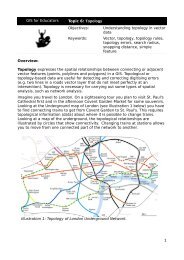
- Page 1: Quantum GIS Training Manual Release
- Page 4 and 5: 7.1 Lesson: Reprojecting and Transf
- Page 7 and 8: 1.1 Background CHAPTER 1 Foreword I
- Page 9 and 10: 1.4 Authors Quantum GIS Training Ma
- Page 11 and 12: 2.1 Lesson: A Brief Introduction CH
- Page 13 and 14: Quantum GIS Training Manual, Releas
- Page 15 and 16: Quantum GIS Training Manual, Releas
- Page 17 and 18: 1. 2. 3. 4. 5. Quantum GIS Training
- Page 19 and 20: CHAPTER 3 Module: Creating a Basic
- Page 21 and 22: Quantum GIS Training Manual, Releas
- Page 23 and 24: 3.2.1 Follow along: Changing colors
- Page 25 and 26: Quantum GIS Training Manual, Releas
- Page 27 and 28: Quantum GIS Training Manual, Releas
- Page 29 and 30: Quantum GIS Training Manual, Releas
- Page 31 and 32: It’s fun! But it probably has too
- Page 33 and 34: The Symbol Levels dialog will appea
- Page 35: Quantum GIS Training Manual, Releas
- Page 39 and 40: • Change the interval to 2,00: Qu
- Page 41 and 42: • Add a new symbol layer with a n
- Page 43 and 44: Quantum GIS Training Manual, Releas
- Page 45 and 46: • Change the Stroke paint to gree
- Page 47 and 48: • Draw a line using the Line tool
- Page 49 and 50: Quantum GIS Training Manual, Releas
- Page 51 and 52: • Change the settings as shown: Q
- Page 53 and 54: 3.2.13 In conclusion Quantum GIS Tr
- Page 55 and 56: CHAPTER 4 Module: Classifying Vecto
- Page 57 and 58: Quantum GIS Training Manual, Releas
- Page 59 and 60: 4.2.2 Follow along: Changing label
- Page 61 and 62: • Open the Label tool dialog. Qua
- Page 63 and 64: Quantum GIS Training Manual, Releas
- Page 65 and 66: Quantum GIS Training Manual, Releas
- Page 67 and 68: The map will look somewhat like thi
- Page 69 and 70: • Reactivate labeling for the pla
- Page 71 and 72: 4.2.10 What’s next? Quantum GIS T
- Page 73 and 74: • Change the Column to TOWN and t
- Page 75 and 76: Quantum GIS Training Manual, Releas
- Page 77 and 78: This gets rid of the ugly classes s
- Page 79 and 80: This gives us a nice map: Quantum G
- Page 81 and 82: • Select the empty category. •
- Page 83 and 84: • Click OK. Quantum GIS Training
- Page 85 and 86: • Double-click on it so that it a
- Page 87 and 88:
Quantum GIS Training Manual, Releas
- Page 89 and 90:
• Click OK. • Choose a suitable
- Page 91 and 92:
4.3.4 Try yourself... Refine the cl
- Page 93 and 94:
• Apply this symbology. Your map
- Page 95 and 96:
CHAPTER 5 Module: Creating Maps In
- Page 97 and 98:
The map will appear on the page.
- Page 99 and 100:
Quantum GIS Training Manual, Releas
- Page 101 and 102:
Quantum GIS Training Manual, Releas
- Page 103 and 104:
• Use this interface to set the f
- Page 105 and 106:
• Click the Show frame checkbox t
- Page 107 and 108:
Quantum GIS Training Manual, Releas
- Page 109 and 110:
formats to choose from: • Export
- Page 111 and 112:
CHAPTER 6 Module: Creating Vector D
- Page 113 and 114:
Quantum GIS Training Manual, Releas
- Page 115 and 116:
6.1.2 Follow along: Data sources Qu
- Page 117 and 118:
Quantum GIS Training Manual, Releas
- Page 119 and 120:
Quantum GIS Training Manual, Releas
- Page 121 and 122:
• the Move Feature(s) tool to mov
- Page 123 and 124:
Quantum GIS Training Manual, Releas
- Page 125 and 126:
• Digitize this new (fictional) f
- Page 127 and 128:
Quantum GIS Training Manual, Releas
- Page 129 and 130:
Quantum GIS Training Manual, Releas
- Page 131 and 132:
6.2.4 Follow along: Correct topolog
- Page 133 and 134:
The topologically correct border lo
- Page 135 and 136:
• Move the slider from side to si
- Page 137 and 138:
6.2.9 Follow along: Tool: Reshape F
- Page 139 and 140:
The result of the above: Quantum GI
- Page 141 and 142:
Quantum GIS Training Manual, Releas
- Page 143 and 144:
Quantum GIS Training Manual, Releas
- Page 145 and 146:
Quantum GIS Training Manual, Releas
- Page 147 and 148:
• Click OK. • Apply the changes
- Page 149 and 150:
Quantum GIS Training Manual, Releas
- Page 151 and 152:
Quantum GIS Training Manual, Releas
- Page 153 and 154:
Quantum GIS Training Manual, Releas
- Page 155 and 156:
• Add a new column: Quantum GIS T
- Page 157 and 158:
• Click OK on the Layer Propertie
- Page 159 and 160:
Quantum GIS Training Manual, Releas
- Page 161 and 162:
• The image for that property wil
- Page 163 and 164:
Now to test the new action! Quantum
- Page 165 and 166:
CHAPTER 7 Module: Vector Analysis N
- Page 167 and 168:
• Click on it to select it, then
- Page 169 and 170:
Quantum GIS Training Manual, Releas
- Page 171 and 172:
• Click OK. • Start a new map:
- Page 173 and 174:
Quantum GIS Training Manual, Releas
- Page 175 and 176:
7.1.6 Further reading Quantum GIS T
- Page 177 and 178:
Quantum GIS Training Manual, Releas
- Page 179 and 180:
Quantum GIS Training Manual, Releas
- Page 181 and 182:
Quantum GIS Training Manual, Releas
- Page 183 and 184:
• Note that we’re now checking
- Page 185 and 186:
Quantum GIS Training Manual, Releas
- Page 187 and 188:
• Click OK and you’ll see the r
- Page 189 and 190:
Quantum GIS Training Manual, Releas
- Page 191 and 192:
• Click OK. Your results should l
- Page 193 and 194:
7.3 Lesson: Network Analysis Quantu
- Page 195 and 196:
• Time unit: hour • Distance un
- Page 197 and 198:
Quantum GIS Training Manual, Releas
- Page 199 and 200:
• Add the aerial photographs unde
- Page 201 and 202:
• Set the SPEED value for all the
- Page 203 and 204:
Notice the values of Length and Tim
- Page 205 and 206:
And these are the smaller streets,
- Page 207 and 208:
Quantum GIS Training Manual, Releas
- Page 209 and 210:
Quantum GIS Training Manual, Releas
- Page 211 and 212:
Quantum GIS Training Manual, Releas
- Page 213 and 214:
Quantum GIS Training Manual, Releas
- Page 215 and 216:
Quantum GIS Training Manual, Releas
- Page 217 and 218:
Quantum GIS Training Manual, Releas
- Page 219 and 220:
• Look at the metadata for this l
- Page 221 and 222:
Quantum GIS Training Manual, Releas
- Page 223 and 224:
On Windows Quantum GIS Training Man
- Page 225 and 226:
Quantum GIS Training Manual, Releas
- Page 227 and 228:
CHAPTER 8 Module: Rasters We’ve u
- Page 229 and 230:
would be better to have one file fo
- Page 231 and 232:
Quantum GIS Training Manual, Releas
- Page 233 and 234:
Quantum GIS Training Manual, Releas
- Page 235 and 236:
8.2.3 In conclusion Quantum GIS Tra
- Page 237 and 238:
• Set the Global transparency to
- Page 239 and 240:
loaded into your map. Quantum GIS T
- Page 241 and 242:
8.3.6 Try yourself... Quantum GIS T
- Page 243 and 244:
8.3.8 Follow along: Simplifying the
- Page 245 and 246:
CHAPTER 9 Module: Completing the An
- Page 247 and 248:
• Input file is all_terrain; Quan
- Page 249 and 250:
9.2.2 Try yourself... Inspecting th
- Page 251 and 252:
Quantum GIS Training Manual, Releas
- Page 253 and 254:
• Click OK. Quantum GIS Training
- Page 255 and 256:
• Navigate to your Rasterprac dir
- Page 257 and 258:
Quantum GIS Training Manual, Releas
- Page 259 and 260:
• Name the output file rural.shp.
- Page 261 and 262:
9.4.20 Clipping a vector layer Quan
- Page 263 and 264:
Quantum GIS Training Manual, Releas
- Page 265 and 266:
Quantum GIS Training Manual, Releas
- Page 267 and 268:
CHAPTER 10 Module: Plugins Plugins
- Page 269 and 270:
Quantum GIS Training Manual, Releas
- Page 271 and 272:
Quantum GIS Training Manual, Releas
- Page 273 and 274:
• Click OK and the relief will be
- Page 275 and 276:
• Check the box beside it. • No
- Page 277 and 278:
Quantum GIS Training Manual, Releas
- Page 279 and 280:
Quantum GIS Training Manual, Releas
- Page 281 and 282:
• Double-click in the Value field
- Page 283 and 284:
CHAPTER 11 Module: Online Resources
- Page 285 and 286:
• The value of the Name field sho
- Page 287 and 288:
• Choose WGS 84 / World Mercator
- Page 289 and 290:
11.1.2 Try yourself... • Hide the
- Page 291 and 292:
Quantum GIS Training Manual, Releas
- Page 293 and 294:
Quantum GIS Training Manual, Releas
- Page 295 and 296:
Quantum GIS Training Manual, Releas
- Page 297 and 298:
Quantum GIS Training Manual, Releas
- Page 299 and 300:
CHAPTER 12 Module: GRASS GRASS (Geo
- Page 301 and 302:
Quantum GIS Training Manual, Releas
- Page 303 and 304:
Quantum GIS Training Manual, Releas
- Page 305 and 306:
Quantum GIS Training Manual, Releas
- Page 307 and 308:
Quantum GIS Training Manual, Releas
- Page 309 and 310:
Quantum GIS Training Manual, Releas
- Page 311 and 312:
• You may now remove the original
- Page 313 and 314:
• Set it up as shown: Quantum GIS
- Page 315 and 316:
• Select item: Select an item and
- Page 317 and 318:
Use your own data for this section.
- Page 319 and 320:
• Do the same as in the section a
- Page 321 and 322:
CHAPTER 14 Module: PostgreSQL Postg
- Page 323 and 324:
insert into person (age) values (40
- Page 325 and 326:
Quantum GIS Training Manual, Releas
- Page 327 and 328:
Quantum GIS Training Manual, Releas
- Page 329 and 330:
14.1.13 Transactions Quantum GIS Tr
- Page 331 and 332:
14.2.4 Verify the new account psql
- Page 333 and 334:
Indexes: "streets_pkey" PRIMARY KEY
- Page 335 and 336:
There are two ways to do this: •
- Page 337 and 338:
drop table people; Quantum GIS Trai
- Page 339 and 340:
Quantum GIS Training Manual, Releas
- Page 341 and 342:
14.3.5 Delete Data Quantum GIS Trai
- Page 343 and 344:
Joe Bloggs | 3 Rusty Bedsprings | 3
- Page 345 and 346:
select * from streets where id=1 )
- Page 347 and 348:
14.4.8 What’s next? Quantum GIS T
- Page 349 and 350:
To test that the rule works, let’
- Page 351 and 352:
CHAPTER 15 Module: PostGIS PostGIS
- Page 353 and 354:
15.1.5 Install spatial_refsys.sql Q
- Page 355 and 356:
Quantum GIS Training Manual, Releas
- Page 357 and 358:
Check your results 15.2.5 Populate
- Page 359 and 360:
Quantum GIS Training Manual, Releas
- Page 361 and 362:
Password: Quantum GIS Training Manu
- Page 363 and 364:
Quantum GIS Training Manual, Releas
- Page 365 and 366:
Result: Quantum GIS Training Manual
- Page 367 and 368:
Select by location Get all the buil
- Page 369 and 370:
In QGIS: WHERE TOUCHES(a.the_geom,
- Page 371 and 372:
Quantum GIS Training Manual, Releas
- Page 373 and 374:
Quantum GIS Training Manual, Releas
- Page 375 and 376:
Check your results Quantum GIS Trai
- Page 377 and 378:
Check your results 15.5.4 Looking a
- Page 379 and 380:
Quantum GIS Training Manual, Releas
- Page 381 and 382:
15.5.9 Geometry Cleaning You can ge
- Page 383 and 384:
CHAPTER 16 Appendix: Contributing T
- Page 385 and 386:
16.4 Adding a Lesson To add a lesso
- Page 387 and 388:
.. _answer-name: Quantum GIS Traini
- Page 389 and 390:
‘Descriptive link text ‘_ • R
- Page 391 and 392:
17.1 Results for Adding Your First
- Page 393 and 394:
Back to text 17.4 Results for Symbo
- Page 395 and 396:
Back to text 17.4.4 Symbol Levels T
- Page 397 and 398:
• Now your symbol should look lik
- Page 399 and 400:
Back to text 17.4.5 Symbol Levels
- Page 401 and 402:
17.6 Results for The Label Tool 17.
- Page 403 and 404:
Quantum GIS Training Manual, Releas
- Page 405 and 406:
17.7 Results for Classification 17.
- Page 407 and 408:
Back to text 17.8.2 Topology: Avoid
- Page 409 and 410:
Quantum GIS Training Manual, Releas
- Page 411 and 412:
17.8.5 Merge Features Quantum GIS T
- Page 413 and 414:
Quantum GIS Training Manual, Releas
- Page 415 and 416:
17.9.2 Distance from High Schools
- Page 417 and 418:
Quantum GIS Training Manual, Releas
- Page 419 and 420:
Back to text Quantum GIS Training M
- Page 421 and 422:
• 5 degrees: Quantum GIS Training
- Page 423 and 424:
Quantum GIS Training Manual, Releas
- Page 425 and 426:
Consider a circular area, continuou
- Page 427 and 428:
Quantum GIS Training Manual, Releas
- Page 429 and 430:
The yellow farms are selected. Quan
- Page 431 and 432:
Back to text 17.12.2 Adding a New W
- Page 433 and 434:
Quantum GIS Training Manual, Releas
- Page 435 and 436:
Quantum GIS Training Manual, Releas
- Page 437:
• genindex • modindex • searc