Teachers Guide Scientriffic 81 - CSIRO
Teachers Guide Scientriffic 81 - CSIRO
Teachers Guide Scientriffic 81 - CSIRO

You also want an ePaper? Increase the reach of your titles
YUMPU automatically turns print PDFs into web optimized ePapers that Google loves.
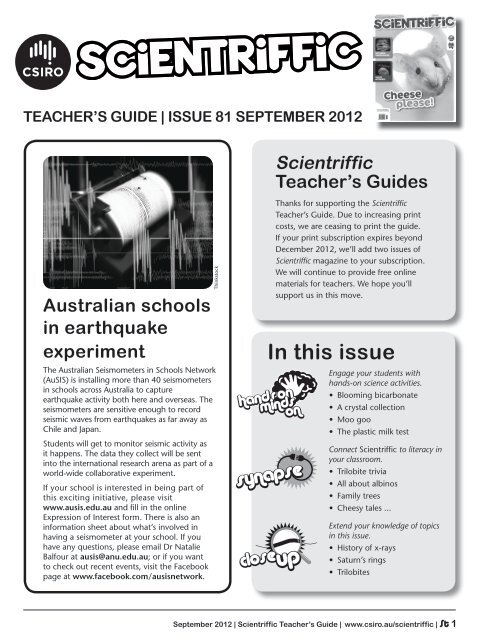
TEACHER’S GUIDE | ISSUE <strong>81</strong> SEPTEMBER 2012<br />
Australian schools<br />
in earthquake<br />
experiment<br />
The Australian Seismometers in Schools Network<br />
(AuSIS) is installing more than 40 seismometers<br />
in schools across Australia to capture<br />
earthquake activity both here and overseas. The<br />
seismometers are sensitive enough to record<br />
seismic waves from earthquakes as far away as<br />
Chile and Japan.<br />
Students will get to monitor seismic activity as<br />
it happens. The data they collect will be sent<br />
into the international research arena as part of a<br />
world-wide collaborative experiment.<br />
If your school is interested in being part of<br />
this exciting initiative, please visit<br />
www.ausis.edu.au and fill in the online<br />
Expression of Interest form. There is also an<br />
information sheet about what’s involved in<br />
having a seismometer at your school. If you<br />
have any questions, please email Dr Natalie<br />
Balfour at ausis@anu.edu.au; or if you want<br />
to check out recent events, visit the Facebook<br />
page at www.facebook.com/ausisnetwork.<br />
Thinkstock<br />
<strong>Scientriffic</strong><br />
Teacher’s <strong>Guide</strong>s<br />
Thanks for supporting the <strong>Scientriffic</strong><br />
Teacher’s <strong>Guide</strong>. Due to increasing print<br />
costs, we are ceasing to print the guide.<br />
If your print subscription expires beyond<br />
December 2012, we’ll add two issues of<br />
<strong>Scientriffic</strong> magazine to your subscription.<br />
We will continue to provide free online<br />
materials for teachers. We hope you’ll<br />
support us in this move.<br />
In this issue<br />
Engage your students with<br />
hands-on science activities.<br />
• Blooming bicarbonate<br />
• A crystal collection<br />
• Moo goo<br />
• The plastic milk test<br />
Connect <strong>Scientriffic</strong> to literacy in<br />
your classroom.<br />
• Trilobite trivia<br />
• All about albinos<br />
• Family trees<br />
• Cheesy tales ...<br />
Extend your knowledge of topics<br />
in this issue.<br />
• History of x-rays<br />
• Saturn’s rings<br />
• Trilobites<br />
September 2012 | <strong>Scientriffic</strong> Teacher’s <strong>Guide</strong> | www.csiro.au/scientriffic | St 1
Blooming bicarbonate<br />
CurriCulum links<br />
Science understanding: Year 4 Earth and space sciences, Year<br />
4 chemical sciences<br />
Science inquiry skills: Foundation – Year 4 Questioning and<br />
predicting, planning and conducting<br />
Aim<br />
To demonstrate stalactite growth using sodium bicarbonate<br />
and water.<br />
BACkground<br />
Read the article ‘Underground wonderland’ on pages<br />
18–19 of <strong>Scientriffic</strong>.<br />
You will need<br />
• Hot water (from a tap)<br />
• 2 glass jars<br />
• 2 metres of white cotton thread<br />
• 2 paper clips<br />
• Bicarb soda (sodium bicarbonate)<br />
• Teaspoon<br />
• Food colouring – two different colours<br />
• A jar lid<br />
NAME ______________________________________________<br />
whAt to do<br />
1. Carefully pour some hot tap water into the two jars<br />
until they are about one-third full.<br />
2. Add three heaped teaspoons of bicarb soda to one of<br />
the jars. Stir the powder until it has dissolved.<br />
3. Continue adding and stirring bicarb soda into the jar,<br />
one teaspoon at a time, until no more will dissolve.<br />
This is called a saturated solution.<br />
4. Repeat steps 2 and 3 with the second jar of water.<br />
5. Put the jars on a flat surface, such as a table or a<br />
window, where they can be left to sit undisturbed for a<br />
few days.<br />
6. Take the piece of cotton thread and fold it in half two<br />
or three times, until you have a piece that is about 30<br />
centimetres long.<br />
7. Put the entire thread into one of the jars and soak it in<br />
the solution.<br />
8. Take out the thread and place one end into one of the<br />
jars so it is submerged in the solution. Use a paper clip<br />
to secure it to the side of the jar. The thread shouldn’t<br />
touch the bottom the jar.<br />
2 St | www.csiro.au/scientriffic | <strong>Scientriffic</strong> Teacher’s <strong>Guide</strong> | September 2012<br />
9. Place the other end of the thread into the solution<br />
in the second jar, holding it in place with another<br />
paperclip. Let the thread droop a little in between the<br />
jars – don’t pull it tight.<br />
10. Put a jar lid between the two jars to catch any liquid<br />
that drips off the thread.<br />
11. Add two drops of food colouring to one of the jars.<br />
12. Add two drops of another colour of food colouring to<br />
the other jar.<br />
13. Draw a picture of the jars and thread in the space<br />
below, describing what you think it will look like in<br />
two days.<br />
14. Leave the jars for at least two days and observe what<br />
happens. Draw a picture of your results in the table.<br />
15. When you have finished the experiment, answer<br />
the questions at the bottom of the page in your<br />
workbook.<br />
PrediCtion<br />
results<br />
PHoToCoPYING PERMITTED FoR PERSoNAL, HoME AND CLASSRooM USE. CoPYRIGHT © CSIRo 2012<br />
Draw a picture of what you think will happen to the<br />
solution inside the jars:<br />
Draw a picture of the jars and the string after two days:<br />
Questions<br />
• What happened to the solution inside the jar?<br />
• How did the food colouring affect the thread and the<br />
crystals?<br />
• How do you think this experiment can be linked to<br />
cave formations such as stalactites and stalagmites?
NAME ______________________________________________<br />
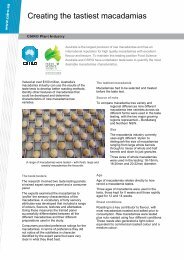
A crystal collection<br />
CurriCulum links<br />
Science understanding: Year 4 chemical sciences<br />
Science inquiry skills: Foundation – Year 4 Questioning and<br />
predicting, planning and conducting<br />
Aim<br />
Grow and compare crystals made from different substances.<br />
BACkground<br />
This experiment should be done as a follow-on activity from<br />
the previous activity on page 2.<br />
You will need<br />
• 4 glass jars<br />
• Bicarb soda (sodium bicarbonate)<br />
• Sugar<br />
• Salt<br />
• Epsom salts<br />
• Food colouring – one colour<br />
• 2 metres of white cotton thread<br />
• 4 paperclips<br />
• Hot tap water<br />
• Piece of card (large enough to hold the four jars)<br />
whAt to do<br />
1. Cut the cotton thread into four pieces, each between<br />
30 and 50 centimetres long. Fold them in half twice<br />
Salt Bicarb soda<br />
Sugar Epsom salts<br />
PHoToCoPYING PERMITTED FoR PERSoNAL, HoME AND CLASSRooM USE. CoPYRIGHT © CSIRo 2012<br />
so you end up with a piece of thread roughly 10<br />
centimetres long.<br />
2. Carefully pour some hot tap water into the four jars<br />
until they are about one-third full.<br />
3. Find a secure place to leave your experiment. Place<br />
the four jars on the piece of card.<br />
4. In the first jar, make a saturated solution of sodium<br />
bicarbonate.<br />
5. Add two drops of food colouring to the jar.<br />
6. Place one end of the thread into the jar so that it is<br />
submerged fully in the solution. Use a paper clip to<br />
secure it to the side of the jar. The thread shouldn’t<br />
touch the bottom of the jar.<br />
7. Repeat steps 4–6 for the salt, sugar and Epsom salts<br />
with the remaining three jars.<br />
8. Leave the jars for two days and observe what<br />
happens. Draw a picture of the crystals in each<br />
jar in the table below. Next to the picture, write a<br />
description. Include the following information in your<br />
description:<br />
a. What size are the crystals?<br />
b. What shape are they?<br />
c. How are they different on the side of the jar and<br />
on the thread?<br />
d. How are they affected by the food colouring?<br />
extending the<br />
investigAtion<br />
You can learn more about<br />
crystals by extending your<br />
investigation. Below are<br />
some questions you could<br />
try testing.<br />
• What if you use string<br />
or thread made from a<br />
different material?<br />
• How does temperature<br />
affect the growth of<br />
crystals?<br />
• What happens if you<br />
leave the crystals for a<br />
week or more?<br />
September 2012 | <strong>Scientriffic</strong> Teacher’s <strong>Guide</strong> | www.csiro.au/scientriffic | St 3
NAME ______________________________________________<br />
Moo goo<br />
CurriCulum links<br />
Science understanding: Year 2, Year 4 and Year 6<br />
chemical sciences<br />
Science inquiry skills: Foundation – Year 4<br />
Questioning and predicting, planning and<br />
conducting<br />
Aim<br />
Make a sticky substance from milk and observe<br />
its properties.<br />
BACkground<br />
Read the article ‘Tasty cheeses’ on pages 22–23<br />
of <strong>Scientriffic</strong>.<br />
CAution<br />
Milk ‘glue’ will spoil after several days. It can<br />
be kept in the fridge to increase its shelf life;<br />
however, it should be disposed of when the<br />
activity is complete.<br />
You will need<br />
• 2 cups<br />
• 1 spoon for stirring<br />
• Coffee filter paper or piece of thin rag<br />
• 1 packet of powdered non-fat milk<br />
• Vinegar<br />
• Baking soda<br />
• Measuring spoons<br />
• Measuring cup<br />
• Kitchen scales<br />
• Hot water<br />
• Cardboard or another material to test your<br />
glue<br />
whAt to do<br />
1. Measure about ¼ cup of hot water into a<br />
cup.<br />
2. Add 2 tablespoons of powdered milk to the<br />
water and stir until has completely dissolved.<br />
3. Add a tablespoon of vinegar to the mixture.<br />
Weigh the cup and the mixture on the scales.<br />
Record the weight in the table.<br />
4. Stir the mixture with the spoon. You should<br />
see the milk begin to separate into solid<br />
chunks of curd and a watery liquid called<br />
whey. Stir until the milk is well separated.<br />
PHoToCoPYING PERMITTED FoR PERSoNAL, HoME AND CLASSRooM USE. CoPYRIGHT © CSIRo 2012<br />
4 St | www.csiro.au/scientriffic | <strong>Scientriffic</strong> Teacher’s <strong>Guide</strong> | September 2012<br />
5. Line the clean, empty second cup with the<br />
coffee filter, and then pour the lumpy mixture<br />
into the filter.<br />
6. Lift the filter slowly. The liquid whey should<br />
drain through the filter, leaving only the lumpy<br />
curd.<br />
7. Squeeze the filter containing the curds to<br />
remove as much of the liquid whey as possible.<br />
Put the curds into an empty plastic cup.<br />
8. Weigh the cup with the curds. Record the<br />
weight in the table.<br />
9. Use the spoon to break the curds into small<br />
pieces.<br />
Material Weight (grams)<br />
cup + milk powder + vinegar<br />
cup + curds<br />
• Roughly how much of the milk mixture is<br />
made of curds?<br />
• How much of the milk mixture is whey?<br />
• Do you think milk from all mammals would<br />
produce the same amounts of curds and<br />
whey? How might milk be different in<br />
different mammals?<br />
10. Add one teaspoon of hot water and about<br />
¼ teaspoon of baking soda to the curd and<br />
mix thoroughly. You should see some slight<br />
foaming or bubbling. Keep mixing until the curd<br />
becomes smoother and more liquid.<br />
11. The curd has now become glue. Test your glue<br />
by sticking together two sheets of cardboard.<br />
Milk reacts with an acid like vinegar to make a new<br />
substance. The vinegar curdles the solids in milk,<br />
and then the rubbery solid is separated from the<br />
liquid part of the milk. The curds dry to form a hard<br />
plastic-like substance called casein plastic. After<br />
the casein is separated from the whey by filtering,<br />
baking soda is added to neutralize the acid. When<br />
the curd no longer has acid in it, it returns to a more<br />
liquid form. The foaming you see when the baking<br />
soda is added to the curd is carbon dioxide gas,<br />
which is made when the baking soda reacts with<br />
the acid in the vinegar. The resulting liquefied casein<br />
protein is our natural glue.
NAME ______________________________________________<br />
The plastic milk test<br />
CurriCulum links<br />
Science understanding: Year 2, Year 4 and Year 6<br />
chemical sciences<br />
Science inquiry skills: Foundation – Year 4 Questioning<br />
and predicting, planning and conducting<br />
Aim<br />
Test some of the different properties of milk glue by<br />
designing your own experiment.<br />
introduCtion<br />
You have already seen how casein plastic can be used<br />
as a glue, but what else can it be used for? To answer<br />
this question, you first have to think about some of<br />
the different properties of casein and how you could<br />
test them.<br />
Below is a list of questions to get you thinking:<br />
• What happens to casein if it’s left in the sun?<br />
• Can casein be frozen solid?<br />
• Does casein have the same properties when it is<br />
cold as it does when it is hot?<br />
• How hard is casein compared to other plastics?<br />
• Can you draw or paint on casein with water-based<br />
paints?<br />
exPeriment design<br />
1) What question do you want to answer?<br />
2) What property of casein are you going to test?<br />
3) How are you going to test it?<br />
4) Write down, step by step, how you will conduct the experiment.<br />
5) What materials do you need?<br />
6) How long will the experiment take?<br />
PHoToCoPYING PERMITTED FoR PERSoNAL, HoME AND CLASSRooM USE. CoPYRIGHT © CSIRo 2012<br />
• Can hard casein be made soft again?<br />
• What happens if you add other materials, such as<br />
salt, sugar or corn flour, to the casein as it’s being<br />
made?<br />
You will need<br />
• Curds (made using the instructions from the<br />
‘Moo goo’ activity)<br />
The rest of the materials you need will depend on what<br />
property you are testing in the experiment.<br />
whAt to do<br />
1. Choose a question from the list above to test, or<br />
think of one of your own.<br />
2. Use the steps below to plan and design your<br />
experiment.<br />
3. When you have planned the steps of your<br />
experiment, gather the materials you need and<br />
do the experiment.<br />
4. Don’t forget to record your observations in your<br />
workbook as you go.<br />
5. When you have finished the experiment, write<br />
a paragraph that summarises your results and<br />
share it with the rest of your class.<br />
7) Are there any materials or steps in your experiment that could be dangerous? For example, do you need<br />
to use very hot water or tools such as scissors?<br />
8) What will you do to make your experiment safer?<br />
September 2012 | <strong>Scientriffic</strong> Teacher’s <strong>Guide</strong> | www.csiro.au/scientriffic | St 5
ConnECTInG SCIEnTRIffIC<br />
To LITERACY In YoUR CLASSRooM<br />
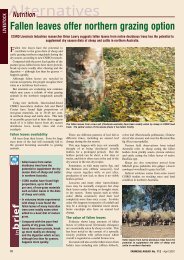
Trilobite trivia<br />
<strong>Scientriffic</strong> pages 28–29<br />
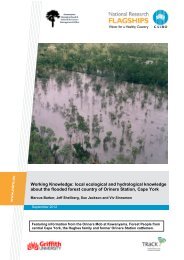
1. Give pairs of students a copy of the image of<br />
the trilobite below.<br />
2. Write the following points on the board under<br />
the heading ‘Trilobite facts’:<br />
• They have been extinct for 250 million<br />
years.<br />
• They lived on Earth for around 270 million<br />
years.<br />
• Around 20 000 different types of trilobite<br />
have been classified by palaeontologists.<br />
• Their size and shape varied greatly.<br />
3. Give students 10 minutes to brainstorm and<br />
answer the questions below by considering the<br />
facts on the board and looking at the image of<br />
the trilobite.<br />
6 St | www.csiro.au/scientriffic | <strong>Scientriffic</strong> Teacher’s <strong>Guide</strong> | September 2012<br />
WikimediaCommons/Amuseofpc<br />
a. Where do you think these creatures lived?<br />
Describe features of their environment.<br />
b. What types of special adaptation could they<br />
have had?<br />
c. What might they have eaten?<br />
d. Why do you think there are so many different<br />
types?<br />
e. What colours do you think they might have<br />
been?<br />
f. Why do you think they became extinct?<br />
4. As a class, discuss the students’ responses to the<br />
questions.<br />
5. Ask students to draw their own extinct creature,<br />
describing its features, adaptations, the<br />
environment it would have lived in and the reason<br />
it became extinct.<br />
istockphoto.com
All About Albinos<br />
<strong>Scientriffic</strong> pages 12–13<br />
Students will answer some questions to test their<br />
comprehension skills and will then have a discussion about<br />
the topic of albinism.<br />
1. Ask students to silently read the article ‘Albinism’ on<br />
pages 12–13 of <strong>Scientriffic</strong>.<br />
2. Have students answer the following questions in their<br />
workbooks:<br />
a. What do albino animals look like?<br />
b. What chemical are albino animals missing?<br />
c. How does an animal become albino?<br />
d. Are there humans with albinism?<br />
e. How common is albinism?<br />
f. How can you tell if an animal is albino or not?<br />
g. What are some of the risks that albinos face?<br />
h. What’s the name of the albino humpback whale?<br />
i. What kind of test will scientists need to do to<br />
determine who the father of the albino humpback<br />
whale is?<br />
3. Put students into small groups. Give each one a<br />
different question to discuss. After a few minutes,<br />
change the question for each group.<br />
• Albinism is a genetic condition. What does that mean?<br />
• Why do you think albinism is rare?<br />
• Have you ever seen an albino animal? What was it?<br />
Where did you see it?<br />
• Why isn’t a polar bear an albino? Does that mean<br />
that polar bears can’t be albinos?<br />
• Is there any type of animal that can’t be albino?<br />
Why or why not?<br />
• You are more likely to find albino echidnas than<br />
many other types of Australian animal. Why do you<br />
think that is?<br />
Cheesy tAles … <strong>Scientriffic</strong> pages 22–23<br />
Students will create some humorous<br />
pieces of writing about cheese.<br />
1. As a class, read the article about cheese on pages<br />
22–23 of <strong>Scientriffic</strong>.<br />
2. Ask students to brainstorm all the different adjectives<br />
they can think of that can be used to describe cheese.<br />
For example: stinky, tasty, yummy, yellow, blue,<br />
mouldy, holey etc.<br />
3. Put students in pairs and ask them to write a limerick<br />
about cheese. Remind them of the rhyming structure of<br />
limericks with this example:<br />
<strong>Scientriffic</strong> pages 12–13<br />
Students will learn the basics of drawing family trees to show<br />
the inheritance of some traits.<br />
1. Put the information below onto the board and ask students<br />
to copy it into their workbooks. Explain that albinism is a<br />
trait, as is an ability to roll one’s tongue into a tube.<br />
shape text trait<br />
FAMily trees<br />
Female No trait (can’t roll their tongue)<br />
Female Trait (can roll their tongue)<br />
Male No trait (can’t roll their tongue)<br />
Male Trait (can roll their tongue)<br />
2. Ask students to choose one of the following inherited<br />
traits:<br />
• Able to roll tongue / unable to roll tongue<br />
• Crooked little finger/ straight little finger<br />
• Widow’s peak / straight hairline<br />
• Attached earlobes / not attached<br />
3. Ask them to work in groups to investigate a person’s<br />
family members. Tell them to draw a family tree of the<br />
person’s family which shows how that trait is expressed<br />
in the parents and siblings.<br />
There was an old man from Kerrat<br />
Who was short and grumpy and fat.<br />
He sang all day long<br />
The most terrible songs<br />
About his orange and white fluffy cat.<br />
4. Ask students to work with a different partner and<br />
write a silly short story about cheese that begins<br />
with this sentence: “Martin the mouse stuffed the<br />
green mouldy cheese in his ears”; and ends with<br />
this sentence: “Susie learnt her lesson and never<br />
again dipped her fingers in cheese sauce”.<br />
September 2012 | <strong>Scientriffic</strong> Teacher’s <strong>Guide</strong> | www.csiro.au/scientriffic | St 7
history oF x-rAys<br />
<strong>Scientriffic</strong> pages 8–9<br />
Today, it is hard to imagine a world<br />
without x-rays. Since their discovery<br />
in 1895 by German physicist Wilhelm<br />
Conrad Röntgen, x-rays have become<br />
an essential part of many scientific<br />
fields. Röntgen stumbled across this<br />
type of radiation whilst investigating<br />
how electrons behaved inside<br />
cathode tubes. When he passed an<br />
electric discharge through a tube<br />
covered in black paper, he noticed<br />
a nearby screen coated in a barium<br />
platinocyanide glow. This led Röntgen<br />
to conclude that the tube was emitting<br />
an unknown type of radiation.<br />
Because it hadn’t yet been described,<br />
he temporarily used the letter ‘x’ for<br />
‘unknown’. The name stuck; however,<br />
in many places – such as Germany –<br />
they became known as Röntgen rays.<br />
In the experiments that followed, he<br />
found that he could record images<br />
of solid objects onto a photographic<br />
plate that showed various levels of<br />
transparency. The first ever x-ray was<br />
an image of his wife’s hand, which<br />
revealed the bones of her hand and<br />
the ring she was wearing. Röntgen’s<br />
discovery excited scientists, and<br />
experimentation with this new type<br />
of radiation quickly began all over the<br />
world. In 1901, he was awarded the<br />
Nobel Prize in Physics. In Australia,<br />
the first x-ray experiments were<br />
carried out as early as 1896.<br />
Queensland government ‘History<br />
of x-ray technology’:<br />
http://bit.ly/Q9rycq<br />
Australian Society of X-ray<br />
Technology:<br />
http://bit.ly/nexlbk<br />
NobelPrize.org:<br />
http://bit.ly/hnrxWd<br />
KEEP A STEP AHEAD of<br />
YoUR STUDEnTS wITH THIS<br />
BACKGRoUnD InfoRMATIon.<br />
sAturn’s rings<br />
<strong>Scientriffic</strong> pages 10–11<br />
Saturn isn’t the only planet to have<br />
rings: Neptune, Jupiter and Uranus<br />
also are orbited by rings. Yet, Saturn’s<br />
rings are the largest and the most<br />
impressive. They were first discovered<br />
by Galileo Galilei in 1610, who<br />
spotted them using his telescope. He<br />
assumed they were moons.<br />
Scientists believe that Saturn’s rings<br />
are made up of pieces of a torn-up<br />
moon, and comets and asteroids<br />
that were pulled apart by gravity<br />
and inertia before they reached the<br />
planet’s surface. In all, there are<br />
millions and millions of particles<br />
orbiting the planet. Some are the size<br />
of dust, whilst others are as big as<br />
houses.<br />
To date, seven main rings have been<br />
identified. They are named A to G<br />
in the order they were discovered.<br />
Interestingly, they all orbit Saturn at<br />
different speeds.<br />
Since 2004, the spacecraft Cassini has<br />
been involved in an extended mission<br />
to discover more about Saturn<br />
rings and moons. The instruments<br />
on board the spacecraft are still<br />
sending valuable information and<br />
images of Saturn back to Earth. It is<br />
hoped that this information will tell<br />
scientists more about the origin and<br />
composition of Saturn’s rings.<br />
NASA:<br />
http://1.usa.gov/Pg3vJr<br />
NASA:<br />
http://1.usa.gov/Q7sbPz<br />
http://science.howstuffworks.<br />
com/rings-of-saturn.htm<br />
8 St | www.csiro.au/scientriffic | <strong>Scientriffic</strong> Teacher’s <strong>Guide</strong> | September 2012<br />
trilobites<br />
<strong>Scientriffic</strong> pages 28–29, 40<br />
Trilobites are one of the best<br />
known types of fossil, due to their<br />
distinctive shape and features and<br />
their numbers. They are among<br />
some of the earliest life forms to<br />
have been preserved in such large<br />
quantities.<br />
According to the fossil record,<br />
trilobites first appeared early in<br />
the Cambrian period around 520<br />
million years ago, at a time when<br />
there was a huge increase in the<br />
diversity of life forms on Earth within<br />
a relatively short period. This time is<br />
often referred to as the ‘Cambrian<br />
Explosion’ by palaeontologists.<br />
For around 270 million years,<br />
trilobites inhabited the planet’s<br />
seas and oceans. Around 20 000<br />
different species of trilobites have<br />
been classified by palaeontologists.<br />
These species have been organised<br />
into around 150 different families<br />
and nine orders, which reflects the<br />
huge diversity of trilobites. These<br />
early arthropods became extinct<br />
around the end of the Permian<br />
period, along with the majority<br />
of other organisms, in a huge<br />
extinction event that is sometimes<br />
nicknamed ‘the great dying’.<br />
http://australianmuseum.net.au/<br />
What-are-trilobites<br />
ABC science: Giant trilobites had<br />
complex social lives:<br />
http://bit.ly/2ttFl<br />
Museum Victoria:<br />
http://bit.ly/t1p1q6<br />
<strong>Scientriffic</strong> magazine is published six times a year (bimonthly in January, March, May, July, September and November) by CSIRo Education.<br />
This guide is written by Catherine Healy. Correspondence concerning the Teacher’s <strong>Guide</strong> can be sent to: The Editor, <strong>Scientriffic</strong>, CSIRo<br />
Education, Po Box 225 Dickson ACT 2602 or <strong>Scientriffic</strong>@csiro.au<br />
To order <strong>Scientriffic</strong> visit www.csiro.au/scientriffic or call (02) 6276 6643.