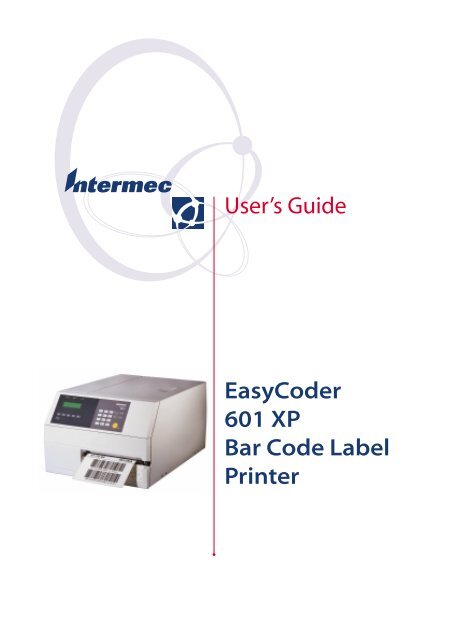
User's Guide EasyCoder 601 XP Bar Code Label Printer - Intermec
User's Guide EasyCoder 601 XP Bar Code Label Printer - Intermec
User's Guide EasyCoder 601 XP Bar Code Label Printer - Intermec

Create successful ePaper yourself
Turn your PDF publications into a flip-book with our unique Google optimized e-Paper software.
User’s <strong>Guide</strong><br />
<strong>Easy<strong>Code</strong>r</strong><br />
<strong>601</strong> <strong>XP</strong><br />
<strong>Bar</strong> <strong>Code</strong> <strong>Label</strong><br />
<strong>Printer</strong>
Information in this manual is subject to change without prior notice and does not represent a<br />
commitment on the part of <strong>Intermec</strong> <strong>Printer</strong> AB.<br />
© Copyright <strong>Intermec</strong> <strong>Printer</strong> AB, 2002. All rights reserved. Published in Sweden.<br />
<strong>Easy<strong>Code</strong>r</strong>, EasyLAN, Fingerprint, and <strong>Label</strong>Shop are registered trademarks of <strong>Intermec</strong> Technologies<br />
Corp. The word <strong>Intermec</strong>, the <strong>Intermec</strong> logo, InterDriver, PrintSet, and Duratherm are<br />
trademarks of <strong>Intermec</strong> Technologies Corp.<br />
Centronics is a registered trademark of Genicom Corporation.<br />
Kimdura is a registered trademark of Kimberly Clark.<br />
Microsoft is a registered trademark of Microsoft Corporation.<br />
Torx is a registered trademark of Camcar Division of Textron Inc.<br />
TrueDoc is a registered trademark of Bitstream, Inc.<br />
TrueType is a trademark of Apple Computer Inc.<br />
Unicode is a trademark of Unicode Inc.<br />
Windows is a trademark of Microsoft Corporation.
Contents<br />
Preface<br />
Preface Table of Contents.........................................................................1<br />
FCC Notice..................................................................................4<br />
DOC Notice.................................................................................4<br />
Declaration of Conformity (CE)..................................................5<br />
1. Introduction <strong>Easy<strong>Code</strong>r</strong> <strong>601</strong> <strong>XP</strong> .......................................................................6<br />
Safety Requirements.....................................................................7<br />
Product <strong>Label</strong>ing ..........................................................................7<br />
2. Installation Unpacking ....................................................................................8<br />
Front View....................................................................................9<br />
Rear View ...................................................................................10<br />
Media Compartment .................................................................11<br />
Print Unit....................................................................................12<br />
Connections ...............................................................................13<br />
Power ...................................................................................13<br />
Computer ............................................................................13<br />
Controls and Indicators..............................................................14<br />
Control Lamps.....................................................................14<br />
Display.................................................................................14<br />
Keyboard..............................................................................14<br />
Beeper ..................................................................................15<br />
3. Starting Up Startup Files................................................................................16<br />
Memory Card.............................................................................17<br />
Switching On the <strong>Printer</strong> ...........................................................18<br />
Display Messages at Startup .......................................................18<br />
4. Media Load Tear-Off (Straight-through) .......................................................19<br />
Cut-Off.......................................................................................24<br />
Peel-Off (Self-strip).....................................................................29<br />
External Supply (Fanfold)...........................................................34<br />
5. Thermal Transfer Printing Ribbon Load...............................................................................36<br />
6. Setting Up the <strong>Printer</strong> Description.................................................................................41<br />
Default Setup..............................................................................42<br />
<strong>Intermec</strong> <strong>Easy<strong>Code</strong>r</strong> <strong>601</strong> <strong>XP</strong> – User’s <strong>Guide</strong> 1
Preface<br />
Contents, cont.<br />
6. Setting Up the <strong>Printer</strong>, cont. Setup Parameters: .......................................................................43<br />
Serial Communication:........................................................43<br />
- Baud Rate ..........................................................................43<br />
- Character Length...............................................................44<br />
- Parity..................................................................................44<br />
- Stop Bits.............................................................................44<br />
- Flow Control .....................................................................44<br />
- New Line ...........................................................................45<br />
- Receive Buffer ....................................................................45<br />
- Transmit Buffer..................................................................45<br />
Feedadjust: ...........................................................................46<br />
- Startadjust ..........................................................................46<br />
- Stopadjust ..........................................................................46<br />
- Recommended Feed Adjustments.....................................46<br />
Media:..................................................................................47<br />
- Media Size..........................................................................47<br />
- Media Type ........................................................................49<br />
- Paper Type..........................................................................50<br />
- Contrast .............................................................................54<br />
- Testfeed ..............................................................................54<br />
Print Defi nes:.......................................................................54<br />
- Head Resistance.................................................................54<br />
- Testprint.............................................................................54<br />
- Print Speed.........................................................................57<br />
7. Setup Mode Entering the Setup Mode at Installation....................................58<br />
Navigating in Setup Mode .........................................................59<br />
Setup Mode Overviews ..............................................................60<br />
8. <strong>Intermec</strong> Shell Startup Program Introduction ...............................................................................65<br />
Starting with <strong>Intermec</strong> Shell.......................................................66<br />
<strong>Intermec</strong> Shell v4.8 Diagram .....................................................69<br />
Line Analyzer..............................................................................70<br />
9. Options Introduction ...............................................................................72<br />
Liner Takeup Kit.........................................................................73<br />
Paper Cutter................................................................................73<br />
Fan Fold <strong>Guide</strong>s .........................................................................74<br />
Edge <strong>Guide</strong>.................................................................................74<br />
3-inch Adapters ..........................................................................74<br />
<strong>Label</strong> Taken Sensor.....................................................................74<br />
2<br />
<strong>Intermec</strong> <strong>Easy<strong>Code</strong>r</strong> <strong>601</strong> <strong>XP</strong> – User’s <strong>Guide</strong>
Contents, cont.<br />
Preface<br />
9. Options, cont. Ribbon Low Sensor....................................................................75<br />
Interface Boards..........................................................................75<br />
10. Troubleshooting Troubleshooting List...................................................................76<br />
11. Maintenance Printhead Cleaning.....................................................................77<br />
External Cleaning.......................................................................81<br />
Cleaning the <strong>Label</strong> Stop Sensor <strong>Guide</strong>s .....................................82<br />
Printhead Replacement ..............................................................83<br />
12. Adjustments Narrow Media ............................................................................86<br />
Printhead Pressure ......................................................................87<br />
<strong>Label</strong> Stop Sensor .......................................................................88<br />
Appendix 1 Technical Data............................................................................89<br />
Appendix 2 Media Specifi cations...................................................................91<br />
• Direct Thermal Media.........................................................91<br />
• Thermal Transfer Media ......................................................92<br />
• Media Roll Size....................................................................93<br />
• Media...................................................................................94<br />
• Thermal Transfer Ribbons...................................................99<br />
Appendix 3 Interfaces...................................................................................100<br />
• RS-232 Interface................................................................100<br />
• Parallel Interface.................................................................101<br />
• <strong>Bar</strong> <strong>Code</strong> Wand Interface ..................................................102<br />
• Double Serial Interface Board (option) .............................103<br />
• Industrial/Serial Interface Board (option)..........................105<br />
• EasyLAN 100i Interface Board (option)...........................106<br />
• Industrial Interface Board (option)....................................107<br />
<strong>Intermec</strong> <strong>Easy<strong>Code</strong>r</strong> <strong>601</strong> <strong>XP</strong> – User’s <strong>Guide</strong> 3
Preface<br />
FCC Notice (United States of America)<br />
WARNING<br />
This equipment generates, uses, and can radiate radio frequency energy and if not installed and<br />
used in accordance with the instructions manual, may cause interference to radio communications.<br />
It has been tested and found to comply with the limits for a Class A computing device pursuant<br />
to Subpart J of Part 15 of FCC Rules, which are designed to provide reasonable protection against<br />
such interference when operated in a commercial environment. Operation of this equipment in<br />
a residential area is likely to cause interference in which case the user at his own expense will be<br />
required to take whatever measures may be required to correct the interference.<br />
DOC Notice (Canada)<br />
Canadian Dept. of Communication<br />
REGULATIONS COMPLIANCE (DOC-A)<br />
This digital apparatus does not exceed the class A limits for radio noise emissions from a digital<br />
apparatus as set out in the radio interference regulations of the Canadian Department of Communication.<br />
Ministère des Communications du Canada<br />
CONFORMITE DE REGLEMENTS (DOC-A)<br />
Le présent appareil numérique n’émet pas de bruits radio-électriques dépassant les limites applicables<br />
aux appareils numériques de classe A prescrites dans le règlement sur brouillage radioélectrique édicté<br />
par le Ministère des Communications du Canada.<br />
4<br />
<strong>Intermec</strong> <strong>Easy<strong>Code</strong>r</strong> <strong>601</strong> <strong>XP</strong> – User’s <strong>Guide</strong>
Declaration of Conformity (CE)<br />
We,<br />
<strong>Intermec</strong> <strong>Printer</strong> AB<br />
Idrottsvägen 10<br />
Box 123<br />
S-431 22 Mölndal<br />
Sweden<br />
declare under our sole responsibility1 that the product<br />
<strong>Easy<strong>Code</strong>r</strong> <strong>601</strong> <strong>XP</strong><br />
to which this declaration relates is in conformity with the following standards<br />
Electrical Safety: EN 60950<br />
EMC Emissions: EN 50081-1:92<br />
(EN 55022:94, EN 61000-3-2:95)<br />
EMC Immunity: EN 50082-2:95<br />
(EN 61000-4-2:95; EN 61000-4-3:96; ENV 50204:95;<br />
EN 61000-4-4:95; EN 61000-4-6:96)<br />
following the provisions of Directives<br />
89/336/EEC and 73/23/EEC<br />
Mölndal 1998-09-01<br />
...................................................................<br />
Mats Gunnarsson<br />
President<br />
1 /. <strong>Intermec</strong> assumes no responsibility regarding the CE Directive if the<br />
printer is handled, modifi ed, or installed in other manners than those described in<br />
<strong>Intermec</strong>’s manuals.<br />
Preface<br />
<strong>Intermec</strong> <strong>Easy<strong>Code</strong>r</strong> <strong>601</strong> <strong>XP</strong> – User’s <strong>Guide</strong> 5
6<br />
Chapter 1<br />
Introduction<br />
<strong>Easy<strong>Code</strong>r</strong> <strong>601</strong> <strong>XP</strong><br />
The <strong>Easy<strong>Code</strong>r</strong> <strong>601</strong> <strong>XP</strong> is a high-volume 6-inch thermal printer,<br />
which provides an astounding print speed of up to 225 mm/sec<br />
(9 inches/sec) at 300 dots per inch (dpi.) It also offers a large<br />
number of useful features, such as:<br />
• Flash memory SIMMs for fi rmware, fonts, bar codes, and<br />
application programs<br />
• Built-in memory card adapter<br />
• Built-in Centronics and RS-232 interfaces<br />
• Provision for extra interface boards<br />
• Advanced ribbon-handling system to prevent ribbon wrinkling.<br />
• Built-in keyboard and display with backlight<br />
The <strong>Easy<strong>Code</strong>r</strong> <strong>601</strong> <strong>XP</strong> works both as a direct thermal printer<br />
and thermal transfer printer for tear-off (straight-through) operation.<br />
An automatic paper cutter is available as an option and can<br />
be fi tted by the user without any tools in a few seconds. There<br />
is also an optional factory-installed liner takeup unit for peel-off<br />
(self-strip) operation.<br />
The <strong>Easy<strong>Code</strong>r</strong> <strong>601</strong> <strong>XP</strong> supports the unique and fl exible <strong>Intermec</strong><br />
Fingerprint v7.61 programming language, which allows<br />
the user to create custom-made application programs and label<br />
layouts in a BASIC-like environment. It is also designed to<br />
work with the <strong>Intermec</strong> Direct Protocol programming language<br />
and with the <strong>Intermec</strong> InterDriver. The InterDriver allows you<br />
to design labels using standard PC applications, for example<br />
Microsoft Offi ce.<br />
The <strong>Easy<strong>Code</strong>r</strong> <strong>601</strong> <strong>XP</strong> supports 15 scaleable Unicode TrueType<br />
and TrueDoc fonts as standard. Additional fonts can be downloaded<br />
into the printer’s Flash memory, or be plugged in using<br />
a memory card. The Unicode standard allows the use of special<br />
characters for various languages including non-Latin fonts, such<br />
as Cyrillic, Chinese, Japanese, Korean, Hebrew, and similar.<br />
<strong>Intermec</strong> <strong>Easy<strong>Code</strong>r</strong> <strong>601</strong> <strong>XP</strong> – User’s <strong>Guide</strong>
Safety<br />
Product <strong>Label</strong>ing<br />
Chapter 1 Introduction<br />
<strong>Intermec</strong> assumes no responsibility regarding the CE Directive if<br />
the printer is handled, modifi ed, or installed in any way other<br />
than that described in <strong>Intermec</strong>’s manuals.<br />
Caution<br />
• Read this manual carefully before connecting the printer.<br />
• Moving parts are exposed when the side door is open, so<br />
ensure that the covers are closed before you operate the printer.<br />
• Do not open the front/left-hand cover. Dangerous voltage!<br />
• Do not remove the left-hand cover. Dangerous voltage!<br />
• Do not put your fi ngers inside the print mechanism when<br />
the power is on.<br />
• Place the printer on an even surface which can support its<br />
weight of approximately 15 kg (33 pounds) plus supplies and<br />
possible options.<br />
• Do not spray the printer with water. If you are using a hose<br />
to clean the premises in an industrial environment, remove the<br />
printer or protect it carefully from spray and moisture.<br />
• Carefully read the warning text on the envelope before using<br />
a cleaning card.<br />
The machine label is attached to the printer’s rear plate and<br />
contains information on type, model, and serial number as well as<br />
AC voltage. It also contains various signs of approval.<br />
<strong>Intermec</strong> <strong>Easy<strong>Code</strong>r</strong> <strong>601</strong> <strong>XP</strong> – User’s <strong>Guide</strong> 7
8<br />
Chapter 2<br />
Installation<br />
Unpacking<br />
1 /. Type and quantity may<br />
vary, or labels/ribbon may be<br />
omitted completely, depending<br />
on area of distribution.<br />
Before you install the printer, examine the package for possible<br />
damage or missing parts:<br />
• Open the box and lift the printer out.<br />
• Check that the printer has not been visibly damaged during<br />
transportation. Keep the packing materials in case you need to<br />
move or reship the printer.<br />
• Check the label on the printer’s rear plate, which gives the<br />
voltage, the part number, and the serial number.<br />
• Check that any options you ordered are included.<br />
• Check that all the accessories are included. As standard, the<br />
box contains:<br />
- <strong>Intermec</strong> <strong>Easy<strong>Code</strong>r</strong> <strong>601</strong> <strong>XP</strong> printer<br />
- Adapters for 3-inch media roll core (2 pcs)<br />
- Edge guide for the label slack absorber<br />
- Power cord (at least one depending on model)<br />
- Quality check card<br />
- Cleaning card<br />
- Short strip of labels 1<br />
- Starter pack of thermal transfer ribbon (thermal transfer<br />
models only) 1<br />
- This User’s <strong>Guide</strong><br />
- Supporting software and product information on CD.<br />
• Check that the power cord is appropriate for the local standard.<br />
The printer works within 100 to 240 VAC, 50 to 60<br />
Hz.<br />
European-type US/Canadian-type GB-type<br />
230 VAC plug 115 VAC plug 230 VAC plug<br />
If the printer has been damaged in any way during transportation,<br />
complain to the carrier immediately.<br />
If the delivery is incorrect or any parts are missing, report it<br />
immediately to the distributor.<br />
<strong>Intermec</strong> <strong>Easy<strong>Code</strong>r</strong> <strong>601</strong> <strong>XP</strong> – User’s <strong>Guide</strong>
Front View<br />
Display Window<br />
Front Door<br />
Control Lamps<br />
Keyboard<br />
Connector for optional<br />
paper cutter<br />
(Not used in this printer model)<br />
Print Unit<br />
Chapter 2 Installation<br />
The front door is held by a snap-lock. Open the front door to<br />
view the various parts on the printer’s front.<br />
Refer to Chapter 9 “Options” for information on possible optional<br />
devices fi tted on the printer’s front.<br />
<strong>Intermec</strong> <strong>Easy<strong>Code</strong>r</strong> <strong>601</strong> <strong>XP</strong> – User’s <strong>Guide</strong> 9
Chapter 2 Installation<br />
Rear View<br />
10<br />
The rear plate contains the On/Off switch, the AC power cord<br />
receptacle, and various interface connectors and slots.<br />
Provision for optional Interface Boards<br />
<strong>Bar</strong> <strong>Code</strong> Wand Connector<br />
On/Off Switch<br />
Not used<br />
AC Power Cord Receptacle<br />
RS-232 Serial Interface Connector ("uart1:")<br />
Upper External Media Intake<br />
Centronics Parallel Interface<br />
Memory Card Slot<br />
Machine <strong>Label</strong><br />
Lower External Media Intake<br />
<strong>Intermec</strong> <strong>Easy<strong>Code</strong>r</strong> <strong>601</strong> <strong>XP</strong> – User’s <strong>Guide</strong>
Media Compartment<br />
Slack Absorber<br />
Chapter 2 Installation<br />
The media compartment becomes accessible when the right-hand<br />
door is opened. The door is held by a magnetic lock and can be<br />
opened 180°, or be removed completely by pushing it rearwards.<br />
Ribbon Rewind Hub<br />
Ribbon Supply Hub<br />
Media Supply Hub<br />
Refer to Chapter 9 “Options” for information on possible optional<br />
devices fi tted inside the printer’s media compartment.<br />
<strong>Intermec</strong> <strong>Easy<strong>Code</strong>r</strong> <strong>601</strong> <strong>XP</strong> – User’s <strong>Guide</strong> 11
Chapter 2 Installation<br />
Print Unit<br />
Pressure Arm<br />
12<br />
Thermal Printhead<br />
Tear <strong>Bar</strong><br />
The print unit features a high-performance 12 dots-per-mm<br />
(≈300 dots-per-inch) thermal printhead with quick-mount fi ttings<br />
to facilitate replacement.<br />
<strong>Label</strong> Stop Sensor<br />
Position Adjustment<br />
(hidden behind locking handle)<br />
Pressure Arm Locking Knob<br />
Printhead Pressure<br />
Adjustment Knob<br />
Locking<br />
Handle<br />
Edge <strong>Guide</strong><br />
Printhead Lift Lever<br />
<strong>Intermec</strong> <strong>Easy<strong>Code</strong>r</strong> <strong>601</strong> <strong>XP</strong> – User’s <strong>Guide</strong>
Connections<br />
Power<br />
Computer<br />
Chapter 2 Installation<br />
1 Place the printer on a level surface near an AC outlet. You<br />
should be able to easily access the printer to load media, to<br />
load ribbon, and to remove the printout.<br />
2 Check that the printer is switched off.<br />
3 Connect the power cord to the receptacle on the rear plate and<br />
to an electrical outlet (>90 to
Chapter 2 Installation<br />
Controls and Indicators<br />
Control Lamps<br />
Display<br />
Keyboard<br />
14<br />
The <strong>Easy<strong>Code</strong>r</strong> <strong>601</strong> <strong>XP</strong> has several ways of communicating<br />
directly with its operator: three control lamps, a display window,<br />
a membrane-switch keyboard with 23 programmable keys, and<br />
a beeper.<br />
F1<br />
Shift<br />
Power Ready<br />
Error<br />
F2<br />
F3<br />
F4<br />
F5<br />
Feed Enter<br />
The control lamps are colored LEDs (Light Emitting Diodes)<br />
and are used for the following purposes:<br />
• Power (green) indicates that the power is on.<br />
• Ready (green) indicates that the printer is ready for use.<br />
• Error (red) indicates that some kind of error has occurred.<br />
If serial communication is used, an error message may be<br />
returned to the host computer.<br />
The display window contains an LCD (Liquid Crystal Display)<br />
with background illumination and two lines of text, each with 16<br />
characters. It guides the operator through the setup and indicates<br />
possible errors during printing.<br />
The <strong>Intermec</strong> Fingerprint programming language and the<br />
<strong>Intermec</strong> Direct Protocol allow custom-made messages to be<br />
composed and displayed according to the requirements of the<br />
application.<br />
The keyboard is of membrane-switch type and has a self-adhesive<br />
overlay that easily can be replaced for special applications. It<br />
has 23 keys with hardcoded functions in the startup and setup<br />
modes.<br />
In application programs created using the <strong>Intermec</strong> Fingerprint<br />
programming language, the keys can be assigned to various<br />
functions. Since one key works as shift key, up to 44 different<br />
key combinations are possible. An audible signal, which can be<br />
turned off, acknowledges that a key has been pressed.<br />
7<br />
4<br />
1<br />
,<br />
Pause<br />
Setup<br />
<strong>Intermec</strong> <strong>Easy<strong>Code</strong>r</strong> <strong>601</strong> <strong>XP</strong> – User’s <strong>Guide</strong><br />
8<br />
5<br />
2<br />
0<br />
9<br />
6<br />
3<br />
C<br />
<strong>Easy<strong>Code</strong>r</strong><br />
<strong>XP</strong><br />
<strong>601</strong><br />
Controls and Indicators, cont.<br />
Beeper<br />
Chapter 2 Installation<br />
The beeper notifi es the operator when an error has occurred<br />
and acknowledges that a key has been pressed. The <strong>Intermec</strong><br />
Fingerprint programming language allows the key acknowledge<br />
signal to be switched off. The frequency and duration of the<br />
signal can be specifi ed. Thus, it is possible create different signals<br />
for different conditions or even to make the printer play simple<br />
melodies!<br />
<strong>Intermec</strong> <strong>Easy<strong>Code</strong>r</strong> <strong>601</strong> <strong>XP</strong> – User’s <strong>Guide</strong> 15
16<br />
Chapter 3<br />
Starting Up<br />
Startup Files<br />
When the printer is switched on, its behavior depends on the<br />
existence of a startup fi le (autoexec.bat) in its memory. There<br />
are two cases:<br />
A The printer is only fi tted with the <strong>Intermec</strong> Shell fi le-managing<br />
program, which allows the operator to choose between a<br />
variety of applications and functions.<br />
B In addition to <strong>Intermec</strong> Shell, the printer is also fi tted with<br />
a custom-made application program that is design to perform<br />
a specifi c task, for example to print tickets, baggage tags, or<br />
product labels for a certain company. Such a program may be<br />
initiated by a startup fi le (autoexec.bat) stored in the printer’s<br />
permanent memory or in a memory card.<br />
There can be one startup fi le stored in each of three different<br />
parts of the printer’s memory. If there are startup fi les stored in<br />
more than one part, only one will be used with the following<br />
priority:<br />
1. An autoexec.bat fi le stored in a memory card, provided the<br />
card was inserted in the printer before power up.<br />
2. An autoexec.bat fi le stored in the read/write part of the<br />
printer’s permanent memory (device "c:").<br />
3. The pup.bat fi le (<strong>Intermec</strong> Shell) in the read-only part of the<br />
printer’s permanent memory (device "rom:").<br />
If you insert a memory card that contains a startup fi le before<br />
you switch on the printer, this startup fi le will be used instead<br />
of <strong>Intermec</strong> Shell.<br />
<strong>Intermec</strong> <strong>Easy<strong>Code</strong>r</strong> <strong>601</strong> <strong>XP</strong> – User’s <strong>Guide</strong>
Memory Card<br />
Chapter 3 Starting Up<br />
If you want to use a memory card, you must insert it into<br />
the slot in the printer’s rear plate before you switch on the<br />
power. The memory card can be an SRAM card complying with<br />
the JEIDA-4 standard or a Flash Memory card from <strong>Intermec</strong>.<br />
Maximum size in both cases is 64Mbit (8MB). There are three<br />
types of Flash Memory cards:<br />
• Font Cards provide additional fonts that can be used as long as<br />
the card remains inserted in the printer.<br />
• Font Install Cards permanently install additional fonts in<br />
the printer, which can be used even after the card has been<br />
removed.<br />
• Firmware Cards automatically replace the printer’s fi rmware,<br />
usually with an updated version.<br />
Backside<br />
Memory Card<br />
Important!<br />
Always switch off the power before inserting or removing a memory<br />
card! The manufacturer’s logotype should face right when viewing<br />
the card as in the illustration above.<br />
<strong>Intermec</strong> <strong>Easy<strong>Code</strong>r</strong> <strong>601</strong> <strong>XP</strong> – User’s <strong>Guide</strong> 17
Chapter 3 Starting Up<br />
Switching On the <strong>Printer</strong><br />
Warning!<br />
During startup, an optional<br />
paper cutter will rotate to<br />
home position. Always keep<br />
the cutter closed when the<br />
power is on.<br />
Display Messages at Startup<br />
18<br />
Before switching on the printer, make the necessary connections,<br />
insert any memory card you want to use, and check that the<br />
printhead is engaged and the optional cutter is closed.<br />
Switch on the power using the On/Off switch on the rear plate.<br />
The “Power” control lamp on the front panel lights up when the<br />
power is on. Wait for a few moments, while the printer loads<br />
the program and runs some self-diagnostic tests. Then some kind<br />
of message will appear in the display window, depending on the<br />
startup fi le.<br />
When the power is switched on, the printer is initialized. The<br />
progress of the initialization is indicated by an increasing number<br />
of colons on the lower line in the display:<br />
Initializing<br />
:::<br />
The type of startup fi le running in the printer is indicated by<br />
the message shown in the display window immediately after<br />
initialization.<br />
A. <strong>Intermec</strong> Shell Startup Program (standard printers)<br />
ENTER=SHELL<br />
5 sec. v.4.8<br />
4 sec. v.4.8<br />
3 sec. v.4.8<br />
2 sec. v.4.8<br />
1 sec. v.4.8<br />
Refer to Chapter 8 for more information on <strong>Intermec</strong> Shell. The<br />
digits in the lower right corner of the display indicate the version<br />
of <strong>Intermec</strong> Shell.<br />
B. Custom-Made Application Program (non-standard printers)<br />
Any other display messages than those illustrated above indicates<br />
that the printer is running some custom-made, non-standard<br />
application program, or that some error has occurred.<br />
<strong>Intermec</strong> <strong>Easy<strong>Code</strong>r</strong> <strong>601</strong> <strong>XP</strong> – User’s <strong>Guide</strong>
Media Load<br />
Tear-Off (Straight-through)<br />
1<br />
Chapter 4<br />
The <strong>Easy<strong>Code</strong>r</strong> <strong>601</strong> <strong>XP</strong> can print on labels, tickets, tags, and<br />
continuous stock in various forms. This section describes the case<br />
when the media is torn off manually against the printer’s tear bar.<br />
This method is also known as “straight-through printing.”<br />
Use the key (see fi gure #13) when loading the same<br />
type of media. When switching to a new type of media, or if<br />
the printer does not feed out the media properly, simultaneously<br />
press the and keys to perform a “testfeed.”<br />
Tear-off can be used for:<br />
• Non-adhesive continuous stock<br />
• Self-adhesive continuous stock with liner<br />
• Self-adhesive labels with liner<br />
• Tickets with gaps, with or without perforations<br />
• Tickets with black marks, with or without perforations<br />
An optional label taken sensor can hold the printing of the next<br />
copy in the batch until the present copy has been removed, see<br />
Chapter 9, “Options.”<br />
Open the front and right-hand doors. Fold the locking handle downward/outward.<br />
<strong>Intermec</strong> <strong>Easy<strong>Code</strong>r</strong> <strong>601</strong> <strong>XP</strong> – User’s <strong>Guide</strong> 19<br />
2
Chapter 4 Media Load<br />
Tear-Off, cont.<br />
20<br />
3<br />
Turn the printhead lift lever to ”Open” position. Remove any core from the media supply hub.<br />
5a<br />
38-40 mm<br />
(1.5")<br />
Fit a new roll of media on the media supply hub and<br />
push the roll inwards as far as it will go.<br />
4a<br />
5b<br />
76 mm<br />
(3")<br />
In case of media roll with a 76 mm (3-inch) core,<br />
fi rst fi t an adapter on the media supply hub.<br />
<strong>Intermec</strong> <strong>Easy<strong>Code</strong>r</strong> <strong>601</strong> <strong>XP</strong> – User’s <strong>Guide</strong>
Tear-Off, cont.<br />
6 7<br />
Route the media underneath the slack absorber and<br />
forward towards the print unit. The slack absorber<br />
can be rotated for better access.<br />
8 9<br />
This diagram shows the media path.<br />
Chapter 4 Media Load<br />
Route the media through the print unit and push it<br />
inwards as far as it will go.<br />
Turn the printhead lift lever to “Closed” position.<br />
<strong>Intermec</strong> <strong>Easy<strong>Code</strong>r</strong> <strong>601</strong> <strong>XP</strong> – User’s <strong>Guide</strong> 21
Chapter 4 Media Load<br />
Tear-Off, cont.<br />
22<br />
10<br />
Adjust the position of the green edge guide so the<br />
media is guided with a minimum of play. Return the locking handle to closed position.<br />
12<br />
Close the front and right-hand doors.<br />
11<br />
13<br />
Feed<br />
Press the Feed key to advance the media and adjust<br />
the media feed.<br />
<strong>Intermec</strong> <strong>Easy<strong>Code</strong>r</strong> <strong>601</strong> <strong>XP</strong> – User’s <strong>Guide</strong>
Tear-Off, cont.<br />
14<br />
To tear off the media, grab the outer edge and pull<br />
downwards.<br />
Chapter 4 Media Load<br />
<strong>Intermec</strong> <strong>Easy<strong>Code</strong>r</strong> <strong>601</strong> <strong>XP</strong> – User’s <strong>Guide</strong> 23
Chapter 4 Media Load<br />
Cut-Off<br />
24<br />
1 2<br />
The <strong>Easy<strong>Code</strong>r</strong> <strong>601</strong> <strong>XP</strong> can print on labels, tickets, tags, and<br />
continuous stock in various forms. This chapter describes the case<br />
when the media is automatically cut off after printing using an<br />
optional paper cutter.<br />
Use the key (see fi gure #16) when loading the same type<br />
of media as before. When switching to a new type of media, or if<br />
the printer does not feed out the media properly, simultaneously<br />
press the and keys to perform a “testfeed.”<br />
Cut-off can be used for:<br />
• Non-adhesive continuous stock<br />
• Self-adhesive labels with liner<br />
Note that the cutter must not cut through the labels–only the<br />
liner–or the adhesive will stick to the blades and render the cutter<br />
inoperable or even damage the cutter’s motor!<br />
• Tickets with gaps without perforations<br />
• Tickets with marks without perforations<br />
WARNING!<br />
The rotating cutting blade can be accidently activated when the<br />
cutter is opened. To avoid any risk of injury to fi ngers, always<br />
switch off the power before loading media and/or ribbon in a<br />
cutter-equipped printer.<br />
Switch off the power using the On/Off switch on<br />
the printer’s rear plate. Open the cutter unit and the right-hand door.<br />
<strong>Intermec</strong> <strong>Easy<strong>Code</strong>r</strong> <strong>601</strong> <strong>XP</strong> – User’s <strong>Guide</strong>
Cut-Off, cont.<br />
3<br />
Fold the locking handle downward/outward.<br />
5<br />
Remove any core from the media supply hub.<br />
Chapter 4 Media Load<br />
<strong>Intermec</strong> <strong>Easy<strong>Code</strong>r</strong> <strong>601</strong> <strong>XP</strong> – User’s <strong>Guide</strong> 25<br />
4<br />
Turn the printhead lift lever to ”Open” position.<br />
6a<br />
38-40 mm<br />
(1.5")<br />
Fit a new roll of media on the media supply hub and<br />
push the roll inwards as far as it will go.
Chapter 4 Media Load<br />
Cut-Off, cont.<br />
26<br />
6b 7<br />
76 mm<br />
(3")<br />
In case of media roll with a 76 mm (3-inch) core,<br />
fi rst fi t an adapter on the media supply hub.<br />
8 9<br />
Route the media through the print unit and push it<br />
inwards as far as it will go.<br />
Route the media underneath the slack absorber and<br />
forward towards the print unit. The slack absorber<br />
can be rotated for better access.<br />
This diagram shows the media path.<br />
<strong>Intermec</strong> <strong>Easy<strong>Code</strong>r</strong> <strong>601</strong> <strong>XP</strong> – User’s <strong>Guide</strong>
Cut-Off, cont.<br />
10 11<br />
Turn the printhead lift lever to “Closed” position.<br />
12 13<br />
Return the locking handle to closed position.<br />
Chapter 4 Media Load<br />
Adjust the position of the green edge guide so the<br />
media is guided with a minimum of play.<br />
Route the media through the cutter between the<br />
two guide plates.<br />
<strong>Intermec</strong> <strong>Easy<strong>Code</strong>r</strong> <strong>601</strong> <strong>XP</strong> – User’s <strong>Guide</strong> 27
Chapter 4 Media Load<br />
Cut-Off, cont.<br />
28<br />
14<br />
Close the cutter unit while pulling at the end of the<br />
media. Close the right-hand door.<br />
16<br />
Feed<br />
Press the Feed key to advance the media and adjust<br />
the media feed.<br />
15<br />
Switch on the power using the On/Off switch on<br />
the rear plate.<br />
<strong>Intermec</strong> <strong>Easy<strong>Code</strong>r</strong> <strong>601</strong> <strong>XP</strong> – User’s <strong>Guide</strong>
Peel-Off (Self-strip)<br />
1<br />
Chapter 4 Media Load<br />
The <strong>Easy<strong>Code</strong>r</strong> <strong>601</strong> <strong>XP</strong> can print on labels, tickets, tags, and<br />
continuous stock in various forms. This chapter describes the<br />
case when precut labels fi tted on liner (backing paper) are to be<br />
separated from the liner immediately after printing. This requires<br />
an optional internal liner/batch takeup unit, on which the liner<br />
is wound up after the labels have been printed and dispensed.<br />
This is also known as “Self-strip” operation.<br />
Use the key (see fi gure #15) when loading the same type<br />
of media as before. When switching to a new type of media, or if<br />
the printer does not feed out the media properly, simultaneously<br />
press the and keys to perform a “testfeed.”<br />
Peel-off can be used for:<br />
• Self-adhesive labels fi tted on liner.<br />
An optional label taken sensor can hold the printing of next label<br />
in a batch until the present label has been removed, see Chapter<br />
9, “Options.”<br />
Open the front and right-hand doors. Fold the locking handle downward/outward.<br />
<strong>Intermec</strong> <strong>Easy<strong>Code</strong>r</strong> <strong>601</strong> <strong>XP</strong> – User’s <strong>Guide</strong> 29<br />
2
Chapter 4 Media Load<br />
Peel-Off, cont.<br />
30<br />
3 4<br />
Turn the printhead lift lever to ”Open” position.<br />
5 6a<br />
Remove any core from the media supply hub.<br />
2.<br />
1.<br />
Pull out the green clip (1) on the liner takeup hub<br />
and dispose of any wound-up liner (2).<br />
38-40 mm<br />
(1.5")<br />
Fit a new roll of media on the media supply hub and<br />
push the roll inwards as far as it will go.<br />
<strong>Intermec</strong> <strong>Easy<strong>Code</strong>r</strong> <strong>601</strong> <strong>XP</strong> – User’s <strong>Guide</strong>
Peel-Off, cont.<br />
6b<br />
8<br />
76 mm<br />
(3")<br />
In case of media roll with a 76 mm (3-inch) core,<br />
fi rst fi t an adapter on the media supply hub.<br />
Route the media through the print unit and push it<br />
inwards as far as it will go.<br />
Chapter 4 Media Load<br />
<strong>Intermec</strong> <strong>Easy<strong>Code</strong>r</strong> <strong>601</strong> <strong>XP</strong> – User’s <strong>Guide</strong> 31<br />
7<br />
Route the media underneath the slack absorber and<br />
forward towards the print unit. The slack absorber<br />
can be rotated for better access.<br />
9<br />
40 cm/15"<br />
Pull out approximately 40 cm (15 inches) of labels<br />
and remove the labels from the liner.
Chapter 4 Media Load<br />
Peel-Off, cont.<br />
32<br />
10 11<br />
Route the liner around the tear bar and back under<br />
the print unit.<br />
12 13<br />
This diagram shows the paths of the labels and<br />
the liner.<br />
2.<br />
1.<br />
Secure the liner with the clip (1) and rotate the hub<br />
so the media becomes tight (2.)<br />
Adjust the position of the green edge guide so the<br />
media is guided with a minimum of play.<br />
<strong>Intermec</strong> <strong>Easy<strong>Code</strong>r</strong> <strong>601</strong> <strong>XP</strong> – User’s <strong>Guide</strong>
Peel-Off, cont.<br />
14 15<br />
Turn the printhead lift lever to “Closed” position.<br />
16 17<br />
Close the front and right-hand doors.<br />
Chapter 4 Media Load<br />
Return the locking handle to closed position.<br />
Press the Feed key to advance the media and adjust<br />
the media feed.<br />
<strong>Intermec</strong> <strong>Easy<strong>Code</strong>r</strong> <strong>601</strong> <strong>XP</strong> – User’s <strong>Guide</strong> 33<br />
Feed
Chapter 4 Media Load<br />
External Supply (Fan-fold)<br />
34<br />
1 2<br />
Use the upper slot in the rear plate when the supply<br />
is at the same level as the printer and when using<br />
peel-off operation.<br />
This chapter describes the case when an external media supply<br />
is used, for example a stack of fan-fold tickets or an external<br />
media roll.<br />
It is possible to simply let the media enter the printer through<br />
either of the two slots in the rear plate. However, we recommend<br />
to fi t the optional <strong>Intermec</strong> Fan-Fold Kit, which provides better<br />
guidance of the media using adjustable guides. The kit can be<br />
fi tted to either the upper or the lower slot in the rear plate.<br />
When using an external media supply, take care to protect the<br />
media from dust, dirt, and other foreign particles, that can impair<br />
the printout quality or cause unneccessary wear to the printhead.<br />
Depending on brand and quality, all direct thermal media are<br />
more or less sensitive to heat, direct sunlight, moisture, oil,<br />
plasticizers, fat, and other substances. Protect it accordingly.<br />
External supply can be used for:<br />
• Tear-off operation<br />
• Cut-off operation<br />
• Peel -off operation (upper slot only)<br />
Use the lower slot in the rear plate when the supply<br />
is placed lower than the printer.<br />
<strong>Intermec</strong> <strong>Easy<strong>Code</strong>r</strong> <strong>601</strong> <strong>XP</strong> – User’s <strong>Guide</strong>
External Supply, cont.<br />
3 4<br />
As an option, the printer can be fi tted with a set of<br />
fan-fold guides in either slot.<br />
5 6<br />
Fit the fan fold guide in the upper slot, when the<br />
supply is at the same level as the printer and when<br />
using peel-off operation.<br />
Chapter 4 Media Load<br />
The outer guide is adjustable for media widths from<br />
76.2 mm (3 in.) to 168 mm (6.6 in.).<br />
Fit the fan fold guide in the lower slot, when the<br />
supply is placed lower than the printer.<br />
<strong>Intermec</strong> <strong>Easy<strong>Code</strong>r</strong> <strong>601</strong> <strong>XP</strong> – User’s <strong>Guide</strong> 35
36<br />
Chapter 5<br />
Thermal Transfer Printing<br />
Ribbon Load<br />
1 2<br />
The <strong>Easy<strong>Code</strong>r</strong> <strong>601</strong> <strong>XP</strong> can print labels, tickets, tags, and continuous<br />
stock using either direct thermal printing on special<br />
heat-sensitive media or thermal transfer printing using a special<br />
ink-coated ribbon.<br />
Thermal transfer printing makes it possible to use a wide range<br />
of receiving face material. Make sure to select a type of transfer<br />
ribbon that matches the type of receiving face material (see<br />
Appendix 2, “Media Specifi cations”) and to set up the printer<br />
properly (see Chapter 6, “Setting Up the <strong>Printer</strong>.”)<br />
The <strong>Easy<strong>Code</strong>r</strong> <strong>601</strong> <strong>XP</strong> can only use transfer ribbon rolls wound<br />
with the ink-coated side facing inwards.<br />
Most transfer ribbons do not smear at room temperature.<br />
Open the front and right-hand doors. Turn the printhead lift lever to ”Open” position.<br />
<strong>Intermec</strong> <strong>Easy<strong>Code</strong>r</strong> <strong>601</strong> <strong>XP</strong> – User’s <strong>Guide</strong>
Ribbon Load, cont.<br />
3 4<br />
Turn the printhead lift lever to “Open” position.<br />
5<br />
Unpack a roll of original <strong>Intermec</strong> thermal transfer<br />
ribbon.<br />
OFF<br />
Chapter 5 Thermal Transfer Printing<br />
In case of ribbon reload, remove any used ribbon<br />
and empty ribbon core.<br />
<strong>Intermec</strong> <strong>Easy<strong>Code</strong>r</strong> <strong>601</strong> <strong>XP</strong> – User’s <strong>Guide</strong> 37<br />
6a<br />
#1<br />
60 mm<br />
(2.3")<br />
In case of ribbon up to 60 mm (2.3 inches) wide,<br />
compress the ribbon supply bobbin and move it so it<br />
snaps into the fi rst (innermost) groove.
Chapter 5 Thermal Transfer Printing<br />
Ribbon Load, cont.<br />
38<br />
6b 6c<br />
#2<br />
88 – 90 mm<br />
(3.5")<br />
In case of 88-90 mm (3.5 inches) ribbon width,<br />
compress the ribbon supply bobbin and move it so it<br />
snaps into the 2:nd groove.<br />
6d 6e<br />
#4<br />
130 mm<br />
(5.1")<br />
In case of 130 mm (5.1 inches) ribbon width,<br />
compress the ribbon supply bobbin and move it so it<br />
snaps into the 4:th groove.<br />
#3<br />
In case of 110 mm (4.3 inches) ribbon width,<br />
compress the ribbon supply bobbin and move it so it<br />
snaps into the 3:rd groove.<br />
#5<br />
110 mm<br />
(4.3")<br />
154 mm<br />
(6.0")<br />
In case of 154 mm (6.0 inches) ribbon width,<br />
compress the ribbon supply bobbin and move it so it<br />
snaps into the 5:th groove.<br />
<strong>Intermec</strong> <strong>Easy<strong>Code</strong>r</strong> <strong>601</strong> <strong>XP</strong> – User’s <strong>Guide</strong>
Ribbon Load, cont.<br />
6f 7<br />
#6<br />
166 mm<br />
(6.5")<br />
In case of 166 mm (6.5 inches) ribbon width,<br />
compress the ribbon supply bobbin and move it so it<br />
snaps into the 6:th groove.<br />
8 9<br />
Without releasing the ribbon, turn the printhead lift<br />
lever to “Closed” position to lock the ribbon.<br />
Chapter 5 Thermal Transfer Printing<br />
Press the ribbon roll onto the ribbon supply bobbin<br />
(1) and route the ribbon through the print unit. Pull<br />
out 20 cm (8 inches) of ribbon (2.)<br />
Press the cardboard core at the front end of the ribbon<br />
onto the rewind hub. During printing, both hubs<br />
should rotate counterclockwise.<br />
<strong>Intermec</strong> <strong>Easy<strong>Code</strong>r</strong> <strong>601</strong> <strong>XP</strong> – User’s <strong>Guide</strong> 39<br />
2.<br />
Power<br />
F1 F2 F3 F4 F5<br />
Shift<br />
Ready Error<br />
<strong>Easy<strong>Code</strong>r</strong> <strong>601</strong> <strong>XP</strong><br />
7 8 9 Pause Setup<br />
4 5 6<br />
1 2 3<br />
0 C Print<br />
.<br />
Feed Enter<br />
1.
Chapter 5 Thermal Transfer Printing<br />
Ribbon Load, cont.<br />
40<br />
9 10<br />
Turn the printhead lift lever to “Open” position.<br />
11<br />
Wind up the ribbon until all of the transparent<br />
leader has passed the printhead and the ribbon<br />
becomes tight.<br />
Turn the printhead lift lever to “Closed” position<br />
and close the locking handle. Close the front and right-hand doors.<br />
12<br />
<strong>Intermec</strong> <strong>Easy<strong>Code</strong>r</strong> <strong>601</strong> <strong>XP</strong> – User’s <strong>Guide</strong>
Setting Up the <strong>Printer</strong><br />
Description<br />
Chapter 6<br />
The setup controls the printer in regard of serial communication,<br />
media feed, and print speed, and specifi es which type of media<br />
and ribbon are loaded in the printer.<br />
Check the list of the printer’s default setup parameters on the next<br />
page to see if they match your requirements. If not, you will have<br />
to change the setup using one of the methods described below.<br />
The setup may also be changed, manually or automatically, by<br />
<strong>Intermec</strong> PrintSet, InterDriver, and <strong>Label</strong>Shop, or by third-party<br />
application programs.<br />
Setup Mode<br />
- Press the key on the printer’s built-in keyboard to<br />
enter the Setup Mode, or<br />
- select the Setup option in <strong>Intermec</strong> Shell to enter the Setup<br />
Mode, or<br />
- execute the <strong>Intermec</strong> Fingerprint SETUP instruction to<br />
enter the Setup Mode, or<br />
- access the Setup Mode via the printer’s home page using an<br />
optional EasyLAN 100i interface board.<br />
See Chapter 7, “Setup Mode” in this manual and the documentation<br />
of the EasyLAN 100i interface board.<br />
<strong>Intermec</strong> Fingerprint<br />
- Use setup strings to change individual setup parameters<br />
remotely from the host, or<br />
- use setup fi les to create sets of setup parameters remotely<br />
from the host.<br />
See the <strong>Intermec</strong> Fingerprint v7.61 manuals.<br />
<strong>Intermec</strong> Direct Protocol<br />
- Use setup strings to change individual setup parameters<br />
remotely from the host.<br />
See the <strong>Intermec</strong> Direct Protocol manuals.<br />
<strong>Intermec</strong> <strong>Easy<strong>Code</strong>r</strong> <strong>601</strong> <strong>XP</strong> – User’s <strong>Guide</strong> 41
Chapter 6 Setting Up the <strong>Printer</strong><br />
Default Setup<br />
42<br />
The printer’s default setup is listed below:<br />
Ser-Com "uart1:"<br />
Baud rate.................................................... 9600 bps<br />
Character length......................................... 8 bits<br />
Parity .......................................................... None<br />
Stop bits ..................................................... 1 bit<br />
RTS/CTS................................................... Disable<br />
ENQ/ACK ................................................ Disable<br />
XON/XOFF, data to host.......................... Disable<br />
XON/XOFF, data from host ..................... Disable<br />
New line..................................................... CR/LF<br />
Receive buffer............................................. 300 bytes<br />
Transmit buffer ..........................................<br />
Feedadjust:<br />
300 bytes<br />
Startadjust .................................................. 0<br />
Stopadjust...................................................<br />
Media:<br />
0<br />
X-start......................................................... 24<br />
Width......................................................... 1284<br />
Length........................................................ 1800<br />
Media type ................................................. <strong>Label</strong> (w Gaps)<br />
Paper type................................................... Thermal transfer<br />
Ribbon constant......................................... 90<br />
Ribbon factor............................................. 25<br />
<strong>Label</strong> offset................................................. 0<br />
Low diameter ............................................. 36<br />
Contrast .....................................................<br />
Print Defi nes:<br />
±0%<br />
Print speed.................................................. 150 mm/sec.<br />
Reading the Current Setup<br />
The printer’s current setup values can be read from the printer’s<br />
display window by browsing through the Setup Mode.<br />
You can list the printer’s current setup values by printing test label<br />
#5 in the Setup Mode or by using <strong>Intermec</strong> Shell.<br />
The current setup values can be sent to the host via the<br />
standard serial communication channel using a SETUP WRITE<br />
"uart1:" statement (see <strong>Intermec</strong> Fingerprint v7.61, Programmer’s<br />
Reference Manual).<br />
<strong>Intermec</strong> <strong>Easy<strong>Code</strong>r</strong> <strong>601</strong> <strong>XP</strong> – User’s <strong>Guide</strong>
Setup Parameters<br />
Serial Communication<br />
Baud Rate<br />
Character Length<br />
Parity<br />
Stop Bits<br />
Flow Control<br />
New Line<br />
Receive Buffer<br />
Transmit Buffer<br />
Chapter 6 Setting Up the <strong>Printer</strong><br />
The serial communication parameters control the communication<br />
between the printer and the connected computer or other<br />
devices on the standard serial port "uart1:" and the optional<br />
serial ports "uart2:" and "uart3:". The optional ports require<br />
an optional interface board. The printer’s fi rmware detects if an<br />
interface board is installed in the printer and presents additional<br />
sets of communication setup menus depending on type of communication<br />
(refer to diagrams 3-5 in Chapter 7, “Setup Mode”).<br />
The serial communication parameters have no effect on parallel communications,<br />
on Ethernet communications, or on the IN and OUT<br />
ports on the optional Industrial Interface Board.<br />
For the serial communication channel "uart1", the following<br />
parameters can be set. Make sure they match the setup of the<br />
connected device or vice versa. If the setup of the printer and the<br />
setup of the host do not match, the response from the printer<br />
to host will be garbled.<br />
Baud Rate<br />
The baud rate is the transmission speed in bits per second. There<br />
are 9 options:<br />
• 300<br />
• 600<br />
• 1200<br />
• 2400<br />
• 4800<br />
• 9600 (default)<br />
• 19200<br />
• 38400<br />
• 57600<br />
<strong>Intermec</strong> <strong>Easy<strong>Code</strong>r</strong> <strong>601</strong> <strong>XP</strong> – User’s <strong>Guide</strong> 43
Chapter 6 Setting Up the <strong>Printer</strong><br />
Setup Parameters, cont.<br />
Serial Communication, cont. Character Length<br />
The character length specifi es the number of bits that will defi ne<br />
a character. Eight bits are recommended, because that option<br />
allows more special characters and characters specifi c for foreign<br />
languages to be used. Refer to the <strong>Intermec</strong> Fingerprint v7.61,<br />
Programmer’s Reference Manual for information on which characters<br />
are available in various combinations of character length and<br />
character set.<br />
• 7 Characters ASCII 000 to 127 decimal<br />
• 8 Characters ASCII 000 to 255 decimal (default)<br />
44<br />
Parity<br />
The parity decides how the fi rmware will check for transmission<br />
errors. There are fi ve options:<br />
• None (default)<br />
• Even<br />
• Odd<br />
• Mark<br />
• Space<br />
Stop Bits<br />
The number of stop bits specifi es how many bits will defi ne the<br />
end of a character. There are two options:<br />
• 1 (default)<br />
• 2<br />
Flow Control<br />
• RTS/CTS<br />
RTS/CTS is a protocol where the communication is controlled<br />
by currents through separate lines in the cable being set<br />
either to high or low. By default, this option is disabled.<br />
RTS high indicates that the transmitting unit is able to receive<br />
characters. RTS low indicates that the receive buffer is fi lled to<br />
75% (see XON/XOFF).<br />
CTS high indicates that the unit transmitting the CTS signal<br />
is ready to receive data. CTS low indicates that the receive<br />
buffer is full (see XON/XOFF). In some computer programs,<br />
for example MS Windows Terminal, RTS/CTS is designated<br />
“Hardware.”<br />
<strong>Intermec</strong> <strong>Easy<strong>Code</strong>r</strong> <strong>601</strong> <strong>XP</strong> – User’s <strong>Guide</strong>
Setup Parameters, cont.<br />
Serial Communication, cont.<br />
Chapter 6 Setting Up the <strong>Printer</strong><br />
• ENQ/ACK<br />
In this protocol, the communication is controlled by the<br />
control characters ENQ (ASCII 05 dec.) and ACK (ASCII 06<br />
dec.) being transmitted on the same line as the data. The sending<br />
unit transmits ENQ at regular intervals. If the response<br />
ACK is not received, the transmission is held up awaiting<br />
an ACK character from the receiving unit. By default, ENQ/<br />
ACK is disabled.<br />
• XON/XOFF<br />
In this protocol, the communication is controlled by the<br />
control characters XON (ASCII 17 dec.) and XOFF (ASCII<br />
19 dec.) being transmitted on the same line as the data. XON/<br />
XOFF can be enabled/disabled separately for data received<br />
from the host by the printer (printer sends XON/XOFF) and<br />
for data transmitted to the host from the printer (host sends<br />
XON/XOFF).<br />
XOFF is sent from the printer when its receive buffer is<br />
fi lled to 75%, and the transmission from the host is held,<br />
waiting for an XON character. When enough data have been<br />
processed so the receive buffer is fi lled only to 50%, the printer<br />
sends an XON character and the host resumes transmitting<br />
data. The same principles apply to XON/XOFF sent by the<br />
host, even if the percentage fi gure may differ.<br />
By default, XON/XOFF is disabled for data both ways.<br />
New Line<br />
Selects the character(s) transmitted from the printer to specify the<br />
switching to a new line. There are three options:<br />
• CR/LF ASCII 13 dec. + ASCII 10 dec. (default)<br />
• LF ASCII 10 dec.<br />
• CR ASCII 13 dec.<br />
Receive Buffer<br />
The receive buffer stores the input data received on the serial<br />
channel before processing. Default size is 300 bytes.<br />
Transmit Buffer<br />
The transmit buffer stores the output data to be transmitted on<br />
the serial channel before transmission. Default size is 300 bytes.<br />
<strong>Intermec</strong> <strong>Easy<strong>Code</strong>r</strong> <strong>601</strong> <strong>XP</strong> – User’s <strong>Guide</strong> 45
Chapter 6 Setting Up the <strong>Printer</strong><br />
Setup Parameters, cont.<br />
Feedadjust<br />
Startadjust<br />
Stopadjust<br />
Recommended Feed Adjustments<br />
The following settings allow<br />
printing from the top of the<br />
label. Minor deviations from<br />
the recommended values may<br />
be required due to various<br />
combinations of media types,<br />
roll size, type of media supply<br />
device, and individual differences<br />
between printers.<br />
Tear-Off:<br />
Start adjust: -175 dots<br />
Stop adjust: 0 dots<br />
Cut between labels:<br />
Start adjust: -441 dots<br />
Stop adjust: 270 dots<br />
Cut variable length strip:<br />
Start adjust: -441 dots<br />
Stop adjust: 375 dots<br />
Peel-Off:<br />
Start adjust: -115 dots<br />
Stop adjust: -60 dots<br />
46<br />
The Feedadjust part of the Setup Mode controls how much of<br />
the media is fed out or pulled back before and/or after the actual<br />
printing. These settings are global and will be effected regardless<br />
of which program is run.<br />
Note that the fi rmware uses the front edges of labels w. gaps, the ends<br />
of detection slots, and the forward edges of black marks for detection,<br />
all seen in relation to the feed direction.<br />
Start Adjust<br />
The Start Adjust value is given as a positive or negative number<br />
of dots (1 dot = 0.125 mm = 4.9 mils). Default value is 0, which<br />
places the origin a certain distance back from the forward edge<br />
of the copy.<br />
• A positive start adjustment means that the specifi ed length<br />
of media will be fed out before the printing starts. Thus, the<br />
origin is moved further back from the forward edge of the<br />
copy.<br />
• A negative start adjustment means that the specifi ed length of<br />
media will be pulled back before the printing starts. Thus, the<br />
origin is moved towards the forward edge of the copy.<br />
Stop Adjust<br />
The Stop Adjust value is given as a positive or negative number<br />
of dots (1 dot = 0.125 mm = 4.9 mils). Default value is 0,<br />
which stops the media feed in a position suitable for tear off<br />
operation.<br />
• A positive stop adjustment means that the normal media<br />
feed after the printing is completed will be increased by the<br />
specifi ed value.<br />
• A negative stop adjustment means that the normal media<br />
feed after the printing is completed will be decreased by the<br />
specifi ed value.<br />
<strong>Intermec</strong> <strong>Easy<strong>Code</strong>r</strong> <strong>601</strong> <strong>XP</strong> – User’s <strong>Guide</strong>
Setup Parameters, cont.<br />
Media<br />
Media Size<br />
Media Type<br />
Paper Type<br />
Testfeed<br />
Contrast<br />
Chapter 6 Setting Up the <strong>Printer</strong><br />
The media parameters tell the fi rmware the characteristics of<br />
the media that will be used, so the printout will be positioned<br />
correctly and get the best quality possible.<br />
Media Size<br />
The size of the printable area is defi ned by three parameters;<br />
X-Start, Width, and Length.<br />
X-Start<br />
Specifi es the position of the origin along the dots on the printhead.<br />
By default, X-start is 24 dots, which places the inner margin of the<br />
print area 3 mm (0.08 inches) from the inner edge of the media<br />
and gives a maximum print width of 1960 dots (163.3 mm/6.43<br />
inches). This prevents printing outside labels when the liner is<br />
slightly wider than the labels.<br />
If you want to use the entire media width, reset the X-start<br />
value to 0 which gives a maximum print width of 1984 dots<br />
(115.3 mm/6.51 inches).<br />
By increasing the value for the X-start parameter, the origin will<br />
be moved outwards, away from the inner edge of the media path.<br />
In other words, the larger X-start value, the wider inner margin<br />
and the less available print width.<br />
Width<br />
Specifi es the width of the printable area in number of dots from<br />
the origin. Thus, the sum of the X-start and width values gives<br />
the outer margin of the printable area. The width should be<br />
set to prevent printing outside the media, which may harm the<br />
printhead.<br />
Length<br />
Specifi es the length of the printable area in number of dots from<br />
the origin along the Y-coordinate and allocates memory space for<br />
two identical image buffers in the printer’s temporary memory.<br />
The size of each buffer can be calculated using this formula:<br />
Buffer size (bits) = [Print length in dots] x [Printhead width in dots]<br />
Note that the temporary memory has other functions that also require<br />
some memory space. To obtain a longer print area, the memory can<br />
be increased by fi tting a larger DRAM SIMM on the printer’s CPU<br />
board as described in the Service Manual.<br />
<strong>Intermec</strong> <strong>Easy<strong>Code</strong>r</strong> <strong>601</strong> <strong>XP</strong> – User’s <strong>Guide</strong> 47
Chapter 6 Setting Up the <strong>Printer</strong><br />
Setup Parameters, cont.<br />
Media, cont.<br />
48<br />
Dot-line<br />
on printhead<br />
Dot #0<br />
Length, cont.<br />
• The length setup also decides the amount of media feed when<br />
using “fi x length strip.”<br />
• The length setup creates an emergency stop, which works<br />
when the printer is set up for “<strong>Label</strong> (w gaps)”, “Ticket (w<br />
mark)”, or “Ticket (w gaps).” If the label stop sensor (LSS) has<br />
not detected a gap or mark within 150% of the set length,<br />
the media feed is automatically stopped to avoid feeding out a<br />
whole roll of media, because of an LSS malfunction.<br />
By setting up the X-start, the Width, and the Length, you<br />
will create a print window inside which the printing can be performed.<br />
Any object or fi eld extending outside the print window<br />
in any direction will either be clipped or cause an error condition<br />
(Error 1003 “Field out of label”), see <strong>Intermec</strong> Fingerprint v7.61,<br />
Programmer’s Reference Manual.<br />
Length<br />
Origin<br />
max. 165.3 mm (6.51 in)<br />
PRINT<br />
WINDOW<br />
X-start Width (1-1960)<br />
FEED<br />
DIRECTION<br />
25-168 mm (1-6.61 in)<br />
2.7 mm (0.11 in)<br />
Dot #1959<br />
<strong>Intermec</strong> <strong>Easy<strong>Code</strong>r</strong> <strong>601</strong> <strong>XP</strong> – User’s <strong>Guide</strong>
Setup Parameters, cont.<br />
Media, cont.<br />
Chapter 6 Setting Up the <strong>Printer</strong><br />
Media Type<br />
The Media Type parameters control how the label stop sensor<br />
(LSS) and the media feed work. There are fi ve media type<br />
options:<br />
• <strong>Label</strong> (w gaps) is used for adhesive labels mounted on liner.<br />
• Ticket (w mark) is used for labels, tickets, or continuous stock<br />
provided with black marks at the back.<br />
• Ticket (w gaps) is used for tickets and tags with detection<br />
slits.<br />
• Fix length strip is used for continuous stock where the length<br />
of the print window decides the length of media to be fed out.<br />
• Var length strip is used for continuous stock and adds 115<br />
dots of media feed after the last printable dot (may even be a<br />
blank space character or a “white dot” in an image or character<br />
cell) to allow the media to be properly torn off.<br />
It is important to select the correct media type, so the printer can<br />
indicate possible errors. Two error conditions may occur:<br />
• Error 1005 “Out of paper” indicates that the last ordered copy<br />
could not be printed because of an empty media stock.<br />
• Error 1031 “Next label not found” indicates that the last<br />
ordered label or ticket was successfully printed, but no more<br />
labels/tickets can be printed because of an empty media stock.<br />
<strong>Intermec</strong> <strong>Easy<strong>Code</strong>r</strong> <strong>601</strong> <strong>XP</strong> – User’s <strong>Guide</strong> 49
Chapter 6 Setting Up the <strong>Printer</strong><br />
Setup Parameters, cont.<br />
Media, cont.<br />
50<br />
Paper Type<br />
The Paper Type parameters control the heat emitted from the<br />
printhead to the direct thermal media or the transfer ribbon in<br />
order to produce the dots that make up the printout image. Start<br />
by choosing between two alternatives:<br />
• Thermal Transfer printing<br />
• Direct Thermal printing (option)<br />
(default)<br />
Your choice will decide which parameters to enter next:<br />
Thermal Transfer Printing (option)<br />
This option contains four parameters:<br />
• Ribbon Constant (range 50 to 115)<br />
• Ribbon Factor (range 10 to 50)<br />
• <strong>Label</strong> Offset (range -50 to 50)<br />
Direct Thermal Printing<br />
This option contains two parameters:<br />
• <strong>Label</strong> Constant (range 50 to 115)<br />
• <strong>Label</strong> Factor (range 10 to 50)<br />
<strong>Intermec</strong> <strong>Easy<strong>Code</strong>r</strong> <strong>601</strong> <strong>XP</strong> – User’s <strong>Guide</strong>
Setup Parameters, cont.<br />
Media, cont.<br />
<strong>Bar</strong> <strong>Code</strong> Directions<br />
Picket Fence<br />
Ladder<br />
Feed<br />
Direction<br />
Chapter 6 Setting Up the <strong>Printer</strong><br />
Thermal Transfer Printing<br />
Keep the Ribbon Factor for each ribbon type at the recommended<br />
value. Decrease or increase the Ribbon Constant for<br />
lighter or darker images respectively. For a new label material,<br />
start with an average Ribbon Constant value for the ribbon<br />
quality in question.<br />
Direct Thermal Printing<br />
<strong>Intermec</strong> recommends that you use the paper type and print<br />
speed settings listed below to produce the highest possible print<br />
quality under normal conditions and to ensure maximum lifetime<br />
of the printhead. <strong>Label</strong> materials are available from <strong>Intermec</strong><br />
either in standard types and sizes, or in special materials and sizes.<br />
When adjusting the image darkness for individual requirements<br />
or new label materials, keep the <strong>Label</strong> Factor at the recommended<br />
value for the type of direct thermal media. Decrease or increase<br />
the <strong>Label</strong> Constant for lighter or darker images respectively,<br />
depending on the requirements of the images or of the new label<br />
material.<br />
<strong>Bar</strong> <strong>Code</strong> Directions<br />
In the tables on the pages that follow, different maximum print<br />
speeds may be recommended depending on the direction of<br />
possible bar codes in the printout. Generally, ladder style bar<br />
codes are more demanding and may require a lower print speed,<br />
especially in connection with a large media roll and/or negative<br />
start adjust values (see “Print Speed” later in this chapter). The<br />
illustration to the left shows how the two type of bar code<br />
directions relate to the media feed direction.<br />
<strong>Intermec</strong> <strong>Easy<strong>Code</strong>r</strong> <strong>601</strong> <strong>XP</strong> – User’s <strong>Guide</strong> 51
Chapter 6 Setting Up the <strong>Printer</strong><br />
Setup Parameters, cont.<br />
Media, cont.<br />
Direct Thermal Printing (Europe)<br />
DT Type/ Media <strong>Label</strong> <strong>Label</strong> Max Rec. Print Speed (mm/sec) 1<br />
Speed Designation Constant Factor Picket Fence <strong>Bar</strong> <strong>Code</strong>2 Ladder <strong>Bar</strong> <strong>Code</strong><br />
Top Coated/ Thermal Top Board3 100 40 150 150<br />
Standard Thermal Top 95 40 200 200<br />
Non Top Coated/ Thermal Eco 85 40 200 200<br />
Standard Thermal Eco Board3 80 40 200 150<br />
Top Coated/High Thermal Top High Speed 80 30 225 225<br />
Thermal Transfer Printing (Europe)<br />
Ribbon Receiving Ribbon Ribbon <strong>Label</strong> Max Rec. Print Speed (mm/sec) 1<br />
Type Material Constant Factor Offset Picket Fence <strong>Bar</strong> <strong>Code</strong>2 Ladder <strong>Bar</strong> <strong>Code</strong><br />
GP02 TTR Uncoated 80 25 0 200 200<br />
TTR Coated 80 25 0 200 200<br />
TTR Premium 70 25 0 225 225<br />
HP07 TTR Coated 100 25 0 225 200<br />
TTR Premium 90 25 0 225 225<br />
TTR Premium Board3 105 25 0 200 200<br />
TTR Polyethylene 85 25 0 200 150<br />
HP66 TTR Coated 100 25 0 225 200<br />
TTR Premium 90 25 0 225 225<br />
TTR Premium Board3 105 25 0 200 200<br />
TTR Polyethylene 85 25 0 225 200<br />
TTR Gloss Polyethylene 90 25 0 200 200<br />
HR03 TTR High Gloss Polyester 100 30 0 225 200<br />
1 /. Exceeding the recommended print speed may cause the printhead to wear out prematurely. If the ambient temperature is lower than +15°C<br />
(+59°F), decrease print speed by 100 mm/sec.<br />
2 /. Also applies to printing of text, images, lines, and boxes.<br />
3 /. Requires high printhead pressure (see Chapter 12 “Adjustments, Printhead Pressure”).<br />
52<br />
<strong>Intermec</strong> <strong>Easy<strong>Code</strong>r</strong> <strong>601</strong> <strong>XP</strong> – User’s <strong>Guide</strong>
Setup Parameters, cont.<br />
Media, cont.<br />
Direct Thermal Printing (North America)<br />
Chapter 6 Setting Up the <strong>Printer</strong><br />
DT Type/ Media <strong>Label</strong> <strong>Label</strong> Max Rec. Print Speed (mm/sec) 1<br />
Speed Designation Constant Factor Picket Fence <strong>Bar</strong> <strong>Code</strong> 2 Ladder <strong>Bar</strong> <strong>Code</strong><br />
Top Coated/ Duratherm II Tag 3 112 40 100 100<br />
Standard Duratherm II 110 40 100 100<br />
Top Coated/ Duratherm Ltg 92 40 175 175<br />
High Duratherm IR 82 40 150 150<br />
Thermal Transfer Printing (North America)<br />
Ribbon Receiving Ribbon Ribbon <strong>Label</strong> Max Rec. Print Speed (mm/sec) 1<br />
Type Material Constant Factor Offset Picket Fence <strong>Bar</strong> <strong>Code</strong>2 Ladder <strong>Bar</strong> <strong>Code</strong><br />
TMX 1500 Duratran I 65 25 2 200 200<br />
Duratran VG 65 25 15 225 225<br />
Duratran II 65 25 0 225 225<br />
Duratran II Tag 65 25 4 225 225<br />
Kimdura 65 25 20 225 225<br />
Kimdura Tag 65 25 15 225 225<br />
TMX 2500 Duratran II 60 25 0 225 225<br />
Duratran II Tag 60 25 4 225 225<br />
Kimdura 60 25 20 225 225<br />
Kimdura Tag 60 25 15 225 225<br />
TMX 3200 Polyester 90 30 0 150 150<br />
1 /. Exceeding the recommended print speed may cause the printhead to wear out prematurely. If the ambient<br />
temperature is lower than +15°C (+59°F), decrease print speed by 100 mm/sec.<br />
2 /. Also applies to printing of text, images, lines, and boxes.<br />
3 /. Requires high printhead pressure (see Chapter 12 “Adjustments, Printhead Pressure”),<br />
<strong>Intermec</strong> <strong>Easy<strong>Code</strong>r</strong> <strong>601</strong> <strong>XP</strong> – User’s <strong>Guide</strong> 53
Chapter 6 Setting Up the <strong>Printer</strong><br />
Setup Parameters, cont.<br />
Media, cont.<br />
Print Defi nes<br />
Head Resistance<br />
Testprint<br />
Print Speed<br />
54<br />
Contrast<br />
Use the contrast parameter to make minor adjustments of the<br />
blackness in the printout, for example to adapt the printer to<br />
variations in quality between different batches of the same media.<br />
11 options are displayed in an endless loop from -10% to +10%.<br />
Default value is 0%. The contrast is reset to the default (±0)<br />
whenever a new paper type is specifi ed, regardless which method<br />
has been used.<br />
Testfeed<br />
The sensitivity of the label stop sensor (LSS) may need to be<br />
adjusted when switching from one type of media to another.<br />
This is especially the case when using adhesive labels since the<br />
transparency of the liner (backing paper) may vary. Adjusting<br />
the LSS entails feeding out a number of blank copies until<br />
the fi rmware has decided the proper setting for the LSS. At<br />
the same time, the front edges of the labels, tickets, etc. are<br />
detected so the feed control can position the media according<br />
to the Feedadjust parameter (same as the <strong>Intermec</strong> Fingerprint<br />
statement TESTFEED). The comparator and amplifi er values of<br />
the LSS are displayed (read-only information).<br />
Head Resistance<br />
The printhead resistance is measured automatically at startup<br />
(read-only information).<br />
Testprint<br />
Test label #1 to #4 check the printout quality and facilitate<br />
adjustment of the printhead pressure, see Chapter 12, “Adjustments.”<br />
Test label #5 lists the printer’s current setup (extra labels<br />
may be printed if the printer is fi tted an optional interface<br />
board). Test label #6 is only printed if the printer has an optional<br />
EasyLAN 100i interface board. Test labels #1 to #5 are illustrated<br />
on the next page. If the printer refuses to print a test label, press<br />
the key to fi nd out what is wrong, for example printhead<br />
lifted or out-of paper.<br />
<strong>Intermec</strong> <strong>Easy<strong>Code</strong>r</strong> <strong>601</strong> <strong>XP</strong> – User’s <strong>Guide</strong>
Setup Parameters, cont.<br />
Print Defi nes, cont.<br />
1160 ohms/12 dots<br />
Test <strong>Label</strong> #1<br />
Test <strong>Label</strong> #2<br />
CODE39 CODE39<br />
1 234567 890128<br />
Test <strong>Label</strong> #3<br />
Chapter 6 Setting Up the <strong>Printer</strong><br />
<strong>Intermec</strong> <strong>Easy<strong>Code</strong>r</strong> <strong>601</strong> <strong>XP</strong> – User’s <strong>Guide</strong> 55
Chapter 6 Setting Up the <strong>Printer</strong><br />
Setup Parameters, cont.<br />
Print Defi nes, cont.<br />
56<br />
CODE39<br />
Test <strong>Label</strong> #4<br />
UART1 9600-8-N-1<br />
RTS/CTS DISABLE<br />
ENQ/ACK DISABLE<br />
XON/XOFF<br />
DATA TO HOST DISABLE<br />
DATA FROM HOST DISABLE<br />
NEW LINE CR/LF<br />
REC BUF 300<br />
TRANS BUF 300<br />
PRINT CONFIG<br />
STARTADJ 0<br />
STOPADJ 0<br />
CONTRAST +0%<br />
XSTART 24<br />
WIDTH 1960<br />
LENGTH 1800<br />
MEDIA TYPE LABEL (w GAPS)<br />
PAPER TYPE TRANSFER<br />
LABEL CONSTANT 100<br />
LABEL FACTOR 40<br />
RIBBON CONSTANT 100<br />
RIBBON FACTOR 25<br />
LABEL OFFSET 0<br />
TESTFEED 12 3<br />
HEAD RESIST 1109<br />
PRINT SPEED 150<br />
Odometer [km] 0<br />
Model <strong>601</strong><strong>XP</strong><br />
Hardware version 1.1<br />
Ram 4096 ( k)<br />
Fos 0+0+2048 (k)<br />
External 0 (k)<br />
FIRMWARE<br />
Fingerprint 7.40<br />
MCS1147 27-Sep-00 15:43:38 m3k<br />
slav0782 27-MAY-97 17:09:25 [0]<br />
slav0782 27-MAY-97 17:09:25 [1]<br />
Test <strong>Label</strong> #5<br />
CODE39<br />
<strong>Intermec</strong> <strong>Easy<strong>Code</strong>r</strong> <strong>601</strong> <strong>XP</strong> – User’s <strong>Guide</strong>
Setup Parameters, cont.<br />
Print Defi nes, cont.<br />
Chapter 6 Setting Up the <strong>Printer</strong><br />
Print Speed<br />
The print speed is variable between 100 and 225 mm/sec.<br />
Generally, the lower the speed, the better the printout quality.<br />
This is especially true when printing bar codes with the bars<br />
running across the media path (“ladder style”), when printing<br />
on demanding face materials, and when printing at low ambient<br />
temperatures. Refer to the tables under “Media” earlier in this<br />
chapter for maximum print speed values. The default setting is<br />
150 mm/sec. (≈ 6 inches/sec.).<br />
<strong>Intermec</strong> <strong>Easy<strong>Code</strong>r</strong> <strong>601</strong> <strong>XP</strong> – User’s <strong>Guide</strong> 57
58<br />
Chapter 7<br />
Setup Mode<br />
Entering Setup Mode at Installation<br />
The method of entering the Setup Mode depends on which startup<br />
fi les are stored in the printer’s memory, a subject that was more<br />
thoroughly discussed in Chapter 3, “Starting Up.”<br />
<strong>Easy<strong>Code</strong>r</strong> <strong>601</strong> <strong>XP</strong> with <strong>Intermec</strong> Shell<br />
• Switch on the power.<br />
• When the display shows the message “Enter=Shell; x sec...”,<br />
press .<br />
• Press (this facility can be used anywhere within<br />
<strong>Intermec</strong> Shell).<br />
• Set up the printer as described in this chapter.<br />
• Return to <strong>Intermec</strong> Shell by pressing .<br />
<strong>Easy<strong>Code</strong>r</strong> <strong>601</strong> <strong>XP</strong> with a custom-made application program<br />
• Normally, there is no need to enter the Setup Mode for<br />
custom-made application programs. Necessary provisions for<br />
changing the setup, manually or automatically, should be<br />
provided by the program.<br />
<strong>Intermec</strong> <strong>Easy<strong>Code</strong>r</strong> <strong>601</strong> <strong>XP</strong> – User’s <strong>Guide</strong>
Navigating in Setup Mode<br />
Chapter 7 Setup Mode<br />
While going through the setup procedure, you are guided by texts<br />
in the printer’s display. You can navigate between setup menus,<br />
acknowledge displayed values, select or type new values, etc. by<br />
using the keys on the printer’s keyboard.<br />
Note!<br />
An external keyboard cannot be used inside the Setup Mode.<br />
-<br />
Move one menu to the left on the same<br />
level 1 .<br />
Move one menu to the right on the same<br />
level 1 .<br />
Display error message at test label printing<br />
failure.<br />
Move up one level or scroll back in a stack<br />
of options 1 .<br />
Move down one level or scroll forward in<br />
a stack of options 1 .<br />
Enter numeric values.<br />
Specify negative values (leading position).<br />
Clear erroneously entered values.<br />
Acknowledge and move to next menu.<br />
Perform testfeeds in the Testfeed menu.<br />
Print test labels in the Test <strong>Label</strong> menu.<br />
Exit the Setup Mode.<br />
Can be used anywhere in Setup Mode.<br />
1 /. “Left”, “right”, “up”, and “down” refer to the overviews later in<br />
this chapter.<br />
<strong>Intermec</strong> <strong>Easy<strong>Code</strong>r</strong> <strong>601</strong> <strong>XP</strong> – User’s <strong>Guide</strong> 59
Chapter 7 Setup Mode<br />
Setup Mode Overview, Part 1<br />
(<strong>Intermec</strong> Fingerprint v7.61)<br />
SETUP:<br />
SER-COM,UART1<br />
SETUP:<br />
SER-COM,UART2<br />
SETUP:<br />
SER-COM,UART3<br />
SETUP:<br />
NET-COM,NET1<br />
SETUP: DETECTION:<br />
FEEDADJ<br />
60<br />
See Overview Part 3<br />
See Overview Part 4<br />
See Overview Part 5<br />
Continued on next page!<br />
SER-COM,UART1:<br />
BAUDRATE<br />
SER-COM,UART1:<br />
CHAR LENGTH<br />
SER-COM,UART1:<br />
PARITY<br />
SER-COM,UART1:<br />
STOP BITS<br />
SER-COM,UART1:<br />
FLOWCONTROL<br />
SER-COM,UART1:<br />
NEW LINE<br />
SER-COM,UART1:<br />
REC BUF<br />
SER-COM,UART1:<br />
TRANS BUF<br />
FEEDADJ:<br />
STARTADJ<br />
FEEDADJ:<br />
STOPADJ<br />
BAUDRATE:<br />
9600<br />
19200<br />
38400<br />
57600<br />
115200<br />
300<br />
600<br />
1200<br />
2400<br />
4800<br />
CHAR LENGTH:<br />
8<br />
7<br />
PARITY:<br />
NONE<br />
EVEN<br />
ODD<br />
MARK<br />
SPACE<br />
STOPBITS:<br />
1<br />
2<br />
FLOWCONTROL:<br />
RTS/CTS<br />
FLOWCONTROL:<br />
ENQ/ACK<br />
FLOWCONTROL:<br />
XON/XOFF<br />
NEW LINE:<br />
CR/LF<br />
LF<br />
CR<br />
REC BUF:<br />
[300]:<br />
TRANS BUF:<br />
[300]:<br />
STARTADJ:<br />
[0]:<br />
STOPADJ:<br />
[0]:<br />
RTS/CTS:<br />
DISABLE<br />
ENABLE<br />
ENQ/ACK:<br />
DISABLE<br />
ENABLE<br />
LEGEND:<br />
Boxes with thick lines indicate default setup.<br />
Boxes with dotted lines indicate menus related to<br />
optional interface boards.<br />
XON/XOFF:<br />
DATA TO HOST<br />
XON/XOFF:<br />
DATA FROM HOST<br />
DATA TO HOST:<br />
DISABLE<br />
ENABLE<br />
DATA FROM HOST:<br />
DISABLE<br />
ENABLE<br />
<strong>Intermec</strong> <strong>Easy<strong>Code</strong>r</strong> <strong>601</strong> <strong>XP</strong> – User’s <strong>Guide</strong>
Setup Mode Overview, Part 2<br />
(<strong>Intermec</strong> Fingerprint v7.61)<br />
SETUP:<br />
MEDIA<br />
SETUP:<br />
PRINT DEFS<br />
SETUP:<br />
NETWORK<br />
Continued from previous page!<br />
See Overview Part 5<br />
MEDIA:<br />
MEDIA SIZE<br />
MEDIA:<br />
MEDIA TYPE<br />
MEDIA:<br />
PAPER TYPE<br />
MEDIA:<br />
CONTRAST<br />
MEDIA:<br />
TESTFEED<br />
PRINT DEFS:<br />
HEAD RESIST<br />
PRINT DEFS:<br />
TESTPRINT<br />
PRINT DEFS:<br />
PRINT SPEED<br />
Press to exit the Setup Mode.<br />
MEDIA SIZE:<br />
XSTART<br />
MEDIA SIZE:<br />
WIDTH<br />
MEDIA SIZE:<br />
LENGTH<br />
MEDIA TYPE:<br />
LABEL (w GAPS)<br />
TICKET (w MARK)<br />
TICKET (w GAPS)<br />
FIX LENGTH STRIP<br />
VAR LENGTH STRIP<br />
PAPER TYPE:<br />
TRANSFER<br />
PAPER TYPE:<br />
DIRECT THERMAL<br />
CONTRAST:<br />
+0%<br />
+2%<br />
+4%<br />
+6%<br />
+8% MEDIA TYPE:<br />
+10%<br />
-10%<br />
-8%<br />
-6%<br />
-4%<br />
-2%<br />
TESTFEED:<br />
[14 1]<br />
HEAD RESIST:<br />
[nnn]:<br />
= PRINT:<br />
= NEXT #1<br />
PRINT SPEED:<br />
[100]:<br />
XSTART:<br />
[24]:<br />
WIDTH:<br />
[1960]:<br />
LENGTH:<br />
[1800]:<br />
TRANSFER:<br />
RIBBON CONSTANT<br />
TRANSFER:<br />
RIBBON FACTOR<br />
TRANSFER:<br />
LABEL OFFSET<br />
DIRECT THERMAL:<br />
LABEL CONSTANT<br />
DIRECT THERMAL:<br />
LABEL FACTOR<br />
Chapter 7 Setup Mode<br />
Press to perform a Testfeed.<br />
Comparator and amplifier values are read-only.<br />
Read-only value.<br />
Printhead resistance is<br />
automatically set at startup.<br />
Use to select type of test label.<br />
Press to print it.<br />
If no label is printed, press for error message.<br />
RIBBON CONSTANT:<br />
[90]:<br />
RIBBON FACTOR:<br />
[25]:<br />
LABEL OFFSET:<br />
[0]:<br />
LABEL CONSTANT:<br />
[85]:<br />
LABEL FACTOR:<br />
[40]:<br />
<strong>Intermec</strong> <strong>Easy<strong>Code</strong>r</strong> <strong>601</strong> <strong>XP</strong> – User’s <strong>Guide</strong> 61
Chapter 7 Setup Mode<br />
Setup Mode Overview, Part 3<br />
(<strong>Intermec</strong> Fingerprint v7.61)<br />
If an optional Double Serial or Industrial Interface Board is installed in the printer, additional menus will be displayed<br />
(in case of Double Serial Interface Board, also see Overview Part 4):<br />
SETUP:<br />
SER-COM,UART2<br />
SETUP:<br />
SER-COM,UART3<br />
62<br />
SER-COM,UART2:<br />
BAUDRATE<br />
SER-COM,UART2:<br />
PROT ADDR<br />
SER-COM,UART2:<br />
CHAR LENGTH<br />
SER-COM,UART2:<br />
PARITY<br />
SER-COM,UART2:<br />
STOP BITS<br />
SER-COM,UART2:<br />
FLOWCONTROL<br />
SER-COM,UART2:<br />
NEW LINE<br />
SER-COM,UART2:<br />
REC BUF<br />
SER-COM,UART2:<br />
TRANS BUF<br />
SER-COM,UART2:<br />
CONNECTED HW<br />
SER-COM,UART2:<br />
PROTOCOL ADDR.<br />
BAUDRATE:<br />
9600<br />
19200<br />
38400<br />
57600<br />
300<br />
600<br />
1200<br />
2400<br />
4800<br />
PROT ADDR:<br />
DISABLE<br />
ENABLE<br />
CHAR LENGTH:<br />
8<br />
7<br />
PARITY:<br />
NONE<br />
EVEN<br />
ODD<br />
MARK<br />
SPACE<br />
STOPBITS:<br />
1<br />
2<br />
FLOWCONTROL:<br />
RTS/CTS<br />
FLOWCONTROL:<br />
ENQ/ACK<br />
FLOWCONTROL:<br />
XON/XOFF<br />
NEW LINE:<br />
CR/LF<br />
LF<br />
CR<br />
REC BUF:<br />
[300]:<br />
TRANS BUF:<br />
[300]:<br />
CONNECTED HW:<br />
RS232<br />
PROTOCOL ADDR.<br />
[1]:<br />
These menus are only displayed if RS 485 is selected on "uart2:"<br />
These menus are not displayed if RS 485 is selected on "uart2:"<br />
RTS/CTS:<br />
DISABLE<br />
ENABLE<br />
ENQ/ACK:<br />
DISABLE<br />
ENABLE<br />
XON/XOFF:<br />
DATA TO HOST<br />
XON/XOFF:<br />
DATA FROM HOST<br />
RTS/CTS flowcontrol cannot be<br />
selected for the following types of<br />
hardware connection on "uart2:":<br />
422 NON ISOLATED<br />
422 ISOLATED<br />
DATA TO HOST:<br />
DISABLE<br />
ENABLE<br />
DATA FROM HOST:<br />
DISABLE<br />
ENABLE<br />
The selected type of hardware connection on "uart2:"<br />
is displayed as one of the following alternatives (read-only):<br />
RS232<br />
422 NON ISOLATED<br />
422 ISOLATED<br />
RS485<br />
These menus are only displayed if RS 485 is selected on "uart2:"<br />
Enter printer's protocol address (0–31).<br />
<strong>Intermec</strong> <strong>Easy<strong>Code</strong>r</strong> <strong>601</strong> <strong>XP</strong> – User’s <strong>Guide</strong>
Setup Mode Overview, Part 4<br />
(<strong>Intermec</strong> Fingerprint v7.61)<br />
If an optional Double Serial Interface Board is installed in the printer, additional menus will be displayed:<br />
SETUP:<br />
SER-COM,UART3<br />
SER-COM,UART3:<br />
BAUDRATE<br />
SER-COM,UART3:<br />
CHAR LENGTH<br />
SER-COM,UART3:<br />
PARITY<br />
SER-COM,UART3:<br />
STOP BITS<br />
SER-COM,UART3:<br />
FLOWCONTROL<br />
SER-COM,UART3:<br />
NEW LINE<br />
SER-COM,UART3:<br />
REC BUF<br />
SER-COM,UART3:<br />
TRANS BUF<br />
SER-COM,UART3:<br />
CONNECTED HW<br />
BAUDRATE:<br />
9600<br />
19200<br />
38400<br />
57600<br />
300<br />
600<br />
1200<br />
2400<br />
4800<br />
CHAR LENGTH:<br />
8<br />
7<br />
PARITY:<br />
NONE<br />
EVEN<br />
ODD<br />
MARK<br />
SPACE<br />
STOPBITS:<br />
1<br />
2<br />
FLOWCONTROL:<br />
RTS/CTS<br />
FLOWCONTROL:<br />
ENQ/ACK<br />
FLOWCONTROL:<br />
XON/XOFF<br />
NEW LINE:<br />
CR/LF<br />
LF<br />
CR<br />
REC BUF:<br />
[300]:<br />
TRANS BUF:<br />
[300]:<br />
CONNECTED HW:<br />
RS232<br />
RTS/CTS:<br />
DISABLE<br />
ENABLE<br />
ENQ/ACK:<br />
DISABLE<br />
ENABLE<br />
XON/XOFF:<br />
DATA TO HOST<br />
XON/XOFF:<br />
DATA FROM HOST<br />
Chapter 7 Setup Mode<br />
RTS/CTS flowcontrol cannot be<br />
selected for the following types of<br />
hardware connection on "uart3:":<br />
422 NON ISOLATED<br />
20 mA CURRENT LOOP<br />
The selected type of hardware connection on "uart3:"<br />
is displayed as one of the following alternatives (read-only):<br />
RS232<br />
422 NON ISOLATED<br />
CURRENT LOOP<br />
DATA TO HOST:<br />
DISABLE<br />
ENABLE<br />
DATA FROM HOST:<br />
DISABLE<br />
ENABLE<br />
<strong>Intermec</strong> <strong>Easy<strong>Code</strong>r</strong> <strong>601</strong> <strong>XP</strong> – User’s <strong>Guide</strong> 63
Chapter 7 Setup Mode<br />
Setup Mode Overview, Part 5<br />
(<strong>Intermec</strong> Fingerprint v7.61)<br />
If an optional an EasyLAN 100i interface board is installed in the printer, additional menus will be displayed.<br />
SETUP:<br />
SER-COM, UART1<br />
SETUP:<br />
NET-COM, NET1<br />
SETUP:<br />
FEEDADJ<br />
SETUP:<br />
MEDIA<br />
SETUP:<br />
PRINT DEFS<br />
SETUP:<br />
NETWORK<br />
64<br />
Standard Setup Mode<br />
See Overview Part 1<br />
Standard Setup Mode<br />
See Overview Part 1<br />
Standard Setup Mode<br />
See Overview Part 2<br />
Standard Setup Mode<br />
See Overview Part 2<br />
NET-COM,NET1:<br />
NEW LINE<br />
NETWORK:<br />
IP SELECTION<br />
Read<br />
Press to exit the Setup Mode.<br />
Set<br />
Read<br />
NEW LINE:<br />
CR/LF<br />
LF<br />
CR<br />
IP SELECTION:<br />
MANUAL<br />
DHCP<br />
BOOTP<br />
RARP<br />
NETWORK:<br />
IP ADDRESS<br />
NETWORK:<br />
NETMASK<br />
NETWORK:<br />
DEFAULT ROUTER<br />
IP ADDRESS:<br />
192.168.1.79<br />
NETMASK:<br />
255.255.255.0<br />
DEFAULT ROUTER:<br />
192.168.1.1<br />
Use and - <br />
to set IP address.<br />
Use to erase.<br />
Use and - <br />
to set netmask.<br />
Use to erase<br />
Use and - <br />
to set default router.<br />
Use to erase.<br />
<strong>Intermec</strong> <strong>Easy<strong>Code</strong>r</strong> <strong>601</strong> <strong>XP</strong> – User’s <strong>Guide</strong>
<strong>Intermec</strong> Shell Startup Program<br />
Introduction<br />
Chapter 8<br />
<strong>Intermec</strong> Shell is a startup program (also called “autoexec-fi le”),<br />
which is a program that automatically starts running when the<br />
printer is switched on. <strong>Intermec</strong> Shell helps the operator to<br />
choose between a number of standard or custom-made application<br />
programs and to start certain useful facilities, as listed below.<br />
Application Programs<br />
• <strong>Intermec</strong> <strong>Label</strong>Shop (WYSIWYG label design program)<br />
• <strong>Intermec</strong> Windows Driver (do not use)<br />
• <strong>Intermec</strong> Fingerprint (for creating your own programs or<br />
to run the <strong>Intermec</strong> InterDriver)<br />
• <strong>Intermec</strong> Direct Protocol (easy-to-use slave protocol)<br />
• LINE_A<strong>XP</strong>.PRG (line analyzer program)<br />
• Other application programs in the printer’s memory . .<br />
A prerequisite is that the program is provided with the extension<br />
“.PRG”. However, some original <strong>Intermec</strong> utility programs are<br />
excluded as long as they remain stored in "rom:":<br />
- ERRHAND.PRG<br />
- FILELIST.PRG<br />
- LBLSHTXT.PRG<br />
- MKAUTO.PRG<br />
- SHELL<strong>XP</strong>.PRG<br />
- WIN<strong>XP</strong>.PRG<br />
Other Facilities<br />
• Setup Mode (manual setup from printer’s keyboard)<br />
• Print Setup (printing setup on label)<br />
• Testfeed (formfeeds + auto-adjust of the LSS)<br />
• Test <strong>Label</strong> (printing of test labels)<br />
• Default setup (resetting all setup parameters to default)<br />
• Update PC card (downloading data from a host to a PC<br />
card in the printer, or upgrading the<br />
printer’s fi rmware from a PC card)<br />
• Reboot (restarting the printer)<br />
<strong>Intermec</strong> Shell is factory-installed in the printer’s permanent<br />
memory (device "rom:"). If you insert a memory card with another<br />
startup fi le before you switch on the printer, or if there is a startup<br />
fi le stored in the printer’s permanent memory (device "c:"), this<br />
startup fi le will be used instead of <strong>Intermec</strong> Shell (see Chapter 3,<br />
“Startup Files”).<br />
<strong>Intermec</strong> <strong>Easy<strong>Code</strong>r</strong> <strong>601</strong> <strong>XP</strong> – User’s <strong>Guide</strong> 65
Chapter 8 <strong>Intermec</strong> Shell Startup Program<br />
Starting with <strong>Intermec</strong> Shell<br />
66<br />
A few seconds after you have switched on the power to the printer and<br />
the initialization is completed, the countdown menu of the <strong>Intermec</strong><br />
Shell program will be displayed:<br />
ENTER=SHELL<br />
5 sec. v.4.8<br />
Now you have 5 seconds to enter <strong>Intermec</strong> Shell by pressing .<br />
The lower line tells you how much time you have left. Should the<br />
time run out before you have taken any action to enter <strong>Intermec</strong><br />
Shell, the last selected application in <strong>Intermec</strong> Shell will be opened. If<br />
you use the same application all the time, you will only need to switch<br />
on the power, once the application has been selected.<br />
If no other application has yet been selected, the current version<br />
of <strong>Intermec</strong> Fingerprint will be opened with the standard RS-232<br />
port "uart1:" selected as std I/O channel (see <strong>Intermec</strong> Fingerprint<br />
manuals). When the countdown is completed, you will see these lines<br />
in the display:<br />
FINGERPRINT<br />
7.61<br />
If you want to select another application, just cycle the power and<br />
enter <strong>Intermec</strong> Shell before the countdown is completed.<br />
When you enter the <strong>Intermec</strong> Shell from the countdown menus, the<br />
Select Application menu will be displayed:<br />
SHELL<br />
SEL. APPLICATION<br />
In this menu, you can choose between two options:<br />
• Press to go to menus where you can select an application<br />
program.<br />
• Press to go to the Facilities part of <strong>Intermec</strong> Shell.<br />
<strong>Intermec</strong> <strong>Easy<strong>Code</strong>r</strong> <strong>601</strong> <strong>XP</strong> – User’s <strong>Guide</strong>
Starting with <strong>Intermec</strong> Shell, cont.<br />
Select Application<br />
1 /. When an application program<br />
is started, it may automatically<br />
change the communication<br />
setup. For example, <strong>Intermec</strong><br />
<strong>Label</strong>Shop changes the setup<br />
to the following values:<br />
Baud rate: 57600<br />
Char. length: 8<br />
Parity: None<br />
Stopbits: 1<br />
RTS/CTS: Enable<br />
ENQ/ACK: Disable<br />
XON/XOFF: Disable<br />
New line: CR/LF<br />
Receive buffer: 600<br />
Transmit buffer: 600<br />
If another application is selected<br />
later, this communication setup<br />
will remain valid, unless the new<br />
application includes instructions<br />
that automatically change<br />
the setup. The setup could also<br />
be changed manually in the<br />
Setup Mode.<br />
Chapter 8 <strong>Intermec</strong> Shell Startup Program<br />
In <strong>Intermec</strong> Shell, the menus present the option in infi nite loops,<br />
To see all menus and options, refer to the overview in this chapter.<br />
The Select application lets you choose an application program<br />
that resides in the printer’s memory:<br />
• Current appl. starts the last selected application (by default<br />
<strong>Intermec</strong> Fingerprint with "uart1:" selected as standard I/O<br />
channel).<br />
• <strong>Label</strong>Shop sets up the printer1 for the various <strong>Intermec</strong><br />
<strong>Label</strong>Shop label formatting programs for Microsoft Windows.<br />
This option requires that you also select a standard IN/OUT<br />
channel, which is the channel you want to use for communication<br />
between the printer and the computer. Refer to<br />
the <strong>Intermec</strong> <strong>Label</strong>Shop manuals.<br />
• Windows Driver selects the "centronics:" interface as standard<br />
IN channel. Use the <strong>Intermec</strong> Windows Driver to print<br />
from most programs run under Microsoft Window. (To run<br />
the <strong>Intermec</strong> InterDriver, use the Fingerprint option).<br />
• Fingerprint is used to create, modify, or run programs written<br />
in the <strong>Intermec</strong> Fingerprint programming language and to<br />
run the <strong>Intermec</strong> InterDriver. This option requires that you<br />
also select a standard IN/OUT channel, which is the channel<br />
you want to use for communication between the printer and<br />
the computer. Normally, you select "uart1:". Refer to the<br />
<strong>Intermec</strong> Fingerprint manuals.<br />
• Direct Protocol is an easy-to-use printer protocol for downloading<br />
label formats and variable input data to a printer from<br />
a host computer. This option requires that you also select a<br />
standard IN/OUT channel, that is the serial channel you want<br />
to use for communication between the printer and the host.<br />
Normally, you select "uart1:". Refer to the <strong>Intermec</strong> Direct<br />
Protocol v7.xx manual.<br />
• LINE-ALY.PRG (Line Analyzer) is a Fingerprint program<br />
that captures characters received by the printer on a communication<br />
channel and prints them on labels. (See later in<br />
this chapter.)<br />
• Other Application Programs<br />
If the printer contains any other application programs, these<br />
will presented as additional options.<br />
<strong>Intermec</strong> <strong>Easy<strong>Code</strong>r</strong> <strong>601</strong> <strong>XP</strong> – User’s <strong>Guide</strong> 67
Chapter 8 <strong>Intermec</strong> Shell Startup Program<br />
Starting with <strong>Intermec</strong> Shell, cont.<br />
Select Other Facilities<br />
1 /. Only Flash PC cards approved<br />
by <strong>Intermec</strong> can be used.<br />
68<br />
As an alternative to selecting an application, you can step through<br />
a number of other useful facilities:<br />
• Setup allows you to enter the Setup Mode where you can set<br />
up the printer by means of its built-in keyboard, see Chapter<br />
7, “Setup Mode.”<br />
• Print Setup allows you to produce a printout of the printer’s<br />
current setup values (test label #5).<br />
• Testfeed allows you to feed out a number of label, ticket,<br />
tag, or portions of continuous stock while the printer autoadjusts<br />
its media feed and label stop/black mark sensor. It is<br />
recommended to perform a Testfeed each time you load a roll<br />
of labels from a new batch or a different brand.<br />
• Test <strong>Label</strong> allows you to print a series of four test labels (test<br />
labels #1 to #4) in order to test the printout quality and<br />
printhead alignment. The labels are presented in an infi nite<br />
loop, so you can print the series over and over again. Press<br />
for each new label.<br />
• Default Setup allows you to reset all setup parameters to<br />
their default values, as listed in Chapter 6, “Setting Up the<br />
<strong>Printer</strong>.”<br />
• Software Update is used for two purposes:<br />
- Update PC card allows the printer to be used as a Flash<br />
PC card programming device. Using the Zmodem communication<br />
tool, fi les can be downloaded from a PC to<br />
a Flash PC card1 inserted in the memory card slot in the<br />
printer’s rear plate.<br />
Caution! If the Flash PC card contains an earlier fi rmware<br />
version than the one in the printer, the printer’s fi rmware will<br />
be downgraded without warning.<br />
- Update fi rmware is used to upgrade the printer’s fi rmware<br />
from a new fi rmware version stored as a fi le in a PC.<br />
• Reboot has the same effect as cycling the power to the printer.<br />
To exit <strong>Intermec</strong> Shell without having selected any application,<br />
select Reboot. Then wait for the 5 seconds countdown to<br />
fi nish, and the last selected application will be opened.<br />
<strong>Intermec</strong> <strong>Easy<strong>Code</strong>r</strong> <strong>601</strong> <strong>XP</strong> – User’s <strong>Guide</strong>
<strong>Intermec</strong> Shell v4.8 Diagram<br />
POWER ON<br />
ENTER=SHELL<br />
5 sec. v.4.8<br />
ENTER=SHELL<br />
4 sec. v.4.8<br />
ENTER=SHELL<br />
3 sec. v.4.8<br />
ENTER=SHELL<br />
2 sec. v.4.8<br />
ENTER=SHELL<br />
1 sec. v.4.8<br />
Last selected<br />
application is started<br />
Default:<br />
Fingerprint 7.61 w. std I/O = "uart1:"<br />
Legend:<br />
Return to previous menu.<br />
Proceed to next menu.<br />
Accept displayed option<br />
and proceed, or<br />
execute displayed option.<br />
Perform a Testfeed<br />
anywhere in <strong>Intermec</strong> Shell.<br />
Enter the Setup Mode<br />
from anywhere<br />
in <strong>Intermec</strong> Shell.<br />
SHELL<br />
SEL. APPLICATION<br />
SHELL<br />
SETUP<br />
SHELL<br />
PRINT SETUP<br />
SHELL<br />
TESTFEED<br />
SHELL<br />
TEST LABEL<br />
SHELL<br />
DEFAULT SETUP<br />
SHELL<br />
SOFTWARE UPDATE<br />
SHELL<br />
REBOOT<br />
Chapter 8 <strong>Intermec</strong> Shell Startup Program<br />
SEL. APPLICATION<br />
CURRENT APPL.<br />
SEL. APPLICATION<br />
LABELSHOP<br />
SEL. APPLICATION<br />
WINDOWS DRIVER<br />
SEL. APPLICATION<br />
Fingerprint 7.61<br />
SEL. APPLICATION<br />
Direct Protocol<br />
SEL.APPL rom:<br />
LINE_A<strong>XP</strong>.PRG<br />
SETUP:<br />
SER-COM,UART1<br />
Performs a Testfeed (feeds out a number of blank copies<br />
while autoadjusting the label stop sensor.)<br />
Prints test labels #1-4 in a loop.<br />
Press Enter for each new label.<br />
UPDATE:<br />
FIRMWARE<br />
Restarts the printer (same as power off/on)<br />
STD I/O CHANNEL<br />
UART2<br />
STD I/O CHANNEL<br />
UART3<br />
See the chapter “Setup Mode”<br />
Prints a list of current setup values (test label #5).<br />
ARE YOU SURE ?<br />
Y=ENTER/ N=F5<br />
UPDATE:<br />
PC-CARD?<br />
Last selected application is started<br />
Note: Dotted channels are only shown if<br />
the corresponding optional interface pcb<br />
is fitted.<br />
STD I/O CHANNEL<br />
auto<br />
STD I/O CHANNEL<br />
UART1<br />
STD I/O CHANNEL<br />
CENTRONICS<br />
STD I/O CHANNEL<br />
net1:<br />
DEFAULT SETUP<br />
PERFORMED<br />
PC-CARD ERASE<br />
TRANSFER FILE<br />
USING ZMODEM<br />
PROGRAMMING<br />
PC-CARD<br />
PROGRAMMING<br />
COMPLETED<br />
TRANSFER FILE<br />
USING ZMODEM<br />
<strong>Printer</strong> rebooted<br />
automatically.<br />
<strong>Intermec</strong> <strong>Easy<strong>Code</strong>r</strong> <strong>601</strong> <strong>XP</strong> – User’s <strong>Guide</strong> 69<br />
The selected application is started
Chapter 8 <strong>Intermec</strong> Shell Startup Program<br />
Line Analyzer<br />
70<br />
The Line Analyzer (LINE_A<strong>XP</strong>.PRG) is a program written in<br />
the <strong>Intermec</strong> Fingerprint programming language and is intended<br />
to help solving possible communication problems. As the name<br />
implies, the Line Analyzer captures all incoming characters on<br />
a specifi ed communication channel and prints them on one or<br />
more labels.<br />
Printable characters are printed in black-on-white, whereas control<br />
characters and space characters (ASCII 000–032 dec) are<br />
printed in white-on-black.<br />
While the printer is receiving data, the “Ready” control lamp<br />
blinks. There is a 0.5 second timeout. That is, if no more<br />
characters have been received after 0.5 second, the program<br />
considers the transmission terminated and prints out a label.<br />
As long as a continuous string of characters is being received, the<br />
program wraps the lines until the label is full and then starts to<br />
print another label. At the bottom of each label, the following<br />
information is printed:<br />
• Page number<br />
• Number of characters printed on the label<br />
• Total number of characters received so far<br />
The Line Analyzer is displayed as the option “LINE_ALY.PRG"<br />
under the “SEL. APPLICATION” menu. After the Line Analyzer<br />
has been selected and the printer has started up again, the<br />
printer feeds out two labels and the following menu is displayed:<br />
Line Analyzer<br />
Sel.port(1-5) 1<br />
Enter the desired communication port using the numeric keys on<br />
the printer’s keyboard:<br />
1 = "uart1:"<br />
2 = "uart2:"<br />
3 = "uart3:"<br />
4 = "centronics:"<br />
5 = "net1:"<br />
If the printer is not fi tted with the specifi ed port, an error message<br />
appears in the display and you can select another port:<br />
Line Analyzer<br />
Error:56<br />
<strong>Intermec</strong> <strong>Easy<strong>Code</strong>r</strong> <strong>601</strong> <strong>XP</strong> – User’s <strong>Guide</strong>
Line Analyzer, cont.<br />
Chapter 8 <strong>Intermec</strong> Shell Startup Program<br />
Once you have sent as string to the printer, you can either return<br />
it on any communication channel or save it in the printer’s<br />
memory ("temp:").<br />
Returning the string<br />
Select the port on which you want to return the string as<br />
described on the previous page. Then simultaneously press<br />
and on the printer’s front panel.<br />
Saving the string<br />
Simultaneously press and on the printer’s<br />
front panel. The data will be saved on device "temp:" as<br />
"linedump.txt". Any existing fi le with the same name will be<br />
overwritten. Max. fi le size is 64K.<br />
To reach the fi le, break the program using and .<br />
Then send the instruction FILES "tmp:" to check that the<br />
fi le has been stored in "temp:" with the fi le name "linedump.txt".<br />
The fi le can be sent to the host or be copied to "c:" for later<br />
analyzing.<br />
<strong>Intermec</strong> <strong>Easy<strong>Code</strong>r</strong> <strong>601</strong> <strong>XP</strong> – User’s <strong>Guide</strong> 71
72<br />
Chapter 9<br />
Options<br />
Introduction<br />
<strong>Label</strong> Taken<br />
Sensor<br />
Paper Cutter<br />
Edge <strong>Guide</strong><br />
(included)<br />
Ribbon Low Sensor<br />
The <strong>Easy<strong>Code</strong>r</strong> <strong>601</strong> <strong>XP</strong> is designed to provide a high degree of<br />
fl exibility because it has a modular design. By adding options<br />
to the basic printer, the <strong>Easy<strong>Code</strong>r</strong> <strong>601</strong> <strong>XP</strong> can be adapted for<br />
a variety of applications. Most options can easily be installed<br />
by the operator, however a few should be installed by an authorized<br />
service technician or are only available as factory-installed<br />
options.<br />
Below is a description of some of the many options available for<br />
<strong>Easy<strong>Code</strong>r</strong> <strong>601</strong> <strong>XP</strong>.<br />
3-inch Adapters<br />
(2 pcs included)<br />
Liner Takeup<br />
Fan Fold <strong>Guide</strong>s<br />
<strong>Intermec</strong> <strong>Easy<strong>Code</strong>r</strong> <strong>601</strong> <strong>XP</strong> – User’s <strong>Guide</strong>
Liner Takeup Kit<br />
Paper Cutter<br />
Warnings!<br />
The cutting edge will rotate<br />
when the power is switched<br />
on and when the printer is<br />
re-booted. Always keep the<br />
cutter in closed position<br />
during operation.<br />
Switch off the power or<br />
disconnect the cutter before<br />
cleaning. Keep your fi ngers<br />
away from cutting parts!<br />
Chapter 9 Options<br />
This is a factory-installed option only and is used to separate<br />
labels from the liner and wind up the spent liner inside the<br />
printer’s media compartment. <strong>Label</strong>s, tickets, tags etc. can be<br />
wound up inside the media compartment after printing by fi tting<br />
a special guide to the front of the print unit.<br />
The kit consists of a stepper motor that drives the liner drive<br />
roller in the print unit (fi tted as standard) and a takeup hub in the<br />
media compartment. A guide shaft is fi tted to the center section<br />
immediately behind the slack absorber.<br />
Operation and media load are described in the section “Peel-Off”<br />
of Chapter 4, “Media Load.”<br />
The <strong>Easy<strong>Code</strong>r</strong> <strong>601</strong> <strong>XP</strong> can easily be fi tted with an optional<br />
paper cutter, provided the printer is not also equipped with a<br />
label taken sensor (LTS.) The cutter unit is fi tted on the same<br />
hinges as the front door, which it replaces. It is connected by<br />
a single cable to the DIN-connector on the printer’s front. The<br />
paper cutter is available both as a factory-installed option and as<br />
a fi eld-installable kit.<br />
The paper cutter is intended to cut through continuous nonadhesive<br />
paper-based media or through the liner between labels.<br />
It must not cut through any adhesive, which would stick to the<br />
cutting parts and rapidly render the cutter inoperable–possibly<br />
also causing damage to the electric motor. Maximum thickness<br />
for normal paper-based materials is 175 µm (≈175 grammes/m2 ).<br />
The paper cutter increases the printer’s total weight by approx.<br />
1.0 kgs (2.2 pounds) and its length by 28 mm (1.1 inches.)<br />
The paper cutter can be tilted forward in order to facilitate<br />
cleaning and media load. For media load instructions, see section<br />
“Cut-Off” in Chapter 4, “Media Load.”<br />
The cutter is activated by CUT or CUT ON instructions, see<br />
the <strong>Intermec</strong> Fingerprint v7.xx manuals. The rotating edge will cut<br />
through the media approx. 37 mm (1.5 inches) in front of the<br />
printer’s dot line. The media feed should be adjusted accordingly,<br />
see Chapter 7, “Setting Up the <strong>Printer</strong>.”<br />
Should you inadvertently have cut through self-adhesive labels,<br />
you will have to clean the cutting parts. Tilt down the cutter and<br />
clean using a piece of tissue moistened with isopropyl alcohol.<br />
<strong>Intermec</strong> <strong>Easy<strong>Code</strong>r</strong> <strong>601</strong> <strong>XP</strong> – User’s <strong>Guide</strong> 73
Chapter 9 Options<br />
Fan Fold <strong>Guide</strong>s<br />
Edge <strong>Guide</strong><br />
3-inch Adapters<br />
<strong>Label</strong> Taken Sensor<br />
74<br />
The fan fold guides are useful for providing a more exact guiding<br />
of the media, when the supply is placed outside the media<br />
compartment, for example a stack of fan-folded tickets. The<br />
guides come as a fi eld-installable kit with installation instructions.<br />
The guides can be fi tted in the upper or lower slot in the rear<br />
plate.<br />
Instructions for loading the media is included in the section<br />
“External Supply” in Chapter 4, “Media Load.”<br />
For demanding applications, the edge guide at the rear part of the<br />
print unit can be supplemented with a second edge guide fi tted<br />
on the slack absorber. This guide is included in the package.<br />
Two 3-inch/76 mm adapters are included in the package and<br />
makes it possible to use media rolls with 3 inch/76 mm inner<br />
diameter cardboard cores.<br />
The adapters are pressed onto the media supply hub and are each<br />
held in place by a screw. When fi tting the adapters, make sure<br />
that the screw hits a rounded plastic surface, not a metal leaf<br />
spring. Illustrations of how to load the media using the adapters<br />
can be found in Chapter 4, “Media Load.”<br />
The <strong>Label</strong> Taken Sensor (LTS) is a photoelectric sensor fi tted to<br />
the center section inside the front door. It allows the printer’s<br />
fi rmware to detect if the latest printed label, ticket, tag etc. has<br />
been removed before printing another copy.<br />
The label taken sensor is usually factory-fi tted, but is also available<br />
as a kit for installation by an authorized service technician. It<br />
cannot be fi tted in combination with a paper cutter.<br />
The LTS can be enabled or disabled by means of the instructions<br />
LTS& ON and LTS& OFF respectively in <strong>Intermec</strong><br />
Fingerprint and the <strong>Intermec</strong> Direct Protocol.<br />
<strong>Intermec</strong> <strong>Easy<strong>Code</strong>r</strong> <strong>601</strong> <strong>XP</strong> – User’s <strong>Guide</strong>
Ribbon Low Sensor<br />
Interface Boards<br />
Chapter 9 Options<br />
The ribbon low sensor is used to detect when the ribbon supply<br />
starts getting low (as opposed to the standard ribbon end detector.)<br />
It is available a factory-installed option or a kit for installation by<br />
an authorized service technician.<br />
The ribbon low sensor requires a dedicated <strong>Intermec</strong> Fingerprint<br />
program to work.<br />
A number of optional interface boards are available for use<br />
with the <strong>Easy<strong>Code</strong>r</strong> <strong>601</strong> <strong>XP</strong>. The interface boards are either<br />
factory-fi tted or can easily be installed by an authorized service<br />
technician.<br />
The <strong>Easy<strong>Code</strong>r</strong> <strong>601</strong> <strong>XP</strong> can usually accommodate one interface<br />
board.<br />
The interface boards for <strong>Easy<strong>Code</strong>r</strong> <strong>601</strong> <strong>XP</strong> are:<br />
• Double Serial Interface Board<br />
• Industrial/Serial Interface Board<br />
• EasyLAN 100i Interface Board<br />
• Industrial Interface Board (for combination with EasyLAN 100i<br />
interface board)<br />
Refer to Appendix 3, “Interfaces” for more information on interface<br />
boards.<br />
<strong>Intermec</strong> <strong>Easy<strong>Code</strong>r</strong> <strong>601</strong> <strong>XP</strong> – User’s <strong>Guide</strong> 75
76<br />
Chapter 10<br />
Troubleshooting<br />
Symptom Possible Cause Remedy Refer to<br />
Overall weak printout Wrong Paper Type parameter Change parameter Chapter 6<br />
Contrast value too low Change parameter Chapter 6<br />
Printhead pressure too low Adjust Chapter 12<br />
Worn printhead Replace printhead Chapter 11<br />
Wrong printhead voltage Replace CPU board ☎ Call Service<br />
Printout weaker on one side Uneven printhead pressure Adjust arm alignment Chapter 12<br />
Weak spots Foreign particles on media Clean or replace Chapters 4 & 5<br />
Media/ribbon don’t match Change to matching media Chapter 6<br />
Poor media or ribbon quality Use <strong>Intermec</strong> media/ribbon Appendix 2<br />
Worn printhead Replace printhead Chapter 11<br />
Worn platen roller Check/replace ☎ Call Service<br />
Overall dark printout Wrong Paper Type parameter Change parameter Chapter 6<br />
Contrast value too high Change parameter Chapter 6<br />
Printhead pressure too high Adjust Chapter 12<br />
Wrong printhead voltage Replace CPU board ☎ Call Service<br />
Excessive bleeding Wrong Paper Type Change parameter Chapter 6<br />
Contrast value too high Change parameter Chapter 6<br />
Printhead pressure too high Adjust Chapter 12<br />
Faulty energy control Replace CPU board ☎ Call Service<br />
Dark lines along media path Foreign objects on printhead Clean printhead Chapter 11<br />
White lines along media path Printhead dirty Clean printhead Chapter 11<br />
Missing dots on printhead Replace printhead Chapter 11<br />
Large part of dot line missing Wrong X-start or Width parameter Change parameter Chapter 6<br />
Failing printhead Replace printhead Chapter 11<br />
Failing strobe signal Check CPU-board ☎ Call Service<br />
Printout missing along inner edge Bad media alignment Adjust Chapter 4<br />
X-start parameter value too low Increase Chapter 6<br />
Transfer ribbon breaks Ribbon not fi tted correctly Reload ribbon Chapter 5<br />
Wrong paper type parameter (too much Change parameter, Chapter 6<br />
energy) then clean printhead Chapter 12<br />
Ribbon supply hub stuck Adjust ☎ Call Service<br />
Bad energy control Check CPU board ☎ Call Service<br />
Transfer ribbon wrinkles Faulty ribbon break shaft adjustment Adjust Chapter 12<br />
Incorrect edge guide adjustment Adjust Chapter 4<br />
Too strong printhead pressure Adjust Chapter 12<br />
No thermal transfer printout Ink-coated side does not face media Reload ribbon Chapter 5<br />
White parts at transfer printing Transfer ribbon wrinkled Adjust See below<br />
Transfer ribbon wrinkles Incorrect edge guide adjustment Adjust Chapter 4<br />
Ribbon obstructed by printhead cable Clear n.a.<br />
Too strong printhead pressure Adjust Chapter 12<br />
Ribbon supply hub not centered Adjust Chapter 5<br />
Faulty ribbon assist roller adjustment Adjust ☎ Call Service<br />
<strong>Intermec</strong> <strong>Easy<strong>Code</strong>r</strong> <strong>601</strong> <strong>XP</strong> – User’s <strong>Guide</strong>
Maintenance<br />
Printhead Cleaning<br />
1 2<br />
Chapter 11<br />
Cleaning the printhead on a regular basis is important for the<br />
life of the printhead and for the printout quality. You should<br />
clean the printhead each time you replace the media. This section<br />
describes how to clean the printhead using cleaning cards. If<br />
additional cleaning is required, for example removing adhesive<br />
residue from the platen roller or tear bar, use a cotton swab<br />
moistened with isopropyl alcohol.<br />
Warning!<br />
Isopropyl alcohol [(CH 3 ) 2 CHOH; CAS 67-63-0] is a highly fl ammable,<br />
moderately toxic, and mildly irritating substance.<br />
Open the front and right-hand doors. Fold the locking handle downward/forward.<br />
<strong>Intermec</strong> <strong>Easy<strong>Code</strong>r</strong> <strong>601</strong> <strong>XP</strong> – User’s <strong>Guide</strong> 77
Chapter 11 Maintenance<br />
Printhead Cleaning, cont.<br />
78<br />
3<br />
Turn the printhead lift lever to “Open” position.<br />
5<br />
Open the cleaning card envelope and pull out the<br />
cleaning card. Read the warning text.<br />
4<br />
6<br />
Remove any media and transfer ribbon.<br />
1.<br />
2.5 cm<br />
(1")<br />
Insert most of the cleaning card under the printhead<br />
(1). Close the printhead (2).<br />
<strong>Intermec</strong> <strong>Easy<strong>Code</strong>r</strong> <strong>601</strong> <strong>XP</strong> – User’s <strong>Guide</strong>
Printhead Cleaning, cont.<br />
7<br />
1.<br />
1.<br />
2.5 cm<br />
(1")<br />
2222<br />
Pull out the cleaning card (1) and raise the printhead<br />
(2).<br />
9<br />
Insert most of the cleaning card under the printhead<br />
(1) again. Close the printhead (2).<br />
Chapter 11 Maintenance<br />
<strong>Intermec</strong> <strong>Easy<strong>Code</strong>r</strong> <strong>601</strong> <strong>XP</strong> – User’s <strong>Guide</strong> 79<br />
8<br />
Wait for approx. 30 seconds to allow the cleaning<br />
fl uid to dissolve the residue.<br />
10<br />
Pull out the cleaning card. If necessary, repeat the<br />
process with a fresh cleaning card.
Chapter 11 Maintenance<br />
Printhead Cleaning, cont.<br />
80<br />
11 12<br />
Return the locking handle to closed position.<br />
Allow the cleaned parts to dry before loading any<br />
media (and ribbon).<br />
<strong>Intermec</strong> <strong>Easy<strong>Code</strong>r</strong> <strong>601</strong> <strong>XP</strong> – User’s <strong>Guide</strong>
External Cleaning<br />
1<br />
Always remove the power cord before cleaning!<br />
3<br />
Never spray the printer. Protect it from water when<br />
cleaning the premises.<br />
Chapter 11 Maintenance<br />
Wipe external surfaces with a soft cloth slightly<br />
moistened with water or a mild detergent.<br />
Never use any sharp tools for removing stuck labels.<br />
The printhead and rollers are delicate.<br />
<strong>Intermec</strong> <strong>Easy<strong>Code</strong>r</strong> <strong>601</strong> <strong>XP</strong> – User’s <strong>Guide</strong> 81<br />
2<br />
4
Chapter 11 Maintenance<br />
Cleaning the Media <strong>Guide</strong>s<br />
82<br />
1 2<br />
Pull the upper guide straight out.<br />
The label stop sensor, which controls the media feed, is partially<br />
enclosed by two black plastic guides. The guides are provided<br />
with transparent windows, through which the light between the<br />
two parts of the label stop sensor is transmitted. These windows<br />
must be kept clean from dust, stuck labels, and adhesive residue.<br />
If the printer starts to feed out labels in an unexpected way,<br />
remove these two guides as described below and check for anything<br />
that may block the beam of light. If necessary, clean them<br />
using a cleaning card or a soft cloth soaked with isopropyl<br />
alcohol. Do not use any other type of chemicals. Be careful not<br />
to scratch the windows.<br />
Warning!<br />
Isopropyl alcohol [(CH 3 ) 2 CHOH; CAS 67-63-0] is a highly fl ammable,<br />
moderately toxic, and mildly irritating substance.<br />
Press the snap-lock, lift the outer end of the lower<br />
guide and pull it out. After cleaning, reassemble<br />
in reverse order.<br />
<strong>Intermec</strong> <strong>Easy<strong>Code</strong>r</strong> <strong>601</strong> <strong>XP</strong> – User’s <strong>Guide</strong>
Printhead Replacement<br />
1 2<br />
Chapter 11 Maintenance<br />
The printhead is subject to wear both from the thermal transfer<br />
ribbon or the direct thermal media and from the rapid heating<br />
and cooling process during printing. Thus, the printhead will<br />
require periodic replacement.<br />
Time between printhead replacements depends on the print<br />
images, the type of direct thermal media or thermal transfer<br />
ribbon in use, the amount of energy to the printhead, the print<br />
speed, the ambient temperature, and several other factors.<br />
Caution!<br />
While replacing the printhead, the power should be off.<br />
Open the front and right-hand doors. Fold the locking handle downward/forward.<br />
<strong>Intermec</strong> <strong>Easy<strong>Code</strong>r</strong> <strong>601</strong> <strong>XP</strong> – User’s <strong>Guide</strong> 83
Chapter 11 Maintenance<br />
Printhead Replacement, cont.<br />
84<br />
3 4<br />
Turn the printhead lift lever to “Open” position. Remove any media and transfer ribbon.<br />
5<br />
Pull the printhead bracket away from the magnet<br />
in the pressure arm.<br />
6<br />
Disconnect the hooked printhead bracket fi ngers<br />
from the shaft and pull out the printhead as far<br />
as the cables allow.<br />
<strong>Intermec</strong> <strong>Easy<strong>Code</strong>r</strong> <strong>601</strong> <strong>XP</strong> – User’s <strong>Guide</strong>
Printhead Replacement, cont.<br />
7<br />
Disconnect the two cables from the printhead. Note<br />
the snap-lock on the outer connector. Pull at the<br />
connectors–not at the cables!<br />
9<br />
Fit the hooks of the printhead bracket fi ngers onto<br />
the headlift shaft.<br />
Chapter 11 Maintenance<br />
Connect the two cables to the replacement printhead.<br />
Close the printhead so the magnet engages the<br />
printhead bracket.<br />
<strong>Intermec</strong> <strong>Easy<strong>Code</strong>r</strong> <strong>601</strong> <strong>XP</strong> – User’s <strong>Guide</strong> 85<br />
8<br />
10
86<br />
Chapter 12<br />
Adjustments<br />
Narrow Media<br />
Knob<br />
Pressure Arm<br />
Center of Media<br />
The printer is factory-adjusted for full size media width. When<br />
using media less than full width, it is recommended that you<br />
adjust the pressure arm so it becomes centered on the media.<br />
Thereby, an even pressure across the media is obtained.<br />
A poorly adjusted pressure arm may be detected by a weaker<br />
printout on either side of the media path.<br />
To adjust the pressure arm, proceed as follows:<br />
• Remove the ribbon, if any.<br />
• Loosen the knob that holds the pressure arm. Move the arm<br />
inwards or outwards until the arrow on the tip of the arm<br />
becomes centered with the media stock.<br />
While moving the arm, push at the part where the knob is<br />
situated, not at the tip. If the arm is hard to move, lift the<br />
printhead and pull the printhead bracket free from the magnet<br />
in the arm.<br />
• After having centered the arm, lock it by tightening the knob.<br />
• Reload the ribbon, if any.<br />
<strong>Intermec</strong> <strong>Easy<strong>Code</strong>r</strong> <strong>601</strong> <strong>XP</strong> – User’s <strong>Guide</strong>
Printhead Pressure<br />
Knob<br />
Chapter 12 Adjustments<br />
The pressure of the thermal printhead against the ribbon or direct<br />
thermal media is factory adjusted. However, the use of thicker or<br />
thinner media than normal could require the printhead pressure<br />
to be readjusted.<br />
Turn the adjustment knob clockwise for increased pressure, or<br />
counterclockwise for less pressure. Print a few labels, preferably<br />
test labels (see Chapter 6, “Setting Up the <strong>Printer</strong>”), and check<br />
the printout. Increased pressure generally gives a darker printout<br />
and vice versa. Repeat until the desired result is obtained.<br />
To fi nd the basic setting, turn the knob counterclockwise until<br />
there is no pressure left. Test with a piece of media under the<br />
printhead. You should be able to pull it out without more than<br />
just a little resistance. Then turn the knob four to fi ve full turns<br />
clockwise. Fine-adjust using the trial-and-error method.<br />
Caution!<br />
Do not use a higher printhead pressure than necessary, because it<br />
may increase the wear of the printhead and shorten its life.<br />
<strong>Intermec</strong> <strong>Easy<strong>Code</strong>r</strong> <strong>601</strong> <strong>XP</strong> – User’s <strong>Guide</strong> 87
Chapter 12 Adjustments<br />
<strong>Label</strong> Stop Sensor<br />
88<br />
Detection Slots<br />
Upper part of LSS<br />
The label stop sensor (LSS) is a photoelectric sensor that controls<br />
the printer’s media feed by detecting gaps between labels or slots<br />
or black marks in continuous stock, depending on the printer’s<br />
setup in regard of media type (see Chapter 6, “Setting Up the<br />
<strong>Printer</strong>”). The LSS should be aligned with the gaps, slots, or black<br />
marks. If using irregularly shaped labels, align the LSS with the<br />
front tips of the labels.<br />
The label stop/black mark sensor (LSS) can be moved laterally<br />
within a range of 0 to 50 mm (0 to 1.96 inches) from the inner<br />
edge of the media path. There is a screw running through the<br />
outer lower gable. Turning the screw clockwise will move the<br />
LSS inwards and vice versa. The position of the LSS in relation<br />
to the media is best checked by looking head on into the print<br />
unit when the printhead is raised. Align the centerpoint of the<br />
V-shaped upper sensor with the center of the slots or marks to<br />
be detected.<br />
The linear markings on the lower guide plate can also be used<br />
for positioning of the LSS because they are spaced with an<br />
interval of exactly 1 cm (0.39 inches.) This method is especially<br />
useful for black marks (measure the lateral position of the black<br />
marks with a ruler before loading the media.)<br />
Adjustment Screw<br />
Upper part of print unit removed to improve visibility.<br />
<strong>Intermec</strong> <strong>Easy<strong>Code</strong>r</strong> <strong>601</strong> <strong>XP</strong> – User’s <strong>Guide</strong><br />
OUT<br />
IN
Technical Data<br />
Appendix 1<br />
Printing<br />
Print Technique Thermal Transfer and Direct Thermal<br />
Printhead Resolution 12 dots/mm (304.8 dpi)<br />
Print Speed (variable) 100 to 225 mm/sec. (≈ 4 to .85 inches/sec.)<br />
Print Width (max) 165.3 mm (6.51 inches)<br />
Media Width (min/max) 76.2 to 168 mm (3 to 6.61 inches)<br />
Print Length (max) 32767 dots = 2,730 mm(107.5 inches) 1<br />
Media Roll Diameter (max) 205 mm (8 inches)<br />
Media Roll Core Diameter 38 to 40 mm (1.5 inches) or 76 mm (3 inches)<br />
Ribbon Width (max) 166 mm (6.54 inches)<br />
Ribbon Length (max) 450 metres (1,475 ft)<br />
Print Directions 4<br />
Modes of Operation<br />
Tear-Off (Straight-through) Yes<br />
Peel-Off (Self-strip) Optional With liner takeup unit<br />
Cut-Off Optional With paper cutter<br />
Firmware<br />
Operating System <strong>Intermec</strong> Fingerprint v7.61 Incl. Direct Protocol<br />
Smooth Fonts TrueDoc and TrueType fonts<br />
Built-in scalable fonts (std) 15 Unicode fonts 2<br />
Built-in bar code symbologies (std) 38<br />
Startup Program (std) <strong>Intermec</strong> Shell v4.8<br />
Physical Measures<br />
Dimensions (W x L x H) 235 x 482 x 238 mm (13.1 x 19.0 x 9.4 inches)<br />
Weight (excluding media and options) 15 kg (33 pounds)<br />
Ambient Operating Temperature +5°C to +40°C (+41°F to +104°F)<br />
Humidity 20 to 80% non-condensing<br />
Electronics<br />
Microprocessor 32 bit RISC<br />
On-board Flash SIMMs 3 sockets for 2 or 4MB each Std. 1 x 2MB<br />
On-board DRAM SIMM 2 sockets for 4 – 32 MB Std. 1 x 4MB<br />
Real-Time Clock Yes 10+ years life<br />
Power Supply<br />
AC Voltage >90 to
Appendix 1 Technical Data<br />
Technical Data, cont.<br />
Sensors<br />
<strong>Label</strong> Gap/Black Mark/Out of Media Yes<br />
Out of ribbon Yes<br />
Printhead Lifted Yes<br />
Ribbon Low Option<br />
<strong>Label</strong> Taken Option<br />
Controls<br />
Control Lamps 3<br />
Display 2 x 16 character LCD with background light<br />
Keyboard 23 keys membrane-switch type<br />
Beeper Yes<br />
Data Interfaces<br />
Serial 1 x RS-232<br />
Parallel 1 x Centronics<br />
Cutter Yes<br />
<strong>Bar</strong> <strong>Code</strong> Wand Yes<br />
Electronic Keys 2 Not used<br />
Connection for Optional Interface Boards 1–2<br />
Memory Card Adapter 1 Flash or SRAM cards<br />
Accessories and Options<br />
Automatic Paper Cutter Option<br />
Liner Takeup Unit Option Factory-installed only<br />
Fan-Fold <strong>Guide</strong>s Option For external supplies<br />
RS-232 Cable Option<br />
Parallel Interface Cable Option<br />
Parallel Interface Board Option IEEE 1284<br />
Double Serial Interface Board Option<br />
Industrial/Serial Interface Board Option<br />
EasyLAN 100i Interface Board Option Ethernet<br />
Industrial Interface Board Option<br />
External Alphanumeric Keyboard Option<br />
MobileLAN®access 2102 Mounting Kit Option<br />
Flash Memory Cards Option ≤ 64Mbit (8MB)<br />
1 /. The max. print length is also restricted by the amount of free DRAM memory.<br />
2 /. Latin, Greek, and Cyrillic fonts according to Unicode standard are included.<br />
90<br />
<strong>Intermec</strong> <strong>Easy<strong>Code</strong>r</strong> <strong>601</strong> <strong>XP</strong> – User’s <strong>Guide</strong>
Media Specifi cations<br />
Appendix 2<br />
Direct Thermal Media<br />
<strong>Intermec</strong> offers two quality grades of direct thermal media for<br />
the <strong>Easy<strong>Code</strong>r</strong> printers:<br />
• Premium Quality: Top-coated media with high demands on<br />
printout quality and resistance against moisture, plasticisers,<br />
and vegetable oils. Examples:<br />
- Thermal Top Board - Duratherm II,<br />
- Thermal Top - Duratherm II Tag<br />
- Thermal Top High Speed - Duratherm Ltg.<br />
- Duratherm IR<br />
• Economy Quality: Non top-coated media with less resistance<br />
to moisture, plasticisers, and vegetable oils. In all other<br />
respects, it is equal to Premium Quality. Examples:<br />
- Thermal Eco<br />
- Thermal Eco Board<br />
<strong>Intermec</strong> <strong>Easy<strong>Code</strong>r</strong> <strong>601</strong> <strong>XP</strong> – User’s <strong>Guide</strong> 91
Appendix 2 Media Specifi cations<br />
Thermal Transfer Media<br />
92<br />
<strong>Intermec</strong> offers stock labels for thermal transfer printing in a<br />
wide range of quality grades.<br />
• Uncoated papers for economical high-volume printing to be<br />
used with GP/TMX 1500 ribbons. Examples:<br />
- TTR Uncoated<br />
• Coated papers with various coat-weight, smoothness, and<br />
gloss to be used with HP/TMX 2500 and GP/TMX 1500<br />
ribbons. Examples:<br />
- TTR Coated - Duratran II<br />
- TTR Premium - Duratran II Tag<br />
- TTR Premium Board<br />
• Polyethylene plastics with better resistance to water and many<br />
common chemicals than uncoated and coated papers. They<br />
can be use outdoors and offer good tear resistance. Most often<br />
used with HP/TMX 2500 ribbons. Examples:<br />
- TTR Polyethylene - Kimdura<br />
- TTR Gloss Polyethylene - Kimdura Tag<br />
- Syntran<br />
• Polyesters give high resistance to chemicals, heat, and<br />
mechanical abrasion with HR/TMX 3200 ribbons. Examples:<br />
- TTR High Gloss Polyester - Polyester<br />
<strong>Intermec</strong> <strong>Easy<strong>Code</strong>r</strong> <strong>601</strong> <strong>XP</strong> – User’s <strong>Guide</strong>
Media Roll Size<br />
Roll Diameter:<br />
205 mm (8 in.)<br />
<strong>Label</strong>s<br />
Media Width:<br />
76.2 mm (3.0 in.)<br />
to<br />
168.0 mm (6.6 in.)<br />
Printable side<br />
Appendix 2 Media Specifi cations<br />
Core Diameter:<br />
38-40 mm (1.5 in)<br />
or 76.2 mm (3 in.)<br />
Core<br />
Diameters: 38-40 mm (1.5 inches) or 76.2 mm (3 inches)<br />
Width: Must not protrude outside the media.<br />
The media must be wound up on the core in such a way<br />
that the printer can pull the end free.<br />
Roll<br />
Max. diameter: 205 mm (8.07 inches)<br />
Max. width: 168 mm (6.61 inches)<br />
Min. width: 76.2 mm (3.00 inches)<br />
The maximum recommended media thickness is 175µm (0.007<br />
inches). Thicker media may be used, but print quality will be<br />
reduced. The stiffness is also important and must be balanced<br />
against thickness to maintain print quality.<br />
Media rolls to be loaded inside the printer should be wound with<br />
the printable side facing outwards.<br />
The media supply must not be exposed to dust, sand, grit, etc.<br />
Any hard particles, however small, can damage the printhead.<br />
<strong>Intermec</strong> <strong>Easy<strong>Code</strong>r</strong> <strong>601</strong> <strong>XP</strong> – User’s <strong>Guide</strong> 93
Appendix 2 Media Specifi cations<br />
Media<br />
Non-Adhesive Strip<br />
94<br />
NON-ADHESIVE<br />
STRIP<br />
⇐ a ⇒ Media Width:<br />
Maximum: 168.0 mm (6.61 inches)<br />
Minimum: 76.2 mm (3.00 inches)<br />
Media Type Setup:<br />
• Fix length strip<br />
• Var length strip<br />
<strong>Intermec</strong> <strong>Easy<strong>Code</strong>r</strong> <strong>601</strong> <strong>XP</strong> – User’s <strong>Guide</strong>
Media, cont.<br />
Self-Adhesive Strip<br />
SELF-ADHESIVE<br />
STRIP<br />
Appendix 2 Media Specifi cations<br />
⇐ a ⇒ Media Width (including liner):<br />
Maximum: 168.0 mm (6.61 inches)<br />
Minimum: 76.2 mm (3.00 inches)<br />
⇐ b ⇒ Liner<br />
The liner must not extend more than a total of 1.6 mm (0.06<br />
inches) outside the media and should protrude equally on both<br />
sides.<br />
⇐ c ⇒ Media Width (excluding liner):<br />
Maximum: 166.4 mm (6.55 inches)<br />
Minimum: 74.6 mm (2.94 inches)<br />
Media Type Setup:<br />
• Fix length strip<br />
• Var length strip<br />
Caution!<br />
This type of media is not suitable for use with a paper cutter.<br />
<strong>Intermec</strong> <strong>Easy<strong>Code</strong>r</strong> <strong>601</strong> <strong>XP</strong> – User’s <strong>Guide</strong> 95
Appendix 2 Media Specifi cations<br />
Media, cont.<br />
Self-Adhesive <strong>Label</strong>s<br />
96<br />
b<br />
a<br />
c<br />
d<br />
SELF-ADHESIVE<br />
LABELS<br />
FEED<br />
DIRECTION<br />
b<br />
⇐ a ⇒ Media Width (including liner):<br />
Maximum: 168.0 mm (6.61 inches)<br />
Minimum: 76.2 mm (3.00 inches)<br />
⇐ b ⇒ Liner<br />
The liner must not extend more than a total of 1.6 mm (0.06<br />
inches) outside the media and should protrude equally on both<br />
side. Recommended min. transparency: 40% (DIN 53147.)<br />
⇐ c ⇒ <strong>Label</strong> Width (excluding liner):<br />
Maximum: 166.4 mm (6.55 inches)<br />
Minimum: 74.6 mm (2.94 inches)<br />
⇐ d ⇒ <strong>Label</strong> Length:<br />
Minimum: 8.0 mm (0.32 inches)<br />
Max label length: depends on DRAM size<br />
Under ideal circumstances, a minimum label length of 4 mm (0.16<br />
inches) could be used. It requires the sum of the label length (d) and<br />
e the label gap (e) to be larger than 7 mm (0.28 inches), that batch<br />
printing is used, and that no pull back of the media is performed.<br />
<strong>Intermec</strong> does not guarantee that such short labels will work, but it is<br />
up to the user to test this in his unique application.<br />
⇐ e ⇒ <strong>Label</strong> Gap:<br />
Maximum: 21.3 mm (0.83 inches)<br />
Recommended: 1.6 mm (0.06 inches)<br />
Minimum: 1.2 mm (0.05 inches)<br />
The <strong>Label</strong> Stop Sensor must be able to detect the extreme front<br />
edges of the labels. It can be moved within a range of 0 to 50 mm<br />
(0 to 1.97 inches) from the inner edge of the media.<br />
Media Type Setup:<br />
• <strong>Label</strong> (w gaps)<br />
<strong>Intermec</strong> <strong>Easy<strong>Code</strong>r</strong> <strong>601</strong> <strong>XP</strong> – User’s <strong>Guide</strong>
Media, cont.<br />
Tickets with Gap<br />
c<br />
b<br />
d<br />
e<br />
f<br />
a<br />
TICKETS & TAGS<br />
FEED<br />
DIRECTION<br />
Appendix 2 Media Specifi cations<br />
⇐ a ⇒ Media Width:<br />
Maximum: 168.0 mm (6.61 inches)<br />
Minimum: 75.2 mm (3.00 inches)<br />
⇐ b ⇒ Copy Length:<br />
Min. length between slots: 8.0 mm (0.32 inches)<br />
Max. length between slots: depends on DRAM size<br />
Under ideal circumstances, a minimum label length of 4 mm (0.16<br />
inches) could be used. It requires the sum of the label length (d) and<br />
the label gap (e) to be larger than 7 mm (0.28 inches), that batch<br />
printing is used, and that no pull back of the media is performed.<br />
<strong>Intermec</strong> does not guarantee that such short labels will work, but it is<br />
up to the user to test this in his unique application.<br />
⇐ c ⇒ Detection Slit Start:<br />
The restriction of the minimum detection slit length (d) must<br />
be observed and the slit must not break the inner edge of the<br />
media.<br />
⇐ d ⇒ Detection Slit Length:<br />
The length of the detection slit (excluding corner radii) must be:<br />
Minimum: 5 mm (0.20<br />
inches)<br />
⇐ e ⇒ Detection Slit End:<br />
Provided the restrictions of the minimum slit length (d) and<br />
slit start (c) are observed, the distance from the inner edge of<br />
the media to the outer end of the slit (excluding corner radii)<br />
may be:<br />
Maximum: 50 mm (1.97 inches)<br />
⇐ f ⇒ Detection Slit Height:<br />
Maximum: 21.3 mm (0.83 inches)<br />
Recommended: 1.6 mm (0.06 inches)<br />
Minimum: 1.2 mm (0.05 inches)<br />
Media Type Setup:<br />
• Ticket (w gaps)<br />
Do not allow any perforation to break the edge of the media as this<br />
may cause the media to split and jam the printer.<br />
<strong>Intermec</strong> <strong>Easy<strong>Code</strong>r</strong> <strong>601</strong> <strong>XP</strong> – User’s <strong>Guide</strong> 97
Appendix 2 Media Specifi cations<br />
Media, cont.<br />
Tickets with Black Mark<br />
c<br />
98<br />
e<br />
d<br />
f<br />
g<br />
a<br />
TICKETS<br />
FEED<br />
DIRECTION<br />
b<br />
⇐ a ⇒ Media Width:<br />
Maximum: 168.0 mm (6.61 inches)<br />
Minimum: 76.2 mm (3.00 inches)<br />
⇐ b ⇒ Copy Length:<br />
Minimum: 20.0 mm (0.8 inches)<br />
Maximum: depends on DRAM memory size<br />
⇐ c ⇒ Black Mark Offset:<br />
The distance between the inner edge of the media and the inner<br />
edge of the black mark must be:<br />
Maximum: 40.0 mm (1.57 inches)<br />
Minimum: 0.0 mm (0.0 inches)<br />
⇐ d ⇒ Black Mark Width:<br />
The detectable width of the black mark must be:<br />
Minimum: 10.0 mm (0.4 inches)<br />
⇐ e ⇒ Black Mark End:<br />
No restriction, but the LSS cannot detect the mark more than 50<br />
mm (1.97 inches) from the inner edge of the media.<br />
⇐ f ⇒ Black Mark Height:<br />
Maximum: 21.3 mm (0.83 inches)<br />
Common: 12.5 mm (0.5 inches)<br />
Minimum: 5.0 mm (0.2 inches)<br />
⇐ g ⇒ Black Mark Y-Position:<br />
It is recommended to place the black mark as close to the front<br />
edge of the ticket as possible and use a negative Stop Adjust<br />
value to control the media feed, so the tickets can be properly<br />
torn or cut off.<br />
Media Type Setup:<br />
• Ticket (w mark)<br />
Important! Preprint that may interfere with the detection of the black<br />
mark should be avoided on the back of the media. However, the<br />
LBLCOND statement allows the sensor to be temporarily disabled<br />
during a specifi ed amount of media feed in order to avoid unintentional<br />
detection, see <strong>Intermec</strong> Fingerprint manuals.<br />
The black mark should be non-refl ective carbon black on a whitish<br />
background.<br />
Do not allow any perforations to break the edge of the media, as this<br />
may cause the media to split and jam the printer.<br />
<strong>Intermec</strong> <strong>Easy<strong>Code</strong>r</strong> <strong>601</strong> <strong>XP</strong> – User’s <strong>Guide</strong>
Transfer Ribbons<br />
Important!<br />
<strong>Intermec</strong> thermal transfer<br />
ribbons are engineered specifi<br />
cally for the <strong>Easy<strong>Code</strong>r</strong><br />
printheads.<br />
Appendix 2 Media Specifi cations<br />
<strong>Intermec</strong> offer three ranges of thermal transfer ribbons optimized<br />
for different purposes:<br />
• General Purpose (GP/TMX 1500) transfer ribbons allow<br />
high speed printing and give a good printout, but are somewhat<br />
sensitive to smearing. They may be the best choice for<br />
uncoated and coated papers.<br />
• High Performance (HP/TMX 2500) transfer ribbons allow<br />
high speed printing and give a highly readable and defi ned<br />
printout on most face materials with smooth surfaces. They<br />
have good “smear resistance” and are most suitable for<br />
intricate logotypes and images on matte-coated papers and<br />
synthetic face materials.<br />
• High Resistance (HR/TMX 3200) transfer ribbons give an<br />
extremely durable printout, which is resistant to most chemical<br />
agents and high temperatures. However, such transfer<br />
ribbons set high demands on the receiving face material,<br />
which must be very smooth, such as polyesters.<br />
The use of HR/TMX 3200 ribbons requires the print speed<br />
and the energy supplied by the printhead to be controlled<br />
with great accuracy according to the receiving face material.<br />
Custom-made setup options adapted for special applications<br />
can also be created. Consult your <strong>Intermec</strong> distributor.<br />
<strong>Intermec</strong> <strong>Easy<strong>Code</strong>r</strong> <strong>601</strong> <strong>XP</strong> – User’s <strong>Guide</strong> 99
100<br />
Appendix 3<br />
Interfaces<br />
RS-232 Interface<br />
"uart1:"<br />
The <strong>Easy<strong>Code</strong>r</strong> <strong>601</strong> <strong>XP</strong> has, as standard, three communication<br />
interfaces: RS-232, Centronics, and <strong>Bar</strong> <strong>Code</strong> Wand.<br />
Protocol<br />
Default setup:<br />
Baud rate: 9600<br />
Char. length 8 bits<br />
Parity: None<br />
Stop bits: 1<br />
RTS/CTS Disabled<br />
ENQ/ACK: Disabled<br />
XON/XOFF: Disabled (both ways)<br />
New Line: CR/LF<br />
To change the RS-232 interface settings, see Chapter 6, “Setting<br />
Up the <strong>Printer</strong>.”<br />
Interface Cable<br />
Computer end: DB-9pin or DB-25pin female connector<br />
(PC)<br />
<strong>Printer</strong> end: DB-25pin male connector<br />
Host<br />
<strong>Printer</strong> Host<br />
Signal DB-9 DB-25 Signal DB-25 DB-25 Signal<br />
1 1<br />
1 1 Shield<br />
RXD 2 2 TXD 2 3 RXD<br />
TXD 3 3 RXD 3 2 TXD<br />
CTS 8 4 RTS 4 5 CTS<br />
RTS 7 5 CTS 5 4 RTS<br />
6 DSR 6 20 DTR<br />
GND 5 7 Signal GND 7 7 GND<br />
16 +5V* 16<br />
DSR<br />
6 20 DTR 20 6 DSR<br />
22 RI 22<br />
* /. The external +5V is limited to 200 mA and is automatically<br />
switched off at overload. It is intended to drive for example an<br />
external alphanumeric keyboard connected to the RS-232 port.<br />
<strong>Intermec</strong> <strong>Easy<strong>Code</strong>r</strong> <strong>601</strong> <strong>XP</strong> – User’s <strong>Guide</strong>
Parallel Interface<br />
"centronics:"<br />
1 /. Nibble, byte, ECP, and EPP<br />
are presently not supported.<br />
2 /. <strong>Intermec</strong> Shell automatically<br />
sets the correct STD I/O<br />
when an application is selected,<br />
for example a Windows driver,<br />
or prompts you to select one, see<br />
Chapter 8.<br />
Appendix 3 Interfaces<br />
The <strong>Easy<strong>Code</strong>r</strong> <strong>601</strong> <strong>XP</strong> has, as standard, one parallel Centronics<br />
communication port. Three different types of Centronics devices<br />
can be selected for this port in the compatible mode1 using<br />
the <strong>Intermec</strong> Fingerprint instruction SYSVAR(25), see <strong>Intermec</strong><br />
Fingerprint v7.61, Programmer’s Reference Manual:<br />
Standard type Centronics (default)<br />
Predefi ned timing for the ACK and BUSY signals when responding<br />
to host data is:<br />
500 ns ACK, BUSY inactivated after ACK fi nishes.<br />
IBM/Epson type Centronics<br />
Predefi ned timing for the ACK and BUSY signals when responding<br />
to host data is:<br />
2500 ns ACK, BUSY inactivated as soon as ACK pulse starts.<br />
Classic type Centronics<br />
Predefi ned timing for the ACK and BUSY signals when responding<br />
to host data is:<br />
BUSY deactivated, wait 2500 ns, then give 2500 ns pulse on ACK.<br />
Select the desired device as standard IN channel by means of a<br />
SETSTDIO statement2 . By default, "uart1:" is STD I/O.<br />
Interface Cable Connectors<br />
Computer end: Depends on type of host computer.<br />
<strong>Printer</strong> end: 36-pin female IEEE 1284B Centronics.<br />
Pin Signal<br />
1 DStrobe<br />
2–9 Data 0–7<br />
10 Ack<br />
11 Busy<br />
12 PE<br />
13 Select<br />
14 AF<br />
15<br />
16–17 GND<br />
18<br />
19–30 GND<br />
31 Init<br />
32 Error<br />
33-35 GND<br />
36 Selectin<br />
<strong>Intermec</strong> <strong>Easy<strong>Code</strong>r</strong> <strong>601</strong> <strong>XP</strong> – User’s <strong>Guide</strong> 101
Appendix 3 Interfaces<br />
<strong>Bar</strong> <strong>Code</strong> Wand Interface<br />
102<br />
<strong>Bar</strong> <strong>Code</strong> Wand<br />
Interface<br />
The printer was originally designed for connection of a bar code<br />
wand or scanner via a connector on the CPU board accessible<br />
through a slot in the printer’s rear plate.<br />
If the <strong>Code</strong> 128 bar code contains FNC3, the data will be treated<br />
as a setup string and will change the printer’s setup accordingly. A<br />
setup bar code may contain a single parameter or a combination<br />
of up to 3 or 4 setup parameters. Refer to the EasySet <strong>Bar</strong> <strong>Code</strong><br />
Wand Setup manual for more information on how to produce<br />
setup bar codes.<br />
The printer will acknowledge that a bar code has been successfully<br />
read by emitting a short beep signal.<br />
If no FNC3 character is found in the bar code, the data will be<br />
stored in a buffer which could be read by specifying the "wand:"<br />
device. The buffer is small, so it is recommended to use short<br />
bar code data (max. 16 characters) and read the buffer regularly<br />
to avoid overfl ow.<br />
For more demanding applications or for reading bar codes other<br />
than <strong>Code</strong> 128, choose a regular bar code scanner from <strong>Intermec</strong>’s<br />
wide product range and connect it to the serial port.<br />
<strong>Intermec</strong> <strong>Easy<strong>Code</strong>r</strong> <strong>601</strong> <strong>XP</strong> – User’s <strong>Guide</strong>
Double Serial Interface Board<br />
"uart2:"<br />
1 /. <strong>Intermec</strong> Shell either<br />
automatically sets the correct<br />
standard IN and OUT<br />
port when an application is<br />
selected or prompts you to<br />
select one, see Chapter 8.<br />
Appendix 3 Interfaces<br />
The <strong>Easy<strong>Code</strong>r</strong> <strong>601</strong> <strong>XP</strong> can optionally be fi tted with a double<br />
serial interface board, which provides the printer with two<br />
more serial ports: "uart2:" and "uart3:". These ports can be<br />
confi gured for various types of serial communication according to<br />
the customer’s request. Use the <strong>Intermec</strong> Fingerprint instruction<br />
SETSTDIO to select standard IN and OUT ports (by default<br />
"uart1:" is both standard IN and OUT port) 1 .<br />
"uart2:" "uart3:"<br />
RS-232 RS-232<br />
RS-422 Non-isolated RS-422 Non-isolated<br />
RS-422 Isolated<br />
RS-485<br />
20 mA Current Loop<br />
"uart2:" Serial Port<br />
Communication port "uart2:" uses a DB-25pin female connector.<br />
Pin Signal Name Description<br />
1 Not connected<br />
2 TxD RS-232 Transmitter<br />
3 RxD RS-232 Receiver<br />
4 RTS RS-232 Request To Send<br />
5 CTS RS-232 Clear To Send<br />
6 DSR RS-232 Data Set Ready<br />
7 GND Ground<br />
8–14 Not connected<br />
15 +RS422I +RS-422 Recieve<br />
16 +5V 5 Volt for external use (max. 200 mA) 1<br />
17 -RS422I -RS-422 Receive<br />
18 Not connected<br />
19 +RS422O/+RS485 +RS-422 Transmit/+RS 485<br />
20 DTR RS-232 Data Terminal Ready<br />
21 -RS422O/-RS485 -RS-422 Transmit/-RS 485<br />
22 RI RS-232 Ring Indicator<br />
23 Shield Optional shield for RS-422 and RS 485<br />
24–25 Not connected<br />
1 /. The external 5V is automatically switched off at overload.<br />
<strong>Intermec</strong> <strong>Easy<strong>Code</strong>r</strong> <strong>601</strong> <strong>XP</strong> – User’s <strong>Guide</strong> 103
Appendix 3 Interfaces<br />
Double Serial Interface Board, cont.<br />
104<br />
"uart3:"<br />
"uart3:" Serial Port<br />
Communication port "uart3:" uses a DB-25pin male connector.<br />
Pin Signal Name Description<br />
1 Not connected<br />
2 TxD RS-232 Transmitter<br />
3 RxD RS-232 Receiver<br />
4 RTS RS-232 Request To Send<br />
5 CTS RS-232 Clear To Send<br />
6 DSR RS-232 Data Set Ready<br />
7 GND Ground<br />
8 Not connected<br />
9 +20M1 +20 mA current loop<br />
10 -20M1 -20 mA current loop<br />
11 +TXD +TXD 20 mA current loop<br />
12 -TXD -TXD 20 mA current loop<br />
13 +20M2 +20 mA current loop (printer active receiver)<br />
14 -20M2 -20 mA current loop (printer active receiver)<br />
15 +RS422I +RS-422 Receive<br />
16 +5V 5 Volt for external use (max. 200 mA) 1<br />
17 -RS422I -RS-422 Receive<br />
18 +RxD +TXD 20 mA current loop<br />
19 +RS422O +RS -422 Transmit<br />
20 DTR RS-232 Data Terminal Ready<br />
21 -RS422O -RS-422 Transmit<br />
22 RI RS-232 Ring Indicator<br />
23 Shield Optional shield for RS-422<br />
24 Not connected<br />
25 -RxD -TXD 20 mA current loop<br />
1 /. The external 5V is automatically switched off at overload.<br />
<strong>Intermec</strong> <strong>Easy<strong>Code</strong>r</strong> <strong>601</strong> <strong>XP</strong> – User’s <strong>Guide</strong>
Industrial/Serial Interface Board<br />
Industrial Interface<br />
"uart2:"<br />
Appendix 3 Interfaces<br />
The <strong>Easy<strong>Code</strong>r</strong> <strong>601</strong> <strong>XP</strong> can optionally be fi tted with an<br />
Industrial/Serial Interface Board, which provides the printer with<br />
one extra serial communication port ("uart2:"). This port can be<br />
confi gured for one of these options:<br />
RS-232<br />
RS-422 Non-isolated<br />
RS-422 Isolated<br />
RS-485<br />
This port is identical to "uart2:" on the double serial interface<br />
board, see earlier in Appendix 3.<br />
The Industrial Interface Board also has a DB-44pin female connector<br />
with:<br />
8 digital IN ports with optocouplers<br />
8 digital OUT ports with optocouplers<br />
4 OUT ports with relays<br />
Refer to the installation instructions for the Industrial Interface<br />
Board for further information.<br />
<strong>Intermec</strong> <strong>Easy<strong>Code</strong>r</strong> <strong>601</strong> <strong>XP</strong> – User’s <strong>Guide</strong> 105
Appendix 3 Interfaces<br />
EasyLAN 100i Interface Board<br />
106<br />
RJ-45<br />
socket<br />
The <strong>Intermec</strong> EasyLAN 100i Ethernet interface board provides<br />
the printer with a 10BaseT Ethernet or 100BaseTX Fast Ethernet<br />
network connection. You can communicate with the printer via<br />
a LAN (Local Area Network) or provide the printer with its own<br />
home page, so you can reach the printer using a Web browser.<br />
EasyLAN 100i supports most major computer systems and environments.<br />
You can assign passwords to restrict both login and<br />
printer access. The internal EasyLAN 100i Web pages allow you<br />
to continuously monitor printer status and to upgrade the fl ash<br />
memory of the printer when new fi rmware becomes available.<br />
EasyLAN 100i supports SNMP for remote monitoring.<br />
When an EasyLAN 100i interface board is installed in the<br />
printer, some extra menus will be added to the Setup Mode (see<br />
Chapter 7, “Setup Mode”). The Ethernet port is addressed as<br />
device "net1:" (communication channel 5).<br />
<strong>Intermec</strong> <strong>Easy<strong>Code</strong>r</strong> <strong>601</strong> <strong>XP</strong> – User’s <strong>Guide</strong>
Industrial Interface Board<br />
Industrial<br />
Interface<br />
EasyLAN 100i<br />
interface<br />
Appendix 3 Interfaces<br />
The Industrial Interface Board is an optional interface board that<br />
makes it possible to install an EasyLAN 100i interface board<br />
while still having an industrial interface. (This is essentially an<br />
Industrial/Serial interface board, where the serial interface has<br />
been omitted in favor of the ability to connect an EasyLAN 100i<br />
interface board.)<br />
This is presently the only case when two interface boards can be<br />
installed in the same <strong>Easy<strong>Code</strong>r</strong> <strong>601</strong> <strong>XP</strong>.<br />
<strong>Intermec</strong> <strong>Easy<strong>Code</strong>r</strong> <strong>601</strong> <strong>XP</strong> – User’s <strong>Guide</strong> 107
108<br />
Notes<br />
<strong>Intermec</strong> <strong>Easy<strong>Code</strong>r</strong> <strong>601</strong> <strong>XP</strong> – User’s <strong>Guide</strong>
<strong>Intermec</strong> <strong>Printer</strong> AB<br />
Idrottsvägen 10, P.O. Box 123<br />
S-431 22 Mölndal, Sweden<br />
tel +46 31 869500<br />
fax +46 31 869595<br />
www.intermec.com<br />
<strong>Easy<strong>Code</strong>r</strong> <strong>601</strong> <strong>XP</strong> User’s <strong>Guide</strong><br />
*1-960568-00*<br />
*1-960568-00*