VRF Service Manual.pdf - Industrial Air
VRF Service Manual.pdf - Industrial Air
VRF Service Manual.pdf - Industrial Air

You also want an ePaper? Increase the reach of your titles
YUMPU automatically turns print PDFs into web optimized ePapers that Google loves.
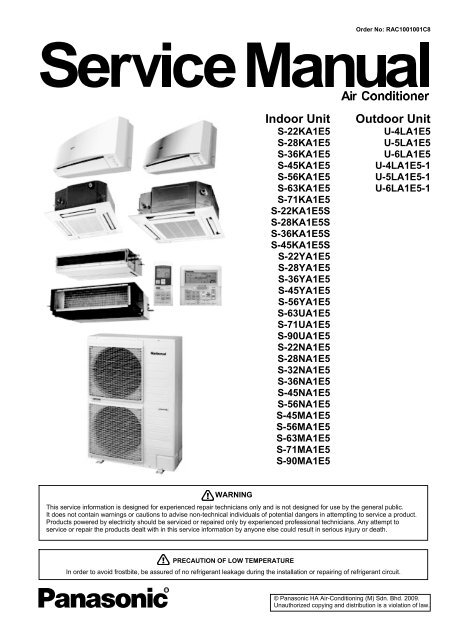
WARNING<br />
Order No: RAC1001001C8<br />
Indoor Unit Outdoor Unit<br />
S-22KA1E5<br />
S-28KA1E5<br />
S-36KA1E5<br />
S-45KA1E5<br />
S-56KA1E5<br />
S-63KA1E5<br />
S-71KA1E5<br />
S-22KA1E5S<br />
S-28KA1E5S<br />
S-36KA1E5S<br />
S-45KA1E5S<br />
S-22YA1E5<br />
S-28YA1E5<br />
S-36YA1E5<br />
S-45YA1E5<br />
S-56YA1E5<br />
S-63UA1E5<br />
S-71UA1E5<br />
S-90UA1E5<br />
S-22NA1E5<br />
S-28NA1E5<br />
S-32NA1E5<br />
S-36NA1E5<br />
S-45NA1E5<br />
S-56NA1E5<br />
S-45MA1E5<br />
S-56MA1E5<br />
S-63MA1E5<br />
S-71MA1E5<br />
S-90MA1E5<br />
PRECAUTION OF LOW TEMPERATURE<br />
In order to avoid frostbite, be assured of no refrigerant leakage during the installation or repairing of refrigerant circuit.<br />
U-4LA1E5<br />
U-5LA1E5<br />
U-6LA1E5<br />
U-4LA1E5-1<br />
U-5LA1E5-1<br />
U-6LA1E5-1<br />
This service information is designed for experienced repair technicians only and is not designed for use by the general public.<br />
It does not contain warnings or cautions to advise non-technical individuals of potential dangers in attempting to service a product.<br />
Products powered by electricity should be serviced or repaired only by experienced professional technicians. Any attempt to<br />
service or repair the products dealt with in this service information by anyone else could result in serious injury or death.<br />
© Panasonic HA <strong>Air</strong>-Conditioning (M) Sdn. Bhd. 2009.<br />
Unauthorized copying and distribution is a violation of law.
TABLE OF CONTENTS<br />
1. Safety Precautions .............................................5<br />
2. Features...............................................................7<br />
3. Product Specification ......................................13<br />
3.1 Wall Mounted Type Indoor Unit – KA1E5 /<br />
KA1E5S Series...........................................13<br />
3.2 60 x 60 Cassette Type Indoor Unit – YA1E5<br />
Series..........................................................19<br />
3.3 95 x 95 Cassette Type Indoor Unit – UA1E5<br />
Series..........................................................23<br />
3.4 Slim Hide-Away Type Indoor Unit – NA1E5<br />
Series..........................................................25<br />
3.5 Low Static Pressure Hide-Away Type Indoor<br />
Unit – MA1E5 Series ..................................31<br />
3.6 Outdoor Unit – LA1E5 Series .....................37<br />
4. Dimensions .......................................................39<br />
4.1 Wall Mounted Type Indoor Unit..................39<br />
4.2 60 x 60 Cassette Type Indoor Unit.............41<br />
4.3 95 x 95 Cassette Type Indoor Unit.............42<br />
4.4 Slim Hide-Away Type Indoor Unit ..............43<br />
4.5 Low Static Pressure Hide-Away Type Indoor<br />
Unit .............................................................44<br />
4.6 Outdoor Unit ...............................................46<br />
5. Refrigeration Cycle Diagram ...........................47<br />
6. Block Diagram ..................................................48<br />
6.1 Wall Mounted Type Indoor Unit – KA1E5<br />
Series..........................................................48<br />
6.2 60 x 60 Cassette Type Indoor Unit – YA1E5<br />
Series..........................................................48<br />
6.3 95 x 95 Cassette Type Indoor Unit – UA1E5<br />
Series..........................................................49<br />
6.4 Slim Hide Away Type Indoor Unit – NA1E5<br />
Series..........................................................49<br />
6.5 Low Static Pressure Hide Away Type Indoor<br />
Unit – MA1E5 Series ..................................50<br />
6.6 Outdoor Unit – LA1E5 Series .....................50<br />
7. Wiring Connection Diagram ............................51<br />
7.1 Wall Mounted Type Indoor Unit – KA1E5<br />
Series..........................................................51<br />
7.2 60 x 60 Cassette Type Indoor Unit – YA1E5<br />
Series..........................................................52<br />
7.3 95 x 95 Cassette Type Indoor Unit – UA1E5<br />
Series..........................................................53<br />
7.4 Slim Hide Away Type Indoor Unit – NA1E5<br />
Series..........................................................54<br />
7.5 Low Static Pressure Hide Away Type Indoor<br />
Unit – MA1E5 Series ..................................55<br />
7.6 Outdoor Unit – LA1E5 Series .....................56<br />
8. Electronic Circuit Diagram ..............................57<br />
8.1 Wall Mounted Type Indoor Unit – KA1E5<br />
Series..........................................................57<br />
8.2 60 x 60 Cassette Type Indoor Unit – YA1E5<br />
Series..........................................................59<br />
8.3 95 x 95 Cassette Type Indoor Unit – UA1E5<br />
Series..........................................................61<br />
2<br />
8.4 Slim Hide Away Type Indoor Unit – NA1E5<br />
Series......................................................... 63<br />
8.5 Low Static Pressure Hide Away Type Indoor<br />
Unit – MA1E5 Series ................................. 65<br />
8.6 Outdoor Unit – LA1E5 Series .................... 67<br />
9. Printed Circuit Board ...................................... 69<br />
9.1 Wall Mounted Type Indoor Unit – KA1E5<br />
Series......................................................... 69<br />
9.2 60 x 60 Cassette Type Indoor Unit – YA1E5<br />
Series......................................................... 71<br />
9.3 95 x 95 Cassette Type Indoor Unit – YA1E5<br />
Series......................................................... 72<br />
9.4 Slim Hide Away Type Indoor Unit – NA1E5<br />
Series......................................................... 72<br />
9.5 Low Static Pressure Hide Away Type Indoor<br />
Unit – MA1E5 Series ................................. 73<br />
9.6 Outdoor Unit – LA1E5 Series .................... 74<br />
10. Remote Control Operating Instructions........ 77<br />
10.1 Wired remote control CZ-RT1 .................. 77<br />
10.2 Wireless Remote Control CZ-RWS1 – Heat<br />
Pump models / CZ-RWC1 – Cooling models.<br />
................................................................... 78<br />
11. Installation Instruction.................................... 79<br />
11.1 Pipe Length ............................................... 79<br />
11.2 Branch Pipe Connection CZ-P155BK1 ..... 80<br />
11.3 Capacity Correction................................... 81<br />
11.4 INSTALLATION INSTRUCTIONS FS MULTI<br />
WALL MOUNTED TYPE ........................... 82<br />
11.5 INSTALLATION INSTRUCTIONS FS MULTI<br />
FOUR-WAY MINI CASSETTE .................. 92<br />
11.6 INSTALLATION INSTRUCTIONS FS MULTI<br />
FOUR-WAY CASSETTE......................... 103<br />
11.7 CZ-RWRU1 Infrared Receiver (For Cassette<br />
only) Installation <strong>Manual</strong>.......................... 114<br />
11.8 INSTALLATION INSTRUCTIONS FS MULTI<br />
DUCT TYPE ............................................ 117<br />
11.9 DUCT TYPE AIR CONDITIONERS<br />
INSTALLATION INSTRUCTIONS........... 126<br />
11.10 CZ-RWRM1 Infrared Receiver (For Ducted<br />
series only) Installation <strong>Manual</strong> ............... 135<br />
11.11 INFRARED REMOTE CONTROLLER<br />
INSTALLATION MANUAL....................... 138<br />
11.12 WIRED CONTROLLER INSTALLATION<br />
MANUAL CZ-RT1.................................... 142<br />
11.13 INSTALLATION INSTRUCTIONS FS MULTI<br />
OUTDOOR UNIT..................................... 151<br />
11.14 INSTALLATION INSTRUCTIONS FS MULTI<br />
OUTDOOR UNIT..................................... 170<br />
11.15 Terminal Module For Outdoor Unit CZ-CAP1<br />
Installation <strong>Manual</strong>................................... 189<br />
11.16 MANUAL FOR TERMINAL MODULE ..... 198<br />
11.17 Cooling / Heating Selector CZ-RD1<br />
Installation <strong>Manual</strong>................................... 204<br />
11.18 LINE BRANCH PIPE INSTALLATION<br />
MANUAL CZ-P155BK1 ........................... 209<br />
12. Testing and Commissioning ........................ 212<br />
12.1 Precautions Regarding Test Run ............ 212<br />
12.2 Check before Test Run............................ 212
12.3 Test Run Procedure .................................213<br />
13. Outdoor Unit Operation Control ...................214<br />
13.1 System Start Control ................................214<br />
13.2 Compressor Startup control .....................214<br />
13.3 Deice Control............................................215<br />
13.4 Crank Case Heater Control......................215<br />
14. Outdoor Unit Protection Control ..................216<br />
14.1 Cooling Oil Return Control .......................216<br />
14.2 Heating Oil Return Control .......................216<br />
14.3 Overload Control ......................................216<br />
14.4 Low Load Control .....................................216<br />
14.5 Compressor Discharge Temperature Control<br />
..................................................................217<br />
14.6 Condenser Temperature Control .............217<br />
14.7 Compressor Restart Delay Control ..........217<br />
14.8 Outdoor Residual Heat Removal Control.217<br />
14.9 Compressor Stops Control.......................217<br />
14.10 Cooling Low Outdoor Ambient Temperature<br />
Protection Control.....................................218<br />
14.11 Heating High Outdoor Ambient Temperature<br />
Protection Control.....................................218<br />
15. Indoor Unit Operation Control ......................219<br />
15.1 Operation Mode Priority Control...............219<br />
15.2 Cooling Operation ....................................219<br />
15.3 Soft Dry Operation....................................220<br />
15.4 Heating Operation ....................................221<br />
15.5 Auto Operation .........................................221<br />
15.6 Indoor Fan Motor Operation.....................222<br />
15.7 <strong>Air</strong>flow Direction .......................................226<br />
15.8 Odor Cut control.......................................229<br />
15.9 Drain Pump Control..................................229<br />
15.10 Filter Check Control..................................230<br />
16. Indoor Unit Protection Control .....................231<br />
16.1 Odor Remove control ...............................231<br />
16.2 Freeze Prevention control ........................231<br />
16.3 Dew Prevention control ............................231<br />
16.4 Mist Prevention Control............................231<br />
16.5 Hot Start Control.......................................232<br />
16.6 Indoor Residual Heat Removal Control ...232<br />
16.7 Auto Restart Control.................................232<br />
17. Servicing Mode...............................................233<br />
17.1 Emergency Operation ..............................233<br />
17.2 Pump down ..............................................234<br />
17.3 Auto Restart Control.................................235<br />
17.4 Power Save Control .................................235<br />
17.5 Wired Remote Control Local Setting Mode....<br />
..................................................................236<br />
17.6 Wireless Remote Control Local Setting Mode<br />
..................................................................238<br />
17.7 AC Reset Control .....................................239<br />
18. Troubleshooting Guide..................................240<br />
19. Troubleshooting Flowchart...........................242<br />
19.1 Drain Level Float Switch Problem (F15-01) ...<br />
..................................................................242<br />
19.2 Indoor Fan Motor (DC Motor) Mechanism<br />
Locked (F17-02).......................................243<br />
19.3 Indoor Intake <strong>Air</strong> Temperature Sensor<br />
Abnormality (F20-01)................................244<br />
3<br />
19.4 Wired Remote Controller Thermistor<br />
Abnormality (F20-02)................................245<br />
19.5 Indoor Pipe Temperature Sensor<br />
Abnormality (F21-01)................................246<br />
19.6 Indoor Gas Temperature Sensor Abnormality<br />
(F22-01)....................................................247<br />
19.7 Indoor Address Double Registration (F25-01)<br />
..................................................................248<br />
19.8 Total Quantity & Capacity of Connected<br />
Indoor Unit Abnormality (F30-01).............249<br />
19.9 Low Pressure Protection (F31-01) ...........250<br />
19.10 High Pressure Protection (F31-02) ..........251<br />
19.11 Four Way Valve Abnormality (F31-06).....252<br />
19.12 Indoor Unit Freezing Abnormality (F31-08)....<br />
..................................................................253<br />
19.13 IPM Temperature Protection (F32-04) .....254<br />
19.14 Total Current Protection (F32-05) ............255<br />
19.15 Compressor Discharge Temperature<br />
Protection (F32-06) ..................................256<br />
19.16 Power Factor Correction (PFC) Abnormality<br />
(F32-08)....................................................257<br />
19.17 DC Peak Current Detection (F32-09).......258<br />
19.18 Compressor Rotation Failure (F32-10) ....259<br />
19.19 Outdoor Fan Motor (DC Motor) Mechanism<br />
Locked (F35-02) .......................................260<br />
19.20 Outdoor Intake <strong>Air</strong> Temperature Sensor<br />
Abnormality (F40-01)................................261<br />
19.21 Compressor Suction Temperature Sensor<br />
Abnormality (F40-11)................................262<br />
19.22 Outdoor Pipe Temperature Sensor<br />
Abnormality (F40-21)................................263<br />
19.23 Outdoor Defrost Temperature Sensor<br />
Abnormality (F40-31)................................264<br />
19.24 Compressor Discharge Temperature Sensor<br />
Abnormality (F40-51)................................265<br />
19.25 Outdoor High Pressure Switch Disconnect<br />
Abnormality (F41-02)................................266<br />
19.26 Outdoor Low Pressure Switch Disconnect<br />
Abnormality (F41-12)................................267<br />
19.27 Outdoor Current Transformer Open Circuit<br />
(F42-11)....................................................268<br />
19.28 IPM Temperature Sensor Abnormality<br />
(F44-01)....................................................269<br />
19.29 Outdoor Address Double Registration<br />
(F45-01)....................................................270<br />
20. Technical Data................................................271<br />
20.1 Operation Characteristic ..........................271<br />
20.2 Capacity and Power Input ........................272<br />
20.3 Sensible Heat Capacity Table..................275<br />
20.4 Cooling Capacity Tables ..........................278<br />
20.5 Heating Capacity Tables ..........................308<br />
20.6 Combination Characteristic ......................338<br />
20.7 <strong>Air</strong> Flow Volume .......................................341<br />
20.8 Sound Data ..............................................364<br />
21. Operation range..............................................377<br />
22. Allowable Pipe Length...................................378<br />
23. Combination Catalogue.................................379<br />
23.1 Cooling .....................................................379<br />
23.2 Heating .....................................................384<br />
23.3 Cooling .....................................................389<br />
23.4 Heating .....................................................399<br />
23.5 Cooling .....................................................409
23.6 Heating .................................................... 430<br />
24. Exploded View and Replacement Parts List451<br />
24.1 Indoor Unit ............................................... 451<br />
4
1. Safety Precautions<br />
• Read the following “SAFETY PRECAUTIONS” carefully before perform any servicing.<br />
• Electrical work must be installed or serviced by a licensed electrician. Be sure to use the correct rating of the<br />
power plug and main circuit for the model installed.<br />
• The caution items stated here must be followed because these important contents are related to safety. The<br />
meaning of each indication used is as below. Incorrect installation or servicing due to ignoring of the instruction<br />
will cause harm or damage, and the seriousness is classified by the following indications.<br />
WARNING<br />
CAUTION<br />
• The items to be followed are classified by the symbols:<br />
This indication shows the possibility of causing death or serious injury<br />
This indication shows the possibility of causing injury or damage to properties.<br />
• Carry out test run to confirm that no abnormality occurs after the servicing. Then, explain to user the operation,<br />
care and maintenance as stated in instructions. Please remind the customer to keep the operating instructions for<br />
future reference.<br />
1. Do not modify the machine, part, material during repairing service.<br />
WARNING<br />
2. If wiring unit is supplied as repairing part, do not repair or connect the wire even only partial wire break. Exchange the whole wiring unit.<br />
3. Do not wrench the fasten terminal. Pull it out or insert it straightly.<br />
4. Engage dealer or specialist with ISO5149 or equivalent requirement for installation and servicing. If installation of servicing done by the user is<br />
defective, it will cause water leakage, electrical shock or fire.<br />
5. Install according to this installation instructions strictly. If installation is defective, it will cause water leakage, electric shock or fire.<br />
6. Use the attached accessories parts and specified parts for installation and servicing. Otherwise, it will cause the set to fall, water leakage, fire<br />
or electrical shock.<br />
7. Install at a strong and firm location which is able to withstand the set’s weight. If the strength is not enough or installation is not properly done,<br />
the set will drop and cause injury.<br />
8. For electrical work, follow the local national wiring standard, regulation and the installation instruction. An independent circuit and single outlet<br />
must be used. If electrical circuit capacity is not enough or defect found in electrical work, it will cause electrical shock or fire.<br />
9. This equipment is strongly recommended to install with Earth Leakage Circuit Breaker (ELCB) or Residual Current Device (RCD).<br />
Otherwise, it may cause electrical shock and fire in case equipment breakdown or insulation breakdown.<br />
10. Do not use joint cable for indoor / outdoor connection cable. Use the specified indoor / outdoor connection cable, refer to installation instruction<br />
CONNECT THE WIRES TO THE CONTROL BOX and connect tightly for indoor / outdoor connection. Clamp the cable so that no external<br />
force will be acted on the terminal. If connection or fixing is not perfect, if will cause heat up or fire at the connection.<br />
11. Wire routing must be properly arranged so that control board cover is fixed properly. If control board cover is not fixed perfectly, it will cause<br />
heat-up or fire at the connection point of terminal, fire or electrical shock.<br />
12. When install or relocate air conditioner, do not let any substance other than the specified refrigerant, eg. air etc. mix into refrigeration cycle<br />
(piping). (Mixing of air etc. will cause abnormal high pressure in refrigeration cycle and result in explosion, injury etc.).<br />
13. Do not install outdoor unit near handrail of veranda. When installing air-conditioner unit at veranda of high rise building, child may<br />
climb up to outdoor unit and cross over the handrail and causing accident.<br />
14. This equipment must be properly earthed. Earth line must not be connected to gas pipe, water pipe, earth of lightning rod and<br />
telephone. Otherwise, it may cause electrical shock in case equipment breakdown or insulation breakdown.<br />
15. When connecting the piping, do not allow air or any substances other than the specified refrigerant to enter the refrigeration cycle.<br />
Otherwise, this may lower the capacity, cause abnormally high pressure in the refrigeration cycle, and possibly result in explosion<br />
and injury.<br />
16. Do not damage or use unspecified power supply cord. Otherwise it will cause fire or electric shock.<br />
17. Do not modify the length of the power supply cord or use extension cord, and do not share the single outlet with other electric appliances.<br />
Otherwise, it will cause fire or electric shock.<br />
18. It is desirable that the amount of residual oil is less than 40 mg/10m.<br />
This symbol denotes item that is PROHIBITED from doing.<br />
5
19. During installation, before run the compressor, confirm the refrigerant pipes are fixed. Operation of compressor without fixing the piping, setting<br />
the valves at open condition, a burst may occur and cause injury.<br />
20. After completion of installation or service, confirm there is no leakage or refrigerant gas. It may generate toxic gas when the refrigerant<br />
contacts with fire or spark.<br />
21. Ventilate if there is refrigerant gas leakage during operation. It may cause toxic gas when refrigerant contacts with fire.<br />
CAUTION<br />
1. Do not install the unit at place where leakage of flammable gas may occur. In case gas leaks and accumulates at surrounding of the<br />
unit, it may cause fire.<br />
2. Carry out drainage piping as mentioned in installation instructions. If drainage is not perfect, water may enter the room and damage<br />
the furniture.<br />
3. Tighten the flare nut with torque wrench according to specified method. If the flare nut is over-tightened, after a long period, the flare<br />
may break and cause refrigerant gas leakage.<br />
4. Do not touch outdoor unit air inlet and aluminium fin. It may cause injury.<br />
5. Select an installation location which is easy for maintenance.<br />
6. Pb free solder has a higher melting point than standard solder; typically the melting point is 50°F – 70°F (30°C – 40°C) higher. Please use<br />
a high temperature solder iron. In case of the soldering iron with temperature control, please set it to 700 ± 20°F (370 ± 10°C).<br />
Pb free solder will tend to splash when heated too high (about 1100°F / 600°C).<br />
7. Power supply connection to the air conditioner. Connect the power supply cord of the air conditioner to the mains using one of the following<br />
methods.<br />
Power supply point shall be the place where there is ease for access for the power disconnection in case of emergency. In some countries,<br />
permanent connection of this room air conditioner to the power supply is prohibited.<br />
i. Power supply connection to the receptacle using a power plug. Use an approved power plug with earth pin for the connection to the socket.<br />
ii. Power supply connection to a circuit breaker for the permanent component. Use an approved circuit breaker for the permanent connection.<br />
It must be a double pole switch with a minimum 3.5 mm contact gap.<br />
8. Do not release refrigerant during piping work for installation, servicing, reinstallation and during repairing a refrigerant parts. Take<br />
care of the liquid refrigerant, it may cause frostbite.<br />
9. Installation work: It may need two people to carry out the installation work.<br />
10. Do not install this appliance in a laundry room or other location where water may drip from the ceiling, etc.<br />
6
2. Features<br />
• Highly Efficient Inverter Technology<br />
o Uses Panasonic advanced inverter technology, intelligent and flexible control ability to achieve energy saving;<br />
Meanwhile, the outdoor unit is capable to drive multiple indoor units.<br />
• More Variety of Indoor Unit Types<br />
o There are 6 different Indoor unit types available<br />
kW 2.2kW 2.8kW 3.2kW 3.6kW 4.5kW 5.6kW 6.3kW 7.1kW 9.0kW<br />
BTU/h 7500 9600 10900 12300 15400 19100 21500 24200 30700<br />
Wall Mounted - White<br />
KA1E5 SERIES<br />
О O O O O O O<br />
Wall Mounted - Silver<br />
KA1E5S SERIES<br />
O O O O<br />
60 x 60 Cassette<br />
YA1E5 SERIES<br />
O O O O O<br />
95 x 95 Cassette<br />
UA1E5 SERIES<br />
O O O<br />
Slim Hide-away<br />
NA1E5 SERIES<br />
Low Static Pressure<br />
O O O O O O<br />
Hide-away<br />
MA1E5 SERIES<br />
O O O O O<br />
Altogether 30 models make up a wide range of indoor units to suit the modern interior design requirement.<br />
• Wall-mounted Type Indoor Unit<br />
o KA1E5, KA1E5S Series<br />
- Delicate design.<br />
- Easy installation.<br />
- Refrigerant distributor.<br />
- Easy Servicing with 7 segment Error Code Display at panel.<br />
• 60 x 60 Cassette Type Indoor Unit<br />
o YA1E5 Series<br />
- Light and thin design with thickness of 24cm, allowing easy installation.<br />
- Easy Servicing with 7 segment Error Code Display at panel.<br />
• 95 x 95 Cassette Type Indoor Unit<br />
o UA1E5 Series<br />
- Flexible and convenient Drain-Up mechanism.<br />
- Light and thin design with thickness of 24cm, allowing easy installation.<br />
- Easy Servicing with 7 segment Error Code Display at panel.<br />
• Slim Hide-away Type Indoor Unit<br />
o NA1E5 Series<br />
- Light body with a thickness of 20cm only.<br />
- Flexible installation options.<br />
- Selectable air inlet.<br />
- Adjustable static pressure 0mmAq or 3mmAq.<br />
- Easy Servicing with 7 segment Error Code Display at panel.<br />
• Low Static Pressure Hide-away Type Indoor Unit<br />
o MA1E5 Series<br />
- Flexible and convenient Drain-Up mechanism.<br />
- Light and thin design with thickness of 25cm, allowing easy installation.<br />
- Selectable air inlet.<br />
- Adjustable static pressure 5mmAq or 7mmAq.<br />
- Easy filter maintenance.<br />
- Easy Servicing with 7 segment Error Code Display at panel.<br />
7
Wired Remote Control<br />
CZ-RT1<br />
1. Includes an easily-visible red pilot indicator. The power can be turned on and off at a single touch, without<br />
opening the cover.<br />
2. The build-in thermistor allows indoor temperature detection in accordance with indoor conditions by switching<br />
with indoor unit thermistor.<br />
3. Twin non-polar wires make installation work easy. (10m cable supplied as accessory).<br />
Wireless Remote Control<br />
CZ-RWS1 – Heat pump models / CZ-RWC1 – Cooling models<br />
1. New ergonomic design.<br />
2. Built-in 24 hours OFF/ON timer.<br />
8
Interface Module for External Control / Integration<br />
CZ-CAP1<br />
• Demand Control<br />
o With Demand Control, it is possible to limit maximum electrical current to air conditioner. This usually<br />
used to integrate with central control system, building automation system or etc.<br />
9<br />
From external device, it is required to use a volt free<br />
contact (relay) for integration.<br />
(DC24V 2mA, wire length max 150m)<br />
COM shorted with Max rated current<br />
LV1 70%<br />
LV2 40%<br />
LV3 0%<br />
• Forced Stop<br />
o With the Forced Stop input, it is possible to override the air conditioning operation to force stop if signal is<br />
received from a fire alarm system, BAS or etc.<br />
From external device, it is required to use a volt free<br />
contact (relay) for integration.<br />
(DC24V 2mA, wire length max 150m)<br />
When contact closed, AC will forced<br />
and continue stop operation.<br />
When contact opened, AC will switch to standby condition.<br />
LED display on PCB<br />
2 3 4 5 6 7 8 9<br />
О О О О О О О О
• Heat / Cool Mode selection<br />
o Must use together with Cooling / Heating Selector Switch (CZ-RD1)<br />
o With the heat cool selector switch, operation mode (Heat / Cool / Fan) can be set & fixed by higher<br />
authority user.<br />
o If OFF selected, Unit will operate freely base on remote setting.<br />
o If ON & FAN selected, Unit will in priority to operate fan mode only.<br />
o If ON & MODE & HEAT selected, unit will in priority to operate heat mode only.<br />
o Priority mode is indicated in wired remote. If remote setting is not same mode with Priority Mode, indoor<br />
unit will standby until priority mode canceled. (power led blinks ON 2.5sec; OFF 0.5sec)<br />
• Share External Signals to Next Outdoor Unit<br />
o The Cooling / Heating Selector and Forced Stop input signals can be share with next outdoor systems.<br />
o Maximum 30 outdoor units can share these signals.<br />
o Wire requirement : 0.5mm² diameter and maximum length is 100m.<br />
o Demand control signal cannot be shared to the next system.<br />
10
Group control equipment<br />
Wired<br />
Remote<br />
Control<br />
Common<br />
control<br />
Group Control by one remote<br />
control<br />
• All air conditioner units are<br />
controlled as a whole by the<br />
remote control.<br />
• All indoor units operate in the<br />
same mode.<br />
Twin remote control separate<br />
control<br />
• Each indoor unit can be<br />
operated by either one of the two<br />
remote controls.<br />
• Apart from timer setting time,<br />
displays for two remote controls<br />
are identical.<br />
• Last pressed button has priority<br />
(main or slave is set at remote<br />
control).<br />
Common control / group<br />
• Operation is possible using<br />
either wired or wireless remote<br />
control unit.<br />
• Last pressed button has priority.<br />
Remote-side<br />
remote control<br />
Remote-side<br />
remote control<br />
Receptor unit<br />
Wire remote<br />
control<br />
Centralized control system possibility (for Europe market only)<br />
Centralized Control<br />
(UM NET)<br />
Urban Controller<br />
BMS RS232C<br />
Serial Connection<br />
11<br />
Indoor units<br />
Local-side<br />
remote control<br />
Wireless<br />
remote<br />
control<br />
Indoor<br />
units<br />
Remote side<br />
• Optional wired remote<br />
control.<br />
Local Side<br />
• Not required.<br />
Remote side<br />
• Optional wired remote control<br />
Local side<br />
• Optional wired remote control<br />
• Optional wired remote control<br />
and wireless remote control.
3. Product Specification<br />
3.1 Wall Mounted Type Indoor Unit – KA1E5 / KA1E5S Series<br />
Cooling<br />
Heating<br />
Indoor Fan<br />
Indoor <strong>Air</strong>flow<br />
Indoor Unit<br />
13<br />
S-22KA1E5<br />
S-22KA1E5S<br />
S-28KA1E5<br />
S-28KA1E5S<br />
Panel -<br />
Wired CZ-RT1<br />
Remote Control<br />
Wireless<br />
CZ-RWS1 (Heat-pump models)<br />
CZ-RWC1 (Cooling models)<br />
Performance Test Condition ISO 5151<br />
Power Supply<br />
Capacity<br />
S-36KA1E5<br />
S-36KA1E5S<br />
Phase 1 1 1<br />
V 220/230/240 220/230/240 220/230/240<br />
Hz 50 50 50<br />
kW 2.20 2.80 3.60<br />
BTU/h 7500 9600 12300<br />
Running Current A 0.25 0.30 0.35<br />
Input Power W 25 27 30<br />
Noise level<br />
Capacity<br />
dB-A (H / L) 38 / 33 39 / 33 42 / 34<br />
Power level dB (H / L) 53 / 48 54 / 48 57 / 49<br />
kW 2.50 3.20 4.20<br />
BTU/h 8500 10900 14300<br />
Running Current A 0.25 0.30 0.35<br />
Input Power W 25 27 30<br />
Noise level<br />
dB-A (H / L) 38 / 33 39 / 33 42 / 34<br />
Power level dB (H / L) 53 / 48 54 / 48 57 / 49<br />
External Static Pressure Pa - - -<br />
Max Current A 0.30 0.35 0.40<br />
Max Input Power W 35 37 40<br />
Speed<br />
Type Cross-Flow Fan Cross-Flow Fan Cross-Flow Fan<br />
Material ASG30K1 ASG30K1 ASG30K1<br />
Motor type DC (8-Poles) DC (8-Poles) DC (8-Poles)<br />
Input power W - - -<br />
Output power W 30 30 30<br />
Lo<br />
Me<br />
Hi<br />
Cool r.p.m. 810 840 940<br />
Heat r.p.m. 940 980 1020<br />
Cool r.p.m. 920 970 1070<br />
Heat r.p.m. 1020 1070 1140<br />
Cool r.p.m. 1030 1100 1200<br />
Heat r.p.m. 1100 1170 1260<br />
Moisture Removal L/h (Pt/h) 1.3 (2.7) 1.6 (3.4) 2.1 (4.4)<br />
Lo<br />
Me<br />
Hi<br />
Cool m 3 /min (ft 3 /min) 6.9 (245) 6.8 (240) 7.9 (279)<br />
Heat m 3 /min (ft 3 /min) 8.4 (295) 8.4 (296) 8.8 (310)<br />
Cool m 3 /min (ft 3 /min) 8.2 (290) 8.3 (293) 9.4 (332)<br />
Heat m 3 /min (ft 3 /min) 9.4 (330) 9.5 (335) 10.2 (360)<br />
Cool m 3 /min (ft 3 /min) 9.5 (335) 9.7 (342) 10.9 (385)<br />
Heat m 3 /min (ft 3 /min) 10.3 (364) 10.9 (385) 11.6 (409)<br />
Refrigeration Cycle Control Device Expansion Valve Expansion Valve Expansion Valve<br />
Height mm (inch) 290 (11-7/16) 290 (11-7/16) 290 (11-7/16)<br />
Dimension<br />
Width mm (inch) 870 (34-9/32) 870 (34-9/32) 870 (34-9/32)<br />
Depth mm (inch) 204 (8-1/16) 204 (8-1/16) 204 (8-1/16)<br />
Net weight kg (lbs) 9 (20) 9 (20) 9 (20)
Piping<br />
Diameter<br />
Drain hose<br />
Indoor Heat<br />
Exchanger<br />
<strong>Air</strong> Filter<br />
Power cord<br />
Indoor Operation<br />
Range<br />
Gas side mm (inch) 12.70 (1/2) 12.70 (1/2) 12.70 (1/2)<br />
Liquid side mm (inch) 6.35 (1/4) 6.35 (1/4) 6.35 (1/4)<br />
Max Length m (ft) 15.0 (49.20) 15.0 (49.20) 15.0 (49.20)<br />
External diameter mm 16 16 16<br />
Length mm 650 650 650<br />
Fin material Aluminium (Pre Coat) Aluminium (Pre Coat) Aluminium (Pre Coat)<br />
Fin Type Slit Fin Slit Fin Slit Fin<br />
Row x Stage x FPI 2 x 15 x 21 2 x 15 x 21 2 x 15 x 21<br />
Size (W x H x L) mm 610.0 x 315.0 x 25.4 610.0 x 315.0 x 25.4 610.0 x 315.0 x 25.4<br />
Material Polypropylene Polypropylene Polypropylene<br />
Type One-Touch One-Touch One-Touch<br />
Power Supply Indoor Power Supply Indoor Power Supply Indoor Power Supply<br />
Length m (ft) - - -<br />
Core x Diameter mm 2 - - -<br />
Thermostat Electronic Control Electronic Control Electronic Control<br />
Cool<br />
Heat<br />
Maximum °C 32 32 32<br />
Minimum °C 21 21 21<br />
Maximum °C 27 27 27<br />
Minimum °C 16 16 16<br />
1. Cooling capacities are based on indoor temperature of 27°C Dry Bulb (80.6°F Dry Bulb), 19.0°C Wet Bulb (66.2°F Wet Bulb) and outdoor air<br />
temperature of 35°C Dry Bulb (95°F Dry Bulb), 24°C Wet Bulb (75.2°F Wet Bulb).<br />
2. Heating capacities are based on indoor temperature of 20°C Dry Bulb (68.0°F Dry Bulb) and outdoor air temperature of 7°C Dry Bulb (44.6°F<br />
Dry Bulb), 6°C Wet Bulb (42.8°F Wet Bulb).<br />
3. Heating low temperature capacity, input power and COP measured at 230V, indoor temperature 20°C, outdoor 2/1°C.<br />
4. Heating extreme low temperature capacity, input power and COP measured at 230V, indoor temperature 20°C, outdoor -7/-8°C.<br />
5. Specifications are subjected to change without prior notice for future improvement.<br />
14
Cooling<br />
Heating<br />
Indoor Fan<br />
Indoor <strong>Air</strong>flow<br />
Piping<br />
Indoor Unit<br />
15<br />
S-45KA1E5<br />
S-45KA1E5S<br />
Panel -<br />
Wired CZ-RT1<br />
Remote Control<br />
Wireless<br />
CZ-RWS1 (Heat-pump models)<br />
CZ-RWC1 (Cooling models)<br />
Performance Test Condition ISO5151<br />
Power Supply<br />
Capacity<br />
Phase 1 1<br />
S-56KA1E5<br />
V 220/230/240 220/230/240<br />
Hz 50 50<br />
kW 4.50 5.60<br />
BTU/h 15400 19100<br />
Running Current A 0.40 0.40<br />
Input Power W 35 45<br />
Noise level<br />
Capacity<br />
dB-A (H / L) 43 / 35 44 / 38<br />
Power level dB (H / L) 58 / 50 59 / 53<br />
kW 5.10 6.40<br />
BTU/h 17400 21800<br />
Running Current A 0.40 0.40<br />
Input Power W 35 45<br />
Noise level<br />
dB-A (H / L) 43 / 35 44 / 38<br />
Power level dB (H / L) 58 / 50 59 / 53<br />
External Static Pressure Pa - -<br />
Max Current A 0.45 0.45<br />
Max Input Power W 45 55<br />
Speed<br />
Type Cross-Flow Fan Cross-Flow Fan<br />
Material ASG30K1 ASG30K1<br />
Motor type DC (8-Poles) DC (8-Poles)<br />
Input power W - -<br />
Output power W 30 30<br />
Lo<br />
Me<br />
Hi<br />
Cool r.p.m. 960 980<br />
Heat r.p.m. 1040 1130<br />
Cool r.p.m. 1090 1120<br />
Heat r.p.m. 1170 1240<br />
Cool r.p.m. 1230 1260<br />
Heat r.p.m. 1300 1350<br />
Moisture Removal L/h (Pt/h) 2.5 (5.3) 3.2 (6.7)<br />
Lo<br />
Me<br />
Hi<br />
Cool m 3 /min (ft 3 /min) 8.2 (289) 11.1 (392)<br />
Heat m 3 /min (ft 3 /min) 9.1 (321) 13.4 (473)<br />
Cool m 3 /min (ft 3 /min) 9.7 (342) 13.2 (466)<br />
Heat m 3 /min (ft 3 /min) 10.6 (374) 15.0 (529)<br />
Cool m 3 /min (ft 3 /min) 11.3 (399) 15.3 (540)<br />
Heat m 3 /min (ft 3 /min) 12.1 (427) 16.7 (590)<br />
Refrigeration Cycle Control Device Expansion Valve Expansion Valve<br />
Height mm (inch) 290 (11-7/16) 290 (11-7/16)<br />
Dimension<br />
Width mm (inch) 870 (34-9/32) 1070 (42-5/32)<br />
Depth mm (inch) 204 (8-1/16) 235 (9-9/32)<br />
Net weight kg (lbs) 9 (20) 11 (24)<br />
Diameter<br />
Gas side<br />
Liquid side<br />
mm (inch)<br />
mm (inch)<br />
12.70 (1/2)<br />
6.35 (1/4)<br />
12.70 (1/2)<br />
6.35 (1/4)<br />
Max Length m (ft) 15.0 (49.20) 15.0 (49.20)
Drain hose<br />
Indoor Heat<br />
Exchanger<br />
<strong>Air</strong> Filter<br />
Power cord<br />
Indoor Operation<br />
Range<br />
External diameter mm<br />
Length mm 650 650<br />
Fin material Aluminium (Pre Coat) Aluminium (Pre Coat)<br />
Fin Type Slit Fin Slit Fin<br />
Row x Stage x FPI 2 x 15 x 21 2 x 15 x 19<br />
Size (W x H x L) mm 610.0 x 315.0 x 25.4 810.0 x 315.0 x 25.4<br />
Material Polypropylene Polypropylene<br />
Type One-Touch One-Touch<br />
Power Supply Indoor Power Supply Indoor Power Supply<br />
Length m (ft) - -<br />
Core x Diameter mm 2 - -<br />
Thermostat Electronic Control Electronic Control<br />
Cool<br />
Heat<br />
Maximum °C 32 32<br />
Minimum °C 21 21<br />
Maximum °C 27 27<br />
Minimum °C 16 16<br />
1. Cooling capacities are based on indoor temperature of 27°C Dry Bulb (80.6°F Dry Bulb), 19.0°C Wet Bulb (66.2°F Wet Bulb) and outdoor air<br />
temperature of 35°C Dry Bulb (95°F Dry Bulb), 24°C Wet Bulb (75.2°F Wet Bulb).<br />
2. Heating capacities are based on indoor temperature of 20°C Dry Bulb (68.0°F Dry Bulb) and outdoor air temperature of 7°C Dry Bulb (44.6°F<br />
Dry Bulb), 6°C Wet Bulb (42.8°F Wet Bulb).<br />
3. Heating low temperature capacity, input power and COP measured at 230V, indoor temperature 20°C, outdoor 2/1°C.<br />
4. Heating extreme low temperature capacity, input power and COP measured at 230V, indoor temperature 20°C, outdoor -7/-8°C.<br />
5. Specifications are subjected to change without prior notice for future improvement.<br />
16
Cooling<br />
Heating<br />
Indoor Fan<br />
Indoor <strong>Air</strong>flow<br />
Piping<br />
Indoor Unit S-63KA1E5 S-71KA1E5<br />
Panel -<br />
Wired CZ-RT1<br />
Remote Control<br />
Wireless<br />
CZ-RWS1 (Heat-pump models)<br />
CZ-RWC1 (Cooling models)<br />
Performance Test Condition ISO5151<br />
Power Supply<br />
Capacity<br />
Phase 1 1<br />
V 220/230/240 220/230/240<br />
Hz 50 50<br />
kW 6.30 7.10<br />
BTU/h 21500 24200<br />
Running Current A 0.45 0.50<br />
Input Power W 50 55<br />
Noise level<br />
Capacity<br />
dB-A (H / L) 46 / 39 48 / 40<br />
Power level dB (H / L) 51 / 54 53 / 55<br />
kW 7.10 8.00<br />
BTU/h 24200 27300<br />
Running Current A 0.45 0.50<br />
Input Power W 50 55<br />
Noise level<br />
dB-A (H / L) 46 / 39 48 / 40<br />
Power level dB (H / L) 51 / 54 53 / 55<br />
External Static Pressure Pa - -<br />
Max Current A 0.50 0.55<br />
Max Input Power W 60 65<br />
Speed<br />
Type Cross-Flow Fan Cross-Flow Fan<br />
Material ASG30K1 ASG30K1<br />
Motor type DC (8-Poles) DC (8-Poles)<br />
Input power W - -<br />
Output power W 30 30<br />
Lo<br />
Me<br />
Hi<br />
Cool r.p.m. 1040 1080<br />
Heat r.p.m. 1160 1200<br />
Cool r.p.m. 1200 1270<br />
Heat r.p.m. 1300 1360<br />
Cool r.p.m. 1360 1460<br />
Heat r.p.m. 1440 1520<br />
Moisture Removal L/h (Pt/h) 3.6 (7.6) 4.2 (8.8)<br />
Lo<br />
Me<br />
Hi<br />
Cool m 3 /min (ft 3 /min) 11.4 (402) 12.0 (423)<br />
Heat m 3 /min (ft 3 /min) 13.1 (462) 13.7 (484)<br />
Cool m 3 /min (ft 3 /min) 13.7 (484) 14.7 (519)<br />
Heat m 3 /min (ft 3 /min) 15.1 (533) 16.0 (565)<br />
Cool m 3 /min (ft 3 /min) 16.0 (565) 17.4 (614)<br />
Heat m 3 /min (ft 3 /min) 17.1 (604) 18.3 (646)<br />
Refrigeration Cycle Control Device Expansion Valve Expansion Valve<br />
Height mm (inch) 290 (11-7/16) 290 (11-7/16)<br />
Dimension<br />
Width mm (inch) 1070 (42-5/32) 1070 (42-5/32)<br />
Depth mm (inch) 235 (9-9/32) 235 (9-9/32)<br />
Net weight kg (lbs) 12 (26) 12 (26)<br />
Diameter<br />
Gas side<br />
Liquid side<br />
mm (inch)<br />
mm (inch)<br />
12.70 (1/2)<br />
6.35 (1/4)<br />
15.88 (5/8)<br />
9.52 (3/8)<br />
Max Length m (ft) 15.0 (49.20) 15.0 (49.20)<br />
17
Drain hose<br />
Indoor Heat<br />
Exchanger<br />
Sub Heat<br />
Exchanger<br />
<strong>Air</strong> Filter<br />
Power cord<br />
Indoor Operation<br />
Range<br />
External diameter mm<br />
Length mm 650 650<br />
Fin material Aluminium (Pre Coat) Aluminium (Pre Coat)<br />
Fin Type Slit Fin Slit Fin<br />
Row x Stage x FPI 2 x 15 x 21 2 x 15 x 21<br />
Size (W x H x L) 810.0 x 315.0 x 25.4 810.0 x 315.0 x 25.4<br />
Fin material Aluminium (Pre Coat) Aluminium (Pre Coat)<br />
Fin Type Slit Fin Slit Fin<br />
Row x Stage x FPI 1 x 4 x 21 1 x 4 x 21<br />
Size (W x H x L) 810.0 x 84.5 x 12.7 810.0 x 84.5 x 12.7<br />
Material Polypropylene Polypropylene<br />
Type One-Touch One-Touch<br />
Power Supply Indoor Power Supply Indoor Power Supply<br />
Length m (ft) - -<br />
Core x Diameter mm 2 - -<br />
Thermostat Electronic Control Electronic Control<br />
Cool<br />
Heat<br />
Maximum °C 32 32<br />
Minimum °C 21 21<br />
Maximum °C 27 27<br />
Minimum °C 16 16<br />
1. Cooling capacities are based on indoor temperature of 27°C Dry Bulb (80.6°F Dry Bulb), 19.0°C Wet Bulb (66.2°F Wet Bulb) and outdoor air<br />
temperature of 35°C Dry Bulb (95°F Dry Bulb), 24°C Wet Bulb (75.2°F Wet Bulb).<br />
2. Heating capacities are based on indoor temperature of 20°C Dry Bulb (68.0°F Dry Bulb) and outdoor air temperature of 7°C Dry Bulb (44.6°F<br />
Dry Bulb), 6°C Wet Bulb (42.8°F Wet Bulb).<br />
3. Heating low temperature capacity, input power and COP measured at 230V, indoor temperature 20°C, outdoor 2/1°C.<br />
4. Heating extreme low temperature capacity, input power and COP measured at 230V, indoor temperature 20°C, outdoor -7/-8°C.<br />
5. Specifications are subjected to change without prior notice for future improvement.<br />
18
3.2 60 x 60 Cassette Type Indoor Unit – YA1E5 Series<br />
Cooling<br />
Heating<br />
Indoor Fan<br />
Indoor <strong>Air</strong>flow<br />
Indoor Unit S-22YA1E5 S-28YA1E5 S-36YA1E5<br />
Panel CZ-KPY1<br />
Wired CZ-RT1<br />
Remote Control<br />
Wireless<br />
CZ-RWS1 (Heat-pump models)<br />
CZ-RWC1 (Cooling models)<br />
Performance Test Condition ISO 5151<br />
Power Supply<br />
Capacity<br />
Phase 1 1 1<br />
V 220/230/240 220/230/240 220/230/240<br />
Hz 50 50 50<br />
kW 2.20 2.80 3.60<br />
BTU/h 7500 9600 12300<br />
Running Current A 0.30 0.30 0.35<br />
Input Power W 35 35 40<br />
Noise level<br />
Capacity<br />
dB-A (H / L) 36 / 33 37 / 33 38 / 34<br />
Power level dB (H / L) 51 / 48 52 / 48 53 / 49<br />
kW 2.50 3.20 4.20<br />
BTU/h 8500 10900 14300<br />
Running Current A 0.30 0.30 0.35<br />
Input Power W 35 35 50<br />
Noise level<br />
dB-A (H / L) 36 / 33 37 / 33 38 / 34<br />
Power level dB (H / L) 51 / 48 52 / 48 53 / 49<br />
External Static Pressure Pa - - -<br />
Max Current A 0.35 0.35 0.40<br />
Max Input Power W 45 45 40<br />
Speed<br />
Type Turbo Fan Turbo Fan Turbo Fan<br />
Material ABS + GF 10% ABS + GF 10% ABS + GF 10%<br />
Motor type DC (8-Poles) DC (8-Poles) DC (8-Poles)<br />
Input power W - - -<br />
Output power W 40 40 40<br />
Lo<br />
Me<br />
Hi<br />
Cool r.p.m. 430 430 440<br />
Heat r.p.m. 500 520 540<br />
Cool r.p.m. 490 500 520<br />
Heat r.p.m. 545 565 585<br />
Cool r.p.m. 560 580 600<br />
Heat r.p.m. 590 610 630<br />
Moisture Removal L/h (Pt/h) 1.3 (2.7) 1.6 (3.4) 2.1 (4.4)<br />
Lo<br />
Me<br />
Hi<br />
Cool m 3 /min (ft 3 /min) 6.2 (219) 6.2 (219) 6.4 (226)<br />
Heat m 3 /min (ft 3 /min) 7.4 (261) 7.7 (272) 8.0 (282)<br />
Cool m 3 /min (ft 3 /min) 7.3 (258) 7.4 (261) 7.7 (272)<br />
Heat m 3 /min (ft 3 /min) 8.1 (286) 8.4 (296) 8.7 (307)<br />
Cool m 3 /min (ft 3 /min) 8.3 (293) 8.6 (304) 9.0 (318)<br />
Heat m 3 /min (ft 3 /min) 9.3 (328) 9.6 (339) 9.9 (349)<br />
Refrigeration Cycle Control Device Expansion Valve Expansion Valve Expansion Valve<br />
Height mm (inch) 260 (10-1/4) 260 (10-1/4) 260 (10-1/4)<br />
Dimension<br />
Width mm (inch) 575 (22-21/32) 575 (22-21/32) 575 (22-21/32)<br />
Depth mm (inch) 575 (22-21/32) 575 (22-21/32) 575 (22-21/32)<br />
Net weight kg (lbs) 18 (40) 18 (40) 18 (40)<br />
19
Piping<br />
Diameter<br />
Drain hose<br />
Indoor Heat<br />
Exchanger<br />
<strong>Air</strong> Filter<br />
Power cord<br />
Indoor Operation<br />
Range<br />
Gas side mm (inch) 12.70 (1/2) 12.70 (1/2) 12.70 (1/2)<br />
Liquid side mm (inch) 6.35 (1/4) 6.35 (1/4) 6.35 (1/4)<br />
Max Length m (ft) 15.0 (49.20) 15.0 (49.20) 15.0 (49.20)<br />
External diameter mm 36 36 36<br />
Length mm 193 193 193<br />
Fin material Aluminium (Pre Coat) Aluminium (Pre Coat) Aluminium (Pre Coat)<br />
Fin Type Slit Fin Slit Fin Slit Fin<br />
Row x Stage x FPI<br />
Size (W x H x L) mm<br />
Material<br />
Type<br />
1285 x 210 x 12.7<br />
1225 x 210 x 12.7<br />
20<br />
1285 x 210 x 12.7<br />
1225 x 210 x 12.7<br />
1285 x 210 x 12.7<br />
1225 x 210 x 12.7<br />
Power Supply Indoor Power Supply Indoor Power Supply Indoor Power Supply<br />
Length m (ft) - - -<br />
Core x Diameter mm 2 - - -<br />
Thermostat Electronic Control Electronic Control Electronic Control<br />
Cool<br />
Heat<br />
Maximum °C 32 32 32<br />
Minimum °C 21 21 21<br />
Maximum °C 27 27 27<br />
Minimum °C 16 16 16<br />
1. Cooling capacities are based on indoor temperature of 27°C Dry Bulb (80.6°F Dry Bulb), 19.0°C Wet Bulb (66.2°F Wet Bulb) and outdoor air<br />
temperature of 35°C Dry Bulb (95°F Dry Bulb), 24°C Wet Bulb (75.2°F Wet Bulb).<br />
2. Heating capacities are based on indoor temperature of 20°C Dry Bulb (68.0°F Dry Bulb) and outdoor air temperature of 7°C Dry Bulb (44.6°F<br />
Dry Bulb), 6°C Wet Bulb (42.8°F Wet Bulb).<br />
3. Heating low temperature capacity, input power and COP measured at 230V, indoor temperature 20°C, outdoor 2/1°C.<br />
4. Heating extreme low temperature capacity, input power and COP measured at 230V, indoor temperature 20°C, outdoor -7/-8°C.<br />
5. Specifications are subjected to change without prior notice for future improvement.
Cooling<br />
Heating<br />
Indoor Fan<br />
Indoor <strong>Air</strong>flow<br />
Piping<br />
Indoor Unit S-45YA1E5 S-56YA1E5<br />
Panel CZ-KPY1<br />
Wired CZ-RT1<br />
Remote Control<br />
Wireless<br />
CZ-RWS1 (Heat-pump models)<br />
CZ-RWC1 (Cooling models)<br />
Performance Test Condition ISO5151<br />
Power Supply<br />
Capacity<br />
Phase 1 1<br />
V 220/230/240 220/230/240<br />
Hz 50 50<br />
kW 4.50 5.60<br />
BTU/h 15400 19100<br />
Running Current A 0.35 0.35<br />
Input Power W 40 45<br />
Noise level<br />
Capacity<br />
dB-A (H / L) 39 / 35 40 / 36<br />
Power level dB (H / L) 54 / 50 55 / 51<br />
kW 5.10 6.40<br />
BTU/h 17400 21800<br />
Running Current A 0.35 0.35<br />
Input Power W 40 45<br />
Noise level<br />
dB-A (H / L) 39 / 35 40 / 36<br />
Power level dB (H / L) 54 / 50 55 / 51<br />
External Static Pressure Pa - -<br />
Max Current A 0.40 0.40<br />
Max Input Power W 50 55<br />
Speed<br />
Type Turbo Fan Turbo Fan<br />
Material ABS + GF 10% ABS + GF 10%<br />
Motor type DC (8-Poles) DC (8-Poles)<br />
Input power W - -<br />
Output power W 40 40<br />
Lo<br />
Me<br />
Hi<br />
Cool r.p.m. 450 490<br />
Heat r.p.m. 560 580<br />
Cool r.p.m. 540 580<br />
Heat r.p.m. 605 625<br />
Cool r.p.m. 620 660<br />
Heat r.p.m. 650 670<br />
Moisture Removal L/h (Pt/h) 2.5 (5.3) 3.2 (6.7)<br />
Lo<br />
Me<br />
Hi<br />
Cool m 3 /min (ft 3 /min) 6.5 (229) 7.2 (254)<br />
Heat m 3 /min (ft 3 /min) 8.3 (293) 8.6 (303)<br />
Cool m 3 /min (ft 3 /min) 7.9 (279) 8.6 (303)<br />
Heat m 3 /min (ft 3 /min) 9.0 (318) 9.4 (331)<br />
Cool m 3 /min (ft 3 /min) 9.3 (326) 9.9 (349)<br />
Heat m 3 /min (ft 3 /min) 10.3 (364) 10.6 (374)<br />
Refrigeration Cycle Control Device Expansion Valve Expansion Valve<br />
Height mm (inch) 260 (10-1/4) 260 (10-1/4)<br />
Dimension<br />
Width mm (inch) 575 (22-21/32) 575 (22-21/32)<br />
Depth mm (inch) 575 (22-21/32) 575 (22-21/32)<br />
Net weight kg (lbs) 18 (40) 18 (40)<br />
Diameter<br />
Gas side<br />
Liquid side<br />
mm (inch)<br />
mm (inch)<br />
12.70 (1/2)<br />
6.35 (1/4)<br />
12.70 (1/2)<br />
6.35 (1/4)<br />
Max Length m (ft) 15.0 (49.20) 15.0 (49.20)<br />
21
Drain hose<br />
Indoor Heat<br />
Exchanger<br />
<strong>Air</strong> Filter<br />
Power cord<br />
Indoor Operation<br />
Range<br />
External diameter mm 36 36<br />
Length mm 193 193<br />
Fin material Aluminium (Pre Coat) Aluminium (Pre Coat)<br />
Fin Type Slit Fin Slit Fin<br />
Row x Stage x FPI<br />
Size (W x H x L) mm<br />
Material<br />
Type<br />
22<br />
1285 x 210 x 12.7<br />
1225 x 210 x 12.7<br />
1285 x 210 x 12.7<br />
1225 x 210 x 12.7<br />
Power Supply Indoor Power Supply Indoor Power Supply<br />
Length m (ft) - -<br />
Core x Diameter mm 2 - -<br />
Thermostat Electronic Control Electronic Control<br />
Cool<br />
Heat<br />
Maximum °C 32 32<br />
Minimum °C 21 21<br />
Maximum °C 27 27<br />
Minimum °C 16 16<br />
1. Cooling capacities are based on indoor temperature of 27°C Dry Bulb (80.6°F Dry Bulb), 19.0°C Wet Bulb (66.2°F Wet Bulb) and outdoor air<br />
temperature of 35°C Dry Bulb (95°F Dry Bulb), 24°C Wet Bulb (75.2°F Wet Bulb).<br />
2. Heating capacities are based on indoor temperature of 20°C Dry Bulb (68.0°F Dry Bulb) and outdoor air temperature of 7°C Dry Bulb (44.6°F<br />
Dry Bulb), 6°C Wet Bulb (42.8°F Wet Bulb).<br />
3. Heating low temperature capacity, input power and COP measured at 230V, indoor temperature 20°C, outdoor 2/1°C.<br />
4. Heating extreme low temperature capacity, input power and COP measured at 230V, indoor temperature 20°C, outdoor -7/-8°C.<br />
5. Specifications are subjected to change without prior notice for future improvement.
3.3 95 x 95 Cassette Type Indoor Unit – UA1E5 Series<br />
Cooling<br />
Heating<br />
Indoor Fan<br />
Indoor <strong>Air</strong>flow<br />
Indoor Unit S-63UA1E5 S-71UA1E5 S-90UA1E5<br />
Panel CZ-BT03P<br />
Wired CZ-RT1<br />
Remote Control<br />
Wireless<br />
CZ-RWS1 (Heat-pump models)<br />
CZ-RWC1 (Cooling models)<br />
Performance Test Condition ISO 5151<br />
Power Supply<br />
Capacity<br />
Phase 1 1 1<br />
V 220 230 240 220 230 240 220 230 240<br />
Hz 50 50 50<br />
kW 6.30 7.10 9.00<br />
BTU/h 21500 24200 30700<br />
Running Current A 0.45 0.50 0.55 0.50 0.55 0.60 0.50 0.55 0.60<br />
Input Power W 105 110 115 110 115 120 110 115 120<br />
Noise level<br />
Capacity<br />
dB-A (H / L) 41 / 35 41 / 36 42 / 36 42/37 42 / 36 42/37<br />
Power level dB (H / L) 56 / 50 56 / 51 57 / 51 57/52 57 / 51 57/52<br />
kW 7.10 8.00 10.00<br />
BTU/h 24200 27300 34100<br />
Running Current A 0.45 0.50 0.55 0.50 0.55 0.60 0.50 0.55 0.60<br />
Input Power W 105 110 115 110 115 120 110 115 120<br />
Noise level<br />
dB-A (H / L) 41 / 35 41 / 36 42 / 36 42/37 42 / 36 42/37<br />
Power level dB (H / L) 56 / 50 56 / 51 57 / 51 57/52 57 / 51 57/52<br />
External Static Pressure Pa - - -<br />
Max Current A 0.55 0.60 0.65 0.61 0.66 0.71 0.61 0.66 0.71<br />
Max Input Power W 110 120 130 121 131 141 121 131 141<br />
Speed<br />
Type Turbo Fan Turbo Fan Turbo Fan<br />
Material ABS + GF 10% ABS + GF 10% ABS + GF 10%<br />
Motor type AC (3 Speeds, 6 Poles) AC (3 Speeds, 6 Poles) AC (3 Speeds, 6 Poles)<br />
Input power W - - -<br />
Output power W 35 35 35<br />
Lo<br />
Me<br />
Hi<br />
Cool r.p.m. 370 390 410 400 420 430 400 420 430<br />
Heat r.p.m. 370 390 410 400 420 430 400 420 430<br />
Cool r.p.m. 430 450 470 460 480 490 460 480 490<br />
Heat r.p.m. 430 450 470 460 480 490 460 480 490<br />
Cool r.p.m. 470 490 510 500 520 530 500 520 530<br />
Heat r.p.m. 470 490 510 500 520 530 500 520 530<br />
Moisture Removal L/h (Pt/h) 3.6 (7.6) 4.6 (8.8) 5.4 (11.3)<br />
Lo<br />
Me<br />
Hi<br />
Cool m 3 /min (ft 3 /min) 17 (600) 18 (635) 18 (635)<br />
Heat m 3 /min (ft 3 /min) 17 (600) 18 (635) 18 (635)<br />
Cool m 3 /min (ft 3 /min) 19 (671) 20 (706) 20 (706)<br />
Heat m 3 /min (ft 3 /min) 19 (671) 20 (706) 20 (706)<br />
Cool m 3 /min (ft 3 /min) 21 (741) 22 (777) 22 (777)<br />
Heat m 3 /min (ft 3 /min) 21 (741) 22 (777) 22 (777)<br />
Refrigeration Cycle Control Device Expansion Valve Expansion Valve Expansion Valve<br />
Height mm (inch) 246 (9-11/16) 246 (9-11/16) 246 (9-11/16)<br />
Dimension<br />
Width mm (inch) 840 (33-1/16) 840 (33-1/16) 840 (33-1/16)<br />
Depth mm (inch) 840 (33-1/16) 840 (33-1/16) 840 (33-1/16)<br />
Net weight kg (lbs) 26 (57) 26 (57) 26 (57)<br />
23
Piping<br />
Diameter<br />
Drain hose<br />
Indoor Heat<br />
Exchanger<br />
<strong>Air</strong> Filter<br />
Power cord<br />
Indoor Operation<br />
Range<br />
Gas side mm (inch) 12.70 (1/2) 15.88 (5/8) 15.88 (5/8)<br />
Liquid side mm (inch) 6.35 (1/4) 9.52 (3/8) 9.52 (3/8)<br />
Max Length m (ft) 15.0 (49.20) 15.0 (49.20) 15.0 (49.20)<br />
External diameter mm 36 36 36<br />
Length mm 193 193 193<br />
Fin material Aluminium (Pre Coat) Aluminium (Pre Coat) Aluminium (Pre Coat)<br />
Fin Type Slit Fin Slit Fin Slit Fin<br />
Row x Stage x FPI 2 x 10 x 19 2 x 10 x 21 2 x 10 x 21<br />
Size (W x H x L) mm<br />
2100 x 210 x 12.7<br />
2040 x 210 x 12.7<br />
24<br />
2100 x 210 x 12.7<br />
2040 x 210 x 12.7<br />
2100 x 210 x 12.7<br />
2040 x 210 x 12.7<br />
Material PP PP PP<br />
Type<br />
Power Supply Indoor Power Supply Indoor Power Supply Indoor Power Supply<br />
Length m (ft) - - -<br />
Core x Diameter mm 2 - - -<br />
Thermostat Electronic Control Electronic Control Electronic Control<br />
Cool<br />
Heat<br />
Maximum °C 32 32 32<br />
Minimum °C 21 21 21<br />
Maximum °C 27 27 27<br />
Minimum °C 16 16 16<br />
1. Cooling capacities are based on indoor temperature of 27°C Dry Bulb (80.6°F Dry Bulb), 19.0°C Wet Bulb (66.2°F Wet Bulb) and outdoor air<br />
temperature of 35°C Dry Bulb (95°F Dry Bulb), 24°C Wet Bulb (75.2°F Wet Bulb).<br />
2. Heating capacities are based on indoor temperature of 20°C Dry Bulb (68.0°F Dry Bulb) and outdoor air temperature of 7°C Dry Bulb (44.6°F<br />
Dry Bulb), 6°C Wet Bulb (42.8°F Wet Bulb).<br />
3. Heating low temperature capacity, input power and COP measured at 230V, indoor temperature 20°C, outdoor 2/1°C.<br />
4. Heating extreme low temperature capacity, input power and COP measured at 230V, indoor temperature 20°C, outdoor -7/-8°C.<br />
5. Specifications are subjected to change without prior notice for future improvement.
3.4 Slim Hide-Away Type Indoor Unit – NA1E5 Series<br />
Cooling<br />
Heating<br />
Indoor Fan<br />
Indoor <strong>Air</strong>flow<br />
Remote Control<br />
Indoor Unit S-22NA1E5 S-28NA1E5<br />
Panel -<br />
Wired CZ-RT1<br />
Wireless CZ-RWC1 (Cooling models)<br />
Performance Test Condition ISO 5151<br />
Power Supply<br />
Capacity<br />
Phase 1 1<br />
V 220 230 240 220 230 240<br />
Hz 50 50<br />
kW 2.20 2.20 2.20 2.80 2.80 2.80<br />
BTU/h 7500 7500 7500 9600 9600 9600<br />
Running Current A 0.35 0.40 0.45 0.40 0.45 0.50<br />
Input Power W 70 75 80 75 80 85<br />
Noise level<br />
Capacity<br />
dB-A (H / L) 36 / 30 36 / 31 37 / 30 37 / 31<br />
Power level dB (H / L) 51 / 45 51 / 46 52 / 45 52 / 46<br />
kW 2.50 2.50 2.50 3.20 3.20 3.20<br />
BTU/h 8500 8500 8500 10900 10900 10900<br />
Running Current A 0.35 0.40 0.45 0.40 0.45 0.50<br />
Input Power W 70 75 80 75 80 85<br />
Noise level<br />
dB-A (H / L) 36 / 30 36 / 31 37 / 30 37 / 31<br />
Power level dB (H / L) 51 / 45 51 / 46 52 / 45 52 / 46<br />
External Static Pressure Pa (mmAq) 0 (0) / 29 (3) 0 (0) / 29 (3)<br />
Max Current A 0.39 0.44 0.49 0.44 0.49 0.54<br />
Max Input Power W 77 82 87 83 88 93<br />
Speed<br />
Type Sirocco Sirocco<br />
Material PP PP<br />
Motor type AC (4 Speeds, 4 Poles) AC (4 Speeds, 4 Poles)<br />
Input power W - -<br />
Output power W 25 25<br />
Lo<br />
Me<br />
Hi<br />
Cool r.p.m. 640 660 690 700 730 750<br />
Heat r.p.m. 640 660 690 700 730 750<br />
Cool r.p.m. 720 740 780 780 810 840<br />
Heat r.p.m. 720 740 780 780 810 840<br />
Cool r.p.m. 800 830 860 880 900 930<br />
Heat r.p.m. 800 830 860 880 900 930<br />
Moisture Removal L/h (Pt/h) 1.3 (2.7) 1.6 (3.4)<br />
Lo<br />
Me<br />
Hi<br />
Cool m 3 /min (ft 3 /min) 7.0 (247) 8.0 (282)<br />
Heat m 3 /min (ft 3 /min) 7.0 (247) 8.0 (282)<br />
Cool m 3 /min (ft 3 /min) 9.0 (318) 10.0 (353)<br />
Heat m 3 /min (ft 3 /min) 9.0 (318) 10.0 (353)<br />
Cool m 3 /min (ft 3 /min) 10.0 (353) 11.0 (388)<br />
Heat m 3 /min (ft 3 /min) 10.0 (353) 11.0 (388)<br />
Refrigeration Cycle Control Device Expansion Valve Expansion Valve<br />
Height mm (inch) 200 (7-7/8) 200 (7-7/8)<br />
Dimension<br />
Width mm (inch) 900 (35-7/16) 900 (35-7/16)<br />
Depth mm (inch) 550 (21-21/32) 550 (21-21/32)<br />
Net weight kg (lbs) 21 (46) 21 (46)<br />
25
Piping<br />
Diameter<br />
Drain hose<br />
Indoor Heat<br />
Exchanger<br />
<strong>Air</strong> Filter<br />
Power cord<br />
Indoor Operation<br />
Range<br />
Gas side mm (inch) 12.70 (1/2) 12.70 (1/2)<br />
Liquid side mm (inch) 6.35 (1/4) 6.35 (1/4)<br />
Max Length m (ft) 15.0 (49.20) 15.0 (49.20)<br />
External diameter mm 21 21<br />
Length mm<br />
Fin material Aluminium (Pre Coat) Aluminium (Pre Coat)<br />
Fin Type Slit Fin Slit Fin<br />
Row x Stage x FPI 2 x 10 x 18 2 x 10 x 18<br />
Size (W x H x L) mm 770 x 210 x 25.4 770 x 210 x 25.4<br />
Material - -<br />
Type - -<br />
Power Supply Indoor Power Supply Indoor Power Supply<br />
Length m (ft) - -<br />
Core x Diameter mm 2 - -<br />
Thermostat Electronic Control Electronic Control<br />
Cool<br />
Heat<br />
Maximum °C 32 32<br />
Minimum °C 21 21<br />
Maximum °C 27 27<br />
Minimum °C 16 16<br />
1. Cooling capacities are based on indoor temperature of 27°C Dry Bulb (80.6°F Dry Bulb), 19.0°C Wet Bulb (66.2°F Wet Bulb) and outdoor air<br />
temperature of 35°C Dry Bulb (95°F Dry Bulb), 24°C Wet Bulb (75.2°F Wet Bulb).<br />
2. Heating capacities are based on indoor temperature of 20°C Dry Bulb (68.0°F Dry Bulb) and outdoor air temperature of 7°C Dry Bulb (44.6°F<br />
Dry Bulb), 6°C Wet Bulb (42.8°F Wet Bulb).<br />
3. Heating low temperature capacity, input power and COP measured at 230V, indoor temperature 20°C, outdoor 2/1°C.<br />
4. Heating extreme low temperature capacity, input power and COP measured at 230V, indoor temperature 20°C, outdoor -7/-8°C.<br />
5. Specifications are subjected to change without prior notice for future improvement.<br />
26
Cooling<br />
Heating<br />
Indoor Fan<br />
Indoor <strong>Air</strong>flow<br />
Indoor Unit S-32NA1E5 S-36NA1E5<br />
Panel - -<br />
Wired CZ-RT1<br />
Remote Control<br />
Wireless<br />
CZ-RWS1 (Heat-pump models)<br />
CZ-RWC1 (Cooling models)<br />
Performance Test Condition ISO 5151<br />
Power Supply<br />
Capacity<br />
Phase 1 1<br />
V 220 230 240 220 230 240<br />
Hz 50 50<br />
kW 3.20 3.20 3.20 3.60 3.60 3.60<br />
BTU/h 10900 10900 10900 12300 12300 12300<br />
Running Current A 0.40 0.45 0.50 0.40 0.45 0.50<br />
Input Power W 80 85 90 80 85 90<br />
Noise level<br />
Capacity<br />
dB-A (H / L) 38 / 31 38 / 32 38 / 31 38 / 32<br />
Power level dB (H / L) 53 / 46 53 / 47 53 / 46 53 / 47<br />
kW 3.60 3.60 3.60 4.20 4.20 4.20<br />
BTU/h 12300 12300 12300 14300 14300 14300<br />
Running Current A 0.40 0.45 050 0.40 0.45 0.50<br />
Input Power W 80 85 90 80 85 90<br />
Noise level<br />
dB-A (H / L) 38 / 31 38 / 32 38 / 31 38 / 32<br />
Power level dB (H / L) 53 / 46 53 / 47 53 / 46 53 / 47<br />
External Static Pressure Pa (mmAq) 0 (0) / 29 (3) 0 (0) / 29 (3)<br />
Max Current A 0.44 0.49 0.54 0.44 0.49 0.54<br />
Max Input Power W 88 93 98 88 93 98<br />
Speed<br />
Type Sirocco Sirocco<br />
Material PP PP<br />
Motor type AC (4 Speeds, 4 Poles) AC (4 Speeds, 4 Poles)<br />
Input power W - -<br />
Output power W 40 40<br />
Lo<br />
Me<br />
Hi<br />
Cool r.p.m. 730 760 790 730 760 790<br />
Heat r.p.m. 730 760 790 730 760 790<br />
Cool r.p.m. 840 870 900 840 870 900<br />
Heat r.p.m. 840 870 900 840 870 900<br />
Cool r.p.m. 940 970 1000 940 970 1000<br />
Heat r.p.m. 940 970 1000 940 970 1000<br />
Moisture Removal L/h (Pt/h) 1.8 (3.8) 2.1 (4.4)<br />
Lo<br />
Me<br />
Hi<br />
Cool m 3 /min (ft 3 /min) 7.0 (247) 7.0 (247)<br />
Heat m 3 /min (ft 3 /min) 7.0 (247) 7.0 (247)<br />
Cool m 3 /min (ft 3 /min) 9.0 (318) 9.0 (318)<br />
Heat m 3 /min (ft 3 /min) 9.0 (318) 9.0 (318)<br />
Cool m 3 /min (ft 3 /min) 11.0 (388) 11.0 (388)<br />
Heat m 3 /min (ft 3 /min) 11.0 (388) 11.0 (388)<br />
Refrigeration Cycle Control Device Expansion Valve Expansion Valve<br />
Height mm (inch) 200 (7-7/8) 200 (7-7/8)<br />
Dimension<br />
Width mm (inch) 900 (35-7/16) 900 (35-7/16)<br />
Depth mm (inch) 550 (21-21/32) 550 (21-21/32)<br />
Net weight kg (lbs) 22 (48) 22 (48)<br />
27
Piping<br />
Diameter<br />
Drain hose<br />
Indoor Heat<br />
Exchanger<br />
<strong>Air</strong> Filter<br />
Power cord<br />
Indoor Operation<br />
Range<br />
Gas side mm (inch) 12.70 (1/2) 12.70 (1/2)<br />
Liquid side mm (inch) 6.35 (1/4) 6.35 (1/4)<br />
Max Length m (ft) 15.0 (49.20) 15.0 (49.20)<br />
External diameter mm 21 21<br />
Length mm<br />
Fin material Aluminium (Pre Coat) Aluminium (Pre Coat)<br />
Fin Type Slit Fin Slit Fin<br />
Row x Stage x FPI 2 x 10 x 18 2 x 10 x 18<br />
Size (W x H x L) mm 770 x 210 x 38.1 770 x 210 x 38.1<br />
Material - -<br />
Type - -<br />
Power Supply Indoor Power Supply Indoor Power Supply<br />
Length m (ft) - -<br />
Core x Diameter mm 2 - -<br />
Thermostat Electronic Control Electronic Control<br />
Cool<br />
Heat<br />
Maximum °C 32 32<br />
Minimum °C 21 21<br />
Maximum °C 27 27<br />
Minimum °C 16 16<br />
1. Cooling capacities are based on indoor temperature of 27°C Dry Bulb (80.6°F Dry Bulb), 19.0°C Wet Bulb (66.2°F Wet Bulb) and outdoor air<br />
temperature of 35°C Dry Bulb (95°F Dry Bulb), 24°C Wet Bulb (75.2°F Wet Bulb).<br />
2. Heating capacities are based on indoor temperature of 20°C Dry Bulb (68.0°F Dry Bulb) and outdoor air temperature of 7°C Dry Bulb (44.6°F<br />
Dry Bulb), 6°C Wet Bulb (42.8°F Wet Bulb).<br />
3. Heating low temperature capacity, input power and COP measured at 230V, indoor temperature 20°C, outdoor 2/1°C.<br />
4. Heating extreme low temperature capacity, input power and COP measured at 230V, indoor temperature 20°C, outdoor -7/-8°C.<br />
5. Specifications are subjected to change without prior notice for future improvement.<br />
28
Cooling<br />
Heating<br />
Indoor Fan<br />
Indoor <strong>Air</strong>flow<br />
Indoor Unit S-45NA1E5 S-56NA1E5<br />
Panel - -<br />
Wired CZ-RT1<br />
Remote Control<br />
Wireless<br />
CZ-RWS1 (Heat-pump models)<br />
CZ-RWC1 (Cooling models)<br />
Performance Test Condition ISO 5151<br />
Power Supply<br />
Capacity<br />
Phase 1 1<br />
V 220 230 240 220 230 240<br />
Hz 50 50<br />
kW 4.50 4.50 4.50 5.60 5.60 5.60<br />
BTU/h 15400 15400 15400 19100 19100 19100<br />
Running Current A 0.45 0.50 0.55 0.45 0.50 0.55<br />
Input Power W 90 95 100 100 105 110<br />
Noise level<br />
Capacity<br />
dB-A (H / L) 39 / 32 39 / 33 39 / 32 39 / 33<br />
Power level dB (H / L) 54 / 47 54 / 48 54 / 47 54 / 48<br />
kW 5.10 5.10 5.10 6.40 6.40 6.40<br />
BTU/h 17400 17400 17400 21800 21800 21800<br />
Running Current A 0.45 0.50 0.55 0.45 0.50 0.55<br />
Input Power W 90 95 100 100 105 110<br />
Noise level<br />
dB-A (H / L) 39 / 32 39 / 33 39 / 32 39 / 33<br />
Power level dB (H / L) 54 / 47 54 / 48 54 / 47 54 / 48<br />
External Static Pressure Pa (mmAq) 0 (0) / 29 (3) 0 (0) / 29 (3)<br />
Max Current A 0.55 0.60 0.65 0.50 0.55 0.60<br />
Max Input Power W 99 104 109 110 115 120<br />
Speed<br />
Type Sirocco Sirocco<br />
Material PP PP<br />
Motor type AC (4 Speeds, 4 Poles) AC (4 Speeds, 4 Poles)<br />
Input power W - -<br />
Output power W 40 50<br />
Lo<br />
Me<br />
Hi<br />
Cool r.p.m. 770 800 830 730 770 800<br />
Heat r.p.m. 770 800 830 730 770 800<br />
Cool r.p.m. 880 910 940 850 890 920<br />
Heat r.p.m. 880 910 940 850 890 920<br />
Cool r.p.m. 970 1000 1040 970 1010 1040<br />
Heat r.p.m. 970 1000 1040 970 1010 1040<br />
Moisture Removal L/h (Pt/h) 2.5 (5.3) 3.2 (6.7)<br />
Lo<br />
Me<br />
Hi<br />
Cool m 3 /min (ft 3 /min) 8.0 (282) 8.5 (300)<br />
Heat m 3 /min (ft 3 /min) 8.0 (282) 8.5 (300)<br />
Cool m 3 /min (ft 3 /min) 10.0 (353) 10.5 (371)<br />
Heat m 3 /min (ft 3 /min) 10.0 (353) 10.5 (371)<br />
Cool m 3 /min (ft 3 /min) 12.0 (424) 12.5 (441)<br />
Heat m 3 /min (ft 3 /min) 12.0 (424) 12.5 (441)<br />
Refrigeration Cycle Control Device Expansion Valve Expansion Valve<br />
Height mm (inch) 200 (7-7/8) 200 (7-7/8)<br />
Dimension<br />
Width mm (inch) 900 (35-7/16) 900 (35-7/16)<br />
Depth mm (inch) 550 (21-21/32) 550 (21-21/32)<br />
Net weight kg (lbs) 22 (48) 22 (48)<br />
29
Piping<br />
Diameter<br />
Drain hose<br />
Indoor Heat<br />
Exchanger<br />
<strong>Air</strong> Filter<br />
Power cord<br />
Indoor Operation<br />
Range<br />
Gas side mm (inch) 12.70 (1/2) 12.70 (1/2)<br />
Liquid side mm (inch) 6.35 (1/4) 6.35 (1/4)<br />
Max Length m (ft) 15.0 (49.20) 15.0 (49.20)<br />
External diameter mm 21 21<br />
Length mm<br />
Fin material Aluminium (Pre Coat) Aluminium (Pre Coat)<br />
Fin Type Slit Fin Slit Fin<br />
Row x Stage x FPI 3 x 10 x 18 3 x 10 x 18<br />
Size (W x H x L) mm 770 x 210 x 38.1 770 x 210 x 38.1<br />
Material - -<br />
Type - -<br />
Power Supply Indoor Power Supply Indoor Power Supply<br />
Length m (ft) - -<br />
Core x Diameter mm 2 - -<br />
Thermostat Electronic Control Electronic Control<br />
Cool<br />
Heat<br />
Maximum °C 32 32<br />
Minimum °C 21 21<br />
Maximum °C 27 27<br />
Minimum °C 16 16<br />
1. Cooling capacities are based on indoor temperature of 27°C Dry Bulb (80.6°F Dry Bulb), 19.0°C Wet Bulb (66.2°F Wet Bulb) and outdoor air<br />
temperature of 35°C Dry Bulb (95°F Dry Bulb), 24°C Wet Bulb (75.2°F Wet Bulb).<br />
2. Heating capacities are based on indoor temperature of 20°C Dry Bulb (68.0°F Dry Bulb) and outdoor air temperature of 7°C Dry Bulb (44.6°F<br />
Dry Bulb), 6°C Wet Bulb (42.8°F Wet Bulb).<br />
3. Heating low temperature capacity, input power and COP measured at 230V, indoor temperature 20°C, outdoor 2/1°C.<br />
4. Heating extreme low temperature capacity, input power and COP measured at 230V, indoor temperature 20°C, outdoor -7/-8°C.<br />
5. Specifications are subjected to change without prior notice for future improvement.<br />
30
3.5 Low Static Pressure Hide-Away Type Indoor Unit – MA1E5 Series<br />
Cooling<br />
Heating<br />
Indoor Fan<br />
Indoor <strong>Air</strong>flow<br />
Indoor Unit S-45MA1E5 S-56MA1E5<br />
Panel -<br />
Wired CZ-RT1<br />
Remote Control<br />
Wireless<br />
CZ-RWS1 (Heat-pump models)<br />
CZ-RWC1 (Cooling models)<br />
Performance Test Condition ISO 5151<br />
Power Supply<br />
Capacity<br />
Phase 1 1<br />
V 220 230 240 220 230 240<br />
Hz 50 50<br />
kW 4.50 4.50 4.50 5.60 5.60 5.60<br />
BTU/h 15400 15400 15400 19100 19100 19100<br />
Running Current A 0.55 0.60 0.75 0.55 0.60 0.75<br />
Input Power W 125 135 145 125 135 145<br />
Noise level<br />
Capacity<br />
dB-A (H / L) 42 / 35 42 / 36 42 / 35 42 / 36<br />
Power level dB (H / L) 57 / 50 57 / 51 57 / 50 57 / 51<br />
kW 5.10 5.10 5.10 6.40 6.40 6.40<br />
BTU/h 17400 17400 17400 21800 21800 21800<br />
Running Current A 0.55 0.60 0.65 0.55 0.60 0.65<br />
Input Power W 125 135 145 125 135 145<br />
Noise level<br />
dB-A (H / L) 42 / 35 42 / 36 42 / 35 42 / 36<br />
Power level dB (H / L) 57 / 50 57 / 51 57 / 50 57 / 51<br />
External Static Pressure Pa (mmAq) 49 (5) / 69 (7) 49 (5) / 69 (7)<br />
Max Current A 0.80 0.85 0.90 0.80 0.85 0.90<br />
Max Input Power W 180 190 200 180 190 200<br />
Speed<br />
Type Sirocco Sirocco<br />
Material ABS ABS<br />
Motor type AC (4 Speeds, 4 Poles) AC (4 Speeds, 4 Poles)<br />
Input power W - -<br />
Output power W 94 94<br />
Lo<br />
Me<br />
Hi<br />
Cool r.p.m. 690 715 740 690 715 740<br />
Heat r.p.m. 690 715 740 690 715 740<br />
Cool r.p.m. 790 825 855 790 825 855<br />
Heat r.p.m. 790 825 855 790 825 855<br />
Cool r.p.m. 925 955 985 925 955 985<br />
Heat r.p.m. 925 955 985 925 955 985<br />
Moisture Removal L/h (Pt/h) 2.5 (5.3) 3.2 (6.7)<br />
Lo<br />
Me<br />
Hi<br />
Cool m 3 /min (ft 3 /min) 11.0 (388) 11.0 (388)<br />
Heat m 3 /min (ft 3 /min) 11.0 (388) 11.0 (388)<br />
Cool m 3 /min (ft 3 /min) 13.0 (459) 13.0 (459)<br />
Heat m 3 /min (ft 3 /min) 13.0 (459) 13.0 (459)<br />
Cool m 3 /min (ft 3 /min) 15.0 (530) 15.0 (530)<br />
Heat m 3 /min (ft 3 /min) 15.0 (530) 15.0 (530)<br />
Refrigeration Cycle Control Device Expansion Valve Expansion Valve<br />
Height mm (inch) 250 (9-27/32) 250 (9-27/32)<br />
Dimension<br />
Width mm (inch) 780 +100 (30-23/32 + 3-15/16) 780 +100 (30-23/32 + 3-15/16)<br />
Depth mm (inch) 650 (25-19/32) 650 (25-19/32)<br />
Net weight kg (lbs) 28 (62) 28 (62)<br />
31
Piping<br />
Diameter<br />
Drain hose<br />
Indoor Heat<br />
Exchanger<br />
<strong>Air</strong> Filter<br />
Power cord<br />
Indoor Operation<br />
Range<br />
Gas side mm (inch) 12.70 (1/2) 12.70 (1/2)<br />
Liquid side mm (inch) 6.35 (1/4) 6.35 (1/4)<br />
Max Length m (ft) 15.0 (49.20) 15.0 (49.20)<br />
External diameter mm 32 32<br />
Length mm 180 180<br />
Fin material Aluminium (Pre Coat) Aluminium (Pre Coat)<br />
Fin Type Slit Fin Slit Fin<br />
Row x Stage x FPI 3 x 12 x 15 3 x 12 x 15<br />
Size (W x H x L) mm 640 x 252 x 38.1 640 x 252 x 38.1<br />
Material PP PP<br />
Type - -<br />
Power Supply Indoor Power Supply Indoor Power Supply<br />
Length m (ft) - -<br />
Core x Diameter mm 2 - -<br />
Thermostat Electronic Control Electronic Control<br />
Cool<br />
Heat<br />
Maximum °C 32 32<br />
Minimum °C 21 21<br />
Maximum °C 27 27<br />
Minimum °C 16 16<br />
1. Cooling capacities are based on indoor temperature of 27°C Dry Bulb (80.6°F Dry Bulb), 19.0°C Wet Bulb (66.2°F Wet Bulb) and outdoor air<br />
temperature of 35°C Dry Bulb (95°F Dry Bulb), 24°C Wet Bulb (75.2°F Wet Bulb).<br />
2. Heating capacities are based on indoor temperature of 20°C Dry Bulb (68.0°F Dry Bulb) and outdoor air temperature of 7°C Dry Bulb (44.6°F<br />
Dry Bulb), 6°C Wet Bulb (42.8°F Wet Bulb).<br />
3. Heating low temperature capacity, input power and COP measured at 230V, indoor temperature 20°C, outdoor 2/1°C.<br />
4. Heating extreme low temperature capacity, input power and COP measured at 230V, indoor temperature 20°C, outdoor -7/-8°C.<br />
5. Specifications are subjected to change without prior notice for future improvement.<br />
32
Cooling<br />
Heating<br />
Indoor Fan<br />
Indoor <strong>Air</strong>flow<br />
Indoor Unit S-63MA1E5 S-71MA1E5<br />
Panel - -<br />
Wired CZ-RT1<br />
Remote Control<br />
Wireless<br />
CZ-RWS1 (Heat-pump models)<br />
CZ-RWC1 (Cooling models)<br />
Performance Test Condition ISO 5151<br />
Power Supply<br />
Capacity<br />
Phase 1 1<br />
V 220 230 240 220 230 240<br />
Hz 50 50<br />
kW 6.30 5.60 5.60 7.10 7.10 7.10<br />
BTU/h 21500 19100 19100 24200 24200 24200<br />
Running Current A 0.55 0.60 0.75 0.55 0.60 0.75<br />
Input Power W 125 135 145 125 135 145<br />
Noise level<br />
Capacity<br />
dB-A (H / L) 43 / 36 43 / 37 43 / 36 43 / 37<br />
Power level dB (H / L) 58 / 51 58 / 52 58 / 51 58 / 52<br />
kW 7.10 6.40 6.40 8.00 8.00 8.00<br />
BTU/h 24200 21800 21800 27300 27300 27300<br />
Running Current A 0.55 0.60 0.65 0.55 0.60 0.65<br />
Input Power W 125 135 145 125 135 145<br />
Noise level<br />
dB-A (H / L) 43 / 36 43 / 37 43 / 36 43 / 37<br />
Power level dB (H / L) 58 / 51 58 / 52 58 / 51 58 / 52<br />
External Static Pressure Pa (mmAq) 49 (5) / 69 (7) 49 (5) / 69 (7)<br />
Max Current A 0.80 0.85 0.90 0.80 0.85 0.90<br />
Max Input Power W 180 190 200 180 190 200<br />
Speed<br />
Type Sirocco Sirocco<br />
Material ABS ABS<br />
Motor type AC (4 Speeds, 4 Poles) AC (4 Speeds, 4 Poles)<br />
Input power W - -<br />
Output power W 94 94<br />
Lo<br />
Me<br />
Hi<br />
Cool r.p.m. 600 625<br />
Heat r.p.m. 600 625<br />
Cool r.p.m. 700 725<br />
Heat r.p.m. 700 725<br />
Cool r.p.m. 815 840<br />
Heat r.p.m. 815 840<br />
Moisture Removal L/h (Pt/h) 3.6 (7.6) 4.2 (8.8)<br />
Lo<br />
Me<br />
Hi<br />
Cool m 3 /min (ft 3 /min) 12.0 (424) 12.0 (424)<br />
Heat m 3 /min (ft 3 /min) 12.0 (424) 12.0 (424)<br />
Cool m 3 /min (ft 3 /min) 14.0 (494) 14.0 (494)<br />
Heat m 3 /min (ft 3 /min) 14.0 (494) 14.0 (494)<br />
Cool m 3 /min (ft 3 /min) 17.0 (600) 17.0 (600)<br />
Heat m 3 /min (ft 3 /min) 17.0 (600) 17.0 (600)<br />
Refrigeration Cycle Control Device Expansion Valve Expansion Valve<br />
Height mm (inch) 250 (9-27/32) 250 (9-27/32)<br />
Dimension<br />
Width mm (inch) 1000 +100 (30-23/32 + 3-15/16) 1000 +100 (30-23/32 + 3-15/16)<br />
Depth mm (inch) 650 (25-19/32) 650 (25-19/32)<br />
Net weight kg (lbs) 32 (71) 32 (71)<br />
33
Piping<br />
Diameter<br />
Drain hose<br />
Indoor Heat<br />
Exchanger<br />
<strong>Air</strong> Filter<br />
Power cord<br />
Indoor Operation<br />
Range<br />
Gas side mm (inch) 12.70 (1/2) 15.88 (5/8)<br />
Liquid side mm (inch) 6.35 (1/4) 9.52 (3/8)<br />
Max Length m (ft) 15.0 (49.20) 15.0 (49.20)<br />
External diameter mm 32 32<br />
Length mm 180 180<br />
Fin material Aluminium (Pre Coat) Aluminium (Pre Coat)<br />
Fin Type Slit Fin Slit Fin<br />
Row x Stage x FPI 3 x 12 x 18 3 x 12 x 18<br />
Size (W x H x L) mm 860 x 252 x 38.1 860 x 252 x 38.1<br />
Material PP PP<br />
Type - -<br />
Power Supply Indoor Power Supply Indoor Power Supply<br />
Length m (ft) - -<br />
Core x Diameter mm 2 - -<br />
Thermostat Electronic Control Electronic Control<br />
Cool<br />
Heat<br />
Maximum °C 32 32<br />
Minimum °C 21 21<br />
Maximum °C 27 27<br />
Minimum °C 16 16<br />
1. Cooling capacities are based on indoor temperature of 27°C Dry Bulb (80.6°F Dry Bulb), 19.0°C Wet Bulb (66.2°F Wet Bulb) and outdoor air<br />
temperature of 35°C Dry Bulb (95°F Dry Bulb), 24°C Wet Bulb (75.2°F Wet Bulb).<br />
2. Heating capacities are based on indoor temperature of 20°C Dry Bulb (68.0°F Dry Bulb) and outdoor air temperature of 7°C Dry Bulb (44.6°F<br />
Dry Bulb), 6°C Wet Bulb (42.8°F Wet Bulb).<br />
3. Heating low temperature capacity, input power and COP measured at 230V, indoor temperature 20°C, outdoor 2/1°C.<br />
4. Heating extreme low temperature capacity, input power and COP measured at 230V, indoor temperature 20°C, outdoor -7/-8°C.<br />
5. Specifications are subjected to change without prior notice for future improvement.<br />
34
Cooling<br />
Heating<br />
Indoor Fan<br />
Indoor <strong>Air</strong>flow<br />
Indoor Unit S-90MA1E5<br />
Panel -<br />
Wired CZ-RT1<br />
Remote Control<br />
Wireless<br />
CZ-RWS1 (Heat-pump models)<br />
CZ-RWC1 (Cooling models)<br />
Performance Test Condition ISO 5151<br />
Power Supply<br />
Capacity<br />
Phase 1<br />
V 220 230 240<br />
Hz 50<br />
kW 9.00 9.00 9.00<br />
BTU/h 30700 30700 30700<br />
Running Current A 0.75 0.80 0.85<br />
Input Power W 165 175 185<br />
Noise level<br />
Capacity<br />
dB-A (H / L) 44 / 37 44 / 38<br />
Power level dB (H / L) 59 / 52 59 / 53<br />
kW 10.00 10.00 10.00<br />
BTU/h 34100 34100 34100<br />
Running Current A 0.75 0.80 0.85<br />
Input Power W 165 175 185<br />
Noise level<br />
dB-A (H / L) 44 / 37 44 / 38<br />
Power level dB (H / L) 59 / 52 59 / 53<br />
External Static Pressure Pa (mmAq) 49 (5) / 69 (7)<br />
Max Current A 1.10 1.15 1.20<br />
Max Input Power W 245 260 275<br />
Speed<br />
Type Sirocco<br />
Material ABS<br />
Motor type AC (4 Speeds, 4 Poles)<br />
Input power W -<br />
Output power W 154<br />
Lo<br />
Me<br />
Hi<br />
Cool r.p.m. 700 730 770<br />
Heat r.p.m. 700 730 770<br />
Cool r.p.m. 820 850 890<br />
Heat r.p.m. 820 850 890<br />
Cool r.p.m. 980 1010 1050<br />
Heat r.p.m. 980 1010 1050<br />
Moisture Removal L/h (Pt/h) 5.4 (11.3)<br />
Lo<br />
Me<br />
Hi<br />
Cool m 3 /min (ft 3 /min) 14.0 (494)<br />
Heat m 3 /min (ft 3 /min) 14.0 (494)<br />
Cool m 3 /min (ft 3 /min) 17.0 (600)<br />
Heat m 3 /min (ft 3 /min) 17.0 (600)<br />
Cool m 3 /min (ft 3 /min) 19.0 (671)<br />
Heat m 3 /min (ft 3 /min) 19.0 (671)<br />
Refrigeration Cycle Control Device Expansion Valve<br />
Height mm (inch) 250 (9-27/32)<br />
Dimension<br />
Width mm (inch) 1000 +100 (30-23/32 + 3-15/16)<br />
Depth mm (inch) 650 (25-19/32)<br />
Net weight kg (lbs) 32 (71)<br />
35
Piping<br />
Diameter<br />
Drain hose<br />
Indoor Heat<br />
Exchanger<br />
<strong>Air</strong> Filter<br />
Power cord<br />
Indoor Operation<br />
Range<br />
Gas side mm (inch) 15.88 (5/8)<br />
Liquid side mm (inch) 9.52 (3/8)<br />
Max Length m (ft) 15.0 (49.20)<br />
External diameter mm 32<br />
Length mm 180<br />
Fin material Aluminium (Pre Coat)<br />
Fin Type Slit Fin<br />
Row x Stage x FPI 3 x 12 x 18<br />
Size (W x H x L) mm 860 x 252 x 38.1<br />
Material PP<br />
Type -<br />
Power Supply Indoor Power Supply<br />
Length m (ft) -<br />
Core x Diameter mm 2 -<br />
Thermostat Electronic Control<br />
Cool<br />
Heat<br />
Maximum °C 32<br />
Minimum °C 21<br />
Maximum °C 27<br />
Minimum °C 16<br />
1. Cooling capacities are based on indoor temperature of 27°C Dry Bulb (80.6°F Dry Bulb), 19.0°C Wet Bulb (66.2°F Wet Bulb) and outdoor air<br />
temperature of 35°C Dry Bulb (95°F Dry Bulb), 24°C Wet Bulb (75.2°F Wet Bulb).<br />
2. Heating capacities are based on indoor temperature of 20°C Dry Bulb (68.0°F Dry Bulb) and outdoor air temperature of 7°C Dry Bulb (44.6°F<br />
Dry Bulb), 6°C Wet Bulb (42.8°F Wet Bulb).<br />
3. Heating low temperature capacity, input power and COP measured at 230V, indoor temperature 20°C, outdoor 2/1°C.<br />
4. Heating extreme low temperature capacity, input power and COP measured at 230V, indoor temperature 20°C, outdoor -7/-8°C.<br />
5. Specifications are subjected to change without prior notice for future improvement.<br />
36
3.6 Outdoor Unit – LA1E5 Series<br />
Cooling<br />
Heating<br />
Outdoor Unit U-6LA1E5, U-6LA1E5- 1 U-5LA1E5, U-5LA1E5-1 U-4LA1E5, U-4LA1E5-1<br />
Performance Test Condition ISO 5151<br />
Indoor Unit Combination<br />
Max Current<br />
Max Input Power<br />
Power Supply<br />
Capacity<br />
2 x S-32NA1E5<br />
1 x S-36NA1E5<br />
1 x S-56NA1E5<br />
37<br />
3 x S-32NA1E5<br />
1 x S-45NA1E5<br />
2 x S-32NA1E5<br />
1 x S-45NA1E5<br />
Phase 1 1 1<br />
V 220 230 240 220 230 240 220 230 240<br />
Hz 50 50 50<br />
kW 15.50 14.00 11.20<br />
BTU/h 52900 47800 38200<br />
Running Current A 24.50 23.50 22.50 20.50 19.80 19.00 14.70 14.20 13.60<br />
Input Power W 5.15k 5.15k 5.15k 4.31k 4.31k 4.31k 3.10k 3.10k 3.10k<br />
Annual Consumption W 25.75k 21.55k 15.50k<br />
EER / EER Class (W/W) / (“A”~”G”) 3.01 / B 3.25 / A 3.61 / A<br />
Power Factor % 96 95 95 96 95 95 96 95 95<br />
Noise<br />
Capacity<br />
dB-A (H / L) 55 / - 53 / - 52 / -<br />
Power level dB (H / L) 73 / - 71 / - 70 / -<br />
kW 18.00 16.00 12.50<br />
BTU/h 61400 54600 42700<br />
Running Current A 22.30 21.40 20.50 18.80 18.10 17.40 14.40 13.90 13.40<br />
Input Power W 4.69k 4.69k 4.69k 3.97k 3.97k 3.97k 3.04k 3.04k 3.04k<br />
COP / COP Class (W/W) / (“A” ~ ”G”) 3.84 / A 4.03 / A 4.11 / A<br />
Power Factor % 96 95 95 96 95 95 96 95 95<br />
Noise level<br />
dB-A (H / L) 57 / - 55 / - 54 / -<br />
Power level dB (H / L) 74 / - 72 / - 71 / -<br />
Cool A 29.0 29.0 29.0 26.0 26.0 26.0 21.0 21.0 21.0<br />
Heat A 29.0 29.0 29.0 26.0 26.0 26.0 22.5 22.5 22.5<br />
Cool W 6.20k 6.20k 6.20k 5.70k 5.70k 5.70k 4.40k 4.40k 4.40k<br />
Heat W 6.20k 6.20k 6.20k 5.70k 5.70k 5.70k 4.70k 4.70k 4.70k<br />
Starting Current A 25 24 23 21 20 19 15 14 14<br />
Type Hermetic Motor Hermetic Motor Hermetic Motor<br />
Compressor Motor Type Brushless (4 Poles) Brushless (4 Poles) Brushless (4 Poles)<br />
Output W 3.8 3.8 3.8 3.6 3.6 3.6 3.1 3.1 3.1<br />
Type Propeller Fan Propeller Fan Propeller Fan<br />
Material PP PP PP<br />
Motor type DC (8 Poles) DC (8 Poles) DC (8 Poles)<br />
Input power W - - -<br />
Output power W 60 x 2 60 x 2 60 x 2<br />
Speed Hi<br />
Cool<br />
Heat<br />
r.p.m.<br />
r.p.m.<br />
680<br />
680<br />
650<br />
650<br />
620<br />
620<br />
Outdoor Fan<br />
Moisture Removal L/h (Pt/h) 10.3 (21.6) 9.0 (18.9) 6.8 (14.3)<br />
Outdoor <strong>Air</strong>flow Hi<br />
Dimension<br />
Cool m 3 /min (ft 3 /min) 98.0 (3459) 95.0 (3353) 92.0 (3247)<br />
Heat m 3 /min (ft 3 /min) 98.0 (3459) 95.0 (3353) 92.0 (3247)<br />
Refrigeration Cycle Control Device Expansion Valve Expansion Valve Expansion Valve<br />
Refrigerant Oil cm 3 FV50S, 1300 FV50S, 1300 FV50S, 1300<br />
Refrigerant Type g (oz) R410a, 8.0k (240) R410a, 8.0k (240) R410a, 7.0k (210)<br />
Height mm (inch) 1340 (52-3/4) 1340 (52-3/4) 1340 (52-3/4)<br />
Width mm (inch) 900 (35-7/16) 900 (35-7/16) 900 (35-7/16)<br />
Depth mm (inch)<br />
350+40<br />
(13-25/32+1-9/16)<br />
350+40<br />
(13-25/32+1-9/16)<br />
350+40<br />
(13-25/32+1-9/16)<br />
Net weight kg (lbs) 123 (271) 123 (271) 115 (253)
Piping<br />
Diameter<br />
Gas side mm (inch) 15.88 (5/8) 15.88 (5/8) 15.88 (5/8)<br />
Liquid side mm (inch) 9.52 (3/8) 9.52 (3/8) 9.52 (3/8)<br />
Standard Length m (ft) 23 (75.4) 23 (75.4) 23 (75.4)<br />
Length Range (min – max) m (ft) 20 – 90 (65.6 – 295.2) 20 – 90 (65.6 – 295.2) 20 – 90 (65.6 – 295.2)<br />
Height Different m (ft) 30 (98.4) 30 (98.4) 30 (98.4)<br />
Fin material Aluminium (Pre Coat) Aluminium (Pre Coat) Aluminium (Pre Coat)<br />
Outdoor Heat Fin Type Corrugated Fin Corrugated Fin Corrugated Fin<br />
Exchanger Row x Stage x FPI 3 x 51 x 18 3 x 51 x 18 2 x 51 x 18<br />
Size (W x H x L) mm 1295.4 x 798 x 66 1295.4 x 798 x 66 1295.4 x 798 x 44<br />
Power Supply Outdoor Power Supply Outdoor Power Supply Outdoor Power Supply<br />
Power cord<br />
Length<br />
Core x Diameter<br />
m (ft)<br />
mm<br />
- - -<br />
2 - - -<br />
Outdoor<br />
Operation<br />
Range<br />
Thermostat Electronic Control Electronic Control Electronic Control<br />
Protection Device Electronic Control Electronic Control Electronic Control<br />
Cool<br />
Heat<br />
Maximum °C 43 43 43<br />
Minimum °C -5 -5 -5<br />
Maximum °C 24 24 24<br />
Minimum °C -15 -15 -15<br />
1. Cooling capacities are based on indoor temperature of 27°C Dry Bulb (80.6°F Dry Bulb), 19.0°C Wet Bulb (66.2°F Wet Bulb) and outdoor air<br />
temperature of 35°C Dry Bulb (95°F Dry Bulb), 24°C Wet Bulb (75.2°F Wet Bulb).<br />
2. Heating capacities are based on indoor temperature of 20°C Dry Bulb (68.0°F Dry Bulb) and outdoor air temperature of 7°C Dry Bulb (44.6°F<br />
Dry Bulb), 6°C Wet Bulb (42.8°F Wet Bulb).<br />
3. Heating low temperature capacity, input power and COP measured at 230V, indoor temperature 20°C, outdoor 2/1°C.<br />
4. Heating extreme low temperature capacity, input power and COP measured at 230V, indoor temperature 20°C, outdoor -7/-8°C.<br />
5. Specifications are subjected to change without prior notice for future improvement.<br />
38
4. Dimensions<br />
4.1 Wall Mounted Type Indoor Unit<br />
4.1.1 S-22KA1E5, S-28KA1E5, S-36KA1E5, S-45KA1E5, S-22KA1E5S, S-28KA1E5S,<br />
S-36KA1E5S, S-45KA1E5S<br />
39
4.1.2 S-56KA1E5, S-63KA1E5, S-71KA1E5<br />
40
4.2 60 x 60 Cassette Type Indoor Unit<br />
4.2.1 S-22YA1E5, S-28YA1E5, S-36YA1E5, S-45YA1E5, S-56YA1E5<br />
41
4.3 95 x 95 Cassette Type Indoor Unit<br />
4.3.1 S-63UA1E5, S-71UA1E5, S-90UA1E5<br />
42
4.4 Slim Hide-Away Type Indoor Unit<br />
4.4.1 S-22NA1E5, S-28NA1E5, S-32NA1E5, S-36NA1E5, S-45NA1E5, S-56NA1E5<br />
43
4.5 Low Static Pressure Hide-Away Type Indoor Unit<br />
4.5.1 S-45MA1E5, S-56MA1E5<br />
44
4.5.2 S-63MA1E5, S-71MA1E5, S-90MA1E5<br />
45
4.6 Outdoor Unit<br />
4.6.1 U-4LA1E5, U-5LA1E5, U-6LE1E5, U-4LA1E5-1, U-5LA1E5-1, U-6LE1E5-1<br />
1340<br />
140 620<br />
140<br />
900<br />
24<br />
385<br />
515<br />
46<br />
200<br />
or more<br />
100<br />
or more<br />
40 350<br />
295 125<br />
<strong>Air</strong> intake side<br />
<strong>Air</strong> outlet side<br />
500<br />
or more<br />
Space for<br />
piping, wiring<br />
and maintenance<br />
Gravity point<br />
300
5. Refrigeration Cycle Diagram<br />
OUTDOOR<br />
UNIT<br />
INDOOR<br />
UNIT<br />
4WAY<br />
VALVE<br />
GAS BYPASS<br />
VALVE<br />
HIGH<br />
PRESSURE<br />
SWITCH<br />
OIL<br />
SEPARATOR<br />
MUFFLER STRAINER<br />
GAS<br />
SIDE<br />
3-WAY<br />
COMP.<br />
DIS.<br />
TEMP.<br />
SENSOR<br />
HEAT<br />
EXCHANGER<br />
SENSOR<br />
LIQUID<br />
SIDE<br />
LOW<br />
PRESSURE<br />
SWITCH<br />
ACCUMULATOR<br />
3-WAY<br />
SUCTION<br />
TEMP.<br />
SENSOR<br />
STRAINER<br />
EXPANSION<br />
VALVE<br />
INTAKE<br />
AIR<br />
TEMP.<br />
SENSOR<br />
GAS SIDE<br />
TEMP.<br />
SENSOR<br />
47<br />
HEAT<br />
EXCHANGER<br />
TEMP.<br />
SENSOR<br />
OUTDOOR AIR<br />
TEMP. SENSOR<br />
PIPE TEMP.<br />
SENSOR<br />
(OFF)<br />
RECEIVER<br />
LIQUID BYPASS<br />
VALVE<br />
HEAT<br />
EXCHANGER<br />
(EVAPORATOR)<br />
CHECKVALVE<br />
EXPANSION<br />
VALVE<br />
STRAINER
6. Block Diagram<br />
6.1 Wall Mounted Type Indoor Unit – KA1E5 Series<br />
AC220V - 240V<br />
50Hz<br />
URBAN - NET<br />
L<br />
N<br />
U1<br />
U2<br />
FUSE100<br />
ZNR100<br />
ZNR101<br />
ZNR102<br />
6.2 60 x 60 Cassette Type Indoor Unit – YA1E5 Series<br />
AC220 / 230 / 240V<br />
50Hz<br />
URBAN - NET<br />
L<br />
N<br />
U1<br />
U2<br />
FUSE100<br />
ZNR1<br />
ZNR2<br />
ZNR3<br />
48<br />
SSR1<br />
M<br />
1~<br />
SC<br />
SC<br />
M<br />
M
6.3 95 x 95 Cassette Type Indoor Unit – UA1E5 Series<br />
AC220 / 230 / 240V<br />
50Hz<br />
URBAN - NET<br />
L<br />
N<br />
U1<br />
U2<br />
FUSE101<br />
ZNR1<br />
ZNR2<br />
ZNR3<br />
SSR1<br />
M<br />
1~<br />
49<br />
RY-L<br />
RY-M<br />
CR3<br />
RY-H<br />
6.4 Slim Hide Away Type Indoor Unit – NA1E5 Series<br />
AC220 / 230 / 240V<br />
50Hz<br />
URBAN - NET<br />
L<br />
N<br />
U1<br />
U2<br />
FUSE101<br />
ZNR1<br />
ZNR2<br />
ZNR3<br />
RY-L<br />
RY-M<br />
CR3<br />
CR2<br />
RY-H<br />
CR2<br />
CR1<br />
CR1<br />
M<br />
1~<br />
M<br />
1~<br />
SC<br />
SC
6.5 Low Static Pressure Hide Away Type Indoor Unit – MA1E5 Series<br />
AC220 / 230 / 240V<br />
50Hz<br />
URBAN - NET<br />
L<br />
N<br />
U1<br />
U2<br />
FUSE101<br />
ZR1<br />
ZR2<br />
ZR3<br />
6.6 Outdoor Unit – LA1E5 Series<br />
50<br />
RY-L<br />
RY-M<br />
CR3<br />
RY-H<br />
CR2<br />
CR1<br />
M<br />
1~<br />
SC
7. Wiring Connection Diagram<br />
7.1 Wall Mounted Type Indoor Unit – KA1E5 Series<br />
51
7.2 60 x 60 Cassette Type Indoor Unit – YA1E5 Series<br />
52
7.3 95 x 95 Cassette Type Indoor Unit – UA1E5 Series<br />
53
7.4 Slim Hide Away Type Indoor Unit – NA1E5 Series<br />
54
7.5 Low Static Pressure Hide Away Type Indoor Unit – MA1E5 Series<br />
55
7.6 Outdoor Unit – LA1E5 Series<br />
56
8. Electronic Circuit Diagram<br />
8.1 Wall Mounted Type Indoor Unit – KA1E5 Series<br />
57
8.2 60 x 60 Cassette Type Indoor Unit – YA1E5 Series<br />
59
8.3 95 x 95 Cassette Type Indoor Unit – UA1E5 Series<br />
61
8.4 Slim Hide Away Type Indoor Unit – NA1E5 Series<br />
63
8.5 Low Static Pressure Hide Away Type Indoor Unit – MA1E5 Series<br />
65
8.6 Outdoor Unit – LA1E5 Series<br />
67
9. Printed Circuit Board<br />
9.1 Wall Mounted Type Indoor Unit – KA1E5 Series<br />
9.1.1 Main PCB<br />
9.1.2 Power PCB<br />
CN-FM<br />
CN-DCV<br />
69
9.1.3 Receiver PCB<br />
9.1.4 Error Code Display PCB<br />
CN-CODE<br />
CN-DISP<br />
70
9.2 60 x 60 Cassette Type Indoor Unit – YA1E5 Series<br />
9.2.1 Main PCB<br />
INDOOR<br />
ADDRESS<br />
CN-FM CN-STM1<br />
CN-STM2 CN-EV LED CN-DISP CN-OPT3 CN-UN CN-TIMER<br />
71<br />
OUTDOOR<br />
ADDRESS<br />
JEM-A<br />
CN-TH1<br />
CN-TH2<br />
CN-REM
9.3 95 x 95 Cassette Type Indoor Unit – YA1E5 Series<br />
9.3.1 Main PCB<br />
INDOOR<br />
ADDRESS<br />
CN-STM1 CN-STM2 CN-EV CN-DISP CN-OPT3 CN-UN<br />
72<br />
OUTDOOR<br />
ADDRESS<br />
9.4 Slim Hide Away Type Indoor Unit – NA1E5 Series<br />
9.4.1 Main PCB<br />
INDOOR<br />
ADDRESS<br />
OUTDOOR<br />
ADDRESS<br />
CN-TIMER<br />
CN-TIMER<br />
CN-TH1<br />
CN-TH1<br />
CN-TH2<br />
CN-TH2<br />
CN-STM1 CN-STM2 CN-EV CN-DISP CN-OPT3 CN-UN<br />
CN-REM<br />
CN-REM
9.5 Low Static Pressure Hide Away Type Indoor Unit – MA1E5 Series<br />
9.5.1 Main PCB<br />
INDOOR<br />
ADDRESS<br />
CN-STM1 CN-STM2 CN-EV CN-DISP CN-OPT3 CN-UN<br />
73<br />
OUTDOOR<br />
ADDRESS<br />
CN-TIMER<br />
CN-TH1<br />
CN-TH2<br />
CN-REM
9.6 Outdoor Unit – LA1E5 Series<br />
9.6.1 Main PCB<br />
74
9.6.2 Noise Filter PCB<br />
CN-TH1 CN-V1 CN-V2<br />
CN-OPT3 CN-OPT4<br />
CN-PWR CN-RY1 CN-HOT<br />
CN-OPT2<br />
75<br />
CN-OPT1
9.6.3 Capacitor PCB<br />
DCN-IN DCN-OUT DCP-IN DCP-OUT<br />
76
10. Remote Control Operating Instructions<br />
10.1 Wired remote control<br />
CZ-RT1<br />
Name and function of each part<br />
REMOTE<br />
1 The OFF/ON button cannot be used.<br />
LOCAL<br />
All wired remote control buttons can be used.<br />
2<br />
3<br />
4<br />
5<br />
6<br />
7<br />
8<br />
9<br />
10<br />
11<br />
12<br />
13<br />
14<br />
15<br />
16<br />
17<br />
18<br />
19<br />
20<br />
Timer/time setting display<br />
Check display<br />
Fan Speed display<br />
Operation mode selection display<br />
FILTER RESET display<br />
Appear after the cumulative running time reaches<br />
approximately 2,500 hours of operation.<br />
Temperature setting display (16°C – 31°C)<br />
<strong>Air</strong>flow direction setting display<br />
OFF/ON button<br />
Used to start and stop the operation.<br />
FAN SPEED button<br />
Used to select the fan speed of HI, MED, LO or<br />
AUTO.<br />
MODE button<br />
Used to select operation mode of AUTO, HEAT,<br />
FAN, COOL or DRY.<br />
TEMP (UP/DOWN) button<br />
Use to select the desired temperature.<br />
AIR SWING (AUTO/MANUAL) button<br />
Not applicable for Hide Away models.<br />
FILTER RESET button<br />
Press to reset the “FILTER RESET” display after washing the filter.<br />
TEST RUN button*<br />
VENTILATION button*<br />
ECONOMY button<br />
Function not available for this model.<br />
ODOUR WASH button<br />
Function not available for this model.<br />
CHECK button<br />
Press this button if the check display is flashing.<br />
TIMER/CLOCK SET button<br />
Use to set the timer operation and the current time.<br />
1<br />
21<br />
20<br />
77<br />
19<br />
18<br />
2 3 4<br />
OPERATION Indicator<br />
21<br />
Light ON when the unit in operation.<br />
NOTES<br />
Buttons with * mark are not needed for normal operation. If one of these buttons is pressed by mistake, press the same button once again to<br />
cancel the operation.<br />
When the power resumed after power failure, by default the unit will restart automatically with all previous setting preserved by the memory<br />
function under AUTO RESTART function.<br />
17<br />
16<br />
15<br />
5<br />
14<br />
6<br />
7<br />
8<br />
10<br />
12<br />
13<br />
9<br />
11
10.2 Wireless Remote Control<br />
CZ-RWS1 – Heat Pump models / CZ-RWC1 – Cooling models<br />
Name and Function of each part<br />
1<br />
2<br />
3<br />
4<br />
5<br />
6<br />
7<br />
8<br />
9<br />
10<br />
11<br />
12<br />
13<br />
14<br />
15<br />
16<br />
17<br />
18<br />
Address number display<br />
Operation mode selection display<br />
Infrared Transmitter<br />
Transmit the remote control signal.<br />
<strong>Air</strong>flow direction setting display<br />
Fan speed display<br />
Temperature setting display (16°C – 31°C)<br />
Timer/time setting display<br />
Show the timer operation setting time or the current time.<br />
TEMP (UP/DOWN) buttons<br />
Use to select desired temperature.<br />
FILTER RESET button<br />
Press to turn OFF the “FILTER” indicator at the control panel.<br />
FAN SPEED button<br />
Use to select the fan speed of HIGH, MEDIUM, LOW and AUTO.<br />
AC RESET button*<br />
System reset.<br />
SET button<br />
Local setting function<br />
ADDRESS button*<br />
Use to change the address setting of indoor unit.<br />
RC RESET button<br />
Use to clear the remote control setting from memory.<br />
TIMER/CLOCK SET buttons<br />
Use to set timer operation and current time.<br />
AIR SWING (AUTO/MANUAL) buttons<br />
Not applicable for Hide Away models.<br />
MODE button<br />
Use to select operation mode of AUTO, HEAT, FAN, COOL or DRY. HEAT mode is not available for CZ-RWC1.<br />
OFF/ON button<br />
Use to start or stop the operation<br />
NOTE<br />
Buttons with * mark are not needed for normal operation. If one of these buttons is pressed by mistake, press the same button once again to<br />
cancel the operation.<br />
When the power resumed after power failure, by default the unit will restart automatically with all previous setting preserved by the memory<br />
function under AUTO RESTART function.<br />
78<br />
2<br />
1<br />
18<br />
17<br />
16<br />
15<br />
14<br />
13<br />
12<br />
3 4<br />
5<br />
6<br />
7<br />
8<br />
9<br />
10<br />
11
11. Installation Instruction<br />
11.1 Pipe Length<br />
Length Calculation<br />
Model<br />
U-4LA1E5, U-5LA1E5, U-6LA1E5<br />
U-4LA1E5-1, U-5LA1E5-1, U-6LA1E5-1<br />
Allowable<br />
height<br />
Indoor / outdoor unit height difference 30m or less<br />
different Indoor / Indoor unit height difference 15m or less<br />
Allowable<br />
piping length<br />
Example of piping connection<br />
Length Piping connection example<br />
Total piping length 20m ~ 90m Main1+Main2+Main3+Main4+Sub1+Sub2+Sub3+Sub4+Sub5<br />
Total Main piping length 40m or less Main1+Main2+Main3+Main4<br />
Total Sub piping length 50m or less Sub1+Sub2+Sub3+Sub4+Sub5<br />
Sub piping length 15m or less<br />
From outdoor unit to innermost indoor unit<br />
difference<br />
From 1 st branch to innermost indoor unit<br />
difference<br />
Outdoor unit<br />
Main1<br />
Main2<br />
Main3<br />
Sub3<br />
1 st branch<br />
Sub1<br />
Sub2<br />
Main4<br />
55m or less<br />
30m or less<br />
Indoor unit<br />
Indoor unit<br />
Sub4<br />
79<br />
Sub5<br />
From “1st branch” to farthest indoor unit” difference Max 30m<br />
“Outdoor unit” to “farthest indoor unit” difference Max 55m<br />
Main1+2+3+4=Max40m<br />
Sub1+2+3+4+5=Max50m<br />
Each Sub (1/2/3/4/5) = Max 15m<br />
Indoor & outdoor<br />
height difference<br />
Max 30m<br />
Indoor & outdoor<br />
height difference<br />
Max 15m<br />
Indoor unit Indoor unit Farthest<br />
Indoor unit
11.2 Branch Pipe Connection<br />
CZ-P155BK1<br />
Liquid Branch<br />
80<br />
Gas Branch<br />
Branch to Indoor Unit Liquid (Hi) Pipe Gas (Low) Pipe<br />
2.2 ~ 6.3kW 0.8 ~ 2.5HP 6.35 mm (1/4”) 12.70 mm (1/2”)<br />
7.1 ~ 9.0kW 3.0 ~ 3.5HP 9.52 mm (3/8”) 15.88 mm (5/8”)<br />
Branch to Outdoor (4,5,6HP) 9.52 mm (3/8”) 15.88 mm (5/8”)<br />
Branch to Branch 9.52 mm (3/8”) 15.88 mm (5/8”)<br />
Branch pipe is required to installed at straight horizontal or vertical<br />
position. This is to have even refrigerant distribution.<br />
Bending point of connecting pipe is<br />
required minimum 30cm from<br />
branch pipe. This is to avoid back<br />
pressure.<br />
Horizontally<br />
Min 30cm<br />
Vertically
11.3 Capacity Correction<br />
Capacity correction according to the connecting pipe length is shown in figure below. The rated capacity (indicated<br />
on the name plate) is based on 7.5m connecting pipe and horizontal installation.<br />
Cooling<br />
heating<br />
I/D & O/D height difference(m)<br />
I/D & O/D height difference(m)<br />
30<br />
25<br />
20<br />
15<br />
10<br />
0<br />
5<br />
5<br />
10<br />
15<br />
20<br />
25<br />
30<br />
30<br />
25<br />
20<br />
15<br />
10<br />
0<br />
5<br />
5<br />
10<br />
15<br />
20<br />
25<br />
30<br />
1.00<br />
10 20 30 40 50 60 70 80 90<br />
1.00<br />
1.00<br />
81<br />
0.95 0.90 0.85<br />
pipe length (m)<br />
0.95 0.90 0.85<br />
10 20 30 40 50 60 70 80 90<br />
1.00<br />
0.99 0.98 0.97<br />
pipe length (m)<br />
0.99 0.98 0.97<br />
capacity ratio<br />
capacity ratio<br />
capacity ratio<br />
capacity ratio
11.4 INSTALLATION INSTRUCTIONS FS MULTI WALL MOUNTED TYPE<br />
REFRIGERANT<br />
R410A<br />
HP Cooling<br />
Model name<br />
capacity<br />
HP<br />
Cooling<br />
capacity<br />
Model name<br />
0.8 2.2kW S-22KA1E5 0.8 2.2kW S-22KA1E5S<br />
1.0 2.8kW S-28KA1E5 1.0 2.8kW S-28KA1E5S<br />
1.5 3.6kW S-36KA1E5 1.5 3.6kW S-36KA1E5S<br />
1.75 4.5kW S-45KA1E5 1.75 4.5kW S-45KA1E5S<br />
2.0 5.6kW S-56KA1E5<br />
2.5 6.3kW S-63KA1E5<br />
3.0 7.1kW S-71KA1E5<br />
Precautions in terms of safety<br />
Carry out installation work with reliability after thorough reading of this “Precaution in terms of safety”.<br />
• Precautions shown here are differentiated between Warnings and Cautions . Those that have much chances<br />
for leading to significant result such as fatality or serious injury if wrong installation would have been carried out<br />
are listed compiling them especially into the column of Warnings .<br />
However, even in the case of items which are listed in the column of<br />
for leading to significant result depending on the situations.<br />
Cautions , such items also have a chance<br />
•<br />
In either case, important descriptions regarding the safety are listed, then observe them without fail.<br />
As to indications with illustration<br />
This mark means “Caution” or “Warning”. This mark means “Earth”.<br />
• After installation work has been completed, do not only make sure that the unit is free from any abnormal<br />
condition through the execution of trial run but also explain how to use and how to perform maintenance of this<br />
unit to the customer according to the instruction manual.<br />
In addition, request the customer to keep this manual for installation work together with instruction manual.<br />
Warnings<br />
The appliance must be installed by technician, who takes into account the requirements given by ISO5149 or eventual equivalent<br />
requirements.<br />
As to installation, request the distributor or vendor to perform it. Imperfection in installation caused by that having been carried out by the<br />
customer himself may leads to water leakage, electric shock, fire, etc.<br />
Carry out the installation work with reliability according to this manual for installation work. Imperfection in installation leads to water<br />
leakage, electric shock, fire, etc.<br />
Carry out the installation work with reliability on the place that can bears the weight of this unit sufficiently. Insufficient strength leads to<br />
injury due to falling of the unit.<br />
Carry out predetermined installation work in preparation for strong wind such as typhoon, earthquake. Imperfection in installation work<br />
may lead to accidents arisen from overturn, etc.<br />
The unit must be installed in accordance with applicable national and local regulations.<br />
Any electrical work should only be carried out by qualified technician and use exclusive circuits without fail.<br />
Presence of insufficient capacity in power circuit or imperfection in execution leads to electric shock, fire, etc.<br />
Wiring shall be connected using specified cables and fix them securely so that external force of the cables may not transfer to the<br />
terminal connection section.<br />
Imperfect connection and fixing leads to fire, etc.<br />
If installing inside a small room, measures should be taken to prevent refrigerant levels from building up to critical concentrations in the<br />
event of a refrigerant leak occurring. Please discuss with the place of purchase for advice on what measures may be necessary to<br />
prevent critical concentrations being exceeded. If the refrigerant leaks and reaches critical concentration levels, there is the danger that<br />
death from suffocation may result.<br />
Securely attach the protective covers for the outdoor unit connection cables and power cord so that they do not lift up after installation. If<br />
the covers are not properly attached and installed, the terminal connections may overheat, and fire or electric shock may result.<br />
Switch off all supplies before accessing any electrical part.<br />
If refrigerant gas escapes during installation, ventilate the affected area. If the refrigerant gas comes into contact with sparks or naked<br />
flames, it will cause toxic gases to be generated.<br />
Once installation work is completed, check that there are no refrigerant gas in the room that can come into contact with sparks or flames<br />
from a fan heater, stove or kitchen range, which will cause toxic gases to be generated.<br />
When performing piping work do not mix air except for specified refrigerant (R410A) in refrigeration cycle. It causes capacity down, and<br />
risk of explosion and injury due to high tension inside the refrigerant cycle.<br />
82
Cautions<br />
Carry out Earthing work.<br />
Do not connect the Earth return to the gas pipe, water line pipe, lightning rod and telephone lines.<br />
Imperfection in Earth return may lead to electric shock<br />
Do not install the unit at the place where the possibility of inflammable gas leakage exists. If gas leakage should arise and the gas builds<br />
up around the unit, such situation may lead to ignition.<br />
Mounting of the earth leakage circuit breaker is required. Omission in mounting of the earth leakage circuit breaker may lead to electric<br />
shock.<br />
Drain piping should be made to ensure secure drainage according to the manual for installation work and carry out the thermal insulation<br />
to prevent the occurrence of condensation.<br />
Imperfection in piping work leads to water leakage and may cause the house and property, etc. to become wet.<br />
Position the indoor unit, outdoor unit, power cords and indoor/outdoor unit connection cables in a way so that they are at least 1 meter<br />
away from televisions and radios. This is to avoid problems such as interference with picture and/or sound. (However, note that<br />
depending on the electromagnetic wave conditions, interference may still occur even if the separation distance is more than 1 meter.)<br />
11.4.1 ACCESSORIES PACKED IN THE INDOOR UNIT CONTAINER<br />
Name Q’ty Appearance Purpose<br />
Plate 1<br />
Screw 5<br />
Installation Instruction 1<br />
83<br />
Installation plate fixing screw<br />
This manual<br />
11.4.2 SELECTING THE LOCATION FOR THE INDOOR UNIT<br />
• Install the indoor unit once the following conditions are satisfied and after receiving the customer approval.<br />
1. The indoor unit must be within a maintenance space.<br />
2. The indoor unit must be free from any obstacles in path of the air inlet and outlet, and must allow spreading<br />
of air throughout the room.<br />
100 or more 50 or more<br />
Floor<br />
(Unit: mm)<br />
Warnings<br />
3. The installation position must be able to support a load four times the indoor unit weight.<br />
4. The indoor unit must be away from heat and steam sources, but avoid installing it near an entrance.<br />
5. The indoor unit must allow easy draining.<br />
6. The indoor unit must allow easy connection to the outdoor unit.<br />
7. Before installing in quiet room such as a bedroom, please consult with an authorized distributor.<br />
8. The indoor unit must be from at least 3m away from any noise-generating equipment. The electrical wiring<br />
should be locally decided.<br />
9. If the power supply is subject to noise generation, add a suppressor.<br />
10. Do not install the indoor unit in a laundry. Electric shocks may result.<br />
65 or more<br />
2500-3000
Note ● Thoroughly study the following installation locations<br />
1. In such places as restaurants and kitchens, considerable amount of oil steam and flour adhere to the fan, the<br />
fin of the heat exchanger, resulting in heat exchange reduction, spraying, dispersing of water drops, etc.<br />
In these cases, take the following actions:<br />
• Make sure that the ventilation fan for smoke-collecting hood on a cooking table has sufficient capacity so that<br />
it draws oily steam which should not flow into the suction of the air conditioner.<br />
• Make enough distance from the cooking room to install the air conditioner in such place where it may not<br />
suck in oily steam.<br />
Ensure ample<br />
distance<br />
84<br />
Cooking table<br />
Use the ventilation fan for smokecollection<br />
hood with sufficient capacity.<br />
2. Avoid installing the air conditioner in such circumstances where cutting oil mist or iron powder exist<br />
especially in factories, etc.<br />
3. Avoid places where inflammable gas is generated, flows-in, contaminated, or leaked.<br />
4. Avoid places where sulphurous acid gas or corrosive gas can be generated.<br />
5. Avoid places near high frequency generators.<br />
11.4.3 INSTALLATION OF INDOOR UNIT<br />
HOW TO FIX INSTALLATION PLATE<br />
The mounting wall shall be strong and solid enough to prevent it from the vibration.<br />
Measuring<br />
Tape<br />
Wall<br />
Wall Wall<br />
More than 1<br />
More than 1<br />
Model<br />
241.5mm<br />
S-22KA**, S-28KA**<br />
S-36KA**, S-45KA**<br />
S-56KA**, S-63KA**<br />
S-71KA**<br />
3<br />
128 mm<br />
2 screw<br />
B<br />
C<br />
5<br />
6<br />
128<br />
More<br />
than 2<br />
Installation<br />
plate 1<br />
Dimension<br />
A<br />
Indoor unit<br />
4<br />
128 mm<br />
234.5mm<br />
○1 ○2 ○3 ○4 ○5 ○6<br />
535 mm 82 mm 165 mm 158 mm 43 mm 95 mm<br />
635 mm 82 mm 165 mm 158 mm 169 mm 219 mm<br />
The centre of installation plate should be at more than ○1 at right and left of the wall.<br />
The distance from installation plate edge to ceiling should more than ○2 .<br />
From installation plate left edge to unit’s left side is ○3 .<br />
From installation plate right edge to unit’s right side is ○4 .<br />
○B : For left side piping, piping connection for liquid should be about ○5 from this line.<br />
: For left side piping, piping connection for gas should be about ○6 from this line.<br />
1. Mount the installation plate on the wall with 5 screws or more (at least 5 screws).<br />
(If mounting the unit on the wall, consider using anchor bolts.)<br />
• Always mount the installation plate horizontally by aligning the marking-off line with the thread and using a<br />
level gauge.
2. Drill the piping plate hole with ø70mm hole-core drill.<br />
• Line according to the left and right side of the installation plate. The meeting point of the extended line is the<br />
center of the hole. Another method is by putting measuring tape at position as shown in the diagram above.<br />
The hole center is obtained by measuring the distance namely 128 mm for left and right hole respectively.<br />
• Drill the piping plate hole at either the right or the left and the hole should be slightly slanted to the outdoor<br />
side.<br />
TO DRILLA HOLE IN THE WALL AND INSTALL A SLEEVE OF PIPING<br />
1. Insert the piping sleeve to the hole.<br />
2. Fix the bushing to the sleeve.<br />
3. Cut the sleeve until it extrudes about 15 mm from<br />
the wall.<br />
CAUTION<br />
When the wall is hollow, please be sure to use the sleeve<br />
for tube assembly to prevent dangers caused by mice biting<br />
the connecting cable.<br />
4. Finish by sealing the sleeve with putty or caulking<br />
compound at the final stage.<br />
INDOOR UNIT INSTALLATION<br />
Piping<br />
Intake grille<br />
CAUTION<br />
Do not turn over the unit without it’s shock<br />
absorber during pull out the piping. It may<br />
cause intake grille damage.<br />
85<br />
Indoor Outdoor<br />
Sleeve for<br />
tube<br />
assembly<br />
ø70 through hole<br />
Wall<br />
Piping<br />
15 mm<br />
Approx. 5 - 7 mm<br />
Bushing for tube assembly<br />
Putty or caulking compound<br />
Use shock absorber during<br />
pull out the piping to protect<br />
the intake grille from damage<br />
Shock absorber
1. FOR THE RIGHT REAR PIPING<br />
Step-1<br />
Step-2<br />
Step-3<br />
Step-4<br />
Pull out the Indoor piping<br />
Install the Indoor Unit<br />
Secure the Indoor Unit<br />
Insert the connecting cable<br />
2. FOR THE RIGHT AND RIGHT BOTTOM PIPING<br />
Step-1 Pull out the Indoor piping<br />
Step-2<br />
Step-3<br />
Step-4<br />
Install the Indoor Unit<br />
Insert the connecting cable<br />
Secure the Indoor Unit<br />
3. FOR THE EMBEDDED PIPING<br />
Step-1<br />
Step-2<br />
Step-3<br />
Step-4<br />
Step-5<br />
Step-6<br />
Step-7<br />
Step-8<br />
Replace the drain hose<br />
Bend the embedded piping<br />
Use a spring bender or equivalent to bend the<br />
piping so that the piping is not crushed.<br />
Pull the connecting cable into Indoor Unit<br />
The inside and outside connecting cable can<br />
be connected without removing the front grille.<br />
Cut and flare the embedded piping<br />
When determining the dimensions of the piping,<br />
slide the unit all the way to the left on the<br />
installation plate.<br />
Install the Indoor Unit<br />
Connect the piping<br />
Please refer to “REFRIGERANT PIPING” column.<br />
Insulate and finish the piping<br />
Please carry out insulation at pipe connection<br />
portion as mentioned in Indoor/Outdoor unit<br />
installation diagram.<br />
If drain hose or connecting piping is in the room<br />
(where dew may form), please increase the<br />
insulation by using POLY-E FOAM with tickness<br />
6mm or above.<br />
Secure the Indoor Unit<br />
Right Rear piping<br />
Tape it with<br />
piping in a position a s<br />
mentioned in<br />
Fig. below.<br />
Piping<br />
Drain<br />
hose<br />
Right and Right Bottom piping<br />
Tape it with piping in a<br />
position as mentioned<br />
in Fig. below.<br />
Drain hose<br />
Install the indoor unit<br />
Hook the indoor unit onto the upper portion<br />
of installation plate. (Engage the indoor<br />
unit with the upper edge of the installation<br />
plate). Ensure the hooks are properly<br />
seated on the installation plate by moving<br />
it in left and right.<br />
86<br />
Cover for<br />
the right<br />
piping<br />
Piping<br />
Cover for the<br />
bottom piping<br />
Cover for<br />
the right<br />
piping<br />
Cover for the<br />
bottom piping<br />
How to keep the cover<br />
In case of the cover is cut, keep the cover at the rear<br />
of chassis as shown in the illustration for future<br />
reinstallation.<br />
(Left, right and 2 bottom covers for piping.)<br />
Secure the Indoor Unit<br />
Cover for the<br />
bottom piping<br />
1. Press the lower left and right side of the<br />
unit against the installation plate until<br />
hooks engages with their slot (sound click).<br />
PUSH<br />
marking<br />
Insert the connecting cable<br />
About<br />
7 – 8 cm<br />
PUSH<br />
Guide<br />
surface<br />
Indoor unit<br />
Unit’s<br />
hook<br />
Cover for the left piping<br />
Cover for piping<br />
Cover for the left piping<br />
Hooks at<br />
installation<br />
plate<br />
Sleeve for<br />
piping hole<br />
Installation<br />
plate<br />
Piping<br />
Drain hose<br />
To take out the unit, push the marking<br />
at the bottom unit, and pull it slightly towards<br />
you to disengage the hooks from the unit.<br />
Connecting<br />
cable<br />
Gas side<br />
piping<br />
Liquid side<br />
piping<br />
Connecting cable Drain hose<br />
(This can be used for left rear piping and bottom piping also.)
Replace the drain hose<br />
Rearview forleft piping installation<br />
Drain cap<br />
Drain hose<br />
Adjustthe pipingslightlydownwards.<br />
How to pull the piping and drain hose out, in case of the embedded piping .<br />
Apply putty or<br />
caulking material<br />
to seal the wall<br />
opening.<br />
PVC tube for<br />
drain hose (VP-20)<br />
More than 700 mm<br />
More than<br />
1150 mm<br />
More than<br />
470 mm<br />
Connecting<br />
cable<br />
Piping<br />
Drain hose<br />
from main unit<br />
PVC tube (VP-65) for piping<br />
and connecting cable<br />
PVC tube for drain hose (VP-30)<br />
Drain hose<br />
Connecting cable<br />
PVC tube<br />
for drain<br />
hose<br />
87<br />
Cable<br />
Indoor unit<br />
72 mm<br />
Piping<br />
Connecting<br />
cable<br />
Piping<br />
Drain hose More than 1150 mm<br />
Sleeve for piping hole<br />
In case of left piping how to insert the<br />
connecting cable and drain hose.<br />
45°<br />
Drain<br />
hose<br />
Piping<br />
Cable<br />
(For the right piping, follow the same procedure)<br />
11.4.4 REFRIGERANT PIPING<br />
Refrigerant is charged to the outdoor unit. For details, see the manual for installation work of outdoor unit. (Additional<br />
charging, etc.)<br />
1. Brazing for piping.<br />
a. Execute brazing before tightening the flare nut.<br />
b. Brazing must be executed while blowing<br />
nitrogen gas. (This prevents generation of<br />
oxidized scale in copper pipe.)<br />
2. When there is a lot of brazings for long piping,<br />
install a strainer midway of the piping. (The strainer<br />
is locally supplied.)<br />
3. Use clean copper pipe with inner wall surface free<br />
from mist and dust. Blow nitrogen gas or air to<br />
blow off dust in the pipe before connection.<br />
4. Form the piping according to its routing. Avoid<br />
bending and bending back the same piping point<br />
more than three times. (This will result in hardening<br />
of the pipe).<br />
5. After deforming the pipe, align centers of the union<br />
fitting of the indoor unit and the piping, and tighten<br />
them firmly with wrenches.<br />
6. Connect pipe to the service valve or ball valve<br />
which is located below the outdoor unit.<br />
7. After completed the piping connection, be sure to<br />
check if there is gas leakage in indoor and outdoor<br />
connection.<br />
Vacuum drying<br />
After completing the piping connection, execute vacuum drying for the connecting piping and the indoor unit.<br />
The vacuum drying must be carried out by using the service ports of both the liquid and gas side valves.<br />
CAUTION Use two wrenches and tighten with regular torque.<br />
Flare nut fastening torque N•m (kgf•cm) Cooling capacity Liquid piping Gas side piping<br />
ø6.35mm 18 (180) ø12.7mm 55 (560) 2.2kW - 6.3kW ø6.35mm ø12.7mm<br />
ø9.52mm 42 (430) ø15.88mm 65 (660) 7.1kW or more ø9.52mm ø15.88mm<br />
Union
11.4.5 ELECTRICAL WIRING<br />
As to main power source and cable size of outdoor unit, read the installation manual attached to the outdoor unit.<br />
Warning<br />
The units must be installed in accordance with applicable national and local regulations.<br />
The units installed by a professional installer must be supplied from a dedicated electrical circuit.<br />
All electric work must be carried out by a qualified technician according to proper technical standards for electrical work and<br />
according to installation manual for installation work.<br />
If circuits with insufficient capacity are used, or if electrical work is not carried out properly, electric shocks or fire may result.<br />
Caution Be sure to install a current leakage breaker or circuit breaker to the main power supply, otherwise electric shocks may result.<br />
Caution<br />
Be sure to connect the unit to secure earth connection. (with a earth resistance of 100 Ω or less).<br />
If the earthing work is not carried out properly, electric shocks may result.<br />
Warning Wiring shall be connected securely using specified cables and fix them securely so that external force of the cables may not<br />
transfer to the terminal connection section. Imperfect connection and fixing leads to fire, etc.<br />
1. Select a power source that is capable of supplying the current required by the air conditioner.<br />
2. Feed the power source to the unit via a distribution switch board designed for this purpose, the switch should<br />
disconnected all poles with a contact separation of at least 3 mm.<br />
3. Always ground the air conditioner with a grounding wire and screw to meet the LOCAL REGULATIONS.<br />
4. Be sure to connect the wires correctly to terminal board with connecting the crimp type ring terminal to the wires.<br />
5. Be sure to turn off the main power before installing and connecting the remote controller.<br />
Note<br />
If momentarily turning on the power supply for both the indoor and outdoor units, do not turn the power off after at least 1<br />
minute has passed. (For the system’s automatic setting.)<br />
Turning off the power supply on the way may cause an abnormal operation.<br />
• Use the standard power cord for Europe (such as H05RN-F or H07RN-F which conforms to CENELEC (HAR)<br />
rating specifications) or use the cables based on IEC standard. (245IEC57, 245IEC66)<br />
Earth leakage breaker<br />
Outdoor unit<br />
• Power supply specifications<br />
Model<br />
name<br />
Power<br />
supply<br />
Switch<br />
Power supply<br />
(ex. 1 ~ 230V)<br />
Infrared remote controller<br />
Earth<br />
Wired controller<br />
Receiver<br />
Branch pipe Refrigerant pipe Control cable<br />
Provide separate power supplies to the indoor and outdoor units.<br />
Power supply cable<br />
Minimum power<br />
cable supply<br />
cables<br />
1<br />
Length<br />
(m)<br />
Leakage<br />
current<br />
breaker<br />
(A)<br />
88<br />
Earth leakage breaker<br />
Indoor unit-A<br />
Switch<br />
Power supply<br />
(ex. 1 ~ 230V)<br />
Earth<br />
Circuit breaker<br />
(Minimum capacity)<br />
Switch<br />
(A)<br />
Fuse<br />
(A)<br />
To other indoor unit<br />
2<br />
Control<br />
Cable<br />
Remote<br />
Controller<br />
Cable<br />
Indoor unit 220V-240V~ 2 mm 2 100 15A 15A 15A 0.75 mm 2 0.5 ~ 2 mm 2<br />
1. The maximum length shows a 2% voltage drop.<br />
2. Use an unshielded bus transmission line.
CONNECTING THE WIRES TO THE CONTROL BOX<br />
You can see the power supply box on the right side after removing the front grille.<br />
HOW TO TAKE OUT FRONT GRILLE<br />
Please follow the steps below to take out front grille if necessary such as<br />
when servicing.<br />
1. Set the vertical airflow direction louvers to the horizontal position.<br />
2. Slide down the 2 caps (3/4 ~ 1.75HP) or 3 caps (2.0 ~ 3.0HP) on the<br />
front grille as shown in the illustration at right, and then remove the 2<br />
(3/4~ 1.75HP) or 4 (2.0 ~ 3.0HP) mounting screws.<br />
3. Pull the lower section of the front grille towards you to remove the<br />
front grille.<br />
When reinstalling the front grille, first set the<br />
vertical airflow direction louver to the<br />
horizontal position and then carry out above<br />
steps 2 - 3 in the reverse order.<br />
Terminal board<br />
Screw to connect the<br />
Earth wire<br />
Power supply cable<br />
L N<br />
Remote control wire<br />
A B<br />
Vane<br />
L N A B U1 U2<br />
89<br />
(Move the vane<br />
to upward)<br />
Control cable<br />
U1 U2<br />
Cap<br />
Screw<br />
Front grille<br />
Cap<br />
Earth lead wire shall be longer than other lead wires as shown in<br />
the figure for the electrical safety in case of the slipping out of the<br />
cord from anchorage.<br />
11.4.6 SETTINGS<br />
<strong>Manual</strong> address setting cannot be done on wall type indoor units.<br />
The automatic system settings can take up to 1 minute once power is supplied; do not operate the remote<br />
controller during this time.<br />
Once the wires are connected to 1 remote controller group control and power is supplied to the indoor unit, the<br />
A/C No. is automatically set. To stop group control use, follow the directions below and clear the A/C No. that was<br />
automatically set after disconnecting the wires for group control. If it is not cleared then the wired controller will not<br />
show any display.<br />
• Instructions on clearing the A/C No. after automatic setup<br />
Turn OFF the indoor unit power supply → Set the SW2 (P.C.B) to ON → Turn ON the power supply of the<br />
indoor unit → After approximately 1 minute, turn OFF the power supply to the indoor unit → Set the SW2<br />
(P.C.B) to OFF.<br />
(The next time the power supply is turned ON, the A/C No. will be cleared.)<br />
• Do not set the SW2 to ON except when clearing the A/C No. as mentioned above. If the SW2 is set to ON,<br />
the wired remote controller will no display.<br />
Setting for 1 remote controller group control<br />
• A maximum of 16 indoor units can be connected at the time of group control. (Do not connect the heat pump unit<br />
with the cooling only unit.)<br />
• Only automatic setting is possible when setting the group control address (A/C No.). (<strong>Manual</strong> setting cannot be<br />
performed.)<br />
• The A/C No. setting cannot be confirmed when using the automatic method.<br />
■ Automatic setting<br />
Refer to the remote controller’s installation instruction manual for the remote controller settings.<br />
Vane
AUTO SWITCH OPERATION<br />
The below operations will be performed by pressing the “AUTO” switch.<br />
1. AUTO OPERATION MODE<br />
The Auto operation will be activated immediately once the Auto Switch is pressed<br />
and release before 5 sec..<br />
2. COOLING TRIAL OPERATION<br />
The Test Run operation will be activated if the Auto Switch is pressed continuously<br />
for more than 5 sec. to below 8 sec..<br />
A “pep” sound will occur at the fifth sec., in order to identify the starting of Test Run<br />
operation.<br />
3. HEATING TRIAL OPERATION<br />
Press the “AUTO” switch continously for more than 8 sec. to below 11 sec. and release when a “pep pep” sound<br />
is occured at eight sec. (However, a “pep” sound is occured at fifth sec..) then press Remote controller “A/C<br />
Reset” button once. Remote controller signal will activate operation to force heating mode.<br />
4. REMOTE CONTROLLER RECEIVING SOUND ON/OFF<br />
The ON/OFF of Remote controller receiving sound can be change over by the following steps:<br />
a. Press AUTO switch continuously for more than 26 sec. to below 31 sec..<br />
A “pep” “pep” “pep” “pep” “pep” “pep” sound will occur at the twenty-sixth sec..<br />
b. Press the “AC RESET” button once. Remote controller signal will activate the Remote controller sound<br />
setting mode.<br />
c. Press the “AUTO” switch once to select Remote controller receiving sound ON/OFF. A “pep” sound<br />
indicates receiving sound ON, and a “peep” sound indicates receiving sound OFF.<br />
11.4.7 AS FOR TIMER OUTPUT<br />
• Connect the timer cord to connector (CN-TIMER) on print circuit board.<br />
Timer setting<br />
Printed<br />
circuit<br />
board<br />
CN-TIMER<br />
2<br />
1<br />
Connector<br />
Relay contact<br />
d.c. 5V<br />
90<br />
Timer<br />
Contact<br />
Close: RUN<br />
Open: STOP<br />
• The connector must use XH-2 (housing) manufactured by J.S.T. Mfg. Co., Ltd.<br />
• Wiring must use vinyl code with the sheath or cable line diameter 0.3mm 2 .<br />
• The length of wiring should be within 150m and separated from power line in order to prevent malfunction.<br />
• The input current is DC5V, and 1mA. The relay contact must use the contact for the minute electric current<br />
suitable for this.
11.4.8 PRECAUTION IN TEST RUN<br />
For test run, refer to the “Precautions in test run” in the outdoor unit installation instructions manual.<br />
Test run is conducted using the wired controller, AUTO switch or by using the outdoor units. For the wired controller<br />
test run see the instructions below.<br />
• Switch the power supply to ON for at least 12 hours in advance before the test run.<br />
• First, press the ON/OFF ( ) button.<br />
• Next, select the operational modes.<br />
TEST RUN<br />
•<br />
•<br />
Then press the TEST RUN button within 1 minute of pressing the ON/OFF ( ) button.<br />
Be sure to run the cooling operation test run for at least 20 minutes before starting the heating<br />
operation test run.<br />
• Press TEST RUN or ON/OFF ( ) button again to cancel the test run mode.<br />
NOTE 1<br />
NOTE 2<br />
NOTE 3<br />
NOTE 4<br />
NOTE 5<br />
Detaching a connector with electrical current may cause damage to the control board. Ensure to<br />
turn OFF the power supply and wait for at least 5 minutes before performing this operation.<br />
Do not short the remote control wires. (There is no protective circuit operation.) Normal operation<br />
will commence once the short is solved.<br />
During the test run; ensure to operate the units in cooling mode prior to operating the units in<br />
heating mode. Caution: Operating the units in heating mode first may cause compressor failure.<br />
Test run should be performed for a minimum of 20 minutes. (Test run using the remote controller<br />
will change to normal operation after 30 minutes.)<br />
Use the outdoor unit to cancel the outdoor unit test run and the wired controller to cancel the wired<br />
controller test run. For the test run method using the AUTO switch, refer to the “AUTO operation”<br />
section in the installation instruction manual for the infrared receiver.<br />
11.4.9 CHECK THE FOLLOWING ITEMS WHEN INSTALLATION IS COMPLETE<br />
• After completing work, be sure to measure and record trial run properties, and store measuring data, etc.<br />
• Measuring items are room temperature, outside temperature, suction temperature, blow out temperature, wind<br />
velocity, wind volume, voltage, current, presence of abnormal vibration and noise, operating pressure, piping<br />
temperature.<br />
• As to the structure and appearance, check the following items.<br />
Is circulation of air adequate?<br />
Is draining smooth?<br />
Is heat insulation complete<br />
(refrigerant and drain piping)?<br />
Is there any leakage of refrigerant?<br />
Is remote controller switch operated?<br />
Is there any faulty wiring?<br />
Are the terminal screws loosened?<br />
M3…69-98N cm {7-10kgf cm}<br />
M4…157-196N cm {16-20kgf cm}<br />
M5…196-245N cm {20-25kgf cm}<br />
11.4.10 HAND OVER<br />
• Teach the customer the operation and maintenance procedures, using the operation manual (air filter cleaning,<br />
temperature control, etc.)<br />
As to parts to be sold separately<br />
• With regards to installation of the parts sold separately, follow the installation manual which is provided with the<br />
parts sold separately.<br />
As for work specifications of the outdoor unit, read the OUTDOOR UNIT INSTALLATION MANUAL attached to<br />
the outdoor unit.<br />
91
11.5 INSTALLATION INSTRUCTIONS FS MULTI FOUR-WAY MINI CASSETTE<br />
REFRIGERANT<br />
R410A<br />
HP Cooling<br />
Model name<br />
capacity<br />
HP<br />
Cooling<br />
Model name<br />
capacity<br />
0.8 2.2kW S-22YA1E5 1.75 4.5kW S-45YA1E5<br />
1.0 2.8kW S-28YA1E5 2.0 5.6kW S-56YA1E5<br />
1.5 3.6kW S-36YA1E5<br />
Precautions in terms of safety<br />
Carry out installation work with reliability after thorough reading of this “Precaution in terms of safety”.<br />
• Precautions shown here are differentiated between Warnings and Cautions . Those that have much chances<br />
for leading to significant result such as fatality or serious injury if wrong installation would have been carried out<br />
are listed compiling them especially into the column of Warnings .<br />
However, even in the case of items which are listed in the column of<br />
for leading to significant result depending on the situations.<br />
Cautions , such items also have a chance<br />
•<br />
In either case, important descriptions regarding the safety are listed, then observe them without fail.<br />
As to indications with illustration<br />
This mark means “Caution” or “Warning”. This mark means “Earth”.<br />
• After installation work has been completed, do not only make sure that the unit is free from any abnormal<br />
condition through the execution of trial run but also explain how to use and how to perform maintenance of this<br />
unit to the customer according to the instruction manual.<br />
In addition, request the customer to keep this manual for installation work together with instruction manual.<br />
Warnings<br />
The appliance must be installed by technician, who takes into account the requirements given by ISO5149 or eventual equivalent<br />
requirements.<br />
As to installation, request the distributor or vendor to perform it. Imperfection in installation caused by that having been carried out by the<br />
customer himself may leads to water leakage, electric shock, fire, etc.<br />
Carry out the installation work with reliability according to this manual for installation work. Imperfection in installation leads to water<br />
leakage, electric shock, fire, etc.<br />
Carry out the installation work with reliability on the place that can bears the weight of this unit sufficiently. Insufficient strength leads to<br />
injury due to falling of the unit.<br />
Carry out predetermined installation work in preparation for strong wind such as typhoon, earthquake. Imperfection in installation work<br />
may lead to accidents arisen from overturn, etc.<br />
The unit must be installed in accordance with applicable national and local regulations.<br />
Any electrical work should only be carried out by qualified technician and use exclusive circuits without fail.<br />
Presence of insufficient capacity in power circuit or imperfection in execution leads to electric shock, fire, etc.<br />
Wiring shall be connected using specified cables and fix them securely so that external force of the cables may not transfer to the<br />
terminal connection section.<br />
Imperfect connection and fixing leads to fire, etc.<br />
If installing inside a small room, measures should be taken to prevent refrigerant levels from building up to critical concentrations in the<br />
event of a refrigerant leak occurring. Please discuss with the place of purchase for advice on what measures may be necessary to<br />
prevent critical concentrations being exceeded. If the refrigerant leaks and reaches critical concentration levels, there is the danger that<br />
death from suffocation may result.<br />
Securely attach the protective covers for the outdoor unit connection cables and power cord so that they do not lift up after installation. If<br />
the covers are not properly attached and installed, the terminal connections may overheat, and fire or electric shock may result.<br />
Switch off all supplies before accessing any electrical part.<br />
If refrigerant gas escapes during installation, ventilate the affected area. If the refrigerant gas comes into contact with sparks or naked<br />
flames, it will cause toxic gases to be generated.<br />
Once installation work is completed, check that there are no refrigerant gas in the room that can come into contact with sparks or flames<br />
from a fan heater, stove or kitchen range, which will cause toxic gases to be generated.<br />
When performing piping work do not mix air except for specified refrigerant (R410A) in refrigeration cycle. It causes capacity down, and<br />
risk of explosion and injury due to high tension inside the refrigerant cycle.<br />
92
Cautions<br />
Carry out Earthing work.<br />
Do not connect the Earth return to the gas pipe, water line pipe, lightning rod and telephone lines.<br />
Imperfection in Earth return may lead to electric shock.<br />
Do not install the unit at the place where the possibility of inflammable gas leakage exists. If gas leakage should arise and the gas builds<br />
up around the unit, such situation may lead to ignition.<br />
Mounting of the earth leakage circuit breaker is required. Omission in mounting of the earth leakage circuit breaker may lead to electric<br />
shock.<br />
Drain piping should be made to ensure secure drainage according to the manual for installation work and carry out the thermal insulation<br />
to prevent the occurrence of condensation.<br />
Imperfection in piping work leads to water leakage and may cause the house and property, etc. to become wet.<br />
Position the indoor unit, outdoor unit, power cords and indoor/outdoor unit connection cables in a way so that they are at least 1 meter<br />
away from televisions and radios. This is to avoid problems such as interference with picture and/or sound. (However, note that<br />
depending on the electromagnetic wave conditions, interference may still occur even if the separation distance is more than 1 meter.)<br />
11.5.1 ACCESSORIES PACKED IN THE INDOOR UNIT CONTAINER<br />
Name Q’ty Appearance Purpose<br />
Drain hose with a clip 1 For drain piping<br />
Heat insulator 2 For insulating refrigerant pipe joint<br />
Band 4<br />
93<br />
For fastening the heat insulator<br />
Flat washer for M10 8 For fixing the hanging bolts<br />
Screw M5 4<br />
Installation Instruction 1<br />
Set screw for paper model and panel fixing<br />
This manual<br />
11.5.2 SELECTING THE LOCATION FOR THE INDOOR UNIT<br />
Provide a check port on the piping side ceiling for repair and maintenance.<br />
• Install the indoor unit once the following conditions are satisfied and after receiving the customer approval.<br />
1. The indoor unit must be within a maintenance space.<br />
2. The indoor unit must be free from any obstacles in path of the air inlet and outlet, and must allow spreading<br />
of air throughout the room.<br />
(Unit: mm)<br />
1000 or<br />
more<br />
2500 – 3000<br />
Obstacles Floor<br />
500 or<br />
more<br />
500 or<br />
more<br />
Beam<br />
500 or<br />
more<br />
300 or less<br />
(Unit: mm)<br />
✳ If the height from the floor to ceiling exceeds three meters, air flow distribution deteriorates and the effect is<br />
decreased.<br />
Warnings<br />
3. The installation position must be able to support a load four times the indoor unit weight.<br />
4. The indoor unit must be away from heat and steam sources, but avoid installing it near an entrance.<br />
5. The indoor unit must allow easy draining.<br />
6. The indoor unit must allow easy connection to the outdoor unit.<br />
7. Place the indoor unit according to the height from the ceiling shown in the table below.<br />
8. The indoor unit must be from at least 3m away from any noise-generating equipment. The electrical wiring<br />
should be locally decided.<br />
9. If the power supply is subject to noise generation, add a suppressor.<br />
10. Do not install the indoor unit in a laundry. Electric shocks may result.<br />
11. Before installing in quiet room such as a bedroom, please consult with an authorized distributor.
Note ● Thoroughly study the following installation locations<br />
1. In such places as restaurants and kitchens, considerable amount of oil steam and flour adhere to the turbo<br />
fan, the fin of the heat exchanger and the drain pump, resulting in heat exchange reduction, spraying,<br />
dispersing of water drops, drain pump malfunction, etc.<br />
In these cases, take the following actions:<br />
• Make sure that the ventilation fan for smoke-collecting hood on a cooking table has sufficient capacity so that<br />
it draws oily steam which should not flow into the suction of the air conditioner.<br />
• Make enough distance from the cooking room to install the air conditioner in such place where it may not<br />
suck in oily steam.<br />
<strong>Air</strong> conditioner<br />
Ensure ample<br />
distance<br />
94<br />
Cooking table<br />
2. Avoid installing the air conditioner in such circumstances where cutting oil mist or iron powder exist especially<br />
in factories, etc.<br />
3. Avoid places where inflammable gas is generated, flows-in, contaminated, or leaked.<br />
4. Avoid places where sulphurous acid gas or corrosive gas can be generated.<br />
5. Avoid places near high frequency generators.<br />
Model name Height from the ceiling<br />
S-22YA1E5 S-28YA1E5<br />
S-36YA1E5<br />
S-56YA1E5<br />
S-45YA1E5<br />
280mm or more<br />
11.5.3 INSTALLATION OF INDOOR UNIT<br />
CEILING OPENING DIMENSIONS AND HANGING BOLT LOCATION<br />
The paper model for installation expand or shrink<br />
according to temperature and humidity.<br />
Check on dimensions before using it.<br />
Caution<br />
During the installation, care must be taken not to<br />
damage electric wires.<br />
• The dimensions of the paper model for installation<br />
are the same as those of the ceiling opening<br />
dimensions.<br />
• Be sure to discuss the ceiling drilling work with the<br />
workers concerned.<br />
This air conditioner uses a drain up motor.<br />
Horizontally install the unit using a level gauge.<br />
60<br />
650 (Ceiling opening)<br />
530 60<br />
(Hanging bolt)<br />
580 (Unit size)<br />
580 (Unit size)<br />
Refrigerant pipe<br />
(Unit: mm)<br />
60<br />
530 (Hanging bolt)<br />
60<br />
Drain pipe<br />
650 (Ceiling opening)
POSITIONS OF AIR CONDITIONER BODY AND CEILING SURFACE<br />
Hanging bolt<br />
(W3/8 or M10)<br />
Nut<br />
(W3/8 or M10)<br />
M10 Spring washer<br />
Warning Tighten the nut and bolt to prevent unit from falling<br />
HANGING POSITION OF THE AIR CONDITIONER BODY<br />
Keep the length of the bolt<br />
from the bracket to 40 mm<br />
Ceiling<br />
Adjust to the same height<br />
Paper model<br />
for installation<br />
95<br />
Flat washer for M10 (accessory)<br />
Flat washer for M10 (accessory)<br />
Nut<br />
(W3/8 or M10)<br />
<strong>Air</strong> conditioner body 113 mm<br />
Set screw for<br />
paper model<br />
(4 pieces)<br />
Open the ceiling board along the<br />
other edge of the paper model.<br />
11.5.4 REFRIGERANT PIPING<br />
Refrigerant is charged to the outdoor unit. For details, see the manual for installation work of outdoor unit. (Additional<br />
charging, etc.)<br />
1. Brazing for piping.<br />
a. Execute brazing before tightening the flare nut.<br />
b. Brazing must be executed while blowing<br />
nitrogen gas. (This prevents generation of<br />
oxidized scale in copper pipe.)<br />
2. When there is a lot of brazings for long piping,<br />
install a strainer midway of the piping. (The<br />
strainer is locally supplied.)<br />
3. Use clean copper pipe with inner wall surface<br />
free from mist and dust. Blow nitrogen gas or air<br />
to blow off dust in the pipe before connection.<br />
4. Form the piping according to its routing. Avoid<br />
bending and bending back the same piping point<br />
more than three times. (This will result in<br />
hardening of the pipe).<br />
5. After deforming the pipe, align centers of the<br />
union fitting of the indoor unit and the piping, and<br />
tighten them firmly with wrenches.<br />
6. Connect pipe to the service valve in the outdoor<br />
unit.<br />
282 mm<br />
292 mm<br />
and above<br />
7. After completed the piping connection, be sure to<br />
check if there is gas leakage in indoor and<br />
outdoor connection.<br />
Union<br />
round mark<br />
• Confirm the round mark of the union (thin side) is<br />
always at lower direction after connecting piping.<br />
Vacuum drying<br />
After completing the piping connection, execute vacuum drying for the connecting piping and the indoor unit.<br />
The vacuum drying must be carried out by using the service ports of both the liquid and gas side valves.<br />
CAUTION Use two wrenches and tighten with regular torque.<br />
Flare nut fastening torque N•m (kgf•cm) Liquid side piping Gas side piping<br />
ø6.35mm 18 (180) ø12.7mm 55 (560) ø6.35mm ø12.7mm
11.5.5 INDOOR UNIT DRAIN PIPING<br />
• Drain piping must have down-slope (1/50 to<br />
1/100); be sure not to provide up-and-down slope<br />
to prevent reversal flow.<br />
• During drain piping connection, be careful not to<br />
exert extra force on the drain port at the indoor<br />
unit.<br />
• The outside diameter of the drain connection at<br />
the indoor unit is 32 mm.<br />
Piping material: Polyvinyl chloride pipe VP-25 and<br />
pipe fittings.<br />
• Be sure to perform heat insulation on the drain<br />
piping.<br />
Heat insulation material: Polyethylene foam with<br />
thickness more than 8 mm (local supply).<br />
• The height of drain may be possible up to 750 mm.<br />
Indoor unit<br />
Drain port<br />
750 mm or less<br />
Down-slope (1/50 ~ 1/100)<br />
Elbow<br />
Elbow<br />
96<br />
Indoor<br />
unit<br />
Pipe clamp<br />
Down-slope<br />
Upward routing<br />
Trap<br />
• When drain set piping, install as shown in the<br />
figure below.<br />
Drain Test<br />
The air conditioner uses a drain up motor to drain water. Use the following procedure to test the drain up motor<br />
operation.<br />
• Connect the main drain pipe to exterior and leave<br />
it provisionally until the test comes to an end.<br />
• Feed water to the flexible drain hose and check<br />
the piping for leakage.<br />
• Be sure to check the drain up motor for normal<br />
operating and noise when electric wiring is<br />
complete.<br />
• When the test is complete, connect the flexible<br />
drain hose to the drain port.<br />
11.5.6 HEAT INSULATION<br />
Caution<br />
Drain up motor<br />
Feed water Drain hose<br />
Main drain<br />
pipe<br />
Drain<br />
port Glue the joint<br />
Drain hose connection<br />
Use the clip (accessory)<br />
Be sure to perform heat insulation on the drain, liquid and gas piping. Imperfection in heat insulation work leads to water<br />
leakage.<br />
1. Use the heat insulation material for the refrigerant piping which has an excellent heat-resistance (over 120°C).<br />
Indoor<br />
unit<br />
Band<br />
(Accessory)<br />
Overlap with heat<br />
insulator for piping.<br />
Heat insulator<br />
for piping<br />
(Local supply)<br />
Heat insulator<br />
(Accessory)<br />
Hose clip (Accessory)<br />
Heat insulator (Local<br />
supply) (The thickness<br />
must be at least 8 mm.)<br />
Flexible hose with<br />
heat insulator<br />
(Accessory)<br />
PVC pipe<br />
(O.D. ø25)<br />
(Local supply)<br />
To be glued<br />
It may be required to take off this part for checking<br />
or servicing the drain up motor. Please do not glue.<br />
Make surethat there isnoclearance here.
2. Precautions in high humidity circumstance.<br />
This air conditioner has been tested according to the “JIS Standard Conditions with Mist” and have been<br />
confirmed that there are no faults. However, if it is operated for a long time in high humid atmosphere (dew point<br />
temperature: more than 23°C), water drops are liable to fall. In this case, add heat insulation material according<br />
to the following procedure:<br />
• Heat insulation material to be prepared…<br />
Adiabatic glass wool with thickness 10 to 20<br />
mm.<br />
• Stick glass wool on all air conditioners that are<br />
located in ceiling atmosphere.<br />
• In addition to the normal heat insulation<br />
(thickness: more than 8 mm) for refrigerant<br />
piping (gas piping: thick piping) and drain<br />
piping, add a further of 10 mm to 30 mm<br />
thickness material.<br />
97<br />
Pipe down<br />
Indoor<br />
unit<br />
Drain pipe<br />
Putty<br />
Pipe<br />
Trap<br />
Incision<br />
✳ Put the incision at the trap part of the heat insulator<br />
(for water drain)<br />
Wall seal<br />
• When the outdoor unit is installed on a higher position than the indoor unit, install the trap so as not to instill<br />
rain water into the wall by transmitting in piping.<br />
• Stuff the space among piping, the electric wire, and the drain hose with “Putty” and seal the penetration wall<br />
hole.<br />
Make sure that rain water do not instill into the wall.<br />
11.5.7 ELECTRICAL WIRING<br />
As to main power source and cable size of outdoor unit, read the installation manual attached to the outdoor unit.<br />
Warning<br />
The units must be installed in accordance with applicable national and local regulations.<br />
The units installed by a professional installer must be supplied from a dedicated electrical circuit.<br />
All electric work must be carried out by a qualified technician according to proper technical standards for electrical work and<br />
according to installation manual for installation work.<br />
If circuits with insufficient capacity are used, or if electrical work is not carried out properly, electric shocks or fire may result.<br />
Caution Be sure to install a current leakage breaker or circuit breaker to the main power supply, otherwise electric shocks may result.<br />
Caution<br />
Be sure to connect the unit to secure earth connection. (with a earth resistance of 100 Ω or less).<br />
If the earthing work is not carried out properly, electric shocks may result.<br />
Warning Wiring shall be connected securely using specified cables and fix them securely so that external force of the cables may not<br />
transfer to the terminal connection section. Imperfect connection and fixing leads to fire, etc.<br />
1. Select a power source that is capable of supplying the current required by the air conditioner.<br />
2. Feed the power source to the unit via a distribution switch board designed for this purpose, the switch should<br />
disconnected all poles with a contact separation of at least 3 mm.<br />
3. Always ground the air conditioner with a grounding wire and screw to meet the LOCAL REGULATIONS.<br />
4. Be sure to connect the wires correctly to terminal board with connecting the crimp type ring terminal to the wires.<br />
5. Be sure to turn off the main power before installing and connecting the remote controller.<br />
Note<br />
If momentarily turning on the power supply for both the indoor and outdoor units, do not turn the power off after at least 1<br />
minute has passed. (For the system’s automatic setting.)<br />
Turning off the power supply on the way may cause an abnormal operation.
• Use the standard power cord for Europe (such as H05RN-F or H07RN-F which conforms to CENELEC (HAR)<br />
rating specifications) or use the cables based on IEC standard. (245IEC57, 245IEC66)<br />
Earth leakage breaker<br />
Outdoor unit<br />
• Power supply specifications<br />
Model<br />
name<br />
Power<br />
supply<br />
Switch<br />
Power supply<br />
(ex. 1 ~ 230V)<br />
Infrared remote controller<br />
Earth<br />
Wired controller<br />
Receiver<br />
Branch pipe Refrigerant pipe Control cable<br />
Provide separate power supplies to the indoor and outdoor units.<br />
Power supply cable<br />
Minimum power<br />
cable supply<br />
cables<br />
1<br />
Length<br />
(m)<br />
Leakage<br />
current<br />
breaker<br />
(A)<br />
98<br />
Earth leakage breaker<br />
Indoor unit-A<br />
Switch<br />
Power supply<br />
(ex. 1 ~ 230V)<br />
Earth<br />
Circuit breaker<br />
(Minimum capacity)<br />
Switch<br />
(A)<br />
Fuse<br />
(A)<br />
To other indoor unit<br />
2<br />
Control<br />
Cable<br />
Remote<br />
Controller<br />
Cable<br />
Indoor unit 220V-240V~ 2 mm 2 100 15A 15A 15A 0.75 mm 2 0.5 ~ 2 mm 2<br />
1. The maximum length shows a 2% voltage drop.<br />
2. Use an unshielded bus transmission line.<br />
CONNECTING THE WIRES TO THE CONTROL BOX<br />
• Remove the mounting screw, remove the control box cover, and then connect the wires by following the<br />
procedure given in the illustration.<br />
Earth wire<br />
Detail of wire insertion<br />
Control box cover<br />
Earth lead wire shall be longer than other lead wires<br />
as shown in the figure for the electrical safety in case<br />
of the slipping out of the cord from anchorage.<br />
Caution<br />
Remote control wire<br />
Louver motor wire<br />
Control cable<br />
Make sure that screws of the terminal<br />
are securely tightened.<br />
Screw to connect<br />
the Earth wire<br />
Terminal board<br />
Power supply cable
11.5.8 SETTINGS<br />
The automatic system settings can take up to 1 minute once power is supplied; do not operate the remote<br />
controller during this time.<br />
In the event that 1 remote controller group control is not used, do not set up the group control address (A/C No.).<br />
The wired remote control will not display when the settings for the A/C No. are set to a value other than “01”.<br />
Once the wires are connected to 1 remote controller group control and power is supplied to the indoor unit, the<br />
A/C No. is automatically set. To stop group control use, follow the directions below and clear the A/C No. that was<br />
automatically set after disconnecting the wires for group control. If it is not cleared then the wired controller will not<br />
show any display.<br />
• Instructions on clearing the A/C No. after automatic setup<br />
Turn OFF the indoor unit power supply → Using the DIP switch set the A/C No. to “16” → Turn ON the power<br />
supply of the indoor unit → After approximately 1 minute, turn OFF the power supply to the indoor unit → Set<br />
the DIP switch for the A/C No. to “01”.<br />
(The next time the power supply is turned ON, the A/C No. will be cleared.)<br />
Setting for 1 remote controller group control<br />
• A maximum of 16 indoor units can be connected at the time of group control. (Do not connect the heat pump unit<br />
with the cooling only unit.)<br />
• There are 2 methods for setting the group control address (A/C No.); an automatic and a manual setting method.<br />
• The A/C No. setting cannot be confirmed when using the automatic method.<br />
• To set each indoor unit’s A/C No., use the manual setting method.<br />
However, if the wall type indoor unit is connected, then manual setting is not possible.<br />
■ Automatic setting<br />
• By switching ON the indoor unit’s power supply with the DIP switch where the A/C No. is set to “01” (factory<br />
setting), the A/C No. will be automatically set. (After activating the power for all indoor units, the automatic<br />
setting takes approximately one minute.)<br />
• Once the A/C No. is automatically set, even when the power supply is switched OFF, the setting is stored.<br />
To reset the A/C No. setting, follow the instructions for the “group control automatic address reset”. Refer to<br />
the item “Local setting” in the installation instruction manual that comes with the wired controller for the<br />
“group control automatic address reset” method.<br />
* If the indoor unit’s A/C No. DIP switch is not set to “01”, the automatic setting cannot be reset.<br />
■ <strong>Manual</strong> setting<br />
• The manual setting is performed using each indoor unit’s printed circuit board DIP switch. (Refer to the<br />
diagram below)<br />
• Set the DIP switch once the power supply for each indoor unit is switched OFF. When the power supply is<br />
turned ON, the stored A/C No. is recalled.<br />
• To change the setting of the A/C No., turn OFF the power supply before resetting the DIP switch.<br />
* Ensure that there is no redundancy in the A/C No. Any redundancy can cause faulty control.<br />
* Ensure to set the A/C No. to “01” for 1 indoor unit.<br />
A/C No.<br />
Indoor unit<br />
printed circuit<br />
board DIP switch<br />
(SW2)<br />
01 02 03 04 05 06 07 08<br />
Unnecessary<br />
operation<br />
1-ON 2-ON 1,2-ON 3-ON 1,3-ON 2,3-ON 1,2,3-ON<br />
A/C No.<br />
Indoor unit printed<br />
circuit board DIP<br />
switch (SW2)<br />
09 10 11 12 13 14 15 16<br />
4-ON 1,4-ON 2,4-ON 1,2,4-ON 3,4-ON 1,3,4-ON 2,3,4-ON 1,2,3,4-ON<br />
(Refer to the remote controller’s installation instruction manual for the remote controller settings.)<br />
99
11.5.9 INSTALLATION OF DECORATIVE PANEL<br />
The decorative panel has its installation direction. Confirm the direction by displaying the piping side.<br />
1. Remove the air inlet grille by moving the catchers to center.<br />
<strong>Air</strong> inlet grill<br />
Catcher<br />
Decorative panel<br />
2. Fitting the decorative panel<br />
• Temporarily secure the fixing screws (3 pcs.)<br />
before fitting the decorative panel. (For<br />
temporarily securing the front grille.)<br />
• Place decorative panel on the screws (3 pcs.)<br />
before fitting, move decorative panel as<br />
illustrated and tighten all the screws (4 pcs.).<br />
Caution<br />
• Check before hand the height from the ceiling to<br />
the unit.<br />
• The front grille fitting direction is determined by<br />
the unit direction.<br />
• Only use the screws with the length of 35mm<br />
which is provided, to fix the decorative panel.<br />
• Do not use other screw which is longer it may<br />
cause damage to the drain-pan and other<br />
components.<br />
Hinge<br />
<strong>Air</strong> inlet grill<br />
* Hang the hinge on the hole of decorative panel.<br />
(The direction of the installation if free)<br />
3. Fit the decorative panel and ceiling wall together and confirm no gap in between. Readjust indoor unit height, if<br />
there is a gap between ceiling wall and decorative panel.<br />
Good<br />
example<br />
<strong>Air</strong><br />
<strong>Air</strong><br />
conditioner<br />
unit<br />
Fit the insulator (this part) and be<br />
careful for cool air leakage.<br />
Ceiling<br />
Decorative panel<br />
4. Open the indoor control box cover. (2 pcs)<br />
5. Insert firmly the connector of cosmetic louver and<br />
of the infrared receiver to indoor PCB CN-STM1,<br />
CN-STM2 and CN-DISP.<br />
Be caution not to clamp the cord in between<br />
control board and control board cover.<br />
6. After complete, install back removed part follow<br />
opposite procedure.<br />
Warning<br />
Be sure to hook the air inlet grill string, to<br />
prevent grill from falling and causing injury<br />
from it.<br />
When using the infrared remote controller, refer to the<br />
instruction manual supplied with the infrared remote<br />
controller (option) and the infrared receiver (option)<br />
100<br />
Bad<br />
example<br />
Cool air leakage<br />
(no good)<br />
<strong>Air</strong><br />
Louver motor wire<br />
CN-STM2<br />
Hang the<br />
string Catcher<br />
<strong>Air</strong> inlet grille<br />
<strong>Air</strong><br />
conditioner<br />
unit<br />
Ceiling<br />
CN-STM1<br />
CN-DISP<br />
Decorative panel<br />
Catcher
11.5.10 AS FOR TIMER OUTPUT<br />
• Connect the timer cord to connector (CN-TIMER) on print circuit board.<br />
Timer setting<br />
Printed<br />
circuit<br />
board<br />
CN-TIMER<br />
2<br />
1<br />
Connector<br />
Relay contact<br />
d.c. 5V<br />
101<br />
Timer<br />
Contact<br />
Close: RUN<br />
Open: STOP<br />
• The connector must use XH-2 (housing) manufactured by J.S.T. Mfg. Co., Ltd.<br />
• Wiring must use vinyl code with the sheath or cable line diameter 0.3mm 2 .<br />
• The length of wiring should be within 150m and separated from power line in order to prevent malfunction.<br />
• The input current is DC5V, and 1mA. The relay contact must use the contact for the minute electric current<br />
suitable for this.<br />
11.5.11 PRECAUTION IN TEST RUN<br />
For test run, refer to the “Precautions in test run” in the outdoor unit installation instructions manual.<br />
Test run is conducted using the wired controller, emergency switch on the infrared receiver or by using the outdoor<br />
units. For the wired controller test run see the instructions below.<br />
TEST RUN<br />
NOTE 1<br />
NOTE 2<br />
NOTE 3<br />
NOTE 4<br />
NOTE 5<br />
• Switch the power supply to ON for at least 12 hours in advance before the test run.<br />
• First, press the ON/OFF ( ) button.<br />
• Next, select the operational modes.<br />
• Then press the TEST RUN button within 1 minute of pressing the ON/OFF ( ) button.<br />
• Be sure to run the cooling operation test run for at least 20 minutes before starting the heating<br />
operation test run.<br />
• Press TEST RUN or ON/OFF ( ) button again to cancel the test run mode.<br />
Detaching a connector with electrical current may cause damage to the control board. Ensure to<br />
turn OFF the power supply and wait for at least 5 minutes before performing this operation.<br />
Do not short the remote control wires. (There is no protective circuit operation.) Normal operation<br />
will commence once the short is solved.<br />
During the test run; ensure to operate the units in cooling mode prior to operating the units in<br />
heating mode. Caution: Operating the units in heating mode first may cause compressor failure.<br />
Test run should be performed for a minimum of 20 minutes. (Test run using the remote controller<br />
will change to normal operation after 30 minutes.)<br />
Use the outdoor unit to cancel the outdoor unit test run and the wired controller to cancel the wired<br />
controller test run. For the test run method using the AUTO button on the infrared receiver, refer to<br />
the “Emergency operation” section in the installation instruction manual for the infrared receiver.<br />
11.5.12 CHECK THE FOLLOWING ITEMS WHEN INSTALLATION IS COMPLETE<br />
• After completing work, be sure to measure and record trial run properties, and store measuring data, etc.<br />
• Measuring items are room temperature, outside temperature, suction temperature, blow out temperature, wind<br />
velocity, wind volume, voltage, current, presence of abnormal vibration and noise, operating pressure, piping<br />
temperature.<br />
• As to the structure and appearance, check the following items.<br />
Is circulation of air adequate?<br />
Is draining smooth?<br />
Is heat insulation complete<br />
(refrigerant and drain piping)?<br />
Is there any leakage of refrigerant?<br />
Is remote controller switch operated?<br />
Is there any faulty wiring?<br />
Are the terminal screws loosened?<br />
M3…69-98N cm {7-10kgf cm}<br />
M4…157-196N cm {16-20kgf cm}<br />
M5…196-245N cm {20-25kgf cm}
11.5.13 HAND OVER<br />
• Teach the customer the operation and maintenance procedures, using the operation manual (air filter cleaning,<br />
temperature control, etc.)<br />
As to parts to be sold separately<br />
• With regards to installation of the parts sold separately, follow the installation manual which is provided with the<br />
parts sold separately.<br />
As for work specifications of the outdoor unit, read the OUTDOOR UNIT INSTALLATION MANUAL attached to<br />
the outdoor unit.<br />
102
11.6 INSTALLATION INSTRUCTIONS FS MULTI FOUR-WAY CASSETTE<br />
HP Cooling capacity Model name<br />
R410A<br />
2.5<br />
3.0<br />
3.5<br />
6.3kW<br />
7.1kW<br />
9.0kW<br />
S-63UA1E5<br />
S-71UA1E5<br />
S-90UA1E5<br />
REFRIGERANT<br />
Precautions in terms of safety<br />
Carry out installation work with reliability after thorough reading of this “Precaution in terms of safety”.<br />
• Precautions shown here are differentiated between Warnings and Cautions . Those that have much chances<br />
for leading to significant result such as fatality or serious injury if wrong installation would have been carried out<br />
are listed compiling them especially into the column of Warnings .<br />
However, even in the case of items which are listed in the column of<br />
for leading to significant result depending on the situations.<br />
Cautions , such items also have a chance<br />
•<br />
In either case, important descriptions regarding the safety are listed, then observe them without fail.<br />
As to indications with illustration<br />
•<br />
This mark means “Caution” or “Warning”. This mark means “Earth”.<br />
After installation work has been completed, do not only make sure that the unit is free from any abnormal<br />
condition through the execution of trial run but also explain how to use and how to perform maintenance of this<br />
unit to the customer according to the instruction manual.<br />
In addition, request the customer to keep this manual for installation work together with instruction manual.<br />
Warnings<br />
The appliance must be installed by technician, who takes into account the requirements given by ISO5149 or eventual equivalent<br />
requirements.<br />
As to installation, request the distributor or vendor to perform it. Imperfection in installation caused by that having been carried out by the<br />
customer himself may leads to water leakage, electric shock, fire, etc.<br />
Carry out the installation work with reliability according to this manual for installation work. Imperfection in installation leads to water<br />
leakage, electric shock, fire, etc.<br />
Carry out the installation work with reliability on the place that can bears the weight of this unit sufficiently. Insufficient strength leads to<br />
injury due to falling of the unit.<br />
Carry out predetermined installation work in preparation for strong wind such as typhoon, earthquake. Imperfection in installation work<br />
may lead to accidents arisen from overturn, etc.<br />
The unit must be installed in accordance with applicable national and local regulations.<br />
Any electrical work should only be carried out by qualified technician and use exclusive circuits without fail.<br />
Presence of insufficient capacity in power circuit or imperfection in execution leads to electric shock, fire, etc.<br />
Wiring shall be connected using specified cables and fix them securely so that external force of the cables may not transfer to the<br />
terminal connection section.<br />
Imperfect connection and fixing leads to fire, etc.<br />
If installing inside a small room, measures should be taken to prevent refrigerant levels from building up to critical concentrations in the<br />
event of a refrigerant leak occurring. Please discuss with the place of purchase for advice on what measures may be necessary to<br />
prevent critical concentrations being exceeded. If the refrigerant leaks and reaches critical concentration levels, there is the danger that<br />
death from suffocation may result.<br />
Securely attach the protective covers for the outdoor unit connection cables and power cord so that they do not lift up after installation. If<br />
the covers are not properly attached and installed, the terminal connections may overheat, and fire or electric shock may result.<br />
Switch off all supplies before accessing any electrical part.<br />
If refrigerant gas escapes during installation, ventilate the affected area. If the refrigerant gas comes into contact with sparks or naked<br />
flames, it will cause toxic gases to be generated.<br />
Once installation work is completed, check that there are no refrigerant gas in the room that can come into contact with sparks or flames<br />
from a fan heater, stove or kitchen range, which will cause toxic gases to be generated.<br />
When performing piping work do not mix air except for specified refrigerant (R410A) in refrigeration cycle. It causes capacity down, and<br />
risk of explosion and injury due to high tension inside the refrigerant cycle.<br />
103
Cautions<br />
Carry out Earthing work.<br />
Do not connect the Earth return to the gas pipe, water line pipe, lightning rod and telephone lines.<br />
Imperfection in Earth return may lead to electric shock.<br />
Do not install the unit at the place where the possibility of inflammable gas leakage exists. If gas leakage should arise and the gas builds<br />
up around the unit, such situation may lead to ignition.<br />
Mounting of the earth leakage circuit breaker is required. Omission in mounting of the earth leakage circuit breaker may lead to electric<br />
shock.<br />
Drain piping should be made to ensure secure drainage according to the manual for installation work and carry out the thermal insulation<br />
to prevent the occurrence of condensation.<br />
Imperfection in piping work leads to water leakage and may cause the house and property, etc. to become wet.<br />
Position the indoor unit, outdoor unit, power cords and indoor/outdoor unit connection cables in a way so that they are at least 1 meter<br />
away from televisions and radios. This is to avoid problems such as interference with picture and/or sound. (However, note that<br />
depending on the electromagnetic wave conditions, interference may still occur even if the separation distance is more than 1 meter.)<br />
11.6.1 ACCESSORIES PACKED IN THE INDOOR UNIT CONTAINER<br />
Name Q’ty Appearance Purpose<br />
Drain hose with a clip 1 For drain piping<br />
Heat insulator 2 For insulating refrigerant pipe joint<br />
Band 4<br />
104<br />
For fastening the heat insulator<br />
Flat washer for M10 8 For fixing the hanging bolts<br />
Screw M5 4<br />
Installation Instruction 1<br />
Set screw for paper model and panel fixing<br />
This manual<br />
11.6.2 SELECTING THE LOCATION FOR THE INDOOR UNIT<br />
Provide a check port on the piping side ceiling for repair and maintenance.<br />
• Install the indoor unit once the following conditions are satisfied and after receiving the customer approval.<br />
1. The indoor unit must be within a maintenance space.<br />
2. The indoor unit must be free from any obstacles in path of the air inlet and outlet, and must allow spreading<br />
of air throughout the room.<br />
(Unit: mm)<br />
1000 or<br />
more<br />
2500 – 3000<br />
Obstacles Floor<br />
500 or<br />
more<br />
500 or<br />
more<br />
Beam<br />
500 or<br />
more<br />
300 or less<br />
(Unit: mm)<br />
✳ If the height from the floor to ceiling exceeds three meters, air flow distribution deteriorates and the effect is<br />
decreased.<br />
Warnings<br />
3. The installation position must be able to support a load four times the indoor unit weight.<br />
4. The indoor unit must be away from heat and steam sources, but avoid installing it near an entrance.<br />
5. The indoor unit must allow easy draining.<br />
6. The indoor unit must allow easy connection to the outdoor unit.<br />
7. Place the indoor unit according to the height from the ceiling shown in the table below.<br />
8. The indoor unit must be from at least 3m away from any noise-generating equipment. The electrical wiring<br />
should be locally decided.<br />
9. If the power supply is subject to noise generation, add a suppressor.<br />
10. Do not install the indoor unit in a laundry. Electric shocks may result.
Note ● Thoroughly study the following installation locations<br />
1. In such places as restaurants and kitchens, considerable amount of oil steam and flour adhere to the turbo<br />
fan, the fin of the heat exchanger and the drain pump, resulting in heat exchange reduction, spraying,<br />
dispersing of water drops, drain pump malfunction, etc.<br />
In these cases, take the following actions:<br />
• Make sure that the ventilation fan for smoke-collecting hood on a cooking table has sufficient capacity so that<br />
it draws oily steam which should not flow into the suction of the air conditioner.<br />
• Make enough distance from the cooking room to install the air conditioner in such place where it may not<br />
suck in oily steam.<br />
<strong>Air</strong> conditioner<br />
Ensure ample<br />
distance<br />
105<br />
Cooking table<br />
2. Avoid installing the air conditioner in such circumstances where cutting oil mist or iron powder exist<br />
especially in factories, etc.<br />
3. Avoid places where inflammable gas is generated, flows-in, contaminated, or leaked.<br />
4. Avoid places where sulphurous acid gas or corrosive gas can be generated.<br />
5. Avoid places near high frequency generators.<br />
Model name Height from the ceiling<br />
S-63UA1E5<br />
S-90UA1E5<br />
S-71UA1E5<br />
246mm or more<br />
11.6.3 INSTALLATION OF INDOOR UNIT<br />
CEILING OPENING DIMENSIONS AND HANGING BOLT LOCATION<br />
The paper model for installation expand or shrink<br />
according to temperature and humidity.<br />
Check on dimensions before using it.<br />
Caution<br />
During the installation, care must be taken not to<br />
damage electric wires.<br />
• The dimensions of the paper model for installation<br />
are the same as those of the ceiling opening<br />
dimensions.<br />
• Be sure to discuss the ceiling drilling work with the<br />
workers concerned.<br />
This air conditioner uses a drain up motor.<br />
Horizontally install the unit using a level gauge.<br />
90<br />
880 (Ceiling opening)<br />
700 90<br />
(Hanging bolt)<br />
840 (Unit size)<br />
840 (Unit size)<br />
Refrigerant pipe<br />
(Unit: mm)<br />
42.5<br />
795 (Hanging bolt)<br />
42.5<br />
Drain pipe<br />
880 (Ceiling opening)
POSITIONS OF AIR CONDITIONER BODY AND CEILING SURFACE<br />
Hanging bolt<br />
(W3/8 or M10)<br />
Nut<br />
(W3/8 or M10)<br />
M10 Spring washer<br />
Warning Tighten the nut and bolt to prevent unit from falling<br />
HANGING POSITION OF THE AIR CONDITIONER BODY<br />
<strong>Air</strong> conditioner body gap setting<br />
between ceiling surface should<br />
be 10mm as right figure.<br />
(Adjustment of height direction<br />
should be done after fixing<br />
decorative panel.)<br />
Keep the length of the bolt<br />
from the bracket as 40 mm<br />
Ceiling<br />
106<br />
Flat washer for M10 (accessory)<br />
Flat washer for M10 (accessory)<br />
Nut<br />
(W3/8 or M10)<br />
<strong>Air</strong><br />
conditioner<br />
Paper model for<br />
installation<br />
Ceiling<br />
10 mm<br />
Open the ceiling board along the<br />
outer edge of the paper model<br />
Place the screws for paper model<br />
(4 pieces)<br />
11.6.4 REFRIGERANT PIPING<br />
Refrigerant is charged to the outdoor unit. For details, see the manual for installation work of outdoor unit. (Additional<br />
charging, etc.)<br />
1. Brazing for piping.<br />
a. Execute brazing before tightening the flare nut.<br />
b. Brazing must be executed while blowing<br />
nitrogen gas. (This prevents generation of<br />
oxidized scale in copper pipe.)<br />
2. When there is a lot of brazings for long piping,<br />
install a strainer midway of the piping. (The<br />
strainer is locally supplied.)<br />
3. Use clean copper pipe with inner wall surface<br />
free from mist and dust. Blow nitrogen gas or air<br />
to blow off dust in the pipe before connection.<br />
4. Form the piping according to its routing. Avoid<br />
bending and bending back the same piping point<br />
more than three times. (This will result in<br />
hardening of the pipe).<br />
5. After deforming the pipe, align centers of the<br />
union fitting of the indoor unit and the piping, and<br />
tighten them firmly with wrenches.<br />
6. Connect pipe to the service valve in the outdoor<br />
unit.<br />
7. After completed the piping connection, be sure to<br />
check if there is gas leakage in indoor and<br />
outdoor connection.<br />
Union<br />
round mark<br />
• Confirm the round mark of the union (thin side) is<br />
always at lower direction after connecting piping.<br />
Vacuum drying<br />
After completing the piping connection, execute vacuum drying for the connecting piping and the indoor unit.<br />
The vacuum drying must be carried out by using the service ports of both the liquid and gas side valves.<br />
CAUTION Use two wrenches and tighten with regular torque.<br />
Flare nut fastening torque N•m (kgf•cm) Cooling capacity Liquid piping Gas side piping<br />
ø6.35 18 (180) ø12.7 55 (560) 2.2kW - 6.3kW ø6.35mm ø12.7mm<br />
ø9.52 42 (430) ø15.88 65 (660) 7.1kW or more ø9.52mm ø15.88mm
11.6.5 INDOOR UNIT DRAIN PIPING<br />
• Drain piping must have down-slope (1/50 to<br />
1/100); be sure not to provide up-and-down slope<br />
to prevent reversal flow.<br />
• During drain piping connection, be careful not to<br />
exert extra force on the drain port at the indoor<br />
unit.<br />
• The outside diameter of the drain connection at<br />
the indoor unit is 32 mm.<br />
Piping material: Polyvinyl chloride pipe VP-25 and<br />
pipe fittings.<br />
• Be sure to perform heat insulation on the drain<br />
piping.<br />
Heat insulation material: Polyethylene foam with<br />
thickness more than 8 mm (local supply).<br />
• The height of drain may be possible up to 750 mm.<br />
Indoor unit<br />
Drain port<br />
750 mm or less<br />
Down-slope (1/50 ~ 1/100)<br />
Elbow<br />
Elbow<br />
107<br />
Indoor<br />
unit<br />
Pipe clamp<br />
Down-slope<br />
Upward routing<br />
Trap<br />
• When drain set piping, install as shown in the<br />
figure below.<br />
Drain Test<br />
The air conditioner uses a drain up motor to drain water. Use the following procedure to test the drain up motor<br />
operation.<br />
• Connect the main drain pipe to exterior and leave<br />
it provisionally until the test comes to an end.<br />
• Feed water to the flexible drain hose and check<br />
the piping for leakage.<br />
• Be sure to check the drain up motor for normal<br />
operating and noise when electric wiring is<br />
complete.<br />
• When the test is complete, connect the flexible<br />
drain hose to the drain port.<br />
11.6.6 HEAT INSULATION<br />
Caution<br />
Drain up motor<br />
Feed water Drain hose<br />
Main drain<br />
pipe<br />
Drain<br />
port Glue the joint<br />
Drain hose connection<br />
Use the clip (accessory)<br />
Be sure to perform heat insulation on the drain, liquid and gas piping. Imperfection in heat insulation work leads to water<br />
leakage.<br />
1. Use the heat insulation material for the refrigerant piping which has an excellent heat-resistance (over 120°C).<br />
Indoor<br />
unit<br />
Band<br />
(Accessory)<br />
Overlap with heat<br />
insulator for piping.<br />
Heat insulator<br />
for piping<br />
(Local supply)<br />
Heat insulator<br />
(Accessory)<br />
Hose clip (Accessory)<br />
Heat insulator (Local<br />
supply) (The thickness<br />
must be at least 8 mm.)<br />
Flexible hose with<br />
heat insulator<br />
(Accessory)<br />
PVC pipe<br />
(O.D. ø25)<br />
(Local supply)<br />
To be glued<br />
It may be required to take off this part for checking<br />
or servicing the drain up motor. Please do not glue.<br />
Make surethat there isnoclearance here.
2. Precautions in high humidity circumstance.<br />
This air conditioner has been tested according to the “JIS Standard Conditions with Mist” and have been<br />
confirmed that there are no faults. However, if it is operated for a long time in high humid atmosphere (dew point<br />
temperature: more than 23°C), water drops are liable to fall. In this case, add heat insulation material according to<br />
the following procedure:<br />
• Heat insulation material to be prepared…<br />
Adiabatic glass wool with thickness 10 to 20<br />
mm.<br />
• Stick glass wool on all air conditioners that are<br />
located in ceiling atmosphere.<br />
• In addition to the normal heat insulation<br />
(thickness: more than 8 mm) for refrigerant<br />
piping (gas piping: thick piping) and drain<br />
piping, add a further of 10 mm to 30 mm<br />
thickness material.<br />
108<br />
Pipe down<br />
Indoor<br />
unit<br />
Drain pipe<br />
Putty<br />
Pipe<br />
Trap<br />
Incision<br />
✳ Put the incision at the trap part of the heat insulator<br />
(for water drain)<br />
Wall seal<br />
• When the outdoor unit is installed on a higher position than the indoor unit, install the trap so as not to instill<br />
rain water into the wall by transmitting in piping.<br />
• Stuff the space among piping, the electric wire, and the drain hose with “Putty” and seal the penetration wall<br />
hole.<br />
Make sure that rain water do not instill into the wall.<br />
11.6.7 ELECTRICAL WIRING<br />
As to main power source and cable size of outdoor unit, read the installation manual attached to the outdoor unit.<br />
Warning<br />
The units must be installed in accordance with applicable national and local regulations.<br />
The units installed by a professional installer must be supplied from a dedicated electrical circuit.<br />
All electric work must be carried out by a qualified technician according to proper technical standards for electrical work and<br />
according to installation manual for installation work.<br />
If circuits with insufficient capacity are used, or if electrical work is not carried out properly, electric shocks or fire may result.<br />
Caution Be sure to install a current leakage breaker or circuit breaker to the main power supply, otherwise electric shocks may result.<br />
Caution<br />
Be sure to connect the unit to secure earth connection. (with a earth resistance of 100 Ω or less).<br />
If the earthing work is not carried out properly, electric shocks may result.<br />
Warning Wiring shall be connected securely using specified cables and fix them securely so that external force of the cables may not<br />
transfer to the terminal connection section. Imperfect connection and fixing leads to fire, etc.<br />
1. Select a power source that is capable of supplying the current required by the air conditioner.<br />
2. Feed the power source to the unit via a distribution switch board designed for this purpose, the switch should<br />
disconnected all poles with a contact separation of at least 3 mm.<br />
3. Always ground the air conditioner with a grounding wire and screw to meet the LOCAL REGULATIONS.<br />
4. Be sure to connect the wires correctly to terminal board with connecting the crimp type ring terminal to the wires.<br />
5. Be sure to turn off the main power before installing and connecting the remote controller.<br />
Note<br />
If momentarily turning on the power supply for both the indoor and outdoor units, do not turn the power off after at least 1<br />
minute has passed. (For the system’s automatic setting.)<br />
Turning off the power supply on the way may cause an abnormal operation.
• Use the standard power cord for Europe (such as H05RN-F or H07RN-F which conforms to CENELEC (HAR)<br />
rating specifications) or use the cables based on IEC standard. (245IEC57, 245IEC66)<br />
Earth leakage breaker<br />
Outdoor unit<br />
• Power supply specifications<br />
Model<br />
name<br />
Power<br />
supply<br />
Switch<br />
Power supply<br />
(ex. 1 ~ 230V)<br />
Infrared remote controller<br />
Earth<br />
Wired controller<br />
Receiver<br />
Branch pipe Refrigerant pipe Control cable<br />
Provide separate power supplies to the indoor and outdoor units.<br />
Power supply cable<br />
Minimum power<br />
cable supply<br />
cables<br />
1<br />
Length<br />
(m)<br />
Leakage<br />
current<br />
breaker<br />
(A)<br />
109<br />
Earth leakage breaker<br />
Indoor unit-A<br />
Switch<br />
Power supply<br />
(ex. 1 ~ 230V)<br />
Earth<br />
Circuit breaker<br />
(Minimum capacity)<br />
Switch<br />
(A)<br />
Fuse<br />
(A)<br />
To other indoor unit<br />
2<br />
Control<br />
Cable<br />
Remote<br />
Controller<br />
Cable<br />
Indoor unit 220V-240V~ 2 mm 2 100 15A 15A 15A 0.75 mm 2 0.5 ~ 2 mm 2<br />
1. The maximum length shows a 2% voltage drop.<br />
2. Use an unshielded bus transmission line.<br />
CONNECTING THE WIRES TO THE CONTROL BOX<br />
• Remove the mounting screw, remove the control box cover, and then connect the wires by following the<br />
procedure given in the illustration.<br />
Detail of wire insertion<br />
Control box cover<br />
Earth lead wire shall be longer than other lead wires<br />
as shown in the figure for the electrical safety in case<br />
of the slipping out of the cord from anchorage.
11.6.8 SETTINGS<br />
The automatic system settings can take up to 1 minute once power is supplied; do not operate the remote<br />
controller during this time.<br />
In the event that 1 remote controller group control is not used, do not set up the group control address (A/C No.).<br />
The wired remote control will not display when the settings for the A/C No. are set to a value other than “01”.<br />
Once the wires are connected to 1 remote controller group control and power is supplied to the indoor unit, the<br />
A/C No. is automatically set. To stop group control use, follow the directions below and clear the A/C No. that was<br />
automatically set after disconnecting the wires for group control. If it is not cleared then the wired controller will not<br />
show any display.<br />
• Instructions on clearing the A/C No. after automatic setup<br />
Turn OFF the indoor unit power supply → Using the DIP switch set the A/C No. to “16” → Turn ON the power<br />
supply of the indoor unit → After approximately 1 minute, turn OFF the power supply to the indoor unit → Set<br />
the DIP switch for the A/C No. to “01”.<br />
(The next time the power supply is turned ON, the A/C No. will be cleared.)<br />
Setting for 1 remote controller group control<br />
• A maximum of 16 indoor units can be connected at the time of group control. (Do not connect the heat pump unit<br />
with the cooling only unit.)<br />
• There are 2 methods for setting the group control address (A/C No.); an automatic and a manual setting method.<br />
• The A/C No. setting cannot be confirmed when using the automatic method.<br />
• To set each indoor unit’s A/C No., use the manual setting method.<br />
However, if the wall type indoor unit is connected, then manual setting is not possible.<br />
■ Automatic setting<br />
• By switching ON the indoor unit’s power supply with the DIP switch where the A/C No. is set to “01” (factory<br />
setting), the A/C No. will be automatically set. (After activating the power for all indoor units, the automatic<br />
setting takes approximately one minute.)<br />
• Once the A/C No. is automatically set, even when the power supply is switched OFF, the setting is stored.<br />
To reset the A/C No. setting, follow the instructions for the “group control automatic address reset”. Refer to<br />
the item “Local setting” in the installation instruction manual that comes with the wired controller for the<br />
“group control automatic address reset” method.<br />
* If the indoor unit’s A/C No. DIP switch is not set to “01”, the automatic setting cannot be reset.<br />
■ <strong>Manual</strong> setting<br />
• The manual setting is performed using each indoor unit’s printed circuit board DIP switch. (Refer to the<br />
diagram below)<br />
• Set the DIP switch once the power supply for each indoor unit is switched OFF. When the power supply is<br />
turned ON, the stored A/C No. is recalled.<br />
• To change the setting of the A/C No., turn OFF the power supply before resetting the DIP switch.<br />
* Ensure that there is no redundancy in the A/C No. Any redundancy can cause faulty control.<br />
* Ensure to set the A/C No. to “01” for 1 indoor unit.<br />
A/C No.<br />
Indoor unit<br />
printed circuit<br />
board DIP switch<br />
(SW2)<br />
01 02 03 04 05 06 07 08<br />
Unnecessary<br />
operation<br />
1-ON 2-ON 1,2-ON 3-ON 1,3-ON 2,3-ON 1,2,3-ON<br />
A/C No.<br />
Indoor unit printed<br />
circuit board DIP<br />
switch (SW2)<br />
09 10 11 12 13 14 15 16<br />
4-ON 1,4-ON 2,4-ON 1,2,4-ON 3,4-ON 1,3,4-ON 2,3,4-ON 1,2,3,4-ON<br />
(Refer to the remote controller’s installation instruction manual for the remote controller settings.)<br />
110
11.6.9 INSTALLATION OF DECORATIVE PANEL<br />
The decorative panel has its installation direction. Confirm the direction by displaying the piping side.<br />
1. Remove the air inlet grill from the decorative panel.<br />
2. Remove the corner cover in 4 corner places.<br />
Pull hook of corner cover as direction ○1 , at same<br />
time remove it by sliding out in direction ○2 .<br />
2<br />
1<br />
Corner cover<br />
Hook<br />
Decorative panel<br />
3. Fix the hanger (2 pieces) of the decorative panel<br />
to the indoor unit.<br />
There is direction information at decorative panel<br />
[PIPING SIDE] indication meaning the direction of<br />
piping side.<br />
4. Adjust between decorative panel fixing hole and<br />
indoor unit screw hole.<br />
5. Fix decorative panel with 4 screws with already fix<br />
at paper model for installation.<br />
Caution<br />
Install certainly the decorative panel.<br />
Cool air leakage causes sweating. → Water drops fall.<br />
111<br />
Before installing the decorative panel, always remove<br />
the paper template<br />
Hinge<br />
<strong>Air</strong> inlet grill<br />
* Hang the hinge on the hole of decorative panel.<br />
(The direction of the installation is free.)
Good example<br />
<strong>Air</strong><br />
<strong>Air</strong> conditioner unit<br />
Ceiling<br />
Decorative panel<br />
Fit the insulator (this part) and be careful for cool air leakage.<br />
6. Adhere the cosmetic panel and ceiling wall<br />
together and confirm no gap in between. Readjust<br />
indoor unit height, if there is a gap between ceiling<br />
wall and decorative panel although it have been<br />
fixed by screw.<br />
If there are no effect to the indoor unit level and<br />
drain piping etc., the adjustment of indoor unit<br />
height can be adjusted through the corner cover<br />
hole. Tighten back firmly the fixing nut of indoor<br />
unit after adjustment has been made.<br />
7. Open the indoor control box cover. (2 pcs)<br />
8. Insert firmly the connector of cosmetic louver to<br />
indoor PCB CN-STM1 and CN-STM2.<br />
Be caution not to clamp the cord in between<br />
control board and control board cover.<br />
9. After complete, install back removed part follow<br />
opposite procedure.<br />
Warning<br />
Be sure to hook the air inlet grill string, to<br />
prevent grill from falling and causing injury<br />
from it.<br />
When using the infrared remote controller, refer to the<br />
instruction manual supplied with the infrared remote<br />
controller (option) and the infrared receiver (option)<br />
112<br />
Bad example<br />
Cool air leakage<br />
(no good)<br />
11.6.10 AS FOR TIMER OUTPUT<br />
• Connect the timer cord to connector (CN-TIMER) on print circuit board.<br />
Timer setting<br />
Printed<br />
circuit<br />
board<br />
CN-TIMER<br />
2<br />
1<br />
Connector<br />
Relay contact<br />
d.c. 5V<br />
Timer<br />
Contact<br />
Close: RUN<br />
Open: STOP<br />
<strong>Air</strong><br />
Clamp the lead wire with a<br />
band here<br />
CN-STM2<br />
Louver motor wire<br />
<strong>Air</strong> conditioner unit<br />
CN-STM1<br />
Ceiling<br />
Decorative panel<br />
• The connector must use XH-2 (housing) manufactured by J.S.T. Mfg. Co., Ltd.<br />
• Wiring must use vinyl code with the sheath or cable line diameter 0.3mm 2 .<br />
• The length of wiring should be within 150m and separated from power line in order to prevent malfunction.<br />
• The input current is DC5V, and 1mA. The relay contact must use the contact for the minute electric current<br />
suitable for this.
11.6.11 PRECAUTION IN TEST RUN<br />
For test run, refer to the “Precautions in test run” in the outdoor unit installation instructions manual.<br />
Test run is conducted using the wired controller, emergency switch on the infrared receiver or by using the outdoor<br />
units. For the wired controller test run see the instructions below.<br />
TEST RUN<br />
NOTE 1<br />
NOTE 2<br />
NOTE 3<br />
NOTE 4<br />
NOTE 5<br />
• Switch the power supply to ON for at least 12 hours in advance before the test run.<br />
• First, press the ON/OFF ( ) button.<br />
• Next, select the operational modes.<br />
• Then press the TEST RUN button within 1 minute of pressing the ON/OFF ( ) button.<br />
• Be sure to run the cooling operation test run for at least 20 minutes before starting the heating<br />
operation test run.<br />
• Press TEST RUN or ON/OFF ( ) button again to cancel the test run mode.<br />
Detaching a connector with electrical current may cause damage to the control board. Ensure to<br />
turn OFF the power supply and wait for at least 5 minutes before performing this operation.<br />
Do not short the remote control wires. (There is no protective circuit operation.) Normal operation<br />
will commence once the short is solved.<br />
During the test run; ensure to operate the units in cooling mode prior to operating the units in<br />
heating mode. Caution: Operating the units in heating mode first may cause compressor failure.<br />
Test run should be performed for a minimum of 20 minutes. (Test run using the remote controller<br />
will change to normal operation after 30 minutes.)<br />
Use the outdoor unit to cancel the outdoor unit test run and the wired controller to cancel the wired<br />
controller test run. For the test run method using the AUTO button on the infrared receiver, refer to<br />
the “Emergency operation” section in the installation instruction manual for the infrared receiver.<br />
11.6.12 CHECK THE FOLLOWING ITEMS WHEN INSTALLATION IS COMPLETE<br />
• After completing work, be sure to measure and record trial run properties, and store measuring data, etc.<br />
• Measuring items are room temperature, outside temperature, suction temperature, blow out temperature, wind<br />
velocity, wind volume, voltage, current, presence of abnormal vibration and noise, operating pressure, piping<br />
temperature.<br />
• As to the structure and appearance, check the following items.<br />
Is circulation of air adequate?<br />
Is draining smooth?<br />
Is heat insulation complete<br />
(refrigerant and drain piping)?<br />
Is there any leakage of refrigerant?<br />
Is remote controller switch operated?<br />
Is there any faulty wiring?<br />
Are the terminal screws loosened?<br />
M3…69-98N cm {7-10kgf cm}<br />
M4…157-196N cm {16-20kgf cm}<br />
M5…196-245N cm {20-25kgf cm}<br />
11.6.13 HAND OVER<br />
• Teach the customer the operation and maintenance procedures, using the operation manual (air filter cleaning,<br />
temperature control, etc.)<br />
As to parts to be sold separately<br />
• With regards to installation of the parts sold separately, follow the installation manual which is provided with the<br />
parts sold separately.<br />
As for work specifications of the outdoor unit, read the OUTDOOR UNIT INSTALLATION MANUAL attached to<br />
the outdoor unit.<br />
113
11.7 CZ-RWRU1 Infrared Receiver (For Cassette only) Installation <strong>Manual</strong><br />
• Before installing the infrared remote controller, be sure to thoroughly read the “Precautions in terms of safety”<br />
section of the installation manual provided with the indoor unit.<br />
Also, be sure to thoroughly read the wireless remote controller installation manual as well.<br />
• After installation is complete, carry out a test operation to check that the unit functions properly and also explain<br />
the operation and cleaning procedures to the customer in accordance with the details in the instruction manual.<br />
Furthermore, ask the customer to keep this installation manual and the operation instruction in a safe place for<br />
later reference.<br />
11.7.1 ACCESSORIES SUPPLIED WITH THE INFRARED RECEIVER<br />
1<br />
No. Name Qty.<br />
○1 Infrared Receiver (For Cassette only) 1<br />
○2 Installation manual (This manual) 1<br />
11.7.2 INSTALLING THE INFRARED RECEIVER<br />
• When installing the infrared receiver (accessory), remove one of the corner covers from the decorative panel and<br />
replace it.<br />
• The receiver should be in a place where it will not be affected by the direct light from fluorescent lights. (Refer to<br />
the illustration below)<br />
(If using an inverter-type fluorescent light, keep the receiver at least 1 meter away from the light, otherwise the<br />
remote control operation may not work properly.)<br />
Indoor unit<br />
Infrared Receiver<br />
300 mm or more<br />
114<br />
2<br />
Fluorescent light<br />
Turn on the fluorescent lights and check to that the receiver properly receives the<br />
remote control signal while the fluorescent lights are lit.<br />
(If the earth wire is not connect, the infrared receiver may not receive the signal.)<br />
• The infrared remote controller can be used to operate indoor units at a maximum range of 8 meters from directly<br />
in front of the indoor unit.<br />
• If the remote controller is at an angle to the receiver, the operating range may become shortened.<br />
INFRARED RECEIVER ASSEMBLY PROCEDURE<br />
○1 Attach the infrared receiver onto the decorative panel of the indoor unit as shown in the figure.<br />
1. Remove the “corner cover” to the left side of the “Panasonic” mark on the decorative panel as shown in the figure.<br />
2. Attach the infrared receiver in the same place where the corner cover was removed from.<br />
Route the joint cord for wiring and connect it to the P.C.B connector in the control box of the indoor unit. After connecting the<br />
○2<br />
cord, secure all the cords and wiring (louver motor wire, etc.) together with the clamp.
1. After attaching the infrared receiver to the decorative panel, route the receiver’s joint cord as shown in the<br />
diagram below and pass the cord through the hook located on the rear side of the decorative panel so it does not<br />
stick out.<br />
2. Remove the control box cover by removing the two screws and connect joint cord for wiring to the P.C.B<br />
connector in the control box.<br />
Note<br />
When securing the decorative panel to the unit, be sure that the receiver’s joint cord remains inside the decorative<br />
panel and is not caught on the ceiling.<br />
Joint cord for receiver remains<br />
inside the decorative panel.<br />
Ceiling<br />
115<br />
Indoor unit<br />
Decorative panel
11.7.3 EMERGENCY OPERATION<br />
• If you do not have the infrared remote controller (because the batteries are weak, or some other reason prevents<br />
the infrared remote controller from being used), the emergency operation can be carried out at the receiver.<br />
AUTO switch<br />
Infrared Receiver<br />
• Press the AUTO switch to start the emergency operation. Press the AUTO switch once more to stop the<br />
emergency operation.<br />
• Press the AUTO switch for 5 seconds or more (it will beep once) to start the cooling operation. Again,<br />
press the AUTO switch for 5 seconds or more (it will beep twice) to start the heating operation.<br />
• The setting of the fan speed and louver control will be fixed as shown by the table below.<br />
• While the indoor unit is running, the POWER indicator on the infrared receiver will illuminate, and it will light off<br />
when the indoor unit stops.<br />
• Heating operation is not available for indoor units which are for cooling only.<br />
Operation mode Fan speed Louver<br />
Cooling Hi Previous setting<br />
Heating Hi Previous setting<br />
INSTRUCTIONS FOR USERS<br />
Please refer to the instruction manual provided with the indoor unit for instructions on how to use the infrared remote<br />
controller.<br />
116
11.8 INSTALLATION INSTRUCTIONS FS MULTI DUCT TYPE<br />
REFRIGERANT<br />
R410A<br />
Precautions in terms of safety<br />
117<br />
HP Cooling capacity Model name<br />
0.8 2.2kW S-22NA1E5<br />
1.0 2.8kW S-28NA1E5<br />
1.25 3.2kW S-32NA1E5<br />
1.5 3.6kW S-36NA1E5<br />
1.75 4.5kW S-45NA1E5<br />
2.0 5.6kW S-56NA1E5<br />
Carry out installation work with reliability after thorough reading of this “Precaution in terms of safety”.<br />
• Precautions shown here are differentiated between Warnings and Cautions . Those that have much chances<br />
for leading to significant result such as fatality or serious injury if wrong installation would have been carried out<br />
are listed compiling them especially into the column of Warnings .<br />
However, even in the case of items which are listed in the column of<br />
for leading to significant result depending on the situations.<br />
Cautions , such items also have a chance<br />
•<br />
In either case, important descriptions regarding the safety are listed, then observe them without fail.<br />
As to indications with illustration<br />
•<br />
This mark means “Caution” or “Warning”. This mark means “Earth”.<br />
After installation work has been completed, do not only make sure that the unit is free from any abnormal<br />
condition through the execution of trial run but also explain how to use and how to perform maintenance of this<br />
unit to the customer according to the instruction manual.<br />
In addition, request the customer to keep this manual for installation work together with instruction manual.<br />
Warnings<br />
The appliance must be installed by technician, who takes into account the requirements given by ISO5149 or eventual equivalent<br />
requirements.<br />
As to installation, request the distributor or vendor to perform it. Imperfection in installation caused by that having been carried out by the<br />
customer himself may leads to water leakage, electric shock, fire, etc.<br />
Carry out the installation work with reliability according to this manual for installation work. Imperfection in installation leads to water<br />
leakage, electric shock, fire, etc.<br />
Carry out the installation work with reliability on the place that can bears the weight of this unit sufficiently. Insufficient strength leads to<br />
injury due to falling of the unit.<br />
Carry out predetermined installation work in preparation for strong wind such as typhoon, earthquake. Imperfection in installation work<br />
may lead to accidents arisen from overturn, etc.<br />
The unit must be installed in accordance with applicable national and local regulations.<br />
Any electrical work should only be carried out by qualified technician and use exclusive circuits without fail.<br />
Presence of insufficient capacity in power circuit or imperfection in execution leads to electric shock, fire, etc.<br />
Wiring shall be connected using specified cables and fix them securely so that external force of the cables may not transfer to the<br />
terminal connection section.<br />
Imperfect connection and fixing leads to fire, etc.<br />
If installing inside a small room, measures should be taken to prevent refrigerant levels from building up to critical concentrations in the<br />
event of a refrigerant leak occurring. Please discuss with the place of purchase for advice on what measures may be necessary to<br />
prevent critical concentrations being exceeded. If the refrigerant leaks and reaches critical concentration levels, there is the danger that<br />
death from suffocation may result.<br />
Securely attach the protective covers for the outdoor unit connection cables and power cord so that they do not lift up after installation. If<br />
the covers are not properly attached and installed, the terminal connections may overheat, and fire or electric shock may result.<br />
Switch off all supplies before accessing any electrical part.<br />
If refrigerant gas escapes during installation, ventilate the affected area. If the refrigerant gas comes into contact with sparks or naked<br />
flames, it will cause toxic gases to be generated.<br />
Once installation work is completed, check that there are no refrigerant gas in the room that can come into contact with sparks or flames<br />
from a fan heater, stove or kitchen range, which will cause toxic gases to be generated.<br />
When performing piping work do not mix air except for specified refrigerant (R410A) in refrigeration cycle. It causes capacity down, and<br />
risk of explosion and injury due to high tension inside the refrigerant cycle.
Cautions<br />
Carry out Earthing work.<br />
Do not connect the Earth return to the gas pipe, water line pipe, lightning rod and telephone lines.<br />
Imperfection in Earth return may lead to electric shock.<br />
Do not install the unit at the place where the possibility of inflammable gas leakage exists. If gas leakage should arise and the gas builds<br />
up around the unit, such situation may lead to ignition.<br />
Mounting of the earth leakage circuit breaker is required. Omission in mounting of the earth leakage circuit breaker may lead to electric<br />
shock.<br />
Drain piping should be made to ensure secure drainage according to the manual for installation work and carry out the thermal insulation<br />
to prevent the occurrence of condensation.<br />
Imperfection in piping work leads to water leakage and may cause the house and property, etc. to become wet.<br />
Position the indoor unit, outdoor unit, power cords and indoor/outdoor unit connection cables in a way so that they are at least 1 meter<br />
away from televisions and radios. This is to avoid problems such as interference with picture and/or sound. (However, note that<br />
depending on the electromagnetic wave conditions, interference may still occur even if the separation distance is more than 1 meter.)<br />
11.8.1 ACCESSORIES PACKED IN THE INDOOR UNIT CONTAINER<br />
Name Q’ty Appearance Purpose<br />
Drain hose 1 For drain piping<br />
Heat insulator 2 For insulating refrigerant pipe joint<br />
Band 4<br />
118<br />
For fastening the heat insulator<br />
Flat washer for M10 8 For fixing the hanging bolts<br />
Installation Instruction 1<br />
This manual<br />
11.8.2 SELECTING THE LOCATION FOR THE INDOOR UNIT<br />
Provide a check port on the piping side ceiling for repair and maintenance.<br />
• Install the indoor unit once the following conditions are satisfied and after receiving the customer approval.<br />
1. The indoor unit must be within a maintenance space.<br />
2. The indoor unit must be free from any obstacles in path of the air inlet and outlet, and must allow spreading<br />
of air throughout the room.<br />
(Unit: mm)<br />
[Top view]<br />
600<br />
Front<br />
Inspection hole<br />
Control box<br />
<strong>Air</strong> conditioner<br />
1000<br />
600<br />
Above 2500mm<br />
✳ If the height from the floor to ceiling exceeds three meters, air flow distribution deteriorates and the effect is<br />
decreased.<br />
Warnings<br />
3. The installation position must be able to support a load four times the indoor unit weight.<br />
4. The indoor unit must be away from heat and steam sources, but avoid installing it near an entrance.<br />
5. The indoor unit must allow easy draining.<br />
6. The indoor unit must allow easy connection to the outdoor unit.<br />
7. Place the indoor unit easy water drainage. (Suitable dimension “H” is necessary to get slop to drain as figure.)<br />
8. The indoor unit must be from at least 3m away from any noise-generating equipment. The electrical wiring<br />
should be locally decided.<br />
9. If the power supply is subject to noise generation, add a suppressor.<br />
10. Do not install the indoor unit in a laundry. Electric shocks may result.
Note ● Thoroughly study the following installation locations<br />
1. In such places as restaurants and kitchens, considerable amount of oil steam and flour adhere to the turbo<br />
fan, the fin of the heat exchanger and the drain pump, resulting in heat exchange reduction, spraying,<br />
dispersing of water drops, drain pump malfunction, etc.<br />
In these cases, take the following actions:<br />
• Make sure that the ventilation fan for smoke-collecting hood on a cooking table has sufficient capacity so that<br />
it draws oily steam which should not flow into the suction of the air conditioner.<br />
• Make enough distance from the cooking room to install the air conditioner in such place where it may not<br />
suck in oily steam.<br />
<strong>Air</strong> conditioner<br />
Ensure ample<br />
distance<br />
Cooking table<br />
2. Avoid installing the air conditioner in such circumstances where<br />
cutting oil mist or iron powder exist especially in factories, etc.<br />
3. Avoid places where inflammable gas is generated, flows-in,<br />
contaminated, or leaked.<br />
4. Avoid places where sulphurous acid gas or corrosive gas can be<br />
generated.<br />
5. Avoid places near high frequency generators.<br />
11.8.3 INSTALLATION OF INDOOR UNIT<br />
POSITION OF SUSPENSION BOLT<br />
550<br />
70<br />
440<br />
900<br />
940<br />
POSITIONS OF AIR CONDITIONER BODY AND CEILING SURFACE<br />
Hanging bolt<br />
(W3/8 or M10)<br />
Nut<br />
(W3/8 or M10)<br />
M10 Spring washer<br />
Flat washer for M10 (accessory)<br />
Flat washer for M10 (accessory)<br />
Nut<br />
(W3/8 or M10)<br />
Warning Tighten the nut and bolt to prevent unit from falling<br />
119<br />
(Unit: mm)<br />
Use the ventilation fan for smoke-collection<br />
hood with suf cient capacity.<br />
• Place a padding between the unit and duct to<br />
absorb unnecessary vibration.<br />
• Install the unit connecting to the side of a drainage<br />
hole as shown in the diagram for easy water<br />
drainage.<br />
Keep the length of the bolt<br />
from the b racket as 40mm<br />
10mm<br />
Drainage hole<br />
H
INSTALLATION OF DUCT<br />
1. There are three ways to install the duct for the air inlet as shown below; (a) ~ (c).<br />
2. The bottom of the panel can be converted into an air inlet [as the case of diagram (c)] as shown below;<br />
11.8.4 REFRIGERANT PIPING<br />
Refrigerant is charged to the outdoor unit. For details, see the manual for installation work of outdoor unit. (Additional<br />
charging, etc.)<br />
1. Brazing for piping.<br />
a. Execute brazing before tightening the flare nut.<br />
b. Brazing must be executed while blowing<br />
nitrogen gas. (This prevents generation of<br />
oxidized scale in copper pipe.)<br />
2. When there is a lot of brazings for long piping,<br />
install a strainer midway of the piping. (The<br />
strainer is locally supplied.)<br />
3. Use clean copper pipe with inner wall surface free<br />
from mist and dust. Blow nitrogen gas or air to<br />
blow off dust in the pipe before connection.<br />
4. Form the piping according to its routing. Avoid<br />
bending and bending back the same piping point<br />
more than three times. (This will result in<br />
hardening of the pipe).<br />
5. After deforming the pipe, align centers of the<br />
union fitting of the indoor unit and the piping, and<br />
tighten them firmly with wrenches.<br />
6. Connect pipe to the service valve or ball valve<br />
which is located below the outdoor unit.<br />
120<br />
7. After completed the piping connection, be sure to<br />
check if there is gas leakage in indoor and<br />
outdoor connection.<br />
Union<br />
round mark<br />
• Confirm the round mark of the union (thin side) is<br />
always at lower direction after connecting piping.<br />
Vacuum drying<br />
After completing the piping connection, execute vacuum drying for the connecting piping and the indoor unit.<br />
The vacuum drying must be carried out by using the service ports of both the liquid and gas side valves.<br />
CAUTION Use two wrenches and tighten with regular torque.<br />
Flare nut fastening torque N•m (kgf•cm) Cooling capacity Liquid piping Gas piping<br />
ø6.35mm 18 (180) ø12.7mm 55 (560) 2.2kW - 6.3kW ø6.35mm ø12.7mm<br />
ø9.52mm 42 (430) ø15.88mm 65 (660) 7.1kW or more ø9.52mm ø15.88mm
11.8.5 INDOOR UNIT DRAIN PIPING<br />
• Drain piping must have down-slope (1/50 to<br />
1/100); be sure not to provide up-and-down slope<br />
to prevent reversal flow.<br />
• During drain piping connection, be careful not to<br />
exert extra force on the drain port at the indoor<br />
unit.<br />
• The outside diameter of the drain connection at<br />
the indoor unit is 16 mm.<br />
Piping material: Polyvinyl chloride pipe VP-16 and<br />
pipe fittings.<br />
• Be sure to perform heat insulation on the drain<br />
piping.<br />
Heat insulation material: Polyethylene foam with<br />
thickness more than 8 mm (local supply).<br />
11.8.6 HEAT INSULATION<br />
Caution<br />
121<br />
Indoor<br />
unit<br />
Pipe clamp<br />
Down-slope<br />
Upward routing<br />
Be sure to perform heat insulation on the drain, liquid and gas piping. Imperfection in heat insulation work leads to water<br />
leakage.<br />
1. Use the heat insulation material for the refrigerant piping which has an excellent heat-resistance (over 120°C).<br />
Indoor<br />
unit<br />
Band<br />
(Accessory)<br />
Overlap with heat<br />
insulator for piping.<br />
Heat insulator<br />
for piping<br />
(Local supply)<br />
Heat insulator<br />
(Accessory)<br />
Hose clip (Accessory)<br />
Heat insulator (Local<br />
supply) (The thickness<br />
must be at least 8 mm.)<br />
Trap<br />
Flexible hose with<br />
heat insulator<br />
(Accessory)<br />
PVC pipe<br />
(O.D. ø16)<br />
(Local supply)<br />
To be glued<br />
It may be required to take off this part for checking<br />
or servicing the drain up motor. Please do not glue.<br />
Make surethat there isnoclearance here.<br />
2. Precautions in high humidity circumstance.<br />
This air conditioner has been tested according to the “JIS Standard Conditions with Mist” and have been<br />
confirmed that there are no faults. However, if it is operated for a long time in high humid atmosphere (dew point<br />
temperature: more than 23°C), water drops are liable to fall. In this case, add heat insulation material according<br />
to the following procedure:<br />
• Heat insulation material to be prepared…<br />
Adiabatic glass wool with thickness 10 to 20<br />
mm.<br />
• Stick glass wool on all air conditioners that are<br />
located in ceiling atmosphere.<br />
• In addition to the normal heat insulation<br />
(thickness: more than 8 mm) for refrigerant<br />
piping (gas piping: thick piping) and drain<br />
piping, add a further of 10 mm to 30 mm<br />
thickness material.<br />
Pipe down<br />
Indoor<br />
unit<br />
Drain pipe<br />
Putty<br />
Pipe<br />
Trap<br />
Incision<br />
✳ Put the incision at the trap part of the heat insulator<br />
(for water drain)<br />
Wall seal<br />
• When the outdoor unit is installed on a higher position than the indoor unit, install the trap so as not to instill<br />
rain water into the wall by transmitting in piping.<br />
• Stuff the space among piping, the electric wire, and the drain hose with “Putty” and seal the penetration wall<br />
hole.<br />
Make sure that rain water do not instill into the wall.
3. The duct connection of the air outlet thermal insulation.<br />
<strong>Air</strong> outlet<br />
122<br />
Thermal insulation<br />
(Local supply)<br />
11.8.7 ELECTRICAL WIRING<br />
As to main power source and cable size of outdoor unit, read the installation manual attached to the outdoor unit.<br />
Warning<br />
The units must be installed in accordance with applicable national and local regulations.<br />
The units installed by a professional installer must be supplied from a dedicated electrical circuit.<br />
All electric work must be carried out by a qualified technician according to proper technical standards for electrical work and<br />
according to installation manual for installation work.<br />
If circuits with insufficient capacity are used, or if electrical work is not carried out properly, electric shocks or fire may result.<br />
Caution Be sure to install a current leakage breaker or circuit breaker to the main power supply, otherwise electric shocks may result.<br />
Caution<br />
Be sure to connect the unit to secure earth connection. (with a earth resistance of 100 Ω or less).<br />
If the earthing work is not carried out properly, electric shocks may result.<br />
Warning Wiring shall be connected securely using specified cables and fix them securely so that external force of the cables may not<br />
transfer to the terminal connection section. Imperfect connection and fixing leads to fire, etc.<br />
1. Select a power source that is capable of supplying the current required by the air conditioner.<br />
2. Feed the power source to the unit via a distribution switch board designed for this purpose, the switch should<br />
disconnected all poles with a contact separation of at least 3 mm.<br />
3. Always ground the air conditioner with a grounding wire and screw to meet the LOCAL REGULATIONS.<br />
4. Be sure to connect the wires correctly to terminal board with connecting the crimp type ring terminal to the wires.<br />
5. Be sure to turn off the main power before installing and connecting the remote controller.<br />
Note<br />
If momentarily turning on the power supply for both the indoor and outdoor units, do not turn the power off after at least 1<br />
minute has passed. (For the system’s automatic setting.)<br />
Turning off the power supply on the way may cause an abnormal operation.<br />
• Use the standard power cord for Europe (such as H05RN-F or H07RN-F which conforms to CENELEC (HAR)<br />
rating specifications) or use the cables based on IEC standard. (245IEC57, 245IEC66)<br />
Earth leakage breaker<br />
Outdoor unit<br />
Switch<br />
Power supply<br />
(ex. 1 ~ 230V)<br />
Infrared remote controller<br />
Earth<br />
Wired controller<br />
Receiver<br />
Earth leakage breaker<br />
Indoor unit-A<br />
Switch<br />
Power supply<br />
(ex. 1 ~ 230V)<br />
Earth<br />
Branch pipe Refrigerant pipe Control cable<br />
Provide separate power supplies to the indoor and outdoor units.<br />
To other indoor unit
• Power supply specifications<br />
Model<br />
name<br />
Power<br />
supply<br />
Power supply cable<br />
Minimum power<br />
cable supply<br />
cables<br />
1<br />
Length<br />
(m)<br />
Leakage<br />
current<br />
breaker<br />
(A)<br />
123<br />
Circuit breaker<br />
(Minimum capacity)<br />
Switch<br />
(A)<br />
Fuse<br />
(A)<br />
2<br />
Control<br />
Cable<br />
Remote<br />
Controller<br />
Cable<br />
Indoor unit 220V-240V~ 2 mm 2 100 15A 15A 15A 0.75 mm 2 0.5 ~ 2 mm 2<br />
1. The maximum length shows a 2% voltage drop.<br />
2. Use an unshielded bus transmission line.<br />
CONNECTING THE WIRES TO THE CONTROL BOX<br />
• Remove the mounting screw, remove the control box cover, and then connect the wires by following the<br />
procedure given in the illustration.<br />
Control box<br />
Screw<br />
Control box cover<br />
11.8.8 SETTINGS<br />
The automatic system settings can take up to 1 minute once power is supplied; do not operate the remote<br />
controller during this time.<br />
In the event that 1 remote controller group control is not used, do not set up the group control address (A/C No.).<br />
The wired remote control will not display when the settings for the A/C No. are set to a value other than “01”.<br />
Once the wires are connected to 1 remote controller group control and power is supplied to the indoor unit, the<br />
A/C No. is automatically set. To stop group control use, follow the directions below and clear the A/C No. that was<br />
automatically set after disconnecting the wires for group control. If it is not cleared then the wired controller will not<br />
show any display.<br />
• Instructions on clearing the A/C No. after automatic setup<br />
Turn OFF the indoor unit power supply → Using the DIP switch set the A/C No. to “16” → Turn ON the power<br />
supply of the indoor unit → After approximately 1 minute, turn OFF the power supply to the indoor unit → Set<br />
the DIP switch for the A/C No. to “01”.<br />
(The next time the power supply is turned ON, the A/C No. will be cleared.)<br />
Setting for 1 remote controller group control<br />
• A maximum of 16 indoor units can be connected at the time of group control. (Do not connect the heat pump unit<br />
with the cooling only unit.)<br />
• There are 2 methods for setting the group control address (A/C No.); an automatic and a manual setting method.<br />
• The A/C No. setting cannot be confirmed when using the automatic method.
• To set each indoor unit’s A/C No., use the manual setting method.<br />
However, if the wall type indoor unit is connected, then manual setting is not possible.<br />
■ Automatic setting<br />
• By switching ON the indoor unit’s power supply with the DIP switch where the A/C No. is set to “01” (factory<br />
setting), the A/C No. will be automatically set. (After activating the power for all indoor units, the automatic<br />
setting takes approximately one minute.)<br />
• Once the A/C No. is automatically set, even when the power supply is switched OFF, the setting is stored.<br />
To reset the A/C No. setting, follow the instructions for the “group control automatic address reset”. Refer to<br />
the item “Local setting” in the installation instruction manual that comes with the wired controller for the<br />
“group control automatic address reset” method.<br />
* If the indoor unit’s A/C No. DIP switch is not set to “01”, the automatic setting cannot be reset.<br />
■ <strong>Manual</strong> setting<br />
• The manual setting is performed using each indoor unit’s printed circuit board DIP switch. (Refer to the<br />
diagram below)<br />
• Set the DIP switch once the power supply for each indoor unit is switched OFF. When the power supply is<br />
turned ON, the stored A/C No. is recalled.<br />
• To change the setting of the A/C No., turn OFF the power supply before resetting the DIP switch.<br />
* Ensure that there is no redundancy in the A/C No. Any redundancy can cause faulty control.<br />
* Ensure to set the A/C No. to “01” for 1 indoor unit.<br />
A/C No.<br />
Indoor unit<br />
printed circuit<br />
board DIP switch<br />
(SW2)<br />
01 02 03 04 05 06 07 08<br />
Unnecessary<br />
operation<br />
1-ON 2-ON 1,2-ON 3-ON 1,3-ON 2,3-ON 1,2,3-ON<br />
A/C No.<br />
Indoor unit printed<br />
circuit board DIP<br />
switch (SW2)<br />
09 10 11 12 13 14 15 16<br />
4-ON 1,4-ON 2,4-ON 1,2,4-ON 3,4-ON 1,3,4-ON 2,3,4-ON 1,2,3,4-ON<br />
(Refer to the remote controller’s installation instruction manual for the remote controller settings.)<br />
11.8.9 AS FOR TIMER OUTPUT<br />
• Connect the timer cord to connector (CN-TIMER) on print circuit board.<br />
Timer setting<br />
Printed<br />
circuit<br />
board<br />
CN-TIMER<br />
2<br />
1<br />
Connector<br />
Relay contact<br />
d.c. 5V<br />
124<br />
Timer<br />
Contact<br />
Close: RUN<br />
Open: STOP<br />
• The connector must use XH-2 (housing) manufactured by J.S.T. Mfg. Co., Ltd.<br />
• Wiring must use vinyl code with the sheath or cable line diameter 0.3mm 2 .<br />
• The length of wiring should be within 150m and separated from power line in order to prevent malfunction.<br />
• The input current is DC5V, and 1mA. The relay contact must use the contact for the minute electric current<br />
suitable for this.
11.8.10 PRECAUTION IN TEST RUN<br />
For test run, refer to the “Precautions in test run” in the outdoor unit installation instructions manual.<br />
Test run is conducted using the wired controller, emergency switch on the infrared receiver or by using the outdoor<br />
units. For the wired controller test run see the instructions below.<br />
TEST RUN<br />
NOTE 1<br />
NOTE 2<br />
NOTE 3<br />
NOTE 4<br />
NOTE 5<br />
• Switch the power supply to ON for at least 12 hours in advance before the test run.<br />
• First, press the ON/OFF ( ) button.<br />
• Next, select the operational modes.<br />
• Then press the TEST RUN button within 1 minute of pressing the ON/OFF ( ) button.<br />
• Be sure to run the cooling operation test run for at least 20 minutes before starting the heating<br />
operation test run.<br />
• Press TEST RUN or ON/OFF ( ) button again to cancel the test run mode.<br />
Detaching a connector with electrical current may cause damage to the control board. Ensure to<br />
turn OFF the power supply and wait for at least 5 minutes before performing this operation.<br />
Do not short the remote control wires. (There is no protective circuit operation.) Normal operation<br />
will commence once the short is solved.<br />
During the test run; ensure to operate the units in cooling mode prior to operating the units in<br />
heating mode. Caution: Operating the units in heating mode first may cause compressor failure.<br />
Test run should be performed for a minimum of 20 minutes. (Test run using the remote controller<br />
will change to normal operation after 30 minutes.)<br />
Use the outdoor unit to cancel the outdoor unit test run and the wired controller to cancel the wired<br />
controller test run. For the test run method using the AUTO button on the infrared receiver, refer to<br />
the “Emergency operation” section in the installation instruction manual for the infrared receiver.<br />
11.8.11 CHECK THE FOLLOWING ITEMS WHEN INSTALLATION IS COMPLETE<br />
• After completing work, be sure to measure and record trial run properties, and store measuring data, etc.<br />
• Measuring items are room temperature, outside temperature, suction temperature, blow out temperature, wind<br />
velocity, wind volume, voltage, current, presence of abnormal vibration and noise, operating pressure, piping<br />
temperature.<br />
• As to the structure and appearance, check the following items.<br />
Is circulation of air adequate?<br />
Is draining smooth?<br />
Is heat insulation complete<br />
(refrigerant and drain piping)?<br />
Is there any leakage of refrigerant?<br />
Is remote controller switch operated?<br />
Is there any faulty wiring?<br />
Are the terminal screws loosened?<br />
M3…69-98N cm {7-10kgf cm}<br />
M4…157-196N cm {16-20kgf cm}<br />
M5…196-245N cm {20-25kgf cm}<br />
11.8.12 HAND OVER<br />
• Teach the customer the operation and maintenance procedures, using the operation manual (air filter cleaning,<br />
temperature control, etc.)<br />
As to parts to be sold separately<br />
• With regards to installation of the parts sold separately, follow the installation manual which is provided with the<br />
parts sold separately.<br />
As for work specifications of the outdoor unit, read the OUTDOOR UNIT INSTALLATION MANUAL attached to<br />
the outdoor unit.<br />
125
11.9 DUCT TYPE AIR CONDITIONERS INSTALLATION INSTRUCTIONS<br />
HP Cooling capacity Model name<br />
R410A<br />
1.75<br />
2.0<br />
2.5<br />
4.5kW<br />
5.6kW<br />
6.3kW<br />
S-45MA1E5<br />
S-56MA1E5<br />
S-63MA1E5<br />
3.0 7.1kW S-71MA1E5<br />
3.5 9.0kW S-90MA1E5<br />
REFRIGERANT<br />
Precautions in terms of safety<br />
Carry out installation work with reliability after thorough reading of this “Precaution in terms of safety”.<br />
• Precautions shown here are differentiated between Warnings and Cautions . Those that have much chances<br />
for leading to significant result such as fatality or serious injury if wrong installation would have been carried out<br />
are listed compiling them especially into the column of Warnings .<br />
However, even in the case of items which are listed in the column of<br />
for leading to significant result depending on the situations.<br />
Cautions , such items also have a chance<br />
•<br />
In either case, important descriptions regarding the safety are listed, then observe them without fail.<br />
As to indications with illustration<br />
•<br />
This mark means “Caution” or “Warning”. This mark means “Earth”.<br />
After installation work has been completed, do not only make sure that the unit is free from any abnormal<br />
condition through the execution of trial run but also explain how to use and how to perform maintenance of this<br />
unit to the customer according to the instruction manual.<br />
In addition, request the customer to keep this manual for installation work together with instruction manual.<br />
Warnings<br />
The appliance must be installed by technician, who takes into account the requirements given by ISO5149 or eventual equivalent<br />
requirements.<br />
As to installation, request the distributor or vendor to perform it. Imperfection in installation caused by that having been carried out by the<br />
customer himself may leads to water leakage, electric shock, fire, etc.<br />
Carry out the installation work with reliability according to this manual for installation work.<br />
Imperfection in installation leads to water leakage, electric shock, fire, etc.<br />
Carry out the installation work with reliability on the place that can bears the weight of this unit sufficiently.<br />
Insufficient strength leads to injury due to falling of the unit.<br />
Carry out predetermined installation work in preparation for strong wind such as typhoon, earthquake.<br />
Imperfection in installation work may lead to accidents arisen from overturn, etc.<br />
The unit must be installed in accordance with applicable national and local regulations.<br />
Any electrical work should only be carried out by qualified technician and use exclusive circuits without fail.<br />
Presence of insufficient capacity in power circuit or imperfection in execution leads to electric shock, fire, etc.<br />
Wiring shall be connected using specified cables and fix them securely so that external force of the cables may not transfer to the<br />
terminal connection section.<br />
Imperfect connection and fixing leads to fire, etc.<br />
If installing inside a small room, measures should be taken to prevent refrigerant levels from building up to critical concentrations in the<br />
event of a refrigerant leak occurring. Please discuss with the place of purchase for advice on what measures may be necessary to<br />
prevent critical concentrations being exceeded. If the refrigerant leaks and reaches critical concentration levels, there is the danger that<br />
death from suffocation may result.<br />
Securely attach the protective covers for the outdoor unit connection cables and power cord so that they do not lift up after installation. If<br />
the covers are not properly attached and installed, the terminal connections may overheat, and fire or electric shock may result.<br />
Switch off all supplies before accessing any electrical part.<br />
If refrigerant gas escapes during installation, ventilate the affected area. If the refrigerant gas comes into contact with sparks or naked<br />
flames, it will cause toxic gases to be generated.<br />
Once installation work is completed, check that there are no refrigerant gas in the room that can come into contact with sparks or flames<br />
from a fan heater, stove or kitchen range, which will cause toxic gases to be generated.<br />
When performing piping work do not mix air except for specified refrigerant (R410A) in refrigeration cycle. It causes capacity down, and<br />
risk of explosion and injury due to high tension inside the refrigerant cycle.<br />
126
Cautions<br />
Carry out Earthing work.<br />
Do not connect the Earth return to the gas pipe, water line pipe, lightning rod and telephone lines.<br />
Imperfection in Earth return may lead to electric shock<br />
Do not install the unit at the place where the possibility of inflammable gas leakage exists. If gas leakage should arise and the gas builds<br />
up around the unit, such situation may lead to ignition.<br />
Mounting of the earth leakage circuit breaker is required. Omission in mounting of the earth leakage circuit breaker may lead to electric<br />
shock.<br />
Drain piping should be made to ensure secure drainage according to the manual for installation work and carry out the thermal insulation<br />
to prevent the occurrence of condensation.<br />
Imperfection in piping work leads to water leakage and may cause the house and property, etc. to become wet.<br />
Position the indoor unit, outdoor unit, power cords and indoor/outdoor unit connection cables in a way so that they are at least 1 meter<br />
away from televisions and radios. This is to avoid problems such as interference with picture and/or sound. (However, note that<br />
depending on the electromagnetic wave conditions, interference may still occur even if the separation distance is more than 1 meter.)<br />
11.9.1 ACCESSORIES PACKED IN THE INDOOR UNIT CONTAINER<br />
No Parts name Q’ty<br />
1 Thermal insulator for refrigerant pipe 2<br />
2 Hose clip for thermal insulator 5<br />
3 M10 Flat waher 8<br />
4 Thermal insulator for drainage hole 1<br />
5 Duct flange R 1<br />
6 Duct flange L 1<br />
7 Screws 4<br />
8 Flexible pipe 1<br />
• (5) and (6) should be installed when the duct will<br />
be installed at the return hole.<br />
11.9.2 SELECTING THE LOCATION FOR THE INDOOR UNIT<br />
Provide a check port on the piping side ceiling for repair and maintenance.<br />
• Install the indoor unit once the following conditions are satisfied and after receiving the customer approval.<br />
1. The indoor unit must be within a maintenance space.<br />
2. The indoor unit must be free from any obstacles in path of the air inlet and outlet, and must allow spreading<br />
of air throughout the room.<br />
✳ If the height from the floor to ceiling exceeds three meters, air flow distribution deteriorates and the effect is<br />
decreased.<br />
Warnings<br />
3. The installation position must be able to support a load four times the indoor unit weight.<br />
4. The indoor unit must be away from heat and steam sources, but avoid installing it near an entrance.<br />
5. The indoor unit must allow easy draining.<br />
6. The indoor unit must allow easy connection to the outdoor unit.<br />
7. Place the indoor unit easy water drainage. (Suitable dimension “H” is necessary to get slop to drain as figure.)<br />
8. The indoor unit must be from at least 3m away from any noise-generating equipment. The electrical wiring<br />
must be shielded with a steel conduit.<br />
9. If the power supply is subject to noise generation, add a suppressor.<br />
10. Do not install the indoor unit in a laundry. Electric shocks may result.<br />
127
Note ● Thoroughly study the following installation locations<br />
1. In such places as restaurants and kitchens, considerable amount of oil steam and flour adhere to the turbo<br />
fan, the fin of the heat exchanger and the drain pump, resulting in heat exchange reduction, spraying,<br />
dispersing of water drops, drain pump malfunction, etc.<br />
In these cases, take the following actions:<br />
• Make sure that the ventilation fan for smoke-collecting hood on a cooking table has sufficient capacity so that<br />
it draws oily steam which should not flow into the suction of the air conditioner.<br />
• Make enough distance from the cooking room to install the air conditioner in such place where it may not<br />
suck in oily steam.<br />
<strong>Air</strong> conditioner<br />
Ensure ample<br />
distance<br />
128<br />
Cooking table<br />
2. Avoid installing the air conditioner in such circumstances where<br />
cutting oil mist or iron powder exist especially in factories, etc.<br />
3. Avoid places where inflammable gas is generated, flows-in,<br />
contaminated, or leaked.<br />
4. Avoid places where sulphurous acid gas or corrosive gas can be<br />
generated.<br />
5. Avoid places near high frequency generators.<br />
11.9.3 INSTALLATION OF INDOOR UNIT<br />
POSITION OF SUPENSION BOLT<br />
• Apply a joint-canvas between the unit and duct to absorb unnecessary vibration.<br />
• Install the unit leaning to a drainage hole side as a figure for easy water drainage.<br />
(unit: mm)<br />
S-45MA1E5<br />
S-56MA1E5<br />
S-63MA1E5<br />
S-71MA1E5<br />
S-90MA1E5<br />
A B C D E<br />
840 780 523 64 650<br />
1060 1000 523 64 650
INSTALLATION OF DUCT<br />
1. The duct of the air inlet could be installed by the three situations as shown in the illustration below (a) ~ (c).<br />
Setting the filter:<br />
Case of (a): Reverse the filter and not install the duct of the air inlet.<br />
Case of (b): Remove the filter (local arrangement) and install the duct of the air inlet.<br />
Case of (c): Change the panel bottom to install the duct of the air inlet.<br />
2. The panel bottom could be changed into air inlet (case of (c)) as shown in the illustration below.<br />
3. When the duct of air inlet will be installed, install the duct flange side R<br />
& L to the air inlet with accessories as shown in the illustration.<br />
4. The filter could be removed from any one of three directions as shown<br />
in the illustration below.<br />
11.9.4 REFRIGERANT PIPING<br />
Refrigerant is charged to the outdoor unit. For details, see the manual for installation work of outdoor unit. (Additional<br />
charging, etc.)<br />
1. Brazing for piping.<br />
a. Execute brazing before tightening the flare nut.<br />
b. Brazing must be executed while blowing<br />
nitrogen gas. (This prevents generation of<br />
oxidized scale in copper pipe.)<br />
2. When there is a lot of brazings for long piping,<br />
install a strainer midway of the piping. (The<br />
strainer is locally supplied.)<br />
3. Use clean copper pipe with inner wall surface free<br />
from mist and dust. Blow nitrogen gas or air to<br />
blow off dust in the pipe before connection.<br />
4. Form the piping according to its routing. Avoid<br />
bending and bending back the same piping point<br />
more than three times. (This will result in<br />
hardening of the pipe).<br />
5. After deforming the pipe, align centers of the<br />
union fitting of the indoor unit and the piping, and<br />
tighten them firmly with wrenches.<br />
6. Connect pipe to the service valve or ball valve<br />
which is located below the outdoor unit.<br />
129<br />
7. After completed the piping connection, be sure to<br />
check if there is gas leakage in indoor and<br />
outdoor connection.<br />
• Confirm the black mark of the union (thin side) is<br />
always at lower direction after connecting piping.
Vacuum drying<br />
After completing the piping connection, execute vacuum drying for the connecting piping and the indoor unit.<br />
The vacuum drying must be carried out by using the service ports of both the liquid and gas side valves.<br />
CAUTION Use two wrenches and tighten with regular torque.<br />
Flare nut fastening torque N•m (kgf•cm)<br />
ø6.35mm 18 (180) ø12.7mm 55 (560) ø19.05mm 100 (1020)<br />
ø9.52mm 42 (430) ø15.88mm 65 (660)<br />
11.9.5 INDOOR UNIT DRAIN PIPING<br />
• The unit has two drainage holes at both side.<br />
The drainage hole without connection needs seal and<br />
thermal insulation with accessories.<br />
• Always lay the drain with downward inclination (1/50 to<br />
1/100).<br />
Prevent any upward flow or reverse flow in any part.<br />
• 5mm or thicker formed thermal insulator shall always be<br />
provided for the drain pipe.<br />
11.9.6 HEAT INSULATION<br />
Caution<br />
Be sure to perform heat insulation on the drain, liquid and gas piping. Imperfection in heat insulation work leads to water<br />
leakage.<br />
1. Use the heat insulation material for the refrigerant piping which has an excellent heat-resistance (over 120°C).<br />
Indoor<br />
unit<br />
Band<br />
(Accessory)<br />
Overlap with heat<br />
insulator for piping.<br />
Heat insulator<br />
for piping<br />
(Local supply)<br />
Heat insulator<br />
(Accessory)<br />
Hose clip (Accessory)<br />
Heat insulator (Local<br />
supply) (The thickness<br />
must be at least 8 mm.)<br />
130<br />
Flexible hose with<br />
heat insulator<br />
(Accessory)<br />
PVC pipe<br />
(O.D. ø32)<br />
(Local supply)<br />
To be glued<br />
It may be required to take off this part for checking<br />
or servicing the drain up motor. Please do not glue.<br />
Make surethat there isnoclearance here.<br />
2. Precautions in high humidity circumstance.<br />
This air conditioner has been tested according to the “JIS Standard Conditions with Mist” and have been<br />
confirmed that there are no faults. However, if it is operated for a long time in high humid atmosphere (dew point<br />
temperature: more than 23°C), water drops are liable to fall. In this case, add heat insulation material according<br />
to the following procedure:<br />
• Heat insulation material to be prepared…<br />
Adiabatic glass wool with thickness 10 to 20<br />
mm.<br />
• Stick glass wool on all air conditioners that are<br />
located in ceiling atmosphere.<br />
• In addition to the normal heat insulation<br />
(thickness: more than 8 mm) for refrigerant<br />
piping (gas piping: thick piping) and drain<br />
piping, add a further of 10 mm to 30 mm<br />
thickness material.<br />
Pipe down<br />
Indoor<br />
unit<br />
Drain pipe<br />
Putty<br />
Pipe<br />
Trap<br />
Incision<br />
✳ Put the incision at the trap part of the heat insulator<br />
(for water drain)
Wall seal<br />
• When the outdoor unit is installed on a higher position than the indoor unit, install the trap so as not to instill<br />
rain water into the wall by transmitting in piping.<br />
• Stuff the space among piping, the electric wire, and the drain hose with “Putty” and seal the penetration wall<br />
hole.<br />
Make sure that rain water do not instill into the wall.<br />
3. The duct connection of the air outlet needs thermal insulation.<br />
11.9.7 ELECTRICAL WIRING<br />
As to main power source and cable size of outdoor unit, read the installation manual attached to the outdoor unit.<br />
Warning<br />
The units must be installed in accordance with applicable national and local regulations.<br />
The units installed by a professional installer must be supplied from a dedicated electrical circuit.<br />
All electric work must be carried out by a qualified technician according to proper technical standards for electrical work and<br />
according to installation manual for installation work.<br />
If circuits with insufficient capacity are used, or if electrical work is not carried out properly, electric shocks or fire may result.<br />
Caution Be sure to install a current leakage breaker or circuit breaker to the main power supply, otherwise electric shocks may result.<br />
Caution<br />
Be sure to connect the unit to secure earth connection. (with a earth resistance of 100 Ω or less).<br />
If the earthing work is not carried out properly, electric shocks may result.<br />
Warning Wiring shall be connected securely using specified cables and fix them securely so that external force of the cables may not<br />
transfer to the terminal connection section. Imperfect connection and fixing leads to fire, etc.<br />
1. Select a power source that is capable of supplying the current required by the air conditioner.<br />
2. Feed the power source to the unit via a distribution switch board designed for this purpose, the switch should<br />
disconnected all poles with a contact separation of at least 3 mm.<br />
3. Always ground the air conditioner with a grounding wire and screw to meet the LOCAL REGULATIONS.<br />
4. Be sure to connect the wires correctly to terminal board with connecting the crimp type ring terminal to the wires.<br />
5. Be sure to turn off the main power before installing and connecting the remote controller.<br />
Note<br />
If momentarily turning on the power supply for both the indoor and outdoor units, do not turn the power off after at least 1<br />
minute has passed. (For the system’s automatic setting.)<br />
Turning off the power supply on the way may cause an abnormal operation.<br />
• Use the standard power cord for Europe (such as H05RN-F or H07RN-F which conforms to CENELEC (HAR)<br />
rating specifications) or use the cables based on IEC standard. (245IEC57, 245IEC66)<br />
Earth leakage breaker<br />
Outdoor unit<br />
Switch<br />
Power supply<br />
(ex. 1 ~ 230V)<br />
Infrared remote controller<br />
Earth<br />
Wired controller<br />
Receiver<br />
Branch pipe Refrigerant pipe Control cable<br />
Provide separate power supplies to the indoor and outdoor units.<br />
131<br />
Earth leakage breaker<br />
Indoor unit-A<br />
Switch<br />
Power supply<br />
(ex. 1 ~ 230V)<br />
Earth<br />
To other indoor unit
• Power supply specifications<br />
Model<br />
name<br />
Power<br />
supply<br />
Power supply cable<br />
Minimum power<br />
cable supply<br />
cables<br />
1<br />
Length<br />
(m)<br />
Leakage<br />
current<br />
breaker<br />
(A)<br />
132<br />
Circuit breaker<br />
(Minimum capacity)<br />
Switch<br />
(A)<br />
Fuse<br />
(A)<br />
2<br />
Control<br />
Cable<br />
Remote<br />
Controller<br />
Cable<br />
Indoor unit 220V-240V~ 2 mm 2 100 15A 15A 15A 0.75 mm 2 0.5 ~ 2 mm 2<br />
1. The maximum length shows a 2% voltage drop.<br />
2. Use an unshielded bus transmission line.<br />
CONNECTING THE WIRES TO THE CONTROL BOX<br />
• Remove the mounting screw, remove the control box cover, and then connect the wires by following the<br />
procedure given in the illustration.<br />
11.9.8 SETTINGS<br />
The automatic system settings can take up to 1 minute once power is supplied; do not operate the remote<br />
controller during this time.<br />
In the event that 1 remote controller group control is not used, do not set up the group control address (A/C No.).<br />
The wired remote control will not display when the settings for the A/C No. are set to a value other than “01”.<br />
Once the wires are connected to 1 remote controller group control and power is supplied to the indoor unit, the<br />
A/C No. is automatically set. To stop group control use, follow the directions below and clear the A/C No. that was<br />
automatically set after disconnecting the wires for group control. If it is not cleared then the wired controller will not<br />
show any display.<br />
• Instructions on clearing the A/C No. after automatic setup<br />
Turn OFF the indoor unit power supply → Using the DIP switch set the A/C No. to “16” → Turn ON the power<br />
supply of the indoor unit → After approximately 1 minute, turn OFF the power supply to the indoor unit → Set<br />
the DIP switch for the A/C No. to “01”.<br />
(The next time the power supply is turned ON, the A/C No. will be cleared.)<br />
(Setting for 1 remote controller group control)<br />
• A maximum of 16 indoor units can be connected at the time of group control. (Do not connect the heat pump unit<br />
with the cooling only unit.)<br />
• There are 2 methods for setting the group control address (A/C No.); an automatic and a manual setting method.<br />
• The A/C No. setting cannot be confirmed when using the automatic method.<br />
• To set each indoor unit’s A/C No., use the manual setting method.<br />
However, if the wall type indoor unit is connected, then manual setting is not possible.
■ Automatic setting<br />
• By switching ON the indoor unit’s power supply with the DIP switch where the A/C No. is set to “01” (factory<br />
setting), the A/C No. will be automatically set. (After activating the power for all indoor units, the automatic<br />
setting takes approximately one minute.)<br />
• Once the A/C No. is automatically set, even when the power supply is switched OFF, the setting is stored.<br />
To view the resetting result, follow the instructions for the “group control automatic address reset”. Refer to<br />
the item “On-site setting” in the installation instruction manual that comes with the wired controller for the<br />
“group control automatic address reset” method.<br />
* If the indoor unit’s A/C No. DIP switch is not set to “01”, the automatic setting cannot be reset.<br />
■ <strong>Manual</strong> setting<br />
• The manual setting is performed using each indoor unit’s printed circuit board DIP switch. (Refer to the<br />
diagram below)<br />
• Set the DIP switch once the power supply for each indoor unit is switched OFF. When the power supply is<br />
turned ON, the stored A/C No. is recalled.<br />
• To change the setting of the A/C No., turn OFF the power supply before resetting the DIP switch.<br />
* Ensure that there is no redundancy in the A/C No. Any redundancy can cause faulty control.<br />
* Ensure to set the A/C No. to “01” for 1 indoor unit.<br />
A/C No.<br />
Indoor unit<br />
printed circuit<br />
board DIP switch<br />
(SW2)<br />
01 02 03 04 05 06 07 08<br />
Unnecessary<br />
operation<br />
1-ON 2-ON 1,2-ON 3-ON 1,3-ON 2,3-ON 1,2,3-ON<br />
A/C No.<br />
Indoor unit printed<br />
circuit board DIP<br />
switch (SW2)<br />
09 10 11 12 13 14 15 16<br />
4-ON 1,4-ON 2,4-ON 1,2,4-ON 3,4-ON 1,3,4-ON 2,3,4-ON 1,2,3,4-ON<br />
(Refer to the remote controller’s installation instruction manual for the remote controller settings.)<br />
11.9.9 AS FOR TIMER OUTPUT<br />
• Connect the timer cord to connector (CN-TIMER) on print circuit board.<br />
Timer setting<br />
Printed<br />
circuit<br />
board<br />
CN-TIMER<br />
2<br />
1<br />
Connector<br />
Relay contact<br />
d.c. 5V<br />
133<br />
Timer<br />
Contact<br />
Close: RUN<br />
Open: STOP<br />
• The connector must use XH-2 (housing) manufactured by J.S.T. Mfg. Co., Ltd.<br />
• Wiring must use vinyl code with the sheath or cable line diameter 0.3mm 2 .<br />
• The length of wiring should be within 150m and separated from power line in order to prevent malfunction.<br />
• The input current is DC5V, and 1mA. The relay contact must use the contact for the minute electric current<br />
suitable for this.
11.9.10 PRECAUTION IN TEST RUN<br />
For test run, refer to the “Precautions in test run” in the outdoor unit installation instructions manual.<br />
Test run is conducted using the wired controller, emergency switch on the infrared receiver or by using the outdoor<br />
units. For the wired controller test run see the instructions below.<br />
TEST RUN<br />
NOTE 1<br />
NOTE 2<br />
NOTE 3<br />
NOTE 4<br />
NOTE 5<br />
• Switch the power supply to ON for at least 12 hours in advance before the test run.<br />
• First, press the ON/OFF ( ) button.<br />
• Next, select the operational modes. (Be sure to run the cooling operation for at least 20<br />
minutes before commencement of the test run.)<br />
• Then press the TEST RUN button within 1 minute of pressing the ON/OFF ( ) button.<br />
• Press TEST RUN or ON/OFF ( ) button again to cancel the test run mode.<br />
Detaching a connector with electrical current may cause damage to the control board. Ensure to<br />
turn OFF the power supply and wait for at least 5 minutes before performing this operation.<br />
Do not short the remote control wires. (There is no protective circuit operation.) Normal operation<br />
will commence once the short is solved.<br />
During the test run; ensure to operate the units in cooling mode prior to operating the units in<br />
heating mode. Caution: Operating the units in heating mode first may cause compressor failure.<br />
Test run should be performed for a minimum of 20 minutes. (Test run using the remote controller<br />
will change to normal operation after 30 minutes.)<br />
Use the outdoor unit to cancel the outdoor unit test run and the wired controller to cancel the wired<br />
controller test run. For the test run method using the AUTO button on the infrared receiver, refer to<br />
the “Emergency operation” section in the installation instruction manual for the infrared receiver.<br />
11.9.11 CHECK THE FOLLOWING ITEMS WHEN INSTALLATION IS COMPLETE<br />
• After completing work, be sure to measure and record trial run properties, and store measuring data, etc.<br />
• Measuring items are room temperature, outside temperature, suction temperature, blow out temperature, wind<br />
velocity, wind volume, voltage, current, presence of abnormal vibration and noise, operating pressure, piping<br />
temperature, compressive pressure, airtight pressure.<br />
• As to the structure and appearance, check the following items.<br />
Is circulation of air adequate?<br />
Is draining smooth?<br />
Is heat insulation complete<br />
(refrigerant and drain piping)?<br />
Is there any leakage of refrigerant?<br />
Is remote controller switch operated?<br />
Is there any faulty wiring?<br />
Are the terminal screws loosened?<br />
M3…69-98N cm {7-10kgf cm}<br />
M4…157-196N cm {16-20kgf cm}<br />
M5…196-245N cm {20-25kgf cm}<br />
11.9.12 HAND OVER<br />
• Teach the customer the operation and maintenance procedures, using the operation manual (air filter cleaning,<br />
temperature control, etc.)<br />
As to parts to be sold separately<br />
• With regards to installation of the parts sold separately, follow the installation manual which is provided with the<br />
parts sold separately.<br />
As for work specifications of the outdoor unit, read the OUTDOOR UNIT INSTALLATION MANUAL attached to<br />
the outdoor unit.<br />
134
11.10 CZ-RWRM1 Infrared Receiver (For Ducted series only) Installation<br />
<strong>Manual</strong><br />
• Before installing the infrared remote controller, be sure to thoroughly read the “Precautions in terms of safety”<br />
section of the installation manual provided with the indoor unit. Also, be sure to thoroughly read the infrared<br />
remote controller installation manual as well.<br />
• After installation is complete, carry out a test operation to check that the unit functions properly and also explain<br />
the operation and cleaning procedures to the customer in accordance with the details in the instruction manual.<br />
Furthermore, ask the customer to keep this installation manual and the operation instruction in a safe place for<br />
later reference.<br />
11.10.1 ACCESSORIES SUPPLIED WITH THE INFRARED RECEIVER<br />
No. Name Qty.<br />
○1 Infrared Receiver (For Ducted series only) 1<br />
○2 Installation manual (This manual) 1<br />
11.10.2 INSTALLING THE INFRARED RECEIVER<br />
• The infrared remote controller infrared receiver should be in a place where it will not be affected by the direct light<br />
from fluorescent lights. (Refer to the illustration below)<br />
(If using an inverter-type fluorescent light, keep the receiver at least 1 meter away from the light, otherwise the<br />
remote control operation may not work properly.)<br />
Indoor unit<br />
Infrared Receiver<br />
300 mm or more<br />
135<br />
Fluorescent light<br />
Turn on the fluorescent lights and check to that the infrared receiver properly receives the<br />
remote control signal while the fluorescent lights are lit.<br />
(If the earth wire is not connect, the infrared receiver may not receive the signal.)<br />
• Select a place where the remote controller can be operated easily (after obtaining approval from the customer).<br />
• Install in a place which is away from direct sunlight and as free from humidity as possible.<br />
• Avoid installing the receiver joint cord near refrigerant pipes or drain pipes.<br />
• Install the receiver joint cord at least 5 cm away from other electric wires (including stereo and television cables,<br />
etc.) to avoid mis-operation (electromagnetic noise).<br />
• If passing the infrared receiver joint cord through a wall, be sure to install a water trap above the cord.<br />
• The infrared remote controller can be used to operate indoor units at a maximum range of 8 meters from directly<br />
in front of the indoor unit.<br />
• If the remote controller is at an angle to the receptor, the operating range may become shortened.
Example of embedding into the wall<br />
Remove the decorative panel for the receiver and secure the outlet box with 2 screws so it is embedded.<br />
Control cable<br />
136<br />
Control box<br />
Screw<br />
Control box cover<br />
Remove the control box cover by removing the screws and connect the joint cord for wiring to the P.C.B connector<br />
in the control box.<br />
Core<br />
Secure and clamp the<br />
joint cord together with<br />
the other cable.<br />
Connect joint cord for wiring to the P.C.B<br />
connector in the control box of<br />
the indoor unit.
11.10.3 EMERGENCY OPERATION<br />
• If you do not have the infrared remote controller (because the batteries are weak, or some other reason prevents<br />
the infrared remote controller from being used), the emergency operation can be carried out at the receiver.<br />
Infrared Receiver<br />
AUTO switch<br />
• Press the AUTO switch to start the emergency operation. Press the AUTO switch once more to stop the<br />
emergency operation.<br />
• Press the AUTO switch for 5 seconds or more (it will beep once) to start the cooling operation. Again, press the<br />
AUTO switch for 5 seconds or more (it will beep twice) to start the heating operation.<br />
• The setting of the fan speed and louver control will be fixed as shown by the table below.<br />
• While the indoor unit is running, the POWER indicator on the infrared receiver will illuminate, and it will light off<br />
when the indoor unit stops.<br />
• Heating operation is not available for indoor units which are for cooling only.<br />
Operation mode Fan speed Louver<br />
Cooling Hi Previous setting<br />
Heating Hi Previous setting<br />
INSTRUCTIONS FOR USERS<br />
Please refer to the instruction manual provided with the indoor unit for instructions on how to use the infrared remote<br />
controller.<br />
137
11.11 INFRARED REMOTE CONTROLLER INSTALLATION MANUAL<br />
CZ-RWS1 (Cooling/Heating)<br />
CZ-RWC1 (Cooling only)<br />
• Before installing the infrared remote controller, be sure to thoroughly read the “Precautions in terms of safety”<br />
section of the installation manual provided with the indoor unit.<br />
• After installing the infrared remote controller, carry out a test operation to check that the remote controller<br />
functions properly and also explain the operation and cleaning procedures to the customer in accordance with<br />
the details in the instruction manual. Furthermore, ask the customer to keep this installation manual and the<br />
operation instruction in a safe place for later reference.<br />
11.11.1 ACCESSORIES SUPPLIED WTH THE INFRARED REMOTE CONTROLLER<br />
138<br />
Ø 4 mm<br />
pan screw<br />
No. Name Qty. No. Name Qty.<br />
○1 Infrared Remote Controller 1 ○4 Holder fixing screw 2<br />
○2 R03 battery 2<br />
○3 Holder 1<br />
11.11.2 INFRARED REMOTE CONTROLLER OPERATION<br />
Installation manual (This manual) 1<br />
• The infrared remote controller can be used to operate indoor units at a maximum range of 8 meters from directly<br />
in front of the indoor unit.<br />
• If the remote controller is at an angle to the receptor unit, the operating range may become shortened.<br />
• If using a single remote controller to operate several air conditioners, address setting will be required.<br />
• (To be discussed later.)<br />
INFRARED REMOTE CONTROLLER INSTALLATION PROCEDURE<br />
(Use the holder to store the remote controller.)<br />
The remote controller can be installed to the wall.<br />
○1<br />
○2<br />
Secure the holder with the screws provided. (2 screw<br />
locations)<br />
Insert and remove the remote controller by sliding it in/out<br />
from the top of the holder.<br />
Transmitter<br />
LCD<br />
ON/OFF switch<br />
Cover<br />
Remote controller holder<br />
Secure the remote controller<br />
holder to the wall using the 4<br />
mm pan screws (accessory).<br />
4 mm pan screws (accessory)<br />
Be sure to only use the accessory<br />
screws, otherwise the remote<br />
controller may become damaged.<br />
Note<br />
• The holder should be in a place where it is not exposed to any type of heat (such as direct sunlight or near a<br />
stove).<br />
• The remote controller may not transmit to the receiver properly while it is in the holder. Be sure to remove the<br />
remote controller unit from the holder and face the receiver when operating it.
INSERTING THE BATTERIES<br />
• Remove the battery cover from the infrared remote controller, and then insert the two accessory R03 size<br />
batteries. (Be sure not to mistake the polarities.)<br />
• When inserting the batteries for the first time, or when replacing the batteries, the remote controller can not<br />
operating. In such case, use a ballpoint pen or similar object to push the RC RESET switch.<br />
The remote controller should then start operating normally.<br />
• When operating the remote controller, if the LCD flickers or if everything lights up, replace the remote controller<br />
with new batteries.<br />
11.11.3 ADDRESS SETTING<br />
• If using a single remote controller to operate several air conditioners,<br />
be sure to set the address setting for the remote controller and receiver.<br />
• At the time of shipment from the factory, the address numbers for both<br />
the infrared remote controller and the receiver are set to “1.” (When<br />
using only one indoor unit, the indoor unit can be used without<br />
changing the factory default settings.)<br />
REMOTE CONTROLLER ADDRESS SETTING<br />
Press the address setting switch with a ballpoint pen or similar object to<br />
change the address setting as shown in the illustration to the right.<br />
The address number displayed on the LCD changes in the order:<br />
[ADDRESS 1] → [ADDRESS 2] → [ADDRESS 3] → [GROUP] →<br />
[ADDRESS 1] → ... each time this switch is pressed.<br />
LCD<br />
Only the air conditioner unit which address numbers match<br />
the address number on the LCD can be operated.<br />
Note<br />
• If the batteries are replaced or the remote controller is reset, the address setting will return to ADDRESS 1, so<br />
you will need to repeat the address setting. All setting details which are stored in memory will be cleared, so you<br />
will need to repeat the settings.<br />
• If the address is set to GROUP, more than one indoor unit can be operated at the same time. (Regardless of the<br />
address number of the infrared receiver, the indoor units can be operated with one remote controller.)<br />
INFRARED RECEIVER SETTING<br />
1. Press and hold the emergency operation switch for approximately 11 seconds and release it when it beeps 3<br />
times. *Note: It beeps once after 5 seconds and twice after 8 seconds.<br />
2. Press the AC RESET on the remote controller.<br />
3. When it is properly set, it beeps once to indicate completion.<br />
4. Check to see if the remote controller functions properly or not.<br />
139
11.11.4 SETTINGS<br />
CONTROL USING TWO REMOTE CONTROLLERS<br />
• If both the infrared remote controller and the optional wired remote controller are being used together, either<br />
remote controller can be used to operate the indoor units. (The indoor unit can be used to operated with the last<br />
switch pressed having priority.)<br />
• Up to 2 optional wired remote controllers can be connected and used.<br />
1 REMOTE CONTROLLER GROUP CONTROL<br />
• When using group control, up to a maximum of 16 indoor units can be connected. (Do not mix heat pump units<br />
and cooling only units.)<br />
• For details on how to set the address (A/C No.) for group control, refer to the “Setting for 1 remote controller<br />
group control” section in the installation instructions provided with the indoor unit.<br />
Wired<br />
control<br />
(optional)<br />
Terminal<br />
block<br />
Indoor unit No. 1 Indoor unit No. 2 Indoor unit No. 3<br />
DIP<br />
switch<br />
Printed<br />
circuit<br />
board<br />
Infrared receiver<br />
Terminal<br />
block<br />
140<br />
DIP<br />
switch<br />
Printed<br />
circuit<br />
board<br />
LOCAL SETTING<br />
• Press the SET switch ○2 to operate the “Local setting mode”.<br />
• Use the switches TEMP to choose the “Mode No.”<br />
• Use the switches TIMER to choose the “Setting value”.<br />
• Press the SET switch ○1 to check the setting details.<br />
The setting details are displayed for approximately 4 seconds and then<br />
it exits the local setting mode.<br />
If no operation is performed, the “Local setting mode” clears after 30 seconds.<br />
Terminal<br />
block<br />
DIP<br />
switch<br />
Printed<br />
circuit<br />
board<br />
Model No. Item Setting Value Setting Remarks<br />
000 Clear address<br />
00 Indoor unit address setting<br />
001 ~ 200<br />
Set address<br />
“001” to “200”<br />
000 Not set (Clear)<br />
02 Low sound at night<br />
001<br />
002<br />
Low sound level 1<br />
Low sound level 2<br />
003 Low sound level 3<br />
000 Clear address<br />
06 Outdoor unit address setting<br />
001 ~ 199<br />
Set address<br />
“001” to “199”<br />
Note: 1. The default setting at shipment is “000”.<br />
SETTING INDOOR UNIT ADDRESS<br />
• Setting and clearing the indoor unit address (Central control address) can be performed.<br />
• It is possible to set the address value from “001” to “200”. Setting the address to “000” clears it.<br />
• Set the mode number to “00” and choose a setting value from “000” to “200” according to the local setting<br />
procedure.
SETTING OUTDOOR UNIT ADDRESS<br />
• Setting and clearing the outdoor unit address on the indoor unit can be performed.<br />
• It is possible to set the address value from “001” to “199”. Setting the address to “000” clears it.<br />
• Set the mode number to “06” and choose a setting value from “000” to “199” according to the local setting<br />
procedure.<br />
LOW SOUND SETTING<br />
• Press the SET switch ○2 to operate the “Local setting mode”.<br />
• Use the switches TEMP to choose “02” for the “Mode No.”<br />
• Use the switches TIMER to choose from “001”, “002” or “003” for the “Setting value”.<br />
• Press the SELECT switch and use the<br />
Press the SET switch ○1 to confirm.<br />
switches TIMER to set the night time low noise “end” time.<br />
• After the “end” time is set, the display proceeds to the “start” time setting. Use the switches TIMER to adjust<br />
the time and the SET switch ○1 to fix the “start” time setting. After the “start” time is displayed for approximately<br />
2 seconds, it exits from local setting mode.<br />
Note<br />
* Be sure to always set the current time with the infrared remote controller.<br />
(Refer to the operation instruction for the current time setting method.)<br />
* For ventilation control, select the mode number and corresponding setting in the table according to the local setting<br />
procedure.<br />
141
11.12 WIRED CONTROLLER INSTALLATION MANUAL CZ-RT1<br />
• Before installing the wired controller, be sure to thoroughly read the “Precautions in terms of safety” in the<br />
installation manual provided with the indoor unit.<br />
• After installing the wired controller, carry out a test operation to check that the remote controller functions<br />
properly, and also explain the operation and cleaning procedures to the customer in accordance with the details<br />
in the instruction manual.<br />
Furthermore, ask the customer to keep this installation manual and the operation instruction in a safe place for<br />
later reference.<br />
11.12.1 ACCESSORIES SUPPLIED WITH THE WIRED CONTROLLER<br />
Name Q’ty Diagram Remark<br />
Remote controller 1<br />
Remote control cable 1<br />
142<br />
Connecting between the air conditioner unit and the<br />
remote controller (Length 10 m)<br />
4 mm wood screw 3 Installing the remote controller to the wall (1 spare)<br />
M4 screw 3 Installing the remote controller to an outlet box<br />
Round terminal 2 Connecting to the indoor unit terminal block<br />
11.12.2 NOTES REGARDING WIRED CONTROLLER SET-UP LOCATION<br />
• Select a place where the remote controller can be operated easily (after obtaining approval from the customer).<br />
• Install in a place which is away from direct sunlight and as free from humidity as possible.<br />
• Install in a place which is as flat as possible to avoid the remote controller from warping (If installed to a wall with<br />
an uneven surface, damage to the LCD case or operation problems may result.)<br />
• Install in a place where the LCD can be seen easily. If the remote controller is installed somewhere which is too<br />
high or too low, it may be difficult to read the LCD. (Standard height from the floor is 1.2 to 1.5 meters)<br />
• Avoid installing the remote control cable near refrigerant pipes or drain pipes.<br />
• Install the remote control cable at least 5 cm away from other electric wires (including stereo and television<br />
cables, etc.) to avoid mis-operation (electromagnetic noise).<br />
• If passing the remote control cable through a wall, be sure to install a water trap above the cable.<br />
• Allow sufficient space around the remote controller as shown in the illustration below. Secure the lower case of<br />
the remote controller to the wall or to an outlet box.<br />
30 or more 30 or more<br />
120 or more<br />
Remote<br />
controller<br />
30 or more<br />
(Unit: mm)
• Use the lower case screws (2 pcs) provided in the<br />
accessories.<br />
• Be sure to secure lower case until the head of the<br />
screw is flush.<br />
Failure to do so may cause the head of the screw<br />
to hit the control board and lead to control board<br />
damage.<br />
11.12.3 REMOTE CONTROLLER INSTALLATION<br />
143<br />
* Please fasten the<br />
screws properly;<br />
tops to be lower<br />
than the rib.<br />
Lower case<br />
Rib<br />
Lower case<br />
screw<br />
• Be sure to turn off the main power before installing and connecting the remote controller.<br />
(If the remote controller is connected while the power is still turned on, the remote controller display may not<br />
appear.)<br />
If no display appears on the remote controller, check it by referring to “If the remote controller displays nothing”<br />
under the section “4. Settings”.<br />
• Be careful not to short the remote controller while there is an electrical current running through the remote control<br />
cable.<br />
REMOTE CONTROLLER WIRING<br />
• Connect the indoor unit and the remote controller as shown in the illustration below.<br />
• The remote control cable is non-polar.<br />
• At the time of shipment from the factory, the connector cable used to connect the terminal block and connector<br />
CN1 is disconnected. When connecting the remote controller wiring and installing the remote controller, be sure<br />
to connect the cord to the connector CN1.<br />
• The remote control cable supplied is 10 m long. Cut the necessary length of cable and connect the cable.<br />
Indoor unit<br />
AB<br />
Terminal block<br />
Connect using the<br />
accessory round terminals<br />
Remote control cable (accessory)<br />
Connector cord<br />
Terminal block<br />
Remote<br />
controller<br />
lower case<br />
Connector CN1<br />
Remote<br />
controller<br />
upper case<br />
EXTENDING THE REMOTE CONTROL CABLE<br />
• Solder a sheathed PVC cord or cable (0.5 - 2 mm 2 ) with specifications among those given below to the remote<br />
controller end of the accessory remote control cable (10 m).<br />
• ● PVC round cabtire cord IEC 502<br />
• ● 600V PVC-insulated PVC sheathed round cable IEC 227-4<br />
• ● 600V PVC-insulated PVC sheathed flat cable IEC 227-4<br />
NOTE<br />
The maximum possible length for the remote control cable is 200 m.<br />
Wall
REMOTE CONTROLLER INSTALLATION PROCEDURE<br />
• Remove the remote controller lower case.<br />
(Insert a flat-tipped screw driver or similar 2 to 3<br />
mm into one of the gaps at the bottom of the case,<br />
and then twist the screw driver to open. [Refer to<br />
the illustration on the right.])<br />
Be careful not to damage the lower case.<br />
• Secure the lower case to the wall or outlet box.<br />
(Refer to the illustration on the right for the<br />
embedded and exposed positions for the remote<br />
control cable.)<br />
NOTE<br />
* Do not remove the protective tape which is<br />
affixed to the upper case circuit board.<br />
• If installing the remote controller with the remote<br />
control cable exposed, use nippers to cut a notch<br />
into the upper case. (The feeding-out direction<br />
can be either up or to the left or right)<br />
• Strip the end of the remote control cable which is<br />
to be connected to the remote controller. (Refer to<br />
the illustration on the right)<br />
• Route the remote control cable inside the lower<br />
case in accordance with the intended feeding-out<br />
direction. (Refer to the illustration on the right)<br />
Securely connect the connector CN1. (If it is not<br />
connected, the remote controller will not operate.)<br />
NOTE<br />
* After connecting the connector, do not suspend<br />
the upper case by its own weight, otherwise the<br />
connector cord may break.<br />
144<br />
Lower<br />
case<br />
Gaps<br />
Upper case<br />
Lower case<br />
4 mm screws<br />
(accessories)<br />
Approx. 7 mm<br />
Approx. 20 mm<br />
Do not suspend the<br />
upper case by its own<br />
weight. (The connector<br />
may break.)
Left feeding-out<br />
position<br />
Remote control<br />
cable<br />
Rear feeding-out<br />
position (when<br />
cable is to be<br />
embedded)<br />
Lower case<br />
Top feeding-out position<br />
• If controlling using two remote controllers, refer to<br />
the “Control using two remote controllers” under<br />
section “4. Settings.”<br />
• Secure the upper case to the lower case.<br />
(Hook the upper tab of the upper case into the<br />
lower case, and then push the upper case until it<br />
snaps shut onto the lower case tab, while being<br />
careful not to clamp the remote control cable and<br />
the connector cord.)<br />
Connector cord<br />
Tab<br />
145<br />
Right<br />
feedingout<br />
position<br />
Lower case<br />
Notches<br />
Setting switch<br />
Connector<br />
CN1<br />
MASTER<br />
SLAVE<br />
Temperature sensor<br />
Upper case<br />
Ventilation holes<br />
If remote control cable is embedded<br />
1. Embed an outlet box into the wall, and then secure the remote controller base plate to the outlet box with the two<br />
accessory M4 screws. Make sure that the base plate is flat against the wall at this time, with no bending<br />
(looseness)<br />
2. Pass the remote control cable into the box and then install the remote controller.<br />
Remote controller<br />
upper case<br />
Upper tab<br />
Connector CN1<br />
Remote controller<br />
lower case<br />
M4 screw<br />
(accessory)<br />
Wall<br />
Terminal block<br />
Lower tab<br />
Remote<br />
control cable<br />
Medium-sized square outlet box<br />
(obtain locally)<br />
Upper<br />
case
If installing with the remote control cable exposed<br />
1. Secure the remote controller base plate to the wall with the two accessory 4 mm screws.<br />
2. The feeding-out direction for the remote control cable can be either up or to the left or the right. (Refer to the<br />
illustration above.)<br />
3. Route the remote control cable as shown in the illustration above. Pull the cord firmly around the outside of the<br />
base plate at this time.<br />
11.12.4 SETTINGS<br />
Remote controller upper case<br />
Remote control cable<br />
Upper tab<br />
Connector CN1<br />
Remote controller lower case<br />
4 mm wood screws<br />
(accessory)<br />
Terminal block<br />
Lower tab<br />
CONTROL USING TWO REMOTE CONTROLLERS<br />
• Up to two remote controllers can be installed for a single indoor unit, and either remote controller can be used to<br />
operate the indoor unit. (The indoor unit can be operated with the last switch pressed having priority.)<br />
• Remote controller thermistor cannot be used. Do not switch to the remote controller thermistor.<br />
• Connect the remote controllers<br />
Connect both remote controllers to terminals and on the indoor unit terminal block (non-polar).<br />
Terminal block<br />
Indoor unit<br />
GROUP CONTROL<br />
• Up to a maximum of 16 indoor units can be connected at the time of group control. (Do not connect the heat<br />
pump unit with the cooling unit only.)<br />
• All in the group will be set by the remote controller thermistor setting when using the remote controller thermistor.<br />
• For the address setting method (A/C No. setting), refer to the section “Group control setting” in the installation<br />
manual provided with the indoor unit.<br />
LOCAL MODE SETTING ● Procedure<br />
1. When operation is stopped, press the TEST RUN switch for 5 seconds, and it will switch to LOCAL MODE.<br />
2. Press the UP / DOWN (TEMP & A/C No.) switch and select the “Mode No”.<br />
3. Press the SELECT switch in order to choose the setting value.<br />
4. Press the UP / DOWN (TIMER) switch to choose the “Setting Value”.<br />
5. Press the SET switch to fix the setting that is displayed.<br />
6. After checking the setting, press the TEST RUN switch to return to the normal display.<br />
If no operation is performed, the “Local setting mode” clears after 30 seconds.<br />
146<br />
Wall
Model No. Item Setting Value Setting Remarks<br />
00<br />
Indoor unit address<br />
(Central control address) 001 ~ 200<br />
000 Clear address<br />
147<br />
Set address<br />
[001] ~ [200]<br />
000 Not set (Clear)<br />
02 Low sound at night<br />
001<br />
002<br />
Low sound level 1<br />
Low sound level 2<br />
003 Low sound level 3<br />
000 Clear address<br />
06 Outdoor unit address<br />
001 ~ 199<br />
Set address<br />
[001] ~ [199]<br />
10<br />
Automatic address resetting for group<br />
control<br />
000<br />
001<br />
-<br />
Reset address<br />
11 Switching the thermistor<br />
12 Ventilation unit control (Option)<br />
Note: 1. The default setting at shipment is “000”.<br />
000 Indoor unit thermistor<br />
001 Remote control thermistor<br />
000 -<br />
001 Available (Non-linking)<br />
002 Available (linking OFF)<br />
003 Available (linking ON/OFF)<br />
SETTING INDOOR UNIT ADDRESS (Central control address)<br />
• Checking, setting and clearing the indoor unit address (Central control address) can be performed.<br />
• It is possible to set the address value from “001” to “200”. Setting the address to “000” clears it.<br />
Perform the steps (1) and (2) from the local setting procedure.<br />
○1<br />
For step (2), select “00”.<br />
Press the SELECT switch to check the indoor unit address.<br />
○2<br />
* For group control, choose the air conditioner No. with the UP / DOWN (TEMP & A/C No.) switches.<br />
To check the address only, press the TEST RUN switch to return to the normal display.<br />
○3<br />
To set and clear the address, press the SELECT switch again and it will display the address settings for the<br />
indoor unit.<br />
○4 The UP / DOWN (TIMER) switches set the indoor unit address.<br />
○5<br />
Once the indoor unit address is fixed with the SET switch, and it will return to the check display screen for the<br />
indoor unit address.<br />
* It is possible to choose a different air conditioner No. with the UP / DOWN (TEMP & A/C No.) switches under<br />
group control. After selecting a different air conditioner No., return to step ○3 of the procedure.<br />
○6 After checking the indoor unit address, press the TEST RUN switch to return to the normal display.<br />
SETTING OUTDOOR UNIT ADDRESS<br />
• Checking, setting and clearing the outdoor unit address can be performed.<br />
• It is possible to set the address value from “001” to “199”. Setting the address to “000” clears it.<br />
Perform the steps (1) and (2) from the local setting procedure.<br />
○1<br />
For step (2), select “06”.<br />
Press the SELECT switch to check the outdoor unit address.<br />
○2<br />
* For group control, choose the air conditioner No. with the UP / DOWN (TEMP & A/C No.) switches.<br />
To check the address only, press the TEST RUN switch to return to the normal display.<br />
○3<br />
To set and clear the address, press the SELECT switch again and it will display the address settings for the<br />
outdoor unit.<br />
○4 The UP / DOWN (TIMER) switches set the outdoor unit address.<br />
○5<br />
Once the outdoor unit address is fixed with the SET switch, and it will return to the check display screen for the<br />
outdoor unit address.<br />
* It is possible to choose a different air conditioner No. with the UP / DOWN (TEMP & A/C No.) switches under<br />
group control. After selecting a different air conditioner No., return to step ○3 of the procedure.<br />
○6 After checking the outdoor unit address, press the TEST RUN switch to return to the normal display.
LOW SOUND NIGHT MODE SETTING<br />
Perform the steps (1) through (5) from the local setting procedure.<br />
○1<br />
For step (2), select “02”.<br />
For step (4), select from “001”, “002” or “003”.<br />
○2 Press the MODE (TIMER) switch to display the “start” time for low sound night mode.<br />
○3 Use the UP / DOWN (TIMER) switches to set the start time for low sound night mode.<br />
○4 Press the SELECT switch to display the “end” time for low sound night mode.<br />
○5 Use the UP / DOWN (TIMER) switches to set the end time for low sound night mode.<br />
○6 The start and end time for low sound night mode is fixed with the SET switch.<br />
<br />
After checking the settings, press the TEST RUN switch to return to the normal display.<br />
Note: Be sure to always set the current time with the wired controller.<br />
(Refer to the instruction manual for the current time setting method)<br />
For automatic address resetting for group control, switching the thermistor, and ventilation unit control, set and<br />
choose the mode number and corresponding value in the table according to the local setting procedure.<br />
IF REMOTE CONTROLLER DISPLAYS NOTHING<br />
• Check the power supply to the indoor unit.<br />
• Check once more that the remote control cable is securely connected.<br />
(Check for loose terminals, poor contacts, connection positions on the terminal block, etc.)<br />
• If the above checks show that nothing is wrong but nothing still appears on the remote controller display, refer to<br />
“Settings” in the installation manual that is provided with the indoor unit.<br />
SETTING FOR 1 REMOTE CONTROLLER GROUP CONTROL<br />
• A maximum of 16 indoor units can be connected at the time of group control. (Do not connect the heat pump unit<br />
with the cooling only unit.)<br />
• There are 2 methods for setting the group control address (A/C No.); an automatic and a manual setting method.<br />
• The A/C No. setting cannot be confirmed when using the automatic method.<br />
• To set each indoor unit’s A/C No., use the manual setting method.<br />
However, if the wall type indoor unit is connected, then manual setting is not possible.<br />
■ Automatic setting<br />
• By switching ON the indoor unit’s power supply with the DIP switch where the A/C No. is set to “01” (factory<br />
setting), the A/C No. will be automatically set. (After activating the power for all indoor units, the automatic<br />
setting takes approximately one minute.)<br />
• Once the A/C No. is automatically set, even when the power supply is switched OFF, the setting is stored.<br />
To reset the A/C No. setting, follow the instructions for the “group control automatic address reset”. Refer to<br />
the item “Local setting” in the installation instruction manual that comes with the wired controller for the<br />
“group control automatic address reset” method.<br />
* If the indoor unit’s A/C No. DIP switch is not set to “01”, the automatic setting cannot be reset.<br />
■ <strong>Manual</strong> setting<br />
• The manual setting is performed using each indoor unit’s printed circuit board DIP switch. (Refer to the<br />
diagram below)<br />
• Set the DIP switch once the power supply for each indoor unit is switched OFF. When the power supply is<br />
turned ON, the stored A/C No. is recalled.<br />
• To change the setting of the A/C No., turn OFF the power supply before resetting the DIP switch.<br />
* Ensure that there is no redundancy in the A/C No. Any redundancy can cause faulty control.<br />
* Ensure to set the A/C No. to “01” for 1 indoor unit.<br />
148
A/C No.<br />
Indoor unit<br />
printed circuit<br />
board DIP switch<br />
(SW2)<br />
01 02 03 04 05 06 07 08<br />
Unnecessary<br />
operation<br />
1-ON 2-ON 1,2-ON 3-ON 1,3-ON 2,3-ON 1,2,3-ON<br />
A/C No.<br />
Indoor unit printed<br />
circuit board DIP<br />
switch (SW2)<br />
09 10 11 12 13 14 15 16<br />
4-ON 1,4-ON 2,4-ON 1,2,4-ON 3,4-ON 1,3,4-ON 2,3,4-ON 1,2,3,4-ON<br />
11.12.5 SELF-DIAGNOSIS FUNCTION<br />
• The lit LED 1 (Green) on the printed circuit board for the outdoor unit indicates that the printed circuit board for<br />
COM is operating properly. When it is unlit or blinks irregularly, check the power connections and then turn the<br />
power on again.<br />
IF “CHECK” IS BLINKING ON THE TIMER<br />
• If the “CHECK” display on the wired controller is blinking, the details of the problems are displayed on the timer<br />
display screen each time the CHECK switch is pressed.<br />
• Further details of the problem can be displayed by pressing the SET switch while the general problem details are<br />
being displayed.<br />
Example of current problem display<br />
• •<br />
Press the CHECK switch Further details of the problem can be<br />
displayed by pressing the SET switch.<br />
Problem display<br />
149<br />
Problem details<br />
REVIEWING THE PROBLEM HISTORY<br />
• If the “CHECK” display on the wired controller is not blinking, press the CHECK switch continuously for 5<br />
seconds or more to display the problem details for the last problem or the problem before that.<br />
• You can then switch between the display for the previous problem and the problem before that by pressing the<br />
UP / DOWN (TIMER) switches.<br />
• Press the CHECK switch once more to return to the normal display.<br />
Example of previous problem display<br />
• •<br />
Press the CHECK switch for 5 seconds or<br />
more<br />
Problem display<br />
Further details of the problem can be<br />
displayed by pressing the SET switch.<br />
Problem details
Example of the abnormality before previous display<br />
• •<br />
While the previous display still appears,<br />
press UP (TIMER)<br />
Problem display<br />
150<br />
Further details of the problem can be<br />
displayed by pressing the SET switch.<br />
Problem details<br />
• The display can be switched between the previous problem and the one before that by pressing the UP / DOWN<br />
(TIMER) switches.<br />
• After eliminating the cause of the problem, press the CHECK switch once more to return to the normal display.
11.13 INSTALLATION INSTRUCTIONS FS MULTI OUTDOOR UNIT<br />
HP MODEL NAME<br />
R410A<br />
4 HP<br />
5 HP<br />
6 HP<br />
U-4LA1E5<br />
U-5LA1E5<br />
U-6LA1E5<br />
REFRIGERANT<br />
Refer to the indoor unit installation instruction manual for the indoor unit installation.<br />
Note: Ensure to hand over this installation instruction manual to the person performing the installation and<br />
inform the customer to keep it properly stored.<br />
• This product uses refrigerant series R410A with the design pressure of 4.15 MPa.<br />
• Refer to the caution items listed in “Refrigerant installation” for the installation of the refrigerant piping and<br />
maintain strict control concerning the prevention of mixing impurities (water and mineral oils such as Suniso oils)<br />
with R410A.<br />
• The indoor unit to be connected must be R410A compatible and be sure to check the catalogue, etc. for available<br />
models. The product may not operation properly if connected to other indoor units.<br />
Option parts: For piping installation, branch pipe unit is needed. Make the<br />
necessary preparations for the number of indoor units for piping<br />
installation to be connected.<br />
Caution: Ensure that the branch pipe unit used is compatible with R410A. Refer to<br />
“Refrigerant installation” for the refrigerant piping installation.<br />
Combination of indoor and outdoor units<br />
Outdoor unit<br />
model name<br />
151<br />
Line branch pipe model<br />
number<br />
CZ-P155BK1<br />
Outdoor unit cooling Indoor unit cooling rated capacity Number of connectable indoor units<br />
rated volume Minimum Maximum Minimum Maximum<br />
U-4LA1E5 11.2kW 5.6kW 14.6kW 2 unit 6 unit<br />
U-5LA1E5 14.0kW 7.0kW 18.2kW 2 unit 8 unit<br />
U-6LA1E5 15.5kW 7.8kW 20.2kW 2 unit 8 unit<br />
1. Use the above table to combine the number of indoor units with the appropriate capacity which matches the<br />
outdoor unit’s cooling capacity rate. Set the combined number of units to comply with the appropriate capacity.<br />
2. Assuming a system where all indoor units are operating at the same time, set the total capacity of the indoor<br />
units to less than the outdoor unit’s cooling capacity rate.<br />
Precautions in terms of safety<br />
Carry out installation work with reliability after thorough reading of this “Precaution in terms of safety”.<br />
• Precautions shown here are differentiated between Warnings and Cautions . Those that have much chances<br />
for leading to significant result such as fatality or serious injury if wrong installation would have been carried out<br />
are listed compiling them especially into the column of Warnings .<br />
However, even in the case of items which are listed in the column of<br />
for leading to significant result depending on the situations.<br />
Cautions , such items also have a chance<br />
•<br />
In either case, important descriptions regarding the safety are listed, then observe them without fail.<br />
As to indications with illustration<br />
•<br />
This mark means “Caution” or “Warning”. This mark means “Earth”.<br />
After installation work has been completed, do not only make sure that the unit is free from any abnormal<br />
condition through the execution of try run but also explain how to use and how to perform maintenance of this<br />
unit to the customer according to the instruction manual.<br />
In addition, request the customer to keep this manual for installation work together with instruction manual.
Warnings<br />
The appliance must be installed by technician, who takes into account the requirements given by ISO 5149 or eventual equivalent<br />
requirements.<br />
As to installation, request the distributor or vendor to perform it. Imperfection in installation caused by that having been carried out by the<br />
customer himself may leads to water leakage, electric shock, fire, etc.<br />
Carry out the installation work with reliability according to this manual for installation work.<br />
Imperfection in installation lead to water leakage, electric shock, fire, etc.<br />
Carry out the installation work with reliability on the place that can bear the weight of this unit sufficiently. Insufficient strength leads to<br />
injury due to falling of the unit.<br />
Carry out predetermined installation work in preparation for strong wind such as typhoon, earthquake. Imperfection in installation work<br />
may lead to accidents arisen from overturn, etc.<br />
The unit must be installed in accordance with applicable national and local regulations.<br />
Any electrical work should only be carried out by qualified technician and use exclusive circuits without fail.<br />
Presence of insufficient capacity in power circuit or imperfection in execution leads to electric shock, fire, etc.<br />
Wiring shall be connected securely using specified cables and fix them securely so that external force of the cables may not transfer to<br />
the terminal connection section.<br />
Imperfect connection and fixing leads to fire, etc.<br />
If installing inside a small room, measures should be taken to prevent refrigerant levels from building up to critical concentrations in the<br />
event of a refrigerant leak occurring. Please discuss with the place of purchase for advice on what measures may be necessary to<br />
prevent critical concentrations being exceeded. If the refrigerant leaks and reaches critical concentration levels, there is the danger that<br />
death from suffocation may result.<br />
Securely attach the protective covers for the outdoor unit connection cables and power cord so that they do not lift up after installation. If<br />
the covers are not properly attached and installed, the terminal connections may overheat, and fire or electric shock may result.<br />
Switch off all supplies before accessing any electrical part.<br />
If refrigerant gas escapes during installation, ventilate the affected area. If the refrigerant gas comes into contact with sparks or naked<br />
flames, it will cause toxic gases to be generated.<br />
Improper fixing of screw may cause leakage current and electrical shock.<br />
Must not use other parts except original optional parts described in catalog and manual.<br />
Once installation work is completed, check that there are no refrigerant gas in the room that can come into contact with sparks or flames<br />
from a fan heater, stove or kitchen range, which will cause toxic gases to be generated.<br />
When performing piping work do not mix air except for specified refrigerant (R410A) in refrigeration cycle. It causes capacity down, and<br />
risk of explosion and injury due to high tension inside the refrigerant cycle.<br />
Earth<br />
This equipment must be properly earthed.<br />
Earth line must not be connected to gas pipe, water pipe, lightning rod and telephone.<br />
Otherwise, it may cause electrical shock in case the equipment breakdown or has leakage current.<br />
Installation of Earth Leakage Current Breaker<br />
This equipment must be installed with earth leakage current breaker. Otherwise, it may cause electrical shock and fire in case the<br />
equipment breakdown or has leakage current.<br />
Cautions<br />
Do not install the unit at the place where the possibility of inflammable gas leakage exists. If such gas leakages should arise and the gas<br />
builds up around the unit, such situation may lead to ignition.<br />
Drain piping should be made to ensure secure drainage according to the manual for installation work and carry out the thermal insulation<br />
to prevent the occurrence of condensation.<br />
Imperfection in piping work leads to water leakage and may cause the house and property, etc. to become wet.<br />
Position the indoor unit and outdoor unit, power cords and indoor/ outdoor unit connection cables in a way so that they are at least 1<br />
meter away from televisions and radios.<br />
This is to avoid problems such as interference with picture and/or sound. (However, note that depending on the electromagnetic wave<br />
conditions, interference may still occur even if the separation distance is more than 1 meter.)<br />
When fixing the product with an overturn prevention wire, care should be taken to choose a place where no one trips over the fixing wire.<br />
Warning<br />
■ During pump-down operation must stop the compressor before disconnecting the piping installation.<br />
(Disconnecting the refrigerant piping, while the compressor is operating with the 2-way valve and 3-way valve opened,<br />
leads to air intake and an abnormal high pressure in the refrigerant cycle which can cause an explosion and/or injury).<br />
■ During installation, ensure that the refrigerant piping is installed before operating the compressor.<br />
(Do not install the refrigerant piping while the compressor is operating with the 2-way valve and 3-way valve opened, as<br />
this leads to air intake and an abnormal high pressure in the refrigerant cycle which may cause an explosion and/or injury).<br />
152
11.13.1 ACCESSORIES SUPPLIED WITH OUTDOOR UNIT<br />
The following parts are supplied as accessories with each outdoor unit. Check that all accessory parts are present<br />
before installing the outdoor unit.<br />
Part name Q’ty Diagram Application<br />
Protective bushing 2<br />
Banding strap 4<br />
Band 1<br />
Drain elbow AS 1<br />
153<br />
For protecting electrical wires<br />
For tying electrical wires together<br />
For wire clamp<br />
Installation Instruction This manual<br />
For connecting the drain pipe<br />
(with ring seat)<br />
11.13.2 SELECT THE OUTDOOR UNIT INSTALLATION LOCATION<br />
1. Install the unit once you have checked that the installation location matches the following conditions.<br />
• A location with sufficient ventilation.<br />
• Possibly a location that is sheltered from rain or direct sunlight and is well-ventilated so that hot and cool air<br />
does not build up.<br />
• A location where the area around the outtake is not exposed to animals or plants which could adversely<br />
affect the release of hot or cool air from the unit.<br />
• A location where the outtake and operation noise will not be a nuisance to the neighbours.<br />
• A location that can support the product’s weight or vibrations and secured for horizontal installation wherever<br />
possible.<br />
• A location that does not obstruct the air outtake or intake.<br />
• A location where there is no danger of flammable or corrosive gas leaks.<br />
• A location that provides space for installation and service.<br />
• A location that allows the pipe and cable length fixture for internal and external connections.<br />
2. Refer to the diagram below for the installation location which is exposed to strong wind.<br />
• If a strong wind of more than 5 m/sec blows to the area directly in front of the outtake, the outdoor unit’s air<br />
flow is reduced and the outflow may re-enter (short circuit) causing the following outcome:<br />
“Reduced capacity”, “Increased frost formation during heating” or “Operation stopped due to increased<br />
pressure”.<br />
Should an exceptionally strong wind blow to the area directly in front of the outtake of the outdoor unit; there<br />
is the risk of damage due to the fan’s high-speed reverse rotation.<br />
• If the direction of the prevailing wind is known when operating the unit, place the unit at an appropriate angle<br />
to the wind’s direction so that the outtake faces towards a building or a wall.<br />
Strong wind<br />
<strong>Air</strong> Intake<br />
Strong wind<br />
Intake side<br />
Wall / Standing outer wall<br />
Selecting the location for installation and service.<br />
3. If installing at locations prone to snowfall, install the unit as high as possible with suitable roofing which shelters<br />
the unit from snow.<br />
4. Avoid installing the unit in locations where there are petroleum products (such as machine oil), saline content,<br />
sulphurous gas and where high frequency noise is generated.<br />
5. Place the indoor and outdoor unit, power cords and indoor/outdoor unit connection cables at a minimum distance<br />
of 1 meter or more away from televisions and radios. This is to avoid interference to picture and/or sound.<br />
(However, depending on the electromagnetic waves, noise interference may still occur even with the 1 meter<br />
separation.)<br />
6. For restaurants and kitchens, avoid installing at locations which draws oil and steam.<br />
Plastic parts can deteriorate from droplets of oil and steam or it can cause falling parts or water leakage.<br />
7. Avoid installing at the location where cutting oil mist or iron powder is present.<br />
8. If there is an immense voltage fluctuation due to the location’s problem, ensure to split the power supply.
9. When installing the product in a place where it will be affected by typhoon or strong wind such as wind blowing<br />
between buildings, including the rooftop of a building and a place where there is no building in surroundings, fix<br />
the product with an overturn prevention wire, etc.<br />
10. Ensure to assign several people or use a mechanical lift, etc. to transport the unit.<br />
11.13.3 SELECTING THE LOCATION FOR INSTALLATION SERVICE<br />
When installing multiple units, allow enough space in between the units and the side of the building.<br />
(A) If there are obstacles at the intake<br />
• If the upper part is open<br />
1 For separate installation location<br />
• Only if there are obstacles at the<br />
intake<br />
More than 100<br />
• If there are obstacles above the unit<br />
1 For separate installation location<br />
• Only if there are obstacles at the<br />
intake<br />
Less than 500<br />
More than<br />
100<br />
(B) If there are obstacles at the outtake<br />
• If the upper part is open<br />
• If there are obstacles above the unit<br />
More than 1000<br />
• If there are obstacles on both sides<br />
More More<br />
than 500 than 200<br />
More than<br />
100<br />
• If there are obstacles on the intake and<br />
the other side<br />
Less than 500<br />
More More<br />
than 500 than 200<br />
154<br />
More than<br />
200<br />
More than 1000<br />
1 For separate installation location<br />
More than 300<br />
1 For separate installation location<br />
Less than 500<br />
More than 300<br />
More than 1000<br />
More than<br />
1000<br />
More<br />
than 200<br />
(unit:mm)<br />
2 For multiple units (more than 2 units)<br />
• If there are obstacles on both sides<br />
More than<br />
200<br />
2 For multiple units (more than 2 units)<br />
• If there are obstacles on both sides<br />
More<br />
than 200<br />
Less than 500<br />
More<br />
than 200<br />
More than<br />
200<br />
More than 1000<br />
2 For multiple units (more than 2 units)<br />
More than 500<br />
2 For multiple units (more than 2 units)<br />
Less than 500<br />
More than<br />
1000<br />
More than 500
(C) If there are obstacles on both the intake and discharge<br />
Pattern 1<br />
If there is an obstacle that is higher than the unit on the intake side. (There is no limit to the height of the obstacle<br />
above the discharge.)<br />
• If the upper part is open<br />
• If there are obstacles above the unit<br />
2 For multiple units (up to 2 units)<br />
1 For separate installation location<br />
155<br />
100<br />
More than<br />
300 More than<br />
2 For multiple units (more than 2 units)<br />
Pattern 2<br />
If there is an obstacle that is higher than the unit on the discharge side. (There is no limit to the height of the<br />
obstacle above the discharge.)<br />
• If the upper part is open<br />
1 For separate installation location 2 For multiple units (more than 2 units)<br />
More<br />
than 300<br />
More<br />
than 100<br />
More<br />
than 500<br />
More than 200<br />
More than<br />
500<br />
More than<br />
200
• If there are obstacles above the unit<br />
(D) Stacking installation setup<br />
• Stack up to 2 tiers.<br />
• A dimension of approximately 400 mm is required for the second tier outdoor unit’s drain pipe and space for<br />
maintenance of the first tier outdoor unit.<br />
• Close A section (the space between the upper and lower level outdoor units) so the outtake air does not<br />
bypass it.<br />
1 If there are obstacles at the discharge 2 If there are obstacles at the intake<br />
A section<br />
400<br />
More<br />
than 500<br />
(E) For multiple row installation (on the roof, etc.)<br />
More<br />
than 300<br />
More than<br />
200<br />
More than<br />
1000<br />
More<br />
than 100<br />
156<br />
A section<br />
400<br />
More than 200<br />
1 For one row installation setup 2 For multiple units (more than 2 units)<br />
• The dimensions for H, A and L are shown<br />
in the following table.<br />
A<br />
L H 200<br />
H < L Installation not possible<br />
• The above mentioned distance is required for optimal unit performance.<br />
Allow as much space as possible in order to obtain the best performance from the units.<br />
More than<br />
500<br />
More than<br />
2000<br />
More than<br />
400
11.13.4 TRANSPORT AND INSTALL THE OUTDOOR UNIT<br />
• Transporting<br />
1. Transport the outdoor unit in its original packaging as close as possible to the installation location.<br />
2. In the event that the unit needs to be lifted or suspended, use a rope or belt and use cloth or wood as<br />
padding to avoid damaging the unit.<br />
3. Use the side handles to carry the unit and be careful not to touch<br />
the fan with your hand or any objects.<br />
• Installation<br />
1. Read the “Select the outdoor unit installation location” thoroughly before installing the outdoor unit.<br />
2. When installing to a concrete or solid surface, use M10 or a W 3/8 bolts and nuts to secure the unit. Ensure<br />
that it installed upright on a horizontal plane. (Use an anchor bolt for the installation as shown in the diagram<br />
below.)<br />
3. Avoid installing on the roof.<br />
4. In the even where the roof is at risk of receiving oscillations or vibrations, secure the unit with a seismic<br />
isolating mount or vibration absorbing rubber.<br />
5. The drain water will be discharged from the unit during heating or defrosting operation mode.<br />
Select an appropriate location with good drainage system. (In the winter, there is risk of slipping due to<br />
freezing, and depending on the installation set up there is risk of drain water running overhead.)<br />
• If installation of a drain pipe is required, install<br />
a drain elbow connected to the mounting hole<br />
at the bottom of the unit and connect it to a<br />
hose with an inner diameter of Ø 16 mm. (The<br />
hose is not supplied.)<br />
If drain holes of the outdoor unit are covered<br />
by a mounting base or by floor surface, raise<br />
the unit in order to provide a free space of<br />
more than 100mm under the outdoor unit.<br />
In cold regions (where the outdoor<br />
temperature can drop to below 0˚ for 2 to 3<br />
consecutive days), the drain water may freeze<br />
and may prevent the fan from operating. For<br />
this case, do not use the drain elbow.<br />
11.13.5 REFRIGERANT INSTALLATION<br />
For indoor unit refrigerant piping installation, refer to the installation instruction manual that comes with that indoor<br />
unit.<br />
Do not reuse existing piping, install new piping.<br />
Allowable piping length and hight difference<br />
[Example of piping connection]<br />
Length from outdoor unit to<br />
the innermost indoor unit<br />
Outdoor unit<br />
Main<br />
pipe 1<br />
Main<br />
pipe 2<br />
Main<br />
pipe 3<br />
First branch<br />
Branch pipe 1<br />
Branch pipe 2<br />
Main pipe 4<br />
Indoor unit Indoor unit Indoor unit<br />
Length from first branch to the innermost<br />
part of the indoor unit<br />
157<br />
Indoor unit<br />
Indoor unit<br />
Branch pipe 3 Branch pipe 4<br />
Height difference between indoor<br />
and outdoor units<br />
Branch pipe 5<br />
Height difference between<br />
indoor units
[Allowable piping connection example]<br />
Allowable<br />
height<br />
Height difference between indoor and outdoor<br />
units<br />
Less than 30 m<br />
difference Height difference between indoor units Less than 15 m<br />
Allowable<br />
piping length<br />
158<br />
Example of piping connection<br />
Total piping length 20 ~ 90 m<br />
Main pipe 1 + Main pipe 2 + Main pipe 3 + Main pipe 4<br />
+ Branch pipe 1 + Branch pipe 2 + Branch pipe 3 +<br />
Branch pipe 4 + Branch pipe 5<br />
Main pipe Total length Less than 40 m Main pipe 1 + Main pipe 2 + Main pipe 3 + Main pipe 4<br />
Branch pipe Total length Less than 50 m<br />
Each branch pipe length Less than 15 m<br />
Length from outdoor unit to the innermost part<br />
of the indoor unit<br />
Length from branch No. 1 to the innermost part<br />
of the indoor unit<br />
Less than 55 m<br />
Less than 30 m<br />
Branch pipe 1 + Branch pipe 2 + Branch pipe 3 +<br />
Branch pipe 4 + Branch pipe 5<br />
The branch pipe maximum length: Branch pipe 1,<br />
Branch pipe 2, Branch pipe 3, Branch pipe 4, Branch<br />
pipe 5<br />
1. Precautions during refrigerant installation.<br />
• Use clean pipes with no dust inside.<br />
The pipe may corrode with the presence of fluorine dust which will adversely affect the refrigerant piping<br />
system due to deterioration of the refrigerant oil, etc.<br />
• This unit is specifically for R410A. Ensure to adhere to the following items and install accordingly:<br />
• Use pipe cutters and flaring tools which are specially designed for use with R410A.<br />
• When connecting with flaring tools, coat the flare section with ether-based oil.<br />
• Ensure to use the flare nuts supplied with the unit when connecting this unit.<br />
• Only for storing or for open pipes.<br />
2. The local pipes can protrude from any four<br />
directions.<br />
• Make holes in the pipe panel for the pipes to<br />
penetrate it and lay the pipes accordingly.<br />
• It is recommended to apply additional<br />
substance to the cut area for anti-rust<br />
protection.<br />
• Ensure to install pipe panels to prevent rain<br />
water from getting into the unit.<br />
• Close the gap at the pipe connected area with<br />
putty or heat insulator (locally supplied).<br />
• If an insect or small animal enters the<br />
outdoor unit, there is the risk of shorting in<br />
the product electronic casing.<br />
[Remove the front panel]<br />
(1) Remove the 2 mounting screws.<br />
(2) Slide the front panel using your hands<br />
downwards to release the pawls.<br />
Then remove by pulling the panel<br />
towards you.<br />
Precautions when operating the 3-way valve for piping installation<br />
• Do not open the 3-way valve until all air flow parts are completed.<br />
• It is closed during shipment.<br />
• During installation the side panel may warp if only the flare nut is loosened and tightened with a torque<br />
wrench. As a result, always be sure to secure to the hexagonal part of the 3-way valve with a spanner, or<br />
other tool.<br />
• Refer to the following table for the tightening torque of the 3-way valve flare nuts.<br />
• If the nuts are over tightened, they may cause the flares to break or leak.
• Do not add additional force to the valve’s cover.<br />
• Using spanners on the cover or valve itself (other than the hexagonal parts) may cause gas leakage.<br />
Avoid using spanners on the cover or parts other than the hexagonal part of the valve.<br />
• During the cooling mode operation under low ambient pressure,<br />
the low pressure side of the valve can be prone to freezing.<br />
Secure the flare nut. (shared gas side / liquid side) section of the<br />
valve with a silicone sealing agent to prevent this from occurring.<br />
Precautions for handling the cover<br />
• Ensure not to scratch the inner surface of the<br />
valve or the end of the valve shaft.<br />
• Once adjustments to the valve are<br />
completed, ensure to tighten the valve cap<br />
according to the prescribed torque.<br />
Precautions for handling the service ports<br />
• Use a push-rod with a charge hose.<br />
• Once adjustments to the valve are<br />
completed, ensure to tighten the valve cap<br />
according to the prescribed torque.<br />
159<br />
Valve size Tightening torque<br />
ø9.52<br />
ø15.88<br />
Tightening torque<br />
10.7N•m~14.7N•m<br />
(1.1kgf•m~1.5kgf•m)<br />
20.6N•m~28.4N•m<br />
(2.1kgf•m~2.8kgf•m)<br />
48.0N•m~59.8N•m<br />
(4.8kgf•m~6.0kgf•m)<br />
Precautions for connecting the pipes<br />
• Ensure that the pipes do not come into contact with the<br />
compressor’s bolts or exterior panel.<br />
• There is a risk of condensation from the 3-way valve coming out<br />
between the insulation material and the indoor unit’s piping when<br />
you install the outdoor unit above then the indoor unit. Ensure to<br />
caulk the connection parts.<br />
• Perform all the necessary checks on the main piping connections.<br />
• Ensure to use the branch pipe unit to diverge the refrigerant piping. (Option parts No.: CZ-P155BK1).<br />
1. Install the branch pipe on a horizontal and vertical plane. (Maximum slant angle: within 15°)<br />
2. Ensure that the pipe length between the branch pipe and each indoor unit as short as possible.<br />
3. Port connections should be soldered with dry nitrogen gas to prevent oxidation of copper on the inner<br />
surface.<br />
Refer to the installation instruction manual for the details on the branch piping.
Precautions for Insulation Installation<br />
Maximum temperature limit of gas or liquid piping exceeds 120 °C<br />
• In high humidity environment, reinforce the insulation material for the refrigerant piping. Failure to do so may<br />
result in condensation on the surface of the insulation material.<br />
• Use materials with good heat-resistant properties as the heat insulator for the pipes. Ensure to insulate both<br />
the gas side and liquid side pipes.<br />
If the pipes are not adequately insulated, condensation and water leakages may occur.<br />
• Ensure that the current insulation covers the pipes up to the unit’s connecting part.<br />
If the piping is exposed, it may cause condensation or burn (when touch the pipe).<br />
Precautions for flare nut Installation<br />
• Dimensions when adding flare nuts and the tightening torque<br />
Piping size Tightening torque Flare section dimensions A Flare configuration<br />
ø 6.35<br />
ø 9.52<br />
ø 12.7<br />
ø 15.88<br />
14.2N•m ~ 17.2N•m<br />
(1.4kgf•m ~ 1.7kgf•m)<br />
32.7N•m ~ 39.9N•m<br />
(3.3kgf•m ~ 4.0kgf•m)<br />
49.5N•m ~ 60.3N•m<br />
(5.0kgf•m ~ 6.0kgf•m)<br />
68.0N•m ~ 75.5N•m<br />
(6.8kgf•m ~ 7.6kgf•m)<br />
160<br />
8.7 ~ 9.1<br />
12.8 ~ 13.2<br />
16.2 ~ 16.6<br />
19.3 ~ 19.7<br />
After piping connection has completed, ensure there is no gas leakage.<br />
• When tightening the flare nut, coat the flares (inner surface only) with<br />
refrigerant oil on the flares<br />
Firstly, screw in 3-4 turns by hand.<br />
Ensure not to get oil on the screw part.<br />
Refrigerant oil used is ether-based.<br />
• Once the piping connections are completed, perform leakage inspection<br />
using nitrogen gas.<br />
Brazing work<br />
• Always blow nitrogen gas through the pipe during brazing work.<br />
During brazing work, it is required to clean the inside of the pipe with nitrogen gas to prevent oxide scale<br />
forming on the inner surface of the pipe. This is called nitrogen displacement which is an extremely important<br />
step during refrigerant piping installation.<br />
(Do not use an antioxidant)<br />
<br />
11.13.6 VACUUM PURGING<br />
Use nitrogen gas for the leak tightness test. Using flammable gas can cause an explosion.<br />
• Once the piping connections are completed,<br />
perform leakage inspection using nitrogen gas<br />
(leak tightness test) using the 3-way valve for the<br />
outdoor unit and then close it.<br />
(Test the pressure with 4.15 MPa)<br />
• Ensure to use a vacuum pump (with a back-flow<br />
prevention device) for inside the refrigerant<br />
system.<br />
• Vacuuming process will take place after the reak<br />
test.<br />
Pressure<br />
meter<br />
Nitrogen Refrigerant<br />
meter<br />
Vacuum<br />
pump<br />
3-way<br />
valve<br />
Outdoor unit<br />
Indoor unit
11.13.7 REGARDING REFRIGERANT FILLING<br />
This unit is charge-free and does not require additional filling of refrigerant. Exercise precaution during refilling due to<br />
refrigerant leakage.<br />
Precautions during refrigerant filling<br />
• Ensure to fill only with liquid refrigerant when<br />
refilling.<br />
If gas refrigerant is filled, the refrigerant<br />
composition will not be balanced and will cause<br />
abnormal operation.<br />
Cylinder with<br />
a siphon tube<br />
Liquid refrigerant<br />
Siphon tube<br />
161<br />
• If using cylinders as shown in the bottom left<br />
diagram; without a siphon tube inside, turn it<br />
upside down and use it.<br />
(It is recommended to use the manifold with the<br />
side glass.)<br />
Gas refrigerant<br />
Not possible<br />
Possible<br />
Cylinder Cylinder<br />
Liquid refrigerant<br />
• Use tools that are designed specifically for R410A, for pressure resistance and to prevent mixing impurities.<br />
• Fill the refrigerant from the 3-way valve’s service port on the liquid-side.<br />
For filling and replacing all refrigerant (For refilling due to a leak)<br />
• For refilling refrigerant, first collect all residual refrigerant and after vacuum dehydration using the vacuum pump.<br />
Refill the refrigerant according to the prescribed amount stated on the placard affixed to this unit.<br />
Precautions after the pipes’ connection have completed<br />
• Ensure to open the 3-way valve after completing the piping installation. If it is closed during operation, it can lead<br />
to compressor failure.
11.13.8 ELECTRICAL WIRING<br />
Warning<br />
The units must be connected to the supply cables for fixed wiring by qualified technician.<br />
Feed the power source to the unit via a distribution switch board designed for this purpose, the<br />
switch should disconnected all poles with a contact separation of at least 3 mm.<br />
When the supply cable is damaged, it must be replaced by qualified technician.<br />
Be sure to install a current leakage breaker, main switch and fuse to the main power supply,<br />
otherwise electric shocks may result.<br />
Be sure to connect the unit to secure earth connection.<br />
If the earthing work is not carried out properly, electric shocks may result.<br />
Wiring shall be connected securely by using specified cables and fix them securely so that external<br />
force of the cables may not transfer to the terminal connection section.<br />
Imperfect connection and fixing leads to fire, etc.<br />
• Ensure to connect the electrical cable connections and clamp the wires securely to the terminal connections<br />
using cord clamps so that no undue force is placed on the wires (power source cable, indoor/outdoor connection<br />
cables, earth lead wire).<br />
• Do not install a phase advance capacitor for power factor improvement. (It does not improve the power factor and<br />
will cause abnormal overheating.)<br />
• Do not bind the excess cables together and place them inside this unit.<br />
• Protect the electrical cable with the protective bushing provided so that the cables do no get damaged on the<br />
knock hole or etched portions. If there is space between the electrical cables and the protective bushing occurs,<br />
seal it accordingly.<br />
• Tie the cables with the provided binding strap so that they do not touch the compressor and the pipes.<br />
• When setting up the cables, inside of unit install properly so that the front panel will not lift up. Make sure that<br />
front panel mount correctly.<br />
• Use a round type terminal with an insulation<br />
sleeve for connecting to the terminal block.<br />
• Use the appropriate screwdriver for tightening the<br />
terminal screws.<br />
Small sized screwdriver damages the head of the<br />
screw and cannot tighten it properly.<br />
• There is risk of damaging the screw if the terminal<br />
screw is over tightened. Tighten with the<br />
appropriate torque.<br />
Screw diameter name Tightening torque N•cm (kgf•cm)<br />
M4 157 ~ 196 (16 ~ 20)<br />
M5 196 ~ 245 (20 ~ 25)<br />
• Direction to pull out wires<br />
Front direction<br />
• Earth lead wire set up<br />
Back direction<br />
Sideways direction<br />
162<br />
Insulate the<br />
terminal section with<br />
insulation sleeves.<br />
Cord clamp<br />
Cord clamp<br />
Firmly secure the power supply<br />
cable, the internal/external<br />
connections and earth wire.<br />
Tie the insulation pipes so that the<br />
power supply cable, control wires,<br />
and earth lead wire do not come into<br />
contact with the compressor and/or<br />
the exposed pipes.<br />
Control<br />
terminal block Power supply<br />
terminal block<br />
Earth lead wire<br />
Tying band<br />
(Standard<br />
accessories)<br />
The earth lead wire shall be longer than other lead wires as shown in the figure for electrical<br />
safety in case it slips out of the cord from the anchorage.<br />
• Be sure to connect the wires correctly to terminal<br />
board with connecting the crimp type ring terminal to<br />
the wires.<br />
• If connecting two separate wires to a single crimped<br />
terminal, place the two crimped terminal wires<br />
together as shown in Fig. A. (If the arrangement<br />
shown in Fig. B is used, poor contacts or<br />
contact damage may result.)<br />
Fig. A (OK) Fig. B (not OK)
Connection method for the power supply cable and indoor/outdoor unit connections<br />
Follow the installation instruction manual provided with the indoor unit to set up the indoor unit wiring and the<br />
indoor/outdoor connections. Provide separate power supplies for the indoor and outdoor units.<br />
This equipment complies with EN/IEC 31000-3-12 provided that the short-circuit power Ssc is greater than or equals<br />
to U-4LA:1850kVA, U-5LA:2200kVA, U-6LA:2200kVA at the interface point between the user’s supply and the public<br />
system. It is the responsibility of the installer or user of the equipment to ensure; by consulting with the distribution<br />
network operator if necessary that the equipment is connected only to supply with a short-circuit power Ssc greater<br />
than or equals to U-4LA:1850kVA, U-5LA:2200kVA, U-6LA:2200kVA.<br />
Ssc::short circuit power<br />
• Power supply specifications<br />
Model name Power supply<br />
Power supply cable<br />
Minimum power<br />
cable supply<br />
cables<br />
1<br />
Length<br />
(m)<br />
163<br />
Leakage<br />
current<br />
breaker<br />
(A)<br />
Circuit breaker<br />
(Minimum capacity)<br />
Switch<br />
(A)<br />
Fuse<br />
(A)<br />
Control Cable<br />
U-4LA1E5 220V-240V~ 4 mm 2 8.5 33A 40A 40A 0.75 mm 2<br />
U-5LA1E5 220V-240V~ 6 mm 2 13 33A 40A 40A 0.75 mm 2<br />
U-6LA1E5 220V-240V~ 6 mm 2 12 33A 40A 40A 0.75 mm 2<br />
1. The maximum length shows a 2% voltage drop.<br />
NOTE<br />
Use the standard power supply cables for Europe (such as H05RN-F or H07RN-F which conforms to CENELEC<br />
(HAR) rating specifications) or use the cables based on IEC standard. (245 IEC57, 245 IEC66)<br />
Urban Network Method<br />
Connect all devices to one bus line irrelevant of the refrigerant system.<br />
Use less than 128 for the total number of connecting devices.<br />
Recommend<br />
If the number of connecting devices is big and since the units have to be connected to each<br />
refrigerant system, it is recommended to connect between each outdoor unit.<br />
(Refer to the diagram on the right).<br />
Should the device malfunction and cause abnormal communications to the other devices due<br />
to multiple connections, disconnect the outdoor units. It is easy to identify the faulty device and<br />
the system can be restored by disconnecting that device.<br />
Warning When using the urban network method for wiring, only switch the power ON for the outdoor unit No. 1.<br />
Turning other units ON besides unit No. 1 damages the control board.
Outdoor unit main power supply<br />
(220V-240V~) 50Hz<br />
Circuit Breaker<br />
witch<br />
Earth<br />
Nonpolar 2 wire<br />
Circuit Breaker<br />
Switch<br />
Circuit<br />
Breaker Earth<br />
Switch<br />
Earth<br />
Bus lines<br />
power supply<br />
switch - ON<br />
Bus lines power<br />
supply switch – OFF<br />
S<br />
Bus line transmission wire<br />
(Signal wire)<br />
Unit<br />
No. 1<br />
Circuit<br />
Breaker<br />
Switch<br />
Earth<br />
Circuit<br />
Breaker<br />
Unit Switch<br />
No. 2<br />
Remote controller<br />
Circuit<br />
Breaker Earth<br />
Circuit<br />
Breaker<br />
Switch Switch<br />
Remote controller Remote controller<br />
164<br />
Earth<br />
Unit<br />
No. 3<br />
Indoor unit main power supply<br />
Circuit<br />
Circuit<br />
Loop wire not possible<br />
(220V-240V~) 50Hz<br />
Breaker Earth Breaker Earth<br />
Circuit Breaker Earth<br />
Switch<br />
Switch<br />
Switch Indoor unit<br />
Central control device<br />
Remote controller<br />
Circuit<br />
Breaker<br />
Remote<br />
controller<br />
Switch<br />
Refrigerant piping pair system<br />
Separate the bus line per each refrigerant system and connect to the device.<br />
Bus lines power<br />
supply switch – OFF<br />
Indoor unit<br />
Outdoor unit<br />
Remote controller Remote Loop wire not possible<br />
Circuit Breaker controller<br />
Earth Switch Earth<br />
Remote<br />
Indoor unit<br />
Remote controller cord (Signal wire)<br />
Greater than 0.5 mm<br />
controller<br />
Earth<br />
2 Less than<br />
2.0 mm2 2 wire: overall extension less than<br />
200 m<br />
Bus line transmission wire (Signal wire)<br />
0.75 mm2 or Ø 1.2 mm<br />
2 wire: overall extension less than 1000 m<br />
Address Setting<br />
The table below shows the required address setting for the indoor/outdoor units. Failure to perform correct settings<br />
will result in abnormal operation.
• The indoor unit address is the number to distinguish the indoor unit. Never duplicate the number. If the number is<br />
duplicated, the unit will not operate properly.<br />
• There is an outdoor unit address for the indoor/outdoor unit and the address shows which outdoor and indoor unit<br />
is connected with the refrigerant pipes. The indoor and outdoor units that are connected to the refrigerant pipes<br />
are set to the same No. 1 unit address.<br />
If a different number is set in the same refrigerant system, then the unit will not operate properly.<br />
• For the A address setting method, there are 3 ways to set the address as shown below: the automatic address<br />
setting, the manual address setting and the address setting which is done using the remote controller by<br />
selecting the address type and wiring method. (For the address setting using the remote controller, refer to the<br />
installation instruction manuals provided with the remote controller.)<br />
For the B address setting method, refer to the installation instruction manual provided with the indoor unit.<br />
• The automatic address setting is only possible with the refrigerant pipes pairing method.<br />
Instructions for automatic address setting<br />
It is only possible to automatically set up the indoor unit address if the wiring set up is using the refrigerant pipes<br />
pairing method. (It is not possible if connected to the central control device.)<br />
(<strong>Manual</strong> address setting and address setting using the remote controller is also possible if the wiring set up follows<br />
the refrigerant pipes pairing method).<br />
1. Set the address for the indoor and outdoor unit to “000” (= erases).<br />
(At the time of shipment from the factory the setting is “000”)<br />
2. Firstly, switch the power supply ON for all indoor units and then switch the power supply ON for the outdoor<br />
units. (It is possible to perform simultaneously.)<br />
After switching ON the outdoor unit’s power supply, the address is automatically set. (After switching ON the<br />
power, it takes approximately 1 minute to automatically set.)<br />
Note: If one of the indoor unit’s power supplies is not turned ON even when the outdoor unit’s power supply<br />
has been turned ON, the address will not automatically set.<br />
3. Once the address is automatically set even when the power supply is turned OFF, the setting is stored.<br />
Reset the automatic setting below by performing step “4” or erase all connecting indoor unit’s indoor unit<br />
addresses using the remote controller and then repeat the resetting procedure by beginning from the above<br />
step “2”.<br />
• It is possible to automatically reset when using the 1 group remote controller.<br />
• It is also possible to check the address setting of the indoor unit by using the wired remote controller.<br />
Refer to the section “Indoor unit address settings” from the installation instruction manual provided with<br />
the wired remote controller.<br />
• Switching ON the power supply of the indoor unit shows a malfunction diagnostics display (F25-01).<br />
However after it has been automatically set, the malfunction diagnostics display will disappear by<br />
pressing the START button on the remote controller.<br />
• If the malfunction diagnostics display (F25-01) does not disappear, then turn ON the power supply for the<br />
outdoor unit.<br />
• If the malfunction diagnostics display (F25-01) does not disappear even after turning ON the power<br />
supply for the outdoor unit, reset the unit.<br />
165
4. Follow these procedures to automatically reset the address.<br />
After switching the power supply to ON for all the indoor and outdoor units by<br />
pressing and holding down SW6 on the control board of the outdoor unit for more<br />
than 4 seconds, the address will automatically reset.<br />
(LED 2 through 9 on the outdoor unit’s control board will light up.<br />
Release SW6 to confirm the reset once all the LED lights 2 through 9 have lit up.)<br />
• If the outdoor unit’s and the indoor unit’s indoor unit address are not “000”, then it<br />
will not automatically reset the address.<br />
<strong>Manual</strong> address setting instructions<br />
Note: <strong>Manual</strong> address setting cannot be done on wall type indoor units.<br />
1. The manual address setting is conducted by using the switch on each indoor / outdoor unit’s control board.<br />
(Refer to the diagram below)<br />
2. Set the power supply switch for all units to OFF. The address you set is stored when the power is turned on.<br />
3. To change the address that is already set, turn the power supply OFF and reset the switch.<br />
• The address number “000” cannot be used.<br />
• Set the order for the unit address starting from “001” without skipping, as this facilitates the procedural tasks,<br />
maintenance and inspection checks.<br />
• Before switching on the power supply of the outdoor unit(s), ensure that the bus lines power supply is<br />
switched on by setting switch SW5 to ON.<br />
Outdoor unit<br />
Indoor unit<br />
DIP switch position<br />
SW5<br />
(Power<br />
supply<br />
SW)<br />
Indoor<br />
unit<br />
Print<br />
board<br />
DIP switch setting<br />
(according to the position)<br />
(Position (Position<br />
100) 10) (Position 1)<br />
(Position 10) (Position 1)<br />
(Position (Position<br />
100) 10) (Position 1)<br />
Outdoor device address<br />
166<br />
Name and setting directions<br />
SW-OUT3 ON–1<br />
OFF–0<br />
This address is to differentiate all the outdoor units individually.<br />
The outdoor unit address must not be duplicated on outdoor units of<br />
other refrigerant piping systems.<br />
Setting is possible between “001” and “199”.<br />
P.C.B<br />
Outdoor device address<br />
The address shows which outdoor unit it is linked to.<br />
Set the same number as the refrigerant piping system’s outdoor unit.<br />
Setting is possible from “01” to “99”.<br />
SW203 ON–1<br />
Indoor device address<br />
OFF–0<br />
This address is to individually differentiate all the indoor units.<br />
Avoid setting (duplicating) any number that is already used by the<br />
units.<br />
Setting is possible from “001” to “199”.
11.13.9 PRECAUTIONS REGARDING TEST RUN<br />
The process flow shows the start of the test run<br />
Check Before Test Run<br />
• Always be sure to use properly insulated tool to operate the switch on the circuit board. (Do not use your<br />
finger or a metallic object)<br />
• Never switch the power supply ON until the installation has completed.<br />
• Supply electrical current through all indoor units and check the voltage.<br />
• Supply electrical current through all the outdoor units and check each inter-phase voltage.<br />
167
• Switch the power supply ON at least 12 hours before the test run.<br />
• Removing a connector while the current is running can cause damage to the control board. Once the power<br />
supply is turned OFF, be sure to wait 5 minutes or more before starting to work on it.<br />
• Follow the indoor and outdoor units’ instructions.<br />
• Before the test run, ensure to check that the 3-way valve is open. Operating while the valve is closed causes<br />
the compressor to fail.<br />
• Ensure to connect the refrigerant piping and the related wiring to the same refrigerant system.<br />
If the refrigerant piping and the related wiring are different and not connected to the same refrigerant system,<br />
it leads to abnormal operation and causes damage to the unit.<br />
Test Run Procedure<br />
• Ensure to conduct a test run. In addition, be sure to run the cooling operation test run for at least 20 minutes<br />
before starting the heating operation test run.<br />
• If you cannot be near the outdoor unit during test run, request for another person to replace you or install a<br />
frontal panel.<br />
• Once the cooling test run is functioning properly, check that the outflow from the indoor unit is cool.<br />
• Once the heating test run is functioning properly, check that the outflow from the indoor unit is warm.<br />
• If the indoor unit has a wired remote controller attached, check that the temperature values displayed during<br />
test run for the heat exchanger are as follows.<br />
(The heat exchanger temperature is displayed on the wired remote controller timer display screen.)<br />
The heat exchanger temperature during the cooling test run is 6 to 20°C and during the heating test run it is<br />
25 to 55°C.<br />
If the connected indoor unit’s capacity exceeds 100% or if the pipe length is long, the heat exchanger<br />
temperature during cooling test run will be high and low during heating test run.<br />
• If the units do not operate during test run, perform the malfunctioning diagnostics to countermeasure any<br />
problems. Resume the test run.<br />
■ Performing test run of the outdoor unit<br />
• Press the TEST RUN button on the outdoor unit’s control board for more than 1 second.<br />
• If you want to cancel after performing the test run, press the TEST RUN button again for more than 1 second.<br />
• Perform test run for each outdoor unit and check that all indoor units connected by the refrigerant piping are<br />
also performing the test run. Ensure that the refrigerant piping system and the electrical wiring system are<br />
the same.<br />
■ Performing trial operation of the indoor unit<br />
• For the test run method, read the installation instruction manual for the indoor unit and Infrared receiver<br />
controller (sold separately).<br />
• Perform test run for each indoor unit and check that the refrigerant piping system and the electrical wiring<br />
system are the same.<br />
168
11.13.10 REGARDING LOCAL SETTINGS<br />
■ Local setting method using the remote controller<br />
• The settings can be performed at night with low sound by using the remote controller.<br />
Follow the instructions below regarding installation, service and repair, and perform local setting.<br />
(If there is a mistake with the settings, it will cause abnormal operations.)<br />
• Perform the local settings according to the installation instruction manual provided with the remote controller.<br />
• Mode number, setting values<br />
Mode number Item Setting value Setting content<br />
000 No setting (Cancel)<br />
02 Low sound at night<br />
001<br />
002<br />
Low sound level 1<br />
Low sound level 2<br />
003 Low sound level 3<br />
■ Model setting for cooling via a jumper wire<br />
• The unit designed for cooling can be set by the JP wire on the outdoor unit’s control<br />
board.<br />
[Setting method]<br />
After disconnecting JP1 (COOL ONLY) as shown in diagram 1 while the power<br />
supply has been turned OFF, switch the unit’s power supply back to ON.<br />
By setting it to cooling operation, the heating operation cannot be used.<br />
Once the unit is in cooling operation and in order to return to heating/cooling mode,<br />
turn off the power supply. Disconnect JP1 and switch ON the power supply.<br />
Note: Ensure to turn OFF the power supply before disconnecting JP1. There is a risk<br />
of damaging the P board by disconnecting JP1 while the power supply is<br />
turned ON.<br />
11.13.11 CHECKS AFTER INSTALLATION HAVE COMPLETED<br />
• Check the following items after completing installation.<br />
11.13.12 REGARDING DELIVERY TO THE CUSTOMER<br />
• Request the customer to review the instruction manual and explain the operating method for the product.<br />
• During delivery, not only provide explanation of the operating methods but the serviceperson also writes his/her<br />
name in the comment column (back page of the instruction manual) and gives it to the customer. In addition, it is<br />
also recommended that regular inspection checks are agreed upon for maintenance.<br />
Refer to the installation instruction manual provided with the indoor unit for the specifications on the indoor<br />
unit installation.<br />
169
11.14 INSTALLATION INSTRUCTIONS FS MULTI OUTDOOR UNIT<br />
HP MODEL NAME<br />
R410A<br />
4 HP<br />
5 HP<br />
6 HP<br />
U-4LA1E5-1<br />
U-5LA1E5-1<br />
U-6LA1E5-1<br />
REFRIGERANT<br />
Refer to the indoor unit installation instruction manual for the indoor unit installation.<br />
Note: Ensure to hand over this installation instruction manual to the person performing the installation and<br />
inform the customer to keep it properly stored.<br />
• This product uses refrigerant series R410A with the design pressure of 4.15 MPa.<br />
• Refer to the caution items listed in “Refrigerant installation” for the installation of the refrigerant piping and<br />
maintain strict control concerning the prevention of mixing impurities (water and mineral oils such as Suniso oils)<br />
with R410A.<br />
• The indoor unit to be connected must be R410A compatible and be sure to check the catalogue, etc. for available<br />
models. The product may not operation properly if connected to other indoor units.<br />
Option parts: For piping installation, branch pipe unit is needed. Make the<br />
necessary preparations for the number of indoor units for piping<br />
installation to be connected.<br />
Caution: Ensure that the branch pipe unit used is compatible with R410A. Refer to<br />
“Refrigerant installation” for the refrigerant piping installation.<br />
Combination of indoor and outdoor units<br />
Outdoor unit<br />
model name<br />
170<br />
Line branch pipe model<br />
number<br />
CZ-P155BK1<br />
Outdoor unit cooling Indoor unit cooling rated capacity Number of connectable indoor units<br />
rated volume Minimum Maximum Minimum Maximum<br />
U-4LA1E5-1 11.2kW 5.6kW 14.6kW 2 unit 6 unit<br />
U-5LA1E5-1 14.0kW 7.0kW 18.2kW 2 unit 8 unit<br />
U-6LA1E5-1 15.5kW 7.8kW 20.2kW 2 unit 8 unit<br />
3. Use the above table to combine the number of indoor units with the appropriate capacity which matches the<br />
outdoor unit’s cooling capacity rate. Set the combined number of units to comply with the appropriate capacity.<br />
4. Assuming a system where all indoor units are operating at the same time, set the total capacity of the indoor<br />
units to less than the outdoor unit’s cooling capacity rate.<br />
Precautions in terms of safety<br />
Carry out installation work with reliability after thorough reading of this “Precaution in terms of safety”.<br />
• Precautions shown here are differentiated between Warnings and Cautions . Those that have much chances<br />
for leading to significant result such as fatality or serious injury if wrong installation would have been carried out<br />
are listed compiling them especially into the column of Warnings .<br />
However, even in the case of items which are listed in the column of<br />
for leading to significant result depending on the situations.<br />
Cautions , such items also have a chance<br />
•<br />
In either case, important descriptions regarding the safety are listed, then observe them without fail.<br />
As to indications with illustration<br />
•<br />
This mark means “Caution” or “Warning”. This mark means “Earth”.<br />
After installation work has been completed, do not only make sure that the unit is free from any abnormal<br />
condition through the execution of try run but also explain how to use and how to perform maintenance of this<br />
unit to the customer according to the instruction manual.<br />
In addition, request the customer to keep this manual for installation work together with instruction manual.
Warnings<br />
The appliance must be installed by technician, who takes into account the requirements given by ISO 5149 or eventual equivalent<br />
requirements.<br />
As to installation, request the distributor or vendor to perform it. Imperfection in installation caused by that having been carried out by the<br />
customer himself may leads to water leakage, electric shock, fire, etc.<br />
Carry out the installation work with reliability according to this manual for installation work.<br />
Imperfection in installation lead to water leakage, electric shock, fire, etc.<br />
Carry out the installation work with reliability on the place that can bear the weight of this unit sufficiently. Insufficient strength leads to<br />
injury due to falling of the unit.<br />
Carry out predetermined installation work in preparation for strong wind such as typhoon, earthquake. Imperfection in installation work<br />
may lead to accidents arisen from overturn, etc.<br />
The unit must be installed in accordance with applicable national and local regulations.<br />
Any electrical work should only be carried out by qualified technician and use exclusive circuits without fail.<br />
Presence of insufficient capacity in power circuit or imperfection in execution leads to electric shock, fire, etc.<br />
Wiring shall be connected securely using specified cables and fix them securely so that external force of the cables may not transfer to<br />
the terminal connection section.<br />
Imperfect connection and fixing leads to fire, etc.<br />
If installing inside a small room, measures should be taken to prevent refrigerant levels from building up to critical concentrations in the<br />
event of a refrigerant leak occurring. Please discuss with the place of purchase for advice on what measures may be necessary to<br />
prevent critical concentrations being exceeded. If the refrigerant leaks and reaches critical concentration levels, there is the danger that<br />
death from suffocation may result.<br />
Securely attach the protective covers for the outdoor unit connection cables and power cord so that they do not lift up after installation. If<br />
the covers are not properly attached and installed, the terminal connections may overheat, and fire or electric shock may result.<br />
Switch off all supplies before accessing any electrical part.<br />
If refrigerant gas escapes during installation, ventilate the affected area. If the refrigerant gas comes into contact with sparks or naked<br />
flames, it will cause toxic gases to be generated.<br />
Improper fixing of screw may cause leakage current and electrical shock.<br />
Must not use other parts except original optional parts described in catalog and manual.<br />
Once installation work is completed, check that there are no refrigerant gas in the room that can come into contact with sparks or flames<br />
from a fan heater, stove or kitchen range, which will cause toxic gases to be generated.<br />
When performing piping work do not mix air except for specified refrigerant (R410A) in refrigeration cycle. It causes capacity down, and<br />
risk of explosion and injury due to high tension inside the refrigerant cycle.<br />
Earth<br />
This equipment must be properly earthed.<br />
Earth line must not be connected to gas pipe, water pipe, lightning rod and telephone.<br />
Otherwise, it may cause electrical shock in case the equipment breakdown or has leakage current.<br />
Installation of Earth Leakage Current Breaker<br />
This equipment must be installed with earth leakage current breaker. Otherwise, it may cause electrical shock and fire in case the<br />
equipment breakdown or has leakage current.<br />
Cautions<br />
Do not install the unit at the place where the possibility of inflammable gas leakage exists. If such gas leakages should arise and the gas<br />
builds up around the unit, such situation may lead to ignition.<br />
Drain piping should be made to ensure secure drainage according to the manual for installation work and carry out the thermal insulation<br />
to prevent the occurrence of condensation.<br />
Imperfection in piping work leads to water leakage and may cause the house and property, etc. to become wet.<br />
Position the indoor unit and outdoor unit, power cords and indoor/ outdoor unit connection cables in a way so that they are at least 1<br />
meter away from televisions and radios.<br />
This is to avoid problems such as interference with picture and/or sound. (However, note that depending on the electromagnetic wave<br />
conditions, interference may still occur even if the separation distance is more than 1 meter.)<br />
When fixing the product with an overturn prevention wire, care should be taken to choose a place where no one trips over the fixing wire.<br />
Warning<br />
■ During pump-down operation must stop the compressor before disconnecting the piping installation.<br />
(Disconnecting the refrigerant piping, while the compressor is operating with the 2-way valve and 3-way valve opened,<br />
leads to air intake and an abnormal high pressure in the refrigerant cycle which can cause an explosion and/or injury).<br />
■ During installation, ensure that the refrigerant piping is installed before operating the compressor.<br />
(Do not install the refrigerant piping while the compressor is operating with the 2-way valve and 3-way valve opened, as<br />
this leads to air intake and an abnormal high pressure in the refrigerant cycle which may cause an explosion and/or injury).<br />
171
11.14.1 ACCESSORIES SUPPLIED WITH OUTDOOR UNIT<br />
The following parts are supplied as accessories with each outdoor unit. Check that all accessory parts are present<br />
before installing the outdoor unit.<br />
Part name Q’ty Diagram Application<br />
Protective bushing 2<br />
Banding strap 3<br />
Drain elbow AS 1<br />
Installation Instruction This manual<br />
172<br />
For protecting electrical wires<br />
For tying electrical wires together<br />
For connecting the drain pipe<br />
(with ring seat)<br />
11.14.2 SELECT THE OUTDOOR UNIT INSTALLATION LOCATION<br />
1. Install the unit once you have checked that the installation location matches the following conditions.<br />
• A location with sufficient ventilation.<br />
• Possibly a location that is sheltered from rain or direct sunlight and is well-ventilated so that hot and cool air<br />
does not build up.<br />
• A location where the area around the outtake is not exposed to animals or plants which could adversely<br />
affect the release of hot or cool air from the unit.<br />
• A location where the outtake and operation noise will not be a nuisance to the neighbours.<br />
• A location that can support the product’s weight or vibrations and secured for horizontal installation wherever<br />
possible.<br />
• A location that does not obstruct the air outtake or intake.<br />
• A location where there is no danger of flammable or corrosive gas leaks.<br />
• A location that provides space for installation and service.<br />
• A location that allows the pipe and cable length fixture for internal and external connections.<br />
2. Refer to the diagram below for the installation location which is exposed to strong wind.<br />
• If a strong wind of more than 5 m/sec blows to the area directly in front of the outtake, the outdoor unit’s air<br />
flow is reduced and the outflow may re-enter (short circuit) causing the following outcome:<br />
“Reduced capacity”, “Increased frost formation during heating” or “Operation stopped due to increased<br />
pressure”.<br />
Should an exceptionally strong wind blow to the area directly in front of the outtake of the outdoor unit; there<br />
is the risk of damage due to the fan’s high-speed reverse rotation.<br />
• If the direction of the prevailing wind is known when operating the unit, place the unit at an appropriate angle<br />
to the wind’s direction so that the outtake faces towards a building or a wall.<br />
Strong wind<br />
<strong>Air</strong> Intake<br />
Strong wind<br />
Intake side<br />
Wall / Standing outer wall<br />
Selecting the location for installation and service.<br />
3. If installing at locations prone to snowfall, install the unit as high as possible with suitable roofing which shelters<br />
the unit from snow.<br />
4. Avoid installing the unit in locations where there are petroleum products (such as machine oil), saline content,<br />
sulphurous gas and where high frequency noise is generated.<br />
5. Place the indoor and outdoor unit, power cords and indoor/outdoor unit connection cables at a minimum distance<br />
of 1 meter or more away from televisions and radios. This is to avoid interference to picture and/or sound.<br />
(However, depending on the electromagnetic waves, noise interference may still occur even with the 1 meter<br />
separation.)<br />
6. For restaurants and kitchens, avoid installing at locations which draws oil and steam.<br />
Plastic parts can deteriorate from droplets of oil and steam or it can cause falling parts or water leakage.<br />
7. Avoid installing at the location where cutting oil mist or iron powder is present.<br />
8. If there is an immense voltage fluctuation due to the location’s problem, ensure to split the power supply.<br />
9. When installing the product in a place where it will be affected by typhoon or strong wind such as wind blowing<br />
between buildings, including the rooftop of a building and a place where there is no building in surroundings, fix<br />
the product with an overturn prevention wire, etc.
10. Ensure to assign several people or use a mechanical lift, etc. to transport the unit.<br />
11.14.3 SELECTING THE LOCATION FOR INSTALLATION SERVICE<br />
When installing multiple units, allow enough space in between the units and the side of the building.<br />
(A) If there are obstacles at the intake<br />
• If the upper part is open<br />
1 For separate installation location<br />
• Only if there are obstacles at the<br />
intake<br />
More than 100<br />
• If there are obstacles above the unit<br />
1 For separate installation location<br />
• Only if there are obstacles at the<br />
intake<br />
Less than 500<br />
More than<br />
100<br />
(B) If there are obstacles at the outtake<br />
• If the upper part is open<br />
• If there are obstacles above the unit<br />
More than 1000<br />
• If there are obstacles on both sides<br />
More More<br />
than 500 than 200<br />
100<br />
More than<br />
• If there are obstacles on the intake and<br />
the other side<br />
Less than 500<br />
More More<br />
than 500 than 200<br />
173<br />
More than<br />
200<br />
More than 1000<br />
1 For separate installation location<br />
More than 300<br />
1 For separate installation location<br />
Less than 500<br />
More than 300<br />
More than 1000<br />
More than<br />
1000<br />
More<br />
than 200<br />
(unit:mm)<br />
2 For multiple units (more than 2 units)<br />
• If there are obstacles on both sides<br />
More than<br />
200<br />
2 For multiple units (more than 2 units)<br />
• If there are obstacles on both sides<br />
More<br />
than 200<br />
Less than 500<br />
More<br />
than 200<br />
More than<br />
200<br />
More than 1000<br />
2 For multiple units (more than 2 units)<br />
More than 500<br />
2 For multiple units (more than 2 units)<br />
Less than 500<br />
More than<br />
1000<br />
More than 500
(C) If there are obstacles on both the intake and discharge<br />
Pattern 1<br />
If there is an obstacle that is higher than the unit on the intake side. (There is no limit to the height of the obstacle<br />
above the discharge.)<br />
• If the upper part is open<br />
• If there are obstacles above the unit<br />
2 For multiple units (up to 2 units)<br />
1 For separate installation location<br />
174<br />
100<br />
More than<br />
300 More than<br />
2 For multiple units (more than 2 units)<br />
Pattern 2<br />
If there is an obstacle that is higher than the unit on the discharge side. (There is no limit to the height of the<br />
obstacle above the discharge.)<br />
• If the upper part is open<br />
1 For separate installation location 2 For multiple units (more than 2 units)<br />
More<br />
than 300<br />
More<br />
than 100<br />
More<br />
than 500<br />
More than 200<br />
More than<br />
500<br />
More than<br />
200
• If there are obstacles above the unit<br />
(D) Stacking installation setup<br />
• Stack up to 2 tiers.<br />
• A dimension of approximately 400 mm is required for the second tier outdoor unit’s drain pipe and space for<br />
maintenance of the first tier outdoor unit.<br />
• Close A section (the space between the upper and lower level outdoor units) so the outtake air does not<br />
bypass it.<br />
1 If there are obstacles at the discharge 2 If there are obstacles at the intake<br />
A section<br />
400<br />
More<br />
than 500<br />
(E) For multiple row installation (on the roof, etc.)<br />
More<br />
than 300<br />
More than<br />
200<br />
More than<br />
1000<br />
More<br />
than 100<br />
175<br />
A section<br />
400<br />
More than 200<br />
1 For one row installation setup 2 For multiple units (more than 2 units)<br />
• The dimensions for H, A and L are shown<br />
in the following table.<br />
A<br />
L H 200<br />
H < L Installation not possible<br />
• The above mentioned distance is required for optimal unit performance.<br />
Allow as much space as possible in order to obtain the best performance from the units.<br />
More than<br />
500<br />
More than<br />
2000<br />
More than<br />
400
11.14.4 TRANSPORT AND INSTALL THE OUTDOOR UNIT<br />
• Transporting<br />
1. Transport the outdoor unit in its original packaging as close as possible to the installation location.<br />
2. In the event that the unit needs to be lifted or suspended, use a rope or belt and use cloth or wood as<br />
padding to avoid damaging the unit.<br />
3. Use the side handles to carry the unit and be careful not to touch<br />
the fan with your hand or any objects.<br />
• Installation<br />
1. Read the “Select the outdoor unit installation location” thoroughly before installing the outdoor unit.<br />
2. When installing to a concrete or solid surface, use M10 or a W 3/8 bolts and nuts to secure the unit. Ensure<br />
that it installed upright on a horizontal plane. (Use an anchor bolt for the installation as shown in the diagram<br />
below.)<br />
3. Avoid installing on the roof.<br />
4. In the even where the roof is at risk of receiving oscillations or vibrations, secure the unit with a seismic<br />
isolating mount or vibration absorbing rubber.<br />
5. The drain water will be discharged from the unit during heating or defrosting operation mode.<br />
Select an appropriate location with good drainage system. (In the winter, there is risk of slipping due to<br />
freezing, and depending on the installation set up there is risk of drain water running overhead.)<br />
• If installation of a drain pipe is required, install<br />
a drain elbow connected to the mounting hole<br />
at the bottom of the unit and connect it to a<br />
hose with an inner diameter of Ø 16 mm. (The<br />
hose is not supplied.)<br />
If drain holes of the outdoor unit are covered<br />
by a mounting base or by floor surface, raise<br />
the unit in order to provide a free space of<br />
more than 100mm under the outdoor unit.<br />
In cold regions (where the outdoor<br />
temperature can drop to below 0˚ for 2 to 3<br />
consecutive days), the drain water may freeze<br />
and may prevent the fan from operating. For<br />
this case, do not use the drain elbow.<br />
11.14.5 REFRIGERANT INSTALLATION<br />
For indoor unit refrigerant piping installation, refer to the installation instruction manual that comes with that indoor<br />
unit.<br />
Do not reuse existing piping, install new piping.<br />
Allowable piping length and hight difference<br />
[Example of piping connection]<br />
Length from outdoor unit to<br />
the innermost indoor unit<br />
Outdoor unit<br />
Main<br />
pipe 1<br />
Main<br />
pipe 2<br />
Main<br />
pipe 3<br />
First branch<br />
Branch pipe 1<br />
Branch pipe 2<br />
Main pipe 4<br />
Indoor unit Indoor unit Indoor unit<br />
Length from first branch to the innermost<br />
part of the indoor unit<br />
176<br />
Indoor unit<br />
Indoor unit<br />
Branch pipe 3 Branch pipe 4<br />
Height difference between indoor<br />
and outdoor units<br />
Branch pipe 5<br />
Height difference between<br />
indoor units
[Allowable piping connection example]<br />
Allowable<br />
height<br />
Height difference between indoor and outdoor<br />
units<br />
Less than 30 m<br />
difference Height difference between indoor units Less than 15 m<br />
Allowable<br />
piping length<br />
177<br />
Example of piping connection<br />
Total piping length 20 ~ 90 m<br />
Main pipe 1 + Main pipe 2 + Main pipe 3 + Main pipe 4<br />
+ Branch pipe 1 + Branch pipe 2 + Branch pipe 3 +<br />
Branch pipe 4 + Branch pipe 5<br />
Main pipe Total length Less than 40 m Main pipe 1 + Main pipe 2 + Main pipe 3 + Main pipe 4<br />
Branch pipe Total length Less than 50 m<br />
Each branch pipe length Less than 15 m<br />
Length from outdoor unit to the innermost part<br />
of the indoor unit<br />
Length from branch No. 1 to the innermost part<br />
of the indoor unit<br />
Less than 55 m<br />
Less than 30 m<br />
Branch pipe 1 + Branch pipe 2 + Branch pipe 3 +<br />
Branch pipe 4 + Branch pipe 5<br />
The branch pipe maximum length: Branch pipe 1,<br />
Branch pipe 2, Branch pipe 3, Branch pipe 4, Branch<br />
pipe 5<br />
1. Precautions during refrigerant installation.<br />
• Use clean pipes with no dust inside.<br />
The pipe may corrode with the presence of fluorine dust which will adversely affect the refrigerant piping<br />
system due to deterioration of the refrigerant oil, etc.<br />
• This unit is specifically for R410A. Ensure to adhere to the following items and install accordingly:<br />
• Use pipe cutters and flaring tools which are specially designed for use with R410A.<br />
• When connecting with flaring tools, coat the flare section with ether-based oil.<br />
• Ensure to use the flare nuts supplied with the unit when connecting this unit.<br />
• Only for storing or for open pipes.<br />
2. The local pipes can protrude from any four<br />
directions.<br />
• Make holes in the pipe panel for the pipes to<br />
penetrate it and lay the pipes accordingly.<br />
• It is recommended to apply additional<br />
substance to the cut area for anti-rust<br />
protection.<br />
• Ensure to install pipe panels to prevent rain<br />
water from getting into the unit.<br />
• Close the gap at the pipe connected area with<br />
putty or heat insulator (locally supplied).<br />
• If an insect or small animal enters the<br />
outdoor unit, there is the risk of shorting in<br />
the product electronic casing.<br />
[Remove the front panel]<br />
(1) Remove the 2 mounting screws.<br />
(2) Slide the front panel using your hands<br />
downwards to release the pawls.<br />
Then remove by pulling the panel<br />
towards you.<br />
Precautions when operating the 3-way valve for piping installation<br />
• Do not open the 3-way valve until all air flow parts are completed.<br />
• It is closed during shipment.<br />
• During installation the side panel may warp if only the flare nut is loosened and tightened with a torque<br />
wrench. As a result, always be sure to secure to the hexagonal part of the 3-way valve with a spanner, or<br />
other tool.<br />
• Refer to the following table for the tightening torque of the 3-way valve flare nuts.<br />
• If the nuts are over tightened, they may cause the flares to break or leak.<br />
• Do not add additional force to the valve’s cover.<br />
• Using spanners on the cover or valve itself (other than the hexagonal parts) may cause gas leakage.<br />
Avoid using spanners on the cover or parts other than the hexagonal part of the valve.
• During the cooling mode operation under low ambient pressure,<br />
the low pressure side of the valve can be prone to freezing.<br />
Secure the flare nut. (shared gas side / liquid side) section of the<br />
valve with a silicone sealing agent to prevent this from occurring.<br />
Precautions for handling the cover<br />
• Ensure not to scratch the inner surface of the<br />
valve or the end of the valve shaft.<br />
• Once adjustments to the valve are<br />
completed, ensure to tighten the valve cap<br />
according to the prescribed torque.<br />
Precautions for handling the service ports<br />
• Use a push-rod with a charge hose.<br />
• Once adjustments to the valve are<br />
completed, ensure to tighten the valve cap<br />
according to the prescribed torque.<br />
178<br />
Valve size Tightening torque<br />
ø9.52<br />
ø15.88<br />
Tightening torque<br />
10.7N•m~14.7N•m<br />
(1.1kgf•m~1.5kgf•m)<br />
20.6N•m~28.4N•m<br />
(2.1kgf•m~2.8kgf•m)<br />
48.0N•m~59.8N•m<br />
(4.8kgf•m~6.0kgf•m)<br />
Precautions for connecting the pipes<br />
• Ensure that the pipes do not come into contact with the<br />
compressor’s bolts or exterior panel.<br />
• There is a risk of condensation from the 3-way valve coming out<br />
between the insulation material and the indoor unit’s piping when<br />
you install the outdoor unit above then the indoor unit. Ensure to<br />
caulk the connection parts.<br />
• Perform all the necessary checks on the main piping connections.<br />
• Ensure to use the branch pipe unit to diverge the refrigerant piping. (Option parts No.: CZ-P155BK1).<br />
1. Install the branch pipe on a horizontal and vertical plane. (Maximum slant angle: within 15°)<br />
2. Ensure that the pipe length between the branch pipe and each indoor unit as short as possible.<br />
3. Port connections should be soldered with dry nitrogen gas to prevent oxidation of copper on the inner<br />
surface.<br />
Refer to the installation instruction manual for the details on the branch piping.
Precautions for Insulation Installation<br />
Maximum temperature limit of gas or liquid piping exceeds 120 °C<br />
• In high humidity environment, reinforce the insulation material for the refrigerant piping. Failure to do so may<br />
result in condensation on the surface of the insulation material.<br />
• Use materials with good heat-resistant properties as the heat insulator for the pipes. Ensure to insulate both<br />
the gas side and liquid side pipes.<br />
If the pipes are not adequately insulated, condensation and water leakages may occur.<br />
• Ensure that the current insulation covers the pipes up to the unit’s connecting part.<br />
If the piping is exposed, it may cause condensation or burn (when touch the pipe).<br />
Precautions for flare nut Installation<br />
• Dimensions when adding flare nuts and the tightening torque<br />
Piping size Tightening torque Flare section dimensions A Flare configuration<br />
ø 6.35<br />
ø 9.52<br />
ø 12.7<br />
ø 15.88<br />
14.2N•m ~ 17.2N•m<br />
(1.4kgf•m ~ 1.7kgf•m)<br />
32.7N•m ~ 39.9N•m<br />
(3.3kgf•m ~ 4.0kgf•m)<br />
49.5N•m ~ 60.3N•m<br />
(5.0kgf•m ~ 6.0kgf•m)<br />
68.0N•m ~ 75.5N•m<br />
(6.8kgf•m ~ 7.6kgf•m)<br />
179<br />
8.7 ~ 9.1<br />
12.8 ~ 13.2<br />
16.2 ~ 16.6<br />
19.3 ~ 19.7<br />
After piping connection has completed, ensure there is no gas leakage.<br />
• When tightening the flare nut, coat the flares (inner surface only) with<br />
refrigerant oil on the flares<br />
Firstly, screw in 3-4 turns by hand.<br />
Ensure not to get oil on the screw part.<br />
Refrigerant oil used is ether-based.<br />
• Once the piping connections are completed, perform leakage inspection<br />
using nitrogen gas.<br />
Brazing work<br />
• Always blow nitrogen gas through the pipe during brazing work.<br />
During brazing work, it is required to clean the inside of the pipe with nitrogen gas to prevent oxide scale<br />
forming on the inner surface of the pipe. This is called nitrogen displacement which is an extremely important<br />
step during refrigerant piping installation.<br />
(Do not use an antioxidant)<br />
<br />
11.14.6 VACUUM PURGING<br />
Use nitrogen gas for the leak tightness test. Using flammable gas can cause an explosion.<br />
• Once the piping connections are completed,<br />
perform leakage inspection using nitrogen gas<br />
(leak tightness test) using the 3-way valve for the<br />
outdoor unit and then close it.<br />
(Test the pressure with 4.15 MPa)<br />
• Ensure to use a vacuum pump (with a back-flow<br />
prevention device) for inside the refrigerant<br />
system.<br />
• Vacuuming process will take place after the reak<br />
test.<br />
Pressure<br />
meter<br />
Nitrogen Refrigerant<br />
meter<br />
Vacuum<br />
pump<br />
3-way<br />
valve<br />
Outdoor unit<br />
Indoor unit
11.14.7 REGARDING REFRIGERANT FILLING<br />
This unit is charge-free and does not require additional filling of refrigerant. Exercise precaution during refilling due to<br />
refrigerant leakage.<br />
Precautions during refrigerant filling<br />
• Ensure to fill only with liquid refrigerant when<br />
refilling.<br />
If gas refrigerant is filled, the refrigerant<br />
composition will not be balanced and will cause<br />
abnormal operation.<br />
Cylinder with<br />
a siphon tube<br />
Liquid refrigerant<br />
Siphon tube<br />
180<br />
• If using cylinders as shown in the bottom left<br />
diagram; without a siphon tube inside, turn it<br />
upside down and use it.<br />
(It is recommended to use the manifold with the<br />
side glass.)<br />
Gas refrigerant<br />
Not possible<br />
Possible<br />
Cylinder Cylinder<br />
Liquid refrigerant<br />
• Use tools that are designed specifically for R410A, for pressure resistance and to prevent mixing impurities.<br />
• Fill the refrigerant from the 3-way valve’s service port on the liquid-side.<br />
For filling and replacing all refrigerant (For refilling due to a leak)<br />
• For refilling refrigerant, first collect all residual refrigerant and after vacuum dehydration using the vacuum pump.<br />
Refill the refrigerant according to the prescribed amount stated on the placard affixed to this unit.<br />
Precautions after the pipes’ connection have completed<br />
• Ensure to open the 3-way valve after completing the piping installation. If it is closed during operation, it can lead<br />
to compressor failure.
11.14.8 ELECTRICAL WIRING<br />
Warning<br />
The units must be connected to the supply cables for fixed wiring by qualified technician.<br />
Feed the power source to the unit via a distribution switch board designed for this purpose, the<br />
switch should disconnected all poles with a contact separation of at least 3 mm.<br />
When the supply cable is damaged, it must be replaced by qualified technician.<br />
Be sure to install a current leakage breaker, main switch and fuse to the main power supply,<br />
otherwise electric shocks may result.<br />
Be sure to connect the unit to secure earth connection.<br />
If the earthing work is not carried out properly, electric shocks may result.<br />
Wiring shall be connected securely by using specified cables and fix them securely so that external<br />
force of the cables may not transfer to the terminal connection section.<br />
Imperfect connection and fixing leads to fire, etc.<br />
• Ensure to connect the electrical cable connections and clamp the wires securely to the terminal connections<br />
using cord clamps so that no undue force is placed on the wires (power source cable, indoor/outdoor connection<br />
cables, earth lead wire).<br />
• Do not install a phase advance capacitor for power factor improvement. (It does not improve the power factor and<br />
will cause abnormal overheating.)<br />
• Do not bind the excess cables together and place them inside this unit.<br />
• Protect the electrical cable with the protective bushing provided so that the cables do no get damaged on the<br />
knock hole or etched portions. If there is space between the electrical cables and the protective bushing occurs,<br />
seal it accordingly.<br />
• Tie the cables with the provided binding strap so that they do not touch the compressor and the pipes.<br />
• When setting up the cables, inside of unit install properly so that the front panel will not lift up. Make sure that<br />
front panel mount correctly.<br />
• Use a round type terminal with an insulation<br />
sleeve for connecting to the terminal block.<br />
• Use the appropriate screwdriver for tightening the<br />
terminal screws.<br />
Small sized screwdriver damages the head of the<br />
screw and cannot tighten it properly.<br />
• There is risk of damaging the screw if the terminal<br />
screw is over tightened. Tighten with the<br />
appropriate torque.<br />
Screw diameter name Tightening torque N•cm (kgf•cm)<br />
M4 157 ~ 196 (16 ~ 20)<br />
M5 196 ~ 245 (20 ~ 25)<br />
• Direction to pull out wires<br />
Front direction<br />
• Earth lead wire set up<br />
Back direction<br />
Sideways direction<br />
181<br />
Insulate the<br />
terminal section with<br />
insulation sleeves.<br />
Cord clamp<br />
Cord clamp<br />
Firmly secure the power supply<br />
cable, the internal/external<br />
connections and earth wire.<br />
Tie the insulation pipes so that the<br />
power supply cable, control wires,<br />
and earth lead wire do not come into<br />
contact with the compressor and/or<br />
the exposed pipes.<br />
Control<br />
terminal block Power supply<br />
terminal block<br />
Earth lead wire<br />
Tying band<br />
(Standard<br />
accessories)<br />
The earth lead wire shall be longer than other lead wires as shown in the figure for electrical<br />
safety in case it slips out of the cord from the anchorage.<br />
• Be sure to connect the wires correctly to terminal<br />
board with connecting the crimp type ring terminal to<br />
the wires.<br />
• If connecting two separate wires to a single crimped<br />
terminal, place the two crimped terminal wires<br />
together as shown in Fig. A. (If the arrangement<br />
shown in Fig. B is used, poor contacts or<br />
contact damage may result.)<br />
Fig. A (OK) Fig. B (not OK)
Connection method for the power supply cable and indoor/outdoor unit connections<br />
Follow the installation instruction manual provided with the indoor unit to set up the indoor unit wiring and the<br />
indoor/outdoor connections. Provide separate power supplies for the indoor and outdoor units.<br />
This equipment complies with EN/IEC 31000-3-12 provided that the short-circuit power Ssc is greater than or equals<br />
to U-4LA:1850kVA, U-5LA:2200kVA, U-6LA:2200kVA at the interface point between the user’s supply and the public<br />
system. It is the responsibility of the installer or user of the equipment to ensure; by consulting with the distribution<br />
network operator if necessary that the equipment is connected only to supply with a short-circuit power Ssc greater<br />
than or equals to U-4LA:1850kVA, U-5LA:2200kVA, U-6LA:2200kVA.<br />
Ssc::short circuit power<br />
• Power supply specifications<br />
Model name Power supply<br />
Power supply cable<br />
Minimum power<br />
cable supply<br />
cables<br />
1<br />
Length<br />
(m)<br />
182<br />
Leakage<br />
current<br />
breaker<br />
(A)<br />
Circuit breaker<br />
(Minimum capacity)<br />
Switch<br />
(A)<br />
Fuse<br />
(A)<br />
Control Cable<br />
U-4LA1E5-1 220V-240V~ 4 mm 2 8.5 33A 40A 40A 0.75 mm 2<br />
U-5LA1E5-1 220V-240V~ 6 mm 2 13 33A 40A 40A 0.75 mm 2<br />
U-6LA1E5-1 220V-240V~ 6 mm 2 12 33A 40A 40A 0.75 mm 2<br />
1. The maximum length shows a 2% voltage drop.<br />
NOTE<br />
Use the standard power supply cables for Europe (such as H05RN-F or H07RN-F which conforms to CENELEC<br />
(HAR) rating specifications) or use the cables based on IEC standard. (245 IEC57, 245 IEC66)<br />
Urban Network Method<br />
Connect all devices to one bus line irrelevant of the refrigerant system.<br />
Use less than 128 for the total number of connecting devices.<br />
Recommend<br />
If the number of connecting devices is big and since the units have to be connected to each<br />
refrigerant system, it is recommended to connect between each outdoor unit.<br />
(Refer to the diagram on the right).<br />
Should the device malfunction and cause abnormal communications to the other devices due<br />
to multiple connections, disconnect the outdoor units. It is easy to identify the faulty device and<br />
the system can be restored by disconnecting that device.<br />
Warning When using the urban network method for wiring, only switch the power ON for the outdoor unit No. 1.<br />
Turning other units ON besides unit No. 1 damages the control board.
Outdoor unit main power supply<br />
(220V-240V~) 50Hz<br />
Circuit Breaker<br />
witch<br />
Earth<br />
Nonpolar 2 wire<br />
Circuit Breaker<br />
Switch<br />
Circuit<br />
Breaker Earth<br />
Switch<br />
Earth<br />
Bus lines<br />
power supply<br />
switch - ON<br />
Bus lines power<br />
supply switch – OFF<br />
S<br />
Bus line transmission wire<br />
(Signal wire)<br />
Unit<br />
No. 1<br />
Circuit<br />
Breaker<br />
Switch<br />
Earth<br />
Circuit<br />
Breaker<br />
Unit Switch<br />
No. 2<br />
Remote controller<br />
Circuit<br />
Breaker Earth<br />
Circuit<br />
Breaker<br />
Switch Switch<br />
Remote controller Remote controller<br />
183<br />
Earth<br />
Unit<br />
No. 3<br />
Indoor unit main power supply<br />
Circuit<br />
Circuit<br />
Loop wire not possible<br />
(220V-240V~) 50Hz<br />
Breaker Earth Breaker Earth<br />
Circuit Breaker Earth<br />
Switch<br />
Switch<br />
Switch Indoor unit<br />
Central control device<br />
Remote controller<br />
Circuit<br />
Breaker<br />
Remote<br />
controller<br />
Switch<br />
Refrigerant piping pair system<br />
Separate the bus line per each refrigerant system and connect to the device.<br />
Bus lines power<br />
supply switch – OFF<br />
Indoor unit<br />
Outdoor unit<br />
Remote controller Remote Loop wire not possible<br />
Circuit Breaker controller<br />
Earth Switch Earth<br />
Remote<br />
Indoor unit<br />
Remote controller cord (Signal wire)<br />
Greater than 0.5 mm<br />
controller<br />
Earth<br />
2 Less than<br />
2.0 mm2 2 wire: overall extension less than<br />
200 m<br />
Bus line transmission wire (Signal wire)<br />
0.75 mm2 or Ø 1.2 mm<br />
2 wire: overall extension less than 1000 m<br />
Address Setting<br />
The table below shows the required address setting for the indoor/outdoor units. Failure to perform correct settings<br />
will result in abnormal operation.
• The indoor unit address is the number to distinguish the indoor unit. Never duplicate the number. If the number is<br />
duplicated, the unit will not operate properly.<br />
• There is an outdoor unit address for the indoor/outdoor unit and the address shows which outdoor and indoor unit<br />
is connected with the refrigerant pipes. The indoor and outdoor units that are connected to the refrigerant pipes<br />
are set to the same No. 1 unit address.<br />
If a different number is set in the same refrigerant system, then the unit will not operate properly.<br />
• For the A address setting method, there are 3 ways to set the address as shown below: the automatic address<br />
setting, the manual address setting and the address setting which is done using the remote controller by<br />
selecting the address type and wiring method. (For the address setting using the remote controller, refer to the<br />
installation instruction manuals provided with the remote controller.)<br />
For the B address setting method, refer to the installation instruction manual provided with the indoor unit.<br />
• The automatic address setting is only possible with the refrigerant pipes pairing method.<br />
Instructions for automatic address setting<br />
It is only possible to automatically set up the indoor unit address if the wiring set up is using the refrigerant pipes<br />
pairing method. (It is not possible if connected to the central control device.)<br />
(<strong>Manual</strong> address setting and address setting using the remote controller is also possible if the wiring set up follows<br />
the refrigerant pipes pairing method).<br />
1. Set the address for the indoor and outdoor unit to “000” (= erases).<br />
(At the time of shipment from the factory the setting is “000”)<br />
2. Firstly, switch the power supply ON for all indoor units and then switch the power supply ON for the outdoor<br />
units. (It is possible to perform simultaneously.)<br />
After switching ON the outdoor unit’s power supply, the address is automatically set. (After switching ON the<br />
power, it takes approximately 1 minute to automatically set.)<br />
Note: If one of the indoor unit’s power supplies is not turned ON even when the outdoor unit’s power supply<br />
has been turned ON, the address will not automatically set.<br />
3. Once the address is automatically set even when the power supply is turned OFF, the setting is stored.<br />
Reset the automatic setting below by performing step “4” or erase all connecting indoor unit’s indoor unit<br />
addresses using the remote controller and then repeat the resetting procedure by beginning from the above<br />
step “2”.<br />
• It is possible to automatically reset when using the 1 group remote controller.<br />
• It is also possible to check the address setting of the indoor unit by using the wired remote controller.<br />
Refer to the section “Indoor unit address settings” from the installation instruction manual provided with<br />
the wired remote controller.<br />
• Switching ON the power supply of the indoor unit shows a malfunction diagnostics display (F25-01).<br />
However after it has been automatically set, the malfunction diagnostics display will disappear by<br />
pressing the START button on the remote controller.<br />
• If the malfunction diagnostics display (F25-01) does not disappear, then turn ON the power supply for the<br />
outdoor unit.<br />
• If the malfunction diagnostics display (F25-01) does not disappear even after turning ON the power<br />
supply for the outdoor unit, reset the unit.<br />
184
4. Follow these procedures to automatically reset the address.<br />
After switching the power supply to ON for all the indoor and outdoor units by<br />
pressing and holding down SW6 on the control board of the outdoor unit for more<br />
than 4 seconds, the address will automatically reset.<br />
(LED 2 through 9 on the outdoor unit’s control board will light up.<br />
Release SW6 to confirm the reset once all the LED lights 2 through 9 have lit up.)<br />
• If the outdoor unit’s and the indoor unit’s indoor unit address are not “000”, then it<br />
will not automatically reset the address.<br />
<strong>Manual</strong> address setting instructions<br />
Note: <strong>Manual</strong> address setting cannot be done on wall type indoor units.<br />
1. The manual address setting is conducted by using the switch on each indoor / outdoor unit’s control board.<br />
(Refer to the diagram below)<br />
2. Set the power supply switch for all units to OFF. The address you set is stored when the power is turned on.<br />
3. To change the address that is already set, turn the power supply OFF and reset the switch.<br />
• The address number “000” cannot be used.<br />
• Set the order for the unit address starting from “001” without skipping, as this facilitates the procedural tasks,<br />
maintenance and inspection checks.<br />
• Before switching on the power supply of the outdoor unit(s), ensure that the bus lines power supply is<br />
switched on by setting switch SW5 to ON.<br />
Outdoor unit<br />
Indoor unit<br />
DIP switch position<br />
SW5<br />
(Power<br />
supply<br />
SW)<br />
Indoor<br />
unit<br />
Print<br />
board<br />
DIP switch setting<br />
(according to the position)<br />
(Position (Position<br />
100) 10) (Position 1)<br />
(Position 10) (Position 1)<br />
(Position (Position<br />
100) 10) (Position 1)<br />
Outdoor device address<br />
185<br />
Name and setting directions<br />
SW-OUT3 ON–1<br />
OFF–0<br />
This address is to differentiate all the outdoor units individually.<br />
The outdoor unit address must not be duplicated on outdoor units of<br />
other refrigerant piping systems.<br />
Setting is possible between “001” and “199”.<br />
P.C.B<br />
Outdoor device address<br />
The address shows which outdoor unit it is linked to.<br />
Set the same number as the refrigerant piping system’s outdoor unit.<br />
Setting is possible from “01” to “99”.<br />
SW203 ON–1<br />
Indoor device address<br />
OFF–0<br />
This address is to individually differentiate all the indoor units.<br />
Avoid setting (duplicating) any number that is already used by the<br />
units.<br />
Setting is possible from “001” to “199”.
11.14.9 PRECAUTIONS REGARDING TEST RUN<br />
The process flow shows the start of the test run<br />
Check Before Test Run<br />
• Always be sure to use properly insulated tool to operate the switch on the circuit board. (Do not use your<br />
finger or a metallic object)<br />
• Never switch the power supply ON until the installation has completed.<br />
• Supply electrical current through all indoor units and check the voltage.<br />
• Supply electrical current through all the outdoor units and check each inter-phase voltage.<br />
186
• Switch the power supply ON at least 12 hours before the test run.<br />
• Removing a connector while the current is running can cause damage to the control board. Once the power<br />
supply is turned OFF, be sure to wait 5 minutes or more before starting to work on it.<br />
• Follow the indoor and outdoor units’ instructions.<br />
• Before the test run, ensure to check that the 3-way valve is open. Operating while the valve is closed causes<br />
the compressor to fail.<br />
• Ensure to connect the refrigerant piping and the related wiring to the same refrigerant system.<br />
If the refrigerant piping and the related wiring are different and not connected to the same refrigerant system,<br />
it leads to abnormal operation and causes damage to the unit.<br />
Test Run Procedure<br />
• Ensure to conduct a test run. In addition, be sure to run the cooling operation test run for at least 20 minutes<br />
before starting the heating operation test run.<br />
• If you cannot be near the outdoor unit during test run, request for another person to replace you or install a<br />
frontal panel.<br />
• Once the cooling test run is functioning properly, check that the outflow from the indoor unit is cool.<br />
• Once the heating test run is functioning properly, check that the outflow from the indoor unit is warm.<br />
• If the indoor unit has a wired remote controller attached, check that the temperature values displayed during<br />
test run for the heat exchanger are as follows.<br />
(The heat exchanger temperature is displayed on the wired remote controller timer display screen.)<br />
The heat exchanger temperature during the cooling test run is 6 to 20°C and during the heating test run it is<br />
25 to 55°C.<br />
If the connected indoor unit’s capacity exceeds 100% or if the pipe length is long, the heat exchanger<br />
temperature during cooling test run will be high and low during heating test run.<br />
• If the units do not operate during test run, perform the malfunctioning diagnostics to countermeasure any<br />
problems. Resume the test run.<br />
■ Performing test run of the outdoor unit<br />
• Press the TEST RUN button on the outdoor unit’s control board for more than 1 second.<br />
• If you want to cancel after performing the test run, press the TEST RUN button again for more than 1 second.<br />
• Perform test run for each outdoor unit and check that all indoor units connected by the refrigerant piping are<br />
also performing the test run. Ensure that the refrigerant piping system and the electrical wiring system are<br />
the same.<br />
■ Performing trial operation of the indoor unit<br />
• For the test run method, read the installation instruction manual for the indoor unit and Infrared receiver<br />
controller (sold separately).<br />
• Perform test run for each indoor unit and check that the refrigerant piping system and the electrical wiring<br />
system are the same.<br />
187
11.14.10 REGARDING LOCAL SETTINGS<br />
■ Local setting method using the remote controller<br />
• The settings can be performed at night with low sound by using the remote controller.<br />
Follow the instructions below regarding installation, service and repair, and perform local setting.<br />
(If there is a mistake with the settings, it will cause abnormal operations.)<br />
• Perform the local settings according to the installation instruction manual provided with the remote controller.<br />
• Mode number, setting values<br />
Mode number Item Setting value Setting content<br />
000 No setting (Cancel)<br />
02 Low sound at night<br />
001<br />
002<br />
Low sound level 1<br />
Low sound level 2<br />
003 Low sound level 3<br />
■ Model setting for cooling via a jumper wire<br />
• The unit designed for cooling can be set by the JP wire on the outdoor unit’s control<br />
board.<br />
[Setting method]<br />
After disconnecting JP1 (COOL ONLY) as shown in diagram 1 while the power<br />
supply has been turned OFF, switch the unit’s power supply back to ON.<br />
By setting it to cooling operation, the heating operation cannot be used.<br />
Once the unit is in cooling operation and in order to return to heating/cooling mode,<br />
turn off the power supply. Disconnect JP1 and switch ON the power supply.<br />
Note: Ensure to turn OFF the power supply before disconnecting JP1. There is a risk<br />
of damaging the P board by disconnecting JP1 while the power supply is<br />
turned ON.<br />
11.14.11 CHECKS AFTER INSTALLATION HAVE COMPLETED<br />
• Check the following items after completing installation.<br />
11.14.12 REGARDING DELIVERY TO THE CUSTOMER<br />
• Request the customer to review the instruction manual and explain the operating method for the product.<br />
• During delivery, not only provide explanation of the operating methods but the serviceperson also writes his/her<br />
name in the comment column (back page of the instruction manual) and gives it to the customer. In addition, it is<br />
also recommended that regular inspection checks are agreed upon for maintenance.<br />
Refer to the installation instruction manual provided with the indoor unit for the specifications on the indoor<br />
unit installation.<br />
188
11.15 Terminal Module For Outdoor Unit CZ-CAP1 Installation <strong>Manual</strong><br />
• This module is used for cooling, heating and fanning operation settings.<br />
• This module is used to conduct a forced stop operation for the air conditioner.<br />
• This module is used for demand control on an outdoor unit.<br />
Before installing the terminal module, be sure to thoroughly read the “Precautions in terms of safety” section in<br />
the installation manual.<br />
Precautions in<br />
terms of safety<br />
Always Observe Safety<br />
Precautions<br />
An explanation for the following safety<br />
marks/symbols is provided and indicates the<br />
level of harm or damage incurred from improper<br />
installation or disregarding the safety<br />
precautions.<br />
Warning<br />
Caution<br />
This warning mark indicates that “There<br />
exists a possibility the serious injury or<br />
death may result”.<br />
This cautionary mark indicates that<br />
“There only exists a possibility that<br />
injury or damage to property may<br />
result”.<br />
189<br />
Warning<br />
All important descriptions regarding safety are<br />
listed here, and always observe them without fail.<br />
The following shows the safety marks and their<br />
meanings.<br />
An explanation for the following safety<br />
symbols is provided and describes the type<br />
of precautions that are required.<br />
This symbol indicates something that is<br />
PROHIBITED.<br />
This symbol indicates something that is<br />
REQUIRED.<br />
Ask the vendor or a qualified technician to perform the installation.<br />
A faulty installation carried out by the customer may lead to electric shock or fire.<br />
Be sure to carry out proper installation according to the installation manual.<br />
A faulty installation may lead to electric shock or fire.<br />
The unit must be installed in accordance with applicable national and local regulations. Any electrical<br />
work should only be carried out by qualified technician and use exclusive circuits without fail.<br />
Presence of insufficient capacity in power circuit or imperfection in execution leads to electric shock,<br />
fire, etc.<br />
Be sure to always use the parts accessories or the specified parts for the connection and installation.<br />
Failure to do so may lead to electric shock or fire.<br />
Connect all wiring and cables securely with the specified cables or wires so that external force from<br />
the cables does not transfer to the terminal connection section. An insecure or faulty connection may<br />
lead to unit failure, excessive heat, or fire.<br />
Be sure to always turn the power off before proceeding with wire and cable set up.<br />
Failure to do so may lead to electric shock or fire.<br />
Caution<br />
Do not install near a place where there is risk of leaking flammable gas.<br />
Failure to do so can lead to electric shock or fire.
Accessories Check that you have the following accessories.<br />
Name Q’ty Diagram Remark<br />
Terminal module 1<br />
Cord for connecting the control<br />
board<br />
Cord clamp 1<br />
Tie 4<br />
Screw 2<br />
11.15.1 OUTSIDE DIMENSIONS<br />
190<br />
For installing the demand controller<br />
For installing the cooling/heating selector<br />
For the forced stop output<br />
1 For connecting on the control board<br />
153<br />
87 12<br />
120<br />
For securing the cord<br />
For securing the cord connection<br />
For installing the terminal module<br />
11.15.2 TERMINAL MODULE INSTALLATION PROCEDURE<br />
1. Install the terminal module with the screws provided (2 pcs.) so it matches the holes on the outdoor unit’s control<br />
panel.<br />
12
2. Connect the lead wires from the installed terminal module with the connection points found on the upper part of<br />
the noise filter P.C.B.<br />
Connect 10P to CN-OPT1, 2P to CN-OPT2 and 4P to CN-OPT3.<br />
3. Use the cord provided for P.C.B to connect to CN-OPT4 on the main P.C.B and to CN-OPT4 on the noise filter<br />
P.C.B.<br />
Main P.C.B<br />
CN-OPT4<br />
191<br />
Cord for connecting the P.C.B<br />
CN-OPT4<br />
4. Secure the cord clamp provided to the holes located on the right side of control panel.
11.15.3 CONNECTION PROCEDURE<br />
Be sure to always turn the power off first when setting up the wire and cable connections.<br />
Failure to do so may lead to electric shock or unit failure<br />
• Connecting cable to H05RN-F or H07RN-F which conforms to CENELEC (HAR) rating specifications, or use the<br />
cables based on IEC standard. (245IEC57, 245IEC66) Diameter: 0.5 mm 2 .<br />
• The maximum wire/cable length is 150 m.<br />
192
WHEN CONNECTING TO THE COOLING / HEATING SELECTOR<br />
It is possible to secure the cooling, heating and fanning operation connection with the Cooling / Heating Selector.<br />
Follow the procedure for the connection set up below.<br />
1. Connect the wiring (4-wire) to points 1 through 4 on the upper part of the terminal block.<br />
Secure the wiring with the cord clamp located on the right side of the terminal block.<br />
2. Connect the wiring to the Cooling / Heating Selector on the terminal block.<br />
The Cooling / Heating Selector is sold separately as an option.<br />
Model No: CZ-RD1<br />
Refer to the installation manual provided with the Cooling / Heating Selector for further details on the installation.<br />
WHEN CONNECTING TO THE FORCED STOP INPUT<br />
With the Forced Stop input, it is possible to override the air conditioning operation to force a stop if a signal is<br />
received from a fire alarm device, etc.<br />
Connect the wiring (2-wire) to points 5 and 6 on the upper part of the terminal block.<br />
Secure the wiring with the cord clamp located on the right side of the terminal block.<br />
193
WHEN CONNECTING THE DEMAND CONTROLLER INPUT<br />
It is possible to choose various demand levels for the operating current. Refer to the table shown on the right.<br />
Terminal no. for demand section Description<br />
LV1 Approx. 70% of rated current<br />
LV2 Approx. 40% of rated current<br />
LV3 Stop<br />
Connect the wiring (4-wire) to the Demand section (LV1, LV2, LV3, COM) on the terminal block.<br />
Secure the wiring with the cord clamp located on the right side of the terminal block.<br />
WHEN CONNECTING TO THE NEXT SYSTEM UNIT<br />
• The Cooling / Heating Selector input and Forced Stop input can be transferred to the next system unit.<br />
• Connecting cable to H05RN-F or H07RN-F which conforms to CENELEC (HAR) rating specifications, or use the<br />
cables based on IEC standard. (245IEC57, 245IEC66) Diameter: 0.5 mm 2 .<br />
• The maximum wire/cable length is 100 m.<br />
• The demand control cannot be transferred to the next system unit.<br />
• When transferring to the next system, the maximum number of connecting units is 30.<br />
1. Connecting the wiring to the lower part of the terminal block.<br />
When transferring to the next system unit with the Cooling / Heating Selector, connect the wiring (4-wire) to the<br />
terminal points 1 through 4 on the lower part of the terminal block, and when transferring the Forced Stop input to<br />
the next system, connect the wiring (2-wire) to the terminal points 5 and 6 on the lower part of the terminal block.<br />
When transferring to the next system for either case, connect the wiring to the terminal points 1 through 6 on the<br />
lower part of the terminal block.<br />
Secure the wiring with the cord clamp located on the right side of the terminal block.<br />
Be sure to connect the transfer line to the next system located on the lower part of the terminal block.<br />
Connecting the transfer line to the upper terminal block can damage the device.<br />
2. Connecting the wiring to the terminal block for the next system.<br />
For the Cooling / Heating Selector, connect the wiring to the terminal points 1 through 4 on the upper part of the<br />
the terminal block for the next system.<br />
For the Forced Stop input, connect the wiring to the terminal points 5 and 6 on the upper part of the terminal<br />
block for the next system.<br />
When connecting to the next system for either case, connect the wiring to the terminal points 1 through 6 on the<br />
upper part of the terminal block for the next system.<br />
When connecting to the next outdoor system unit, be sure to connect to the appropriate terminal point due to the<br />
polarity.<br />
194
195
11.15.4 WIRING PROCEDURE<br />
Follow the wiring procedure below for terminal connection.<br />
○1 Set up the wiring through the back side of the control panel.<br />
○2 Secure the wiring with the cord clamp located on the right side of the control panel.<br />
Set the wiring and cables for the power and signal lines to the outdoor unit together, and secure each wire and<br />
○3<br />
cable with the tie.<br />
○4 Secure and clamp the power and signal lines with the tie, set up close to the 3 way valve.<br />
○5 Set up the wiring and cable for the outdoor unit piping and secure with a tie.<br />
196
11.15.5 CHECK AFTER COMPLETING INSTALLATION<br />
Check the signals to make sure the unit operates properly using an external input device.<br />
197
11.16 MANUAL FOR TERMINAL MODULE<br />
11.16.1 CONNECTION PROCEDURE<br />
Be sure to always turn the power off first when setting up the wire and cable connections.<br />
Failure to do so may lead to electric shock or unit failure.<br />
• Connecting cable to H05RN-F or H07RN-F which conforms to CENELEC (HAR) rating specifications, or use the<br />
cables based on IEC standard. (245IEC57, 245IEC66) Diameter: 0.5 mm 2 .<br />
• The maximum wire/cable length is 150 m.<br />
198
WHEN CONNECTING TO THE COOLING / HEATING SELECTOR<br />
It is possible to secure the cooling, heating and fanning operation connection with the Cooling / Heating Selector.<br />
Follow the procedure for the connection set up below.<br />
1. Connect the wiring (4-wire) to points 1 through 4 on the upper part of the terminal block.<br />
Secure the wiring with the cord clamp located on the right side of the terminal block.<br />
2. Connect the wiring to the Cooling / Heating Selector on the terminal block.<br />
The Cooling / Heating Selector is sold separately as an option.<br />
Model No: CZ-RD1<br />
Refer to the installation manual provided with the Cooling / Heating Selector for further details on the installation.<br />
WHEN CONNECTING TO THE FORCED STOP INPUT<br />
With the Forced Stop input, it is possible to override the air conditioning operation to force a stop if a signal is<br />
received from a fire alarm device, etc.<br />
Connect the wiring (2-wire) to points 5 and 6 on the upper part of the terminal block.<br />
Secure the wiring with the cord clamp located on the right side of the terminal block.<br />
199
WHEN CONNECTING THE DEMAND CONTROLLER INPUT<br />
It is possible to choose various demand levels for the operating current. Refer to the table shown on the right.<br />
Terminal no. for demand section Description<br />
LV1 Approx. 70% of rated current<br />
LV2 Approx. 40% of rated current<br />
LV3 Stop<br />
Connect the wiring (4-wire) to the Demand section (LV1, LV2, LV3, COM) on the terminal block.<br />
Secure the wiring with the cord clamp located on the right side of the terminal block.<br />
WHEN CONNECTING TO THE NEXT SYSTEM UNIT<br />
• The Cooling / Heating Selector input and Forced Stop input can be transferred to the next system unit.<br />
• Connecting cable to H05RN-F or H07RN-F which conforms to CENELEC (HAR) rating specifications, or use the<br />
cables based on IEC standard. (245IEC57, 245IEC66) Diameter: 0.5 mm 2 .<br />
• The maximum wire/cable length is 100 m.<br />
• The demand control cannot be transferred to the next system unit.<br />
• When transferring to the next system, the maximum number of connecting units is 30.<br />
1. Connecting the wiring to the lower part of the terminal block.<br />
When transferring to the next system unit with the Cooling / Heating Selector, connect the wiring (4-wire) to the<br />
terminal points 1 through 4 on the lower part of the terminal block, and when transferring the Forced Stop input to<br />
the next system, connect the wiring (2-wire) to the terminal points 5 and 6 on the lower part of the terminal block.<br />
When transferring to the next system for either case, connect the wiring to the terminal points 1 through 6 on the<br />
lower part of the terminal block.<br />
Secure the wiring with the cord clamp located on the right side of the terminal block.<br />
Be sure to connect the transfer line to the next system located on the lower part of the terminal block.<br />
Connecting the transfer line to the upper terminal block can damage the device.<br />
2. Connecting the wiring to the terminal block for the next system.<br />
For the Cooling / Heating Selector, connect the wiring to the terminal points 1 through 4 on the upper part of the<br />
the terminal block for the next system.<br />
For the Forced Stop input, connect the wiring to the terminal points 5 and 6 on the upper part of the terminal<br />
block for the next system.<br />
When connecting to the next system for either case, connect the wiring to the terminal points 1 through 6 on the<br />
upper part of the terminal block for the next system.<br />
When connecting to the next outdoor system unit, be sure to connect to the appropriate terminal point due to the<br />
polarity.<br />
200
201
11.16.2 WIRING PROCEDURE<br />
Follow the wiring procedure below for terminal connection.<br />
○1 Set up the wiring through the back side of the control panel.<br />
○2 Secure the wiring with the cord clamp located on the right side of the control panel.<br />
Set the wiring and cables for the power and signal lines to the outdoor unit together, and secure each wire and<br />
○3<br />
cable with the tie.<br />
○4 Secure and clamp the power and signal lines with the tie, set up close to the 3 way valve.<br />
○5 Set up the wiring and cable for the outdoor unit piping and secure with a tie.<br />
202
11.16.3 CHECK AFTER COMPLETING INSTALLATION<br />
Check the signals to make sure the unit operates properly using an external input device.<br />
203
11.17 Cooling / Heating Selector CZ-RD1 Installation <strong>Manual</strong><br />
• This module is used for cooling, heating and fanning operation settings.<br />
Before installing the Cooling/Heating Selector, be sure to thoroughly read the “Precautions in terms of safety”<br />
section in the installation manual.<br />
Precautions in<br />
terms of safety<br />
Always Observe Safety<br />
Precautions<br />
An explanation for the following safety marks/symbols is<br />
provided and indicates the level of harm or damage<br />
incurred from improper installation or disregarding the<br />
safety precautions.<br />
Warning<br />
Caution<br />
This warning mark indicates that “There<br />
exists a possibility the serious injury or<br />
death may result”.<br />
This cautionary mark indicates that<br />
“There only exists a possibility that<br />
injury or damage to property may<br />
result”.<br />
204<br />
All important descriptions regarding safety are<br />
listed here, and always observe them without fail.<br />
An explanation for the following safety<br />
symbols is provided and describes the type<br />
of precautions that are required.<br />
This symbol indicates something that is<br />
PROHIBITED.<br />
This symbol indicates something that is<br />
REQUIRED.<br />
After installing the Cooling/Heating Selector, check that the module functions properly and also explain the<br />
operation and cleaning procedures to the customer according to the instruction manual. Furthermore, ask the<br />
customer to keep this installation manual and the instruction manual in a safe place for later reference.<br />
Warning<br />
Ask the vendor or a qualified technician to perform the installation.<br />
A faulty installation carried out by the customer may lead to electric shock or fire.<br />
Be sure to carry out proper installation according to the installation manual.<br />
A faulty installation may lead to electric shock or fire.<br />
The unit must be installed in accordance with applicable national and local regulations. Any electrical<br />
work should only be carried out by qualified technician and use exclusive circuits without fail.<br />
Presence of insufficient capacity in power circuit or imperfection in execution leads to electric shock,<br />
fire, etc.<br />
Be sure to always use the parts accessories or the specified parts for the connection and installation.<br />
Failure to do so may lead to electric shock or fire.<br />
Connect all wiring and cables securely with the specified cables or wires so that external force from<br />
the cables does not transfer to the terminal connection section. An insecure or faulty connection may<br />
lead to unit failure, excessive heat, or fire.<br />
Be sure to always turn the power off before proceeding with wire and cable set up.<br />
Failure to do so may lead to electric shock or fire.<br />
Caution<br />
Do not install near a place where there is risk of leaking flammable gas.<br />
Failure to do so can lead to electric shock or fire.
Accessories Check that you have the following accessories.<br />
Name Q’ty Diagram Remark<br />
Cooling/Heating selector SW 1<br />
Installation manual 1<br />
11.17.1 EXTERNAL DIMENSIONS<br />
FAN<br />
COO L<br />
CZ-RD1<br />
11.17.2 CONNECTION PROCEDURE<br />
70<br />
MOD E<br />
HEA T<br />
FAN<br />
COOL<br />
CZ-RD1<br />
MODE<br />
HEAT<br />
120<br />
205<br />
For setting the cooling/heating operation<br />
This manual<br />
Be sure to always turn the power off before proceeding with wire and cable set up.<br />
Failure to do so may lead to electric shock or fire.<br />
68<br />
61<br />
(Unit: mm)<br />
• Connecting cable to H05RN-F or H07RN-F which conforms to CENELEC (HAR) rating specifications, or use the<br />
cables based on IEC standard. (245IEC57, 245IEC66) Diameter: 0.5 mm 2 .<br />
• The maximum wire/cable length is 150 meters. Also avoid installing near power cable due to possible malfunction.<br />
1. Removing the decorative panel.<br />
The decorative panel is embedded in the unit.<br />
Remove the decorative panel from the mount.<br />
You can separate the decorative panel from<br />
mount quite easily at the points where it clips in.<br />
2. Remove the case.<br />
Remove the screws (2 pcs.) that secure the case.<br />
3. Connect the wiring.<br />
Connect the electric wiring (Local supply) to the<br />
round terminals of the short wires and then<br />
crimped.<br />
Decorative panel<br />
Mount<br />
Case
3<br />
2<br />
4<br />
1<br />
1: Brown cord<br />
2: Red cord<br />
3: Orange cord<br />
4: Yellow cord<br />
Yellow cord<br />
Orange cord<br />
Red cord<br />
Brown cord<br />
206<br />
Screws to secure case<br />
Shown without the decorative panel<br />
Connect to the round terminals of the short wires No.1~4. Install securely using a crimp-type device for round<br />
terminals. The cords have positive and negative properties. On the outdoor unit’s terminal module, match and<br />
connect (optional connection) to the terminal points 1 through 4 for the Cooling/Heating Selector section on the<br />
terminal module.<br />
4: Yellow cord<br />
Connect to terminal point 4 on terminal<br />
block<br />
3: Orange cord<br />
Connect to terminal point 3 on terminal<br />
block<br />
2: Red cord<br />
Connect to terminal point 2 on terminal<br />
block<br />
1: Brown cord<br />
Connect to terminal point 1 on terminal<br />
block<br />
Demand<br />
Forced<br />
Stop<br />
To the next system outdoor unit<br />
Cooling/Heating<br />
Selector<br />
Mount<br />
Terminal module with optional connection on<br />
the outdoor unit’s control panel<br />
When connecting to the short wire, follow the diagram below and strip 8 to 10 mm of the wire’s end exposing the<br />
base wire. After inserting it into the connector, securely crimp the connection so it does not disconnect.<br />
Connector<br />
Short wire<br />
4. Connect the earth wire<br />
Connect the earth wire to the screw on the bottom<br />
side of the case.<br />
5. Open the hole to the exterior and pull the<br />
electrical wiring through.<br />
There is a hole on the bottom of the case and on<br />
the side of the case.<br />
Only use the necessary hole and pull the wiring<br />
through to the exterior.<br />
8 ~ 10 mm<br />
Stripped segment<br />
Seal the hole to prevent small animals from<br />
entering the unit.<br />
6. Install the case.<br />
Re-install the case that was removed by securing<br />
it with the screws.<br />
7. Install the decorative panel.<br />
Install the decorative panel by clipping it in.<br />
There is a specific direction to install the<br />
decorative panel.
Install the decorative panel by matching the<br />
directional arrow ↑UP for the decorative panel as<br />
shown in the illustration to the right.<br />
Install the case by matching it<br />
with the directional arrow.<br />
11.17.3 OPERATING PROCEDURE<br />
1. Enable or disable cooling/heating selector.<br />
Choose SW ○1 or ○2 .<br />
207<br />
Directional arrow UP<br />
UP<br />
Earth screw<br />
Case<br />
Hole<br />
FAN<br />
COO L<br />
Decorative panel<br />
CZ-RD1<br />
Please note the installation direction.<br />
By choosing ○1 , the set operations are turned OFF, and by choosing ○2 , the set operations are turned ON.<br />
2. Choose either the fan operation or the cooling/heating operation.<br />
Choose SW ○3 or ○4 .<br />
Choose ○3 for the fan operation, and choose ○4 for the cooling/heating operations.<br />
By choosing ○3 , the wired controller indicates priority to the fan operation.<br />
MOD E<br />
HEA T
3. Choose either the cooling operation or the heating operation.<br />
Choose SW ○5 or ○6 .<br />
Choose ○5 for the cooling operation, and choose ○6 for the heating operation.<br />
By choosing ○5 , the wired controller indicates priority to the cooling operation.<br />
By choosing ○6 , the wired controller indicates priority to the heating operation.<br />
11.17.4 CHECK AFTER COMPLETING INSTALLATION<br />
Check the signals to make sure the each setting switch operates properly.<br />
Be sure that choosing ○2 to enable cooling/heating selector.<br />
208
11.18 LINE BRANCH PIPE INSTALLATION MANUAL CZ-P155BK1<br />
• Prior to undertaking the installation work, read carefully through the “Installation Instructions” for the air<br />
conditioner and this “Installation <strong>Manual</strong>”.<br />
• This line branch pipe is used for the R410A refrigerant.<br />
• This line branch pipe is used where the connection of the MINI-<strong>VRF</strong> type indoor/outdoor pipes is to be branched.<br />
11.18.1 Details of parts supplied<br />
○1 Liquid side branch pipe (inner diameter)<br />
○2 Gas side branch pipe (inner diameter)<br />
ø12.85<br />
(I.D)<br />
ø12.85<br />
(I.D)<br />
ø6.45<br />
(I.D)<br />
ø9.65<br />
(I.D)<br />
ø6.45<br />
(I.D)<br />
ø9.65<br />
(I.D)<br />
ø16.0<br />
(I.D)<br />
ø16.0<br />
(I.D)<br />
○3 Thermal insulator (Gas side) ○4 Thermal insulator (Liquid side) ○5 Installation manual<br />
209<br />
ø16.0<br />
(I.D)<br />
ø9.65<br />
(I.D)<br />
ø12.85<br />
(I.D)<br />
1pcs 1pcs 1sheet<br />
11.18.2 Indoor/Outdoor unit piping installation<br />
• For details on the allowable amount of refrigerant, allowable pipe lengths and allowable elevation difference, refer<br />
to the installation instructions provided with the indoor unit.<br />
• The diameter of the piping for the indoor and outdoor units differs depending on the model of the unit. (Refer to<br />
respective diameter of the piping for the indoor and the outdoor units and install accordingly.) Use pipe cutters to<br />
cut the appropriate connecting section of the branch pipe to match the diameter of piping for the indoor and<br />
outdoor units.<br />
Pipe diameter for indoor unit<br />
Cooling capacity of<br />
the indoor unit<br />
Liquid side pipe<br />
diameter<br />
Gas side pipe<br />
diameter<br />
2.2 kW - 6.3 kW ø6.35 ø12.7<br />
7.1 kW and above ø9.52 ø15.88<br />
Pipe diameter for indoor unit<br />
Cooling capacity of<br />
the outdoor unit<br />
Liquid side pipe<br />
diameter<br />
Gas side pipe<br />
diameter<br />
11.2 kW - 15.5 kW ø9.52 ø15.88
11.18.2.1 Installation instructions<br />
Refrigerant pipe<br />
To the outdoor unit or<br />
next branch pipe Input<br />
210<br />
Output (1)<br />
Refrigerant pipe<br />
To next branch pipe<br />
or indoor unit<br />
Output (2)<br />
Gas side / Liquid side<br />
branch pipe<br />
11.18.2.2 Installation precaution<br />
Position the branch pipe on the appropriate horizontal and vertical plane so that branch flow is even.<br />
Horizontal<br />
line<br />
Horizontal line<br />
15°<br />
(Within a 30° incline)<br />
Within 30°<br />
11.18.2.3 Precautions at connecting points<br />
After removing any impurities at the mouth of the pipe or the connecting points, be sure to clean the inside of the pipe<br />
with nitrogen gas (nitrogen displacement) to prevent oxide scale forming on the inner surface of the pipe. This step is<br />
extremely important when making the connections in the refrigerant piping. (Do not use an antioxidant)<br />
• If the size of the selected refrigerant pipe and the size of the branch pipe differ, cut the connecting section with<br />
pipe cutters per the illustration below.<br />
(Be sure to deburr and remove any impurities on the cutting surface.)<br />
Installation on a<br />
vertical plane is also<br />
possible
11.18.3 Insulation directions<br />
Gas side / Liquid side branch pipe insulation.<br />
Note: Use insulating material that can tolerate 120°C on the gas side.<br />
1) Insulate the gas side / liquid side of the branch pipe with thermal insulator.<br />
Thermal insulator Gas side / Liquid side of the<br />
branch pipe<br />
2) Wrap tape all around the areas where the insulating materials are joined in order to seal it.<br />
Tape<br />
(Local supply)<br />
Thermal insulator<br />
(Accessory)<br />
Insulating material for<br />
refrigerant piping<br />
Note: Do not use any adhesive agents on the connections between thermal insulator.<br />
3) Wrap a wide PVC tape all around the surfaces where the ends of the branch pipe and insulating materials<br />
are abutted so as to close any gaps.<br />
Wide PVC tape<br />
(Local supply)<br />
211
12. Testing and Commissioning<br />
12.1 Precautions Regarding Test Run<br />
12.2 Check before Test Run<br />
Power supply cable<br />
Indoor/outdoor connection wire<br />
Earth wire<br />
Refrigerant pipe<br />
212<br />
Content check<br />
● Is the wire set up and connected as described in the instructions? Check for any phase<br />
sequence.<br />
● Are the wire connection’s screws loose?<br />
● Is the open and close device / leakage breaker installed?<br />
● Is the power supply cable’s thickness and length appropriately measured as described in the<br />
instructions?<br />
● Is it earthed (grounded)?<br />
● Check that the insulation resistant value is more than 1 MΩ.<br />
Use the 500 V mega-testers to measure the insulation.<br />
Do not use the mega-testers for any other circuit except for voltage of 220 V to 240 V.<br />
● Are the wire connections for the indoor/outdoor units connected as described in the<br />
instructions? Are there any looped wires?<br />
● Is the piping installed as described in the instructions?<br />
● Are the pipes sizes appropriate?<br />
● Does the pipe’s length adhere to the specifications?<br />
● Is the branch pipe slant being appropriately done as described in the instructions?<br />
● Was vacuum removal sufficiently carried out?<br />
● Was the leak tightness test carried out with nitrogen gas? Use the testing pressure of 4.15<br />
MPa.<br />
● Is the piping insulation material appropriately installed? Insulation material is necessary for<br />
both gas and liquid piping.<br />
● Is the 3-way valve for the liquid side and gas side open?<br />
Filling additional refrigerant ● This product is charge-free. No additional refrigerant is necessary.<br />
Other<br />
● Does the indoor unit’s connection capacity fall within the range of 50 to 130%?<br />
● Check that the refrigerant piping and the related wiring is connected to the same refrigerant<br />
system.
12.3 Test Run Procedure<br />
Test operation can be performed from outdoor unit or indoor unit<br />
(1) Test operation from outdoor unit<br />
HEATING TEST (SW2)<br />
COOLING TEST (SW3)<br />
(2) Test run from indoor unit<br />
1. Press COOLING (SW3) or HEATING TEST (SW2) switch from<br />
outdoor PCB (main) for one second to start the test operation.<br />
2. Select cooling operation first for 20 minutes before select<br />
heating operation. This is to avoid liquid in condenser to flood<br />
the compressor which could cause knocking noise, current<br />
increase and undesirable vibration.<br />
Outdoor PCB (main)<br />
1. Check that COOL or HEAT is displayed on the LCD.<br />
2. Press OFF/ON to start the test operation.<br />
3. Within one minute after pressing the OFF/ON button, press<br />
TEST RUN button.<br />
4. Then, the pipe temperature (gas pipe) will display on the LCD.<br />
5. Press TEMP/A/C No. UP or DOWN button to display other<br />
pipe temperature in a group control system.<br />
Wired remote controller<br />
213
13. Outdoor Unit Operation Control<br />
13.1 System Start Control<br />
13.1.1 Outdoor unit operation mode judgment<br />
• When remote control, centralized control, or Cool/Heat Selector Switch (CZ-RD1) is turned ON, outdoor unit<br />
operation mode is set as shown in table below:<br />
Indoor Unit Operation Condition Outdoor Unit Operation Condition<br />
Cool or Soft Dry Mode Cool Mode<br />
Heat Mode Heat Mode<br />
Fan Mode Off<br />
• The priority of outdoor unit operation mode is given to the indoor unit that turn ON first, when another operation<br />
mode is selected from other indoor unit, the subsequence operation mode will be standby.<br />
• When all indoor units have stopped operation in deice control, outdoor unit continues operation Heat mode, and<br />
operation mode stops after completion of deice control.<br />
13.2 Compressor Startup control<br />
• During cool start condition where the compressor discharge temperature is less than 15°C, compressor<br />
frequency perform a shift up after indoor heat exchanger temperature increase 1°C (15 seconds interval<br />
sampling).<br />
(Hz)<br />
Step 1 Step 2 Step 3 Step 4 Step 5<br />
Min 30sec<br />
Max 180sec<br />
Min 30sec<br />
Max 180sec<br />
Min 30sec<br />
Max 180sec<br />
Min 30sec<br />
Max 300sec<br />
Min 30sec<br />
Max 180sec<br />
Time (Sec)<br />
• If not in cool start condition compressor startup will skipped step 2, 3, 4.<br />
Gas bypass valve will ON for a short period once compressor startup<br />
o ON for 60 seconds if compressor discharged temperature is less than 15°C.<br />
o ON for 30 seconds if compressor discharged temperature is 15°C or more.<br />
• Compressor only can be startup after at least 3 minutes of compressor OFF (Compressor restart delay control).<br />
214
13.3 Deice Control<br />
• This control will operate for 1 cycle after accumulation time for heating (Compressor ON) under low outdoor<br />
ambient environment as stated in table below:<br />
Outdoor <strong>Air</strong> Temperature (°C) Heat exchanger temperature (°C) Acc. Time (minutes)<br />
-3 & above<br />
-3 to -10<br />
Below -10<br />
• During deice control, for indoor units in ON condition:<br />
o Indoor fan OFF<br />
o Power LED blinking<br />
o Expansion valve fully opened<br />
o During deice control, for indoor units in OFF condition:<br />
o Expansion valve fully opened<br />
• Deice control start condition:<br />
ON<br />
Defrost<br />
OFF<br />
Compressor<br />
ON<br />
4 Way Valve<br />
OFF<br />
Outdoor Fan<br />
Gas Bypass Valve<br />
Liquid Bypass Valve<br />
Trigger<br />
Condition<br />
OFF<br />
ON<br />
Normal<br />
Indoor Fan Stop<br />
Deice Temperature<br />
sensor<br />
3k<br />
1k<br />
480 pulse (full open)<br />
480 pulse (full open)<br />
-5 to -7 75<br />
-7 or below 45<br />
-10 to -12 100<br />
-12 or below 85<br />
-20 to -22 115<br />
-22 or below 85<br />
Control<br />
Reset<br />
30 sec<br />
Deice control will end if below condition is fulfilled; whichever comes first.<br />
o Outdoor Heat Exchanger Discharge temperature achieved:<br />
Outdoor Ambient Temperature (°C) Deice Temperature sensor (°C)<br />
-3 & above 11 or more<br />
-3 to -10 5 or more<br />
Below -10 3 or more<br />
o 10 minutes has elapsed<br />
13.4 Crank Case Heater Control<br />
• This control is used to prevent condensation of refrigerant inside compressor and keep the temperature of<br />
compressor oil at the suitable level.<br />
• Crank case heater will ON if below conditions are all fulfilled:<br />
o Compressor is OFF.<br />
o Outdoor ambient temperature is less than 15°C.<br />
o Compressor discharge temperature is less than 15°C.<br />
o Crank case heater will OFF if either of conditions below is fulfilled:<br />
o Compressor is ON.<br />
o Outdoor ambient temperature is more than 17°C.<br />
o Compressor discharge temperature is more than 17°C.<br />
215
14. Outdoor Unit Protection Control<br />
14.1 Cooling Oil Return Control<br />
• Oil Return control will operate 1 cycle for every 3 hours of compressor accumulation run times (normal cooling<br />
operation mode continuously).<br />
• Cooling oil return control will take 5 minutes to complete.<br />
• During the control, Outdoor unit is fixed in cooling refrigerant cycle operation with fixed compressor frequency<br />
and all indoor’s expansion valves are fixed open (even the indoor is in OFF operation or thermo OFF).<br />
• Compressor accumulation run time counter will be reset when below conditions happened :<br />
o Completion of cooling oil return control.<br />
o System operation mode changed.<br />
14.2 Heating Oil Return Control<br />
• This control will operate 1 cycle if either 1 of below conditions fulfilled:<br />
o Every 3 hours of compressor accumulation run times (normal heating operation mode continuously).<br />
o Max Heat Exchanger Temperature (thermo ON) – Min Heat Exchanger Temperature (thermo OFF) > 15°C<br />
for 3 minutes continuously.<br />
• During the control, Outdoor unit is continued in heating refrigerant cycle operation and expansion valve for indoor<br />
units (thermo OFF / stand-by) will be fully opened (for one minute) one at a time sequentially started from indoor<br />
unit with lowest Heat Exchanger Temperature (thermo OFF).<br />
• Compressor accumulation run time counter will be reset when below conditions happened :<br />
o Completion of heating oil return control.<br />
o All indoor units thermo ON at 3rd hour of accumulation.<br />
o System operation mode changed.<br />
o Deice control activated.<br />
14.3 Overload Control<br />
• Overload control will operate if either 1 of below conditions happened :<br />
o During Cool Mode<br />
Outdoor heat exchanger temp > +58°C for 10 seconds.<br />
o During Heat Mode<br />
Outdoor heat exchanger temp < -30°C when outdoor ambient > -5°C<br />
Outdoor heat exchanger temp < -35°C when outdoor ambient ≤ -5°C<br />
• Every interval of 30sec, compressor frequency will reduce 10% if the outdoor heat exchanger temperature still at<br />
down zone.<br />
Free<br />
zone<br />
Cooling Operation<br />
Unchanged<br />
zone<br />
54 o C 56 o C 58 o 54 C<br />
o C 56 o C 58 o C<br />
Down<br />
zone<br />
• The compressor frequency will only reduce max 3 times OR to minimum frequency.<br />
• For Heat operation, If compressor already reduced to minimum level but temp still at down zone, gas bypass<br />
valve will opens.<br />
14.4 Low Load Control<br />
• Low Load control will operate if either 1 of below conditions happened :<br />
o Indoor heat exchanger temp < 0°C during cooling operation.<br />
o Indoor heat exchanger temp > 54°C for 5 seconds during heating operation.<br />
• Every interval (15 seconds for cool mode; 30 seconds for heat mode), compressor frequency will reduce 10% if<br />
the indoor heat exchanger temp still at down zone.<br />
Cooling Operation<br />
Heating Operation<br />
Down<br />
zone<br />
Down<br />
zone<br />
Unchanged<br />
zone<br />
0 o C 3 o C 5 o 0 C<br />
o C 3 o C 5 o C<br />
Heating (Outdoor >- 5 o Heating (Outdoor >- 5 C)<br />
o C)<br />
Unchanged<br />
zone<br />
Free<br />
zone<br />
216<br />
Free<br />
zone<br />
Down<br />
zone<br />
52 o C 54 o 52 C<br />
o C 54 o C<br />
• The compressor frequency will only reduce to minimum frequency.<br />
• If compressor already reduced to minimum level but temp still at down zone, gas bypass valve will opens.<br />
Free<br />
zone<br />
-30 o C -25 o -30 C<br />
o C -25 o C<br />
Heating (Outdoor ≤ -5 o Heating (Outdoor ≤ -5 C)<br />
o C)<br />
Down<br />
zone<br />
Unchanged<br />
zone<br />
Free<br />
zone<br />
-35 o C -30 o -35 C<br />
o C -30 o C
14.5 Compressor Discharge Temperature Control<br />
• This control will operate if compressor discharge temperature is detected hot at alert level.<br />
o If Compressor Discharge Temperature ≥ 100°C, liquid bypass valve will open.<br />
o If Compressor Discharge Temp ≥ 105°C, compressor frequency will reduce 10% if the compressor<br />
discharge temp still at down zone.<br />
Liquid Bypass Valve Control<br />
Close<br />
(OFF)<br />
• The compressor frequency will only reduce max 2 times with 3 minutes interval OR to minimum frequency.<br />
• If compressor already reduced to minimum level but temp still at down zone, gas bypass valve will opens.<br />
14.6 Condenser Temperature Control<br />
• During Heating operation only, this control will start if below conditions are fulfilled:<br />
o Total capacity of thermostat ON indoor units maintain for 10 minutes<br />
o None of the indoor units’ heat exchanger > 40°C<br />
• Every interval of 60 sec, compressor frequency will increase 20% if the indoor heat exchanger temperature still in<br />
up zone.<br />
• The compressor frequency will only increase maximum 5 times OR up to maximum frequency<br />
• This control will be ignored if any of the following control activated:<br />
o Deice<br />
o Low Load<br />
o Overload<br />
o Compressor Discharge Temperature Control<br />
o Total Current Protection<br />
o Night Time Low Noise Control<br />
14.7 Compressor Restart Delay Control<br />
• Compressor only can be startup after at least 3 minutes of compressor OFF.<br />
• During this control, compressor cannot restart and gas bypass valve is ON.<br />
14.8 Outdoor Residual Heat Removal Control<br />
• When compressor OFF, outdoor fan operate for 1 minute to remove the remaining heat.<br />
14.9 Compressor Stops Control<br />
• This control ensures compressor is stopped within 30 seconds during normal operation.<br />
• If compressor stop is due to protection control, compressor will stop immediately.<br />
Comp Frequency (Hz)<br />
Unchanged<br />
zone<br />
Up<br />
zone<br />
Normal Control<br />
Open<br />
(ON)<br />
80 o C 100 o 80 C<br />
o C 100 o C<br />
Comp Stop Signal<br />
40 o C 45 o 40 C<br />
o C 45 o C<br />
Max 30sec<br />
Unchanged<br />
zone<br />
217<br />
Free<br />
zone<br />
Time (Sec)<br />
• Outdoor fan motor will continue to run at maximum speed for 60 seconds after compressor OFF signal is<br />
received.<br />
• Gas bypass valve will ON for 3 minutes once received compressor OFF signal.<br />
Free<br />
Zone<br />
Comp Frequency Control<br />
Unchanged<br />
zone<br />
Down Zone<br />
90 o C 105 o C 110 o 90 C<br />
o C 105 o C 110 o C<br />
Comp<br />
Stop
14.10 Cooling Low Outdoor Ambient Temperature Protection Control<br />
• When outdoor is operating in Cool Mode if outdoor ambient temperature is below -15°C and compressor is<br />
operating for 15 minutes, compressor will stop.<br />
• When outdoor ambient temperature is less than -10°C, the system will restart.<br />
14.11 Heating High Outdoor Ambient Temperature Protection Control<br />
• When outdoor is operating in Heat mode, if outdoor ambient temperature is more than 35°C and compressor is<br />
operating for 15 minutes, compressor will stop.<br />
• When outdoor ambient temperature is less than 27°C, the system will restart.<br />
218
15. Indoor Unit Operation Control<br />
15.1 Operation Mode Priority Control<br />
• Operation modes available for remote control selection are: AUTO, COOL, DRY, HEAT and FAN<br />
• Types of operation mode which cannot be performed simultaneously at different indoor unit will be in standby<br />
condition.<br />
Room A<br />
Unit A<br />
Operation Mode<br />
Cool<br />
Dry<br />
Heat<br />
Fan<br />
Room B<br />
15.2 Cooling Operation<br />
15.2.1 Thermostat Control<br />
Cool<br />
Dry<br />
Heat<br />
Fan<br />
219<br />
Unit B Operation Mode<br />
Cool Dry Heat Fan<br />
Cool<br />
Cool<br />
Standby<br />
Cool<br />
Cool<br />
Dry<br />
Heat<br />
Fan<br />
Dry<br />
Dry<br />
Standby<br />
Dry<br />
Cool<br />
Dry<br />
Heat<br />
Standby<br />
Standby<br />
Standby<br />
Heat<br />
Heat<br />
Cool<br />
Dry<br />
Heat<br />
Fan<br />
Fan<br />
Fan<br />
Standby<br />
• Thermostat OFF point (ΔD) is determined using Indoor Intake Temperature - Remote Control Setting Temperature.<br />
Default thermostat off point is shown in table below:<br />
Model<br />
Indoor fan<br />
Thermostat OFF speed ≥ Me<br />
Point (ΔD) Indoor fan<br />
speed < Me<br />
Wall Mounted<br />
(KA1-series)<br />
Thermostat OFF point<br />
60 x 60<br />
Cassette<br />
(YA1-series)<br />
95 x 95<br />
Cassette<br />
(UA1-series)<br />
Fan<br />
Slim Hide-away<br />
(NA1-series) 4.5 / 5.6<br />
kW<br />
Low Static Hide-away<br />
(MA1-series)<br />
6.3 / 7.1 / 9.0<br />
kW<br />
-2.0 -2.0 -1.5 -2.0 -1.0 -2.0<br />
-2.0 -2.5 -2.0 -2.0 -1.0 -2.0<br />
Intake air temperature – remote<br />
controller temperature setting<br />
Cooling<br />
Thermostat<br />
OFF<br />
Thermostat OFF point + 1.0<br />
• Thermostat OFF continues for 3 minutes, if the Intake <strong>Air</strong> Temperature - Internal Setting Temperature ><br />
Thermostat OFF point + 1.0°C<br />
15.2.2 Expansion Valve Control<br />
• During Thermostat OFF signal received, the indoor unit expansion valve is closed fully.
15.3 Soft Dry Operation<br />
15.3.1 Thermostat Control<br />
• Thermostat off point (ΔD) is determined using Indoor Intake Temperature - Remote Control Setting Temperature.<br />
Default thermostat off point is shown in table below:<br />
Model<br />
Thermostat OFF<br />
Point (ΔD)<br />
Wall Mounted<br />
(KA1-series)<br />
60 x 60 Cassette<br />
(YA1-series)<br />
95 x 95 Cassette<br />
(UA1-series)<br />
220<br />
Slim Hide-away<br />
Low Static Hide-away<br />
(MA1-series)<br />
(NA1-series) 4.5 / 5.6<br />
kW<br />
6.3 / 7.1 / 9.0 kW<br />
-3.0 -3.0 -2.5 -3.0 -2.0 -3.0<br />
Cooling thermostat OFF point + 1.0<br />
Softdry thermostat OFF point<br />
Intake air temperature – remote<br />
controller temperature setting<br />
Cooling<br />
Softdry<br />
Thermostat<br />
OFF<br />
Cooling thermostat OFF point + 2.0<br />
• Thermostat OFF continues for 3 minutes, if the Intake <strong>Air</strong> Temperature - Internal Setting Temperature ><br />
Thermostat OFF point<br />
15.3.2 Expansion Valve Control<br />
• During Thermostat OFF signal received, the indoor unit expansion valve is closed fully.
15.4 Heating Operation<br />
15.4.1 Thermostat Control<br />
• Thermostat off point (ΔD) is determined using Indoor Intake Temperature - Remote Control Setting Temperature.<br />
Default thermostat off point is shown in table below:<br />
Model<br />
Indoor fan<br />
Thermostat OFF speed ≥ Me<br />
Point (ΔD) Indoor fan<br />
speed < Me<br />
Wall Mounted<br />
(KA1-series)<br />
Thermostat OFF point<br />
60 x 60 Cassette<br />
(YA1-series)<br />
221<br />
95 x 95 Cassette<br />
(UA1-series)<br />
Slim Hide-away<br />
(NA1-series) 4.5 / 5.6<br />
kW<br />
Low Static Hide-away<br />
(MA1-series)<br />
6.3 / 7.1 / 9.0<br />
kW<br />
2.0 3.5 -1.5 2.5 2.5 2.5<br />
2.0 4.0 -2.0 2.5 2.5 2.5<br />
Intake air temperature – remote<br />
controller temperature setting<br />
Thermostat<br />
OFF<br />
Heating<br />
Figure 15: Heating thermostat OFF characteristic<br />
Thermostat OFF point - 1.0<br />
• Thermostat OFF continues for 3 minutes, if the Intake <strong>Air</strong> Temperature - Internal Setting Temperature ><br />
Thermostat OFF point – 1.0°C<br />
15.4.2 Expansion Valve Control<br />
• During Thermostat OFF, the indoor unit expansion valve operation is controlled by the system.<br />
15.5 Auto Operation<br />
• Operation mode is determined by indoor intake temperature and remote control setting temperature.<br />
o Indoor intake temperature < remote control setting temperature, Heat mode is selected.<br />
o Indoor intake temperature ≥ remote control setting temperature, Cool mode is selected.<br />
• Indoor intake temperature (even for the indoor unit is standing by for different operation mode) is judged by<br />
o Operate indoor fan at Lo- for 30 seconds, for indoor unit with DC fan motor.<br />
o Operate indoor fan at Lo for 30 seconds, for indoor unit with AC fan motor.<br />
• Immediate judgment to Heat mode if<br />
o Indoor intake temperature < 16°C<br />
o Deice operation<br />
• The operation mode judgment repeats every 3 hours.<br />
• For second judgment onwards<br />
o Indoor intake temperature ≥ remote control setting temperature + 3°C change from Heat Mode to Cool Mode.<br />
o Indoor intake temperature < remote control setting temperature - 3°C, change from Cool Mode to Heat Mode.
15.6 Indoor Fan Motor Operation<br />
• Type of indoor fan motor are shown in below table:<br />
Wall Mounted Type<br />
(KA1E5 Series)<br />
60 x 60 Cassette Type<br />
(MA1E5 Series)<br />
95 x 95 Cassette Type<br />
(NA1E5 Series)<br />
Slim Hide-away Type<br />
(NA1E5 Series)<br />
Low Pressure Hide-away Type<br />
(MA1E5 Series)<br />
• During Cool / Fan Mode,<br />
o DC fan motor <strong>Manual</strong> fan speed is based on remote control setting.<br />
222<br />
DC Fan Motor<br />
AC Fan Motor<br />
Remote<br />
Control<br />
Setting<br />
- High - Medium - Low - - -<br />
Indoor fan tap SHi Hi Me+ Me Me- Lo Lo- SLo SSLo<br />
o DC fan motor Auto fan speed is specified to repetition of 8 patterns (1 pattern: 10 seconds) and follows odor<br />
cut control.<br />
o AC fan motor <strong>Manual</strong> fan speed is based on remote control setting.<br />
Mode Hi Me Lo<br />
Cool ● ● ●<br />
Fan ● ● ●<br />
o AC fan motor Auto fan speed is determined in table below and follows odor cut control.<br />
Mode Hi Me Lo Stop<br />
Cool ● ● ●<br />
Fan ●<br />
• During Soft Dry Mode<br />
o DC fan motor <strong>Manual</strong> and Auto indoor fan speed is fixed at SLo regardless of remote control fan setting.<br />
o AC fan motor <strong>Manual</strong> and Auto indoor fan speed is fixed at Lo regardless of remote control fan setting.
• During Heat Mode<br />
o DC fan motor <strong>Manual</strong> fan speed depends on indoor heat exchanger temperature and air swing setting.<br />
57 o C<br />
(55 o C for<br />
cassette)<br />
34 o C<br />
29 o C<br />
Min Me<br />
Remote control<br />
setting<br />
Reduced<br />
Stop<br />
53 o C<br />
33 o C<br />
26 o C<br />
Automatic air swing <strong>Manual</strong> air swing<br />
223<br />
57 o C<br />
(55 o C for<br />
cassette)<br />
29 o C<br />
39 o C<br />
Min Me<br />
Remote control<br />
setting<br />
Reduced<br />
Stop<br />
Indoor heat exchanger temperature Indoor heat exchanger temperature<br />
o DC fan motor Auto fan speed depends on indoor heat exchanger temperature and air swing setting.<br />
29 o C<br />
39 o C<br />
Hi<br />
Reduced<br />
Stop<br />
Indoor heat exchanger temperature<br />
Automatic air swing / <strong>Manual</strong> air swing<br />
o DC fan motor control during Thermostat OFF and Compressor OFF.<br />
o<br />
35 o C<br />
26 o C<br />
53 o C<br />
33 o C<br />
26 o C
o AC fan motor <strong>Manual</strong> fan speed and Auto fan speed depends on indoor heat exchanger temperature.<br />
32 o C<br />
29 o C<br />
57 o C<br />
Min Me<br />
Remote control<br />
setting<br />
Reduced<br />
Stop<br />
53 o C<br />
29 o C<br />
26 o C<br />
224<br />
36 o C<br />
29 o C<br />
Hi<br />
Reduced<br />
Stop<br />
Indoor heat exchanger temperature Indoor heat exchanger temperature<br />
o AC Fan motor control during Thermostat OFF and Compressor OFF.<br />
o Temperature sampling during thermostat OFF, compressor ON and temperature between indoor intake<br />
temperature and setting temperature is below 30°C.<br />
Compressor<br />
Thermostat<br />
Sampling<br />
signal from<br />
outdoor unit<br />
Indoor fan<br />
ON<br />
ON<br />
OFF<br />
ON<br />
OFF<br />
Remote controller<br />
fan speed setting<br />
20s<br />
240s<br />
120s 240s 120s 240s<br />
Sampling time<br />
DC fan motor: SLo<br />
AC fan motor: Lo<br />
120s<br />
DC fan motor: SLo<br />
AC fan motor: Lo<br />
Model<br />
Wall mounted<br />
60x60 Cassette<br />
95x95 Cassette<br />
Ducted (D4)<br />
Ducted (D3)<br />
33 o C<br />
26 o C<br />
Sampling time (s)<br />
75<br />
75<br />
75<br />
60<br />
60
o Temperature sampling during thermostat OFF, compressor ON and temperature between indoor intake<br />
temperature and setting temperature is above 30°C.<br />
Compressor<br />
Thermostat<br />
Sampling<br />
signal from<br />
outdoor unit<br />
Indoor fan<br />
ON<br />
ON<br />
OFF<br />
ON<br />
OFF<br />
Remote controller<br />
fan speed setting<br />
20s<br />
240s<br />
120s 240s 120s 240s<br />
225<br />
Skip sampling<br />
120s<br />
Sampling time<br />
DC fan motor: SLo<br />
AC fan motor: Lo
15.7 <strong>Air</strong>flow Direction<br />
15.7.1 Wall Mounted Type (KA1E5 Series)<br />
<strong>Air</strong> swing direction setting <strong>Manual</strong><br />
Mode Condition<br />
Heat<br />
Indoor heat<br />
exchanger<br />
temperature<br />
Step 1 Step 2 Step 3 Step 4<br />
Normal 20° 32° 50° 68°<br />
226<br />
Automatic<br />
Zone A 56°<br />
Zone B 56°<br />
Zone C 20°<br />
Deice 144°<br />
Hot start 20°<br />
Heat removal control 144°<br />
Thermostat OFF 20° 32° 50° 68° 20°<br />
Normal 20° 26° 32° 45° 20° ~ 45°<br />
Cool/Fan<br />
Dew control 26° 26° 32° 45° 26° ~ 45°<br />
Thermostat OFF 20° 26° 32° 45° 20° ~ 45°<br />
Normal 20° 26° 32° 45° 20° ~ 45°<br />
Dry<br />
Dew control 26° 26° 32° 45° 26° ~ 45°<br />
Thermostat OFF 20° 26° 32° 45° 20° ~ 45°<br />
Automatic mode judgment 20° 26° 32° 45° 20°<br />
Operation stop 145°<br />
• Heating automatic air swing control according indoor heat exchanger temperature<br />
60 o C<br />
30 o C<br />
Zone A<br />
Zone B<br />
Zone C<br />
Indoor heat exchanger temperature<br />
57 o C<br />
25 o C
15.7.2 60 x 60 Cassette (YA1E5 Series)<br />
<strong>Air</strong> swing direction setting <strong>Manual</strong><br />
Mode Condition<br />
Heat<br />
Step 1 Step 2 Step 3 Step 4<br />
Normal 20° 37° 53° 70°<br />
Deice 10°<br />
Hot start 10°<br />
Heat removal control 20°<br />
Thermostat OFF 20°<br />
Normal 20° 37° 53° 70°<br />
Cool/Fan<br />
Dew control 37° 37° 45° 45°<br />
Thermostat OFF 20° 37° 53° 70°<br />
Normal 37°<br />
Dry<br />
Dew control 37° 37° 45° 45°<br />
Thermostat OFF 20° 37° 53° 70°<br />
Automatic mode judgment 20° 37° 53° 70°<br />
Operation stop 0°<br />
<strong>Air</strong> swing direction setting Automatic<br />
Mode Condition<br />
Heat<br />
Indoor heat<br />
exchanger<br />
temperature<br />
Zone A 70° 70° 70°<br />
Zone B 20° ~ 70° 20° ~ 53° 42° ~ 70°<br />
Zone C 20° 20° 20°<br />
Deice 10°<br />
Hot start 10°<br />
Heat removal control 20°<br />
Thermostat OFF 20°<br />
Normal 20° ~ 70° 20° ~ 53° 42° ~ 70°<br />
Cool/Fan<br />
Dew control 34° ~ 45° 37° ~ 45° 42° ~ 45°<br />
Thermostat OFF 20° ~ 70° 20° ~ 53° 42° ~ 70°<br />
Normal 37°<br />
Dry<br />
Dew control 37° ~ 45° 37° ~ 45° 42° ~ 45°<br />
Thermostat OFF 20° ~ 70° 20° ~ 53° 42° ~ 70°<br />
Automatic mode judgment 20° 20° 20°<br />
Operation stop 0°<br />
• Heating automatic air swing control according indoor unit heat exchanger temperature.<br />
60 o C<br />
30 o C<br />
227<br />
Zone A<br />
Zone B<br />
Zone C<br />
Indoor heat exchanger temperature<br />
57 o C<br />
25 o C
15.7.3 95 x 95 Cassette (UA1E5 Series)<br />
<strong>Air</strong> swing direction setting <strong>Manual</strong><br />
Mode Condition<br />
Heat<br />
Step 1 Step 2 Step 3 Step 4<br />
Normal 20° 35° 50° 70°<br />
Deice 10°<br />
Hot start 10°<br />
Heat removal control 20°<br />
Thermostat OFF 20°<br />
Normal 20° 35° 50° 70°<br />
Cool/Fan<br />
Dew control 35°<br />
Thermostat OFF 20° 35° 50° 70°<br />
Normal 35°<br />
Dry<br />
Dew control 35°<br />
Thermostat OFF 20° 35° 50° 70°<br />
Automatic mode judgment 20° 35° 50° 70°<br />
Operation stop 0°<br />
<strong>Air</strong> swing direction setting Automatic<br />
Mode Condition<br />
Heat<br />
Indoor heat<br />
exchanger<br />
temperature<br />
Zone A 70° 70° 70°<br />
Zone B 20° ~ 70° 20° ~ 50° 40° ~ 70°<br />
Zone C 20° 20° 20°<br />
Deice 10°<br />
Hot start 10°<br />
Heat removal control 20°<br />
Thermostat OFF 20°<br />
Normal 20° ~ 70° 20° ~ 50° 40° ~ 70°<br />
Cool/Fan<br />
Dew control 35°<br />
Thermostat OFF 20° ~ 70° 20° ~ 50° 40° ~ 70°<br />
Normal 30°<br />
Dry<br />
Dew control 35°<br />
Thermostat OFF 20° ~ 70° 20° ~ 50° 40° ~ 70°<br />
Automatic mode judgment 20° 20° 20°<br />
Operation stop 0°<br />
• Heating automatic air swing control according indoor unit heat exchanger temperature.<br />
60 o C<br />
30 o C<br />
228<br />
Zone A<br />
Zone B<br />
Zone C<br />
Indoor heat exchanger temperature<br />
57 o C<br />
25 o C
15.8 Odor Cut control<br />
• This control starts when Cool / Soft Dry Mode ON and indoor fan speed is Auto.<br />
• The Auto fan pattern during this control.<br />
Thermostat &<br />
Compressor<br />
DC fan Cool OFF SSLo Auto SSLo OFF SSLo OFF SSLo Auto<br />
motor Softdry OFF SSLo SLo SSLo OFF SSLo OFF SSLo SLo<br />
AC fan<br />
motor<br />
Indoor fan<br />
Cool<br />
ON<br />
OFF<br />
Softdry<br />
40 sec 50 sec - 20 sec 120 sec 20 sec 40 sec 50 sec -<br />
OFF<br />
OFF<br />
• During freeze prevention control, this control is not triggered.<br />
15.9 Drain Pump Control<br />
Lo<br />
Lo<br />
• This control applicable for 95 x 95 Cassette and 60 x 60 Cassette indoor units only.<br />
• During the unit is operating Cool / Soft Dry Mode<br />
(A) When compressor starts within 10 seconds<br />
(B) When compressor starts after 10 seconds<br />
(C) When thermostat OFF<br />
• During the unit in deice operation<br />
Hi<br />
Lo<br />
Lo<br />
Lo<br />
229<br />
OFF<br />
OFF<br />
Lo<br />
Lo<br />
OFF<br />
OFF<br />
Lo<br />
Lo<br />
Me<br />
Lo
15.10 Filter Check Control<br />
• This control detects the contamination of filter from the accumulated operation time of indoor unit<br />
Model Filter check time (hour)<br />
Wall mounted 360<br />
Except above 1000<br />
• Accumulated time will be multiplied by a correction factor<br />
Fan Number Group Correction factor (%)<br />
Below Lo 50<br />
Below Me 75<br />
Except above 100<br />
• To inform user to clean the filter, FILTER RESET display on the wired remote control LCD and FILTER LED on<br />
indoor unit remote control receiver / indicator will blink for 10 seconds each time operation ON and operation<br />
OFF.<br />
Indoor<br />
operation<br />
Filter LED/Filter<br />
RESET LCD<br />
ON<br />
OFF<br />
Blink Blink<br />
10s 10s<br />
230
16. Indoor Unit Protection Control<br />
Protection controls applicable for Cool / Soft Dry Mode<br />
16.1 Odor Remove control<br />
16.2 Freeze Prevention control<br />
• This control starts when all below condition are satisfied<br />
o Indoor thermostat ON and compressor ON for 4 minutes after startup.<br />
o Indoor heat exchanger temperature less than 4°C.<br />
• When received freeze prevention signal from indoor unit, the compressor frequency changes according to indoor<br />
heat exchanger temperature.<br />
• When freeze condition continuously for 6 minutes, indoor unit request thermostat OFF and capability supplies to<br />
targeted indoor unit stops.<br />
• This control stops when indoor heat exchanger temperature > 6°.C<br />
16.3 Dew Prevention control<br />
• This control starts when all conditions below are satisfied<br />
o Indoor thermostat ON and compressor ON<br />
o Outdoor temperature < 30°C<br />
o Indoor intake temperature > 24°C<br />
o Indoor fan speed is ≤ Lo or AUTO<br />
• Indoor fan speed changed from SLo to Lo and air swing angle follows dew prevention angle.<br />
• When received dew prevention signal from indoor unit, compressor frequency reduces according to indoor heat<br />
exchanger temperature.<br />
• This control stops when any conditions below is satisfied<br />
o Thermostat OFF or compressor OFF<br />
o Remote control fan speed & temperature setting changed<br />
o Outdoor temperature > 30°C<br />
o Indoor intake temperature < 24°C<br />
o Indoor heat exchanger temperature > 17°C<br />
16.4 Mist Prevention Control<br />
• This control starts when all conditions below are satisfied<br />
o Indoor thermostat ON and Compressor ON<br />
o Indoor fan ≤ Lo<br />
o Indoor heat exchanger temperature < 13°C<br />
• When received mist prevention signal from indoor unit, the compressor frequency reduces according to indoor<br />
heat exchanger temperature.<br />
• Indoor fan speed changes from SLo to Lo.<br />
• This control stops when any conditions below is satisfied<br />
o Thermostat OFF or compressor OFF<br />
o Remote control fan speed & temperature setting changed<br />
o Indoor heat exchanger temperature > 14°C<br />
231
Protection controls applicable for Heat Mode.<br />
16.5 Hot Start Control<br />
• This control starts when all conditions below are satisfied<br />
o Compressor ON after completion of deice operation.<br />
• During this control<br />
o PRE HEAT will display on wired remote control LCD.<br />
o Indoor unit POWER LED blinks.<br />
o Indoor fan stops.<br />
• This control stops when any conditions below is satisfied<br />
o Indoor heat exchanger temperature > 25°C<br />
o 4 minutes has passed after the start of heating operation<br />
16.6 Indoor Residual Heat Removal Control<br />
• This control starts when all conditions below are satisfied<br />
o Compressor ON<br />
o Indoor heat exchanger temperature is more than 45°C<br />
o Operation mode changed from Heat to Fan, Cool, Soft Dry or OFF.<br />
o Indoor Thermostat ON before Heat mode changes.<br />
• During this control<br />
o DC motor fan speed is fixed at Lo-, and airflow direction is fixed.<br />
o AC motor fan speed is fixed at Lo, and airflow direction is fixed.<br />
o Indoor unit POWER LED is OFF<br />
• This control stops when any conditions below is satisfied<br />
o 30 seconds has passed after the start of residual heat removal control<br />
o Compressor OFF<br />
Protection controls applicable for all operation modes.<br />
16.7 Auto Restart Control<br />
• This control is available will auto restart the operation when electrical power resume from interruption.<br />
• When electrical power resume, the outdoor unit will send an auto restart signal to all connected indoor units.<br />
• Indoor Units that have Outdoor Address setting same with the Outdoor Unit will memorize the signal in EEPROM.<br />
• This control could be enable/disable using Auto Restart Switch (AUTO R/S) at outdoor main PCB.<br />
232
17. Servicing Mode<br />
17.1 Emergency Operation<br />
• Emergency operation can be performed in the event of misplaced of wireless remote controller.<br />
Emergency Operation<br />
1. Press and hold the receptor's AUTO switch for<br />
less than 5s.<br />
Force Cooling Mode<br />
1. Press and hold the receptor's AUTO switch for<br />
more than 5s till one beep is heard.<br />
Force Heating Mode<br />
1. Press and hold the receptor’s AUTO switch for<br />
more than 8s till two beeps is heard.<br />
2. Press AC RESET button on the wireless remote<br />
controller to enter heating mode.<br />
Individual Response Mode (Receiving Sound<br />
ON/OFF Setting Mode)<br />
1. Press and hold the receptor's AUTO switch for<br />
more than 26s till six beeps is heard.<br />
2. Press AC RESET button on the wireless remote<br />
controller to enter individual response mode.<br />
3. Then, press AUTO switch to confirm ON/OFF<br />
receiving sound:<br />
Press AC RESET<br />
button for 5 second s<br />
233<br />
Press AC RESET<br />
button for 5 second s
17.2 Pump down<br />
1. Standby Electrical Power without switch on<br />
Operation.<br />
2. Press (1sec) Pump Down Switch at outdoor<br />
PCB.<br />
3. Compressor start pump down. (Operate max<br />
10min).<br />
4. Close Liquid Valve.<br />
5. Wait for refrigerant collection until low<br />
pressure switch triggered, then countdown<br />
timer (40sec) started with LED indication.<br />
6. Close Gas Valve.<br />
7. Compressor stop when 40sec countdown<br />
timer completed.<br />
8. LEDs will be OFF in sequence to indicate the<br />
40sec timer countdown,<br />
LED OFF in sequence as indication of 40sec countdown<br />
Timer Count<br />
0 ~ 4sec<br />
5 ~ 9sec<br />
10 ~ 14sec<br />
15 ~ 19sec<br />
20 ~ 24sec<br />
25 ~ 29sec<br />
30 ~ 34sec<br />
35 ~ 39sec<br />
40sec<br />
LED2<br />
ON<br />
ON<br />
ON<br />
ON<br />
ON<br />
ON<br />
ON<br />
ON<br />
OFF<br />
LED3<br />
ON<br />
ON<br />
ON<br />
ON<br />
ON<br />
ON<br />
ON<br />
OFF<br />
OFF<br />
LED4<br />
ON<br />
ON<br />
ON<br />
ON<br />
ON<br />
ON<br />
OFF<br />
OFF<br />
OFF<br />
Pump down Operation Control<br />
COMP<br />
Outdoor Fan<br />
Outdoor Expansion<br />
4WayValve<br />
Indoor Fan<br />
Indoor Expansion<br />
Stop<br />
Stop<br />
Normal<br />
Control<br />
Stop<br />
Normal<br />
Control<br />
LED5<br />
ON<br />
ON<br />
ON<br />
ON<br />
ON<br />
OFF<br />
OFF<br />
OFF<br />
OFF<br />
LED6<br />
ON<br />
ON<br />
ON<br />
ON<br />
OFF<br />
OFF<br />
OFF<br />
OFF<br />
OFF<br />
LED7<br />
ON<br />
ON<br />
ON<br />
OFF<br />
OFF<br />
OFF<br />
OFF<br />
OFF<br />
OFF<br />
234<br />
LED8<br />
ON<br />
ON<br />
OFF<br />
OFF<br />
OFF<br />
OFF<br />
OFF<br />
OFF<br />
OFF<br />
Max Speed<br />
Fully Open<br />
OFF<br />
Hi Speed<br />
Fully Open<br />
Max 10 min<br />
During Pump down Operation, below protection controls will be ignore or cancel :<br />
1. Cooling low load control.<br />
2. Dew prevention, freezing prevention control.<br />
3. Gas by pass control at cooling low load.<br />
4. Low pressure protection control.<br />
5. Discharge temperature sensor abnormal.<br />
6. Indoor unit freezing abnormal.<br />
LED9<br />
ON<br />
OFF<br />
OFF<br />
OFF<br />
OFF<br />
OFF<br />
OFF<br />
OFF<br />
OFF<br />
Compressor Stopped<br />
Stop<br />
Stop<br />
Normal<br />
Control<br />
Stop<br />
Normal<br />
Control
17.3 Auto Restart Control<br />
Auto Restart Switch (AUTO R/S) at outdoor main<br />
PCB is a setting to enable/disable AC system for<br />
auto restart back the operation when electrical<br />
power resume back from interruption.<br />
When electrical power on, the outdoor unit will send a<br />
signal about the auto restart switch setting to all<br />
connected indoor units.<br />
Indoor Units that having Outdoor Address setting<br />
same with the Outdoor Unit will memorized the signal<br />
to EEPROM.<br />
17.4 Power Save Control<br />
Power Save Setting Switch is located at outdoor<br />
main PCB.<br />
With Power Save ON, the maximum electrical current<br />
pulling from the power source is limited to ~ 85%.<br />
Usually, it used when a 25A breaker is installed at<br />
power source line.<br />
If power save function is activated, the maximum<br />
performance capacity also dropped to lower level.<br />
235
17.5 Wired Remote Control Local Setting Mode<br />
• During unit off, press the TEST RUN button for 5 seconds to enter LOCAL MODE.<br />
• Press Temperature Up / Down button to select Mode No.<br />
• Press Timer SELECT button to enter setting mode.<br />
• Press Timer Up / Down button to select setting value.<br />
• Press Timer SET button to confirm the selection.<br />
• Press TEST RUN button to exit LOCAL SETTING MODE. If no operation is performed for 30 seconds, exit<br />
LOCAL SETTING MODE.<br />
Mode<br />
No.<br />
Items Setting value<br />
236<br />
Individual<br />
Setting<br />
Note 1)<br />
00 Centralized control address 000 – 200: Address 0 – Address 200 ○ I<br />
01 Fan speed up 000: OFF 001: ON I<br />
02<br />
03<br />
04<br />
Nighttime low noise<br />
000: Execute Reset<br />
(Level 0)<br />
001 – 003: Level 1 – Level 3<br />
Nighttime low noise ON time 0:00 23.50 (10 minutes interval)<br />
Nighttime low noise OFF time 0:00 23.50 (10 minutes interval)<br />
Thermostat OFF<br />
indoor fan control<br />
Thermostat OFF<br />
point adjustment<br />
06 Outdoor unit address<br />
000: Default control<br />
001: 10 seconds fan sampling operation<br />
002: Fixed fan speed operation<br />
000: default Thermostat OFF point (ΔD)<br />
001: Cool = ΔD+2°C, Heat = ΔD-2°C<br />
002: Cool = ΔD+4°C, Heat = ΔD-4°C<br />
003: Cool = ΔD-2°C, Heat = ΔD+2°C<br />
004: Cool = ΔD-4°C, Heat = ΔD+4°C<br />
000: Clear address<br />
001 – 199: Address 1 - Address 199<br />
Setting<br />
value<br />
memory<br />
terminal<br />
Note 2)<br />
R<br />
○ I<br />
○ I<br />
○ I<br />
10 Group address reset 000: Non-processed 001: Execute Reset Note 3)<br />
11 Thermistor selection 000: Non-processed 001: Remote control R<br />
12 Ventilation unit control<br />
000: OFF<br />
002: ON<br />
(OFF coupling)<br />
001: ON<br />
(no-interlocking)<br />
003: ON<br />
(ON/OFF coupling)<br />
Note 1) Mark ○ in the column of the “Individual setting” shows a setting item individually made for each connected<br />
indoor unit.<br />
Note 2) “R” represents remote control and I “indoor unit”.<br />
Note 3) Start the setting from the setting value 000.<br />
17.5.1 Fan Speed Up<br />
• This control can increase the fan speed of indoor unit with DC motor.<br />
• When enable, the HIGH fan speed setting at Remote Control, indoor unit fan tap changed from Hi to SHi.<br />
R
17.5.2 Night Time Low Noise<br />
• This control turns down outdoor unit operation noise by limiting compressor and outdoor fan speed.<br />
Setting Value Description Remark<br />
000 Not set Normal Noise Level<br />
001 Level 1 Low Noise Level<br />
002 Level 2 Lower Noise Level<br />
003 Level 3 Lowest Noise Level<br />
• Ensure current time is set correctly at remote control.<br />
• After enable Night Time Low Noise at Level 1, Level 2 or Level 3, follow procedure below to set ON and OFF<br />
timer:<br />
o Press Timer MODE button, remote control LCD will display “ON Timer”<br />
o Press Timer Up / Down button to set the ON time for Night Time Low Noise<br />
o Press Timer SELECT button, remote control LCD will display “OFF Timer”<br />
o Press Timer Up / Down button to set the OFF time for Night Time Low Noise.<br />
o Confirm the Night Time Low Noise ON and OFF timer by pressing Timer SET button.<br />
o Press TEST RUN button to exit LOCAL SETTING MODE.<br />
17.5.3 Thermostat OFF Indoor Fan Control<br />
• During thermostat OFF and compressor OFF, indoor fan control can be alter to suit different application<br />
requirement.<br />
Setting Value Description Operation details<br />
000 Default control Fan control by EEPROM<br />
001 10 seconds fan sampling<br />
Fan OFF for 3 minutes, then ON for 10<br />
seconds.<br />
002 Fixed fan speed<br />
AC Fan Motor Speed: Lo<br />
DC Fan Motor Speed: Lo-<br />
17.5.4 Thermostat OFF Point Adjustment<br />
• The default thermostat OFF point might not be accurate depends on indoor unit installation condition, thermostat<br />
OFF point adjustment is could be done.<br />
17.5.5 Thermistor Selection<br />
The default Indoor intake temperature sensor is set at indoor unit (000), the indoor intake temperature might not<br />
be accurate depends on indoor unit installation condition; indoor intake temperature sensor could be set at<br />
remote control.<br />
237
17.6 Wireless Remote Control Local Setting Mode<br />
• Press the SET button (2) to enter Local Setting<br />
Mode<br />
• Press Temperature Up / Down button to select<br />
Mode No.<br />
• Press Timer Up / Down button to select setting<br />
value.<br />
• Press Timer SET button (1) to confirm the selection.<br />
• Setting display for 4 seconds, exits from LOCAL<br />
SETTING MODE. If no operation is performed for<br />
30 seconds, exit LOCAL SETTING MODE.<br />
Mode<br />
No.<br />
Items Setting value<br />
238<br />
Individual<br />
Setting<br />
Note 1)<br />
00 Centralized control address 000 – 200: Address 0 – Address 200 ○<br />
01 Fan speed up 000: OFF<br />
000: Execute Reset<br />
001: ON<br />
Nighttime low noise<br />
(Level 0)<br />
02<br />
001 – 003: Level 1 – Level 3<br />
Nighttime low noise ON time 0:00 23.50 (10 minutes interval)<br />
03<br />
04<br />
Nighttime low noise OFF time 0:00 23.50 (10 minutes interval)<br />
Thermostat OFF<br />
indoor fan control<br />
Thermostat OFF<br />
point adjustment<br />
06 Outdoor unit address<br />
000: Default control<br />
001: 10 seconds fan sampling operation<br />
002: Fixed fan speed operation<br />
000: default Thermostat OFF point (ΔD)<br />
001: Cool = ΔD+2°C, Heat = ΔD-2°C<br />
002: Cool = ΔD+4°C, Heat = ΔD-4°C<br />
003: Cool = ΔD-2°C, Heat = ΔD+2°C<br />
004: Cool = ΔD-4°C, Heat = ΔD+4°C<br />
000: Clear address<br />
001 – 199: Address 1 - Address 199<br />
Note 1) Mark ○ in the column of the “Individual setting” shows a setting item individually made for each connected<br />
indoor unit.<br />
Note 2) “R” represents remote control and I “indoor unit”.<br />
Note 3) Start the setting from the setting value 000.<br />
17.6.1 Night Time Low Noise<br />
• This control turns down outdoor unit operation noise by limiting compressor and outdoor fan speed.<br />
Setting Value Description Remark<br />
000 Not set Normal Noise Level<br />
001 Level 1 Low Noise Level<br />
002 Level 2 Lower Noise Level<br />
003 Level 3 Lowest Noise Level<br />
• Ensure current time is set correctly at remote control.<br />
• To enable Night Time Low Noise:<br />
o Press SET button (2) to enter local setting mode<br />
o Press Temperature Up / Down button to select Mode No. 2<br />
o Press Timer Up / Down button to select 001, 002 or 003 for the noise level.<br />
o Press Timer SELECT button and then press Timer Up / Down button to set Night time low noise OFF time.<br />
o Press Timer SET button (1) to confirm the OFF time and continue set Night time low noise ON time.<br />
o Press Timer Up / Down button to set the ON time for Night Time Low Noise.<br />
o Press Timer SET button (1) to confirm the ON time.<br />
o After 2 seconds, exits from local setting mode.<br />
○<br />
○<br />
○
17.6.2 Thermostat OFF Indoor Fan Control<br />
• During thermostat OFF and compressor OFF, indoor fan control can be alter to suit different application<br />
requirement.<br />
Setting Value Description Operation details<br />
000 Default control Fan control by EEPROM<br />
001 10 seconds fan sampling<br />
Fan OFF for 3 minutes, then ON for 10<br />
seconds.<br />
002 Fixed fan speed<br />
AC Fan Motor Speed: Lo<br />
DC Fan Motor Speed: Lo-<br />
17.6.3 Thermostat OFF Point Adjustment<br />
The default thermostat OFF point might not be accurate depends on indoor unit installation condition, thermostat<br />
OFF point adjustment is could be done.<br />
17.7 AC Reset Control<br />
When AC Reset at remote control is pressed, all indoors & outdoor in the system (same Outdoor Address)<br />
will perform micron reset. All processing memory & counter will be cleared & restart.<br />
Perform AC Reset when abnormal display at remote controller or LED indicators is found during normal operation<br />
condition.<br />
239
18. Troubleshooting Guide<br />
Outdoor Unit<br />
Error Code<br />
Abnormality Control Areas to verify<br />
F27-01<br />
Indoor / outdoor unit communication line<br />
disconnection error<br />
Indoor / outdoor unit communication line, lead<br />
wire terminal.<br />
F30-01<br />
Total quantity / capacity of connected indoor<br />
unit error<br />
Total quantity / capacity of connected indoor<br />
unit is insufficient or over.<br />
F30-02 Noise filter circuit (capacitor) error. Outdoor unit main PCB.<br />
F31-01 Low pressure protection<br />
Refrigerant cycle, 2 or 3-way valve close,<br />
insufficient refrigerant.<br />
F31-02 High pressure protection<br />
Refrigerant cycle, 2 or 3-way valve close,<br />
overcharged refrigerant.<br />
F31-06 4-way valve error<br />
4-way valve, outdoor unit noise filter PCB,<br />
connector CN-HOT.<br />
F31-08 Indoor unit freezing error Abnormal indoor unit expansion valve.<br />
F32-04 IPM temperature protection Outdoor unit main PCB, power supply.<br />
F32-05 Total current protection Compressor locked, refrigerant cycle.<br />
F32-06 Compressor discharge temperature protection Insufficient refrigerant.<br />
F32-08 PFC protection Outdoor unit main PCB.<br />
IPM abnormal, compressor locked,<br />
F32-09 DC peak current error<br />
compressor lead wire connection, outdoor unit<br />
main PCB.<br />
IPM abnormal, compressor locked,<br />
F32-10 Compressor rotation error<br />
compressor lead wire connection, outdoor unit<br />
main PCB.<br />
F35-02 Outdoor DC fan motor error<br />
F40-01 Outdoor temperature sensor error<br />
F40-11 Compressor suction temperature sensor error<br />
F40-21<br />
Outdoor heat exchanger temperature sensor<br />
error<br />
F40-31 DEF temperature sensor error<br />
F40-51<br />
Compressor discharge temperature sensor<br />
error<br />
F41-02 High pressure switch disconnection error<br />
F41-12 Low pressure switch disconnection error<br />
240<br />
Outdoor DC fan motor, outdoor unit main PCB,<br />
connector CN-FM1, CN-FM2.<br />
Outdoor temperature sensor lead wire, outdoor<br />
unit main PCB, connector CN-TH1.<br />
Compressor suction temperature lead wire,<br />
outdoor unit main PCB, connector CN-TH2, 3-<br />
way valve close.<br />
Outdoor heat exchanger temperature sensor<br />
lead wire, outdoor unit main PCB, connector<br />
CN-TH1.<br />
DEF temperature sensor lead wire, outdoor<br />
unit main PCB, connector CN-TH2.<br />
Compressor discharge temperature sensor<br />
lead wire, outdoor unit main PCB, connector<br />
CN-DIS.<br />
High pressure switch lead wire, outdoor unit<br />
main PCB, connector CN-PSW1.<br />
Low pressure switch lead wire, outdoor unit<br />
main PCB, connector CN-PSW2.<br />
F42-11 Outdoor CT disconnection error Outdoor unit main PCB.<br />
F44-01 IPM temperature sensor error Outdoor unit main PCB.<br />
F45-01 Outdoor address double registration error Outdoor unit address.
Indoor Unit<br />
Error Code<br />
F15-01 Drain level error<br />
Abnormality Control Areas to verify<br />
241<br />
Drain pump, float switch, drain pipe, indoor unit<br />
main PCB, connector CN-DRMTR, CN-TH2.<br />
F17-02 Indoor DC fan motor error Indoor DC fan motor, connector CN-FM.<br />
F20-01 Indoor liquid pipe temperature sensor error<br />
Indoor liquid pipe temperature sensor lead wire,<br />
indoor unit main PCB, connector CN-TH2.<br />
F20-02 Remote control thersistor error Remote control thermistor.<br />
F21-01<br />
Indoor heat exchanger temperature sensor<br />
error<br />
F22-01 Indoor gas pipe temperature sensor error<br />
F25-01 Indoor address double registration error Indoor unit address.<br />
F26-01<br />
F27-01<br />
Remote control communication line<br />
disconnection error<br />
Indoor / outdoor unit communication line<br />
disconnection error<br />
F31-08 * Indoor unit freezing error.<br />
Indoor heat exchanger temperature sensor lead<br />
wire, indoor unit main PCB, connector CN-TH1.<br />
Indoor gas pipe temperature sensor lead wire,<br />
indoor unit main PCB, connector CN-TH1.<br />
Remote control lead wire, terminal, indoor unit<br />
main PCB connector CN-REM.<br />
Indoor / outdoor unit communication lead wire,<br />
connection terminal, indoor unit main PCB<br />
connector CN-UN, outdoor unit address.<br />
Abnormal indoor unit expansion valve, indoor<br />
unit heat exchanger sensor.<br />
* For indoor unit with error, indoor unit man PCB<br />
LED1 blinking ON: 2.5 sec. OFF: 0.5 sec..
19. Troubleshooting Flowchart<br />
19.1 Drain Level Float Switch Problem (F15-01)<br />
Malfunction Decision Conditions<br />
• During operation of cooling and heating, the signal received from drain level float switch in indoor unit is checked<br />
whether it is normal.<br />
Malfunction Caused<br />
• Faulty connector connection.<br />
• Faulty indoor unit drain pump motor.<br />
• Clogged drain hose.<br />
• Faulty indoor unit PCB (main).<br />
Troubleshooting<br />
242
19.2 Indoor Fan Motor (DC Motor) Mechanism Locked (F17-02)<br />
Malfunction Decision Conditions<br />
• The rotation speed detected by the Hall IC of the fan motor during fan motor operation is used to determine<br />
abnormal fan motor (feedback of rotation > 2550rpm or < 50rpm).<br />
Malfunction Caused<br />
• Operation stop due to short circuit inside the fan motor winding.<br />
• Operation stop due to breaking of wire inside the fan motor.<br />
• Operation stop due to breaking of fan motor lead wires.<br />
• Operation stop due to fan motor Hall IC malfunction.<br />
• Operation error due to faulty indoor unit PCB (main).<br />
Abnormality Judgment<br />
• Fan motor runs for 5 seconds and stops for 25 seconds, and repeat continuously for 7 times.<br />
Troubleshooting<br />
243
19.3 Indoor Intake <strong>Air</strong> Temperature Sensor Abnormality (F20-01)<br />
Malfunction Decision Conditions<br />
• During startup and operation of cooling and heating, the temperatures detected by the indoor intake air<br />
temperature sensor are used to determine sensor errors.<br />
Malfunction Caused<br />
• Faulty connector connection.<br />
• Faulty sensor.<br />
• Faulty indoor unit PCB (main).<br />
Abnormality Judgment<br />
• After 20 minutes operation start and indoor fan running.<br />
• Continue for 120 seconds.<br />
Troubleshooting<br />
244
19.4 Wired Remote Controller Thermistor Abnormality (F20-02)<br />
Malfunction Decision Conditions<br />
• During startup and operation of cooling and heating, the temperatures detected by the wired remote controller<br />
thermistor are used to determine sensor errors.<br />
Malfunction Caused<br />
• Faulty wired remote controller.<br />
• Faulty indoor unit PCB (main).<br />
Abnormality Judgment<br />
• Abnormality occur only when wired remote controller thermistor selection is made via Local Setting.<br />
Troubleshooting<br />
245
19.5 Indoor Pipe Temperature Sensor Abnormality (F21-01)<br />
Malfunction Decision Conditions<br />
• During startup and operation of cooling and heating, the temperatures detected by the indoor pipe temperature<br />
sensor are used to determine sensor errors.<br />
Malfunction Caused<br />
• Faulty connector connection.<br />
• Faulty sensor.<br />
• Faulty indoor unit PCB (main).<br />
Abnormality Judgment<br />
• Continue for 120 seconds.<br />
Troubleshooting<br />
246
19.6 Indoor Gas Temperature Sensor Abnormality (F22-01)<br />
Malfunction Decision Conditions<br />
• During startup and operation of cooling and heating, the temperatures detected by the indoor gas temperature<br />
sensor are used to determine sensor errors.<br />
Malfunction Caused<br />
• Faulty connector connection.<br />
• Faulty sensor.<br />
• Faulty indoor unit PCB (main).<br />
Abnormality Judgment<br />
• Continue for 120 seconds.<br />
Troubleshooting<br />
247
19.7 Indoor Address Double Registration (F25-01)<br />
Malfunction Decision Conditions<br />
• During standby, startup and operation of cooling and heating, the indoor unit detects the same address as that of<br />
its own.<br />
Malfunction Caused<br />
• Wrong indoor unit address setting.<br />
• Faulty indoor unit PCB (main).<br />
Troubleshooting<br />
248
19.8 Total Quantity & Capacity of Connected Indoor Unit Abnormality (F30-01)<br />
Malfunction Decision Conditions<br />
• The total quantity & capacity of connected indoor units are used to determine abnormal system connectivity.<br />
Malfunction Caused<br />
• No power supply to indoor unit.<br />
• Wrong total number (max. & min.) of connected indoor unit.<br />
• Wrong total capacity (max. & min.) of connected indoor unit.<br />
• Wrong indoor unit and outdoor unit address settings.<br />
• Indoor-outdoor signal transmission error due to breaking of U1 & U2.<br />
• Faulty outdoor unit PCB (main).<br />
Troubleshooting<br />
249
19.9 Low Pressure Protection (F31-01)<br />
Malfunction Decision Conditions<br />
• During operation of cooling and heating, when the outdoor unit low pressure switch is open (-0.03MPa and<br />
below).<br />
Malfunction Caused<br />
• Clogged air filter of indoor unit.<br />
• Dust accumulation on the indoor/outdoor unit heat exchanger.<br />
• <strong>Air</strong> short circuit at indoor/outdoor unit.<br />
• 3 way valve closed.<br />
• Faulty outdoor unit fan motor.<br />
• Refrigerant shortage (refrigerant leakage).<br />
• Clogged expansion valve or strainer.<br />
• Faulty outdoor unit low pressure switch.<br />
• Faulty outdoor unit PCB (main).<br />
Abnormality Judgment<br />
• Continue 3 times in 60 minutes.<br />
Troubleshooting<br />
250
19.10 High Pressure Protection (F31-02)<br />
Malfunction Decision Conditions<br />
• During operation of cooling and heating, when the outdoor unit high pressure switch is open (4.15MPa and<br />
above).<br />
Malfunction Caused<br />
• Clogged air filter of indoor unit.<br />
• Dust accumulation on the indoor/outdoor unit heat exchanger.<br />
• <strong>Air</strong> short circuit at indoor/outdoor unit.<br />
• 3 way valve closed.<br />
• Faulty outdoor unit fan motor.<br />
• Excess refrigerant.<br />
• Clogged expansion valve or strainer.<br />
• Faulty outdoor unit high pressure switch.<br />
• Faulty outdoor unit PCB (main).<br />
Abnormality Judgment<br />
• Continue 8 times in 60 minutes.<br />
Troubleshooting<br />
251
19.11 Four Way Valve Abnormality (F31-06)<br />
Malfunction Decision Conditions<br />
• During heating operation, when the indoor pipe temperature of thermostat ON indoor unit < 5°C.<br />
• During cooling operation, when the indoor pipe temperature of thermostat ON indoor unit > 45°C.<br />
Malfunction Caused<br />
• Faulty sensor.<br />
• Faulty connector connection.<br />
• Faulty outdoor unit PCB (main/noise filter).<br />
• Faulty four way valve.<br />
Abnormality Judgment<br />
• Continue 3 times in 45 minutes.<br />
Troubleshooting<br />
252
19.12 Indoor Unit Freezing Abnormality (F31-08)<br />
Malfunction Decision Conditions<br />
• During operation of cooling, and when outdoor unit receive indoor unit freezing abnormal signal (indoor pipe<br />
temperature < 0°C) from thermostat OFF/standby indoor unit.<br />
Malfunction Caused<br />
• Faulty sensor.<br />
• Faulty indoor unit expansion valve.<br />
• Faulty indoor unit PCB (main).<br />
Abnormality Judgment<br />
• Continue 3 times in 45 minutes.<br />
Troubleshooting<br />
253
19.13 IPM Temperature Protection (F32-04)<br />
Malfunction Decision Conditions<br />
• During operation of cooling and heating, when IPM temperature data (95°C) is detected by the IPM temperature<br />
sensor.<br />
Malfunction Caused<br />
• <strong>Air</strong> short circuit at outdoor unit.<br />
• Faulty outdoor unit fan motor.<br />
• Faulty outdoor unit PCB (main).<br />
Abnormality Judgment<br />
• Continue 4 times in 30 minutes.<br />
Troubleshooting<br />
254
19.14 Total Current Protection (F32-05)<br />
Malfunction Decision Conditions<br />
• During operation of cooling and heating, when an input over-current is detected by the current transformer (CT)<br />
in the outdoor unit PCB.<br />
Malfunction Caused<br />
• Excess refrigerant.<br />
• Faulty outdoor unit PCB (main).<br />
Abnormality Judgment<br />
• Continue 6 times in 60 minutes.<br />
Troubleshooting<br />
255
19.15 Compressor Discharge Temperature Protection (F32-06)<br />
Malfunction Decision Conditions<br />
• During operation of cooling and heating, when compressor discharge temperature data (110°C) is detected by<br />
the compressor discharge temperature sensor.<br />
Malfunction Caused<br />
• Faulty compressor discharge temperature sensor.<br />
• 3 way valve closed.<br />
• Refrigerant shortage (refrigerant leakage).<br />
• Clogged expansion valve or strainer.<br />
• Faulty outdoor unit PCB (main).<br />
• Faulty compressor.<br />
Abnormality Judgment<br />
• Continue 6 times in 120 minutes.<br />
Troubleshooting<br />
256
19.16 Power Factor Correction (PFC) Abnormality (F32-08)<br />
Malfunction Decision Conditions<br />
• During startup and operation of cooling and heating, when the PFC protection circuitry in the outdoor unit PCB<br />
(main) senses abnormal high DC voltage level.<br />
Malfunction Caused<br />
• Power supply surge.<br />
• Compressor windings not uniform.<br />
• Faulty outdoor unit PCB (main).<br />
Abnormality Judgment<br />
• Continue 2 times in 1 minute.<br />
Troubleshooting<br />
257
19.17 DC Peak Current Detection (F32-09)<br />
Malfunction Decision Conditions<br />
• During operation of cooling and heating, when DC peak is detected by the inverter DC Peak sensing circuitry in<br />
the outdoor unit PCB (main).<br />
Malfunction Caused<br />
• Faulty outdoor unit PCB (main).<br />
• Faulty compressor.<br />
Abnormality Judgment<br />
• Continue for 7 times within 30 minutes (DC peak occur within 30 seconds compressor startup).<br />
• Continue for 3 times within 30 minutes (DC peak occur after 30 seconds compressor startup).<br />
Troubleshooting<br />
258
19.18 Compressor Rotation Failure (F32-10)<br />
Malfunction Decision Conditions<br />
• A compressor rotation failure is detected by checking the compressor running condition through the position<br />
detection circuitry in the outdoor unit PCB (main).<br />
Malfunction Caused<br />
• Compressor terminal disconnect.<br />
• Faulty outdoor unit PCB (main).<br />
• Faulty compressor.<br />
Abnormality Judgment<br />
• Continue 4 times in 20 minutes.<br />
Troubleshooting<br />
259
19.19 Outdoor Fan Motor (DC Motor) Mechanism Locked (F35-02)<br />
Malfunction Decision Conditions<br />
• The rotation speed detected by the Hall IC of the fan motor during fan motor operation is used to determine<br />
abnormal fan motor (feedback of rotation > 2550rpm or < 50rpm).<br />
Malfunction Caused<br />
• Operation stop due to short circuit inside the fan motor winding.<br />
• Operation stop due to breaking of wire inside the fan motor.<br />
• Operation stop due to breaking of fan motor lead wires.<br />
• Operation stop due to fan motor Hall IC malfunction.<br />
• Operation error due to faulty outdoor unit PCB (main).<br />
Abnormality Judgment<br />
• Continue 2 times in 30 minutes.<br />
Troubleshooting<br />
260
19.20 Outdoor Intake <strong>Air</strong> Temperature Sensor Abnormality (F40-01)<br />
Malfunction Decision Conditions<br />
• During startup and operation of cooling and heating, the temperatures detected by the outdoor intake air<br />
temperature sensor are used to determine sensor errors.<br />
Malfunction Caused<br />
• Faulty connector connection.<br />
• Faulty sensor.<br />
• Faulty outdoor unit PCB (main).<br />
Abnormality Judgment<br />
• Continue for 5 seconds.<br />
Troubleshooting<br />
261
19.21 Compressor Suction Temperature Sensor Abnormality (F40-11)<br />
Malfunction Decision Conditions<br />
• During startup and operation of cooling and heating, the temperatures detected by the compressor suction<br />
temperature sensor are used to determine sensor errors.<br />
Malfunction Caused<br />
• Faulty connector connection.<br />
• Faulty sensor.<br />
• Faulty outdoor unit PCB (main).<br />
Abnormality Judgment<br />
• Continue for 5 seconds.<br />
Troubleshooting<br />
262
19.22 Outdoor Pipe Temperature Sensor Abnormality (F40-21)<br />
Malfunction Decision Conditions<br />
• During startup and operation of cooling and heating, the temperatures detected by the outdoor pipe temperature<br />
sensor are used to determine sensor errors.<br />
Malfunction Caused<br />
• Faulty connector connection.<br />
• Faulty sensor.<br />
• Faulty outdoor unit PCB (main).<br />
Abnormality Judgment<br />
• Continue for 5 seconds.<br />
Troubleshooting<br />
263
19.23 Outdoor Defrost Temperature Sensor Abnormality (F40-31)<br />
Malfunction Decision Conditions<br />
• During startup and operation of cooling and heating, the temperatures detected by the outdoor defrost<br />
temperature sensor are used to determine sensor errors.<br />
Malfunction Caused<br />
• Faulty connector connection.<br />
• Faulty sensor.<br />
• Faulty outdoor unit PCB (main).<br />
Abnormality Judgment<br />
• Continue for 5 seconds.<br />
Troubleshooting<br />
264
19.24 Compressor Discharge Temperature Sensor Abnormality (F40-51)<br />
Malfunction Decision Conditions<br />
• During startup and operation of cooling and heating, the temperatures detected by the compressor discharge<br />
temperature sensor are used to determine sensor errors.<br />
Malfunction Caused<br />
• Faulty connector connection.<br />
• Faulty sensor.<br />
• Faulty outdoor unit PCB (main).<br />
Abnormality Judgment<br />
• Continue for 5 seconds.<br />
Troubleshooting<br />
265
19.25 Outdoor High Pressure Switch Disconnect Abnormality (F41-02)<br />
Malfunction Decision Conditions<br />
• During compressor stop, when the outdoor unit high pressure switch is open for 1 minute.<br />
Malfunction Caused<br />
• Faulty connector connection.<br />
• Faulty outdoor unit high pressure switch.<br />
• Faulty outdoor unit PCB (main).<br />
Troubleshooting<br />
266
19.26 Outdoor Low Pressure Switch Disconnect Abnormality (F41-12)<br />
Malfunction Decision Conditions<br />
• During compressor stop, when the outdoor unit low pressure switch is open for 1 minute.<br />
Malfunction Caused<br />
• Faulty connector connection.<br />
• Faulty outdoor unit high pressure switch.<br />
• Faulty outdoor unit PCB (main).<br />
Troubleshooting<br />
267
19.27 Outdoor Current Transformer Open Circuit (F42-11)<br />
Malfunction Decision Conditions<br />
• A current transformer (CT) open circuit is detected by checking the compressor running frequency (> 50Hz) and<br />
CT detected input current (< 1.6A) for continuously 60 seconds.<br />
Malfunction Caused<br />
• CT defective.<br />
• Faulty outdoor unit PCB (main).<br />
• Compressor defective (low compression).<br />
Troubleshooting<br />
268
19.28 IPM Temperature Sensor Abnormality (F44-01)<br />
Malfunction Decision Conditions<br />
• During startup and operation of cooling and heating, the temperatures detected by the IPM temperature sensor<br />
are used to determine sensor errors.<br />
Malfunction Caused<br />
• Faulty indoor unit PCB (main).<br />
Abnormality Judgment<br />
• Continue for 5 seconds.<br />
Troubleshooting<br />
269
19.29 Outdoor Address Double Registration (F45-01)<br />
Malfunction Decision Conditions<br />
• During standby, startup and operation of cooling and heating, the outdoor unit detects the same address as that<br />
of its own on any other outdoor unit of same urban network.<br />
Malfunction Caused<br />
• Wrong outdoor unit address setting.<br />
• Faulty outdoor unit PCB (main).<br />
Troubleshooting<br />
270
20. Technical Data<br />
20.1 Operation Characteristic<br />
• The numbers of indoor unit connectable to one outdoor unit is shown in tables below, but the total cooling<br />
capacity of indoor unit combination must be 50% to 130% of outdoor unit cooling capacity.<br />
Total indoor capacity (kW)<br />
Total indoor capacity (kW)<br />
4HP<br />
MAX 14.6<br />
Rated 11.2<br />
MIN 5.6<br />
MAX 6<br />
MIN 2<br />
Combination (%) 50 ~ 130<br />
Total indoor capacity (kW)<br />
Total indoor capacity (kW)<br />
5HP<br />
MAX 18.2<br />
Rated 14.0<br />
MIN 7.0<br />
MAX 8<br />
MIN 2<br />
Combination (%) 50 ~ 130<br />
Total indoor capacity (kW)<br />
Total indoor capacity (kW)<br />
6HP<br />
MAX 20.2<br />
Rated 15.5<br />
MIN 7.8<br />
MAX 8<br />
MIN 2<br />
Combination (%) 50 ~ 130<br />
271
20.2 Capacity and Power Input<br />
20.2.1 U-4LAE5<br />
cooling capacity curve<br />
U-4LA1E5<br />
cooling capacity ratio<br />
heating capacity curve<br />
U-4LA1E5<br />
heating capacity ratio<br />
1.6<br />
1.5<br />
1.4<br />
1.3<br />
1.2<br />
1.1<br />
1.0<br />
0.9<br />
0.8<br />
0.7<br />
0.6<br />
0.5<br />
0.4<br />
0.3<br />
0.2<br />
0.1<br />
1.6<br />
1.5<br />
1.4<br />
1.3<br />
1.2<br />
1.1<br />
1.0<br />
0.9<br />
0.8<br />
0.7<br />
0.6<br />
0.5<br />
0.4<br />
0.3<br />
0.2<br />
0.1<br />
indoor air temperature(℃WB)<br />
indoor air temperature(℃DB)<br />
23℃<br />
19℃<br />
15℃<br />
0.0<br />
-10 0 10 20 30 40 50<br />
outdoor air temperature(℃DB)<br />
16℃<br />
20℃<br />
27℃<br />
0.0<br />
-15 -10 -5 0 5 10 15 20<br />
outdoor air temperature(℃WB)<br />
272<br />
cooling power input curve<br />
U-4LA1E5<br />
cooling power input ratio<br />
heating power input curve<br />
U-4LA1E5<br />
heating power input ratio<br />
1.4<br />
1.3<br />
1.2<br />
1.1<br />
1.0<br />
0.9<br />
0.8<br />
0.7<br />
0.6<br />
0.5<br />
0.4<br />
0.3<br />
0.2<br />
0.1<br />
0.0<br />
-10 0 10 20 30 40 50<br />
outdoor air temperature(℃DB)<br />
1.4<br />
1.3<br />
1.2<br />
1.1<br />
1.0<br />
0.9<br />
0.8<br />
0.7<br />
0.6<br />
0.5<br />
0.4<br />
0.3<br />
0.2<br />
0.1<br />
indoor air temperature(℃WB)<br />
23℃<br />
19℃<br />
15℃<br />
indoor air temperature(℃DB)<br />
27℃<br />
20℃<br />
16℃<br />
0.0<br />
-15 -10 -5 0 5 10 15 20<br />
outdoor air temperature(℃WB)
20.2.2 U-5LA1E5<br />
cooling capacity curve<br />
U-5LA1E5<br />
cooling capacity ratio<br />
heating capacity curve<br />
U-5LA1E5<br />
heating capacity ratio<br />
1.6<br />
1.5<br />
1.4<br />
1.3<br />
1.2<br />
1.1<br />
1.0<br />
0.9<br />
0.8<br />
0.7<br />
0.6<br />
0.5<br />
0.4<br />
0.3<br />
0.2<br />
0.1<br />
1.6<br />
1.5<br />
1.4<br />
1.3<br />
1.2<br />
1.1<br />
1.0<br />
0.9<br />
0.8<br />
0.7<br />
0.6<br />
0.5<br />
0.4<br />
0.3<br />
0.2<br />
0.1<br />
indoor air temperature(℃WB)<br />
indoor air temperature(℃DB)<br />
23℃<br />
19℃<br />
15℃<br />
0.0<br />
-10 0 10 20 30 40 50<br />
outdoor air temperature(℃DB)<br />
16℃<br />
20℃<br />
27℃<br />
0.0<br />
-15 -10 -5 0 5 10 15 20<br />
outdoor air temperature(℃WB)<br />
273<br />
cooling power input curve<br />
U-5LA1E5<br />
cooling power input ratio<br />
heating power input curve<br />
U-5LA1E5<br />
heating power input ratio<br />
1.4<br />
1.3<br />
1.2<br />
1.1<br />
1.0<br />
0.9<br />
0.8<br />
0.7<br />
0.6<br />
0.5<br />
0.4<br />
0.3<br />
0.2<br />
0.1<br />
0.0<br />
-10 0 10 20 30 40 50<br />
outdoor air temperature(℃DB)<br />
1.4<br />
1.3<br />
1.2<br />
1.1<br />
1.0<br />
0.9<br />
0.8<br />
0.7<br />
0.6<br />
0.5<br />
0.4<br />
0.3<br />
0.2<br />
0.1<br />
indoor air temperature(℃WB)<br />
indoor air temperature(℃DB)<br />
23℃<br />
19℃<br />
15℃<br />
27℃<br />
20℃<br />
16℃<br />
0.0<br />
-15 -10 -5 0 5 10 15 20<br />
outdoor air temperature(℃WB)
20.2.3 U-6LA1E5<br />
cooling capacity curve<br />
U-6LA1E5<br />
cooling capacity ratio<br />
heating capacity curve<br />
U-6LA1E5<br />
heating capacity ratio<br />
1.6<br />
1.5<br />
1.4<br />
1.3<br />
1.2<br />
1.1<br />
1.0<br />
0.9<br />
0.8<br />
0.7<br />
0.6<br />
0.5<br />
0.4<br />
0.3<br />
0.2<br />
0.1<br />
1.6<br />
1.5<br />
1.4<br />
1.3<br />
1.2<br />
1.1<br />
1.0<br />
0.9<br />
0.8<br />
0.7<br />
0.6<br />
0.5<br />
0.4<br />
0.3<br />
0.2<br />
0.1<br />
indoor air temperature(℃WB)<br />
indoor air temperature(℃DB)<br />
23℃<br />
19℃<br />
15℃<br />
0.0<br />
-10 0 10 20 30 40 50<br />
outdoor air temperature(℃DB)<br />
16℃<br />
20℃<br />
27℃<br />
0.0<br />
-15 -10 -5 0 5 10 15 20<br />
outdoor air temperature(℃WB)<br />
274<br />
cooling power input curve<br />
U-6LA1E5<br />
cooling power input ratio<br />
heating power input curve<br />
U-6LA1E5<br />
heating power input ratio<br />
1.4<br />
1.3<br />
1.2<br />
1.1<br />
1.0<br />
0.9<br />
0.8<br />
0.7<br />
0.6<br />
0.5<br />
0.4<br />
0.3<br />
0.2<br />
0.1<br />
0.0<br />
-10 0 10 20 30 40 50<br />
outdoor air temperature(℃DB)<br />
1.4<br />
1.3<br />
1.2<br />
1.1<br />
1.0<br />
0.9<br />
0.8<br />
0.7<br />
0.6<br />
0.5<br />
0.4<br />
0.3<br />
0.2<br />
0.1<br />
indoor air temperature(℃WB)<br />
indoor air temperature(℃DB)<br />
23℃<br />
19℃<br />
15℃<br />
27℃<br />
20℃<br />
16℃<br />
0.0<br />
-15 -10 -5 0 5 10 15 20<br />
outdoor air temperature(℃WB)
20.3 Sensible Heat Capacity Table<br />
20.3.1 U-4LA1E5<br />
Connection indoor units:S-28KA1E5 x 4 units (an example)<br />
Combination 100% TC:Total Capacity (kW)、PI:Power Input (kW)<br />
Outdoor Indoor <strong>Air</strong> Temperature (°CWB)<br />
<strong>Air</strong><br />
Temp.<br />
14.0 16.0 18.0 19.0 20.0 22.0 24.0<br />
(°CDB) TC PI TC PI TC PI TC PI TC PI TC PI TC PI<br />
kW kW kW kW kW kW kW kW kW kW kW kW kW kW<br />
10 7.56 0.71 9.02 0.95 10.5 1.20 11.2 1.33 11.9 1.46 13.4 1.73 14.8 2.00<br />
12 7.56 0.73 9.02 0.97 10.5 1.23 11.2 1.36 11.9 1.49 13.4 1.77 14.8 2.04<br />
14 7.56 0.75 9.02 1.00 10.5 1.26 11.2 1.39 11.9 1.53 13.4 1.81 14.8 2.09<br />
16 7.56 0.77 9.02 1.03 10.5 1.29 11.2 1.43 11.9 1.57 13.4 1.85 14.8 2.19<br />
18 7.56 0.79 9.02 1.05 10.5 1.33 11.2 1.47 11.9 1.61 13.4 1.98 14.8 2.40<br />
20 7.56 0.82 9.02 1.08 10.5 1.38 11.2 1.56 11.9 1.75 13.4 2.16 14.8 2.61<br />
21 7.56 0.83 9.02 1.10 10.5 1.44 11.2 1.63 11.9 1.83 13.4 2.26 14.8 2.72<br />
23 7.56 0.86 9.02 1.20 10.5 1.57 11.2 1.78 11.9 1.99 13.4 2.45 14.8 2.89<br />
25 7.56 0.95 9.02 1.31 10.5 1.71 11.2 1.93 11.9 2.16 13.4 2.66 14.8 3.04<br />
27 7.56 1.03 9.02 1.42 10.5 1.86 11.2 2.09 11.9 2.34 13.4 2.87 14.8 3.18<br />
29 7.56 1.13 9.02 1.54 10.5 2.01 11.2 2.27 11.9 2.53 13.4 3.10 14.8 3.33<br />
31 7.56 1.23 9.02 1.67 10.5 2.17 11.2 2.45 11.9 2.73 13.4 3.34 14.8 3.47<br />
33 7.56 1.33 9.02 1.81 10.5 2.35 11.2 2.64 11.9 2.94 13.4 3.59 14.8 3.62<br />
35 7.56 1.44 9.02 1.95 10.5 2.53 11.2 2.84 11.9 3.17 13.4 3.74 14.8 3.77<br />
37 7.56 1.56 9.02 2.10 10.5 2.72 11.2 3.05 11.9 3.41 13.4 3.88 14.8 3.91<br />
39 7.56 1.68 9.02 2.26 10.5 2.92 11.2 3.28 11.9 3.66 13.4 4.03 14.8 4.06<br />
Combination 50% TC:Total Capacity (kW)、PI:Power Input (kW)<br />
Outdoor Indoor <strong>Air</strong> Temperature (°CWB)<br />
<strong>Air</strong><br />
Temp.<br />
14.0 16.0 18.0 19.0 20.0 22.0 24.0<br />
(°CDB) TC PI TC PI TC PI TC PI TC PI TC PI TC PI<br />
kW kW kW kW kW kW kW kW kW kW kW kW kW kW<br />
10 3.78 0.42 4.51 0.51 5.24 0.60 5.60 0.66 5.96 0.71 6.69 0.82 7.42 0.93<br />
12 3.78 0.42 4.51 0.52 5.24 0.62 5.60 0.67 5.96 0.72 6.69 0.83 7.42 0.95<br />
14 3.78 0.44 4.51 0.54 5.24 0.64 5.60 0.69 5.96 0.75 6.69 0.86 7.42 0.98<br />
16 3.78 0.45 4.51 0.55 5.24 0.65 5.60 0.71 5.96 0.76 6.69 0.88 7.42 1.00<br />
18 3.78 0.46 4.51 0.56 5.24 0.66 5.60 0.72 5.96 0.78 6.69 0.90 7.42 1.02<br />
20 3.78 0.47 4.51 0.57 5.24 0.68 5.60 0.74 5.96 0.79 6.69 0.92 7.42 1.04<br />
21 3.78 0.47 4.51 0.57 5.24 0.69 5.60 0.74 5.96 0.80 6.69 0.93 7.42 1.05<br />
23 3.78 0.48 4.51 0.59 5.24 0.70 5.60 0.76 5.96 0.82 6.69 0.95 7.42 1.08<br />
25 3.78 0.49 4.51 0.60 5.24 0.72 5.60 0.78 5.96 0.85 6.69 1.00 7.42 1.16<br />
27 3.78 0.50 4.51 0.63 5.24 0.76 5.60 0.84 5.96 0.91 6.69 1.08 7.42 1.26<br />
29 3.78 0.54 4.51 0.67 5.24 0.82 5.60 0.90 5.96 0.98 6.69 1.16 7.42 1.34<br />
31 3.78 0.58 4.51 0.72 5.24 0.88 5.60 0.96 5.96 1.05 6.69 1.24 7.42 1.44<br />
33 3.78 0.62 4.51 0.77 5.24 0.94 5.60 1.03 5.96 1.13 6.69 1.32 7.42 1.54<br />
35 3.78 0.66 4.51 0.83 5.24 1.01 5.60 1.10 5.96 1.20 6.69 1.42 7.42 1.64<br />
37 3.78 0.71 4.51 0.88 5.24 1.08 5.60 1.18 5.96 1.29 6.69 1.51 7.42 1.76<br />
39 3.78 0.75 4.51 0.94 5.24 1.15 5.60 1.26 5.96 1.37 6.69 1.61 7.42 1.88<br />
Note:PI of indoor units is not included in the table.<br />
275
20.3.2 U-5LA1E5<br />
Connection indoor units:S-71KA1E5 x 2 units (an example)<br />
Combination 100% TC:Total Capacity (kW)、PI:Power Input (kW)<br />
Outdoor Indoor <strong>Air</strong> Temperature (°CWB)<br />
<strong>Air</strong><br />
Temp.<br />
14.0 16.0 18.0 19.0 20.0 22.0 24.0<br />
(°CDB) TC PI TC PI TC PI TC PI TC PI TC PI TC PI<br />
kW kW kW kW kW kW kW kW kW kW kW kW kW kW<br />
10 9.45 1.83 11.3 2.07 13.1 2.32 14.0 2.45 14.9 2.58 16.7 2.85 18.6 3.12<br />
12 9.45 1.85 11.3 2.09 13.1 2.35 14.0 2.48 14.9 2.61 16.7 2.89 18.6 3.16<br />
14 9.45 1.87 11.3 2.12 13.1 2.38 14.0 2.51 14.9 2.65 16.7 2.93 18.6 3.21<br />
16 9.45 1.89 11.3 2.15 13.1 2.41 14.0 2.55 14.9 2.69 16.7 2.97 18.6 3.31<br />
18 9.45 1.91 11.3 2.17 13.1 2.45 14.0 2.59 14.9 2.73 16.7 3.10 18.6 3.52<br />
20 9.45 1.94 11.3 2.20 13.1 2.50 14.0 2.68 14.9 2.87 16.7 3.28 18.6 3.73<br />
21 9.45 1.95 11.3 2.22 13.1 2.56 14.0 2.75 14.9 2.95 16.7 3.38 18.6 3.84<br />
23 9.45 1.98 11.3 2.32 13.1 2.69 14.0 2.90 14.9 3.11 16.7 3.57 18.6 4.01<br />
25 9.45 2.07 11.3 2.43 13.1 2.83 14.0 3.05 14.9 3.28 16.7 3.78 18.6 4.16<br />
27 9.45 2.15 11.3 2.54 13.1 2.98 14.0 3.21 14.9 3.46 16.7 3.99 18.6 4.30<br />
29 9.45 2.25 11.3 2.66 13.1 3.13 14.0 3.39 14.9 3.65 16.7 4.22 18.6 4.45<br />
31 9.45 2.35 11.3 2.79 13.1 3.29 14.0 3.57 14.9 3.85 16.7 4.46 18.6 4.59<br />
33 9.45 2.45 11.3 2.93 13.1 3.47 14.0 3.76 14.9 4.06 16.7 4.71 18.6 4.74<br />
35 9.45 2.56 11.3 3.07 13.1 3.65 14.0 3.96 14.9 4.29 16.7 4.86 18.6 4.89<br />
37 9.45 2.68 11.3 3.22 13.1 3.84 14.0 4.17 14.9 4.53 16.7 5.00 18.6 5.03<br />
39 9.45 2.80 11.3 3.38 13.1 4.04 14.0 4.40 14.9 4.78 16.7 5.15 18.6 5.18<br />
Combination 50% TC:Total Capacity (kW)、PI:Power Input (kW)<br />
Outdoor Indoor <strong>Air</strong> Temperature (°CWB)<br />
<strong>Air</strong><br />
Temp.<br />
14.0 16.0 18.0 19.0 20.0 22.0 24.0<br />
(°CDB) TC PI TC PI TC PI TC PI TC PI TC PI TC PI<br />
kW kW kW kW kW kW kW kW kW kW kW kW kW kW<br />
10 4.72 0.85 5.63 0.94 6.54 1.03 7.00 1.09 7.46 1.14 8.37 1.25 9.28 1.36<br />
12 4.72 0.85 5.63 0.95 6.54 1.05 7.00 1.10 7.46 1.15 8.37 1.26 9.28 1.38<br />
14 4.72 0.87 5.63 0.97 6.54 1.07 7.00 1.12 7.46 1.18 8.37 1.29 9.28 1.41<br />
16 4.72 0.88 5.63 0.98 6.54 1.08 7.00 1.14 7.46 1.19 8.37 1.31 9.28 1.43<br />
18 4.72 0.89 5.63 0.99 6.54 1.09 7.00 1.15 7.46 1.21 8.37 1.33 9.28 1.45<br />
20 4.72 0.90 5.63 1.00 6.54 1.11 7.00 1.17 7.46 1.22 8.37 1.35 9.28 1.47<br />
21 4.72 0.90 5.63 1.00 6.54 1.12 7.00 1.17 7.46 1.23 8.37 1.36 9.28 1.48<br />
23 4.72 0.91 5.63 1.02 6.54 1.13 7.00 1.19 7.46 1.25 8.37 1.38 9.28 1.51<br />
25 4.72 0.92 5.63 1.03 6.54 1.15 7.00 1.21 7.46 1.28 8.37 1.43 9.28 1.59<br />
27 4.72 0.93 5.63 1.06 6.54 1.19 7.00 1.27 7.46 1.34 8.37 1.51 9.28 1.69<br />
29 4.72 0.97 5.63 1.10 6.54 1.25 7.00 1.33 7.46 1.41 8.37 1.59 9.28 1.77<br />
31 4.72 1.01 5.63 1.15 6.54 1.31 7.00 1.39 7.46 1.48 8.37 1.67 9.28 1.87<br />
33 4.72 1.05 5.63 1.20 6.54 1.37 7.00 1.46 7.46 1.56 8.37 1.75 9.28 1.97<br />
35 4.72 1.09 5.63 1.26 6.54 1.44 7.00 1.53 7.46 1.63 8.37 1.85 9.28 2.07<br />
37 4.72 1.14 5.63 1.31 6.54 1.51 7.00 1.61 7.46 1.72 8.37 1.94 9.28 2.19<br />
39 4.72 1.18 5.63 1.37 6.54 1.58 7.00 1.69 7.46 1.80 8.37 2.04 9.28 2.31<br />
Note:PI of indoor units is not included in the table.<br />
276
20.3.3 U-6LA1E5<br />
Connection indoor units:S-22KA1E5 x 2 units + S-56KA1E5 x 2 units (an example)<br />
Combination 100% TC:Total Capacity (kW)、PI:Power Input (kW)<br />
Outdoor Indoor <strong>Air</strong> Temperature (°CWB)<br />
<strong>Air</strong><br />
Temp.<br />
14.0 16.0 18.0 19.0 20.0 22.0 24.0<br />
(°CDB) TC PI TC PI TC PI TC PI TC PI TC PI TC PI<br />
kW kW kW kW kW kW kW kW kW kW kW kW kW kW<br />
10 10.5 2.66 12.5 2.90 14.5 3.15 15.5 3.28 16.5 3.41 18.5 3.68 20.2 3.95<br />
12 10.5 2.68 12.5 2.92 14.5 3.18 15.5 3.31 16.5 3.44 18.5 3.72 20.2 3.99<br />
14 10.5 2.70 12.5 2.95 14.5 3.21 15.5 3.34 16.5 3.48 18.5 3.76 20.2 4.04<br />
16 10.5 2.72 12.5 2.98 14.5 3.24 15.5 3.38 16.5 3.52 18.5 3.80 20.2 4.14<br />
18 10.5 2.74 12.5 3.00 14.5 3.28 15.5 3.42 16.5 3.56 18.5 3.93 20.2 4.35<br />
20 10.5 2.77 12.5 3.03 14.5 3.33 15.5 3.51 16.5 3.70 18.5 4.11 20.2 4.56<br />
21 10.5 2.78 12.5 3.05 14.5 3.39 15.5 3.58 16.5 3.78 18.5 4.21 20.2 4.67<br />
23 10.5 2.81 12.5 3.15 14.5 3.52 15.5 3.73 16.5 3.94 18.5 4.40 20.2 4.84<br />
25 10.5 2.90 12.5 3.26 14.5 3.66 15.5 3.88 16.5 4.11 18.5 4.61 20.2 4.99<br />
27 10.5 2.98 12.5 3.37 14.5 3.81 15.5 4.04 16.5 4.29 18.5 4.82 20.2 5.13<br />
29 10.5 3.08 12.5 3.49 14.5 3.96 15.5 4.22 16.5 4.48 18.5 5.05 20.2 5.28<br />
31 10.5 3.18 12.5 3.62 14.5 4.12 15.5 4.40 16.5 4.68 18.5 5.29 20.2 5.42<br />
33 10.5 3.28 12.5 3.76 14.5 4.30 15.5 4.59 16.5 4.89 18.5 5.54 20.2 5.57<br />
35 10.5 3.39 12.5 3.90 14.5 4.48 15.5 4.79 16.5 5.12 18.5 5.69 20.2 5.72<br />
37 10.5 3.51 12.5 4.05 14.5 4.67 15.5 5.00 16.5 5.36 18.5 5.83 20.2 5.86<br />
39 10.5 3.63 12.5 4.21 14.5 4.87 15.5 5.23 16.5 5.61 18.5 5.98 20.2 6.01<br />
Combination 50% TC:Total Capacity (kW)、PI:Power Input (kW)<br />
Outdoor Indoor <strong>Air</strong> Temperature (°CWB)<br />
<strong>Air</strong><br />
Temp.<br />
14.0 16.0 18.0 19.0 20.0 22.0 24.0<br />
(°CDB) TC PI TC PI TC PI TC PI TC PI TC PI TC PI<br />
kW kW kW kW kW kW kW kW kW kW kW kW kW kW<br />
10 5.23 1.18 6.24 1.27 7.25 1.36 7.75 1.42 8.25 1.47 9.26 1.58 10.3 1.69<br />
12 5.23 1.18 6.24 1.28 7.25 1.38 7.75 1.43 8.25 1.48 9.26 1.59 10.3 1.71<br />
14 5.23 1.20 6.24 1.30 7.25 1.40 7.75 1.45 8.25 1.51 9.26 1.62 10.3 1.74<br />
16 5.23 1.21 6.24 1.31 7.25 1.41 7.75 1.47 8.25 1.52 9.26 1.64 10.3 1.76<br />
18 5.23 1.22 6.24 1.32 7.25 1.42 7.75 1.48 8.25 1.54 9.26 1.66 10.3 1.78<br />
20 5.23 1.23 6.24 1.33 7.25 1.44 7.75 1.50 8.25 1.55 9.26 1.68 10.3 1.80<br />
21 5.23 1.23 6.24 1.33 7.25 1.45 7.75 1.50 8.25 1.56 9.26 1.69 10.3 1.81<br />
23 5.23 1.24 6.24 1.35 7.25 1.46 7.75 1.52 8.25 1.58 9.26 1.71 10.3 1.84<br />
25 5.23 1.25 6.24 1.36 7.25 1.48 7.75 1.54 8.25 1.61 9.26 1.76 10.3 1.92<br />
27 5.23 1.26 6.24 1.39 7.25 1.52 7.75 1.60 8.25 1.67 9.26 1.84 10.3 2.02<br />
29 5.23 1.30 6.24 1.43 7.25 1.58 7.75 1.66 8.25 1.74 9.26 1.92 10.3 2.10<br />
31 5.23 1.34 6.24 1.48 7.25 1.64 7.75 1.72 8.25 1.81 9.26 2.00 10.3 2.20<br />
33 5.23 1.38 6.24 1.53 7.25 1.70 7.75 1.79 8.25 1.89 9.26 2.08 10.3 2.30<br />
35 5.23 1.42 6.24 1.59 7.25 1.77 7.75 1.86 8.25 1.96 9.26 2.18 10.3 2.40<br />
37 5.23 1.47 6.24 1.64 7.25 1.84 7.75 1.94 8.25 2.05 9.26 2.27 10.3 2.52<br />
39 5.23 1.51 6.24 1.70 7.25 1.91 7.75 2.02 8.25 2.13 9.26 2.37 10.3 2.64<br />
Note:PI of indoor units is not included in the table.<br />
277
20.4 Cooling Capacity Tables<br />
20.4.1 U-4LA1E5<br />
Combination 130%<br />
Capacity index(kW) 14.56<br />
TC:Total Capacity (kW)、PI:Power Input (kW)<br />
Outdoor Indoor <strong>Air</strong> Temperature (°CDB)<br />
<strong>Air</strong> Temp. 14.0 16.0 18.0 19.0 20.0 22.0 24.0<br />
(°CWB) TC PI TC PI TC PI TC PI TC PI TC PI TC PI<br />
kW kW kW kW kW kW kW kW kW kW kW kW kW kW<br />
10 9.83 1.51 11.7 1.75 13.6 2.00 14.6 2.13 15.5 2.26 16.6 2.53 16.9 2.80<br />
12 9.83 1.53 11.7 1.77 13.6 2.03 14.6 2.16 15.5 2.29 16.4 2.57 16.7 2.84<br />
14 9.83 1.55 11.7 1.80 13.6 2.06 14.6 2.19 15.5 2.33 16.1 2.61 16.5 2.89<br />
16 9.83 1.57 11.7 1.83 13.6 2.09 14.6 2.23 15.5 2.37 15.9 2.65 16.3 2.99<br />
18 9.83 1.59 11.7 1.85 13.6 2.13 14.6 2.27 15.4 2.41 15.7 2.78 16.1 3.20<br />
20 9.83 1.62 11.7 1.88 13.6 2.18 14.6 2.36 15.2 2.55 15.5 2.96 15.9 3.41<br />
21 9.83 1.63 11.7 1.90 13.6 2.24 14.6 2.43 15.0 2.63 15.4 3.06 15.8 3.52<br />
23 9.83 1.66 11.7 2.00 13.6 2.37 14.6 2.58 14.8 2.79 15.2 3.25 15.5 3.69<br />
25 9.83 1.75 11.7 2.11 13.6 2.51 14.4 2.73 14.6 2.96 15.0 3.46 15.3 3.84<br />
27 9.83 1.83 11.7 2.22 13.6 2.66 14.2 2.89 14.4 3.14 14.8 3.67 15.1 3.98<br />
29 9.83 1.93 11.7 2.34 13.6 2.81 14.0 3.07 14.2 3.33 14.5 3.90 14.9 4.13<br />
31 9.83 2.03 11.7 2.47 13.6 2.97 13.8 3.25 14.0 3.53 14.3 4.14 14.7 4.17<br />
33 9.83 2.13 11.7 2.61 13.4 3.15 13.6 3.44 13.8 3.74 14.1 4.19 14.5 4.22<br />
35 9.83 2.24 11.7 2.75 13.2 3.33 13.4 3.64 13.6 3.97 13.9 4.24 14.3 4.27<br />
37 9.83 2.26 11.7 2.80 13.0 3.42 13.2 3.75 13.3 4.01 13.7 4.28 14.1 4.31<br />
39 9.83 2.28 11.7 2.86 12.8 3.52 13.0 3.88 13.1 4.16 13.5 4.33 13.8 4.36<br />
Combination 120%<br />
Capacity index(kW) 13.44<br />
TC:Total Capacity (kW)、PI:Power Input (kW)<br />
Outdoor Indoor <strong>Air</strong> Temperature (°CDB)<br />
<strong>Air</strong> Temp. 14.0 16.0 18.0 19.0 20.0 22.0 24.0<br />
(°CWB) TC PI TC PI TC PI TC PI TC PI TC PI TC PI<br />
kW kW kW kW kW kW kW kW kW kW kW kW kW kW<br />
10 9.07 1.49 10.8 1.73 12.6 1.98 13.4 2.11 14.3 2.24 16.1 2.51 16.7 2.78<br />
12 9.07 1.51 10.8 1.75 12.6 2.01 13.4 2.14 14.3 2.27 16.1 2.55 16.4 2.82<br />
14 9.07 1.53 10.8 1.78 12.6 2.04 13.4 2.17 14.3 2.31 15.9 2.59 16.2 2.87<br />
16 9.07 1.55 10.8 1.81 12.6 2.07 13.4 2.21 14.3 2.35 15.7 2.63 16.0 2.97<br />
18 9.07 1.57 10.8 1.83 12.6 2.11 13.4 2.25 14.3 2.39 15.5 2.76 15.8 3.18<br />
20 9.07 1.60 10.8 1.86 12.6 2.16 13.4 2.34 14.3 2.53 15.3 2.94 15.6 3.39<br />
21 9.07 1.61 10.8 1.88 12.6 2.22 13.4 2.41 14.3 2.61 15.2 3.04 15.5 3.50<br />
23 9.07 1.64 10.8 1.98 12.6 2.35 13.4 2.56 14.3 2.77 14.9 3.23 15.3 3.67<br />
25 9.07 1.73 10.8 2.09 12.6 2.49 13.4 2.71 14.3 2.94 14.7 3.44 15.1 3.82<br />
27 9.07 1.81 10.8 2.20 12.6 2.64 13.4 2.87 14.2 3.12 14.5 3.65 14.8 3.96<br />
29 9.07 1.91 10.8 2.32 12.6 2.79 13.4 3.05 14.0 3.31 14.3 3.88 14.6 4.01<br />
31 9.07 2.01 10.8 2.45 12.6 2.95 13.4 3.23 13.8 3.51 14.1 3.92 14.4 4.05<br />
33 9.07 2.11 10.8 2.59 12.6 3.13 13.4 3.42 13.5 3.72 13.9 4.07 14.2 4.10<br />
35 9.07 2.22 10.8 2.73 12.6 3.31 13.2 3.62 13.3 3.95 13.7 4.12 14.0 4.15<br />
37 9.07 2.24 10.8 2.78 12.6 3.40 13.0 3.73 13.1 3.99 13.4 4.16 13.8 4.19<br />
39 9.07 2.26 10.8 2.84 12.6 3.50 12.7 3.86 12.9 4.04 13.2 4.21 13.6 4.24<br />
278
Combination 110%<br />
Capacity index(kW) 12.32<br />
TC:Total Capacity (kW)、PI:Power Input (kW)<br />
Outdoor Indoor <strong>Air</strong> Temperature (°CDB)<br />
<strong>Air</strong> Temp. 14.0 16.0 18.0 19.0 20.0 22.0 24.0<br />
(°CWB) TC PI TC PI TC PI TC PI TC PI TC PI TC PI<br />
kW kW kW kW kW kW kW kW kW kW kW kW kW kW<br />
10 8.31 1.15 9.92 1.39 11.5 1.64 12.3 1.77 13.1 1.90 14.7 2.17 16.3 2.44<br />
12 8.31 1.17 9.92 1.41 11.5 1.67 12.3 1.80 13.1 1.93 14.7 2.21 16.2 2.48<br />
14 8.31 1.19 9.92 1.44 11.5 1.70 12.3 1.83 13.1 1.97 14.7 2.25 15.9 2.53<br />
16 8.31 1.21 9.92 1.47 11.5 1.73 12.3 1.87 13.1 2.01 14.7 2.29 15.7 2.63<br />
18 8.31 1.23 9.92 1.49 11.5 1.77 12.3 1.91 13.1 2.05 14.7 2.42 15.5 2.84<br />
20 8.31 1.26 9.92 1.52 11.5 1.82 12.3 2.00 13.1 2.19 14.7 2.60 15.3 3.05<br />
21 8.31 1.27 9.92 1.54 11.5 1.88 12.3 2.07 13.1 2.27 14.7 2.70 15.2 3.16<br />
23 8.31 1.30 9.92 1.64 11.5 2.01 12.3 2.22 13.1 2.43 14.7 2.89 15.0 3.33<br />
25 8.31 1.39 9.92 1.75 11.5 2.15 12.3 2.37 13.1 2.60 14.5 3.10 14.8 3.48<br />
27 8.31 1.47 9.92 1.86 11.5 2.30 12.3 2.53 13.1 2.78 14.3 3.31 14.6 3.62<br />
29 8.31 1.57 9.92 1.98 11.5 2.45 12.3 2.71 13.1 2.97 14.0 3.54 14.3 3.77<br />
31 8.31 1.67 9.92 2.11 11.5 2.61 12.3 2.89 13.1 3.17 13.8 3.78 14.1 3.81<br />
33 8.31 1.77 9.92 2.25 11.5 2.79 12.3 3.08 13.1 3.38 13.6 3.83 13.9 3.86<br />
35 8.31 1.88 9.92 2.39 11.5 2.97 12.3 3.28 13.1 3.61 13.4 3.98 13.7 4.01<br />
37 8.31 1.90 9.92 2.44 11.5 3.06 12.3 3.39 12.9 3.75 13.2 4.02 13.5 4.05<br />
39 8.31 1.92 9.92 2.50 11.5 3.16 12.3 3.52 12.7 3.80 13.0 4.07 13.3 4.10<br />
Combination 100%<br />
Capacity index(kW) 11.20<br />
TC:Total Capacity (kW)、PI:Power Input (kW)<br />
Outdoor Indoor <strong>Air</strong> Temperature (°CDB)<br />
<strong>Air</strong> Temp. 14.0 16.0 18.0 19.0 20.0 22.0 24.0<br />
(°CWB) TC PI TC PI TC PI TC PI TC PI TC PI TC PI<br />
kW kW kW kW kW kW kW kW kW kW kW kW kW kW<br />
10 7.56 0.71 9.02 0.95 10.5 1.20 11.2 1.33 11.9 1.46 13.4 1.73 14.8 2.00<br />
12 7.56 0.73 9.02 0.97 10.5 1.23 11.2 1.36 11.9 1.49 13.4 1.77 14.8 2.04<br />
14 7.56 0.75 9.02 1.00 10.5 1.26 11.2 1.39 11.9 1.53 13.4 1.81 14.8 2.09<br />
16 7.56 0.77 9.02 1.03 10.5 1.29 11.2 1.43 11.9 1.57 13.4 1.85 14.8 2.19<br />
18 7.56 0.79 9.02 1.05 10.5 1.33 11.2 1.47 11.9 1.61 13.4 1.98 14.8 2.40<br />
20 7.56 0.82 9.02 1.08 10.5 1.38 11.2 1.56 11.9 1.75 13.4 2.16 14.8 2.61<br />
21 7.56 0.83 9.02 1.10 10.5 1.44 11.2 1.63 11.9 1.83 13.4 2.26 14.8 2.72<br />
23 7.56 0.86 9.02 1.20 10.5 1.57 11.2 1.78 11.9 1.99 13.4 2.45 14.7 2.89<br />
25 7.56 0.95 9.02 1.31 10.5 1.71 11.2 1.93 11.9 2.16 13.4 2.66 14.5 3.04<br />
27 7.56 1.03 9.02 1.42 10.5 1.86 11.2 2.09 11.9 2.34 13.4 2.87 14.3 3.18<br />
29 7.56 1.13 9.02 1.54 10.5 2.01 11.2 2.27 11.9 2.53 13.4 3.10 14.1 3.33<br />
31 7.56 1.23 9.02 1.67 10.5 2.17 11.2 2.45 11.9 2.73 13.4 3.34 13.9 3.47<br />
33 7.56 1.33 9.02 1.81 10.5 2.35 11.2 2.64 11.9 2.94 13.4 3.59 13.6 3.62<br />
35 7.56 1.44 9.02 1.95 10.5 2.53 11.2 2.84 11.9 3.17 13.2 3.74 13.4 3.77<br />
37 7.56 1.56 9.02 2.10 10.5 2.72 11.2 3.05 11.9 3.41 12.9 3.88 13.2 3.91<br />
39 7.56 1.68 9.02 2.26 10.5 2.92 11.2 3.28 11.9 3.66 12.7 4.03 13.0 4.06<br />
279
Combination 90%<br />
Capacity index(kW) 10.08<br />
TC:Total Capacity (kW)、PI:Power Input (kW)<br />
Outdoor Indoor <strong>Air</strong> Temperature (°CDB)<br />
<strong>Air</strong> Temp. 14.0 16.0 18.0 19.0 20.0 22.0 24.0<br />
(°CWB) TC PI TC PI TC PI TC PI TC PI TC PI TC PI<br />
kW kW kW kW kW kW kW kW kW kW kW kW kW kW<br />
10 6.80 0.65 8.11 0.80 9.42 0.89 10.1 0.95 10.7 1.00 12.0 1.11 13.4 1.22<br />
12 6.80 0.68 8.11 0.83 9.42 0.93 10.1 0.98 10.7 1.03 12.0 1.14 13.4 1.26<br />
14 6.80 0.72 8.11 0.87 9.42 0.97 10.1 1.02 10.7 1.08 12.0 1.19 13.4 1.31<br />
16 6.80 0.75 8.11 0.90 9.42 1.00 10.1 1.06 10.7 1.11 12.0 1.23 13.4 1.35<br />
18 6.80 0.77 8.11 0.99 9.42 1.09 10.1 1.15 10.7 1.21 12.0 1.33 13.4 1.45<br />
20 6.80 0.80 8.11 1.05 9.42 1.16 10.1 1.22 10.7 1.27 12.0 1.40 13.4 1.52<br />
21 6.80 0.82 8.11 1.07 9.42 1.32 10.1 1.37 10.7 1.43 12.0 1.56 13.4 1.68<br />
23 6.80 0.84 8.11 1.15 9.42 1.46 10.1 1.52 10.7 1.58 12.0 1.71 13.4 1.84<br />
25 6.80 0.93 8.11 1.20 9.42 1.62 10.1 1.68 10.7 1.75 12.0 1.90 13.4 2.06<br />
27 6.80 0.98 8.11 1.35 9.42 1.78 10.1 1.86 10.7 1.93 12.0 2.10 13.4 2.28<br />
29 6.80 1.08 8.11 1.51 9.42 1.96 10.1 2.04 10.7 2.12 12.0 2.30 13.4 2.48<br />
31 6.80 1.18 8.11 1.65 9.42 2.15 10.1 2.23 10.7 2.32 12.0 2.51 13.4 2.71<br />
33 6.80 1.27 8.11 1.77 9.42 2.34 10.1 2.43 10.7 2.53 12.0 2.72 13.4 2.94<br />
35 6.80 1.40 8.11 1.87 9.42 2.45 10.1 2.54 10.7 2.64 12.0 2.86 13.2 3.08<br />
37 6.80 1.52 8.11 2.07 9.42 2.57 10.1 2.67 10.7 2.78 12.0 3.00 12.9 3.25<br />
39 6.80 1.64 8.11 2.13 9.42 2.64 10.1 2.75 10.7 2.86 12.0 3.10 12.7 3.37<br />
Combination 80%<br />
Capacity index(kW) 8.96<br />
TC:Total Capacity (kW)、PI:Power Input (kW)<br />
Outdoor Indoor <strong>Air</strong> Temperature (°CDB)<br />
<strong>Air</strong> Temp. 14.0 16.0 18.0 19.0 20.0 22.0 24.0<br />
(°CWB) TC PI TC PI TC PI TC PI TC PI TC PI TC PI<br />
kW kW kW kW kW kW kW kW kW kW kW kW kW kW<br />
10 6.05 0.60 7.21 0.69 8.38 0.78 8.96 0.84 9.54 0.89 10.7 1.00 11.9 1.11<br />
12 6.05 0.62 7.21 0.72 8.38 0.82 8.96 0.87 9.54 0.92 10.7 1.03 11.9 1.15<br />
14 6.05 0.65 7.21 0.75 8.38 0.85 8.96 0.90 9.54 0.96 10.7 1.07 11.9 1.19<br />
16 6.05 0.68 7.21 0.78 8.38 0.88 8.96 0.94 9.54 0.99 10.7 1.11 11.9 1.23<br />
18 6.05 0.72 7.21 0.82 8.38 0.92 8.96 0.98 9.54 1.04 10.7 1.16 11.9 1.28<br />
20 6.05 0.78 7.21 0.90 8.38 1.01 8.96 1.07 9.54 1.12 10.7 1.25 11.9 1.37<br />
21 6.05 0.80 7.21 0.97 8.38 1.09 8.96 1.14 9.54 1.20 10.7 1.33 11.9 1.45<br />
23 6.05 0.81 7.21 1.12 8.38 1.23 8.96 1.29 9.54 1.35 10.7 1.48 11.9 1.61<br />
25 6.05 0.90 7.21 1.16 8.38 1.38 8.96 1.44 9.54 1.51 10.7 1.66 11.9 1.82<br />
27 6.05 0.96 7.21 1.29 8.38 1.52 8.96 1.60 9.54 1.67 10.7 1.84 11.9 2.02<br />
29 6.05 1.02 7.21 1.45 8.38 1.70 8.96 1.78 9.54 1.86 10.7 2.04 11.9 2.22<br />
31 6.05 1.12 7.21 1.52 8.38 1.78 8.96 1.86 9.54 1.95 10.7 2.14 11.9 2.34<br />
33 6.05 1.24 7.21 1.59 8.38 1.86 8.96 1.95 9.54 2.05 10.7 2.24 11.9 2.46<br />
35 6.05 1.33 7.21 1.68 8.38 1.96 8.96 2.05 9.54 2.15 10.7 2.37 11.9 2.59<br />
37 6.05 1.46 7.21 1.93 8.38 2.16 8.96 2.26 9.54 2.37 10.7 2.59 11.9 2.84<br />
39 6.05 1.58 7.21 2.07 8.38 2.38 8.96 2.49 9.54 2.60 10.7 2.84 11.9 3.11<br />
280
Combination 70%<br />
Capacity index(kW) 7.84<br />
TC:Total Capacity (kW)、PI:Power Input (kW)<br />
Outdoor Indoor <strong>Air</strong> Temperature (°CDB)<br />
<strong>Air</strong> Temp. 14.0 16.0 18.0 19.0 20.0 22.0 24.0<br />
(°CWB) TC PI TC PI TC PI TC PI TC PI TC PI TC PI<br />
kW kW kW kW kW kW kW kW kW kW kW kW kW kW<br />
10 5.29 0.53 6.31 0.62 7.33 0.71 7.84 0.77 8.35 0.82 9.37 0.93 10.4 1.04<br />
12 5.29 0.54 6.31 0.63 7.33 0.73 7.84 0.78 8.35 0.83 9.37 0.94 10.4 1.06<br />
14 5.29 0.55 6.31 0.65 7.33 0.75 7.84 0.80 8.35 0.86 9.37 0.97 10.4 1.09<br />
16 5.29 0.56 6.31 0.66 7.33 0.76 7.84 0.82 8.35 0.87 9.37 0.99 10.4 1.11<br />
18 5.29 0.57 6.31 0.67 7.33 0.77 7.84 0.83 8.35 0.89 9.37 1.01 10.4 1.13<br />
20 5.29 0.58 6.31 0.68 7.33 0.79 7.84 0.85 8.35 0.90 9.37 1.03 10.4 1.15<br />
21 5.29 0.68 6.31 0.78 7.33 0.90 7.84 0.95 8.35 1.01 9.37 1.14 10.4 1.26<br />
23 5.29 0.69 6.31 0.80 7.33 0.91 7.84 0.97 8.35 1.03 9.37 1.16 10.4 1.29<br />
25 5.29 0.70 6.31 0.81 7.33 0.93 7.84 0.99 8.35 1.06 9.37 1.21 10.4 1.37<br />
27 5.29 0.75 6.31 0.88 7.33 1.01 7.84 1.09 8.35 1.16 9.37 1.33 10.4 1.51<br />
29 5.29 0.85 6.31 0.98 7.33 1.13 7.84 1.21 8.35 1.29 9.37 1.47 10.4 1.65<br />
31 5.29 0.99 6.31 1.13 7.33 1.29 7.84 1.37 8.35 1.46 9.37 1.65 10.4 1.85<br />
33 5.29 1.13 6.31 1.28 7.33 1.45 7.84 1.54 8.35 1.64 9.37 1.83 10.4 2.05<br />
35 5.29 1.27 6.31 1.44 7.33 1.62 7.84 1.71 8.35 1.81 9.37 2.03 10.4 2.25<br />
37 5.29 1.32 6.31 1.49 7.33 1.69 7.84 1.79 8.35 1.90 9.37 2.12 10.4 2.37<br />
39 5.29 1.36 6.31 1.55 7.33 1.76 7.84 1.87 8.35 1.98 9.37 2.22 10.4 2.49<br />
Combination 60%<br />
Capacity index(kW) 6.72<br />
TC:Total Capacity (kW)、PI:Power Input (kW)<br />
Outdoor Indoor <strong>Air</strong> Temperature (°CDB)<br />
<strong>Air</strong> Temp. 14.0 16.0 18.0 19.0 20.0 22.0 24.0<br />
(°CWB) TC PI TC PI TC PI TC PI TC PI TC PI TC PI<br />
kW kW kW kW kW kW kW kW kW kW kW kW kW kW<br />
10 4.54 0.47 5.41 0.56 6.28 0.65 6.72 0.71 7.16 0.76 8.03 0.87 8.90 0.98<br />
12 4.54 0.48 5.41 0.57 6.28 0.67 6.72 0.72 7.16 0.77 8.03 0.88 8.90 1.00<br />
14 4.54 0.49 5.41 0.59 6.28 0.69 6.72 0.74 7.16 0.80 8.03 0.91 8.90 1.03<br />
16 4.54 0.50 5.41 0.60 6.28 0.70 6.72 0.76 7.16 0.81 8.03 0.93 8.90 1.05<br />
18 4.54 0.51 5.41 0.61 6.28 0.71 6.72 0.77 7.16 0.83 8.03 0.95 8.90 1.07<br />
20 4.54 0.52 5.41 0.62 6.28 0.73 6.72 0.79 7.16 0.84 8.03 0.97 8.90 1.09<br />
21 4.54 0.53 5.41 0.63 6.28 0.75 6.72 0.80 7.16 0.86 8.03 0.99 8.90 1.11<br />
23 4.54 0.54 5.41 0.65 6.28 0.76 6.72 0.82 7.16 0.88 8.03 1.01 8.90 1.14<br />
25 4.54 0.55 5.41 0.66 6.28 0.78 6.72 0.84 7.16 0.91 8.03 1.06 8.90 1.22<br />
27 4.54 0.56 5.41 0.69 6.28 0.82 6.72 0.90 7.16 0.97 8.03 1.14 8.90 1.32<br />
29 4.54 0.60 5.41 0.73 6.28 0.88 6.72 0.96 7.16 1.04 8.03 1.22 8.90 1.40<br />
31 4.54 0.68 5.41 0.82 6.28 0.98 6.72 1.06 7.16 1.15 8.03 1.34 8.90 1.54<br />
33 4.54 0.82 5.41 0.97 6.28 1.14 6.72 1.23 7.16 1.33 8.03 1.52 8.90 1.74<br />
35 4.54 0.96 5.41 1.13 6.28 1.31 6.72 1.40 7.16 1.50 8.03 1.72 8.90 1.94<br />
37 4.54 1.01 5.41 1.18 6.28 1.38 6.72 1.48 7.16 1.59 8.03 1.81 8.90 2.06<br />
39 4.54 1.05 5.41 1.24 6.28 1.45 6.72 1.56 7.16 1.67 8.03 1.91 8.90 2.18<br />
281
Combination 50%<br />
Capacity index(kW) 5.60<br />
TC:Total Capacity (kW)、PI:Power Input (kW)<br />
Outdoor Indoor <strong>Air</strong> Temperature (°CDB)<br />
<strong>Air</strong> Temp. 14.0 16.0 18.0 19.0 20.0 22.0 24.0<br />
(°CWB) TC PI TC PI TC PI TC PI TC PI TC PI TC PI<br />
kW kW kW kW kW kW kW kW kW kW kW kW kW kW<br />
10 3.78 0.42 4.51 0.51 5.24 0.60 5.60 0.66 5.96 0.71 6.69 0.82 7.42 0.93<br />
12 3.78 0.42 4.51 0.52 5.24 0.62 5.60 0.67 5.96 0.72 6.69 0.83 7.42 0.95<br />
14 3.78 0.44 4.51 0.54 5.24 0.64 5.60 0.69 5.96 0.75 6.69 0.86 7.42 0.98<br />
16 3.78 0.45 4.51 0.55 5.24 0.65 5.60 0.71 5.96 0.76 6.69 0.88 7.42 1.00<br />
18 3.78 0.46 4.51 0.56 5.24 0.66 5.60 0.72 5.96 0.78 6.69 0.90 7.42 1.02<br />
20 3.78 0.47 4.51 0.57 5.24 0.68 5.60 0.74 5.96 0.79 6.69 0.92 7.42 1.04<br />
21 3.78 0.47 4.51 0.57 5.24 0.69 5.60 0.74 5.96 0.80 6.69 0.93 7.42 1.05<br />
23 3.78 0.48 4.51 0.59 5.24 0.70 5.60 0.76 5.96 0.82 6.69 0.95 7.42 1.08<br />
25 3.78 0.49 4.51 0.60 5.24 0.72 5.60 0.78 5.96 0.85 6.69 1.00 7.42 1.16<br />
27 3.78 0.50 4.51 0.63 5.24 0.76 5.60 0.84 5.96 0.91 6.69 1.08 7.42 1.26<br />
29 3.78 0.54 4.51 0.67 5.24 0.82 5.60 0.90 5.96 0.98 6.69 1.16 7.42 1.34<br />
31 3.78 0.58 4.51 0.72 5.24 0.88 5.60 0.96 5.96 1.05 6.69 1.24 7.42 1.44<br />
33 3.78 0.62 4.51 0.77 5.24 0.94 5.60 1.03 5.96 1.13 6.69 1.32 7.42 1.54<br />
35 3.78 0.66 4.51 0.83 5.24 1.01 5.60 1.10 5.96 1.20 6.69 1.42 7.42 1.64<br />
37 3.78 0.71 4.51 0.88 5.24 1.08 5.60 1.18 5.96 1.29 6.69 1.51 7.42 1.76<br />
39 3.78 0.75 4.51 0.94 5.24 1.15 5.60 1.26 5.96 1.37 6.69 1.61 7.42 1.88<br />
Note:PI of indoor units is not included in the table.<br />
282
20.4.2 U-5LA1E5<br />
Combination 130%<br />
Capacity index(kW) 18.20<br />
TC:Total Capacity (kW)、PI:Power Input (kW)<br />
Outdoor Indoor <strong>Air</strong> Temperature (°CDB)<br />
<strong>Air</strong> Temp. 14.0 16.0 18.0 19.0 20.0 22.0 24.0<br />
(°CWB) TC PI TC PI TC PI TC PI TC PI TC PI TC PI<br />
kW kW kW kW kW kW kW kW kW kW kW kW kW kW<br />
10 12.3 2.44 14.7 2.68 17.0 2.93 18.2 3.06 19.1 3.19 19.6 3.46 20.0 3.73<br />
12 12.3 2.48 14.7 2.72 17.0 2.98 18.2 3.11 18.9 3.24 19.3 3.52 19.8 3.79<br />
14 12.3 2.52 14.7 2.77 17.0 3.03 18.2 3.16 18.6 3.30 19.1 3.58 19.5 3.86<br />
16 12.3 2.58 14.7 2.84 17.0 3.10 18.2 3.24 18.4 3.38 18.8 3.66 19.3 4.00<br />
18 12.3 2.70 14.7 2.96 17.0 3.24 17.9 3.38 18.1 3.52 18.6 3.89 19.0 4.31<br />
20 12.3 2.71 14.7 2.97 17.0 3.27 17.7 3.45 17.9 3.64 18.3 4.05 18.8 4.50<br />
21 12.3 2.72 14.7 2.99 17.0 3.33 17.5 3.52 17.8 3.72 18.2 4.15 18.7 4.61<br />
23 12.3 2.74 14.7 3.08 17.0 3.45 17.3 3.66 17.5 3.87 18.0 4.33 18.4 4.77<br />
25 12.3 2.82 14.7 3.18 16.8 3.58 17.1 3.80 17.3 4.03 17.7 4.53 18.2 4.91<br />
27 12.3 2.88 14.7 3.27 16.6 3.71 16.8 3.94 17.0 4.19 17.5 4.72 17.9 5.03<br />
29 12.3 2.94 14.7 3.35 16.3 3.82 16.6 4.08 16.8 4.34 17.2 4.91 17.7 5.14<br />
31 12.3 3.00 14.7 3.44 16.1 3.94 16.3 4.22 16.5 4.50 17.0 5.11 17.4 5.24<br />
33 12.3 3.05 14.7 3.53 15.8 4.07 16.1 4.36 16.3 4.66 16.7 5.31 17.2 5.34<br />
35 12.3 3.11 14.7 3.62 15.6 4.20 15.8 4.51 16.0 4.84 16.5 5.41 16.9 5.44<br />
37 12.3 3.16 14.7 3.70 15.3 4.32 15.6 4.65 15.8 5.01 16.2 5.48 16.7 5.51<br />
39 12.3 3.19 14.7 3.77 15.1 4.43 15.3 4.79 15.5 5.17 16.0 5.54 16.4 5.57<br />
Combination 120%<br />
Capacity index(kW) 16.80<br />
TC:Total Capacity (kW)、PI:Power Input (kW)<br />
Outdoor Indoor <strong>Air</strong> Temperature (°CDB)<br />
<strong>Air</strong> Temp. 14.0 16.0 18.0 19.0 20.0 22.0 24.0<br />
(°CWB) TC PI TC PI TC PI TC PI TC PI TC PI TC PI<br />
kW kW kW kW kW kW kW kW kW kW kW kW kW kW<br />
10 11.3 2.15 13.5 2.39 15.7 2.64 16.8 2.77 17.9 2.90 19.3 3.17 19.7 3.44<br />
12 11.3 2.18 13.5 2.42 15.7 2.68 16.8 2.81 17.9 2.94 19.0 3.22 19.4 3.49<br />
14 11.3 2.22 13.5 2.47 15.7 2.73 16.8 2.86 17.9 3.00 18.8 3.28 19.2 3.56<br />
16 11.3 2.24 13.5 2.50 15.7 2.76 16.8 2.90 17.9 3.04 18.5 3.32 18.9 3.66<br />
18 11.3 2.37 13.5 2.63 15.7 2.91 16.8 3.05 17.9 3.19 18.3 3.56 18.7 3.98<br />
20 11.3 2.51 13.5 2.77 15.7 3.07 16.8 3.25 17.6 3.44 18.0 3.85 18.4 4.30<br />
21 11.3 2.55 13.5 2.82 15.7 3.16 16.8 3.35 17.5 3.55 17.9 3.98 18.3 4.44<br />
23 11.3 2.64 13.5 2.98 15.7 3.35 16.8 3.56 17.2 3.77 17.7 4.23 18.1 4.67<br />
25 11.3 2.80 13.5 3.16 15.7 3.56 16.8 3.78 17.0 4.01 17.4 4.51 17.8 4.89<br />
27 11.3 2.86 13.5 3.25 15.7 3.69 16.5 3.92 16.7 4.17 17.2 4.70 17.6 5.01<br />
29 11.3 2.92 13.5 3.33 15.7 3.80 16.3 4.06 16.5 4.32 16.9 4.89 17.3 5.12<br />
31 11.3 2.98 13.5 3.42 15.7 3.92 16.0 4.20 16.3 4.48 16.7 5.09 17.1 5.22<br />
33 11.3 3.03 13.5 3.51 15.6 4.05 15.8 4.34 16.0 4.64 16.4 5.29 16.8 5.32<br />
35 11.3 3.08 13.5 3.59 15.3 4.17 15.5 4.48 15.8 4.81 16.2 5.38 16.6 5.41<br />
37 11.3 3.13 13.5 3.67 15.1 4.29 15.3 4.62 15.5 4.98 15.9 5.45 16.3 5.48<br />
39 11.3 3.17 13.5 3.75 14.8 4.41 15.1 4.77 15.3 5.15 15.7 5.52 16.1 5.55<br />
283
Combination 110%<br />
Capacity index(kW) 15.40<br />
TC:Total Capacity (kW)、PI:Power Input (kW)<br />
Outdoor Indoor <strong>Air</strong> Temperature (°CDB)<br />
<strong>Air</strong> Temp. 14.0 16.0 18.0 19.0 20.0 22.0 24.0<br />
(°CWB) TC PI TC PI TC PI TC PI TC PI TC PI TC PI<br />
kW kW kW kW kW kW kW kW kW kW kW kW kW kW<br />
10 10.4 1.93 12.4 2.17 14.4 2.42 15.4 2.55 16.4 2.68 18.4 2.95 19.3 3.22<br />
12 10.4 1.96 12.4 2.20 14.4 2.46 15.4 2.59 16.4 2.72 18.4 3.00 19.1 3.27<br />
14 10.4 1.99 12.4 2.24 14.4 2.50 15.4 2.63 16.4 2.77 18.4 3.05 18.8 3.33<br />
16 10.4 2.01 12.4 2.27 14.4 2.53 15.4 2.67 16.4 2.81 18.2 3.09 18.6 3.43<br />
18 10.4 2.05 12.4 2.31 14.4 2.59 15.4 2.73 16.4 2.87 18.0 3.24 18.3 3.66<br />
20 10.4 2.16 12.4 2.42 14.4 2.72 15.4 2.90 16.4 3.09 17.7 3.50 18.1 3.95<br />
21 10.4 2.19 12.4 2.46 14.4 2.80 15.4 2.99 16.4 3.19 17.6 3.62 18.0 4.08<br />
23 10.4 2.25 12.4 2.59 14.4 2.96 15.4 3.17 16.4 3.38 17.3 3.84 17.7 4.28<br />
25 10.4 2.39 12.4 2.75 14.4 3.15 15.4 3.37 16.4 3.60 17.1 4.10 17.5 4.48<br />
27 10.4 2.51 12.4 2.90 14.4 3.34 15.4 3.57 16.4 3.82 16.8 4.35 17.2 4.66<br />
29 10.4 2.65 12.4 3.06 14.4 3.53 15.4 3.79 16.2 4.05 16.6 4.62 17.0 4.85<br />
31 10.4 2.80 12.4 3.24 14.4 3.74 15.4 4.02 16.0 4.30 16.3 4.91 16.7 5.04<br />
33 10.4 2.95 12.4 3.43 14.4 3.97 15.4 4.26 15.7 4.56 16.1 5.21 16.5 5.24<br />
35 10.4 3.06 12.4 3.57 14.4 4.15 15.3 4.46 15.5 4.79 15.8 5.36 16.2 5.39<br />
37 10.4 3.11 12.4 3.65 14.4 4.27 15.0 4.60 15.2 4.96 15.6 5.43 16.0 5.46<br />
39 10.4 3.14 12.4 3.72 14.4 4.38 14.8 4.74 15.0 5.12 15.4 5.49 15.7 5.52<br />
Combination 100%<br />
Capacity index(kW) 14.00<br />
TC:Total Capacity (kW)、PI:Power Input (kW)<br />
Outdoor Indoor <strong>Air</strong> Temperature (°CDB)<br />
<strong>Air</strong> Temp. 14.0 16.0 18.0 19.0 20.0 22.0 24.0<br />
(°CWB) TC PI TC PI TC PI TC PI TC PI TC PI TC PI<br />
kW kW kW kW kW kW kW kW kW kW kW kW kW kW<br />
10 9.45 1.83 11.3 2.07 13.1 2.32 14.0 2.45 14.9 2.58 16.7 2.85 18.6 3.12<br />
12 9.45 1.85 11.3 2.09 13.1 2.35 14.0 2.48 14.9 2.61 16.7 2.89 18.6 3.16<br />
14 9.45 1.87 11.3 2.12 13.1 2.38 14.0 2.51 14.9 2.65 16.7 2.93 18.5 3.21<br />
16 9.45 1.89 11.3 2.15 13.1 2.41 14.0 2.55 14.9 2.69 16.7 2.97 18.2 3.31<br />
18 9.45 1.91 11.3 2.17 13.1 2.45 14.0 2.59 14.9 2.73 16.7 3.10 18.0 3.52<br />
20 9.45 1.94 11.3 2.20 13.1 2.50 14.0 2.68 14.9 2.87 16.7 3.28 17.7 3.73<br />
21 9.45 1.95 11.3 2.22 13.1 2.56 14.0 2.75 14.9 2.95 16.7 3.38 17.6 3.84<br />
23 9.45 1.98 11.3 2.32 13.1 2.69 14.0 2.90 14.9 3.11 16.7 3.57 17.4 4.01<br />
25 9.45 2.07 11.3 2.43 13.1 2.83 14.0 3.05 14.9 3.28 16.7 3.78 17.1 4.16<br />
27 9.45 2.15 11.3 2.54 13.1 2.98 14.0 3.21 14.9 3.46 16.5 3.99 16.9 4.30<br />
29 9.45 2.25 11.3 2.66 13.1 3.13 14.0 3.39 14.9 3.65 16.3 4.22 16.6 4.45<br />
31 9.45 2.35 11.3 2.79 13.1 3.29 14.0 3.57 14.9 3.85 16.0 4.46 16.4 4.59<br />
33 9.45 2.45 11.3 2.93 13.1 3.47 14.0 3.76 14.9 4.06 15.8 4.71 16.1 4.74<br />
35 9.45 2.56 11.3 3.07 13.1 3.65 14.0 3.96 14.9 4.29 15.5 4.86 15.9 4.89<br />
37 9.45 2.68 11.3 3.22 13.1 3.84 14.0 4.17 14.9 4.53 15.3 5.00 15.6 5.03<br />
39 9.45 2.80 11.3 3.38 13.1 4.04 14.0 4.40 14.7 4.78 15.0 5.15 15.4 5.18<br />
284
Combination 90%<br />
Capacity index(kW) 12.60<br />
TC:Total Capacity (kW)、PI:Power Input (kW)<br />
Outdoor Indoor <strong>Air</strong> Temperature (°CDB)<br />
<strong>Air</strong> Temp. 14.0 16.0 18.0 19.0 20.0 22.0 24.0<br />
(°CWB) TC PI TC PI TC PI TC PI TC PI TC PI TC PI<br />
kW kW kW kW kW kW kW kW kW kW kW kW kW kW<br />
10 8.50 1.63 10.1 1.96 11.8 2.05 12.6 2.11 13.4 2.16 15.1 2.27 16.7 2.38<br />
12 8.50 1.69 10.1 1.99 11.8 2.09 12.6 2.14 13.4 2.19 15.1 2.30 16.7 2.42<br />
14 8.50 1.73 10.1 2.03 11.8 2.13 12.6 2.18 13.4 2.24 15.1 2.35 16.7 2.47<br />
16 8.50 1.75 10.1 2.05 11.8 2.15 12.6 2.21 13.4 2.26 15.1 2.38 16.7 2.50<br />
18 8.50 1.78 10.1 2.08 11.8 2.18 12.6 2.24 13.4 2.30 15.1 2.42 16.7 2.54<br />
20 8.50 1.81 10.1 2.11 11.8 2.22 12.6 2.28 13.4 2.33 15.1 2.46 16.7 2.58<br />
21 8.50 1.84 10.1 2.14 11.8 2.29 12.6 2.34 13.4 2.40 15.1 2.53 16.7 2.65<br />
23 8.50 1.90 10.1 2.21 11.8 2.42 12.6 2.48 13.4 2.54 15.1 2.67 16.7 2.80<br />
25 8.50 2.00 10.1 2.36 11.8 2.56 12.6 2.62 13.4 2.69 15.1 2.84 16.7 3.00<br />
27 8.50 2.09 10.1 2.47 11.8 2.69 12.6 2.77 13.4 2.84 15.1 3.01 16.5 3.19<br />
29 8.50 2.16 10.1 2.54 11.8 2.84 12.6 2.92 13.4 3.00 15.1 3.18 16.3 3.36<br />
31 8.50 2.29 10.1 2.68 11.8 3.01 12.6 3.09 13.4 3.18 15.1 3.37 16.0 3.57<br />
33 8.50 2.36 10.1 2.86 11.8 3.17 12.6 3.26 13.4 3.36 15.1 3.55 15.8 3.77<br />
35 8.50 2.48 10.1 2.98 11.8 3.36 12.6 3.45 13.4 3.55 15.1 3.77 15.5 3.99<br />
37 8.50 2.58 10.1 3.14 11.8 3.54 12.6 3.64 13.4 3.75 15.0 3.97 15.3 4.22<br />
39 8.50 2.73 10.1 3.23 11.8 3.74 12.6 3.85 13.4 3.96 14.7 4.20 15.0 4.47<br />
Combination 80%<br />
Capacity index(kW) 11.20<br />
TC:Total Capacity (kW)、PI:Power Input (kW)<br />
Outdoor Indoor <strong>Air</strong> Temperature (°CDB)<br />
<strong>Air</strong> Temp. 14.0 16.0 18.0 19.0 20.0 22.0 24.0<br />
(°CWB) TC PI TC PI TC PI TC PI TC PI TC PI TC PI<br />
kW kW kW kW kW kW kW kW kW kW kW kW kW kW<br />
10 7.56 1.43 9.02 1.76 10.5 1.85 11.2 1.91 11.9 1.96 13.4 2.07 14.8 2.18<br />
12 7.56 1.48 9.02 1.78 10.5 1.88 11.2 1.93 11.9 1.98 13.4 2.09 14.8 2.21<br />
14 7.56 1.51 9.02 1.81 10.5 1.91 11.2 1.96 11.9 2.02 13.4 2.13 14.8 2.25<br />
16 7.56 1.53 9.02 1.83 10.5 1.93 11.2 1.99 11.9 2.04 13.4 2.16 14.8 2.28<br />
18 7.56 1.56 9.02 1.86 10.5 1.96 11.2 2.02 11.9 2.08 13.4 2.20 14.8 2.32<br />
20 7.56 1.58 9.02 1.88 10.5 1.99 11.2 2.05 11.9 2.10 13.4 2.23 14.8 2.35<br />
21 7.56 1.60 9.02 1.90 10.5 2.02 11.2 2.07 11.9 2.13 13.4 2.26 14.8 2.38<br />
23 7.56 1.67 9.02 2.00 10.5 2.11 11.2 2.17 11.9 2.23 13.4 2.36 14.8 2.49<br />
25 7.56 1.80 9.02 2.11 10.5 2.23 11.2 2.29 11.9 2.36 13.4 2.51 14.8 2.67<br />
27 7.56 1.87 9.02 2.20 10.5 2.33 11.2 2.41 11.9 2.48 13.4 2.65 14.8 2.83<br />
29 7.56 1.98 9.02 2.31 10.5 2.46 11.2 2.54 11.9 2.62 13.4 2.80 14.8 2.98<br />
31 7.56 2.10 9.02 2.44 10.5 2.60 11.2 2.68 11.9 2.77 13.4 2.96 14.8 3.16<br />
33 7.56 2.22 9.02 2.57 10.5 2.74 11.2 2.83 11.9 2.93 13.4 3.12 14.8 3.34<br />
35 7.56 2.34 9.02 2.71 10.5 2.89 11.2 2.98 11.9 3.08 13.4 3.30 14.8 3.52<br />
37 7.56 2.47 9.02 2.84 10.5 3.04 11.2 3.14 11.9 3.25 13.4 3.47 14.8 3.72<br />
39 7.56 2.60 9.02 2.99 10.5 3.20 11.2 3.31 11.9 3.42 13.4 3.66 14.7 3.93<br />
285
Combination 70%<br />
Capacity index(kW) 9.80<br />
TC:Total Capacity (kW)、PI:Power Input (kW)<br />
Outdoor Indoor <strong>Air</strong> Temperature (°CDB)<br />
<strong>Air</strong> Temp. 14.0 16.0 18.0 19.0 20.0 22.0 24.0<br />
(°CWB) TC PI TC PI TC PI TC PI TC PI TC PI TC PI<br />
kW kW kW kW kW kW kW kW kW kW kW kW kW kW<br />
10 6.61 1.23 7.89 1.56 9.16 1.65 9.80 1.71 10.4 1.76 11.7 1.87 13.0 1.98<br />
12 6.61 1.28 7.89 1.58 9.16 1.68 9.80 1.73 10.4 1.78 11.7 1.89 13.0 2.01<br />
14 6.61 1.30 7.89 1.60 9.16 1.70 9.80 1.75 10.4 1.81 11.7 1.92 13.0 2.04<br />
16 6.61 1.32 7.89 1.62 9.16 1.72 9.80 1.78 10.4 1.83 11.7 1.95 13.0 2.07<br />
18 6.61 1.34 7.89 1.64 9.16 1.74 9.80 1.80 10.4 1.86 11.7 1.98 13.0 2.10<br />
20 6.61 1.36 7.89 1.66 9.16 1.77 9.80 1.83 10.4 1.88 11.7 2.01 13.0 2.13<br />
21 6.61 1.37 7.89 1.67 9.16 1.79 9.80 1.84 10.4 1.90 11.7 2.03 13.0 2.15<br />
23 6.61 1.41 7.89 1.72 9.16 1.83 9.80 1.89 10.4 1.95 11.7 2.08 13.0 2.21<br />
25 6.61 1.50 7.89 1.81 9.16 1.93 9.80 1.99 10.4 2.06 11.7 2.21 13.0 2.37<br />
27 6.61 1.55 7.89 1.88 9.16 2.01 9.80 2.09 10.4 2.16 11.7 2.33 13.0 2.51<br />
29 6.61 1.63 7.89 1.96 9.16 2.11 9.80 2.19 10.4 2.27 11.7 2.45 13.0 2.63<br />
31 6.61 1.73 7.89 2.07 9.16 2.23 9.80 2.31 10.4 2.40 11.7 2.59 13.0 2.79<br />
33 6.61 1.81 7.89 2.16 9.16 2.33 9.80 2.42 10.4 2.52 11.7 2.71 13.0 2.93<br />
35 6.61 1.91 7.89 2.28 9.16 2.46 9.80 2.55 10.4 2.65 11.7 2.87 13.0 3.09<br />
37 6.61 2.01 7.89 2.38 9.16 2.58 9.80 2.68 10.4 2.79 11.7 3.01 13.0 3.26<br />
39 6.61 2.11 7.89 2.50 9.16 2.71 9.80 2.82 10.4 2.93 11.7 3.17 13.0 3.44<br />
Combination 60%<br />
Capacity index(kW) 8.40<br />
TC:Total Capacity (kW)、PI:Power Input (kW)<br />
Outdoor Indoor <strong>Air</strong> Temperature (°CDB)<br />
<strong>Air</strong> Temp. 14.0 16.0 18.0 19.0 20.0 22.0 24.0<br />
(°CWB) TC PI TC PI TC PI TC PI TC PI TC PI TC PI<br />
kW kW kW kW kW kW kW kW kW kW kW kW kW kW<br />
10 5.67 1.03 6.76 1.37 7.85 1.46 8.40 1.52 8.95 1.57 10.0 1.68 11.1 1.79<br />
12 5.67 1.05 6.76 1.39 7.85 1.49 8.40 1.54 8.95 1.59 10.0 1.70 11.1 1.82<br />
14 5.67 1.07 6.76 1.41 7.85 1.51 8.40 1.56 8.95 1.62 10.0 1.73 11.1 1.85<br />
16 5.67 1.08 6.76 1.42 7.85 1.52 8.40 1.58 8.95 1.63 10.0 1.75 11.1 1.87<br />
18 5.67 1.10 6.76 1.44 7.85 1.54 8.40 1.60 8.95 1.66 10.0 1.78 11.1 1.90<br />
20 5.67 1.11 6.76 1.45 7.85 1.56 8.40 1.62 8.95 1.67 10.0 1.80 11.1 1.92<br />
21 5.67 1.12 6.76 1.46 7.85 1.58 8.40 1.63 8.95 1.69 10.0 1.82 11.1 1.94<br />
23 5.67 1.14 6.76 1.48 7.85 1.59 8.40 1.65 8.95 1.71 10.0 1.84 11.1 1.97<br />
25 5.67 1.19 6.76 1.53 7.85 1.65 8.40 1.71 8.95 1.78 10.0 1.93 11.1 2.09<br />
27 5.67 1.24 6.76 1.58 7.85 1.71 8.40 1.79 8.95 1.86 10.0 2.03 11.1 2.21<br />
29 5.67 1.31 6.76 1.65 7.85 1.80 8.40 1.88 8.95 1.96 10.0 2.14 11.1 2.32<br />
31 5.67 1.39 6.76 1.73 7.85 1.89 8.40 1.97 8.95 2.06 10.0 2.25 11.1 2.45<br />
33 5.67 1.45 6.76 1.80 7.85 1.97 8.40 2.06 8.95 2.16 10.0 2.35 11.1 2.57<br />
35 5.67 1.54 6.76 1.89 7.85 2.07 8.40 2.16 8.95 2.26 10.0 2.48 11.1 2.70<br />
37 5.67 1.62 6.76 1.97 7.85 2.17 8.40 2.27 8.95 2.38 10.0 2.60 11.1 2.85<br />
39 5.67 1.71 6.76 2.06 7.85 2.27 8.40 2.38 8.95 2.49 10.0 2.73 11.1 3.00<br />
286
Combination 50%<br />
Capacity index(kW) 7.00<br />
TC:Total Capacity (kW)、PI:Power Input (kW)<br />
Outdoor Indoor <strong>Air</strong> Temperature (°CDB)<br />
<strong>Air</strong> Temp. 14.0 16.0 18.0 19.0 20.0 22.0 24.0<br />
(°CWB) TC PI TC PI TC PI TC PI TC PI TC PI TC PI<br />
kW kW kW kW kW kW kW kW kW kW kW kW kW kW<br />
10 4.72 0.85 5.63 0.94 6.54 1.03 7.00 1.09 7.46 1.14 8.37 1.25 9.28 1.36<br />
12 4.72 0.85 5.63 0.95 6.54 1.05 7.00 1.10 7.46 1.15 8.37 1.26 9.28 1.38<br />
14 4.72 0.87 5.63 0.97 6.54 1.07 7.00 1.12 7.46 1.18 8.37 1.29 9.28 1.41<br />
16 4.72 0.88 5.63 0.98 6.54 1.08 7.00 1.14 7.46 1.19 8.37 1.31 9.28 1.43<br />
18 4.72 0.89 5.63 0.99 6.54 1.09 7.00 1.15 7.46 1.21 8.37 1.33 9.28 1.45<br />
20 4.72 0.90 5.63 1.00 6.54 1.11 7.00 1.17 7.46 1.22 8.37 1.35 9.28 1.47<br />
21 4.72 0.90 5.63 1.00 6.54 1.12 7.00 1.17 7.46 1.23 8.37 1.36 9.28 1.48<br />
23 4.72 0.91 5.63 1.02 6.54 1.13 7.00 1.19 7.46 1.25 8.37 1.38 9.28 1.51<br />
25 4.72 0.92 5.63 1.03 6.54 1.15 7.00 1.21 7.46 1.28 8.37 1.43 9.28 1.59<br />
27 4.72 0.93 5.63 1.06 6.54 1.19 7.00 1.27 7.46 1.34 8.37 1.51 9.28 1.69<br />
29 4.72 0.97 5.63 1.10 6.54 1.25 7.00 1.33 7.46 1.41 8.37 1.59 9.28 1.77<br />
31 4.72 1.01 5.63 1.15 6.54 1.31 7.00 1.39 7.46 1.48 8.37 1.67 9.28 1.87<br />
33 4.72 1.05 5.63 1.20 6.54 1.37 7.00 1.46 7.46 1.56 8.37 1.75 9.28 1.97<br />
35 4.72 1.09 5.63 1.26 6.54 1.44 7.00 1.53 7.46 1.63 8.37 1.85 9.28 2.07<br />
37 4.72 1.14 5.63 1.31 6.54 1.51 7.00 1.61 7.46 1.72 8.37 1.94 9.28 2.19<br />
39 4.72 1.18 5.63 1.37 6.54 1.58 7.00 1.69 7.46 1.80 8.37 2.04 9.28 2.31<br />
Note:PI of indoor units is not included in the table.<br />
287
20.4.3 U-6LA1E5<br />
Combination 130%<br />
Capacity index(kW) 20.15<br />
TC:Total Capacity (kW)、PI:Power Input (kW)<br />
Outdoor Indoor <strong>Air</strong> Temperature (°CDB)<br />
<strong>Air</strong> Temp. 14.0 16.0 18.0 19.0 20.0 22.0 24.0<br />
(°CWB) TC PI TC PI TC PI TC PI TC PI TC PI TC PI<br />
kW kW kW kW kW kW kW kW kW kW kW kW kW kW<br />
10 13.6 3.02 16.2 3.26 18.8 3.51 20.2 3.64 20.4 3.77 20.9 4.04 21.4 4.31<br />
12 13.6 3.04 16.2 3.28 18.8 3.54 19.9 3.67 20.1 3.80 20.6 4.08 21.1 4.35<br />
14 13.6 3.06 16.2 3.31 18.8 3.57 19.6 3.70 19.9 3.84 20.4 4.12 20.9 4.40<br />
16 13.6 3.08 16.2 3.34 18.8 3.60 19.4 3.74 19.6 3.88 20.1 4.16 20.6 4.50<br />
18 13.6 3.10 16.2 3.36 18.8 3.64 19.1 3.78 19.3 3.92 19.8 4.29 20.3 4.71<br />
20 13.6 3.13 16.2 3.39 18.6 3.69 18.8 3.87 19.1 4.06 19.6 4.47 20.1 4.92<br />
21 13.6 3.14 16.2 3.41 18.5 3.75 18.7 3.94 19.0 4.14 19.4 4.57 19.9 5.03<br />
23 13.6 3.17 16.2 3.51 18.2 3.88 18.4 4.09 18.7 4.30 19.2 4.76 19.7 5.20<br />
25 13.6 3.26 16.2 3.62 17.9 4.02 18.2 4.24 18.4 4.47 18.9 4.97 19.4 5.35<br />
27 13.6 3.34 16.2 3.73 17.7 4.17 17.9 4.40 18.2 4.65 18.7 5.18 19.1 5.49<br />
29 13.6 3.44 16.2 3.85 17.4 4.32 17.7 4.58 17.9 4.84 18.4 5.41 18.9 5.64<br />
31 13.6 3.54 16.2 3.98 17.2 4.48 17.4 4.76 17.6 5.04 18.1 5.65 18.6 5.78<br />
33 13.6 3.64 16.2 4.12 16.9 4.66 17.1 4.95 17.4 5.25 17.9 5.90 18.4 5.93<br />
35 13.6 3.75 16.1 4.26 16.6 4.84 16.9 5.15 17.1 5.48 17.6 6.05 18.1 6.08<br />
37 13.6 3.83 15.9 4.37 16.4 4.99 16.6 5.32 16.9 5.63 17.3 6.10 17.8 6.13<br />
39 13.6 3.90 15.6 4.48 16.1 5.14 16.4 5.50 16.6 5.78 17.1 6.15 17.6 6.18<br />
Combination 120%<br />
Capacity index(kW) 18.60<br />
TC:Total Capacity (kW)、PI:Power Input (kW)<br />
Outdoor Indoor <strong>Air</strong> Temperature (°CDB)<br />
<strong>Air</strong> Temp. 14.0 16.0 18.0 19.0 20.0 22.0 24.0<br />
(°CWB) TC PI TC PI TC PI TC PI TC PI TC PI TC PI<br />
kW kW kW kW kW kW kW kW kW kW kW kW kW kW<br />
10 12.6 2.99 15.0 3.23 17.4 3.48 18.6 3.61 19.8 3.74 20.5 4.01 21.0 4.28<br />
12 12.6 3.01 15.0 3.25 17.4 3.51 18.6 3.64 19.8 3.77 20.3 4.05 20.7 4.32<br />
14 12.6 3.03 15.0 3.28 17.4 3.54 18.6 3.67 19.6 3.81 20.0 4.09 20.5 4.37<br />
16 12.6 3.05 15.0 3.31 17.4 3.57 18.6 3.71 19.3 3.85 19.8 4.13 20.2 4.47<br />
18 12.6 3.07 15.0 3.33 17.4 3.61 18.6 3.75 19.0 3.89 19.5 4.26 19.9 4.68<br />
20 12.6 3.10 15.0 3.36 17.4 3.66 18.6 3.84 18.8 4.03 19.2 4.44 19.7 4.89<br />
21 12.6 3.11 15.0 3.38 17.4 3.72 18.4 3.91 18.6 4.11 19.1 4.54 19.6 5.00<br />
23 12.6 3.14 15.0 3.48 17.4 3.85 18.2 4.06 18.4 4.27 18.8 4.73 19.3 5.17<br />
25 12.6 3.23 15.0 3.59 17.4 3.99 17.9 4.21 18.1 4.44 18.6 4.94 19.0 5.32<br />
27 12.6 3.31 15.0 3.70 17.4 4.14 17.6 4.37 17.9 4.62 18.3 5.15 18.8 5.46<br />
29 12.6 3.41 15.0 3.82 17.1 4.29 17.4 4.55 17.6 4.81 18.1 5.38 18.5 5.61<br />
31 12.6 3.51 15.0 3.95 16.9 4.45 17.1 4.73 17.3 5.01 17.8 5.62 18.2 5.75<br />
33 12.6 3.61 15.0 4.09 16.6 4.63 16.8 4.92 17.1 5.22 17.5 5.87 18.0 5.90<br />
35 12.6 3.72 15.0 4.23 16.4 4.81 16.6 5.12 16.8 5.45 17.3 6.02 17.7 6.05<br />
37 12.6 3.73 15.0 4.27 16.1 4.89 16.3 5.22 16.5 5.58 17.0 6.05 17.5 6.08<br />
39 12.6 3.74 15.0 4.32 15.8 4.98 16.1 5.34 16.3 5.72 16.7 6.09 17.2 6.12<br />
288
Combination 110%<br />
Capacity index(kW) 17.05<br />
TC:Total Capacity (kW)、PI:Power Input (kW)<br />
Outdoor Indoor <strong>Air</strong> Temperature (°CDB)<br />
<strong>Air</strong> Temp. 14.0 16.0 18.0 19.0 20.0 22.0 24.0<br />
(°CWB) TC PI TC PI TC PI TC PI TC PI TC PI TC PI<br />
kW kW kW kW kW kW kW kW kW kW kW kW kW kW<br />
10 11.5 2.96 13.7 3.20 15.9 3.45 17.1 3.58 18.2 3.71 20.2 3.98 20.6 4.25<br />
12 11.5 2.98 13.7 3.22 15.9 3.48 17.1 3.61 18.2 3.74 19.9 4.02 20.3 4.29<br />
14 11.5 3.00 13.7 3.25 15.9 3.51 17.1 3.64 18.2 3.78 19.7 4.06 20.1 4.34<br />
16 11.5 3.02 13.7 3.28 15.9 3.54 17.1 3.68 18.2 3.82 19.4 4.10 19.8 4.44<br />
18 11.5 3.04 13.7 3.30 15.9 3.58 17.1 3.72 18.2 3.86 19.1 4.23 19.6 4.65<br />
20 11.5 3.07 13.7 3.33 15.9 3.63 17.1 3.81 18.2 4.00 18.9 4.41 19.3 4.86<br />
21 11.5 3.08 13.7 3.35 15.9 3.69 17.1 3.88 18.2 4.08 18.8 4.51 19.2 4.97<br />
23 11.5 3.11 13.7 3.45 15.9 3.82 17.1 4.03 18.1 4.24 18.5 4.70 18.9 5.14<br />
25 11.5 3.20 13.7 3.56 15.9 3.96 17.1 4.18 17.8 4.41 18.2 4.91 18.6 5.29<br />
27 11.5 3.28 13.7 3.67 15.9 4.11 17.1 4.34 17.6 4.59 18.0 5.12 18.4 5.43<br />
29 11.5 3.38 13.7 3.79 15.9 4.26 17.1 4.52 17.3 4.78 17.7 5.35 18.1 5.58<br />
31 11.5 3.48 13.7 3.92 15.9 4.42 16.8 4.70 17.0 4.98 17.4 5.59 17.9 5.72<br />
33 11.5 3.58 13.7 4.06 15.9 4.60 16.6 4.89 16.8 5.19 17.2 5.84 17.6 5.87<br />
35 11.5 3.69 13.7 4.20 15.9 4.78 16.3 5.09 16.5 5.42 16.9 5.99 17.3 6.02<br />
37 11.5 3.70 13.7 4.24 15.8 4.86 16.0 5.19 16.2 5.55 16.7 6.02 17.1 6.05<br />
39 11.5 3.69 13.7 4.27 15.6 4.93 15.8 5.29 16.0 5.67 16.4 6.04 16.8 6.07<br />
Combination 100%<br />
Capacity index(kW) 15.50<br />
TC:Total Capacity (kW)、PI:Power Input (kW)<br />
Outdoor Indoor <strong>Air</strong> Temperature (°CDB)<br />
<strong>Air</strong> Temp. 14.0 16.0 18.0 19.0 20.0 22.0 24.0<br />
(°CWB) TC PI TC PI TC PI TC PI TC PI TC PI TC PI<br />
kW kW kW kW kW kW kW kW kW kW kW kW kW kW<br />
10 10.5 2.66 12.5 2.90 14.5 3.15 15.5 3.28 16.5 3.41 18.5 3.68 20.2 3.95<br />
12 10.5 2.68 12.5 2.92 14.5 3.18 15.5 3.31 16.5 3.44 18.5 3.72 20.0 3.99<br />
14 10.5 2.70 12.5 2.95 14.5 3.21 15.5 3.34 16.5 3.48 18.5 3.76 19.7 4.04<br />
16 10.5 2.72 12.5 2.98 14.5 3.24 15.5 3.38 16.5 3.52 18.5 3.80 19.4 4.14<br />
18 10.5 2.74 12.5 3.00 14.5 3.28 15.5 3.42 16.5 3.56 18.5 3.93 19.2 4.35<br />
20 10.5 2.77 12.5 3.03 14.5 3.33 15.5 3.51 16.5 3.70 18.5 4.11 18.9 4.56<br />
21 10.5 2.78 12.5 3.05 14.5 3.39 15.5 3.58 16.5 3.78 18.4 4.21 18.8 4.67<br />
23 10.5 2.81 12.5 3.15 14.5 3.52 15.5 3.73 16.5 3.94 18.1 4.40 18.5 4.84<br />
25 10.5 2.90 12.5 3.26 14.5 3.66 15.5 3.88 16.5 4.11 17.9 4.61 18.3 4.99<br />
27 10.5 2.98 12.5 3.37 14.5 3.81 15.5 4.04 16.5 4.29 17.6 4.82 18.0 5.13<br />
29 10.5 3.08 12.5 3.49 14.5 3.96 15.5 4.22 16.5 4.48 17.4 5.05 17.7 5.28<br />
31 10.5 3.18 12.5 3.62 14.5 4.12 15.5 4.40 16.5 4.68 17.1 5.29 17.5 5.42<br />
33 10.5 3.28 12.5 3.76 14.5 4.30 15.5 4.59 16.5 4.89 16.8 5.54 17.2 5.57<br />
35 10.5 3.39 12.5 3.90 14.5 4.48 15.5 4.79 16.2 5.12 16.6 5.69 16.9 5.72<br />
37 10.5 3.51 12.5 4.05 14.5 4.67 15.5 5.00 15.9 5.36 16.3 5.83 16.7 5.86<br />
39 10.5 3.63 12.5 4.21 14.5 4.87 15.5 5.23 15.7 5.61 16.0 5.98 16.4 6.01<br />
289
Combination 90%<br />
Capacity index(kW) 13.95<br />
TC:Total Capacity (kW)、PI:Power Input (kW)<br />
Outdoor Indoor <strong>Air</strong> Temperature (°CDB)<br />
<strong>Air</strong> Temp. 14.0 16.0 18.0 19.0 20.0 22.0 24.0<br />
(°CWB) TC PI TC PI TC PI TC PI TC PI TC PI TC PI<br />
kW kW kW kW kW kW kW kW kW kW kW kW kW kW<br />
10 9.41 2.36 11.2 2.46 13.0 2.55 14.0 2.61 14.9 2.74 16.7 3.01 18.5 3.28<br />
12 9.41 2.40 11.2 2.50 13.0 2.60 14.0 2.65 14.9 2.78 16.7 3.06 18.5 3.33<br />
14 9.41 2.44 11.2 2.54 13.0 2.64 14.0 2.69 14.9 2.83 16.7 3.11 18.5 3.39<br />
16 9.41 2.47 11.2 2.57 13.0 2.67 14.0 2.73 14.9 2.87 16.7 3.15 18.5 3.49<br />
18 9.41 2.52 11.2 2.62 13.0 2.72 14.0 2.78 14.9 2.92 16.7 3.29 18.5 3.71<br />
20 9.41 2.55 11.2 2.65 13.0 2.76 14.0 2.82 14.9 3.01 16.7 3.42 18.5 3.87<br />
21 9.41 2.63 11.2 2.73 13.0 2.85 14.0 2.90 14.9 3.10 16.7 3.53 18.4 3.99<br />
23 9.41 2.70 11.2 2.91 13.0 3.02 14.0 3.08 14.9 3.29 16.7 3.75 18.1 4.19<br />
25 9.41 2.77 11.2 3.08 13.0 3.20 14.0 3.26 14.9 3.49 16.7 3.99 17.9 4.37<br />
27 9.41 2.91 11.2 3.24 13.0 3.37 14.0 3.45 14.9 3.70 16.7 4.23 17.6 4.54<br />
29 9.41 3.02 11.2 3.42 13.0 3.57 14.0 3.65 14.9 3.91 16.7 4.48 17.4 4.71<br />
31 9.41 3.09 11.2 3.53 13.0 3.79 14.0 3.87 14.9 4.15 16.7 4.76 17.1 4.89<br />
33 9.41 3.18 11.2 3.63 13.0 3.90 14.0 3.99 14.9 4.29 16.5 4.94 16.8 4.97<br />
35 9.41 3.29 11.2 3.76 13.0 4.04 14.0 4.13 14.9 4.46 16.2 5.03 16.6 5.06<br />
37 9.41 3.41 11.2 3.98 13.0 4.28 14.0 4.38 14.9 4.74 16.0 5.21 16.3 5.24<br />
39 9.41 3.54 11.2 4.13 13.0 4.54 14.0 4.65 14.9 5.03 15.7 5.40 16.0 5.43<br />
Combination 80%<br />
Capacity index(kW) 12.40<br />
TC:Total Capacity (kW)、PI:Power Input (kW)<br />
Outdoor Indoor <strong>Air</strong> Temperature (°CDB)<br />
<strong>Air</strong> Temp. 14.0 16.0 18.0 19.0 20.0 22.0 24.0<br />
(°CWB) TC PI TC PI TC PI TC PI TC PI TC PI TC PI<br />
kW kW kW kW kW kW kW kW kW kW kW kW kW kW<br />
10 8.37 2.06 10.0 2.15 11.6 2.24 12.4 2.30 13.2 2.43 14.8 2.70 16.4 2.97<br />
12 8.37 2.08 10.0 2.18 11.6 2.28 12.4 2.33 13.2 2.46 14.8 2.74 16.4 3.01<br />
14 8.37 2.12 10.0 2.22 11.6 2.32 12.4 2.37 13.2 2.51 14.8 2.79 16.4 3.07<br />
16 8.37 2.15 10.0 2.25 11.6 2.35 12.4 2.41 13.2 2.55 14.8 2.83 16.4 3.17<br />
18 8.37 2.19 10.0 2.29 11.6 2.39 12.4 2.45 13.2 2.59 14.8 2.96 16.4 3.38<br />
20 8.37 2.21 10.0 2.31 11.6 2.42 12.4 2.48 13.2 2.67 14.8 3.08 16.4 3.53<br />
21 8.37 2.24 10.0 2.34 11.6 2.46 12.4 2.51 13.2 2.71 14.8 3.14 16.4 3.60<br />
23 8.37 2.36 10.0 2.47 11.6 2.58 12.4 2.64 13.2 2.85 14.8 3.31 16.4 3.75<br />
25 8.37 2.50 10.0 2.61 11.6 2.73 12.4 2.79 13.2 3.02 14.8 3.52 16.4 3.90<br />
27 8.37 2.61 10.0 2.74 11.6 2.87 12.4 2.95 13.2 3.20 14.8 3.73 16.4 4.04<br />
29 8.37 2.76 10.0 2.89 11.6 3.04 12.4 3.12 13.2 3.38 14.8 3.95 16.4 4.18<br />
31 8.37 2.92 10.0 3.06 11.6 3.22 12.4 3.30 13.2 3.58 14.8 4.19 16.4 4.32<br />
33 8.37 3.02 10.0 3.17 11.6 3.34 12.4 3.43 13.2 3.73 14.8 4.38 16.4 4.41<br />
35 8.37 3.08 10.0 3.25 11.6 3.43 12.4 3.52 13.2 3.85 14.8 4.42 16.2 4.45<br />
37 8.37 3.26 10.0 3.43 11.6 3.63 12.4 3.73 13.2 4.09 14.8 4.56 15.9 4.59<br />
39 8.37 3.44 10.0 3.63 11.6 3.84 12.4 3.95 13.2 4.33 14.8 4.70 15.7 4.73<br />
290
Combination 70%<br />
Capacity index(kW) 10.85<br />
TC:Total Capacity (kW)、PI:Power Input (kW)<br />
Outdoor Indoor <strong>Air</strong> Temperature (°CDB)<br />
<strong>Air</strong> Temp. 14.0 16.0 18.0 19.0 20.0 22.0 24.0<br />
(°CWB) TC PI TC PI TC PI TC PI TC PI TC PI TC PI<br />
kW kW kW kW kW kW kW kW kW kW kW kW kW kW<br />
10 7.32 1.76 8.73 1.85 10.1 1.94 10.9 2.00 11.6 2.13 13.0 2.40 14.4 2.67<br />
12 7.32 1.78 8.73 1.88 10.1 1.98 10.9 2.03 11.6 2.16 13.0 2.44 14.4 2.71<br />
14 7.32 1.81 8.73 1.91 10.1 2.01 10.9 2.06 11.6 2.20 13.0 2.48 14.4 2.76<br />
16 7.32 1.83 8.73 1.93 10.1 2.03 10.9 2.09 11.6 2.23 13.0 2.51 14.4 2.85<br />
18 7.32 1.86 8.73 1.96 10.1 2.06 10.9 2.12 11.6 2.26 13.0 2.63 14.4 3.05<br />
20 7.32 1.89 8.73 1.99 10.1 2.10 10.9 2.16 11.6 2.35 13.0 2.76 14.4 3.21<br />
21 7.32 1.91 8.73 2.01 10.1 2.13 10.9 2.18 11.6 2.38 13.0 2.81 14.4 3.27<br />
23 7.32 1.96 8.73 2.07 10.1 2.18 10.9 2.24 11.6 2.45 13.0 2.91 14.4 3.35<br />
25 7.32 2.07 8.73 2.18 10.1 2.30 10.9 2.36 11.6 2.59 13.0 3.09 14.4 3.47<br />
27 7.32 2.15 8.73 2.28 10.1 2.41 10.9 2.49 11.6 2.74 13.0 3.27 14.4 3.58<br />
29 7.32 2.27 8.73 2.40 10.1 2.55 10.9 2.63 11.6 2.89 13.0 3.46 14.4 3.69<br />
31 7.32 2.39 8.73 2.53 10.1 2.69 10.9 2.77 11.6 3.05 13.0 3.66 14.4 3.79<br />
33 7.32 2.46 8.73 2.61 10.1 2.78 10.9 2.87 11.6 3.17 13.0 3.82 14.4 3.85<br />
35 7.32 2.53 8.73 2.70 10.1 2.88 10.9 2.97 11.6 3.30 13.0 3.87 14.4 3.90<br />
37 7.32 2.67 8.73 2.84 10.1 3.04 10.9 3.14 11.6 3.50 13.0 3.97 14.4 4.00<br />
39 7.32 2.81 8.73 3.00 10.1 3.21 10.9 3.32 11.6 3.70 13.0 4.07 14.4 4.10<br />
Combination 60%<br />
Capacity index(kW) 9.30<br />
TC:Total Capacity (kW)、PI:Power Input (kW)<br />
Outdoor Indoor <strong>Air</strong> Temperature (°CDB)<br />
<strong>Air</strong> Temp. 14.0 16.0 18.0 19.0 20.0 22.0 24.0<br />
(°CWB) TC PI TC PI TC PI TC PI TC PI TC PI TC PI<br />
kW kW kW kW kW kW kW kW kW kW kW kW kW kW<br />
10 6.28 1.46 7.49 1.55 8.70 1.64 9.30 1.70 9.90 1.83 11.1 2.10 12.3 2.37<br />
12 6.28 1.47 7.49 1.57 8.70 1.67 9.30 1.72 9.90 1.85 11.1 2.13 12.3 2.40<br />
14 6.28 1.50 7.49 1.60 8.70 1.70 9.30 1.75 9.90 1.89 11.1 2.17 12.3 2.45<br />
16 6.28 1.51 7.49 1.61 8.70 1.71 9.30 1.77 9.90 1.91 11.1 2.19 12.3 2.53<br />
18 6.28 1.54 7.49 1.64 8.70 1.74 9.30 1.80 9.90 1.94 11.1 2.31 12.3 2.73<br />
20 6.28 1.56 7.49 1.66 8.70 1.77 9.30 1.83 9.90 2.02 11.1 2.43 12.3 2.88<br />
21 6.28 1.57 7.49 1.67 8.70 1.79 9.30 1.84 9.90 2.04 11.1 2.47 12.3 2.93<br />
23 6.28 1.59 7.49 1.70 8.70 1.81 9.30 1.87 9.90 2.08 11.1 2.54 12.3 2.98<br />
25 6.28 1.66 7.49 1.77 8.70 1.89 9.30 1.95 9.90 2.18 11.1 2.68 12.3 3.06<br />
27 6.28 1.71 7.49 1.84 8.70 1.97 9.30 2.05 9.90 2.30 11.1 2.83 12.3 3.14<br />
29 6.28 1.79 7.49 1.92 8.70 2.07 9.30 2.15 9.90 2.41 11.1 2.98 12.3 3.21<br />
31 6.28 1.87 7.49 2.01 8.70 2.17 9.30 2.25 9.90 2.53 11.1 3.14 12.3 3.27<br />
33 6.28 1.95 7.49 2.10 8.70 2.27 9.30 2.36 9.90 2.66 11.1 3.31 12.3 3.34<br />
35 6.28 2.03 7.49 2.20 8.70 2.38 9.30 2.47 9.90 2.80 11.1 3.37 12.3 3.40<br />
37 6.28 2.13 7.49 2.30 8.70 2.50 9.30 2.60 9.90 2.96 11.1 3.43 12.3 3.46<br />
39 6.28 2.24 7.49 2.43 8.70 2.64 9.30 2.75 9.90 3.13 11.1 3.50 12.3 3.53<br />
291
Combination 50%<br />
Capacity index(kW) 7.75<br />
TC:Total Capacity (kW)、PI:Power Input (kW)<br />
Outdoor Indoor <strong>Air</strong> Temperature (°CDB)<br />
<strong>Air</strong> Temp. 14.0 16.0 18.0 19.0 20.0 22.0 24.0<br />
(°CWB) TC PI TC PI TC PI TC PI TC PI TC PI TC PI<br />
kW kW kW kW kW kW kW kW kW kW kW kW kW kW<br />
10 5.23 1.18 6.24 1.27 7.25 1.36 7.75 1.42 8.25 1.47 9.26 1.58 10.3 1.69<br />
12 5.23 1.18 6.24 1.28 7.25 1.38 7.75 1.43 8.25 1.48 9.26 1.59 10.3 1.71<br />
14 5.23 1.20 6.24 1.30 7.25 1.40 7.75 1.45 8.25 1.51 9.26 1.62 10.3 1.74<br />
16 5.23 1.21 6.24 1.31 7.25 1.41 7.75 1.47 8.25 1.52 9.26 1.64 10.3 1.76<br />
18 5.23 1.22 6.24 1.32 7.25 1.42 7.75 1.48 8.25 1.54 9.26 1.66 10.3 1.78<br />
20 5.23 1.23 6.24 1.33 7.25 1.44 7.75 1.50 8.25 1.55 9.26 1.68 10.3 1.80<br />
21 5.23 1.23 6.24 1.33 7.25 1.45 7.75 1.50 8.25 1.56 9.26 1.69 10.3 1.81<br />
23 5.23 1.24 6.24 1.35 7.25 1.46 7.75 1.52 8.25 1.58 9.26 1.71 10.3 1.84<br />
25 5.23 1.25 6.24 1.36 7.25 1.48 7.75 1.54 8.25 1.61 9.26 1.76 10.3 1.92<br />
27 5.23 1.26 6.24 1.39 7.25 1.52 7.75 1.60 8.25 1.67 9.26 1.84 10.3 2.02<br />
29 5.23 1.30 6.24 1.43 7.25 1.58 7.75 1.66 8.25 1.74 9.26 1.92 10.3 2.10<br />
31 5.23 1.34 6.24 1.48 7.25 1.64 7.75 1.72 8.25 1.81 9.26 2.00 10.3 2.20<br />
33 5.23 1.38 6.24 1.53 7.25 1.70 7.75 1.79 8.25 1.89 9.26 2.08 10.3 2.30<br />
35 5.23 1.42 6.24 1.59 7.25 1.77 7.75 1.86 8.25 1.96 9.26 2.18 10.3 2.40<br />
37 5.23 1.47 6.24 1.64 7.25 1.84 7.75 1.94 8.25 2.05 9.26 2.27 10.3 2.52<br />
39 5.23 1.51 6.24 1.70 7.25 1.91 7.75 2.02 8.25 2.13 9.26 2.37 10.3 2.64<br />
Note:PI of indoor units is not included in the table.<br />
292
20.4.4 KA1E5 / KA1E5S Series<br />
Indoor Unit: S-22KA1E5, S-22KA1E5S<br />
Nominal Capacity (kW) 2.2<br />
TC:Total Capacity (kW)、SHC:Sensible Heat Capacity (kW)<br />
Outdoor Indoor <strong>Air</strong> Temperature<br />
<strong>Air</strong> Temp. 14.0WB 16.0WB 18.0WB 19.0WB 20.0WB 22.0WB 24.0WB<br />
(°CDB) 20.0DB 23.0DB 26.0DB 27.0DB 28.0DB 30.0DB 32.0DB<br />
TC SHC TC SHC TC SHC TC SHC TC SHC TC SHC TC SHC<br />
10 1.5 1.4 1.8 1.6 2.1 1.7 2.2 1.8 2.3 1.8 2.6 1.9 2.9 1.9<br />
12 1.5 1.4 1.8 1.6 2.1 1.7 2.2 1.8 2.3 1.8 2.6 1.9 2.9 1.9<br />
14 1.5 1.4 1.8 1.6 2.1 1.7 2.2 1.8 2.3 1.8 2.6 1.9 2.8 1.8<br />
16 1.5 1.4 1.8 1.6 2.1 1.7 2.2 1.8 2.3 1.8 2.6 1.9 2.8 1.8<br />
18 1.5 1.4 1.8 1.6 2.1 1.7 2.2 1.8 2.3 1.8 2.6 1.9 2.7 1.8<br />
20 1.5 1.4 1.8 1.6 2.1 1.7 2.2 1.8 2.3 1.8 2.6 1.9 2.7 1.8<br />
21 1.5 1.4 1.8 1.6 2.1 1.7 2.2 1.8 2.3 1.8 2.6 1.9 2.7 1.8<br />
23 1.5 1.4 1.8 1.6 2.1 1.7 2.2 1.8 2.3 1.8 2.6 1.9 2.6 1.7<br />
25 1.5 1.4 1.8 1.6 2.1 1.7 2.2 1.8 2.3 1.8 2.6 1.9 2.6 1.7<br />
27 1.5 1.4 1.8 1.6 2.1 1.7 2.2 1.8 2.3 1.8 2.5 1.8 2.6 1.7<br />
29 1.5 1.4 1.8 1.6 2.1 1.7 2.2 1.8 2.3 1.8 2.5 1.8 2.5 1.7<br />
31 1.5 1.4 1.8 1.6 2.1 1.7 2.2 1.8 2.3 1.8 2.4 1.8 2.5 1.7<br />
33 1.5 1.4 1.8 1.6 2.1 1.7 2.2 1.8 2.3 1.8 2.4 1.7 2.5 1.7<br />
35 1.5 1.4 1.8 1.6 2.1 1.7 2.2 1.8 2.3 1.8 2.4 1.7 2.4 1.7<br />
37 1.5 1.4 1.8 1.6 2.1 1.7 2.2 1.8 2.3 1.8 2.3 1.7 2.4 1.7<br />
39 1.5 1.4 1.8 1.6 2.1 1.7 2.2 1.8 2.2 1.8 2.3 1.7 2.3 1.7<br />
Indoor Unit: S-28KA1E5, S-28KA1E5S<br />
Nominal Capacity (kW) 2.8<br />
TC:Total Capacity (kW)、SHC:Sensible Heat Capacity (kW)<br />
Outdoor Indoor <strong>Air</strong> Temperature<br />
<strong>Air</strong> Temp. 14.0WB 16.0WB 18.0WB 19.0WB 20.0WB 22.0WB 24.0WB<br />
(°CDB) 20.0DB 23.0DB 26.0DB 27.0DB 28.0DB 30.0DB 32.0DB<br />
TC SHC TC SHC TC SHC TC SHC TC SHC TC SHC TC SHC<br />
10 1.9 1.8 2.3 2.1 2.6 2.2 2.8 2.3 3.0 2.4 3.4 2.4 3.7 2.5<br />
12 1.9 1.8 2.3 2.1 2.6 2.2 2.8 2.3 3.0 2.4 3.4 2.4 3.6 2.5<br />
14 1.9 1.8 2.3 2.1 2.6 2.2 2.8 2.3 3.0 2.4 3.4 2.4 3.6 2.4<br />
16 1.9 1.8 2.3 2.1 2.6 2.2 2.8 2.3 3.0 2.4 3.4 2.4 3.5 2.4<br />
18 1.9 1.8 2.3 2.1 2.6 2.2 2.8 2.3 3.0 2.4 3.4 2.4 3.5 2.4<br />
20 1.9 1.8 2.3 2.1 2.6 2.2 2.8 2.3 3.0 2.4 3.4 2.4 3.4 2.3<br />
21 1.9 1.8 2.3 2.1 2.6 2.2 2.8 2.3 3.0 2.4 3.4 2.4 3.4 2.3<br />
23 1.9 1.8 2.3 2.1 2.6 2.2 2.8 2.3 3.0 2.4 3.3 2.4 3.4 2.3<br />
25 1.9 1.8 2.3 2.1 2.6 2.2 2.8 2.3 3.0 2.4 3.3 2.4 3.3 2.3<br />
27 1.9 1.8 2.3 2.1 2.6 2.2 2.8 2.3 3.0 2.4 3.2 2.3 3.3 2.3<br />
29 1.9 1.8 2.3 2.1 2.6 2.2 2.8 2.3 3.0 2.4 3.2 2.3 3.2 2.2<br />
31 1.9 1.8 2.3 2.1 2.6 2.2 2.8 2.3 3.0 2.4 3.1 2.3 3.2 2.2<br />
33 1.9 1.8 2.3 2.1 2.6 2.2 2.8 2.3 3.0 2.4 3.1 2.3 3.1 2.2<br />
35 1.9 1.8 2.3 2.1 2.6 2.2 2.8 2.3 3.0 2.4 3.0 2.3 3.1 2.2<br />
37 1.9 1.8 2.3 2.1 2.6 2.2 2.8 2.3 2.9 2.4 3.0 2.3 3.0 2.2<br />
39 1.9 1.8 2.3 2.1 2.6 2.2 2.8 2.3 2.9 2.4 2.9 2.2 3.0 2.2<br />
293
Indoor Unit: S-36KA1E5, S-36KA1E5S<br />
Nominal Capacity (kW) 3.6<br />
TC:Total Capacity (kW)、SHC:Sensible Heat Capacity (kW)<br />
Outdoor Indoor <strong>Air</strong> Temperature<br />
<strong>Air</strong> Temp. 14.0WB 16.0WB 18.0WB 19.0WB 20.0WB 22.0WB 24.0WB<br />
(°CDB) 20.0DB 23.0DB 26.0DB 27.0DB 28.0DB 30.0DB 32.0DB<br />
TC SHC TC SHC TC SHC TC SHC TC SHC TC SHC TC SHC<br />
10 2.4 2.3 2.9 2.6 3.4 2.8 3.6 2.8 3.8 2.9 4.3 2.9 4.7 3.0<br />
12 2.4 2.3 2.9 2.6 3.4 2.8 3.6 2.8 3.8 2.9 4.3 2.9 4.7 3.0<br />
14 2.4 2.3 2.9 2.6 3.4 2.8 3.6 2.8 3.8 2.9 4.3 2.9 4.6 3.0<br />
16 2.4 2.3 2.9 2.6 3.4 2.8 3.6 2.8 3.8 2.9 4.3 2.9 4.6 3.0<br />
18 2.4 2.3 2.9 2.6 3.4 2.8 3.6 2.8 3.8 2.9 4.3 2.9 4.5 2.9<br />
20 2.4 2.3 2.9 2.6 3.4 2.8 3.6 2.8 3.8 2.9 4.3 2.9 4.4 2.9<br />
21 2.4 2.3 2.9 2.6 3.4 2.8 3.6 2.8 3.8 2.9 4.3 2.9 4.4 2.9<br />
23 2.4 2.3 2.9 2.6 3.4 2.8 3.6 2.8 3.8 2.9 4.2 2.8 4.3 2.8<br />
25 2.4 2.3 2.9 2.6 3.4 2.8 3.6 2.8 3.8 2.9 4.2 2.8 4.3 2.8<br />
27 2.4 2.3 2.9 2.6 3.4 2.8 3.6 2.8 3.8 2.9 4.1 2.8 4.2 2.8<br />
29 2.4 2.3 2.9 2.6 3.4 2.8 3.6 2.8 3.8 2.9 4.1 2.8 4.2 2.7<br />
31 2.4 2.3 2.9 2.6 3.4 2.8 3.6 2.8 3.8 2.9 4.0 2.8 4.1 2.7<br />
33 2.4 2.3 2.9 2.6 3.4 2.8 3.6 2.8 3.8 2.9 3.9 2.7 4.0 2.7<br />
35 2.4 2.3 2.9 2.6 3.4 2.8 3.6 2.8 3.8 2.9 3.9 2.7 4.0 2.7<br />
37 2.4 2.3 2.9 2.6 3.4 2.8 3.6 2.8 3.7 2.8 3.8 2.7 3.9 2.7<br />
39 2.4 2.3 2.9 2.6 3.4 2.8 3.6 2.8 3.7 2.8 3.8 2.7 3.8 2.6<br />
Indoor Unit: S-45KA1E5, S-45KA1E5S<br />
Nominal Capacity (kW) 4.5<br />
TC:Total Capacity (kW)、SHC:Sensible Heat Capacity (kW)<br />
Outdoor Indoor <strong>Air</strong> Temperature<br />
<strong>Air</strong> Temp. 14.0WB 16.0WB 18.0WB 19.0WB 20.0WB 22.0WB 24.0WB<br />
(°CDB) 20.0DB 23.0DB 26.0DB 27.0DB 28.0DB 30.0DB 32.0DB<br />
TC SHC TC SHC TC SHC TC SHC TC SHC TC SHC TC SHC<br />
10 3.0 2.8 3.6 3.0 4.2 3.3 4.5 3.4 4.8 3.5 5.4 3.2 5.9 3.5<br />
12 3.0 2.8 3.6 3.0 4.2 3.3 4.5 3.4 4.8 3.5 5.4 3.2 5.8 3.5<br />
14 3.0 2.8 3.6 3.0 4.2 3.3 4.5 3.4 4.8 3.5 5.4 3.2 5.8 3.5<br />
16 3.0 2.8 3.6 3.0 4.2 3.3 4.5 3.4 4.8 3.5 5.4 3.2 5.7 3.4<br />
18 3.0 2.8 3.6 3.0 4.2 3.3 4.5 3.4 4.8 3.5 5.4 3.2 5.6 3.4<br />
20 3.0 2.8 3.6 3.0 4.2 3.3 4.5 3.4 4.8 3.5 5.4 3.2 5.5 3.4<br />
21 3.0 2.8 3.6 3.0 4.2 3.3 4.5 3.4 4.8 3.5 5.4 3.2 5.5 3.3<br />
23 3.0 2.8 3.6 3.0 4.2 3.3 4.5 3.4 4.8 3.5 5.3 3.2 5.4 3.3<br />
25 3.0 2.8 3.6 3.0 4.2 3.3 4.5 3.4 4.8 3.5 5.2 3.2 5.3 3.3<br />
27 3.0 2.8 3.6 3.0 4.2 3.3 4.5 3.4 4.8 3.5 5.2 3.1 5.3 3.3<br />
29 3.0 2.8 3.6 3.0 4.2 3.3 4.5 3.4 4.8 3.5 5.1 3.1 5.2 3.2<br />
31 3.0 2.8 3.6 3.0 4.2 3.3 4.5 3.4 4.8 3.5 5.0 3.1 5.1 3.2<br />
33 3.0 2.8 3.6 3.0 4.2 3.3 4.5 3.4 4.8 3.5 4.9 3.0 5.0 3.2<br />
35 3.0 2.8 3.6 3.0 4.2 3.3 4.5 3.4 4.7 3.5 4.9 3.0 5.0 3.1<br />
37 3.0 2.8 3.6 3.0 4.2 3.3 4.5 3.4 4.7 3.5 4.8 3.0 4.9 3.1<br />
39 3.0 2.8 3.6 3.0 4.2 3.3 4.5 3.4 4.6 3.4 4.7 3.0 4.8 3.1<br />
294
Indoor Unit: S-56KA1E5<br />
Nominal Capacity (kW) 5.6<br />
TC:Total Capacity (kW)、SHC:Sensible Heat Capacity (kW)<br />
Outdoor Indoor <strong>Air</strong> Temperature<br />
<strong>Air</strong> Temp. 14.0WB 16.0WB 18.0WB 19.0WB 20.0WB 22.0WB 24.0WB<br />
(°CDB) 20.0DB 23.0DB 26.0DB 27.0DB 28.0DB 30.0DB 32.0DB<br />
TC SHC TC SHC TC SHC TC SHC TC SHC TC SHC TC SHC<br />
10 3.8 3.2 4.5 3.6 5.2 4.0 5.6 4.3 6.0 4.4 6.7 4.4 7.4 4.5<br />
12 3.8 3.2 4.5 3.6 5.2 4.0 5.6 4.3 6.0 4.4 6.7 4.4 7.3 4.5<br />
14 3.8 3.2 4.5 3.6 5.2 4.0 5.6 4.3 6.0 4.4 6.7 4.4 7.2 4.5<br />
16 3.8 3.2 4.5 3.6 5.2 4.0 5.6 4.3 6.0 4.4 6.7 4.4 7.1 4.4<br />
18 3.8 3.2 4.5 3.6 5.2 4.0 5.6 4.3 6.0 4.4 6.7 4.4 7.0 4.4<br />
20 3.8 3.2 4.5 3.6 5.2 4.0 5.6 4.3 6.0 4.4 6.7 4.4 6.9 4.3<br />
21 3.8 3.2 4.5 3.6 5.2 4.0 5.6 4.3 6.0 4.4 6.7 4.4 6.8 4.3<br />
23 3.8 3.2 4.5 3.6 5.2 4.0 5.6 4.3 6.0 4.4 6.7 4.4 6.7 4.3<br />
25 3.8 3.2 4.5 3.6 5.2 4.0 5.6 4.3 6.0 4.4 6.5 4.4 6.6 4.2<br />
27 3.8 3.2 4.5 3.6 5.2 4.0 5.6 4.3 6.0 4.4 6.4 4.3 6.6 4.2<br />
29 3.8 3.2 4.5 3.6 5.2 4.0 5.6 4.3 6.0 4.4 6.3 4.3 6.5 4.1<br />
31 3.8 3.2 4.5 3.6 5.2 4.0 5.6 4.3 6.0 4.4 6.2 4.3 6.4 4.1<br />
33 3.8 3.2 4.5 3.6 5.2 4.0 5.6 4.3 6.0 4.4 6.1 4.2 6.3 4.1<br />
35 3.8 3.2 4.5 3.6 5.2 4.0 5.6 4.3 5.9 4.4 6.0 4.2 6.2 4.0<br />
37 3.8 3.2 4.5 3.6 5.2 4.0 5.6 4.3 5.8 4.4 5.9 4.1 6.1 4.0<br />
39 3.8 3.2 4.5 3.6 5.2 4.0 5.6 4.3 5.7 4.3 5.8 4.1 6.0 3.9<br />
Indoor Unit: S-63KA1E5<br />
Nominal Capacity (kW) 6.3<br />
TC:Total Capacity (kW)、SHC:Sensible Heat Capacity (kW)<br />
Outdoor Indoor <strong>Air</strong> Temperature<br />
<strong>Air</strong> Temp. 14.0WB 16.0WB 18.0WB 19.0WB 20.0WB 22.0WB 24.0WB<br />
(°CDB) 20.0DB 23.0DB 26.0DB 27.0DB 28.0DB 30.0DB 32.0DB<br />
TC SHC TC SHC TC SHC TC SHC TC SHC TC SHC TC SHC<br />
10 4.0 3.4 5.1 4.1 5.9 4.5 6.3 4.6 6.8 4.8 7.6 4.8 8.3 4.9<br />
12 4.0 3.4 5.1 4.1 5.9 4.5 6.3 4.6 6.8 4.8 7.6 4.8 8.2 4.9<br />
14 4.0 3.4 5.1 4.1 5.9 4.5 6.3 4.6 6.8 4.8 7.6 4.8 8.1 4.9<br />
16 4.0 3.4 5.1 4.1 5.9 4.5 6.3 4.6 6.8 4.8 7.6 4.8 8.0 4.8<br />
18 4.0 3.4 5.1 4.1 5.9 4.5 6.3 4.6 6.8 4.8 7.6 4.8 7.9 4.8<br />
20 4.0 3.4 5.1 4.1 5.9 4.5 6.3 4.6 6.8 4.8 7.6 4.8 7.8 4.7<br />
21 4.0 3.4 5.1 4.1 5.9 4.5 6.3 4.6 6.8 4.8 7.6 4.8 7.7 4.7<br />
23 4.0 3.4 5.1 4.1 5.9 4.5 6.3 4.6 6.8 4.8 7.5 4.8 7.6 4.7<br />
25 4.0 3.4 5.1 4.1 5.9 4.5 6.3 4.6 6.8 4.8 7.4 4.8 7.5 4.6<br />
27 4.0 3.4 5.1 4.1 5.9 4.5 6.3 4.6 6.8 4.8 7.3 4.7 7.5 4.6<br />
29 4.0 3.4 5.1 4.1 5.9 4.5 6.3 4.6 6.8 4.8 7.2 4.7 7.4 4.5<br />
31 4.0 3.4 5.1 4.1 5.9 4.5 6.3 4.6 6.8 4.8 7.1 4.7 7.3 4.5<br />
33 4.0 3.4 5.1 4.1 5.9 4.5 6.3 4.6 6.8 4.8 7.0 4.6 7.2 4.5<br />
35 4.0 3.4 5.1 4.1 5.9 4.5 6.3 4.6 6.8 4.8 6.9 4.6 7.1 4.4<br />
37 4.0 3.4 5.1 4.1 5.9 4.5 6.3 4.6 6.8 4.8 6.8 4.5 7.0 4.4<br />
39 4.0 3.4 5.1 4.1 5.9 4.5 6.3 4.6 6.8 4.8 6.7 4.5 6.9 4.3<br />
295
Indoor Unit: S-71KA1E5<br />
Nominal Capacity (kW) 7.1<br />
TC:Total Capacity (kW)、SHC:Sensible Heat Capacity (kW)<br />
Outdoor Indoor <strong>Air</strong> Temperature<br />
<strong>Air</strong> Temp. 14.0WB 16.0WB 18.0WB 19.0WB 20.0WB 22.0WB 24.0WB<br />
(°CDB) 20.0DB 23.0DB 26.0DB 27.0DB 28.0DB 30.0DB 32.0DB<br />
TC SHC TC SHC TC SHC TC SHC TC SHC TC SHC TC SHC<br />
10 4.8 4.1 5.7 4.6 6.6 5.0 7.1 5.2 7.6 5.3 8.5 5.4 9.3 5.5<br />
12 4.8 4.1 5.7 4.6 6.6 5.0 7.1 5.2 7.6 5.3 8.5 5.4 9.2 5.4<br />
14 4.8 4.1 5.7 4.6 6.6 5.0 7.1 5.2 7.6 5.3 8.5 5.4 9.1 5.4<br />
16 4.8 4.1 5.7 4.6 6.6 5.0 7.1 5.2 7.6 5.3 8.5 5.4 9.0 5.3<br />
18 4.8 4.1 5.7 4.6 6.6 5.0 7.1 5.2 7.6 5.3 8.5 5.4 8.8 5.2<br />
20 4.8 4.1 5.7 4.6 6.6 5.0 7.1 5.2 7.6 5.3 8.5 5.4 8.7 5.1<br />
21 4.8 4.1 5.7 4.6 6.6 5.0 7.1 5.2 7.6 5.3 8.5 5.4 8.7 5.1<br />
23 4.8 4.1 5.7 4.6 6.6 5.0 7.1 5.2 7.6 5.3 8.4 5.4 8.5 5.0<br />
25 4.8 4.1 5.7 4.6 6.6 5.0 7.1 5.2 7.6 5.3 8.3 5.3 8.4 5.0<br />
27 4.8 4.1 5.7 4.6 6.6 5.0 7.1 5.2 7.6 5.3 8.1 5.2 8.3 5.0<br />
29 4.8 4.1 5.7 4.6 6.6 5.0 7.1 5.2 7.6 5.3 8.0 5.1 8.2 4.9<br />
31 4.8 4.1 5.7 4.6 6.6 5.0 7.1 5.2 7.6 5.3 7.9 5.1 8.1 4.9<br />
33 4.8 4.1 5.7 4.6 6.6 5.0 7.1 5.2 7.6 5.3 7.8 5.0 7.9 4.8<br />
35 4.8 4.1 5.7 4.6 6.6 5.0 7.1 5.2 7.5 5.2 7.7 5.0 7.8 4.8<br />
37 4.8 4.1 5.7 4.6 6.6 5.0 7.1 5.2 7.4 5.2 7.5 4.9 7.7 4.7<br />
39 4.8 4.1 5.7 4.6 6.6 5.0 7.1 5.2 7.2 5.1 7.4 4.9 7.6 4.7<br />
296
20.4.5 YA1E5 Series<br />
Indoor Unit: S-22YA1E5<br />
Nominal Capacity (kW) 2.2<br />
TC:Total Capacity (kW)、SHC:Sensible Heat Capacity (kW)<br />
Outdoor Indoor <strong>Air</strong> Temperature<br />
<strong>Air</strong> Temp. 14.0WB 16.0WB 18.0WB 19.0WB 20.0WB 22.0WB 24.0WB<br />
(°CDB) 20.0DB 23.0DB 26.0DB 27.0DB 28.0DB 30.0DB 32.0DB<br />
TC SHC TC SHC TC SHC TC SHC TC SHC TC SHC TC SHC<br />
10 1.5 1.4 1.8 1.6 2.1 1.7 2.2 1.8 2.3 1.8 2.6 1.9 2.9 1.9<br />
12 1.5 1.4 1.8 1.6 2.1 1.7 2.2 1.8 2.3 1.8 2.6 1.9 2.9 1.9<br />
14 1.5 1.4 1.8 1.6 2.1 1.7 2.2 1.8 2.3 1.8 2.6 1.9 2.8 1.8<br />
16 1.5 1.4 1.8 1.6 2.1 1.7 2.2 1.8 2.3 1.8 2.6 1.9 2.8 1.8<br />
18 1.5 1.4 1.8 1.6 2.1 1.7 2.2 1.8 2.3 1.8 2.6 1.9 2.7 1.8<br />
20 1.5 1.4 1.8 1.6 2.1 1.7 2.2 1.8 2.3 1.8 2.6 1.9 2.7 1.8<br />
21 1.5 1.4 1.8 1.6 2.1 1.7 2.2 1.8 2.3 1.8 2.6 1.9 2.7 1.8<br />
23 1.5 1.4 1.8 1.6 2.1 1.7 2.2 1.8 2.3 1.8 2.6 1.9 2.6 1.7<br />
25 1.5 1.4 1.8 1.6 2.1 1.7 2.2 1.8 2.3 1.8 2.6 1.9 2.6 1.7<br />
27 1.5 1.4 1.8 1.6 2.1 1.7 2.2 1.8 2.3 1.8 2.5 1.8 2.6 1.7<br />
29 1.5 1.4 1.8 1.6 2.1 1.7 2.2 1.8 2.3 1.8 2.5 1.8 2.5 1.7<br />
31 1.5 1.4 1.8 1.6 2.1 1.7 2.2 1.8 2.3 1.8 2.4 1.8 2.5 1.7<br />
33 1.5 1.4 1.8 1.6 2.1 1.7 2.2 1.8 2.3 1.8 2.4 1.7 2.5 1.7<br />
35 1.5 1.4 1.8 1.6 2.1 1.7 2.2 1.8 2.3 1.8 2.4 1.7 2.4 1.7<br />
37 1.5 1.4 1.8 1.6 2.1 1.7 2.2 1.7 2.3 1.8 2.3 1.7 2.4 1.7<br />
39 1.5 1.4 1.8 1.6 2.1 1.7 2.2 1.7 2.2 1.8 2.3 1.7 2.3 1.7<br />
Indoor Unit: S-28YA1E5<br />
Nominal Capacity (kW) 2.8<br />
TC:Total Capacity (kW)、SHC:Sensible Heat Capacity (kW)<br />
Outdoor Indoor <strong>Air</strong> Temperature<br />
<strong>Air</strong> Temp. 14.0WB 16.0WB 18.0WB 19.0WB 20.0WB 22.0WB 24.0WB<br />
(°CDB) 20.0DB 23.0DB 26.0DB 27.0DB 28.0DB 30.0DB 32.0DB<br />
TC SHC TC SHC TC SHC TC SHC TC SHC TC SHC TC SHC<br />
10 1.9 1.8 2.3 2.0 2.6 2.1 2.8 2.2 3.0 2.3 3.4 2.3 3.7 2.4<br />
12 1.9 1.8 2.3 2.0 2.6 2.1 2.8 2.2 3.0 2.3 3.4 2.3 3.6 2.4<br />
14 1.9 1.8 2.3 2.0 2.6 2.1 2.8 2.2 3.0 2.3 3.4 2.3 3.6 2.3<br />
16 1.9 1.8 2.3 2.0 2.6 2.1 2.8 2.2 3.0 2.3 3.4 2.3 3.5 2.3<br />
18 1.9 1.8 2.3 2.0 2.6 2.1 2.8 2.2 3.0 2.3 3.4 2.3 3.5 2.3<br />
20 1.9 1.8 2.3 2.0 2.6 2.1 2.8 2.2 3.0 2.3 3.4 2.3 3.4 2.2<br />
21 1.9 1.8 2.3 2.0 2.6 2.1 2.8 2.2 3.0 2.3 3.4 2.3 3.4 2.2<br />
23 1.9 1.8 2.3 2.0 2.6 2.1 2.8 2.2 3.0 2.3 3.3 2.3 3.4 2.2<br />
25 1.9 1.8 2.3 2.0 2.6 2.1 2.8 2.2 3.0 2.3 3.3 2.3 3.3 2.2<br />
27 1.9 1.8 2.3 2.0 2.6 2.1 2.8 2.2 3.0 2.3 3.2 2.2 3.3 2.2<br />
29 1.9 1.8 2.3 2.0 2.6 2.1 2.8 2.2 3.0 2.3 3.2 2.2 3.2 2.1<br />
31 1.9 1.8 2.3 2.0 2.6 2.1 2.8 2.2 3.0 2.3 3.1 2.2 3.2 2.1<br />
33 1.9 1.8 2.3 2.0 2.6 2.1 2.8 2.2 3.0 2.3 3.1 2.2 3.1 2.1<br />
35 1.9 1.8 2.3 2.0 2.6 2.1 2.8 2.2 3.0 2.3 3.0 2.2 3.1 2.1<br />
37 1.9 1.8 2.3 2.0 2.6 2.1 2.8 2.2 2.9 2.3 3.0 2.2 3.0 2.1<br />
39 1.9 1.8 2.3 2.0 2.6 2.1 2.8 2.2 2.9 2.3 2.9 2.1 3.0 2.1<br />
297
Indoor Unit: S-36YA1E5<br />
Nominal Capacity (kW) 3.6<br />
TC:Total Capacity (kW)、SHC:Sensible Heat Capacity (kW)<br />
Outdoor Indoor <strong>Air</strong> Temperature<br />
<strong>Air</strong> Temp. 14.0WB 16.0WB 18.0WB 19.0WB 20.0WB 22.0WB 24.0WB<br />
(°CDB) 20.0DB 23.0DB 26.0DB 27.0DB 28.0DB 30.0DB 32.0DB<br />
TC SHC TC SHC TC SHC TC SHC TC SHC TC SHC TC SHC<br />
10 2.4 2.2 2.9 2.5 3.4 2.7 3.6 2.7 3.8 2.8 4.3 2.8 4.7 2.9<br />
12 2.4 2.2 2.9 2.5 3.4 2.7 3.6 2.7 3.8 2.8 4.3 2.8 4.7 2.9<br />
14 2.4 2.2 2.9 2.5 3.4 2.7 3.6 2.7 3.8 2.8 4.3 2.8 4.6 2.9<br />
16 2.4 2.2 2.9 2.5 3.4 2.7 3.6 2.7 3.8 2.8 4.3 2.8 4.6 2.9<br />
18 2.4 2.2 2.9 2.5 3.4 2.7 3.6 2.7 3.8 2.8 4.3 2.8 4.5 2.8<br />
20 2.4 2.2 2.9 2.5 3.4 2.7 3.6 2.7 3.8 2.8 4.3 2.8 4.4 2.8<br />
21 2.4 2.2 2.9 2.5 3.4 2.7 3.6 2.7 3.8 2.8 4.3 2.8 4.4 2.8<br />
23 2.4 2.2 2.9 2.5 3.4 2.7 3.6 2.7 3.8 2.8 4.2 2.7 4.3 2.7<br />
25 2.4 2.2 2.9 2.5 3.4 2.7 3.6 2.7 3.8 2.8 4.2 2.7 4.3 2.7<br />
27 2.4 2.2 2.9 2.5 3.4 2.7 3.6 2.7 3.8 2.8 4.1 2.7 4.2 2.7<br />
29 2.4 2.2 2.9 2.5 3.4 2.7 3.6 2.7 3.8 2.8 4.1 2.7 4.2 2.6<br />
31 2.4 2.2 2.9 2.5 3.4 2.7 3.6 2.7 3.8 2.8 4.0 2.7 4.1 2.6<br />
33 2.4 2.2 2.9 2.5 3.4 2.7 3.6 2.7 3.8 2.8 3.9 2.6 4.0 2.6<br />
35 2.4 2.2 2.9 2.5 3.4 2.7 3.6 2.7 3.8 2.8 3.9 2.6 4.0 2.6<br />
37 2.4 2.2 2.9 2.5 3.4 2.7 3.6 2.7 3.7 2.7 3.8 2.6 3.9 2.6<br />
39 2.4 2.2 2.9 2.5 3.4 2.7 3.6 2.7 3.7 2.7 3.8 2.6 3.8 2.6<br />
Indoor Unit: S-45YA1E5<br />
Nominal Capacity (kW) 4.5<br />
TC:Total Capacity (kW)、SHC:Sensible Heat Capacity (kW)<br />
Outdoor Indoor <strong>Air</strong> Temperature<br />
<strong>Air</strong> Temp. 14.0WB 16.0WB 18.0WB 19.0WB 20.0WB 22.0WB 24.0WB<br />
(°CDB) 20.0DB 23.0DB 26.0DB 27.0DB 28.0DB 30.0DB 32.0DB<br />
TC SHC TC SHC TC SHC TC SHC TC SHC TC SHC TC SHC<br />
10 3.0 2.7 3.6 2.9 4.2 3.1 4.5 3.2 4.8 3.3 5.4 3.3 5.9 3.5<br />
12 3.0 2.7 3.6 2.9 4.2 3.1 4.5 3.2 4.8 3.3 5.4 3.3 5.8 3.5<br />
14 3.0 2.7 3.6 2.9 4.2 3.1 4.5 3.2 4.8 3.3 5.4 3.3 5.8 3.5<br />
16 3.0 2.7 3.6 2.9 4.2 3.1 4.5 3.2 4.8 3.3 5.4 3.3 5.7 3.4<br />
18 3.0 2.7 3.6 2.9 4.2 3.1 4.5 3.2 4.8 3.3 5.4 3.3 5.6 3.4<br />
20 3.0 2.7 3.6 2.9 4.2 3.1 4.5 3.2 4.8 3.3 5.4 3.3 5.5 3.4<br />
21 3.0 2.7 3.6 2.9 4.2 3.1 4.5 3.2 4.8 3.3 5.4 3.3 5.5 3.3<br />
23 3.0 2.7 3.6 2.9 4.2 3.1 4.5 3.2 4.8 3.3 5.3 3.3 5.4 3.3<br />
25 3.0 2.7 3.6 2.9 4.2 3.1 4.5 3.2 4.8 3.3 5.2 3.3 5.3 3.3<br />
27 3.0 2.7 3.6 2.9 4.2 3.1 4.5 3.2 4.8 3.3 5.2 3.2 5.3 3.3<br />
29 3.0 2.7 3.6 2.9 4.2 3.1 4.5 3.2 4.8 3.3 5.1 3.2 5.2 3.2<br />
31 3.0 2.7 3.6 2.9 4.2 3.1 4.5 3.2 4.8 3.3 5.0 3.2 5.1 3.2<br />
33 3.0 2.7 3.6 2.9 4.2 3.1 4.5 3.2 4.8 3.3 4.9 3.1 5.0 3.2<br />
35 3.0 2.7 3.6 2.9 4.2 3.1 4.5 3.2 4.7 3.3 4.9 3.1 5.0 3.1<br />
37 3.0 2.7 3.6 2.9 4.2 3.1 4.5 3.2 4.7 3.3 4.8 3.1 4.9 3.1<br />
39 3.0 2.7 3.6 2.9 4.2 3.1 4.5 3.2 4.6 3.2 4.7 3.1 4.8 3.1<br />
298
Indoor Unit: S-56YA1E5<br />
Nominal Capacity (kW) 5.6<br />
TC:Total Capacity (kW)、SHC:Sensible Heat Capacity (kW)<br />
Outdoor Indoor <strong>Air</strong> Temperature<br />
<strong>Air</strong> Temp. 14.0WB 16.0WB 18.0WB 19.0WB 20.0WB 22.0WB 24.0WB<br />
(°CDB) 20.0DB 23.0DB 26.0DB 27.0DB 28.0DB 30.0DB 32.0DB<br />
TC SHC TC SHC TC SHC TC SHC TC SHC TC SHC TC SHC<br />
10 3.8 3.1 4.5 3.5 5.2 3.9 5.6 4.0 6.0 4.1 6.7 4.1 7.4 4.2<br />
12 3.8 3.1 4.5 3.5 5.2 3.9 5.6 4.0 6.0 4.1 6.7 4.1 7.3 4.2<br />
14 3.8 3.1 4.5 3.5 5.2 3.9 5.6 4.0 6.0 4.1 6.7 4.1 7.2 4.2<br />
16 3.8 3.1 4.5 3.5 5.2 3.9 5.6 4.0 6.0 4.1 6.7 4.1 7.1 4.1<br />
18 3.8 3.1 4.5 3.5 5.2 3.9 5.6 4.0 6.0 4.1 6.7 4.1 7.0 4.1<br />
20 3.8 3.1 4.5 3.5 5.2 3.9 5.6 4.0 6.0 4.1 6.7 4.1 6.9 4.0<br />
21 3.8 3.1 4.5 3.5 5.2 3.9 5.6 4.0 6.0 4.1 6.7 4.1 6.8 4.0<br />
23 3.8 3.1 4.5 3.5 5.2 3.9 5.6 4.0 6.0 4.1 6.7 4.1 6.7 4.0<br />
25 3.8 3.1 4.5 3.5 5.2 3.9 5.6 4.0 6.0 4.1 6.5 4.1 6.6 3.9<br />
27 3.8 3.1 4.5 3.5 5.2 3.9 5.6 4.0 6.0 4.1 6.4 4.0 6.6 3.9<br />
29 3.8 3.1 4.5 3.5 5.2 3.9 5.6 4.0 6.0 4.1 6.3 4.0 6.5 3.8<br />
31 3.8 3.1 4.5 3.5 5.2 3.9 5.6 4.0 6.0 4.1 6.2 4.0 6.4 3.8<br />
33 3.8 3.1 4.5 3.5 5.2 3.9 5.6 4.0 6.0 4.1 6.1 3.9 6.3 3.8<br />
35 3.8 3.1 4.5 3.5 5.2 3.9 5.6 4.0 5.9 4.1 6.0 3.9 6.2 3.7<br />
37 3.8 3.1 4.5 3.5 5.2 3.9 5.6 4.0 5.8 4.1 5.9 3.8 6.1 3.7<br />
39 3.8 3.1 4.5 3.5 5.2 3.9 5.6 4.0 5.7 4.0 5.8 3.8 6.0 3.6<br />
299
20.4.6 UA1E5 Series<br />
Indoor Unit: S-63UA1E5<br />
Nominal Capacity (kW) 6.3<br />
TC:Total Capacity (kW)、SHC:Sensible Heat Capacity (kW)<br />
Outdoor Indoor <strong>Air</strong> Temperature<br />
<strong>Air</strong> Temp. 14.0WB 16.0WB 18.0WB 19.0WB 20.0WB 22.0WB 24.0WB<br />
(°CDB) 20.0DB 23.0DB 26.0DB 27.0DB 28.0DB 30.0DB 32.0DB<br />
TC SHC TC SHC TC SHC TC SHC TC SHC TC SHC TC SHC<br />
10 4.0 3.4 5.1 4.1 5.9 4.5 6.3 4.6 6.8 4.8 7.6 4.8 8.3 4.9<br />
12 4.0 3.4 5.1 4.1 5.9 4.5 6.3 4.6 6.8 4.8 7.6 4.8 8.2 4.9<br />
14 4.0 3.4 5.1 4.1 5.9 4.5 6.3 4.6 6.8 4.8 7.6 4.8 8.1 4.9<br />
16 4.0 3.4 5.1 4.1 5.9 4.5 6.3 4.6 6.8 4.8 7.6 4.8 8.0 4.8<br />
18 4.0 3.4 5.1 4.1 5.9 4.5 6.3 4.6 6.8 4.8 7.6 4.8 7.9 4.8<br />
20 4.0 3.4 5.1 4.1 5.9 4.5 6.3 4.6 6.8 4.8 7.6 4.8 7.8 4.7<br />
21 4.0 3.4 5.1 4.1 5.9 4.5 6.3 4.6 6.8 4.8 7.6 4.8 7.7 4.7<br />
23 4.0 3.4 5.1 4.1 5.9 4.5 6.3 4.6 6.8 4.8 7.5 4.8 7.6 4.7<br />
25 4.0 3.4 5.1 4.1 5.9 4.5 6.3 4.6 6.8 4.8 7.4 4.8 7.5 4.6<br />
27 4.0 3.4 5.1 4.1 5.9 4.5 6.3 4.6 6.8 4.8 7.3 4.7 7.5 4.6<br />
29 4.0 3.4 5.1 4.1 5.9 4.5 6.3 4.6 6.8 4.8 7.2 4.7 7.4 4.5<br />
31 4.0 3.4 5.1 4.1 5.9 4.5 6.3 4.6 6.8 4.8 7.1 4.7 7.3 4.5<br />
33 4.0 3.4 5.1 4.1 5.9 4.5 6.3 4.6 6.8 4.8 7.0 4.6 7.2 4.5<br />
35 4.0 3.4 5.1 4.1 5.9 4.5 6.3 4.6 6.8 4.8 6.9 4.6 7.1 4.4<br />
37 4.0 3.4 5.1 4.1 5.9 4.5 6.3 4.6 6.8 4.8 6.8 4.5 7.0 4.4<br />
39 4.0 3.4 5.1 4.1 5.9 4.5 6.3 4.6 6.8 4.8 6.7 4.5 6.9 4.3<br />
Indoor Unit: S-71UA1E5<br />
Nominal Capacity (kW) 7.1<br />
TC:Total Capacity (kW)、SHC:Sensible Heat Capacity (kW)<br />
Outdoor Indoor <strong>Air</strong> Temperature<br />
<strong>Air</strong> Temp. 14.0WB 16.0WB 18.0WB 19.0WB 20.0WB 22.0WB 24.0WB<br />
(°CDB) 20.0DB 23.0DB 26.0DB 27.0DB 28.0DB 30.0DB 32.0DB<br />
TC SHC TC SHC TC SHC TC SHC TC SHC TC SHC TC SHC<br />
10 4.8 4.1 5.7 4.6 6.6 5.0 7.1 5.2 7.6 5.3 8.5 5.4 9.3 5.5<br />
12 4.8 4.1 5.7 4.6 6.6 5.0 7.1 5.2 7.6 5.3 8.5 5.4 9.2 5.4<br />
14 4.8 4.1 5.7 4.6 6.6 5.0 7.1 5.2 7.6 5.3 8.5 5.4 9.1 5.4<br />
16 4.8 4.1 5.7 4.6 6.6 5.0 7.1 5.2 7.6 5.3 8.5 5.4 9.0 5.3<br />
18 4.8 4.1 5.7 4.6 6.6 5.0 7.1 5.2 7.6 5.3 8.5 5.4 8.8 5.2<br />
20 4.8 4.1 5.7 4.6 6.6 5.0 7.1 5.2 7.6 5.3 8.5 5.4 8.7 5.1<br />
21 4.8 4.1 5.7 4.6 6.6 5.0 7.1 5.2 7.6 5.3 8.5 5.4 8.7 5.1<br />
23 4.8 4.1 5.7 4.6 6.6 5.0 7.1 5.2 7.6 5.3 8.4 5.4 8.5 5.0<br />
25 4.8 4.1 5.7 4.6 6.6 5.0 7.1 5.2 7.6 5.3 8.3 5.3 8.4 5.0<br />
27 4.8 4.1 5.7 4.6 6.6 5.0 7.1 5.2 7.6 5.3 8.1 5.2 8.3 5.0<br />
29 4.8 4.1 5.7 4.6 6.6 5.0 7.1 5.2 7.6 5.3 8.0 5.1 8.2 4.9<br />
31 4.8 4.1 5.7 4.6 6.6 5.0 7.1 5.2 7.6 5.3 7.9 5.1 8.1 4.9<br />
33 4.8 4.1 5.7 4.6 6.6 5.0 7.1 5.2 7.6 5.3 7.8 5.0 7.9 4.8<br />
35 4.8 4.1 5.7 4.6 6.6 5.0 7.1 5.2 7.5 5.2 7.7 5.0 7.8 4.8<br />
37 4.8 4.1 5.7 4.6 6.6 5.0 7.1 5.2 7.4 5.2 7.5 4.9 7.7 4.7<br />
39 4.8 4.1 5.7 4.6 6.6 5.0 7.1 5.2 7.2 5.1 7.4 4.9 7.6 4.7<br />
300
Indoor Unit: S-90UA1E5<br />
Nominal Capacity (kW) 9.0<br />
TC:Total Capacity (kW)、SHC:Sensible Heat Capacity (kW)<br />
Outdoor Indoor <strong>Air</strong> Temperature<br />
<strong>Air</strong> Temp. 14.0WB 16.0WB 18.0WB 19.0WB 20.0WB 22.0WB 24.0WB<br />
(°CDB) 20.0DB 23.0DB 26.0DB 27.0DB 28.0DB 30.0DB 32.0DB<br />
TC SHC TC SHC TC SHC TC SHC TC SHC TC SHC TC SHC<br />
10 6.1 5.2 7.2 5.8 8.4 6.4 9.0 6.5 9.6 6.7 10.8 6.9 11.8 7.1<br />
12 6.1 5.2 7.2 5.8 8.4 6.4 9.0 6.5 9.6 6.7 10.8 6.9 11.7 7.0<br />
14 6.1 5.2 7.2 5.8 8.4 6.4 9.0 6.5 9.6 6.7 10.8 6.9 11.5 6.9<br />
16 6.1 5.2 7.2 5.8 8.4 6.4 9.0 6.5 9.6 6.7 10.8 6.9 11.4 6.8<br />
18 6.1 5.2 7.2 5.8 8.4 6.4 9.0 6.5 9.6 6.7 10.8 6.9 11.2 6.7<br />
20 6.1 5.2 7.2 5.8 8.4 6.4 9.0 6.5 9.6 6.7 10.8 6.9 11.1 6.6<br />
21 6.1 5.2 7.2 5.8 8.4 6.4 9.0 6.5 9.6 6.7 10.8 6.9 11.0 6.6<br />
23 6.1 5.2 7.2 5.8 8.4 6.4 9.0 6.5 9.6 6.7 10.6 6.8 10.8 6.4<br />
25 6.1 5.2 7.2 5.8 8.4 6.4 9.0 6.5 9.6 6.7 10.5 6.7 10.7 6.4<br />
27 6.1 5.2 7.2 5.8 8.4 6.4 9.0 6.5 9.6 6.7 10.3 6.6 10.5 6.3<br />
29 6.1 5.2 7.2 5.8 8.4 6.4 9.0 6.5 9.6 6.7 10.2 6.5 10.4 6.2<br />
31 6.1 5.2 7.2 5.8 8.4 6.4 9.0 6.5 9.6 6.7 10.0 6.5 10.2 6.2<br />
33 6.1 5.2 7.2 5.8 8.4 6.4 9.0 6.5 9.6 6.7 9.8 6.4 10.1 6.2<br />
35 6.1 5.2 7.2 5.8 8.4 6.4 9.0 6.5 9.5 6.6 9.7 6.4 9.9 6.1<br />
37 6.1 5.2 7.2 5.8 8.4 6.4 9.0 6.5 9.3 6.5 9.5 6.3 9.8 6.0<br />
39 6.1 5.2 7.2 5.8 8.4 6.4 9.0 6.5 9.2 6.5 9.4 6.2 9.6 6.0<br />
301
20.4.7 NA1E5 Series<br />
Indoor Unit: S-22NA1E5<br />
Nominal Capacity (kW) 2.2<br />
TC:Total Capacity (kW)、SHC:Sensible Heat Capacity (kW)<br />
Outdoor Indoor <strong>Air</strong> Temperature<br />
<strong>Air</strong> Temp. 14.0WB 16.0WB 18.0WB 19.0WB 20.0WB 22.0WB 24.0WB<br />
(°CDB) 20.0DB 23.0DB 26.0DB 27.0DB 28.0DB 30.0DB 32.0DB<br />
TC SHC TC SHC TC SHC TC SHC TC SHC TC SHC TC SHC<br />
10 1.5 1.4 1.8 1.6 2.1 1.7 2.2 1.8 2.3 1.8 2.6 1.9 2.9 1.9<br />
12 1.5 1.4 1.8 1.6 2.1 1.7 2.2 1.8 2.3 1.8 2.6 1.9 2.9 1.9<br />
14 1.5 1.4 1.8 1.6 2.1 1.7 2.2 1.8 2.3 1.8 2.6 1.9 2.8 1.8<br />
16 1.5 1.4 1.8 1.6 2.1 1.7 2.2 1.8 2.3 1.8 2.6 1.9 2.8 1.8<br />
18 1.5 1.4 1.8 1.6 2.1 1.7 2.2 1.8 2.3 1.8 2.6 1.9 2.7 1.8<br />
20 1.5 1.4 1.8 1.6 2.1 1.7 2.2 1.8 2.3 1.8 2.6 1.9 2.7 1.8<br />
21 1.5 1.4 1.8 1.6 2.1 1.7 2.2 1.8 2.3 1.8 2.6 1.9 2.7 1.8<br />
23 1.5 1.4 1.8 1.6 2.1 1.7 2.2 1.8 2.3 1.8 2.6 1.9 2.6 1.7<br />
25 1.5 1.4 1.8 1.6 2.1 1.7 2.2 1.8 2.3 1.8 2.6 1.9 2.6 1.7<br />
27 1.5 1.4 1.8 1.6 2.1 1.7 2.2 1.8 2.3 1.8 2.5 1.8 2.6 1.7<br />
29 1.5 1.4 1.8 1.6 2.1 1.7 2.2 1.8 2.3 1.8 2.5 1.8 2.5 1.7<br />
31 1.5 1.4 1.8 1.6 2.1 1.7 2.2 1.8 2.3 1.8 2.4 1.8 2.5 1.7<br />
33 1.5 1.4 1.8 1.6 2.1 1.7 2.2 1.8 2.3 1.8 2.4 1.7 2.5 1.7<br />
35 1.5 1.4 1.8 1.6 2.1 1.7 2.2 1.8 2.3 1.8 2.4 1.7 2.4 1.7<br />
37 1.5 1.4 1.8 1.6 2.1 1.7 2.2 1.7 2.3 1.8 2.3 1.7 2.4 1.7<br />
39 1.5 1.4 1.8 1.6 2.1 1.7 2.2 1.7 2.2 1.8 2.3 1.7 2.3 1.7<br />
Indoor Unit: S-28NA1E5<br />
Nominal Capacity (kW) 2.8<br />
TC:Total Capacity (kW)、SHC:Sensible Heat Capacity (kW)<br />
Outdoor Indoor <strong>Air</strong> Temperature<br />
<strong>Air</strong> Temp. 14.0WB 16.0WB 18.0WB 19.0WB 20.0WB 22.0WB 24.0WB<br />
(°CDB) 20.0DB 23.0DB 26.0DB 27.0DB 28.0DB 30.0DB 32.0DB<br />
TC SHC TC SHC TC SHC TC SHC TC SHC TC SHC TC SHC<br />
10 1.9 1.7 2.3 1.9 2.6 2.0 2.8 2.1 3.0 2.2 3.4 2.2 3.7 2.3<br />
12 1.9 1.7 2.3 1.9 2.6 2.0 2.8 2.1 3.0 2.2 3.4 2.2 3.6 2.3<br />
14 1.9 1.7 2.3 1.9 2.6 2.0 2.8 2.1 3.0 2.2 3.4 2.2 3.6 2.2<br />
16 1.9 1.7 2.3 1.9 2.6 2.0 2.8 2.1 3.0 2.2 3.4 2.2 3.5 2.2<br />
18 1.9 1.7 2.3 1.9 2.6 2.0 2.8 2.1 3.0 2.2 3.4 2.2 3.5 2.2<br />
20 1.9 1.7 2.3 1.9 2.6 2.0 2.8 2.1 3.0 2.2 3.4 2.2 3.4 2.1<br />
21 1.9 1.7 2.3 1.9 2.6 2.0 2.8 2.1 3.0 2.2 3.4 2.2 3.4 2.1<br />
23 1.9 1.7 2.3 1.9 2.6 2.0 2.8 2.1 3.0 2.2 3.3 2.2 3.4 2.1<br />
25 1.9 1.7 2.3 1.9 2.6 2.0 2.8 2.1 3.0 2.2 3.3 2.2 3.3 2.1<br />
27 1.9 1.7 2.3 1.9 2.6 2.0 2.8 2.1 3.0 2.2 3.2 2.1 3.3 2.1<br />
29 1.9 1.7 2.3 1.9 2.6 2.0 2.8 2.1 3.0 2.2 3.2 2.1 3.2 2.0<br />
31 1.9 1.7 2.3 1.9 2.6 2.0 2.8 2.1 3.0 2.2 3.1 2.1 3.2 2.0<br />
33 1.9 1.7 2.3 1.9 2.6 2.0 2.8 2.1 3.0 2.2 3.1 2.1 3.1 2.0<br />
35 1.9 1.7 2.3 1.9 2.6 2.0 2.8 2.1 3.0 2.2 3.0 2.1 3.1 2.0<br />
37 1.9 1.7 2.3 1.9 2.6 2.0 2.8 2.1 2.9 2.2 3.0 2.1 3.0 2.0<br />
39 1.9 1.7 2.3 1.9 2.6 2.0 2.8 2.1 2.9 2.2 2.9 2.0 3.0 2.0<br />
302
Indoor Unit: S-32NA1E5<br />
Nominal Capacity (kW) 3.2<br />
TC:Total Capacity (kW)、SHC:Sensible Heat Capacity (kW)<br />
Outdoor Indoor <strong>Air</strong> Temperature<br />
<strong>Air</strong> Temp. 14.0WB 16.0WB 18.0WB 19.0WB 20.0WB 22.0WB 24.0WB<br />
(°CDB) 20.0DB 23.0DB 26.0DB 27.0DB 28.0DB 30.0DB 32.0DB<br />
TC SHC TC SHC TC SHC TC SHC TC SHC TC SHC TC SHC<br />
10 2.2 2.0 2.6 2.3 3.0 2.4 3.2 2.5 3.4 2.6 3.8 2.6 4.2 2.6<br />
12 2.2 2.0 2.6 2.3 3.0 2.4 3.2 2.5 3.4 2.6 3.8 2.6 4.1 2.6<br />
14 2.2 2.0 2.6 2.3 3.0 2.4 3.2 2.5 3.4 2.6 3.8 2.6 4.1 2.5<br />
16 2.2 2.0 2.6 2.3 3.0 2.4 3.2 2.5 3.4 2.6 3.8 2.6 4.0 2.5<br />
18 2.2 2.0 2.6 2.3 3.0 2.4 3.2 2.5 3.4 2.6 3.8 2.6 4.0 2.5<br />
20 2.2 2.0 2.6 2.3 3.0 2.4 3.2 2.5 3.4 2.6 3.8 2.6 3.9 2.4<br />
21 2.2 2.0 2.6 2.3 3.0 2.4 3.2 2.5 3.4 2.6 3.8 2.6 3.9 2.4<br />
23 2.2 2.0 2.6 2.3 3.0 2.4 3.2 2.5 3.4 2.6 3.7 2.6 3.9 2.4<br />
25 2.2 2.0 2.6 2.3 3.0 2.4 3.2 2.5 3.4 2.6 3.7 2.6 3.8 2.4<br />
27 2.2 2.0 2.6 2.3 3.0 2.4 3.2 2.5 3.4 2.6 3.6 2.5 3.8 2.4<br />
29 2.2 2.0 2.6 2.3 3.0 2.4 3.2 2.5 3.4 2.6 3.6 2.5 3.7 2.3<br />
31 2.2 2.0 2.6 2.3 3.0 2.4 3.2 2.5 3.4 2.6 3.5 2.5 3.7 2.3<br />
33 2.2 2.0 2.6 2.3 3.0 2.4 3.2 2.5 3.4 2.6 3.5 2.5 3.6 2.3<br />
35 2.2 2.0 2.6 2.3 3.0 2.4 3.2 2.5 3.4 2.6 3.4 2.5 3.6 2.3<br />
37 2.2 2.0 2.6 2.3 3.0 2.4 3.2 2.5 3.3 2.5 3.4 2.5 3.5 2.3<br />
39 2.2 2.0 2.6 2.3 3.0 2.4 3.2 2.5 3.3 2.5 3.3 2.4 3.5 2.3<br />
Indoor Unit: S-36NA1E5<br />
Nominal Capacity (kW) 3.6<br />
TC:Total Capacity (kW)、SHC:Sensible Heat Capacity (kW)<br />
Outdoor Indoor <strong>Air</strong> Temperature<br />
<strong>Air</strong> Temp. 14.0WB 16.0WB 18.0WB 19.0WB 20.0WB 22.0WB 24.0WB<br />
(°CDB) 20.0DB 23.0DB 26.0DB 27.0DB 28.0DB 30.0DB 32.0DB<br />
TC SHC TC SHC TC SHC TC SHC TC SHC TC SHC TC SHC<br />
10 2.4 2.2 2.9 2.6 3.4 2.8 3.6 2.8 3.8 2.9 4.3 2.9 4.7 3.0<br />
12 2.4 2.2 2.9 2.6 3.4 2.8 3.6 2.8 3.8 2.9 4.3 2.9 4.7 3.0<br />
14 2.4 2.2 2.9 2.6 3.4 2.8 3.6 2.8 3.8 2.9 4.3 2.9 4.6 3.0<br />
16 2.4 2.2 2.9 2.6 3.4 2.8 3.6 2.8 3.8 2.9 4.3 2.9 4.6 3.0<br />
18 2.4 2.2 2.9 2.6 3.4 2.8 3.6 2.8 3.8 2.9 4.3 2.9 4.5 2.9<br />
20 2.4 2.2 2.9 2.6 3.4 2.8 3.6 2.8 3.8 2.9 4.3 2.9 4.4 2.9<br />
21 2.4 2.2 2.9 2.6 3.4 2.8 3.6 2.8 3.8 2.9 4.3 2.9 4.4 2.9<br />
23 2.4 2.2 2.9 2.6 3.4 2.8 3.6 2.8 3.8 2.9 4.2 2.8 4.3 2.8<br />
25 2.4 2.2 2.9 2.6 3.4 2.8 3.6 2.8 3.8 2.9 4.2 2.8 4.3 2.8<br />
27 2.4 2.2 2.9 2.6 3.4 2.8 3.6 2.8 3.8 2.9 4.1 2.8 4.2 2.8<br />
29 2.4 2.2 2.9 2.6 3.4 2.8 3.6 2.8 3.8 2.9 4.1 2.8 4.2 2.7<br />
31 2.4 2.2 2.9 2.6 3.4 2.8 3.6 2.8 3.8 2.9 4.0 2.8 4.1 2.7<br />
33 2.4 2.2 2.9 2.6 3.4 2.8 3.6 2.8 3.8 2.9 3.9 2.7 4.0 2.7<br />
35 2.4 2.2 2.9 2.6 3.4 2.8 3.6 2.8 3.8 2.9 3.9 2.7 4.0 2.7<br />
37 2.4 2.2 2.9 2.6 3.4 2.8 3.6 2.8 3.7 2.8 3.8 2.7 3.9 2.7<br />
39 2.4 2.2 2.9 2.6 3.4 2.8 3.6 2.8 3.7 2.8 3.8 2.7 3.8 2.6<br />
303
Indoor Unit: S-45NA1E5<br />
Nominal Capacity (kW) 4.5<br />
TC:Total Capacity (kW)、SHC:Sensible Heat Capacity (kW)<br />
Outdoor Indoor <strong>Air</strong> Temperature<br />
<strong>Air</strong> Temp. 14.0WB 16.0WB 18.0WB 19.0WB 20.0WB 22.0WB 24.0WB<br />
(°CDB) 20.0DB 23.0DB 26.0DB 27.0DB 28.0DB 30.0DB 32.0DB<br />
TC SHC TC SHC TC SHC TC SHC TC SHC TC SHC TC SHC<br />
10 3.0 2.7 3.6 3.0 4.2 3.3 4.5 3.4 4.8 3.5 5.4 3.2 5.9 3.5<br />
12 3.0 2.7 3.6 3.0 4.2 3.3 4.5 3.4 4.8 3.5 5.4 3.2 5.8 3.5<br />
14 3.0 2.7 3.6 3.0 4.2 3.3 4.5 3.4 4.8 3.5 5.4 3.2 5.8 3.5<br />
16 3.0 2.7 3.6 3.0 4.2 3.3 4.5 3.4 4.8 3.5 5.4 3.2 5.7 3.4<br />
18 3.0 2.7 3.6 3.0 4.2 3.3 4.5 3.4 4.8 3.5 5.4 3.2 5.6 3.4<br />
20 3.0 2.7 3.6 3.0 4.2 3.3 4.5 3.4 4.8 3.5 5.4 3.2 5.5 3.4<br />
21 3.0 2.7 3.6 3.0 4.2 3.3 4.5 3.4 4.8 3.5 5.4 3.2 5.5 3.3<br />
23 3.0 2.7 3.6 3.0 4.2 3.3 4.5 3.4 4.8 3.5 5.3 3.2 5.4 3.3<br />
25 3.0 2.7 3.6 3.0 4.2 3.3 4.5 3.4 4.8 3.5 5.2 3.2 5.3 3.3<br />
27 3.0 2.7 3.6 3.0 4.2 3.3 4.5 3.4 4.8 3.5 5.2 3.1 5.3 3.3<br />
29 3.0 2.7 3.6 3.0 4.2 3.3 4.5 3.4 4.8 3.5 5.1 3.1 5.2 3.2<br />
31 3.0 2.7 3.6 3.0 4.2 3.3 4.5 3.4 4.8 3.5 5.0 3.1 5.1 3.2<br />
33 3.0 2.7 3.6 3.0 4.2 3.3 4.5 3.4 4.8 3.5 4.9 3.0 5.0 3.2<br />
35 3.0 2.7 3.6 3.0 4.2 3.3 4.5 3.4 4.7 3.5 4.9 3.0 5.0 3.1<br />
37 3.0 2.7 3.6 3.0 4.2 3.3 4.5 3.4 4.7 3.5 4.8 3.0 4.9 3.1<br />
39 3.0 2.7 3.6 3.0 4.2 3.3 4.5 3.4 4.6 3.4 4.7 3.0 4.8 3.1<br />
Indoor Unit: S-56NA1E5<br />
Nominal Capacity (kW) 5.6<br />
TC:Total Capacity (kW)、SHC:Sensible Heat Capacity (kW)<br />
Outdoor Indoor <strong>Air</strong> Temperature<br />
<strong>Air</strong> Temp. 14.0WB 16.0WB 18.0WB 19.0WB 20.0WB 22.0WB 24.0WB<br />
(°CDB) 20.0DB 23.0DB 26.0DB 27.0DB 28.0DB 30.0DB 32.0DB<br />
TC SHC TC SHC TC SHC TC SHC TC SHC TC SHC TC SHC<br />
10 3.8 3.2 4.5 3.6 5.2 4.0 5.6 4.1 6.0 4.2 6.7 4.2 7.4 4.3<br />
12 3.8 3.2 4.5 3.6 5.2 4.0 5.6 4.1 6.0 4.2 6.7 4.2 7.3 4.3<br />
14 3.8 3.2 4.5 3.6 5.2 4.0 5.6 4.1 6.0 4.2 6.7 4.2 7.2 4.3<br />
16 3.8 3.2 4.5 3.6 5.2 4.0 5.6 4.1 6.0 4.2 6.7 4.2 7.1 4.2<br />
18 3.8 3.2 4.5 3.6 5.2 4.0 5.6 4.1 6.0 4.2 6.7 4.2 7.0 4.2<br />
20 3.8 3.2 4.5 3.6 5.2 4.0 5.6 4.1 6.0 4.2 6.7 4.2 6.9 4.1<br />
21 3.8 3.2 4.5 3.6 5.2 4.0 5.6 4.1 6.0 4.2 6.7 4.2 6.8 4.1<br />
23 3.8 3.2 4.5 3.6 5.2 4.0 5.6 4.1 6.0 4.2 6.7 4.2 6.7 4.1<br />
25 3.8 3.2 4.5 3.6 5.2 4.0 5.6 4.1 6.0 4.2 6.5 4.2 6.6 4.0<br />
27 3.8 3.2 4.5 3.6 5.2 4.0 5.6 4.1 6.0 4.2 6.4 4.1 6.6 4.0<br />
29 3.8 3.2 4.5 3.6 5.2 4.0 5.6 4.1 6.0 4.2 6.3 4.1 6.5 3.9<br />
31 3.8 3.2 4.5 3.6 5.2 4.0 5.6 4.1 6.0 4.2 6.2 4.1 6.4 3.9<br />
33 3.8 3.2 4.5 3.6 5.2 4.0 5.6 4.1 6.0 4.2 6.1 4.0 6.3 3.9<br />
35 3.8 3.2 4.5 3.6 5.2 4.0 5.6 4.1 5.9 4.2 6.0 4.0 6.2 3.8<br />
37 3.8 3.2 4.5 3.6 5.2 4.0 5.6 4.1 5.8 4.2 5.9 3.9 6.1 3.8<br />
39 3.8 3.2 4.5 3.6 5.2 4.0 5.6 4.1 5.7 4.1 5.8 3.9 6.0 3.7<br />
304
20.4.8 MA1E5 Series<br />
Indoor Unit: S-45MA1E5<br />
Nominal Capacity (kW) 4.5<br />
TC:Total Capacity (kW)、SHC:Sensible Heat Capacity (kW)<br />
Outdoor Indoor <strong>Air</strong> Temperature<br />
<strong>Air</strong> Temp. 14.0WB 16.0WB 18.0WB 19.0WB 20.0WB 22.0WB 24.0WB<br />
(°CDB) 20.0DB 23.0DB 26.0DB 27.0DB 28.0DB 30.0DB 32.0DB<br />
TC SHC TC SHC TC SHC TC SHC TC SHC TC SHC TC SHC<br />
10 3.0 2.7 3.6 3.0 4.2 3.3 4.5 3.4 4.8 3.5 5.4 3.2 5.9 3.5<br />
12 3.0 2.7 3.6 3.0 4.2 3.3 4.5 3.4 4.8 3.5 5.4 3.2 5.8 3.5<br />
14 3.0 2.7 3.6 3.0 4.2 3.3 4.5 3.4 4.8 3.5 5.4 3.2 5.8 3.5<br />
16 3.0 2.7 3.6 3.0 4.2 3.3 4.5 3.4 4.8 3.5 5.4 3.2 5.7 3.4<br />
18 3.0 2.7 3.6 3.0 4.2 3.3 4.5 3.4 4.8 3.5 5.4 3.2 5.6 3.4<br />
20 3.0 2.7 3.6 3.0 4.2 3.3 4.5 3.4 4.8 3.5 5.4 3.2 5.5 3.4<br />
21 3.0 2.7 3.6 3.0 4.2 3.3 4.5 3.4 4.8 3.5 5.4 3.2 5.5 3.3<br />
23 3.0 2.7 3.6 3.0 4.2 3.3 4.5 3.4 4.8 3.5 5.3 3.2 5.4 3.3<br />
25 3.0 2.7 3.6 3.0 4.2 3.3 4.5 3.4 4.8 3.5 5.2 3.2 5.3 3.3<br />
27 3.0 2.7 3.6 3.0 4.2 3.3 4.5 3.4 4.8 3.5 5.2 3.1 5.3 3.3<br />
29 3.0 2.7 3.6 3.0 4.2 3.3 4.5 3.4 4.8 3.5 5.1 3.1 5.2 3.2<br />
31 3.0 2.7 3.6 3.0 4.2 3.3 4.5 3.4 4.8 3.5 5.0 3.1 5.1 3.2<br />
33 3.0 2.7 3.6 3.0 4.2 3.3 4.5 3.4 4.8 3.5 4.9 3.0 5.0 3.2<br />
35 3.0 2.7 3.6 3.0 4.2 3.3 4.5 3.4 4.7 3.5 4.9 3.0 5.0 3.1<br />
37 3.0 2.7 3.6 3.0 4.2 3.3 4.5 3.4 4.7 3.5 4.8 3.0 4.9 3.1<br />
39 3.0 2.7 3.6 3.0 4.2 3.3 4.5 3.4 4.6 3.4 4.7 3.0 4.8 3.1<br />
Indoor Unit: S-56MA1E5<br />
Nominal Capacity (kW) 5.6<br />
TC:Total Capacity (kW)、SHC:Sensible Heat Capacity (kW)<br />
Outdoor Indoor <strong>Air</strong> Temperature<br />
<strong>Air</strong> Temp. 14.0WB 16.0WB 18.0WB 19.0WB 20.0WB 22.0WB 24.0WB<br />
(°CDB) 20.0DB 23.0DB 26.0DB 27.0DB 28.0DB 30.0DB 32.0DB<br />
TC SHC TC SHC TC SHC TC SHC TC SHC TC SHC TC SHC<br />
10 3.8 3.2 4.5 3.6 5.2 4.0 5.6 4.1 6.0 4.2 6.7 4.2 7.4 4.3<br />
12 3.8 3.2 4.5 3.6 5.2 4.0 5.6 4.1 6.0 4.2 6.7 4.2 7.3 4.3<br />
14 3.8 3.2 4.5 3.6 5.2 4.0 5.6 4.1 6.0 4.2 6.7 4.2 7.2 4.3<br />
16 3.8 3.2 4.5 3.6 5.2 4.0 5.6 4.1 6.0 4.2 6.7 4.2 7.1 4.2<br />
18 3.8 3.2 4.5 3.6 5.2 4.0 5.6 4.1 6.0 4.2 6.7 4.2 7.0 4.2<br />
20 3.8 3.2 4.5 3.6 5.2 4.0 5.6 4.1 6.0 4.2 6.7 4.2 6.9 4.1<br />
21 3.8 3.2 4.5 3.6 5.2 4.0 5.6 4.1 6.0 4.2 6.7 4.2 6.8 4.1<br />
23 3.8 3.2 4.5 3.6 5.2 4.0 5.6 4.1 6.0 4.2 6.7 4.2 6.7 4.1<br />
25 3.8 3.2 4.5 3.6 5.2 4.0 5.6 4.1 6.0 4.2 6.5 4.2 6.6 4.0<br />
27 3.8 3.2 4.5 3.6 5.2 4.0 5.6 4.1 6.0 4.2 6.4 4.1 6.6 4.0<br />
29 3.8 3.2 4.5 3.6 5.2 4.0 5.6 4.1 6.0 4.2 6.3 4.1 6.5 3.9<br />
31 3.8 3.2 4.5 3.6 5.2 4.0 5.6 4.1 6.0 4.2 6.2 4.1 6.4 3.9<br />
33 3.8 3.2 4.5 3.6 5.2 4.0 5.6 4.1 6.0 4.2 6.1 4.0 6.3 3.9<br />
35 3.8 3.2 4.5 3.6 5.2 4.0 5.6 4.1 5.9 4.2 6.0 4.0 6.2 3.8<br />
37 3.8 3.2 4.5 3.6 5.2 4.0 5.6 4.1 5.8 4.2 5.9 3.9 6.1 3.8<br />
39 3.8 3.2 4.5 3.6 5.2 4.0 5.6 4.1 5.7 4.1 5.8 3.9 6.0 3.7<br />
305
Indoor Unit: S-63MA1E5<br />
Nominal Capacity (kW) 6.3<br />
TC:Total Capacity (kW)、SHC:Sensible Heat Capacity (kW)<br />
Outdoor Indoor <strong>Air</strong> Temperature<br />
<strong>Air</strong> Temp. 14.0WB 16.0WB 18.0WB 19.0WB 20.0WB 22.0WB 24.0WB<br />
(°CDB) 20.0DB 23.0DB 26.0DB 27.0DB 28.0DB 30.0DB 32.0DB<br />
TC SHC TC SHC TC SHC TC SHC TC SHC TC SHC TC SHC<br />
10 4.0 3.4 5.1 4.1 5.9 4.5 6.3 4.6 6.8 4.8 7.6 4.8 8.3 4.9<br />
12 4.0 3.4 5.1 4.1 5.9 4.5 6.3 4.6 6.8 4.8 7.6 4.8 8.2 4.9<br />
14 4.0 3.4 5.1 4.1 5.9 4.5 6.3 4.6 6.8 4.8 7.6 4.8 8.1 4.9<br />
16 4.0 3.4 5.1 4.1 5.9 4.5 6.3 4.6 6.8 4.8 7.6 4.8 8.0 4.8<br />
18 4.0 3.4 5.1 4.1 5.9 4.5 6.3 4.6 6.8 4.8 7.6 4.8 7.9 4.8<br />
20 4.0 3.4 5.1 4.1 5.9 4.5 6.3 4.6 6.8 4.8 7.6 4.8 7.8 4.7<br />
21 4.0 3.4 5.1 4.1 5.9 4.5 6.3 4.6 6.8 4.8 7.6 4.8 7.7 4.7<br />
23 4.0 3.4 5.1 4.1 5.9 4.5 6.3 4.6 6.8 4.8 7.5 4.8 7.6 4.7<br />
25 4.0 3.4 5.1 4.1 5.9 4.5 6.3 4.6 6.8 4.8 7.4 4.8 7.5 4.6<br />
27 4.0 3.4 5.1 4.1 5.9 4.5 6.3 4.6 6.8 4.8 7.3 4.7 7.5 4.6<br />
29 4.0 3.4 5.1 4.1 5.9 4.5 6.3 4.6 6.8 4.8 7.2 4.7 7.4 4.5<br />
31 4.0 3.4 5.1 4.1 5.9 4.5 6.3 4.6 6.8 4.8 7.1 4.7 7.3 4.5<br />
33 4.0 3.4 5.1 4.1 5.9 4.5 6.3 4.6 6.8 4.8 7.0 4.6 7.2 4.5<br />
35 4.0 3.4 5.1 4.1 5.9 4.5 6.3 4.6 6.8 4.8 6.9 4.6 7.1 4.4<br />
37 4.0 3.4 5.1 4.1 5.9 4.5 6.3 4.6 6.8 4.8 6.8 4.5 7.0 4.4<br />
39 4.0 3.4 5.1 4.1 5.9 4.5 6.3 4.6 6.8 4.8 6.7 4.5 6.9 4.3<br />
Indoor Unit: S-71MA1E5<br />
Nominal Capacity (kW) 7.1<br />
TC:Total Capacity (kW)、SHC:Sensible Heat Capacity (kW)<br />
Outdoor Indoor <strong>Air</strong> Temperature<br />
<strong>Air</strong> Temp. 14.0WB 16.0WB 18.0WB 19.0WB 20.0WB 22.0WB 24.0WB<br />
(°CDB) 20.0DB 23.0DB 26.0DB 27.0DB 28.0DB 30.0DB 32.0DB<br />
TC SHC TC SHC TC SHC TC SHC TC SHC TC SHC TC SHC<br />
10 4.8 4.1 5.7 4.6 6.6 5.0 7.1 5.2 7.6 5.3 8.5 5.4 9.3 5.5<br />
12 4.8 4.1 5.7 4.6 6.6 5.0 7.1 5.2 7.6 5.3 8.5 5.4 9.2 5.4<br />
14 4.8 4.1 5.7 4.6 6.6 5.0 7.1 5.2 7.6 5.3 8.5 5.4 9.1 5.4<br />
16 4.8 4.1 5.7 4.6 6.6 5.0 7.1 5.2 7.6 5.3 8.5 5.4 9.0 5.3<br />
18 4.8 4.1 5.7 4.6 6.6 5.0 7.1 5.2 7.6 5.3 8.5 5.4 8.8 5.2<br />
20 4.8 4.1 5.7 4.6 6.6 5.0 7.1 5.2 7.6 5.3 8.5 5.4 8.7 5.1<br />
21 4.8 4.1 5.7 4.6 6.6 5.0 7.1 5.2 7.6 5.3 8.5 5.4 8.7 5.1<br />
23 4.8 4.1 5.7 4.6 6.6 5.0 7.1 5.2 7.6 5.3 8.4 5.4 8.5 5.0<br />
25 4.8 4.1 5.7 4.6 6.6 5.0 7.1 5.2 7.6 5.3 8.3 5.3 8.4 5.0<br />
27 4.8 4.1 5.7 4.6 6.6 5.0 7.1 5.2 7.6 5.3 8.1 5.2 8.3 5.0<br />
29 4.8 4.1 5.7 4.6 6.6 5.0 7.1 5.2 7.6 5.3 8.0 5.1 8.2 4.9<br />
31 4.8 4.1 5.7 4.6 6.6 5.0 7.1 5.2 7.6 5.3 7.9 5.1 8.1 4.9<br />
33 4.8 4.1 5.7 4.6 6.6 5.0 7.1 5.2 7.6 5.3 7.8 5.0 7.9 4.8<br />
35 4.8 4.1 5.7 4.6 6.6 5.0 7.1 5.2 7.5 5.2 7.7 5.0 7.8 4.8<br />
37 4.8 4.1 5.7 4.6 6.6 5.0 7.1 5.2 7.4 5.2 7.5 4.9 7.7 4.7<br />
39 4.8 4.1 5.7 4.6 6.6 5.0 7.1 5.2 7.2 5.1 7.4 4.9 7.6 4.7<br />
306
Indoor Unit: S-90MA1E5<br />
Nominal Capacity (kW) 9.0<br />
TC:Total Capacity (kW)、SHC:Sensible Heat Capacity (kW)<br />
Outdoor Indoor <strong>Air</strong> Temperature<br />
<strong>Air</strong> Temp. 14.0WB 16.0WB 18.0WB 19.0WB 20.0WB 22.0WB 24.0WB<br />
(°CDB) 20.0DB 23.0DB 26.0DB 27.0DB 28.0DB 30.0DB 32.0DB<br />
TC SHC TC SHC TC SHC TC SHC TC SHC TC SHC TC SHC<br />
10 6.1 5.2 7.2 5.8 8.4 6.4 9.0 6.5 9.6 6.7 10.8 6.9 11.8 7.1<br />
12 6.1 5.2 7.2 5.8 8.4 6.4 9.0 6.5 9.6 6.7 10.8 6.9 11.7 7.0<br />
14 6.1 5.2 7.2 5.8 8.4 6.4 9.0 6.5 9.6 6.7 10.8 6.9 11.5 6.9<br />
16 6.1 5.2 7.2 5.8 8.4 6.4 9.0 6.5 9.6 6.7 10.8 6.9 11.4 6.8<br />
18 6.1 5.2 7.2 5.8 8.4 6.4 9.0 6.5 9.6 6.7 10.8 6.9 11.2 6.7<br />
20 6.1 5.2 7.2 5.8 8.4 6.4 9.0 6.5 9.6 6.7 10.8 6.9 11.1 6.6<br />
21 6.1 5.2 7.2 5.8 8.4 6.4 9.0 6.5 9.6 6.7 10.8 6.9 11.0 6.6<br />
23 6.1 5.2 7.2 5.8 8.4 6.4 9.0 6.5 9.6 6.7 10.6 6.8 10.8 6.4<br />
25 6.1 5.2 7.2 5.8 8.4 6.4 9.0 6.5 9.6 6.7 10.5 6.7 10.7 6.4<br />
27 6.1 5.2 7.2 5.8 8.4 6.4 9.0 6.5 9.6 6.7 10.3 6.6 10.5 6.3<br />
29 6.1 5.2 7.2 5.8 8.4 6.4 9.0 6.5 9.6 6.7 10.2 6.5 10.4 6.2<br />
31 6.1 5.2 7.2 5.8 8.4 6.4 9.0 6.5 9.6 6.7 10.0 6.5 10.2 6.2<br />
33 6.1 5.2 7.2 5.8 8.4 6.4 9.0 6.5 9.6 6.7 9.8 6.4 10.1 6.2<br />
35 6.1 5.2 7.2 5.8 8.4 6.4 9.0 6.5 9.5 6.6 9.7 6.4 9.9 6.1<br />
37 6.1 5.2 7.2 5.8 8.4 6.4 9.0 6.5 9.3 6.5 9.5 6.3 9.8 6.0<br />
39 6.1 5.2 7.2 5.8 8.4 6.4 9.0 6.5 9.2 6.5 9.4 6.2 9.6 6.0<br />
307
20.5 Heating Capacity Tables<br />
20.5.1 U-4LA1E5<br />
Combination 130%<br />
Capacity index(kW) 16.25<br />
TC:Total Capacity (kW)、PI:Power Input (kW)<br />
Outdoor Indoor <strong>Air</strong> Temperature (°CDB)<br />
<strong>Air</strong> Temp. 16.0 18.0 20.0 21.0 22.0 24.0<br />
(°CWB) TC PI TC PI TC PI TC PI TC PI TC PI<br />
kW kW kW kW kW kW kW kW kW kW kW kW<br />
-15 11.7 3.67 11.7 3.76 11.7 3.85 11.6 3.89 11.6 3.94 11.6 3.65<br />
-13 12.3 3.78 12.3 3.86 12.3 3.94 12.3 3.95 12.2 3.77 12.2 3.41<br />
-11 12.9 4.02 12.9 4.10 12.9 4.03 12.9 3.85 12.9 3.68 12.8 3.35<br />
-10 13.2 4.10 13.2 4.17 13.2 4.07 13.2 3.90 13.2 3.74 13.1 3.41<br />
-9.1 13.5 4.17 13.5 4.20 13.5 4.10 13.4 3.94 13.4 3.78 13.4 3.46<br />
-7.6 14.0 4.46 13.9 4.26 13.9 4.16 13.9 4.00 13.9 3.85 13.9 3.56<br />
-5.6 14.6 4.61 14.6 4.31 14.5 4.23 14.5 4.09 14.5 3.95 14.2 3.67<br />
-3.7 15.2 4.64 15.1 4.36 15.1 4.28 15.1 4.14 15.1 4.01 14.2 3.75<br />
-0.7 16.1 4.69 16.1 4.43 16.0 4.37 15.7 4.25 15.2 4.13 14.2 3.89<br />
2.2 17.0 4.65 16.9 4.41 16.3 4.17 15.7 4.05 15.2 3.94 14.2 3.72<br />
4.1 17.6 4.44 17.3 4.21 16.3 3.99 15.7 3.88 15.2 3.77 14.2 3.56<br />
6 18.1 4.26 17.3 4.04 16.3 3.83 15.7 3.73 15.2 3.62 14.2 3.42<br />
7.9 18.3 4.09 17.3 3.88 16.3 3.68 15.7 3.58 15.2 3.48 14.2 3.29<br />
9.8 18.3 3.94 17.3 3.74 16.3 3.54 15.7 3.45 15.2 3.35 14.2 3.17<br />
11.8 18.3 3.78 17.3 3.59 16.3 3.40 15.7 3.31 15.2 3.22 14.2 3.04<br />
13.7 18.3 3.65 17.3 3.47 16.3 3.29 15.7 3.20 15.2 3.12 14.2 2.95<br />
Combination 120%<br />
Capacity index(kW) 15.00<br />
TC:Total Capacity (kW)、PI:Power Input (kW)<br />
Outdoor Indoor <strong>Air</strong> Temperature (°CDB)<br />
<strong>Air</strong> Temp. 16.0 18.0 20.0 21.0 22.0 24.0<br />
(°CWB) TC PI TC PI TC PI TC PI TC PI TC PI<br />
kW kW kW kW kW kW kW kW kW kW kW kW<br />
-15 11.7 3.80 11.6 3.89 11.6 3.98 11.6 4.02 11.6 4.07 11.6 3.78<br />
-13 12.3 3.91 12.3 3.99 12.2 4.07 12.2 4.08 12.2 3.90 12.2 3.54<br />
-11 12.9 4.14 12.9 4.22 12.8 4.15 12.8 3.97 12.8 3.80 12.8 3.47<br />
-10 13.2 4.22 13.2 4.29 13.2 4.19 13.1 4.02 13.1 3.86 13.1 3.53<br />
-9.1 13.5 4.29 13.5 4.32 13.4 4.22 13.4 4.06 13.4 3.90 13.1 3.58<br />
-7.6 13.9 4.57 13.9 4.37 13.9 4.27 13.9 4.11 13.9 3.96 13.1 3.67<br />
-5.6 14.5 4.65 14.5 4.40 14.5 4.33 14.5 4.19 14.0 4.05 13.1 3.77<br />
-3.7 15.1 4.70 15.1 4.42 15.0 4.35 14.5 4.21 14.0 4.08 13.1 3.82<br />
-0.7 16.0 4.36 16.0 4.10 15.0 4.03 14.5 3.91 14.0 3.79 13.1 3.55<br />
2.2 16.9 4.24 16.0 4.00 15.0 3.76 14.5 3.64 14.0 3.53 13.1 3.31<br />
4.1 16.9 4.06 16.0 3.83 15.0 3.61 14.5 3.50 14.0 3.39 13.1 3.18<br />
6 16.9 3.89 16.0 3.67 15.0 3.46 14.5 3.36 14.0 3.25 13.1 3.05<br />
7.9 16.9 3.74 16.0 3.53 15.0 3.33 14.5 3.23 14.0 3.13 13.1 2.94<br />
9.8 16.9 3.61 16.0 3.41 15.0 3.21 14.5 3.12 14.0 3.02 13.1 2.84<br />
11.8 16.9 3.47 16.0 3.28 15.0 3.09 14.5 3.00 14.0 2.91 13.1 2.73<br />
13.7 16.9 3.34 16.0 3.16 15.0 2.98 14.5 2.89 14.0 2.81 13.1 2.64<br />
308
Combination 110%<br />
Capacity index(kW) 13.75<br />
TC:Total Capacity (kW)、PI:Power Input (kW)<br />
Outdoor Indoor <strong>Air</strong> Temperature (°CDB)<br />
<strong>Air</strong> Temp. 16.0 18.0 20.0 21.0 22.0 24.0<br />
(°CWB) TC PI TC PI TC PI TC PI TC PI TC PI<br />
kW kW kW kW kW kW kW kW kW kW kW kW<br />
-15 11.6 3.94 11.6 4.03 11.6 4.12 11.6 4.16 11.6 4.21 11.5 3.92<br />
-13 12.2 4.04 12.2 4.12 12.2 4.20 12.2 4.21 12.2 4.03 12.0 3.67<br />
-11 12.9 4.27 12.8 4.35 12.8 4.28 12.8 4.10 12.8 3.93 12.0 3.60<br />
-10 13.2 4.34 13.1 4.41 13.1 4.31 13.1 4.14 12.9 3.98 12.0 3.65<br />
-9.1 13.4 4.41 13.4 4.44 13.4 4.34 13.3 4.18 12.9 4.02 12.0 3.70<br />
-7.6 13.9 4.64 13.9 4.44 13.8 4.34 13.3 4.18 12.9 4.03 12.0 3.74<br />
-5.6 14.5 4.47 14.5 4.17 13.8 4.10 13.3 3.96 12.9 3.82 12.0 3.54<br />
-3.7 15.1 4.25 14.6 3.97 13.8 3.90 13.3 3.76 12.9 3.63 12.0 3.37<br />
-0.7 15.5 3.94 14.6 3.68 13.8 3.61 13.3 3.49 12.9 3.37 12.0 3.13<br />
2.2 15.5 3.86 14.6 3.62 13.8 3.38 13.3 3.26 12.9 3.15 12.0 2.93<br />
4.1 15.5 3.69 14.6 3.46 13.8 3.24 13.3 3.13 12.9 3.02 12.0 2.81<br />
6 15.5 3.54 14.6 3.32 13.8 3.11 13.3 3.01 12.9 2.90 12.0 2.70<br />
7.9 15.5 3.41 14.6 3.20 13.8 3.00 13.3 2.90 12.9 2.80 12.0 2.61<br />
9.8 15.5 3.29 14.6 3.09 13.8 2.89 13.3 2.80 12.9 2.70 12.0 2.52<br />
11.8 15.5 3.16 14.6 2.97 13.8 2.78 13.3 2.69 12.9 2.60 12.0 2.42<br />
13.7 15.5 3.05 14.6 2.87 13.8 2.69 13.3 2.60 12.9 2.52 12.0 2.35<br />
Combination 100%<br />
Capacity index(kW) 12.50<br />
TC:Total Capacity (kW)、PI:Power Input (kW)<br />
Outdoor Indoor <strong>Air</strong> Temperature (°CDB)<br />
<strong>Air</strong> Temp. 16.0 18.0 20.0 21.0 22.0 24.0<br />
(°CWB) TC PI TC PI TC PI TC PI TC PI TC PI<br />
kW kW kW kW kW kW kW kW kW kW kW kW<br />
-15 11.6 4.08 11.6 4.17 11.6 4.26 11.5 4.30 11.5 4.35 10.9 4.06<br />
-13 12.2 4.17 12.2 4.25 12.2 4.33 12.1 4.34 11.7 4.16 10.9 3.80<br />
-11 12.8 4.24 12.8 4.32 12.5 4.25 12.1 4.07 11.7 3.90 10.9 3.57<br />
-10 13.1 4.28 13.1 4.35 12.5 4.12 12.1 3.95 11.7 3.79 10.9 3.46<br />
-9.1 13.4 4.31 13.3 4.34 12.5 4.01 12.1 3.85 11.7 3.69 10.9 3.37<br />
-7.6 13.9 4.35 13.3 4.15 12.5 3.84 12.1 3.68 11.7 3.53 10.9 3.24<br />
-5.6 14.1 4.23 13.3 3.93 12.5 3.63 12.1 3.49 11.7 3.35 10.9 3.07<br />
-3.7 14.1 4.02 13.3 3.74 12.5 3.46 12.1 3.32 11.7 3.19 10.9 2.93<br />
-0.7 14.1 3.73 13.3 3.47 12.5 3.21 12.1 3.09 11.7 2.97 10.9 2.73<br />
2.2 14.1 3.49 13.3 3.25 12.5 3.01 12.1 2.89 11.7 2.78 10.9 2.56<br />
4.1 14.1 3.34 13.3 3.11 12.5 2.89 12.1 2.78 11.7 2.67 10.9 2.46<br />
6 14.1 3.21 13.3 2.99 12.5 2.78 12.1 2.68 11.7 2.57 10.9 2.37<br />
7.9 14.1 3.09 13.3 2.88 12.5 2.68 12.1 2.58 11.7 2.48 10.9 2.29<br />
9.8 14.1 2.98 13.3 2.78 12.5 2.58 12.1 2.49 11.7 2.39 10.9 2.21<br />
11.8 14.1 2.87 13.3 2.68 12.5 2.49 12.1 2.40 11.7 2.31 10.9 2.13<br />
13.7 14.1 2.77 13.3 2.59 12.5 2.41 12.1 2.32 11.7 2.24 10.9 2.07<br />
309
Combination 90%<br />
Capacity index(kW) 11.25<br />
TC:Total Capacity (kW)、PI:Power Input (kW)<br />
Outdoor Indoor <strong>Air</strong> Temperature (°CDB)<br />
<strong>Air</strong> Temp. 16.0 18.0 20.0 21.0 22.0 24.0<br />
(°CWB) TC PI TC PI TC PI TC PI TC PI TC PI<br />
kW kW kW kW kW kW kW kW kW kW kW kW<br />
-15 11.6 4.24 11.5 4.32 11.3 4.23 10.9 4.15 10.5 4.08 9.80 3.94<br />
-13 12.2 4.18 12.0 4.04 11.3 3.96 10.9 3.89 10.5 3.82 9.80 3.69<br />
-11 12.7 3.91 12.0 3.78 11.3 3.71 10.9 3.64 10.5 3.58 9.80 3.45<br />
-10 12.7 3.95 12.0 3.83 11.3 3.60 10.9 3.54 10.5 3.48 9.80 3.35<br />
-9.1 12.7 3.97 12.0 3.84 11.3 3.51 10.9 3.45 10.5 3.39 9.80 3.27<br />
-7.6 12.7 3.80 12.0 3.68 11.3 3.37 10.9 3.31 10.5 3.25 9.80 3.14<br />
-5.6 12.7 3.59 12.0 3.49 11.3 3.19 10.9 3.13 10.5 3.08 9.80 2.97<br />
-3.7 12.7 3.43 12.0 3.32 11.3 3.04 10.9 2.99 10.5 2.94 9.80 2.84<br />
-0.7 12.7 3.18 12.0 3.09 11.3 2.83 10.9 2.78 10.5 2.74 9.80 2.64<br />
2.2 12.7 3.00 12.0 2.90 11.3 2.66 10.9 2.62 10.5 2.57 9.80 2.49<br />
4.1 12.7 2.86 12.0 2.77 11.3 2.55 10.9 2.50 10.5 2.46 9.80 2.38<br />
6 12.7 2.76 12.0 2.67 11.3 2.46 10.9 2.42 10.5 2.38 9.80 2.30<br />
7.9 12.7 2.65 12.0 2.57 11.3 2.37 10.9 2.34 10.5 2.30 9.80 2.22<br />
9.8 12.7 2.57 12.0 2.49 11.3 2.29 10.9 2.25 10.5 2.21 9.80 2.14<br />
11.8 12.7 2.48 12.0 2.40 11.3 2.21 10.9 2.18 10.5 2.14 9.80 2.07<br />
13.7 12.7 2.39 12.0 2.32 11.3 2.14 10.9 2.10 10.5 2.07 9.80 2.00<br />
Combination 80%<br />
Capacity index(kW) 10.00<br />
TC:Total Capacity (kW)、PI:Power Input (kW)<br />
Outdoor Indoor <strong>Air</strong> Temperature (°CDB)<br />
<strong>Air</strong> Temp. 16.0 18.0 20.0 21.0 22.0 24.0<br />
(°CWB) TC PI TC PI TC PI TC PI TC PI TC PI<br />
kW kW kW kW kW kW kW kW kW kW kW kW<br />
-15 11.3 3.94 10.6 3.79 10.0 3.64 9.68 3.56 9.36 3.49 8.71 3.35<br />
-13 11.3 3.69 10.6 3.55 10.0 3.41 9.68 3.34 9.36 3.27 8.71 3.14<br />
-11 11.3 3.47 10.6 3.34 10.0 3.21 9.68 3.14 9.36 3.08 8.71 2.95<br />
-10 11.3 3.37 10.6 3.25 10.0 3.12 9.68 3.06 9.36 3.00 8.71 2.87<br />
-9.1 11.3 3.29 10.6 3.16 10.0 3.04 9.68 2.98 9.36 2.92 8.71 2.80<br />
-7.6 11.3 3.15 10.6 3.03 10.0 2.92 9.68 2.86 9.36 2.80 8.71 2.69<br />
-5.6 11.3 2.98 10.6 2.88 10.0 2.77 9.68 2.71 9.36 2.66 8.71 2.55<br />
-3.7 11.3 2.87 10.6 2.76 10.0 2.65 9.68 2.60 9.36 2.55 8.71 2.45<br />
-0.7 11.3 2.66 10.6 2.57 10.0 2.47 9.68 2.42 9.36 2.38 8.71 2.28<br />
2.2 11.3 2.51 10.6 2.41 10.0 2.32 9.68 2.28 9.36 2.23 8.71 2.15<br />
4.1 11.3 2.40 10.6 2.31 10.0 2.23 9.68 2.18 9.36 2.14 8.71 2.06<br />
6 11.3 2.33 10.6 2.24 10.0 2.15 9.68 2.11 9.36 2.07 8.71 1.99<br />
7.9 11.3 2.24 10.6 2.16 10.0 2.08 9.68 2.05 9.36 2.01 8.71 1.93<br />
9.8 11.3 2.16 10.6 2.08 10.0 2.01 9.68 1.97 9.36 1.93 8.71 1.86<br />
11.8 11.3 2.09 10.6 2.01 10.0 1.94 9.68 1.91 9.36 1.87 8.71 1.80<br />
13.7 11.3 2.02 10.6 1.95 10.0 1.88 9.68 1.84 9.36 1.81 8.71 1.74<br />
310
Combination 70%<br />
Capacity index(kW) 8.75<br />
TC:Total Capacity (kW)、PI:Power Input (kW)<br />
Outdoor Indoor <strong>Air</strong> Temperature (°CDB)<br />
<strong>Air</strong> Temp. 16.0 18.0 20.0 21.0 22.0 24.0<br />
(°CWB) TC PI TC PI TC PI TC PI TC PI TC PI<br />
kW kW kW kW kW kW kW kW kW kW kW kW<br />
-15 9.87 3.39 9.31 3.24 8.75 3.09 8.47 3.01 8.19 2.94 7.63 2.80<br />
-13 9.87 3.18 9.31 3.04 8.75 2.90 8.47 2.83 8.19 2.76 7.63 2.63<br />
-11 9.87 3.00 9.31 2.87 8.75 2.74 8.47 2.67 8.19 2.61 7.63 2.48<br />
-10 9.87 2.91 9.31 2.79 8.75 2.66 8.47 2.60 8.19 2.54 7.63 2.41<br />
-9.1 9.87 2.85 9.31 2.72 8.75 2.60 8.47 2.54 8.19 2.48 7.63 2.36<br />
-7.6 9.87 2.73 9.31 2.61 8.75 2.50 8.47 2.44 8.19 2.38 7.63 2.27<br />
-5.6 9.87 2.59 9.31 2.49 8.75 2.38 8.47 2.32 8.19 2.27 7.63 2.16<br />
-3.7 9.87 2.49 9.31 2.38 8.75 2.27 8.47 2.22 8.19 2.17 7.63 2.07<br />
-0.7 9.87 2.31 9.31 2.22 8.75 2.12 8.47 2.07 8.19 2.03 7.63 1.93<br />
2.2 9.87 2.19 9.31 2.09 8.75 2.00 8.47 1.96 8.19 1.91 7.63 1.83<br />
4.1 9.87 2.10 9.31 2.01 8.75 1.93 8.47 1.88 8.19 1.84 7.63 1.76<br />
6 9.87 2.04 9.31 1.95 8.75 1.86 8.47 1.82 8.19 1.78 7.63 1.70<br />
7.9 9.87 1.96 9.31 1.88 8.75 1.80 8.47 1.77 8.19 1.73 7.63 1.65<br />
9.8 9.87 1.89 9.31 1.81 8.75 1.74 8.47 1.70 8.19 1.66 7.63 1.59<br />
11.8 9.87 1.84 9.31 1.76 8.75 1.69 8.47 1.66 8.19 1.62 7.63 1.55<br />
13.7 9.87 1.78 9.31 1.71 8.75 1.64 8.47 1.60 8.19 1.57 7.63 1.50<br />
Combination 60%<br />
Capacity index(kW) 7.50<br />
TC:Total Capacity (kW)、PI:Power Input (kW)<br />
Outdoor Indoor <strong>Air</strong> Temperature (°CDB)<br />
<strong>Air</strong> Temp. 16.0 18.0 20.0 21.0 22.0 24.0<br />
(°CWB) TC PI TC PI TC PI TC PI TC PI TC PI<br />
kW kW kW kW kW kW kW kW kW kW kW kW<br />
-15 8.46 2.88 7.98 2.73 7.50 2.58 7.26 2.50 7.02 2.43 6.54 2.29<br />
-13 8.46 2.71 7.98 2.57 7.50 2.43 7.26 2.36 7.02 2.29 6.54 2.16<br />
-11 8.46 2.55 7.98 2.42 7.50 2.29 7.26 2.22 7.02 2.16 6.54 2.03<br />
-10 8.46 2.48 7.98 2.36 7.50 2.23 7.26 2.17 7.02 2.11 6.54 1.98<br />
-9.1 8.46 2.43 7.98 2.30 7.50 2.18 7.26 2.12 7.02 2.06 6.54 1.94<br />
-7.6 8.46 2.33 7.98 2.21 7.50 2.10 7.26 2.04 7.02 1.98 6.54 1.87<br />
-5.6 8.46 2.21 7.98 2.11 7.50 2.00 7.26 1.94 7.02 1.89 6.54 1.78<br />
-3.7 8.46 2.14 7.98 2.03 7.50 1.92 7.26 1.87 7.02 1.82 6.54 1.72<br />
-0.7 8.46 1.99 7.98 1.90 7.50 1.80 7.26 1.75 7.02 1.71 6.54 1.61<br />
2.2 8.46 1.89 7.98 1.79 7.50 1.70 7.26 1.66 7.02 1.61 6.54 1.53<br />
4.1 8.46 1.81 7.98 1.72 7.50 1.64 7.26 1.59 7.02 1.55 6.54 1.47<br />
6 8.46 1.77 7.98 1.68 7.50 1.59 7.26 1.55 7.02 1.51 6.54 1.43<br />
7.9 8.46 1.70 7.98 1.62 7.50 1.54 7.26 1.51 7.02 1.47 6.54 1.39<br />
9.8 8.46 1.64 7.98 1.56 7.50 1.49 7.26 1.45 7.02 1.41 6.54 1.34<br />
11.8 8.46 1.59 7.98 1.51 7.50 1.44 7.26 1.41 7.02 1.37 6.54 1.30<br />
13.7 8.46 1.54 7.98 1.47 7.50 1.40 7.26 1.36 7.02 1.33 6.54 1.26<br />
311
Combination 50%<br />
Capacity index(kW) 6.25<br />
TC:Total Capacity (kW)、PI:Power Input (kW)<br />
Outdoor Indoor <strong>Air</strong> Temperature (°CDB)<br />
<strong>Air</strong> Temp. 16.0 18.0 20.0 21.0 22.0 24.0<br />
(°CWB) TC PI TC PI TC PI TC PI TC PI TC PI<br />
kW kW kW kW kW kW kW kW kW kW kW kW<br />
-15 7.05 2.38 6.65 2.23 6.25 2.08 6.05 2.00 5.85 1.93 5.45 1.79<br />
-13 7.05 2.24 6.65 2.10 6.25 1.96 6.05 1.89 5.85 1.82 5.45 1.69<br />
-11 7.05 2.12 6.65 1.99 6.25 1.86 6.05 1.79 5.85 1.73 5.45 1.60<br />
-10 7.05 2.06 6.65 1.94 6.25 1.81 6.05 1.75 5.85 1.69 5.45 1.56<br />
-9.1 7.05 2.02 6.65 1.89 6.25 1.77 6.05 1.71 5.85 1.65 5.45 1.53<br />
-7.6 7.05 1.94 6.65 1.82 6.25 1.71 6.05 1.65 5.85 1.59 5.45 1.48<br />
-5.6 7.05 1.84 6.65 1.74 6.25 1.63 6.05 1.57 5.85 1.52 5.45 1.41<br />
-3.7 7.05 1.78 6.65 1.67 6.25 1.56 6.05 1.51 5.85 1.46 5.45 1.36<br />
-0.7 7.05 1.66 6.65 1.57 6.25 1.47 6.05 1.42 5.85 1.38 5.45 1.28<br />
2.2 7.05 1.58 6.65 1.48 6.25 1.39 6.05 1.35 5.85 1.30 5.45 1.22<br />
4.1 7.05 1.52 6.65 1.43 6.25 1.35 6.05 1.30 5.85 1.26 5.45 1.18<br />
6 7.05 1.48 6.65 1.39 6.25 1.30 6.05 1.26 5.85 1.22 5.45 1.14<br />
7.9 7.05 1.42 6.65 1.34 6.25 1.26 6.05 1.23 5.85 1.19 5.45 1.11<br />
9.8 7.05 1.38 6.65 1.30 6.25 1.23 6.05 1.19 5.85 1.15 5.45 1.08<br />
11.8 7.05 1.34 6.65 1.26 6.25 1.19 6.05 1.16 5.85 1.12 5.45 1.05<br />
13.7 7.05 1.30 6.65 1.23 6.25 1.16 6.05 1.12 5.85 1.09 5.45 1.02<br />
Note:PI of indoor units is not included in the table.<br />
312
20.5.2 U-5LA1E5<br />
Combination 130%<br />
Capacity index(kW) 20.80<br />
TC:Total Capacity (kW)、PI:Power Input (kW)<br />
Outdoor Indoor <strong>Air</strong> Temperature (°CDB)<br />
<strong>Air</strong> Temp. 16.0 18.0 20.0 21.0 22.0 24.0<br />
(°CWB) TC PI TC PI TC PI TC PI TC PI TC PI<br />
kW kW kW kW kW kW kW kW kW kW kW kW<br />
-15 12.7 5.38 12.7 5.47 12.6 5.56 12.6 5.60 12.6 5.65 12.6 5.36<br />
-13 13.4 5.47 13.3 5.55 13.3 5.63 13.3 5.64 13.3 5.46 13.2 5.10<br />
-11 14.0 5.54 14.0 5.62 14.0 5.55 13.9 5.37 13.9 5.20 13.9 4.87<br />
-10 14.4 5.58 14.3 5.65 14.3 5.42 14.3 5.25 14.3 5.09 14.2 4.76<br />
-9.1 14.7 5.61 14.6 5.64 14.6 5.31 14.6 5.15 14.5 4.99 14.5 4.67<br />
-7.6 15.2 5.70 15.1 5.50 15.1 5.19 15.1 5.03 15.0 4.88 15.0 4.59<br />
-5.6 15.8 5.68 15.8 5.38 15.7 5.08 15.7 4.94 15.7 4.80 15.7 4.52<br />
-3.7 16.4 5.54 16.4 5.26 16.4 4.98 16.3 4.84 16.3 4.71 16.3 4.45<br />
-0.7 17.4 5.38 17.4 5.12 17.4 4.86 17.3 4.74 17.3 4.62 17.3 4.38<br />
2.2 18.4 5.24 18.3 5.00 18.3 4.76 18.3 4.64 18.3 4.53 18.1 4.31<br />
4.1 19.0 5.12 19.0 4.89 18.9 4.67 18.9 4.56 18.9 4.45 18.1 4.24<br />
6 19.6 5.02 19.6 4.80 19.6 4.59 19.5 4.49 19.5 4.38 18.1 4.18<br />
7.9 20.3 4.90 20.2 4.69 20.2 4.49 20.1 4.39 19.5 4.29 18.1 4.10<br />
9.8 20.9 4.79 20.8 4.59 20.8 4.39 20.1 4.30 19.5 4.20 18.1 4.02<br />
11.8 21.5 4.68 21.5 4.49 20.8 4.30 20.1 4.21 19.5 4.12 18.1 3.94<br />
13.7 22.2 4.58 22.1 4.40 20.8 4.22 20.1 4.13 19.5 4.05 18.1 3.88<br />
Combination 120%<br />
Capacity index(kW) 19.20<br />
TC:Total Capacity (kW)、PI:Power Input (kW)<br />
Outdoor Indoor <strong>Air</strong> Temperature (°CDB)<br />
<strong>Air</strong> Temp. 16.0 18.0 20.0 21.0 22.0 24.0<br />
(°CWB) TC PI TC PI TC PI TC PI TC PI TC PI<br />
kW kW kW kW kW kW kW kW kW kW kW kW<br />
-15 12.7 5.37 12.6 5.46 12.6 5.55 12.6 5.59 12.6 5.64 12.5 5.35<br />
-13 13.3 5.46 13.3 5.54 13.3 5.62 13.2 5.63 13.2 5.45 13.2 5.09<br />
-11 14.0 5.53 14.0 5.61 13.9 5.54 13.9 5.36 13.9 5.19 13.8 4.86<br />
-10 14.3 5.57 14.3 5.64 14.2 5.41 14.2 5.24 14.2 5.08 14.2 4.75<br />
-9.1 14.6 5.60 14.6 5.63 14.5 5.30 14.5 5.14 14.5 4.98 14.5 4.66<br />
-7.6 15.1 5.69 15.1 5.49 15.0 5.18 15.0 5.02 15.0 4.87 15.0 4.58<br />
-5.6 15.8 5.67 15.7 5.37 15.7 5.07 15.7 4.93 15.7 4.79 15.6 4.51<br />
-3.7 16.4 5.53 16.4 5.25 16.3 4.97 16.3 4.83 16.3 4.70 16.3 4.44<br />
-0.7 17.4 5.37 17.3 5.11 17.3 4.85 17.3 4.73 17.3 4.61 16.7 4.37<br />
2.2 18.3 5.23 18.3 4.99 18.3 4.75 18.2 4.63 18.0 4.52 16.7 4.30<br />
4.1 19.0 5.11 18.9 4.88 18.9 4.66 18.6 4.55 18.0 4.44 16.7 4.23<br />
6 19.6 5.01 19.5 4.79 19.2 4.58 18.6 4.48 18.0 4.37 16.7 4.17<br />
7.9 20.2 4.89 20.2 4.68 19.2 4.48 18.6 4.38 18.0 4.28 16.7 4.09<br />
9.8 20.8 4.78 20.4 4.58 19.2 4.38 18.6 4.29 18.0 4.19 16.7 4.01<br />
11.8 21.5 4.67 20.4 4.48 19.2 4.29 18.6 4.20 18.0 4.11 16.7 3.93<br />
13.7 21.7 4.57 20.4 4.39 19.2 4.21 18.6 4.12 18.0 4.04 16.7 3.87<br />
313
Combination 110%<br />
Capacity index(kW) 17.60<br />
TC:Total Capacity (kW)、PI:Power Input (kW)<br />
Outdoor Indoor <strong>Air</strong> Temperature (°CDB)<br />
<strong>Air</strong> Temp. 16.0 18.0 20.0 21.0 22.0 24.0<br />
(°CWB) TC PI TC PI TC PI TC PI TC PI TC PI<br />
kW kW kW kW kW kW kW kW kW kW kW kW<br />
-15 12.6 5.39 12.6 5.48 12.6 5.57 12.5 5.61 12.5 5.66 12.5 5.37<br />
-13 13.3 5.48 13.2 5.56 13.2 5.64 13.2 5.65 13.2 5.47 13.2 5.11<br />
-11 13.9 5.55 13.9 5.63 13.9 5.56 13.9 5.38 13.8 5.21 13.8 4.88<br />
-10 14.3 5.59 14.2 5.66 14.2 5.43 14.2 5.26 14.2 5.10 14.1 4.77<br />
-9.1 14.6 5.62 14.5 5.65 14.5 5.32 14.5 5.16 14.5 5.00 14.4 4.68<br />
-7.6 15.1 5.66 15.0 5.46 15.0 5.15 15.0 4.99 15.0 4.84 14.9 4.55<br />
-5.6 15.7 5.54 15.7 5.24 15.7 4.94 15.6 4.80 15.6 4.66 15.3 4.38<br />
-3.7 16.3 5.33 16.3 5.05 16.3 4.77 16.3 4.63 16.2 4.50 15.3 4.24<br />
-0.7 17.3 5.04 17.3 4.78 17.3 4.52 17.0 4.40 16.5 4.28 15.3 4.04<br />
2.2 18.3 4.80 18.2 4.56 17.6 4.32 17.0 4.20 16.5 4.09 15.3 3.87<br />
4.1 18.9 4.65 18.7 4.42 17.6 4.20 17.0 4.09 16.5 3.98 15.3 3.77<br />
6 19.5 4.52 18.7 4.30 17.6 4.09 17.0 3.99 16.5 3.88 15.3 3.68<br />
7.9 19.9 4.40 18.7 4.19 17.6 3.99 17.0 3.89 16.5 3.79 15.3 3.60<br />
9.8 19.9 4.29 18.7 4.09 17.6 3.89 17.0 3.80 16.5 3.70 15.3 3.52<br />
11.8 19.9 4.18 18.7 3.99 17.6 3.80 17.0 3.71 16.5 3.62 15.3 3.44<br />
13.7 19.9 4.08 18.7 3.90 17.6 3.72 17.0 3.63 16.5 3.55 15.3 3.38<br />
Combination 100%<br />
Capacity index(kW) 16.00<br />
TC:Total Capacity (kW)、PI:Power Input (kW)<br />
Outdoor Indoor <strong>Air</strong> Temperature (°CDB)<br />
<strong>Air</strong> Temp. 16.0 18.0 20.0 21.0 22.0 24.0<br />
(°CWB) TC PI TC PI TC PI TC PI TC PI TC PI<br />
kW kW kW kW kW kW kW kW kW kW kW kW<br />
-15 12.6 4.92 12.5 5.01 12.5 5.10 12.5 5.14 12.5 5.19 12.5 4.90<br />
-13 13.2 5.01 13.2 5.09 13.2 5.17 13.2 5.18 13.1 5.00 13.1 4.64<br />
-11 13.9 5.08 13.9 5.16 13.8 5.09 13.8 4.91 13.8 4.74 13.8 4.41<br />
-10 14.2 5.12 14.2 5.19 14.2 4.96 14.1 4.79 14.1 4.63 13.9 4.30<br />
-9.1 14.5 5.15 14.5 5.18 14.5 4.85 14.4 4.69 14.4 4.53 13.9 4.21<br />
-7.6 15.0 5.19 15.0 4.99 14.9 4.68 14.9 4.52 14.9 4.37 13.9 4.08<br />
-5.6 15.7 5.07 15.6 4.77 15.6 4.47 15.5 4.33 15.0 4.19 13.9 3.91<br />
-3.7 16.3 4.86 16.3 4.58 16.0 4.30 15.5 4.16 15.0 4.03 13.9 3.77<br />
-0.7 17.3 4.57 17.0 4.31 16.0 4.05 15.5 3.93 15.0 3.81 13.9 3.57<br />
2.2 18.1 4.33 17.0 4.09 16.0 3.85 15.5 3.73 15.0 3.62 13.9 3.40<br />
4.1 18.1 4.18 17.0 3.95 16.0 3.73 15.5 3.62 15.0 3.51 13.9 3.30<br />
6 18.1 4.05 17.0 3.83 16.0 3.62 15.5 3.52 15.0 3.41 13.9 3.21<br />
7.9 18.1 3.93 17.0 3.72 16.0 3.52 15.5 3.42 15.0 3.32 13.9 3.13<br />
9.8 18.1 3.82 17.0 3.62 16.0 3.42 15.5 3.33 15.0 3.23 13.9 3.05<br />
11.8 18.1 3.71 17.0 3.52 16.0 3.33 15.5 3.24 15.0 3.15 13.9 2.97<br />
13.7 18.1 3.61 17.0 3.43 16.0 3.25 15.5 3.16 15.0 3.08 13.9 2.91<br />
314
Combination 90%<br />
Capacity index(kW) 14.40<br />
TC:Total Capacity (kW)、PI:Power Input (kW)<br />
Outdoor Indoor <strong>Air</strong> Temperature (°CDB)<br />
<strong>Air</strong> Temp. 16.0 18.0 20.0 21.0 22.0 24.0<br />
(°CWB) TC PI TC PI TC PI TC PI TC PI TC PI<br />
kW kW kW kW kW kW kW kW kW kW kW kW<br />
-15 12.5 4.90 12.5 4.75 12.5 4.60 12.5 4.52 12.4 4.45 12.4 4.31<br />
-13 13.2 4.95 13.2 4.81 13.1 4.67 13.1 4.60 13.1 4.53 12.6 4.40<br />
-11 13.8 4.85 13.8 4.72 13.8 4.59 13.8 4.52 13.5 4.46 12.6 4.33<br />
-10 14.2 4.71 14.1 4.59 14.1 4.46 13.9 4.40 13.5 4.34 12.6 4.21<br />
-9.1 14.5 4.60 14.4 4.47 14.4 4.35 13.9 4.29 13.5 4.23 12.6 4.11<br />
-7.6 15.0 4.41 14.9 4.29 14.4 4.18 13.9 4.12 13.5 4.06 12.6 3.95<br />
-5.6 15.6 4.18 15.3 4.08 14.4 3.97 13.9 3.91 13.5 3.86 12.6 3.75<br />
-3.7 16.2 4.02 15.3 3.91 14.4 3.80 13.9 3.75 13.5 3.70 12.6 3.60<br />
-0.7 16.3 3.79 15.3 3.70 14.4 3.60 13.9 3.55 13.5 3.51 12.6 3.41<br />
2.2 16.3 3.59 15.3 3.49 14.4 3.40 13.9 3.36 13.5 3.31 12.6 3.23<br />
4.1 16.3 3.45 15.3 3.36 14.4 3.28 13.9 3.23 13.5 3.19 12.6 3.11<br />
6 16.3 3.35 15.3 3.26 14.4 3.17 13.9 3.13 13.5 3.09 12.6 3.01<br />
7.9 16.3 3.23 15.3 3.15 14.4 3.07 13.9 3.04 13.5 3.00 12.6 2.92<br />
9.8 16.3 3.12 15.3 3.04 14.4 2.97 13.9 2.93 13.5 2.89 12.6 2.82<br />
11.8 16.3 3.03 15.3 2.95 14.4 2.88 13.9 2.85 13.5 2.81 12.6 2.74<br />
13.7 16.3 2.94 15.3 2.87 14.4 2.80 13.9 2.76 13.5 2.73 12.6 2.66<br />
Combination 80%<br />
Capacity index(kW) 12.80<br />
TC:Total Capacity (kW)、PI:Power Input (kW)<br />
Outdoor Indoor <strong>Air</strong> Temperature (°CDB)<br />
<strong>Air</strong> Temp. 16.0 18.0 20.0 21.0 22.0 24.0<br />
(°CWB) TC PI TC PI TC PI TC PI TC PI TC PI<br />
kW kW kW kW kW kW kW kW kW kW kW kW<br />
-15 12.5 4.47 12.4 4.32 12.4 4.17 12.4 4.09 12.0 4.02 11.2 3.88<br />
-13 13.1 4.52 13.1 4.38 12.8 4.24 12.4 4.17 12.0 4.10 11.2 3.97<br />
-11 13.8 4.42 13.6 4.29 12.8 4.16 12.4 4.09 12.0 4.03 11.2 3.90<br />
-10 14.1 4.28 13.6 4.16 12.8 4.03 12.4 3.97 12.0 3.91 11.2 3.78<br />
-9.1 14.4 4.17 13.6 4.04 12.8 3.92 12.4 3.86 12.0 3.80 11.2 3.68<br />
-7.6 14.4 3.98 13.6 3.86 12.8 3.75 12.4 3.69 12.0 3.63 11.2 3.52<br />
-5.6 14.4 3.75 13.6 3.65 12.8 3.54 12.4 3.48 12.0 3.43 11.2 3.32<br />
-3.7 14.4 3.59 13.6 3.48 12.8 3.37 12.4 3.32 12.0 3.27 11.2 3.17<br />
-0.7 14.4 3.36 13.6 3.27 12.8 3.17 12.4 3.12 12.0 3.08 11.2 2.98<br />
2.2 14.4 3.16 13.6 3.06 12.8 2.97 12.4 2.93 12.0 2.88 11.2 2.80<br />
4.1 14.4 3.02 13.6 2.93 12.8 2.85 12.4 2.80 12.0 2.76 11.2 2.68<br />
6 14.4 2.92 13.6 2.83 12.8 2.74 12.4 2.70 12.0 2.66 11.2 2.58<br />
7.9 14.4 2.80 13.6 2.72 12.8 2.64 12.4 2.61 12.0 2.57 11.2 2.49<br />
9.8 14.4 2.69 13.6 2.61 12.8 2.54 12.4 2.50 12.0 2.46 11.2 2.39<br />
11.8 14.4 2.60 13.6 2.52 12.8 2.45 12.4 2.42 12.0 2.38 11.2 2.31<br />
13.7 14.4 2.51 13.6 2.44 12.8 2.37 12.4 2.33 12.0 2.30 11.2 2.23<br />
315
Combination 70%<br />
Capacity index(kW) 11.20<br />
TC:Total Capacity (kW)、PI:Power Input (kW)<br />
Outdoor Indoor <strong>Air</strong> Temperature (°CDB)<br />
<strong>Air</strong> Temp. 16.0 18.0 20.0 21.0 22.0 24.0<br />
(°CWB) TC PI TC PI TC PI TC PI TC PI TC PI<br />
kW kW kW kW kW kW kW kW kW kW kW kW<br />
-15 12.4 4.06 11.9 3.91 11.2 3.76 10.8 3.68 10.5 3.61 9.76 3.47<br />
-13 12.6 4.11 11.9 3.97 11.2 3.83 10.8 3.76 10.5 3.69 9.76 3.56<br />
-11 12.6 4.01 11.9 3.88 11.2 3.75 10.8 3.68 10.5 3.62 9.76 3.49<br />
-10 12.6 3.87 11.9 3.75 11.2 3.62 10.8 3.56 10.5 3.50 9.76 3.37<br />
-9.1 12.6 3.76 11.9 3.63 11.2 3.51 10.8 3.45 10.5 3.39 9.76 3.27<br />
-7.6 12.6 3.57 11.9 3.45 11.2 3.34 10.8 3.28 10.5 3.22 9.76 3.11<br />
-5.6 12.6 3.34 11.9 3.24 11.2 3.13 10.8 3.07 10.5 3.02 9.76 2.91<br />
-3.7 12.6 3.18 11.9 3.07 11.2 2.96 10.8 2.91 10.5 2.86 9.76 2.76<br />
-0.7 12.6 2.95 11.9 2.86 11.2 2.76 10.8 2.71 10.5 2.67 9.76 2.57<br />
2.2 12.6 2.75 11.9 2.65 11.2 2.56 10.8 2.52 10.5 2.47 9.76 2.39<br />
4.1 12.6 2.61 11.9 2.52 11.2 2.44 10.8 2.39 10.5 2.35 9.76 2.27<br />
6 12.6 2.51 11.9 2.42 11.2 2.33 10.8 2.29 10.5 2.25 9.76 2.17<br />
7.9 12.6 2.39 11.9 2.31 11.2 2.23 10.8 2.20 10.5 2.16 9.76 2.08<br />
9.8 12.6 2.28 11.9 2.20 11.2 2.13 10.8 2.09 10.5 2.05 9.76 1.98<br />
11.8 12.6 2.19 11.9 2.11 11.2 2.04 10.8 2.01 10.5 1.97 9.76 1.90<br />
13.7 12.6 2.10 11.9 2.03 11.2 1.96 10.8 1.92 10.5 1.89 9.76 1.82<br />
Combination 60%<br />
Capacity index(kW) 9.60<br />
TC:Total Capacity (kW)、PI:Power Input (kW)<br />
Outdoor Indoor <strong>Air</strong> Temperature (°CDB)<br />
<strong>Air</strong> Temp. 16.0 18.0 20.0 21.0 22.0 24.0<br />
(°CWB) TC PI TC PI TC PI TC PI TC PI TC PI<br />
kW kW kW kW kW kW kW kW kW kW kW kW<br />
-15 10.8 3.55 10.2 3.40 9.60 3.25 9.29 3.17 8.98 3.10 8.37 2.96<br />
-13 10.8 3.60 10.2 3.46 9.60 3.32 9.29 3.25 8.98 3.18 8.37 3.05<br />
-11 10.8 3.50 10.2 3.37 9.60 3.24 9.29 3.17 8.98 3.11 8.37 2.98<br />
-10 10.8 3.36 10.2 3.24 9.60 3.11 9.29 3.05 8.98 2.99 8.37 2.86<br />
-9.1 10.8 3.25 10.2 3.12 9.60 3.00 9.29 2.94 8.98 2.88 8.37 2.76<br />
-7.6 10.8 3.08 10.2 2.96 9.60 2.85 9.29 2.79 8.98 2.73 8.37 2.62<br />
-5.6 10.8 2.91 10.2 2.81 9.60 2.70 9.29 2.64 8.98 2.59 8.37 2.48<br />
-3.7 10.8 2.75 10.2 2.64 9.60 2.53 9.29 2.48 8.98 2.43 8.37 2.33<br />
-0.7 10.8 2.54 10.2 2.45 9.60 2.35 9.29 2.30 8.98 2.26 8.37 2.16<br />
2.2 10.8 2.36 10.2 2.26 9.60 2.17 9.29 2.13 8.98 2.08 8.37 2.00<br />
4.1 10.8 2.22 10.2 2.13 9.60 2.05 9.29 2.00 8.98 1.96 8.37 1.88<br />
6 10.8 2.12 10.2 2.03 9.60 1.94 9.29 1.90 8.98 1.86 8.37 1.78<br />
7.9 10.8 2.00 10.2 1.92 9.60 1.84 9.29 1.81 8.98 1.77 8.37 1.69<br />
9.8 10.8 1.89 10.2 1.81 9.60 1.74 9.29 1.70 8.98 1.66 8.37 1.59<br />
11.8 10.8 1.80 10.2 1.72 9.60 1.65 9.29 1.62 8.98 1.58 8.37 1.51<br />
13.7 10.8 1.71 10.2 1.64 9.60 1.57 9.29 1.53 8.98 1.50 8.37 1.43<br />
316
Combination 50%<br />
Capacity index(kW) 8.00<br />
TC:Total Capacity (kW)、PI:Power Input (kW)<br />
Outdoor Indoor <strong>Air</strong> Temperature (°CDB)<br />
<strong>Air</strong> Temp. 16.0 18.0 20.0 21.0 22.0 24.0<br />
(°CWB) TC PI TC PI TC PI TC PI TC PI TC PI<br />
kW kW kW kW kW kW kW kW kW kW kW kW<br />
-15 9.03 2.78 8.51 2.63 8.00 2.48 7.74 2.40 7.49 2.33 6.97 2.19<br />
-13 9.03 2.64 8.51 2.50 8.00 2.36 7.74 2.29 7.49 2.22 6.97 2.09<br />
-11 9.03 2.52 8.51 2.39 8.00 2.26 7.74 2.19 7.49 2.13 6.97 2.00<br />
-10 9.03 2.46 8.51 2.34 8.00 2.21 7.74 2.15 7.49 2.09 6.97 1.96<br />
-9.1 9.03 2.42 8.51 2.29 8.00 2.17 7.74 2.11 7.49 2.05 6.97 1.93<br />
-7.6 9.03 2.34 8.51 2.22 8.00 2.11 7.74 2.05 7.49 1.99 6.97 1.88<br />
-5.6 9.03 2.24 8.51 2.14 8.00 2.03 7.74 1.97 7.49 1.92 6.97 1.81<br />
-3.7 9.03 2.18 8.51 2.07 8.00 1.96 7.74 1.91 7.49 1.86 6.97 1.76<br />
-0.7 9.03 2.06 8.51 1.97 8.00 1.87 7.74 1.82 7.49 1.78 6.97 1.68<br />
2.2 9.03 1.98 8.51 1.88 8.00 1.79 7.74 1.75 7.49 1.70 6.97 1.62<br />
4.1 9.03 1.92 8.51 1.83 8.00 1.75 7.74 1.70 7.49 1.66 6.97 1.58<br />
6 9.03 1.88 8.51 1.79 8.00 1.70 7.74 1.66 7.49 1.62 6.97 1.54<br />
7.9 9.03 1.82 8.51 1.74 8.00 1.66 7.74 1.63 7.49 1.59 6.97 1.51<br />
9.8 9.03 1.78 8.51 1.70 8.00 1.63 7.74 1.59 7.49 1.55 6.97 1.48<br />
11.8 9.03 1.74 8.51 1.66 8.00 1.59 7.74 1.56 7.49 1.52 6.97 1.45<br />
13.7 9.03 1.70 8.51 1.63 8.00 1.56 7.74 1.52 7.49 1.49 6.97 1.42<br />
Note:PI of indoor units is not included in the table.<br />
317
20.5.3 U-6LA1E5<br />
Combination 130%<br />
Capacity index(kW) 23.40<br />
TC:Total Capacity (kW)、PI:Power Input (kW)<br />
Outdoor Indoor <strong>Air</strong> Temperature (°CDB)<br />
<strong>Air</strong> Temp. 16.0 18.0 20.0 21.0 22.0 24.0<br />
(°CWB) TC PI TC PI TC PI TC PI TC PI TC PI<br />
kW kW kW kW kW kW kW kW kW kW kW kW<br />
-15 13.0 5.90 12.9 5.99 12.9 6.08 12.9 6.12 12.8 6.17 12.8 5.88<br />
-13 13.6 5.99 13.6 6.07 13.6 6.15 13.5 6.16 13.5 5.98 13.5 5.62<br />
-11 14.3 6.06 14.3 6.14 14.2 6.07 14.2 5.89 14.2 5.72 14.1 5.39<br />
-10 14.6 6.10 14.6 6.17 14.6 5.94 14.5 5.77 14.5 5.61 14.5 5.28<br />
-9.1 14.9 6.13 14.9 6.16 14.9 5.83 14.8 5.67 14.8 5.51 14.8 5.19<br />
-7.6 15.4 6.17 15.4 5.97 15.4 5.66 15.3 5.50 15.3 5.35 15.3 5.06<br />
-5.6 16.1 6.05 16.1 5.75 16.0 5.45 16.0 5.31 16.0 5.17 15.9 4.89<br />
-3.7 16.7 5.84 16.7 5.56 16.7 5.28 16.6 5.14 16.6 5.01 16.6 4.75<br />
-0.7 17.7 5.55 17.7 5.29 17.7 5.03 17.6 4.91 17.6 4.79 17.6 4.55<br />
2.2 18.7 5.31 18.7 5.07 18.6 4.83 18.6 4.71 18.6 4.60 18.5 4.38<br />
4.1 19.3 5.16 19.3 4.93 19.3 4.71 19.2 4.60 19.2 4.49 19.2 4.28<br />
6 20.0 5.03 19.9 4.81 19.9 4.60 19.9 4.50 19.9 4.39 19.8 4.19<br />
7.9 20.6 4.91 20.6 4.70 20.5 4.50 20.5 4.40 20.5 4.30 20.4 4.11<br />
9.8 21.3 4.80 21.2 4.60 21.2 4.40 21.1 4.31 21.1 4.21 20.4 4.03<br />
11.8 21.9 4.69 21.9 4.50 21.8 4.31 21.8 4.22 21.8 4.13 20.4 3.95<br />
13.7 22.6 4.59 22.5 4.41 22.5 4.23 22.4 4.14 21.9 4.06 20.4 3.89<br />
Combination 120%<br />
Capacity index(kW) 21.60<br />
TC:Total Capacity (kW)、PI:Power Input (kW)<br />
Outdoor Indoor <strong>Air</strong> Temperature (°CDB)<br />
<strong>Air</strong> Temp. 16.0 18.0 20.0 21.0 22.0 24.0<br />
(°CWB) TC PI TC PI TC PI TC PI TC PI TC PI<br />
kW kW kW kW kW kW kW kW kW kW kW kW<br />
-15 12.9 5.92 12.9 6.01 12.8 6.10 12.8 6.14 12.8 6.19 12.8 5.90<br />
-13 13.6 6.01 13.5 6.09 13.5 6.17 13.5 6.18 13.5 6.00 13.4 5.64<br />
-11 14.3 6.08 14.2 6.16 14.2 6.09 14.2 5.91 14.1 5.74 14.1 5.41<br />
-10 14.6 6.12 14.5 6.19 14.5 5.96 14.5 5.79 14.5 5.63 14.4 5.30<br />
-9.1 14.9 6.15 14.8 6.18 14.8 5.85 14.8 5.69 14.8 5.53 14.7 5.21<br />
-7.6 15.4 6.19 15.3 5.99 15.3 5.68 15.3 5.52 15.3 5.37 15.2 5.08<br />
-5.6 16.1 6.09 16.0 5.79 16.0 5.49 16.0 5.35 15.9 5.21 15.9 4.93<br />
-3.7 16.7 5.88 16.6 5.60 16.6 5.32 16.6 5.18 16.6 5.05 16.5 4.79<br />
-0.7 17.7 5.69 17.7 5.43 17.6 5.17 17.6 5.05 17.6 4.93 17.5 4.69<br />
2.2 18.7 5.45 18.6 5.21 18.6 4.97 18.6 4.85 18.5 4.74 18.5 4.52<br />
4.1 19.3 5.30 19.3 5.07 19.2 4.85 19.2 4.74 19.2 4.63 18.8 4.42<br />
6 19.9 5.17 19.9 4.95 19.9 4.74 19.8 4.64 19.8 4.53 18.8 4.33<br />
7.9 20.6 5.05 20.5 4.84 20.5 4.64 20.5 4.54 20.2 4.44 18.8 4.25<br />
9.8 21.2 4.94 21.2 4.74 21.1 4.54 20.9 4.45 20.2 4.35 18.8 4.17<br />
11.8 21.9 4.83 21.8 4.64 21.6 4.45 20.9 4.36 20.2 4.27 18.8 4.09<br />
13.7 22.5 4.73 22.5 4.55 21.6 4.37 20.9 4.28 20.2 4.20 18.8 4.03<br />
318
Combination 110%<br />
Capacity index(kW) 19.80<br />
TC:Total Capacity (kW)、PI:Power Input (kW)<br />
Outdoor Indoor <strong>Air</strong> Temperature (°CDB)<br />
<strong>Air</strong> Temp. 16.0 18.0 20.0 21.0 22.0 24.0<br />
(°CWB) TC PI TC PI TC PI TC PI TC PI TC PI<br />
kW kW kW kW kW kW kW kW kW kW kW kW<br />
-15 12.9 5.93 12.8 6.02 12.8 6.11 12.8 6.15 12.8 6.20 12.7 5.91<br />
-13 13.5 6.02 13.5 6.10 13.5 6.18 13.4 6.19 13.4 6.01 13.4 5.65<br />
-11 14.2 6.09 14.2 6.17 14.1 6.10 14.1 5.92 14.1 5.75 14.1 5.42<br />
-10 14.5 6.13 14.5 6.20 14.5 5.97 14.4 5.80 14.4 5.64 14.4 5.31<br />
-9.1 14.8 6.16 14.8 6.19 14.8 5.86 14.7 5.70 14.7 5.54 14.7 5.22<br />
-7.6 15.3 6.20 15.3 6.00 15.3 5.69 15.2 5.53 15.2 5.38 15.2 5.09<br />
-5.6 16.0 6.19 16.0 5.89 15.9 5.59 15.9 5.45 15.9 5.31 15.9 5.03<br />
-3.7 16.6 5.98 16.6 5.70 16.6 5.42 16.5 5.28 16.5 5.15 16.5 4.89<br />
-0.7 17.6 5.79 17.6 5.53 17.6 5.27 17.5 5.15 17.5 5.03 17.3 4.79<br />
2.2 18.6 5.60 18.6 5.36 18.5 5.12 18.5 5.00 18.5 4.89 17.3 4.67<br />
4.1 19.2 5.45 19.2 5.22 19.2 5.00 19.1 4.89 18.5 4.78 17.3 4.57<br />
6 19.9 5.32 19.8 5.10 19.8 4.89 19.2 4.79 18.5 4.68 17.3 4.48<br />
7.9 20.5 5.20 20.5 4.99 19.8 4.79 19.2 4.69 18.5 4.59 17.3 4.40<br />
9.8 21.1 5.09 21.1 4.89 19.8 4.69 19.2 4.60 18.5 4.50 17.3 4.32<br />
11.8 21.8 4.98 21.1 4.79 19.8 4.60 19.2 4.51 18.5 4.42 17.3 4.24<br />
13.7 22.3 4.88 21.1 4.70 19.8 4.52 19.2 4.43 18.5 4.35 17.3 4.18<br />
Combination 100%<br />
Capacity index(kW) 18.00<br />
TC:Total Capacity (kW)、PI:Power Input (kW)<br />
Outdoor Indoor <strong>Air</strong> Temperature (°CDB)<br />
<strong>Air</strong> Temp. 16.0 18.0 20.0 21.0 22.0 24.0<br />
(°CWB) TC PI TC PI TC PI TC PI TC PI TC PI<br />
kW kW kW kW kW kW kW kW kW kW kW kW<br />
-15 12.8 5.63 12.8 5.72 12.7 5.81 12.7 5.85 12.7 5.90 12.7 5.61<br />
-13 13.5 5.72 13.4 5.80 13.4 5.88 13.4 5.89 13.4 5.71 13.3 5.35<br />
-11 14.1 5.79 14.1 5.87 14.1 5.80 14.1 5.62 14.0 5.45 14.0 5.12<br />
-10 14.5 5.83 14.4 5.90 14.4 5.67 14.4 5.50 14.4 5.34 14.3 5.01<br />
-9.1 14.8 5.86 14.7 5.89 14.7 5.56 14.7 5.40 14.7 5.24 14.6 4.92<br />
-7.6 15.3 5.90 15.2 5.70 15.2 5.39 15.2 5.23 15.2 5.08 15.1 4.79<br />
-5.6 15.9 5.78 15.9 5.48 15.9 5.18 15.9 5.04 15.8 4.90 15.7 4.62<br />
-3.7 16.6 5.57 16.5 5.29 16.5 5.01 16.5 4.87 16.5 4.74 15.7 4.48<br />
-0.7 17.6 5.28 17.5 5.02 17.5 4.76 17.4 4.64 16.8 4.52 15.7 4.28<br />
2.2 18.5 5.04 18.5 4.80 18.0 4.56 17.4 4.44 16.8 4.33 15.7 4.11<br />
4.1 19.2 4.89 19.1 4.66 18.0 4.44 17.4 4.33 16.8 4.22 15.7 4.01<br />
6 19.8 4.76 19.2 4.54 18.0 4.33 17.4 4.23 16.8 4.12 15.7 3.92<br />
7.9 20.3 4.64 19.2 4.43 18.0 4.23 17.4 4.13 16.8 4.03 15.7 3.84<br />
9.8 20.3 4.53 19.2 4.33 18.0 4.13 17.4 4.04 16.8 3.94 15.7 3.76<br />
11.8 20.3 4.42 19.2 4.23 18.0 4.04 17.4 3.95 16.8 3.86 15.7 3.68<br />
13.7 20.3 4.32 19.2 4.14 18.0 3.96 17.4 3.87 16.8 3.79 15.7 3.62<br />
319
Combination 90%<br />
Capacity index(kW) 16.20<br />
TC:Total Capacity (kW)、PI:Power Input (kW)<br />
Outdoor Indoor <strong>Air</strong> Temperature (°CDB)<br />
<strong>Air</strong> Temp. 16.0 18.0 20.0 21.0 22.0 24.0<br />
(°CWB) TC PI TC PI TC PI TC PI TC PI TC PI<br />
kW kW kW kW kW kW kW kW kW kW kW kW<br />
-15 12.7 5.58 12.7 5.43 12.7 5.28 12.7 5.20 12.7 5.13 12.6 4.99<br />
-13 13.4 5.63 13.4 5.49 13.4 5.35 13.3 5.28 13.3 5.21 13.3 5.08<br />
-11 14.1 5.53 14.1 5.40 14.0 5.27 14.0 5.20 14.0 5.14 14.0 5.01<br />
-10 14.4 5.39 14.4 5.27 14.4 5.14 14.3 5.08 14.3 5.02 14.1 4.89<br />
-9.1 14.7 5.28 14.7 5.15 14.7 5.03 14.6 4.97 14.6 4.91 14.1 4.79<br />
-7.6 15.2 5.09 15.2 4.97 15.2 4.86 15.1 4.80 15.1 4.74 14.1 4.63<br />
-5.6 15.9 4.86 15.9 4.76 15.8 4.65 15.7 4.59 15.2 4.54 14.1 4.43<br />
-3.7 16.5 4.70 16.5 4.59 16.2 4.48 15.7 4.43 15.2 4.38 14.1 4.28<br />
-0.7 17.5 4.42 17.2 4.33 16.2 4.23 15.7 4.18 15.2 4.14 14.1 4.04<br />
2.2 18.3 4.22 17.2 4.12 16.2 4.03 15.7 3.99 15.2 3.94 14.1 3.86<br />
4.1 18.3 4.08 17.2 3.99 16.2 3.91 15.7 3.86 15.2 3.82 14.1 3.74<br />
6 18.3 3.98 17.2 3.89 16.2 3.80 15.7 3.76 15.2 3.72 14.1 3.64<br />
7.9 18.3 3.86 17.2 3.78 16.2 3.70 15.7 3.67 15.2 3.63 14.1 3.55<br />
9.8 18.3 3.75 17.2 3.67 16.2 3.60 15.7 3.56 15.2 3.52 14.1 3.45<br />
11.8 18.3 3.66 17.2 3.58 16.2 3.51 15.7 3.48 15.2 3.44 14.1 3.37<br />
13.7 18.3 3.57 17.2 3.50 16.2 3.43 15.7 3.39 15.2 3.36 14.1 3.29<br />
Combination 80%<br />
Capacity index(kW) 14.40<br />
TC:Total Capacity (kW)、PI:Power Input (kW)<br />
Outdoor Indoor <strong>Air</strong> Temperature (°CDB)<br />
<strong>Air</strong> Temp. 16.0 18.0 20.0 21.0 22.0 24.0<br />
(°CWB) TC PI TC PI TC PI TC PI TC PI TC PI<br />
kW kW kW kW kW kW kW kW kW kW kW kW<br />
-15 12.7 5.07 12.7 4.92 12.6 4.77 12.6 4.69 12.6 4.62 12.6 4.48<br />
-13 13.4 5.12 13.3 4.98 13.3 4.84 13.3 4.77 13.3 4.70 12.6 4.57<br />
-11 14.0 5.02 14.0 4.89 14.0 4.76 13.9 4.69 13.5 4.63 12.6 4.50<br />
-10 14.4 4.88 14.3 4.76 14.3 4.63 13.9 4.57 13.5 4.51 12.6 4.38<br />
-9.1 14.7 4.77 14.6 4.64 14.4 4.52 13.9 4.46 13.5 4.40 12.6 4.28<br />
-7.6 15.2 4.58 15.1 4.46 14.4 4.35 13.9 4.29 13.5 4.23 12.6 4.12<br />
-5.6 15.8 4.35 15.3 4.25 14.4 4.14 13.9 4.08 13.5 4.03 12.6 3.92<br />
-3.7 16.3 4.19 15.3 4.08 14.4 3.97 13.9 3.92 13.5 3.87 12.6 3.77<br />
-0.7 16.3 3.91 15.3 3.82 14.4 3.72 13.9 3.67 13.5 3.63 12.6 3.53<br />
2.2 16.3 3.71 15.3 3.61 14.4 3.52 13.9 3.48 13.5 3.43 12.6 3.35<br />
4.1 16.3 3.57 15.3 3.48 14.4 3.40 13.9 3.35 13.5 3.31 12.6 3.23<br />
6 16.3 3.47 15.3 3.38 14.4 3.29 13.9 3.25 13.5 3.21 12.6 3.13<br />
7.9 16.3 3.35 15.3 3.27 14.4 3.19 13.9 3.16 13.5 3.12 12.6 3.04<br />
9.8 16.3 3.24 15.3 3.16 14.4 3.09 13.9 3.05 13.5 3.01 12.6 2.94<br />
11.8 16.3 3.15 15.3 3.07 14.4 3.00 13.9 2.97 13.5 2.93 12.6 2.86<br />
13.7 16.3 3.06 15.3 2.99 14.4 2.92 13.9 2.88 13.5 2.85 12.6 2.78<br />
320
Combination 70%<br />
Capacity index(kW) 12.60<br />
TC:Total Capacity (kW)、PI:Power Input (kW)<br />
Outdoor Indoor <strong>Air</strong> Temperature (°CDB)<br />
<strong>Air</strong> Temp. 16.0 18.0 20.0 21.0 22.0 24.0<br />
(°CWB) TC PI TC PI TC PI TC PI TC PI TC PI<br />
kW kW kW kW kW kW kW kW kW kW kW kW<br />
-15 12.6 4.58 12.6 4.43 12.6 4.28 12.2 4.20 11.8 4.13 11.0 3.99<br />
-13 13.3 4.63 13.3 4.49 12.6 4.35 12.2 4.28 11.8 4.21 11.0 4.08<br />
-11 14.0 4.53 13.4 4.40 12.6 4.27 12.2 4.20 11.8 4.14 11.0 4.01<br />
-10 14.2 4.39 13.4 4.27 12.6 4.14 12.2 4.08 11.8 4.02 11.0 3.89<br />
-9.1 14.2 4.28 13.4 4.15 12.6 4.03 12.2 3.97 11.8 3.91 11.0 3.79<br />
-7.6 14.2 4.09 13.4 3.97 12.6 3.86 12.2 3.80 11.8 3.74 11.0 3.63<br />
-5.6 14.2 3.86 13.4 3.76 12.6 3.65 12.2 3.59 11.8 3.54 11.0 3.43<br />
-3.7 14.2 3.70 13.4 3.59 12.6 3.48 12.2 3.43 11.8 3.38 11.0 3.28<br />
-0.7 14.2 3.42 13.4 3.33 12.6 3.23 12.2 3.18 11.8 3.14 11.0 3.04<br />
2.2 14.2 3.22 13.4 3.12 12.6 3.03 12.2 2.99 11.8 2.94 11.0 2.86<br />
4.1 14.2 3.08 13.4 2.99 12.6 2.91 12.2 2.86 11.8 2.82 11.0 2.74<br />
6 14.2 2.98 13.4 2.89 12.6 2.80 12.2 2.76 11.8 2.72 11.0 2.64<br />
7.9 14.2 2.86 13.4 2.78 12.6 2.70 12.2 2.67 11.8 2.63 11.0 2.55<br />
9.8 14.2 2.75 13.4 2.67 12.6 2.60 12.2 2.56 11.8 2.52 11.0 2.45<br />
11.8 14.2 2.66 13.4 2.58 12.6 2.51 12.2 2.48 11.8 2.44 11.0 2.37<br />
13.7 14.2 2.57 13.4 2.50 12.6 2.43 12.2 2.39 11.8 2.36 11.0 2.29<br />
Combination 60%<br />
Capacity index(kW) 10.80<br />
TC:Total Capacity (kW)、PI:Power Input (kW)<br />
Outdoor Indoor <strong>Air</strong> Temperature (°CDB)<br />
<strong>Air</strong> Temp. 16.0 18.0 20.0 21.0 22.0 24.0<br />
(°CWB) TC PI TC PI TC PI TC PI TC PI TC PI<br />
kW kW kW kW kW kW kW kW kW kW kW kW<br />
-15 12.2 3.84 11.5 3.69 10.8 3.54 10.5 3.46 10.1 3.39 9.41 3.25<br />
-13 12.2 3.89 11.5 3.75 10.8 3.61 10.5 3.54 10.1 3.47 9.41 3.34<br />
-11 12.2 3.79 11.5 3.66 10.8 3.53 10.5 3.46 10.1 3.40 9.41 3.27<br />
-10 12.2 3.68 11.5 3.56 10.8 3.43 10.5 3.37 10.1 3.31 9.41 3.18<br />
-9.1 12.2 3.58 11.5 3.45 10.8 3.33 10.5 3.27 10.1 3.21 9.41 3.09<br />
-7.6 12.2 3.46 11.5 3.34 10.8 3.23 10.5 3.17 10.1 3.11 9.41 3.00<br />
-5.6 12.2 3.33 11.5 3.23 10.8 3.12 10.5 3.06 10.1 3.01 9.41 2.90<br />
-3.7 12.2 3.19 11.5 3.08 10.8 2.97 10.5 2.92 10.1 2.87 9.41 2.77<br />
-0.7 12.2 2.96 11.5 2.87 10.8 2.77 10.5 2.72 10.1 2.68 9.41 2.58<br />
2.2 12.2 2.76 11.5 2.66 10.8 2.57 10.5 2.53 10.1 2.48 9.41 2.40<br />
4.1 12.2 2.62 11.5 2.53 10.8 2.45 10.5 2.40 10.1 2.36 9.41 2.28<br />
6 12.2 2.52 11.5 2.43 10.8 2.34 10.5 2.30 10.1 2.26 9.41 2.18<br />
7.9 12.2 2.40 11.5 2.32 10.8 2.24 10.5 2.21 10.1 2.17 9.41 2.09<br />
9.8 12.2 2.29 11.5 2.21 10.8 2.14 10.5 2.10 10.1 2.06 9.41 1.99<br />
11.8 12.2 2.20 11.5 2.12 10.8 2.05 10.5 2.02 10.1 1.98 9.41 1.91<br />
13.7 12.2 2.11 11.5 2.04 10.8 1.97 10.5 1.93 10.1 1.90 9.41 1.83<br />
321
Combination 50%<br />
Capacity index(kW) 9.00<br />
TC:Total Capacity (kW)、PI:Power Input (kW)<br />
Outdoor Indoor <strong>Air</strong> Temperature (°CDB)<br />
<strong>Air</strong> Temp. 16.0 18.0 20.0 21.0 22.0 24.0<br />
(°CWB) TC PI TC PI TC PI TC PI TC PI TC PI<br />
kW kW kW kW kW kW kW kW kW kW kW kW<br />
-15 10.2 3.11 9.58 2.96 9.00 2.81 8.71 2.73 8.42 2.66 7.84 2.52<br />
-13 10.2 2.97 9.58 2.83 9.00 2.69 8.71 2.62 8.42 2.55 7.84 2.42<br />
-11 10.2 2.85 9.58 2.72 9.00 2.59 8.71 2.52 8.42 2.46 7.84 2.33<br />
-10 10.2 2.79 9.58 2.67 9.00 2.54 8.71 2.48 8.42 2.42 7.84 2.29<br />
-9.1 10.2 2.75 9.58 2.62 9.00 2.50 8.71 2.44 8.42 2.38 7.84 2.26<br />
-7.6 10.2 2.67 9.58 2.55 9.00 2.44 8.71 2.38 8.42 2.32 7.84 2.21<br />
-5.6 10.2 2.57 9.58 2.47 9.00 2.36 8.71 2.30 8.42 2.25 7.84 2.14<br />
-3.7 10.2 2.51 9.58 2.40 9.00 2.29 8.71 2.24 8.42 2.19 7.84 2.09<br />
-0.7 10.2 2.39 9.58 2.30 9.00 2.20 8.71 2.15 8.42 2.11 7.84 2.01<br />
2.2 10.2 2.31 9.58 2.21 9.00 2.12 8.71 2.08 8.42 2.03 7.84 1.95<br />
4.1 10.2 2.25 9.58 2.16 9.00 2.08 8.71 2.03 8.42 1.99 7.84 1.91<br />
6 10.2 2.21 9.58 2.12 9.00 2.03 8.71 1.99 8.42 1.95 7.84 1.87<br />
7.9 10.2 2.15 9.58 2.07 9.00 1.99 8.71 1.96 8.42 1.92 7.84 1.84<br />
9.8 10.2 2.11 9.58 2.03 9.00 1.96 8.71 1.92 8.42 1.88 7.84 1.81<br />
11.8 10.2 2.07 9.58 1.99 9.00 1.92 8.71 1.89 8.42 1.85 7.84 1.78<br />
13.7 10.2 2.03 9.58 1.96 9.00 1.89 8.71 1.85 8.42 1.82 7.84 1.75<br />
Note:PI of indoor units is not included in the table.<br />
322
20.5.4 KA1E5 / KA1E5S Series<br />
Indoor Unit: S-22KA1E5, S-22KA1E5S<br />
Nominal Capacity (kW) 2.5<br />
Outdoor Indoor <strong>Air</strong> Temperature (°CDB)<br />
<strong>Air</strong> Temp. 16.0 18.0 20.0 21.0 22.0 24.0<br />
(°CDB) (°CWB) kW kW kW kW kW kW<br />
-14.7 -15.0 1.7 1.7 1.7 1.7 1.7 1.7<br />
-12.6 -13.0 1.8 1.8 1.8 1.8 1.8 1.8<br />
-10.5 -11.0 1.9 1.9 1.9 1.9 1.9 1.9<br />
-9.5 -10.0 1.9 1.9 1.9 1.9 1.9 1.9<br />
-8.5 -9.1 2.0 2.0 1.9 1.9 1.9 1.9<br />
-7.0 -7.6 2.0 2.0 2.0 2.0 2.0 2.0<br />
-5.0 -5.6 2.1 2.1 2.1 2.1 2.1 2.1<br />
-3.0 -3.7 2.2 2.2 2.2 2.2 2.2 2.2<br />
0.0 -0.7 2.3 2.3 2.3 2.3 2.3 2.2<br />
3.0 2.2 2.5 2.5 2.4 2.4 2.3 2.2<br />
5.0 4.1 2.5 2.5 2.5 2.4 2.3 2.2<br />
7.0 6.0 2.6 2.6 2.5 2.4 2.3 2.2<br />
9.0 7.9 2.7 2.7 2.5 2.4 2.3 2.2<br />
11.0 9.8 2.8 2.7 2.5 2.4 2.3 2.2<br />
13.0 11.8 2.8 2.7 2.5 2.4 2.3 2.2<br />
15.0 13.7 2.8 2.7 2.5 2.4 2.3 2.2<br />
Indoor Unit: S-28KA1E5, S-28KA1E5S<br />
Nominal Capacity (kW) 3.2<br />
Outdoor Indoor <strong>Air</strong> Temperature (°CDB)<br />
<strong>Air</strong> Temp. 16.0 18.0 20.0 21.0 22.0 24.0<br />
(°CDB) (°CWB) kW kW kW kW kW kW<br />
-14.7 -15.0 2.2 2.2 2.2 2.2 2.2 2.1<br />
-12.6 -13.0 2.3 2.3 2.3 2.3 2.3 2.3<br />
-10.5 -11.0 2.4 2.4 2.4 2.4 2.4 2.4<br />
-9.5 -10.0 2.5 2.4 2.4 2.4 2.4 2.4<br />
-8.5 -9.1 2.5 2.5 2.5 2.5 2.5 2.5<br />
-7.0 -7.6 2.6 2.6 2.6 2.6 2.6 2.6<br />
-5.0 -5.6 2.7 2.7 2.7 2.7 2.7 2.7<br />
-3.0 -3.7 2.8 2.8 2.8 2.8 2.8 2.8<br />
0.0 -0.7 3.0 3.0 3.0 3.0 3.0 2.8<br />
3.0 2.2 3.1 3.1 3.1 3.1 3.0 2.8<br />
5.0 4.1 3.3 3.2 3.2 3.1 3.0 2.8<br />
7.0 6.0 3.4 3.4 3.2 3.1 3.0 2.8<br />
9.0 7.9 3.5 3.4 3.2 3.1 3.0 2.8<br />
11.0 9.8 3.6 3.4 3.2 3.1 3.0 2.8<br />
13.0 11.8 3.6 3.4 3.2 3.1 3.0 2.8<br />
15.0 13.7 3.6 3.4 3.2 3.1 3.0 2.8<br />
323
Indoor Unit: S-36KA1E5, S-36KA1E5S<br />
Nominal Capacity (kW) 4.2<br />
Outdoor Indoor <strong>Air</strong> Temperature (°CDB)<br />
<strong>Air</strong> Temp. 16.0 18.0 20.0 21.0 22.0 24.0<br />
(°CDB) (°CWB) kW kW kW kW kW kW<br />
-14.7 -15.0 2.9 2.9 2.9 2.9 2.9 2.9<br />
-12.6 -13.0 3.1 3.0 3.0 3.0 3.0 3.0<br />
-10.5 -11.0 3.2 3.2 3.2 3.2 3.2 3.2<br />
-9.5 -10.0 3.3 3.3 3.3 3.3 3.2 3.2<br />
-8.5 -9.1 3.3 3.3 3.3 3.3 3.3 3.3<br />
-7.0 -7.6 3.4 3.4 3.4 3.4 3.4 3.4<br />
-5.0 -5.6 3.6 3.6 3.6 3.6 3.6 3.6<br />
-3.0 -3.7 3.7 3.7 3.7 3.7 3.7 3.7<br />
0.0 -0.7 3.9 3.9 3.9 3.9 3.9 3.7<br />
3.0 2.2 4.1 4.1 4.1 4.1 3.9 3.7<br />
5.0 4.1 4.3 4.3 4.2 4.1 3.9 3.7<br />
7.0 6.0 4.4 4.4 4.2 4.1 3.9 3.7<br />
9.0 7.9 4.5 4.5 4.2 4.1 3.9 3.7<br />
11.0 9.8 4.7 4.5 4.2 4.1 3.9 3.7<br />
13.0 11.8 4.7 4.5 4.2 4.1 3.9 3.7<br />
15.0 13.7 4.7 4.5 4.2 4.1 3.9 3.7<br />
Indoor Unit: S-45KA1E5, S-45KA1E5S<br />
Nominal Capacity (kW) 5.1<br />
Outdoor Indoor <strong>Air</strong> Temperature (°CDB)<br />
<strong>Air</strong> Temp. 16.0 18.0 20.0 21.0 22.0 24.0<br />
(°CDB) (°CWB) kW kW kW kW kW kW<br />
-14.7 -15.0 3.5 3.5 3.5 3.5 3.5 3.5<br />
-12.6 -13.0 3.7 3.7 3.7 3.6 3.6 3.6<br />
-10.5 -11.0 3.8 3.8 3.8 3.8 3.8 3.8<br />
-9.5 -10.0 3.9 3.9 3.9 3.9 3.9 3.9<br />
-8.5 -9.1 4.0 4.0 4.0 4.0 4.0 4.0<br />
-7.0 -7.6 4.1 4.1 4.1 4.1 4.1 4.1<br />
-5.0 -5.6 4.3 4.3 4.3 4.3 4.3 4.3<br />
-3.0 -3.7 4.5 4.5 4.5 4.5 4.5 4.5<br />
0.0 -0.7 4.8 4.7 4.7 4.7 4.7 4.5<br />
3.0 2.2 5.0 5.0 5.0 4.9 4.8 4.5<br />
5.0 4.1 5.2 5.2 5.1 4.9 4.8 4.5<br />
7.0 6.0 5.3 5.3 5.1 4.9 4.8 4.5<br />
9.0 7.9 5.5 5.4 5.1 4.9 4.8 4.5<br />
11.0 9.8 5.7 5.4 5.1 4.9 4.8 4.5<br />
13.0 11.8 5.7 5.4 5.1 4.9 4.8 4.5<br />
15.0 13.7 5.7 5.4 5.1 4.9 4.8 4.5<br />
324
Indoor Unit: S-56KA1E5<br />
Nominal Capacity (kW) 6.4<br />
Outdoor Indoor <strong>Air</strong> Temperature (°CDB)<br />
<strong>Air</strong> Temp. 16.0 18.0 20.0 21.0 22.0 24.0<br />
(°CDB) (°CWB) kW kW kW kW kW kW<br />
-14.7 -15.0 4.4 4.4 4.4 4.3 4.3 4.3<br />
-12.6 -13.0 4.6 4.6 4.6 4.6 4.6 4.6<br />
-10.5 -11.0 4.8 4.8 4.8 4.8 4.8 4.8<br />
-9.5 -10.0 4.9 4.9 4.9 4.9 4.9 4.9<br />
-8.5 -9.1 5.0 5.0 5.0 5.0 5.0 5.0<br />
-7.0 -7.6 5.2 5.2 5.2 5.2 5.2 5.2<br />
-5.0 -5.6 5.4 5.4 5.4 5.4 5.4 5.4<br />
-3.0 -3.7 5.6 5.6 5.6 5.6 5.6 5.6<br />
0.0 -0.7 6.0 6.0 5.9 5.9 5.9 5.6<br />
3.0 2.2 6.3 6.3 6.3 6.2 6.0 5.6<br />
5.0 4.1 6.5 6.5 6.4 6.2 6.0 5.6<br />
7.0 6.0 6.7 6.7 6.4 6.2 6.0 5.6<br />
9.0 7.9 6.9 6.8 6.4 6.2 6.0 5.6<br />
11.0 9.8 7.1 6.8 6.4 6.2 6.0 5.6<br />
13.0 11.8 7.2 6.8 6.4 6.2 6.0 5.6<br />
15.0 13.7 7.2 6.8 6.4 6.2 6.0 5.6<br />
Indoor Unit: S-63KA1E5<br />
Nominal Capacity (kW) 7.1<br />
Outdoor Indoor <strong>Air</strong> Temperature (°CDB)<br />
<strong>Air</strong> Temp. 16.0 18.0 20.0 21.0 22.0 24.0<br />
(°CDB) (°CWB) kW kW kW kW kW kW<br />
-14.7 -15.0 4.8 4.8 4.8 4.8 4.8 4.8<br />
-12.6 -13.0 5.1 5.1 5.1 5.1 5.1 5.1<br />
-10.5 -11.0 5.3 5.3 5.3 5.3 5.3 5.3<br />
-9.5 -10.0 5.4 5.4 5.4 5.4 5.4 5.4<br />
-8.5 -9.1 5.6 5.6 5.5 5.5 5.5 5.5<br />
-7.0 -7.6 5.8 5.8 5.7 5.7 5.7 5.7<br />
-5.0 -5.6 6.0 6.0 6.0 6.0 6.0 6.0<br />
-3.0 -3.7 6.2 6.2 6.2 6.2 6.2 6.2<br />
0.0 -0.7 6.7 6.6 6.6 6.6 6.6 6.2<br />
3.0 2.2 7.0 7.0 7.0 6.9 6.7 6.2<br />
5.0 4.1 7.2 7.2 7.1 6.9 6.7 6.2<br />
7.0 6.0 7.5 7.5 7.1 6.9 6.7 6.2<br />
9.0 7.9 7.7 7.6 7.1 6.9 6.7 6.2<br />
11.0 9.8 7.9 7.6 7.1 6.9 6.7 6.2<br />
13.0 11.8 8.0 7.6 7.1 6.9 6.7 6.2<br />
15.0 13.7 8.0 7.6 7.1 6.9 6.7 6.2<br />
325
Indoor Unit: S-71KA1E5<br />
Nominal Capacity (kW) 8.0<br />
Outdoor Indoor <strong>Air</strong> Temperature (°CDB)<br />
<strong>Air</strong> Temp. 16.0 18.0 20.0 21.0 22.0 24.0<br />
(°CDB) (°CWB) kW kW kW kW kW kW<br />
-14.7 -15.0 5.4 5.4 5.4 5.4 5.4 5.4<br />
-12.6 -13.0 5.7 5.7 5.7 5.7 5.7 5.7<br />
-10.5 -11.0 6.0 6.0 6.0 6.0 6.0 5.9<br />
-9.5 -10.0 6.1 6.1 6.1 6.1 6.1 6.1<br />
-8.5 -9.1 6.3 6.3 6.2 6.2 6.2 6.2<br />
-7.0 -7.6 6.5 6.5 6.4 6.4 6.4 6.4<br />
-5.0 -5.6 6.8 6.7 6.7 6.7 6.7 6.7<br />
-3.0 -3.7 7.0 7.0 7.0 7.0 7.0 7.0<br />
0.0 -0.7 7.5 7.4 7.4 7.4 7.4 7.0<br />
3.0 2.2 7.9 7.8 7.8 7.7 7.5 7.0<br />
5.0 4.1 8.1 8.1 8.0 7.7 7.5 7.0<br />
7.0 6.0 8.4 8.4 8.0 7.7 7.5 7.0<br />
9.0 7.9 8.7 8.5 8.0 7.7 7.5 7.0<br />
11.0 9.8 8.9 8.5 8.0 7.7 7.5 7.0<br />
13.0 11.8 9.0 8.5 8.0 7.7 7.5 7.0<br />
15.0 13.7 9.0 8.5 8.0 7.7 7.5 7.0<br />
326
20.5.5 YA1E5 Series<br />
Indoor Unit: S-22YA1E5<br />
Nominal Capacity (kW) 2.5<br />
Outdoor Indoor <strong>Air</strong> Temperature (°CDB)<br />
<strong>Air</strong> Temp. 16.0 18.0 20.0 21.0 22.0 24.0<br />
(°CDB) (°CWB) kW kW kW kW kW kW<br />
-14.7 -15.0 1.7 1.7 1.7 1.7 1.7 1.7<br />
-12.6 -13.0 1.8 1.8 1.8 1.8 1.8 1.8<br />
-10.5 -11.0 1.9 1.9 1.9 1.9 1.9 1.9<br />
-9.5 -10.0 1.9 1.9 1.9 1.9 1.9 1.9<br />
-8.5 -9.1 2.0 2.0 1.9 1.9 1.9 1.9<br />
-7.0 -7.6 2.0 2.0 2.0 2.0 2.0 2.0<br />
-5.0 -5.6 2.1 2.1 2.1 2.1 2.1 2.1<br />
-3.0 -3.7 2.2 2.2 2.2 2.2 2.2 2.2<br />
0.0 -0.7 2.3 2.3 2.3 2.3 2.3 2.2<br />
3.0 2.2 2.5 2.5 2.4 2.4 2.3 2.2<br />
5.0 4.1 2.5 2.5 2.5 2.4 2.3 2.2<br />
7.0 6.0 2.6 2.6 2.5 2.4 2.3 2.2<br />
9.0 7.9 2.7 2.7 2.5 2.4 2.3 2.2<br />
11.0 9.8 2.8 2.7 2.5 2.4 2.3 2.2<br />
13.0 11.8 2.8 2.7 2.5 2.4 2.3 2.2<br />
15.0 13.7 2.8 2.7 2.5 2.4 2.3 2.2<br />
Indoor Unit: S-28YA1E5<br />
Nominal Capacity (kW) 3.2<br />
Outdoor Indoor <strong>Air</strong> Temperature (°CDB)<br />
<strong>Air</strong> Temp. 16.0 18.0 20.0 21.0 22.0 24.0<br />
(°CDB) (°CWB) kW kW kW kW kW kW<br />
-14.7 -15.0 2.2 2.2 2.2 2.2 2.2 2.1<br />
-12.6 -13.0 2.3 2.3 2.3 2.3 2.3 2.3<br />
-10.5 -11.0 2.4 2.4 2.4 2.4 2.4 2.4<br />
-9.5 -10.0 2.5 2.4 2.4 2.4 2.4 2.4<br />
-8.5 -9.1 2.5 2.5 2.5 2.5 2.5 2.5<br />
-7.0 -7.6 2.6 2.6 2.6 2.6 2.6 2.6<br />
-5.0 -5.6 2.7 2.7 2.7 2.7 2.7 2.7<br />
-3.0 -3.7 2.8 2.8 2.8 2.8 2.8 2.8<br />
0.0 -0.7 3.0 3.0 3.0 3.0 3.0 2.8<br />
3.0 2.2 3.1 3.1 3.1 3.1 3.0 2.8<br />
5.0 4.1 3.3 3.2 3.2 3.1 3.0 2.8<br />
7.0 6.0 3.4 3.4 3.2 3.1 3.0 2.8<br />
9.0 7.9 3.5 3.4 3.2 3.1 3.0 2.8<br />
11.0 9.8 3.6 3.4 3.2 3.1 3.0 2.8<br />
13.0 11.8 3.6 3.4 3.2 3.1 3.0 2.8<br />
15.0 13.7 3.6 3.4 3.2 3.1 3.0 2.8<br />
327
Indoor Unit: S-36YA1E5<br />
Nominal Capacity (kW) 4.2<br />
Outdoor Indoor <strong>Air</strong> Temperature (°CDB)<br />
<strong>Air</strong> Temp. 16.0 18.0 20.0 21.0 22.0 24.0<br />
(°CDB) (°CWB) kW kW kW kW kW kW<br />
-14.7 -15.0 2.9 2.9 2.9 2.9 2.9 2.9<br />
-12.6 -13.0 3.1 3.0 3.0 3.0 3.0 3.0<br />
-10.5 -11.0 3.2 3.2 3.2 3.2 3.2 3.2<br />
-9.5 -10.0 3.3 3.3 3.3 3.3 3.2 3.2<br />
-8.5 -9.1 3.3 3.3 3.3 3.3 3.3 3.3<br />
-7.0 -7.6 3.4 3.4 3.4 3.4 3.4 3.4<br />
-5.0 -5.6 3.6 3.6 3.6 3.6 3.6 3.6<br />
-3.0 -3.7 3.7 3.7 3.7 3.7 3.7 3.7<br />
0.0 -0.7 3.9 3.9 3.9 3.9 3.9 3.7<br />
3.0 2.2 4.1 4.1 4.1 4.1 3.9 3.7<br />
5.0 4.1 4.3 4.3 4.2 4.1 3.9 3.7<br />
7.0 6.0 4.4 4.4 4.2 4.1 3.9 3.7<br />
9.0 7.9 4.5 4.5 4.2 4.1 3.9 3.7<br />
11.0 9.8 4.7 4.5 4.2 4.1 3.9 3.7<br />
13.0 11.8 4.7 4.5 4.2 4.1 3.9 3.7<br />
15.0 13.7 4.7 4.5 4.2 4.1 3.9 3.7<br />
Indoor Unit: S-45YA1E5<br />
Nominal Capacity (kW) 5.1<br />
Outdoor Indoor <strong>Air</strong> Temperature (°CDB)<br />
<strong>Air</strong> Temp. 16.0 18.0 20.0 21.0 22.0 24.0<br />
(°CDB) (°CWB) kW kW kW kW kW kW<br />
-14.7 -15.0 3.5 3.5 3.5 3.5 3.5 3.5<br />
-12.6 -13.0 3.7 3.7 3.7 3.6 3.6 3.6<br />
-10.5 -11.0 3.8 3.8 3.8 3.8 3.8 3.8<br />
-9.5 -10.0 3.9 3.9 3.9 3.9 3.9 3.9<br />
-8.5 -9.1 4.0 4.0 4.0 4.0 4.0 4.0<br />
-7.0 -7.6 4.1 4.1 4.1 4.1 4.1 4.1<br />
-5.0 -5.6 4.3 4.3 4.3 4.3 4.3 4.3<br />
-3.0 -3.7 4.5 4.5 4.5 4.5 4.5 4.5<br />
0.0 -0.7 4.8 4.7 4.7 4.7 4.7 4.5<br />
3.0 2.2 5.0 5.0 5.0 4.9 4.8 4.5<br />
5.0 4.1 5.2 5.2 5.1 4.9 4.8 4.5<br />
7.0 6.0 5.3 5.3 5.1 4.9 4.8 4.5<br />
9.0 7.9 5.5 5.4 5.1 4.9 4.8 4.5<br />
11.0 9.8 5.7 5.4 5.1 4.9 4.8 4.5<br />
13.0 11.8 5.7 5.4 5.1 4.9 4.8 4.5<br />
15.0 13.7 5.7 5.4 5.1 4.9 4.8 4.5<br />
328
Indoor Unit: S-56YA1E5<br />
Nominal Capacity (kW) 6.4<br />
Outdoor Indoor <strong>Air</strong> Temperature (°CDB)<br />
<strong>Air</strong> Temp. 16.0 18.0 20.0 21.0 22.0 24.0<br />
(°CDB) (°CWB) kW kW kW kW kW kW<br />
-14.7 -15.0 4.4 4.4 4.4 4.3 4.3 4.3<br />
-12.6 -13.0 4.6 4.6 4.6 4.6 4.6 4.6<br />
-10.5 -11.0 4.8 4.8 4.8 4.8 4.8 4.8<br />
-9.5 -10.0 4.9 4.9 4.9 4.9 4.9 4.9<br />
-8.5 -9.1 5.0 5.0 5.0 5.0 5.0 5.0<br />
-7.0 -7.6 5.2 5.2 5.2 5.2 5.2 5.2<br />
-5.0 -5.6 5.4 5.4 5.4 5.4 5.4 5.4<br />
-3.0 -3.7 5.6 5.6 5.6 5.6 5.6 5.6<br />
0.0 -0.7 6.0 6.0 5.9 5.9 5.9 5.6<br />
3.0 2.2 6.3 6.3 6.3 6.2 6.0 5.6<br />
5.0 4.1 6.5 6.5 6.4 6.2 6.0 5.6<br />
7.0 6.0 6.7 6.7 6.4 6.2 6.0 5.6<br />
9.0 7.9 6.9 6.8 6.4 6.2 6.0 5.6<br />
11.0 9.8 7.1 6.8 6.4 6.2 6.0 5.6<br />
13.0 11.8 7.2 6.8 6.4 6.2 6.0 5.6<br />
15.0 13.7 7.2 6.8 6.4 6.2 6.0 5.6<br />
329
20.5.6 UA1E5 Series<br />
Indoor Unit: S-63UA1E5<br />
Nominal Capacity (kW) 7.1<br />
Outdoor Indoor <strong>Air</strong> Temperature (°CDB)<br />
<strong>Air</strong> Temp. 16.0 18.0 20.0 21.0 22.0 24.0<br />
(°CDB) (°CWB) kW kW kW kW kW kW<br />
-14.7 -15.0 4.8 4.8 4.8 4.8 4.8 4.8<br />
-12.6 -13.0 5.1 5.1 5.1 5.1 5.1 5.1<br />
-10.5 -11.0 5.3 5.3 5.3 5.3 5.3 5.3<br />
-9.5 -10.0 5.4 5.4 5.4 5.4 5.4 5.4<br />
-8.5 -9.1 5.6 5.6 5.5 5.5 5.5 5.5<br />
-7.0 -7.6 5.8 5.8 5.7 5.7 5.7 5.7<br />
-5.0 -5.6 6.0 6.0 6.0 6.0 6.0 6.0<br />
-3.0 -3.7 6.2 6.2 6.2 6.2 6.2 6.2<br />
0.0 -0.7 6.7 6.6 6.6 6.6 6.6 6.2<br />
3.0 2.2 7.0 7.0 7.0 6.9 6.7 6.2<br />
5.0 4.1 7.2 7.2 7.1 6.9 6.7 6.2<br />
7.0 6.0 7.5 7.5 7.1 6.9 6.7 6.2<br />
9.0 7.9 7.7 7.6 7.1 6.9 6.7 6.2<br />
11.0 9.8 7.9 7.6 7.1 6.9 6.7 6.2<br />
13.0 11.8 8.0 7.6 7.1 6.9 6.7 6.2<br />
15.0 13.7 8.0 7.6 7.1 6.9 6.7 6.2<br />
Indoor Unit: S-71UA1E5<br />
Nominal Capacity (kW) 8.0<br />
Outdoor Indoor <strong>Air</strong> Temperature (°CDB)<br />
<strong>Air</strong> Temp. 16.0 18.0 20.0 21.0 22.0 24.0<br />
(°CDB) (°CWB) kW kW kW kW kW kW<br />
-14.7 -15.0 5.4 5.4 5.4 5.4 5.4 5.4<br />
-12.6 -13.0 5.7 5.7 5.7 5.7 5.7 5.7<br />
-10.5 -11.0 6.0 6.0 6.0 6.0 6.0 5.9<br />
-9.5 -10.0 6.1 6.1 6.1 6.1 6.1 6.1<br />
-8.5 -9.1 6.3 6.3 6.2 6.2 6.2 6.2<br />
-7.0 -7.6 6.5 6.5 6.4 6.4 6.4 6.4<br />
-5.0 -5.6 6.8 6.7 6.7 6.7 6.7 6.7<br />
-3.0 -3.7 7.0 7.0 7.0 7.0 7.0 7.0<br />
0.0 -0.7 7.5 7.4 7.4 7.4 7.4 7.0<br />
3.0 2.2 7.9 7.8 7.8 7.7 7.5 7.0<br />
5.0 4.1 8.1 8.1 8.0 7.7 7.5 7.0<br />
7.0 6.0 8.4 8.4 8.0 7.7 7.5 7.0<br />
9.0 7.9 8.7 8.5 8.0 7.7 7.5 7.0<br />
11.0 9.8 8.9 8.5 8.0 7.7 7.5 7.0<br />
13.0 11.8 9.0 8.5 8.0 7.7 7.5 7.0<br />
15.0 13.7 9.0 8.5 8.0 7.7 7.5 7.0<br />
330
Indoor Unit: S-90UA1E5<br />
Nominal Capacity (kW) 10.0<br />
Outdoor Indoor <strong>Air</strong> Temperature (°CDB)<br />
<strong>Air</strong> Temp. 16.0 18.0 20.0 21.0 22.0 24.0<br />
(°CDB) (°CWB) kW kW kW kW kW kW<br />
-14.7 -15.0 6.8 6.8 6.8 6.7 6.7 6.7<br />
-12.6 -13.0 7.1 7.1 7.1 7.1 7.1 7.1<br />
-10.5 -11.0 7.5 7.5 7.5 7.5 7.4 7.4<br />
-9.5 -10.0 7.7 7.7 7.7 7.6 7.6 7.6<br />
-8.5 -9.1 7.8 7.8 7.8 7.8 7.8 7.8<br />
-7.0 -7.6 8.1 8.1 8.1 8.1 8.0 8.0<br />
-5.0 -5.6 8.4 8.4 8.4 8.4 8.4 8.4<br />
-3.0 -3.7 8.8 8.8 8.7 8.7 8.7 8.7<br />
0.0 -0.7 9.3 9.3 9.3 9.3 9.3 8.7<br />
3.0 2.2 9.8 9.8 9.8 9.7 9.4 8.7<br />
5.0 4.1 10.2 10.1 10.0 9.7 9.4 8.7<br />
7.0 6.0 10.5 10.5 10.0 9.7 9.4 8.7<br />
9.0 7.9 10.8 10.6 10.0 9.7 9.4 8.7<br />
11.0 9.8 11.2 10.6 10.0 9.7 9.4 8.7<br />
13.0 11.8 11.3 10.6 10.0 9.7 9.4 8.7<br />
15.0 13.7 11.3 10.6 10.0 9.7 9.4 8.7<br />
331
20.5.7 NA1E5 Series<br />
Indoor Unit: S-22NA1E5<br />
Nominal Capacity (kW) 2.5<br />
Outdoor Indoor <strong>Air</strong> Temperature (°CDB)<br />
<strong>Air</strong> Temp. 16.0 18.0 20.0 21.0 22.0 24.0<br />
(°CDB) (°CWB) kW kW kW kW kW kW<br />
-14.7 -15.0 1.7 1.7 1.7 1.7 1.7 1.7<br />
-12.6 -13.0 1.8 1.8 1.8 1.8 1.8 1.8<br />
-10.5 -11.0 1.9 1.9 1.9 1.9 1.9 1.9<br />
-9.5 -10.0 1.9 1.9 1.9 1.9 1.9 1.9<br />
-8.5 -9.1 2.0 2.0 1.9 1.9 1.9 1.9<br />
-7.0 -7.6 2.0 2.0 2.0 2.0 2.0 2.0<br />
-5.0 -5.6 2.1 2.1 2.1 2.1 2.1 2.1<br />
-3.0 -3.7 2.2 2.2 2.2 2.2 2.2 2.2<br />
0.0 -0.7 2.3 2.3 2.3 2.3 2.3 2.2<br />
3.0 2.2 2.5 2.5 2.4 2.4 2.3 2.2<br />
5.0 4.1 2.5 2.5 2.5 2.4 2.3 2.2<br />
7.0 6.0 2.6 2.6 2.5 2.4 2.3 2.2<br />
9.0 7.9 2.7 2.7 2.5 2.4 2.3 2.2<br />
11.0 9.8 2.8 2.7 2.5 2.4 2.3 2.2<br />
13.0 11.8 2.8 2.7 2.5 2.4 2.3 2.2<br />
15.0 13.7 2.8 2.7 2.5 2.4 2.3 2.2<br />
Indoor Unit: S-28NA1E5<br />
Nominal Capacity (kW) 3.2<br />
Outdoor Indoor <strong>Air</strong> Temperature (°CDB)<br />
<strong>Air</strong> Temp. 16.0 18.0 20.0 21.0 22.0 24.0<br />
(°CDB) (°CWB) kW kW kW kW kW kW<br />
-14.7 -15.0 2.2 2.2 2.2 2.2 2.2 2.1<br />
-12.6 -13.0 2.3 2.3 2.3 2.3 2.3 2.3<br />
-10.5 -11.0 2.4 2.4 2.4 2.4 2.4 2.4<br />
-9.5 -10.0 2.5 2.4 2.4 2.4 2.4 2.4<br />
-8.5 -9.1 2.5 2.5 2.5 2.5 2.5 2.5<br />
-7.0 -7.6 2.6 2.6 2.6 2.6 2.6 2.6<br />
-5.0 -5.6 2.7 2.7 2.7 2.7 2.7 2.7<br />
-3.0 -3.7 2.8 2.8 2.8 2.8 2.8 2.8<br />
0.0 -0.7 3.0 3.0 3.0 3.0 3.0 2.8<br />
3.0 2.2 3.1 3.1 3.1 3.1 3.0 2.8<br />
5.0 4.1 3.3 3.2 3.2 3.1 3.0 2.8<br />
7.0 6.0 3.4 3.4 3.2 3.1 3.0 2.8<br />
9.0 7.9 3.5 3.4 3.2 3.1 3.0 2.8<br />
11.0 9.8 3.6 3.4 3.2 3.1 3.0 2.8<br />
13.0 11.8 3.6 3.4 3.2 3.1 3.0 2.8<br />
15.0 13.7 3.6 3.4 3.2 3.1 3.0 2.8<br />
332
Indoor Unit: S-32NA1E5<br />
Nominal Capacity (kW) 3.6<br />
Outdoor Indoor <strong>Air</strong> Temperature (°CDB)<br />
<strong>Air</strong> Temp. 16.0 18.0 20.0 21.0 22.0 24.0<br />
(°CDB) (°CWB) kW kW kW kW kW kW<br />
-14.7 -15.0 2.5 2.5 2.5 2.5 2.5 2.4<br />
-12.6 -13.0 2.6 2.6 2.6 2.6 2.6 2.6<br />
-10.5 -11.0 2.7 2.7 2.7 2.7 2.7 2.7<br />
-9.5 -10.0 2.8 2.8 2.8 2.8 2.7 2.7<br />
-8.5 -9.1 2.8 2.8 2.8 2.8 2.8 2.8<br />
-7.0 -7.6 2.9 2.9 2.9 2.9 2.9 2.9<br />
-5.0 -5.6 3.1 3.1 3.1 3.1 3.1 3.1<br />
-3.0 -3.7 3.2 3.2 3.2 3.2 3.2 3.2<br />
0.0 -0.7 3.4 3.4 3.4 3.4 3.4 3.2<br />
3.0 2.2 3.5 3.5 3.5 3.5 3.4 3.2<br />
5.0 4.1 3.7 3.7 3.6 3.5 3.4 3.2<br />
7.0 6.0 3.8 3.8 3.6 3.5 3.4 3.2<br />
9.0 7.9 3.9 3.9 3.6 3.5 3.4 3.2<br />
11.0 9.8 4.1 3.9 3.6 3.5 3.4 3.2<br />
13.0 11.8 4.1 3.9 3.6 3.5 3.4 3.2<br />
15.0 13.7 4.1 3.9 3.6 3.5 3.4 3.2<br />
Indoor Unit: S-36NA1E5<br />
Nominal Capacity (kW) 4.2<br />
Outdoor Indoor <strong>Air</strong> Temperature (°CDB)<br />
<strong>Air</strong> Temp. 16.0 18.0 20.0 21.0 22.0 24.0<br />
(°CDB) (°CWB) kW kW kW kW kW kW<br />
-14.7 -15.0 2.9 2.9 2.9 2.9 2.9 2.9<br />
-12.6 -13.0 3.1 3.0 3.0 3.0 3.0 3.0<br />
-10.5 -11.0 3.2 3.2 3.2 3.2 3.2 3.2<br />
-9.5 -10.0 3.3 3.3 3.3 3.3 3.2 3.2<br />
-8.5 -9.1 3.3 3.3 3.3 3.3 3.3 3.3<br />
-7.0 -7.6 3.4 3.4 3.4 3.4 3.4 3.4<br />
-5.0 -5.6 3.6 3.6 3.6 3.6 3.6 3.6<br />
-3.0 -3.7 3.7 3.7 3.7 3.7 3.7 3.7<br />
0.0 -0.7 3.9 3.9 3.9 3.9 3.9 3.7<br />
3.0 2.2 4.1 4.1 4.1 4.1 3.9 3.7<br />
5.0 4.1 4.3 4.3 4.2 4.1 3.9 3.7<br />
7.0 6.0 4.4 4.4 4.2 4.1 3.9 3.7<br />
9.0 7.9 4.5 4.5 4.2 4.1 3.9 3.7<br />
11.0 9.8 4.7 4.5 4.2 4.1 3.9 3.7<br />
13.0 11.8 4.7 4.5 4.2 4.1 3.9 3.7<br />
15.0 13.7 4.7 4.5 4.2 4.1 3.9 3.7<br />
333
Indoor Unit: S-45NA1E5<br />
Nominal Capacity (kW) 5.1<br />
Outdoor Indoor <strong>Air</strong> Temperature (°CDB)<br />
<strong>Air</strong> Temp. 16.0 18.0 20.0 21.0 22.0 24.0<br />
(°CDB) (°CWB) kW kW kW kW kW kW<br />
-14.7 -15.0 3.5 3.5 3.5 3.5 3.5 3.5<br />
-12.6 -13.0 3.7 3.7 3.7 3.6 3.6 3.6<br />
-10.5 -11.0 3.8 3.8 3.8 3.8 3.8 3.8<br />
-9.5 -10.0 3.9 3.9 3.9 3.9 3.9 3.9<br />
-8.5 -9.1 4.0 4.0 4.0 4.0 4.0 4.0<br />
-7.0 -7.6 4.1 4.1 4.1 4.1 4.1 4.1<br />
-5.0 -5.6 4.3 4.3 4.3 4.3 4.3 4.3<br />
-3.0 -3.7 4.5 4.5 4.5 4.5 4.5 4.5<br />
0.0 -0.7 4.8 4.7 4.7 4.7 4.7 4.5<br />
3.0 2.2 5.0 5.0 5.0 4.9 4.8 4.5<br />
5.0 4.1 5.2 5.2 5.1 4.9 4.8 4.5<br />
7.0 6.0 5.3 5.3 5.1 4.9 4.8 4.5<br />
9.0 7.9 5.5 5.4 5.1 4.9 4.8 4.5<br />
11.0 9.8 5.7 5.4 5.1 4.9 4.8 4.5<br />
13.0 11.8 5.7 5.4 5.1 4.9 4.8 4.5<br />
15.0 13.7 5.7 5.4 5.1 4.9 4.8 4.5<br />
Indoor Unit: S-56NA1E5<br />
Nominal Capacity (kW) 6.4<br />
Outdoor Indoor <strong>Air</strong> Temperature (°CDB)<br />
<strong>Air</strong> Temp. 16.0 18.0 20.0 21.0 22.0 24.0<br />
(°CDB) (°CWB) kW kW kW kW kW kW<br />
-14.7 -15.0 4.4 4.4 4.4 4.3 4.3 4.3<br />
-12.6 -13.0 4.6 4.6 4.6 4.6 4.6 4.6<br />
-10.5 -11.0 4.8 4.8 4.8 4.8 4.8 4.8<br />
-9.5 -10.0 4.9 4.9 4.9 4.9 4.9 4.9<br />
-8.5 -9.1 5.0 5.0 5.0 5.0 5.0 5.0<br />
-7.0 -7.6 5.2 5.2 5.2 5.2 5.2 5.2<br />
-5.0 -5.6 5.4 5.4 5.4 5.4 5.4 5.4<br />
-3.0 -3.7 5.6 5.6 5.6 5.6 5.6 5.6<br />
0.0 -0.7 6.0 6.0 5.9 5.9 5.9 5.6<br />
3.0 2.2 6.3 6.3 6.3 6.2 6.0 5.6<br />
5.0 4.1 6.5 6.5 6.4 6.2 6.0 5.6<br />
7.0 6.0 6.7 6.7 6.4 6.2 6.0 5.6<br />
9.0 7.9 6.9 6.8 6.4 6.2 6.0 5.6<br />
11.0 9.8 7.1 6.8 6.4 6.2 6.0 5.6<br />
13.0 11.8 7.2 6.8 6.4 6.2 6.0 5.6<br />
15.0 13.7 7.2 6.8 6.4 6.2 6.0 5.6<br />
334
20.5.8 MA1E5 Series<br />
Indoor Unit: S-45MA1E5<br />
Nominal Capacity (kW) 5.1<br />
Outdoor Indoor <strong>Air</strong> Temperature (°CDB)<br />
<strong>Air</strong> Temp. 16.0 18.0 20.0 21.0 22.0 24.0<br />
(°CDB) (°CWB) kW kW kW kW kW kW<br />
-14.7 -15.0 3.5 3.5 3.5 3.5 3.5 3.5<br />
-12.6 -13.0 3.7 3.7 3.7 3.6 3.6 3.6<br />
-10.5 -11.0 3.8 3.8 3.8 3.8 3.8 3.8<br />
-9.5 -10.0 3.9 3.9 3.9 3.9 3.9 3.9<br />
-8.5 -9.1 4.0 4.0 4.0 4.0 4.0 4.0<br />
-7.0 -7.6 4.1 4.1 4.1 4.1 4.1 4.1<br />
-5.0 -5.6 4.3 4.3 4.3 4.3 4.3 4.3<br />
-3.0 -3.7 4.5 4.5 4.5 4.5 4.5 4.5<br />
0.0 -0.7 4.8 4.7 4.7 4.7 4.7 4.5<br />
3.0 2.2 5.0 5.0 5.0 4.9 4.8 4.5<br />
5.0 4.1 5.2 5.2 5.1 4.9 4.8 4.5<br />
7.0 6.0 5.3 5.3 5.1 4.9 4.8 4.5<br />
9.0 7.9 5.5 5.4 5.1 4.9 4.8 4.5<br />
11.0 9.8 5.7 5.4 5.1 4.9 4.8 4.5<br />
13.0 11.8 5.7 5.4 5.1 4.9 4.8 4.5<br />
15.0 13.7 5.7 5.4 5.1 4.9 4.8 4.5<br />
Indoor Unit: S-56MA1E5<br />
Nominal Capacity (kW) 6.4<br />
Outdoor Indoor <strong>Air</strong> Temperature (°CDB)<br />
<strong>Air</strong> Temp. 16.0 18.0 20.0 21.0 22.0 24.0<br />
(°CDB) (°CWB) kW kW kW kW kW kW<br />
-14.7 -15.0 4.4 4.4 4.4 4.3 4.3 4.3<br />
-12.6 -13.0 4.6 4.6 4.6 4.6 4.6 4.6<br />
-10.5 -11.0 4.8 4.8 4.8 4.8 4.8 4.8<br />
-9.5 -10.0 4.9 4.9 4.9 4.9 4.9 4.9<br />
-8.5 -9.1 5.0 5.0 5.0 5.0 5.0 5.0<br />
-7.0 -7.6 5.2 5.2 5.2 5.2 5.2 5.2<br />
-5.0 -5.6 5.4 5.4 5.4 5.4 5.4 5.4<br />
-3.0 -3.7 5.6 5.6 5.6 5.6 5.6 5.6<br />
0.0 -0.7 6.0 6.0 5.9 5.9 5.9 5.6<br />
3.0 2.2 6.3 6.3 6.3 6.2 6.0 5.6<br />
5.0 4.1 6.5 6.5 6.4 6.2 6.0 5.6<br />
7.0 6.0 6.7 6.7 6.4 6.2 6.0 5.6<br />
9.0 7.9 6.9 6.8 6.4 6.2 6.0 5.6<br />
11.0 9.8 7.1 6.8 6.4 6.2 6.0 5.6<br />
13.0 11.8 7.2 6.8 6.4 6.2 6.0 5.6<br />
15.0 13.7 7.2 6.8 6.4 6.2 6.0 5.6<br />
335
Indoor Unit: S-63MA1E5<br />
Nominal Capacity (kW) 7.1<br />
Outdoor Indoor <strong>Air</strong> Temperature (°CDB)<br />
<strong>Air</strong> Temp. 16.0 18.0 20.0 21.0 22.0 24.0<br />
(°CDB) (°CWB) kW kW kW kW kW kW<br />
-14.7 -15.0 4.8 4.8 4.8 4.8 4.8 4.8<br />
-12.6 -13.0 5.1 5.1 5.1 5.1 5.1 5.1<br />
-10.5 -11.0 5.3 5.3 5.3 5.3 5.3 5.3<br />
-9.5 -10.0 5.4 5.4 5.4 5.4 5.4 5.4<br />
-8.5 -9.1 5.6 5.6 5.5 5.5 5.5 5.5<br />
-7.0 -7.6 5.8 5.8 5.7 5.7 5.7 5.7<br />
-5.0 -5.6 6.0 6.0 6.0 6.0 6.0 6.0<br />
-3.0 -3.7 6.2 6.2 6.2 6.2 6.2 6.2<br />
0.0 -0.7 6.7 6.6 6.6 6.6 6.6 6.2<br />
3.0 2.2 7.0 7.0 7.0 6.9 6.7 6.2<br />
5.0 4.1 7.2 7.2 7.1 6.9 6.7 6.2<br />
7.0 6.0 7.5 7.5 7.1 6.9 6.7 6.2<br />
9.0 7.9 7.7 7.6 7.1 6.9 6.7 6.2<br />
11.0 9.8 7.9 7.6 7.1 6.9 6.7 6.2<br />
13.0 11.8 8.0 7.6 7.1 6.9 6.7 6.2<br />
15.0 13.7 8.0 7.6 7.1 6.9 6.7 6.2<br />
Indoor Unit: S-71MA1E5<br />
Nominal Capacity (kW) 8.0<br />
Outdoor Indoor <strong>Air</strong> Temperature (°CDB)<br />
<strong>Air</strong> Temp. 16.0 18.0 20.0 21.0 22.0 24.0<br />
(°CDB) (°CWB) kW kW kW kW kW kW<br />
-14.7 -15.0 5.4 5.4 5.4 5.4 5.4 5.4<br />
-12.6 -13.0 5.7 5.7 5.7 5.7 5.7 5.7<br />
-10.5 -11.0 6.0 6.0 6.0 6.0 6.0 5.9<br />
-9.5 -10.0 6.1 6.1 6.1 6.1 6.1 6.1<br />
-8.5 -9.1 6.3 6.3 6.2 6.2 6.2 6.2<br />
-7.0 -7.6 6.5 6.5 6.4 6.4 6.4 6.4<br />
-5.0 -5.6 6.8 6.7 6.7 6.7 6.7 6.7<br />
-3.0 -3.7 7.0 7.0 7.0 7.0 7.0 7.0<br />
0.0 -0.7 7.5 7.4 7.4 7.4 7.4 7.0<br />
3.0 2.2 7.9 7.8 7.8 7.7 7.5 7.0<br />
5.0 4.1 8.1 8.1 8.0 7.7 7.5 7.0<br />
7.0 6.0 8.4 8.4 8.0 7.7 7.5 7.0<br />
9.0 7.9 8.7 8.5 8.0 7.7 7.5 7.0<br />
11.0 9.8 8.9 8.5 8.0 7.7 7.5 7.0<br />
13.0 11.8 9.0 8.5 8.0 7.7 7.5 7.0<br />
15.0 13.7 9.0 8.5 8.0 7.7 7.5 7.0<br />
336
Indoor Unit: S-90MA1E5<br />
Nominal Capacity (kW) 10.0<br />
Outdoor Indoor <strong>Air</strong> Temperature (°CDB)<br />
<strong>Air</strong> Temp. 16.0 18.0 20.0 21.0 22.0 24.0<br />
(°CDB) (°CWB) kW kW kW kW kW kW<br />
-14.7 -15.0 6.8 6.8 6.8 6.7 6.7 6.7<br />
-12.6 -13.0 7.1 7.1 7.1 7.1 7.1 7.1<br />
-10.5 -11.0 7.5 7.5 7.5 7.5 7.4 7.4<br />
-9.5 -10.0 7.7 7.7 7.7 7.6 7.6 7.6<br />
-8.5 -9.1 7.8 7.8 7.8 7.8 7.8 7.8<br />
-7.0 -7.6 8.1 8.1 8.1 8.1 8.0 8.0<br />
-5.0 -5.6 8.4 8.4 8.4 8.4 8.4 8.4<br />
-3.0 -3.7 8.8 8.8 8.7 8.7 8.7 8.7<br />
0.0 -0.7 9.3 9.3 9.3 9.3 9.3 8.7<br />
3.0 2.2 9.8 9.8 9.8 9.7 9.4 8.7<br />
5.0 4.1 10.2 10.1 10.0 9.7 9.4 8.7<br />
7.0 6.0 10.5 10.5 10.0 9.7 9.4 8.7<br />
9.0 7.9 10.8 10.6 10.0 9.7 9.4 8.7<br />
11.0 9.8 11.2 10.6 10.0 9.7 9.4 8.7<br />
13.0 11.8 11.3 10.6 10.0 9.7 9.4 8.7<br />
15.0 13.7 11.3 10.6 10.0 9.7 9.4 8.7<br />
337
20.6 Combination Characteristic<br />
• Calculation method of indoor unit capacity<br />
(an example)<br />
Outdoor unit:U-6LA1E5<br />
Indoor unit:S-36KA1E5 x 2 + S-56KA1E5 + S-63KA1E5<br />
Actual cooling capacity of S-56KA1E5:<br />
indoor rated cooling capacity(5.6kW)<br />
Cooling capacity(15.5kW)× = 4.54kW<br />
Total indoor rated cooling capacity(19.1kW)<br />
• Indoor cooling capacity (kW)<br />
Cooling<br />
cooling capacity(kW)<br />
cooling capacity(kW)<br />
cooling capacity(kW)<br />
14<br />
12<br />
10<br />
20<br />
18<br />
16<br />
14<br />
12<br />
10<br />
8<br />
6<br />
4<br />
2<br />
0<br />
18<br />
16<br />
14<br />
12<br />
10<br />
8<br />
6<br />
4<br />
2<br />
0<br />
8<br />
6<br />
4<br />
2<br />
Indoor unit 0.8HP 1.0HP 1.25HP 1.5HP 1.75HP 2.0HP 2.5HP 3.0HP 3.5HP<br />
Cooling capacity 2.2kW 2.8kW 3.2kW 3.6kW 4.5kW 5.6kW 6.3kW 7.1kW 9.0kW<br />
Wall mounted ○ ○ ○ ○ ○ ○ ○<br />
Mini cassette ○ ○ ○ ○ ○<br />
Big cassette ○ ○ ○<br />
Duct D4 ○ ○ ○ ○ ○ ○<br />
Duct D3 ○ ○ ○ ○ ○<br />
cooling capacity(6HP)<br />
0 1 2 3 4 5 6 7 8 9 10 11 12 13 14 15 16 17 18 19 20 21 22<br />
total indoor rated cooling capacity(kW)<br />
cooling capacity(5HP)<br />
0<br />
0 1 2 3 4 5 6 7 8 9 10 11 12 13 14 15 16 17 18 19 20<br />
total indoor rated cooling capacity(kW)<br />
cooling capacity(4HP)<br />
0 1 2 3 4 5 6 7 8 9 10 11 12 13 14 15 16<br />
total indoor rated cooling capacity(kW)<br />
338<br />
cooling power input(kw)<br />
cooling power input(kw)<br />
cooling power input(kw)<br />
6.00<br />
5.00<br />
4.00<br />
3.00<br />
2.00<br />
1.00<br />
0.00<br />
5.00<br />
4.50<br />
4.00<br />
3.50<br />
3.00<br />
2.50<br />
2.00<br />
1.50<br />
1.00<br />
0.50<br />
0.00<br />
4.00<br />
3.50<br />
3.00<br />
2.50<br />
2.00<br />
1.50<br />
1.00<br />
0.50<br />
0.00<br />
cooling power input(6HP)<br />
0 5 10 15 20 25<br />
total indoor rated cooling capacity(kW)<br />
cooling power input(5HP)<br />
0 5 10 15 20<br />
total indoor rated cooling capacity(kW)<br />
cooling power input(4HP)<br />
0 5 10 15 20<br />
total indoor rated cooling capacity(kW)
• Indoor heating capacity (kW)<br />
Heating<br />
heating capacity (kW)<br />
heating capacity (kW)<br />
heating capacity (kW)<br />
22<br />
20<br />
18<br />
16<br />
14<br />
12<br />
10<br />
8<br />
6<br />
4<br />
2<br />
Indoor unit 0.8HP 1.0HP 1.25HP 1.5HP 1.75HP 2.0HP 2.5HP 3.0HP 3.5HP<br />
Heating capacity 2.5kW 3.2kW 3.6kW 4.2kW 5.1kW 6.4kW 7.1kW 8.0kW 10.0kW<br />
Wall mounted ○ ○ ○ ○ ○ ○ ○<br />
Mini cassette ○ ○ ○ ○ ○<br />
Big cassette ○ ○ ○<br />
Duct D4 ○ ○ ○ ○ ○ ○<br />
Duct D3 ○ ○ ○ ○ ○<br />
hea ting capa city(6HP)<br />
0<br />
0 5 10 15 20 25<br />
total indoo r rated hea ting capa city(kW)<br />
20<br />
18<br />
16<br />
14<br />
12<br />
10<br />
8<br />
6<br />
4<br />
2<br />
hea ting capa city(5HP)<br />
0<br />
0 5 10 15 20 25<br />
total indoo r rated hea ting capa city(kW)<br />
16<br />
14<br />
12<br />
10<br />
8<br />
6<br />
4<br />
2<br />
hea ting capa city(4HP)<br />
0<br />
0 2 4 6 8 10 12 14 16 18<br />
total indoo r rated hea ting capa city(kW)<br />
• Heating capacity correction factor<br />
339<br />
heating power input (kW)<br />
heating power input (kW)<br />
heating power input (kW)<br />
6.00<br />
5.00<br />
4.00<br />
3.00<br />
2.00<br />
1.00<br />
0.00<br />
5.00<br />
4.00<br />
3.00<br />
2.00<br />
1.00<br />
0.00<br />
4.00<br />
3.00<br />
2.00<br />
1.00<br />
0.00<br />
heating power input(6HP)<br />
0 5 10 15 20 25<br />
total indoo r rated hea ting capa city(kW)<br />
heating power input(5HP)<br />
0 5 10 15 20 25<br />
total indoo r rated hea ting capa city(kW)<br />
heating power input(4HP)<br />
0 2 4 6 8 10 12 14 16 18<br />
total indoo r rated hea ting capa city(kW)<br />
Outdoor air temperature<br />
(°CWB)<br />
-15 -10 -8 -6 -4 -2 0 1 2 4 6<br />
Correction factor 0.94 0.93 0.92 0.92 0.88 0.86 0.85 0.90 0.93 0.96 1.00<br />
※ Heating capacity = (Heating capacity excluding defrost operation in the tables) x (correction factor)
• Explanation of correct capacity combination with example of minimum and maximum Kw<br />
o 4HP (an example of maximum kW)<br />
Outdoor unit: U-4LA1E5 (maximum combination capacity: 14.6kW)<br />
Indoor units: S-22KA1E5 (2.2kW) x 5+S-36KA1E5 (3.6kW)<br />
Total capacity of indoor units selected: 14.6kW<br />
o 4HP (an example of maximum kW)<br />
Outdoor unit: U-4LA1E5 (maximum combination capacity: 5.6kW)<br />
Indoor units: S-22KA1E5 (2.2kW) x 5 + S-36KA1E5 (3.6kW)<br />
Total capacity of indoor units selected: 5.6kW<br />
o 5HP (an example of maximum kW)<br />
Outdoor unit: U-5LA1E5 (maximum combination capacity: 18.2kW)<br />
Indoor units: S-22KA1E5 (2.2kW) x 7 + S-28KA1E5 (2.8kW)<br />
Total capacity of indoor units selected: 18.2kW<br />
o 5HP (an example of maximum kW)<br />
Outdoor unit: U-5LA1E5 (maximum combination capacity: 7.0kW)<br />
Indoor units: S-36KA1E5 (3.6kW) x 2<br />
Total capacity of indoor units selected: 7.2 kW<br />
o 6HP (an example of maximum kW)<br />
Outdoor unit: U-6LA1E5 (maximum combination capacity: 20.2kW)<br />
Indoor units: S-22KA1E5 (2.2kW) x 5 + S-28KA1E5 (2.8kW) x 2 + S-36KA1E5 (3.6kW)<br />
Total capacity of indoor units selected: 20.2kW<br />
o 6HP (an example of maximum kW)<br />
Outdoor unit: U-6LA1E5 (maximum combination capacity: 7.8kW)<br />
Indoor units: S-22KA1E5 (2.2kW) + S-56KA1E5 (5.6kW)<br />
Total capacity of indoor units selected: 7.8kW<br />
340
20.7 <strong>Air</strong> Flow Volume<br />
20.7.1 Wall Mounted Type Indoor Unit<br />
Cooling<br />
Heating<br />
Cooling<br />
Heating<br />
S-22KA1E5 (S) S-28KA1E5 (S) S-36KA1E5 (S) S-45KA1E5 (S)<br />
Hi m 3 /min 9.5 9.7 10.9 11.3<br />
Me m 3 /min 8.2 8.3 9.4 9.7<br />
Lo m 3 /min 6.9 6.8 7.9 8.2<br />
Hi m 3 /min 10.3 10.9 11.6 12.1<br />
Me m 3 /min 9.4 9.5 10.2 10.6<br />
Lo m 3 /min 8.4 8.4 8.8 9.1<br />
S-56KA1E5 S-63KA1E5 S-71KA1E5<br />
Hi m 3 /min 15.3 16.0 17.4<br />
Me m 3 /min 13.2 13.7 14.7<br />
Lo m 3 /min 11.1 11.4 12.0<br />
Hi m 3 /min 16.7 17.1 18.3<br />
Me m 3 /min 15.0 15.1 16.0<br />
Lo m 3 /min 13.4 13.1 13.7<br />
20.7.2 60 x 60 Cassette Type Indoor Unit<br />
S-22YA1E5 S-28YA1E5 S-36YA1E5 S-45YA1E5<br />
Cooling<br />
Heating<br />
Cooling<br />
Heating<br />
Hi m 3 /min 8.3 8.6 9.0 9.3<br />
Me m 3 /min 7.3 7.4 7.7 7.9<br />
Lo m 3 /min 6.2 6.2 6.4 6.5<br />
Hi m 3 /min 9.3 9.6 9.9 10.3<br />
Me m 3 /min 8.1 8.4 8.7 9.0<br />
Lo m 3 /min 7.4 7.7 8.0 8.3<br />
Hi m<br />
S-56YA1E5<br />
3 /min 9.9<br />
Me m 3 /min 8.6<br />
Lo m 3 /min 7.2<br />
Hi m 3 /min 10.6<br />
Me m 3 /min 9.4<br />
Lo m 3 /min 8.6<br />
341
S-22YA1E5<br />
<strong>Air</strong>flow direction:20°<br />
1. Cooling Hi<br />
Height(m)<br />
4<br />
3.5<br />
3<br />
2.5<br />
2<br />
1.5<br />
1<br />
0.5<br />
0<br />
2. Cooling Me<br />
Height(m)<br />
4<br />
3.5<br />
3<br />
2.5<br />
2<br />
1.5<br />
1<br />
0.5<br />
0<br />
3. Cooling Lo<br />
Height(m)<br />
4<br />
3.5<br />
3<br />
2.5<br />
2<br />
1.5<br />
1<br />
0.5<br />
0<br />
<strong>Air</strong> velocity distribution<br />
0 2 4 6 8 10 12 14<br />
Reaching distance(m)<br />
<strong>Air</strong> velocity distribution<br />
342<br />
1m/sec over 0.5~1m/sec 0~0.5m/sec<br />
1m/sec over 0.5~1m/sec 0~0.5m/sec<br />
0 2 4 6 8 10 12 14<br />
Reaching distance(m)<br />
<strong>Air</strong> velocity distribution<br />
1m/sec over 0.5~1m/sec 0~0.5m/sec<br />
0 2 4 6 8 10 12 14<br />
Reaching distance(m)
<strong>Air</strong>flow direction:70°<br />
1. Heating Hi<br />
Height(m)<br />
4<br />
3.5<br />
3<br />
2.5<br />
2<br />
1.5<br />
1<br />
0.5<br />
0<br />
2. Heating Me<br />
Height(m)<br />
4<br />
3.5<br />
3<br />
2.5<br />
2<br />
1.5<br />
1<br />
0.5<br />
0<br />
3. Heating Lo<br />
Height(m)<br />
4<br />
3.5<br />
3<br />
2.5<br />
2<br />
1.5<br />
1<br />
0.5<br />
0<br />
<strong>Air</strong> velocity distribution<br />
0 2 4 6 8 10 12 14<br />
Reaching distance(m)<br />
<strong>Air</strong> velocity distribution<br />
343<br />
1m/sec over 0.5~1m/sec 0~0.5m/sec<br />
1m/sec over 0.5~1m/sec 0~0.5m/sec<br />
0 2 4 6 8 10 12 14<br />
Reaching distance(m)<br />
<strong>Air</strong> velocity distribution<br />
1m/sec over 0.5~1m/sec 0~0.5m/sec<br />
0 2 4 6 8 10 12 14<br />
Reaching distance(m)
S-28YA1E5<br />
<strong>Air</strong>flow direction:20°<br />
1. Cooling Hi<br />
Height(m)<br />
4<br />
3.5<br />
3<br />
2.5<br />
2<br />
1.5<br />
1<br />
0.5<br />
0<br />
2. Cooling Me<br />
Height(m)<br />
4<br />
3.5<br />
3<br />
2.5<br />
2<br />
1.5<br />
1<br />
0.5<br />
0<br />
3. Cooling Lo<br />
Height(m)<br />
4<br />
3.5<br />
3<br />
2.5<br />
2<br />
1.5<br />
1<br />
0.5<br />
0<br />
<strong>Air</strong> velocity distribution<br />
0 2 4 6 8 10 12 14<br />
Reaching distance(m)<br />
<strong>Air</strong> velocity distribution<br />
344<br />
1m/sec over 0.5~1m/sec 0~0.5m/sec<br />
1m/sec over 0.5~1m/sec 0~0.5m/sec<br />
0 2 4 6 8 10 12 14<br />
Reaching distance(m)<br />
<strong>Air</strong> velocity distribution<br />
1m/sec over 0.5~1m/sec 0~0.5m/sec<br />
0 2 4 6 8 10 12 14<br />
Reaching distance(m)
<strong>Air</strong>flow direction:70°<br />
1. Heating Hi<br />
Height(m)<br />
4<br />
3.5<br />
3<br />
2.5<br />
2<br />
1.5<br />
1<br />
0.5<br />
0<br />
2. Heating Me<br />
Height(m)<br />
4<br />
3.5<br />
3<br />
2.5<br />
2<br />
1.5<br />
1<br />
0.5<br />
0<br />
3. Heating Lo<br />
Height(m)<br />
4<br />
3.5<br />
3<br />
2.5<br />
2<br />
1.5<br />
1<br />
0.5<br />
0<br />
<strong>Air</strong> velocity distribution<br />
0 2 4 6 8 10 12 14<br />
Reaching distance(m)<br />
<strong>Air</strong> velocity distribution<br />
345<br />
1m/sec over 0.5~1m/sec 0~0.5m/sec<br />
1m/sec over 0.5~1m/sec 0~0.5m/sec<br />
0 2 4 6 8 10 12 14<br />
Reaching distance(m)<br />
<strong>Air</strong> velocity distribution<br />
1m/sec over 0.5~1m/sec 0~0.5m/sec<br />
0 2 4 6 8 10 12 14<br />
Reaching distance(m)
S-36YA1E5<br />
<strong>Air</strong>flow direction:20°<br />
1. Cooling Hi<br />
Height(m)<br />
4<br />
3.5<br />
3<br />
2.5<br />
2<br />
1.5<br />
1<br />
0.5<br />
0<br />
2. Cooling Me<br />
Height(m)<br />
4<br />
3.5<br />
3<br />
2.5<br />
2<br />
1.5<br />
1<br />
0.5<br />
0<br />
3. Cooling Lo<br />
Height(m)<br />
4<br />
3.5<br />
3<br />
2.5<br />
2<br />
1.5<br />
1<br />
0.5<br />
0<br />
<strong>Air</strong> velocity distribution<br />
0 2 4 6 8 10 12 14<br />
Reaching distance(m)<br />
<strong>Air</strong> velocity distribution<br />
346<br />
1m/sec over 0.5~1m/sec 0~0.5m/sec<br />
1m/sec over 0.5~1m/sec 0~0.5m/sec<br />
0 2 4 6 8 10 12 14<br />
Reaching distance(m)<br />
<strong>Air</strong> velocity distribution<br />
1m/sec over 0.5~1m/sec 0~0.5m/sec<br />
0 2 4 6 8 10 12 14<br />
Reaching distance(m)
<strong>Air</strong>flow direction:70°<br />
1. Heating Hi<br />
Height(m)<br />
4<br />
3.5<br />
3<br />
2.5<br />
2<br />
1.5<br />
1<br />
0.5<br />
0<br />
2. Heating Me<br />
Height(m)<br />
4<br />
3.5<br />
3<br />
2.5<br />
2<br />
1.5<br />
1<br />
0.5<br />
0<br />
3. Heating Lo<br />
Height(m)<br />
4<br />
3.5<br />
3<br />
2.5<br />
2<br />
1.5<br />
1<br />
0.5<br />
0<br />
<strong>Air</strong> velocity distribution<br />
0 2 4 6 8 10 12 14<br />
Reaching distance(m)<br />
<strong>Air</strong> velocity distribution<br />
347<br />
1m/sec over 0.5~1m/sec 0~0.5m/sec<br />
1m/sec over 0.5~1m/sec 0~0.5m/sec<br />
0 2 4 6 8 10 12 14<br />
Reaching distance(m)<br />
<strong>Air</strong> velocity distribution<br />
1m/sec over 0.5~1m/sec 0~0.5m/sec<br />
0 2 4 6 8 10 12 14<br />
Reaching distance(m)
S-45YA1E5<br />
<strong>Air</strong>flow direction:20°<br />
1. Cooling Hi<br />
Height(m)<br />
4<br />
3.5<br />
3<br />
2.5<br />
2<br />
1.5<br />
1<br />
0.5<br />
0<br />
2. Cooling Me<br />
Height(m)<br />
4<br />
3.5<br />
3<br />
2.5<br />
2<br />
1.5<br />
1<br />
0.5<br />
0<br />
3. Cooling Lo<br />
Height(m)<br />
4<br />
3.5<br />
3<br />
2.5<br />
2<br />
1.5<br />
1<br />
0.5<br />
0<br />
<strong>Air</strong> velocity distribution<br />
0 2 4 6 8 10 12 14<br />
Reaching distance(m)<br />
<strong>Air</strong> velocity distribution<br />
348<br />
1m/sec over 0.5~1m/sec 0~0.5m/sec<br />
1m/sec over 0.5~1m/sec 0~0.5m/sec<br />
0 2 4 6 8 10 12 14<br />
Reaching distance(m)<br />
<strong>Air</strong> velocity distribution<br />
1m/sec over 0.5~1m/sec 0~0.5m/sec<br />
0 2 4 6 8 10 12 14<br />
Reaching distance(m)
<strong>Air</strong>flow direction:70°<br />
1. Heating Hi<br />
Height(m)<br />
4<br />
3.5<br />
3<br />
2.5<br />
2<br />
1.5<br />
1<br />
0.5<br />
0<br />
2. Heating Me<br />
Height(m)<br />
4<br />
3.5<br />
3<br />
2.5<br />
2<br />
1.5<br />
1<br />
0.5<br />
0<br />
3. Heating Lo<br />
Height(m)<br />
4<br />
3.5<br />
3<br />
2.5<br />
2<br />
1.5<br />
1<br />
0.5<br />
0<br />
<strong>Air</strong> velocity distribution<br />
0 2 4 6 8 10 12 14<br />
Reaching distance(m)<br />
<strong>Air</strong> velocity distribution<br />
349<br />
1m/sec over 0.5~1m/sec 0~0.5m/sec<br />
1m/sec over 0.5~1m/sec 0~0.5m/sec<br />
0 2 4 6 8 10 12 14<br />
Reaching distance(m)<br />
<strong>Air</strong> velocity distribution<br />
1m/sec over 0.5~1m/sec 0~0.5m/sec<br />
0 2 4 6 8 10 12 14<br />
Reaching distance(m)
S-56YA1E5<br />
<strong>Air</strong>flow direction:20°<br />
1. Cooling Hi<br />
Height(m)<br />
4<br />
3.5<br />
3<br />
2.5<br />
2<br />
1.5<br />
1<br />
0.5<br />
0<br />
2. Cooling Me<br />
Height(m)<br />
4<br />
3.5<br />
3<br />
2.5<br />
2<br />
1.5<br />
1<br />
0.5<br />
0<br />
3. Cooling Lo<br />
Height(m)<br />
4<br />
3.5<br />
3<br />
2.5<br />
2<br />
1.5<br />
1<br />
0.5<br />
0<br />
<strong>Air</strong> velocity distribution<br />
0 2 4 6 8 10 12 14<br />
Reaching distance(m)<br />
<strong>Air</strong> velocity distribution<br />
350<br />
1m/sec over 0.5~1m/sec 0~0.5m/sec<br />
1m/sec over 0.5~1m/sec 0~0.5m/sec<br />
0 2 4 6 8 10 12 14<br />
Reaching distance(m)<br />
<strong>Air</strong> velocity distribution<br />
1m/sec over 0.5~1m/sec 0~0.5m/sec<br />
0 2 4 6 8 10 12 14<br />
Reaching distance(m)
<strong>Air</strong>flow direction:70°<br />
1. Heating Hi<br />
Height(m)<br />
4<br />
3.5<br />
3<br />
2.5<br />
2<br />
1.5<br />
1<br />
0.5<br />
0<br />
2. Heating Me<br />
Height(m)<br />
4<br />
3.5<br />
3<br />
2.5<br />
2<br />
1.5<br />
1<br />
0.5<br />
0<br />
3. Heating Lo<br />
Height(m)<br />
4<br />
3.5<br />
3<br />
2.5<br />
2<br />
1.5<br />
1<br />
0.5<br />
0<br />
<strong>Air</strong> velocity distribution<br />
0 2 4 6 8 10 12 14<br />
Reaching distance(m)<br />
<strong>Air</strong> velocity distribution<br />
351<br />
1m/sec over 0.5~1m/sec 0~0.5m/sec<br />
1m/sec over 0.5~1m/sec 0~0.5m/sec<br />
0 2 4 6 8 10 12 14<br />
Reaching distance(m)<br />
<strong>Air</strong> velocity distribution<br />
1m/sec over 0.5~1m/sec 0~0.5m/sec<br />
0 2 4 6 8 10 12 14<br />
Reaching distance(m)
20.7.3 90 x 90 Cassette Type Indoor Unit<br />
S-63UA1E5 S-71UA1E5 S-90UA1E5<br />
Hi m 3 /min 21.0 22.0 22.0<br />
Me m 3 /min 19.0 20.0 20.0<br />
Lo m 3 /min 17.0 18.0 18.0<br />
S-63UA1E5<br />
<strong>Air</strong>flow direction:20°<br />
1. Cooling Hi<br />
Height(m)<br />
4<br />
3.5<br />
3<br />
2.5<br />
2<br />
1.5<br />
1<br />
0.5<br />
0<br />
2. Cooling Me<br />
Height(m)<br />
4<br />
3.5<br />
3<br />
2.5<br />
2<br />
1.5<br />
1<br />
0.5<br />
0<br />
3. Cooling Lo<br />
Height(m)<br />
4<br />
3.5<br />
3<br />
2.5<br />
2<br />
1.5<br />
1<br />
0.5<br />
0<br />
<strong>Air</strong> velocity distribution<br />
0 2 4 6 8 10 12 14<br />
Reaching distance(m)<br />
<strong>Air</strong> velocity distribution<br />
352<br />
1m/sec over 0.5~1m/sec 0~0.5m/sec<br />
1m/sec over 0.5~1m/sec 0~0.5m/sec<br />
0 2 4 6 8 10 12 14<br />
Reaching distance(m)<br />
<strong>Air</strong> velocity distribution<br />
1m/sec over 0.5~1m/sec 0~0.5m/sec<br />
0 2 4 6 8 10 12 14<br />
Reaching distance(m)
<strong>Air</strong>flow direction:70°<br />
1. Heating Hi<br />
Height(m)<br />
4<br />
3.5<br />
3<br />
2.5<br />
2<br />
1.5<br />
1<br />
0.5<br />
0<br />
2. Heating Me<br />
Height(m)<br />
4<br />
3.5<br />
3<br />
2.5<br />
2<br />
1.5<br />
1<br />
0.5<br />
0<br />
3. Heating Lo<br />
Height(m)<br />
4<br />
3.5<br />
3<br />
2.5<br />
2<br />
1.5<br />
1<br />
0.5<br />
0<br />
<strong>Air</strong> velocity distribution<br />
0 2 4 6 8 10 12 14<br />
Reaching distance(m)<br />
<strong>Air</strong> velocity distribution<br />
353<br />
1m/sec over 0.5~1m/sec 0~0.5m/sec<br />
1m/sec over 0.5~1m/sec 0~0.5m/sec<br />
0 2 4 6 8 10 12 14<br />
Reaching distance(m)<br />
<strong>Air</strong> velocity distribution<br />
1m/sec over 0.5~1m/sec 0~0.5m/sec<br />
0 2 4 6 8 10 12 14<br />
Reaching distance(m)
S-71UA1E5<br />
<strong>Air</strong>flow direction:20°<br />
1. Cooling Hi<br />
Height(m)<br />
4<br />
3.5<br />
3<br />
2.5<br />
2<br />
1.5<br />
1<br />
0.5<br />
0<br />
2. Cooling Me<br />
Height(m)<br />
4<br />
3.5<br />
3<br />
2.5<br />
2<br />
1.5<br />
1<br />
0.5<br />
0<br />
3. Cooling Lo<br />
Height(m)<br />
4<br />
3.5<br />
3<br />
2.5<br />
2<br />
1.5<br />
1<br />
0.5<br />
0<br />
<strong>Air</strong> velocity distribution<br />
0 2 4 6 8 10 12 14<br />
Reaching distance(m)<br />
<strong>Air</strong> velocity distribution<br />
354<br />
1m/sec over 0.5~1m/sec 0~0.5m/sec<br />
1m/sec over 0.5~1m/sec 0~0.5m/sec<br />
0 2 4 6 8 10 12 14<br />
Reaching distance(m)<br />
<strong>Air</strong> velocity distribution<br />
1m/sec over 0.5~1m/sec 0~0.5m/sec<br />
0 2 4 6 8 10 12 14<br />
Reaching distance(m)
<strong>Air</strong>flow direction:70°<br />
1. Heating Hi<br />
Height(m)<br />
4<br />
3.5<br />
3<br />
2.5<br />
2<br />
1.5<br />
1<br />
0.5<br />
0<br />
2. Heating Me<br />
Height(m)<br />
4<br />
3.5<br />
3<br />
2.5<br />
2<br />
1.5<br />
1<br />
0.5<br />
0<br />
3. Heating Lo<br />
Height(m)<br />
4<br />
3.5<br />
3<br />
2.5<br />
2<br />
1.5<br />
1<br />
0.5<br />
0<br />
<strong>Air</strong> velocity distribution<br />
0 2 4 6 8 10 12 14<br />
Reaching distance(m)<br />
<strong>Air</strong> velocity distribution<br />
355<br />
1m/sec over 0.5~1m/sec 0~0.5m/sec<br />
1m/sec over 0.5~1m/sec 0~0.5m/sec<br />
0 2 4 6 8 10 12 14<br />
Reaching distance(m)<br />
<strong>Air</strong> velocity distribution<br />
1m/sec over 0.5~1m/sec 0~0.5m/sec<br />
0 2 4 6 8 10 12 14<br />
Reaching distance(m)
S-90UA1E5<br />
<strong>Air</strong>flow direction:20°<br />
1. Cooling Hi<br />
Height(m)<br />
4<br />
3.5<br />
3<br />
2.5<br />
2<br />
1.5<br />
1<br />
0.5<br />
0<br />
2. Cooling Me<br />
Height(m)<br />
4<br />
3.5<br />
3<br />
2.5<br />
2<br />
1.5<br />
1<br />
0.5<br />
0<br />
3. Cooling Lo<br />
Height(m)<br />
4<br />
3.5<br />
3<br />
2.5<br />
2<br />
1.5<br />
1<br />
0.5<br />
0<br />
<strong>Air</strong> velocity distribution<br />
0 2 4 6 8 10 12 14<br />
Reaching distance(m)<br />
<strong>Air</strong> velocity distribution<br />
356<br />
1m/sec over 0.5~1m/sec 0~0.5m/sec<br />
1m/sec over 0.5~1m/sec 0~0.5m/sec<br />
0 2 4 6 8 10 12 14<br />
Reaching distance(m)<br />
<strong>Air</strong> velocity distribution<br />
1m/sec over 0.5~1m/sec 0~0.5m/sec<br />
0 2 4 6 8 10 12 14<br />
Reaching distance(m)
<strong>Air</strong>flow direction:70°<br />
1. Heating Hi<br />
Height(m)<br />
4<br />
3.5<br />
3<br />
2.5<br />
2<br />
1.5<br />
1<br />
0.5<br />
0<br />
2. Heating Me<br />
Height(m)<br />
4<br />
3.5<br />
3<br />
2.5<br />
2<br />
1.5<br />
1<br />
0.5<br />
0<br />
3. Heating Lo<br />
Height(m)<br />
4<br />
3.5<br />
3<br />
2.5<br />
2<br />
1.5<br />
1<br />
0.5<br />
0<br />
<strong>Air</strong> velocity distribution<br />
0 2 4 6 8 10 12 14<br />
Reaching distance(m)<br />
<strong>Air</strong> velocity distribution<br />
357<br />
1m/sec over 0.5~1m/sec 0~0.5m/sec<br />
1m/sec over 0.5~1m/sec 0~0.5m/sec<br />
0 2 4 6 8 10 12 14<br />
Reaching distance(m)<br />
<strong>Air</strong> velocity distribution<br />
1m/sec over 0.5~1m/sec 0~0.5m/sec<br />
0 2 4 6 8 10 12 14<br />
Reaching distance(m)
20.7.4 Slim Hide-Away Type Indoor Unit<br />
S-22NA1E5<br />
S-28NA1E5<br />
3mmAq(29Pa) Standard Hair flow volume:H10.0、M9.0、L7.0m3/min<br />
M L<br />
標準 50<br />
下限<br />
45<br />
センター<br />
上限 40<br />
Q<br />
10.0<br />
9.0<br />
10.0<br />
11.0<br />
P Q P<br />
29.4<br />
0mmAq(0Pa)<br />
9.0 20.6<br />
43.8 8.2 32.2<br />
29.4 9.0 20.6<br />
11.3 9.7 5.6<br />
Q P<br />
3mmAq(29Pa)<br />
7.0 14.7<br />
6.4 26.6<br />
7.0 14.7<br />
7.5 2.7<br />
35<br />
0mmAq(0Pa) 30<br />
H M L<br />
H<br />
25<br />
標準<br />
20<br />
下限<br />
センター 15<br />
Q<br />
10.0<br />
9.0L 10.0<br />
P<br />
0.0<br />
23.2<br />
0.0<br />
Q<br />
9.0<br />
8.2<br />
9.0<br />
P<br />
0.0<br />
17.2<br />
0.0<br />
Q<br />
M<br />
7.0<br />
6.4<br />
7.0<br />
P<br />
0.0<br />
16.2<br />
0.0<br />
上限 10 10.0 0.0 9.0 0.0 7.0 0.0<br />
External static pressure Pa<br />
External static pressure Pa<br />
5<br />
0<br />
L<br />
6 7 8 9 10 11 12<br />
<strong>Air</strong> flow volume m3/min<br />
3mmAq(29Pa) StandardHair flow volume:H11.0、M10.0、L8.0m3/min<br />
M L<br />
標準 50<br />
Q<br />
11.0<br />
P Q P<br />
0mmAq(0Pa)<br />
29.4 10.0 20.6<br />
Q P<br />
3mmAq(29Pa)<br />
8.0 14.7<br />
下限<br />
45<br />
センター<br />
上限 40<br />
9.9<br />
11.0<br />
12.1<br />
43.7<br />
29.4<br />
11.2<br />
9.2<br />
10.0<br />
10.8<br />
32.2<br />
20.6<br />
5.7<br />
7.3<br />
8.0<br />
8.5<br />
26.6<br />
14.7<br />
2.6<br />
35<br />
0mmAq(0Pa) 30<br />
H M L<br />
H<br />
25<br />
標準<br />
20<br />
下限<br />
センター 15<br />
Q<br />
11.0<br />
9.9L 11.0<br />
P<br />
0.0<br />
23.2<br />
0.0<br />
Q<br />
10.0<br />
9.2<br />
10.0<br />
P<br />
0.0<br />
17.3<br />
0.0<br />
Q<br />
M<br />
8.0<br />
7.3<br />
8.0<br />
P<br />
0.0<br />
16.2<br />
0.0<br />
上限 10<br />
11.0 0.0 10.0 0.0 8.0 0.0<br />
5<br />
0<br />
L<br />
7 8 9 10 11 12 13<br />
<strong>Air</strong> flow volume m3/min<br />
358<br />
M<br />
M<br />
H<br />
H
S-32NA1E5<br />
S-36NA1E5<br />
External static pressure Pa<br />
3mmAq(29Pa) StandardHair flow volume:H11.0、M9.0、L7.0m3/min<br />
M L<br />
標準 50<br />
Q<br />
11.0<br />
P Q P<br />
0mmAq(0Pa)<br />
29.4 9.0 20.6<br />
Q P<br />
3mmAq(29Pa)<br />
7.0 14.7<br />
下限<br />
45<br />
センター<br />
上限 40<br />
35<br />
9.9<br />
11.0<br />
12.1<br />
43.8<br />
29.4<br />
11.4<br />
8.2<br />
9.0<br />
9.8<br />
32.1<br />
20.6<br />
5.6<br />
6.3<br />
7.0<br />
7.5<br />
26.6<br />
14.7<br />
2.6<br />
0mmAq(0Pa) 30<br />
H M L<br />
H<br />
25<br />
標準<br />
20<br />
下限<br />
センター 15<br />
Q<br />
11.0<br />
9.9 L<br />
11.0<br />
P<br />
0.0<br />
23.2<br />
0.0<br />
Q<br />
9.0<br />
8.2<br />
9.0<br />
P<br />
0.0 M<br />
17.2<br />
0.0<br />
Q<br />
7.0<br />
6.3<br />
7.0<br />
P<br />
0.0<br />
16.2<br />
0.0<br />
上限 10<br />
11.0 0.0 9.0 0.0 7.0 0.0<br />
External static pressure Pa<br />
5<br />
0<br />
L<br />
M<br />
6 7 8 9 10 11 12 13<br />
<strong>Air</strong> flow volume m3/min<br />
3mmAq(29Pa) Standard air H flow volume:H11.0、M9.0、L7.0m3/min<br />
M L<br />
50 標準<br />
Q<br />
11.0<br />
P Q P Q P<br />
0mmAq(0Pa) 3mmAq(29Pa)<br />
29.4 9.0 20.6 7.0 14.7<br />
45<br />
下限<br />
センター<br />
40<br />
上限<br />
35<br />
9.9<br />
11.0<br />
12.1<br />
43.8<br />
29.4<br />
11.4<br />
8.2<br />
9.0<br />
9.8<br />
32.1<br />
20.6<br />
5.6<br />
6.3<br />
7.0<br />
7.5<br />
26.6<br />
14.7<br />
2.6<br />
30 0mmAq(0Pa) H M L<br />
H<br />
25<br />
標準<br />
20<br />
下限<br />
15<br />
センター<br />
Q<br />
11.0<br />
L9.9<br />
11.0<br />
P<br />
0.0<br />
23.2<br />
0.0<br />
Q<br />
9.0<br />
8.2<br />
9.0<br />
P<br />
M0.0<br />
17.2<br />
0.0<br />
Q<br />
7.0<br />
6.3<br />
7.0<br />
P<br />
0.0<br />
16.2<br />
0.0<br />
10 上限 11.0 0.0 9.0 0.0 7.0 0.0<br />
5<br />
0<br />
L<br />
M<br />
H<br />
6 7 8 9 10 11 12 13<br />
<strong>Air</strong> flow volume m3/min<br />
359<br />
H
S-45NA1E5<br />
S-56NA1E5<br />
External static pressure Pa<br />
External static pressure Pa<br />
3mmAq(29Pa) Standard Hair flow volume:H12.0、M10.0、L8.0m3/min<br />
M L<br />
標準 50<br />
Q<br />
12.0<br />
P Q P Q P<br />
0mmAq(0Pa) 3mmAq(29Pa)<br />
29.4 10.0 20.6 8.0 14.7<br />
下限<br />
45<br />
センター<br />
上限 40<br />
35<br />
10.8<br />
12.0<br />
13.2<br />
43.8<br />
29.4<br />
11.3<br />
9.2<br />
10.0<br />
10.8<br />
32.1<br />
20.6<br />
5.6<br />
7.3<br />
8.0<br />
8.5<br />
26.7<br />
14.7<br />
2.8<br />
0mmAq(0Pa) 30<br />
H M L<br />
H<br />
25<br />
標準<br />
20<br />
下限<br />
センター 15<br />
Q<br />
12.0<br />
10.8 L<br />
12.0<br />
P<br />
0.0<br />
23.2<br />
0.0<br />
Q<br />
10.0<br />
9.2<br />
10.0<br />
P<br />
0.0 M<br />
17.2<br />
0.0<br />
Q<br />
8.0<br />
7.3<br />
8.0<br />
P<br />
0.0<br />
16.2<br />
0.0<br />
上限 10<br />
12.0 0.0 10.0 0.0 8.0 0.0<br />
5<br />
0<br />
L<br />
M<br />
7 8 9 10 11 12 13 14<br />
<strong>Air</strong> flow volume m3/min<br />
3mmAq(29Pa) Standard air H flow volume:H12.5、M10.5、L8.5m3/min<br />
M L<br />
標準 50<br />
Q<br />
12.5<br />
P Q P Q P<br />
0mmAq(0Pa) 3mmAq(29Pa)<br />
29.4 10.5 20.6 8.5 14.7<br />
下限<br />
45<br />
センター<br />
上限 40<br />
35<br />
11.3<br />
12.5<br />
13.8<br />
43.8<br />
29.4<br />
11.3<br />
9.6<br />
10.5<br />
11.4<br />
32.2<br />
20.6<br />
5.7<br />
7.7<br />
8.5<br />
9.1<br />
26.6<br />
14.7<br />
2.6<br />
0mmAq(0Pa) 30<br />
H M L<br />
H<br />
25<br />
標準<br />
20<br />
下限<br />
センター 15<br />
Q<br />
12.5<br />
11.3<br />
12.5<br />
P<br />
0.0<br />
23.1<br />
0.0 L<br />
Q<br />
10.5<br />
9.6<br />
10.5<br />
P<br />
0.0<br />
17.3<br />
0.0<br />
Q<br />
M8.5<br />
7.7<br />
8.5<br />
P<br />
0.0<br />
16.2<br />
0.0<br />
上限 10<br />
12.5 0.0 10.5 0.0 8.5 0.0<br />
5<br />
0<br />
L<br />
7 8 9 10 11 12 13 14<br />
<strong>Air</strong> flow volume m3/min<br />
360<br />
M<br />
H<br />
H
20.7.5 Low Static Pressure Hide-away Type Indoor Unit<br />
S-45MA1E5<br />
S-56MA1E5<br />
Standard air flow volume:H15、M13、L11m3/min<br />
5mmAq(49Pa) 7mmAq(69Pa)<br />
5mmAq(49Pa) H M L<br />
標準 100<br />
下限 90<br />
Q<br />
15.0<br />
13.5<br />
P<br />
49.0<br />
74.1<br />
Q<br />
13.0<br />
12.0<br />
P<br />
32.1<br />
57.2<br />
Q<br />
11.0<br />
10.2<br />
P<br />
25.6<br />
47.8<br />
センター 80<br />
上限<br />
15.0<br />
16.5<br />
49.0<br />
11.1<br />
13.0<br />
14.0<br />
32.1<br />
6.8<br />
11.0<br />
11.6 H<br />
25.6<br />
3.5<br />
External static pressure Pa<br />
70<br />
60<br />
7mmAq(69Pa)<br />
50<br />
40<br />
標準<br />
下限 30<br />
センター 20<br />
QL 15.0<br />
13.5<br />
L<br />
15.0<br />
H<br />
P<br />
69.0<br />
86.3<br />
69.0<br />
M<br />
Q<br />
13.0 M<br />
12.0<br />
13.0<br />
M<br />
P<br />
50.0<br />
70.9<br />
50.0<br />
H<br />
Q<br />
11.0<br />
10.2<br />
11.0<br />
L<br />
P<br />
41.0<br />
60.0<br />
41.0<br />
上限 16.5 37.3 14.0 27.0 11.6 19.7<br />
10<br />
0<br />
10 11 12 13 14 15 16 17 18 19 20<br />
<strong>Air</strong> flow volume m3/min<br />
361
S-63MA1E5<br />
S-71MA1E5<br />
Standard air flow volume:H17、M14、L12m3/min<br />
5mmAq(49Pa) 7mmAq(69Pa)<br />
5mmAq(49Pa) H M L<br />
標準 100<br />
Q<br />
17.0<br />
P<br />
49.0<br />
Q<br />
14.0<br />
P<br />
35.8<br />
Q<br />
12.0<br />
P<br />
26.6<br />
下限 90 15.3 77.4 13.0 59.2 11.2 49.8<br />
センター 80 17.0 49.0 14.0 35.8 12.0 26.6<br />
上限 18.7 12.1 15.0 6.8 12.6 3.7<br />
External static pressure Pa<br />
70<br />
60<br />
7mmAq(69Pa)<br />
50<br />
標準 40<br />
下限 30<br />
センター 20<br />
Q<br />
17.0<br />
15.3<br />
17.0<br />
H<br />
P<br />
69.0<br />
90.5<br />
L<br />
69.0<br />
L Q<br />
14.0<br />
13.0<br />
14.0<br />
M M<br />
P<br />
51.0M 72.9<br />
51.0<br />
Q<br />
12.0<br />
11.2<br />
12.0<br />
L<br />
P<br />
41.0<br />
61.5<br />
41.0<br />
上限 18.7 38.3 15.0 27.0 12.6 20.7<br />
10<br />
0<br />
10 11 12 13 14 15 16 17 18 19 20<br />
<strong>Air</strong> flow volume m3/min<br />
362<br />
H<br />
H<br />
H<br />
H
S-90MA1E5<br />
Standard air flow volume:H19、M17、L14m3/min<br />
5mmAq(49Pa) 7mmAq(69Pa)<br />
5mmAq(49Pa) H M L<br />
標準 100<br />
Q<br />
19.0<br />
P<br />
49.0<br />
Q<br />
17.0<br />
P<br />
39.5<br />
Q<br />
14.0<br />
P<br />
26.9<br />
下限 90 17.1 80.7 15.6 69.9 13.0 54.4<br />
センター 80 19.0 49.0 17.0 39.5 14.0 26.9<br />
上限 70 20.9 9.4 18.4 6.8 14.7 5.1<br />
60<br />
M<br />
7mmAq(69Pa)<br />
50<br />
標準 40<br />
下限 30<br />
センター 20<br />
Q<br />
19.0<br />
17.1<br />
19.0<br />
H<br />
P L<br />
69.0<br />
L<br />
94.7<br />
69.0<br />
Q<br />
17.0<br />
15.5<br />
17.0<br />
M<br />
P<br />
57.0M 83.1<br />
57.0<br />
Q<br />
14.0<br />
13.0<br />
14.0<br />
L<br />
P<br />
41.0<br />
65.1<br />
41.0<br />
上限 20.9 37.2 18.4 27.1 14.8 16.1<br />
External static pressure Pa<br />
10<br />
0<br />
20.7.6 Outdoor Units<br />
12 13 14 15 16 17 18 19 20 21 22<br />
<strong>Air</strong> flow volume m3/min<br />
U-4LA1E5 U-5LA1E5 U-6LA1E5<br />
Hi m 3 /min 92.0 95.0 98.0<br />
363<br />
H<br />
H
20.8 Sound Data<br />
20.8.1 Wall Mounted Type Indoor Unit<br />
S-22KA1E5、S-22KA1E5S<br />
Octave Band Central Frequency(Hz)<br />
Octave Band Sound Pressure Level(dB)(OdB=0.0002μbar)<br />
Octave Band Sound Pressure Level(dB)(OdB=0.0002μbar)<br />
80<br />
70<br />
60<br />
50<br />
40<br />
30<br />
20<br />
10<br />
80<br />
70<br />
60<br />
50<br />
40<br />
30<br />
20<br />
10<br />
H<br />
M<br />
L<br />
NC-20<br />
H ○━━○<br />
M △━━△<br />
L □━━□<br />
50Hz<br />
H M L<br />
38 40 36 33<br />
43 41 38<br />
Frequency<br />
Fan Speed<br />
A-scale(dB)<br />
C-scale(dB)<br />
Back Ground Noise12dB<br />
NC-60<br />
NC-50<br />
NC-40<br />
NC-30<br />
63 125 250 500 1000 2000 4000 8000<br />
Frequency(Hz)<br />
S-36KA1E5、S-36KA1E5S<br />
Octave Band Central Frequency(Hz)<br />
H<br />
M<br />
L<br />
NC-20<br />
H ○━━○<br />
M △━━△<br />
L □━━□<br />
50Hz<br />
H M L<br />
42 40 38 34<br />
46 43 40<br />
Frequency<br />
Fan Speed<br />
A-scale(dB)<br />
C-scale(dB)<br />
Back Ground Noise12dB<br />
NC-60<br />
NC-50<br />
NC-40<br />
NC-30<br />
63 125 250 500 1000 2000 4000 8000<br />
Frequency(Hz)<br />
Octave Band Sound Pressure Level(dB)(OdB=0.0002μbar)<br />
364<br />
S-28KA1E5、S-28KA1E5S<br />
Octave Band Central Frequency(Hz)<br />
Octave Band Sound Pressure Level(dB)(OdB=0.0002μbar)<br />
80<br />
70<br />
60<br />
50<br />
40<br />
30<br />
20<br />
10<br />
80<br />
70<br />
60<br />
50<br />
40<br />
30<br />
20<br />
10<br />
H<br />
M<br />
L<br />
NC-20<br />
H ○━━○<br />
M △━━△<br />
L □━━□<br />
Frequency 50Hz<br />
Fan Speed H M L<br />
A-scale(dB) 39 36 33<br />
C-scale(dB) 44 41 38<br />
Back Ground Noise12dB<br />
NC-60<br />
NC-50<br />
NC-40<br />
NC-30<br />
63 125 250 500 1000 2000 4000 8000<br />
Frequency(Hz)<br />
S-45KA1E5、S-45KA1E5S<br />
Octave Band Central Frequency(Hz)<br />
H<br />
M<br />
L<br />
NC-20<br />
H ○━━○<br />
M △━━△<br />
L □━━□<br />
Frequency 50Hz<br />
Fan Speed H M L<br />
A-scale(dB) 43 39<br />
35<br />
C-scale(dB) 47 44 39<br />
Back Ground Noise12dB<br />
NC-60<br />
NC-50<br />
NC-40<br />
NC-30<br />
63 125 250 500 1000 2000 4000 8000<br />
Frequency(Hz)
S-56KA1E5<br />
Octave Band Central Frequency(Hz)<br />
Octave Band Sound Pressure Level(dB)(OdB=0.0002μbar)<br />
80<br />
70<br />
60<br />
50<br />
40<br />
30<br />
20<br />
10<br />
H<br />
M<br />
L<br />
NC-20<br />
H ○━━○<br />
M △━━△<br />
L □━━□<br />
50Hz<br />
H M L<br />
44 40 41 38<br />
49 45 42<br />
Frequency<br />
Fan Speed<br />
A-scale(dB)<br />
C-scale(dB)<br />
Back Ground Noise12dB<br />
NC-60<br />
NC-50<br />
NC-40<br />
NC-30<br />
63 125 250 500 1000 2000 4000 8000<br />
Frequency(Hz)<br />
S-71KA1E5<br />
Octave Band Central Frequency(Hz)<br />
Octave Band Sound Pressure Level(dB)(OdB=0.0002μbar)<br />
80<br />
70<br />
60<br />
50<br />
40<br />
30<br />
20<br />
10<br />
H<br />
M<br />
L<br />
NC-20<br />
H ○━━○<br />
M △━━△<br />
L □━━□<br />
50Hz<br />
H M L<br />
48 40 44 40<br />
53 49 44<br />
Frequency<br />
Fan Speed<br />
A-scale(dB)<br />
C-scale(dB)<br />
Back Ground Noise12dB<br />
NC-60<br />
NC-50<br />
NC-40<br />
NC-30<br />
63 125 250 500 1000 2000 4000 8000<br />
Frequency(Hz)<br />
Octave Band Sound Pressure Level(dB)(OdB=0.0002μbar)<br />
365<br />
S-63KA1E5<br />
Octave Band Central Frequency(Hz)<br />
80<br />
70<br />
60<br />
50<br />
40<br />
30<br />
20<br />
10<br />
H<br />
M<br />
L<br />
NC-20<br />
H ○━━○<br />
M △━━△<br />
L □━━□<br />
Frequency 50Hz<br />
Fan Speed H M L<br />
A-scale(dB) 46 43 39<br />
C-scale(dB) 51 47 44<br />
Back Ground Noise12dB<br />
NC-60<br />
NC-50<br />
NC-40<br />
NC-30<br />
63 125 250 500 1000 2000 4000 8000<br />
Frequency(Hz)
20.8.2 60 x 60 Cassette Type Indoor Unit<br />
S-22YA1E5<br />
Octave Band Central Frequency(Hz)<br />
Octave Band Sound Pressure Level(dB)(OdB=0.0002μbar)<br />
Octave Band Sound Pressure Level(dB)(OdB=0.0002μbar)<br />
80<br />
70<br />
60<br />
50<br />
40<br />
30<br />
20<br />
10<br />
80<br />
70<br />
60<br />
50<br />
40<br />
30<br />
20<br />
10<br />
H<br />
M<br />
L<br />
NC-20<br />
H ○━━○<br />
M △━━△<br />
L □━━□<br />
50Hz<br />
H M L<br />
36 40 35 33<br />
41 40 37<br />
Frequency<br />
Fan Speed<br />
A-scale(dB)<br />
C-scale(dB)<br />
Back Ground Noise12dB<br />
NC-60<br />
NC-50<br />
NC-40<br />
NC-30<br />
63 125 250 500 1000 2000 4000 8000<br />
Frequency(Hz)<br />
S-36YA1E5<br />
Octave Band Central Frequency(Hz)<br />
H<br />
M<br />
L<br />
NC-20<br />
H ○━━○<br />
M △━━△<br />
L □━━□<br />
50Hz<br />
H M L<br />
38 40 36 34<br />
43 41 40<br />
Frequency<br />
Fan Speed<br />
A-scale(dB)<br />
C-scale(dB)<br />
Back Ground Noise12dB<br />
NC-60<br />
NC-50<br />
NC-40<br />
NC-30<br />
63 125 250 500 1000 2000 4000 8000<br />
Frequency(Hz)<br />
Octave Band Sound Pressure Level(dB)(OdB=0.0002μbar)<br />
366<br />
S-28YA1E5<br />
Octave Band Central Frequency(Hz)<br />
Octave Band Sound Pressure Level(dB)(OdB=0.0002μbar)<br />
80<br />
70<br />
60<br />
50<br />
40<br />
30<br />
20<br />
10<br />
80<br />
70<br />
60<br />
50<br />
40<br />
30<br />
20<br />
10<br />
H<br />
M<br />
L<br />
NC-20<br />
H ○━━○<br />
M △━━△<br />
L □━━□<br />
Frequency 50Hz<br />
Fan Speed H M L<br />
A-scale(dB) 37 35 33<br />
C-scale(dB) 42 40 38<br />
Back Ground Noise12dB<br />
NC-60<br />
NC-50<br />
NC-40<br />
NC-30<br />
63 125 250 500 1000 2000 4000 8000<br />
Frequency(Hz)<br />
S-45YA1E5<br />
Octave Band Central Frequency(Hz)<br />
H<br />
M<br />
L<br />
NC-20<br />
H ○━━○<br />
M △━━△<br />
L □━━□<br />
Frequency 50Hz<br />
Fan Speed H M L<br />
A-scale(dB) 39 37<br />
35<br />
C-scale(dB) 44 42 39<br />
Back Ground Noise12dB<br />
NC-60<br />
NC-50<br />
NC-40<br />
NC-30<br />
63 125 250 500 1000 2000 4000 8000<br />
Frequency(Hz)
S-56YA1E5<br />
Octave Band Central Frequency(Hz)<br />
Octave Band Sound Pressure Level(dB)(OdB=0.0002μbar)<br />
80<br />
70<br />
60<br />
50<br />
40<br />
30<br />
20<br />
10<br />
H<br />
M<br />
L<br />
NC-20<br />
H ○━━○<br />
M △━━△<br />
L □━━□<br />
50Hz<br />
H M L<br />
40 40 38 36<br />
44 43 41<br />
Frequency<br />
Fan Speed<br />
A-scale(dB)<br />
C-scale(dB)<br />
Back Ground Noise12dB<br />
NC-60<br />
NC-50<br />
NC-40<br />
NC-30<br />
63 125 250 500 1000 2000 4000 8000<br />
Frequency(Hz)<br />
367
20.8.3 95 x 95 Cassette Type Indoor Unit<br />
S-63UA1E5(230V)<br />
Octave Band Central Frequency(Hz)<br />
Octave Band Sound Pressure Level(dB)(OdB=0.0002μbar)<br />
80<br />
70<br />
60<br />
50<br />
40<br />
30<br />
20<br />
10<br />
H<br />
M<br />
L<br />
NC-20<br />
H ○━━○<br />
M △━━△<br />
L □━━□<br />
50Hz<br />
H M L<br />
41 40 39 35<br />
46 44 41<br />
Frequency<br />
Fan Speed<br />
A-scale(dB)<br />
C-scale(dB)<br />
Back Ground Noise12dB<br />
NC-60<br />
NC-50<br />
NC-40<br />
NC-30<br />
63 125 250 500 1000 2000 4000 8000<br />
Frequency(Hz)<br />
S-90UA1E5(230V)<br />
Octave Band Central Frequency(Hz)<br />
Octave Band Sound Pressure Level(dB)(OdB=0.0002μbar)<br />
80<br />
70<br />
60<br />
50<br />
40<br />
30<br />
20<br />
10<br />
H<br />
M<br />
L<br />
NC-20<br />
H ○━━○<br />
M △━━△<br />
L □━━□<br />
50Hz<br />
H M L<br />
42 40 36<br />
47 45 42<br />
Frequency<br />
Fan Speed<br />
A-scale(dB)<br />
C-scale(dB)<br />
Back Ground Noise12dB<br />
NC-60<br />
NC-50<br />
NC-40<br />
NC-30<br />
63 125 250 500 1000 2000 4000 8000<br />
Frequency(Hz)<br />
Octave Band Sound Pressure Level(dB)(OdB=0.0002μbar)<br />
368<br />
S-71UA1E5(230V)<br />
Octave Band Central Frequency(Hz)<br />
80<br />
70<br />
60<br />
50<br />
40<br />
30<br />
20<br />
10<br />
H<br />
M<br />
L<br />
NC-20<br />
H ○━━○<br />
M △━━△<br />
L □━━□<br />
Frequency 50Hz<br />
Fan Speed H M L<br />
A-scale(dB) 42 40 36<br />
C-scale(dB) 47 45 42<br />
Back Ground Noise12dB<br />
NC-60<br />
NC-50<br />
NC-40<br />
NC-30<br />
63 125 250 500 1000 2000 4000 8000<br />
Frequency(Hz)
20.8.4 Slim Hide-Away Type Indoor Unit<br />
S-22NA1E5(230V)<br />
Octave Band Central Frequency(Hz)<br />
Octave Band Sound Pressure Level(dB)(OdB=0.0002μbar)<br />
Octave Band Sound Pressure Level(dB)(OdB=0.0002μbar)<br />
80<br />
70<br />
60<br />
50<br />
40<br />
30<br />
20<br />
10<br />
80<br />
70<br />
60<br />
50<br />
40<br />
30<br />
20<br />
10<br />
H<br />
M<br />
L<br />
NC-20<br />
H ○━━○<br />
M △━━△<br />
L □━━□<br />
50Hz<br />
H M L<br />
36 40 33 30<br />
41 38 35<br />
Frequency<br />
Fan Speed<br />
A-scale(dB)<br />
C-scale(dB)<br />
Back Ground Noise12dB<br />
NC-60<br />
NC-50<br />
NC-40<br />
NC-30<br />
63 125 250 500 1000 2000 4000 8000<br />
Frequency(Hz)<br />
S-32NA1E5(230V)<br />
Octave Band Central Frequency(Hz)<br />
H<br />
M<br />
L<br />
NC-20<br />
H ○━━○<br />
M △━━△<br />
L □━━□<br />
50Hz<br />
H M L<br />
38 40 34 31<br />
43 40 36<br />
Frequency<br />
Fan Speed<br />
A-scale(dB)<br />
C-scale(dB)<br />
Back Ground Noise12dB<br />
NC-60<br />
NC-50<br />
NC-40<br />
NC-30<br />
63 125 250 500 1000 2000 4000 8000<br />
Frequency(Hz)<br />
Octave Band Sound Pressure Level(dB)(OdB=0.0002μbar)<br />
369<br />
S-28NA1E5(230V)<br />
Octave Band Central Frequency(Hz)<br />
Octave Band Sound Pressure Level(dB)(OdB=0.0002μbar)<br />
80<br />
70<br />
60<br />
50<br />
40<br />
30<br />
20<br />
10<br />
80<br />
70<br />
60<br />
50<br />
40<br />
30<br />
20<br />
10<br />
H<br />
M<br />
L<br />
NC-20<br />
H ○━━○<br />
M △━━△<br />
L □━━□<br />
Frequency 50Hz<br />
Fan Speed H M L<br />
A-scale(dB) 37 33 30<br />
C-scale(dB) 42 39 35<br />
Back Ground Noise12dB<br />
NC-60<br />
NC-50<br />
NC-40<br />
NC-30<br />
63 125 250 500 1000 2000 4000 8000<br />
Frequency(Hz)<br />
S-36NA1E5(230V)<br />
Octave Band Central Frequency(Hz)<br />
H<br />
M<br />
L<br />
NC-20<br />
H ○━━○<br />
M △━━△<br />
L □━━□<br />
Frequency 50Hz<br />
Fan Speed H M L<br />
A-scale(dB) 38 34<br />
31<br />
C-scale(dB) 43 40 36<br />
Back Ground Noise12dB<br />
NC-60<br />
NC-50<br />
NC-40<br />
NC-30<br />
63 125 250 500 1000 2000 4000 8000<br />
Frequency(Hz)
S-45NA1E5(230V)<br />
Octave Band Central Frequency(Hz)<br />
Octave Band Sound Pressure Level(dB)(OdB=0.0002μbar)<br />
80<br />
70<br />
60<br />
50<br />
40<br />
30<br />
20<br />
10<br />
H<br />
M<br />
L<br />
NC-20<br />
H ○━━○<br />
M △━━△<br />
L □━━□<br />
50Hz<br />
H M L<br />
39 40 37 32<br />
44 42 38<br />
Frequency<br />
Fan Speed<br />
A-scale(dB)<br />
C-scale(dB)<br />
Back Ground Noise12dB<br />
NC-60<br />
NC-50<br />
NC-40<br />
NC-30<br />
63 125 250 500 1000 2000 4000 8000<br />
Frequency(Hz)<br />
Octave Band Sound Pressure Level(dB)(OdB=0.0002μbar)<br />
370<br />
S-56NA1E5(230V)<br />
Octave Band Central Frequency(Hz)<br />
80<br />
70<br />
60<br />
50<br />
40<br />
30<br />
20<br />
10<br />
H<br />
M<br />
L<br />
NC-20<br />
H ○━━○<br />
M △━━△<br />
L □━━□<br />
Frequency 50Hz<br />
Fan Speed H M L<br />
A-scale(dB) 39 37<br />
32<br />
C-scale(dB) 44 42 38<br />
Back Ground Noise12dB<br />
NC-60<br />
NC-50<br />
NC-40<br />
NC-30<br />
63 125 250 500 1000 2000 4000 8000<br />
Frequency(Hz)
20.8.5 Low Static Pressure Type Indoor Unit<br />
S-45MA1E5(230V)<br />
Octave Band Central Frequency(Hz)<br />
Octave Band Sound Pressure Level(dB)(OdB=0.0002μbar)<br />
Octave Band Sound Pressure Level(dB)(OdB=0.0002μbar)<br />
80<br />
70<br />
60<br />
50<br />
40<br />
30<br />
20<br />
10<br />
80<br />
70<br />
60<br />
50<br />
40<br />
30<br />
20<br />
10<br />
H<br />
M<br />
L<br />
NC-20<br />
H ○━━○<br />
M △━━△<br />
L □━━□<br />
50Hz<br />
H M L<br />
42 40 35<br />
46 44 39<br />
Frequency<br />
Fan Speed<br />
A-scale(dB)<br />
C-scale(dB)<br />
Back Ground Noise12dB<br />
NC-60<br />
NC-50<br />
NC-40<br />
NC-30<br />
63 125 250 500 1000 2000 4000 8000<br />
Frequency(Hz)<br />
S-63MA1E5(230V)<br />
Octave Band Central Frequency(Hz)<br />
H<br />
M<br />
L<br />
NC-20<br />
H ○━━○<br />
M △━━△<br />
L □━━□<br />
50Hz<br />
H M L<br />
43 40 41 36<br />
47 45 40<br />
Frequency<br />
Fan Speed<br />
A-scale(dB)<br />
C-scale(dB)<br />
Back Ground Noise12dB<br />
NC-60<br />
NC-50<br />
NC-40<br />
NC-30<br />
63 125 250 500 1000 2000 4000 8000<br />
Frequency(Hz)<br />
Octave Band Sound Pressure Level(dB)(OdB=0.0002μbar)<br />
371<br />
S-56MA1E5(230V)<br />
Octave Band Central Frequency(Hz)<br />
Octave Band Sound Pressure Level(dB)(OdB=0.0002μbar)<br />
80<br />
70<br />
60<br />
50<br />
40<br />
30<br />
20<br />
10<br />
80<br />
70<br />
60<br />
50<br />
40<br />
30<br />
20<br />
10<br />
H<br />
M<br />
L<br />
NC-20<br />
H ○━━○<br />
M △━━△<br />
L □━━□<br />
Frequency 50Hz<br />
Fan Speed H M L<br />
A-scale(dB) 42 40 35<br />
C-scale(dB) 46 44 39<br />
Back Ground Noise12dB<br />
NC-60<br />
NC-50<br />
NC-40<br />
NC-30<br />
63 125 250 500 1000 2000 4000 8000<br />
Frequency(Hz)<br />
S-71MA1E5(230V)<br />
Octave Band Central Frequency(Hz)<br />
H<br />
M<br />
L<br />
NC-20<br />
H ○━━○<br />
M △━━△<br />
L □━━□<br />
Frequency 50Hz<br />
Fan Speed H M L<br />
A-scale(dB) 43 41<br />
36<br />
C-scale(dB) 47 45 40<br />
Back Ground Noise12dB<br />
NC-60<br />
NC-50<br />
NC-40<br />
NC-30<br />
63 125 250 500 1000 2000 4000 8000<br />
Frequency(Hz)
S-90MA1E5(230V)<br />
Octave Band Central Frequency(Hz)<br />
Octave Band Sound Pressure Level(dB)(OdB=0.0002μbar)<br />
80<br />
70<br />
60<br />
50<br />
40<br />
30<br />
20<br />
10<br />
H<br />
M<br />
L<br />
NC-20<br />
H ○━━○<br />
M △━━△<br />
L □━━□<br />
50Hz<br />
H M L<br />
44 40 42 37<br />
49 47 42<br />
Frequency<br />
Fan Speed<br />
A-scale(dB)<br />
C-scale(dB)<br />
Back Ground Noise12dB<br />
NC-60<br />
NC-50<br />
NC-40<br />
NC-30<br />
63 125 250 500 1000 2000 4000 8000<br />
Frequency(Hz)<br />
372
20.8.6 Outdoor Unit<br />
U-4LA1E5(Cooling)<br />
Octave Band Central Frequency(Hz)<br />
Octave Band Sound Pressure Level(dB)(OdB=0.0002μbar)<br />
80<br />
70<br />
60<br />
50<br />
40<br />
30<br />
20<br />
10<br />
H ○━━○<br />
Frequency 50Hz<br />
Fan Speed H<br />
A-scale(dB) 52<br />
C-scale(dB) 57<br />
Back Ground Noise12dB<br />
NC-20<br />
NC-60<br />
NC-50<br />
NC-40<br />
NC-30<br />
63 125 250 500 1000 2000 4000 8000<br />
Frequency(Hz)<br />
U-5LA1E5(Cooling)<br />
Octave Band Central Frequency(Hz)<br />
Octave Band Sound Pressure Level(dB)(OdB=0.0002μbar)<br />
80<br />
70<br />
60<br />
50<br />
40<br />
30<br />
20<br />
10<br />
H ○━━○<br />
Frequency 50Hz<br />
Fan Speed H<br />
A-scale(dB) 53<br />
C-scale(dB) 58<br />
Back Ground Noise12dB<br />
NC-20<br />
NC-60<br />
NC-50<br />
NC-40<br />
NC-30<br />
63 125 250 500 1000 2000 4000 8000<br />
Frequency(Hz)<br />
Octave Band Sound Pressure Level(dB)(OdB=0.0002μbar)<br />
373<br />
U-4LA1E5(Heating)<br />
Octave Band Central Frequency(Hz)<br />
Octave Band Sound Pressure Level(dB)(OdB=0.0002μbar)<br />
80<br />
70<br />
60<br />
50<br />
40<br />
30<br />
20<br />
10<br />
80<br />
70<br />
60<br />
50<br />
40<br />
30<br />
20<br />
10<br />
H ○━━○<br />
Frequency 50Hz<br />
Fan Speed H<br />
A-scale(dB) 54<br />
C-scale(dB) 58<br />
Back Ground Noise12dB<br />
NC-20<br />
NC-60<br />
NC-50<br />
NC-40<br />
NC-30<br />
63 125 250 500 1000 2000 4000 8000<br />
Frequency(Hz)<br />
U-5LA1E5(Heating)<br />
Octave Band Central Frequency(Hz)<br />
H ○━━○<br />
Frequency 50Hz<br />
Fan Speed H<br />
A-scale(dB)<br />
55<br />
C-scale(dB) 59<br />
Back Ground Noise12dB<br />
NC-20<br />
NC-60<br />
NC-50<br />
NC-40<br />
NC-30<br />
63 125 250 500 1000 2000 4000 8000<br />
Frequency(Hz)
U-6LA1E5(Cooling)<br />
Octave Band Central Frequency(Hz)<br />
Octave Band Sound Pressure Level(dB)(OdB=0.0002μbar)<br />
80<br />
70<br />
60<br />
50<br />
40<br />
30<br />
20<br />
10<br />
H ○━━○<br />
Frequency 50Hz<br />
Fan Speed H<br />
A-scale(dB) 55<br />
C-scale(dB) 59<br />
Back Ground Noise12dB<br />
NC-20<br />
NC-60<br />
NC-50<br />
NC-40<br />
NC-30<br />
63 125 250 500 1000 2000 4000 8000<br />
Frequency(Hz)<br />
374<br />
U-6LA1E5(Heating)<br />
Octave Band Central Frequency(Hz)<br />
Octave Band Sound Pressure Level(dB)(OdB=0.0002μbar)<br />
80<br />
70<br />
60<br />
50<br />
40<br />
30<br />
20<br />
10<br />
H ○━━○<br />
Frequency 50Hz<br />
Fan Speed H<br />
A-scale(dB)<br />
57<br />
C-scale(dB) 60<br />
Back Ground Noise12dB<br />
NC-20<br />
NC-60<br />
NC-50<br />
NC-40<br />
NC-30<br />
63 125 250 500 1000 2000 4000 8000<br />
Frequency(Hz)
20.8.7 Indoor Unit Measurement Specification<br />
D4<br />
※ 1<br />
D3<br />
※ 2<br />
Mini-<br />
Cassette<br />
Cassette<br />
Wall<br />
mounted<br />
※ 3<br />
Cooling Heating<br />
220/230V 240V 220/230V 240V<br />
Hi/Lo Hi/Lo Hi/Lo Hi/Lo<br />
S-22NA1E5 36/30 36/31 36/30 36/31<br />
S-28NA1E5 37/30 37/31 37/30 37/31<br />
S-32NA1E5 38/31 38/32 38/31 38/32<br />
S-36NA1E5 38/31 38/32 38/31 38/32<br />
S-45NA1E5 39/32 39/33 39/32 39/33<br />
S-56NA1E5 39/32 39/33 39/32 39/33<br />
S-45MA1E5 42/35 42/36 42/35 42/36<br />
S-56MA1E5 42/35 42/36 42/35 42/36<br />
S-63MA1E5 43/36 43/37 43/36 43/37<br />
S-71MA1E5 43/36 43/37 43/36 43/37<br />
S-90MA1E5 44/37 44/38 44/37 44/38<br />
S-22YA1E5 36/33 36/33<br />
S-28YA1E5 37/33 37/33<br />
S-36YA1E5 38/34 38/34<br />
S-45YA1E5 39/35 39/35<br />
S-56YA1E5 40/36 40/36<br />
S-63UA1E5 41/35 41/36 41/35 41/36<br />
S-71UA1E5 42/36 42/37 42/36 42/37<br />
S-90UA1E5 42/36 42/37 42/36 42/37<br />
S-22KA1E5(S) 38/33 38/33<br />
S-28KA1E5(S) 39/33 39/33<br />
S-36KA1E5(S) 42/34 42/34<br />
S-45KA1E5(S) 43/35 43/35<br />
S-56KA1E5 44/38 44/38<br />
S-63KA1E5 46/39 46/39<br />
S-71KA1E5 48/40 48/40<br />
375<br />
outlet duct<br />
(2m)<br />
※ 1・・・The external static pressure of sound measurement is 0mmAq (0Pa).<br />
※ 2・・・The external static pressure of sound measurement is 5mmAq (49Pa).<br />
※ 3・・・(for example) S-22KA1E5:white color、S-22KA1E5S:silver color.<br />
microphone position<br />
indoor<br />
unit<br />
1.5m<br />
microphone<br />
0.8m<br />
1.5m<br />
indoor<br />
unit<br />
microphone<br />
1m<br />
microphone<br />
indoor<br />
unit<br />
【dB(A)】<br />
inlet duct<br />
(1m)
20.8.8 Outdoor Unit Measurement Specification<br />
Cooling Heating<br />
220/230/240V – 50Hz<br />
U-4LA1E5 52 54<br />
U-5LA1E5 53 55<br />
U-6LA1E5 55 57<br />
376<br />
1.0m<br />
microphone<br />
microphone position<br />
1.5m<br />
【dB(A)】
21. Operation range<br />
outdoor air temperature(℃DB)<br />
Cooling<br />
45<br />
40<br />
35<br />
30<br />
25<br />
20<br />
15<br />
10<br />
5<br />
0<br />
-5<br />
pull down area<br />
10 15 20 25 30 35<br />
indoor air temperature(℃WB)<br />
377<br />
outdoor air temperature(℃WB)<br />
Heating<br />
20<br />
15<br />
10<br />
5<br />
0<br />
- 5<br />
-10<br />
-15<br />
-20<br />
pull up area<br />
10 15 20 25 30 35<br />
indoor air temperature(℃DB)
22. Allowable Pipe Length<br />
Allowable<br />
height<br />
IN/OUT<br />
height<br />
difference<br />
difference IN/IN height<br />
difference<br />
Total pipe<br />
length<br />
Total pipe<br />
length of<br />
Main pipe<br />
Total pipe<br />
length of Sub<br />
pipe<br />
Sub pipe<br />
length<br />
Allowable<br />
pipe length<br />
From<br />
''Outdoor<br />
unit'' to<br />
''innermost<br />
indoor unit''<br />
difference<br />
From ''1st<br />
branch'' to<br />
''innermost<br />
indoor unit''<br />
difference<br />
Pipe connection example<br />
Main 1<br />
Main 2<br />
Main 3<br />
Sub 3<br />
U-4LA1E5/5LA1E5/6LA1E5 Pipe connection example<br />
1st branch<br />
Sub 1<br />
Sub 2<br />
Main 4<br />
30m or less<br />
15m or less<br />
20m~90m<br />
378<br />
Main1+Main2+Main3+Main4+Sub1+Sub2<br />
+Sub3+Sub4+Sub5<br />
40m or less Main1+Main2+Main3+Main4<br />
50m or less Sub1+Sub2+Sub3+Sub4+Sub5<br />
15m or less<br />
55m or less<br />
30m or less<br />
Sub 4<br />
From ''1st branch'' to ''innermost indoor unit'' difference<br />
From ''Outdoor unit'' to ''innermost indoor unit'' difference<br />
Sub 5<br />
IN/OUT height difference<br />
IN/IN height difference
23. Combination Catalogue<br />
23.1 Cooling<br />
23.1.1 4HP(U-4LA1E5)<br />
Combination criteria<br />
4HP<br />
Total indoor<br />
MAX 14.6<br />
capacity<br />
Rated 11.2<br />
(kW) MIN 5.6<br />
Total indoor unit<br />
MAX 6<br />
number MIN 2<br />
Combination (%) 50 ~ 130<br />
Indoor 0.8 1.0 1.25 1.5 1.75 2.0 2.5 3.0 3.5<br />
unit HP HP HP HP HP HP HP HP HP<br />
Wall<br />
mounted<br />
○ ○ ○ ○ ○ ○ ○<br />
NO.<br />
Mini<br />
cassette<br />
Big<br />
cassette<br />
○ ○ ○ ○ ○<br />
○ ○ ○<br />
Total<br />
indoor<br />
capacity<br />
Total<br />
indoor<br />
unit<br />
number<br />
Duct D4 ○ ○ ○ ○ ○ ○<br />
Duct D3 ○ ○ ○ ○ ○<br />
Cooling 2.2 2.8 3.2 3.6 4.5 5.6 6.3 7.1 9.0<br />
capacity kW kW kW kW kW kW kW kW kW<br />
1 5 1 14.6 6<br />
2 4 2 14.4 6<br />
3 5 1 14.2 6<br />
4 5 1 13.8 6<br />
5 6 13.2 6<br />
6 1 1 3 14.6 5<br />
7 1 2 1 1 14.6 5<br />
8 2 2 1 14.5 5<br />
9 4 1 14.4 5<br />
10 2 1 2 14.4 5<br />
11 2 2 1 14.4 5<br />
12 4 1 14.4 5<br />
13 3 1 1 14.3 5<br />
14 1 2 2 14.2 5<br />
15 1 3 1 14.2 5<br />
16 2 3 14 5<br />
17 5 14 5<br />
18 2 1 1 1 14 5<br />
19 3 1 1 13.9 5<br />
20 3 2 13.8 5<br />
21 1 3 1 13.8 5<br />
22 2 1 2 13.6 5<br />
23 2 2 1 13.6 5<br />
24 3 1 1 13.4 5<br />
25 1 4 13.4 5<br />
26 4 1 13.3 5<br />
27 2 2 1 13.2 5<br />
379
28 3 1 1 13 5<br />
29 3 2 13 5<br />
30 2 3 12.8 5<br />
31 3 1 1 12.6 5<br />
32 4 1 12.4 5<br />
33 3 2 12.2 5<br />
34 4 1 12 5<br />
35 4 1 11.6 5<br />
36 5 11 5<br />
37 1 1 1 1 14.6 4<br />
38 2 2 14.6 4<br />
39 2 1 1 14.5 4<br />
40 1 1 1 1 14.5 4<br />
41 1 2 1 14.5 4<br />
42 2 1 1 14.5 4<br />
43 1 1 2 14.4 4<br />
44 2 1 1 14.4 4<br />
45 4 14.4 4<br />
46 2 1 1 14.3 4<br />
47 2 1 1 14.3 4<br />
48 1 2 1 14.2 4<br />
49 3 1 14.1 4<br />
50 1 2 1 14.1 4<br />
51 1 1 1 1 14.1 4<br />
52 1 1 2 14 4<br />
53 1 3 14 4<br />
54 3 1 14 4<br />
55 2 1 1 13.9 4<br />
56 1 2 1 13.9 4<br />
57 1 1 1 1 13.8 4<br />
58 3 1 13.7 4<br />
59 2 1 1 13.7 4<br />
60 1 2 1 13.7 4<br />
61 1 3 13.6 4<br />
62 2 2 13.6 4<br />
63 2 1 1 13.6 4<br />
64 2 1 1 13.5 4<br />
65 1 1 1 1 13.5 4<br />
66 2 2 13.4 4<br />
67 1 2 1 13.4 4<br />
68 2 1 1 13.3 4<br />
69 3 1 13.2 4<br />
70 2 1 1 13.2 4<br />
71 1 1 2 13.2 4<br />
72 1 2 1 13.1 4<br />
73 1 1 1 1 13.1 4<br />
74 1 3 13 4<br />
75 3 1 12.9 4<br />
76 3 1 12.9 4<br />
77 2 1 1 12.8 4<br />
78 2 2 12.8 4<br />
79 4 12.8 4<br />
80 1 2 1 12.8 4<br />
380
81 1 1 1 1 12.7 4<br />
82 1 1 2 12.6 4<br />
83 2 1 1 12.5 4<br />
84 1 3 12.4 4<br />
85 2 1 1 12.4 4<br />
86 1 2 1 12.3 4<br />
87 1 2 1 12.2 4<br />
88 3 1 12.2 4<br />
89 1 1 2 12.2 4<br />
90 2 1 1 12.1 4<br />
91 2 2 12 4<br />
92 3 1 12 4<br />
93 1 3 11.8 4<br />
94 1 1 1 1 11.8 4<br />
95 2 1 1 11.7 4<br />
96 2 2 11.6 4<br />
97 3 1 11.6 4<br />
98 1 2 1 11.4 4<br />
99 1 1 2 11.4 4<br />
100 2 1 1 11.2 4<br />
101 4 11.2 4<br />
102 3 1 11.1 4<br />
103 1 2 1 11 4<br />
104 2 1 1 10.8 4<br />
105 2 2 10.8 4<br />
106 1 3 10.6 4<br />
107 2 1 1 10.4 4<br />
108 3 1 10.2 4<br />
109 2 2 10 4<br />
110 3 1 9.8 4<br />
111 3 1 9.4 4<br />
112 4 8.8 4<br />
113 2 1 14.6 3<br />
114 2 1 14.6 3<br />
115 1 1 1 14.4 3<br />
116 1 1 1 14.4 3<br />
117 1 2 14.4 3<br />
118 1 1 1 14.4 3<br />
119 2 1 14.3 3<br />
120 1 1 1 14.1 3<br />
121 1 1 1 14 3<br />
122 1 2 14 3<br />
123 1 1 1 14 3<br />
124 1 1 1 13.9 3<br />
125 1 1 1 13.8 3<br />
126 1 1 1 13.7 3<br />
127 1 1 1 13.6 3<br />
128 1 1 1 13.5 3<br />
129 2 1 13.5 3<br />
130 2 1 13.5 3<br />
131 3 13.5 3<br />
132 2 1 13.4 3<br />
133 1 2 13.4 3<br />
381
134 1 1 1 13.3 3<br />
135 1 1 1 13.1 3<br />
136 1 1 1 13.1 3<br />
137 1 1 1 13 3<br />
138 1 1 1 12.9 3<br />
139 1 1 1 12.9 3<br />
140 2 1 12.8 3<br />
141 2 1 12.7 3<br />
142 1 1 1 12.7 3<br />
143 2 1 12.7 3<br />
144 1 2 12.6 3<br />
145 1 1 1 12.5 3<br />
146 1 1 1 12.4 3<br />
147 1 1 1 12.3 3<br />
148 1 1 1 12.3 3<br />
149 1 2 12.2 3<br />
150 1 1 1 12.1 3<br />
151 1 1 1 12.1 3<br />
152 1 1 1 12 3<br />
153 2 1 12 3<br />
154 2 1 11.9 3<br />
155 1 2 11.8 3<br />
156 1 1 1 11.7 3<br />
157 2 1 11.7 3<br />
158 1 1 1 11.6 3<br />
159 2 1 11.5 3<br />
160 1 1 1 11.4 3<br />
161 1 1 1 11.3 3<br />
162 1 1 1 11.3 3<br />
163 1 2 11.2 3<br />
164 2 1 11.2 3<br />
165 1 1 1 11 3<br />
166 1 1 1 10.9 3<br />
167 2 1 10.9 3<br />
168 3 10.8 3<br />
169 2 1 10.7 3<br />
170 1 1 1 10.6 3<br />
171 1 1 1 10.5 3<br />
172 1 2 10.4 3<br />
173 1 1 1 10.3 3<br />
174 2 1 10.1 3<br />
175 2 1 10 3<br />
176 1 2 10 3<br />
177 2 1 10 3<br />
178 1 1 1 9.9 3<br />
179 3 9.6 3<br />
180 1 1 1 9.6 3<br />
181 1 1 1 9.5 3<br />
182 1 2 9.4 3<br />
183 2 1 9.2 3<br />
184 1 2 9.2 3<br />
185 1 1 1 9 3<br />
186 2 1 8.9 3<br />
382
187 2 1 8.8 3<br />
188 1 2 8.6 3<br />
189 1 1 1 8.6 3<br />
190 3 8.4 3<br />
191 1 1 1 8.2 3<br />
192 2 1 8 3<br />
193 1 2 7.8 3<br />
194 2 1 7.6 3<br />
195 2 1 7.2 3<br />
196 3 6.6 3<br />
197 1 1 14.6 2<br />
198 2 14.2 2<br />
199 1 1 13.5 2<br />
200 1 1 13.4 2<br />
201 1 1 12.7 2<br />
202 1 1 12.6 2<br />
203 2 12.6 2<br />
204 1 1 12.2 2<br />
205 1 1 11.9 2<br />
206 1 1 11.8 2<br />
207 1 1 11.6 2<br />
208 1 1 11.2 2<br />
209 2 11.2 2<br />
210 1 1 10.8 2<br />
211 1 1 10.7 2<br />
212 1 1 10.3 2<br />
213 1 1 10.1 2<br />
214 1 1 9.9 2<br />
215 1 1 9.9 2<br />
216 1 1 9.5 2<br />
217 1 1 9.3 2<br />
218 1 1 9.2 2<br />
219 1 1 9.1 2<br />
220 2 9 2<br />
221 1 1 8.8 2<br />
222 1 1 8.5 2<br />
223 1 1 8.4 2<br />
224 1 1 8.1 2<br />
225 1 1 7.8 2<br />
226 1 1 7.7 2<br />
227 1 1 7.3 2<br />
228 2 7.2 2<br />
229 1 1 6.8 2<br />
230 1 1 6.7 2<br />
231 1 1 6.4 2<br />
232 2 6.4 2<br />
233 1 1 6 2<br />
234 1 1 5.8 2<br />
235 2 5.6 2<br />
383
23.2 Heating<br />
23.2.1 4HP(U-4LA1E5)<br />
Indoor 0.8 1.0 1.25 1.5 1.75 2.0 2.5 3.0 3.5<br />
unit HP HP HP HP HP HP HP HP HP<br />
Wall<br />
mounted<br />
○ ○ ○ ○ ○ ○ ○<br />
NO.<br />
Mini<br />
cassette<br />
Big<br />
cassette<br />
○ ○ ○ ○ ○<br />
○ ○ ○<br />
Total<br />
indoor<br />
capacity<br />
Total<br />
indoor<br />
unit<br />
number<br />
Duct D4 ○ ○ ○ ○ ○ ○<br />
Duct D3 ○ ○ ○ ○ ○<br />
Heating 2.5 3.2 3.6 4.2 5.1 6.4 7.1 8.0 10.0<br />
capacity kW kW kW kW kW kW kW kW kW<br />
1 5 1 16.7 6<br />
2 4 2 16.4 6<br />
3 5 1 16.1 6<br />
4 5 1 15.7 6<br />
5 6 15 6<br />
6 1 1 3 16.5 5<br />
7 1 2 1 1 16.7 5<br />
8 2 2 1 16.5 5<br />
9 4 1 16.4 5<br />
10 2 1 2 16.6 5<br />
11 2 2 1 16.4 5<br />
12 4 1 16.4 5<br />
13 3 1 1 16.2 5<br />
14 1 2 2 16.1 5<br />
15 1 3 1 16.3 5<br />
16 2 3 15.8 5<br />
17 5 16 5<br />
18 2 1 1 1 16 5<br />
19 3 1 1 15.8 5<br />
20 3 2 15.9 5<br />
21 1 3 1 15.7 5<br />
22 2 1 2 15.4 5<br />
23 2 2 1 15.6 5<br />
24 3 1 1 15.3 5<br />
25 1 4 15.3 5<br />
26 4 1 15.1 5<br />
27 2 2 1 15 5<br />
28 3 1 1 14.9 5<br />
29 3 2 14.7 5<br />
30 2 3 14.6 5<br />
31 3 1 1 14.3 5<br />
32 4 1 14.2 5<br />
33 3 2 13.9 5<br />
34 4 1 13.6 5<br />
35 4 1 13.2 5<br />
36 5 12.5 5<br />
37 1 1 1 1 16.7 4<br />
38 2 2 16.6 4<br />
39 2 1 1 16.5 4<br />
384
40 1 1 1 1 16.4 4<br />
41 1 2 1 16.7 4<br />
42 2 1 1 16.5 4<br />
43 1 1 2 16.3 4<br />
44 2 1 1 16.4 4<br />
45 4 16.8 4<br />
46 2 1 1 16.2 4<br />
47 2 1 1 16.3 4<br />
48 1 2 1 16.1 4<br />
49 3 1 15.9 4<br />
50 1 2 1 16 4<br />
51 1 1 1 1 16.1 4<br />
52 1 1 2 15.9 4<br />
53 1 3 16.2 4<br />
54 3 1 16 4<br />
55 2 1 1 15.7 4<br />
56 1 2 1 16 4<br />
57 1 1 1 1 15.7 4<br />
58 3 1 15.5 4<br />
59 2 1 1 15.7 4<br />
60 1 2 1 15.5 4<br />
61 1 3 15.8 4<br />
62 2 2 15.6 4<br />
63 2 1 1 15.6 4<br />
64 2 1 1 15.3 4<br />
65 1 1 1 1 15.4 4<br />
66 2 2 15.2 4<br />
67 1 2 1 15.3 4<br />
68 2 1 1 15.1 4<br />
69 3 1 15 4<br />
70 2 1 1 15 4<br />
71 1 1 2 15.2 4<br />
72 1 2 1 14.8 4<br />
73 1 1 1 1 15 4<br />
74 1 3 15.1 4<br />
75 3 1 14.6 4<br />
76 3 1 14.7 4<br />
77 2 1 1 14.6 4<br />
78 2 2 14.8 4<br />
79 4 14.4 4<br />
80 1 2 1 14.6 4<br />
81 1 1 1 1 14.4 4<br />
82 1 1 2 14.5 4<br />
83 2 1 1 14.3 4<br />
84 1 3 14 4<br />
85 2 1 1 14.2 4<br />
86 1 2 1 14 4<br />
87 1 2 1 13.9 4<br />
88 3 1 13.9 4<br />
89 1 1 2 14.1 4<br />
90 2 1 1 13.7 4<br />
91 2 2 13.6 4<br />
92 3 1 13.8 4<br />
385
93 1 3 13.3 4<br />
94 1 1 1 1 13.5 4<br />
95 2 1 1 13.3 4<br />
96 2 2 13.4 4<br />
97 3 1 13.2 4<br />
98 1 2 1 13.1 4<br />
99 1 1 2 12.9 4<br />
100 2 1 1 12.8 4<br />
101 4 12.8 4<br />
102 3 1 12.6 4<br />
103 1 2 1 12.5 4<br />
104 2 1 1 12.4 4<br />
105 2 2 12.2 4<br />
106 1 3 12.1 4<br />
107 2 1 1 11.8 4<br />
108 3 1 11.7 4<br />
109 2 2 11.4 4<br />
110 3 1 11.1 4<br />
111 3 1 10.7 4<br />
112 4 10 4<br />
113 2 1 16.4 3<br />
114 2 1 16.6 3<br />
115 1 1 1 16.1 3<br />
116 1 1 1 16.3 3<br />
117 1 2 16.4 3<br />
118 1 1 1 16.4 3<br />
119 2 1 16.4 3<br />
120 1 1 1 16 3<br />
121 1 1 1 15.7 3<br />
122 1 2 16 3<br />
123 1 1 1 15.8 3<br />
124 1 1 1 15.8 3<br />
125 1 1 1 15.6 3<br />
126 1 1 1 15.7 3<br />
127 1 1 1 15.4 3<br />
128 1 1 1 15.4 3<br />
129 2 1 15.2 3<br />
130 2 1 15.5 3<br />
131 3 15.3 3<br />
132 2 1 15 3<br />
133 1 2 15.3 3<br />
134 1 1 1 15.1 3<br />
135 1 1 1 14.9 3<br />
136 1 1 1 14.8 3<br />
137 1 1 1 14.7 3<br />
138 1 1 1 14.7 3<br />
139 1 1 1 14.7 3<br />
140 2 1 14.8 3<br />
141 2 1 14.4 3<br />
142 1 1 1 14.5 3<br />
143 2 1 14.3 3<br />
144 1 2 14.4 3<br />
145 1 1 1 14.1 3<br />
386
146 1 1 1 14.2 3<br />
147 1 1 1 14 3<br />
148 1 1 1 13.9 3<br />
149 1 2 13.8 3<br />
150 1 1 1 13.8 3<br />
151 1 1 1 13.7 3<br />
152 1 1 1 13.8 3<br />
153 2 1 13.6 3<br />
154 2 1 13.5 3<br />
155 1 2 13.4 3<br />
156 1 1 1 13.2 3<br />
157 2 1 13.5 3<br />
158 1 1 1 13.2 3<br />
159 2 1 13 3<br />
160 1 1 1 13.1 3<br />
161 1 1 1 12.8 3<br />
162 1 1 1 12.9 3<br />
163 1 2 12.7 3<br />
164 2 1 12.8 3<br />
165 1 1 1 12.5 3<br />
166 1 1 1 12.5 3<br />
167 2 1 12.3 3<br />
168 3 12.6 3<br />
169 2 1 12.1 3<br />
170 1 1 1 12.1 3<br />
171 1 1 1 11.9 3<br />
172 1 2 12 3<br />
173 1 1 1 11.8 3<br />
174 2 1 11.5 3<br />
175 2 1 11.4 3<br />
176 1 2 11.6 3<br />
177 2 1 11.4 3<br />
178 1 1 1 11.2 3<br />
179 3 10.8 3<br />
180 1 1 1 11 3<br />
181 1 1 1 10.8 3<br />
182 1 2 10.9 3<br />
183 2 1 10.6 3<br />
184 1 2 10.4 3<br />
185 1 1 1 10.3 3<br />
186 2 1 10.1 3<br />
187 2 1 10 3<br />
188 1 2 9.7 3<br />
189 1 1 1 9.9 3<br />
190 3 9.6 3<br />
191 1 1 1 9.3 3<br />
192 2 1 9.2 3<br />
193 1 2 8.9 3<br />
194 2 1 8.6 3<br />
195 2 1 8.2 3<br />
196 3 7.5 3<br />
197 1 1 16.4 2<br />
198 2 16 2<br />
387
199 1 1 15.1 2<br />
200 1 1 15.1 2<br />
201 1 1 14.4 2<br />
202 1 1 14.2 2<br />
203 2 14.2 2<br />
204 1 1 13.6 2<br />
205 1 1 13.5 2<br />
206 1 1 13.2 2<br />
207 1 1 13.1 2<br />
208 1 1 12.5 2<br />
209 2 12.8 2<br />
210 1 1 12.2 2<br />
211 1 1 12.2 2<br />
212 1 1 11.6 2<br />
213 1 1 11.5 2<br />
214 1 1 11.3 2<br />
215 1 1 11.2 2<br />
216 1 1 10.7 2<br />
217 1 1 10.5 2<br />
218 1 1 10.6 2<br />
219 1 1 10.3 2<br />
220 2 10.2 2<br />
221 1 1 10 2<br />
222 1 1 9.6 2<br />
223 1 1 9.6 2<br />
224 1 1 9.3 2<br />
225 1 1 8.9 2<br />
226 1 1 8.7 2<br />
227 1 1 8.3 2<br />
228 2 8.4 2<br />
229 1 1 7.8 2<br />
230 1 1 7.6 2<br />
231 1 1 7.4 2<br />
232 2 7.2 2<br />
233 1 1 6.8 2<br />
234 1 1 6.7 2<br />
235 2 6.4 2<br />
388
23.3 Cooling<br />
23.3.1 5HP(U-5LA1E5)<br />
Combination criteria<br />
5HP<br />
Total indoor<br />
MAX 18.2<br />
capacity<br />
Rated 14.0<br />
(kW) MIN 7.0<br />
Total indoor unit<br />
MAX 8<br />
number MIN 2<br />
Combination (%) 50 ~ 130<br />
Indoor 0.8 1.0 1.25 1.5 1.75 2.0 2.5 3.0 3.5<br />
unit HP HP HP HP HP HP HP HP HP<br />
Wall<br />
mounted<br />
○ ○ ○ ○ ○ ○ ○<br />
NO.<br />
Mini<br />
cassette<br />
Big<br />
cassette<br />
○ ○ ○ ○ ○<br />
○ ○ ○<br />
Total<br />
indoor<br />
capacity<br />
Total<br />
indoor<br />
unit<br />
number<br />
Duct D4 ○ ○ ○ ○ ○ ○<br />
Duct D3 ○ ○ ○ ○ ○<br />
Cooling 2.2 2.8 3.2 3.6 4.5 5.6 6.3 7.1 9.0<br />
capacity kW kW kW kW kW kW kW kW kW<br />
1 7 1 18.2 8<br />
2 8 17.6 8<br />
3 5 2 18.2 7<br />
4 3 3 1 18.2 7<br />
5 4 2 1 18 7<br />
6 4 1 2 18 7<br />
7 5 1 1 17.8 7<br />
8 3 4 17.8 7<br />
9 6 1 17.7 7<br />
10 4 2 1 17.6 7<br />
11 5 1 1 17.4 7<br />
12 5 2 17.4 7<br />
13 4 3 17.2 7<br />
14 5 1 1 17 7<br />
15 6 1 16.8 7<br />
16 5 2 16.6 7<br />
17 6 1 16.4 7<br />
18 6 1 16 7<br />
19 7 15.4 7<br />
20 3 1 1 1 18.2 6<br />
21 1 1 3 1 18.2 6<br />
22 1 2 1 2 18.2 6<br />
23 1 5 18.2 6<br />
24 5 1 18.1 6<br />
25 2 2 1 1 18.1 6<br />
26 2 1 2 1 18.1 6<br />
27 4 1 1 18 6<br />
28 2 1 3 18 6<br />
29 2 2 2 18 6<br />
30 4 1 1 18 6<br />
389
31 3 3 18 6<br />
32 4 1 1 17.9 6<br />
33 3 1 1 1 17.9 6<br />
34 1 4 1 17.9 6<br />
35 4 2 17.8 6<br />
36 1 2 2 1 17.8 6<br />
37 1 1 4 17.8 6<br />
38 3 2 1 17.8 6<br />
39 1 3 2 17.8 6<br />
40 2 2 1 1 17.7 6<br />
41 4 1 1 17.6 6<br />
42 2 1 1 2 17.6 6<br />
43 2 3 1 17.6 6<br />
44 5 1 17.6 6<br />
45 4 2 17.6 6<br />
46 3 2 1 17.5 6<br />
47 3 3 17.4 6<br />
48 1 2 3 17.4 6<br />
49 1 3 1 1 17.4 6<br />
50 5 1 17.3 6<br />
51 2 3 1 17.3 6<br />
52 4 1 1 17.2 6<br />
53 2 1 2 1 17.2 6<br />
54 2 4 17.2 6<br />
55 2 2 2 17.2 6<br />
56 5 1 17.2 6<br />
57 3 1 1 1 17.1 6<br />
58 3 1 2 17 6<br />
59 1 4 1 17 6<br />
60 1 3 2 17 6<br />
61 4 1 1 16.9 6<br />
62 2 2 1 1 16.8 6<br />
63 2 1 3 16.8 6<br />
64 6 16.8 6<br />
65 3 2 1 16.7 6<br />
66 5 1 16.6 6<br />
67 3 2 1 16.6 6<br />
68 1 4 1 16.6 6<br />
69 4 1 1 16.5 6<br />
70 2 3 1 16.4 6<br />
71 2 2 2 16.4 6<br />
72 3 1 1 1 16.2 6<br />
73 3 3 16.2 6<br />
74 1 5 16.2 6<br />
75 4 1 1 16.1 6<br />
76 4 2 16 6<br />
77 2 3 1 16 6<br />
78 3 1 2 15.8 6<br />
79 3 2 1 15.8 6<br />
80 4 1 1 15.6 6<br />
81 2 4 15.6 6<br />
82 5 1 15.5 6<br />
83 3 2 1 15.4 6<br />
390
84 4 1 1 15.2 6<br />
85 4 2 15.2 6<br />
86 3 3 15 6<br />
87 4 1 1 14.8 6<br />
88 5 1 14.6 6<br />
89 4 2 14.4 6<br />
90 5 1 14.2 6<br />
91 5 1 13.8 6<br />
92 6 13.2 6<br />
93 1 1 2 1 18.2 5<br />
94 1 2 2 18.2 5<br />
95 1 2 1 1 18.1 5<br />
96 2 2 1 18.1 5<br />
97 1 3 1 18.1 5<br />
98 1 1 1 1 1 18.1 5<br />
99 1 1 1 2 18 5<br />
100 2 1 1 1 18 5<br />
101 1 3 1 18 5<br />
102 3 1 1 17.9 5<br />
103 2 2 1 17.9 5<br />
104 1 2 1 1 17.8 5<br />
105 2 1 1 1 17.7 5<br />
106 3 1 1 17.7 5<br />
107 1 1 2 1 17.7 5<br />
108 1 1 2 1 17.7 5<br />
109 1 4 17.6 5<br />
110 1 2 2 17.6 5<br />
111 2 2 1 17.6 5<br />
112 2 1 1 1 17.5 5<br />
113 2 1 1 1 17.5 5<br />
114 1 1 1 1 1 17.4 5<br />
115 1 3 1 17.4 5<br />
116 1 2 1 1 17.3 5<br />
117 4 1 17.3 5<br />
118 1 2 1 1 17.3 5<br />
119 2 3 17.2 5<br />
120 1 1 1 2 17.2 5<br />
121 3 1 1 17.2 5<br />
122 1 1 2 1 17.1 5<br />
123 2 2 1 17.1 5<br />
124 1 1 2 1 17 5<br />
125 1 3 1 16.9 5<br />
126 3 1 1 16.9 5<br />
127 2 1 1 1 16.9 5<br />
128 2 1 1 1 16.8 5<br />
129 1 1 3 16.8 5<br />
130 3 2 16.8 5<br />
131 1 2 1 1 16.7 5<br />
132 2 1 1 1 16.7 5<br />
133 2 1 2 16.6 5<br />
134 1 2 1 1 16.6 5<br />
135 2 2 1 16.5 5<br />
136 4 1 16.4 5<br />
391
137 2 2 1 16.4 5<br />
138 1 2 2 16.4 5<br />
139 1 3 1 16.3 5<br />
140 1 1 1 1 1 16.3 5<br />
141 1 1 3 16.2 5<br />
142 3 1 1 16.1 5<br />
143 3 1 1 16.1 5<br />
144 1 3 1 16 5<br />
145 2 1 1 1 16 5<br />
146 2 1 2 16 5<br />
147 5 16 5<br />
148 1 1 2 1 15.9 5<br />
149 1 2 2 15.8 5<br />
150 2 1 1 1 15.7 5<br />
151 1 4 15.6 5<br />
152 3 2 15.6 5<br />
153 2 2 1 15.6 5<br />
154 2 2 1 15.6 5<br />
155 3 2 15.6 5<br />
156 1 2 1 1 15.5 5<br />
157 3 1 1 15.4 5<br />
158 1 3 1 15.4 5<br />
159 1 1 1 2 15.4 5<br />
160 2 2 1 15.3 5<br />
161 2 1 1 1 15.3 5<br />
162 2 3 15.2 5<br />
163 2 3 15.2 5<br />
164 3 1 1 15.2 5<br />
165 4 1 15.1 5<br />
166 1 3 1 15.1 5<br />
167 1 1 2 1 15 5<br />
168 1 4 15 5<br />
169 1 2 2 15 5<br />
170 3 1 1 15 5<br />
171 2 1 1 1 14.9 5<br />
172 2 1 2 14.8 5<br />
173 3 2 14.8 5<br />
174 4 1 14.8 5<br />
175 3 1 1 14.7 5<br />
176 1 1 3 14.6 5<br />
177 1 2 1 1 14.6 5<br />
178 2 2 1 14.5 5<br />
179 2 2 1 14.4 5<br />
180 2 1 2 14.4 5<br />
181 4 1 14.4 5<br />
182 4 1 14.4 5<br />
183 3 1 1 14.3 5<br />
184 1 3 1 14.2 5<br />
185 2 3 14 5<br />
186 2 1 1 1 14 5<br />
187 5 14 5<br />
188 3 1 1 13.9 5<br />
189 3 2 13.8 5<br />
392
190 1 3 1 13.8 5<br />
191 2 1 2 13.6 5<br />
192 2 2 1 13.6 5<br />
193 3 1 1 13.4 5<br />
194 1 4 13.4 5<br />
195 4 1 13.3 5<br />
196 2 2 1 13.2 5<br />
197 3 2 13 5<br />
198 3 1 1 13 5<br />
199 2 3 12.8 5<br />
200 3 1 1 12.6 5<br />
201 4 1 12.4 5<br />
202 3 2 12.2 5<br />
203 4 1 12 5<br />
204 4 1 11.6 5<br />
205 5 11 5<br />
206 1 2 1 18.2 4<br />
207 1 1 1 1 18.1 4<br />
208 1 1 1 1 18 4<br />
209 1 1 2 18 4<br />
210 1 1 2 18 4<br />
211 2 1 1 18 4<br />
212 1 1 1 1 17.9 4<br />
213 2 1 1 17.8 4<br />
214 1 2 1 17.8 4<br />
215 1 1 1 1 17.6 4<br />
216 1 1 1 1 17.6 4<br />
217 1 2 1 17.6 4<br />
218 2 2 17.6 4<br />
219 1 2 1 17.5 4<br />
220 1 1 1 1 17.3 4<br />
221 1 1 1 1 17.2 4<br />
222 1 1 2 17.2 4<br />
223 2 1 1 17.2 4<br />
224 2 1 1 17.1 4<br />
225 1 1 1 1 17 4<br />
226 1 1 1 1 16.9 4<br />
227 1 1 1 1 16.8 4<br />
228 3 1 16.7 4<br />
229 1 1 1 1 16.7 4<br />
230 1 2 1 16.7 4<br />
231 1 3 16.7 4<br />
232 2 1 1 16.6 4<br />
233 1 1 2 16.6 4<br />
234 2 1 1 16.5 4<br />
235 2 1 1 16.3 4<br />
236 1 2 1 16.3 4<br />
237 1 1 1 1 16.2 4<br />
238 1 1 1 1 16.1 4<br />
239 1 1 1 1 16.1 4<br />
240 1 2 1 16 4<br />
241 3 1 15.9 4<br />
242 2 1 1 15.9 4<br />
393
243 1 1 1 1 15.9 4<br />
244 1 1 2 15.8 4<br />
245 1 2 1 15.7 4<br />
246 3 1 15.6 4<br />
247 2 1 1 15.6 4<br />
248 1 2 1 15.6 4<br />
249 2 2 15.6 4<br />
250 1 1 1 1 15.5 4<br />
251 1 2 1 15.5 4<br />
252 2 1 1 15.5 4<br />
253 3 1 15.5 4<br />
254 2 2 15.4 4<br />
255 1 1 2 15.4 4<br />
256 1 1 1 1 15.3 4<br />
257 3 1 15.3 4<br />
258 1 1 1 1 15.3 4<br />
259 3 1 15.2 4<br />
260 1 1 1 1 15.2 4<br />
261 2 1 1 15.2 4<br />
262 2 1 1 15.1 4<br />
263 2 1 1 15.1 4<br />
264 1 1 1 1 15.1 4<br />
265 1 1 2 15 4<br />
266 1 2 1 15 4<br />
267 1 2 1 14.9 4<br />
268 1 2 1 14.9 4<br />
269 1 2 1 14.9 4<br />
270 1 1 1 1 14.9 4<br />
271 1 1 2 14.8 4<br />
272 1 2 1 14.8 4<br />
273 2 1 1 14.8 4<br />
274 2 1 1 14.7 4<br />
275 3 1 14.7 4<br />
276 1 1 1 1 14.6 4<br />
277 2 2 14.6 4<br />
278 1 1 1 1 14.5 4<br />
279 2 1 1 14.5 4<br />
280 1 2 1 14.5 4<br />
281 2 1 1 14.5 4<br />
282 1 1 2 14.4 4<br />
283 2 1 1 14.4 4<br />
284 4 14.4 4<br />
285 2 1 1 14.3 4<br />
286 2 1 1 14.3 4<br />
287 1 2 1 14.2 4<br />
288 1 1 1 1 14.2 4<br />
289 3 1 14.1 4<br />
290 1 1 1 1 14.1 4<br />
291 1 2 1 14.1 4<br />
292 1 3 14 4<br />
394
293 1 1 2 14 4<br />
294 3 1 14 4<br />
295 2 1 1 13.9 4<br />
296 1 2 1 13.9 4<br />
297 1 1 1 1 13.8 4<br />
298 1 2 1 13.7 4<br />
299 3 1 13.7 4<br />
300 2 1 1 13.7 4<br />
301 2 2 13.6 4<br />
302 1 3 13.6 4<br />
303 2 1 1 13.6 4<br />
304 1 1 1 1 13.5 4<br />
305 2 1 1 13.5 4<br />
306 2 2 13.4 4<br />
307 1 2 1 13.4 4<br />
308 2 1 1 13.3 4<br />
309 3 1 13.2 4<br />
310 2 1 1 13.2 4<br />
311 1 1 2 13.2 4<br />
312 1 2 1 13.1 4<br />
313 1 1 1 1 13.1 4<br />
314 1 3 13 4<br />
315 3 1 12.9 4<br />
316 3 1 12.9 4<br />
317 4 12.8 4<br />
318 2 2 12.8 4<br />
319 2 1 1 12.8 4<br />
320 1 2 1 12.8 4<br />
321 1 1 1 1 12.7 4<br />
322 1 1 2 12.6 4<br />
323 2 1 1 12.5 4<br />
324 1 3 12.4 4<br />
325 2 1 1 12.4 4<br />
326 1 2 1 12.3 4<br />
327 1 2 1 12.2 4<br />
328 1 1 2 12.2 4<br />
329 3 1 12.2 4<br />
330 2 1 1 12.1 4<br />
331 2 2 12 4<br />
332 3 1 12 4<br />
333 1 3 11.8 4<br />
334 1 1 1 1 11.8 4<br />
335 2 1 1 11.7 4<br />
336 2 2 11.6 4<br />
337 3 1 11.6 4<br />
338 1 1 2 11.4 4<br />
339 1 2 1 11.4 4<br />
340 2 1 1 11.2 4<br />
341 4 11.2 4<br />
342 3 1 11.1 4<br />
395
343 1 2 1 11 4<br />
344 2 2 10.8 4<br />
345 2 1 1 10.8 4<br />
346 1 3 10.6 4<br />
347 2 1 1 10.4 4<br />
348 3 1 10.2 4<br />
349 2 2 10 4<br />
350 3 1 9.8 4<br />
351 3 1 9.4 4<br />
352 4 8.8 4<br />
353 1 1 1 17.8 3<br />
354 1 2 17.4 3<br />
355 1 1 1 16.7 3<br />
356 1 1 1 16.6 3<br />
357 1 1 1 15.9 3<br />
358 1 1 1 15.8 3<br />
359 1 2 15.8 3<br />
360 1 1 1 15.6 3<br />
361 1 1 1 15.5 3<br />
362 1 1 1 15.5 3<br />
363 2 1 15.4 3<br />
364 1 1 1 15.4 3<br />
365 1 2 15.4 3<br />
366 2 1 15.3 3<br />
367 1 1 1 15.2 3<br />
368 1 1 1 15.1 3<br />
369 1 1 1 15 3<br />
370 1 1 1 14.9 3<br />
371 1 1 1 14.8 3<br />
372 1 1 1 14.8 3<br />
373 1 2 14.8 3<br />
374 1 2 14.8 3<br />
375 1 1 1 14.7 3<br />
376 2 1 14.6 3<br />
377 2 1 14.6 3<br />
378 1 1 1 14.4 3<br />
379 1 2 14.4 3<br />
380 1 1 1 14.4 3<br />
381 1 1 1 14.4 3<br />
382 2 1 14.3 3<br />
383 1 1 1 14.1 3<br />
384 1 1 1 14 3<br />
385 1 1 1 14 3<br />
386 1 2 14 3<br />
387 1 1 1 13.9 3<br />
388 1 1 1 13.8 3<br />
389 1 1 1 13.7 3<br />
390 1 1 1 13.6 3<br />
391 2 1 13.5 3<br />
392 1 1 1 13.5 3<br />
396
393 2 1 13.5 3<br />
394 3 13.5 3<br />
395 2 1 13.4 3<br />
396 1 2 13.4 3<br />
397 1 1 1 13.3 3<br />
398 1 1 1 13.1 3<br />
399 1 1 1 13.1 3<br />
400 1 1 1 13 3<br />
401 1 1 1 12.9 3<br />
402 1 1 1 12.9 3<br />
403 2 1 12.8 3<br />
404 2 1 12.7 3<br />
405 2 1 12.7 3<br />
406 1 1 1 12.7 3<br />
407 1 2 12.6 3<br />
408 1 1 1 12.5 3<br />
409 1 1 1 12.4 3<br />
410 1 1 1 12.3 3<br />
411 1 1 1 12.3 3<br />
412 1 2 12.2 3<br />
413 1 1 1 12.1 3<br />
414 1 1 1 12.1 3<br />
415 2 1 12 3<br />
416 1 1 1 12 3<br />
417 2 1 11.9 3<br />
418 1 2 11.8 3<br />
419 1 1 1 11.7 3<br />
420 2 1 11.7 3<br />
421 1 1 1 11.6 3<br />
422 2 1 11.5 3<br />
423 1 1 1 11.4 3<br />
424 1 1 1 11.3 3<br />
425 1 1 1 11.3 3<br />
426 1 2 11.2 3<br />
427 2 1 11.2 3<br />
428 1 1 1 11 3<br />
429 2 1 10.9 3<br />
430 1 1 1 10.9 3<br />
431 3 10.8 3<br />
432 2 1 10.7 3<br />
433 1 1 1 10.6 3<br />
434 1 1 1 10.5 3<br />
435 1 2 10.4 3<br />
436 1 1 1 10.3 3<br />
437 2 1 10.1 3<br />
438 2 1 10 3<br />
439 1 2 10 3<br />
440 2 1 10 3<br />
441 1 1 1 9.9 3<br />
442 3 9.6 3<br />
397
443 1 1 1 9.6 3<br />
444 1 1 1 9.5 3<br />
445 1 2 9.4 3<br />
446 1 2 9.2 3<br />
447 2 1 9.2 3<br />
448 1 1 1 9 3<br />
449 2 1 8.9 3<br />
450 2 1 8.8 3<br />
451 1 2 8.6 3<br />
452 1 1 1 8.6 3<br />
453 3 8.4 3<br />
454 1 1 1 8.2 3<br />
455 2 1 8 3<br />
456 1 2 7.8 3<br />
457 2 1 7.6 3<br />
458 2 1 7.2 3<br />
459 1 1 15.3 2<br />
460 1 1 14.6 2<br />
461 2 14.2 2<br />
462 1 1 13.5 2<br />
463 1 1 13.4 2<br />
464 1 1 12.7 2<br />
465 1 1 12.6 2<br />
466 2 12.6 2<br />
467 1 1 12.2 2<br />
468 1 1 11.9 2<br />
469 1 1 11.8 2<br />
470 1 1 11.6 2<br />
471 1 1 11.2 2<br />
472 2 11.2 2<br />
473 1 1 10.8 2<br />
474 1 1 10.7 2<br />
475 1 1 10.3 2<br />
476 1 1 10.1 2<br />
477 1 1 9.9 2<br />
478 1 1 9.9 2<br />
479 1 1 9.5 2<br />
480 1 1 9.3 2<br />
481 1 1 9.2 2<br />
482 1 1 9.1 2<br />
483 2 9 2<br />
484 1 1 8.8 2<br />
485 1 1 8.5 2<br />
486 1 1 8.4 2<br />
487 1 1 8.1 2<br />
488 1 1 7.8 2<br />
489 1 1 7.7 2<br />
490 1 1 7.3 2<br />
491 2 7.2 2<br />
398
23.4 Heating<br />
23.4.1 5HP(U-5LA1E5)<br />
Indoor 0.8 1.0 1.25 1.5 1.75 2.0 2.5 3.0 3.5<br />
unit HP HP HP HP HP HP HP HP HP<br />
Wall<br />
mounted<br />
○ ○ ○ ○ ○ ○ ○<br />
NO.<br />
Mini<br />
cassette<br />
Big<br />
cassette<br />
○ ○ ○ ○ ○<br />
○ ○ ○<br />
Total<br />
indoor<br />
capacity<br />
Total<br />
indoor<br />
unit<br />
number<br />
Duct D4 ○ ○ ○ ○ ○ ○<br />
Duct D3 ○ ○ ○ ○ ○<br />
Heating 2.5 3.2 3.6 4.2 5.1 6.4 7.1 8.0 10.0<br />
capacity kW kW kW kW kW kW kW kW kW<br />
1 7 1 20.7 8<br />
2 8 20 8<br />
3 5 2 20.9 7<br />
4 3 3 1 20.7 7<br />
5 4 2 1 20.6 7<br />
6 4 1 2 20.4 7<br />
7 5 1 1 20.3 7<br />
8 3 4 20.3 7<br />
9 6 1 20.1 7<br />
10 4 2 1 20 7<br />
11 5 1 1 19.9 7<br />
12 5 2 19.7 7<br />
13 4 3 19.6 7<br />
14 5 1 1 19.3 7<br />
15 6 1 19.2 7<br />
16 5 2 18.9 7<br />
17 6 1 18.6 7<br />
18 6 1 18.2 7<br />
19 7 17.5 7<br />
20 3 1 1 1 20.7 6<br />
21 1 1 3 1 20.7 6<br />
22 1 2 1 2 20.9 6<br />
23 1 5 20.5 6<br />
24 5 1 20.5 6<br />
25 2 2 1 1 20.7 6<br />
26 2 1 2 1 20.5 6<br />
27 4 1 1 20.6 6<br />
28 2 1 3 20.8 6<br />
29 2 2 2 20.6 6<br />
30 4 1 1 20.6 6<br />
31 3 3 20.4 6<br />
32 4 1 1 20.3 6<br />
33 3 1 1 1 20.4 6<br />
34 1 4 1 20.4 6<br />
35 4 2 20.2 6<br />
36 1 2 2 1 20.3 6<br />
37 1 1 4 20.1 6<br />
38 3 2 1 20.3 6<br />
39 1 3 2 20.5 6<br />
399
40 2 2 1 1 20.1 6<br />
41 4 1 1 20 6<br />
42 2 1 1 2 20.2 6<br />
43 2 3 1 20 6<br />
44 5 1 20.2 6<br />
45 4 2 20 6<br />
46 3 2 1 19.8 6<br />
47 3 3 20.1 6<br />
48 1 2 3 19.7 6<br />
49 1 3 1 1 19.9 6<br />
50 5 1 19.6 6<br />
51 2 3 1 19.7 6<br />
52 4 1 1 19.6 6<br />
53 2 1 2 1 19.6 6<br />
54 2 4 19.4 6<br />
55 2 2 2 19.8 6<br />
56 5 1 19.6 6<br />
57 3 1 1 1 19.4 6<br />
58 3 1 2 19.5 6<br />
59 1 4 1 19.5 6<br />
60 1 3 2 19.3 6<br />
61 4 1 1 19.3 6<br />
62 2 2 1 1 19.2 6<br />
63 2 1 3 19 6<br />
64 6 19.2 6<br />
65 3 2 1 19 6<br />
66 5 1 18.9 6<br />
67 3 2 1 18.9 6<br />
68 1 4 1 18.9 6<br />
69 4 1 1 18.7 6<br />
70 2 3 1 18.8 6<br />
71 2 2 2 18.6 6<br />
72 3 1 1 1 18.5 6<br />
73 3 3 18.3 6<br />
74 1 5 18.5 6<br />
75 4 1 1 18.3 6<br />
76 4 2 18.4 6<br />
77 2 3 1 18.2 6<br />
78 3 1 2 17.9 6<br />
79 3 2 1 18.1 6<br />
80 4 1 1 17.8 6<br />
81 2 4 17.8 6<br />
82 5 1 17.6 6<br />
83 3 2 1 17.5 6<br />
84 4 1 1 17.4 6<br />
85 4 2 17.2 6<br />
86 3 3 17.1 6<br />
87 4 1 1 16.8 6<br />
88 5 1 16.7 6<br />
89 4 2 16.4 6<br />
90 5 1 16.1 6<br />
91 5 1 15.7 6<br />
92 6 15 6<br />
400
93 1 1 2 1 20.9 5<br />
94 1 2 2 20.6 5<br />
95 1 2 1 1 20.5 5<br />
96 2 2 1 20.7 5<br />
97 1 3 1 20.4 5<br />
98 1 1 1 1 1 20.6 5<br />
99 1 1 1 2 20.5 5<br />
100 2 1 1 1 20.6 5<br />
101 1 3 1 20.4 5<br />
102 3 1 1 20.3 5<br />
103 2 2 1 20.2 5<br />
104 1 2 1 1 20.3 5<br />
105 2 1 1 1 20.1 5<br />
106 3 1 1 20.1 5<br />
107 1 1 2 1 20.3 5<br />
108 1 1 2 1 20 5<br />
109 1 4 20.4 5<br />
110 1 2 2 19.9 5<br />
111 2 2 1 20 5<br />
112 2 1 1 1 19.8 5<br />
113 2 1 1 1 19.9 5<br />
114 1 1 1 1 1 19.9 5<br />
115 1 3 1 19.7 5<br />
116 1 2 1 1 19.6 5<br />
117 4 1 19.5 5<br />
118 1 2 1 1 19.7 5<br />
119 2 3 19.8 5<br />
120 1 1 1 2 19.5 5<br />
121 3 1 1 19.6 5<br />
122 1 1 2 1 19.6 5<br />
123 2 2 1 19.3 5<br />
124 1 1 2 1 19.3 5<br />
125 1 3 1 19.1 5<br />
126 3 1 1 19.1 5<br />
127 2 1 1 1 19.3 5<br />
128 2 1 1 1 19.2 5<br />
129 1 1 3 19.4 5<br />
130 3 2 19.2 5<br />
131 1 2 1 1 19 5<br />
132 2 1 1 1 18.9 5<br />
133 2 1 2 18.8 5<br />
134 1 2 1 1 18.9 5<br />
135 2 2 1 18.7 5<br />
136 4 1 18.6 5<br />
137 2 2 1 18.6 5<br />
138 1 2 2 18.8 5<br />
139 1 3 1 18.4 5<br />
140 1 1 1 1 1 18.6 5<br />
141 1 1 3 18.7 5<br />
142 3 1 1 18.2 5<br />
143 3 1 1 18.3 5<br />
144 1 3 1 18.2 5<br />
145 2 1 1 1 18.2 5<br />
401
146 2 1 2 18.4 5<br />
147 5 18 5<br />
148 1 1 2 1 18 5<br />
149 1 2 2 18.1 5<br />
150 2 1 1 1 17.9 5<br />
151 1 4 17.6 5<br />
152 3 2 17.7 5<br />
153 2 2 1 17.8 5<br />
154 2 2 1 17.8 5<br />
155 3 2 18 5<br />
156 1 2 1 1 17.6 5<br />
157 3 1 1 17.5 5<br />
158 1 3 1 17.5 5<br />
159 1 1 1 2 17.7 5<br />
160 2 2 1 17.3 5<br />
161 2 1 1 1 17.5 5<br />
162 2 3 17.2 5<br />
163 2 3 17.6 5<br />
164 3 1 1 17.4 5<br />
165 4 1 17.1 5<br />
166 1 3 1 17.2 5<br />
167 1 1 2 1 17.1 5<br />
168 1 4 16.9 5<br />
169 1 2 2 17.3 5<br />
170 3 1 1 17.1 5<br />
171 2 1 1 1 16.9 5<br />
172 2 1 2 17 5<br />
173 3 2 16.8 5<br />
174 4 1 17 5<br />
175 3 1 1 16.8 5<br />
176 1 1 3 16.5 5<br />
177 1 2 1 1 16.7 5<br />
178 2 2 1 16.5 5<br />
179 2 2 1 16.4 5<br />
180 2 1 2 16.6 5<br />
181 4 1 16.4 5<br />
182 4 1 16.4 5<br />
183 3 1 1 16.2 5<br />
184 1 3 1 16.3 5<br />
185 2 3 15.8 5<br />
186 2 1 1 1 16 5<br />
187 5 16 5<br />
188 3 1 1 15.8 5<br />
189 3 2 15.9 5<br />
190 1 3 1 15.7 5<br />
191 2 1 2 15.4 5<br />
192 2 2 1 15.6 5<br />
193 3 1 1 15.3 5<br />
194 1 4 15.3 5<br />
195 4 1 15.1 5<br />
196 2 2 1 15 5<br />
197 3 2 14.7 5<br />
198 3 1 1 14.9 5<br />
402
199 2 3 14.6 5<br />
200 3 1 1 14.3 5<br />
201 4 1 14.2 5<br />
202 3 2 13.9 5<br />
203 4 1 13.6 5<br />
204 4 1 13.2 5<br />
205 5 12.5 5<br />
206 1 2 1 20.4 4<br />
207 1 1 1 1 20.5 4<br />
208 1 1 1 1 20.3 4<br />
209 1 1 2 20.3 4<br />
210 1 1 2 20.6 4<br />
211 2 1 1 20.3 4<br />
212 1 1 1 1 20.3 4<br />
213 2 1 1 20 4<br />
214 1 2 1 20.2 4<br />
215 1 1 1 1 19.9 4<br />
216 1 1 1 1 20 4<br />
217 1 2 1 19.7 4<br />
218 2 2 20 4<br />
219 1 2 1 20 4<br />
220 1 1 1 1 19.6 4<br />
221 1 1 1 1 19.3 4<br />
222 1 1 2 19.6 4<br />
223 2 1 1 19.4 4<br />
224 2 1 1 19.4 4<br />
225 1 1 1 1 19.2 4<br />
226 1 1 1 1 19.3 4<br />
227 1 1 1 1 19 4<br />
228 3 1 18.8 4<br />
229 1 1 1 1 19 4<br />
230 1 2 1 19.1 4<br />
231 1 3 18.9 4<br />
232 2 1 1 18.6 4<br />
233 1 1 2 18.9 4<br />
234 2 1 1 18.7 4<br />
235 2 1 1 18.5 4<br />
236 1 2 1 18.4 4<br />
237 1 1 1 1 18.3 4<br />
238 1 1 1 1 18.3 4<br />
239 1 1 1 1 18.3 4<br />
240 1 2 1 18.4 4<br />
241 3 1 17.9 4<br />
242 2 1 1 18 4<br />
243 1 1 1 1 18.1 4<br />
244 1 1 2 18 4<br />
245 1 2 1 17.7 4<br />
246 3 1 17.5 4<br />
247 2 1 1 17.8 4<br />
248 1 2 1 18 4<br />
249 2 2 17.8 4<br />
250 1 1 1 1 17.6 4<br />
403
251 1 2 1 17.5 4<br />
252 2 1 1 17.7 4<br />
253 3 1 17.6 4<br />
254 2 2 17.4 4<br />
255 1 1 2 17.6 4<br />
256 1 1 1 1 17.4 4<br />
257 3 1 17.7 4<br />
258 1 1 1 1 17.3 4<br />
259 3 1 17.2 4<br />
260 1 1 1 1 17.4 4<br />
261 2 1 1 17.2 4<br />
262 2 1 1 17.1 4<br />
263 2 1 1 17.2 4<br />
264 1 1 1 1 17.2 4<br />
265 1 1 2 17 4<br />
266 1 2 1 17.3 4<br />
267 1 2 1 16.8 4<br />
268 1 2 1 17.1 4<br />
269 1 2 1 16.9 4<br />
270 1 1 1 1 17 4<br />
271 1 1 2 16.9 4<br />
272 1 2 1 16.8 4<br />
273 2 1 1 17 4<br />
274 2 1 1 16.6 4<br />
275 3 1 16.7 4<br />
276 1 1 1 1 16.7 4<br />
277 2 2 16.6 4<br />
278 1 1 1 1 16.4 4<br />
279 2 1 1 16.5 4<br />
280 1 2 1 16.7 4<br />
281 2 1 1 16.5 4<br />
282 1 1 2 16.3 4<br />
283 2 1 1 16.4 4<br />
284 4 16.8 4<br />
285 2 1 1 16.2 4<br />
286 2 1 1 16.3 4<br />
287 1 2 1 16.1 4<br />
288 1 1 1 1 16.3 4<br />
289 3 1 15.9 4<br />
290 1 1 1 1 16.1 4<br />
291 1 2 1 16 4<br />
292 1 3 16.2 4<br />
293 1 1 2 15.9 4<br />
294 3 1 16 4<br />
295 2 1 1 15.7 4<br />
296 1 2 1 16 4<br />
297 1 1 1 1 15.7 4<br />
298 1 2 1 15.5 4<br />
299 3 1 15.5 4<br />
300 2 1 1 15.7 4<br />
404
301 2 2 15.6 4<br />
302 1 3 15.8 4<br />
303 2 1 1 15.6 4<br />
304 1 1 1 1 15.4 4<br />
305 2 1 1 15.3 4<br />
306 2 2 15.2 4<br />
307 1 2 1 15.3 4<br />
308 2 1 1 15.1 4<br />
309 3 1 15 4<br />
310 2 1 1 15 4<br />
311 1 1 2 15.2 4<br />
312 1 2 1 14.8 4<br />
313 1 1 1 1 15 4<br />
314 1 3 15.1 4<br />
315 3 1 14.6 4<br />
316 3 1 14.7 4<br />
317 4 14.4 4<br />
318 2 2 14.8 4<br />
319 2 1 1 14.6 4<br />
320 1 2 1 14.6 4<br />
321 1 1 1 1 14.4 4<br />
322 1 1 2 14.5 4<br />
323 2 1 1 14.3 4<br />
324 1 3 14 4<br />
325 2 1 1 14.2 4<br />
326 1 2 1 14 4<br />
327 1 2 1 13.9 4<br />
328 1 1 2 14.1 4<br />
329 3 1 13.9 4<br />
330 2 1 1 13.7 4<br />
331 2 2 13.6 4<br />
332 3 1 13.8 4<br />
333 1 3 13.3 4<br />
334 1 1 1 1 13.5 4<br />
335 2 1 1 13.3 4<br />
336 2 2 13.4 4<br />
337 3 1 13.2 4<br />
338 1 1 2 12.9 4<br />
339 1 2 1 13.1 4<br />
340 2 1 1 12.8 4<br />
341 4 12.8 4<br />
342 3 1 12.6 4<br />
343 1 2 1 12.5 4<br />
344 2 2 12.2 4<br />
345 2 1 1 12.4 4<br />
346 1 3 12.1 4<br />
347 2 1 1 11.8 4<br />
348 3 1 11.7 4<br />
349 2 2 11.4 4<br />
350 3 1 11.1 4<br />
405
351 3 1 10.7 4<br />
352 4 10 4<br />
353 1 1 1 20 3<br />
354 1 2 19.6 3<br />
355 1 1 1 18.7 3<br />
356 1 1 1 18.7 3<br />
357 1 1 1 18 3<br />
358 1 1 1 17.8 3<br />
359 1 2 17.8 3<br />
360 1 1 1 17.6 3<br />
361 1 1 1 17.7 3<br />
362 1 1 1 17.6 3<br />
363 2 1 17.2 3<br />
364 1 1 1 17.4 3<br />
365 1 2 17.4 3<br />
366 2 1 17.3 3<br />
367 1 1 1 17.3 3<br />
368 1 1 1 17.1 3<br />
369 1 1 1 16.8 3<br />
370 1 1 1 16.9 3<br />
371 1 1 1 16.7 3<br />
372 1 1 1 16.7 3<br />
373 1 2 16.7 3<br />
374 1 2 17 3<br />
375 1 1 1 16.7 3<br />
376 2 1 16.4 3<br />
377 2 1 16.6 3<br />
378 1 1 1 16.1 3<br />
379 1 2 16.4 3<br />
380 1 1 1 16.3 3<br />
381 1 1 1 16.4 3<br />
382 2 1 16.4 3<br />
383 1 1 1 16 3<br />
384 1 1 1 15.8 3<br />
385 1 1 1 15.7 3<br />
386 1 2 16 3<br />
387 1 1 1 15.8 3<br />
388 1 1 1 15.6 3<br />
389 1 1 1 15.7 3<br />
390 1 1 1 15.4 3<br />
391 2 1 15.2 3<br />
392 1 1 1 15.4 3<br />
393 2 1 15.5 3<br />
394 3 15.3 3<br />
395 2 1 15 3<br />
396 1 2 15.3 3<br />
397 1 1 1 15.1 3<br />
398 1 1 1 14.9 3<br />
399 1 1 1 14.8 3<br />
400 1 1 1 14.7 3<br />
406
401 1 1 1 14.7 3<br />
402 1 1 1 14.7 3<br />
403 2 1 14.8 3<br />
404 2 1 14.3 3<br />
405 2 1 14.4 3<br />
406 1 1 1 14.5 3<br />
407 1 2 14.4 3<br />
408 1 1 1 14.1 3<br />
409 1 1 1 14.2 3<br />
410 1 1 1 13.9 3<br />
411 1 1 1 14 3<br />
412 1 2 13.8 3<br />
413 1 1 1 13.8 3<br />
414 1 1 1 13.7 3<br />
415 2 1 13.6 3<br />
416 1 1 1 13.8 3<br />
417 2 1 13.5 3<br />
418 1 2 13.4 3<br />
419 1 1 1 13.2 3<br />
420 2 1 13.5 3<br />
421 1 1 1 13.2 3<br />
422 2 1 13 3<br />
423 1 1 1 13.1 3<br />
424 1 1 1 12.9 3<br />
425 1 1 1 12.8 3<br />
426 1 2 12.7 3<br />
427 2 1 12.8 3<br />
428 1 1 1 12.5 3<br />
429 2 1 12.3 3<br />
430 1 1 1 12.5 3<br />
431 3 12.6 3<br />
432 2 1 12.1 3<br />
433 1 1 1 12.1 3<br />
434 1 1 1 11.9 3<br />
435 1 2 12 3<br />
436 1 1 1 11.8 3<br />
437 2 1 11.5 3<br />
438 2 1 11.4 3<br />
439 1 2 11.6 3<br />
440 2 1 11.4 3<br />
441 1 1 1 11.2 3<br />
442 3 10.8 3<br />
443 1 1 1 11 3<br />
444 1 1 1 10.8 3<br />
445 1 2 10.9 3<br />
446 1 2 10.4 3<br />
447 2 1 10.6 3<br />
448 1 1 1 10.3 3<br />
449 2 1 10.1 3<br />
450 2 1 10 3<br />
407
451 1 2 9.7 3<br />
452 1 1 1 9.9 3<br />
453 3 9.6 3<br />
454 1 1 1 9.3 3<br />
455 2 1 9.2 3<br />
456 1 2 8.9 3<br />
457 2 1 8.6 3<br />
458 2 1 8.2 3<br />
459 1 1 17.1 2<br />
460 1 1 16.4 2<br />
461 2 16 2<br />
462 1 1 15.1 2<br />
463 1 1 15.1 2<br />
464 1 1 14.4 2<br />
465 1 1 14.2 2<br />
466 2 14.2 2<br />
467 1 1 13.6 2<br />
468 1 1 13.5 2<br />
469 1 1 13.2 2<br />
470 1 1 13.1 2<br />
471 1 1 12.5 2<br />
472 2 12.8 2<br />
473 1 1 12.2 2<br />
474 1 1 12.2 2<br />
475 1 1 11.6 2<br />
476 1 1 11.5 2<br />
477 1 1 11.3 2<br />
478 1 1 11.2 2<br />
479 1 1 10.7 2<br />
480 1 1 10.5 2<br />
481 1 1 10.6 2<br />
482 1 1 10.3 2<br />
483 2 10.2 2<br />
484 1 1 10 2<br />
485 1 1 9.6 2<br />
486 1 1 9.6 2<br />
487 1 1 9.3 2<br />
488 1 1 8.9 2<br />
489 1 1 8.7 2<br />
490 1 1 8.3 2<br />
491 2 8.4 2<br />
408
23.5 Cooling<br />
23.5.1 6HP(U-6LA1E5)<br />
Combination criteria<br />
6HP<br />
Total indoor<br />
MAX 20.2<br />
capacity<br />
Rated 15.5<br />
(kW) MIN 7.8<br />
Total indoor unit<br />
MAX 8<br />
number MIN 2<br />
Combination (%) 50 ~ 130<br />
Indoor 0.8 1.0 1.25 1.5 1.75 2.0 2.5 3.0 3.5<br />
unit HP HP HP HP HP HP HP HP HP<br />
Wall<br />
mounted<br />
○ ○ ○ ○ ○ ○ ○<br />
NO.<br />
Mini<br />
cassette<br />
Big<br />
cassette<br />
○ ○ ○ ○ ○<br />
○ ○ ○<br />
Total<br />
indoor<br />
capacity<br />
Total<br />
indoor<br />
unit<br />
number<br />
Duct D4 ○ ○ ○ ○ ○ ○<br />
Duct D3 ○ ○ ○ ○ ○<br />
Cooling 2.2 2.8 3.2 3.6 4.5 5.6 6.3 7.1 9.0<br />
capacity kW kW kW kW kW kW kW kW kW<br />
1 5 2 1 20.2 8<br />
2 6 1 1 20 8<br />
3 4 4 20 8<br />
4 7 1 19.9 8<br />
5 5 2 1 19.8 8<br />
6 6 2 19.6 8<br />
7 6 1 1 19.6 8<br />
8 6 1 1 19.2 8<br />
9 7 1 19 8<br />
10 6 2 18.8 8<br />
11 7 1 18.6 8<br />
12 7 1 18.2 8<br />
13 8 17.6 8<br />
14 3 1 3 20.2 7<br />
15 1 4 1 1 20.2 7<br />
16 1 3 3 20.2 7<br />
17 5 1 1 20.2 7<br />
18 5 1 1 20.1 7<br />
19 2 4 1 20.1 7<br />
20 2 2 2 1 20 7<br />
21 2 1 4 20 7<br />
22 2 3 2 20 7<br />
23 5 2 20 7<br />
24 4 2 1 20 7<br />
25 3 2 1 1 19.9 7<br />
26 3 3 1 19.8 7<br />
27 3 1 1 2 19.8 7<br />
28 1 5 1 19.8 7<br />
29 5 1 1 19.8 7<br />
30 1 4 2 19.8 7<br />
409
31 4 2 1 19.7 7<br />
32 4 1 1 1 19.7 7<br />
33 2 3 1 1 19.6 7<br />
34 2 2 3 19.6 7<br />
35 4 3 19.6 7<br />
36 7 19.6 7<br />
37 6 1 19.5 7<br />
38 3 3 1 19.5 7<br />
39 3 1 2 1 19.4 7<br />
40 3 4 19.4 7<br />
41 1 5 1 19.4 7<br />
42 3 2 2 19.4 7<br />
43 5 1 1 19.4 7<br />
44 4 1 1 1 19.3 7<br />
45 2 3 2 19.2 7<br />
46 2 4 1 19.2 7<br />
47 5 1 1 19.1 7<br />
48 3 2 1 1 19 7<br />
49 3 1 3 19 7<br />
50 1 6 19 7<br />
51 4 2 1 18.9 7<br />
52 2 4 1 18.8 7<br />
53 4 2 1 18.8 7<br />
54 4 1 2 18.8 7<br />
55 6 1 18.8 7<br />
56 5 1 1 18.7 7<br />
57 3 2 2 18.6 7<br />
58 3 3 1 18.6 7<br />
59 4 1 1 1 18.4 7<br />
60 4 3 18.4 7<br />
61 2 5 18.4 7<br />
62 5 1 1 18.3 7<br />
63 3 3 1 18.2 7<br />
64 5 2 18.2 7<br />
65 4 1 2 18 7<br />
66 4 2 1 18 7<br />
67 5 1 1 17.8 7<br />
68 3 4 17.8 7<br />
69 6 1 17.7 7<br />
70 4 2 1 17.6 7<br />
71 5 1 1 17.4 7<br />
72 5 2 17.4 7<br />
73 4 3 17.2 7<br />
74 5 1 1 17 7<br />
75 6 1 16.8 7<br />
76 5 2 16.6 7<br />
77 6 1 16.4 7<br />
78 6 1 16 7<br />
79 7 15.4 7<br />
80 2 1 1 2 20.2 6<br />
81 1 2 1 1 1 20.2 6<br />
82 1 5 20.2 6<br />
83 4 2 20.2 6<br />
410
84 3 2 1 20.1 6<br />
85 2 2 1 1 20.1 6<br />
86 1 4 1 20.1 6<br />
87 3 1 1 1 20.1 6<br />
88 3 2 1 20.1 6<br />
89 3 3 20.1 6<br />
90 2 2 1 1 20.1 6<br />
91 1 3 1 1 20.1 6<br />
92 3 2 1 20.1 6<br />
93 1 2 1 2 20 6<br />
94 4 1 1 20 6<br />
95 2 2 1 1 20 6<br />
96 1 2 3 20 6<br />
97 4 2 20 6<br />
98 2 4 20 6<br />
99 2 1 2 1 20 6<br />
100 5 1 20 6<br />
101 4 2 20 6<br />
102 2 1 2 1 19.9 6<br />
103 3 1 1 1 19.9 6<br />
104 1 1 1 2 1 19.9 6<br />
105 1 3 1 1 19.9 6<br />
106 2 3 1 19.9 6<br />
107 2 2 1 1 19.9 6<br />
108 1 1 4 19.8 6<br />
109 2 2 2 19.8 6<br />
110 2 1 1 2 19.8 6<br />
111 1 2 2 1 19.8 6<br />
112 1 3 1 1 19.8 6<br />
113 3 1 1 1 19.7 6<br />
114 2 3 1 19.7 6<br />
115 2 3 1 19.7 6<br />
116 3 1 1 1 19.7 6<br />
117 1 4 1 19.7 6<br />
118 2 1 1 1 1 19.6 6<br />
119 2 3 1 19.6 6<br />
120 1 3 2 19.6 6<br />
121 5 1 19.6 6<br />
122 4 1 1 19.6 6<br />
123 5 1 19.6 6<br />
124 1 3 2 19.6 6<br />
125 2 2 1 1 19.5 6<br />
126 1 1 2 1 1 19.5 6<br />
127 1 4 1 19.5 6<br />
128 4 1 1 19.5 6<br />
129 1 2 2 1 19.5 6<br />
130 1 2 3 19.4 6<br />
131 2 1 1 2 19.4 6<br />
132 1 3 1 1 19.4 6<br />
133 1 1 4 19.4 6<br />
134 3 2 1 19.4 6<br />
135 2 1 2 1 19.3 6<br />
136 3 2 1 19.3 6<br />
411
137 3 1 1 1 19.3 6<br />
138 3 2 1 19.3 6<br />
139 3 2 1 19.3 6<br />
140 4 1 1 19.3 6<br />
141 2 1 2 1 19.2 6<br />
142 1 4 1 19.2 6<br />
143 6 19.2 6<br />
144 3 1 2 19.2 6<br />
145 2 2 2 19.2 6<br />
146 3 3 19.2 6<br />
147 2 2 1 1 19.2 6<br />
148 4 1 1 19.1 6<br />
149 1 2 1 1 1 19.1 6<br />
150 2 3 1 19.1 6<br />
151 3 1 1 1 19 6<br />
152 1 1 1 3 19 6<br />
153 1 3 2 19 6<br />
154 2 2 2 19 6<br />
155 1 4 1 19 6<br />
156 3 1 1 1 18.9 6<br />
157 4 1 1 18.9 6<br />
158 2 2 1 1 18.9 6<br />
159 2 1 2 1 18.9 6<br />
160 4 1 1 18.9 6<br />
161 3 1 2 18.8 6<br />
162 2 3 1 18.8 6<br />
163 1 5 18.8 6<br />
164 2 4 18.8 6<br />
165 2 2 1 1 18.8 6<br />
166 3 1 2 18.8 6<br />
167 4 1 1 18.7 6<br />
168 1 2 2 1 18.7 6<br />
169 4 1 1 18.7 6<br />
170 1 3 1 1 18.7 6<br />
171 3 2 1 18.6 6<br />
172 1 1 2 2 18.6 6<br />
173 1 4 1 18.6 6<br />
174 1 2 3 18.6 6<br />
175 3 1 1 1 18.6 6<br />
176 2 1 1 1 1 18.5 6<br />
177 2 3 1 18.5 6<br />
178 3 2 1 18.5 6<br />
179 5 1 18.5 6<br />
180 2 1 3 18.4 6<br />
181 3 2 1 18.4 6<br />
182 2 4 18.4 6<br />
183 4 2 18.4 6<br />
184 2 3 1 18.4 6<br />
185 4 1 1 18.3 6<br />
186 3 2 1 18.3 6<br />
187 1 3 1 1 18.3 6<br />
188 3 1 1 1 18.2 6<br />
189 1 1 3 1 18.2 6<br />
412
190 1 2 1 2 18.2 6<br />
191 1 5 18.2 6<br />
192 2 1 2 1 18.1 6<br />
193 5 1 18.1 6<br />
194 2 2 1 1 18.1 6<br />
195 4 1 1 18 6<br />
196 2 2 2 18 6<br />
197 3 3 18 6<br />
198 2 1 3 18 6<br />
199 4 1 1 18 6<br />
200 4 1 1 17.9 6<br />
201 3 1 1 1 17.9 6<br />
202 1 4 1 17.9 6<br />
203 1 2 2 1 17.8 6<br />
204 1 1 4 17.8 6<br />
205 4 2 17.8 6<br />
206 1 3 2 17.8 6<br />
207 3 2 1 17.8 6<br />
208 2 2 1 1 17.7 6<br />
209 4 1 1 17.6 6<br />
210 2 1 1 2 17.6 6<br />
211 4 2 17.6 6<br />
212 2 3 1 17.6 6<br />
213 5 1 17.6 6<br />
214 3 2 1 17.5 6<br />
215 3 1 1 1 17.5 6<br />
216 1 2 3 17.4 6<br />
217 3 3 17.4 6<br />
218 1 3 1 1 17.4 6<br />
219 5 1 17.3 6<br />
220 2 3 1 17.3 6<br />
221 2 1 2 1 17.2 6<br />
222 2 4 17.2 6<br />
223 4 1 1 17.2 6<br />
224 5 1 17.2 6<br />
225 2 2 2 17.2 6<br />
226 3 1 1 1 17.1 6<br />
227 3 1 2 17 6<br />
228 1 3 2 17 6<br />
229 1 4 1 17 6<br />
230 4 1 1 16.9 6<br />
231 2 2 1 1 16.8 6<br />
232 2 1 3 16.8 6<br />
233 6 16.8 6<br />
234 3 2 1 16.7 6<br />
235 3 2 1 16.6 6<br />
236 3 1 2 16.6 6<br />
237 5 1 16.6 6<br />
238 1 4 1 16.6 6<br />
239 4 1 1 16.5 6<br />
240 2 2 2 16.4 6<br />
241 2 3 1 16.4 6<br />
242 3 1 1 1 16.2 6<br />
413
243 3 3 16.2 6<br />
244 1 5 16.2 6<br />
245 4 1 1 16.1 6<br />
246 2 3 1 16 6<br />
247 4 2 16 6<br />
248 3 1 2 15.8 6<br />
249 3 2 1 15.8 6<br />
250 4 1 1 15.6 6<br />
251 2 4 15.6 6<br />
252 5 1 15.5 6<br />
253 3 2 1 15.4 6<br />
254 4 2 15.2 6<br />
255 4 1 1 15.2 6<br />
256 3 3 15 6<br />
257 4 1 1 14.8 6<br />
258 5 1 14.6 6<br />
259 4 2 14.4 6<br />
260 5 1 14.2 6<br />
261 5 1 13.8 6<br />
262 6 13.2 6<br />
263 2 1 1 1 20.2 5<br />
264 1 2 1 1 20.2 5<br />
265 2 1 2 20.2 5<br />
266 1 1 1 2 20.2 5<br />
267 1 1 1 1 1 20.2 5<br />
268 1 2 1 1 20.2 5<br />
269 1 4 20.2 5<br />
270 4 1 20.2 5<br />
271 2 2 1 20.2 5<br />
272 2 1 1 1 20.1 5<br />
273 1 3 1 20.1 5<br />
274 1 2 1 1 20.1 5<br />
275 3 1 1 20.1 5<br />
276 2 1 2 20.1 5<br />
277 1 1 1 1 1 20.1 5<br />
278 1 2 1 1 20 5<br />
279 1 1 2 1 20 5<br />
280 2 1 2 20 5<br />
281 1 2 1 1 20 5<br />
282 4 1 20 5<br />
283 3 1 1 20 5<br />
284 3 1 1 20 5<br />
285 2 1 1 1 20 5<br />
286 2 2 1 19.9 5<br />
287 1 3 1 19.9 5<br />
288 1 2 1 1 19.9 5<br />
289 2 3 19.9 5<br />
290 4 1 19.9 5<br />
291 2 2 1 19.9 5<br />
292 1 1 3 19.9 5<br />
414
293 2 1 1 1 19.9 5<br />
294 2 1 1 1 19.9 5<br />
295 1 1 1 1 1 19.8 5<br />
296 2 2 1 19.8 5<br />
297 1 2 2 19.8 5<br />
298 3 2 19.8 5<br />
299 2 1 1 1 19.8 5<br />
300 2 1 2 19.8 5<br />
301 1 1 1 1 1 19.8 5<br />
302 1 1 1 2 19.8 5<br />
303 1 1 2 1 19.7 5<br />
304 3 1 1 19.7 5<br />
305 1 1 1 1 1 19.7 5<br />
306 2 2 1 19.7 5<br />
307 1 2 1 1 19.7 5<br />
308 2 1 1 1 19.6 5<br />
309 1 3 1 19.6 5<br />
310 2 1 1 1 19.6 5<br />
311 1 1 2 1 19.6 5<br />
312 1 3 1 19.6 5<br />
313 3 2 19.6 5<br />
314 2 1 1 1 19.5 5<br />
315 2 1 1 1 19.5 5<br />
316 1 1 2 1 19.5 5<br />
317 1 1 3 19.5 5<br />
318 1 3 1 19.5 5<br />
319 3 1 1 19.5 5<br />
320 1 2 1 1 19.5 5<br />
321 1 2 1 1 19.4 5<br />
322 2 1 1 1 19.4 5<br />
323 1 1 1 2 19.4 5<br />
324 1 2 2 19.4 5<br />
325 1 2 1 1 19.4 5<br />
326 1 1 1 1 1 19.4 5<br />
327 1 2 1 1 19.3 5<br />
328 1 3 1 19.3 5<br />
329 1 1 3 19.3 5<br />
330 1 2 1 1 19.3 5<br />
331 1 1 2 1 19.3 5<br />
332 3 1 1 19.3 5<br />
333 2 1 1 1 19.3 5<br />
334 2 1 1 1 19.2 5<br />
335 2 2 1 19.2 5<br />
336 1 3 1 19.2 5<br />
337 3 1 1 19.2 5<br />
338 3 2 19.2 5<br />
339 3 1 1 19.2 5<br />
340 2 1 2 19.2 5<br />
341 1 1 1 1 1 19.1 5<br />
342 2 2 1 19.1 5<br />
415
343 4 1 19.1 5<br />
344 2 2 1 19.1 5<br />
345 2 3 19.1 5<br />
346 2 1 1 1 19.1 5<br />
347 1 2 1 1 19.1 5<br />
348 3 1 1 19.1 5<br />
349 1 1 1 1 1 19 5<br />
350 2 1 2 19 5<br />
351 1 2 2 19 5<br />
352 2 2 1 19 5<br />
353 2 2 1 19 5<br />
354 1 2 2 19 5<br />
355 1 1 2 1 18.9 5<br />
356 1 1 1 1 1 18.9 5<br />
357 1 1 3 18.9 5<br />
358 2 1 1 1 18.9 5<br />
359 1 3 1 18.9 5<br />
360 4 1 18.9 5<br />
361 3 1 1 18.8 5<br />
362 2 1 2 18.8 5<br />
363 3 1 1 18.8 5<br />
364 2 1 1 1 18.8 5<br />
365 1 1 2 1 18.8 5<br />
366 2 1 1 1 18.8 5<br />
367 1 2 1 1 18.7 5<br />
368 1 3 1 18.7 5<br />
369 2 2 1 18.7 5<br />
370 2 1 1 1 18.7 5<br />
371 1 1 1 1 1 18.7 5<br />
372 3 1 1 18.7 5<br />
373 1 1 1 2 18.6 5<br />
374 3 2 18.6 5<br />
375 1 3 1 18.6 5<br />
376 1 2 1 1 18.6 5<br />
377 1 3 1 18.5 5<br />
378 1 1 2 1 18.5 5<br />
379 1 2 1 1 18.5 5<br />
380 1 2 1 1 18.5 5<br />
381 1 1 2 1 18.5 5<br />
382 1 1 3 18.5 5<br />
383 3 1 1 18.5 5<br />
384 3 1 1 18.5 5<br />
385 2 1 1 1 18.4 5<br />
386 1 2 1 1 18.4 5<br />
387 4 1 18.4 5<br />
388 1 2 2 18.4 5<br />
389 2 2 1 18.4 5<br />
390 3 1 1 18.4 5<br />
391 2 1 2 18.4 5<br />
392 2 1 1 1 18.3 5<br />
416
393 2 2 1 18.3 5<br />
394 1 1 1 1 1 18.3 5<br />
395 4 1 18.3 5<br />
396 3 1 1 18.3 5<br />
397 1 1 2 1 18.2 5<br />
398 3 1 1 18.2 5<br />
399 1 2 2 18.2 5<br />
400 2 1 2 18.2 5<br />
401 1 2 1 1 18.1 5<br />
402 2 2 1 18.1 5<br />
403 1 3 1 18.1 5<br />
404 1 3 1 18.1 5<br />
405 2 1 1 1 18.1 5<br />
406 1 1 1 1 1 18.1 5<br />
407 1 1 1 2 18 5<br />
408 2 1 1 1 18 5<br />
409 1 3 1 18 5<br />
410 5 18 5<br />
411 2 1 1 1 18 5<br />
412 2 2 1 17.9 5<br />
413 3 1 1 17.9 5<br />
414 2 2 1 17.9 5<br />
415 2 1 1 1 17.9 5<br />
416 2 3 17.9 5<br />
417 1 2 1 1 17.9 5<br />
418 2 1 2 17.8 5<br />
419 1 2 1 1 17.8 5<br />
420 4 1 17.8 5<br />
421 3 2 17.8 5<br />
422 1 1 2 1 17.8 5<br />
423 2 1 1 1 17.7 5<br />
424 3 1 1 17.7 5<br />
425 1 1 2 1 17.7 5<br />
426 1 1 2 1 17.7 5<br />
427 1 2 1 1 17.7 5<br />
428 1 3 1 17.7 5<br />
429 1 4 17.6 5<br />
430 1 2 2 17.6 5<br />
431 2 2 1 17.6 5<br />
432 1 1 1 2 17.6 5<br />
433 3 1 1 17.6 5<br />
434 2 1 1 1 17.5 5<br />
435 2 1 1 1 17.5 5<br />
436 1 3 1 17.5 5<br />
437 4 1 17.5 5<br />
438 3 1 1 17.4 5<br />
439 1 1 1 1 1 17.4 5<br />
440 1 3 1 17.4 5<br />
441 3 2 17.4 5<br />
442 1 2 1 1 17.3 5<br />
417
443 4 1 17.3 5<br />
444 3 1 1 17.3 5<br />
445 2 2 1 17.3 5<br />
446 1 2 1 1 17.3 5<br />
447 2 1 1 1 17.3 5<br />
448 2 3 17.2 5<br />
449 2 2 1 17.2 5<br />
450 1 1 1 2 17.2 5<br />
451 1 4 17.2 5<br />
452 3 1 1 17.2 5<br />
453 1 1 2 1 17.1 5<br />
454 2 2 1 17.1 5<br />
455 2 2 1 17.1 5<br />
456 2 1 1 1 17.1 5<br />
457 1 1 2 1 17 5<br />
458 2 1 2 17 5<br />
459 1 2 1 1 17 5<br />
460 1 3 1 16.9 5<br />
461 3 1 1 16.9 5<br />
462 2 1 1 1 16.9 5<br />
463 1 3 1 16.9 5<br />
464 2 1 1 1 16.8 5<br />
465 1 1 3 16.8 5<br />
466 3 2 16.8 5<br />
467 1 2 2 16.8 5<br />
468 4 1 16.8 5<br />
469 1 2 1 1 16.7 5<br />
470 3 1 1 16.7 5<br />
471 2 1 1 1 16.7 5<br />
472 1 1 2 1 16.7 5<br />
473 2 1 2 16.6 5<br />
474 1 2 1 1 16.6 5<br />
475 1 4 16.6 5<br />
476 2 2 1 16.5 5<br />
477 3 1 1 16.5 5<br />
478 3 1 1 16.5 5<br />
479 3 1 1 16.5 5<br />
480 4 1 16.4 5<br />
481 2 2 1 16.4 5<br />
482 1 2 2 16.4 5<br />
483 2 3 16.4 5<br />
484 2 1 1 1 16.4 5<br />
485 1 3 1 16.3 5<br />
486 2 2 1 16.3 5<br />
487 1 1 1 1 1 16.3 5<br />
488 1 1 3 16.2 5<br />
489 2 1 2 16.2 5<br />
490 1 3 1 16.2 5<br />
491 3 1 1 16.1 5<br />
492 2 2 1 16.1 5<br />
418
493 3 1 1 16.1 5<br />
494 1 3 1 16 5<br />
495 2 1 1 1 16 5<br />
496 2 1 2 16 5<br />
497 5 16 5<br />
498 1 1 2 1 15.9 5<br />
499 4 1 15.9 5<br />
500 1 2 1 1 15.9 5<br />
501 1 2 2 15.8 5<br />
502 1 1 3 15.8 5<br />
503 3 1 1 15.8 5<br />
504 2 1 1 1 15.7 5<br />
505 3 1 1 15.7 5<br />
506 4 1 15.7 5<br />
507 1 4 15.6 5<br />
508 3 2 15.6 5<br />
509 2 2 1 15.6 5<br />
510 2 2 1 15.6 5<br />
511 3 2 15.6 5<br />
512 1 2 1 1 15.5 5<br />
513 3 1 1 15.4 5<br />
514 1 3 1 15.4 5<br />
515 1 1 1 2 15.4 5<br />
516 2 2 1 15.3 5<br />
517 2 1 1 1 15.3 5<br />
518 2 3 15.2 5<br />
519 2 3 15.2 5<br />
520 3 1 1 15.2 5<br />
521 4 1 15.1 5<br />
522 1 3 1 15.1 5<br />
523 1 1 2 1 15 5<br />
524 1 4 15 5<br />
525 1 2 2 15 5<br />
526 3 1 1 15 5<br />
527 2 1 1 1 14.9 5<br />
528 2 1 2 14.8 5<br />
529 3 2 14.8 5<br />
530 4 1 14.8 5<br />
531 3 1 1 14.7 5<br />
532 1 1 3 14.6 5<br />
533 1 2 1 1 14.6 5<br />
534 2 2 1 14.5 5<br />
535 2 2 1 14.4 5<br />
536 2 1 2 14.4 5<br />
537 4 1 14.4 5<br />
538 4 1 14.4 5<br />
539 3 1 1 14.3 5<br />
540 1 2 2 14.2 5<br />
541 1 3 1 14.2 5<br />
542 2 3 14 5<br />
419
543 2 1 1 1 14 5<br />
544 5 14 5<br />
545 3 1 1 13.9 5<br />
546 3 2 13.8 5<br />
547 1 3 1 13.8 5<br />
548 2 1 2 13.6 5<br />
549 2 2 1 13.6 5<br />
550 3 1 1 13.4 5<br />
551 1 4 13.4 5<br />
552 4 1 13.3 5<br />
553 2 2 1 13.2 5<br />
554 3 2 13 5<br />
555 3 1 1 13 5<br />
556 2 3 12.8 5<br />
557 3 1 1 12.6 5<br />
558 4 1 12.4 5<br />
559 3 2 12.2 5<br />
560 4 1 12 5<br />
561 4 1 11.6 5<br />
562 5 11 5<br />
563 1 1 1 1 20.2 4<br />
564 1 1 2 20.2 4<br />
565 1 2 1 20.2 4<br />
566 2 1 1 20.2 4<br />
567 2 2 20.2 4<br />
568 1 1 1 1 20.1 4<br />
569 1 1 1 1 20 4<br />
570 1 1 2 20 4<br />
571 1 1 1 1 20 4<br />
572 1 1 1 1 20 4<br />
573 1 3 20 4<br />
574 2 1 1 19.9 4<br />
575 2 1 1 19.9 4<br />
576 1 1 1 1 19.9 4<br />
577 1 1 2 19.9 4<br />
578 3 1 19.8 4<br />
579 2 2 19.8 4<br />
580 3 1 19.8 4<br />
581 2 1 1 19.8 4<br />
582 2 2 19.8 4<br />
583 1 1 1 1 19.8 4<br />
584 1 2 1 19.7 4<br />
585 2 1 1 19.7 4<br />
586 1 2 1 19.7 4<br />
587 1 1 2 19.6 4<br />
588 1 1 1 1 19.6 4<br />
589 1 1 1 1 19.6 4<br />
590 1 3 19.6 4<br />
591 1 1 1 1 19.5 4<br />
592 1 1 1 1 19.5 4<br />
420
593 1 1 1 1 19.4 4<br />
594 1 2 1 19.4 4<br />
595 1 1 2 19.4 4<br />
596 1 1 1 1 19.4 4<br />
597 1 1 1 1 19.3 4<br />
598 1 1 2 19.3 4<br />
599 1 2 1 19.3 4<br />
600 1 1 2 19.3 4<br />
601 1 1 1 1 19.2 4<br />
602 1 1 2 19.2 4<br />
603 1 1 1 1 19.2 4<br />
604 2 1 1 19.1 4<br />
605 1 1 1 1 19.1 4<br />
606 2 1 1 19.1 4<br />
607 2 1 1 19.1 4<br />
608 3 1 19.1 4<br />
609 2 1 1 19 4<br />
610 2 2 19 4<br />
611 2 1 1 19 4<br />
612 1 2 1 19 4<br />
613 1 1 2 19 4<br />
614 2 1 1 19 4<br />
615 1 3 19 4<br />
616 1 1 1 1 18.9 4<br />
617 1 1 2 18.9 4<br />
618 1 2 1 18.9 4<br />
619 1 2 1 18.9 4<br />
620 1 1 1 1 18.8 4<br />
621 2 1 1 18.8 4<br />
622 1 1 1 1 18.7 4<br />
623 1 1 1 1 18.7 4<br />
624 1 1 1 1 18.6 4<br />
625 1 1 2 18.6 4<br />
626 3 1 18.6 4<br />
627 2 2 18.6 4<br />
628 1 1 1 1 18.6 4<br />
629 1 2 1 18.5 4<br />
630 1 1 1 1 18.5 4<br />
631 1 1 1 1 18.5 4<br />
632 1 1 2 18.5 4<br />
633 1 1 1 1 18.4 4<br />
634 1 1 1 1 18.4 4<br />
635 1 2 1 18.4 4<br />
636 1 1 2 18.4 4<br />
637 2 2 18.4 4<br />
638 2 1 1 18.3 4<br />
639 1 1 1 1 18.3 4<br />
640 1 2 1 18.3 4<br />
641 2 1 1 18.3 4<br />
642 1 2 1 18.2 4<br />
421
643 2 1 1 18.2 4<br />
644 2 2 18.2 4<br />
645 1 2 1 18.2 4<br />
646 1 1 1 1 18.1 4<br />
647 1 2 1 18.1 4<br />
648 1 1 1 1 18 4<br />
649 1 1 2 18 4<br />
650 1 1 2 18 4<br />
651 2 1 1 18 4<br />
652 1 1 1 1 18 4<br />
653 2 1 1 18 4<br />
654 4 18 4<br />
655 1 1 1 1 17.9 4<br />
656 3 1 17.9 4<br />
657 2 1 1 17.9 4<br />
658 1 1 2 17.9 4<br />
659 2 1 1 17.8 4<br />
660 1 2 1 17.8 4<br />
661 2 1 1 17.8 4<br />
662 1 1 1 1 17.7 4<br />
663 1 1 1 1 17.7 4<br />
664 1 1 1 1 17.6 4<br />
665 1 1 1 1 17.6 4<br />
666 1 2 1 17.6 4<br />
667 2 2 17.6 4<br />
668 1 1 1 1 17.6 4<br />
669 1 1 2 17.6 4<br />
670 1 1 2 17.6 4<br />
671 1 2 1 17.5 4<br />
672 1 2 1 17.5 4<br />
673 2 1 1 17.5 4<br />
674 1 1 1 1 17.4 4<br />
675 3 1 17.4 4<br />
676 1 2 1 17.4 4<br />
677 1 1 1 1 17.3 4<br />
678 2 1 1 17.3 4<br />
679 1 1 1 1 17.2 4<br />
680 1 1 2 17.2 4<br />
681 2 1 1 17.2 4<br />
682 2 1 1 17.2 4<br />
683 1 1 1 1 17.2 4<br />
684 2 1 1 17.1 4<br />
685 1 2 1 17.1 4<br />
686 3 1 17.1 4<br />
687 1 3 17.1 4<br />
688 2 1 1 17.1 4<br />
689 1 1 1 1 17 4<br />
690 2 1 1 17 4<br />
691 2 2 17 4<br />
692 1 1 2 17 4<br />
422
693 1 1 1 1 16.9 4<br />
694 1 1 1 1 16.9 4<br />
695 1 1 1 1 16.8 4<br />
696 1 2 1 16.8 4<br />
697 1 2 1 16.8 4<br />
698 2 2 16.8 4<br />
699 3 1 16.7 4<br />
700 1 1 1 1 16.7 4<br />
701 1 2 1 16.7 4<br />
702 1 3 16.7 4<br />
703 2 1 1 16.6 4<br />
704 1 1 2 16.6 4<br />
705 1 1 1 1 16.6 4<br />
706 1 1 1 1 16.6 4<br />
707 2 1 1 16.5 4<br />
708 1 2 1 16.5 4<br />
709 1 1 1 1 16.5 4<br />
710 3 1 16.4 4<br />
711 2 1 1 16.4 4<br />
712 2 1 1 16.3 4<br />
713 1 2 1 16.3 4<br />
714 1 3 16.3 4<br />
715 2 1 1 16.3 4<br />
716 1 2 1 16.3 4<br />
717 2 1 1 16.3 4<br />
718 1 1 1 1 16.2 4<br />
719 2 2 16.2 4<br />
720 2 1 1 16.2 4<br />
721 1 1 2 16.2 4<br />
722 1 1 1 1 16.1 4<br />
723 1 1 1 1 16.1 4<br />
724 1 2 1 16 4<br />
725 2 1 1 16 4<br />
726 3 1 15.9 4<br />
727 2 1 1 15.9 4<br />
728 1 1 1 1 15.9 4<br />
729 1 1 1 1 15.9 4<br />
730 1 1 2 15.8 4<br />
731 1 1 1 1 15.8 4<br />
732 1 2 1 15.7 4<br />
733 1 1 1 1 15.7 4<br />
734 1 2 1 15.7 4<br />
735 1 3 15.7 4<br />
736 2 1 1 15.7 4<br />
737 3 1 15.6 4<br />
738 2 1 1 15.6 4<br />
739 1 2 1 15.6 4<br />
740 2 2 15.6 4<br />
741 1 1 1 1 15.5 4<br />
742 1 2 1 15.5 4<br />
423
743 2 1 1 15.5 4<br />
744 3 1 15.5 4<br />
745 2 2 15.4 4<br />
746 1 1 2 15.4 4<br />
747 1 1 1 1 15.3 4<br />
748 3 1 15.3 4<br />
749 1 1 1 1 15.3 4<br />
750 3 1 15.2 4<br />
751 1 1 1 1 15.2 4<br />
752 2 1 1 15.2 4<br />
753 2 1 1 15.1 4<br />
754 2 1 1 15.1 4<br />
755 1 1 1 1 15.1 4<br />
756 1 1 2 15 4<br />
757 1 2 1 15 4<br />
758 1 2 1 14.9 4<br />
759 1 2 1 14.9 4<br />
760 1 2 1 14.9 4<br />
761 1 1 1 1 14.9 4<br />
762 1 1 2 14.8 4<br />
763 1 2 1 14.8 4<br />
764 2 1 1 14.8 4<br />
765 2 1 1 14.7 4<br />
766 3 1 14.7 4<br />
767 1 1 1 1 14.6 4<br />
768 2 2 14.6 4<br />
769 1 1 1 1 14.5 4<br />
770 2 1 1 14.5 4<br />
771 1 2 1 14.5 4<br />
772 2 1 1 14.5 4<br />
773 1 1 2 14.4 4<br />
774 2 1 1 14.4 4<br />
775 4 14.4 4<br />
776 2 1 1 14.3 4<br />
777 2 1 1 14.3 4<br />
778 1 2 1 14.2 4<br />
779 1 1 1 1 14.2 4<br />
780 3 1 14.1 4<br />
781 1 1 1 1 14.1 4<br />
782 1 2 1 14.1 4<br />
783 1 3 14 4<br />
784 1 1 2 14 4<br />
785 3 1 14 4<br />
786 2 1 1 13.9 4<br />
787 1 2 1 13.9 4<br />
788 1 1 1 1 13.8 4<br />
789 1 2 1 13.7 4<br />
790 3 1 13.7 4<br />
791 2 1 1 13.7 4<br />
792 2 2 13.6 4<br />
424
793 1 3 13.6 4<br />
794 2 1 1 13.6 4<br />
795 1 1 1 1 13.5 4<br />
796 2 1 1 13.5 4<br />
797 2 2 13.4 4<br />
798 1 2 1 13.4 4<br />
799 2 1 1 13.3 4<br />
800 3 1 13.2 4<br />
801 2 1 1 13.2 4<br />
802 1 1 2 13.2 4<br />
803 1 2 1 13.1 4<br />
804 1 1 1 1 13.1 4<br />
805 1 3 13 4<br />
806 3 1 12.9 4<br />
807 3 1 12.9 4<br />
808 4 12.8 4<br />
809 2 2 12.8 4<br />
810 2 1 1 12.8 4<br />
811 1 2 1 12.8 4<br />
812 1 1 1 1 12.7 4<br />
813 1 1 2 12.6 4<br />
814 2 1 1 12.5 4<br />
815 1 3 12.4 4<br />
816 2 1 1 12.4 4<br />
817 1 2 1 12.3 4<br />
818 1 2 1 12.2 4<br />
819 1 1 2 12.2 4<br />
820 3 1 12.2 4<br />
821 2 1 1 12.1 4<br />
822 2 2 12 4<br />
823 3 1 12 4<br />
824 1 3 11.8 4<br />
825 1 1 1 1 11.8 4<br />
826 2 1 1 11.7 4<br />
827 2 2 11.6 4<br />
828 3 1 11.6 4<br />
829 1 1 2 11.4 4<br />
830 1 2 1 11.4 4<br />
831 2 1 1 11.2 4<br />
832 4 11.2 4<br />
833 3 1 11.1 4<br />
834 1 2 1 11 4<br />
835 2 2 10.8 4<br />
836 2 1 1 10.8 4<br />
837 1 3 10.6 4<br />
838 2 1 1 10.4 4<br />
839 3 1 10.2 4<br />
840 2 2 10 4<br />
841 3 1 9.8 4<br />
842 3 1 9.4 4<br />
425
843 4 8.8 4<br />
844 1 2 20.2 3<br />
845 2 1 20.2 3<br />
846 1 1 1 19.8 3<br />
847 1 2 19.8 3<br />
848 1 1 1 19.7 3<br />
849 2 1 19.7 3<br />
850 1 1 1 19.3 3<br />
851 1 1 1 19.1 3<br />
852 1 1 1 19 3<br />
853 1 1 1 18.9 3<br />
854 1 1 1 18.9 3<br />
855 3 18.9 3<br />
856 1 2 18.7 3<br />
857 1 1 1 18.5 3<br />
858 1 1 1 18.3 3<br />
859 2 1 18.3 3<br />
860 1 1 1 18.2 3<br />
861 1 2 18.2 3<br />
862 1 1 1 18.1 3<br />
863 2 1 18 3<br />
864 1 1 1 17.9 3<br />
865 1 2 17.8 3<br />
866 1 1 1 17.8 3<br />
867 1 1 1 17.5 3<br />
868 2 1 17.5 3<br />
869 1 1 1 17.4 3<br />
870 1 2 17.4 3<br />
871 1 1 1 17.2 3<br />
872 1 1 1 17.1 3<br />
873 1 2 17.1 3<br />
874 1 2 17 3<br />
875 1 1 1 17 3<br />
876 1 1 1 16.8 3<br />
877 3 16.8 3<br />
878 1 1 1 16.7 3<br />
879 1 1 1 16.6 3<br />
880 1 2 16.4 3<br />
881 1 1 1 16.4 3<br />
882 1 1 1 16.3 3<br />
883 1 1 1 16.3 3<br />
884 1 1 1 16.2 3<br />
885 2 1 16.2 3<br />
886 1 2 16.2 3<br />
887 2 1 16.1 3<br />
888 1 1 1 15.9 3<br />
889 1 1 1 15.8 3<br />
890 1 2 15.8 3<br />
891 1 1 1 15.7 3<br />
892 1 2 15.7 3<br />
426
893 1 1 1 15.6 3<br />
894 1 1 1 15.5 3<br />
895 1 1 1 15.5 3<br />
896 1 1 1 15.4 3<br />
897 2 1 15.4 3<br />
898 1 2 15.4 3<br />
899 2 1 15.3 3<br />
900 1 1 1 15.2 3<br />
901 1 1 1 15.1 3<br />
902 1 1 1 15 3<br />
903 1 1 1 14.9 3<br />
904 1 1 1 14.8 3<br />
905 1 2 14.8 3<br />
906 1 1 1 14.8 3<br />
907 1 2 14.8 3<br />
908 1 1 1 14.7 3<br />
909 2 1 14.6 3<br />
910 2 1 14.6 3<br />
911 1 1 1 14.4 3<br />
912 1 1 1 14.4 3<br />
913 1 1 1 14.4 3<br />
914 1 2 14.4 3<br />
915 2 1 14.3 3<br />
916 1 1 1 14.1 3<br />
917 1 1 1 14 3<br />
918 1 2 14 3<br />
919 1 1 1 14 3<br />
920 1 1 1 13.9 3<br />
921 1 1 1 13.8 3<br />
922 1 1 1 13.7 3<br />
923 1 1 1 13.6 3<br />
924 1 1 1 13.5 3<br />
925 2 1 13.5 3<br />
926 3 13.5 3<br />
927 2 1 13.5 3<br />
928 2 1 13.4 3<br />
929 1 2 13.4 3<br />
930 1 1 1 13.3 3<br />
931 1 1 1 13.1 3<br />
932 1 1 1 13.1 3<br />
933 1 1 1 13 3<br />
934 1 1 1 12.9 3<br />
935 1 1 1 12.9 3<br />
936 2 1 12.8 3<br />
937 2 1 12.7 3<br />
938 1 1 1 12.7 3<br />
939 2 1 12.7 3<br />
940 1 2 12.6 3<br />
941 1 1 1 12.5 3<br />
942 1 1 1 12.4 3<br />
427
943 1 1 1 12.3 3<br />
944 1 1 1 12.3 3<br />
945 1 2 12.2 3<br />
946 1 1 1 12.1 3<br />
947 1 1 1 12.1 3<br />
948 1 1 1 12 3<br />
949 2 1 12 3<br />
950 2 1 11.9 3<br />
951 1 2 11.8 3<br />
952 2 1 11.7 3<br />
953 1 1 1 11.7 3<br />
954 1 1 1 11.6 3<br />
955 2 1 11.5 3<br />
956 1 1 1 11.4 3<br />
957 1 1 1 11.3 3<br />
958 1 1 1 11.3 3<br />
959 1 2 11.2 3<br />
960 2 1 11.2 3<br />
961 1 1 1 11 3<br />
962 1 1 1 10.9 3<br />
963 2 1 10.9 3<br />
964 3 10.8 3<br />
965 2 1 10.7 3<br />
966 1 1 1 10.6 3<br />
967 1 1 1 10.5 3<br />
968 1 2 10.4 3<br />
969 1 1 1 10.3 3<br />
970 2 1 10.1 3<br />
971 1 2 10 3<br />
972 2 1 10 3<br />
973 2 1 10 3<br />
974 1 1 1 9.9 3<br />
975 3 9.6 3<br />
976 1 1 1 9.6 3<br />
977 1 1 1 9.5 3<br />
978 1 2 9.4 3<br />
979 2 1 9.2 3<br />
980 1 2 9.2 3<br />
981 1 1 1 9 3<br />
982 2 1 8.9 3<br />
983 2 1 8.8 3<br />
984 1 2 8.6 3<br />
985 1 1 1 8.6 3<br />
986 3 8.4 3<br />
987 1 1 1 8.2 3<br />
988 2 1 8 3<br />
989 1 2 7.8 3<br />
990 2 18 2<br />
991 1 1 16.1 2<br />
992 1 1 15.3 2<br />
428
993 1 1 14.6 2<br />
994 2 14.2 2<br />
995 1 1 13.5 2<br />
996 1 1 13.4 2<br />
997 1 1 12.7 2<br />
998 1 1 12.6 2<br />
999 2 12.6 2<br />
1000 1 1 12.2 2<br />
1001 1 1 11.9 2<br />
1002 1 1 11.8 2<br />
1003 1 1 11.6 2<br />
1004 1 1 11.2 2<br />
1005 2 11.2 2<br />
1006 1 1 10.8 2<br />
1007 1 1 10.7 2<br />
1008 1 1 10.3 2<br />
1009 1 1 10.1 2<br />
1010 1 1 9.9 2<br />
1011 1 1 9.9 2<br />
1012 1 1 9.5 2<br />
1013 1 1 9.3 2<br />
1014 1 1 9.2 2<br />
1015 1 1 9.1 2<br />
1016 2 9 2<br />
1017 1 1 8.8 2<br />
1018 1 1 8.5 2<br />
1019 1 1 8.4 2<br />
1020 1 1 8.1 2<br />
1021 1 1 7.8 2<br />
429
23.6 Heating<br />
23.6.1 6HP(U-6LA1E5)<br />
Indoor 0.8 1.0 1.25 1.5 1.75 2.0 2.5 3.0 3.5<br />
unit HP HP HP HP HP HP HP HP HP<br />
Wall<br />
mounted<br />
○ ○ ○ ○ ○ ○ ○<br />
NO.<br />
Mini<br />
cassette<br />
Big<br />
cassette<br />
○ ○ ○ ○ ○<br />
○ ○ ○<br />
Total<br />
indoor<br />
capacity<br />
Total<br />
indoor<br />
unit<br />
number<br />
Duct D4 ○ ○ ○ ○ ○ ○<br />
Duct D3 ○ ○ ○ ○ ○<br />
Heating 2.5 3.2 3.6 4.2 5.1 6.4 7.1 8.0 10.0<br />
capacity kW kW kW kW kW kW kW kW kW<br />
1 5 2 1 23.1 8<br />
2 6 1 1 22.8 8<br />
3 4 4 22.8 8<br />
4 7 1 22.6 8<br />
5 5 2 1 22.5 8<br />
6 6 2 22.2 8<br />
7 6 1 1 22.4 8<br />
8 6 1 1 21.8 8<br />
9 7 1 21.7 8<br />
10 6 2 21.4 8<br />
11 7 1 21.1 8<br />
12 7 1 20.7 8<br />
13 8 20 8<br />
14 3 1 3 23.3 7<br />
15 1 4 1 1 23.1 7<br />
16 1 3 3 22.9 7<br />
17 5 1 1 23.1 7<br />
18 5 1 1 22.8 7<br />
19 2 4 1 22.9 7<br />
20 2 2 2 1 22.8 7<br />
21 2 1 4 22.6 7<br />
22 2 3 2 23 7<br />
23 5 2 22.7 7<br />
24 4 2 1 22.8 7<br />
25 3 2 1 1 22.6 7<br />
26 3 3 1 22.5 7<br />
27 3 1 1 2 22.7 7<br />
28 1 5 1 22.7 7<br />
29 5 1 1 22.5 7<br />
30 1 4 2 22.5 7<br />
31 4 2 1 22.3 7<br />
32 4 1 1 1 22.5 7<br />
33 2 3 1 1 22.4 7<br />
34 2 2 3 22.2 7<br />
35 4 3 22.6 7<br />
36 7 22.4 7<br />
37 6 1 22.1 7<br />
38 3 3 1 22.2 7<br />
39 3 1 2 1 22.1 7<br />
430
40 3 4 21.9 7<br />
41 1 5 1 22.1 7<br />
42 3 2 2 22.3 7<br />
43 5 1 1 22.1 7<br />
44 4 1 1 1 21.9 7<br />
45 2 3 2 21.8 7<br />
46 2 4 1 22 7<br />
47 5 1 1 21.8 7<br />
48 3 2 1 1 21.7 7<br />
49 3 1 3 21.5 7<br />
50 1 6 21.7 7<br />
51 4 2 1 21.5 7<br />
52 2 4 1 21.4 7<br />
53 4 2 1 21.4 7<br />
54 4 1 2 21.6 7<br />
55 6 1 21.4 7<br />
56 5 1 1 21.2 7<br />
57 3 2 2 21.1 7<br />
58 3 3 1 21.3 7<br />
59 4 1 1 1 21 7<br />
60 4 3 20.8 7<br />
61 2 5 21 7<br />
62 5 1 1 20.8 7<br />
63 3 3 1 20.7 7<br />
64 5 2 20.9 7<br />
65 4 1 2 20.4 7<br />
66 4 2 1 20.6 7<br />
67 5 1 1 20.3 7<br />
68 3 4 20.3 7<br />
69 6 1 20.1 7<br />
70 4 2 1 20 7<br />
71 5 1 1 19.9 7<br />
72 5 2 19.7 7<br />
73 4 3 19.6 7<br />
74 5 1 1 19.3 7<br />
75 6 1 19.2 7<br />
76 5 2 18.9 7<br />
77 6 1 18.6 7<br />
78 6 1 18.2 7<br />
79 7 17.5 7<br />
80 2 1 1 2 23 6<br />
81 1 2 1 1 1 23.1 6<br />
82 1 5 23.5 6<br />
83 4 2 23 6<br />
84 3 2 1 22.7 6<br />
85 2 2 1 1 22.9 6<br />
86 1 4 1 22.7 6<br />
87 3 1 1 1 22.9 6<br />
88 3 2 1 23 6<br />
89 3 3 22.8 6<br />
90 2 2 1 1 22.9 6<br />
91 1 3 1 1 22.8 6<br />
92 3 2 1 23.1 6<br />
431
93 1 2 1 2 22.7 6<br />
94 4 1 1 22.8 6<br />
95 2 2 1 1 22.8 6<br />
96 1 2 3 23 6<br />
97 4 2 22.8 6<br />
98 2 4 23.2 6<br />
99 2 1 2 1 23 6<br />
100 5 1 22.5 6<br />
101 4 2 22.8 6<br />
102 2 1 2 1 22.5 6<br />
103 3 1 1 1 22.6 6<br />
104 1 1 1 2 1 22.8 6<br />
105 1 3 1 1 22.6 6<br />
106 2 3 1 22.6 6<br />
107 2 2 1 1 22.7 6<br />
108 1 1 4 22.9 6<br />
109 2 2 2 22.4 6<br />
110 2 1 1 2 22.6 6<br />
111 1 2 2 1 22.5 6<br />
112 1 3 1 1 22.7 6<br />
113 3 1 1 1 22.3 6<br />
114 2 3 1 22.3 6<br />
115 2 3 1 22.7 6<br />
116 3 1 1 1 22.4 6<br />
117 1 4 1 22.4 6<br />
118 2 1 1 1 1 22.4 6<br />
119 2 3 1 22.2 6<br />
120 1 3 2 22.4 6<br />
121 5 1 22.2 6<br />
122 4 1 1 22.2 6<br />
123 5 1 22.4 6<br />
124 1 3 2 22.3 6<br />
125 2 2 1 1 22.1 6<br />
126 1 1 2 1 1 22.2 6<br />
127 1 4 1 22 6<br />
128 4 1 1 22.2 6<br />
129 1 2 2 1 22.4 6<br />
130 1 2 3 22.3 6<br />
131 2 1 1 2 22 6<br />
132 1 3 1 1 22.1 6<br />
133 1 1 4 22.5 6<br />
134 3 2 1 22.3 6<br />
135 2 1 2 1 22.1 6<br />
136 3 2 1 21.8 6<br />
137 3 1 1 1 22 6<br />
138 3 2 1 21.9 6<br />
139 3 2 1 21.9 6<br />
140 4 1 1 22.1 6<br />
141 2 1 2 1 21.8 6<br />
142 1 4 1 21.8 6<br />
143 6 21.6 6<br />
144 3 1 2 21.9 6<br />
145 2 2 2 22 6<br />
432
146 3 3 22.2 6<br />
147 2 2 1 1 22 6<br />
148 4 1 1 21.6 6<br />
149 1 2 1 1 1 21.8 6<br />
150 2 3 1 21.7 6<br />
151 3 1 1 1 21.7 6<br />
152 1 1 1 3 21.9 6<br />
153 1 3 2 21.7 6<br />
154 2 2 2 21.6 6<br />
155 1 4 1 21.7 6<br />
156 3 1 1 1 21.4 6<br />
157 4 1 1 21.5 6<br />
158 2 2 1 1 21.5 6<br />
159 2 1 2 1 21.7 6<br />
160 4 1 1 21.5 6<br />
161 3 1 2 21.3 6<br />
162 2 3 1 21.4 6<br />
163 1 5 21.2 6<br />
164 2 4 21.8 6<br />
165 2 2 1 1 21.4 6<br />
166 3 1 2 21.6 6<br />
167 4 1 1 21.2 6<br />
168 1 2 2 1 21.2 6<br />
169 4 1 1 21.3 6<br />
170 1 3 1 1 21.4 6<br />
171 3 2 1 21.1 6<br />
172 1 1 2 2 21.3 6<br />
173 1 4 1 21.1 6<br />
174 1 2 3 21.5 6<br />
175 3 1 1 1 21.3 6<br />
176 2 1 1 1 1 21.1 6<br />
177 2 3 1 20.9 6<br />
178 3 2 1 21 6<br />
179 5 1 21.1 6<br />
180 2 1 3 21.2 6<br />
181 3 2 1 21 6<br />
182 2 4 20.8 6<br />
183 4 2 21.2 6<br />
184 2 3 1 21 6<br />
185 4 1 1 20.7 6<br />
186 3 2 1 21 6<br />
187 1 3 1 1 20.8 6<br />
188 3 1 1 1 20.7 6<br />
189 1 1 3 1 20.7 6<br />
190 1 2 1 2 20.9 6<br />
191 1 5 20.5 6<br />
192 2 1 2 1 20.5 6<br />
193 5 1 20.5 6<br />
194 2 2 1 1 20.7 6<br />
195 4 1 1 20.6 6<br />
196 2 2 2 20.6 6<br />
197 3 3 20.4 6<br />
198 2 1 3 20.8 6<br />
433
199 4 1 1 20.6 6<br />
200 4 1 1 20.3 6<br />
201 3 1 1 1 20.4 6<br />
202 1 4 1 20.4 6<br />
203 1 2 2 1 20.3 6<br />
204 1 1 4 20.1 6<br />
205 4 2 20.2 6<br />
206 1 3 2 20.5 6<br />
207 3 2 1 20.3 6<br />
208 2 2 1 1 20.1 6<br />
209 4 1 1 20 6<br />
210 2 1 1 2 20.2 6<br />
211 4 2 20 6<br />
212 2 3 1 20 6<br />
213 5 1 20.2 6<br />
214 3 2 1 19.8 6<br />
215 3 1 1 1 20 6<br />
216 1 2 3 19.7 6<br />
217 3 3 20.1 6<br />
218 1 3 1 1 19.9 6<br />
219 5 1 19.6 6<br />
220 2 3 1 19.7 6<br />
221 2 1 2 1 19.6 6<br />
222 2 4 19.4 6<br />
223 4 1 1 19.6 6<br />
224 5 1 19.6 6<br />
225 2 2 2 19.8 6<br />
226 3 1 1 1 19.4 6<br />
227 3 1 2 19.5 6<br />
228 1 3 2 19.3 6<br />
229 1 4 1 19.5 6<br />
230 4 1 1 19.3 6<br />
231 2 2 1 1 19.2 6<br />
232 2 1 3 19 6<br />
233 6 19.2 6<br />
234 3 2 1 19 6<br />
235 3 2 1 18.9 6<br />
236 3 1 2 19.1 6<br />
237 5 1 18.9 6<br />
238 1 4 1 18.9 6<br />
239 4 1 1 18.7 6<br />
240 2 2 2 18.6 6<br />
241 2 3 1 18.8 6<br />
242 3 1 1 1 18.5 6<br />
243 3 3 18.3 6<br />
244 1 5 18.5 6<br />
245 4 1 1 18.3 6<br />
246 2 3 1 18.2 6<br />
247 4 2 18.4 6<br />
248 3 1 2 17.9 6<br />
249 3 2 1 18.1 6<br />
250 4 1 1 17.8 6<br />
434
251 2 4 17.8 6<br />
252 5 1 17.6 6<br />
253 3 2 1 17.5 6<br />
254 4 2 17.2 6<br />
255 4 1 1 17.4 6<br />
256 3 3 17.1 6<br />
257 4 1 1 16.8 6<br />
258 5 1 16.7 6<br />
259 4 2 16.4 6<br />
260 5 1 16.1 6<br />
261 5 1 15.7 6<br />
262 6 15 6<br />
263 2 1 1 1 22.8 5<br />
264 1 2 1 1 22.8 5<br />
265 2 1 2 22.8 5<br />
266 1 1 1 2 23.1 5<br />
267 1 1 1 1 1 23 5<br />
268 1 2 1 1 23.1 5<br />
269 1 4 22.9 5<br />
270 4 1 22.8 5<br />
271 2 2 1 23 5<br />
272 2 1 1 1 22.9 5<br />
273 1 3 1 23.1 5<br />
274 1 2 1 1 23.1 5<br />
275 3 1 1 22.6 5<br />
276 2 1 2 22.9 5<br />
277 1 1 1 1 1 22.8 5<br />
278 1 2 1 1 22.5 5<br />
279 1 1 2 1 22.7 5<br />
280 2 1 2 22.8 5<br />
281 1 2 1 1 22.6 5<br />
282 4 1 23.2 5<br />
283 3 1 1 22.6 5<br />
284 3 1 1 22.7 5<br />
285 2 1 1 1 22.8 5<br />
286 2 2 1 22.7 5<br />
287 1 3 1 22.9 5<br />
288 1 2 1 1 22.6 5<br />
289 2 3 22.5 5<br />
290 4 1 22.4 5<br />
291 2 2 1 22.8 5<br />
292 1 1 3 22.7 5<br />
293 2 1 1 1 22.6 5<br />
294 2 1 1 1 22.7 5<br />
295 1 1 1 1 1 22.5 5<br />
296 2 2 1 22.2 5<br />
297 1 2 2 22.5 5<br />
298 3 2 22.8 5<br />
299 2 1 1 1 22.4 5<br />
300 2 1 2 22.4 5<br />
435
301 1 1 1 1 1 22.4 5<br />
302 1 1 1 2 22.7 5<br />
303 1 1 2 1 22.5 5<br />
304 3 1 1 22.3 5<br />
305 1 1 1 1 1 22.5 5<br />
306 2 2 1 22.3 5<br />
307 1 2 1 1 22.4 5<br />
308 2 1 1 1 22.2 5<br />
309 1 3 1 22.6 5<br />
310 2 1 1 1 22.3 5<br />
311 1 1 2 1 22.3 5<br />
312 1 3 1 22.1 5<br />
313 3 2 22.4 5<br />
314 2 1 1 1 22.1 5<br />
315 2 1 1 1 22.2 5<br />
316 1 1 2 1 22.3 5<br />
317 1 1 3 22.1 5<br />
318 1 3 1 22 5<br />
319 3 1 1 22.1 5<br />
320 1 2 1 1 22.4 5<br />
321 1 2 1 1 21.9 5<br />
322 2 1 1 1 21.8 5<br />
323 1 1 1 2 22.1 5<br />
324 1 2 2 22.2 5<br />
325 1 2 1 1 22 5<br />
326 1 1 1 1 1 22.1 5<br />
327 1 2 1 1 21.9 5<br />
328 1 3 1 22.2 5<br />
329 1 1 3 22 5<br />
330 1 2 1 1 21.9 5<br />
331 1 1 2 1 22.1 5<br />
332 3 1 1 21.9 5<br />
333 2 1 1 1 22.1 5<br />
334 2 1 1 1 21.7 5<br />
335 2 2 1 22 5<br />
336 1 3 1 22.2 5<br />
337 3 1 1 21.7 5<br />
338 3 2 21.7 5<br />
339 3 1 1 21.8 5<br />
340 2 1 2 22 5<br />
341 1 1 1 1 1 21.8 5<br />
342 2 2 1 21.6 5<br />
343 4 1 21.5 5<br />
344 2 2 1 21.9 5<br />
345 2 3 21.7 5<br />
346 2 1 1 1 21.7 5<br />
347 1 2 1 1 21.7 5<br />
348 3 1 1 21.8 5<br />
349 1 1 1 1 1 21.5 5<br />
350 2 1 2 21.6 5<br />
436
351 1 2 2 21.8 5<br />
352 2 2 1 21.4 5<br />
353 2 2 1 21.6 5<br />
354 1 2 2 21.7 5<br />
355 1 1 2 1 21.6 5<br />
356 1 1 1 1 1 21.5 5<br />
357 1 1 3 21.4 5<br />
358 2 1 1 1 21.5 5<br />
359 1 3 1 21.3 5<br />
360 4 1 21.9 5<br />
361 3 1 1 21.1 5<br />
362 2 1 2 21.4 5<br />
363 3 1 1 21.4 5<br />
364 2 1 1 1 21.4 5<br />
365 1 1 2 1 21.6 5<br />
366 2 1 1 1 21.3 5<br />
367 1 2 1 1 21.2 5<br />
368 1 3 1 21.1 5<br />
369 2 2 1 21.4 5<br />
370 2 1 1 1 21.3 5<br />
371 1 1 1 1 1 21.4 5<br />
372 3 1 1 21.2 5<br />
373 1 1 1 2 21.2 5<br />
374 3 2 21 5<br />
375 1 3 1 21.5 5<br />
376 1 2 1 1 21.1 5<br />
377 1 3 1 21.3 5<br />
378 1 1 2 1 20.9 5<br />
379 1 2 1 1 21 5<br />
380 1 2 1 1 21.1 5<br />
381 1 1 2 1 21.2 5<br />
382 1 1 3 21 5<br />
383 3 1 1 21 5<br />
384 3 1 1 21.1 5<br />
385 2 1 1 1 20.8 5<br />
386 1 2 1 1 21 5<br />
387 4 1 20.8 5<br />
388 1 2 2 21.1 5<br />
389 2 2 1 21.2 5<br />
390 3 1 1 20.7 5<br />
391 2 1 2 21 5<br />
392 2 1 1 1 20.8 5<br />
393 2 2 1 20.7 5<br />
394 1 1 1 1 1 20.8 5<br />
395 4 1 20.8 5<br />
396 3 1 1 20.9 5<br />
397 1 1 2 1 20.9 5<br />
398 3 1 1 20.6 5<br />
399 1 2 2 20.6 5<br />
400 2 1 2 20.8 5<br />
437
401 1 2 1 1 20.5 5<br />
402 2 2 1 20.7 5<br />
403 1 3 1 20.4 5<br />
404 1 3 1 20.9 5<br />
405 2 1 1 1 20.7 5<br />
406 1 1 1 1 1 20.6 5<br />
407 1 1 1 2 20.5 5<br />
408 2 1 1 1 20.6 5<br />
409 1 3 1 20.4 5<br />
410 5 21 5<br />
411 2 1 1 1 20.4 5<br />
412 2 2 1 20.5 5<br />
413 3 1 1 20.3 5<br />
414 2 2 1 20.2 5<br />
415 2 1 1 1 20.4 5<br />
416 2 3 20.3 5<br />
417 1 2 1 1 20.4 5<br />
418 2 1 2 20.2 5<br />
419 1 2 1 1 20.3 5<br />
420 4 1 20 5<br />
421 3 2 20.3 5<br />
422 1 1 2 1 20.5 5<br />
423 2 1 1 1 20.1 5<br />
424 3 1 1 20.1 5<br />
425 1 1 2 1 20.3 5<br />
426 1 1 2 1 20 5<br />
427 1 2 1 1 20.2 5<br />
428 1 3 1 20.1 5<br />
429 1 4 20.4 5<br />
430 1 2 2 19.9 5<br />
431 2 2 1 20 5<br />
432 1 1 1 2 20.1 5<br />
433 3 1 1 20.2 5<br />
434 2 1 1 1 19.8 5<br />
435 2 1 1 1 19.9 5<br />
436 1 3 1 20.2 5<br />
437 4 1 19.9 5<br />
438 3 1 1 19.7 5<br />
439 1 1 1 1 1 19.9 5<br />
440 1 3 1 19.7 5<br />
441 3 2 19.8 5<br />
442 1 2 1 1 19.6 5<br />
443 4 1 19.5 5<br />
444 3 1 1 19.7 5<br />
445 2 2 1 19.9 5<br />
446 1 2 1 1 19.7 5<br />
447 2 1 1 1 19.7 5<br />
448 2 3 19.8 5<br />
449 2 2 1 19.8 5<br />
450 1 1 1 2 19.5 5<br />
438
451 1 4 20 5<br />
452 3 1 1 19.6 5<br />
453 1 1 2 1 19.6 5<br />
454 2 2 1 19.3 5<br />
455 2 2 1 19.4 5<br />
456 2 1 1 1 19.5 5<br />
457 1 1 2 1 19.3 5<br />
458 2 1 2 19.4 5<br />
459 1 2 1 1 19.5 5<br />
460 1 3 1 19.1 5<br />
461 3 1 1 19.1 5<br />
462 2 1 1 1 19.3 5<br />
463 1 3 1 19.2 5<br />
464 2 1 1 1 19.2 5<br />
465 1 1 3 19.4 5<br />
466 3 2 19.2 5<br />
467 1 2 2 19.1 5<br />
468 4 1 19.2 5<br />
469 1 2 1 1 19 5<br />
470 3 1 1 19 5<br />
471 2 1 1 1 18.9 5<br />
472 1 1 2 1 19.2 5<br />
473 2 1 2 18.8 5<br />
474 1 2 1 1 18.9 5<br />
475 1 4 19.3 5<br />
476 2 2 1 18.7 5<br />
477 3 1 1 18.7 5<br />
478 3 1 1 18.8 5<br />
479 3 1 1 18.9 5<br />
480 4 1 18.6 5<br />
481 2 2 1 18.6 5<br />
482 1 2 2 18.8 5<br />
483 2 3 19 5<br />
484 2 1 1 1 18.8 5<br />
485 1 3 1 18.4 5<br />
486 2 2 1 18.5 5<br />
487 1 1 1 1 1 18.6 5<br />
488 1 1 3 18.7 5<br />
489 2 1 2 18.4 5<br />
490 1 3 1 18.5 5<br />
491 3 1 1 18.2 5<br />
492 2 2 1 18.5 5<br />
493 3 1 1 18.3 5<br />
494 1 3 1 18.2 5<br />
495 2 1 1 1 18.2 5<br />
496 2 1 2 18.4 5<br />
497 5 18 5<br />
498 1 1 2 1 18 5<br />
499 4 1 18 5<br />
500 1 2 1 1 18.2 5<br />
439
501 1 2 2 18.1 5<br />
502 1 1 3 18.3 5<br />
503 3 1 1 18.1 5<br />
504 2 1 1 1 17.9 5<br />
505 3 1 1 17.8 5<br />
506 4 1 17.9 5<br />
507 1 4 17.6 5<br />
508 3 2 17.7 5<br />
509 2 2 1 17.8 5<br />
510 2 2 1 17.8 5<br />
511 3 2 18 5<br />
512 1 2 1 1 17.6 5<br />
513 3 1 1 17.5 5<br />
514 1 3 1 17.5 5<br />
515 1 1 1 2 17.7 5<br />
516 2 2 1 17.3 5<br />
517 2 1 1 1 17.5 5<br />
518 2 3 17.2 5<br />
519 2 3 17.6 5<br />
520 3 1 1 17.4 5<br />
521 4 1 17.1 5<br />
522 1 3 1 17.2 5<br />
523 1 1 2 1 17.1 5<br />
524 1 4 16.9 5<br />
525 1 2 2 17.3 5<br />
526 3 1 1 17.1 5<br />
527 2 1 1 1 16.9 5<br />
528 2 1 2 17 5<br />
529 3 2 16.8 5<br />
530 4 1 17 5<br />
531 3 1 1 16.8 5<br />
532 1 1 3 16.5 5<br />
533 1 2 1 1 16.7 5<br />
534 2 2 1 16.5 5<br />
535 2 2 1 16.4 5<br />
536 2 1 2 16.6 5<br />
537 4 1 16.4 5<br />
538 4 1 16.4 5<br />
539 3 1 1 16.2 5<br />
540 1 2 2 16.1 5<br />
541 1 3 1 16.3 5<br />
542 2 3 15.8 5<br />
543 2 1 1 1 16 5<br />
544 5 16 5<br />
545 3 1 1 15.8 5<br />
546 3 2 15.9 5<br />
547 1 3 1 15.7 5<br />
548 2 1 2 15.4 5<br />
549 2 2 1 15.6 5<br />
550 3 1 1 15.3 5<br />
440
551 1 4 15.3 5<br />
552 4 1 15.1 5<br />
553 2 2 1 15 5<br />
554 3 2 14.7 5<br />
555 3 1 1 14.9 5<br />
556 2 3 14.6 5<br />
557 3 1 1 14.3 5<br />
558 4 1 14.2 5<br />
559 3 2 13.9 5<br />
560 4 1 13.6 5<br />
561 4 1 13.2 5<br />
562 5 12.5 5<br />
563 1 1 1 1 22.9 4<br />
564 1 1 2 22.8 4<br />
565 1 2 1 22.7 4<br />
566 2 1 1 22.8 4<br />
567 2 2 23 4<br />
568 1 1 1 1 22.7 4<br />
569 1 1 1 1 22.5 4<br />
570 1 1 2 22.7 4<br />
571 1 1 1 1 22.7 4<br />
572 1 1 1 1 22.8 4<br />
573 1 3 22.8 4<br />
574 2 1 1 22.3 4<br />
575 2 1 1 22.8 4<br />
576 1 1 1 1 22.5 4<br />
577 1 1 2 22.5 4<br />
578 3 1 22.6 4<br />
579 2 2 22.6 4<br />
580 3 1 22.4 4<br />
581 2 1 1 22.3 4<br />
582 2 2 22.4 4<br />
583 1 1 1 1 22.5 4<br />
584 1 2 1 22.4 4<br />
585 2 1 1 22.1 4<br />
586 1 2 1 22.4 4<br />
587 1 1 2 22.1 4<br />
588 1 1 1 1 22.2 4<br />
589 1 1 1 1 22.1 4<br />
590 1 3 22.4 4<br />
591 1 1 1 1 21.9 4<br />
592 1 1 1 1 22.2 4<br />
593 1 1 1 1 21.9 4<br />
594 1 2 1 22 4<br />
595 1 1 2 22 4<br />
596 1 1 1 1 22 4<br />
597 1 1 1 1 21.8 4<br />
598 1 1 2 21.8 4<br />
599 1 2 1 21.8 4<br />
600 1 1 2 22.1 4<br />
441
601 1 1 1 1 21.8 4<br />
602 1 1 2 21.7 4<br />
603 1 1 1 1 21.8 4<br />
604 2 1 1 21.6 4<br />
605 1 1 1 1 21.8 4<br />
606 2 1 1 21.9 4<br />
607 2 1 1 21.5 4<br />
608 3 1 21.7 4<br />
609 2 1 1 21.4 4<br />
610 2 2 21.4 4<br />
611 2 1 1 21.5 4<br />
612 1 2 1 21.6 4<br />
613 1 1 2 21.6 4<br />
614 2 1 1 21.4 4<br />
615 1 3 21.7 4<br />
616 1 1 1 1 21.2 4<br />
617 1 1 2 21.5 4<br />
618 1 2 1 21.4 4<br />
619 1 2 1 21.5 4<br />
620 1 1 1 1 21.2 4<br />
621 2 1 1 21.5 4<br />
622 1 1 1 1 21.2 4<br />
623 1 1 1 1 21.3 4<br />
624 1 1 1 1 21 4<br />
625 1 1 2 21 4<br />
626 3 1 20.8 4<br />
627 2 2 21 4<br />
628 1 1 1 1 21.1 4<br />
629 1 2 1 20.9 4<br />
630 1 1 1 1 21.1 4<br />
631 1 1 1 1 20.8 4<br />
632 1 1 2 21.1 4<br />
633 1 1 1 1 20.9 4<br />
634 1 1 1 1 20.8 4<br />
635 1 2 1 20.9 4<br />
636 1 1 2 20.9 4<br />
637 2 2 21.2 4<br />
638 2 1 1 20.7 4<br />
639 1 1 1 1 20.9 4<br />
640 1 2 1 20.7 4<br />
641 2 1 1 20.8 4<br />
642 1 2 1 20.4 4<br />
643 2 1 1 20.6 4<br />
644 2 2 20.6 4<br />
645 1 2 1 20.8 4<br />
646 1 1 1 1 20.5 4<br />
647 1 2 1 20.5 4<br />
648 1 1 1 1 20.3 4<br />
649 1 1 2 20.3 4<br />
650 1 1 2 20.6 4<br />
442
651 2 1 1 20.3 4<br />
652 1 1 1 1 20.5 4<br />
653 2 1 1 20.6 4<br />
654 4 20.4 4<br />
655 1 1 1 1 20.3 4<br />
656 3 1 20.6 4<br />
657 2 1 1 20.1 4<br />
658 1 1 2 20.4 4<br />
659 2 1 1 20 4<br />
660 1 2 1 20.2 4<br />
661 2 1 1 20.1 4<br />
662 1 1 1 1 20.1 4<br />
663 1 1 1 1 20.2 4<br />
664 1 1 1 1 19.9 4<br />
665 1 1 1 1 20 4<br />
666 1 2 1 19.7 4<br />
667 2 2 20 4<br />
668 1 1 1 1 19.9 4<br />
669 1 1 2 19.9 4<br />
670 1 1 2 20.2 4<br />
671 1 2 1 20 4<br />
672 1 2 1 19.8 4<br />
673 2 1 1 19.9 4<br />
674 1 1 1 1 19.8 4<br />
675 3 1 19.6 4<br />
676 1 2 1 19.8 4<br />
677 1 1 1 1 19.6 4<br />
678 2 1 1 19.9 4<br />
679 1 1 1 1 19.3 4<br />
680 1 1 2 19.6 4<br />
681 2 1 1 19.4 4<br />
682 2 1 1 19.5 4<br />
683 1 1 1 1 19.6 4<br />
684 2 1 1 19.4 4<br />
685 1 2 1 19.6 4<br />
686 3 1 19.7 4<br />
687 1 3 19.5 4<br />
688 2 1 1 19.4 4<br />
689 1 1 1 1 19.2 4<br />
690 2 1 1 19.2 4<br />
691 2 2 19.2 4<br />
692 1 1 2 19.5 4<br />
693 1 1 1 1 19.3 4<br />
694 1 1 1 1 19.2 4<br />
695 1 1 1 1 19 4<br />
696 1 2 1 18.9 4<br />
697 1 2 1 19.1 4<br />
698 2 2 19.2 4<br />
699 3 1 18.8 4<br />
700 1 1 1 1 19 4<br />
443
701 1 2 1 19.1 4<br />
702 1 3 18.9 4<br />
703 2 1 1 18.6 4<br />
704 1 1 2 18.9 4<br />
705 1 1 1 1 18.8 4<br />
706 1 1 1 1 18.9 4<br />
707 2 1 1 18.7 4<br />
708 1 2 1 18.9 4<br />
709 1 1 1 1 18.9 4<br />
710 3 1 19 4<br />
711 2 1 1 18.6 4<br />
712 2 1 1 18.5 4<br />
713 1 2 1 18.7 4<br />
714 1 3 18.5 4<br />
715 2 1 1 18.5 4<br />
716 1 2 1 18.4 4<br />
717 2 1 1 18.6 4<br />
718 1 1 1 1 18.3 4<br />
719 2 2 18.6 4<br />
720 2 1 1 18.2 4<br />
721 1 1 2 18.5 4<br />
722 1 1 1 1 18.3 4<br />
723 1 1 1 1 18.3 4<br />
724 1 2 1 18.4 4<br />
725 2 1 1 18.1 4<br />
726 3 1 17.9 4<br />
727 2 1 1 18 4<br />
728 1 1 1 1 18.2 4<br />
729 1 1 1 1 18.1 4<br />
730 1 1 2 18 4<br />
731 1 1 1 1 17.9 4<br />
732 1 2 1 17.7 4<br />
733 1 1 1 1 17.9 4<br />
734 1 2 1 18 4<br />
735 1 3 17.8 4<br />
736 2 1 1 17.9 4<br />
737 3 1 17.5 4<br />
738 2 1 1 17.8 4<br />
739 1 2 1 18 4<br />
740 2 2 17.8 4<br />
741 1 1 1 1 17.6 4<br />
742 1 2 1 17.5 4<br />
743 2 1 1 17.7 4<br />
744 3 1 17.6 4<br />
745 2 2 17.4 4<br />
746 1 1 2 17.6 4<br />
747 1 1 1 1 17.4 4<br />
748 3 1 17.7 4<br />
749 1 1 1 1 17.3 4<br />
750 3 1 17.2 4<br />
444
751 1 1 1 1 17.4 4<br />
752 2 1 1 17.2 4<br />
753 2 1 1 17.1 4<br />
754 2 1 1 17.2 4<br />
755 1 1 1 1 17.2 4<br />
756 1 1 2 17 4<br />
757 1 2 1 17.3 4<br />
758 1 2 1 16.8 4<br />
759 1 2 1 17.1 4<br />
760 1 2 1 16.9 4<br />
761 1 1 1 1 17 4<br />
762 1 1 2 16.9 4<br />
763 1 2 1 16.8 4<br />
764 2 1 1 17 4<br />
765 2 1 1 16.6 4<br />
766 3 1 16.7 4<br />
767 1 1 1 1 16.7 4<br />
768 2 2 16.6 4<br />
769 1 1 1 1 16.4 4<br />
770 2 1 1 16.5 4<br />
771 1 2 1 16.7 4<br />
772 2 1 1 16.5 4<br />
773 1 1 2 16.3 4<br />
774 2 1 1 16.4 4<br />
775 4 16.8 4<br />
776 2 1 1 16.2 4<br />
777 2 1 1 16.3 4<br />
778 1 2 1 16.1 4<br />
779 1 1 1 1 16.3 4<br />
780 3 1 15.9 4<br />
781 1 1 1 1 16.1 4<br />
782 1 2 1 16 4<br />
783 1 3 16.2 4<br />
784 1 1 2 15.9 4<br />
785 3 1 16 4<br />
786 2 1 1 15.7 4<br />
787 1 2 1 16 4<br />
788 1 1 1 1 15.7 4<br />
789 1 2 1 15.5 4<br />
790 3 1 15.5 4<br />
791 2 1 1 15.7 4<br />
792 2 2 15.6 4<br />
793 1 3 15.8 4<br />
794 2 1 1 15.6 4<br />
795 1 1 1 1 15.4 4<br />
796 2 1 1 15.3 4<br />
797 2 2 15.2 4<br />
798 1 2 1 15.3 4<br />
799 2 1 1 15.1 4<br />
800 3 1 15 4<br />
445
801 2 1 1 15 4<br />
802 1 1 2 15.2 4<br />
803 1 2 1 14.8 4<br />
804 1 1 1 1 15 4<br />
805 1 3 15.1 4<br />
806 3 1 14.6 4<br />
807 3 1 14.7 4<br />
808 4 14.4 4<br />
809 2 2 14.8 4<br />
810 2 1 1 14.6 4<br />
811 1 2 1 14.6 4<br />
812 1 1 1 1 14.4 4<br />
813 1 1 2 14.5 4<br />
814 2 1 1 14.3 4<br />
815 1 3 14 4<br />
816 2 1 1 14.2 4<br />
817 1 2 1 14 4<br />
818 1 2 1 13.9 4<br />
819 1 1 2 14.1 4<br />
820 3 1 13.9 4<br />
821 2 1 1 13.7 4<br />
822 2 2 13.6 4<br />
823 3 1 13.8 4<br />
824 1 3 13.3 4<br />
825 1 1 1 1 13.5 4<br />
826 2 1 1 13.3 4<br />
827 2 2 13.4 4<br />
828 3 1 13.2 4<br />
829 1 1 2 12.9 4<br />
830 1 2 1 13.1 4<br />
831 2 1 1 12.8 4<br />
832 4 12.8 4<br />
833 3 1 12.6 4<br />
834 1 2 1 12.5 4<br />
835 2 2 12.2 4<br />
836 2 1 1 12.4 4<br />
837 1 3 12.1 4<br />
838 2 1 1 11.8 4<br />
839 3 1 11.7 4<br />
840 2 2 11.4 4<br />
841 3 1 11.1 4<br />
842 3 1 10.7 4<br />
843 4 10 4<br />
844 1 2 22.5 3<br />
845 2 1 22.8 3<br />
846 1 1 1 22.2 3<br />
847 1 2 22.4 3<br />
848 1 1 1 22.2 3<br />
849 2 1 22.2 3<br />
850 1 1 1 21.6 3<br />
446
851 1 1 1 21.5 3<br />
852 1 1 1 21.5 3<br />
853 1 1 1 21.2 3<br />
854 1 1 1 21.3 3<br />
855 3 21.3 3<br />
856 1 2 21.1 3<br />
857 1 1 1 20.7 3<br />
858 1 1 1 20.5 3<br />
859 2 1 20.8 3<br />
860 1 1 1 20.6 3<br />
861 1 2 20.6 3<br />
862 1 1 1 20.3 3<br />
863 2 1 20.2 3<br />
864 1 1 1 20.2 3<br />
865 1 2 20.2 3<br />
866 1 1 1 20 3<br />
867 1 1 1 19.6 3<br />
868 2 1 19.9 3<br />
869 1 1 1 19.6 3<br />
870 1 2 19.6 3<br />
871 1 1 1 19.5 3<br />
872 1 1 1 19.3 3<br />
873 1 2 19.3 3<br />
874 1 2 19.2 3<br />
875 1 1 1 19.3 3<br />
876 1 1 1 18.9 3<br />
877 3 19.2 3<br />
878 1 1 1 18.7 3<br />
879 1 1 1 18.7 3<br />
880 1 2 18.5 3<br />
881 1 1 1 18.6 3<br />
882 1 1 1 18.3 3<br />
883 1 1 1 18.6 3<br />
884 1 1 1 18.3 3<br />
885 2 1 18.4 3<br />
886 1 2 18.4 3<br />
887 2 1 18.2 3<br />
888 1 1 1 18 3<br />
889 1 1 1 17.8 3<br />
890 1 2 17.8 3<br />
891 1 1 1 17.6 3<br />
892 1 2 17.9 3<br />
893 1 1 1 17.6 3<br />
894 1 1 1 17.7 3<br />
895 1 1 1 17.6 3<br />
896 1 1 1 17.4 3<br />
897 2 1 17.2 3<br />
898 1 2 17.4 3<br />
899 2 1 17.3 3<br />
900 1 1 1 17.3 3<br />
447
901 1 1 1 17.1 3<br />
902 1 1 1 16.8 3<br />
903 1 1 1 16.9 3<br />
904 1 1 1 16.7 3<br />
905 1 2 16.7 3<br />
906 1 1 1 16.7 3<br />
907 1 2 17 3<br />
908 1 1 1 16.7 3<br />
909 2 1 16.4 3<br />
910 2 1 16.6 3<br />
911 1 1 1 16.1 3<br />
912 1 1 1 16.3 3<br />
913 1 1 1 16.4 3<br />
914 1 2 16.4 3<br />
915 2 1 16.4 3<br />
916 1 1 1 16 3<br />
917 1 1 1 15.7 3<br />
918 1 2 16 3<br />
919 1 1 1 15.8 3<br />
920 1 1 1 15.8 3<br />
921 1 1 1 15.6 3<br />
922 1 1 1 15.7 3<br />
923 1 1 1 15.4 3<br />
924 1 1 1 15.4 3<br />
925 2 1 15.5 3<br />
926 3 15.3 3<br />
927 2 1 15.2 3<br />
928 2 1 15 3<br />
929 1 2 15.3 3<br />
930 1 1 1 15.1 3<br />
931 1 1 1 14.9 3<br />
932 1 1 1 14.8 3<br />
933 1 1 1 14.7 3<br />
934 1 1 1 14.7 3<br />
935 1 1 1 14.7 3<br />
936 2 1 14.8 3<br />
937 2 1 14.4 3<br />
938 1 1 1 14.5 3<br />
939 2 1 14.3 3<br />
940 1 2 14.4 3<br />
941 1 1 1 14.1 3<br />
942 1 1 1 14.2 3<br />
943 1 1 1 14 3<br />
944 1 1 1 13.9 3<br />
945 1 2 13.8 3<br />
946 1 1 1 13.8 3<br />
947 1 1 1 13.7 3<br />
948 1 1 1 13.8 3<br />
949 2 1 13.6 3<br />
950 2 1 13.5 3<br />
448
951 1 2 13.4 3<br />
952 2 1 13.5 3<br />
953 1 1 1 13.2 3<br />
954 1 1 1 13.2 3<br />
955 2 1 13 3<br />
956 1 1 1 13.1 3<br />
957 1 1 1 12.8 3<br />
958 1 1 1 12.9 3<br />
959 1 2 12.7 3<br />
960 2 1 12.8 3<br />
961 1 1 1 12.5 3<br />
962 1 1 1 12.5 3<br />
963 2 1 12.3 3<br />
964 3 12.6 3<br />
965 2 1 12.1 3<br />
966 1 1 1 12.1 3<br />
967 1 1 1 11.9 3<br />
968 1 2 12 3<br />
969 1 1 1 11.8 3<br />
970 2 1 11.5 3<br />
971 1 2 11.6 3<br />
972 2 1 11.4 3<br />
973 2 1 11.4 3<br />
974 1 1 1 11.2 3<br />
975 3 10.8 3<br />
976 1 1 1 11 3<br />
977 1 1 1 10.8 3<br />
978 1 2 10.9 3<br />
979 2 1 10.6 3<br />
980 1 2 10.4 3<br />
981 1 1 1 10.3 3<br />
982 2 1 10.1 3<br />
983 2 1 10 3<br />
984 1 2 9.7 3<br />
985 1 1 1 9.9 3<br />
986 3 9.6 3<br />
987 1 1 1 9.3 3<br />
988 2 1 9.2 3<br />
989 1 2 8.9 3<br />
990 2 20 2<br />
991 1 1 18 2<br />
992 1 1 17.1 2<br />
993 1 1 16.4 2<br />
994 2 16 2<br />
995 1 1 15.1 2<br />
996 1 1 15.1 2<br />
997 1 1 14.4 2<br />
998 1 1 14.2 2<br />
999 2 14.2 2<br />
1000 1 1 13.6 2<br />
449
1001 1 1 13.5 2<br />
1002 1 1 13.2 2<br />
1003 1 1 13.1 2<br />
1004 1 1 12.5 2<br />
1005 2 12.8 2<br />
1006 1 1 12.2 2<br />
1007 1 1 12.2 2<br />
1008 1 1 11.6 2<br />
1009 1 1 11.5 2<br />
1010 1 1 11.3 2<br />
1011 1 1 11.2 2<br />
1012 1 1 10.7 2<br />
1013 1 1 10.5 2<br />
1014 1 1 10.6 2<br />
1015 1 1 10.3 2<br />
1016 2 10.2 2<br />
1017 1 1 10 2<br />
1018 1 1 9.6 2<br />
1019 1 1 9.6 2<br />
1020 1 1 9.3 2<br />
1021 1 1 8.9 2<br />
450
24. Exploded View and Replacement Parts List<br />
24.1 Indoor Unit<br />
24.1.1 S-22KA1E5 S-22KA1E5S S-28KA1E5 S-28KA1E5S S-36KA1E5 S-36KA1E5S<br />
S-45KA1E5 S-45KA1E5S<br />
O/I 45 O/I 46 I/I 47<br />
41<br />
40<br />
36<br />
4<br />
27<br />
3<br />
5<br />
50<br />
37<br />
30<br />
9<br />
38<br />
Note<br />
The above exploded view is for the purpose of parts disassembly and replacement.<br />
The non-numbered parts are not kept as standard service parts.<br />
8<br />
49<br />
2<br />
7<br />
34<br />
16<br />
451<br />
28<br />
33<br />
25<br />
29<br />
39<br />
13<br />
22<br />
26<br />
1<br />
10<br />
14<br />
19<br />
31<br />
18<br />
15 12<br />
23<br />
44<br />
48<br />
21 17<br />
42<br />
CWH55025J<br />
CWH55051AJ<br />
43<br />
24<br />
20
REF.<br />
NO.<br />
PART NAME & DESCRIPTION QTY S-22KA1E5 S-22KA1E5S REMARK<br />
1 CHASSY COMPLETE 1 CWD50C1653 CWD50C1666<br />
2 FAN MOTOR 1 L6CBYYYL0058 L6CBYYYL0058 O<br />
3 CROSS FLOW FAN COMPLETE 1 CWH02C1076 CWH02C1076<br />
4 BEARING ASS’Y 1 CWH64K007 CWH64K007<br />
5 SCREW - CROSS FLOW FAN 1 CWH551146 CWH551146<br />
7 EVAPORATOR 1 CWB30C3135 CWB30C3135<br />
8 FLARE NUT (LIQUID) 1 CWT251030 CWT251030<br />
9 FLARE NUT (GAS) 1 CWT251032 CWT251032<br />
10 HOLDER SENSOR 1 CWH32143 CWH32143<br />
12 CONTROL BOARD CASING 1 CWH102370 CWH102370 O<br />
13 TERMINAL BOARD COMPLETE 1 CWA28C2484 CWA28C2484 O<br />
14 ELECTRONIC CONTROLLER - MAIN 1 CWA73C4578 CWA73C4578 O<br />
15 ELECTRONIC CONTROLLER - POWER 1 CWA745499 CWA745499 O<br />
16 ELECTRONIC CONTROLLER-DISPLAY 1 CWA745770 CWA745770 O<br />
17<br />
ELECTRONIC CONTROLLER-<br />
INDICATOR & RECEIVER<br />
1 CWA745769 CWA745769 O<br />
18 SENSOR COMPLETE (AIR TEMP) 1 CWA50C2687 CWA50C2687 O<br />
19<br />
SENSOR COMPLETE(GAS & PIPE<br />
TEMP)<br />
1 CWA50C2688 CWA50C2688 O<br />
20 CONTROL BOARD TOP COVER 1 CWH131350 CWH131350<br />
21 INDICATOR HOLDER 1 CWD933021 CWD933021<br />
22 CONTROL BOARD FRONT COVER 1 CWH13C1212 CWH13C1212<br />
23 DISCHARGE GRILLE COMPLETE 1 CWE20C3084 CWE20C3083<br />
24 BACK COVER CHASSIS 1 CWD933019 CWD933019A<br />
25 FULCRUM 1 CWH621102 CWH621102<br />
26 VERTICAL VANE 11 CWE241287 CWE241287<br />
27 CONNECTING BAR 1 CWE261152 CWE261152<br />
28 CONNECTING BAR 1 CWE261153 CWE261153<br />
29 CONNECTING BAR 1 CWE261154 CWE261154<br />
30 CONNECTING BAR 1 CWE261155 CWE261155<br />
31 AIR SWING MOTOR 1 CWA981240 CWA981240 O<br />
33 CAP - DRAIN TRAY 1 CWH521096 CWH521096<br />
34 HORIZONTAL VANE 1 CWE24C1268 CWE24C1288<br />
36 FRONT GRILLE COMPLETE 1 CWE11C4550 CWE11C4551 O<br />
37 INTAKE GRILLE COMPLETE 1 CWE22C1507 CWE22C1482<br />
38 GRILLE DOOR 1 CWE14C1029 CWE14C1038<br />
39 AIR FILTER 2 CWD001279 CWD001279<br />
40 SCREW - FRONT GRILLE 2 XTT4+16CFJ XTT4+16CFJ<br />
41 CAP - FRONT GRILLE 2 CWH521194 CWH521194A<br />
42 DRAIN HOSE 1 CWH851173 CWH851173<br />
43 INSTALLATION PLATE 1 CWH361097 CWH361097<br />
44<br />
BAG COMPLETE - INSTALLATION<br />
SCREW<br />
1 CWH82C1705 CWH82C1705<br />
45 OPERATING INSTRUCTION 1 CWF567211 CWF567211<br />
46 OPERATING INSTRUCTION 1 CWF567361 CWF567361<br />
47 INSTALLATION INSTRUCTION 1 CWF614160 CWF614160<br />
48 PARTICULAR PLATE COMPLETE 1 CWD91C0128 CWD91C0128<br />
49 V-COIL COMPLETE 1 CWA43C2372 CWA43C2372<br />
50 DRAIN PAN 1 CWH401062 CWH401062<br />
(Note)<br />
- All parts are supplied from PHAAM, Malaysia (Vendor Code: 00029488)<br />
- “O” marked parts are recommended to be kept in stock.<br />
452
REF.<br />
NO.<br />
PART NAME & DESCRIPTION QTY S-28KA1E5 S-28KA1E5S REMARK<br />
1 CHASSY COMPLETE 1 CWD50C1653 CWD50C1666<br />
2 FAN MOTOR 1 L6CBYYYL0058 L6CBYYYL0058 O<br />
3 CROSS FLOW FAN COMPLETE 1 CWH02C1076 CWH02C1076<br />
4 BEARING ASS’Y 1 CWH64K007 CWH64K007<br />
5 SCREW - CROSS FLOW FAN 1 CWH551146 CWH551146<br />
7 EVAPORATOR 1 CWB30C3136 CWB30C3136<br />
8 FLARE NUT (LIQUID) 1 CWT251030 CWT251030<br />
9 FLARE NUT (GAS) 1 CWT251032 CWT251032<br />
10 HOLDER SENSOR 1 CWH32143 CWH32143<br />
12 CONTROL BOARD CASING 1 CWH102370 CWH102370<br />
13 TERMINAL BOARD COMPLETE 1 CWA28C2484 CWA28C2484 O<br />
14 ELECTRONIC CONTROLLER - MAIN 1 CWA73C4579 CWA73C4579 O<br />
15 ELECTRONIC CONTROLLER - POWER 1 CWA745499 CWA745499 O<br />
16 ELECTRONIC CONTROLLER-DISPLAY 1 CWA745770 CWA745770 O<br />
17<br />
ELECTRONIC CONTROLLER-<br />
INDICATOR & RECEIVER<br />
1 CWA745769 CWA745769 O<br />
18 SENSOR COMPLETE (AIR TEMP) 1 CWA50C2687 CWA50C2687 O<br />
19<br />
SENSOR COMPLETE(GAS & PIPE<br />
TEMP)<br />
1 CWA50C2688 CWA50C2688 O<br />
20 CONTROL BOARD TOP COVER 1 CWH131350 CWH131350<br />
21 INDICATOR HOLDER 1 CWD933021 CWD933021<br />
22 CONTROL BOARD FRONT COVER 1 CWH13C1212 CWH13C1212<br />
23 DISCHARGE GRILLE COMPLETE 1 CWE20C3084 CWE20C3083<br />
24 BACK COVER CHASSIS 1 CWD933019 CWD933019A<br />
25 FULCRUM 1 CWH621102 CWH621102<br />
26 VERTICAL VANE 11 CWE241287 CWE241287<br />
27 CONNECTING BAR 1 CWE261152 CWE261152<br />
28 CONNECTING BAR 1 CWE261153 CWE261153<br />
29 CONNECTING BAR 1 CWE261154 CWE261154<br />
30 CONNECTING BAR 1 CWE261155 CWE261155<br />
31 AIR SWING MOTOR 1 CWA981240 CWA981240 O<br />
33 CAP - DRAIN TRAY 1 CWH521096 CWH521096<br />
34 HORIZONTAL VANE 1 CWE24C1268 CWE24C1288<br />
36 FRONT GRILLE COMPLETE 1 CWE11C4550 CWE11C4551 O<br />
37 INTAKE GRILLE COMPLETE 1 CWE22C1507 CWE22C1482<br />
38 GRILLE DOOR 1 CWE14C1029 CWE14C1038<br />
39 AIR FILTER 2 CWD001279 CWD001279<br />
40 SCREW - FRONT GRILLE 2 XTT4+16CFJ XTT4+16CFJ<br />
41 CAP - FRONT GRILLE 2 CWH521194 CWH521194A<br />
42 DRAIN HOSE 1 CWH851173 CWH851173<br />
43 INSTALLATION PLATE 1 CWH361097 CWH361097<br />
44<br />
BAG COMPLETE - INSTALLATION<br />
SCREW<br />
1 CWH82C1705 CWH82C1705<br />
45 OPERATING INSTRUCTION 1 CWF567211 CWF567211<br />
46 OPERATING INSTRUCTION 1 CWF567361 CWF567361<br />
47 INSTALLATION INSTRUCTION 1 CWF614160 CWF614160<br />
48 PARTICULAR PLATE COMPLETE 1 CWD91C0128 CWD91C0128<br />
49 V-COIL COMPLETE 1 CWA43C2372 CWA43C2372<br />
50 DRAIN PAN 1 CWH401062 CWH401062<br />
(Note)<br />
- All parts are supplied from PHAAM, Malaysia (Vendor Code: 00029488)<br />
- “O” marked parts are recommended to be kept in stock.<br />
453
REF.<br />
NO.<br />
PART NAME & DESCRIPTION QTY S-36KA1E5 S-36KA1E5S REMARK<br />
1 CHASSY COMPLETE 1 CWD50C1653 CWD50C1666<br />
2 FAN MOTOR 1 L6CBYYYL0058 L6CBYYYL0058 O<br />
3 CROSS FLOW FAN COMPLETE 1 CWH02C1076 CWH02C1076<br />
4 BEARING ASS’Y 1 CWH64K007 CWH64K007<br />
5 SCREW - CROSS FLOW FAN 1 CWH551146 CWH551146<br />
7 EVAPORATOR 1 CWB30C3136 CWB30C3136<br />
8 FLARE NUT (LIQUID) 1 CWT251030 CWT251030<br />
9 FLARE NUT (GAS) 1 CWT251032 CWT251032<br />
10 HOLDER SENSOR 1 CWH32143 CWH32143<br />
12 CONTROL BOARD CASING 1 CWH102370 CWH102370<br />
13 TERMINAL BOARD COMPLETE 1 CWA28C2484 CWA28C2484 O<br />
14 ELECTRONIC CONTROLLER - MAIN 1 CWA73C4580 CWA73C4580 O<br />
15 ELECTRONIC CONTROLLER - POWER 1 CWA745499 CWA745499 O<br />
16 ELECTRONIC CONTROLLER-DISPLAY 1 CWA745770 CWA745770 O<br />
17<br />
ELECTRONIC CONTROLLER-<br />
INDICATOR & RECEIVER<br />
1 CWA745769 CWA745769 O<br />
18 SENSOR COMPLETE (AIR TEMP) 1 CWA50C2687 CWA50C2687 O<br />
19<br />
SENSOR COMPLETE(GAS & PIPE<br />
TEMP)<br />
1 CWA50C2688 CWA50C2688 O<br />
20 CONTROL BOARD TOP COVER 1 CWH131350 CWH131350<br />
21 INDICATOR HOLDER 1 CWD933021 CWD933021<br />
22 CONTROL BOARD FRONT COVER 1 CWH13C1212 CWH13C1212<br />
23 DISCHARGE GRILLE COMPLETE 1 CWE20C3084 CWE20C3083<br />
24 BACK COVER CHASSIS 1 CWD933019 CWD933019A<br />
25 FULCRUM 1 CWH621102 CWH621102<br />
26 VERTICAL VANE 11 CWE241287 CWE241287<br />
27 CONNECTING BAR 1 CWE261152 CWE261152<br />
28 CONNECTING BAR 1 CWE261153 CWE261153<br />
29 CONNECTING BAR 1 CWE261154 CWE261154<br />
30 CONNECTING BAR 1 CWE261155 CWE261155<br />
31 AIR SWING MOTOR 1 CWA981240 CWA981240 O<br />
33 CAP - DRAIN TRAY 1 CWH521096 CWH521096<br />
34 HORIZONTAL VANE 1 CWE24C1268 CWE24C1288<br />
36 FRONT GRILLE COMPLETE 1 CWE11C4550 CWE11C4551 O<br />
37 INTAKE GRILLE COMPLETE 1 CWE22C1507 CWE22C1482<br />
38 GRILLE DOOR 1 CWE14C1029 CWE14C1038<br />
39 AIR FILTER 2 CWD001279 CWD001279<br />
40 SCREW - FRONT GRILLE 2 XTT4+16CFJ XTT4+16CFJ<br />
41 CAP - FRONT GRILLE 2 CWH521194 CWH521194A<br />
42 DRAIN HOSE 1 CWH851173 CWH851173<br />
43 INSTALLATION PLATE 1 CWH361097 CWH361097<br />
44<br />
BAG COMPLETE - INSTALLATION<br />
SCREW<br />
1 CWH82C1705 CWH82C1705<br />
45 OPERATING INSTRUCTION 1 CWF567211 CWF567211<br />
46 OPERATING INSTRUCTION 1 CWF567361 CWF567361<br />
47 INSTALLATION INSTRUCTION 1 CWF614160 CWF614160<br />
48 PARTICULAR PLATE COMPLETE 1 CWD91C0128 CWD91C0128<br />
49 V-COIL COMPLETE 1 CWA43C2372 CWA43C2372<br />
50 DRAIN PAN 1 CWH401062 CWH401062<br />
(Note)<br />
- All parts are supplied from PHAAM, Malaysia (Vendor Code: 00029488)<br />
- “O” marked parts are recommended to be kept in stock.<br />
454
REF.<br />
NO.<br />
PART NAME & DESCRIPTION QTY S-45KA1E5 S-45KA1E5S REMARK<br />
1 CHASSY COMPLETE 1 CWD50C1653 CWD50C1666<br />
2 FAN MOTOR 1 L6CBYYYL0058 L6CBYYYL0058 O<br />
3 CROSS FLOW FAN COMPLETE 1 CWH02C1076 CWH02C1076<br />
4 BEARING ASS’Y 1 CWH64K007 CWH64K007<br />
5 SCREW - CROSS FLOW FAN 1 CWH551146 CWH551146<br />
7 EVAPORATOR 1 CWB30C3136 CWB30C3136<br />
8 FLARE NUT (LIQUID) 1 CWT251030 CWT251030<br />
9 FLARE NUT (GAS) 1 CWT251032 CWT251032<br />
10 HOLDER SENSOR 1 CWH32143 CWH32143<br />
12 CONTROL BOARD CASING 1 CWH102370 CWH102370<br />
13 TERMINAL BOARD COMPLETE 1 CWA28C2484 CWA28C2484 O<br />
14 ELECTRONIC CONTROLLER - MAIN 1 CWA73C4581 CWA73C4581 O<br />
15 ELECTRONIC CONTROLLER - POWER 1 CWA745499 CWA745499 O<br />
16 ELECTRONIC CONTROLLER-DISPLAY 1 CWA745770 CWA745770 O<br />
17<br />
ELECTRONIC CONTROLLER-<br />
INDICATOR & RECEIVER<br />
1 CWA745769 CWA745769 O<br />
18 SENSOR COMPLETE (AIR TEMP) 1 CWA50C2687 CWA50C2687 O<br />
19<br />
SENSOR COMPLETE(GAS & PIPE<br />
TEMP)<br />
1 CWA50C2688 CWA50C2688 O<br />
20 CONTROL BOARD TOP COVER 1 CWH131350 CWH131350<br />
21 INDICATOR HOLDER 1 CWD933021 CWD933021<br />
22 CONTROL BOARD FRONT COVER 1 CWH13C1212 CWH13C1212<br />
23 DISCHARGE GRILLE COMPLETE 1 CWE20C3084 CWE20C3083<br />
24 BACK COVER CHASSIS 1 CWD933019 CWD933019A<br />
25 FULCRUM 1 CWH621102 CWH621102<br />
26 VERTICAL VANE 11 CWE241287 CWE241287<br />
27 CONNECTING BAR 1 CWE261152 CWE261152<br />
28 CONNECTING BAR 1 CWE261153 CWE261153<br />
29 CONNECTING BAR 1 CWE261154 CWE261154<br />
30 CONNECTING BAR 1 CWE261155 CWE261155<br />
31 AIR SWING MOTOR 1 CWA981240 CWA981240 O<br />
33 CAP - DRAIN TRAY 1 CWH521096 CWH521096<br />
34 HORIZONTAL VANE 1 CWE24C1268 CWE24C1288<br />
36 FRONT GRILLE COMPLETE 1 CWE11C4550 CWE11C4551 O<br />
37 INTAKE GRILLE COMPLETE 1 CWE22C1507 CWE22C1482<br />
38 GRILLE DOOR 1 CWE14C1029 CWE14C1038<br />
39 AIR FILTER 2 CWD001279 CWD001279<br />
40 SCREW - FRONT GRILLE 2 XTT4+16CFJ XTT4+16CFJ<br />
41 CAP - FRONT GRILLE 2 CWH521194 CWH521194A<br />
42 DRAIN HOSE 1 CWH851173 CWH851173<br />
43 INSTALLATION PLATE 1 CWH361097 CWH361097<br />
44<br />
BAG COMPLETE - INSTALLATION<br />
SCREW<br />
1 CWH82C1705 CWH82C1705<br />
45 OPERATING INSTRUCTION 1 CWF567211 CWF567211<br />
46 OPERATING INSTRUCTION 1 CWF567361 CWF567361<br />
47 INSTALLATION INSTRUCTION 1 CWF614160 CWF614160<br />
48 PARTICULAR PLATE COMPLETE 1 CWD91C0128 CWD91C0128<br />
49 V-COIL COMPLETE 1 CWA43C2372 CWA43C2372<br />
50 DRAIN PAN 1 CWH401062 CWH401062<br />
(Note)<br />
- All parts are supplied from PHAAM, Malaysia (Vendor Code: 00029488)<br />
- “O” marked parts are recommended to be kept in stock.<br />
455
24.1.2 S-56KA1E5 S-63KA1E5 S-71KA1E5<br />
41<br />
40<br />
36<br />
4<br />
50<br />
30<br />
9<br />
8<br />
26<br />
O/I 45 O/I 46 I/I 47<br />
49<br />
5<br />
28<br />
3<br />
7<br />
31 27<br />
Note<br />
The above exploded view is for the purpose of parts disassembly and replacement.<br />
The non-numbered parts are not kept as standard service parts.<br />
37<br />
38<br />
456<br />
25<br />
34<br />
29<br />
2<br />
33<br />
16<br />
22<br />
48<br />
21<br />
13<br />
39<br />
17<br />
14<br />
32<br />
23<br />
42<br />
10<br />
15<br />
44<br />
12<br />
20<br />
1<br />
43<br />
19<br />
CWH55025J<br />
CWH55051AJ<br />
24<br />
18
REF.<br />
NO.<br />
PART NAME & DESCRIPTION QTY S-56KA1E5 S-63KA1E5 S-71KA1E5 REMARK<br />
1 CHASSY COMPLETE 1 CWD50C1665 CWD50C1665 CWD50C1665<br />
2 FAN MOTOR 1 L6CBYYYL0057 L6CBYYYL0057 L6CBYYYL0057 O<br />
3 CROSS FLOW FAN COMPLETE 1 CWH02C1077 CWH02C1077 CWH02C1077<br />
4 BEARING ASS’Y 1 CWH64K007 CWH64K007 CWH64K007<br />
5 SCREW - CROSS FLOW FAN 1 CWH551146 CWH551146 CWH551146<br />
7 EVAPORATOR 1 CWB30C3141 CWB30C3151 CWB30C3160<br />
8 FLARE NUT (LIQUID) 1 CWT251030 CWT251030 CWT251031<br />
9 FLARE NUT (GAS) 1 CWT251032 CWT251032 CWT251033<br />
10 HOLDER SENSOR 1 CWH32143 CWH32143 CWH32143<br />
12 CONTROL BOARD CASING 1 CWH102370 CWH102370 CWH102370<br />
13 TERMINAL BOARD COMPLETE 1 CWA28C2484 CWA28C2484 CWA28C2484 O<br />
14 ELECTRONIC CONTROLLER - MAIN 1 CWA73C4582 CWA73C4583 CWA73C4584 O<br />
15 ELECTRONIC CONTROLLER - POWER 1 CWA745499 CWA745499 CWA745499 O<br />
16 ELECTRONIC CONTROLLER-DISPLAY 1 CWA745770 CWA745770 CWA745770 O<br />
17<br />
ELECTRONIC CONTROLLER-<br />
INDICATOR & RECEIVER<br />
1 CWA745769 CWA745769 CWA745769 O<br />
18 SENSOR COMPLETE (AIR TEMP) 1 CWA50C2687 CWA50C2687 CWA50C2687 O<br />
19<br />
SENSOR COMPLETE(GAS & PIPE<br />
TEMP)<br />
1 CWA50C2688 CWA50C2688 CWA50C2688 O<br />
20 CONTROL BOARD TOP COVER 1 CWH131350 CWH131350 CWH131350<br />
21 INDICATOR HOLDER 1 CWD933021 CWD933021 CWD933021<br />
22 CONTROL BOARD FRONT COVER 1 CWH13C1212 CWH13C1212 CWH13C1212<br />
23 DISCHARGE GRILLE COMPLETE 1 CWE20C3008 CWE20C3008 CWE20C3008<br />
24 BACK COVER CHASSIS 1 CWD933031 CWD933031 CWD933031<br />
25 FULCRUM 2 CWH621103 CWH621103 CWH621103<br />
26 VERTICAL VANE 15 CWE241289 CWE241289 CWE241289<br />
27 CONNECTING BAR 1 CWE261156 CWE261156 CWE261156<br />
28 CONNECTING BAR 1 CWE261158 CWE261158 CWE261158<br />
29 CONNECTING BAR 1 CWE261167 CWE261167 CWE261167<br />
30 CONNECTING BAR 1 CWE261159 CWE261159 CWE261159<br />
31 CONNECTING BAR 1 CWE261160 CWE261160 CWE261160<br />
32 AIR SWING MOTOR 1 CWA981241 CWA981241 CWA981241 O<br />
33 CAP - DRAIN TRAY 1 CWH521096 CWH521096 CWH521096<br />
34 HORIZONTAL VANE 1 CWE24C1295 CWE24C1295 CWE24C1295 O<br />
36 FRONT GRILLE COMPLETE 1 CWE11C4552 CWE11C4553 CWE11C4553<br />
37 INTAKE GRILLE COMPLETE 1 CWE22C1483 CWE22C1483 CWE22C1483<br />
38 GRILLE DOOR 1 CWE14C1029 CWE14C1029 CWE14C1029<br />
39 AIR FILTER 2 CWD001283 CWD001283 CWD001283<br />
40 SCREW - FRONT GRILLE 4 XTT4+16CFJ XTT4+16CFJ XTT4+16CFJ<br />
41 CAP - FRONT GRILLE 3 CWH521194 CWH521194 CWH521194<br />
42 DRAIN HOSE 1 CWH851173 CWH851173 CWH851173<br />
43 INSTALLATION PLATE 1 CWH361098 CWH361098 CWH361098<br />
44<br />
BAG COMPLETE - INSTALLATION<br />
SCREW<br />
1 CWH82C1705 CWH82C1705 CWH82C1705<br />
45 OPERATING INSTRUCTION 1 CWF567211 CWF567211 CWF567211<br />
46 OPERATING INSTRUCTION 1 CWF567361 CWF567361 CWF567361<br />
47 INSTALLATION INSTRUCTION 1 CWF614160 CWF614160 CWF614160<br />
48 PARTICULAR PLATE COMPLETE 1 CWD91C0133 CWD91C0133 CWD91C0133<br />
457
49 V-COIL COMPLETE 1 CWA43C2371 CWA43C2371 CWA43C2371<br />
50 DRAIN PAN 1 CWH401062 CWH401062 CWH401062<br />
(Note)<br />
- All parts are supplied from PHAAM, Malaysia (Vendor Code: 00029488)<br />
- “O” marked parts are recommended to be kept in stock.<br />
458
24.1.3 S-22YA1E5 S-28YA1E5 S-36YA1E5 S-45YA1E5 S-56YA1E5<br />
42<br />
Note<br />
The above exploded view is for the purpose of parts disassembly and replacement.<br />
The non-numbered parts are not kept as standard service parts.<br />
459<br />
20
Note<br />
The above exploded view is for the purpose of parts disassembly and replacement.<br />
The non-numbered parts are not kept as standard service parts.<br />
460
REF.<br />
NO.<br />
PART NAME & DESCRIPTION QTY S-22YA1E5 S-28YA1E5 S-36YA1E5 REMARK<br />
1 BASE PAN ASS’Y 1 CWD52K1100 CWD52K1100 CWD52K1100<br />
2 INNER POLYSTYRENE COMPLETE 1 CWG07C1067 CWG07C1067 CWG07C1067<br />
3 CABINET SIDE PLATE ASS’Y 1 CWE041121 CWE041121 CWE041121<br />
4 CABINET SIDE PLATE ASS’Y 1 CWE041122 CWE041122 CWE041122<br />
6 FAN MOTOR,DC 40W 3 PH 1 L6CBYYYL0048 L6CBYYYL0048 L6CBYYYL0048 O<br />
7 ANTI-VIBRATION BUSHING 3 CWH501105 CWH501105 CWH501105<br />
8 CORD HOLDER 1 CWD741024 CWD741024 CWD741024<br />
9 SCREW - FAN MOTOR 3 CWH561058 CWH561058 CWH561058<br />
11 TURBO FAN 1 CWH03K1022 CWH03K1022 CWH03K1022<br />
12 NUT for TURBO FAN 1 CWH561042 CWH561042 CWH561042<br />
13 SPRING WASHER 1 XWA8BFJ XWA8BFJ XWA8BFJ<br />
14 PLAIN WASHER 1 XWG8H22FJ XWG8H22FJ XWG8H22FJ<br />
15 EVAPORATOR COMPLETE 1 CWB30C3133 CWB30C3155 CWB30C3155<br />
16 FLARE NUT (1/2”) 1 CWT251032 CWT251032 CWT251032<br />
17 HEATPROOF TUBE 1 CWG021023 CWG021023 CWG021023<br />
18 HEATPROOF TUBE 1 CWG021064 CWG021064 CWG021064<br />
19 FLARE NUT (1/4”) 1 CWT251030 CWT251030 CWT251030<br />
21 PIPE COVER 1 CWD93C1099 CWD93C1099 CWD93C1099<br />
20 V-COIL COMPLETE 2 CWA43C2386 CWA43C2386 CWA43C2386<br />
22 SENSOR - EVAPORATOR 1 CWA50C2735 CWA50C2735 CWA50C2735<br />
23 HOLDER SENSOR 2 CWH32143 CWH32143 CWH32143<br />
24 EVAPORATOR SUPPORTER 3 CWD911529A CWD911529A CWD911529A<br />
26 DRAIN PUMP COMPLETE 1 CWB53C1038 CWB53C1038 CWB53C1038<br />
27 PANEL DRAIN PUMP ASS’Y 1 CWD93K1021 CWD93K1021 CWD93K1021<br />
28 DRAIN PUMP 1 CWB532093 CWB532093 CWB532093<br />
29 ANTI - VIBRATION BUSHING 3 CWH501080 CWH501080 CWH501080<br />
30 FLOAT SWITCH - DRAIN PUMP 1 CWA121285 CWA121285 CWA121285<br />
31 FLEXIBLE PIPE 1 CWH85C1033 CWH85C1033 CWH85C1033<br />
32 DRAIN NOZZLE 1 CWH411011 CWH411011 CWH411011<br />
33 DRAIN HOSE HEAT INSULATION 1 CWG321050 CWG321050 CWG321050<br />
35 DRAIN PAN - COMPLETE 1 CWH40C1071 CWH40C1071 CWH40C1071<br />
36 DRAIN PLUG 1 CWB821008 CWB821008 CWB821008<br />
37 AIR GUIDER BLOWER WHEEL 1 CWD321058 CWD321058 CWD321058<br />
38 CONTROL BOARD CASING 1 CWH10K1108 CWH10K1108 CWH10K1108<br />
39 ELECTRONIC CONTROLLER - MAIN 1 CWA73C4573 CWA73C4574 CWA73C4575 O<br />
42 TERMINAL BOARD ASS'Y 1 CWA28K1042J CWA28K1042J CWA28K1042J O<br />
43 TERMINAL BOARD ASS'Y 1 CWA28K1202 CWA28K1202 CWA28K1202 O<br />
44 LEADWIRE-AIR TEMP. SENSOR 1 CWA67C8544 CWA67C8544 CWA67C8544 O<br />
47 CONTROL BOARD COVER 1 CWH13C1202 CWH13C1202 CWH13C1202<br />
48 ACCESSORY COMPLETE 1 CWH82C1270 CWH82C1270 CWH82C1270<br />
52 OPERATING INSTRUCTION 1 CWF567156 CWF567156 CWF567156<br />
53 OPERATING INSTRUCTION 1 CWF567157 CWF567157 CWF567157<br />
54 INSTALLATION INSTRUCTION 1 CWF614111 CWF614111 CWF614111<br />
(Note)<br />
- All parts are supplied from PHAAM, Malaysia (Vendor Code: 00029488)<br />
- “O” marked parts are recommended to be kept in stock.<br />
461
REF.<br />
NO.<br />
PART NAME & DESCRIPTION QTY S-45YA1E5 S-56YA1E5 REMARK<br />
1 BASE PAN ASS’Y 1 CWD52K1100 CWD52K1100<br />
2 INNER POLYSTYRENE COMPLETE 1 CWG07C1067 CWG07C1067<br />
3 CABINET SIDE PLATE ASS’Y 1 CWE041121 CWE041121<br />
4 CABINET SIDE PLATE ASS’Y 1 CWE041122 CWE041122<br />
6 FAN MOTOR,DC 40W 3 PH 1 L6CBYYYL0048 L6CBYYYL0048 O<br />
7 ANTI-VIBRATION BUSHING 3 CWH501105 CWH501105<br />
8 CORD HOLDER 1 CWD741024 CWD741024<br />
9 SCREW - FAN MOTOR 3 CWH561058 CWH561058<br />
11 TURBO FAN 1 CWH03K1022 CWH03K1022<br />
12 NUT for TURBO FAN 1 CWH561042 CWH561042<br />
13 SPRING WASHER 1 XWA8BFJ XWA8BFJ<br />
14 PLAIN WASHER 1 XWG8H22FJ XWG8H22FJ<br />
15 EVAPORATOR COMPLETE 1 CWB30C3155 CWB30C3155<br />
16 FLARE NUT (1/2”) 1 CWT251032 CWT251032<br />
17 HEATPROOF TUBE 1 CWG021023 CWG021023<br />
18 HEATPROOF TUBE 1 CWG021064 CWG021064<br />
19 FLARE NUT (1/4”) 1 CWT251030 CWT251030<br />
21 PIPE COVER 1 CWD93C1099 CWD93C1099<br />
20 V-COIL COMPLETE 2 CWA43C2386 CWA43C2386<br />
22 SENSOR - EVAPORATOR 1 CWA50C2735 CWA50C2735<br />
23 HOLDER SENSOR 2 CWH32143 CWH32143<br />
24 EVAPORATOR SUPPORTER 3 CWD911529A CWD911529A<br />
26 DRAIN PUMP COMPLETE 1 CWB53C1038 CWB53C1038<br />
27 PANEL DRAIN PUMP ASS’Y 1 CWD93K1021 CWD93K1021<br />
28 DRAIN PUMP 1 CWB532093 CWB532093<br />
29 ANTI - VIBRATION BUSHING 3 CWH501080 CWH501080<br />
30 FLOAT SWITCH - DRAIN PUMP 1 CWA121285 CWA121285<br />
31 FLEXIBLE PIPE 1 CWH85C1033 CWH85C1033<br />
32 DRAIN NOZZLE 1 CWH411011 CWH411011<br />
33 DRAIN HOSE HEAT INSULATION 1 CWG321050 CWG321050<br />
35 DRAIN PAN - COMPLETE 1 CWH40C1071 CWH40C1071<br />
36 DRAIN PLUG 1 CWB821008 CWB821008<br />
37 AIR GUIDER BLOWER WHEEL 1 CWD321058 CWD321058<br />
38 CONTROL BOARD CASING 1 CWH10K1108 CWH10K1108<br />
39 ELECTRONIC CONTROLLER - MAIN 1 CWA73C4576 CWA73C4577 O<br />
42 TERMINAL BOARD ASS'Y 1 CWA28K1042J CWA28K1042J O<br />
43 TERMINAL BOARD ASS'Y 1 CWA28K1202 CWA28K1202 O<br />
44 LEADWIRE-AIR TEMP. SENSOR 1 CWA67C8544 CWA67C8544 O<br />
47 CONTROL BOARD COVER 1 CWH13C1202 CWH13C1202<br />
48 ACCESSORY COMPLETE 1 CWH82C1270 CWH82C1270<br />
52 OPERATING INSTRUCTION 1 CWF567156 CWF567156<br />
53 OPERATING INSTRUCTION 1 CWF567157 CWF567157<br />
54 INSTALLATION INSTRUCTION 1 CWF614111 CWF614111<br />
(Note)<br />
- All parts are supplied from PHAAM, Malaysia (Vendor Code: 00029488)<br />
- “O” marked parts are recommended to be kept in stock.<br />
462
Note<br />
The above exploded view is for the purpose of parts disassembly and replacement.<br />
The non-numbered parts are not kept as standard service parts.<br />
463
REF.<br />
NO.<br />
PART DESCRIPTION QTY PART NO. REMARK<br />
1 FRONT GRILLE - COMPLETE 1 CWE11C4526<br />
4 A.S MOTOR DC SINGLE 12V 250 OHM 2 CWA981105J<br />
5 BRACKET - A.S.MOTOR 1 CWD932522<br />
6 VANE 4 CWE241159<br />
7 SHAFT 6 CWH631038<br />
8 SHAFT 2 CWH631045<br />
9 CONNECTOR - SHAFT 4 CWH081007<br />
10 BEARING 6 CWH641008<br />
12 PLATE COVER FOR A.S.MOTOR 1 CWD911459<br />
13 PLATE COVER FOR CONNECTING SHAFT 2 CWD911460<br />
14 PLATE COVER FOR END SHAFT 1 CWD911461<br />
21 ELECTRONIC CONT. (RECEIVER & INDICATOR) 1 CWA744545<br />
22 LEAD WIRE - COMPLETE 1 CWA67C8578<br />
24 INTAKE GRILLE 1 CWE221131<br />
28 LEVER ARM 2 CWH651029<br />
29 AIR FILTER 1 CWD001142<br />
(Note)<br />
- All parts are supplied from PHAAM, Malaysia (Vendor Code: 00029488)<br />
- “O” marked parts are recommended to be kept in stock.<br />
464
24.1.4 S-63UA1E5 S-71UA1E5 S-90UA1E5<br />
Note<br />
The above exploded view is for the purpose of parts disassembly and replacement.<br />
The non-numbered parts are not kept as standard service parts.<br />
465
Note<br />
The above exploded view is for the purpose of parts disassembly and replacement.<br />
The non-numbered parts are not kept as standard service parts.<br />
466
REF.<br />
NO.<br />
PART NAME & DESCRIPTION QTY S-63UA1E5 S-71UA1E5 S-90UA1E5 REMARK<br />
1 BASE PAN ASS'Y 1 D52K1111 D52K1111 D52K1111<br />
2 INNER POLYSTYRENE COMPLETE 1 G07C1060 G07C1060 G07C1060<br />
3 CABINET SIDE PLATE 1 E041139 E041139 E041139<br />
4 CABINET SIDE PLATE 1 E041140 E041140 E041140<br />
6 FAN MOTOR 1 L6LAJYF00017 L6LAJYF00017 L6LAJYF00017 O<br />
7 ANTI-VIBRATION BUSHING 4 H501016 H501016 H501016<br />
9 SCREW-FAN MOTOR 4 7080300J 7080300J 7080300J<br />
11 TURBO FAN 1 H03K1021 H03K1021 H03K1021<br />
12 NUT FOR TURBO FAN 1 XNG8FJ XNG8FJ XNG8FJ<br />
13 SP WASHER 1 XWA8BFJ XWA8BFJ XWA8BFJ<br />
14 WASHER 1 H571048 H571048 H571048<br />
15 EVAPORATER COMPLETE 1 B30C3260 B30C3173 B30C3173<br />
16 FLARE NUT 1 T251032 T251033 T251033<br />
17 HEATPROOF TUBE 1 G122699 G122699 G122699<br />
18 HEATPROOF TUBE 1 G122692 G122692 G122692<br />
19 FLARE NUT 1 T25086 T25087 T25087<br />
21 PIPE COVER 1 D93C1052 D93C1052 D93C1052<br />
22 SENSOR-EVAPORATER 1 A50C2437 A50C2437 A50C2437<br />
23 PLATE SPRING 1 H711010 H711010 H711010<br />
23-a PLATE SPRING 1 H711013 H711013 H711013<br />
24 EVAPORATER SUPPORTER 1 D911638A D911638A D911638A<br />
24-a EVAPORATER SUPPORTER 2 D911689A D911689A D911689A<br />
25 TUBE ASS'Y (CAPIL. TUBE) 1 T07K1363 T07K1363 T07K1363<br />
26 DRAIN PUMP COMPLETE 1 B53C1023 B53C1023 B53C1023<br />
27 PANEL DRAIN PUMP ASS'Y 1 D93K1016 D93K1016 D93K1016<br />
28 DRAIN PUMP 1 B532065 B532065 B532065<br />
29 ANTI-VIBRATION BUSHING 3 H501097 H501097 H501097<br />
30 FLOAT SWITCH-DRAIN PUMP 1 A121245 A121245 A121245<br />
31 FLEXIBLE PIPE 1 CWH851156 CWH851156 CWH851156<br />
32 DRAIN NOZZLE 1 H411013 H411013 H411013<br />
33 DRAIN HOSE HEAT INSULATION 1 G101284 G101284 G101284<br />
35 DRAIN PAN-COMPLETE 1 H40C1053 H40C1053 H40C1053<br />
36 DRAIN PLUG 1 B821016 B821016 B821016<br />
37 AIR GUIDER B.W. 1 D321093 D321093 D321093<br />
38 CONTROL BOARD A'SSY 1 H10K1084 H10K1084 H10K1084<br />
39<br />
ELECTRONIC CONTROLLER-<br />
COMPLETE<br />
1 A73C4046 A73C4047 A73C4048 O<br />
40 SPACER 6 H541026 H541026 H541026<br />
41 SH CAPACITOR 1 DS441255XPQE DS441305XPQC DS441305XPQC<br />
42 TERMINAL BOARD ASS'Y 1 A28K1042J A28K1042J A28K1042J O<br />
43 TERMINAL BOARD ASS'Y 1 A28K1202 A28K1202 A28K1202 O<br />
44 LEAD WIRE-COMPLETE 1 A67C8646 A67C8646 A67C8646<br />
47<br />
CONTROL BOARD COVER-<br />
COMPLETE<br />
1 H13C1203 H13C1203 H13C1203<br />
48 ACCESSORY-COMPLETE 1 H82C1752 H82C1752 H82C1752<br />
48A FLEXIBLE PIPE 1 H851032 H851032 H851032<br />
49<br />
50<br />
51<br />
WIRED REMOTE CONTROL<br />
COMPLETE(ACCESSORY)<br />
WIRED REMOTE CONTROL<br />
COMPLETE<br />
WIRELESS REMOTE CONTROL<br />
COMPLETE(HEAT PUMP)<br />
WIRELESS REMOTE CONTROL<br />
COMPLETE(COOLING ONLY)<br />
1 CWG87C2049 CWG87C2049 CWG87C2049<br />
1 CWA75C3587 CWA75C3587 CWA75C3587<br />
1 CWA75C3621 CWA75C3621 CWA75C3621<br />
1 CWA75C3629 CWA75C3629 CWA75C3629<br />
467
52 RAY RECEIVER COMPLETE 1 CWD91C0134 CWD91C0134 CWD91C0134<br />
53 EXPANSION VALVE 1 CWB051049 CWB051049 CWB051049<br />
54 V-COIL COMPLETE 1 A43C2388 A43C2388 A43C2388<br />
100 CORD HOLDER 1 D741022 D741022 D741022<br />
55 OPERATING INSTRUCTION 1 F567158 F567158 F567158<br />
56 OPERATING INSTRUCTION 1 F567159 F567159 F567159<br />
57 INSTALLATION INSTRUCTION 1 F614112 F614112 F614112<br />
(Note)<br />
- All parts are supplied from PHAAG, China.<br />
- “O” marked parts are recommended to be kept in stock.<br />
468
24.1.5 S-22NA1E5 S-28NA1E5 S-32NA1E5 S-36NA1E5 S-45NA1E5 S-56NA1E5<br />
26<br />
24<br />
25<br />
33<br />
23<br />
2<br />
6<br />
2<br />
28<br />
3<br />
4<br />
27<br />
3<br />
8<br />
37<br />
34<br />
35<br />
36<br />
29<br />
9<br />
30<br />
5<br />
22<br />
Note<br />
The above exploded view is for the purpose of parts disassembly and replacement.<br />
The non-numbered parts are not kept as standard service parts.<br />
11<br />
14<br />
469<br />
16<br />
15<br />
1<br />
7<br />
17<br />
12<br />
13<br />
32<br />
31<br />
16<br />
1<br />
10<br />
1<br />
19<br />
20<br />
2<br />
21<br />
18<br />
1
REF.<br />
NO.<br />
PART NAME & DESCRIPTION QTY S-22NA1E5 S-28NA1E5 S-32NA1E5 REMARK<br />
1 CABINET TOP PLATE 1 CWE03K1029 CWE03K1029 CWE03K1029<br />
2 EVAPORATOR COMPLETE 1 CWB30C3146 CWB30C3179 CWB30C3148 O<br />
3 PIPE BRANCH (G ) 1 CWT07K1364 CWT07K1364 CWT07K1376<br />
4 PIPE BRANCH (L ) 1 CWT01C5132 CWT01C5132 CWT01C5133<br />
5 EXPANSION VALVE 1 CWB051029 CWB051029 CWB051029<br />
6 PARTICULAR PLATE(LEFT) 1 CWD91C0016 CWD91C0016 CWD91C0016<br />
7 PARTICULAR PLATE(RIGHT) 1 CWD91C0017 CWD91C0017 CWD91C0017<br />
8 COIL FOR EXPANSION VALVE 1 CWA43C2389 CWA43C2389 CWA43C2389<br />
9 CABINET SIDE PLATE (L) 1 CWE04C1107 CWE04C1107 CWE04C1107<br />
10 CABINET SIDE PLATE( R) 1 CWE04C1131 CWE04C1131 CWE04C1131<br />
11 BULKHEAD 1 CWD53C1033 CWD53C1033 CWD53C1033<br />
12 AIR GUIDER B.W.(BOTTOM) 2 CWD321068 CWD321068 CWD321068<br />
13 AIR GUIDER B.W.(UPPER) 2 CWD321069 CWD321069 CWD321069<br />
14 FAN MOTOR BRACKET (BACK) 1 CWD541102 CWD541102 CWD541102<br />
15 FAN MOTOR BRACKET (FRONT) 1 CWD541103 CWD541103 CWD541103<br />
16 BLOW WHEEL 2 CWH01K1026 CWH01K1026 CWH01K1026<br />
17 FAN MOTOR 1 L6LAJYF00018 L6LAJYF00018 L6LAKYF00010 O<br />
18 DRAIN PAN COMPLETE 1 CWH40C1063 CWH40C1063 CWH40C1063<br />
19 BOTTOM PLATE (DRAIN SIDE) 1 CWE051025 CWE051025 CWE051025<br />
20 BOTTOM PLATE (MIDDLE) 1 CWE051026 CWE051026 CWE051026<br />
21 BOTTOM PLATE (FAN SIDE) 1 CWE051011 CWE051011 CWE051011<br />
22 FLANGE COMPLETE 1 CWD60K1009 CWD60K1009 CWD60K1009<br />
23 C-BOX COMPLETE 1 CWH14C7300 CWH14C7301 CWH14C7302<br />
24 CONTROL BOARD CASING 1 CWH10K1097 CWH10K1097 CWH10K1097<br />
25 TERMINAL BOARD 1 CWA28K1042J CWA28K1042J CWA28K1042J O<br />
26 TERMINAL BOARD 1 CWA28K1202 CWA28K1202 CWA28K1202 O<br />
27 CAPACITOR 1 DS441155XPQE DS441205XPQC DS441205XPQC<br />
28 ELECTRONIC CONTROLLER 1 CWA73C4050 CWA73C4051 CWA73C4052 O<br />
29 INTAKE AIR SENSOR 1 CWA50C2425 CWA50C2425 CWA50C2425 O<br />
30 CONTROL BOARD COVER 1 CWH131159 CWH131159 CWH131159<br />
31 PIPING TEMP.SENSOR 1 CWA50C2436 CWA50C2436 CWA50C2436<br />
32 HOLDER-SENSOR 1 CWH711010 CWH711010 CWH711010 O<br />
33 HOLDER-SENSOR 1 CWH711013 CWH711013 CWH711013 O<br />
34 OPERATING INSTRUCTIONS 1 CWF567160 CWF567160 CWF567160<br />
35 OPERATING INSTRUCTIONS 1 CWF567161 CWF567161 CWF567161<br />
36 INSTALLATION INSTRUCTIONS 1 CWF614113 CWF614113 CWF614113<br />
37 DRAIN HOSE 1 CWH85C1010 CWH85C1010 CWH85C1010<br />
(Note)<br />
- All parts are supplied from PHAAG, China.<br />
- “O” marked parts are recommended to be kept in stock.<br />
470
REF.<br />
NO.<br />
PART NAME & DESCRIPTION QTY S-36NA1E5 S-45NA1E5 S-56NA1E5 REMARK<br />
1 CABINET TOP PLATE 1 CWE03K1029 CWE03K1029 CWE03K1029<br />
2 EVAPORATOR COMPLETE 1 CWB30C3148 CWB30C3148 CWB30C3148 O<br />
3 PIPE BRANCH (G ) 1 CWT07K1376 CWT07K1376 CWT07K1376<br />
4 PIPE BRANCH (L ) 1 CWT01C5133 CWT01C5133 CWT01C5133<br />
5 EXPANSION VALVE 1 CWB051029 CWB051029 CWB051029<br />
6 PARTICULAR PLATE(LEFT) 1 CWD91C0016 CWD91C0016 CWD91C0016<br />
7 PARTICULAR PLATE(RIGHT) 1 CWD91C0017 CWD91C0017 CWD91C0017<br />
8 COIL FOR EXPANSION VALVE 1 CWA43C2389 CWA43C2389 CWA43C2389<br />
9 CABINET SIDE PLATE (L) 1 CWE04C1107 CWE04C1107 CWE04C1107<br />
10 CABINET SIDE PLATE( R) 1 CWE04C1131 CWE04C1131 CWE04C1131<br />
11 BULKHEAD 1 CWD53C1033 CWD53C1033 CWD53C1033<br />
12 AIR GUIDER B.W.(BOTTOM) 2 CWD321068 CWD321068 CWD321068<br />
13 AIR GUIDER B.W.(UPPER) 2 CWD321069 CWD321069 CWD321069<br />
14 FAN MOTOR BRACKET (BACK) 1 CWD541102 CWD541102 CWD541102<br />
15 FAN MOTOR BRACKET (FRONT) 1 CWD541103 CWD541103 CWD541103<br />
16 BLOW WHEEL 2 CWH01K1026 CWH01K1026 CWH01K1026<br />
17 FAN MOTOR 1 L6LAKYF00010 L6LAKYF00010 L6LALYF00005 O<br />
18 DRAIN PAN COMPLETE 1 CWH40C1063 CWH40C1063 CWH40C1063<br />
19 BOTTOM PLATE (DRAIN SIDE) 1 CWE051025 CWE051025 CWE051025<br />
20 BOTTOM PLATE (MIDDLE) 1 CWE051026 CWE051026 CWE051026<br />
21 BOTTOM PLATE (FAN SIDE) 1 CWE051011 CWE051011 CWE051011<br />
22 FLANGE COMPLETE 1 CWD60K1009 CWD60K1009 CWD60K1009<br />
23 C-BOX COMPLETE 1 CWH14C7303 CWH14C7304 CWH14C7305<br />
24 CONTROL BOARD CASING 1 CWH10K1097 CWH10K1097 CWH10K1097<br />
25 TERMINAL BOARD 1 CWA28K1042J CWA28K1042J CWA28K1042J O<br />
26 TERMINAL BOARD 1 CWA28K1202 CWA28K1202 CWA28K1202 O<br />
27 CAPACITOR 1 DS441205XPQC DS441255XPQE DS441255XPQE<br />
28 ELECTRONIC CONTROLLER 1 CWA73C4053 CWA73C4054 CWA73C4055 O<br />
29 INTAKE AIR SENSOR 1 CWA50C2425 CWA50C2425 CWA50C2425 O<br />
30 CONTROL BOARD COVER 1 CWH131159 CWH131159 CWH131159<br />
31 PIPING TEMP.SENSOR 1 CWA50C2436 CWA50C2436 CWA50C2436<br />
32 HOLDER-SENSOR 1 CWH711010 CWH711010 CWH711010 O<br />
33 HOLDER-SENSOR 1 CWH711013 CWH711013 CWH711013 O<br />
34 OPERATING INSTRUCTIONS 1 CWF567160 CWF567160 CWF567160<br />
35 OPERATING INSTRUCTIONS 1 CWF567161 CWF567161 CWF567161<br />
36 INSTALLATION INSTRUCTIONS 1 CWF614113 CWF614113 CWF614113<br />
37 DRAIN HOSE 1 CWH85C1010 CWH85C1010 CWH85C1010<br />
(Note)<br />
- All parts are supplied from PHAAG, China.<br />
- “O” marked parts are recommended to be kept in stock.<br />
471
24.1.6 S-45MA1E5 S-56MA1E5 S-63MA1E5 S-71MA1E5 S-90MA1E5<br />
15<br />
34<br />
35<br />
14<br />
16<br />
9<br />
6<br />
26<br />
25<br />
24<br />
Note<br />
The above exploded view is for the purpose of parts disassembly and replacement.<br />
The non-numbered parts are not kept as standard service parts.<br />
472<br />
5<br />
12<br />
23<br />
10<br />
1<br />
3<br />
22<br />
37<br />
2<br />
21<br />
20<br />
32<br />
36<br />
31 30 29 17<br />
33<br />
18<br />
11<br />
19<br />
13<br />
7<br />
8<br />
4<br />
27<br />
28
REF.<br />
NO.<br />
PART NAME PARTS NUMBER<br />
473<br />
QUANTITY PER 1 UNIT REMARK<br />
S-45MA1E5 S-56MA1E5<br />
1 PANEL BOTTOM P42-T04150 1 1<br />
2 DRAIN PAN ASSY P42-T04460 1 1<br />
3 STAY DRAIN PAN ASSY P45-T09250 1 1<br />
4 PANEL SIDE L ASSY P42-T04390 1 1<br />
5 PANEL TOP ASSY P42-T03740R 1 1<br />
6 PANEL SIDE R ASSY P42-T04280 1 1<br />
7 FAN BASE P45-T07690R 1 1<br />
8 FAN BRACKET L P02-T07890R 1 1<br />
9 FAN BRACKET R P02-T07900R 1 1<br />
10 EVAPORATOR ASSY P45-T09260 1 1 O<br />
11 BRACKET EVA L P05-T13000R 1 1<br />
12 BRACKET EVA R P05-T13010R 1 1<br />
13 TUBE ASSY COMPLETE P45-T09100 1 1<br />
14 FAN MOTOR P06-T05800 1 1 O<br />
15 CASING AS. P45-T07950R 1 1<br />
16 CASING AS. P45-T07950R 1 1<br />
17 COVER RELAY BOX P06-T05830 1 1<br />
18 HEADER PIPE ASSY P45-T07850 1 1<br />
19 MULTIBENT TUBE P05-T14780 1 1<br />
20 MAINFOLD TUBE ASSY P45-T09110 1 1<br />
21 STRAINER B111033 1 1<br />
22 SILENCER B121017 1 1<br />
23 L-SHAPED TUBE P05-T14770 1 1<br />
24 EXPANSION VALVE COIL P05-T15110 1 1<br />
25 EXPANSION VALVE P05-T14970 1 1<br />
26 L-SHAPED TUBE P05-T14760 1 1<br />
27 RELAY BOX ASSY (CMPT) P46-T08090 1 -<br />
P46-T08120 - 1<br />
28 PCB BOARD (PROGRAM) A73C4608 1 - O<br />
A73C4609 - 1 O<br />
29 TERMINAL BOARD (2P) P06-T05770 1 1 O<br />
30 TERMINAL BOARD (3P) P46-T05780 1 1 O<br />
31 RELAY BOX ASSY (WELD) P46-T08010 1 1<br />
32 CAPACITOR P06-T05400 1 1<br />
33 DUCT FLANGE ASSY P42-T03770R 1 1<br />
34 FILTER GUIDE ASSY P42-T03790R 1 1<br />
35 FILTER P03-T01520R 1 1<br />
36 COIL SENSOR A50C2438 1 1<br />
37 THERMISTOR P06-T05180 1 1<br />
(Note)<br />
- All parts are supplied from PTW, Taiwan.<br />
- “O” marked parts are recommended to be kept in stock.
REF.<br />
NO.<br />
PART NAME PARTS NUMBER<br />
474<br />
QUANTITY PER 1 UNIT REMARK<br />
S-63MA1E5 S-71MA1E5 S-90MA1E5<br />
1 PANEL BOTTOM P42-T04160 1 1 1<br />
2 DRAIN PAN ASSY P42-T04470 1 1 1<br />
3 STAY DRAIN PAN ASSY P45-T08740 1 1 1<br />
4 PANEL SIDE L ASSY P42-T04290 1 1 1<br />
5 PANEL TOP ASSY P42-T03750R 1 1 1<br />
6 PANEL SIDE R ASSY P42-T04280 1 1 1<br />
7 FAN BASE ASSY P45-T08850 1 1 1<br />
8 FAN BRACKET L P02-T07890R 1 1 1<br />
9 FAN BRACKET R P02-T07900R 1 1 1<br />
10 EVAPORATOR ASSY P45-T09380 1 - - O<br />
P45-T08780 - 1 1<br />
11 BRACKET EVA L P05-T13000R 1 1 1<br />
12 BRACKET EVA R P05-T13010R 1 1 1<br />
13 TUBE ASSY COMPLETE P45-T09400 1 - -<br />
P45-T09270 - 1 1<br />
14 FAN MOTOR P06-T05800 1 1 - O<br />
P06-T05810 - - 1<br />
15 CASING AS. P45-T07950R 1 1 1<br />
16 CASING AS. P45-T07950R 1 1 1<br />
17 COVER RELAY BOX P06-T05830 1 1 1<br />
18 HEADER PIPE ASSY P45-T09390 1 - -<br />
P45-T08820 - 1 1<br />
19 MULTIBENT TUBE P05-T15240 1 - -<br />
P05-T14320 - 1 1<br />
20 MAINFOLD TUBE ASSY P45-T08840 1 1 1<br />
21 STRAINER B111033 1 1 1<br />
22 SILENCER B121017 1 1 1<br />
23 L-SHAPED TUBE P05-T15260 1 1 1<br />
24 EXPANSION VALVE COIL P05-T15110 1 1 1<br />
25 EXPANSION VALVE P05-T14960 1 1 1<br />
26 L-SHAPED TUBE P05-T15250 1 1 1<br />
27 RELAY BOX ASSY (CMPT) P46-T08070 1 - -<br />
P46-T08130 - 1 -<br />
P46-T08140 - - 1<br />
28 PCB BOARD (PROGRAM) A73C4610 1 - - O<br />
A73C4611 - 1 - O<br />
A73C4612 - - 1 O<br />
29 TERMINAL BOARD (2P) P06-T05770 1 1 1 O<br />
30 TERMINAL BOARD (3P) P46-T05780 1 1 1 O<br />
31 RELAY BOX ASSY (WELD) P46-T08010 1 1 1<br />
32 CAPACITOR P06-T05400 1 1 1<br />
33 DUCT FLANGE ASSY P42-T03780R 1 1 1<br />
34 FILTER GUIDE ASSY P42-T03800R 1 1 1<br />
35 FILTER P03-T01510R 1 1 1<br />
36 COIL SENSOR A50C2438 1 1 1<br />
37 THERMISTOR P06-T05180 1 1 1<br />
(Note)<br />
- All parts are supplied from PTW, Taiwan.<br />
- “O” marked parts are recommended to be kept in stock.
24.1.7 U-4LA1E5-1 U-5LA1E5-1 U-6LA1E5-1 U-4LA1E5 U-5LA1E5 U-6LA1E5<br />
11<br />
57<br />
33<br />
10<br />
7<br />
32<br />
34<br />
34<br />
Note<br />
The above exploded view is for the purpose of parts disassembly and replacement.<br />
The non-numbered parts are not kept as standard service parts.<br />
8<br />
36<br />
37<br />
34<br />
25<br />
4<br />
12<br />
27<br />
475<br />
34<br />
26<br />
28<br />
13<br />
3<br />
36<br />
17<br />
18<br />
5<br />
15<br />
56<br />
55<br />
2<br />
4<br />
14<br />
19<br />
20<br />
16 23<br />
21<br />
22<br />
6<br />
32<br />
33<br />
69<br />
31<br />
30<br />
29<br />
24
49<br />
43<br />
48<br />
47<br />
45<br />
44<br />
Note<br />
The above exploded view is for the purpose of parts disassembly and replacement.<br />
The non-numbered parts are not kept as standard service parts.<br />
46<br />
476<br />
41<br />
40<br />
42<br />
54<br />
39<br />
38
63<br />
64<br />
64<br />
66<br />
65<br />
62<br />
68<br />
63<br />
71<br />
70<br />
Note<br />
The above exploded view is for the purpose of parts disassembly and replacement.<br />
The non-numbered parts are not kept as standard service parts.<br />
61<br />
61<br />
60<br />
60<br />
59<br />
477<br />
59<br />
58<br />
52<br />
53<br />
9<br />
1<br />
67<br />
50<br />
51<br />
63
REF.<br />
NO.<br />
PART NAME & DESCRIPTION QTY U-4LA1E5-1 U-5LA1E5-1 U-6LA1E5-1 REMARK<br />
1 BASE PAN ASS'Y 1 CWD52K1164A CWD52K1164A CWD52K1164A<br />
2 COMPRESSOR 1 CWB092390 CWB092390 CWB092390<br />
3 ANTI-VIBRATION BUSHING 3 CWH50055 CWH50055 CWH50055<br />
4 NUT 3 CWH561049 CWH561049 CWH561049<br />
5 PARTICULAR PLATE 1 CWD911471 CWD911471 CWD911471<br />
6 HEATER 1 CWA341037 CWA341037 CWA341037<br />
7 FIN & TUBE CONDENSER COMPLETE 1 CWB32C2896 CWB32C2887 CWB32C2887<br />
8 MANIFOLD TUBE ASS'Y 1 CWT07K1348 CWT07K1520 CWT07K1520<br />
9 SOUND-PROOF BOARD ASS'Y 1 CWH15K1025 CWH15K1025 CWH15K1025<br />
10 ACCUMLATOR 1 CWB131039 CWB131039 CWB131039<br />
11 OIL SEPARATER 1 CWB161008 CWB161008 CWB161008<br />
12 TUBE ASS'Y 1 CWT024421 CWT024421 CWT024421<br />
13 PRESSURE SWITCH 1 CWA101019 CWA101019 CWA101019<br />
14 4-WAYS VALVE COMPLETE 1 CWB00C1038 CWB00C1038 CWB00C1038<br />
15 PRESSURE SWITCH 1 CWA101013 CWA101013 CWA101013<br />
16 4-WAYS VALVE 1 CWB001046 CWB001046 CWB001046<br />
17 V-COIL COMPLETE 1 CWA43C2269 CWA43C2269 CWA43C2269<br />
18 3-WAYS VALVE 1 CWB011251 CWB011251 CWB011251<br />
19 TUBE ASS'Y 1 CWT024424 CWT024424 CWT024424<br />
20 3-WAYS VALVE 1 CWB011292 CWB011292 CWB011292<br />
21 STRAINER 1 CWB111041 CWB111041 CWB111041<br />
22 2-WAYS VALVE 1 CWB021389 CWB021389 CWB021389<br />
23 V-COIL COMPLETE 1 CWA43C2296 CWA43C2296 CWA43C2296<br />
24 RECEIVER 1 CWB141035 CWB141035 CWB141035<br />
25 TUBE ASS'Y 1 CWT025274 CWT026846 CWT026846<br />
26 2-WAYS VALVE 1 CWB021389 CWB021389 CWB021389<br />
27 V-COIL COMPLETE 1 CWA43C2268 CWA43C2268 CWA43C2268<br />
28 DISCHARGE MUFFLER 1 CWB121024 CWB121024 CWB121024<br />
29 TUBE ASS'Y 1 CWT026848 CWT026847 CWT026847<br />
30 EXPANTION VALVE 1 CWB051020J CWB051020J CWB051020J<br />
31 V-COIL COMPLETE 1 CWA43C2375 CWA43C2375 CWA43C2375<br />
32 STRAINER 1 CWB111045 CWB111045 CWB111045<br />
33 CHECK VALVE 1 CWB031049 CWB031049 CWB031049<br />
34 PLATE SPRING 4 CWH711010 CWH711010 CWH711010<br />
35 SENSOR-COMPLETE 1 CWA50C2416 CWA50C2416 CWA50C2416<br />
36 SENSOR-COMPLETE 1 CWA50C2417 CWA50C2417 CWA50C2417<br />
37 SENSOR-COMPLETE 1 CWA50C2418 CWA50C2418 CWA50C2418<br />
38 CONTROL BOARD A'SSY 1 CWH10K1111 CWH10K1111 CWH10K1111<br />
39 FUSE HOLDER 1 K3GB1YH00004 K3GB1YH00004 K3GB1YH00004<br />
40 FUSE 1 K5D503YYA057 K5D503YYA057 K5D503YYA057<br />
41 CONTROL BOARD A'SSY 1 CWH10K1112 CWH10K1112 CWH10K1112<br />
42<br />
43<br />
ELECTRONIC CONTROLLER(NOISE<br />
FILTER)<br />
ELECTRONIC<br />
CONTROLLER(CONDENSER)<br />
1 CWA745706 CWA745706 CWA745706<br />
1 CWA744604 CWA744604 CWA744604<br />
44 TERMINAL BOARD ASS'Y 1 CWA28K1085J CWA28K1085J CWA28K1085J<br />
45 TERMINAL BOARD ASS'Y 1 CWA28K1080J CWA28K1080J CWA28K1080J<br />
46 PARTICULAR PLATE COMPLETE 1 - - -<br />
47 TERMINAL BOARD ASS'Y 1 - - -<br />
48 TERMINAL BOARD ASS'Y 1 - - -<br />
478
49<br />
ELECTRONIC CONTROLLER-<br />
COMPLETE(MAIN))<br />
1 CWA73C4043 CWA73C4044 CWA73C4045<br />
50 CABINET REAR PLATE-COMPLETE 1 CWE02C1045 CWE02C1045 CWE02C1045<br />
51 L-SHAPED PLATE 1 CWD601123A CWD601123A CWD601123A<br />
52 REACTOR 2 G0C123J00005 G0C123J00005 G0C123J00005<br />
53 PARTICULAR PLATE-A'SSY 1 CWD90K1030 CWD90K1030 CWD90K1030<br />
54 LEAD WIRE-COMPLETE 1 CWA67C8373 CWA67C8373 CWA67C8373<br />
55 TERMINAL COVER 1 CWH171032 CWH171032 CWH171032<br />
56 NUT 1 CW7080300J CW7080300J CW7080300J<br />
57A SOUND PROOF MATERIAL 1 CWG302420 CWG302420 CWG302420<br />
57 SOUND PROOF MATERIAL 1 CWG302421 CWG302421 CWG302421<br />
58 FAN MOTOR BRACKET ASS'Y 1 CWD54K1032 CWD54K1032 CWD54K1032<br />
59 MOTOR (MEDIUM DC) 2 CWEHDS83AAC CWEHDS83AAC CWEHDS83AAC<br />
60 FAN ASSY 2 CWH03K1041 CWH03K1041 CWH03K1041<br />
61 NUT 2 CWH561051 CWH561051 CWH561051<br />
62 CABINET FRONT PLATE 1 CWE061135A CWE061135A CWE061135A<br />
63 HANDLE 3 CWE161008 CWE161008 CWE161008<br />
64 DISCHARGE GRILLE 2 CWE201088 CWE201088 CWE201088<br />
65 CABINET SIDE PLATE 1 CWE041235A CWE041235A CWE041235A<br />
66 WIRE NET.RESIN NET 1 CWD041107A CWD041107A CWD041107A<br />
67 WIRE NET.RESIN NET 1 CWD041108A CWD041108A CWD041108A<br />
68 CABINET TOP PLATE-COMPLETE 1 CWE03C1046 CWE03C1046 CWE03C1046<br />
69 ACCESSORY-COMPLETE 1 CWH82C1733 CWH82C1733 CWH82C1733<br />
70 L-SHAPED PLATE 1 CWD601187A CWD601187A CWD601187A<br />
71 CABINET FRONT PLATE-COMPLETE 1 CWE06C1197 CWE06C1197 CWE06C1197<br />
INSTALLATION INSTRUCTION 1 CWF614383 CWF614383 CWF614383<br />
(Note)<br />
- All parts are supplied from PHAAG, China.<br />
- “O” marked parts are recommended to be kept in stock.<br />
479
REF.<br />
NO.<br />
PART NAME & DESCRIPTION QTY U-4LA1E5 U-5LA1E5 U-6LA1E5 REMARK<br />
1 BASE PAN ASS'Y 1 CWD52K1164A CWD52K1164A CWD52K1164A<br />
2 COMPRESSOR 1 CWB092390 CWB092390 CWB092390<br />
3 ANTI-VIBRATION BUSHING 3 CWH50055 CWH50055 CWH50055<br />
4 NUT 3 CWH561049 CWH561049 CWH561049<br />
5 PARTICULAR PLATE 1 CWD911471 CWD911471 CWD911471<br />
6 HEATER 1 CWA341037 CWA341037 CWA341037<br />
7 FIN & TUBE CONDENSER COMPLETE 1 CWB32C2896 CWB32C2887 CWB32C2887<br />
8 MANIFOLD TUBE ASS'Y 1 CWT07K1348 CWT07K1520 CWT07K1520<br />
9 SOUND-PROOF BOARD ASS'Y 1 CWH15K1025 CWH15K1025 CWH15K1025<br />
10 ACCUMLATOR 1 CWB131039 CWB131039 CWB131039<br />
11 OIL SEPARATER 1 CWB161008 CWB161008 CWB161008<br />
12 TUBE ASS'Y 1 CWT024421 CWT024421 CWT024421<br />
13 PRESSURE SWITCH 1 CWA101019 CWA101019 CWA101019<br />
14 4-WAYS VALVE COMPLETE 1 CWB00C1038 CWB00C1038 CWB00C1038<br />
15 PRESSURE SWITCH 1 CWA101013 CWA101013 CWA101013<br />
16 4-WAYS VALVE 1 CWB001046 CWB001046 CWB001046<br />
17 V-COIL COMPLETE 1 CWA43C2269 CWA43C2269 CWA43C2269<br />
18 3-WAYS VALVE 1 CWB011251 CWB011251 CWB011251<br />
19 TUBE ASS'Y 1 CWT024424 CWT024424 CWT024424<br />
20 3-WAYS VALVE 1 CWB011292 CWB011292 CWB011292<br />
21 STRAINER 1 CWB111041 CWB111041 CWB111041<br />
22 2-WAYS VALVE 1 CWB021389 CWB021389 CWB021389<br />
23 V-COIL COMPLETE 1 CWA43C2296 CWA43C2296 CWA43C2296<br />
24 RECEIVER 1 CWB141035 CWB141035 CWB141035<br />
25 TUBE ASS'Y 1 CWT025274 CWT026846 CWT026846<br />
26 2-WAYS VALVE 1 CWB021389 CWB021389 CWB021389<br />
27 V-COIL COMPLETE 1 CWA43C2268 CWA43C2268 CWA43C2268<br />
28 DISCHARGE MUFFLER 1 CWB121024 CWB121024 CWB121024<br />
29 TUBE ASS'Y 1 CWT026848 CWT026847 CWT026847<br />
30 EXPANTION VALVE 1 CWB051020J CWB051020J CWB051020J<br />
31 V-COIL COMPLETE 1 CWA43C2375 CWA43C2375 CWA43C2375<br />
32 STRAINER 1 CWB111045 CWB111045 CWB111045<br />
33 CHECK VALVE 1 CWB031049 CWB031049 CWB031049<br />
34 PLATE SPRING 4 CWH711010 CWH711010 CWH711010<br />
35 SENSOR-COMPLETE 1 CWA50C2416 CWA50C2416 CWA50C2416<br />
36 SENSOR-COMPLETE 1 CWA50C2417 CWA50C2417 CWA50C2417<br />
37 SENSOR-COMPLETE 1 CWA50C2418 CWA50C2418 CWA50C2418<br />
38 CONTROL BOARD A'SSY 1 CWH10K1111 CWH10K1111 CWH10K1111<br />
39 FUSE HOLDER 1 K3GB1YH00004 K3GB1YH00004 K3GB1YH00004<br />
40 FUSE 1 K5D503YYA057 K5D503YYA057 K5D503YYA057<br />
41 CONTROL BOARD A'SSY 1 CWH10K1112 CWH10K1112 CWH10K1112<br />
42<br />
43<br />
ELECTRONIC CONTROLLER(NOISE<br />
FILTER)<br />
ELECTRONIC<br />
CONTROLLER(CONDENSER)<br />
1 CWA745706 CWA745706 CWA745706<br />
1 CWA744604 CWA744604 CWA744604<br />
44 TERMINAL BOARD ASS'Y 1 CWA28K1085J CWA28K1085J CWA28K1085J<br />
45 TERMINAL BOARD ASS'Y 1 CWA28K1080J CWA28K1080J CWA28K1080J<br />
46 PARTICULAR PLATE COMPLETE 1 CWD91C0140 CWD91C0140 CWD91C0140<br />
47 TERMINAL BOARD ASS'Y 1 CWA28K1208 CWA28K1208 CWA28K1208<br />
48 TERMINAL BOARD ASS'Y 1 CWA28K1209 CWA28K1209 CWA28K1209<br />
480
49<br />
ELECTRONIC CONTROLLER-<br />
COMPLETE(MAIN))<br />
1 CWA73C4043 CWA73C4044 CWA73C4045<br />
50 CABINET REAR PLATE-COMPLETE 1 CWE02C1045 CWE02C1045 CWE02C1045<br />
51 L-SHAPED PLATE 1 CWD601123A CWD601123A CWD601123A<br />
52 REACTOR 2 G0C123J00005 G0C123J00005 G0C123J00005<br />
53 PARTICULAR PLATE-A'SSY 1 CWD90K1030 CWD90K1030 CWD90K1030<br />
54 LEAD WIRE-COMPLETE 1 CWA67C8373 CWA67C8373 CWA67C8373<br />
55 TERMINAL COVER 1 CWH171032 CWH171032 CWH171032<br />
56 NUT 1 CW7080300J CW7080300J CW7080300J<br />
57A SOUND PROOF MATERIAL 1 CWG302421 CWG302421 CWG302421<br />
57 SOUND PROOF MATERIAL 1 CWG302420 CWG302420 CWG302420<br />
58 FAN MOTOR BRACKET ASS'Y 1 CWD54K1032 CWD54K1032 CWD54K1032<br />
59 MOTOR (MEDIUM DC) 2 CWEHDS83AAC CWEHDS83AAC CWEHDS83AAC<br />
60 FAN ASSY 2 CWH03K1041 CWH03K1041 CWH03K1041<br />
61 NUT 2 CWH561051 CWH561051 CWH561051<br />
62 CABINET FRONT PLATE 1 CWE061135A CWE061135A CWE061135A<br />
63 HANDLE 3 CWE161008 CWE161008 CWE161008<br />
64 DISCHARGE GRILLE 2 CWE201088 CWE201088 CWE201088<br />
65 CABINET SIDE PLATE 1 CWE041235A CWE041235A CWE041235A<br />
66 WIRE NET.RESIN NET 1 CWD041107A CWD041107A CWD041107A<br />
67 WIRE NET.RESIN NET 1 CWD041108A CWD041108A CWD041108A<br />
68 CABINET TOP PLATE-COMPLETE 1 CWE03C1046 CWE03C1046 CWE03C1046<br />
69 ACCESSORY-COMPLETE 1 CWH82C1733 CWH82C1733 CWH82C1733<br />
70 L-SHAPED PLATE 1 CWD601187A CWD601187A CWD601187A<br />
71 CABINET FRONT PLATE-COMPLETE 1 CWE06C1197 CWE06C1197 CWE06C1197<br />
INSTALLATION INSTRUCTION 1 CWF614114 CWF614114 CWF614114<br />
(Note)<br />
- All parts are supplied from PHAAG, China.<br />
- “O” marked parts are recommended to be kept in stock.<br />
481<br />
Printed in Malaysia<br />
SSYF0911-00