Instruction Manual - The Gator Amateur Radio Club
Instruction Manual - The Gator Amateur Radio Club
Instruction Manual - The Gator Amateur Radio Club

Create successful ePaper yourself
Turn your PDF publications into a flip-book with our unique Google optimized e-Paper software.
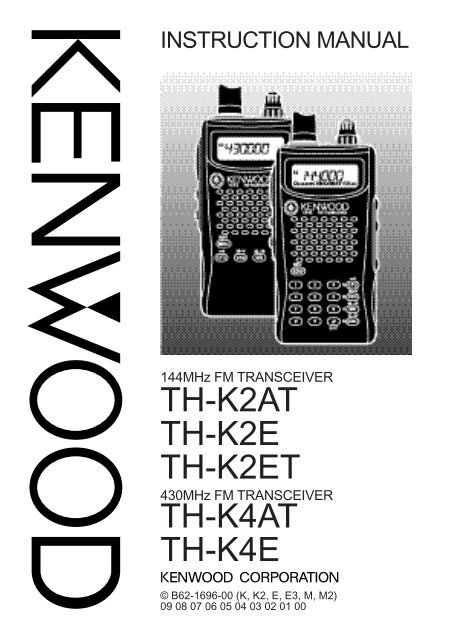
INSTRUCTION MANUAL<br />
144MHz FM TRANSCEIVER<br />
TH-K2AT<br />
TH-K2E<br />
TH-K2ET<br />
430MHz FM TRANSCEIVER<br />
TH-K4AT<br />
TH-K4E<br />
© B62-1696-00 (K, K2, E, E3, M, M2)<br />
09 08 07 06 05 04 03 02 01 00
NOTICE TO THE USER<br />
One or more of the following statements may be<br />
applicable for this equipment.<br />
FCC WARNING<br />
This equipment generates or uses radio frequency energy. Changes<br />
or modifications to this equipment may cause harmful interference<br />
unless the modifications are expressly approved in the instruction<br />
manual. <strong>The</strong> user could lose the authority to operate this equipment<br />
if an unauthorized change or modification is made.<br />
INFORMATION TO THE DIGITAL DEVICE USER REQUIRED BY<br />
THE FCC<br />
This equipment has been tested and found to comply with the limits<br />
for a Class B digital device, pursuant to Part 15 of the FCC Rules.<br />
<strong>The</strong>se limits are designed to provide reasonable protection against<br />
harmful interference in a residential installation.<br />
This equipment generates, uses and can generate radio frequency<br />
energy and, if not installed and used in accordance with the<br />
instructions, may cause harmful interference to radio<br />
communications. However, there is no guarantee that the<br />
interference will not occur in a particular installation. If this equipment<br />
does cause harmful interference to radio or television reception,<br />
which can be determined by turning the equipment off and on, the<br />
user is encouraged to try to correct the interference by one or more of<br />
the following measures:<br />
• Reorient or relocate the receiving antenna.<br />
• Increase the separation between the equipment and receiver.<br />
• Connect the equipment to an outlet on a circuit different from that<br />
to which the receiver is connected.<br />
• Consult the dealer for technical assistance.
MODELS COVERED BY THIS MANUAL<br />
<strong>The</strong> models listed below are covered by this manual.<br />
TH-K2AT, TH-K2E, TH-K2ET<br />
TH-K4AT, TH-K4E<br />
MARKET CODES<br />
Kn: <strong>The</strong> Americas<br />
En: Europe<br />
Mn: General<br />
(Where n represents a variation number.)<br />
<strong>The</strong> market code is printed on the bar-code label of the<br />
carton box.<br />
Refer to the product specifications {pages 122 ~ 133}<br />
for information on the available operating frequencies<br />
within each model. For accessories supplied with each<br />
model, refer to pages vii ~ ix.
PRECAUTIONS<br />
Please observe the following precautions to prevent fire,<br />
personal injury, or transceiver damage:<br />
• Do not transmit with high output power for extended<br />
periods. <strong>The</strong> transceiver may overheat.<br />
• Do not modify this transceiver unless instructed by<br />
this manual or by KENWOOD documentation.<br />
• When using a regulated power supply, connect the<br />
specified DC cable (option) to the DC IN jack on the<br />
transceiver. <strong>The</strong> supply voltage must be between<br />
12 V and 16 V to prevent damaging the transceiver.<br />
• When connecting the transceiver to a cigarette<br />
lighter socket in a vehicle, use the specified cigarette<br />
lighter cable (option).<br />
• Do not expose the transceiver to long periods of<br />
direct sunlight nor place it close to heating<br />
appliances.<br />
• Do not place the transceiver in excessively dusty,<br />
humid, or wet areas, nor on unstable surfaces.<br />
• If an abnormal odor or smoke is detected coming<br />
from the transceiver, turn OFF the power<br />
immediately and remove the battery case or the<br />
battery pack from the transceiver. Contact your<br />
authorized KENWOOD dealer, customer service, or<br />
service station.
NOTICE TO THE USER<br />
MODELS COVERED BY THIS MANUAL<br />
MARKET CODES<br />
CONTENTS<br />
PRECAUTIONS<br />
CONTENTS ................................................................... i<br />
THANK YOU.................................................................... vi<br />
FEATURES...................................................................... vi<br />
SUPPLIED ACCESSORIES ....................................................... vii<br />
WRITING CONVENTIONS FOLLOWED ............................................. x<br />
PREPARATION ............................................................. 1<br />
INSTALLING THE PB-43N NI-MH BATTERY PACK ......................... 1<br />
INSTALLING ALKALINE BATTERIES .......................................... 2<br />
INSTALLING THE ANTENNA ................................................. 4<br />
ATTACHING THE HAND STRAP (OTHER THAN TH-K2AT K/ K2) ............ 4<br />
INSTALLING THE BELT CLIP ................................................ 5<br />
CHARGING THE PB-43N NI-MH BATTERY PACK<br />
(OTHER THAN TH-K2AT K2/ M2, TH-K4AT M2) ...................... 6<br />
CONNECTING TO A CIGARETTE LIGHTER SOCKET ............................ 8<br />
CONNECTING TO A REGULATED POWER SUPPLY ............................. 9<br />
YOUR FIRST QSO ........................................................ 10<br />
FIRST QSO ............................................................. 10<br />
GETTING ACQUAINTED .................................................. 12<br />
KEYS AND CONTROLS .................................................... 12<br />
DISPLAY ................................................................. 14<br />
BASIC OPERATION ........................................................ 17<br />
Switching the Power ON/OFF ................................ 17<br />
Adjusting the Volume ......................................... 17<br />
Adjusting the Squelch ......................................... 18<br />
Transmitting ..................................................... 19<br />
Selecting an Output Power .............................. 19<br />
Selecting a Frequency ........................................ 20<br />
VFO Mode .................................................. 20<br />
MHz Mode .................................................. 20<br />
Direct Frequency Entry<br />
(TH-K2AT/ET/K4AT only) ................................. 21<br />
i
MENU SETUP ............................................................. 24<br />
WHAT IS A MENU? ...................................................... 24<br />
MENU ACCESS ........................................................... 24<br />
MENU FUNCTION LIST ................................................... 26<br />
ALPHABETICAL FUNCTION LIST ............................................ 29<br />
OPERATING THROUGH REPEATERS................................... 31<br />
OFFSET PROGRAMMING FLOW ............................................ 32<br />
Programming an Offset ....................................... 32<br />
Selecting an Offset Direction ........................... 32<br />
Selecting an Offset Frequency .......................... 33<br />
Activating the Tone Function ............................ 34<br />
Selecting a Tone Frequency ............................. 35<br />
AUTOMATIC REPEATER OFFSET (TH-K2AT/ E/ ET ONLY) ................. 37<br />
REVERSE FUNCTION ...................................................... 38<br />
AUTOMATIC SIMPLEX CHECK (ASC) ...................................... 38<br />
TONE FREQ. ID SCAN ................................................... 39<br />
MEMORY CHANNELS .................................................... 41<br />
NUMBER OF MEMORY CHANNELS ......................................... 41<br />
SIMPLEX & REPEATER OR ODD-SPLIT MEMORY CHANNEL? ............... 42<br />
Storing Simplex Frequencies or<br />
Standard Repeater Frequencies ............................. 44<br />
Storing Odd-Split Repeater Frequencies .................. 45<br />
Recalling a Memory Channel ................................ 46<br />
Using the Tuning Control ................................ 46<br />
Using a Numeric Keypad<br />
(TH-K2AT/ ET/ K4AT only) ................................ 46<br />
CLEARING A MEMORY CHANNEL .......................................... 47<br />
NAMING A MEMORY CHANNEL ............................................ 48<br />
MEMORY CHANNEL TRANSFER ............................................ 50<br />
Memory a VFO Transfer ..................................... 50<br />
Channel a Channel Transfer ................................ 50<br />
CALL CHANNEL .......................................................... 53<br />
Recalling the Call Channel ................................... 53<br />
Reprogramming the Call Channel ........................... 54<br />
WEATHER ALERT (TH-K2AT K/ K2 ONLY) .............................. 55<br />
Programming the Weather <strong>Radio</strong> Frequency ............. 55<br />
ii
Enabling a Weather Alert ..................................... 56<br />
CHANNEL DISPLAY ....................................................... 57<br />
SCAN ....................................................................... 59<br />
NORMAL SCAN ........................................................... 60<br />
Band Scan ....................................................... 60<br />
Program Scan................................................... 61<br />
Storing a Program Scan Frequency Range ........... 61<br />
Performing Program Scan ............................... 62<br />
MEMORY SCAN .......................................................... 63<br />
All-Channel Scan ............................................... 63<br />
CALL SCAN .............................................................. 64<br />
PRIORITY SCAN .......................................................... 65<br />
Programming Priority Channels ............................. 65<br />
Using Priority Scan ............................................ 65<br />
MEMORY CHANNEL LOCKOUT ............................................. 67<br />
SCAN RESUME METHOD.................................................. 68<br />
SELECTIVE CALL ......................................................... 69<br />
CTCSS AND DCS ...................................................... 69<br />
CTCSS ................................................................. 69<br />
Using CTCSS .................................................... 69<br />
Selecting a CTCSS Frequency ............................... 70<br />
CTCSS Freq. ID Scan .......................................... 72<br />
DCS .................................................................... 73<br />
Using DCS ....................................................... 73<br />
Selecting a DCS Code ......................................... 74<br />
DCS Code ID Scan ............................................. 75<br />
DTMF FUNCTIONS ....................................................... 76<br />
MANUAL DIALING (TH-K2AT/ ET/ K4AT ONLY) ........................ 76<br />
DTMF TX Hold (TH-K2AT/ ET/ K4AT only) .................. 77<br />
AUTOMATIC DIALER ...................................................... 77<br />
Storing a DTMF Number in Memory ........................ 77<br />
Transmitting a Stored DTMF Number ....................... 79<br />
Adjusting the DTMF Tone Transmission Speed ........... 80<br />
Adjusting the Pause Duration ................................ 80<br />
DTMF KEY LOCK ....................................................... 81<br />
iii
OPERATOR CONVENIENCES ............................................ 82<br />
APO (AUTO POWER OFF) .............................................. 82<br />
BATTERY LIFE ............................................................ 83<br />
REMAINING BATTERY CAPACITY ........................................... 83<br />
BATTERY SAVER ......................................................... 84<br />
BEAT SHIFT .............................................................. 85<br />
BEEP FUNCTION .......................................................... 85<br />
BUSY CHANNEL LOCKOUT ................................................ 86<br />
FREQUENCY STEP SIZE ................................................... 86<br />
LAMP .................................................................... 88<br />
LOCK FUNCTION ......................................................... 88<br />
Tuning Control Unlock ......................................... 89<br />
MICROPHONE PF KEYS (OPTIONAL) ...................................... 89<br />
MONITOR ................................................................ 91<br />
NARROW BAND FM OPERATION .......................................... 91<br />
POWER-ON MESSAGE ................................................... 92<br />
PROGRAMMABLE VFO ................................................... 93<br />
TIME-OUT TIMER ........................................................ 94<br />
TX INHIBIT .............................................................. 95<br />
TX POWER .............................................................. 95<br />
VOX (VOICE-OPERATED TRANSMISSION) ................................. 96<br />
VOX Gain ........................................................ 97<br />
VOX Delay Time ................................................ 99<br />
VOX on Busy .................................................. 100<br />
OPTIONAL ACCESSORIES ............................................. 101<br />
INTERFACING TO PERIPHERALS .................................... 104<br />
SP/MIC JACK ........................................................ 104<br />
SP/MIC ......................................................... 104<br />
PC ............................................................... 105<br />
Using the PG-4Y PC Interface Cable ................. 106<br />
Using the MCP-1A Software ........................... 107<br />
TROUBLESHOOTING ................................................... 108<br />
GENERAL INFORMATION................................................. 108<br />
Service ......................................................... 108<br />
Service Note .................................................. 109<br />
Cleaning ....................................................... 110<br />
BACKUP BATTERY ...................................................... 110<br />
iv
MICROPROCESSOR RESET .............................................. 111<br />
Initial Settings ................................................ 111<br />
Full Reset ..................................................... 111<br />
VFO Reset ..................................................... 111<br />
Performing Reset ............................................ 112<br />
Full reset ................................................. 112<br />
VFO reset ................................................. 113<br />
Reset using the Menu ....................................... 114<br />
OPERATION NOTICES ................................................... 115<br />
Operating Voltage ............................................ 115<br />
Receiving Signals in Cities ................................ 115<br />
Transmission.................................................. 116<br />
Internal Beats ................................................. 116<br />
TROUBLESHOOTING ..................................................... 117<br />
INTERNAL BEATS FREQUENCY LIST ...................................... 121<br />
SPECIFICATIONS ....................................................... 122<br />
INDEX .................................................................... 134<br />
v
THANK YOU<br />
Thank you for choosing this KENWOOD TH-K2AT/ E/ ET,<br />
TH-K4AT/ E transceiver. It has been developed by a<br />
team of engineers determined to continue the tradition<br />
of excellence and innovation in KENWOOD<br />
transceivers.<br />
Don’t let the size fool you! This small FM portable<br />
transceiver features a 5-watt transmitter and various<br />
selective calls without installing options. As you learn<br />
how to use this transceiver, you will also find that<br />
KENWOOD is pursuing “user friendliness”. For<br />
example, each time you change the Menu No. in Menu<br />
Mode, you will see a text message on the display that<br />
lets you know what you are configuring.<br />
Though user friendly, this transceiver is technically<br />
sophisticated and some features may be new to you.<br />
Consider this manual to be a personal tutorial from the<br />
designers. Allow the manual to guide you through the<br />
learning process now, then act as a reference in the<br />
coming years.<br />
FEATURES<br />
• Compact design<br />
• Aluminum die-cast chassis<br />
• High output power (up to 5 W operation)<br />
• 100 memory channels or 50 channels with names<br />
• Long operation period with a Ni-MH battery pack<br />
• Menu allows for easy control and selecting of various<br />
functions.<br />
• Optional PC software is available to manage the<br />
memory channel contents.<br />
• Built-in VOX function<br />
vi
SUPPLIED ACCESSORIES<br />
After carefully unpacking the transceiver, identify the<br />
items listed in the table below. We recommend you<br />
keep the box and packings for the shipping.<br />
Accessory Part<br />
Number<br />
Quantity<br />
TH-K2AT<br />
K K2 M M2<br />
Belt<br />
hook<br />
( w/<br />
screws)<br />
J29-0709-XX 1 1 1 1<br />
Antenna T90-1018-XX 1 1 1 1<br />
Strap J 69-0342-XX<br />
– – 1 1<br />
Battery case<br />
A 02-3817-XX<br />
– 1 – 1<br />
Ni-MH battery<br />
W09-0991-XX 1 – 1 –<br />
Charger<br />
W 08-0959-XX<br />
W08-0960-XX –<br />
1<br />
–<br />
–<br />
1<br />
–<br />
–<br />
–<br />
E B62-1696-XX 1 1 1 1<br />
S B62-1697-XX 1 1 – –<br />
<strong>Instruction</strong><br />
<strong>Manual</strong><br />
G<br />
C<br />
I<br />
B 62-1699-XX<br />
B 62-1695-XX<br />
B 62-1702-XX<br />
–<br />
–<br />
–<br />
–<br />
–<br />
–<br />
–<br />
–<br />
–<br />
–<br />
1<br />
–<br />
F B 62-1757-XX<br />
– – – –<br />
D B 62-1758-XX<br />
– – – –<br />
W arranty<br />
card<br />
– 1 1 – –<br />
vii
Accessory Part<br />
Number<br />
viii<br />
Quantity<br />
TH-K2E TH-K2ET<br />
E E3<br />
Belt<br />
hook<br />
( w/<br />
screws)<br />
J29-0709-XX 1 1<br />
Antenna T90-1018-XX 1 1<br />
Strap J69-0342-XX 1 1<br />
Battery case<br />
A 02-3817-XX<br />
– –<br />
Ni-MH battery<br />
W09-0991-XX 1 1<br />
Charger<br />
W08-0959-XX W 08-0960-XX<br />
1<br />
–<br />
1<br />
–<br />
E B62-1696-XX 1 1<br />
S B62-1697-XX 1 1<br />
<strong>Instruction</strong><br />
<strong>Manual</strong><br />
G<br />
C<br />
I<br />
B62-1699-XX B 62-1695-XX<br />
B62-1702-XX 1<br />
–<br />
1<br />
1<br />
–<br />
1<br />
F B62-1757-XX 1 1<br />
D B62-1758-XX 1 1<br />
W arranty<br />
card<br />
– 1 1
Accessory Part<br />
Number<br />
Quantity<br />
TH-K4AT TH-K4E<br />
M2 E3<br />
Belt<br />
hook<br />
( w/<br />
screws)<br />
J29-0709-XX 1 1<br />
Antenna T90-1019-XX 1 1<br />
Strap J69-0342-XX 1 1<br />
Battery case<br />
A02-3817-XX 1 –<br />
Ni-MH battery<br />
W 09-0991-XX<br />
– 1<br />
Charger<br />
W 08-0959-XX<br />
W 08-0960-XX<br />
–<br />
–<br />
1<br />
–<br />
E B62-1696-XX 1 1<br />
S B 62-1697-XX<br />
– 1<br />
<strong>Instruction</strong><br />
<strong>Manual</strong><br />
G<br />
C<br />
I<br />
B 62-1699-XX<br />
B62-1695-XX B 62-1702-XX<br />
–<br />
1<br />
–<br />
1<br />
–<br />
1<br />
F B 62-1757-XX<br />
– 1<br />
D B 62-1758-XX<br />
– 1<br />
W arranty<br />
card<br />
– – 1<br />
ix
WRITING CONVENTIONS FOLLOWED<br />
<strong>The</strong> writing conventions described below have<br />
been followed to simplify instructions and avoid<br />
unnecessary repetition.<br />
<strong>Instruction</strong> What<br />
to<br />
Do<br />
P ress<br />
[ KEY]<br />
. Press and<br />
release<br />
K EY.<br />
Press<br />
[ KEY1]<br />
, [ KEY2]<br />
.<br />
Press<br />
[ KEY]<br />
( 1 s)<br />
.<br />
Press<br />
[ KEY1]<br />
+ [ KEY2]<br />
.<br />
Press<br />
[ KEY]<br />
+ [ ] .<br />
x<br />
Press KEY1 momentarily,<br />
release<br />
KEY1, then<br />
press<br />
K EY2.<br />
Press and<br />
hold<br />
KEY down<br />
for<br />
a<br />
second.<br />
Press and<br />
hold<br />
KEY1 down,<br />
then<br />
press KEY2. If<br />
there<br />
are<br />
more<br />
than<br />
two<br />
keys,<br />
press<br />
and<br />
hold<br />
down<br />
each<br />
key<br />
in<br />
turn<br />
until<br />
the<br />
final<br />
key<br />
has<br />
been<br />
pressed.<br />
With<br />
the<br />
transceiver<br />
OFF,<br />
press<br />
and hold<br />
KEY, then<br />
switch<br />
ON<br />
the<br />
transceiver<br />
power<br />
by<br />
pressing<br />
[ ] ( POWER)<br />
.<br />
Since the amateur radio bands are slightly different from<br />
country to country, the following meter band descriptions<br />
are used in this manual.<br />
• 2 m band: 144 ~ 148 MHz or 144 ~ 146 MHz<br />
• 70 cm band: 430 ~ 440 MHz
PREPARATION<br />
INSTALLING THE PB-43N Ni-MH BATTERY PACK<br />
Note: Because the battery pack is provided uncharged, you must<br />
charge the battery pack before using it with the transceiver. To<br />
charge the battery pack, refer to “CHARGING THE PB-43N Ni-MH<br />
BATTERY PACK (Other than TH-K2AT K2/ M2, TH-K4AT M2)” {page 6}.<br />
1 Unlock (open) the safety catch located at the bottom<br />
of the battery pack.<br />
2 Match the guides of the battery pack with the<br />
corresponding grooves on the upper rear of the<br />
transceiver, then firmly press the battery pack to lock<br />
it in place.<br />
3 Flip the safety catch into place to prevent<br />
accidentally pressing the release latch and removing<br />
the battery pack.<br />
1
4 To remove the battery pack, lift the safety catch, then<br />
press the release latch to unlock the battery pack.<br />
Lift the battery pack away from the transceiver.<br />
INSTALLING ALKALINE BATTERIES<br />
1 To open the BT-14 battery case lid, insert your thumb<br />
or finger into the hole on the top of the battery case,<br />
then pull the cover up.<br />
2
2 Insert (or remove) six AA (LR6) Alkaline batteries.<br />
• Be sure to match the battery polarities with those<br />
marked in the bottom of the battery case.<br />
3 Align the two tabs at the bottom of battery case, then<br />
close the cover until the locking tabs on top click.<br />
4 To install the battery case onto (or remove it from)<br />
the transceiver, follow steps 1 to 3 of “INSTALLING THE<br />
PB-43N Ni-MH BATTERY PACK” {page 1}.<br />
Note:<br />
◆ Do not use Manganese batteries or Ni-Cd batteries in place of<br />
Alkaline batteries.<br />
◆ Always replace all batteries at the same time. Mixing old and new<br />
batteries or mixing types (such as Alkaline with zinc carbon) will<br />
reduce overall performance and could cause leakage or rupture.<br />
◆ Remove all batteries from the case when it is not expected to be<br />
in use for several months.<br />
◆ <strong>The</strong> voltage of new Alkaline batteries varies slightly, depending<br />
on the manufacturer. Thus, the high battery power indicator may<br />
not appear even though new Alkaline batteries are installed<br />
{page 83}.<br />
◆ To lift the battery pack safety catch, use a piece of hardened<br />
plastic or metal, such as a screwdriver, that is no more than<br />
6 mm wide and 1 mm thick. It is imperative that you place the<br />
implement under only the lip of the safety catch so that you do<br />
not damage the release latch.<br />
3
INSTALLING THE ANTENNA<br />
Hold the supplied antenna by its base, then screw it into<br />
the connector on the top panel of the transceiver until<br />
secure.<br />
ATTACHING THE HAND STRAP (OTHER THAN TH-K2AT K/ K2)<br />
If desired, you can attach the supplied hand strap to the<br />
transceiver.<br />
4<br />
Strap
INSTALLING THE BELT CLIP<br />
If desired, you can install the supplied belt clip to the<br />
transceiver.<br />
1 Loosely insert the two supplied screws into the holes<br />
on the back panel of the transceiver.<br />
2 Slide the belt hook into position, under the screws.<br />
3 Tighten the screws until secure.<br />
Note: When the belt hook is not attached to the transceiver, remove<br />
the screws from the transceiver to avoid scratching other materials.<br />
5
CHARGING THE PB-43N Ni-MH BATTERY PACK<br />
(OTHER THAN TH-K2AT K2/ M2, TH-K4AT M2)<br />
<strong>The</strong> Ni-MH battery pack can be charged after it has<br />
been installed onto the transceiver. (<strong>The</strong> battery pack is<br />
provided uncharged for safety purposes.)<br />
1 Confirm that the transceiver power is OFF.<br />
• While charging the battery pack, leave the transceiver<br />
power OFF.<br />
2 Insert the charger plug into the DC IN jack of the<br />
transceiver.<br />
3 Plug the charger into an AC wall outlet.<br />
• Charging starts.<br />
4 It takes approximately 12 hours to charge an empty<br />
PB-43N Ni-MH battery pack. After 12 hours, remove<br />
the charger plug from the transceiver DC IN jack.<br />
5 Unplug the charger from the AC wall outlet.<br />
6<br />
DC IN jack
Note:<br />
◆ Never leave the battery pack in direct sunlight.<br />
◆ <strong>The</strong> transceiver becomes warm while charging the battery pack.<br />
◆ While the battery pack is charged, the ambient temperature must<br />
be within 0°C ~ 40°C (32°F ~ 104°F). Otherwise, charging does<br />
not start. If the transceiver senses that the temperature is more<br />
than 60°C (140° F) during charging, the transceiver stops<br />
charging.<br />
◆ Before recharging the battery pack, use the battery pack until the<br />
transceiver stops receiving.<br />
◆ Do not plug the charger into the DC IN jack for more than 24<br />
hours.<br />
◆ Unplug the charger as soon as possible after the charging period<br />
is over.<br />
◆ After the battery pack is charged, do not unplug and plug the<br />
charger into the AC outlet again. Unpluging the charger will reset<br />
the charging timer and the battery pack will be charged again.<br />
This could result in over-charging.<br />
◆ If the battery pack is recharged repeatedly before the battery<br />
pack is not fully used, the memory effect (the battery pack will not<br />
allow the charger to recharge the battery to more than a certain<br />
voltage level) may occur. In this case, turn the transceiver ON<br />
until it stops receiving in order to discharge the battery pack, then<br />
recharge the battery pack as normal.<br />
◆ If the battery pack is not used for a long time, the battery pack<br />
capacity temporarily decreases. In this case, charge the battery<br />
and use the battery pack until the transceiver stops receiving.<br />
Repeat this procedure a few times. <strong>The</strong> battery pack should<br />
recover its capacity.<br />
◆ If the charger is plugged into the DC IN jack before the battery<br />
pack is attached, turn the transceiver power ON and then OFF<br />
again to initiate charging.<br />
◆ Exceeding the specified charge period shortens the useful life of<br />
the PB-43N Ni-MH battery pack.<br />
◆ <strong>The</strong> provided charger is designed to charge only the PB-43N<br />
Ni-MH battery pack. Charging other models of battery packs<br />
may damage the charger and battery pack.<br />
◆ Do not transmit while charging.<br />
◆ When not in use, store the battery pack in a cool and dry place.<br />
◆ Before charging the PB-43N Ni-MH battery pack, ensure that the<br />
safety catch is firmly closed.<br />
7
CONNECTING TO A CIGARETTE LIGHTER SOCKET<br />
To connect the transceiver to the cigarette lighter socket<br />
in your vehicle, use an optional PG-3J Cigarette Lighter<br />
cable.<br />
When the PG-3J is connected to the cigarette lighter<br />
plug, the transceiver automatically starts charging the<br />
PB-43N Ni-MH battery pack. While you operate the<br />
transceiver, it charges the PB-43N Ni-MH battery pack<br />
in the background.<br />
Note:<br />
To connect with an external 24 V power source via a DC-DC<br />
converter, only use the optional PG-3J Cigarette Lighter cable.<br />
Using the PG-2W DC cable in this situation may cause a fire.<br />
24V<br />
24V<br />
8<br />
12V<br />
Socket<br />
12V<br />
DC-DC Converter<br />
PG-3J<br />
24V<br />
12V<br />
DC-DC Converter<br />
PG-3J<br />
PG-2W<br />
◆ Do not use the PG-2W to connect a vehicle battery (12 V)<br />
directly. Extensive voltage could result in damaging the<br />
transceiver.<br />
◆ If the input voltage exceeds approximately 16.5 V, warning beeps<br />
sound and “DC ERR” appears.
CONNECTING TO A REGULATED POWER SUPPLY<br />
To connect the transceiver to an appropriate regulated<br />
DC power supply, use an optional PG-2W DC cable.<br />
1 Confirm that the power of both the transceiver and<br />
the DC power supply is OFF.<br />
2 Connect the optional PG-2W DC cable to the DC<br />
power supply; the red lead to the positive (+)<br />
terminal, and the black lead to the negative (–)<br />
terminal.<br />
Fuses (4 A)<br />
3 Connect the barrel plug on the DC cable to the<br />
DC IN jack of the transceiver.<br />
While a DC power supply is connected with the DC IN<br />
jack, the transceiver automatically initiates charging the<br />
PB-43N Ni-MH battery pack.<br />
Note:<br />
◆ If the DC power supply voltage is below 12.0 V DC, you may not<br />
be able to charge the PB-43N Ni-MH battery pack.<br />
◆ <strong>The</strong> supply voltage must be between 12.0 V and 16.0 V to<br />
prevent damaging the transceiver. If the input voltage exceeds<br />
approximately 16.5 V, warning beeps sound and “DC ERR”<br />
appears. Remove the DC IN jack plug immediately.<br />
◆ If the DC power supply voltage is above 14.5 V DC and “ ”<br />
(High Power) is selected, the “ ” icon blinks and the output<br />
power is gradually reduced to “<br />
{page 95}.<br />
” level (Medium Power)<br />
9
10<br />
YOUR FIRST QSO<br />
FIRST QSO<br />
Are you ready to give your transceiver a quick try?<br />
Reading this chapter should get your voice on the air<br />
right away. <strong>The</strong> instructions below are intended only for<br />
a quick guide. If you encounter problems or there is<br />
something you would like to know more, read the<br />
detailed explanations given later in this manual.<br />
1 Press and hold [ ] (POWER) briefly to switch the<br />
transceiver power ON (TH-K2AT/ E/ ET example<br />
shown below).
• A high pitched double beep sounds and a Power-ON<br />
message appears momentarily. <strong>The</strong> various indicators<br />
and the current operating frequency appear on the LCD.<br />
• <strong>The</strong> transceiver stores the current parameters when it<br />
is turned OFF and automatically recalls these<br />
parameters the next time you turn the transceiver ON.<br />
2 Turn the VOL control clockwise, to the 11 o’clock<br />
position.<br />
3 Turn the Tuning control to select a reception<br />
frequency.<br />
VOL ENC.<br />
• You may further turn the VOL control to adjust the<br />
volume level of the signal.<br />
4 To transmit, hold the transceiver approximately 5 cm<br />
(2 inches) from your mouth.<br />
5 Press and hold [PTT], then speak in your normal<br />
tone of voice.<br />
6 Release [PTT] to receive.<br />
7 Repeat steps 4, 5 and 6 to continue communication.<br />
11
KEYS AND CONTROLS<br />
PTT switch<br />
Power Switch<br />
LAMP key<br />
MONI/SQL key<br />
MENU key<br />
12<br />
GETTING ACQUAINTED<br />
Antenna connector<br />
Tuning control<br />
TH-K2AT/ ET/ K4AT<br />
VOL control<br />
LED<br />
(TX:Red RX:Green)<br />
Display (LCD)<br />
SP/MIC jack<br />
DC IN jack<br />
Keypad
PTT switch<br />
Power Switch<br />
LAMP key<br />
MONI/SQL key<br />
MENU key<br />
Antenna connector<br />
Tuning control<br />
TH-K2E/ K4E<br />
VOL control<br />
LED<br />
(TX:Red RX:Green)<br />
Display (LCD)<br />
SP/MIC jack<br />
DC IN jack<br />
Keypad<br />
13
DISPLAY<br />
!8<br />
q w e r t y u i o !0 !1<br />
!7<br />
14<br />
!6<br />
!5 !4 !3<br />
q<br />
Appears when the CTCSS function is activated<br />
{page 69}.<br />
w<br />
Appears when the Tone function is activated<br />
{page 34}.<br />
e<br />
Appears when the DCS function is activated {page 73}.<br />
r<br />
Appears when the repeater shift function is activated<br />
{pages 31 ~ 34, 37}.<br />
t<br />
Appears when the Reverse function is activated<br />
{page 38}.<br />
y<br />
Appears when the Automatic Simplex Check (ASC)<br />
function is activated {page 38}.<br />
!2
u<br />
Appears when a Priority Scan function is activated<br />
{page 65}.<br />
i<br />
Displays the frequencies, Menu settings, Memory name<br />
and other information.<br />
o<br />
Appears when the Weather Alert function is activated<br />
{page 55}.<br />
!0<br />
Appears when narrow FM Mode is selected {page 91}.<br />
!1<br />
Displays the Menu No., memory channel number, and<br />
status {pages 24, 41}.<br />
!2<br />
Appears when the displayed memory channel has data<br />
{page 44}.<br />
!3<br />
Appears when the Lock function is ON {page 88}.<br />
!4<br />
Appears when the Memory Channel Lockout function is<br />
ON {page 67}.<br />
!5<br />
Appears when the VOX function is ON {page 96}.<br />
!6<br />
S-meter (RX) and remaining battery capacity indicator<br />
(TX). Confirm the remaining battery capacity when the<br />
transceiver transmits {page 83}.<br />
15
!7<br />
Appears when the function key is pressed.<br />
!8<br />
appears when high power transmission is selected,<br />
appears when medium power is selected, and<br />
appears when low power is selected {page 95}.<br />
16
BASIC OPERATION<br />
Switching the Power ON/OFF<br />
1 Press [ ] (POWER) briefly to switch the transceiver<br />
power ON.<br />
• A high pitched double beep sounds and a Power-ON<br />
message {page 92} appears briefly, followed by the<br />
frequency and other indicators.<br />
2 To switch the transceiver OFF, press [ ] (POWER)<br />
again.<br />
• When you turn the transceiver OFF, a low pitched<br />
double beep sounds.<br />
• <strong>The</strong> transceiver stores the current frequency and<br />
parameters when it is turned OFF and recalls these<br />
parameters the next time you turn the transceiver ON.<br />
Adjusting the Volume<br />
Turn the VOL control clockwise to increase the audio<br />
output level and counterclockwise to decrease the<br />
output level.<br />
VOL ENC.<br />
• If you are not receiving a signal, press and hold<br />
[MONI/SQL] to unmute the speaker, then adjust the<br />
VOL control to a comfortable audio output level.<br />
17
Adjusting the Squelch<br />
<strong>The</strong> purpose of Squelch is to mute the speaker when no<br />
signals are present. With the squelch level correctly set,<br />
you will hear sound only while actually receiving signals.<br />
<strong>The</strong> higher the selected squelch level, the stronger the<br />
signals must be to receive.<br />
<strong>The</strong> appropriate squelch level depends on the ambient<br />
RF noise conditions.<br />
1 Press [F], [MONI/SQL].<br />
• <strong>The</strong> current squelch level appears.<br />
2 Turn the Tuning control to adjust the level.<br />
• Select the level at which the background noise is just<br />
eliminated when no signal is present.<br />
• <strong>The</strong> higher the level, the stronger the signals must be<br />
to receive.<br />
• 6 different levels can be set.<br />
(0: Minimum ~ 5: Maximum; 2 is the default value)<br />
3 Press any key other than [LAMP], [MONI/SQL] to<br />
store the new setting and exit the squelch<br />
adjustment.<br />
18
Transmitting<br />
1 To transmit, hold the transceiver approximately 5 cm<br />
(2 inches) from your mouth, then press and hold<br />
[PTT] and speak into the microphone in your normal<br />
tone of voice.<br />
• <strong>The</strong> LED lights red and the bar-graph meter appears.<br />
• If you press [PTT] while you are outside of the<br />
transmission coverage, a high pitched error beep<br />
sounds.<br />
2 When you finish speaking, release [PTT].<br />
Note: If you continuously transmit for longer than the time specified<br />
in Menu No. 23 (default is 10 minutes) {page 94}, the internal timeout<br />
timer generates a warning beep and the transceiver stops<br />
transmitting. In this case, release [PTT] and let the transceiver cool<br />
down for a while, then press [PTT] again to resume transmission<br />
{page 116}.<br />
■ Selecting an Output Power<br />
Selecting a lower transmission power is the best way<br />
to reduce battery consumption, if communication is<br />
still reliable. You can configure different power levels<br />
for transmission {page 95}.<br />
Press [F], [PTT] to cycle between “ ” (high), “ ”<br />
(medium), and “ ” (low).<br />
19
Selecting a Frequency<br />
■ VFO Mode<br />
This is the basic mode for changing the operating<br />
frequency. Turn the Tuning control clockwise to<br />
increase the frequency and counterclockwise to<br />
decrease the frequency.<br />
■ MHz Mode<br />
If the desired operating frequency is far away from<br />
the current frequency, it is quicker to use the MHz<br />
Tuning Mode.<br />
To adjust the MHz digit:<br />
1 Press [F].<br />
• <strong>The</strong> MHz digit blinks.<br />
2 Turn the Tuning control to select the desired MHz<br />
value.<br />
3 After selecting the desired MHz value, press [F]<br />
to exit the mode and return to normal VFO Mode.<br />
4 Continue adjusting the frequency as necessary,<br />
using the Tuning control.<br />
20
■ Direct Frequency Entry (TH-K2AT/ ET/ K4AT only)<br />
In addition to turning the Tuning control, there is<br />
another way to select the frequency. When the<br />
desired frequency is far away from the current<br />
frequency, you can directly enter a frequency using<br />
the numeric keypad.<br />
1 Press [VFO].<br />
• You must be in the VFO Mode to make the direct<br />
frequency entry.<br />
2 Press [#].<br />
3 Press the numeric keys ([0] to [9]) to enter your<br />
desired frequency. [ ] allows you to complete the<br />
MHz digits entry.<br />
• Pressing [#] fills all remaining digits (the digits you<br />
did not enter) with 0 and completes the entry. For<br />
example, to select 145.000 MHz, press [1], [4], [5]<br />
and press [#] to complete the entry.<br />
• If you want to revise the MHz digits only, leaving the<br />
kHz digits as they are, press [VFO] in place of [#].<br />
Example 1<br />
To enter 145.750 MHz:<br />
Key in Display<br />
[#] – –– –––<br />
[1], [4], [5] 1 4 5. – – –<br />
[7], [5], [0] 1 4 5. 7 5 0<br />
21
Example 2<br />
To enter 145.000 MHz:<br />
Key in Display<br />
[#] ––– –––<br />
[1], [4], [5] 1 4 5. – – –<br />
[#] 1 4 5. 0 0 0<br />
Example 3 (Short cut)<br />
To enter 145.000 MHz:<br />
Key in Display<br />
1 4 4. 6 2 5<br />
[#] ––– –––<br />
[5] 5 – –. – – –<br />
[ ] 1 4 5. – – –<br />
[#] 1 4 5. 0 0 0<br />
Example 4<br />
To change 144.650 MHz to 145.650 MHz:<br />
Key in Display<br />
1 4 4. 6 5 0<br />
[#] ––– –––<br />
[1], [4], [5] 1 4 5. – – –<br />
[VFO] 1 4 5. 6 5 0<br />
22
Example 5 (Short cut)<br />
To change 144.650 MHz to 145.650 MHz:<br />
Key in Display<br />
1 4 4. 6 5 0<br />
[#] ––– –––<br />
[5] 5 – – – – –<br />
[ ] 1 4 5. – – –<br />
[VFO] 1 4 5. 6 5 0<br />
Example 6<br />
To change 145.200 MHz to 145.750 MHz:<br />
Key in Display<br />
1 4 5. 2 0 0<br />
[#] ––– –––<br />
[ ] 1 4 5. – – –<br />
[7], [5], [0] 1 4 5. 7 5 0<br />
Note:<br />
◆ If the entered frequency does not match the current<br />
frequency step size, the frequency is automatically rounded<br />
down to the next available frequency.<br />
◆ When the desired frequency cannot be entered exactly,<br />
confirm the frequency step size {page 86}.<br />
◆ If you turn the Tuning control while entering the frequency,<br />
the transceiver clears the entry and changes to the next<br />
available frequency.<br />
23
24<br />
MENU SETUP<br />
WHAT IS A MENU?<br />
Many functions on this transceiver are selected or<br />
configured via a software-controlled Menu rather than<br />
through the physical controls of the transceiver. Once<br />
you become familiar with the Menu system, you will<br />
appreciate its versatility. You can customize the various<br />
timings, settings, and programming functions on this<br />
transceiver to meet your needs without using many<br />
controls and switches.<br />
MENU ACCESS<br />
1 Press [MENU].<br />
• A brief explanation of the Menu, and the setting and<br />
Menu No. appear on the display.<br />
Parameter<br />
Menu No.<br />
Function<br />
2 Turn the Tuning control to select your desired Menu.<br />
• As you change the Menu No., a brief explanation of<br />
each Menu appears along with its current parameter.
3 Press [MENU] to configure the parameter of the<br />
currently selected Menu No.<br />
4 Turn the Tuning control to select your desired<br />
parameter.<br />
5 Press [MENU] to store the new setting. Otherwise,<br />
press any key other than [LAMP], [MONI/SQL] or<br />
[ ] (POWER) to cancel.<br />
Note:<br />
◆ <strong>The</strong> [LAMP] and [MONI/SQL] keys can be operated while<br />
configuring the Menu.<br />
◆ We recommend you pressing [PTT] to cancel the parameter<br />
setting and restore its old value. However, you can also press<br />
any key other than [LAMP], [MONI/SQL] or [MENU] to cancel.<br />
25
26<br />
MENU FUNCTION LIST<br />
e<br />
h<br />
t<br />
n<br />
O<br />
y<br />
a<br />
l<br />
p<br />
s<br />
i<br />
D<br />
u<br />
n<br />
e<br />
M<br />
.<br />
o<br />
N<br />
n<br />
o<br />
i<br />
t<br />
c<br />
n<br />
u<br />
F s<br />
n<br />
o<br />
i<br />
t<br />
c<br />
e<br />
l<br />
e<br />
S t<br />
l<br />
u<br />
a<br />
f<br />
e<br />
D<br />
.<br />
f<br />
e<br />
R<br />
e<br />
g<br />
a<br />
P<br />
P<br />
T<br />
S 1 1<br />
p<br />
e<br />
t<br />
s<br />
y<br />
c<br />
n<br />
e<br />
u<br />
q<br />
e<br />
r<br />
F<br />
e<br />
z<br />
i<br />
s<br />
/<br />
0<br />
1<br />
/<br />
5<br />
2<br />
.<br />
6<br />
/<br />
5<br />
/<br />
5<br />
2<br />
/<br />
0<br />
2<br />
/<br />
5<br />
1<br />
/<br />
5<br />
.<br />
2<br />
1<br />
z<br />
H<br />
k<br />
0<br />
0<br />
1<br />
/<br />
0<br />
5<br />
/<br />
0<br />
3<br />
/<br />
5<br />
.<br />
2<br />
1<br />
/<br />
5<br />
5<br />
2<br />
6<br />
8<br />
S<br />
C<br />
D<br />
.<br />
T<br />
C<br />
.<br />
T 2<br />
/<br />
S<br />
S<br />
C<br />
T<br />
C<br />
/<br />
e<br />
n<br />
o<br />
T<br />
n<br />
o<br />
i<br />
t<br />
c<br />
e<br />
l<br />
e<br />
s<br />
S<br />
C<br />
D<br />
/<br />
E<br />
N<br />
O<br />
T<br />
/<br />
F<br />
F<br />
O<br />
S<br />
C<br />
D<br />
/<br />
S<br />
S<br />
C<br />
T<br />
C<br />
F<br />
F<br />
O<br />
,<br />
4<br />
3<br />
3<br />
7<br />
,<br />
9<br />
6<br />
T 3 y<br />
c<br />
n<br />
e<br />
u<br />
q<br />
e<br />
r<br />
f<br />
e<br />
n<br />
o<br />
T z<br />
H<br />
1<br />
.<br />
4<br />
5<br />
2<br />
~<br />
0<br />
.<br />
7<br />
6 5<br />
.<br />
8<br />
8 5<br />
3<br />
T<br />
C 4<br />
S<br />
S<br />
C<br />
T<br />
C<br />
y<br />
c<br />
n<br />
e<br />
u<br />
q<br />
e<br />
r<br />
f<br />
z<br />
H<br />
1<br />
.<br />
4<br />
5<br />
2<br />
~<br />
0<br />
.<br />
7<br />
6 5<br />
.<br />
8<br />
8 0<br />
7<br />
S<br />
C<br />
D 5 e<br />
d<br />
o<br />
c<br />
S<br />
C<br />
D 4<br />
5<br />
7<br />
~<br />
3<br />
2<br />
0 3<br />
2<br />
0 4<br />
7<br />
T<br />
F<br />
S 6 n<br />
o<br />
i<br />
t<br />
c<br />
e<br />
r<br />
i<br />
d<br />
t<br />
f<br />
i<br />
h<br />
S 6<br />
.<br />
7<br />
–<br />
/<br />
–<br />
/<br />
+<br />
/<br />
F<br />
F<br />
O F<br />
F<br />
O 2<br />
3<br />
O<br />
F<br />
V<br />
.<br />
P 7<br />
e<br />
l<br />
b<br />
a<br />
m<br />
m<br />
a<br />
r<br />
g<br />
o<br />
r<br />
P<br />
O<br />
F<br />
V<br />
z<br />
H<br />
M<br />
4<br />
7<br />
1<br />
~<br />
6<br />
3<br />
1<br />
)<br />
T<br />
A<br />
2<br />
K<br />
-<br />
H<br />
T<br />
(<br />
z<br />
H<br />
M<br />
6<br />
4<br />
1<br />
~<br />
4<br />
4<br />
1<br />
)<br />
T<br />
E<br />
/<br />
E<br />
2<br />
K<br />
-<br />
H<br />
T<br />
(<br />
z<br />
H<br />
M<br />
0<br />
7<br />
4<br />
~<br />
0<br />
0<br />
4<br />
)<br />
T<br />
A<br />
4<br />
K<br />
-<br />
H<br />
T<br />
(<br />
z<br />
H<br />
M<br />
0<br />
4<br />
4<br />
~<br />
0<br />
3<br />
4<br />
)<br />
E<br />
4<br />
K<br />
-<br />
H<br />
T<br />
(<br />
3<br />
9<br />
T<br />
E<br />
S<br />
F<br />
F<br />
O 1 8<br />
t<br />
e<br />
s<br />
f<br />
f<br />
o<br />
r<br />
e<br />
t<br />
a<br />
e<br />
p<br />
e<br />
R<br />
y<br />
c<br />
n<br />
e<br />
u<br />
q<br />
e<br />
r<br />
f<br />
0<br />
5<br />
9<br />
.<br />
9<br />
6<br />
~<br />
0<br />
0<br />
0<br />
.<br />
0<br />
z<br />
H<br />
M<br />
/<br />
0<br />
0<br />
6<br />
.<br />
0<br />
/<br />
0<br />
0<br />
6<br />
.<br />
1<br />
0<br />
0<br />
0<br />
.<br />
5<br />
3<br />
3<br />
O<br />
R<br />
A 2 9<br />
c<br />
i<br />
t<br />
a<br />
m<br />
o<br />
t<br />
u<br />
A<br />
t<br />
e<br />
s<br />
f<br />
f<br />
O<br />
r<br />
e<br />
t<br />
a<br />
e<br />
p<br />
e<br />
R<br />
F<br />
F<br />
O<br />
/<br />
N<br />
O N<br />
O 7<br />
3<br />
I<br />
R<br />
P 0<br />
1 n<br />
a<br />
c<br />
s<br />
y<br />
t<br />
i<br />
r<br />
o<br />
i<br />
r<br />
P F<br />
F<br />
O<br />
/<br />
N<br />
O F<br />
F<br />
O 6<br />
6<br />
N<br />
A<br />
C<br />
S 1<br />
1<br />
e<br />
m<br />
u<br />
s<br />
e<br />
r<br />
n<br />
a<br />
c<br />
S<br />
d<br />
o<br />
h<br />
t<br />
e<br />
m<br />
E<br />
S<br />
/<br />
O<br />
C<br />
/<br />
O<br />
T O<br />
T 8<br />
6<br />
T<br />
U<br />
O<br />
.<br />
L 2<br />
1<br />
l<br />
e<br />
n<br />
n<br />
a<br />
h<br />
c<br />
y<br />
r<br />
o<br />
m<br />
e<br />
M<br />
t<br />
u<br />
o<br />
k<br />
c<br />
o<br />
l<br />
F<br />
F<br />
O<br />
/<br />
N<br />
O F<br />
F<br />
O 7<br />
6<br />
H<br />
C<br />
.<br />
M 3<br />
1<br />
l<br />
e<br />
n<br />
n<br />
a<br />
h<br />
c<br />
y<br />
r<br />
o<br />
m<br />
e<br />
M<br />
y<br />
t<br />
i<br />
c<br />
a<br />
p<br />
a<br />
c<br />
0<br />
0<br />
1<br />
/<br />
0<br />
5 0<br />
5 1<br />
4
On<br />
the<br />
Display<br />
Menu<br />
No.<br />
Function Selections Ref.<br />
Default<br />
Page<br />
M. NAME<br />
14 Memory name<br />
6 characters<br />
– 48<br />
Memory<br />
name/<br />
MDF 15<br />
Frequency<br />
display<br />
MN/ FRQ<br />
MN 49<br />
OFF/<br />
0.<br />
2/<br />
0.<br />
4/<br />
SAV 16 Battery<br />
saver<br />
0.<br />
6/<br />
0.<br />
8/<br />
1.<br />
0/<br />
2.<br />
0/<br />
3.<br />
0/<br />
4.<br />
0/<br />
5.<br />
0<br />
1. 0 84<br />
APO 17<br />
Automatic<br />
Power-OFF<br />
OFF/<br />
30/<br />
60/<br />
90/<br />
120/<br />
180<br />
min.<br />
3082 CK1 18CALL key<br />
CALL/<br />
1750<br />
C ALL/<br />
1750<br />
36,<br />
64<br />
HLD 19<br />
1750<br />
Hz<br />
tone<br />
TX<br />
hold<br />
ON/ OFF<br />
OFF 36<br />
VOX 20 VOX function<br />
OFF/ 1 ~ 9 OFF 96<br />
VXB 21 VOX on<br />
busy<br />
ON/ OFF<br />
OFF 100<br />
250/<br />
500/<br />
750/<br />
VD22 VOX<br />
delay<br />
1000/<br />
1500/<br />
2000/<br />
3000<br />
ms<br />
500 99<br />
TOT 23 Time-out Timer<br />
3/ 5/<br />
10<br />
minutes<br />
10 94<br />
BCL 24<br />
Busy<br />
channel<br />
lockout<br />
ON/ OFF<br />
OFF 86<br />
TXI 25 TXinhibit ON/ OFF<br />
OFF 95<br />
P. ON.<br />
MSG<br />
26<br />
Power-ON<br />
message<br />
6 characters<br />
– 92<br />
BP27 Beep ON/ OFF<br />
ON 85<br />
BS28 Beat Shift<br />
ON/ OFF<br />
OFF 85<br />
FMN 29 Narrow FM<br />
ON/ OFF<br />
OFF 91<br />
ENC 30<br />
Tuning control<br />
unlock<br />
ON/ OFF<br />
OFF 89<br />
27
On<br />
the<br />
Display<br />
28<br />
Menu<br />
No.<br />
Ref.<br />
Function Selections Default<br />
Page<br />
PC31 PCcontrol ON/ OFF<br />
OFF 107<br />
DTMF. MR<br />
32 Automatic dialer<br />
U p to<br />
16<br />
digits<br />
– 77<br />
SPD 33 DTMF TX<br />
speed<br />
FA/ SL<br />
FA 80<br />
3 DT. H 34DTMF TX<br />
hold<br />
ON/ OFF<br />
OFF 77<br />
PA35 DTMF<br />
pause<br />
period<br />
100/<br />
250/<br />
500/<br />
750/<br />
1000/<br />
1500/<br />
2000<br />
ms<br />
500 80<br />
DT. L 36 DTMF key<br />
lock<br />
ON/ OFF<br />
OFF 81<br />
WXA4 37Weather Alert<br />
ON/ OFF<br />
OFF 56<br />
RESET 99 Reset selection<br />
VFO/ FULL<br />
VFO 111<br />
1 Default settings vary according to the transceiver model you are<br />
using. See the reference page to determine which default setting<br />
is available for your transceiver.<br />
2 Only available for TH-K2AT K/ K2 and TH-K2E/ ET<br />
3 Only available for TH-K2AT/ ET and TH-K4AT<br />
4 Only available for TH-K2AT K/ K2
On<br />
the<br />
Display<br />
Menu<br />
No.<br />
Selections Default<br />
Ref.<br />
Page<br />
APO 1 7 OFF/ 30/<br />
60/<br />
90/<br />
120/<br />
180<br />
min.<br />
30 82<br />
2 ARO 9 ON/ OFF<br />
ON 37<br />
BCL 24 ON/ OFF<br />
OFF 86<br />
BP27 ON/ OFF<br />
ON 85<br />
BS28 ON/ OFF<br />
OFF 85<br />
CK1 ALPHABETICAL FUNCTION LIST<br />
18CALL/ 1750<br />
CALL/<br />
1750<br />
36,<br />
64<br />
CT4 67. 0 ~ 254.<br />
1 Hz<br />
88. 5 70<br />
DCS 5 023 ~ 754<br />
023 74<br />
DTMF. MR<br />
32 U p to<br />
16<br />
digits<br />
– 77<br />
3 DT. H 34ON/ OFF<br />
OFF 77<br />
DT. L 36 ON/ OFF<br />
OFF 81<br />
ENC 30 ON/ OFF<br />
OFF 89<br />
FMN 29 ON/ OFF<br />
OFF 91<br />
HLD 19 ON/ OFF<br />
OFF 36<br />
L. OUT<br />
12 ON/ OFF<br />
OFF 67<br />
M. CH<br />
13 50/ 100<br />
50 41<br />
MDF 15 MN/ FRQ<br />
MN 49<br />
M. NAME<br />
14 6 characters<br />
– 48<br />
1 OFFSET 8<br />
0.<br />
000<br />
~ 69.<br />
950<br />
MHz<br />
in<br />
steps<br />
of<br />
50<br />
kHz<br />
0.<br />
600/<br />
1.<br />
600/<br />
5.<br />
000<br />
33<br />
PA35 100/<br />
250/<br />
500/<br />
750/<br />
1000/<br />
1500/<br />
2000<br />
ms<br />
500 80<br />
PC31 ON/ OFF<br />
OFF 107<br />
P. ON.<br />
MSG<br />
26 6 characters<br />
– 92<br />
29
On<br />
the<br />
Display<br />
Menu<br />
No.<br />
Selections Default<br />
Ref.<br />
Page<br />
PRI 10 ON/ OFF<br />
136<br />
~ 174<br />
MHz<br />
( TH-K2AT)<br />
OFF 66<br />
P. VFO<br />
7<br />
144<br />
~ 146<br />
MHz<br />
( TH-K2E/<br />
ET)<br />
400<br />
~ 470<br />
MHz<br />
( TH-K4AT)<br />
430<br />
~ 440<br />
MHz<br />
( TH-K4E)<br />
93<br />
RESET 99 VFO/ FULL<br />
VFO 111<br />
SAV 16<br />
OFF/<br />
0.<br />
2/<br />
0.<br />
4/<br />
0.<br />
6/<br />
0.<br />
8/<br />
1.<br />
0/<br />
2.<br />
0/<br />
3.<br />
0/<br />
4.<br />
0/<br />
5.<br />
0<br />
1. 0 84<br />
SCAN 11 TO/ CO/<br />
SE<br />
TO 68<br />
SFT1 6 OFF/ + / – / – 7.<br />
6<br />
OFF 32<br />
SPD 33 FA/ SL<br />
FA 80<br />
STP1 1<br />
5/<br />
6.<br />
25/<br />
10/<br />
12.<br />
5/<br />
15/<br />
20/<br />
25/<br />
30/<br />
50/<br />
100<br />
kHz<br />
5/<br />
12.<br />
5/<br />
25<br />
86<br />
T 3 67. 0 ~ 254.<br />
1 Hz<br />
88. 5 35<br />
T. CT.<br />
DCS<br />
2 OFF/ TONE/<br />
CTCSS/<br />
DCS<br />
OFF<br />
30<br />
34,<br />
69,<br />
73<br />
TOT 23 3/ 5/<br />
10<br />
minutes<br />
10 94<br />
TXI 25 ON/ OFF<br />
OFF 95<br />
VD22 250/<br />
500/<br />
750/<br />
1000/<br />
1500/<br />
2000/<br />
3000<br />
ms<br />
500 99<br />
VOX 20 OFF/ 1 ~ 9<br />
OFF 96<br />
VXB 21 ON/ OFF<br />
OFF 100<br />
WXA4 37ON/ OFF<br />
OFF 56<br />
1 Default settings vary according to the transceiver model you are<br />
using. See the reference page to determine which default setting<br />
is available for your transceiver.<br />
2 Only available for TH-K2AT K/ K2 and TH-K2E/ ET<br />
3 Only available for TH-K2AT/ ET and TH-K4AT<br />
4 Only available for TH-K2AT K/ K2
OPERATING THROUGH REPEATERS<br />
Repeaters, which are often installed and maintained by<br />
radio clubs, are usually located on mountain tops or<br />
other elevated locations. <strong>The</strong>y generally operate at<br />
higher ERP (Effective Radiated Power) than a typical<br />
station. This combination of elevation and high ERP<br />
allows communications over much greater distances<br />
than communicating without using repeaters.<br />
Most repeaters use a receive and transmit frequency<br />
pair with a standard or non-standard offset (odd-split).<br />
In addition, some repeaters must receive a tone from<br />
the transceiver to be accessed. For details, consult your<br />
local repeater reference.<br />
TX: 144.725 MHz<br />
TX tone: 88.5 Hz<br />
RX: 145.325 MHz TX: 144.725 MHz<br />
TX tone: 88.5 Hz<br />
RX: 145.325 MHz<br />
31
OFFSET PROGRAMMING FLOW<br />
q<br />
w Select an offset direction.<br />
e<br />
r<br />
t<br />
32<br />
Select a receive frequency.<br />
Select an offset frequency<br />
(only when programming odd-split<br />
repeater frequencies).<br />
Activate the Tone function<br />
(if necessary).<br />
Select a tone frequency<br />
(if necessary).<br />
If you store all the above data in a memory channel, you<br />
will not need to reprogram the parameters every time.<br />
Refer to “MEMORY CHANNELS” {page 41}.<br />
Programming an Offset<br />
You must first select an amateur radio repeater downlink<br />
frequency as described in “Selecting an Offset<br />
Frequency” {page 33}.<br />
■ Selecting an Offset Direction<br />
Select whether the transmission frequency will be<br />
higher (+) or lower (–) than the reception frequency.
1 Press [MENU].<br />
2 Turn the Tuning control to select Menu No. 6<br />
(SFT).<br />
3 Press [MENU].<br />
4 Turn the Tuning control to select “+” or “–”.<br />
• To program a –7.6 MHz offset (TH-K4E only),<br />
select “–7.6” instead.<br />
5 Press [MENU] to store the setting or [PTT] to<br />
cancel.<br />
• “+” or “–” (or “ ”) appears above the frequency,<br />
indicating which offset direction is selected.<br />
If the offset transmission frequency falls outside the<br />
allowable range, transmission is inhibited. In this<br />
case, adjust the reception frequency so that the<br />
transmission frequency is within the band limits.<br />
Note: While using an odd-split memory channel or transmitting,<br />
you cannot change the offset direction.<br />
■ Selecting an Offset Frequency<br />
To access a repeater which requires an odd-split<br />
frequency pair, change the offset frequency from the<br />
default which is used by most repeaters. <strong>The</strong> default<br />
offset frequency on the 2 m band is 600 kHz (all<br />
TH-K2 models); the default on the 70 cm band is<br />
5.0 MHz (TH-K4AT) or 1.6 MHz (TH-K4E).<br />
33
1 Press [MENU].<br />
2 Turn the Tuning control to select Menu No. 8<br />
(OFFSET).<br />
3 Press [MENU].<br />
4 Turn the Tuning control to select the appropriate<br />
offset frequency.<br />
• <strong>The</strong> selectable range is from 0.000 MHz to 69.950<br />
MHz in steps of 50 kHz.<br />
5 Press [MENU] to store the setting or [PTT] to<br />
cancel.<br />
6 Press any key other than [LAMP], [MONI/SQL],<br />
and [MENU] to exit Menu Mode.<br />
TH-K4E only: If you have selected “ ” for the offset direction, you<br />
cannot change the default (–7.6 MHz) offset frequency.<br />
Note: After changing the offset frequency, the new offset<br />
frequency will also be used by Automatic Repeater Offset.<br />
■ Activating the Tone Function<br />
1 Press [MENU].<br />
2 Turn the Tuning control to select Menu No. 2<br />
(T.CT.DCS).<br />
34
3 Press [MENU].<br />
4 Turn the Tuning control to select “TONE”.<br />
5 Press [MENU] to store the setting or [PTT] to<br />
cancel.<br />
6 Press any key other than [LAMP], [MONI/SQL],<br />
and [MENU] to exit Menu Mode.<br />
• “T” appears when the Tone function is ON.<br />
Note: You cannot use the Tone and CTCSS/ DCS functions at<br />
the same time. Switching the Tone function ON after activating<br />
the CTCSS/ DCS deactivates the CTCSS/ DCS function.<br />
TH-K2E/ ET/ K4E only: When you access repeaters that require<br />
a 1750 Hz tone, you do not need to activate the Tone function.<br />
Simply press [CALL] without pressing [PTT] switch to transmit a<br />
1750 Hz tone (default setting).<br />
■ Selecting a Tone Frequency<br />
1 Press [MENU].<br />
2 Turn the Tuning control to select Menu No. 3 (T).<br />
3 Press [MENU].<br />
4 Turn the Tuning control to select the desired tone<br />
frequency.<br />
5 Press [MENU] to store the setting or [PTT] to<br />
cancel.<br />
6 Press any key other than [LAMP], [MONI/SQL],<br />
and [MENU] to exit Menu Mode.<br />
35
Available Tone Frequencies<br />
36<br />
Tone<br />
Frequency<br />
( Hz)<br />
67. 0 82. 5 100. 0 123. 0 151. 4 186. 2 225.<br />
7<br />
69. 3 85. 4 103. 5 127. 3 156. 7 192. 8 229.<br />
1<br />
71. 9 88. 5 107. 2 131. 8 162. 2 203. 5 233.<br />
6<br />
74. 4 91. 5 110. 9 136. 5 167. 9 206. 5 241.<br />
8<br />
77. 0 94. 8 114. 8 141. 3 173. 8 210. 7 250.<br />
3<br />
79. 7 97. 4 118. 8 146. 2 179. 9 218. 1 254.<br />
1<br />
Note: 42 different tones are available for the transceiver. <strong>The</strong>se<br />
42 tones includes 37 EIA standard tones and 5 non-standard<br />
tones.<br />
TH-K2E/ ET/ K4E only:<br />
◆ To transmit a 1750 Hz tone, simply press [CALL] without<br />
pressing [PTT] (default setting). Release [CALL] to quit<br />
transmitting. You can also make the transceiver remain in the<br />
transmit mode for 2 seconds after releasing [CALL]; a 1750<br />
Hz tone is not continuously transmitted. Access Menu No. 19<br />
(HLD) and select “ON”.<br />
◆ If you want to use [CALL] for recalling the Call channel in<br />
place of transmitting a 1750 Hz tone, access Menu No. 18<br />
(CK) and select “CALL”.<br />
TH-K2E/ 4E only:<br />
◆ If you press [CALL] while transmitting, 1750 Hz tone will be<br />
transmitted.<br />
TH-K2AT/ ET/ K4AT only:<br />
◆ If you press [CALL] while transmitting, DTMF D code will be<br />
transmitted.
AUTOMATIC REPEATER OFFSET (TH-K2AT/ E/ ET ONLY)<br />
This function automatically selects an offset direction,<br />
according to the frequency on the 2 m band. <strong>The</strong><br />
transceiver is programmed for offset direction as shown<br />
below. To obtain an up-to-date band plan for repeater<br />
offset direction, contact your national <strong>Amateur</strong> <strong>Radio</strong><br />
association.<br />
TH-K2AT K/ K2 only<br />
144.0 145.5 146.4 147.0 147.6<br />
145.1 146.0 146.6 147.4 148.0 MHz<br />
S<br />
– S + S – + S –<br />
S: Simplex<br />
This complies with the standard ARRL band plan.<br />
TH-K2E/ K2ET only<br />
144.0 145.6 145.8 146.0 MHz<br />
S: Simplex<br />
S<br />
–<br />
Note: Automatic Repeater Offset does not function when the<br />
Reverse function is ON {page 38}. However, pressing [F], [MENU]<br />
after Automatic Repeater Offset has selected an offset (split) status,<br />
exchanges the receive and transmit frequencies.<br />
S<br />
1 Press [MENU].<br />
2 Turn the Tuning control to select Menu No. 9 (ARO).<br />
3 Press [MENU].<br />
4 Turn the Tuning control to switch the function “ON”<br />
(default) or “OFF”.<br />
5 Press [MENU] to store the setting or [PTT] to cancel.<br />
37
REVERSE FUNCTION<br />
<strong>The</strong> Reverse function exchanges a separate reception<br />
and transmission frequency. So, while using a repeater,<br />
you can manually check the strength of a signal that you<br />
receive directly from the other station. If the station’s<br />
signal is strong, both stations should move to a simplex<br />
frequency and free up the repeater.<br />
To swap the transmission and reception frequencies:<br />
Press [F], [MENU] to switch the Reverse function ON<br />
(or OFF).<br />
• “R” appears when the function is ON.<br />
Note: You can turn the Reverse function ON when you are operating<br />
in Simplex Mode. However, it does not change the Transmission/<br />
Reception frequency.<br />
AUTOMATIC SIMPLEX CHECK (ASC)<br />
While using a repeater, the ASC function periodically<br />
checks the strength of the signal you are receiving from<br />
the other station. If the station’s signal is strong enough<br />
to allow direct contact without a repeater, the “ ”<br />
indicator starts blinking.<br />
38
Press [F], [MENU] (1 s) to switch the function ON (or<br />
OFF).<br />
• “ ” appears when the function is ON.<br />
• While direct contact is possible, “ ” blinks.<br />
Note:<br />
◆ Pressing [PTT] switch causes the “ ” icon to quit blinking.<br />
◆ ASC can be activated while operating in Simplex mode.<br />
However, it does not change the Transmission/ Reception<br />
frequencies.<br />
◆ ASC does not function during scan.<br />
◆ ASC does not function while Weather Alert function is activated<br />
(TH-K2AT K/ K2 only) {page 55}.<br />
◆ Activating ASC while using Reverse, turns Reverse function OFF.<br />
◆ If you recall a memory channel or the Call Channel that contains<br />
a Reverse ON status, ASC is switched OFF.<br />
◆ ASC causes received audio to be momentarily intermitted every<br />
3 seconds.<br />
TONE FREQ. ID SCAN<br />
This function scans through all tone frequencies to<br />
identify the incoming tone frequency on a received<br />
signal. You can use this function to determine which<br />
tone frequency is required by accessing your local<br />
repeater.<br />
1 Press [MENU].<br />
2 Turn the Tuning control to select Menu No. 3 (T).<br />
39
3 Press [MENU] (1 s).<br />
• When the transceiver receives a signal, scan starts.<br />
<strong>The</strong> decimal point blinks during scan.<br />
• While the transceiver is receiving a signal during Tone<br />
Freq. ID Scan, the signal is emitted from the speaker.<br />
• To reverse the scan direction, turn the Tuning control.<br />
• To quit the function, press [PTT].<br />
• When the tone frequency is identified, a beep sounds<br />
and the identified frequency blinks.<br />
4 Press [MENU] to program the identified frequency in<br />
place of the current tone frequency.<br />
• Press any key other than [MENU], [LAMP], and<br />
[MONI/SQL] if you do not want to program the<br />
identified frequency.<br />
• Turn the Tuning control while the identified frequency<br />
is blinking to resume scanning.<br />
Note: Some repeaters do not re-transmit the access tone in the<br />
downlink signal. In this case, check the other station’s uplink signal<br />
to detect the repeater access tone.<br />
40
MEMORY CHANNELS<br />
In memory channels, you can store frequencies and<br />
related data that you frequently use so that you do not<br />
need to reprogram that data every time. You can quickly<br />
recall a programmed channel through simple operation.<br />
A total of 100 memory channels (50 when using the<br />
Memory Name function) are available for storing<br />
frequencies, modes and other operating conditions.<br />
NUMBER OF MEMORY CHANNELS<br />
<strong>The</strong> transceiver must be configured to either 100<br />
memory channels without using the Memory Name<br />
function or 50 memory channels with the Memory Name<br />
function (default).<br />
To change the memory channel capacity:<br />
1 Press [MENU].<br />
2 Turn the Tuning control to select Menu No. 13<br />
(M.CH).<br />
3 Press [MENU].<br />
4 Turn the Tuning control to select either “50” (default)<br />
or “100”.<br />
5 Press [MENU].<br />
• “SURE ?” appears.<br />
6 Press [MENU] to accept or press any key other than<br />
[MENU], [LAMP], and [MONI/SQL] to cancel.<br />
41
Note:<br />
◆ If you change the memory channel capacity from 100 channels to<br />
50 channels after having stored data in channels 50 to 99, all<br />
memory channel data in channels 50 to 99 will be erased.<br />
◆ If you change the memory channel capacity from 50 channels to<br />
100 channels after storing Memory names in those channels, all<br />
Memory name data will be erased.<br />
SIMPLEX & REPEATER OR ODD-SPLIT MEMORY CHANNEL?<br />
You can use each memory channel as a simplex &<br />
repeater channel or an odd-split channel. Store only<br />
one frequency to use as a simplex & repeater channel<br />
or two separate frequencies to use as an odd-split<br />
channel. Select either application for each channel<br />
depending on the operations you have in mind.<br />
Simplex & repeater channels allow:<br />
• Simplex frequency operation<br />
• Repeater operation with a standard offset (if an offset<br />
direction is stored)<br />
Odd-split channels allow:<br />
• Repeater operation with a non-standard offset<br />
Note: Not only you can store data in memory channels, but you can<br />
also overwrite existing data with new data.<br />
42
<strong>The</strong> data listed below can be stored in each memory<br />
channel:<br />
Parameter<br />
Simplex<br />
&<br />
Repeater<br />
Odd-Split<br />
Reception<br />
frequency<br />
Transmission frequency<br />
Yes<br />
Yes<br />
Yes<br />
Tone frequency<br />
Yes Yes<br />
Tone ON<br />
Yes Yes<br />
CTCSS frequency<br />
Yes Yes<br />
CTCSS ON<br />
Yes Yes<br />
DCS code<br />
Yes Yes<br />
DCS ON<br />
Yes Yes<br />
Offset direction<br />
Yes N/<br />
A<br />
Offset frequency<br />
Yes N/<br />
A<br />
Reverse ON<br />
Yes N/<br />
A<br />
Frequency step<br />
size<br />
Yes Yes<br />
Narrow band<br />
FM<br />
Yes Yes<br />
Beat Shift<br />
Yes Yes<br />
Memory Channel<br />
Lockout<br />
Yes Yes<br />
Memory Channel<br />
Name<br />
Yes Yes<br />
Yes: Can be stored in memory.<br />
N/A: Cannot be stored in memory.<br />
43
Storing Simplex Frequencies or Standard Repeater Frequencies<br />
1 Press [VFO].<br />
2 Turn the Tuning control to select your desired<br />
frequency.<br />
• You can also directly enter a desired frequency using<br />
the keypad (TH-K2AT/ ET/ K4AT only) {page 21}.<br />
3 If storing a standard repeater frequency, select the<br />
following data:<br />
• Offset direction {page 32}<br />
• Tone function, if necessary {page 34}<br />
• CTCSS/ DCS function, if necessary {pages 69, 73}<br />
If storing a simplex frequency, you may select other<br />
related data (CTCSS or DCS settings, etc.).<br />
4 Press [F], [MR].<br />
• A memory channel number appears and blinks.<br />
• “ ” appears if the channel contains data.<br />
• Memory channel number L0/U0 ~ L2/U2 {page 61},<br />
Pr (Priority Channel) {page 65} and AL (Weather Alert)<br />
{page 55} (TH-K2AT K/ K2 only) are reserved for other<br />
functions.<br />
5 Turn the Tuning control to select the memory<br />
channel in which you want to store the data.<br />
6 Press [MR] to store the data to the channel.<br />
44
Storing Odd-Split Repeater Frequencies<br />
Some repeaters use a pair of reception and<br />
transmission frequencies with a non-standard offset.<br />
If you store two separate frequencies in a memory<br />
channel, you can operate on those repeaters without<br />
programming the offset frequency and direction.<br />
1 Store the desired reception frequency and related<br />
data by following the procedure given for simplex or<br />
standard repeater frequencies {page 44}.<br />
2 Turn the Tuning control to select the desired<br />
transmission frequency.<br />
3 Press [F], [MR].<br />
4 Turn the Tuning control to select the memory<br />
channel you programmed in step 1.<br />
5 Press [PTT]+[MR].<br />
• <strong>The</strong> transmission frequency is stored in the memory<br />
channel.<br />
Note: When you recall an odd-split memory channel, “+” and “–”<br />
appear on the display. To confirm the transmission frequency, press<br />
[F], [MENU] (Reverse function) {page 38}.<br />
45
Recalling a Memory Channel<br />
■ Using the Tuning Control<br />
1 Press [MR] to enter Memory Recall Mode.<br />
• <strong>The</strong> memory channel last used is recalled.<br />
2 Turn the Tuning control to select your desired<br />
memory channel.<br />
• You cannot recall an empty memory channel.<br />
• To restore VFO Mode, press [VFO].<br />
■ Using a Numeric Keypad (TH-K2AT/ ET/ K4AT only)<br />
You can also recall a memory channel by entering a<br />
desired memory channel number with the keypad.<br />
1 Press [MR] to enter Memory Recall Mode.<br />
2 Press [#], then enter the channel number using<br />
2 digits.<br />
• For example, to recall channel 49, press [#], [4],<br />
[9].<br />
• You can also enter a memory channel number that<br />
is less than 10 by pressing [#] after entering the<br />
channel number. For example, to recall memory<br />
channel 9, press [#], [9], [#]. You can also press<br />
[#], [0], [9].<br />
46
Note:<br />
◆ You cannot recall an empty memory channel. An error beep<br />
sounds.<br />
◆ You cannot recall the Program Scan memory channels<br />
(L0/U0 ~ L2/U2), Priority Channel (Pr) and Weather Alert<br />
(AL) (TH-K2AT K/ K2 only) using the numeric keypad.<br />
◆ When you recall an odd-split memory channel, “+” and “–”<br />
appear on the display. Press [F], [MENU] (Reverse function)<br />
{page 38} to display the transmission frequency.<br />
◆ After recalling a memory channel, you may modify data such<br />
as Tone or CTCSS. However, these settings are cleared<br />
once you select another channel or the VFO Mode. To<br />
permanently store the data, overwrite the channel contents<br />
{page 44}.<br />
CLEARING A MEMORY CHANNEL<br />
To clear the data from an individual memory channel:<br />
1 Recall the memory channel you want to clear the<br />
data.<br />
2 Press and hold [<br />
transceiver OFF.<br />
] (POWER) to switch the<br />
3 Press [MR]+[ ] (POWER).<br />
• A confirmation message appears.<br />
4 Press [MR] to clear the channel data.<br />
• <strong>The</strong> contents of the memory channel are cleared.<br />
• To quit clearing the memory channel, press any key<br />
other than [MR], [LAMP], [MONI/SQL] and [ ]<br />
(POWER).<br />
47
Note:<br />
◆ Call Channel data cannot be cleared.<br />
◆ You can also clear the Priority Channel, L0/U0 ~ L2/U2 and<br />
Weather Alert data.<br />
◆ While the trasceiver is in Channel Display Mode or Lock function<br />
is activated, you cannot clear the channel data.<br />
◆ To clear all memory channels contents at once, perform Full<br />
Reset {page 111}.<br />
NAMING A MEMORY CHANNEL<br />
You can name memory channels using up to 6<br />
alphanumeric characters. When you recall a named<br />
memory channel, its name appears on the display in<br />
place of the stored frequency. Names can be call signs,<br />
repeater names, cities, names of people, etc. In order<br />
to use the Memory Name function, the memory channel<br />
capacity must be set to 50 channels. To change the<br />
memory channel capacity from 100 to 50, access Menu<br />
No. 13 (M.CH) {page 41}.<br />
1 Press [MR] to recall your desired memory channel.<br />
2 Press [MENU] to enter Menu Mode.<br />
3 Turn the Tuning control to select Menu No. 14<br />
(M.NAME).<br />
4 Press [MENU].<br />
• A blinking cursor appears.<br />
5 Turn the Tuning control to select a desired<br />
alphanumeric character.<br />
48
• You can enter the following alphanumeric characters:<br />
0 ~ 9, A ~ Z, – (hyphen), / (slash), and a space.<br />
• Press [MONI/SQL] to delete the character at the<br />
current cursor position.<br />
6 Press [MENU].<br />
• <strong>The</strong> cursor moves to the next digit.<br />
7 Repeat steps 5 and 6 to enter up to 6 digits.<br />
• To complete the entry, press [MENU] without selecting<br />
a character.<br />
• Press [MONI/SQL] to delete a character.<br />
• Press any key other than [MONI/SQL], [MENU], and<br />
[LAMP] to cancel the entry.<br />
After storing a Memory name, the Memory name<br />
appears in place of the operating frequency. However,<br />
you can still display the operating frequency, if desired.<br />
To display the frequency rather than Memory name,<br />
access Menu No. 15 (MDF) and select “FRQ”. This<br />
menu toggles the display mode between the Memory<br />
name (“MN”) and frequency display (“FRQ”).<br />
Note:<br />
◆ You cannot name the Call Channel {page 53}.<br />
◆ You cannot assign a Memory name to a channel that does not<br />
contain data.<br />
◆ You can overwrite stored names by repeating steps 1 to 7.<br />
◆ <strong>The</strong> stored name is erased when you clear the Memory channel<br />
data.<br />
49
MEMORY CHANNEL TRANSFER<br />
Memory \ VFO Transfer<br />
After retrieving frequencies and associated data from<br />
Memory Recall Mode, you can copy the data to the<br />
VFO. This function is useful, for example, when the<br />
frequency you want to monitor is near the frequency<br />
stored in a memory channel.<br />
1 Press [MR], then turn the Tuning control to recall a<br />
desired memory channel.<br />
2 Press [F], [VFO] to copy the memory channel data<br />
to the VFO.<br />
Note:<br />
◆ To copy an odd-split channel data {page 45}, turn the Reverse<br />
function ON {page 38} before performing the transfer.<br />
◆ You can also transfer the Program Scan memory channels (L0/U0<br />
~ L2/U2), the Priority Channel (Pr) and Weather Alert (AL)<br />
frequency (TH-K2AT K/ K2 only) to the VFO.<br />
Channel \ Channel Transfer<br />
You can copy channel information from one memory<br />
channel to another. This function is useful when storing<br />
frequencies and associated data that you temporarily<br />
change in Memory Recall Mode.<br />
1 Press [MR], then turn the Tuning control to recall a<br />
desired memory channel.<br />
2 Press [F], [MR].<br />
50
3 Select the memory channel where you would like the<br />
data copied, using the Tuning control.<br />
4 Press [MR].<br />
<strong>The</strong> tables below illustrate how data is transferred<br />
between memory channels.<br />
Channel 0 ~ 99<br />
a Channel<br />
0 ~ 99<br />
Reception frequency<br />
a Reception<br />
frequency<br />
Transmission frequency<br />
a Transmission<br />
frequency<br />
Tone frequency<br />
a Tone<br />
frequency<br />
Offset direction<br />
a Offset<br />
direction<br />
CTCSS frequency<br />
a CTCSS<br />
frequency<br />
DCS code<br />
a DCS<br />
code<br />
Tone/<br />
CTCSS/<br />
DCS<br />
ON/<br />
OFF<br />
status<br />
a<br />
Tone/<br />
CTCSS/<br />
DCS<br />
ON/<br />
OFF<br />
status<br />
Offset frequency<br />
a Offset<br />
frequency<br />
Reverse ON<br />
a Reverse<br />
ON<br />
Frequency step<br />
size<br />
a Frequency<br />
step<br />
size<br />
1 Memory channel<br />
name<br />
a 1<br />
Memory<br />
channel<br />
name<br />
Memory<br />
Channel<br />
Lockout<br />
ON/<br />
OFF<br />
a<br />
Memory<br />
Channel<br />
Lockout<br />
ON/<br />
OFF<br />
51
Channel 0 ~ 99<br />
a L0/<br />
U0<br />
~ L2/<br />
U2,<br />
Pr,<br />
AL<br />
Reception frequency<br />
a Reception<br />
frequency<br />
Transmission frequency<br />
a Transmission<br />
frequency<br />
Tone frequency<br />
a Tone<br />
frequency<br />
Offset direction<br />
a Offset<br />
direction<br />
CTCSS frequency<br />
a CTCSS<br />
frequency<br />
DCS code<br />
a DCS<br />
code<br />
Tone/<br />
CTCSS/<br />
DCS<br />
ON/<br />
OFF<br />
status<br />
a<br />
Tone/<br />
CTCSS/<br />
DCS<br />
ON/<br />
OFF<br />
status<br />
Offset frequency<br />
a Offset<br />
frequency<br />
Reverse ON<br />
a Reverse<br />
ON<br />
Frequency step<br />
size<br />
a Frequency<br />
step<br />
size<br />
2 Memory channel<br />
name<br />
a 2<br />
Memory<br />
channel<br />
name<br />
Memory<br />
Channel<br />
Lockout<br />
ON<br />
52<br />
a<br />
1 TH-K2AT K/ K2 only<br />
2 When “50” is selected in Menu No.13 (M.CH).<br />
Memory<br />
Channel<br />
Lockout<br />
OFF<br />
Note: When transferring an odd-split channel, the Reverse status,<br />
Offset direction and Offset frequency are not transferred {pages 32,<br />
33, 38}.<br />
1
CALL CHANNEL<br />
<strong>The</strong> Call Channel can be recalled instantly no matter<br />
what frequency the transceiver is operating on. For<br />
instance, you may use the Call Channel as an<br />
emergency channel within your group. In this case, Call<br />
Scan {page 64} will be useful.<br />
<strong>The</strong> default Call Channel frequencies are 144.000 MHz<br />
for the 2 m band (all TH-K2 models), and 430.000 MHz<br />
(all TH-K4 models) for the 70 cm band.<br />
Note: Unlike memory channels 0 to 99, the Call Channel cannot be<br />
cleared.<br />
Recalling the Call Channel<br />
1 Press [CALL] to recall the Call Channel.<br />
• <strong>The</strong> Call Channel frequency and “C” appear.<br />
• To return to the previous frequency, press [CALL]<br />
again.<br />
53
Reprogramming the Call Channel<br />
1 Select your desired frequency and related data<br />
(Tone, CTCSS, DCS, or offset direction, etc.).<br />
• When you program the Call Channel as an odd-split<br />
channel, select a reception frequency first.<br />
2 Press [F], [CALL].<br />
• <strong>The</strong> selected frequency and related data are stored in<br />
the Call Channel.<br />
To also store a separate transmit frequency, continue<br />
with the following steps.<br />
3 Select the desired transmission frequency.<br />
4 Press [F].<br />
5 Press [PTT]+[CALL].<br />
• <strong>The</strong> separate transmission frequency is stored in the<br />
Call Channel.<br />
Note:<br />
◆ When you recall an odd-split Call Channel, “+” and “–” appear on<br />
the display.<br />
◆ Transmit offset status and Reverse status are not stored in an<br />
odd-split Call Channel.<br />
54
WEATHER ALERT (TH-K2AT K/ K2 ONLY)<br />
One of the NOAA Weather <strong>Radio</strong> channels can be<br />
programmed to the AL memory channel of the TH-K2AT.<br />
<strong>The</strong> transceiver can be configured to check the NOAA<br />
Weather Alert tone (1050 Hz) and will automatically alert<br />
you by recalling and monitoring the Weather <strong>Radio</strong><br />
frequency when the Weather Alert tone is broadcasted.<br />
Programming the Weather <strong>Radio</strong> Frequency<br />
<strong>The</strong> transceiver is preprogrammed to 162.550 MHz<br />
(WX1). You can store a different frequency to the AL<br />
channel to use this function. Refer to the NOAA<br />
channel frequency directory for your local Weather<br />
<strong>Radio</strong> frequency before you use the Weather Alert<br />
function. <strong>The</strong> latest Weather <strong>Radio</strong> information can be<br />
obtained from http://www.nws.noaa.gov/nwr/.<br />
1 Press [VFO].<br />
2 Select your local NOAA Weather <strong>Radio</strong> frequency<br />
using the Tuning control or keypad.<br />
3 Press [F], [MR].<br />
4 Turn the Tuning control to select memory channel<br />
“AL” (Alert).<br />
5 Press [MR].<br />
• A long beep sounds and the new NOAA Weather<br />
<strong>Radio</strong> frequency is stored to memory channel “AL”.<br />
W<br />
eather<br />
<strong>Radio</strong><br />
F<br />
requencies<br />
( MHz)<br />
WX1 WX2 WX3 WX4 WX5 WX6 WX7 WX8<br />
162. 550<br />
162. 400<br />
162. 475<br />
162. 425<br />
162. 450<br />
162. 500<br />
162. 525<br />
163.<br />
275<br />
55
Note:<br />
◆ When you perform Full Reset {page 111}, the Weather <strong>Radio</strong><br />
frequency recovers the factory default frequency (162.550 MHz).<br />
◆ When you clear the Weather <strong>Radio</strong> channel {page 47}, the<br />
factory default frequency (162.550 MHz) will not be recovered.<br />
◆ You can also transfer the AL memory channel data to the VFO or<br />
another memory channel.<br />
Enabling a Weather Alert<br />
You can monitor the Weather <strong>Radio</strong> frequency<br />
continuously or in the background while receiving on<br />
another frequency.<br />
To monitor the Weather <strong>Radio</strong> frequency continuously:<br />
1 Press [MENU].<br />
2 Turn the Tuning control to select Menu No. 37<br />
(WXA).<br />
3 Press [MENU] and turn the Tuning control to select<br />
“ON”.<br />
4 Press [MENU] to store the setting.<br />
• <strong>The</strong> frequency automatically changes to the Weather<br />
<strong>Radio</strong> frequency.<br />
• “WX” appears on the LCD and the transceiver mutes.<br />
• <strong>The</strong> Tone, CTCSS and DCS functions cannot be<br />
configured to the AL channel.<br />
• When the Weather Alert tone is broadcasted, a morse<br />
code “WX” sounds from speaker and the transceiver<br />
unmutes.<br />
5 To exit the Weather Alert mode, press [MENU],<br />
select Menu No. 37 (WXA), and set it to “OFF”.<br />
56
If you want to monitor another frequency while<br />
monitoring the Weather <strong>Radio</strong> in the background:<br />
1 Perform step 1 ~ 4 above.<br />
2 Press [VFO] or [MR] and turn the Tuning control to<br />
select another frequency or memory channel.<br />
• “WX” remains on the LCD.<br />
3 When the Weather Alert tone is broadcasted, the<br />
transceiver automatically switches to the Weather<br />
<strong>Radio</strong> frequency.<br />
4 To exit the Weather Alert Mode, press [MENU],<br />
select Menu No. 37 (WXA), and set it to “OFF”.<br />
Note:<br />
◆ <strong>The</strong> transceiver checks the weather alert tone every 1 second<br />
while you are monitoring another frequency or channel.<br />
◆ If the transceiver is transmitting or receiving a signal on another<br />
frequency, Weather Alert function temporarily pauses.<br />
CHANNEL DISPLAY<br />
While in this mode, the transceiver displays only<br />
memory channel numbers (or Memory names if they<br />
have been stored), instead of frequencies.<br />
1 Press [PTT]+[MR]+[ ] (POWER).<br />
• <strong>The</strong> transceiver displays the memory channel number<br />
in place of the operating frequencies.<br />
2 Turn the Tuning control to select your desired<br />
memory channel number.<br />
57
While in Channel Display Mode, only the following keys<br />
can be operated.<br />
[KEY]<br />
PTT LAMP MONI/ SQL<br />
F # 1<br />
MRCALL Tuning control<br />
1 TH-K2AT/ ET/ K4AT only<br />
[F] then<br />
1 PTT LAMP MONI/ SQL<br />
MENU F<br />
1 <strong>The</strong> light stays ON until [F], [LAMP] is pressed again {page 88}.<br />
[KEY] (1 s)<br />
F MR CALL<br />
While transmitting:<br />
1 LAMP MENU CALL Tuning control<br />
1 1750 Hz tone is transmitted (TH-K2E/ K4E) {page 36}. DTMF D tone<br />
is transmitted (TH-K2AT/ ET/ K4AT) {page 76}.<br />
2 DTMF keypad, [0] ~ [9], [ ], [#], and [F] (A tone) ~ [CALL] (D tone)<br />
also works (TH-K2AT/ ET/ K4AT only) {page 76}.<br />
To recover normal operation, turn the transceiver OFF<br />
and press [PTT]+[MR]+[ ] (POWER) again.<br />
Note:<br />
◆ To enter the Channel Display Mode, you must have at least one<br />
memory channel that contains the data.<br />
◆ If the memory channel contains the Memory name data, the<br />
Memory name is displayed in place of the “CH” characters.<br />
58<br />
2
59<br />
SCAN<br />
Scan is a useful function for hands-off monitoring of<br />
your favorite frequencies. By becoming comfortable<br />
with all types of scan, you will increase your operating<br />
efficiency.<br />
This transceiver provides the following types of scans.<br />
e<br />
p<br />
y<br />
T<br />
n<br />
a<br />
c<br />
S e<br />
s<br />
o<br />
p<br />
r<br />
u<br />
P<br />
l<br />
a<br />
m<br />
r<br />
o<br />
N<br />
n<br />
a<br />
c<br />
S<br />
n<br />
a<br />
c<br />
S<br />
d<br />
n<br />
a<br />
B<br />
e<br />
h<br />
t<br />
f<br />
o<br />
d<br />
n<br />
a<br />
b<br />
e<br />
r<br />
i<br />
t<br />
n<br />
e<br />
e<br />
h<br />
t<br />
s<br />
n<br />
a<br />
c<br />
S<br />
.<br />
d<br />
e<br />
t<br />
c<br />
e<br />
l<br />
e<br />
s<br />
u<br />
o<br />
y<br />
y<br />
c<br />
n<br />
e<br />
u<br />
q<br />
e<br />
r<br />
f<br />
m<br />
a<br />
r<br />
g<br />
o<br />
r<br />
P<br />
n<br />
a<br />
c<br />
S<br />
y<br />
c<br />
n<br />
e<br />
u<br />
q<br />
e<br />
r<br />
f<br />
d<br />
e<br />
i<br />
f<br />
i<br />
c<br />
e<br />
p<br />
s<br />
e<br />
h<br />
t<br />
s<br />
n<br />
a<br />
c<br />
S<br />
y<br />
r<br />
o<br />
m<br />
e<br />
M<br />
n<br />
i<br />
d<br />
e<br />
r<br />
o<br />
t<br />
s<br />
s<br />
e<br />
g<br />
n<br />
a<br />
r<br />
.<br />
2<br />
U<br />
/<br />
2<br />
L<br />
~<br />
0<br />
U<br />
/<br />
0<br />
L<br />
s<br />
l<br />
e<br />
n<br />
n<br />
a<br />
h<br />
c<br />
y<br />
r<br />
o<br />
m<br />
e<br />
M<br />
n<br />
a<br />
c<br />
S<br />
l<br />
e<br />
n<br />
n<br />
a<br />
h<br />
C<br />
-<br />
l<br />
l<br />
A<br />
n<br />
a<br />
c<br />
S<br />
s<br />
l<br />
e<br />
n<br />
n<br />
a<br />
h<br />
c<br />
y<br />
r<br />
o<br />
m<br />
e<br />
M<br />
l<br />
l<br />
a<br />
s<br />
n<br />
a<br />
c<br />
S<br />
.<br />
)<br />
9<br />
4<br />
o<br />
t<br />
0<br />
m<br />
o<br />
r<br />
f<br />
r<br />
o<br />
(<br />
9<br />
9<br />
o<br />
t<br />
0<br />
m<br />
o<br />
r<br />
f<br />
l<br />
l<br />
a<br />
C<br />
n<br />
a<br />
c<br />
S<br />
O<br />
F<br />
V<br />
d<br />
n<br />
a<br />
l<br />
e<br />
n<br />
n<br />
a<br />
h<br />
c<br />
l<br />
l<br />
a<br />
C<br />
e<br />
h<br />
t<br />
s<br />
n<br />
a<br />
c<br />
S<br />
.<br />
y<br />
c<br />
n<br />
e<br />
u<br />
q<br />
e<br />
r<br />
f<br />
O<br />
F<br />
V<br />
t<br />
n<br />
e<br />
r<br />
r<br />
u<br />
c<br />
e<br />
h<br />
t<br />
y<br />
r<br />
o<br />
m<br />
e<br />
M<br />
l<br />
e<br />
n<br />
n<br />
a<br />
h<br />
C<br />
d<br />
n<br />
a<br />
l<br />
e<br />
n<br />
n<br />
a<br />
h<br />
c<br />
l<br />
l<br />
a<br />
C<br />
e<br />
h<br />
t<br />
s<br />
n<br />
a<br />
c<br />
S<br />
.<br />
l<br />
e<br />
n<br />
n<br />
a<br />
h<br />
c<br />
y<br />
r<br />
o<br />
m<br />
e<br />
M<br />
d<br />
e<br />
t<br />
c<br />
e<br />
l<br />
e<br />
s<br />
e<br />
h<br />
t<br />
n<br />
a<br />
c<br />
S<br />
y<br />
t<br />
i<br />
r<br />
o<br />
i<br />
r<br />
P<br />
e<br />
h<br />
t<br />
n<br />
o<br />
s<br />
e<br />
i<br />
t<br />
i<br />
v<br />
i<br />
t<br />
c<br />
a<br />
e<br />
h<br />
t<br />
s<br />
k<br />
c<br />
e<br />
h<br />
C<br />
y<br />
r<br />
e<br />
v<br />
e<br />
)<br />
r<br />
P<br />
(<br />
l<br />
e<br />
n<br />
n<br />
a<br />
h<br />
c<br />
y<br />
t<br />
i<br />
r<br />
o<br />
i<br />
r<br />
P<br />
.<br />
s<br />
d<br />
n<br />
o<br />
c<br />
e<br />
s<br />
3
Note:<br />
◆ When the CTCSS or DCS function is activated, the transceiver<br />
stops at a busy frequency and decodes the CTCSS tone or DCS<br />
code. If the tone or code matches, the transceiver unmutes.<br />
Otherwise, it resumes scanning.<br />
◆ Press and hold [MONI/SQL] to pause scan in order to monitor<br />
the scanning frequency. Release [MONI/SQL] to resume<br />
scanning.<br />
◆ While the transceiver is in VOX Mode or transmitting, it causes<br />
scan to stop (excluding Priority Scan).<br />
◆ Pressing [MENU] causes scan to stop.<br />
◆ Starting scan switches OFF the Automatic Simplex Check (ASC)<br />
{page 38}.<br />
◆ If you press any key other than the following keys during scan,<br />
the transceiver exits scan (excluding Priority Scan). Priority Scan<br />
stops while “Pr” is blinking: [F], [F] (1 s), [LAMP], [MONI/SQL],<br />
Tuning control, and [F] then [MONI/SQL].<br />
NORMAL SCAN<br />
When you are operating the transceiver in VFO Mode,<br />
2 types of scanning are available: Band Scan and<br />
Program Scan.<br />
Band Scan<br />
<strong>The</strong> transceiver scans the entire band of the frequency<br />
you selected. For example, if you are operating and<br />
receiving at 144.525 MHz, it scans all the frequencies<br />
available for the 2 m band. (Refer to receiver VFO<br />
frequency range in the specifications {page 122}.) When<br />
the current VFO receive frequency is outside the Program<br />
Scan frequency range {page 59}, the transceiver scans<br />
the entire frequency range available for the current VFO.<br />
1 Press [VFO].<br />
2 Turn the Tuning control to select the frequency<br />
outside of the Program Scan frequency range.<br />
60
3 Press [VFO] (1 s) to start Band Scan.<br />
4 To stop Band Scan, press [VFO] or [PTT].<br />
Note:<br />
◆ While scanning, you can change the scan frequency direction by<br />
turning the Tuning control.<br />
◆ <strong>The</strong> transceiver scans the frequency range that is stored in Menu<br />
No. 7 (P.VFO) {page 93}.<br />
◆ If you select a frequency within the L0/U0 ~ L2/U2 range in step 3,<br />
Program Scan {page 61} starts.<br />
◆ If you press [MONI/SQL], Band Scan temporarily pauses.<br />
Release [MONI/SQL] to resume scanning.<br />
Program Scan<br />
You can limit the scanning frequency range. <strong>The</strong>re are<br />
3 memory channel pairs (L0/U0 ~ L2/U2) available for<br />
specifying the start and end frequencies. Program Scan<br />
monitors the range between the start and end<br />
frequencies that you have stored in these memory<br />
channels. Before performing Program Scan, store the<br />
Program Scan frequency range to one of the memory<br />
channel pairs (L0/U0 ~ L2/U2).<br />
■ Storing a Program Scan Frequency Range<br />
1 Press [VFO].<br />
2 Turn the Tuning control to select your desired<br />
start frequency.<br />
3 Press [F], [MR] then turn the Tuning control to<br />
select a memory channel from L0 ~ L2.<br />
61
4 Press [MR] to store the start frequency in the<br />
memory channel.<br />
5 Turn the Tuning control to select your desired<br />
end frequency.<br />
6 Press [F], [MR] then turn the Tuning control to<br />
select a channel from U0 ~ U2, corresponding to<br />
the channel selected in step 4.<br />
• For example, if you selected L0 in step 4, select U0<br />
for the end frequency.<br />
7 Press [MR] to store the end frequency in the<br />
memory channel.<br />
■ Performing Program Scan<br />
1 Press [VFO].<br />
2 Turn the Tuning control to select a frequency<br />
within the frequency range of memory channel<br />
L0/U0 ~ L2/U2.<br />
3 Press [VFO] (1 s) to start Program Scan.<br />
4 To stop Program Scan, press [VFO] or [PTT].<br />
Note:<br />
◆ If you press [MONI/SQL], Program Scan temporarily pauses.<br />
Release [MONI/SQL] to resume scanning.<br />
◆ <strong>The</strong> transceiver stops scanning when it detects a signal.<br />
◆ If more than 2 Program Scan channel pairs are stored and<br />
overlaps the frequency range among the pairs, the smaller<br />
Program Scan memory channel number has priority.<br />
62
◆ To perform Program Scan, the “L” channel must be lower<br />
than the “U” channel. Otherwise, Band Scan starts {page<br />
60}.<br />
MEMORY SCAN<br />
Memory Scan monitors memory channels in which you<br />
have stored frequencies.<br />
All-Channel Scan<br />
<strong>The</strong> transceiver scans all of the memory channels in<br />
which you have stored frequencies.<br />
1 Press [MR] (1 s).<br />
• Scan starts from the last memory channel number and<br />
ascends up through the channel numbers (default).<br />
Turn the Tuning control to change the scanning<br />
direction.<br />
2 To stop All-Channel Scan, press [MR] or [PTT].<br />
Note:<br />
◆ You must have 2 or more memory channels that contain data,<br />
excluding special function memory channels (L0/U0 ~ L2/U2, Pr,<br />
and AL).<br />
◆ You can perform All-Channel Scan in Channel Display Mode<br />
{page 57}.<br />
63
CALL SCAN<br />
You can alternate between monitoring the Call Channel<br />
and the current operating frequency.<br />
1 Select the frequency (in VFO or Memory Recall<br />
Mode) you want to monitor.<br />
• In VFO Mode, turn the Tuning control to select the<br />
desired frequency.<br />
• In Memory Recall Mode, turn the Tuning control to<br />
select the memory channel you want to monitor.<br />
2 Press [CALL] (1 s) to start the Call Scan.<br />
3 <strong>The</strong> Call Channel and the selected VFO frequency or<br />
memory channel are monitored.<br />
4 To stop Call Scan, press [PTT] or [CALL].<br />
Note:<br />
◆ You must configure the CALL key function to “CALL” (Menu No.<br />
18) prior to using Call Scan. Otherwise, a 1750 Hz tone will be<br />
transmitted.<br />
◆ <strong>The</strong> transceiver stops scanning when it detects a signal.<br />
◆ You can perform Call Scan even if the recalled memory channel<br />
has been locked out {page 67}.<br />
64
PRIORITY SCAN<br />
You may sometimes want to check your favorite<br />
frequency activities while monitoring other frequencies.<br />
In this case, use the Priority Scan function. Priority<br />
Scan checks the activities of the Priority Channel every<br />
3 seconds. If the transceiver detects a signal on the<br />
Priority Channel, it recalls the frequency.<br />
Note: If you do not operate any control or key for 3 seconds after the<br />
signal drops, the transceiver returns to the original frequency and<br />
resumes Priority Scan.<br />
Programming Priority Channels<br />
1 Press [VFO].<br />
2 Turn the Tuning control to select your desired<br />
Priority Channel frequency.<br />
3 Select selective call functions, if necessary.<br />
4 Press [F], [MR].<br />
• <strong>The</strong> memory channel number appears and blinks.<br />
5 Turn the Tuning control to select “Pr”.<br />
6 Press [MR] to store the data on the Priority Channel.<br />
65
Using Priority Scan<br />
1 Press [MENU] and turn the Tuning control to select<br />
Menu No. 10 (PRI).<br />
2 Press [MENU] and turn the Tuning control to select<br />
“ON”.<br />
3 Press [MENU] to store the setting.<br />
• “PRI” appears.<br />
4 Press any key other than [PTT], [LAMP], and<br />
[MONI/SQL] to exit Menu Mode.<br />
• <strong>The</strong> transceiver checks for a signal on the Priority<br />
Channel every 3 seconds.<br />
• When the transceiver detects a signal on the Priority<br />
Channel, “Pr” blinks and the frequency changes to the<br />
Priority Channel.<br />
• If you do not operate any control or key for 3 seconds<br />
after the signal drops, the transceiver returns to the<br />
original frequency and resumes Priority Scan.<br />
5 To quit Priority Scan, select “OFF” in step 2.<br />
• You can also press any key other than [PTT], [F],<br />
[LAMP], [MONI/SQL], [F] then [MONI/SQL] and<br />
[F] (1 s) to exit Priority Scan while “Pr” is blinking.<br />
Note:<br />
◆ If a signal is received on a Priority Channel with a CTCSS or<br />
DCS code programmed, the Priority Channel is recalled only<br />
when the programmed tone/ code matches.<br />
◆ Press and hold [MONI/SQL] to pause Priority Scan when the<br />
transceiver is not displaying the Priority Channel. Release<br />
[MONI/SQL] to resume Priority Scan.<br />
◆ If you clear the Priority Channels {page 47}, Priority Scan stops.<br />
◆ If you press any key other than the following keys while “Pr” is<br />
blinking, the transceiver exits Priority Scan: [LAMP],<br />
[MONI/SQL], [F] (1 s), [F] then [MONI/SQL] (Squelch<br />
adjustment) and [PTT].<br />
66
MEMORY CHANNEL LOCKOUT<br />
You can lock out memory channels that you prefer not<br />
to monitor during All-Channel Memory Scan {page 63}.<br />
1 Press [MR] to enter Memory Recall Mode.<br />
2 Turn the Tuning control to select the memory<br />
channel to be locked out.<br />
3 Press [MENU].<br />
4 Turn the Tuning control and select Menu No. 12<br />
(L.OUT).<br />
5 Press [MENU] and turn the Tuning control to select<br />
“ON”.<br />
Memory channel number<br />
6 Press [MENU] to store the setting.<br />
7 Press any key other than [LAMP] and [MONI/SQL]<br />
to exit the Menu Mode.<br />
• A “ ” icon appears below the memory channel<br />
number, indicating the channel is locked out.<br />
8 To unlock the memory channel, repeat steps 1 ~ 7,<br />
selecting “OFF” in step 5.<br />
• <strong>The</strong> “ ” icon disappears.<br />
Note:<br />
◆ <strong>The</strong> Program Scan memories (L0/U0 ~ L2/U2), Priority Channel<br />
(Pr) and Weather <strong>Radio</strong> frequency (AL) cannot be locked out.<br />
◆ Even if a memory channel is locked out, you can perform Call Scan<br />
{page 64} between the Call Channel and the memory channel.<br />
67
SCAN RESUME METHOD<br />
<strong>The</strong> transceiver stops scanning at the frequency (or<br />
memory channel) where a signal is detected. It then<br />
continues or stops scanning according to which Resume<br />
Mode you have selected.<br />
• Time-Operated Mode (default)<br />
<strong>The</strong> transceiver remains on a busy frequency (or<br />
memory channel) for approximately 5 seconds, then<br />
continues to scan even if the signal is still present.<br />
• Carrier-Operated Mode<br />
<strong>The</strong> transceiver remains on a busy frequency (or<br />
memory channel) until the signal drops out. <strong>The</strong>re is<br />
a 2-second delay between signal dropout and scan<br />
resumption.<br />
• Seek Mode<br />
<strong>The</strong> transceiver moves to a frequency or memory<br />
channel where a signal is present and stops.<br />
To change the scan resume method:<br />
1 Press [MENU].<br />
2 Turn the Tuning control to select Menu No. 11 (SCAN).<br />
3 Press [MENU].<br />
4 Turn the Tuning control to select “TO” (Time-Operated),<br />
“CO” (Carrier-Operated), or “SE” (Seek) Mode.<br />
5 Press [MENU] to store the new setting. Otherwise,<br />
press [PTT] to cancel.<br />
68
SELECTIVE CALL<br />
CTCSS AND DCS<br />
You may sometimes want to hear calls from only<br />
specific persons or groups. In this case, use the<br />
Selective Call. This transceiver is equipped with<br />
CTCSS (Continuous Tone Coded Squelch System) and<br />
DCS (Digital Coded Squelch). <strong>The</strong>se Selective Calls<br />
allow you to ignore (not hear) unwanted calls from other<br />
persons who are using the same frequency. <strong>The</strong><br />
transceiver unmutes only when it receives a signal<br />
having the same CTCSS tone or DCS code.<br />
Note: CTCSS and DCS do not cause your conversation to be<br />
private or scrambled. It only relieves you from listening to unwanted<br />
conversations.<br />
CTCSS<br />
A CTCSS tone is a sub-audible tone and is selectable<br />
from among the 42 tone frequencies listed in the table<br />
on the page 71. <strong>The</strong> list includes 37 EIA standard tones<br />
and 5 non-standard tones.<br />
Using CTCSS<br />
1 Press [MENU] and turn the Tuning control to select<br />
Menu No. 2 (T.CT.DCS).<br />
2 Press [MENU] and turn the Tuning control to select<br />
“CTCSS”.<br />
69
• As you turn the Tuning control, the selection cycles as<br />
follows: “OFF” ➞ “TONE” ➞ “CTCSS” ➞ “DCS” ➞ “OFF”.<br />
3 Press [MENU].<br />
• “CT” appears on the upper part of display, indicating<br />
that the CTCSS function is activated.<br />
4 Press any key other than [MENU], [MONI/SQL], and<br />
[LAMP] to exit Menu Mode.<br />
When CTCSS is ON, you will hear calls only when the<br />
selected CTCSS tone is received. To answer the call,<br />
press and hold [PTT], then speak into the microphone.<br />
Note:<br />
◆ You cannot use the CTCSS and Tone/ DCS functions<br />
simultaneously. Switching the CTCSS function ON after having<br />
activated the Tone/ DCS functions deactivates the Tone/ DCS<br />
functions.<br />
◆ If you select a high CTCSS frequency, receiving audio or noise<br />
that contains the same frequency portions may cause CTCSS to<br />
function incorrectly. To prevent noise from causing this problem,<br />
select an appropriate squelch level {page 18}.<br />
◆ While transmitting the 1750 Hz tone by pressing [CALL]<br />
{page 35}, the transceiver does not transmit the CTCSS tone.<br />
Selecting a CTCSS Frequency<br />
1 Press [MENU] and turn the Tuning control to select<br />
Menu No. 4 (CT).<br />
• <strong>The</strong> current CTCSS frequency appears.<br />
2 Press [MENU] and turn the Tuning control to select<br />
your desired CTCSS frequency.<br />
• <strong>The</strong> selectable CTCSS frequencies are the same as<br />
those for the Tone frequency. Refer to the table on the<br />
following page for the available CTCSS frequencies.<br />
70
3 Press [MENU] to store the new setting or [PTT] to<br />
cancel.<br />
Note: To use the selected CTCSS tone, you must turn the CTCSS<br />
function ON {page 69}.<br />
Available CTCSS Tone Frequencies<br />
Tone<br />
Frequency<br />
( Hz)<br />
67. 0 82. 5 100. 0 123. 0 151. 4 186. 2 225.<br />
7<br />
69. 3 85. 4 103. 5 127. 3 156. 7 192. 8 229.<br />
1<br />
71. 9 88. 5 107. 2 131. 8 162. 2 203. 5 233.<br />
6<br />
74. 4 91. 5 110. 9 136. 5 167. 9 206. 5 241.<br />
8<br />
77. 0 94. 8 114. 8 141. 3 173. 8 210. 7 250.<br />
3<br />
79. 7 97. 4 118. 8 146. 2 179. 9 218. 1 254.<br />
1<br />
71
CTCSS Freq. ID Scan<br />
This function scans through all CTCSS frequencies to<br />
identify the incoming CTCSS frequency on the received<br />
signal. You may find this useful when you cannot recall<br />
the CTCSS frequency that the other persons in your<br />
group are using.<br />
1 Press [MENU] and turn the Tuning control to select<br />
Menu No. 4 (CT).<br />
2 Press [MENU] (1 s) to start the CTCSS Freq. ID<br />
Scan.<br />
• While scanning, the decimal point of CTCSS frequency<br />
blinks.<br />
• To reverse the scan direction, turn the Tuning control.<br />
• To quit the function, press [PTT].<br />
• When a CTCSS frequency is identified, the identified<br />
frequency appears and blinks.<br />
3 Press [MENU] to program the identified frequency in<br />
place of the current CTCSS frequency. Otherwise,<br />
press [PTT] to exit the CTCSS FREQ. ID Scan.<br />
• Turn the Tuning control while the identified frequency<br />
is blinking to resume scanning.<br />
Note:<br />
◆ Received signals are monitored through the speaker while<br />
scanning is in progress.<br />
◆ CTCSS Freq. ID Scan does not scan the tone if a signal is not<br />
detected.<br />
72
DCS<br />
DCS is similar to CTCSS. However, instead of using an<br />
analog audio tone, it uses a continuous sub-audible<br />
digital waveform that represents a 3-digit octal number.<br />
You can select a DCS code from among the 104 DCS<br />
codes listed in the table on the next page.<br />
Using DCS<br />
1 Press [MENU] and turn the Tuning control to select<br />
Menu No. 2 (T.CT.DCS).<br />
2 Press [MENU] and turn the Tuning control to select<br />
“DCS”.<br />
• As you turn the Tuning control, the selection cycles as<br />
follows: “OFF” ➞ “TONE” ➞ “CTCSS” ➞ “DCS” ➞ “OFF”.<br />
3 Press [MENU].<br />
• “DCS” appears on the display, indicating that the DCS<br />
function is activated.<br />
4 Press any key other than [MENU], [MONI/SQL], and<br />
[LAMP] to exit the Menu Mode.<br />
When DCS is ON, you will hear calls only when the<br />
selected DCS code is received. To answer the call, press<br />
and hold [PTT], then speak into the microphone.<br />
Note: You cannot use the DCS function and CTCSS/ Tone functions<br />
simultaneously. Switching the DCS function ON after having<br />
activated the CTCSS/ Tone functions deactivate the CTCSS/ Tone<br />
functions.<br />
73
Selecting a DCS Code<br />
1 While in DCS Mode, press [MENU] and turn the<br />
Tuning control to select Menu No. 5 (DCS).<br />
• <strong>The</strong> current DCS code appears.<br />
2 Press [MENU] and turn the Tuning control to select<br />
your desired DCS code.<br />
• <strong>The</strong> available DCS codes are shown in the following<br />
table.<br />
023 065 132 205 255 331 413 465 612 731<br />
025 071 134 212 261 332 423 466 624 732<br />
026 072 143 223 263 343 431 503 627 734<br />
031 073 145 225 265 346 432 506 631 743<br />
032 074 152 226 266 351 445 516 632 754<br />
036 114 155 243 271 356 446 523 654<br />
043 115 156 244 274 364 452 526 662<br />
047 116 162 245 306 365 454 532 664<br />
051 122 165 246 311 371 455 546 703<br />
053 125 172 251 315 411 462 565 712<br />
054 131 174 252 325 412 464 606 723<br />
3 Press [MENU] to store the new code or [PTT] to<br />
cancel.<br />
74
DCS Code ID Scan<br />
This function scans through all DCS codes to identify<br />
the incoming DCS code on the received signal. You<br />
may find this useful when you cannot recall the DCS<br />
code that the other persons in your group are using.<br />
1 Press [MENU] and turn the Tuning control to select<br />
Menu No. 5 (DCS).<br />
2 Press [MENU] (1 s) to start the DCS Code ID Scan<br />
function.<br />
• While scanning, the decimal point between “DCS” and<br />
the DCS code blinks.<br />
• To reverse the scan direction, turn the Tuning control.<br />
• To quit the function, press [PTT].<br />
• When a DCS code is identified, the identified DCS<br />
code appears and blinks.<br />
3 Press [MENU] to program the identified DCS code in<br />
place of the current DCS code. Otherwise, press<br />
[PTT] to exit the DCS Code ID Scan.<br />
• Turn the Tuning control while the identified DCS code<br />
is blinking to resume scanning.<br />
Note:<br />
◆ Received signals are monitored through the speaker while<br />
scanning is in progress.<br />
◆ DCS Code ID Scan does not scan the code if a signal is not<br />
detected.<br />
75
76<br />
DTMF FUNCTIONS<br />
This transceiver provides you with 10 dedicated DTMF<br />
memory channels. You can store a DTMF number (16<br />
digits max.) in each of these channel to recall later for<br />
speed dialing.<br />
Many repeaters in the U.S.A. and Canada offer a<br />
service called Autopatch. You can access the public<br />
telephone network via such a repeater by sending<br />
DTMF tones. For further information, consult your local<br />
repeater reference.<br />
MANUAL DIALING (TH-K2AT/ ET/ K4AT ONLY)<br />
<strong>The</strong> numeric keypad functions as a DTMF keypad; the<br />
12 keys found on a touch-tone phone plus 4 additional<br />
keys (A, B, C, D) on the rightmost column.<br />
To perform <strong>Manual</strong> Dialing, follow the steps below.<br />
1 Press and hold [PTT] to transmit.<br />
2 While transmitting, press the keys in sequence on<br />
the keypad, to send the DTMF tones.<br />
• <strong>The</strong> corresponding DTMF tones are transmitted and<br />
monitored through the speaker.<br />
Freq.<br />
( Hz)<br />
1209 1336 1477 1633<br />
697 1 2 3 A<br />
770 4 5 6 B<br />
852 7 8 9 C<br />
941 0 # D
• When DTMF TX Hold is activated {page 77}, you do<br />
not need to continuously press [PTT] to remain in<br />
Transmission Mode. However, Transmission Mode is<br />
retained for only 2 seconds after pressing a key, so if<br />
the next key is not pressed within this time limit, the<br />
transceiver stops transmitting.<br />
DTMF TX Hold (TH-K2AT/ ET/ K4AT only)<br />
This function causes the transceiver to remain in<br />
Transmission Mode for 2 seconds after you release<br />
each key. So, you can release [PTT] while sending the<br />
DTMF tones.<br />
1 Press [MENU] to enter Menu Mode.<br />
2 Turn the Tuning control to select Menu No. 34<br />
(DT.H).<br />
3 Press [MENU] and turn the Tuning control to select<br />
“ON”.<br />
4 Press [MENU] to store the setting or [PTT] to cancel.<br />
AUTOMATIC DIALER<br />
If you use the 10 dedicated memory channels to store<br />
DTMF numbers, you do not need to remember a long<br />
string of digits.<br />
Storing a DTMF Number in Memory<br />
1 Press [MENU] to enter Menu Mode.<br />
2 Turn the Tuning control to select Menu No. 32<br />
(DTMF.MR).<br />
3 Press [MENU].<br />
4 Turn the Tuning control to select your desired DTMF<br />
memory channel number from 0 to 9.<br />
77
5 Press [MENU].<br />
• <strong>The</strong> DTMF code entry display appears and the last<br />
digit blinks.<br />
6 Turn the Tuning control to select a DTMF code.<br />
• Press [MONI/SQL] to delete the character at the<br />
current cursor position.<br />
• On the transceiver display, DTMF code “ ” is<br />
represented by “E” and “#” is represented by “F”<br />
(TH-K2AT/ ET/ K4AT only).<br />
• You can also enter a DTMF code using the keypad.<br />
Simply press your desired DTMF codes on the keypad<br />
(TH-K2AT/ ET/ K4AT only).<br />
7 Press [MENU] to select the DTMF code and move<br />
the cursor to the next digit.<br />
8 Repeat steps 6 and 7 to enter up to 16 digits.<br />
9 To complete the entry, press [MENU] without<br />
selecting a DTMF code.<br />
To confirm the stored DTMF number, perform steps 1 to<br />
4 then press [MONI/SQL]. <strong>The</strong> programmed DTMF<br />
code scrolls through the display without transmitting.<br />
78
Transmitting a Stored DTMF Number<br />
1 While pressing and holding [PTT], press [MENU].<br />
2 Release [MENU] (continue pressing [PTT]), then<br />
turn the Tuning control to select the desired DTMF<br />
memory channel number.<br />
3 While still holding [PTT], press [MENU] again to<br />
transmit the selected DTMF tones.<br />
• <strong>The</strong> number stored in the channel scrolls across the<br />
display, accompanied by DTMF tones from the<br />
speaker.<br />
• After transmission, the frequency display is restored.<br />
TH-K2AT/ ET/ K4AT only: If you do not need to confirm the<br />
memory channel contents, press [0] ~ [9] instead of turning<br />
the Tuning control in step 2, to select a channel number. <strong>The</strong><br />
stored DTMF number will be immediately transmitted. (You<br />
do not have to press [MENU] in step 3.)<br />
Note: If you select an empty DTMF memory channel and press<br />
[MENU], the frequency display is restored.<br />
79
Adjusting the DTMF Tone Transmission Speed<br />
This transceiver allows you to configure the DTMF<br />
number transmission speed between Fast (default) and<br />
Slow. If a repeater cannot respond to the fast speed,<br />
adjust this parameter.<br />
1 Press [MENU] to enter Menu Mode.<br />
2 Turn the Tuning control to select Menu No. 33<br />
(SPD).<br />
3 Press [MENU].<br />
4 Turn the Tuning control to select “FA” (Fast) or “SL”<br />
(Slow).<br />
• <strong>The</strong> tone duration of FAST is 50 ms and SLOW is<br />
100 ms. “FA” (Fast) is the default setting.<br />
5 Press [MENU] to store the setting or [PTT] to cancel.<br />
Adjusting the Pause Duration<br />
You can change the pause duration (a space digit)<br />
stored in memory channels. <strong>The</strong> default setting is<br />
500 miliseconds.<br />
1 Press [MENU] to enter Menu Mode.<br />
2 Turn the Tuning control to select Menu No. 35 (PA).<br />
3 Press [MENU].<br />
4 Turn the Tuning control to select 100, 250,<br />
500 (default), 750, 1000, 1500, 2000 ms.<br />
5 Press [MENU] to store the setting. Otherwise, press<br />
[PTT] to cancel.<br />
80
DTMF KEY LOCK<br />
Assuming you have a transceiver with the optional<br />
speaker microphone installed and you are carrying it in<br />
the holder or bag, you sometimes may want to disable<br />
the keypad to avoid accidental DTMF transmission. In<br />
this case, turn the DTMF Key Lock function ON.<br />
1 Press [MENU] to enter Menu Mode.<br />
2 Turn the Tuning control to select Menu No. 36<br />
(DT.L).<br />
3 Press [MENU].<br />
4 Turn the Tuning control to select “ON”.<br />
5 Press [MENU] to store the setting or [PTT] to cancel.<br />
When this function is activated, you cannot send DTMF<br />
tones using [MENU] (all models) or DTMF keypad<br />
(TH-K2AT/ ET/ K4AT) during transmission.<br />
81
82<br />
OPERATOR CONVENIENCES<br />
APO (AUTO POWER OFF)<br />
<strong>The</strong> transceiver switches OFF automatically if no keys<br />
or controls are pressed or adjusted for 30 minutes<br />
(default). One minute before the transceiver switches<br />
OFF, warning beeps sound for a few seconds and<br />
“APO” blinks.<br />
You can select the APO time from OFF (disable), 30<br />
(default), 60, 90, 120, or 180 minutes.<br />
1 Press [MENU].<br />
2 Turn the Tuning control to select Menu No. 17<br />
(APO).<br />
3 Press [MENU].<br />
4 Turn the Tuning control to select the APO time from<br />
OFF, 30, 60, 90, 120 or 180 minutes.<br />
5 Press [MENU] to store the setting. Otherwise, press<br />
[PTT] to cancel.<br />
Note:<br />
◆ APO does not function while the transceiver is scanning.<br />
◆ <strong>The</strong> APO timer starts counting down the time when no key<br />
presses, no control adjustments, and no PC control command<br />
(SP/MIC jack) sequences are detected.<br />
◆ <strong>The</strong> APO warning beep sounds and “APO” appears 1 minute<br />
before the transceiver turns OFF.<br />
◆ <strong>The</strong> APO warning beep sounds even if Menu No. 27 (BP)<br />
{page 85} is set to “OFF”.
BATTERY LIFE<br />
Before you operate the transceiver outside using a<br />
battery pack, it is important to know how long the<br />
battery pack will last. <strong>The</strong> operating times listed in the<br />
table below are measured under the following cyclic<br />
conditions:<br />
TX: 6 seconds, RX: 6 seconds, Stand-by: 48 seconds<br />
We recommend you carry extra battery packs with you,<br />
in case the battery pack becomes discharged.<br />
Battery<br />
Type<br />
PB-43N<br />
( 7.<br />
2 V)<br />
BT-14<br />
( 9.<br />
0 V)<br />
Output<br />
Power<br />
Operating<br />
Time/<br />
Hours<br />
( Approx.<br />
)<br />
TH-K2AT/ E/<br />
ET<br />
TH-K4AT/<br />
E<br />
H 5. 5<br />
5.<br />
0<br />
M 8. 5<br />
7.<br />
5<br />
L 11. 0<br />
10.<br />
0<br />
H 4. 0<br />
3.<br />
0<br />
M 8. 0<br />
7.<br />
0<br />
L 10. 5<br />
9.<br />
5<br />
REMAINING BATTERY CAPACITY<br />
You can confirm the remaining battery capacity when<br />
you transmit in low power.<br />
To check the remaining capacity:<br />
1 Press [F], [PTT] until “ ” appears.<br />
2 Press and hold [PTT].<br />
• <strong>The</strong> bar-graph shows the remaining battery capacity.<br />
83
: High battery power<br />
: Medium battery power<br />
: Low battery power<br />
No display : Recharge or replace the batteries.<br />
3 Release [PTT] to exit.<br />
Note: You may not be able to transmit at high power (“ ” position) if<br />
the battery remaining indicator shows low battery power.<br />
BATTERY SAVER<br />
<strong>The</strong> Battery Saver extends the operating time of the<br />
transceiver. It automatically activates when the<br />
squelch is closed and no key is pressed for more than<br />
10 seconds. To reduce battery consumption, this<br />
function shuts the receiver circuit OFF for the<br />
programmed time, then momentarily turn it back ON to<br />
detect a signal.<br />
To program the receiver shut-off period for the battery<br />
saver:<br />
1 Press [MENU].<br />
2 Turn the Tuning control to select Menu No. 16 (SAV).<br />
3 Press [MENU].<br />
4 Turn the Tuning control to select the receiver shutoff<br />
period from OFF, 0.2, 0.4, 0.6, 0.8, 1.0 (default),<br />
2.0, 3.0, 4.0, and 5.0 seconds.<br />
5 Press [MENU] to store the setting or [PTT] to cancel.<br />
Note:<br />
◆ <strong>The</strong> longer the shut-off period, the more you can save on battery<br />
consumption. However, there is a greater chance of missing a<br />
signal.<br />
◆ When the CTCSS/ DCS code matches during reception, the<br />
battery saver function is turned OFF.<br />
84
◆ While the transceiver is communicating in PC Mode {page107},<br />
the Battery Saver does not function.<br />
◆ Battery Saver does not function while scanning.<br />
BEAT SHIFT<br />
Since the transceiver uses a microprocessor to control<br />
various functions of the transceiver, the CPU clock<br />
oscillator’s harmonics or image may appear on some<br />
spots of the reception frequencies {page 121}. In this<br />
case, turn the Beat Shift function ON.<br />
1 Press [MENU].<br />
2 Turn the Tuning control to select Menu No. 28 (BS).<br />
3 Press [MENU].<br />
4 Turn the Tuning control to select “ON”.<br />
5 Press [MENU] to store the setting or [PTT] to cancel.<br />
Note: Beat Shift status can be stored to each Memory channel.<br />
BEEP FUNCTION<br />
<strong>The</strong> Beep function provides confirmation of entry, error<br />
status, and malfunctions of the transceiver. We<br />
recommend you leave this function ON in order to detect<br />
erroneous operations and malfunctions.<br />
However, to turn the beep function OFF:<br />
1 Press [MENU].<br />
2 Turn the Tuning control to select Menu No. 27 (BP).<br />
3 Press [MENU].<br />
4 Turn the Tuning control to select “OFF”.<br />
85
5 Press [MENU] to store the setting or [PTT] to cancel.<br />
<strong>The</strong> transceiver generates the following warning beeps<br />
even if the beep function is turned OFF.<br />
• APO warning beeps {page 82}<br />
• DC voltage error beep {page 115}<br />
• Weather Alert beep {page 55}<br />
• Time-Out Timer warning beep {page 94}<br />
Note: <strong>The</strong> beep output level is linked to the VOL control position.<br />
BUSY CHANNEL LOCKOUT<br />
This function is used in order to prevent transmitting on<br />
a channel or frequency that somebody else is currently<br />
using. When turned ON, an error beep sounds and you<br />
cannot transmit even if you press [PTT].<br />
1 Press [MENU] and turn the Tuning control to select<br />
Menu No. 24 (BCL).<br />
2 Press [MENU] and turn the Tuning control to select<br />
“ON” or “OFF” (default).<br />
3 Press [MENU] to store the setting or [PTT] to cancel.<br />
FREQUENCY STEP SIZE<br />
Choosing the correct frequency step size is essential in<br />
order to select your exact receive frequency using the<br />
Tuning control. You can select your desired frequency<br />
step size from:<br />
86
5 kHz, 6.25 kHz, 10 kHz, 12.5 kHz, 15 kHz, 20 kHz,<br />
25 kHz, 30 kHz, 50 kHz, 100 kHz.<br />
To change the frequency step size:<br />
1 Press [MENU] and turn the Tuning control to select<br />
Menu No. 1 (STP).<br />
• <strong>The</strong> current frequency step size appears.<br />
2 Press [MENU] and turn the Tuning control to select<br />
your desired frequency step size.<br />
3 Press [MENU] to store the setting or [PTT] to cancel.<br />
Note: If you change to a frequency step size that does not match the<br />
current operating frequency, the transceiver automatically adjusts the<br />
frequency to match the new frequency step size.<br />
<strong>The</strong> default step size for each model is as follows.<br />
Model Market<br />
code<br />
Freq.<br />
Step<br />
Size<br />
( Default)<br />
TH-K2AT<br />
K, K2<br />
M, M2<br />
5 kHz<br />
12.<br />
5 kHz<br />
TH-K2E E 12.<br />
5 kHz<br />
TH-K2ET E3 12.<br />
5 kHz<br />
TH-K4AT M2 25<br />
kHz<br />
TH-K4E E 25<br />
kHz<br />
Note: <strong>The</strong> market code is printed on the bar-code label of the carton<br />
box.<br />
87
LAMP<br />
To illuminate the display and keys:<br />
Press [LAMP].<br />
• If no other key is pressed, the light turns OFF<br />
approximately 5 seconds after releasing [LAMP].<br />
• Press any key (including [PTT]) other than [LAMP] while<br />
the display and keys are lit to restart the 5-second timer.<br />
• Press [LAMP] while the display and keys are lit to<br />
immediately turn the light OFF.<br />
To keep the light ON continuously:<br />
Press [F], [LAMP].<br />
• <strong>The</strong> light remains ON until you press [F], [LAMP] again.<br />
LOCK FUNCTION<br />
<strong>The</strong> lock function disables most of the keys to prevent<br />
you from accidentally activating a function.<br />
1 Press [F] (1 s).<br />
• “ ” appears when this function is ON.<br />
• <strong>The</strong> following keys cannot be locked:<br />
[LAMP], [MONI/SQL], [PTT], [F] (1 s), [ ] (POWER),<br />
[F] then [LAMP] and [F] then [MONI/SQL].<br />
2 Press [F] (1 s) to unlock the keys.<br />
88
Note:<br />
◆ <strong>The</strong> Tuning control is also locked. To unlock the Tuning control<br />
while the Lock function is ON, access Menu No. 30 (ENC)<br />
{below} and select “ON”.<br />
◆ You cannot perform the Microprocessor Reset {page 111} while<br />
the Lock function is ON.<br />
◆ Microphone PF keys {below} operate normally even if the Lock<br />
function is ON.<br />
Tuning Control Unlock<br />
While the Lock function is ON, you sometimes may want<br />
to turn the Tuning control to change the frequency. In<br />
this case, turn the Tuning control unlock function ON.<br />
1 Press [MENU].<br />
2 Turn the Tuning control to select Menu No. 30<br />
(ENC).<br />
3 Press [MENU].<br />
4 Turn the Tuning control to select “ON”.<br />
5 Press [MENU] to store the setting or [PTT] to cancel.<br />
MICROPHONE PF KEYS (OPTIONAL)<br />
If you have an optional SMC-33 or SMC-34 speaker<br />
microphone, you can access many transceiver settings<br />
without using transceiver keys or controls. Microphone<br />
keys 1, 2, and 3, located on the top of the microphone,<br />
are programmable with transceiver functions.<br />
<strong>The</strong> microphone key default assignments are as follows:<br />
Mic [1]: VFO<br />
Mic [2]: MR<br />
Mic [3]: CALL (TH-K2AT/ K4AT)<br />
1750 Hz (TH-K2E/ ET/ K4E)<br />
89
Note:<br />
◆ Turn the transceiver OFF before connecting the optional speaker<br />
microphone.<br />
◆ While Menu No. 31 (PC) is ”ON“ {page 107} or the Lock function<br />
is ON {page 88}, you cannot program PF keys.<br />
◆ If the LOCK switch on the rear of the microphone is ON, you<br />
must move the switch to the OFF position to program the keys.<br />
1 Press one of the following key combinations to<br />
reprogram the keys on the speaker microphone.<br />
• Press Mic [1]+[ ] (POWER) to reprogram Mic [1].<br />
• Press Mic [2]+[ ] (POWER) to reprogram Mic [2].<br />
• Press Mic [3]+[ ] (POWER) to reprogram Mic [3].<br />
2 Press a key or the key combination you want to<br />
assign to the microphone key.<br />
[ KEY]<br />
[ F]<br />
+ [ KEY]<br />
Function<br />
VFO VFO M VFO<br />
Transfer<br />
MRMR M.<br />
IN<br />
CALL CALL C.<br />
IN/<br />
1750<br />
Hz<br />
LAMP 3 LAMP Lamp<br />
stays<br />
ON.<br />
MONI/<br />
SQL<br />
MONI/<br />
SQL<br />
Squelch<br />
adjustment<br />
PTT1 PTT Change<br />
power<br />
setting<br />
MENU MENU Reverse<br />
2 Tuning<br />
control<br />
2 Tuning<br />
control<br />
Up/<br />
Down<br />
1 You can press [PTT] to assign a function key to alternate VFO<br />
and Memory Recall Mode.<br />
2 Tuning control (Up or Down) can also be programmed.<br />
3 <strong>The</strong> light stays ON until you press [F], [LAMP] again {page 88}.<br />
90
MONITOR<br />
When you are receiving while the squelch function is<br />
ON, weak signals may become intermittent.<br />
If the CTCSS or DCS function is ON, you may want to<br />
disable the squelch function temporarily to monitor the<br />
current channel activities.<br />
In both of these cases, use the Monitor function to<br />
temporarily disable the squelch function.<br />
To activate the Monitor function:<br />
1 Press and hold [MONI/SQL].<br />
• <strong>The</strong> speaker is unmuted and you can monitor the<br />
signals.<br />
2 Release [MONI/SQL] to return to normal operation.<br />
NARROW BAND FM OPERATION<br />
By default, the transceiver operates in normal FM<br />
(±5 kHz) mode for both transmission and reception.<br />
You can also operate the transceiver in narrow band FM<br />
(±2.5 kHz).<br />
To operate the transceiver in narrow band FM:<br />
1 Press [MENU].<br />
2 Turn the Tuning control to select Menu No. 29<br />
(FMN).<br />
3 Press [MENU].<br />
4 Turn the Tuning control to select “ON”.<br />
5 Press [MENU] to store the setting or [PTT] to cancel.<br />
91
When narrow band FM operation is ON, “N” appears in<br />
the top right of the LCD.<br />
Note: You can store the narrow band FM operation status to the<br />
memory channels {page 41}.<br />
POWER-ON MESSAGE<br />
You can change the Power-ON Message (a maximum<br />
of 6 characters) when the transceiver is turned ON.<br />
1 Press [MENU].<br />
2 Turn the Tuning control to select Menu No. 26<br />
(P.ON.MSG).<br />
3 Press [MENU].<br />
• <strong>The</strong> current message and entry cursor appear.<br />
• <strong>The</strong> cursor moves to the next digit.<br />
4 Turn the Tuning control to select a character.<br />
• You can enter the following alphanumeric characters:<br />
0 ~ 9, A ~ Z, – (hyphen), / (slash) and a space.<br />
5 Press [MENU].<br />
• <strong>The</strong> cursor moves to the next digit.<br />
6 Repeat steps 4 and 5 to enter up to 6 digits.<br />
92
• Press [MONI/SQL] to delete the character at the<br />
current cursor position.<br />
• If no Power-ON Message is programmed, “TH-K2” or<br />
“TH-K4” appears as the Power-ON Message.<br />
7 To complete the entry, press [MENU] without<br />
selecting a character. Otherwise press [PTT] to<br />
cancel the entry.<br />
PROGRAMMABLE VFO<br />
If you want to limit the operating frequencies within a<br />
certain range, program the upper and lower frequency<br />
limits to the programmable VFO parameters. For<br />
example, if you select 144 MHz for the lower limit and<br />
145 MHz for the upper limit, the tunable range will be<br />
limited from 144.000 MHz to 145.995 MHz.<br />
1 Press [VFO].<br />
2 Press [MENU].<br />
3 Turn the Tuning control to select Menu No. 7<br />
(P.VFO).<br />
• <strong>The</strong> current programmable frequency range for the<br />
band appears.<br />
4 Press [MENU].<br />
5 Turn the Tuning control to select the lower limit<br />
frequency in MHz.<br />
6 Press [MENU] to store the lower limit frequency. To<br />
cancel, press [PTT].<br />
93
• <strong>The</strong> upper limit frequency blinks.<br />
7 Turn the Tuning control to select the upper limit<br />
frequency in MHz.<br />
8 Press [MENU] to store the upper limit frequency or<br />
[PTT] to cancel.<br />
Note:<br />
◆ You cannot program the 100 kHz or lower digits.<br />
◆ <strong>The</strong> upper limit frequency cannot be set lower than the selected<br />
lower limit frequency.<br />
TIME-OUT TIMER<br />
<strong>The</strong> Time-out Timer limits the time of each transmission.<br />
<strong>The</strong> built-in Time-out Timer limits each transmission<br />
time to a maximum of 3, 5 or 10 (default) minutes. Just<br />
before the transceiver stops the transmission, a warning<br />
beep sounds. This function is necessary to protect the<br />
transceiver from thermal damage and can therefore not<br />
be turned OFF.<br />
1 Press [MENU].<br />
2 Turn the Tuning control to select Menu No. 23<br />
(TOT).<br />
3 Press [MENU].<br />
4 Turn the Tuning control to select “3”, “5” or “10”<br />
(default) minutes.<br />
5 Press [MENU] to store the setting or [PTT] to cancel.<br />
94
Note: A warning beep sounds even if you select Menu No. 27 (BP)<br />
OFF {page 85}.<br />
TX INHIBIT<br />
You can inhibit the transmission to prevent unauthorized<br />
individuals from transmitting, or to eliminate accidental<br />
transmissions while carrying the transceiver.<br />
1 Press [MENU].<br />
2 Turn the Tuning control to select Menu No. 25 (TXI).<br />
3 Press [MENU].<br />
4 Turn the Tuning control to select “ON”.<br />
5 Press [MENU] to store the setting or [PTT] to cancel.<br />
• “TX INH” appears and an error beep sounds if the<br />
transceiver tries to transmit while TX Inhibit is ON.<br />
TX POWER<br />
To change the transmission output power, press [F],<br />
[PTT].<br />
• Each time you press [F], [PTT] the icon cycles from ➞<br />
➞ , and then back to .<br />
<strong>The</strong> output power varies depending on the battery type<br />
and operating voltage. <strong>The</strong> table below shows the<br />
approximate output power when the transceiver<br />
operates with different types of battery or DC power<br />
sources.<br />
95
Battery<br />
Type<br />
BT-14<br />
( 9.<br />
0 V)<br />
PB-43N<br />
( 7.<br />
2 V)<br />
DC<br />
IN<br />
( 13.<br />
8 V)<br />
96<br />
Output<br />
Power<br />
Selection<br />
Output<br />
Power<br />
( Approx.<br />
)<br />
H 3.<br />
5 W<br />
M 1.<br />
2 W<br />
L 0.<br />
3 W<br />
H 5.<br />
0 W<br />
M 1.<br />
5 W<br />
L 0.<br />
5 W<br />
H 5.<br />
0 W<br />
M 1.<br />
5 W<br />
L 0.<br />
5 W<br />
Note: If the DC IN voltage exceeds 14.5 V DC and “ ” (High Power)<br />
is selected, the “ ” icon blinks and the output power is automatically<br />
reduced to “ ” (Medium Power).<br />
VOX (VOICE-OPERATED TRANSMISSION)<br />
VOX eliminates the necessity of manually switching to<br />
the Transmission Mode each time you want to transmit.<br />
<strong>The</strong> transceiver automatically switches to Transmission<br />
Mode when the VOX circuitry senses that you have<br />
begun speaking into the microphone.<br />
When you operate the VOX function, you must use an<br />
optional microphone (KHS-21) because the internal<br />
speaker and microphone are too near to be used for the<br />
VOX function without using this headset.<br />
To turn the VOX function ON:
1 Press [MENU] then turn the Tuning control to select<br />
Menu No. 20 (VOX).<br />
2 Press [MENU] and turn the Tuning control to select<br />
the desired VOX gain level from 1 (least sensitive) to<br />
9 (most sensitive).<br />
• To turn OFF the VOX function, select “OFF” in step 2.<br />
Note:<br />
◆ While in Menu Mode {page 24}, the VOX function is temporarily<br />
disabled.<br />
◆ Since the VOX circuit must detect the presence of your voice, you<br />
may notice a slight delay in transmission; the very first part of<br />
your message may not be transmitted.<br />
◆ When the VOX function is ON, the ASC function turns OFF.<br />
◆ VOX cannot be used with an optional Speaker/ Microsphone.<br />
VOX Gain<br />
To enjoy the VOX function, take the time to properly<br />
adjust the VOX Gain level. This level controls the VOX<br />
circuit to detect the presence or absence of your voice.<br />
<strong>The</strong>re are 2 ways to adjust the VOX Gain.<br />
While the VOX function is ON:<br />
1 Continue from step 1 and 2, above.<br />
Press [MENU] to turn the VOX function ON, then<br />
press any key other than [LAMP], [MONI/SQL] and<br />
[MENU] to exit Menu Mode.<br />
2 Speak into the headset microphone using your<br />
normal tone of voice to transmit.<br />
97
• If the transmission does not begin, you must<br />
readjust the VOX Gain so that transeiver<br />
transmits while you are speaking. To readjust the<br />
gain, press and hold [PTT] then turn the Tuning<br />
control to select a more sensitive gain level.<br />
• While readjusting the gain, you can release<br />
[PTT]. <strong>The</strong> transceiver will remain in Adjustment<br />
Mode for approximately 5 seconds.<br />
3 Adjust the VOX Gain by turning the Tuning control<br />
until the transceiver reliably switches to transmission<br />
mode each time you speak while the transceiver is<br />
transmitting.<br />
From the Menu:<br />
1 Continue from step 1 and 2 from VOX (Voice-<br />
Operated Trasmission) on page 97.<br />
2 Press [MENU] to store the VOX Gain level.<br />
• “VOX” appears on the bottom right of the display when<br />
the VOX function is ON.<br />
3 Press any key other than [LAMP], [MONI/SQL] and<br />
[MENU] to exit Menu Mode.<br />
4 Adjust the VOX Gain, performing steps 1 to 3 until<br />
the transceiver reliably switches between<br />
transmission and reception each time you speak.<br />
• <strong>The</strong> setting should not allow background noise to<br />
switch the transceiver to Transmission Mode.<br />
98
VOX Delay Time<br />
If the transceiver returns to Reception Mode too quickly<br />
after you stop speaking, the end of your transmission<br />
may not be sent. To avoid this, select an appropriate<br />
delay time that allows your entire transmission to be<br />
sent, before Transmission Mode ends. However, do not<br />
make the delay overly long.<br />
1 Press [MENU].<br />
2 Turn the Tuning control to select Menu No. 22 (VD).<br />
3 Press [MENU].<br />
4 Turn the Tuning control to select the desired delay<br />
time from 250, 500 (default), 750, 1000, 1500, 2000<br />
and 3000 ms.<br />
5 Press [MENU] to store the setting or [PTT] to cancel.<br />
6 While speaking into the microphone using your<br />
normal tone of voice, adjust the VOX delay time,<br />
performing steps 1 to 5 until the transceiver reliably<br />
switches between transmission and reception each<br />
time you speak.<br />
Note:<br />
◆ If you press [PTT] while the VOX function is ON, the VOX Delay<br />
Time is not reflected to the transmission.<br />
◆ If you press [CALL] (if 1750 Hz is programmed) {page 35} to<br />
transmit a 1750 Hz tone, the VOX Delay Time is not reflected.<br />
◆ If the DCS function {page 73} is ON, the transceiver remains in<br />
Transmission Mode for the duration set by the VOX Delay Time. It<br />
then sends a Turn-Off Code to close the receiving party’s squelch.<br />
99
VOX on Busy<br />
You can configure the transceiver to force VOX<br />
transmission even if the transceiver is receiving a<br />
signal.<br />
1 Press [MENU].<br />
2 Turn the Tuning control to select Menu No. 21<br />
(VXB).<br />
3 Press [MENU].<br />
4 Turn the Tuning control to select “ON”.<br />
• To suppress the VOX transmission when the<br />
transceiver is receiving a signal, select “OFF”.<br />
5 Press [MENU] to store the setting or [PTT] to cancel.<br />
Note: You can press [PTT] or [CALL] (if 1750 Hz is programmed) to<br />
transmit, regardless of Menu No. 21 (VXB) settings.<br />
100
BC-21<br />
Battery Charger<br />
EMC-3<br />
Clip Microphone with<br />
Earphone<br />
KHS-21<br />
Headset<br />
OPTIONAL ACCESSORIES<br />
BT-14<br />
Battery Case (6 AA/ LR6)<br />
HMC-3<br />
Headset (with VOX/ PTT)<br />
KSC-24<br />
Rapid Charger<br />
101
MCP-1A<br />
Memory Channel Control<br />
Software<br />
Refer to pages 105 and 107.<br />
PG-2W<br />
DC Power Cable<br />
PG-4Y<br />
PC Interface Cable<br />
102<br />
PB-43N<br />
Ni-MH Battery Pack<br />
(7.2 V/ 1100 mAh)<br />
PG-3J<br />
Cigarette Lighter Power<br />
Cable<br />
SMC-32<br />
Speaker Microphone
SMC-33<br />
Speaker Microphone<br />
(with PF keys)<br />
SMC-34<br />
Speaker Microphone (with<br />
PF keys and VOL control)<br />
103
104<br />
INTERFACING TO PERIPHERALS<br />
SP/MIC JACK<br />
<strong>The</strong> SP/MIC jack on the transceiver can be configured<br />
to interface to various kind of peripherals available for<br />
the transceiver, such as a speaker microphone<br />
(SMC-32/ 33/ 34) and PC interface cable (PG-4Y).<br />
Access Menu No. 31 (PC) and select “ON” or “OFF”.<br />
SP/MIC<br />
If you plug the speaker microphone or headset into the<br />
SP/MIC jack, access Menu No. 31 and select “OFF”<br />
(default). To emulate the programmable function keys<br />
using external keys (to control the transceiver), refer to<br />
the circuit diagram below.<br />
SP<br />
SP/MIC jack<br />
MIC<br />
LOCK SW<br />
2.5 mm<br />
Plug<br />
SW-1 3.9k<br />
3.5 mm<br />
Plug<br />
SW-2 10k<br />
5.0 V 10 μF<br />
Note 1 Note 2<br />
SW-3 27k<br />
PTT<br />
Speaker<br />
Microphone
Note 1: Voltage is developed across a 100Ω resistor on the 5 V line in<br />
the transceiver. When 2 mA flows, approximately 4.8 V is developed.<br />
Note 2: A 10 μF capacitor is not required in the following cases:<br />
• When other equipment has DC blocking capacitors.<br />
• When a 2-terminal electret condenser microphone is used.<br />
PC<br />
To connect the transceiver to a PC in order to manage<br />
the memory channels in the transceiver, use the PG-4Y<br />
PC interface cable. You will also need the supported<br />
software to manage the memory channel contents of the<br />
transceiver. To download the software, access the<br />
following URL:<br />
http://www.kenwood.com/i/products/info/amateur.htm.<br />
To use the software, access Menu No. 31 and select<br />
“ON” {page 107}.<br />
For your reference, the following diagram shows how<br />
the transceiver communicates to the PC using a serial<br />
(COM) port.<br />
SP/MIC jack<br />
SP<br />
MIC<br />
2.5 mm<br />
Plug<br />
3.5 mm<br />
Plug<br />
Level<br />
converter<br />
RXD<br />
DTR<br />
DSR<br />
GND<br />
RTS<br />
CTS<br />
TXD<br />
COM port<br />
Note: Contact an authorized KENWOOD dealer for the PG-4Y, PC<br />
Interface cable availability.<br />
105
■ Using the PG-4Y PC Interface Cable<br />
Use the PG-4Y PC interface cable to connect<br />
between the transceiver and PC. Plug the Speaker/<br />
Microphone connector to the SP/MIC jack and DB-9<br />
connector to one of the COM (serial) ports on your<br />
PC.<br />
106<br />
PC
■ Using the MCP-1A Software<br />
When the transceiver is connected to a PC in order<br />
to use the MCP-1A (Memory Channel Control<br />
Program) software, you must configure the SP/MIC<br />
jack function prior to using the software.<br />
1 Press [MENU].<br />
2 Turn the Tuning control to select Menu No. 31<br />
(PC).<br />
3 Press [MENU].<br />
4 Turn the Tuning control to select “ON”.<br />
5 Press [MENU] to store the setting or press [PTT]<br />
to cancel.<br />
6 Press any key other than [LAMP], [MONI/SQL],<br />
and [MENU] to exit Menu Mode.<br />
Note: If you use an optional Speaker/ Microphone after using<br />
the MCP software, select “OFF” in step 4. Otherwise, the<br />
Speaker/ Micrphone does not function properly.<br />
107
108<br />
TROUBLESHOOTING<br />
GENERAL INFORMATION<br />
Your transceiver has been factory aligned and tested to<br />
specification before shipment. Under normal<br />
circumstances, the transceiver will operate in<br />
accordance with these operating instructions. All<br />
adjustable trimmers, coils and resistors in the<br />
transceiver were preset at the factory. <strong>The</strong>y should only<br />
be readjusted by a qualified technician who is familiar<br />
with this transceiver and has the necessary test<br />
equipment. Attempting service or alignment without<br />
factory authorization can void the transceiver warranty.<br />
When operated properly, the transceiver will provide<br />
years of service and enjoyment without requiring further<br />
realignment. <strong>The</strong> information in this section gives some<br />
general service procedures requiring little or no test<br />
equipment.<br />
Service<br />
If it is ever necessary to return the equipment to your<br />
dealer or service center for repair, pack the transceiver<br />
in its original box and packing material. Include a full<br />
description of the problems experienced. Include your<br />
telephone number, fax number, and email address (if<br />
available) along with your name and address in case the<br />
service technician needs to contact you for further<br />
information while investigating your problem. Do not<br />
return accessory items unless you feel they are directly<br />
related to the service problem.<br />
You may return your transceiver for service to the<br />
authorized KENWOOD dealer from whom you<br />
purchased it or to any authorized KENWOOD service
center. A copy of the service report will be returned with<br />
the transceiver. Please do not send subassemblies or<br />
printed circuit boards; send the complete transceiver.<br />
Tag all returned items with your name and call sign for<br />
identification. Please mention the model and serial<br />
number of the transceiver in any communication<br />
regarding the problem.<br />
Service Note<br />
If you desire to correspond on a technical or operational<br />
problem, please make your note short, complete, and to<br />
the point. Help us help you by providing the following:<br />
1 Model and serial number of equipment<br />
2 Question or problem you are having<br />
3 Other equipment in your station pertaining to the<br />
problem<br />
4 Meter readings<br />
5 Other related information (menu setup, mode,<br />
frequency, key sequence to induce malfunction, etc.)<br />
Do not pack the equipment in crushed newspapers for shipment!<br />
Extensive damage may result during rough handling or shipping.<br />
Note:<br />
◆ Record the date of purchase, serial number and dealer from<br />
whom the transceiver was purchased.<br />
◆ For your own information, retain a written record of any<br />
maintenance performed on the transceiver.<br />
◆ When claiming warranty service, please include a photocopy of<br />
the bill of sale or other proof-of-purchase showing the date of<br />
sale.<br />
109
Cleaning<br />
<strong>The</strong> keys, controls, and case of the transceiver are likely<br />
to become soiled after extended use. Remove the<br />
controls from the transceiver and clean them with a<br />
neutral detergent and warm water. Use a neutral<br />
detergent (no strong chemicals) and a damp cloth to<br />
clean the case.<br />
BACKUP BATTERY<br />
This transceiver uses an EEPROM to store memory<br />
channel data, menu configurations, and all necessary<br />
operation parameters. So, you never have to worry<br />
about replacing back-up batteries to operate the<br />
transceiver.<br />
110
MICROPROCESSOR RESET<br />
If your transceiver seems to be malfunctioning, resetting<br />
the microprocessor may solve the problem. <strong>The</strong><br />
following 2 reset Modes are available. When performing<br />
the reset, you may lose memory data and stored<br />
information. Back up or write down important data<br />
before performing the reset.<br />
Initial Settings<br />
<strong>The</strong> factory defaults for the operating frequencies are as<br />
follows:<br />
• TH-K2AT/ E/ ET: 144.000 MHz<br />
• TH-K4AT/ E: 430.000 MHz<br />
<strong>The</strong> Memory channels have no data stored. <strong>The</strong><br />
Weather <strong>Radio</strong> frequency (AL channel) is restored as<br />
162.550 MHz (TH-K2AT K/ K2 only). Refer to pages 53,<br />
55 and 87 for the Call Channel, Weather <strong>Radio</strong><br />
frequency and frequency step size default values.<br />
Full Reset<br />
This resets all transceiver parameters to the factory<br />
default values.<br />
VFO Reset<br />
This resets the transceiver parameters excluding the<br />
stored DTMF Number in Memory {page 77} and<br />
memory channel contents.<br />
Note: While transceiver is operating in the Channel Display Mode<br />
{page 57}, you cannot reset the transceiver.<br />
111
Performing Reset<br />
<strong>The</strong>re are 2 ways to enter the Reset Mode selection.<br />
However, the transceiver’s Lock function must be turned<br />
OFF {page 88}.<br />
When the transceiver is turned OFF:<br />
■ Full reset<br />
1 Press [F]+[ ] (POWER).<br />
• All indicators are lit.<br />
2 Release [F].<br />
• <strong>The</strong> full reset confirmation message, “FL.RST?”,<br />
appears.<br />
3 Press [F] to proceed.<br />
• “SURE ?” appears.<br />
• Press any key other than [F], [LAMP] and<br />
[MONI/SQL] to exit the Reset Mode.<br />
4 Press [F] to reset the transceiver.<br />
112
■ VFO reset<br />
1 Press [VFO]+[ ] (POWER).<br />
2 Release [VFO].<br />
• <strong>The</strong> VFO reset confirmation message, “VF.RST?”,<br />
appears.<br />
3 Press [VFO] to proceed.<br />
• “SURE ?” appears.<br />
• Press any key other than [VFO], [LAMP] and<br />
[MONI/SQL] to exit the Reset Mode.<br />
4 Press [VFO] to reset the transceiver.<br />
113
Reset using the Menu<br />
1 Press [MENU].<br />
2 Turn the Tuning control to select Menu No. 99<br />
(RESET).<br />
3 Press [MENU].<br />
4 Turn the Tuning control to select the Reset Mode,<br />
“FULL” or “VFO”.<br />
5 Press [MENU] to select the Reset Mode.<br />
• “SURE ?” appears.<br />
• Press any key other than [MENU], [LAMP] and<br />
[MONI/SQL] to exit the Reset Mode.<br />
6 Press [MENU] to reset the transceiver.<br />
114
OPERATION NOTICES<br />
<strong>The</strong> transceiver has been designed and engineered to<br />
avoid possible hardware glitches. However, you may<br />
notice the following symptoms when you operate the<br />
transceiver. <strong>The</strong>se symptoms are not malfunctions.<br />
Operating Voltage<br />
As stated in “SPECIFICATIONS” {page 122}, this<br />
transceiver operates on 6.0 V ~ 9.0 V DC (battery<br />
terminal) or 12.0 V ~ 16.0 V DC (DC IN jack). If you<br />
find that the transceiver cannot be switched ON, or<br />
“DC ERR” appears, the supplied power source may be<br />
outside of the specified range.<br />
In such a case, remove the DC power cable from the<br />
transceiver immediately and confirm that the power<br />
source voltage is within the specified range.<br />
If you are using a variable DC power supply to operate<br />
the transceiver, adjust the DC power supply voltage to<br />
13.8 V DC. Considering the output power efficiency and<br />
thermal characteristics of the transceiver, this is the<br />
optimal voltage to operate the transceiver. If the voltage<br />
at DC IN jack exceeds 14.5 V, the transceiver output<br />
power is automatically reduced to “ ” power.<br />
Receiving Signals in Cities<br />
When you receive signals in cities, the receiver’s entire<br />
S-meter may light up without receiving any strong<br />
signals. This happens when the RF amplifier in the<br />
receiver is overloaded by strong interference signals<br />
that are nearby.<br />
115
Transmission<br />
If you continuously transmit for more than 8 minutes<br />
at high power (5 W), the transceiver becomes warm.<br />
If you continue or repeat the transmission before the<br />
transceiver cools down, the thermal protector gradually<br />
decreases the output power down to 1.5 W.<br />
“ ” also blinks at the same time. If this happens, let the<br />
transceiver cool down for a while before transmitting<br />
again.<br />
Internal Beats<br />
On some spots of the frequency {page 121}, the<br />
S-meter moves without receiving any signals or you<br />
cannot receive any signals. This is inevitable when you<br />
use super-heterodyne receivers. If this happens,<br />
access Menu No. 28 (BS) and select “ON”.<br />
116
TROUBLESHOOTING<br />
<strong>The</strong> problems described in the following tables are<br />
commonly encountered operational malfunctions.<br />
<strong>The</strong>se types of difficulties are usually caused by<br />
improper hook-up, accidental incorrect control settings,<br />
or operator error due to incomplete programming.<br />
<strong>The</strong>se problems are usually not caused by circuit<br />
failure. Please review these tables and the appropriate<br />
section(s) of this instruction manual before assuming<br />
your transceiver is defective.<br />
Note: Placing powered PC peripherals near this transceiver may<br />
cause noise in the transceiver.<br />
Problem Solution<br />
Nothing<br />
appears<br />
on<br />
the<br />
• <strong>The</strong><br />
battery<br />
pack<br />
is<br />
display<br />
when<br />
the<br />
transceiver<br />
discharged.<br />
Recharge<br />
the<br />
is<br />
switched<br />
ON,<br />
or<br />
the<br />
battery<br />
pack<br />
or<br />
replace<br />
the<br />
display<br />
is<br />
blinking<br />
ON<br />
and<br />
OFF.<br />
•<br />
batteries.<br />
<strong>The</strong><br />
DC<br />
cable<br />
or<br />
connection<br />
is<br />
bad.<br />
Replace<br />
the<br />
cable.<br />
• <strong>The</strong><br />
power<br />
supply<br />
fuse<br />
is<br />
open<br />
( blown)<br />
. Investigate<br />
the<br />
cause<br />
Most keys<br />
and<br />
the<br />
Tuning<br />
•<br />
for<br />
the<br />
open<br />
fuse<br />
and<br />
replace<br />
the<br />
fuse.<br />
Transceiver<br />
Lock<br />
function<br />
is<br />
control<br />
do<br />
not<br />
function.<br />
ON<br />
( the<br />
“ ” icon<br />
is<br />
visible)<br />
.<br />
•<br />
P ress<br />
[ F]<br />
( 1 s)<br />
to<br />
turn<br />
OFF<br />
Transceiver<br />
Lock.<br />
<strong>The</strong><br />
transceiver<br />
is<br />
in<br />
Channel<br />
Display<br />
Mode.<br />
Press<br />
[ PTT]<br />
+ [ MR]<br />
+ [ ] ( POWER)<br />
to<br />
exit<br />
Channel<br />
Display<br />
Mode.<br />
117<br />
Ref.<br />
Page<br />
2,<br />
6<br />
8<br />
9<br />
88<br />
57
118<br />
m<br />
e<br />
l<br />
b<br />
o<br />
r<br />
P n<br />
o<br />
i<br />
t<br />
u<br />
l<br />
o<br />
S<br />
.<br />
f<br />
e<br />
R<br />
e<br />
g<br />
a<br />
P<br />
t<br />
c<br />
a<br />
x<br />
e<br />
e<br />
h<br />
t<br />
t<br />
c<br />
e<br />
l<br />
e<br />
s<br />
t<br />
o<br />
n<br />
n<br />
a<br />
c<br />
u<br />
o<br />
Y<br />
e<br />
h<br />
t<br />
g<br />
n<br />
i<br />
s<br />
u<br />
y<br />
c<br />
n<br />
e<br />
u<br />
q<br />
e<br />
r<br />
f<br />
d<br />
e<br />
r<br />
i<br />
s<br />
e<br />
d<br />
g<br />
n<br />
i<br />
n<br />
u<br />
T .<br />
l<br />
o<br />
r<br />
t<br />
n<br />
o<br />
c<br />
•<br />
•<br />
p<br />
e<br />
t<br />
s<br />
y<br />
c<br />
n<br />
e<br />
u<br />
q<br />
e<br />
r<br />
f<br />
t<br />
n<br />
e<br />
r<br />
r<br />
u<br />
c<br />
e<br />
h<br />
T<br />
e<br />
h<br />
t<br />
w<br />
o<br />
l<br />
l<br />
a<br />
t<br />
o<br />
n<br />
s<br />
e<br />
o<br />
d<br />
e<br />
z<br />
i<br />
s<br />
.<br />
d<br />
e<br />
t<br />
c<br />
e<br />
l<br />
e<br />
s<br />
e<br />
b<br />
o<br />
t<br />
y<br />
c<br />
n<br />
e<br />
u<br />
q<br />
e<br />
r<br />
f<br />
e<br />
t<br />
a<br />
i<br />
r<br />
p<br />
o<br />
r<br />
p<br />
p<br />
a<br />
n<br />
a<br />
t<br />
c<br />
e<br />
l<br />
e<br />
S<br />
u<br />
n<br />
e<br />
M<br />
n<br />
i<br />
e<br />
z<br />
i<br />
s<br />
p<br />
e<br />
t<br />
s<br />
y<br />
c<br />
n<br />
e<br />
u<br />
q<br />
e<br />
r<br />
f<br />
.<br />
)<br />
P<br />
T<br />
S<br />
(<br />
1<br />
.<br />
o<br />
N<br />
y<br />
c<br />
n<br />
e<br />
u<br />
q<br />
e<br />
r<br />
f<br />
O<br />
F<br />
V<br />
e<br />
l<br />
b<br />
a<br />
m<br />
m<br />
a<br />
r<br />
g<br />
o<br />
r<br />
P<br />
d<br />
n<br />
a<br />
p<br />
x<br />
E<br />
.<br />
w<br />
o<br />
r<br />
r<br />
a<br />
n<br />
o<br />
o<br />
t<br />
s<br />
i<br />
e<br />
g<br />
n<br />
a<br />
r<br />
u<br />
n<br />
e<br />
M<br />
n<br />
i<br />
e<br />
g<br />
n<br />
a<br />
r<br />
y<br />
c<br />
n<br />
e<br />
u<br />
q<br />
e<br />
r<br />
f<br />
e<br />
h<br />
t<br />
.<br />
)<br />
O<br />
F<br />
V<br />
.<br />
P<br />
(<br />
7<br />
.<br />
o<br />
N<br />
7<br />
8<br />
3<br />
9<br />
y<br />
n<br />
a<br />
l<br />
l<br />
a<br />
c<br />
e<br />
r<br />
t<br />
o<br />
n<br />
n<br />
a<br />
c<br />
u<br />
o<br />
Y<br />
.<br />
l<br />
e<br />
n<br />
n<br />
a<br />
h<br />
c<br />
y<br />
r<br />
o<br />
m<br />
e<br />
m<br />
• n<br />
i<br />
a<br />
t<br />
a<br />
d<br />
o<br />
n<br />
d<br />
e<br />
r<br />
o<br />
t<br />
s<br />
e<br />
v<br />
a<br />
h<br />
u<br />
o<br />
Y<br />
.<br />
s<br />
l<br />
e<br />
n<br />
n<br />
a<br />
h<br />
c<br />
y<br />
r<br />
o<br />
m<br />
e<br />
m<br />
e<br />
h<br />
t<br />
f<br />
o<br />
y<br />
n<br />
a<br />
s<br />
e<br />
i<br />
c<br />
n<br />
e<br />
u<br />
q<br />
e<br />
r<br />
f<br />
d<br />
e<br />
r<br />
i<br />
s<br />
e<br />
d<br />
e<br />
h<br />
t<br />
e<br />
r<br />
o<br />
t<br />
S<br />
.<br />
s<br />
l<br />
e<br />
n<br />
n<br />
a<br />
h<br />
c<br />
y<br />
r<br />
o<br />
m<br />
e<br />
m<br />
e<br />
h<br />
t<br />
n<br />
i<br />
4<br />
4<br />
e<br />
m<br />
u<br />
l<br />
o<br />
v<br />
d<br />
n<br />
u<br />
o<br />
s<br />
g<br />
n<br />
i<br />
v<br />
i<br />
e<br />
c<br />
e<br />
r<br />
e<br />
h<br />
T<br />
s<br />
i<br />
l<br />
a<br />
n<br />
g<br />
i<br />
s<br />
e<br />
h<br />
t<br />
f<br />
i<br />
n<br />
e<br />
v<br />
e<br />
k<br />
a<br />
e<br />
w<br />
s<br />
i<br />
.<br />
g<br />
n<br />
o<br />
r<br />
t<br />
s<br />
• e<br />
b<br />
y<br />
a<br />
m<br />
n<br />
o<br />
i<br />
t<br />
a<br />
t<br />
s<br />
g<br />
n<br />
i<br />
v<br />
i<br />
e<br />
c<br />
e<br />
r<br />
e<br />
h<br />
T<br />
M<br />
F<br />
d<br />
n<br />
a<br />
b<br />
w<br />
o<br />
r<br />
r<br />
a<br />
n<br />
n<br />
i<br />
g<br />
n<br />
i<br />
t<br />
a<br />
r<br />
e<br />
p<br />
o<br />
.<br />
o<br />
N<br />
u<br />
n<br />
e<br />
M<br />
s<br />
s<br />
e<br />
c<br />
c<br />
A<br />
.<br />
h<br />
t<br />
d<br />
i<br />
w<br />
d<br />
n<br />
a<br />
b<br />
.<br />
”<br />
N<br />
O<br />
“<br />
t<br />
c<br />
e<br />
l<br />
e<br />
s<br />
d<br />
n<br />
a<br />
)<br />
N<br />
M<br />
F<br />
(<br />
9<br />
2<br />
1<br />
9<br />
e<br />
h<br />
t<br />
g<br />
n<br />
i<br />
n<br />
r<br />
u<br />
T L<br />
O<br />
V l<br />
o<br />
r<br />
t<br />
n<br />
o<br />
c<br />
r<br />
a<br />
e<br />
h<br />
o<br />
t<br />
u<br />
o<br />
y<br />
w<br />
o<br />
l<br />
l<br />
a<br />
t<br />
o<br />
n<br />
s<br />
e<br />
o<br />
d<br />
.<br />
o<br />
i<br />
d<br />
u<br />
a<br />
• n<br />
o<br />
i<br />
t<br />
c<br />
n<br />
u<br />
f<br />
l<br />
l<br />
a<br />
c<br />
e<br />
v<br />
i<br />
t<br />
c<br />
e<br />
l<br />
e<br />
s<br />
e<br />
h<br />
T<br />
n<br />
r<br />
u<br />
T<br />
.<br />
N<br />
O<br />
s<br />
i<br />
)<br />
S<br />
C<br />
D<br />
r<br />
o<br />
S<br />
S<br />
C<br />
T<br />
C<br />
(<br />
.<br />
n<br />
o<br />
i<br />
t<br />
c<br />
n<br />
u<br />
f<br />
l<br />
l<br />
a<br />
c<br />
e<br />
v<br />
i<br />
t<br />
c<br />
e<br />
l<br />
e<br />
s<br />
e<br />
h<br />
t<br />
F<br />
F<br />
O<br />
9<br />
6<br />
/<br />
r<br />
e<br />
k<br />
a<br />
e<br />
p<br />
S<br />
e<br />
h<br />
t<br />
f<br />
i<br />
n<br />
e<br />
v<br />
E<br />
o<br />
t<br />
n<br />
i<br />
d<br />
e<br />
g<br />
g<br />
u<br />
l<br />
p<br />
s<br />
i<br />
e<br />
n<br />
o<br />
h<br />
p<br />
o<br />
r<br />
c<br />
i<br />
M<br />
e<br />
h<br />
t C<br />
I<br />
M<br />
/<br />
P<br />
S t<br />
o<br />
n<br />
n<br />
a<br />
c<br />
u<br />
o<br />
y<br />
,<br />
k<br />
c<br />
a<br />
j<br />
r<br />
o<br />
/<br />
d<br />
n<br />
a<br />
(<br />
e<br />
v<br />
i<br />
e<br />
c<br />
e<br />
r<br />
/<br />
t<br />
i<br />
m<br />
s<br />
n<br />
a<br />
r<br />
t<br />
e<br />
h<br />
t<br />
h<br />
g<br />
u<br />
o<br />
r<br />
h<br />
t<br />
)<br />
l<br />
o<br />
r<br />
t<br />
n<br />
o<br />
c<br />
e<br />
t<br />
o<br />
m<br />
e<br />
r<br />
.<br />
e<br />
n<br />
o<br />
h<br />
p<br />
o<br />
r<br />
c<br />
i<br />
M<br />
/<br />
r<br />
e<br />
k<br />
a<br />
e<br />
p<br />
S<br />
• .<br />
e<br />
d<br />
o<br />
M<br />
C<br />
P<br />
n<br />
i<br />
s<br />
i<br />
r<br />
e<br />
v<br />
i<br />
e<br />
c<br />
s<br />
n<br />
a<br />
r<br />
t<br />
e<br />
h<br />
T<br />
d<br />
n<br />
a<br />
)<br />
C<br />
P<br />
(<br />
1<br />
3<br />
.<br />
o<br />
N<br />
u<br />
n<br />
e<br />
M<br />
s<br />
s<br />
e<br />
c<br />
c<br />
A<br />
.<br />
”<br />
F<br />
F<br />
O<br />
“<br />
t<br />
c<br />
e<br />
l<br />
e<br />
s<br />
7<br />
0<br />
1
119<br />
m<br />
e<br />
l<br />
b<br />
o<br />
r<br />
P n<br />
o<br />
i<br />
t<br />
u<br />
l<br />
o<br />
S<br />
.<br />
f<br />
e<br />
R<br />
e<br />
g<br />
a<br />
P<br />
y<br />
b<br />
t<br />
i<br />
m<br />
s<br />
n<br />
a<br />
r<br />
t<br />
t<br />
o<br />
n<br />
n<br />
a<br />
c<br />
u<br />
o<br />
Y<br />
g<br />
n<br />
i<br />
s<br />
s<br />
e<br />
r<br />
p ]<br />
T<br />
T<br />
P<br />
[ .<br />
•<br />
•<br />
•<br />
•<br />
y<br />
c<br />
n<br />
e<br />
u<br />
q<br />
e<br />
r<br />
f<br />
a<br />
d<br />
e<br />
t<br />
c<br />
e<br />
l<br />
e<br />
s<br />
u<br />
o<br />
Y<br />
.<br />
e<br />
g<br />
n<br />
a<br />
r<br />
e<br />
l<br />
b<br />
a<br />
w<br />
o<br />
l<br />
l<br />
a<br />
e<br />
h<br />
t<br />
e<br />
d<br />
i<br />
s<br />
t<br />
u<br />
o<br />
e<br />
h<br />
t<br />
n<br />
i<br />
h<br />
t<br />
i<br />
w<br />
y<br />
c<br />
n<br />
e<br />
u<br />
q<br />
e<br />
r<br />
f<br />
a<br />
t<br />
c<br />
e<br />
l<br />
e<br />
S<br />
y<br />
c<br />
n<br />
e<br />
u<br />
q<br />
e<br />
r<br />
f<br />
t<br />
i<br />
m<br />
s<br />
n<br />
a<br />
r<br />
t<br />
e<br />
l<br />
b<br />
a<br />
w<br />
o<br />
l<br />
l<br />
a<br />
.<br />
e<br />
g<br />
n<br />
a<br />
r<br />
t<br />
e<br />
s<br />
f<br />
f<br />
o<br />
t<br />
i<br />
m<br />
s<br />
n<br />
a<br />
r<br />
t<br />
a<br />
d<br />
e<br />
t<br />
c<br />
e<br />
l<br />
e<br />
s<br />
u<br />
o<br />
Y<br />
t<br />
i<br />
m<br />
s<br />
n<br />
a<br />
r<br />
t<br />
e<br />
h<br />
t<br />
s<br />
e<br />
c<br />
a<br />
l<br />
p<br />
t<br />
a<br />
h<br />
t<br />
.<br />
t<br />
i<br />
m<br />
i<br />
l<br />
e<br />
h<br />
t<br />
e<br />
d<br />
i<br />
s<br />
t<br />
u<br />
o<br />
y<br />
c<br />
n<br />
e<br />
u<br />
q<br />
e<br />
r<br />
f<br />
n<br />
o<br />
i<br />
t<br />
c<br />
e<br />
r<br />
i<br />
d<br />
t<br />
e<br />
s<br />
f<br />
f<br />
o<br />
r<br />
e<br />
p<br />
o<br />
r<br />
p<br />
a<br />
t<br />
c<br />
e<br />
l<br />
e<br />
S<br />
.<br />
y<br />
c<br />
n<br />
e<br />
u<br />
q<br />
e<br />
r<br />
f<br />
t<br />
e<br />
s<br />
f<br />
f<br />
o<br />
r<br />
o<br />
s<br />
s<br />
e<br />
c<br />
c<br />
A<br />
.<br />
N<br />
O<br />
s<br />
i<br />
t<br />
i<br />
b<br />
i<br />
h<br />
n<br />
i<br />
X<br />
T<br />
t<br />
c<br />
e<br />
l<br />
e<br />
s<br />
d<br />
n<br />
a<br />
)<br />
I<br />
X<br />
T<br />
(<br />
5<br />
2<br />
.<br />
o<br />
N<br />
u<br />
n<br />
e<br />
M<br />
.<br />
”<br />
F<br />
F<br />
O<br />
“<br />
o<br />
o<br />
t<br />
s<br />
i<br />
e<br />
g<br />
a<br />
t<br />
l<br />
o<br />
v<br />
k<br />
c<br />
a<br />
p<br />
y<br />
r<br />
e<br />
t<br />
t<br />
a<br />
b<br />
e<br />
h<br />
T<br />
r<br />
o<br />
e<br />
g<br />
n<br />
a<br />
h<br />
C<br />
.<br />
t<br />
i<br />
m<br />
s<br />
n<br />
a<br />
r<br />
t<br />
o<br />
t<br />
w<br />
o<br />
l<br />
.<br />
k<br />
c<br />
a<br />
p<br />
y<br />
r<br />
e<br />
t<br />
t<br />
a<br />
b<br />
e<br />
h<br />
t<br />
e<br />
c<br />
a<br />
l<br />
p<br />
e<br />
r<br />
0<br />
2<br />
3<br />
3<br />
5<br />
9<br />
6<br />
,<br />
2<br />
e<br />
b<br />
t<br />
o<br />
n<br />
n<br />
a<br />
c<br />
r<br />
e<br />
t<br />
a<br />
e<br />
p<br />
e<br />
R<br />
.<br />
d<br />
e<br />
s<br />
s<br />
e<br />
c<br />
c<br />
a<br />
•<br />
•<br />
•<br />
s<br />
i<br />
y<br />
c<br />
n<br />
e<br />
u<br />
q<br />
e<br />
r<br />
f<br />
e<br />
n<br />
o<br />
t<br />
g<br />
n<br />
o<br />
r<br />
W<br />
r<br />
e<br />
p<br />
o<br />
r<br />
p<br />
a<br />
t<br />
c<br />
e<br />
l<br />
e<br />
S<br />
.<br />
d<br />
e<br />
t<br />
c<br />
e<br />
l<br />
e<br />
s<br />
.<br />
e<br />
n<br />
o<br />
t<br />
s<br />
s<br />
e<br />
c<br />
c<br />
a<br />
r<br />
e<br />
t<br />
a<br />
e<br />
p<br />
e<br />
r<br />
t<br />
e<br />
s<br />
f<br />
f<br />
o<br />
r<br />
e<br />
t<br />
a<br />
e<br />
p<br />
e<br />
r<br />
g<br />
n<br />
o<br />
r<br />
W<br />
s<br />
s<br />
e<br />
c<br />
c<br />
A<br />
.<br />
d<br />
e<br />
t<br />
c<br />
e<br />
l<br />
e<br />
s<br />
s<br />
i<br />
y<br />
c<br />
n<br />
e<br />
u<br />
q<br />
e<br />
r<br />
f<br />
d<br />
n<br />
a<br />
)<br />
T<br />
E<br />
S<br />
F<br />
F<br />
O<br />
(<br />
8<br />
.<br />
o<br />
N<br />
u<br />
n<br />
e<br />
M<br />
t<br />
e<br />
s<br />
f<br />
f<br />
o<br />
e<br />
t<br />
a<br />
i<br />
r<br />
p<br />
o<br />
r<br />
p<br />
p<br />
a<br />
n<br />
a<br />
t<br />
c<br />
e<br />
l<br />
e<br />
s<br />
.<br />
y<br />
c<br />
n<br />
e<br />
u<br />
q<br />
e<br />
r<br />
f<br />
s<br />
i<br />
n<br />
o<br />
i<br />
t<br />
c<br />
e<br />
r<br />
i<br />
d<br />
t<br />
f<br />
i<br />
h<br />
s<br />
g<br />
n<br />
o<br />
r<br />
W<br />
t<br />
f<br />
i<br />
h<br />
s<br />
r<br />
e<br />
h<br />
t<br />
o<br />
y<br />
r<br />
T<br />
.<br />
d<br />
e<br />
t<br />
c<br />
e<br />
l<br />
e<br />
s<br />
.<br />
s<br />
n<br />
o<br />
i<br />
t<br />
c<br />
e<br />
r<br />
i<br />
d<br />
5<br />
3<br />
3<br />
3<br />
2<br />
3<br />
e<br />
b<br />
t<br />
o<br />
n<br />
n<br />
a<br />
c<br />
e<br />
n<br />
o<br />
t<br />
F<br />
M<br />
T<br />
D<br />
.<br />
d<br />
e<br />
t<br />
t<br />
i<br />
m<br />
s<br />
n<br />
a<br />
r<br />
t<br />
• s<br />
s<br />
e<br />
c<br />
c<br />
A<br />
.<br />
N<br />
O<br />
s<br />
i<br />
k<br />
c<br />
o<br />
L<br />
F<br />
M<br />
T<br />
D<br />
t<br />
c<br />
e<br />
l<br />
e<br />
s<br />
d<br />
n<br />
a<br />
)<br />
L<br />
.<br />
T<br />
D<br />
(<br />
6<br />
3<br />
.<br />
o<br />
N<br />
u<br />
n<br />
e<br />
M<br />
.<br />
”<br />
F<br />
F<br />
O<br />
“<br />
1<br />
8
120<br />
m<br />
e<br />
l<br />
b<br />
o<br />
r<br />
P n<br />
o<br />
i<br />
t<br />
u<br />
l<br />
o<br />
S<br />
.<br />
f<br />
e<br />
R<br />
e<br />
g<br />
a<br />
P<br />
t<br />
p<br />
e<br />
c<br />
c<br />
a<br />
t<br />
o<br />
n<br />
s<br />
e<br />
o<br />
d<br />
r<br />
e<br />
t<br />
a<br />
e<br />
p<br />
e<br />
R<br />
.<br />
s<br />
e<br />
n<br />
o<br />
t<br />
F<br />
M<br />
T<br />
D<br />
r<br />
u<br />
o<br />
y<br />
• n<br />
o<br />
i<br />
s<br />
s<br />
i<br />
m<br />
s<br />
n<br />
a<br />
r<br />
t<br />
e<br />
n<br />
o<br />
t<br />
F<br />
M<br />
T<br />
D<br />
s<br />
s<br />
e<br />
c<br />
c<br />
A<br />
.<br />
t<br />
r<br />
o<br />
h<br />
s<br />
o<br />
o<br />
t<br />
s<br />
i<br />
n<br />
o<br />
i<br />
t<br />
a<br />
r<br />
u<br />
d<br />
t<br />
c<br />
e<br />
l<br />
e<br />
s<br />
d<br />
n<br />
a<br />
)<br />
D<br />
P<br />
S<br />
(<br />
3<br />
3<br />
.<br />
o<br />
N<br />
u<br />
n<br />
e<br />
M<br />
.<br />
)<br />
W<br />
O<br />
L<br />
S<br />
(<br />
”<br />
L<br />
S<br />
“<br />
0<br />
8<br />
s<br />
t<br />
i<br />
m<br />
s<br />
n<br />
a<br />
r<br />
t<br />
r<br />
e<br />
v<br />
i<br />
e<br />
c<br />
s<br />
n<br />
a<br />
r<br />
T<br />
g<br />
n<br />
i<br />
s<br />
s<br />
e<br />
r<br />
p<br />
t<br />
u<br />
o<br />
h<br />
t<br />
i<br />
w ]<br />
T<br />
T<br />
P<br />
[ .<br />
• s<br />
s<br />
e<br />
c<br />
c<br />
A<br />
.<br />
N<br />
O<br />
s<br />
i<br />
n<br />
o<br />
i<br />
t<br />
c<br />
n<br />
u<br />
f<br />
X<br />
O<br />
V<br />
t<br />
c<br />
e<br />
l<br />
e<br />
s<br />
d<br />
n<br />
a<br />
)<br />
X<br />
O<br />
V<br />
(<br />
0<br />
2<br />
.<br />
o<br />
N<br />
u<br />
n<br />
e<br />
M<br />
.<br />
”<br />
F<br />
F<br />
O<br />
“<br />
6<br />
9<br />
s<br />
e<br />
h<br />
c<br />
t<br />
i<br />
w<br />
s<br />
r<br />
e<br />
v<br />
i<br />
e<br />
c<br />
s<br />
n<br />
a<br />
r<br />
t<br />
e<br />
h<br />
T<br />
.<br />
n<br />
o<br />
s<br />
a<br />
e<br />
r<br />
t<br />
n<br />
e<br />
r<br />
a<br />
p<br />
p<br />
a<br />
o<br />
n<br />
r<br />
o<br />
f<br />
F<br />
F<br />
O<br />
• F<br />
F<br />
O<br />
r<br />
e<br />
w<br />
o<br />
P<br />
c<br />
i<br />
t<br />
a<br />
m<br />
o<br />
t<br />
u<br />
A<br />
e<br />
h<br />
T<br />
s<br />
s<br />
e<br />
c<br />
c<br />
A<br />
.<br />
N<br />
O<br />
s<br />
i<br />
n<br />
o<br />
i<br />
t<br />
c<br />
n<br />
u<br />
f<br />
)<br />
O<br />
P<br />
A<br />
(<br />
t<br />
c<br />
e<br />
l<br />
e<br />
s<br />
d<br />
n<br />
a<br />
)<br />
O<br />
P<br />
A<br />
(<br />
7<br />
1<br />
.<br />
o<br />
N<br />
u<br />
n<br />
e<br />
M<br />
r<br />
o<br />
h<br />
t<br />
g<br />
n<br />
e<br />
l<br />
e<br />
m<br />
i<br />
t<br />
d<br />
e<br />
r<br />
i<br />
s<br />
e<br />
d<br />
r<br />
u<br />
o<br />
y<br />
.<br />
”<br />
F<br />
F<br />
O<br />
“<br />
2<br />
8<br />
o<br />
t<br />
s<br />
n<br />
r<br />
u<br />
t<br />
e<br />
r<br />
r<br />
e<br />
v<br />
i<br />
e<br />
c<br />
s<br />
n<br />
a<br />
r<br />
t<br />
e<br />
h<br />
T<br />
a<br />
g<br />
n<br />
i<br />
r<br />
u<br />
d<br />
e<br />
d<br />
o<br />
M<br />
n<br />
o<br />
i<br />
t<br />
p<br />
e<br />
c<br />
e<br />
R<br />
.<br />
n<br />
o<br />
i<br />
s<br />
s<br />
i<br />
m<br />
s<br />
n<br />
a<br />
r<br />
t<br />
g<br />
n<br />
o<br />
l<br />
• e<br />
m<br />
i<br />
t<br />
n<br />
o<br />
i<br />
s<br />
s<br />
i<br />
m<br />
s<br />
n<br />
a<br />
r<br />
t<br />
e<br />
h<br />
T<br />
d<br />
e<br />
m<br />
m<br />
a<br />
r<br />
g<br />
o<br />
r<br />
p<br />
e<br />
h<br />
t<br />
d<br />
e<br />
d<br />
e<br />
e<br />
c<br />
x<br />
e<br />
.<br />
o<br />
N<br />
u<br />
n<br />
e<br />
M<br />
s<br />
s<br />
e<br />
c<br />
c<br />
A<br />
.<br />
e<br />
m<br />
i<br />
t<br />
T<br />
O<br />
T<br />
r<br />
u<br />
o<br />
y<br />
t<br />
c<br />
e<br />
l<br />
e<br />
s<br />
o<br />
t<br />
)<br />
T<br />
O<br />
T<br />
(<br />
3<br />
2<br />
.<br />
h<br />
t<br />
g<br />
n<br />
e<br />
l<br />
n<br />
o<br />
i<br />
s<br />
s<br />
i<br />
m<br />
s<br />
n<br />
a<br />
r<br />
t<br />
d<br />
e<br />
r<br />
i<br />
s<br />
e<br />
d<br />
d<br />
e<br />
n<br />
r<br />
u<br />
t<br />
e<br />
b<br />
t<br />
o<br />
n<br />
n<br />
a<br />
c<br />
T<br />
O<br />
T<br />
e<br />
h<br />
T<br />
e<br />
h<br />
t<br />
g<br />
n<br />
i<br />
t<br />
c<br />
e<br />
t<br />
o<br />
r<br />
p<br />
,<br />
F<br />
F<br />
O<br />
l<br />
a<br />
m<br />
r<br />
e<br />
h<br />
t<br />
e<br />
h<br />
t<br />
m<br />
o<br />
r<br />
f<br />
r<br />
e<br />
v<br />
i<br />
e<br />
c<br />
s<br />
n<br />
a<br />
r<br />
t<br />
.<br />
e<br />
g<br />
a<br />
m<br />
a<br />
d<br />
4<br />
9<br />
t<br />
o<br />
n<br />
s<br />
e<br />
o<br />
d<br />
n<br />
o<br />
i<br />
t<br />
c<br />
n<br />
u<br />
f<br />
n<br />
a<br />
c<br />
S<br />
e<br />
h<br />
T<br />
e<br />
h<br />
t<br />
r<br />
e<br />
t<br />
f<br />
a<br />
g<br />
n<br />
i<br />
n<br />
n<br />
a<br />
c<br />
s<br />
e<br />
m<br />
u<br />
s<br />
e<br />
r<br />
.<br />
l<br />
a<br />
n<br />
g<br />
i<br />
s<br />
a<br />
s<br />
t<br />
c<br />
e<br />
t<br />
e<br />
d<br />
r<br />
e<br />
v<br />
i<br />
e<br />
c<br />
s<br />
n<br />
a<br />
r<br />
t<br />
• ”<br />
E<br />
S<br />
“<br />
d<br />
e<br />
t<br />
c<br />
e<br />
l<br />
e<br />
s<br />
e<br />
v<br />
a<br />
h<br />
u<br />
o<br />
Y<br />
1<br />
1<br />
.<br />
o<br />
N<br />
u<br />
n<br />
e<br />
M<br />
r<br />
o<br />
f<br />
)<br />
K<br />
E<br />
E<br />
S<br />
(<br />
”<br />
O<br />
T<br />
“<br />
r<br />
e<br />
h<br />
t<br />
i<br />
e<br />
t<br />
c<br />
e<br />
l<br />
e<br />
S<br />
.<br />
)<br />
N<br />
A<br />
C<br />
S<br />
(<br />
”<br />
O<br />
C<br />
“<br />
r<br />
o<br />
)<br />
d<br />
e<br />
t<br />
a<br />
r<br />
e<br />
p<br />
O<br />
-<br />
e<br />
m<br />
i<br />
T<br />
(<br />
u<br />
n<br />
e<br />
M<br />
r<br />
o<br />
f<br />
)<br />
d<br />
e<br />
t<br />
a<br />
r<br />
e<br />
p<br />
O<br />
-<br />
r<br />
e<br />
i<br />
r<br />
r<br />
a<br />
C<br />
(<br />
.<br />
)<br />
N<br />
A<br />
C<br />
S<br />
(<br />
1<br />
1<br />
.<br />
o<br />
N<br />
8<br />
6
INTERNAL BEATS FREQUENCY LIST<br />
TH-K2AT/ E/ ET<br />
140.800 MHz, 153.600 MHz, 166.400 MHz,<br />
168.350 MHz<br />
TH-K4AT/ E<br />
453.250 MHz<br />
121
122<br />
SPECIFICATIONS<br />
l<br />
a<br />
r<br />
e<br />
n<br />
e<br />
G T<br />
A<br />
2<br />
K<br />
-<br />
H<br />
T<br />
e<br />
d<br />
o<br />
c<br />
t<br />
e<br />
k<br />
r<br />
a<br />
M 2<br />
K<br />
,<br />
K 2<br />
M<br />
,<br />
M<br />
y<br />
r<br />
o<br />
m<br />
e<br />
m<br />
f<br />
o<br />
r<br />
e<br />
b<br />
m<br />
u<br />
N<br />
s<br />
l<br />
e<br />
n<br />
n<br />
a<br />
h<br />
c<br />
+<br />
)<br />
0<br />
5<br />
(<br />
0<br />
0<br />
1<br />
l<br />
a<br />
i<br />
c<br />
e<br />
p<br />
s<br />
9<br />
n<br />
o<br />
i<br />
t<br />
c<br />
n<br />
u<br />
f<br />
s<br />
e<br />
i<br />
r<br />
o<br />
m<br />
e<br />
m<br />
+<br />
)<br />
0<br />
5<br />
(<br />
0<br />
0<br />
1<br />
l<br />
a<br />
i<br />
c<br />
e<br />
p<br />
s<br />
8<br />
n<br />
o<br />
i<br />
t<br />
c<br />
n<br />
u<br />
f<br />
s<br />
e<br />
i<br />
r<br />
o<br />
m<br />
e<br />
m<br />
e<br />
c<br />
n<br />
a<br />
d<br />
e<br />
p<br />
m<br />
i<br />
a<br />
n<br />
n<br />
e<br />
t<br />
n<br />
A<br />
)<br />
e<br />
p<br />
y<br />
t<br />
r<br />
o<br />
t<br />
c<br />
e<br />
n<br />
n<br />
o<br />
C<br />
(<br />
0<br />
5 Ω )<br />
A<br />
M<br />
S<br />
(<br />
g<br />
n<br />
i<br />
t<br />
a<br />
r<br />
e<br />
p<br />
O<br />
e<br />
g<br />
a<br />
t<br />
l<br />
o<br />
V<br />
k<br />
c<br />
a<br />
j<br />
N<br />
I<br />
C<br />
D<br />
V<br />
0<br />
.<br />
6<br />
1<br />
~<br />
0<br />
.<br />
2<br />
1<br />
C<br />
D<br />
)<br />
l<br />
a<br />
n<br />
i<br />
m<br />
o<br />
n<br />
V<br />
8<br />
.<br />
3<br />
1<br />
(<br />
y<br />
r<br />
e<br />
t<br />
t<br />
a<br />
B<br />
l<br />
a<br />
n<br />
i<br />
m<br />
r<br />
e<br />
t<br />
V<br />
0<br />
.<br />
9<br />
~<br />
0<br />
.<br />
6<br />
C<br />
D<br />
)<br />
l<br />
a<br />
n<br />
i<br />
m<br />
o<br />
n<br />
V<br />
2<br />
.<br />
7<br />
(<br />
d<br />
o<br />
h<br />
t<br />
e<br />
m<br />
g<br />
n<br />
i<br />
d<br />
n<br />
u<br />
o<br />
r<br />
G d<br />
n<br />
u<br />
o<br />
r<br />
g<br />
e<br />
v<br />
i<br />
t<br />
a<br />
g<br />
e<br />
N<br />
t<br />
n<br />
e<br />
r<br />
r<br />
u<br />
C<br />
h<br />
t<br />
i<br />
w<br />
t<br />
i<br />
m<br />
s<br />
n<br />
a<br />
r<br />
T<br />
V<br />
8<br />
.<br />
3<br />
1<br />
,<br />
H<br />
)<br />
N<br />
I<br />
C<br />
D<br />
(<br />
s<br />
s<br />
e<br />
l<br />
r<br />
o<br />
A<br />
8<br />
.<br />
1<br />
h<br />
t<br />
i<br />
w<br />
t<br />
i<br />
m<br />
s<br />
n<br />
a<br />
r<br />
T<br />
V<br />
2<br />
.<br />
7<br />
,<br />
H<br />
)<br />
N<br />
3<br />
4<br />
-<br />
B<br />
P<br />
(<br />
s<br />
s<br />
e<br />
l<br />
r<br />
o<br />
A<br />
0<br />
.<br />
2<br />
h<br />
t<br />
i<br />
w<br />
t<br />
i<br />
m<br />
s<br />
n<br />
a<br />
r<br />
T<br />
V<br />
2<br />
.<br />
7<br />
,<br />
M<br />
)<br />
N<br />
3<br />
4<br />
-<br />
B<br />
P<br />
(<br />
s<br />
s<br />
e<br />
l<br />
r<br />
o<br />
A<br />
5<br />
.<br />
1<br />
h<br />
t<br />
i<br />
w<br />
t<br />
i<br />
m<br />
s<br />
n<br />
a<br />
r<br />
T<br />
V<br />
2<br />
.<br />
7<br />
,<br />
L<br />
)<br />
N<br />
3<br />
4<br />
-<br />
B<br />
P<br />
(<br />
s<br />
s<br />
e<br />
l<br />
r<br />
o<br />
A<br />
8<br />
.<br />
0
General TH-K2AT<br />
Market code<br />
K, K2<br />
M,<br />
M2<br />
Current<br />
Receive<br />
( no<br />
signal)<br />
Battery<br />
Saver<br />
ON<br />
( Average)<br />
100<br />
mA<br />
or<br />
less<br />
30<br />
mA<br />
or<br />
less<br />
– 20°<br />
C ~ 60°C<br />
( – 4°<br />
F ~ 140°<br />
F)<br />
Usable<br />
temperature<br />
range<br />
– 10°<br />
C ~ 60°C<br />
( + 14°<br />
F ~ 140°<br />
F)<br />
with<br />
PB-43N<br />
Frequency<br />
stability<br />
W ithin<br />
± 5ppm<br />
( – 20°<br />
C ~ 60°<br />
C)<br />
58<br />
x 110<br />
x 35.<br />
8 mm/<br />
Dimensions<br />
( W x H x D including<br />
Projections)<br />
2 7/ 16"<br />
x 4 6/ 16"<br />
x 1 7 / 16"<br />
with<br />
PB-43N<br />
58<br />
x 110<br />
x 37<br />
mm/<br />
2 7/ 16"<br />
x 4 6/ 16"<br />
x 1 1 / 2"<br />
with<br />
BT-14<br />
Approx.<br />
320<br />
g/<br />
11.<br />
3 oz.<br />
Weight<br />
with<br />
PB-43N<br />
Approx.<br />
320<br />
g/<br />
11.<br />
3 oz.<br />
with<br />
BT-14<br />
Note: All specifications (General, Transmitter and Receiver) are<br />
guaranteed within the amateur radio band.<br />
123
124<br />
r<br />
e<br />
t<br />
t<br />
i<br />
m<br />
s<br />
n<br />
a<br />
r<br />
T T<br />
A<br />
2<br />
K<br />
-<br />
H<br />
T<br />
e<br />
d<br />
o<br />
c<br />
t<br />
e<br />
k<br />
r<br />
a<br />
M 2<br />
K<br />
,<br />
K 2<br />
M<br />
,<br />
M<br />
e<br />
d<br />
o<br />
M<br />
n<br />
o<br />
i<br />
s<br />
s<br />
i<br />
m<br />
s<br />
n<br />
a<br />
r<br />
T )<br />
M<br />
F<br />
(<br />
D<br />
2<br />
F<br />
/<br />
)<br />
M<br />
F<br />
(<br />
E<br />
3<br />
F<br />
e<br />
g<br />
n<br />
a<br />
r<br />
y<br />
c<br />
n<br />
e<br />
u<br />
q<br />
e<br />
r<br />
F<br />
8<br />
4<br />
1<br />
~<br />
4<br />
4<br />
1<br />
z<br />
H<br />
M<br />
4<br />
7<br />
1<br />
~<br />
6<br />
3<br />
1<br />
z<br />
H<br />
M<br />
t<br />
u<br />
p<br />
t<br />
u<br />
O<br />
r<br />
e<br />
w<br />
o<br />
P<br />
k<br />
c<br />
a<br />
j<br />
N<br />
I<br />
C<br />
D<br />
)<br />
V<br />
8<br />
.<br />
3<br />
1<br />
(<br />
)<br />
.<br />
x<br />
o<br />
r<br />
p<br />
p<br />
a<br />
(<br />
W<br />
0<br />
.<br />
5<br />
:<br />
H<br />
)<br />
.<br />
x<br />
o<br />
r<br />
p<br />
p<br />
a<br />
(<br />
W<br />
5<br />
.<br />
1<br />
:<br />
M<br />
)<br />
.<br />
x<br />
o<br />
r<br />
p<br />
p<br />
a<br />
(<br />
W<br />
5<br />
.<br />
0<br />
:<br />
L<br />
N<br />
3<br />
4<br />
-<br />
B<br />
P<br />
)<br />
V<br />
2<br />
.<br />
7<br />
(<br />
)<br />
.<br />
x<br />
o<br />
r<br />
p<br />
p<br />
a<br />
(<br />
W<br />
0<br />
.<br />
5<br />
:<br />
H<br />
)<br />
.<br />
x<br />
o<br />
r<br />
p<br />
p<br />
a<br />
(<br />
W<br />
5<br />
.<br />
1<br />
:<br />
M<br />
)<br />
.<br />
x<br />
o<br />
r<br />
p<br />
p<br />
a<br />
(<br />
W<br />
5<br />
.<br />
0<br />
:<br />
L<br />
4<br />
1<br />
-<br />
T<br />
B<br />
)<br />
V<br />
0<br />
.<br />
9<br />
(<br />
)<br />
.<br />
x<br />
o<br />
r<br />
p<br />
p<br />
a<br />
(<br />
W<br />
5<br />
.<br />
3<br />
:<br />
H<br />
)<br />
.<br />
x<br />
o<br />
r<br />
p<br />
p<br />
a<br />
(<br />
W<br />
2<br />
.<br />
1<br />
:<br />
M<br />
)<br />
.<br />
x<br />
o<br />
r<br />
p<br />
p<br />
a<br />
(<br />
W<br />
3<br />
.<br />
0<br />
:<br />
L<br />
n<br />
o<br />
i<br />
t<br />
a<br />
l<br />
u<br />
d<br />
o<br />
M e<br />
c<br />
n<br />
a<br />
t<br />
c<br />
a<br />
e<br />
R<br />
y<br />
c<br />
n<br />
e<br />
u<br />
q<br />
e<br />
r<br />
f<br />
m<br />
u<br />
m<br />
i<br />
x<br />
a<br />
M<br />
n<br />
o<br />
i<br />
t<br />
a<br />
i<br />
v<br />
e<br />
d<br />
± /<br />
)<br />
M<br />
F<br />
(<br />
z<br />
H<br />
k<br />
5<br />
± )<br />
M<br />
F<br />
N<br />
(<br />
z<br />
H<br />
k<br />
5<br />
.<br />
2<br />
s<br />
n<br />
o<br />
i<br />
s<br />
s<br />
i<br />
m<br />
e<br />
s<br />
u<br />
o<br />
i<br />
r<br />
u<br />
p<br />
S<br />
s<br />
s<br />
e<br />
l<br />
r<br />
o<br />
B<br />
d<br />
0<br />
6<br />
–<br />
)<br />
r<br />
e<br />
w<br />
o<br />
p<br />
M<br />
d<br />
n<br />
a<br />
H<br />
(<br />
s<br />
s<br />
e<br />
l<br />
r<br />
o<br />
B<br />
d<br />
0<br />
5<br />
–<br />
)<br />
r<br />
e<br />
w<br />
o<br />
p<br />
L<br />
(<br />
e<br />
c<br />
n<br />
a<br />
d<br />
e<br />
p<br />
m<br />
i<br />
e<br />
n<br />
o<br />
h<br />
p<br />
o<br />
r<br />
c<br />
i<br />
M k<br />
2 Ω
125<br />
r<br />
e<br />
v<br />
i<br />
e<br />
c<br />
e<br />
R T<br />
A<br />
2<br />
K<br />
-<br />
H<br />
T<br />
e<br />
d<br />
o<br />
c<br />
t<br />
e<br />
k<br />
r<br />
a<br />
M 2<br />
K<br />
,<br />
K 2<br />
M<br />
,<br />
M<br />
e<br />
d<br />
o<br />
M<br />
n<br />
o<br />
i<br />
t<br />
p<br />
e<br />
c<br />
e<br />
R )<br />
M<br />
F<br />
(<br />
D<br />
2<br />
F<br />
/<br />
)<br />
M<br />
F<br />
(<br />
E<br />
3<br />
F<br />
e<br />
g<br />
n<br />
a<br />
r<br />
y<br />
c<br />
n<br />
e<br />
u<br />
q<br />
e<br />
r<br />
F z<br />
H<br />
M<br />
4<br />
7<br />
1<br />
~<br />
6<br />
3<br />
1<br />
y<br />
c<br />
n<br />
e<br />
u<br />
q<br />
e<br />
r<br />
F<br />
e<br />
t<br />
a<br />
i<br />
d<br />
e<br />
m<br />
r<br />
e<br />
t<br />
n<br />
I<br />
)<br />
F<br />
I<br />
(<br />
z<br />
H<br />
M<br />
5<br />
8<br />
.<br />
8<br />
3<br />
:<br />
F<br />
I<br />
t<br />
s<br />
1<br />
z<br />
H<br />
k<br />
0<br />
5<br />
4<br />
:<br />
F<br />
I<br />
d<br />
n<br />
2<br />
e<br />
p<br />
y<br />
t<br />
t<br />
i<br />
u<br />
c<br />
r<br />
i<br />
C e<br />
l<br />
b<br />
u<br />
o<br />
D e<br />
n<br />
y<br />
d<br />
o<br />
r<br />
e<br />
t<br />
e<br />
h<br />
-<br />
r<br />
e<br />
p<br />
u<br />
s<br />
y<br />
t<br />
i<br />
v<br />
i<br />
t<br />
i<br />
s<br />
n<br />
e<br />
S<br />
)<br />
D<br />
A<br />
N<br />
I<br />
S<br />
B<br />
d<br />
2<br />
1<br />
(<br />
M<br />
F<br />
:<br />
d<br />
n<br />
a<br />
b<br />
o<br />
i<br />
d<br />
a<br />
r<br />
r<br />
u<br />
e<br />
t<br />
a<br />
m<br />
a<br />
m<br />
2<br />
8<br />
1<br />
.<br />
0 μ s<br />
s<br />
e<br />
l<br />
r<br />
o<br />
V<br />
y<br />
t<br />
i<br />
v<br />
i<br />
t<br />
i<br />
s<br />
n<br />
e<br />
s<br />
h<br />
c<br />
l<br />
e<br />
u<br />
q<br />
S<br />
3<br />
1<br />
.<br />
0 μ s<br />
s<br />
e<br />
l<br />
r<br />
o<br />
V<br />
r<br />
u<br />
e<br />
t<br />
a<br />
m<br />
a<br />
m<br />
2<br />
n<br />
i<br />
h<br />
t<br />
i<br />
w<br />
(<br />
)<br />
d<br />
n<br />
a<br />
b<br />
o<br />
i<br />
d<br />
a<br />
r<br />
y<br />
t<br />
i<br />
v<br />
i<br />
t<br />
c<br />
e<br />
l<br />
e<br />
S<br />
)<br />
l<br />
a<br />
m<br />
r<br />
o<br />
n<br />
(<br />
M<br />
F<br />
s<br />
s<br />
e<br />
l<br />
r<br />
o<br />
z<br />
H<br />
k<br />
0<br />
1<br />
/<br />
B<br />
d<br />
6<br />
–<br />
s<br />
s<br />
e<br />
l<br />
r<br />
o<br />
z<br />
H<br />
k<br />
8<br />
2<br />
/<br />
B<br />
d<br />
0<br />
4<br />
–<br />
r<br />
u<br />
e<br />
t<br />
a<br />
m<br />
a<br />
m<br />
2<br />
n<br />
i<br />
h<br />
t<br />
i<br />
w<br />
(<br />
)<br />
d<br />
n<br />
a<br />
b<br />
o<br />
i<br />
d<br />
a<br />
r<br />
)<br />
w<br />
o<br />
r<br />
r<br />
a<br />
n<br />
(<br />
N<br />
M<br />
F<br />
s<br />
s<br />
e<br />
l<br />
r<br />
o<br />
z<br />
H<br />
k<br />
0<br />
1<br />
/<br />
B<br />
d<br />
6<br />
–<br />
s<br />
s<br />
e<br />
l<br />
r<br />
o<br />
z<br />
H<br />
k<br />
8<br />
2<br />
/<br />
B<br />
d<br />
0<br />
4<br />
–<br />
r<br />
u<br />
e<br />
t<br />
a<br />
m<br />
a<br />
m<br />
2<br />
n<br />
i<br />
h<br />
t<br />
i<br />
w<br />
(<br />
)<br />
d<br />
n<br />
a<br />
b<br />
o<br />
i<br />
d<br />
a<br />
r<br />
t<br />
u<br />
p<br />
t<br />
u<br />
o<br />
o<br />
i<br />
d<br />
u<br />
A<br />
)<br />
n<br />
o<br />
i<br />
t<br />
r<br />
o<br />
t<br />
s<br />
i<br />
d<br />
%<br />
0<br />
1<br />
(<br />
r<br />
e<br />
h<br />
g<br />
i<br />
h<br />
r<br />
o<br />
W<br />
m<br />
0<br />
0<br />
4<br />
8<br />
,<br />
V<br />
2<br />
.<br />
7<br />
( Ω )<br />
d<br />
a<br />
o<br />
l
126<br />
l<br />
a<br />
r<br />
e<br />
n<br />
e<br />
G E<br />
2<br />
K<br />
-<br />
H<br />
T T<br />
E<br />
2<br />
K<br />
-<br />
H<br />
T<br />
e<br />
d<br />
o<br />
c<br />
t<br />
e<br />
k<br />
r<br />
a<br />
M E 3<br />
E<br />
y<br />
r<br />
o<br />
m<br />
e<br />
m<br />
f<br />
o<br />
r<br />
e<br />
b<br />
m<br />
u<br />
N<br />
s<br />
l<br />
e<br />
n<br />
n<br />
a<br />
h<br />
c<br />
l<br />
a<br />
i<br />
c<br />
e<br />
p<br />
s<br />
8<br />
+<br />
)<br />
0<br />
5<br />
(<br />
0<br />
0<br />
1<br />
s<br />
e<br />
i<br />
r<br />
o<br />
m<br />
e<br />
m<br />
n<br />
o<br />
i<br />
t<br />
c<br />
n<br />
u<br />
f<br />
e<br />
c<br />
n<br />
a<br />
d<br />
e<br />
p<br />
m<br />
i<br />
a<br />
n<br />
n<br />
e<br />
t<br />
n<br />
A<br />
)<br />
e<br />
p<br />
y<br />
t<br />
r<br />
o<br />
t<br />
c<br />
e<br />
n<br />
n<br />
o<br />
C<br />
(<br />
0<br />
5 Ω )<br />
A<br />
M<br />
S<br />
(<br />
g<br />
n<br />
i<br />
t<br />
a<br />
r<br />
e<br />
p<br />
O<br />
e<br />
g<br />
a<br />
t<br />
l<br />
o<br />
V<br />
k<br />
c<br />
a<br />
j<br />
N<br />
I<br />
C<br />
D<br />
V<br />
0<br />
.<br />
6<br />
1<br />
~<br />
0<br />
.<br />
2<br />
1<br />
C<br />
D<br />
)<br />
l<br />
a<br />
n<br />
i<br />
m<br />
o<br />
n<br />
V<br />
8<br />
.<br />
3<br />
1<br />
(<br />
y<br />
r<br />
e<br />
t<br />
t<br />
a<br />
B<br />
l<br />
a<br />
n<br />
i<br />
m<br />
r<br />
e<br />
t<br />
V<br />
0<br />
.<br />
9<br />
~<br />
0<br />
.<br />
6<br />
C<br />
D<br />
)<br />
l<br />
a<br />
n<br />
i<br />
m<br />
o<br />
n<br />
V<br />
2<br />
.<br />
7<br />
(<br />
d<br />
o<br />
h<br />
t<br />
e<br />
m<br />
g<br />
n<br />
i<br />
d<br />
n<br />
u<br />
o<br />
r<br />
G d<br />
n<br />
u<br />
o<br />
r<br />
g<br />
e<br />
v<br />
i<br />
t<br />
a<br />
g<br />
e<br />
N<br />
t<br />
n<br />
e<br />
r<br />
r<br />
u<br />
C<br />
h<br />
t<br />
i<br />
w<br />
t<br />
i<br />
m<br />
s<br />
n<br />
a<br />
r<br />
T<br />
V<br />
8<br />
.<br />
3<br />
1<br />
,<br />
H<br />
)<br />
N<br />
I<br />
C<br />
D<br />
(<br />
s<br />
s<br />
e<br />
l<br />
r<br />
o<br />
A<br />
8<br />
.<br />
1<br />
h<br />
t<br />
i<br />
w<br />
t<br />
i<br />
m<br />
s<br />
n<br />
a<br />
r<br />
T<br />
V<br />
2<br />
.<br />
7<br />
,<br />
H<br />
)<br />
N<br />
3<br />
4<br />
-<br />
B<br />
P<br />
(<br />
s<br />
s<br />
e<br />
l<br />
r<br />
o<br />
A<br />
0<br />
.<br />
2<br />
h<br />
t<br />
i<br />
w<br />
t<br />
i<br />
m<br />
s<br />
n<br />
a<br />
r<br />
T<br />
V<br />
2<br />
.<br />
7<br />
,<br />
M<br />
)<br />
N<br />
3<br />
4<br />
-<br />
B<br />
P<br />
(<br />
s<br />
s<br />
e<br />
l<br />
r<br />
o<br />
A<br />
5<br />
.<br />
1<br />
h<br />
t<br />
i<br />
w<br />
t<br />
i<br />
m<br />
s<br />
n<br />
a<br />
r<br />
T<br />
V<br />
2<br />
.<br />
7<br />
,<br />
L<br />
)<br />
N<br />
3<br />
4<br />
-<br />
B<br />
P<br />
(<br />
s<br />
s<br />
e<br />
l<br />
r<br />
o<br />
A<br />
8<br />
.<br />
0
General TH-K2E TH-K2ET<br />
Market code<br />
E E3<br />
Current<br />
Receive<br />
( no<br />
signal)<br />
Battery<br />
Saver<br />
ON<br />
( Average)<br />
100<br />
mA<br />
or<br />
less<br />
30<br />
mA<br />
or<br />
less<br />
– 20°<br />
C ~ 60°C<br />
( – 4°<br />
F ~ 140°<br />
F)<br />
Usable<br />
temperature<br />
range<br />
– 10°<br />
C ~ 60°C<br />
( + 14°<br />
F ~ 140°<br />
F)<br />
with<br />
PB-43N<br />
Frequency<br />
stability<br />
W ithin<br />
± 5ppm<br />
( – 20°<br />
C ~ 60°<br />
C)<br />
58<br />
x 110<br />
x 35.<br />
8 mm/<br />
Dimensions<br />
( W x H x D including<br />
Projections)<br />
2 7/ 16"<br />
x 4 6/ 16"<br />
x 1 7 / 16"<br />
with<br />
PB-43N<br />
58<br />
x 110<br />
x 37<br />
mm/<br />
2 7/ 16"<br />
x 4 6/ 16"<br />
x 1 1 / 2"<br />
with<br />
BT-14<br />
Approx.<br />
320<br />
g/<br />
11.<br />
3 oz.<br />
Weight<br />
with<br />
PB-43N<br />
Approx.<br />
320<br />
g/<br />
11.<br />
3 oz.<br />
with<br />
BT-14<br />
Note: All specifications (General, Transmitter and Receiver) are<br />
guaranteed within the amateur radio band.<br />
127
128<br />
r<br />
e<br />
t<br />
t<br />
i<br />
m<br />
s<br />
n<br />
a<br />
r<br />
T E<br />
2<br />
K<br />
-<br />
H<br />
T T<br />
E<br />
2<br />
K<br />
-<br />
H<br />
T<br />
e<br />
d<br />
o<br />
c<br />
t<br />
e<br />
k<br />
r<br />
a<br />
M E 3<br />
E<br />
e<br />
d<br />
o<br />
M<br />
n<br />
o<br />
i<br />
s<br />
s<br />
i<br />
m<br />
s<br />
n<br />
a<br />
r<br />
T )<br />
M<br />
F<br />
(<br />
D<br />
2<br />
F<br />
/<br />
)<br />
M<br />
F<br />
(<br />
E<br />
3<br />
F<br />
e<br />
g<br />
n<br />
a<br />
r<br />
y<br />
c<br />
n<br />
e<br />
u<br />
q<br />
e<br />
r<br />
F z<br />
H<br />
M<br />
6<br />
4<br />
1<br />
~<br />
4<br />
4<br />
1<br />
t<br />
u<br />
p<br />
t<br />
u<br />
O<br />
r<br />
e<br />
w<br />
o<br />
P<br />
k<br />
c<br />
a<br />
j<br />
N<br />
I<br />
C<br />
D<br />
)<br />
V<br />
8<br />
.<br />
3<br />
1<br />
(<br />
)<br />
.<br />
x<br />
o<br />
r<br />
p<br />
p<br />
a<br />
(<br />
W<br />
0<br />
.<br />
5<br />
:<br />
H<br />
)<br />
.<br />
x<br />
o<br />
r<br />
p<br />
p<br />
a<br />
(<br />
W<br />
5<br />
.<br />
1<br />
:<br />
M<br />
)<br />
.<br />
x<br />
o<br />
r<br />
p<br />
p<br />
a<br />
(<br />
W<br />
5<br />
.<br />
0<br />
:<br />
L<br />
N<br />
3<br />
4<br />
-<br />
B<br />
P<br />
)<br />
V<br />
2<br />
.<br />
7<br />
(<br />
)<br />
.<br />
x<br />
o<br />
r<br />
p<br />
p<br />
a<br />
(<br />
W<br />
0<br />
.<br />
5<br />
:<br />
H<br />
)<br />
.<br />
x<br />
o<br />
r<br />
p<br />
p<br />
a<br />
(<br />
W<br />
5<br />
.<br />
1<br />
:<br />
M<br />
)<br />
.<br />
x<br />
o<br />
r<br />
p<br />
p<br />
a<br />
(<br />
W<br />
5<br />
.<br />
0<br />
:<br />
L<br />
4<br />
1<br />
-<br />
T<br />
B<br />
)<br />
V<br />
0<br />
.<br />
9<br />
(<br />
)<br />
.<br />
x<br />
o<br />
r<br />
p<br />
p<br />
a<br />
(<br />
W<br />
5<br />
.<br />
3<br />
:<br />
H<br />
)<br />
.<br />
x<br />
o<br />
r<br />
p<br />
p<br />
a<br />
(<br />
W<br />
2<br />
.<br />
1<br />
:<br />
M<br />
)<br />
.<br />
x<br />
o<br />
r<br />
p<br />
p<br />
a<br />
(<br />
W<br />
3<br />
.<br />
0<br />
:<br />
L<br />
n<br />
o<br />
i<br />
t<br />
a<br />
l<br />
u<br />
d<br />
o<br />
M e<br />
c<br />
n<br />
a<br />
t<br />
c<br />
a<br />
e<br />
R<br />
y<br />
c<br />
n<br />
e<br />
u<br />
q<br />
e<br />
r<br />
f<br />
m<br />
u<br />
m<br />
i<br />
x<br />
a<br />
M<br />
n<br />
o<br />
i<br />
t<br />
a<br />
i<br />
v<br />
e<br />
d<br />
± /<br />
)<br />
M<br />
F<br />
(<br />
z<br />
H<br />
k<br />
5<br />
± )<br />
M<br />
F<br />
N<br />
(<br />
z<br />
H<br />
k<br />
5<br />
.<br />
2<br />
s<br />
n<br />
o<br />
i<br />
s<br />
s<br />
i<br />
m<br />
e<br />
s<br />
u<br />
o<br />
i<br />
r<br />
u<br />
p<br />
S<br />
s<br />
s<br />
e<br />
l<br />
r<br />
o<br />
B<br />
d<br />
0<br />
6<br />
–<br />
)<br />
r<br />
e<br />
w<br />
o<br />
p<br />
M<br />
d<br />
n<br />
a<br />
H<br />
(<br />
s<br />
s<br />
e<br />
l<br />
r<br />
o<br />
B<br />
d<br />
0<br />
5<br />
–<br />
)<br />
r<br />
e<br />
w<br />
o<br />
p<br />
L<br />
(<br />
e<br />
c<br />
n<br />
a<br />
d<br />
e<br />
p<br />
m<br />
i<br />
e<br />
n<br />
o<br />
h<br />
p<br />
o<br />
r<br />
c<br />
i<br />
M k<br />
2 Ω
129<br />
r<br />
e<br />
v<br />
i<br />
e<br />
c<br />
e<br />
R E<br />
2<br />
K<br />
-<br />
H<br />
T T<br />
E<br />
2<br />
K<br />
-<br />
H<br />
T<br />
e<br />
d<br />
o<br />
c<br />
t<br />
e<br />
k<br />
r<br />
a<br />
M E 3<br />
E<br />
e<br />
d<br />
o<br />
M<br />
n<br />
o<br />
i<br />
t<br />
p<br />
e<br />
c<br />
e<br />
R )<br />
M<br />
F<br />
(<br />
D<br />
2<br />
F<br />
/<br />
)<br />
M<br />
F<br />
(<br />
E<br />
3<br />
F<br />
e<br />
g<br />
n<br />
a<br />
r<br />
y<br />
c<br />
n<br />
e<br />
u<br />
q<br />
e<br />
r<br />
F z<br />
H<br />
M<br />
6<br />
4<br />
1<br />
~<br />
4<br />
4<br />
1<br />
y<br />
c<br />
n<br />
e<br />
u<br />
q<br />
e<br />
r<br />
F<br />
e<br />
t<br />
a<br />
i<br />
d<br />
e<br />
m<br />
r<br />
e<br />
t<br />
n<br />
I<br />
)<br />
F<br />
I<br />
(<br />
z<br />
H<br />
M<br />
5<br />
8<br />
.<br />
8<br />
3<br />
:<br />
F<br />
I<br />
t<br />
s<br />
1<br />
z<br />
H<br />
k<br />
0<br />
5<br />
4<br />
:<br />
F<br />
I<br />
d<br />
n<br />
2<br />
e<br />
p<br />
y<br />
t<br />
t<br />
i<br />
u<br />
c<br />
r<br />
i<br />
C e<br />
n<br />
y<br />
d<br />
o<br />
r<br />
e<br />
t<br />
e<br />
h<br />
-<br />
r<br />
e<br />
p<br />
u<br />
s<br />
e<br />
l<br />
b<br />
u<br />
o<br />
D<br />
y<br />
t<br />
i<br />
v<br />
i<br />
t<br />
i<br />
s<br />
n<br />
e<br />
S<br />
)<br />
D<br />
A<br />
N<br />
I<br />
S<br />
B<br />
d<br />
2<br />
1<br />
(<br />
M<br />
F<br />
:<br />
d<br />
n<br />
a<br />
b<br />
o<br />
i<br />
d<br />
a<br />
r<br />
r<br />
u<br />
e<br />
t<br />
a<br />
m<br />
a<br />
m<br />
2<br />
8<br />
1<br />
.<br />
0 μ s<br />
s<br />
e<br />
l<br />
r<br />
o<br />
V<br />
y<br />
t<br />
i<br />
v<br />
i<br />
t<br />
i<br />
s<br />
n<br />
e<br />
s<br />
h<br />
c<br />
l<br />
e<br />
u<br />
q<br />
S<br />
3<br />
1<br />
.<br />
0 μ s<br />
s<br />
e<br />
l<br />
r<br />
o<br />
V<br />
r<br />
u<br />
e<br />
t<br />
a<br />
m<br />
a<br />
m<br />
2<br />
n<br />
i<br />
h<br />
t<br />
i<br />
w<br />
(<br />
)<br />
d<br />
n<br />
a<br />
b<br />
o<br />
i<br />
d<br />
a<br />
r<br />
y<br />
t<br />
i<br />
v<br />
i<br />
t<br />
c<br />
e<br />
l<br />
e<br />
S<br />
)<br />
l<br />
a<br />
m<br />
r<br />
o<br />
n<br />
(<br />
M<br />
F<br />
s<br />
s<br />
e<br />
l<br />
r<br />
o<br />
z<br />
H<br />
k<br />
0<br />
1<br />
/<br />
B<br />
d<br />
6<br />
–<br />
s<br />
s<br />
e<br />
l<br />
r<br />
o<br />
z<br />
H<br />
k<br />
8<br />
2<br />
/<br />
B<br />
d<br />
0<br />
4<br />
–<br />
r<br />
u<br />
e<br />
t<br />
a<br />
m<br />
a<br />
m<br />
2<br />
n<br />
i<br />
h<br />
t<br />
i<br />
w<br />
(<br />
)<br />
d<br />
n<br />
a<br />
b<br />
o<br />
i<br />
d<br />
a<br />
r<br />
)<br />
w<br />
o<br />
r<br />
r<br />
a<br />
n<br />
(<br />
N<br />
M<br />
F<br />
s<br />
s<br />
e<br />
l<br />
r<br />
o<br />
z<br />
H<br />
k<br />
0<br />
1<br />
/<br />
B<br />
d<br />
6<br />
–<br />
s<br />
s<br />
e<br />
l<br />
r<br />
o<br />
z<br />
H<br />
k<br />
8<br />
2<br />
/<br />
B<br />
d<br />
0<br />
4<br />
–<br />
r<br />
u<br />
e<br />
t<br />
a<br />
m<br />
a<br />
m<br />
2<br />
n<br />
i<br />
h<br />
t<br />
i<br />
w<br />
(<br />
)<br />
d<br />
n<br />
a<br />
b<br />
o<br />
i<br />
d<br />
a<br />
r<br />
t<br />
u<br />
p<br />
t<br />
u<br />
o<br />
o<br />
i<br />
d<br />
u<br />
A<br />
)<br />
n<br />
o<br />
i<br />
t<br />
r<br />
o<br />
t<br />
s<br />
i<br />
d<br />
%<br />
0<br />
1<br />
(<br />
r<br />
e<br />
h<br />
g<br />
i<br />
h<br />
r<br />
o<br />
W<br />
m<br />
0<br />
0<br />
4<br />
8<br />
,<br />
V<br />
2<br />
.<br />
7<br />
( Ω )<br />
d<br />
a<br />
o<br />
l
130<br />
l<br />
a<br />
r<br />
e<br />
n<br />
e<br />
G T<br />
A<br />
4<br />
K<br />
-<br />
H<br />
T E<br />
4<br />
K<br />
-<br />
H<br />
T<br />
e<br />
d<br />
o<br />
c<br />
t<br />
e<br />
k<br />
r<br />
a<br />
M 2<br />
M E<br />
y<br />
r<br />
o<br />
m<br />
e<br />
m<br />
f<br />
o<br />
r<br />
e<br />
b<br />
m<br />
u<br />
N<br />
s<br />
l<br />
e<br />
n<br />
n<br />
a<br />
h<br />
c<br />
l<br />
a<br />
i<br />
c<br />
e<br />
p<br />
s<br />
8<br />
+<br />
)<br />
0<br />
5<br />
(<br />
0<br />
0<br />
1<br />
s<br />
e<br />
i<br />
r<br />
o<br />
m<br />
e<br />
m<br />
n<br />
o<br />
i<br />
t<br />
c<br />
n<br />
u<br />
f<br />
e<br />
c<br />
n<br />
a<br />
d<br />
e<br />
p<br />
m<br />
i<br />
a<br />
n<br />
n<br />
e<br />
t<br />
n<br />
A<br />
)<br />
e<br />
p<br />
y<br />
t<br />
r<br />
o<br />
t<br />
c<br />
e<br />
n<br />
n<br />
o<br />
C<br />
(<br />
0<br />
5 Ω )<br />
A<br />
M<br />
S<br />
(<br />
g<br />
n<br />
i<br />
t<br />
a<br />
r<br />
e<br />
p<br />
O<br />
e<br />
g<br />
a<br />
t<br />
l<br />
o<br />
V<br />
k<br />
c<br />
a<br />
j<br />
N<br />
I<br />
C<br />
D<br />
V<br />
0<br />
.<br />
6<br />
1<br />
~<br />
0<br />
.<br />
2<br />
1<br />
C<br />
D<br />
)<br />
l<br />
a<br />
n<br />
i<br />
m<br />
o<br />
n<br />
V<br />
8<br />
.<br />
3<br />
1<br />
(<br />
y<br />
r<br />
e<br />
t<br />
t<br />
a<br />
B<br />
l<br />
a<br />
n<br />
i<br />
m<br />
r<br />
e<br />
t<br />
V<br />
0<br />
.<br />
9<br />
~<br />
0<br />
.<br />
6<br />
C<br />
D<br />
)<br />
l<br />
a<br />
n<br />
i<br />
m<br />
o<br />
n<br />
V<br />
2<br />
.<br />
7<br />
(<br />
d<br />
o<br />
h<br />
t<br />
e<br />
m<br />
g<br />
n<br />
i<br />
d<br />
n<br />
u<br />
o<br />
r<br />
G d<br />
n<br />
u<br />
o<br />
r<br />
g<br />
e<br />
v<br />
i<br />
t<br />
a<br />
g<br />
e<br />
N<br />
t<br />
n<br />
e<br />
r<br />
r<br />
u<br />
C<br />
h<br />
t<br />
i<br />
w<br />
t<br />
i<br />
m<br />
s<br />
n<br />
a<br />
r<br />
T<br />
V<br />
8<br />
.<br />
3<br />
1<br />
,<br />
H<br />
)<br />
N<br />
I<br />
C<br />
D<br />
(<br />
s<br />
s<br />
e<br />
l<br />
r<br />
o<br />
A<br />
8<br />
.<br />
1<br />
h<br />
t<br />
i<br />
w<br />
t<br />
i<br />
m<br />
s<br />
n<br />
a<br />
r<br />
T<br />
V<br />
2<br />
.<br />
7<br />
,<br />
H<br />
)<br />
N<br />
3<br />
4<br />
-<br />
B<br />
P<br />
(<br />
s<br />
s<br />
e<br />
l<br />
r<br />
o<br />
A<br />
0<br />
.<br />
2<br />
h<br />
t<br />
i<br />
w<br />
t<br />
i<br />
m<br />
s<br />
n<br />
a<br />
r<br />
T<br />
V<br />
2<br />
.<br />
7<br />
,<br />
M<br />
)<br />
N<br />
3<br />
4<br />
-<br />
B<br />
P<br />
(<br />
s<br />
s<br />
e<br />
l<br />
r<br />
o<br />
A<br />
5<br />
.<br />
1<br />
h<br />
t<br />
i<br />
w<br />
t<br />
i<br />
m<br />
s<br />
n<br />
a<br />
r<br />
T<br />
V<br />
2<br />
.<br />
7<br />
,<br />
L<br />
)<br />
N<br />
3<br />
4<br />
-<br />
B<br />
P<br />
(<br />
s<br />
s<br />
e<br />
l<br />
r<br />
o<br />
A<br />
8<br />
.<br />
0
General TH-K4AT TH-K4E<br />
Market code<br />
M2 M<br />
Current<br />
Receive<br />
( no<br />
signal)<br />
Battery<br />
Saver<br />
ON<br />
( Average)<br />
100<br />
mA<br />
or<br />
less<br />
30<br />
mA<br />
or<br />
less<br />
– 20°<br />
C ~ 60°C<br />
( – 4°<br />
F ~ 140°<br />
F)<br />
Usable<br />
temperature<br />
range<br />
– 10°<br />
C ~ 60°C<br />
( + 14°<br />
F ~ 140°<br />
F)<br />
with<br />
PB-43N<br />
Frequency<br />
stability<br />
W ithin<br />
± 5ppm<br />
( – 20°<br />
C ~ 60°<br />
C)<br />
58<br />
x 110<br />
x 35.<br />
8 mm/<br />
Dimensions<br />
( W x H x D including<br />
Projections)<br />
2 7/ 16"<br />
x 4 6/ 16"<br />
x 1 7 / 16"<br />
with<br />
PB-43N<br />
58<br />
x 110<br />
x 37<br />
mm/<br />
2 7/ 16"<br />
x 4 6/ 16"<br />
x 1 1 / 2"<br />
with<br />
BT-14<br />
Approx.<br />
320<br />
g/<br />
11.<br />
3 oz.<br />
Weight<br />
with<br />
PB-43N<br />
Approx.<br />
320<br />
g/<br />
11.<br />
3 oz.<br />
with<br />
BT-14<br />
Note: All specifications (General, Transmitter and Receiver) are<br />
guaranteed within the amateur radio band.<br />
131
132<br />
r<br />
e<br />
t<br />
t<br />
i<br />
m<br />
s<br />
n<br />
a<br />
r<br />
T T<br />
A<br />
4<br />
K<br />
-<br />
H<br />
T E<br />
4<br />
K<br />
-<br />
H<br />
T<br />
e<br />
d<br />
o<br />
c<br />
t<br />
e<br />
k<br />
r<br />
a<br />
M 2<br />
M E<br />
e<br />
d<br />
o<br />
M<br />
n<br />
o<br />
i<br />
s<br />
s<br />
i<br />
m<br />
s<br />
n<br />
a<br />
r<br />
T )<br />
M<br />
F<br />
(<br />
D<br />
2<br />
F<br />
/<br />
)<br />
M<br />
F<br />
(<br />
E<br />
3<br />
F<br />
e<br />
g<br />
n<br />
a<br />
r<br />
y<br />
c<br />
n<br />
e<br />
u<br />
q<br />
e<br />
r<br />
F<br />
0<br />
7<br />
4<br />
~<br />
0<br />
0<br />
4<br />
z<br />
H<br />
M<br />
0<br />
4<br />
4<br />
~<br />
0<br />
3<br />
4<br />
z<br />
H<br />
M<br />
t<br />
u<br />
p<br />
t<br />
u<br />
O<br />
r<br />
e<br />
w<br />
o<br />
P<br />
k<br />
c<br />
a<br />
j<br />
N<br />
I<br />
C<br />
D<br />
)<br />
V<br />
8<br />
.<br />
3<br />
1<br />
(<br />
)<br />
.<br />
x<br />
o<br />
r<br />
p<br />
p<br />
a<br />
(<br />
W<br />
0<br />
.<br />
5<br />
:<br />
H<br />
)<br />
.<br />
x<br />
o<br />
r<br />
p<br />
p<br />
a<br />
(<br />
W<br />
5<br />
.<br />
1<br />
:<br />
M<br />
)<br />
.<br />
x<br />
o<br />
r<br />
p<br />
p<br />
a<br />
(<br />
W<br />
5<br />
.<br />
0<br />
:<br />
L<br />
N<br />
3<br />
4<br />
-<br />
B<br />
P<br />
)<br />
V<br />
2<br />
.<br />
7<br />
(<br />
)<br />
.<br />
x<br />
o<br />
r<br />
p<br />
p<br />
a<br />
(<br />
W<br />
0<br />
.<br />
5<br />
:<br />
H<br />
)<br />
.<br />
x<br />
o<br />
r<br />
p<br />
p<br />
a<br />
(<br />
W<br />
5<br />
.<br />
1<br />
:<br />
M<br />
)<br />
.<br />
x<br />
o<br />
r<br />
p<br />
p<br />
a<br />
(<br />
W<br />
5<br />
.<br />
0<br />
:<br />
L<br />
4<br />
1<br />
-<br />
T<br />
B<br />
)<br />
V<br />
0<br />
.<br />
9<br />
(<br />
)<br />
.<br />
x<br />
o<br />
r<br />
p<br />
p<br />
a<br />
(<br />
W<br />
5<br />
.<br />
3<br />
:<br />
H<br />
)<br />
.<br />
x<br />
o<br />
r<br />
p<br />
p<br />
a<br />
(<br />
W<br />
2<br />
.<br />
1<br />
:<br />
M<br />
)<br />
.<br />
x<br />
o<br />
r<br />
p<br />
p<br />
a<br />
(<br />
W<br />
3<br />
.<br />
0<br />
:<br />
L<br />
n<br />
o<br />
i<br />
t<br />
a<br />
l<br />
u<br />
d<br />
o<br />
M e<br />
c<br />
n<br />
a<br />
t<br />
c<br />
a<br />
e<br />
R<br />
y<br />
c<br />
n<br />
e<br />
u<br />
q<br />
e<br />
r<br />
f<br />
m<br />
u<br />
m<br />
i<br />
x<br />
a<br />
M<br />
n<br />
o<br />
i<br />
t<br />
a<br />
i<br />
v<br />
e<br />
d<br />
± /<br />
)<br />
M<br />
F<br />
(<br />
z<br />
H<br />
k<br />
5<br />
± )<br />
M<br />
F<br />
N<br />
(<br />
z<br />
H<br />
k<br />
5<br />
.<br />
2<br />
s<br />
n<br />
o<br />
i<br />
s<br />
s<br />
i<br />
m<br />
e<br />
s<br />
u<br />
o<br />
i<br />
r<br />
u<br />
p<br />
S<br />
s<br />
s<br />
e<br />
l<br />
r<br />
o<br />
B<br />
d<br />
0<br />
6<br />
–<br />
)<br />
r<br />
e<br />
w<br />
o<br />
p<br />
M<br />
d<br />
n<br />
a<br />
H<br />
(<br />
s<br />
s<br />
e<br />
l<br />
r<br />
o<br />
B<br />
d<br />
0<br />
5<br />
–<br />
)<br />
r<br />
e<br />
w<br />
o<br />
p<br />
L<br />
(<br />
e<br />
c<br />
n<br />
a<br />
d<br />
e<br />
p<br />
m<br />
i<br />
e<br />
n<br />
o<br />
h<br />
p<br />
o<br />
r<br />
c<br />
i<br />
M k<br />
2 Ω
133<br />
r<br />
e<br />
v<br />
i<br />
e<br />
c<br />
e<br />
R T<br />
A<br />
4<br />
K<br />
-<br />
H<br />
T E<br />
4<br />
K<br />
-<br />
H<br />
T<br />
e<br />
d<br />
o<br />
c<br />
t<br />
e<br />
k<br />
r<br />
a<br />
M 2<br />
M E<br />
e<br />
d<br />
o<br />
M<br />
n<br />
o<br />
i<br />
t<br />
p<br />
e<br />
c<br />
e<br />
R )<br />
M<br />
F<br />
(<br />
D<br />
2<br />
F<br />
/<br />
)<br />
M<br />
F<br />
(<br />
E<br />
3<br />
F<br />
e<br />
g<br />
n<br />
a<br />
r<br />
y<br />
c<br />
n<br />
e<br />
u<br />
q<br />
e<br />
r<br />
F<br />
0<br />
7<br />
4<br />
~<br />
0<br />
0<br />
4<br />
z<br />
H<br />
M<br />
0<br />
4<br />
4<br />
~<br />
0<br />
3<br />
4<br />
z<br />
H<br />
M<br />
y<br />
c<br />
n<br />
e<br />
u<br />
q<br />
e<br />
r<br />
F<br />
e<br />
t<br />
a<br />
i<br />
d<br />
e<br />
m<br />
r<br />
e<br />
t<br />
n<br />
I<br />
)<br />
F<br />
I<br />
(<br />
z<br />
H<br />
M<br />
5<br />
8<br />
.<br />
8<br />
3<br />
:<br />
F<br />
I<br />
t<br />
s<br />
1<br />
z<br />
H<br />
k<br />
0<br />
5<br />
4<br />
:<br />
F<br />
I<br />
d<br />
n<br />
2<br />
e<br />
p<br />
y<br />
t<br />
t<br />
i<br />
u<br />
c<br />
r<br />
i<br />
C e<br />
n<br />
y<br />
d<br />
o<br />
r<br />
e<br />
t<br />
e<br />
h<br />
-<br />
r<br />
e<br />
p<br />
u<br />
s<br />
e<br />
l<br />
b<br />
u<br />
o<br />
D<br />
y<br />
t<br />
i<br />
v<br />
i<br />
t<br />
i<br />
s<br />
n<br />
e<br />
S<br />
)<br />
D<br />
A<br />
N<br />
I<br />
S<br />
B<br />
d<br />
2<br />
1<br />
(<br />
M<br />
F<br />
:<br />
d<br />
n<br />
a<br />
b<br />
m<br />
c<br />
0<br />
7<br />
n<br />
i<br />
h<br />
t<br />
i<br />
w<br />
8<br />
1<br />
.<br />
0 μ s<br />
s<br />
e<br />
l<br />
r<br />
o<br />
V<br />
y<br />
t<br />
i<br />
v<br />
i<br />
t<br />
i<br />
s<br />
n<br />
e<br />
s<br />
h<br />
c<br />
l<br />
e<br />
u<br />
q<br />
S<br />
3<br />
1<br />
.<br />
0 μ s<br />
s<br />
e<br />
l<br />
r<br />
o<br />
V<br />
r<br />
u<br />
e<br />
t<br />
a<br />
m<br />
a<br />
m<br />
c<br />
0<br />
7<br />
n<br />
i<br />
h<br />
t<br />
i<br />
w<br />
(<br />
)<br />
d<br />
n<br />
a<br />
b<br />
o<br />
i<br />
d<br />
a<br />
r<br />
y<br />
t<br />
i<br />
v<br />
i<br />
t<br />
c<br />
e<br />
l<br />
e<br />
S<br />
)<br />
l<br />
a<br />
m<br />
r<br />
o<br />
n<br />
(<br />
M<br />
F<br />
s<br />
s<br />
e<br />
l<br />
r<br />
o<br />
z<br />
H<br />
k<br />
0<br />
1<br />
/<br />
B<br />
d<br />
6<br />
–<br />
s<br />
s<br />
e<br />
l<br />
r<br />
o<br />
z<br />
H<br />
k<br />
8<br />
2<br />
/<br />
B<br />
d<br />
0<br />
4<br />
–<br />
r<br />
u<br />
e<br />
t<br />
a<br />
m<br />
a<br />
m<br />
c<br />
0<br />
7<br />
n<br />
i<br />
h<br />
t<br />
i<br />
w<br />
(<br />
)<br />
d<br />
n<br />
a<br />
b<br />
o<br />
i<br />
d<br />
a<br />
r<br />
)<br />
w<br />
o<br />
r<br />
r<br />
a<br />
n<br />
(<br />
N<br />
M<br />
F<br />
s<br />
s<br />
e<br />
l<br />
r<br />
o<br />
z<br />
H<br />
k<br />
0<br />
1<br />
/<br />
B<br />
d<br />
6<br />
–<br />
s<br />
s<br />
e<br />
l<br />
r<br />
o<br />
z<br />
H<br />
k<br />
8<br />
2<br />
/<br />
B<br />
d<br />
0<br />
4<br />
–<br />
r<br />
u<br />
e<br />
t<br />
a<br />
m<br />
a<br />
m<br />
c<br />
0<br />
7<br />
n<br />
i<br />
h<br />
t<br />
i<br />
w<br />
(<br />
)<br />
d<br />
n<br />
a<br />
b<br />
o<br />
i<br />
d<br />
a<br />
r<br />
t<br />
u<br />
p<br />
t<br />
u<br />
o<br />
o<br />
i<br />
d<br />
u<br />
A<br />
)<br />
n<br />
o<br />
i<br />
t<br />
r<br />
o<br />
t<br />
s<br />
i<br />
d<br />
%<br />
0<br />
1<br />
(<br />
r<br />
e<br />
h<br />
g<br />
i<br />
h<br />
r<br />
o<br />
W<br />
m<br />
0<br />
0<br />
4<br />
8<br />
,<br />
V<br />
2<br />
.<br />
7<br />
( Ω )<br />
d<br />
a<br />
o<br />
l
134<br />
INDEX<br />
A<br />
All-Channel Scan ......................................................... 63<br />
Alkaline Batteries, Installing ............................................ 2<br />
APO (Menu No. 17) ..................................................... 82<br />
ARO (Menu No. 9) ....................................................... 37<br />
ASC (Automatic Simplex Check) .................................. 38<br />
Automatic Dialer........................................................... 77<br />
B<br />
Band Scan ................................................................... 60<br />
Battery<br />
Installing the Alkaline ................................................. 2<br />
Installing the PB-43N Ni-MH, Pack ............................ 1<br />
Life ......................................................................... 83<br />
Remaining .............................................................. 83<br />
Saver ...................................................................... 84<br />
BCL (Menu No. 24) ...................................................... 86<br />
Beat Shift ..................................................................... 85<br />
Beep Function.............................................................. 85<br />
Belt Clip, Installing the .................................................... 5<br />
BP (Menu No. 27) ........................................................ 85<br />
BS (Menu No. 28) ........................................................ 85<br />
Busy Channel Lockout ................................................. 86<br />
C<br />
Call Channel, Recalling ................................................ 53<br />
Call Scan ..................................................................... 64<br />
Carrier-Operated Mode ................................................ 68<br />
Channel Display ........................................................... 57<br />
Charging the PB-43N Ni-MH Battery Pack ..................... 6<br />
Cigarette Lighter Socket ................................................. 8<br />
CK (Menu No. 18) ........................................................ 36
Clearing<br />
Memory Channel .................................................... 47<br />
COM Port................................................................... 106<br />
CT (Menu No. 4) .......................................................... 70<br />
CTCSS<br />
Freq. ID Scan .......................................................... 72<br />
Selecting a, Frequency ........................................... 70<br />
Using ...................................................................... 69<br />
D<br />
DC IN jack ........................................................ 6, 12, 115<br />
DCS (Menu No. 5)<br />
Code ID Scan ......................................................... 75<br />
Selecting a, Code .................................................... 74<br />
Using ...................................................................... 73<br />
Direct Frequency Entry ................................................ 21<br />
Display<br />
LCD ........................................................................ 14<br />
DT.H (Menu No. 34) ..................................................... 77<br />
DT.L (Menu No. 36) ...................................................... 81<br />
DTMF<br />
Adjusting the Pause Duration .................................. 80<br />
Adjusting the, Tone Transmission Speed ................. 80<br />
Automatic Dialer...................................................... 77<br />
Key Lock ................................................................. 81<br />
<strong>Manual</strong> Dialing ........................................................ 76<br />
Storing a, Number in memory ................................. 77<br />
Transmitting a Stored, Number................................ 79<br />
TX hold ................................................................... 77<br />
DTMF.MR (Menu No. 32) ............................................. 77<br />
E<br />
ENC (Menu No. 30) ..................................................... 89<br />
F<br />
First QSO..................................................................... 10<br />
FMN (Menu No. 29) ..................................................... 91<br />
135
Frequency Step Size .................................................... 86<br />
Full Reset ...................................................................111<br />
H<br />
HLD (Menu No. 19) ...................................................... 36<br />
I<br />
Installing<br />
the Alkaline Batteries ................................................. 2<br />
the Antenna .............................................................. 4<br />
the Belt Clip .............................................................. 5<br />
the PB-43N Ni-MH Battery Pack ............................... 1<br />
Internal Beats ......................................................116, 121<br />
K<br />
Keys and Control ................................................... 12, 13<br />
L<br />
Lamp ........................................................................... 88<br />
Lock Function .............................................................. 88<br />
L.OUT (Menu No. 12) ................................................... 67<br />
M<br />
<strong>Manual</strong> Dialing ............................................................. 76<br />
M.CH (Menu No. 13) .................................................... 41<br />
MDF (Menu No. 15) ..................................................... 49<br />
Memory Channel<br />
Lockout ................................................................... 67<br />
Naming a ................................................................ 48<br />
Recalling ................................................................. 46<br />
Transfer .................................................................. 50<br />
Menu<br />
Access .................................................................... 24<br />
Function List ........................................................... 26<br />
Meter ..................................................................... 15, 83<br />
MHz Mode ................................................................... 20<br />
Microphone PF Keys (optional) .................................... 89<br />
Microprocessor Reset .................................................111<br />
136
M.NAME (Menu No. 14) ............................................... 48<br />
N<br />
Narrow Band FM Operation ......................................... 91<br />
Normal Scan ................................................................ 60<br />
O<br />
Odd-split Frequency ..................................................... 42<br />
Offset<br />
Programming .......................................................... 32<br />
Programming Flow .................................................. 32<br />
Selecting, Direction ................................................. 32<br />
Selecting, Frequency .............................................. 33<br />
OFFSET (Menu No. 8) ................................................. 93<br />
Operating Voltage ...................................................... 115<br />
Optional Accessories.................................................. 101<br />
P<br />
PA (Menu No. 35) ......................................................... 80<br />
PC (Menu No. 31) ...................................................... 107<br />
PF Keys, Microphone (Optional) .................................. 89<br />
P.ON.MSG (Menu No. 26) ............................................ 92<br />
Power ON/ OFF ........................................................... 17<br />
PRI (Menu No. 10) ....................................................... 66<br />
Priority Channel<br />
Programming .......................................................... 65<br />
Using, Scan ............................................................ 65<br />
Priority Scan ................................................................ 65<br />
Program Scan<br />
Storing, Frequency Range ...................................... 61<br />
Programmable VFO ..................................................... 93<br />
P.VFO (Menu No. 7) ..................................................... 93<br />
R<br />
Recalling<br />
Call Channel ........................................................... 53<br />
Memory Channel .................................................... 46<br />
137
Regulated Power Supply ................................................ 9<br />
Repeater Offset, Automatic .......................................... 37<br />
Repeater Operation ..................................................... 31<br />
Reprogramming<br />
the Call Channel ..................................................... 54<br />
Reset<br />
Full ....................................................................... 112<br />
VFO ...................................................................... 113<br />
RESET (Menu No. 99) ............................................... 114<br />
Reverse Function ......................................................... 38<br />
S<br />
SAV (Menu No. 16) ...................................................... 84<br />
Scan<br />
All-Channel ............................................................. 63<br />
Band ....................................................................... 60<br />
Call ......................................................................... 64<br />
Carrier-Operated Mode ........................................... 68<br />
Seek Mode ............................................................. 68<br />
Time-Operated Mode .............................................. 68<br />
SCAN (Menu No. 11) ................................................... 68<br />
SFT (Menu No. 6) ........................................................ 32<br />
Simplex<br />
Storing, Frequencies or Standard ............................ 44<br />
SPD (Menu No. 33) ...................................................... 80<br />
Specifications ............................................................. 122<br />
Squelch, Adjusting ....................................................... 18<br />
Supplied Accessories .................................................... vii<br />
SP/MIC .......................................................... 12, 89, 104<br />
STP (Menu No. 1) ........................................................ 86<br />
Switching Power ON/ OFF ........................................... 17<br />
T<br />
T (Menu No. 3) ....................................................... 34, 35<br />
T.CT.DCS (Menu No. 2) ................................... 34, 69, 73<br />
138
Time-Operated Mode ................................................... 68<br />
Time-out Timer ............................................................. 94<br />
Tone<br />
Activating, Function ................................................. 34<br />
Freq. ID Scan .......................................................... 39<br />
Selecting a, Frequency ........................................... 35<br />
Transmit a 1750 Hz ................................................. 36<br />
TOT (Menu No. 23) ...................................................... 94<br />
Transmitting ................................................................. 19<br />
Troubleshooting ......................................................... 108<br />
Tuning Control Unlock .................................................. 89<br />
TXI (Menu No. 25) ....................................................... 95<br />
TX Inhibit ..................................................................... 95<br />
TX Power ..................................................................... 95<br />
V<br />
VD (Menu No. 22) ........................................................ 99<br />
VFO<br />
Mode ...................................................................... 20<br />
Programmable ........................................................ 93<br />
Reset .....................................................................111<br />
Volume<br />
Adjusting ................................................................. 17<br />
VOX (Voice-Operated Transmission)<br />
Delay Time .............................................................. 99<br />
Gain ........................................................................ 97<br />
on Busy ................................................................ 100<br />
VOX (Menu No. 20) ..................................................... 96<br />
VXB (Menu No. 21) .................................................... 100<br />
W<br />
WX .............................................................................. 55<br />
WXA (Menu No. 37) ..................................................... 56<br />
1750 Hz ....................................................................... 36<br />
139