Chapter 10 Using VFP's Object- Oriented Tools - dFPUG-Portal
Chapter 10 Using VFP's Object- Oriented Tools - dFPUG-Portal
Chapter 10 Using VFP's Object- Oriented Tools - dFPUG-Portal
Create successful ePaper yourself
Turn your PDF publications into a flip-book with our unique Google optimized e-Paper software.
268 The Fundamentals of Visual FoxPro 6.0<br />
Quick start to creating classes<br />
You’re probably plenty full of theory by now. It’s time to actually start creating your own<br />
classes. In this section, I’ll cover creating classes both from forms and from controls, and then<br />
show you how to use both of them together.<br />
Form classes<br />
Creating your own form base class<br />
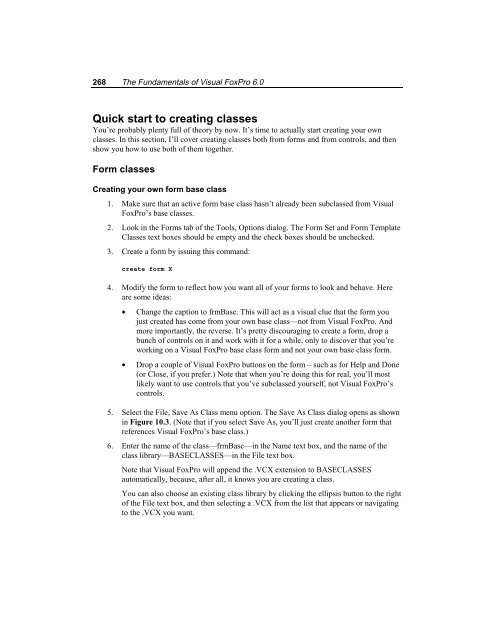
1. Make sure that an active form base class hasn’t already been subclassed from Visual<br />
FoxPro’s base classes.<br />
2. Look in the Forms tab of the <strong>Tools</strong>, Options dialog. The Form Set and Form Template<br />
Classes text boxes should be empty and the check boxes should be unchecked.<br />
3. Create a form by issuing this command:<br />
create form X<br />
4. Modify the form to reflect how you want all of your forms to look and behave. Here<br />
are some ideas:<br />
• Change the caption to frmBase. This will act as a visual clue that the form you<br />
just created has come from your own base class—not from Visual FoxPro. And<br />
more importantly, the reverse. It’s pretty discouraging to create a form, drop a<br />
bunch of controls on it and work with it for a while, only to discover that you’re<br />
working on a Visual FoxPro base class form and not your own base class form.<br />
• Drop a couple of Visual FoxPro buttons on the form – such as for Help and Done<br />
(or Close, if you prefer.) Note that when you’re doing this for real, you’ll most<br />
likely want to use controls that you’ve subclassed yourself, not Visual FoxPro’s<br />
controls.<br />
5. Select the File, Save As Class menu option. The Save As Class dialog opens as shown<br />
in Figure <strong>10</strong>.3. (Note that if you select Save As, you’ll just create another form that<br />
references Visual FoxPro’s base class.)<br />
6. Enter the name of the class—frmBase—in the Name text box, and the name of the<br />
class library—BASECLASSES—in the File text box.<br />
Note that Visual FoxPro will append the .VCX extension to BASECLASSES<br />
automatically, because, after all, it knows you are creating a class.<br />
You can also choose an existing class library by clicking the ellipsis button to the right<br />
of the File text box, and then selecting a .VCX from the list that appears or navigating<br />
to the .VCX you want.


