ST-7970 - Canyon
ST-7970 - Canyon
ST-7970 - Canyon

Create successful ePaper yourself
Turn your PDF publications into a flip-book with our unique Google optimized e-Paper software.
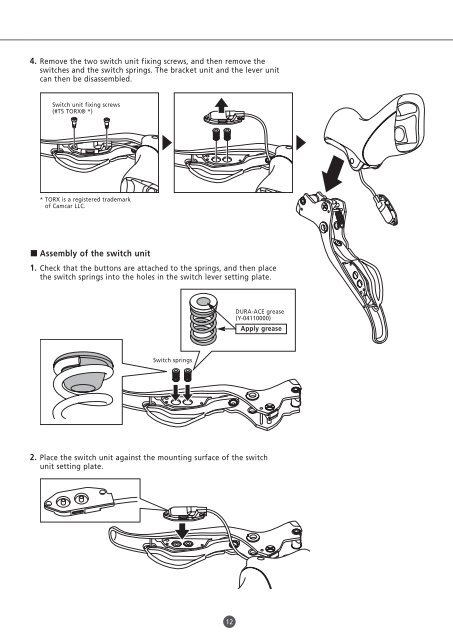
4. Remove the two switch unit fixing screws, and then remove the<br />
switches and the switch springs. The bracket unit and the lever unit<br />
can then be disassembled.<br />
Switch unit fixing screws<br />
(#T5 TORX® *)<br />
* TORX is a registered trademark<br />
of Camcar LLC.<br />
Assembly of the switch unit<br />
1. Check that the buttons are attached to the springs, and then place<br />
the switch springs into the holes in the switch lever setting plate.<br />
Switch springs<br />
2. Place the switch unit against the mounting surface of the switch<br />
unit setting plate.<br />
12<br />
DURA-ACE grease<br />
(Y-04110000)<br />
Apply grease