Windows Vista - ICT - New Mexico State University
Windows Vista - ICT - New Mexico State University
Windows Vista - ICT - New Mexico State University

Create successful ePaper yourself
Turn your PDF publications into a flip-book with our unique Google optimized e-Paper software.
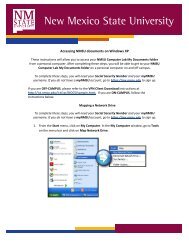
<strong>New</strong> <strong>Mexico</strong> <strong>State</strong> <strong>University</strong><br />
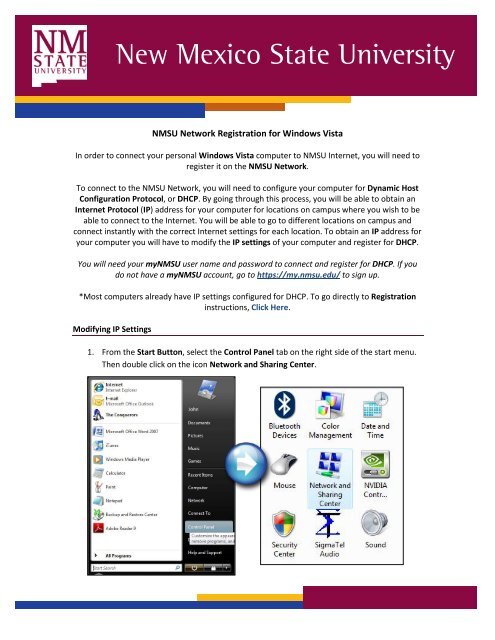
NMSU Network Registration for <strong>Windows</strong> <strong>Vista</strong><br />
In order to connect your personal <strong>Windows</strong> <strong>Vista</strong> computer to NMSU Internet, you will need to<br />
register it on the NMSU Network.<br />
To connect to the NMSU Network, you will need to configure your computer for Dynamic Host<br />
Configuration Protocol, or DHCP. By going through this process, you will be able to obtain an<br />
Internet Protocol (IP) address for your computer for locations on campus where you wish to be<br />
able to connect to the Internet. You will be able to go to different locations on campus and<br />
connect instantly with the correct Internet settings for each location. To obtain an IP address for<br />
your computer you will have to modify the IP settings of your computer and register for DHCP.<br />
You will need your myNMSU user name and password to connect and register for DHCP. If you<br />
do not have a myNMSU account, go to https://my.nmsu.edu/ to sign up.<br />
*Most computers already have IP settings configured for DHCP. To go directly to Registration<br />
instructions, Click Here.<br />
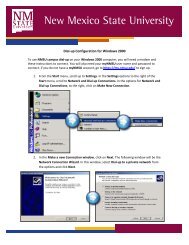
Modifying IP Settings<br />
1. From the Start Button, select the Control Panel tab on the right side of the start menu.<br />
Then double click on the icon Network and Sharing Center.
<strong>New</strong> <strong>Mexico</strong> <strong>State</strong> <strong>University</strong><br />
2. In the Network and Sharing Center window that pops up, double click on Manage<br />
Network Connections; you will find this in the toolbar on the left side. A window will<br />
come up asking for confirmation that you started the program Manage Network<br />
Connections: in this window, click Continue.<br />
3. In the Manage Network Connections window, double click on the Local Area<br />
Connection icon.
<strong>New</strong> <strong>Mexico</strong> <strong>State</strong> <strong>University</strong><br />
4. The next window will be Local Area Connection Properties. In this window, select<br />
Internet Protocol Version 4 (TCP/IPv4) and click the Properties button.<br />
5. In the Internet Protocol Version 4 (TCP/IPv4) window, select the Obtain an IP address<br />
automatically option from the first set of options. Then select the Obtain DNS server<br />
address automatically option from the second set of options. Now click OK.
Register for DHCP<br />
<strong>New</strong> <strong>Mexico</strong> <strong>State</strong> <strong>University</strong><br />
Now that you’ve changed your computer’s IP settings, it’s time to register your computer for<br />
DHCP.<br />
*IMPORTANT: To register your computer, you will need your myNMSU username and password.<br />
If you do not have a myNMSU account, go to https://my.nmsu.edu/ to sign up.<br />
1. Start a web browser (Internet Explorer, Netscape, Mozilla Firefox, etc.). A Dynamic Host<br />
Registration page should appear. If it does not, type http://netreg.nmsu.edu in the<br />
location bar of the browser. If you still don’t get the registration page, check to make<br />
sure you have selected both Obtain an IP address automatically and Obtain DNS server<br />
automatically in the Internet Protocol (TCP/IP) Properties window in step 4.
<strong>New</strong> <strong>Mexico</strong> <strong>State</strong> <strong>University</strong><br />
2. Once you are on the Dynamic Host Registration Page, read the terms of agreement. If<br />
you select I Accept, you can continue with the registration process.<br />
After you select I Accept, two options will appear: Authorized User (any NMSU affiliated faculty,<br />
staff, or student) and Guest Access Request (a non-NMSU affiliate with a faculty or staff<br />
sponsor). Choose the option appropriate to you. A page with spaces for your myNMSU<br />
username and password should appear; if it does not, please come by the <strong>ICT</strong> Customer Service<br />
and Help Desk in room 141 of the Computer Center, call 646-1840, or e-mail us at<br />
help@nmsu.edu.<br />
*NOTE: selecting the Guest Access Request option will take you to the Guest Network<br />
Registration page.<br />
3. Enter your My NMSU username and password in the appropriate boxes on the Dynamic Host<br />
Registration page. If you do not have your My NMSU username or password or do not<br />
remember it, you can come by the <strong>ICT</strong> Customer Service and Help Desk in room 141 of the<br />
Computer Center, call 646-1840, or e-mail us at help@nmsu.edu for assistance.<br />
Next, enter a hostname in the Hostname box. The hostname can be anything you want, but<br />
each hostname must be unique. If you duplicate a hostname that has already been selected by<br />
another user, you will be notified on the Dynamic Host Registration page, and you will need to<br />
select a new one.
<strong>New</strong> <strong>Mexico</strong> <strong>State</strong> <strong>University</strong><br />
*IMPORTANT: The hostname can contain both letters and numbers, but must begin with a<br />
letter.<br />
*The field labeled Ethernet Address should be filled in. If it is blank, please come by the <strong>ICT</strong><br />
Customer Service and Help Desk in room 141 of the Computer Center, call 646-1840, or e-mail<br />
us at help@nmsu.edu.<br />
.<br />
4. Now press Submit Query. You should come up with another page confirming your<br />
information. On this page, click Submit Query again.
<strong>New</strong> <strong>Mexico</strong> <strong>State</strong> <strong>University</strong><br />
5. Now you should receive a confirmation page. Close this page and reboot your machine.<br />
Congratulations! You are now registered for DHCP. Whenever you use your personal computer<br />
on campus, it will automatically connect to the correct Network Settings.<br />
If you have any questions, come by the <strong>ICT</strong> Customer Service and Help Desk in room 141 of the<br />
Computer Center, call 646-1840, or e-mail us at help@nmsu.edu.