You also want an ePaper? Increase the reach of your titles
YUMPU automatically turns print PDFs into web optimized ePapers that Google loves.
<strong>Camera</strong> <strong>User</strong> <strong>Guide</strong><br />
The serial number of this product is given<br />
on the bottom face of the camera.<br />
Caution!<br />
Do not connect the USB cable yet!<br />
If you connect the camera to a computer through the<br />
USB cable before installing the provided software on the<br />
computer, the software required for connection between<br />
camera and computer may not be installed<br />
appropriately.<br />
Be sure to connect the camera to your computer after<br />
installing the provided software.<br />
For how to install the software, see P.152.<br />
About other documentation<br />
Detailed explanations on how to use the provided<br />
software can be found in "Software <strong>User</strong> <strong>Guide</strong>" (PDF<br />
format file) included on the supplied CD-ROM.<br />
For how to display the PDF file, see P.167.<br />
The CD-ROM also contains English version of <strong>Camera</strong><br />
<strong>User</strong> <strong>Guide</strong> and Software <strong>User</strong> <strong>Guide</strong> in PDF format.<br />
Quick <strong>Guide</strong><br />
A Variety of Shooting<br />
Techniques/Playback<br />
Changing <strong>Camera</strong><br />
Settings<br />
Installing Software<br />
Troubleshooting
Preface<br />
This manual provides information on how to use the shooting and playback functions of this<br />
product, as well as warnings on its use. To make the best use of this product's functions, read<br />
this manual thoroughly before use. Please keep this manual handy for ease of reference.<br />
Ricoh Co., Ltd.<br />
Safety Precautions For the safe use of your camera, be sure to read the<br />
safety precautions thoroughly.<br />
Test shooting Please be sure to do some test shooting to make sure it<br />
is recording properly before normal use.<br />
Copyright Reproduction or alteration of copyrighted documents,<br />
magazines, music and other materials, other than for<br />
personal, home or similarly limited purposes, without the<br />
consent of the copyright holder is prohibited.<br />
Exemption from<br />
Liability<br />
Ricoh Co., Ltd. assumes no liability for failure to record or<br />
play back images caused by malfunction of this product.<br />
Warranty This product is manufactured to local specifications and<br />
the warranty is valid within the country of purchase.<br />
Should the product fail or malfunction while you are<br />
abroad, the manufacturer assumes no responsibility for<br />
servicing the product locally or bearing the expenditure<br />
incurred thereof.<br />
Radio Interference Operating this product in the vicinity of other electronic<br />
equipment may adversely affect the performance of both<br />
devices. In particular, operating the camera close to a<br />
radio or television may lead to interference. If<br />
interference occurs, follow the procedures below.<br />
• Move the camera as far away as possible from the TV, radio or other<br />
device.<br />
• Reorient the TV or radio antenna.<br />
• Plug the devices into separate electrical outlets.<br />
• This publication may not be reproduced in whole or in part without the express written permission of Ricoh.<br />
© 2005 RICOH CO.,LTD. All rights reserved.<br />
• The contents of this document may be changed in the future, without prior notice.<br />
• This booklet was created with thorough attention to its content. If, however, you have a question, spot an<br />
error, or find a description lacking, please refer to the end of this booklet for information on how to contact us.<br />
Microsoft, MS, Windows and DirectX are registered trademarks of Microsoft Corporation in the United States of<br />
America and other countries.<br />
Macintosh, Power Macintosh, and Mac OS are registered trademarks of Apple Computer, Inc. in the United<br />
States of America and other countries.<br />
Adobe and Adobe Acrobat are trademarks of Adobe Systems Incorporated.<br />
All trademarked company and product names mentioned in this manual are the property of their respective<br />
owners.
Key Features<br />
High-quality and -definition camera<br />
ready for professional use<br />
The advanced technology for remarkably<br />
high-quality photography adopted for the<br />
camera fits well inside a compact body. The<br />
CCD with 8.13 million effective pixels<br />
achieves high image quality enough to<br />
satisfy professionals. The camera also<br />
achieves high-speed processing of<br />
voluminous data while suppressing image<br />
noise, enabling crisp, definite prints on largeformat<br />
paper.<br />
High-end model with aperture<br />
priority, manual exposure, and<br />
program shift modes<br />
The aperture and shutter speed can be set<br />
with an easy-to-operate up-down dial. The<br />
high-end camera features compactness,<br />
lightweight, and slimness, as well as an<br />
ability comparable to that of a digital singlelens<br />
reflex camera.<br />
Rapid shutter response to capture a<br />
moment (P.36)<br />
The shutter release time lag is as short as<br />
approx. 0.1 seconds.<br />
Ricoh's patented hybrid auto focusing<br />
system technology even keeps action shots<br />
looking good.<br />
Close-up flash (P.43) for approx. 1.5cm<br />
macro (P.44)<br />
The unsurpassed macro function allows you<br />
to capture details from a very close distance<br />
at only 1.5 cm. The close-up flashing<br />
capability provides you with clear macro<br />
shots even under low light conditions.<br />
1
2<br />
Expandability sparking the imagination<br />
The wide conversion lens combined with the<br />
hood and adapter gives super-wide 21 mm<br />
photography. You can enjoy the benefits of<br />
bounce flash by connecting an external flash.<br />
Various optional accessories such as the<br />
external viewfinder and cable switch allow you<br />
to configure a well-rounded system.<br />
AF target shift function for easy<br />
focus lock even on a tripod (P.94)<br />
The camera has an AF target shift function.<br />
At macro shooting, the AF target shift<br />
function allows you to lock the focus by<br />
button operation, without moving the camera<br />
itself.<br />
Choice of three power sources<br />
makes sure you won’t miss any<br />
shooting opportunities (P.19)<br />
The camera can be used with one of three<br />
power supplies: Dedicated large-capacity<br />
rechargeable battery, an AAA alkaline battery<br />
easily available anywhere (available in stores),<br />
and an economical AC adapter (sold<br />
separately) useful for transfer to a computer.<br />
Two dials for easy and speedy operation<br />
The up-down and ADJ. dials let you make<br />
settings and select menu options more<br />
quickly than ever before.<br />
The ADJ. dial allows you to enter the ADJ.<br />
mode where you can correct exposure and<br />
white balance with fewer operations. You can<br />
also customize functions other than these<br />
adjustment functions with the ADJ. dial.<br />
High-quality movie with sound of 30<br />
frames/second (P.105)<br />
A high-quality movie of 320 x 240 pixels can<br />
be shot at 30 frames/second with sound.
RAW mode ensuring shooting at the<br />
highest quality<br />
The camera's RAW mode gives you an<br />
option to save full data of shot images in the<br />
uncompressed RAW format (.DNG files).<br />
The image quality of RAW files degrades<br />
little as compared with JPEG files and you<br />
can create images as expected by<br />
processing them on the computer. JPEG<br />
files converted from RAW files are also<br />
recorded.<br />
Instant transfer to PC through the<br />
USB cable<br />
If the provided software is installed on your<br />
computer, just connecting the camera to<br />
your computer with the provided USB cable<br />
will automatically transfer images to your<br />
computer.<br />
Provided with multi-functional<br />
software "ImageMixer" that helps in<br />
not only managing shot images in<br />
an album, but also editing images<br />
and sounds, and creating video CDs<br />
For the integrated handling of images, this<br />
software has a input function to download<br />
still images, movies, and sounds from a<br />
digital camera or music CD, an album<br />
function to manage captured contents, an<br />
edit function to edit movies by MPEG-1, a<br />
layout function to create layouts using still<br />
image contents, and a disk creation function<br />
to create video CDs.<br />
Direct printing without requiring any<br />
computer (P.60)<br />
A direct print compatible printer can be<br />
connected to the camera with the USB cable<br />
for direct transfer. This allows for easy<br />
printing without using a computer.<br />
3
4<br />
Contents<br />
Chapter 1 Quick <strong>Guide</strong><br />
Before Shooting .......................................................................................... 10<br />
Packing List .................................................................................................................. 10<br />
Optional Accessories.................................................................................................... 11<br />
About Options for <strong>GR</strong> <strong>DIGITAL</strong> Only............................................................................ 12<br />
Accessories .................................................................................................................. 13<br />
Names of parts ............................................................................................................. 14<br />
Using the Mode Dial ..................................................................................................... 16<br />
Up-down Dial/ADJ. Dial................................................................................................ 16<br />
About LCD Monitor Display .......................................................................................... 17<br />
Getting Ready to Shoot.............................................................................. 19<br />
About the Batteries....................................................................................................... 19<br />
Batteries (Cells) Not Acceptable .................................................................................. 20<br />
Battery level indication ................................................................................................. 21<br />
About an SD Memory Card (available in stores) .......................................................... 22<br />
Inserting an SD Memory Card...................................................................................... 23<br />
Charging the Rechargeable Battery ............................................................................. 24<br />
Inserting the rechargeable battery................................................................................ 25<br />
Using the AC Adapter (sold separately) ....................................................................... 26<br />
Loading the Batteries ................................................................................................... 28<br />
Turning the Power On/Off ............................................................................................ 29<br />
Setting the language .................................................................................................... 30<br />
Setting the date and time ............................................................................................. 31<br />
Changing the Display ................................................................................................... 32<br />
Maximizing the LCD Monitor Brightness ...................................................................... 32<br />
Histogram Display ........................................................................................................ 33<br />
Basic Shooting............................................................................................ 34<br />
How to Hold the <strong>Camera</strong> .............................................................................................. 34<br />
Preventing camera shake............................................................................................. 35<br />
Capturing the Moment Shooting (Full-press) ............................................................... 36<br />
Checking the Focus and Shooting (Half-press)............................................................ 37<br />
When the Subject is not Centered (Shooting with Focus-lock) .................................... 40<br />
Using the Digital Zoom................................................................................................. 42<br />
Shooting Close-Ups (Macro-Mode).............................................................................. 43<br />
Using the Flash ........................................................................................................... 44<br />
Using the Hot Shoe ...................................................................................................... 45<br />
Shooting with Scenery-Matching.................................................................................. 47<br />
Playing Back................................................................................................ 48<br />
Checking the image you just took (Quick Review) ....................................................... 48<br />
Viewing Your Images ................................................................................................... 49<br />
Playing back in the three-frame view ........................................................................... 50<br />
Thumbnail Display....................................................................................................... 52<br />
Magnifying Images ...................................................................................................... 53<br />
Viewing on a Television ............................................................................. 54<br />
Erasing......................................................................................................... 56<br />
Erasing Unwanted Files (Still Images/Movies/Sounds)................................................ 56<br />
Erasing Multiple Frames at One Time.......................................................................... 57
Chapter 2 A Variety of Shooting Techniques/Playback<br />
Direct Printing ............................................................................................. 60<br />
Direct Print Function..................................................................................................... 60<br />
Connecting the <strong>Camera</strong> to a Printer............................................................................. 60<br />
Printing Still Images...................................................................................................... 61<br />
A Variety of Shooting Techniques ............................................................ 65<br />
Using the ADJ. (Adjust) Mode ...................................................................................... 65<br />
Shooting Setting Menu................................................................................................. 67<br />
Using the Shooting Setting Menu................................................................................. 68<br />
Choosing Picture Quality Mode/Image Size (PIC QUALITY/SIZE) .............................. 69<br />
Changing the Focusing Mode (FOCUS: MULTI AF/SPOT AF).................................... 72<br />
Manual Focus Shooting (FOCUS: MF) ........................................................................ 74<br />
Shooting at a Fixed Distance (FOCUS: SNAP/ ) ..................................................... 76<br />
Changing the Light Metering (PHOTOMETRY) ........................................................... 77<br />
Setting the Image Quality (IMG SET)........................................................................... 78<br />
Shooting Consecutively with Different Exposures (AUTO BRACKET) ........................ 80<br />
Shooting Consecutively with Different White Balance (WHITE BALANCE BRACKET) 81<br />
Shooting Pictures Automatically at Set Intervals (INTERVAL)..................................... 83<br />
Shooting a Still Image with Sound (IMAGE WITH SOUND) ........................................ 85<br />
Inserting the Date into a Still Image (DATE IMPRINT)................................................. 86<br />
Changing the Exposure (EXPOSURE COMP.)............................................................ 87<br />
Using Natural and Artificial Lighting (WHITE BALANCE)............................................. 88<br />
Changing Sensitivities (ISO SETTING)........................................................................ 91<br />
Returning the Shooting Setting Menu Settings to their Defaults (RESTORE DEFAULTS) ......... 92<br />
Changing Shading for Shooting Text (DENSITY) ........................................................ 93<br />
Using the AF Target Shift Function .............................................................................. 94<br />
Using the Self-Timer..................................................................................................... 95<br />
Shooting with the Aperture Set (Aperture Priority Mode) ............................................. 96<br />
Shooting with the Aperture and Shutter Speed Set (Manual Exposure Mode) ............ 97<br />
Shooting with the Aperture and Shutter Speed Changed (Program Shift Mode) ......... 99<br />
Shooting with Multi-Shot.......................................................................... 101<br />
CONT ........................................................................................................................ 103<br />
SCONT (S Multi-Shot)............................................................................................... 103<br />
MCONT (M Multi-Shot).............................................................................................. 103<br />
Viewing an S Multi-Shot or M Multi-Shot Still Image in Enlarged Display Mode ........ 104<br />
Shooting/Playing Back Movies................................................................ 105<br />
Shooting Movies......................................................................................................... 105<br />
Playing Back Movies .................................................................................................. 107<br />
Recording/Playing Back Sound............................................................... 108<br />
Recording Sound........................................................................................................ 108<br />
Playing Back Sound ................................................................................................... 109<br />
Other Functions Available in Playback Mode ........................................ 110<br />
Playback Setting Menu............................................................................................... 110<br />
Using the Playback Menu........................................................................................... 110<br />
Showing Photos in Order Automatically (SLIDE SHOW) ........................................... 111<br />
Write-protecting Your Images (PROTECT) ................................................................ 112<br />
Using a Printing Service (DPOF)................................................................................ 115<br />
Changing the Image Size (RESIZE)........................................................................... 118<br />
Copying the Contents of Internal Memory to a Memory Card (COPY TO CARD) ..... 119<br />
5
6<br />
Chapter 3 Changing <strong>Camera</strong> Settings<br />
Changing <strong>Camera</strong> Settings...................................................................... 122<br />
SETUP Menu ............................................................................................................. 122<br />
Using the SETUP Menu ............................................................................................. 123<br />
Formatting the SD Memory Card (FORMAT [CARD])................................................ 124<br />
Formatting Internal Memory (FORMAT [INT. MEM.]) ................................................ 125<br />
Adjusting the Brightness of the LCD Monitor (LCD BRIGHTNESS) .......................... 126<br />
Setting a Function to the ADJ. dial (ADJ BTN.SET. 1/2)............................................ 127<br />
Changing Auto Power-Off Settings (AUTO POWER OFF) ........................................ 128<br />
Changing the Beep Sound Setting (BEEP SOUND) .................................................. 129<br />
Changing the Beep Sound Volume (VOL. SETTINGS) ............................................. 130<br />
Changing Image Confirmation Time (LCD CONFIRM.) ............................................. 131<br />
Changing File Name Settings (SEQUENTIAL NO.) ................................................... 132<br />
Setting the Date and Time (DATE SETTINGS).......................................................... 134<br />
Changing the Display Language (LANGUAGE/ )............................................... 135<br />
Changing the Playback Method for Viewing on TV (VIDEO OUT MODE) ................. 136<br />
Displaying a Setting Change Warning (SHTG STGS WARNG.)................................ 137<br />
Changing the USB Communication System (USB Connection)................................. 138<br />
Enlarging Icon Display (ENLGE PHOTO ICON) ........................................................ 142<br />
Setting the Color Space (COLOR SPACE SET) ........................................................ 143<br />
Setting the AF Auxiliary Light (AF AUX. LIGHT) ........................................................ 145<br />
Setting Whether to Use Digital Zooming (<strong>DIGITAL</strong> ZOOM) ....................................... 146<br />
Changing the Zoom Button Setting (ZOOM BTN. SET.)............................................ 147<br />
Registering the Power-on Settings (REG. MY SETTINGS) ....................................... 148<br />
Changing the Startup Settings (START SETTING).................................................... 149<br />
Chapter 4 Installing Software<br />
Installing the Provided Software (For Windows) ................................... 152<br />
System Requirements for Using the Provided Software ............................................ 156<br />
Installing the Software on Your Computer.................................................................. 157<br />
Installing the DeskTopBinder Lite............................................................................... 159<br />
Connecting the <strong>Camera</strong> to Your Computer ................................................................ 161<br />
Downloading Images from an SD Memory Card........................................................ 166<br />
Installing Acrobat Reader ........................................................................................... 167<br />
Installing DirectX ........................................................................................................ 168<br />
Uninstalling the Software............................................................................................ 169<br />
Uninstalling the ImageMixer ....................................................................................... 170<br />
Installing the Provided Software (For Macintosh) ................................. 171<br />
System Requirements for Using the Provided Software ............................................ 173<br />
Installing the Software on Your Computer (Mac OS 8.6 to 9.2.2) .............................. 174<br />
Installing the Software on Your Computer (Mac OS X 10.1.2 to 10.4)....................... 175<br />
Installing Adobe“ Photoshop“ Elements (Trial Version).............................................. 177<br />
Chapter 5 Troubleshooting<br />
Troubleshooting........................................................................................ 180<br />
Troubleshooting the <strong>Camera</strong>...................................................................................... 180<br />
Warning Messages Under Windows XP Service Pack 2 ........................................... 185<br />
Appendices................................................................................................ 187<br />
A. Specifications......................................................................................................... 187<br />
B. Recommended Parts ............................................................................................. 189<br />
C. Menu Items By Mode............................................................................................. 190
D. Functions Whose Defaults will be Restored upon Power-off................................. 190<br />
E. Number of Images That Can be Stored in Internal Memory/SD Memory Card ..... 192<br />
F. Operations that can be Performed with the Up-down Dial and ADJ. Dial .............. 193<br />
G. Using Your <strong>Camera</strong> Abroad .................................................................................. 194<br />
H. Cautions on Use .................................................................................................... 195<br />
I. Care and Storage .................................................................................................... 196<br />
J. Error Messages ...................................................................................................... 197<br />
K. Warranty and Servicing.......................................................................................... 198<br />
Index........................................................................................................................... 200<br />
Using Manuals<br />
The two manuals included are for your <strong>GR</strong> <strong>DIGITAL</strong>.<br />
<strong>Camera</strong> <strong>User</strong> <strong>Guide</strong> (This booklet)<br />
This guide explains the usage and functions of the camera.You will also see how to install<br />
the provided software on your computer.<br />
*The Software <strong>User</strong> <strong>Guide</strong> (English edition) is available from the provided CD-ROM as a<br />
PDF file.<br />
Software <strong>User</strong> <strong>Guide</strong> (PDF file)<br />
This guide explains how to download images from the camera to your computer, and<br />
display and edit them on your computer.<br />
*The Software <strong>User</strong> <strong>Guide</strong> is available from the following folder on the provided CD-ROM.<br />
Windows<br />
Each language has its own Software<br />
<strong>User</strong> <strong>Guide</strong> in the respective folder.<br />
"Software <strong>User</strong> <strong>Guide</strong> (English<br />
edition)" (PDF file)<br />
Macintosh<br />
Each language has its own Software<br />
<strong>User</strong> <strong>Guide</strong> in the respective folder.<br />
To copy the Software <strong>User</strong> <strong>Guide</strong> onto your hard disk<br />
Copy the PDF file from the above folder.<br />
7
8<br />
Reference<br />
The camera is provided with software (ImageMixer) that allows you to display and edit<br />
images from your computer. For how to use ImageMixer, click the [?] button on the<br />
ImageMixer window and see the displayed manual.<br />
For more information on the ImageMixer, contact the Customer Support Center below.<br />
North America (Los Angeles) TEL: +1-213-341-0163<br />
Europe (U.K.) TEL: +44-1489-564-764<br />
Asia (Philippines) TEL: +63-2-438-0090<br />
China TEL: +86-21-5450-0391<br />
Registration time: 9:00 - 17:00<br />
How to Use This <strong>Guide</strong><br />
Chapter 1 explains the basic operations of this product.<br />
If you are using the camera for the first time, read from this chapter.<br />
The following symbols are also used in this guide:<br />
Important<br />
Note<br />
Term<br />
Reference<br />
This indicates important notices and restrictions for using this camera.<br />
This indicates supplementary explanations and useful tips about camera<br />
operations.<br />
This indicates terms that are useful for understanding the explanations.<br />
This indicates page(s) relevant to a particular function.<br />
The LCD Monitor Display examples may be different from actual<br />
display screens.
Chapter 1<br />
Quick <strong>Guide</strong><br />
If you are using the camera for the first time,<br />
read from this chapter.<br />
Before Shooting............................................... 10<br />
Getting Ready to Shoot................................... 19<br />
Basic Shooting................................................. 34<br />
Playing Back .................................................... 48<br />
Viewing on a Television .................................. 54<br />
Erasing.............................................................. 56
10<br />
Before Shooting<br />
Packing List<br />
Open the package and make sure all the items are included.<br />
• <strong>GR</strong> <strong>DIGITAL</strong><br />
• AV Cable<br />
Used when viewing your images on a TV<br />
unit.<br />
• USB Cable<br />
Used to connect the camera to a computer<br />
or Direct Print supported printer.<br />
• Handstrap<br />
• Rechargeable Battery<br />
• Battery Charger<br />
Note<br />
Attaching the hand strap to the camera<br />
Thread the tips of the strap through the<br />
camera's strap eyelet and loop them as<br />
shown.<br />
The serial number of this product is given<br />
on the bottom face of the camera.
• <strong>Camera</strong> <strong>User</strong> <strong>Guide</strong><br />
(This booklet)<br />
• Warranty<br />
• Safety Precautions<br />
• Caplio Software CD-ROM<br />
The provided software and the Software<br />
<strong>User</strong> <strong>Guide</strong> are included on this CD-ROM.<br />
• Adobe Photoshop Elements<br />
(Trial Version) CD-ROM<br />
Optional Accessories<br />
• Cable switch (CA-1)<br />
• AC Adapter (AC-4c)<br />
• Rechargeable Battery (DB-60)<br />
• Battery Charger (BJ-6)<br />
• PC Card Adapter (FM-SD53)<br />
• SD Memory Card (available in<br />
stores)<br />
Reference<br />
For the latest information about<br />
accessories, access Ricoh home page<br />
(http//:www.ricohpmmc.com).<br />
1<br />
11<br />
Quick <strong>Guide</strong>
12<br />
About Options for <strong>GR</strong> <strong>DIGITAL</strong> Only<br />
• Wide conversion lens (GW-1)<br />
• Hood & adapter (GH-1)<br />
• External Viewfinder (GV-1)<br />
• Soft Case (GC-1)<br />
• Neck strap (GS-1)<br />
This lens has a magnification of<br />
x0.75 that is equivalent to 21 mm<br />
(as converted to be equivalent to 35<br />
mm).<br />
The hood & adapter (with case) is<br />
used in combination.<br />
This is a set of a hood to prevent<br />
lens exposure to sunlight and an<br />
adapter used to attach a 37 mm<br />
general-purpose filter.<br />
This optical viewfinder is to be<br />
attached to the hot shoe.<br />
This viewfinder has a frame for 21<br />
mm and 28 mm (as converted to be<br />
equivalent to 35 mm) (with case).
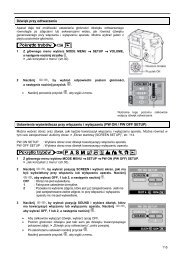
Accessories<br />
Filter<br />
37mm<br />
Macro light<br />
External flash<br />
Sigma<br />
EF-500 DG SUPER<br />
EF-500 DG ST<br />
(Recommended)<br />
External<br />
Viewfinder<br />
(GV-1)<br />
LCD hood<br />
Loupe<br />
Tripod<br />
Wide-conversion lens<br />
(GW-1)<br />
Hood & adapter<br />
(GH-1)<br />
<strong>Camera</strong> body<br />
AC Adapter<br />
(AC-4c)<br />
Rechargeable Battery<br />
(DB-60)<br />
Battery Charger<br />
(BJ-6)<br />
AAA alkaline battery<br />
Computer<br />
(USB cable)<br />
TV/Video<br />
(AV cable)<br />
Direct printer<br />
(USB cable)<br />
Cable switch<br />
(CA-1)<br />
Soft Case<br />
(GC-1)<br />
Neck strap<br />
(GS-1)<br />
SD Memory Card<br />
PC card adapter<br />
(FM-SD53)<br />
Optional item General-purpose item<br />
1<br />
13<br />
Quick <strong>Guide</strong>
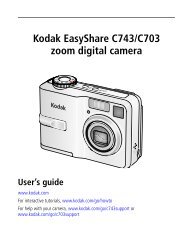
14<br />
Names of parts<br />
<strong>Camera</strong><br />
Front View<br />
Item Name Refer to<br />
1 Strap Eyelet P.10<br />
2 Unlock Button P.16<br />
3 Mode Dial P.16<br />
4 Shutter Release Button P.34<br />
5 AF Window -<br />
6 Power Button P.29<br />
7 Hot Shoe P.45<br />
8 Flash P.44<br />
9 Up-down Dial P.16<br />
10 Microphone P.108<br />
11 AF Auxiliary Light P.145<br />
12 Lens P.34<br />
13 AV-Out Terminal P.54<br />
14 USB Terminal P.161<br />
Caution<br />
To avoid damaging the connectors, do not plug any objects into the camera's microphone or<br />
speaker holes.
Rear View<br />
Item Name Refer to Item Name Refer to<br />
1 LCD Monitor - 11 D (Delete) /<br />
T (Self-timer) Button<br />
2 Auto Focus/<br />
Flash Lamp<br />
P.37<br />
P.44<br />
P.56<br />
P.95<br />
12 "/N (Macro) Button P.43<br />
3 ADJ. Dial P.65 13 (DISP.) Button P.32<br />
4 8 (Enlarged View) Button P.42<br />
P.53<br />
P.147<br />
5 9 (Thumbnail Display) Button P.42<br />
P.52<br />
P.147<br />
14 Strap Eyelet P.10<br />
15 Speaker P.107<br />
P.109<br />
6 !/F(Flash) Button P.44 16 Power (DC in) Cable Cover P.26<br />
7 $ Button - 17 Battery/Card Cover -<br />
8 M/O Button P.68 18 Release lever P.23<br />
P.110<br />
P.25<br />
P.28<br />
9 6 (Playback) Button P.49 19 Tripod Screw Hole (underside) -<br />
10 # /Q(Quick Review)Button P.48<br />
1<br />
15<br />
Quick <strong>Guide</strong>
16<br />
Using the Mode Dial<br />
The Mode Dial is provided on top of the camera.<br />
Turn the Mode Dial to select the camera operation mode such as<br />
shooting, playback (still image display), or setting change.<br />
1. Hold down the Unlock button<br />
while turning the Mode Dial to the<br />
mark of your desired mode.<br />
Mode Dial Symbols and Functions<br />
Symbol Mode Name Function Refer to<br />
4 Scene mode Use this to record sounds or to shoot text. P.47<br />
M Manual Exposure mode Use this to set the shutter speed and aperture<br />
manually.<br />
P.97<br />
A Aperture Priority mode Use this to set the aperture manually. The camera<br />
automatically sets the shutter speed corresponding to<br />
the manually set aperture.<br />
P.96<br />
P Program Shift mode Use this to change the combination of aperture and<br />
shutter speed.<br />
P.99<br />
5 Still Image mode Use this to shoot still images. P.36<br />
3 Movie mode Use this to shoot movies. P.105<br />
Up-down Dial/ADJ. Dial<br />
The up-down dial and ADJ. dial allow<br />
you to perform various operations easily<br />
together with the !"#$ buttons.<br />
Turn the up-down and ADJ. dials as<br />
shown.<br />
Reference<br />
For the operations possible with the up-down and ADJ. dials, see P.193.
About LCD Monitor Display<br />
Screen Examples when Shooting Pictures<br />
10<br />
11<br />
12 11<br />
1 2 3 4 5 6 7 8 9<br />
13 14 15 16 17 18 19<br />
20<br />
21<br />
22<br />
23<br />
24<br />
Still Image Mode Movie Mode<br />
Item Name Refer to Item Name Refer to<br />
1 Flash P.44 14 Photometry P.77<br />
2 External flash P.45 15 Image Setting P.78<br />
3 Macro Shooting P.43 16 Exposure P.87<br />
4 Self-timer P.95 17 ISO Setting P.91<br />
5 Mode Types - 18 Date/Time P.86<br />
6 Recording Destination P.22 19 Battery P.19<br />
7 Remaining Number of Still Images P.192 20 Interval P.83<br />
8 Picture Quality P.69 21 Histogram P.33<br />
9 Image Size P.69 22 <strong>Camera</strong> Shake P.35<br />
10 Digital zoom P.42 23 Aperture Value P.37<br />
11 Focus P.72 24 Shutter Speed P.37<br />
12 Auto Bracket P.80 25 Remaining Recording Time P.192<br />
13 White Balance P.88 26 Recording Time P.192<br />
25<br />
29 26<br />
(When the shutter release button is half-pressed)<br />
1<br />
17<br />
Quick <strong>Guide</strong>
18<br />
Note<br />
• The number of remaining shots available may differ from the actual number of shots, depending<br />
on the subject.<br />
• Even between cards of the same capacity, the number of remaining shots and other values may<br />
vary with the manufacturer, type, and shooting condition.<br />
• The continuous shooting (recording) time depends on the card type, capacity, and performance.<br />
• When the number of remaining shots is 10,000 or more, "9999" is displayed.<br />
The Screen During Playback<br />
7<br />
1 2 3 4 5 6<br />
Item Name Refer to Item Name Refer to<br />
1 Protect P.112 8 Picture Quality P.69<br />
2 DPOF P.115 9 Image Size P.69<br />
3 Mode Types - 10 File No. -<br />
4 Playback Data Source P.49 11 Battery P.19<br />
5 Number of Playback Files - 12 Date at Shooting P.86<br />
P.134<br />
6 Total Number of Files - 13 Recording Time or Lapsed Time -<br />
7 Setting at Shooting (Recording) - 14 Indicator -<br />
Note<br />
8, 9<br />
10<br />
11<br />
12<br />
Still Image Mode Movie Mode<br />
The LCD monitor may display messages to inform you of operational instructions or the<br />
camera’s status while in use.<br />
14<br />
13
Getting Ready to Shoot<br />
Turn the power on and get ready to shoot.<br />
Note<br />
If you have already used this camera, follow the steps<br />
below to make sure it is turned off before removing or<br />
loading batteries.<br />
1. Make sure the LCD monitor is turned off.<br />
2. Make sure the protective lens barrier is closed.<br />
For how to turn the camera off, see P.29.<br />
About the Batteries<br />
The following batteries can be used in the camera. Please choose<br />
which kind to use according to your needs.<br />
• Rechargeable Battery DB-60<br />
This is a lithium-ion battery. This is economical<br />
because you can recharge it using the battery<br />
charger and use it over and over again. They<br />
last a long time, so they are convenient for<br />
travel.<br />
• AAA alkaline batteries (available in stores)<br />
You can obtain them anywhere, so they are<br />
convenient for travel.<br />
However, in a low-temperature environment the<br />
number of shots you can take will decrease.<br />
Warm the batteries before use. It is recommended that you use the<br />
rechargeable battery when using the camera for a long time.<br />
• AAA Oxyride batteries (available in stores)<br />
Oxyride batteries cannot be recharged.<br />
However, they last long as compared with AAA<br />
alkaline batteries.<br />
1<br />
19<br />
Quick <strong>Guide</strong>
20<br />
• AAA nickel hydride batteries (available in stores)<br />
This is economical because you can recharge<br />
and use it over and over again. Use a charger<br />
(available in stores) for charging.<br />
The battery may be inert and consequently it<br />
may not supply power immediately after it is<br />
purchased or left unused for more than a<br />
month. In such a case, recharge the battery two or three times<br />
before use. The battery self-discharges with time even if the<br />
camera is not used, so recharge it before use.<br />
In addition to the batteries, you can use the AC Adapter.<br />
Batteries (Cells) Not Acceptable<br />
The camera does not accept the following batteries (cells):<br />
• Manganese dry cell (R03)<br />
• Ni-Cd battery<br />
Note<br />
Indication of the number of images you can take<br />
Battery Type Number of Shots<br />
Rechargeable Battery (DB-60) Approx. 250<br />
AAA alkaline batteries Approx. 30<br />
• Based on CIPA standard (Temperature: 23 degrees Celsius, LCD on, 50% flash usage,<br />
turning the power off after each 10 shots).<br />
• Number of shots of the AAA Alkaline Batteries, it is using the AAA Alkaline Batteries by<br />
Matsushita Battery Industrial Co., Ltd.<br />
• If you set the camera to the Power-Save or Synchro-Monitor mode, the number of shots<br />
you can take will increase. (P.32)<br />
• The number of shots is for reference only. If the camera is used for long periods of time for<br />
setting and playback, the shooting time (the number of shots) will decrease.<br />
Reference<br />
• For how to insert the Rechargeable Battery , see P.25.<br />
• For how to use the AC Adapter, see P.26.
Caution<br />
• Please remove the batteries if you are not going to use the camera for a long period of<br />
time.<br />
• The life of an AAA alkaline battery depends on the brand and the storage time from the<br />
date of production. In addition, the life of an AAA alkaline battery becomes shorter at low<br />
temperatures.<br />
• The AAA Nickel-Hydrogen Battery is not factory-charged. Charge it before use.<br />
Immediately after the purchase or after a long storage, the battery may not be charged fully.<br />
Repeat charging and discharging before use. For details, see the documentation that came<br />
with the battery or charger.<br />
• The battery may become very hot immediately after operation. Turn the camera off and<br />
leave it to cool down sufficiently before removing the battery.<br />
Battery level indication<br />
A battery mark appears at the lower left of the LCD monitor to<br />
indicate the battery level. Prepare new batteries before the batteries<br />
wear out.<br />
Battery Mark Description<br />
Green<br />
Green<br />
Orange<br />
Caution<br />
Sufficient battery charge<br />
Low remaining charge: Prepare new batteries.<br />
No remaining charge: Replace the batteries.<br />
• If you are using nickel metal hydride batteries, may not appear or or<br />
may appear immediately depending on the battery type and environmental<br />
conditions. Check the batteries at hand before use.<br />
• If you are using the AC Adapter, may appear. This does not indicate malfunction<br />
and you can continue to use the camera.<br />
1<br />
21<br />
Quick <strong>Guide</strong>
22<br />
About an SD Memory Card (available in stores)<br />
You can store still images you have taken either in the camera's internal<br />
memory or on an SD Memory Card (available in stores). The internal memory<br />
capacity is 26 MB.<br />
When you want to record a lot of still images, movies or sounds at high<br />
resolutions, use a high-capacity SD Memory Card.<br />
Note<br />
Where images are recorded<br />
When no SD memory card is inserted, the camera records images in the internal memory;<br />
when an SD memory card is inserted, it records images on the memory card.<br />
When no memory card is loaded Records to internal memory<br />
When an SD Memory Card is loaded Records to the SD memory card<br />
Caution<br />
• If an SD memory card is loaded, the camera will not record to the internal memory, even if<br />
the card is full.<br />
• Take care not to get the metal parts of the card dirty.<br />
• Before using a new SD memory card, be sure to format it.<br />
Note<br />
Write-protecting your images<br />
If you move the card's write-protection switch to LOCK, your still images<br />
cannot be accidentally erased and the memory card cannot be<br />
formatted. If you release the protection (by returning the switch to its<br />
original position), it is once again possible to erase images and format<br />
the card.<br />
So it's a good idea to switch to LOCK when you have some important<br />
data recorded.<br />
Note that you cannot shoot images in the LOCK state because no data can be recorded on<br />
the card. Unlock the card when shooting.<br />
Reference<br />
• For switching between the SD Memory Card and internal memory during playback, see<br />
P.49.<br />
• For recording capacities, see P.192.<br />
• For how to format the SD memory card, see P.124.
Inserting an SD Memory Card<br />
If you have already used this camera, make sure it is turned off<br />
before loading an SD memory card.<br />
1. Slide the release lever to the<br />
OPEN side to open the battery/<br />
card cover.<br />
2. Make sure the card is facing<br />
the right way and push the card<br />
all the way in until it clicks.<br />
3. Close the battery/card cover<br />
and slide the release lever to<br />
the side opposite to OPEN to<br />
lock the cover.<br />
Caution<br />
Slide the release lever securely to lock the battery/card cover.<br />
Reference<br />
For how to format the SD memory card, see P.124.<br />
1<br />
23<br />
Quick <strong>Guide</strong>
24<br />
Charging the Rechargeable Battery<br />
The rechargeable battery needs to be charged before use.<br />
1. Insert the battery, making sure that the and markings<br />
on the battery match with those on the battery charger.<br />
The battery label should face up.<br />
Caution<br />
Be careful not to reverse the and sides.<br />
2. Plug the battery charger into an outlet.<br />
Charging starts and the charger lamp shows you the progress as shown<br />
below. Once charging has finished, unplug the power cable from the<br />
power outlet.<br />
Depending on the battery level, the charging time differs:<br />
Charger Lamp Description<br />
Lit Charging started<br />
Unlit Charging complete<br />
Flashing Battery charger or battery may be faulty (unplug the battery charger from the<br />
power outlet and remove the battery from the battery charger).
Inserting the rechargeable battery<br />
The rechargeable battery (DB-60) is another option for powering this<br />
camera. This battery is convenient because it can be used over and<br />
over again by recharging, and the battery power lasts long.<br />
If you have already used this camera, make sure it is turned off<br />
before loading batteries.<br />
1. Slide the release lever to the<br />
OPEN side to open the battery/<br />
card cover.<br />
2. Insert the rechargeable battery.<br />
3. Close the battery/card cover and slide the release lever to<br />
the side opposite to OPEN to lock the cover.<br />
Caution<br />
• Slide the release lever securely to lock the battery/card cover.<br />
• Please remove the rechargeable batteries if you are not going to use the camera for a long<br />
period of time.<br />
• Store the removed battery in a dry cool place.<br />
• Use the battery charger to recharge the battery.<br />
Rechargeable battery charging time<br />
DB-60 About two hours (25°C)<br />
1<br />
25<br />
Quick <strong>Guide</strong>
26<br />
Removing the rechargeable battery<br />
If you have already used this camera, make sure it is turned off before<br />
removing batteries.<br />
1. Slide the release lever to the OPEN side to open the battery/<br />
card cover.<br />
2. Remove the battery.<br />
3. Close the battery/card cover and<br />
slide the release lever to the side<br />
opposite to OPEN to lock the cover.<br />
Caution<br />
Store the removed battery in a dry cool place.<br />
Using the AC Adapter (sold separately)<br />
When shooting or viewing still images for a long time, or when<br />
connecting to your computer, using the AC Adapter (sold separately)<br />
is recommended.<br />
If you have already used this camera, make sure it is turned off<br />
before loading the AC Adapter Battery.<br />
1. Slide the release lever to the OPEN side to open the battery/<br />
card cover.<br />
2. Insert the AC Adapter Battery.<br />
3. Open the power (DC input) cable cover and take the cable<br />
out.
4. Close the battery/card cover and<br />
slide the release lever to the side<br />
opposite to OPEN to lock the<br />
cover.<br />
5. Plug the power cord into an<br />
outlet.<br />
Removing the AC Adapter<br />
If you have already used this camera, make sure it is turned off<br />
before removing the AC Adapter Battery.<br />
1. Unplug the power plug from the outlet.<br />
2. Slide the release lever to the OPEN side to open the battery/<br />
card cover.<br />
3. Remove the battery.<br />
4. Close the battery/card cover and slide the release lever to<br />
the side opposite to OPEN to lock the cover.<br />
Caution<br />
• Slide the release lever securely to lock the battery/card cover.<br />
• Be sure to firmly attach cables and plug in cords.<br />
• When you are not using the camera, unplug the AC Adapter from the camera and the<br />
power outlet.<br />
• While in use, if you detach the AC Adapter or unplug it from the outlet, data may be lost.<br />
• When using the AC Adapter, the battery level indication may not reach the full area.<br />
1<br />
27<br />
Quick <strong>Guide</strong>
28<br />
Loading the Batteries<br />
If you have already used this camera, make sure it is turned off<br />
before loading batteries.<br />
1. Slide the release lever to the<br />
OPEN side to open the battery/<br />
card cover.<br />
2. Insert the two batteries, making sure they are facing the<br />
correct way.<br />
3. Close the battery/card cover and<br />
slide the release lever to the side<br />
opposite to OPEN to lock the<br />
cover.<br />
Caution<br />
Slide the release lever securely to lock the battery/card cover.
Turning the Power On/Off<br />
To turn the power on:<br />
1. Press the Power button.<br />
After the start sound, the auto-focus/flash<br />
lamp blinks for several seconds.<br />
Using the <strong>Camera</strong> in Playback Mode<br />
Pressing the Playback button for more<br />
than one second turns on the camera in<br />
Playback Mode, allowing you to start<br />
playback at once.<br />
To turn the power off:<br />
1. Press the Power button.<br />
Caution<br />
• If you have turned on the camera by pressing the Playback button, pressing the Playback<br />
button again allows you to select the Shooting Mode.<br />
• It takes longer from power-on until the camera becomes ready for shooting when the flash<br />
is enabled than when it is disabled.<br />
Note<br />
Auto Power Off<br />
If the camera goes unused for a set period of time, it will automatically turn itself off to save<br />
power. To continue on using the camera, slide the power switch to close the lens cover once<br />
(power-off) and slide it again to open (power-on).<br />
Reference<br />
For how to change the Auto Power Off setting, see P.128.<br />
1<br />
29<br />
Quick <strong>Guide</strong>
30<br />
Setting the language<br />
When the power is turned on for the first time, the language setting<br />
screen appears (for the LCD monitor display language). After setting<br />
the language, go on to the date/time setting (for printing the date and<br />
time on your photos).<br />
You can shoot without these settings. However, be sure to set the<br />
language, and the date/time later. Use the SETUP screen for these<br />
settings.<br />
Note<br />
To display the SETUP screen, turn the mode dial to SETUP.<br />
1. Turn the power on for the first time after purchase.<br />
The language selection screen appears.<br />
To skip language setting, press the M/O button.<br />
When the M/O button is pressed, the language setting is cancelled<br />
and the video signal format-setting screen appears.<br />
2. Press the !"#$ buttons to select a language.<br />
3. Press the M/O button.<br />
The display language is set, and the date/<br />
time setting screen appears.<br />
Reference<br />
For how to set the display language and date/time on the SETUP screen, see "Changing the<br />
Display Language (LANGUAGE)" and "Setting the Date and Time (DATE SETTINGS)" in this<br />
guide.
Setting the date and time<br />
When the power is turned on for the first time and the language<br />
setting is completed, the date/time setting screen appears.<br />
1. Press the !"#$ buttons to set<br />
the year, month, date and time.<br />
Change the value with !" and move<br />
the frame with #$.<br />
2. In [FORMAT], choose the Date and<br />
Time format.<br />
Select the format with !".<br />
3. Check the display on the bottom of<br />
the screen and then press the<br />
M/O button.<br />
The date is set.<br />
Pressing the DISP. button on this screen<br />
allows you to cancel the setting.<br />
Note<br />
• If the batteries are removed for more than one week, the date and time settings will be lost.<br />
These settings must be made again.<br />
• To retain the date and time settings, load a fully charged battery in the camera for more<br />
than two hours.<br />
Reference<br />
• For how to correct the set date and time,, see P.134.<br />
• For how to put a date stamp on each frame, see P.86.<br />
Setting at shipping<br />
1<br />
31<br />
Quick <strong>Guide</strong>
32<br />
Changing the Display<br />
If you press DISP., you can change the screen display mode, such as<br />
switching between display/no display of symbols, etc.<br />
Every time you press the DISP. button, the view cycles in the order of<br />
Histogram On, Grid <strong>Guide</strong>, No Display, LCD Monitor Off, and Normal Symbol<br />
Display.<br />
Normal Symbol Display<br />
LCD Monitor Off<br />
(Synchro-Monitor Mode)<br />
Maximizing the LCD Monitor Brightness<br />
Hold the DISP. button down to maximize the display brightness.<br />
When the brightness is maximal, holding the DISP. button down returns the<br />
brightness to the level set in [LCD BRIGHTNESS] (P.126).<br />
Term<br />
Histogram On Grid <strong>Guide</strong><br />
Switches screens with the<br />
DISP. button<br />
No Display<br />
Grid <strong>Guide</strong><br />
Displays auxiliary lines on the LCD monitor to help shooting. These lines are not recorded<br />
with images.<br />
Synchro-Monitor Mode<br />
Keeps the LCD monitor off except when the camera is operated. This mode is effective for<br />
saving power consumption. With this mode, half-pressing the shutter release button turns the<br />
LCD monitor on. Subsequently, full-pressing the shutter release button displays the shot<br />
image on the LCD monitor, and then turns the LCD monitor off.
Histogram Display<br />
When histogram display is on, a histogram<br />
appears in the lower right corner on the LCD<br />
monitor screen.<br />
A histogram is a graph indicating the number<br />
of pixels on the vertical axis and the<br />
brightness on the horizontal axis. The<br />
brightness is shadow (dark), halftone, and<br />
highlight (light) from the left.<br />
By using the histogram, you can judge the brightness of an image without<br />
being affected by the brightness around the LCD monitor. This also helps<br />
preventing voids and solids.<br />
If the histogram has only peaks on the right<br />
side without anything else, this picture is<br />
over-exposed with too many pixels only for<br />
highlight sections.<br />
If the histogram has only peaks on the left<br />
side without anything else, this picture is<br />
under-exposed with too many pixels only for<br />
shadow sections.<br />
Correct the exposure to an appropriate level.<br />
Note<br />
• The histogram displayed on the LCD monitor is for reference only. Depending on the<br />
shooting condition (flashing is required, the surrounding light is dark, and so on), the<br />
exposure level indicated in the histogram may not correspond to the brightness of the shot<br />
image.<br />
• Exposure compensation has its limitation. It does not necessarily achieve the best possible<br />
result.<br />
• The histogram having peaks in the center part does not necessarily provide the best result<br />
to suit your particular requirements.<br />
For example, an adjustment is required if you want to intentionally achieve under or over<br />
exposure.<br />
Reference<br />
For details about exposure correction, see P.87.<br />
1<br />
33<br />
Quick <strong>Guide</strong>
34<br />
Basic Shooting<br />
Now you are ready. Let's shoot!<br />
How to Hold the <strong>Camera</strong><br />
Hold the camera as illustrated below for best results.<br />
1. Hold the camera with both hands<br />
and lightly press both elbows<br />
against your body.<br />
2. Put your finger on the shutter<br />
button.<br />
Note<br />
Be careful when you are shooting not to get a finger, your hair, or the strap in front of the lens<br />
or the flash.
Preventing camera shake<br />
If the camera moves when you press the shutter button, the still<br />
image might not come out clearly (due to camera shake). The<br />
mark displayed on the LCD monitor indicates that camera shake<br />
should be avoided under the current shooting condition.<br />
To prevent camera shake, use a tripod or hold the camera securely<br />
with both hands when you shoot.<br />
Note that camera shake tends to occur in the following cases:<br />
• When shooting in a dark place without using the flash.<br />
• When shooting in Slow Sync Mode (P.44).<br />
• When shooting using the Digital Zoom (P.42).<br />
If the camera shake mark ( ) is displayed, try the following:<br />
• Using the flash (Set the camera to Forced Flash Mode) (P.44).<br />
• Raising the ISO sensitivity (P.91).<br />
• Using the self-timer (P.95).<br />
1<br />
35<br />
Quick <strong>Guide</strong>
36<br />
Capturing the Moment Shooting (Full-press)<br />
The shutter release button works in two steps.<br />
There are two methods of using the shutter button; pressing the<br />
shutter button all the way down at once (full-press) and pressing it<br />
halfway (half-press).<br />
Full-press the shutter release button for quick focusing not to miss a<br />
shooting opportunity.<br />
1. Make sure the camera power is<br />
on and turn the mode dial to 5,<br />
P, A, or M.<br />
2. Compose your shot by looking at<br />
the LCD monitor.<br />
3. Put the subject of your photo<br />
right in the middle and press the<br />
shutter release button fully.<br />
While the shot image is being written<br />
onto the card, the auto-focus/flash lamp<br />
blinks.<br />
Note<br />
• The still image you have taken freezes for a moment on the LCD Monitor and is recorded.<br />
(P.131)<br />
• Full-press is apt to cause camera shake. Hold the camera firmly with both hands and shoot.
Checking the Focus and Shooting (Half-press)<br />
When you press the shutter release button halfway (half-press), the autofocus<br />
function is triggered to determine the focal distance. Subsequently press it all<br />
the way down (full-press) to shoot.<br />
This is useful when the subject is not in the middle (see P.40).<br />
1. Make sure the camera power is on<br />
and turn the mode dial to 5, P, A,<br />
or M.<br />
2. Compose your shot by looking at<br />
the LCD monitor.<br />
3. Put the subject of your photo right<br />
in the middle and press the<br />
shutter release button half-way.<br />
The F-value (aperture value) and shutter<br />
speed are displayed at the right end of the<br />
LCD monitor.<br />
The subject comes into focus and the<br />
exposure and white balance are fixed.<br />
If the automatic focusing fails, the<br />
crosshairs in the center of the LCD<br />
monitor turn red and the auto-focus lamp<br />
in the upper right of the viewfinder blinks<br />
in green.<br />
Auto Focus/Flash Lamp<br />
Frame<br />
1<br />
37<br />
Quick <strong>Guide</strong>
38<br />
.<br />
Frame color Auto Focus/Flash Lamp<br />
Before focusing White Off<br />
Focused Green On (green)<br />
Focusing failure Blink (red) Blink (green)<br />
The focal distance is measured at five<br />
points. Green frames appear to indicate<br />
focus positions.<br />
Reference<br />
When specifying a focus position at macro shooting, use the AF target shift function. (P.94)<br />
4. Gently press the shutter button all<br />
the way.<br />
While the shot image is being written<br />
onto the card, the auto-focus/flash lamp<br />
blinks.<br />
The still image you have taken freezes<br />
for a moment on the LCD Monitor and is<br />
recorded.
Note<br />
Certain subjects are hard to bring into focus:<br />
It may be impossible to bring the following subjects into focus.<br />
• Subjects lacking contrast (the sky, a white wall, the hood of a car, etc.)<br />
• Flat two-dimensional objects with only horizontal lines and no significant protrusions.<br />
• Quickly moving objects.<br />
• Things in poorly lit places.<br />
• Areas with strong backlighting, or reflections.<br />
• Things that flicker, such as fluorescent lights.<br />
When you want to shoot subjects like this, first focus on an object the same distance as your<br />
subject and then shoot. (see P.40)<br />
• Press gently to prevent camera shake when you press the shutter release button.<br />
• During distance measurement for auto focusing, the white dot at the center of the cross on<br />
the LCD monitor blinks.<br />
• The mark indicates that blurring may occur. Hold the camera still and focus the<br />
camera again.<br />
• When shooting in a dark place, the camera raises the focusing performance (auto focus<br />
precision) by preliminary flashing immediately before shooting. This preliminary flashing is<br />
skipped for shooting in no-flash mode.<br />
• When the [LCD CONFIRM] is set to OFF in the setup screen, the still image shot will not be<br />
displayed on the LCD monitor.<br />
Reference<br />
• For how to change the image confirmation time, see P.131.<br />
• For how to change the focusing mode, see P.72.<br />
1<br />
39<br />
Quick <strong>Guide</strong>
40<br />
When the Subject is not Centered<br />
(Shooting with Focus-lock)<br />
When your subject is not in the center of your composition, compose<br />
your photo after focusing. (Focus-lock)<br />
Example: Taking a photograph of the castle in the background with the camera<br />
focused on a person in front.<br />
Shooting range Subject to be focused on<br />
1. Make sure the camera power is on and turn the mode dial to<br />
5, P, A, or M.<br />
2. Put the subject of your photo right<br />
in the center of the LCD Monitor or<br />
the Viewfinder and press the<br />
shutter button half-way.<br />
The F-value (aperture value) and shutter<br />
speed are displayed at the right end of the<br />
LCD monitor and the subject comes into<br />
focus.<br />
3. With the shutter half-pressed,<br />
move the camera and compose<br />
your shot.<br />
Final still image
4. Gently press the shutter button all<br />
the way.<br />
Note<br />
At macro shooting, the AF target shift function allows you to lock the focus without moving the<br />
camera. This function is useful when a tripod is used.<br />
Reference<br />
• For details about macro shooting, see P.43.<br />
• For details about the AF target shift function, see P.94.<br />
1<br />
41<br />
Quick <strong>Guide</strong>
42<br />
Using the Digital Zoom<br />
Set <strong>DIGITAL</strong> ZOOM on the SETUP menu (P.146) to ON to use the<br />
digital zoom function. When the digital zoom function is active, press<br />
the 8 button to enlarge the subject. Press the 9 button to reduce<br />
the subject. The digital zoom function can magnify the subject up to<br />
about 4 times the original size.<br />
1. With the camera ready to shoot,<br />
press the 8 or 9 button.<br />
The magnification is displayed on the<br />
LCD monitor.<br />
2. Compose your picture and halfpress<br />
the shutter release button.<br />
3. Press the shutter release button<br />
all the way.<br />
Note<br />
• When the digital zoom function is off, selecting [ZOOM BTN. SET.] on the SETUP menu<br />
allows you to assign the exposure compensation or white balancing to the 89 button.<br />
• The digital zoom function cannot be used when [PIC QUALITY/SIZE] is set to RAW MODE.<br />
Reference<br />
• For how to assign another function to the 89 button, see P.147.<br />
• For how to turn on/off the digital zoom function, see P.146.
Shooting Close-Ups (Macro-Mode)<br />
Using the N (Macro) button allows you to<br />
take a tight close-up (Macro Photo).<br />
It is good for shooting small subjects<br />
because you can get up to 1.5<br />
centimeter away.<br />
1. With the camera ready to shoot,<br />
press the N button.<br />
N is displayed momentarily in a large<br />
size at the center of the LCD monitor<br />
and then at the upper part.<br />
2. Compose your picture and halfpress<br />
the shutter release button.<br />
3. Press the shutter release button<br />
all the way.<br />
To get out of Macro Mode, press the :N<br />
button again.<br />
Note<br />
• The macro function allows you to shoot a subject at as close as approx. 1.5 cm from the<br />
front of the lens (shooting range: approx. 31 x 23 mm).<br />
• During Macro Shooting, the Viewfinder cannot be used. Use the LCD Monitor.<br />
• The AF target shift function enables you to lock the focus for macro shooting only by button<br />
operation without moving the camera. This function is useful for shooting on a tripod. (P.94)<br />
1<br />
43<br />
Quick <strong>Guide</strong>
44<br />
Using the Flash<br />
Press the F (Flash) button to switch between flash modes. By<br />
default, your camera is set to Flash Off.<br />
From the front edge of the lens, flashlight reaches about 0.2 to 3.0 m<br />
when ISO sensitivity is set to AUTO.<br />
Flash Modes<br />
1. Make sure the camera power is on and turn the mode dial to<br />
5, P, A, M, or SCENE.<br />
2. Press the F (Flash) button to switch between flash modes.<br />
The Flash mode mark appears momentarily in a large size at the center of<br />
the LCD monitor and then is displayed at the upper left.<br />
During flash charging, the flash lamp keeps blinking. Once the flash is<br />
charged, the lamp goes off and it is possible to shoot.<br />
Note<br />
Flash Off The flash will not fire.<br />
Auto When your subject is poorly lit or backlit, the flash fires automatically.<br />
Red-eye reduction Reduces the red-eye phenomenon, in which people's eyes appear red<br />
when shooting images of people.<br />
Forced Flash The flash fires, whatever the light conditions are, when you shoot.<br />
Slow Synchro The flash fires with the shutter speed slowed. This is suitable when taking<br />
portrait pictures in a nightscape. It is recommended to use a tripod.<br />
External flash Indicates that the external flash is attached.<br />
• When shooting in a dark place, the flash cover pops up automatically. After shooting, press<br />
down the flash cover in place.<br />
• When other than the lithium-ion battery is used, the flash lamp icon is not displayed on the<br />
LCD monitor during flash charging.<br />
• The settings are saved until you press the F (Flash) button to change them.<br />
• When shooting movies or in Multi-Shot mode, the flash turns off.<br />
• The flash fires twice to increase the AE/AF (Auto Exposure/Auto Focus) accuracy.<br />
• The camera has a hot shoe, allowing you to attach an external flash (available in stores).<br />
(P.45)
Using the Hot Shoe<br />
The camera has a hot shoe, allowing you to attach an external flash<br />
(available in stores).<br />
X contact<br />
Certain models of external flashes are recommended for the<br />
camera. When using a recommended external flash, follow the<br />
operation procedure described on P.189.<br />
When using an external flash other than the recommended one,<br />
follow the steps below.<br />
1. Select FLASH OFF as the flash mode of the built-in flash.<br />
(P.44)<br />
2. With the camera and external flash powered off, attach the<br />
external flash to the hot shoe.<br />
3. Turn on the camera, turn the Mode Dial to A or M, and set<br />
the aperture value. (P.96, P.97)<br />
4. Set the ISO sensitivity to a value other than AUTO.<br />
5. Turn on the external flash, turn its mode to AUTO, and set<br />
the F-value and ISO sensitivity to the camera-set values.<br />
Be sure to turn off the external flash before detaching the external flash<br />
from the camera.<br />
1<br />
45<br />
Quick <strong>Guide</strong>
46<br />
Note<br />
When a recommended external flash is attached, the built-in flash does not fire.<br />
Caution<br />
• When using an external flash only or if the internal flash does not pop up normally when an<br />
external flash is connected, set the internal flash to [Flash Off].<br />
• Irrespective of flash setting, a flash ON signal is output to the X contact of the hot shoe. To<br />
stop an external flash, use a switch on the flash.<br />
• Exposure may not be appropriate even when the f-number and ISO sensitivity of the<br />
external flash are the same as those of the camera. If so, change the f-number and ISO<br />
sensitivity of the flash.<br />
• As the flash ON signal, the camera outputs a positive pulse to the X pulse contact.<br />
• A flash on the market rarely have an X contact of the opposite polarity. This kind of flash<br />
may not only not work but also cause a problem to the camera. For the terminal<br />
specifications, contact the manufacturer of the external flash.<br />
• Use an external flash of a lighting angle covering the angle of view of the shooting lens.<br />
• Use an external flash basically at a distance where the internal flash is not adequate (long<br />
distance). Shooting at a short distance may end in over-exposure.<br />
• Do not use an external flash having a special signal pin. Using such a flash may cause<br />
inappropriate exposure or damage of the camera circuit.
Shooting with Scenery-Matching<br />
If you use the Scene Mode, you can record texts and sounds.<br />
1. Turn the Mode Dial to 4 .<br />
2. Press the $ button.<br />
The scene-selection screen is displayed.<br />
3. Press the !" buttons to select<br />
[TEXT MODE] or [SOUND MODE].<br />
4. Press the M/O button.<br />
The Mode's symbol is displayed on the<br />
upper part of the LCD monitor.<br />
5. Press the shutter release button.<br />
Now you can shoot texts using Text mode.<br />
For how to record sounds, see P.108.<br />
If you press the $ button, the scene<br />
selection screen appears and you can change the mode.<br />
Reference<br />
Text Use when shooting texts (e.g., memos written on a white-board in a conference).<br />
Sound Use when recording sounds.<br />
• For how to change the image quality and size, see P.69.<br />
• For how to change the text density in Text mode, see P.93.<br />
• For the list of shooting setting menus displayed in the Scene mode, see P.190.<br />
1<br />
47<br />
Quick <strong>Guide</strong>
48<br />
Playing Back<br />
Checking the image you just took<br />
(Quick Review)<br />
You can view the image you just took on the LCD monitor. If you are<br />
not pleased with the way the photo came out, you can erase it then<br />
and there.<br />
1. While still in the Still Image Mode,<br />
press the Q (Quick Review)<br />
button.<br />
The last image you took is displayed on<br />
the LCD monitor.<br />
In Quick Review<br />
Q Button Returns to Shooting Mode.<br />
8 Button Enlarges the displayed still image. You can move around on the displayed<br />
image by pressing the !"#$ buttons.<br />
9 Button Reduces the displayed still image enlarged by pressing the 8 button.<br />
M/O Button Displays the still image at the maximum available ratio by pressing the 8<br />
button.<br />
When displayed for the maximum size, it returns to a whole display.<br />
D Button Deletes the currently displayed file. When the D button is pressed, a warning<br />
message about deleting the file appears. Select [DELETE] and press the<br />
M/O button.<br />
Note<br />
• Once the power is turned off, the image you took cannot be displayed in the still image<br />
mode even if you press the Q button.<br />
• If you use Quick Review to view the image taken in Text mode (see P.47), the displayed<br />
image may have slightly lower quality than the recorded one.
Viewing Your Images<br />
In the Playback Mode you can check still images you have taken.<br />
You can also delete or zoom in on them.<br />
1. Press the 6 (Playback) button.<br />
The camera switches to Playback mode<br />
and the last still image you took is<br />
displayed.<br />
You can view your pictures in order by<br />
using the #$ button.<br />
To switch the camera from playback mode<br />
to still image mode (or movie or voice memo mode), press the Playback<br />
button again.<br />
Caution<br />
If you happen to delete a JPEG file corresponding to the DNG file shot in RAW mode, the<br />
thumbnail of the DNG file can only be viewed but not displayed in an enlarged view.<br />
Note<br />
When an image is shot in RAW mode (RAW3264/RAW3:2), the corresponding JPEG image<br />
(F3264/F3:2) appears. In this case, the mark standing for RAW is displayed.<br />
About power-on in playback mode<br />
When the camera power is off, pressing the Playback button for more than one second turns<br />
on the camera. (The camera starts up in Playback Mode.)<br />
When the camera is turned on with the Playback button, pressing the Playback button again<br />
switches Playback Mode to Shooting Mode.<br />
Where images are played back from<br />
When no SD memory card is inserted, the camera plays back from the internal memory.<br />
When an SD memory card is inserted, it plays back from the SD memory card.<br />
Reference<br />
• For how to playback movies, see P.107.<br />
• For how to playback sounds, see P.109.<br />
• For how to playback still images with voice memo, see P.85.<br />
1<br />
49<br />
Quick <strong>Guide</strong>
50<br />
Playing back in the three-frame view<br />
A playback view can be divided into three frames. The three-frame<br />
view allows you to select a still image to enlarge or delete it.<br />
1. Press the 6 (Playback) button.<br />
The last image you took is displayed.<br />
2. Press the 9 (Thumbnail Display)<br />
button.<br />
The screen changes to the three-frame<br />
view. The large frame at the center<br />
displays the still image now selected.<br />
To switch to single-picture display:<br />
1. Press the #$ buttons to select a still image.<br />
2. Press the 8 (Enlarge) button or the M/O button.
About Screen Switching at Playback<br />
The playback screen changes as follows:<br />
Note<br />
If one of the following operations is performed on the three-frame view, the display returns to<br />
the ordinary playback screen (single-picture display) and the operation is executed.<br />
• Deletion (P.56)<br />
• Movie playback (P.107)<br />
• Sound playback (P.109)<br />
Reference<br />
For how to erase unwanted Images, see P.56.<br />
1<br />
51<br />
Quick <strong>Guide</strong>
52<br />
Thumbnail Display<br />
You can view your images in sets of 12.<br />
You can then select an image to erase or magnify.<br />
1. Press the 6 (Playback) button.<br />
The last image you took is displayed.<br />
2. Press the 9 (Thumbnail Display)<br />
button.<br />
The screen changes to three-frame<br />
view.<br />
3. Press the 9 (Thumbnail Display)<br />
button.<br />
The screen is divided into 12 frames and<br />
displays 12 still images at once.<br />
To display just one photo<br />
1. Use the !"#$ buttons to select an image.<br />
2. Press the 8 (Enlarged Display) button twice.<br />
Reference<br />
• For how to erase the selected image, see P.57.<br />
• For how to switch to the three-frame view, see P.50.<br />
Selected still image
Magnifying Images<br />
You can enlarge a still image displayed on the LCD Monitor.<br />
3264 X 2448, 3264 X 2176, 2592 X 1944, 2048 X 1536 8 times<br />
1280 X 960 6.7 times<br />
640 X 480 3.4 times<br />
1. Press the 6 (Playback) button.<br />
The last image you took is displayed.<br />
2. Press the #$ buttons to display the still image you want to<br />
enlarge.<br />
3. Press the 8 (Enlarged View)<br />
button.<br />
The still image is enlarged.<br />
In Enlarged View<br />
8 Button Enlarges the displayed still image. You can move around on the displayed<br />
image by pressing the !"#$ buttons.<br />
9 Button Reduces the displayed still image enlarged by pressing the 8 button.<br />
M/O Button Displays the still image at the maximum magnification ratio.<br />
Displays the still image at the maximum available ratio or returns it to its<br />
original size.<br />
1<br />
53<br />
Quick <strong>Guide</strong>
54<br />
Viewing on a Television<br />
You can view still images you have taken on a TV screen. The<br />
camera displays everything on the TV screen just as it would on the<br />
LCD Monitor.<br />
To use your television for viewing, connect your camera to the<br />
television with the AV cable that came with your camera.<br />
To view still images on a television, follow the steps below.<br />
1. Securely connect the AV cable to<br />
the Video In terminal on the<br />
television.<br />
Connect the white plug of the AV cable<br />
to the audio input terminal (white) of the<br />
TV unit and the yellow plug to the video<br />
input terminal (yellow).<br />
2. Make sure the camera power is off.<br />
3. Securely connect the AV cable to<br />
the Video Out terminal.<br />
Video input terminal (yellow)<br />
Audio input terminal (white)<br />
4. Set the television to "Video" mode. (Set the input to<br />
"Video".)<br />
For details, see the documentation that came with the television.
5. Press the Power button or keep<br />
pressing the Playback button for<br />
more than one second to turn the<br />
camera on.<br />
Caution<br />
Connecting the AV cable to the camera turns off the LCD monitor display and the speaker<br />
output.<br />
Note<br />
• If you connect the AV cable to your video recorder's In terminal, you can record what you<br />
have shot onto video.<br />
• Your camera is set to NTSC playback format (used in Japan and other countries) for use<br />
with television equipment, etc. If the equipment you want to connect to uses PAL format<br />
(used in Europe and else-where), then switch your camera to PAL format in the Setup<br />
Menu before connecting.<br />
Reference<br />
For how to change the video out mode, see P.136.<br />
1<br />
55<br />
Quick <strong>Guide</strong>
56<br />
Erasing<br />
Erasing Unwanted Files<br />
(Still Images/Movies/Sounds)<br />
You can erase unwanted or failed files from the SD memory card or internal<br />
memory.<br />
You can erase them in the following three ways:<br />
• One file at a time<br />
• Deleting all frames at once<br />
• Select multiple frames and erase together<br />
1. Press the 6 (Playback) button.<br />
2. To erase images one at a time,<br />
press the #$ buttons to display<br />
the file you want to erase.<br />
3. Press the D (Delete) button.<br />
4. Press the !" buttons to select<br />
[DELETE ONE] or [DELETE ALL].<br />
If you selected [DELETE ONE], you can<br />
also change the image for deletion with<br />
the #$ buttons.<br />
5. Press the M/O button.<br />
If you selected [DELETE ONE]:<br />
The display indicates deletion is in progress; once finished, it returns<br />
to the screen in step 4.<br />
If you selected [DELETE ALL]:<br />
You will be prompted to confirm that you want to erase; if so, press<br />
the $ button to select [Yes], and then press the M/O button.<br />
Note<br />
In the three-frame view (see P.50), you can display a still image at the center and press the<br />
D (Delete) button to delete it.
Erasing Multiple Frames at One Time<br />
1. Press the 6 (Playback) button.<br />
2. Press the 9 (Thumbnail) button<br />
twice.<br />
The screen is divided into 12 frames and<br />
displays 12 still images at once.<br />
3. Press the !"#$ buttons to select<br />
the image you want to erase and<br />
press the D (Delete) button.<br />
The trash symbol is displayed in the<br />
upper left corner of the image.<br />
4. Repeat Step 3. to select all the still images you wish to<br />
erase.<br />
If you selected an image by mistake, you can deselect it by selecting the<br />
image and pressing the D (Delete) button again.<br />
5. Press the M/O button.<br />
6. Press the $ button to select [YES] and then press the<br />
M/O button.<br />
The display indicates deletion is in progress; once finished, the Thumbnail<br />
Display screen returns.<br />
1<br />
57<br />
Quick <strong>Guide</strong>
Chapter 2<br />
A Variety of Shooting<br />
Techniques/Playback<br />
Direct Printing .................................................. 60<br />
A Variety of Shooting Techniques ................. 65<br />
Shooting with Multi-Shot .............................. 101<br />
Shooting/Playing Back Movies..................... 105<br />
Recording/Playing Back Sound ................... 108<br />
Other Functions Available in Playback Mode.......110
60<br />
Direct Printing<br />
Direct Print Function<br />
The Direct Print standard enables direct printing from a camera to a<br />
printer, by connecting them via a USB cable. Photos can be printed<br />
quickly and easily from your digital camera without using a<br />
computer.<br />
Caution<br />
• You cannot print movies (.AVI) with this function. For still images with sounds (.JPG and<br />
.WAV), only the still images (.JPG) are printed.<br />
• Some printer does not support images taken in Text mode (TIFF). Even when TIFF images<br />
are printed, their printed contents cannot be guaranteed.<br />
• When an image is shot in RAW mode, the corresponding JPEG file is printed. The .DNG<br />
file cannot be printed.<br />
Note<br />
• This camera uses PictBridge, an industry standard for Direct Printing.<br />
• Your printer must comply with the PictBridge to use the Direct Print function. For support<br />
information, see the documentation that came with the printer.<br />
• For direct printing on a printer supporting both Direct Print and PictBridge, select [Original]<br />
for [USB Connection].<br />
Connecting the <strong>Camera</strong> to a Printer<br />
Connect your camera to a printer using the USB cable provided.<br />
1. Make sure the camera power is off.<br />
2. Connect your camera to a printer using the USB cable<br />
provided.<br />
Turn on the printer, if it is off.<br />
Note<br />
To disconnect the camera from the printer, check that the power is off on both units before<br />
disconnecting the USB cable between them.
Printing Still Images<br />
You can send still images from the camera to a PictBridge<br />
compatible printer to print them.<br />
Still images are sent from the internal memory when no SD memory<br />
card is loaded or from an SD memory card when one is loaded.<br />
Caution<br />
Do not disconnect the USB cable during printing.<br />
Note<br />
If a printer error message appears during transmission, check the condition of the printer, and<br />
take the appropriate action.<br />
Printing One or All Still Images<br />
1. Check that the printer is ready for printing.<br />
The "Connecting" screen appears.<br />
2. Press the ADJ. dial.<br />
The Direct Print playback mode screen<br />
appears.<br />
3. Press the #$ buttons to select an<br />
image for printing.<br />
4. Press the ADJ. dial.<br />
5. Press the !" button to select [1<br />
FILE] or [ALL FILES].<br />
6. Press the M/O button.<br />
The Direct Print menu appears.<br />
2<br />
61<br />
A Variety of Shooting Techniques/Playback
62<br />
7. Press the !" buttons to select an<br />
item, and then press the $ button<br />
to display the detailed options<br />
screen.<br />
While "CONNECTING..." is displayed,<br />
connection to the printer is still incomplete.<br />
When printer connection is completed,<br />
"CONNECTING..." disappears and<br />
"DIRECT PRINT" appears. Proceed to the<br />
next step after the connection is complete.<br />
The following items can be selected. Each item appears only when<br />
supported by the printer.<br />
Item Name Function<br />
PAPER SIZE Sets the paper size.<br />
PAPER TYPE Sets the paper type.<br />
LAYOUT Sets the number of images printed on a sheet of paper.<br />
The number of images that can be laid out on a sheet of paper varies<br />
depending on the type of the connected printer.<br />
DATE PRINT Selects whether to print the date (shooting date). The date format can be set<br />
using the date/time option in the 1 Mode.<br />
FILE NAME PRINT Selects whether to print the file name.<br />
OPTIMIZE IMAGE Selects whether to optimize the image data (still image) prior to printing on the<br />
printer.<br />
FIXED-SIZE PRINT Setting the print image size.<br />
PRINT QUALITY Setting the print quality.<br />
FORMS PRINT Printing forms.<br />
8. Press the !" buttons to select the detailed item, and then<br />
press the M/O button.<br />
The display returns to the Direct Print menu.<br />
9. Repeat steps 7 and 8 to change the settings as required.
Note<br />
To specify the set value as the default selected at the<br />
next connection, click the ADJ. dial on the screen of<br />
Step 7. Upon appearance of the screen at right, select<br />
[Set] and press the M/O button.<br />
Select [Cancel] to return to the default setting.<br />
10.Press the M/O button.<br />
The selected still images are sent to the printer and the "Connecting" screen<br />
appears.<br />
Press the DISP. button to cancel the operation.<br />
At the end of transmission, the display returns to the Direct Print playback mode<br />
screen and printing starts.<br />
Printing Several Still Images<br />
1. Check that the printer is ready for printing.<br />
The "Connecting" screen appears.<br />
2. Press the ADJ. dial.<br />
The Direct Print playback mode screen<br />
appears.<br />
3. Press the 9 (Thumbnail) button<br />
twice.<br />
The screen is divided into 12 frames and<br />
displays 12 still images at once.<br />
4. Press the !"#$ buttons to select an image for printing.<br />
5. Press the M/O button.<br />
6. Press the !" buttons to set the<br />
number of copies to print.<br />
Press the ! button to increase the<br />
number, or the " button to decrease it.<br />
7. Press the #$ buttons to select an<br />
image for printing.<br />
2<br />
63<br />
A Variety of Shooting Techniques/Playback
64<br />
8. Press the !" buttons to set the number of copies to print.<br />
9. Repeat steps 7 and 8 to select all the still images to be<br />
printed and the number of copies for each.<br />
10.Press the M/O button.<br />
The Direct Print menu appears.<br />
11.Press the !" buttons to select an<br />
item, and then press the $ button<br />
to display the detailed options<br />
screen.<br />
While "CONNECTING..." is displayed,<br />
connection to the printer is still incomplete.<br />
When printer connection is completed,<br />
"CONNECTING..." disappears and<br />
"DIRECT PRINT" appears. Proceed to the<br />
next step after the connection is complete.<br />
For settings available, see P.62.<br />
12.Press the !" buttons to select the detailed item, and then<br />
press the M/O button.<br />
The display returns to the Direct Print menu.<br />
13. Repeat steps 11 and 12 to change the settings as required.<br />
14. Press the M/O button.<br />
The selected still images are sent to the printer and the "Connecting"<br />
screen appears.<br />
Press the M/O button to cancel the operation.<br />
When all the selected still images have been sent from the camera to the<br />
printer, the camera display returns to the Direct Print playback mode<br />
screen.<br />
Note<br />
• Only images with a printer mark ( ) are printed. When you cancel printing and then try to<br />
print again, make sure that the printer mark is on the images you want to print.<br />
• The same still image can also be printed several times on a single sheet.<br />
• The items available vary depending on the functions of the printer.<br />
• To print images using the printer's default settings, select Printer Setting on the detailed<br />
options screen.
A Variety of Shooting Techniques<br />
Using the ADJ. (Adjust) Mode<br />
When you enter the ADJ. mode, you can display various setting<br />
screens with fewer dial operations and set functions with fewer<br />
button operations as compared with the Shooting menu.<br />
The ADJ. mode allows you to register two functions other than<br />
exposure correction and white balancing functions.<br />
Operation Flow in ADJ. Mode<br />
1. Press the ADJ. dial.<br />
The camera enters the ADJ. mode, and<br />
the functions that can be set in this mode<br />
are displayed.<br />
2. Turn the ADJ. dial until the<br />
function you want to set is<br />
displayed.<br />
3. Use the !" buttons or up-down<br />
dial to change the setting.<br />
4. If you have another function to set,<br />
repeat steps 2 and 3.<br />
5. Press the M/O button.<br />
The ordinary shooting screen reappears.<br />
2<br />
65<br />
A Variety of Shooting Techniques/Playback
66<br />
Note<br />
To assign functions to [SETTING 1] and [SETTING 2], select [ADJ. BTN. SET. 1] and [ADJ.<br />
BTN. SET. 2] on the SETUP menu. (P.127)<br />
Settings that can be made with the ADJ. dial<br />
Settings that can be made differ between the Scene mode and Movie mode.<br />
Still Image Mode Exposure, White Balance, ISO Setting, Pic Quality/Size, Focus,<br />
Image Setting, Photometry, Auto Bracket, Multi-Shot,<br />
Image with sound<br />
Movie Mode White Balance<br />
Scene Mode (Text Mode) Density<br />
Scene Mode (other than Text Mode) None<br />
Reference<br />
• For how to assign functions to the ADJ. dial, see P.127.<br />
• Exposure Comp, see P.87.<br />
• White Balance, see P.88.<br />
• ISO Setting, see P.91.<br />
• Pic Quality/Size, see P.69.<br />
• Focus, see P.72.<br />
• Photometry, see P.77.<br />
• Auto Bracket, see P.80.<br />
• Multi-shot, see P.101.<br />
• Image With Sound, see P.85.<br />
• Density, see P.93.
Shooting Setting Menu<br />
The Shooting Setting menu enables you to shoot pictures by setting<br />
the items listed in the table below.<br />
*Among the choices listed in the table below, default values at purchase are enclosed in [ ].<br />
Setting Option Refer to<br />
PIC QUALITY/SIZE RAW(8M), RAW3:2(8M), F3264(8M), F3:2(8M), [N3264(8M)],<br />
N2592(5M), N2048(3M), N1280(1M), N640(VGA)<br />
P.69<br />
FOCUS [MULTI AF], SPOT AF, MF, SNAP, ∞ P.74<br />
PHOTOMETRY [MULTI], CENTER, SPOT P.77<br />
CONT. MODE [OFF], CONT, SCONT, MCONT P.101<br />
IMG SET HARD, [NORMAL], SOFT, B&W, SETTING1, SETTING2 P.78<br />
AUTO BRACKET [OFF], ON, WB-BKT P.80<br />
INTERVAL [0 s], 5 seconds to 3 hours P.83<br />
IMAGE WITH SOUND [OFF], ON P.85<br />
DATE IMPRINT [OFF], DATE, TIME P.86<br />
EXPOSURE COMP. -2.0 to +2.0 P.87<br />
WHITE BALANCE [AUTO], (Daylight), (Overcast), (Tungsten light), P.88<br />
(Fluorescent light), (Manual Setting), (Detail)<br />
ISO SETTING [AUTO], ISO64, ISO100, ISO200, ISO400, ISO800, ISO1600 P.91<br />
RESTORE DEFAULTS P.92<br />
Reference<br />
For the list of Shooting Setting menu items in Movie and Scene Modes, see P.190.<br />
2<br />
67<br />
A Variety of Shooting Techniques/Playback
68<br />
Using the Shooting Setting Menu<br />
1. With the camera ready to shoot, press the M/O<br />
button.<br />
The Shooting Setting menu appears.<br />
2. Press the !" buttons to select the desired item.<br />
The setting items are provided on 3 screens.<br />
When the " button is pressed at the<br />
bottom item, the next screen<br />
appears.<br />
To select a screen by screen number:<br />
1. Press the # button to select a screen number on<br />
the left of the screen.<br />
2. With the screen number selectable, press the !"<br />
buttons to switch between screens.<br />
3. After selecting the screen, press the $ button to<br />
return to the setting item selection step.<br />
3. After selecting a setting item, press the $ button.<br />
Choices for the setting item are displayed.<br />
4. Press the !" buttons to select a choice.<br />
5. Press the M/O or # button.<br />
6. If you pressed the # button in step 5, press also the M/<br />
O button.<br />
The Shooting Setting menu disappears and the camera becomes ready<br />
for shooting.
Choosing Picture Quality Mode/Image Size<br />
(PIC QUALITY/SIZE)<br />
The size of a stored still image and movie file depends on picture<br />
quality and size settings.<br />
There are three types of picture quality modes: N (Normal), F (Fine),<br />
and R (RAW).<br />
Types of Modes You Can Select<br />
Symbol Mode Description<br />
The aspect ratio of 3:2 can be used in RAW and Fine modes.<br />
(Default aspect ratio = 4:3)<br />
Note<br />
Normal Mode The compression ratio is high, resulting in a small file. Normally,<br />
shooting is done in this mode.<br />
Fine Mode The compression ratio is low, resulting in a large file, but the picture<br />
quality is better than in Normal Mode.<br />
RAW Mode Raw data of shot images is saved as RAW files (.DNG files). JPEG<br />
files (Fine mode) converted from RAW files are also recorded.<br />
Generally, the shot images are compressed in the camera to be<br />
saved as JPEG files.<br />
The image quality of JPEG files degrades due to compression<br />
although their file size is small.<br />
RAW files are saved as raw data without being processed in the<br />
camera. You can edit RAW files as desired using image processing<br />
software without degrading the initial image quality of the shot<br />
images.<br />
The DNG files created in the RAW mode store the raw data from the camera's sensor.<br />
The data close to the original can be edited as desired using the application software<br />
compliant with the DNG file format.<br />
The DNG file format, one of RAW file formats, is the standard file format advocated by Adobe<br />
Systems Inc.<br />
2<br />
69<br />
A Variety of Shooting Techniques/Playback
70<br />
Combining Picture Quality Mode and Image Size.<br />
Mode Size On screen display Uses<br />
RAW 3264 X 2448 RAW (8M) Images can be created with less quality<br />
3264 X 2176 RAW3:2 (8M)<br />
degradation. This mode is suitable for highlevel<br />
image correction and editing on the<br />
computer.<br />
F (Fine) 3264 X 2448 F3264 (8M) Suitable for downloading images to your<br />
N (Normal)<br />
3264 X 2176<br />
3264 X 2448<br />
F3:2 (8M)<br />
N3264 (8M)<br />
computer and correcting the images or printing<br />
them in large sizes.<br />
2592 X 1944 N2592 (5M) Suitable for printing images in large sizes.<br />
2048 X 1536 N2048 (3M)<br />
1280 X 960 N1280 (1M) Suitable for shooting many pictures.<br />
In Movie Mode, 320 X 240 or 160 X 120 can be selected.<br />
Note<br />
• In RAW mode, you cannot use the functions such as Multi-Shot, Auto Bracket, White<br />
Balance Bracket, Digital Zoom, and Image with Sound.<br />
• DNG files shot in the RAW mode must be processed with the image processing software<br />
installed on the computer. They can be processed with the provided software, Adobe<br />
Photoshop Elements (Trial Version) (P.177).<br />
• DATE IMPRINT cannot be used with RAW mode.<br />
• In RAW mode, the sharpness, color depth, and other image settings made using the<br />
Shooting menu are reflected only in JPEG files.<br />
• In RAW mode, the ISO sensitivity is fixed to 800 even if it is set to 1600.<br />
Reference<br />
640 X 480 N640 (VGA) Capable of recording the greatest number of<br />
pictures on a single SD memory card. Suitable<br />
for attaching images to e-mail messages or<br />
using them on Web pages.<br />
For internal memory/SD memory card recording capacities, see P.192.
1. Make sure the camera power is on and turn the mode dial to<br />
5, P, A or M.<br />
2. Press the M/O button.<br />
The Shooting Setting menu appears.<br />
3. Press the " button to select [PIC QUALITY/SIZE] and press<br />
the $ button.<br />
4. Press the !" buttons to select a<br />
picture quality/size.<br />
5. Press the M/O or # button.<br />
Picture Quality/Image Size settings are<br />
completed.<br />
6. If you pressed the # button in step<br />
5, press also the M/O<br />
button.<br />
The shooting setting menu disappears<br />
and the LCD monitor displays the set<br />
values.<br />
This setting will be used for shooting<br />
until you change it.<br />
Still Image Mode<br />
Movie Mode<br />
2<br />
71<br />
A Variety of Shooting Techniques/Playback
72<br />
Changing the Focusing Mode<br />
(FOCUS: MULTI AF/SPOT AF)<br />
If you shoot the subject in the default focusing mode, the camera<br />
focuses automatically (AF).<br />
The camera automatically measures the distances to 15 AF areas<br />
and focuses on the nearest AF area (MULTI AF), preventing the<br />
central area of the subject from becoming out of focus and allowing<br />
you to shoot with a minimum number of out-of-focus pictures.<br />
You can select only one AF area at the center of the LCD monitor to<br />
allow the camera to focus on this area (SPOT AF).<br />
Five different focusing modes are supported.<br />
Selective focusing modes<br />
Mark Mode Description<br />
None MULTI AF Automatically measures the distances to multiple areas to<br />
adjust the focus.<br />
None SPOT AF Measures the distance to the central area of the subject to<br />
adjust the focus automatically.<br />
MANUAL FOCUS (MF) Allows you to adjust the focus manually.<br />
SNAP Fixes the shooting distance to short distance (about 2.5 m).<br />
Infinity ( )<br />
Fixes the shooting distance to infinity.
Changing the Auto Focusing Mode (MULTI AF/SPOT AF)<br />
1. Make sure the camera power is on and turn the mode dial to<br />
5, P, A, M or 3.<br />
2. Press the M/O button.<br />
The Shooting Setting menu appears.<br />
3. Press the " button to select [FOCUS] and press the $<br />
button.<br />
4. Press the !" buttons to select<br />
[MULTI AF] or [SPOT AF].<br />
5. Press the M/O button or #<br />
button.<br />
6. If you pressed the # button in step<br />
5, press the M/O button.<br />
Now you are finished with the focus<br />
setting.<br />
The Shooting Setting menu closes.<br />
Reference<br />
• For details about fixing the shooting distance to Snapshot or Infinity ( .), see P.76.<br />
• For details about manual focusing (shooting with manual focusing), see P.74.<br />
2<br />
73<br />
A Variety of Shooting Techniques/Playback
74<br />
Manual Focus Shooting (FOCUS: MF)<br />
If the camera fails in focusing automatically, you can focus manually<br />
(Manual Focus: MF).<br />
Manual focusing allows shooting at a fixed distance. When using a<br />
fixed shooting distance, it can be set to either Snapshot or Infinity<br />
(∞).<br />
Note<br />
• Manual focus cannot be used in Scene Mode.<br />
• Manual focusing can focus the camera also on an object that requires macro shooting.<br />
Setting Manual Focusing<br />
1. Make sure the camera power is on and turn the mode dial to<br />
5, P, A, M or 3.<br />
2. Press the M/O button.<br />
The Shooting Setting menu appears.<br />
3. Press the " button to select [FOCUS] and press the $<br />
button.<br />
4. Press the !" buttons to select<br />
[MF].<br />
5. Press the M/O or # button.<br />
Focus settings are complete.<br />
6. If you pressed the # button in step<br />
5, press also the M/O<br />
button.<br />
Now you have finished focus setting.<br />
The Menu closes and "MF" is displayed<br />
on the screen.
Shooting with Manual Focusing<br />
1. Press the " button as required.<br />
Pressing the " button enlarges the<br />
display for easy focusing.<br />
2. Press the # button to display the<br />
focus bar.<br />
3. Press the 8 and 9 buttons for<br />
focusing.<br />
Pressing the 8 button moves the focus away from you.<br />
Pressing the 9 button brings the focus closer to you.<br />
Until the setting is changed the next time, pictures are shot by manual<br />
focusing.<br />
4. Press the shutter button for shooting.<br />
Reference<br />
• For details about setting to Auto Focus (Multi AF/Spot AF), see P.72.<br />
• For details about fixing the shooting distance to Snapshot or Infinity, (∞), see P.76.<br />
• For details about changing the shutter speed, see P.97, P.99.<br />
2<br />
75<br />
A Variety of Shooting Techniques/Playback
76<br />
Shooting at a Fixed Distance<br />
(FOCUS: SNAP/ )<br />
The shooting distance can be set to short distance or infinity.<br />
Infinity is useful to shoot a distant view.<br />
To shoot with the shooting distance fixed, follow the steps below.<br />
1. Make sure the camera power is on and turn the mode dial to<br />
5, P, A, M or 3.<br />
2. Press the M/O button.<br />
The Shooting Setting menu appears.<br />
3. Press the " button to select [FOCUS] and press the $<br />
button.<br />
4. Press the !" buttons to select<br />
[SNAP] or [∞] (Infinity).<br />
Selecting [SNAP] will fix the shooting<br />
distance to 2.5 meters.<br />
Selecting [∞] will fix the shooting distance<br />
to infinity.<br />
5. Press the M/O or # button.<br />
6. If you pressed the # button in step 5, press also the M/<br />
O button.<br />
Now you have finished focus setting.<br />
The Shooting Setting menu closes and the setting value appears on the<br />
screen.<br />
This setting will be used for shooting until you change it.
Changing the Light Metering (PHOTOMETRY)<br />
You can change the metering method (the range to use for metering) to<br />
determine the exposure value.<br />
There are three Light Metering Methods available: MULTI, CENTER, and<br />
SPOT.<br />
Types of Modes You Can Select<br />
Symbol Mode Description<br />
(No Symbol) MULTI The entire shooting range is divided into 256 partitions, and subjected to<br />
photometry for overall decision.<br />
CENTER The light metering is determined by a measurement of the whole, with the<br />
central part emphasized.<br />
Use this when the brightness of the center and surroundings are different.<br />
SPOT Light metering is determined by measuring only the central part.<br />
Use this setting when you want to use the brightness of the center. It is<br />
useful if there is marked difference in contrast or backlighting.<br />
1. Make sure the camera power is on and turn the mode dial to<br />
5, P, A or M.<br />
2. Press the M/O button.<br />
The Shooting Setting menu appears.<br />
3. Press the " button to select [PHOTOMETRY] and press the<br />
$ button.<br />
4. Press the !" buttons to select<br />
the desired setting.<br />
5. Press the M/O or # button.<br />
6. If you pressed the # button in step<br />
5, press also the M/O<br />
button.<br />
The shooting setting menu disappears and<br />
the LCD monitor displays the set values.<br />
This setting will be used for shooting<br />
until you change it.<br />
2<br />
77<br />
A Variety of Shooting Techniques/Playback
78<br />
Setting the Image Quality (IMG SET)<br />
You can select an image quality type from Normal, Hard Tone, Soft<br />
Tone, Black and White, Setting 1, and Setting 2.<br />
Type Description<br />
Normal Normal image quality.<br />
Hard The contrast, sharpness, and color density are set at levels slightly higher than usual,<br />
making the image look hard.<br />
Soft The contrast, sharpness, and color density are set at levels slightly lower than usual,<br />
making the image look soft.<br />
B&W Monochrome image.<br />
Setting 1 You can select a contrast level, sharpness level, and color depth level from among five<br />
levels respectively to set the image quality of the original as required.<br />
Setting 2<br />
Selecting the Image Quality<br />
1. Make sure the camera power is on and turn the mode dial to<br />
5, P, A or M.<br />
2. Press the M/O button.<br />
The Shooting Setting menu appears.<br />
3. Press the " button to select [IMG SET] and press the $<br />
button.<br />
4. Press the !" buttons to select<br />
the Image setting.<br />
If you selected [SETTING 1] or [SETTING<br />
2], set the desired values. If they have<br />
already been set for [SETTING 1] or<br />
[SETTING 2], just select [SETTING 1] or<br />
[SETTING 2] to set the image quality.<br />
5. Press the M/O or # button.<br />
6. If you pressed the # button in step 5, press also the M/<br />
O button.<br />
Now you have finished focus setting.<br />
The shooting setting menu disappears and the LCD monitor displays the<br />
set values.<br />
This setting will be used for shooting until you change it.
Setting the Values for [SETTING 1] or [SETTING 2]<br />
1. Make sure the camera power is on and turn the mode dial to<br />
5, P, A or M.<br />
2. Press the M/O button.<br />
The Shooting Setting menu appears.<br />
3. Press the " button to select [IMG SET] and press the $<br />
button.<br />
4. Press the !" buttons to select<br />
[SETTING 1] or [SETTING 2].<br />
5. Press the $ button.<br />
The customizing menu appears.<br />
6. Using the #$ buttons, set the<br />
contrast, sharpness, and color<br />
depth levels.<br />
To move between [CONTRAST],<br />
[SHARPNESS], and [COLOR DEPTH],<br />
use the !" buttons.<br />
7. Press the M/O button.<br />
8. Press the M/O or # button.<br />
9. If you pressed the # button in step 8, press also the M/<br />
O button.<br />
Now you have completed settings for [SETTING 1] or [SETTING 2].<br />
If you shoot immediately, the values set for [SETTING 1] or [SETTING 2]<br />
are applied.<br />
2<br />
79<br />
A Variety of Shooting Techniques/Playback
80<br />
Shooting Consecutively with Different<br />
Exposures (AUTO BRACKET)<br />
The Auto Bracketing function automatically shoots three consecutive shots,<br />
with the specified exposure value as standard, at three exposure levels, at<br />
-0.5EV, ±0, and +0.5EV.<br />
Note<br />
• This function is not available when shooting with sound.<br />
• This function cannot be used when [PIC QUALITY/SIZE] is set to RAW.<br />
1. Make sure the camera power is on and turn the mode dial to<br />
5, P, A or M.<br />
2. Press the M/O button.<br />
The Shooting Setting menu appears.<br />
3. Press the " button to select [AUTO BRACKET] and press<br />
the $ button.<br />
4. Press the !" buttons to select [ON].<br />
5. Press the M/O or # button.<br />
The shooting setting menu disappears and<br />
the LCD monitor displays [AB].<br />
6. If you pressed the # button in step<br />
5, press also the M/O button.<br />
7. Press the shutter release button.<br />
Three consecutive shots are taken, with the<br />
specified Exposure Compensation value as the<br />
standard, at -0.5EV, ±0, and +0.5EV.<br />
After shooting, three still images are displayed<br />
on the LCD Monitor. They are, from the left, at -<br />
0.5EV (darker), standard compensation, and<br />
+0.5EV (brighter).<br />
This setting will be used for shooting until you change it or you turn the power off.<br />
Reference<br />
• For how to change the Exposure Compensation, see P.87.<br />
• For how to change the White Balance, see P.88.
Shooting Consecutively with Different White<br />
Balance (WHITE BALANCE BRACKET)<br />
Three images are automatically recorded - a reddish image, a bluish<br />
image, and an image of the current white balance.<br />
This is useful if the appropriate white balance cannot be judged.<br />
1. Make sure the camera power is on and turn the mode dial to<br />
5, P, A or M.<br />
2. Press the M/O button.<br />
The Shooting Setting menu appears.<br />
3. Press the " button to select [AUTO BRACKET] and press<br />
the $ button.<br />
4. Press the !" buttons to select<br />
[WB-BKT].<br />
5. Press the M/O or # button.<br />
6. If you pressed the # button in step<br />
5, press also the M/O<br />
button.<br />
Now you have finished white balance<br />
bracket setting.<br />
The Shooting Setting menu disappears<br />
and the screen displays [WB-BKT].<br />
7. Press the shutter release button.<br />
Three images (reddish, bluish, and equal<br />
to the current white balance) are<br />
automatically recorded.<br />
This setting will be used for shooting until<br />
you change it or you turn the power off.<br />
2<br />
81<br />
A Variety of Shooting Techniques/Playback
82<br />
Note<br />
• This function is not available for Multi-Shot shooting (P.101) and Auto Bracket shooting<br />
(P.80).<br />
• The flash cannot be used.<br />
• If [B&W] is set for [IMG SET], the white balance bracket can be set but does not become<br />
valid.<br />
• This function cannot be used when [IMAGE QUALITY/SIZE] is set to RAW.<br />
Reference<br />
For how to change the White Balance, see P.88.
Shooting Pictures Automatically at Set<br />
Intervals (INTERVAL)<br />
You can set the camera to automatically take pictures at fixed<br />
intervals.<br />
You can set the shooting interval at any length from 5 seconds to 3<br />
hours, in increments of 5 seconds.<br />
1. Make sure the camera power is on and turn the mode dial to<br />
5, P, A or M.<br />
2. Press the M/O button.<br />
The Shooting Setting menu appears.<br />
3. Press the " button to select<br />
[INTERVAL] and press the $<br />
button.<br />
4. Press the !" buttons to specify<br />
the length of time.<br />
5. Press the $ button to move to the<br />
minutes setting, then use the !"<br />
buttons to set the minutes.<br />
6. Press the $ button to move to the<br />
seconds setting, then use the !"<br />
buttons to set the seconds.<br />
7. Press the M/O button.<br />
Interval shooting is set and the LCD<br />
monitor displays "Interval".<br />
2<br />
83<br />
A Variety of Shooting Techniques/Playback
84<br />
8. Press the shutter release button.<br />
A picture is taken every time the fixed interval elapses.<br />
9. To stop shooting, press the M/O button.<br />
Interval Shooting settings are cleared when the power is turned off.<br />
Caution<br />
If the time until the next shooting is set longer on the shooting menu than the time for interval<br />
shooting, the shooting interval becomes longer than that for interval shooting.<br />
Note<br />
• In step 5, press and hold either the ! or " button to quickly raise or lower the setting<br />
value for minute.<br />
• If you use batteries for power, you may exhaust the batteries. Using the AC Adapter (sold<br />
separately) is recommended.<br />
• Even during Interval Shooting, if you press the shutter button, the camera will shoot as<br />
usual. However, Interval Shooting Mode is unaffected. After shooting, once the time<br />
specified in Interval Shooting elapses, the next shot is taken.<br />
• When Interval Shooting is on, even when Multi-Shot is set to [CONT] or [MCONT],<br />
consecutive shooting is automatically switched off.
Shooting a Still Image with Sound<br />
(IMAGE WITH SOUND)<br />
You can shoot a still image with a voice memo. Voice recording can<br />
continue for up to eight seconds.<br />
1. Make sure the camera power is on and turn the mode dial to<br />
5, P, A or M.<br />
2. Press the M/O button.<br />
The Shooting Setting menu appears.<br />
3. Press the " button to select [IMAGE WITH SOUND] and<br />
press the $ button.<br />
4. Press the !" buttons to select [ON].<br />
5. Press the M/O or # button.<br />
6. If you pressed the # button in step<br />
5, press also the M/O button.<br />
The Shooting Setting menu disappears.<br />
7. Press the shutter release button<br />
for shooting.<br />
After shooting, the voice mark appears on<br />
the screen to indicate the recording<br />
status.<br />
8. Press the shutter release button<br />
to stop recording.<br />
Note<br />
• This function cannot be used when [IMAGE QUALITY/SIZE] is set to RAW.<br />
• When playing back a still image with sound, display the image in the same way as an<br />
ordinary image without voice. Pressing the shutter release button plays back the sound.<br />
Press the !" buttons to display the volume adjustment bar, where you can adjust the<br />
volume with the !" buttons.<br />
Reference<br />
For how to display still images, see P.49.<br />
2<br />
85<br />
A Variety of Shooting Techniques/Playback
86<br />
Inserting the Date into a Still Image<br />
(DATE IMPRINT)<br />
You can insert the date (YY/MM/DD) or the date and time (YY/MM/<br />
DD hh:mm) at the lower right of a still image.<br />
1. Make sure the camera power is on and turn the mode dial to<br />
5, P, A or M.<br />
2. Press the M/O button.<br />
The Shooting Setting menu appears.<br />
3. Press the " button to select [DATE IMPRINT] and press the<br />
$ button.<br />
4. Press the !" buttons to select<br />
the desired setting.<br />
5. Press the M/O or # button.<br />
6. If you pressed the # button in step 5, press also the M/<br />
O button.<br />
The Date Imprint settings are completed.<br />
The shooting setting menu disappears<br />
and the LCD monitor displays .<br />
This setting will be used for shooting until<br />
you change it.<br />
Note<br />
• If the date and time have not been set, DATE IMPRINT cannot be used. First make the<br />
date and time settings (P.134).<br />
• DATE IMPRINT cannot be used with movies.<br />
• A thumbnail image is not displayed with a date.
Changing the Exposure (EXPOSURE COMP.)<br />
The exposure setting allows you to select brightness levels for your shots.<br />
Normally, if your subject is centered, backlight compensation is automatically<br />
activated, and you can shoot with correct exposure.<br />
However, in the following cases, or when you intentionally want to change the<br />
exposure, you can change the exposure setting. Exposure can be specified in<br />
the range from -2.0 to +2.0. Setting the level higher (+) makes pictures<br />
brighter and lower (-) makes pictures darker.<br />
For Backlighting<br />
When the background is particularly bright, the subject will be dark (underexposure).<br />
In this case, set the exposure level higher (+).<br />
When your subject is whitish<br />
It will turn out entirely dark (underexposure). Set the exposure level higher (+).<br />
When your subject is darkish<br />
It will turn out entirely bright (overexposure). Set the exposure level lower (-).<br />
The same happens when you take photos of people in a spotlight.<br />
To change the setting, use either the Shooting Setting menu or the ADJ. dial.<br />
This section explains easy ways with the ADJ. dial.<br />
When using the Shooting Setting menu, see "Using the Shooting Setting Menu" ( P.68).<br />
1. Make sure the camera power is on and turn the mode dial to<br />
5, P or A.<br />
2. Press the ADJ. dial.<br />
3. Press the #$ buttons until the<br />
Exposure menu appears.<br />
4. Press the !" buttons and specify<br />
a value.<br />
5. Press the M/O button.<br />
The setting of exposure compensation is completed and the LCD monitor<br />
displays the set values.<br />
Note<br />
• This function cannot be used in Manual Exposure mode.<br />
• When shooting in particularly bright places, you may fail in preventing overexposure. In that<br />
case, the [!AE] symbol will be displayed.<br />
2<br />
87<br />
A Variety of Shooting Techniques/Playback
88<br />
Using Natural and Artificial Lighting<br />
(WHITE BALANCE)<br />
Adjust the white balance so that a white subject may be reproduced as white.<br />
At purchase, the White Balance is set to "AUTO"; normally you do not need to<br />
change the setting, but if the camera is having difficulty determining the white<br />
balance when shooting an object of a single color or under several light sources, you<br />
can change the setting.<br />
Types of Modes You Can Select<br />
Symbol Mode Description<br />
AUTO Auto Make adjustments automatically.<br />
Daylight Select when shooting outdoors (Sunny) and White Balance fails to adjust properly.<br />
Overcast Select when shooting in cloudy weather or shade and the White Balance fails to<br />
adjust properly.<br />
Tungsten light Select when shooting under tungsten light and White Balance fails to adjust properly.<br />
Fluorescent light Select when shooting under fluorescent light and White Balance fails to adjust properly.<br />
Manual Setting Make adjustments manually.<br />
Detail Select a setting value from 16 levels including the levels close to the<br />
incandescent lamp level, fine weather level, and cloudy weather level.<br />
To change the setting, use either the Shooting Setting menu or the ADJ. dial.<br />
This section explains easy ways with the ADJ. dial.<br />
When using the Shooting Setting menu, see "Using the Shooting Setting Menu" ( P.68).<br />
1. Make sure the camera power is on and turn the mode dial to<br />
5, P, A or M.<br />
2. Press the ADJ. dial.<br />
The camera enters the ADJ. mode.<br />
3. Turn the ADJ. dial.<br />
4. Press the #$ buttons until the<br />
White Balance menu appears.<br />
5. Press the !" buttons to select a<br />
mode other than .<br />
You can also press the shutter button in<br />
this state.
6. Press the M/O button.<br />
White Balance settings are completed<br />
and the symbol appears on the screen.<br />
This setting will be used for shooting<br />
until you change it.<br />
Setting the White Balance Manually (Manual Setting)<br />
1. Make sure the camera power is on and turn the mode dial to<br />
5, P, A or M.<br />
2. Press the ADJ. dial.<br />
The camera enters the ADJ. mode.<br />
3. Turn the ADJ. dial.<br />
4. Press the #$ buttons until the White Balance menu<br />
appears.<br />
5. Press the !" buttons to select<br />
(Manual Setting).<br />
6. Point the camera at a piece of<br />
paper or something white under<br />
the lighting conditions for your<br />
picture.<br />
7. Press the DISP. button.<br />
White Balance is set.<br />
8. Press the M/O button.<br />
The setting of white balance is completed<br />
and the LCD monitor displays a marking.<br />
This setting will be used for shooting until<br />
you change it.<br />
If you press the DISP. button in step 7, the<br />
screen refreshes to show the White<br />
Balance settings made. If the result is not<br />
as expected, repeat steps 6 and 7 to change the settings as many times<br />
as required.<br />
2<br />
89<br />
A Variety of Shooting Techniques/Playback
90<br />
Setting the White Balance (Detail)<br />
1. Make sure the camera power is on and turn the mode dial to<br />
5, P, A or M.<br />
2. Press the ADJ. dial.<br />
The camera enters the ADJ. mode.<br />
3. Turn the ADJ. dial.<br />
4. Press the #$ buttons until the White Balance menu<br />
appears.<br />
5. Press the !" button to select<br />
[Detail] and press the DISP. button.<br />
The Detail Setting menu appears.<br />
6. Press the !" buttons to select an<br />
White Balance.<br />
7. Press the M/O button.<br />
8. Press the M/O button.<br />
The setting of white balance is completed<br />
and the LCD monitor displays a marking.<br />
This setting will be used for shooting until<br />
you change it.<br />
Note<br />
In Auto Mode, white balance may not be adjusted correctly for a subject that is mostly dark. In<br />
this case, add something white as the subject.<br />
Caution<br />
When shooting with flash, white balance may not be adjusted correctly. In this case, switch to<br />
Auto Mode for shooting with flash.
Changing Sensitivities (ISO SETTING)<br />
The ISO sensitivity indicates how sensitive to light the film is. A greater value<br />
means higher sensitivity. High sensitivity is suitable for shooting an object in a<br />
dark place or moving fast and suppresses blurring. However, the images<br />
become rough.<br />
For higher or lower sensitivity, you can select from the following seven levels:<br />
AUTO, ISO64, 100, 200, 400, 800, 1600<br />
When the ISO sensitivity is set to AUTO, the camera automatically varies the<br />
sensitivity according to the distance, brightness, and macro settings. Usually,<br />
use your camera in AUTO mode.<br />
1. Make sure the camera power is on and turn the mode dial to<br />
5, P, A or M.<br />
2. Press the M/O button.<br />
The Shooting Setting menu appears.<br />
3. Press the " button to select [ISO<br />
SETTING] and press the $ button.<br />
4. Press the !" buttons to select an<br />
ISO setting.<br />
5. Press the M/O or # button.<br />
6. If you pressed the # button in step<br />
5, press also the M/O button.<br />
Now you have finished ISO sensitivity<br />
setting.<br />
The setting of ISO sensitivity is completed and the LCD monitor displays<br />
the set values.<br />
This setting will be used for shooting until you change it.<br />
Note<br />
In Wide-angle Zoom mode, when the ISO Sensitivity is set to Auto, the sensitivity is<br />
equivalent to ISO125 with flash or ISO60-160 without flash.<br />
2<br />
91<br />
A Variety of Shooting Techniques/Playback
92<br />
Returning the Shooting Setting Menu<br />
Settings to their Defaults<br />
(RESTORE DEFAULTS)<br />
To return the Shooting Setting menu settings to their defaults, follow<br />
the steps below.<br />
1. Turn the Mode Dial to 5 .<br />
2. Press the M/O button.<br />
3. Press the !" button to select<br />
[RESTORE DEFAULTS] and press<br />
the $ button.<br />
4. Make sure that [YES] is selected,<br />
and then press the M/O<br />
button.<br />
The display indicates the camera is<br />
restoring the initial settings; once it is<br />
finished, the display returns to the Mode screen.<br />
Reference<br />
For a list of functions whose settings are not cleared by power-off, see P.190.
Changing Shading for Shooting Text<br />
(DENSITY)<br />
You can change the shading of text for shooting in Text Mode of<br />
Scene Mode.<br />
You can select from DEEP, NORMAL and LIGHT.<br />
To change the setting, use either the Shooting Setting menu or the ADJ. dial.<br />
This section explains easy ways with the ADJ. dial.<br />
When using the Shooting Setting menu, see "Using the Shooting Setting Menu" ( P.68).<br />
1. Turn the Mode Dial to 4.<br />
2. Press the $ button.<br />
The still image mode selection screen appears.<br />
3. Press the !" buttons to select an text mode.<br />
4. Press the M/O button.<br />
5. Press the ADJ. dial.<br />
The Text Density menu appears.<br />
6. Press the !" buttons to select<br />
the desired density setting.<br />
You can also press the shutter button in<br />
this state.<br />
7. Press the M/O button.<br />
Text Density settings are completed.<br />
The Text Density setting value does not appear on the screen. This<br />
setting will be used for shooting until you change it.<br />
Reference<br />
For how to shoot text, see P.47.<br />
2<br />
93<br />
A Variety of Shooting Techniques/Playback
94<br />
Using the AF Target Shift Function<br />
At macro shooting, the AF target shift function allows you to lock the<br />
focus (P.40) by using the !"#$ buttons on the camera without<br />
moving the camera.<br />
This is useful for macro shooting on a tripod with locked focus.<br />
The AF target shift function allows you to shift the cross at the center<br />
of the LCD monitor to the subject with the !"#$ buttons for<br />
focusing.<br />
Press the #<br />
button to shift the<br />
cross (focus) to<br />
the left<br />
1. With the camera ready to shoot, press the N button.<br />
The Macro symbol is displayed at the top of the screen.<br />
2. Press the ADJ. dial.<br />
3. Press the #$ buttons until the AF<br />
Target Shift Function screen<br />
(cross shown in the figure)<br />
appears.<br />
4. Shift the cross to the subject with<br />
the !"#$ buttons for focusing.<br />
5. Press the M/O button.<br />
6. Half-press the shutter button.<br />
The camera focuses on the cross.<br />
7. Gently press the shutter button all<br />
the way.<br />
Until you get out of the Macro mode, the AF target shift function<br />
automatically focuses the camera on the set position.
Using the Self-Timer<br />
You can set the Self-timer to shoot after either two or ten seconds.<br />
A setting of two seconds is useful for preventing camera shake.<br />
1. Make sure the camera power is on and turn the mode dial to<br />
5, P, A, M or 4.<br />
2. Press the T (Self-timer) button.<br />
The Self Timer mark appears.<br />
The "10" to the right of the symbol<br />
indicates the number of seconds. In this<br />
case, if you press the shutter button, the<br />
camera will shoot after 10 seconds.<br />
3. Press the shutter release button.<br />
The focus is locked, the auxiliary light goes on, and the self-timer starts.<br />
Once the picture is taken, the self-timer mode is cleared.<br />
Note<br />
• Each press of the T (Self-timer) button, it selects a function in the following sequence: 10<br />
sec, 2 sec, Self-timer Off, 10 sec, 2 sec.<br />
• Self-timer settings are released when the power is turned off.<br />
• When the self-timer is set to 2 seconds, the AF auxiliary light for self-timer display does not<br />
go on.<br />
2<br />
95<br />
A Variety of Shooting Techniques/Playback
96<br />
Shooting with the Aperture Set<br />
(Aperture Priority Mode)<br />
To shoot with the aperture fixed, follow the steps below.<br />
Turn the Mode Dial to A (Aperture Priority mode) to set the aperture<br />
manually.<br />
When you select the Aperture Priority mode, the camera<br />
automatically sets the shutter speed according to the manually set<br />
aperture. You can select the aperture from Maximum, Medium, and<br />
Minimum.<br />
When Maximum is selected, the subject is emphasized with the<br />
background befogged. When Minimum is selected, the shot image is<br />
given depth and can be seen clearly from the front to the far back.<br />
To make settings in the Aperture Priority mode, use the up-down<br />
dial.<br />
1. Turn the Mode Dial to A.<br />
The current F-value is displayed orange at<br />
the right end of the LCD monitor.<br />
2. Turn the up-down dial to change<br />
the F-value.<br />
3. Half-press the shutter button.<br />
The shutter speed is determined and<br />
displayed on the LCD monitor.<br />
4. Gently press the shutter button all<br />
the way.<br />
You can press the shutter button all the<br />
way without half-pressing it.<br />
Note<br />
The aperture operation is performed when the shutter button is fully depressed.
Shooting with the Aperture and Shutter<br />
Speed Set (Manual Exposure Mode)<br />
Turning the Mode Dial to M (Manual Exposure mode) allows you to<br />
set the shutter speed manually.<br />
If you set the shutter speed, you can shoot at this shutter speed and<br />
the camera-set aperture.<br />
You can select a shutter speed from the following:<br />
1/2000 1/1600 1/1250 1/1000 1/800 1/640<br />
1/500 1/400 1/320 1/250 1/200 1/160<br />
1/125 1/100 1/80 1/60 1/50 1/40<br />
1/30 1/25 1/20 1/15 1/13 1/10<br />
1/8 1/6 1/5 1/4 1/3 1/2.5<br />
1/2 1/1.6 1/1.3 1 2 4<br />
8 15 30 60 120 180<br />
If a fast shutter speed is selected, you can shoot a fast-moving<br />
substance as if it were stopping momentarily. If a slow shutter speed<br />
is selected, you can shoot the trace of a moving substance.<br />
To make settings in the Manual Exposure mode, use the ADJ. dial.<br />
To shoot with the shutter speed set manually, follow the steps below.<br />
1. Turn the Mode Dial to M.<br />
The current F-value and shutter speed are<br />
displayed along with the indicator.<br />
2<br />
97<br />
A Variety of Shooting Techniques/Playback
98<br />
The indicator shows the range from -2EV<br />
to +2EV. If this range is exceeded, the<br />
indicator turns orange.<br />
If the difference in exposure is within the<br />
range of the indicator, the indication on the<br />
LCD monitor changes.<br />
2. Turn the up-down dial to change<br />
the F-value and turn the ADJ. dial<br />
to change the shutter speed.<br />
3. Half-press the shutter button.<br />
4. Gently press the shutter button all<br />
the way.<br />
Note<br />
• If you select a long exposure, the shutter speed becomes slow and blurring may result.<br />
Hold you camera steadily with your hands, a tripod or the like.<br />
• If you select a long exposure, the indication on the LCD monitor disappears during<br />
shooting.<br />
Caution<br />
<br />
<br />
If the shutter speed is longer than 15 second, the noise reduction function works to increase<br />
the time for recording the shot image.
Shooting with the Aperture and Shutter<br />
Speed Changed (Program Shift Mode)<br />
To shoot with the combination of the aperture and shutter speed<br />
(program) changed, follow the steps below.<br />
1. Turn the Mode Dial to P.<br />
2. Half-press the shutter button.<br />
The current combination of the F-value<br />
and shutter speed appears on the LCD<br />
monitor.<br />
3. Release your finger from the<br />
shutter release button.<br />
4. Turn the up-down dial to change<br />
the combination of the F-value and<br />
shutter speed.<br />
The combination of the F-value and<br />
shutter speed is displayed for about 10<br />
seconds. During this period, change the<br />
combination using the up-down dial.<br />
5. Shoot by half- or full-pressing the<br />
shutter button.<br />
2<br />
99<br />
A Variety of Shooting Techniques/Playback
100<br />
Note<br />
The program diagram is shown below.<br />
The above diagram is created with the flash mode set to FLASH OFF and the ISO sensitivity<br />
to AUTO (ISO 100). The gray portion shows the range where the programmed combination<br />
can be shifted. It varies with Ev.<br />
Ev8<br />
Ev7<br />
Ev6<br />
Ev5<br />
Ev4<br />
Ev3<br />
Ev2<br />
Ev1<br />
Ev0<br />
Ev9 Ev10 Ev11 Ev12 Ev13 Ev14 Ev15 Ev16 Ev17<br />
2 1 1/2 1/4 1/8 1/15 1/30 1/60 1/125 1/250 1/500 1/1000 1/2000<br />
Shutter Speed<br />
F11<br />
F8<br />
F5.6<br />
F4<br />
F2.8<br />
F2.0<br />
F1.4
Shooting with Multi-Shot<br />
If you switch to Multi-Shot, you can shoot consecutive images.<br />
Multi-shot can be classified into the following types:<br />
CONT (Multi-Shot)<br />
As long as you hold the shutter button<br />
down, pictures continue to be taken.<br />
The still images are recorded one file<br />
each, just as in normal shooting.<br />
S (Stream) Multi-Shot<br />
With just one full-press of the shutter, you<br />
can take 16 consecutive shots at<br />
intervals of 1/7.5 second in about 2<br />
seconds. The 16 still images are grouped<br />
together as a set and are recorded as<br />
one image file (3264 x 2448 pixels).<br />
M (Memory-reversal) Multi-Shot<br />
The camera memorizes the scene while you hold the shutter release<br />
button down, and once you release it the previous 2 seconds of<br />
shots are recorded.<br />
The 16 still images are grouped together as a set and are recorded<br />
as one image file (3264 x 2448 pixels).<br />
2. The camera records for about 2 seconds ahead<br />
1. If you release the shutter release button here...<br />
2<br />
101<br />
A Variety of Shooting Techniques/Playback
102<br />
Note<br />
• This function cannot be used when [PIC QUALITY/SIZE] is set to RAW.<br />
• When shooting with S Multi- or M Multi-Shot, the ISO sensitivity is fixed to AUTO even if it is<br />
set to 64,100.<br />
• The maximum number of images that can be shot in the Multi-Shot mode depends on the<br />
image size setting.<br />
• The numbers of images that can be shot in the Multi-Shot mode with the built-in memory<br />
are as shown in the table below.<br />
F3264 (8M) F3:2 (8M) N3264 (8M) N2592 (5M) N2048 (3M) N1280 (1M) N640 (VGA)<br />
4 4 4 4 4 13 13<br />
• When an SD memory card is used to record the images shot in the Multi-Shot mode,<br />
images can be recorded normally until the SD memory card becomes full. Once the<br />
maximum number of images that can be shot is exceeded, the image recording speed<br />
becomes slow. (This depends on the image size setting.)<br />
• When shooting with S Multi-Shot or M Multi-Shot, PIC QUALITY/SIZE can be set to either<br />
F3264 or N3264.<br />
1. Make sure the camera power is on and turn the mode dial to<br />
5, P, A or M.<br />
2. Press the M/O button.<br />
The Shooting Setting menu appears.<br />
3. Press the " button to select [CONT] and press the $ button.<br />
4. Press the !" buttons to select<br />
[CONT], [SCONT], or [MCONT].<br />
5. Press the M/O or # button.<br />
6. If you pressed the # button in<br />
step 5, press also the M/O<br />
button.<br />
The Shooting Setting menu closes and<br />
the symbol is displayed at the top of the<br />
screen.
CONT<br />
7. Compose your picture, then press and hold the shutter<br />
button.<br />
As long as you hold the shutter button down, pictures continue to be<br />
taken.<br />
8. Release your finger from the shutter release button to stop<br />
recording.<br />
To playback consecutive images shot in Multi-Shot mode, turn the camera<br />
to playback mode (see P.49) and select the still image with the #$<br />
buttons for playback.<br />
SCONT (S Multi-Shot)<br />
7. Compose your picture, then press the shutter button.<br />
16 pictures are taken automatically.<br />
MCONT (M Multi-Shot)<br />
7. Compose your picture, then press and hold the shutter<br />
button.<br />
The camera memorizes the scene while you hold the shutter release<br />
button down.<br />
8. Release your finger from the shutter release button.<br />
The camera stops memorizing and the previous 16 still images (in about 2<br />
seconds) are recorded as one still image.<br />
Note<br />
• When you want to return to normal single-shot shooting, follow step 1 through 3, select<br />
[OFF] in step 4, and press the M/O button.<br />
• In MCONT mode, if you release the shutter button within 2 seconds from the time you first<br />
pressed it, the shots from the time you pressed the shutter until you released it will be<br />
recorded (the number of consecutive shots will be less than 16).<br />
• The internal flash is switched to OFF.<br />
• During consecutive image shooting, the LCD monitor is off.<br />
2<br />
103<br />
A Variety of Shooting Techniques/Playback
104<br />
Viewing an S Multi-Shot or M Multi-Shot Still<br />
Image in Enlarged Display Mode<br />
While still images (16 frames in a file) taken by SCONT or MCONT<br />
are displayed, one of the 16 frames can be displayed in an enlarged<br />
view. While viewing an enlarged frame image, you can switch<br />
between frames.<br />
To view a shot from S Multi-Shot or M Multi-Shot still images in<br />
Enlarged Display Mode, follow the steps below.<br />
1. Press the 6 (Playback) button.<br />
The last shot taken is displayed.<br />
2. Press the #$ buttons to display<br />
an S Multi-Shot or M Multi-Shot<br />
still image.<br />
3. Press the 8 (Enlarged Display)<br />
button.<br />
The first frame of consecutive images is<br />
displayed in Enlarged Display Mode.<br />
The shot position bar appears at the<br />
lower part of the LCD monitor.<br />
Press the #$ buttons to feed the shot.<br />
To return to the 16-shot display, press<br />
the M/O button.<br />
Note<br />
Press the DISP. button to turn on or off the bar display at the lower part of the LCD moitor.<br />
Reference<br />
For how to shoot images in S Multi-Shot or M Multi-Shot mode, see P.101.
Shooting/Playing Back Movies<br />
Shooting Movies<br />
You can shoot movies with sound.<br />
You can select the image size, either 320 x 240 or 160 x 120 pixels.<br />
Each movie you shoot is recorded as one AVI file.<br />
1. Turn the Mode Dial to 3.<br />
2. Press the shutter release button.<br />
The camera starts recording.<br />
Recording continues until you press the<br />
shutter button again.<br />
3. Pressing the shutter button again<br />
stops recording.<br />
2<br />
105<br />
A Variety of Shooting Techniques/Playback
106<br />
Caution<br />
• While shooting movies, operation sounds may be recorded.<br />
• The maximum recording time per shooting depends on your card. Even within the<br />
maximum recording time, some cards may end shooting.<br />
Note<br />
• The flash cannot be used.<br />
• When you pressed the shutter button in step 2, the shot comes into focus and the white<br />
balance is fixed.<br />
• The remaining recording time may not change uniformly because it is recalculated from the<br />
remaining memory capacity during movie recording.<br />
Reference<br />
• For how to change the image size for movies, see P.69.<br />
• For the list of shooting setup menu items available in Movie mode, see P.190.<br />
Note<br />
The movie recording time depends on the capacity of the SD memory card.<br />
The recording time is as shown below.<br />
320 X 240 39 s 44 s 1 min<br />
31 s<br />
160 X 120 2 min<br />
26 s<br />
IN 32MB 64MB 128MB 256MB 512MB 1GB<br />
2 min<br />
46 s<br />
5 min<br />
40 s<br />
3 min<br />
4 s<br />
11 min<br />
27 s<br />
6 min<br />
7 s<br />
22 min<br />
50 s<br />
12 min<br />
19 s<br />
46 min<br />
1 s<br />
23 min<br />
42 s<br />
88 min<br />
31 s
Playing Back Movies<br />
To playback movies, follow the steps below.<br />
1. Press the 6 (Playback) button.<br />
The last shot taken is displayed.<br />
For movies, the first frame is displayed as a still image.<br />
2. Move to the movie you want to<br />
view using the #$ buttons.<br />
Press the $ button to display the next<br />
file.<br />
Press the # button to display the<br />
previous file.<br />
3. Press the ADJ. dial.<br />
Playback begins.<br />
The elapsed playback indicator or the elapsed time is displayed on the<br />
LCD Monitor.<br />
Fast Forward Press the 8 button during playback.<br />
Rewind Press the 9 button during playback.<br />
Pause/Playback Press the ADJ. dial.<br />
Slow Playback Keep pressing the 8 button during pause.<br />
Slow Rewind Keep pressing the 9 button during pause.<br />
Next Frame Press the 8 button during pause.<br />
Previous Frame Press the 9 button during pause.<br />
Volume Adjustment Press the !" buttons during playback.<br />
Term<br />
Movie Frames<br />
A movie frame is also called a frame. Movies consist of many frames whose images appear<br />
to be moving when displayed at high speed.<br />
2<br />
107<br />
A Variety of Shooting Techniques/Playback
108<br />
Recording/Playing Back Sound<br />
Recording Sound<br />
You can record sound.<br />
Recorded data is stored as a WAV file.<br />
1. Turn the mode dial to SCENE.<br />
2. If the camera is in Text Mode,<br />
change it to Voice Memo Mode.<br />
1. Press the $ button.<br />
The scene selection screen appears.<br />
2. Press the !" buttons to select 2 (Voice Memo).<br />
3. Press the M/O button.<br />
3. Press the shutter release button.<br />
Sound recording starts.<br />
4. Release your finger from the<br />
shutter release button to stop<br />
recording.<br />
Note<br />
The voice recording time depends on the capacity of the SD memory card.<br />
The table below shows the available recording time.<br />
Internal<br />
Memory<br />
56 min<br />
45 s<br />
Caution<br />
32MB 64MB 128MB 256MB 512MB 1GB<br />
64 min<br />
36 s<br />
132 min<br />
11 s<br />
267 min<br />
15 s<br />
532 min<br />
36 s<br />
1073 min<br />
00 s<br />
2063 min<br />
25 s<br />
When recording sound for a long time, use of the AC adapter (AC-4c) is recommended.
Playing Back Sound<br />
To playback sounds, follow the steps below.<br />
1. Press the 6 (Playback) button.<br />
The last shot taken is displayed.<br />
2. Press the #$ buttons to select a<br />
sound file for playback (speaker<br />
icon).<br />
Press the $ button to display the next<br />
file.<br />
Press the # button to display the<br />
previous file.<br />
3. Press the ADJ. dial.<br />
Playback begins.<br />
Fast Forward Press the 8 button during playback.<br />
Rewind Press the 9 button during playback.<br />
Pause/Playback Press the ADJ. dial.<br />
Volume Adjustment Press the !" buttons during playback.<br />
2<br />
109<br />
A Variety of Shooting Techniques/Playback
110<br />
Other Functions Available in Playback Mode<br />
Playback Setting Menu<br />
The Playback menu provides the functions shown in the table below:<br />
Setting Option Refer to<br />
SLIDE SHOW P.111<br />
PROTECT Select/Deselect 1 FILE, Select/Deselect ALL FILES, Select Multi-files P.112<br />
DPOF Select/Deselect 1 FILE, Select/Deselect ALL FILES, Select Multi-files P.115<br />
RESIZE 1280, 640 P.118<br />
COPY TO CARD P.119<br />
Using the Playback Menu<br />
1. Press the 6 (Playback) button to<br />
select the Playback mode.<br />
2. Press the M/O button.<br />
The Playback menu appears.<br />
3. Press the !" buttons to select<br />
the desired setting.<br />
4. After selecting a setting item,<br />
press the $ button.<br />
Each function screen appears.
Showing Photos in Order Automatically<br />
(SLIDE SHOW)<br />
You can show the recorded still images, movies, and sound files<br />
sequentially on the LCD Monitor. This function is called a slide show.<br />
To view a slide show, follow the steps below.<br />
1. Press the 6 (Playback) button.<br />
The last shot taken is displayed.<br />
2. Press the M/O button.<br />
The Playback menu appears.<br />
3. Make sure that [SLIDE SHOW] is<br />
selected, and then press the $<br />
button.<br />
The slide show starts and files are<br />
played back in order.<br />
If you want to stop the slide show in<br />
progress, press any button on the<br />
camera.<br />
Until stopped, the slide show will repeat<br />
itself.<br />
Note<br />
• Still images are displayed for 3 seconds each.<br />
• For movies, not just one frame, but the entire movie you shot is displayed.<br />
• Sound files are also played back.<br />
2<br />
111<br />
A Variety of Shooting Techniques/Playback
112<br />
Write-protecting Your Images (PROTECT)<br />
You can protect files from being accidentally deleted.<br />
Caution<br />
Protected files cannot be deleted normally. However, they will be deleted completely if you<br />
format the memory where the files are stored.<br />
Protecting Files<br />
1. Press the 6 (Playback) button.<br />
The last shot taken is displayed.<br />
2. Press the #$ buttons to display the file you want to<br />
protect.<br />
3. Press the M/O button.<br />
The Playback Setting menu appears.<br />
4. Press the " buttons to select<br />
[PROTECT] and press the $<br />
button.<br />
5. Make sure that [1 FILE] is selected,<br />
and then press the M/O<br />
button.<br />
Protection is applied and the Protect<br />
symbol appears in the upper-left corner of<br />
the screen.
Protecting All Files<br />
To protect all your files, follow the steps below.<br />
1. Press the 6 (Playback) button.<br />
2. Press the M/O button.<br />
The Playback menu appears.<br />
3. Press the " button to select<br />
[PROTECT] and press the $<br />
button.<br />
4. Press the !" button to select<br />
[ALL FILES].<br />
5. Make sure that [SELECT] is<br />
selected, and then press the<br />
M/O button.<br />
Protection is applied and the Protect<br />
symbol appears in the upper-left corner of<br />
the screen.<br />
To remove protection from all your files,<br />
select [CANCEL] in step 5.<br />
Note<br />
You can remove protection from all or multiple files at once.<br />
2<br />
113<br />
A Variety of Shooting Techniques/Playback
114<br />
Protecting Multiple Files at Once<br />
To protect selected files all at once, follow the steps below.<br />
1. Press the 6 (Playback) button.<br />
2. Press the 9 (Thumbnail) button twice.<br />
The screen is divided into 12 frames and displays 12 still images at once.<br />
3. Press the !"#$ buttons to select the first file of the<br />
selection.<br />
4. Press the M/O button.<br />
The Playback menu appears.<br />
5. Press the " button to select [PROTECT] and press the $<br />
button.<br />
6. Press the !"#$ buttons to select<br />
the next file of the selection, and<br />
then press the M/O button.<br />
The Protect symbol appears in the upperright<br />
corner of the file.<br />
7. Repeat Step 6 to select all the files<br />
you wish to protect.<br />
If you selected a file by mistake, you can deselect by selecting the file and<br />
pressing the M/O button again.<br />
8. Press the DISP. button.<br />
The display indicates that the selected images are being processed; once<br />
finished, the display returns to the Thumbnail Display screen.<br />
Note<br />
To remove protection from multiple files, follow the same steps described above to select<br />
them and remove protection.<br />
Reference<br />
For details on thumbnail display, see P.52.
Using a Printing Service (DPOF)<br />
The still images recorded on an SD Memory Card can be printed out<br />
if you take them to a shop that offers a digital camera print service.<br />
To use a print service, it is necessary to make settings required for<br />
printing. These settings are called DPOF (Dee-Pof) settings.<br />
The DPOF setting specifies one print per still image.<br />
However, if multiple images are selected for batch setting, you can<br />
specify the number of copies to print.<br />
Setting DPOF for the Still Image Displayed<br />
1. Press the 6 (Playback) button.<br />
2. Display the still image you want to specify.<br />
3. Press the M/O button.<br />
The Playback Setting menu appears.<br />
4. Press the " button to select<br />
[DPOF] and press the $ button.<br />
5. Make sure that [1 FILE] is selected,<br />
and then press the M/O<br />
button.<br />
Once the DPOF setting is made, the<br />
DPOF symbol appears in the upper-left<br />
portion of the screen.<br />
Note<br />
• Removing the DPOF setting for one photo at a time is done in the same way as setting it.<br />
• DPOF is set only for the JPEG files among the images shot in RAW mode.<br />
2<br />
115<br />
A Variety of Shooting Techniques/Playback
116<br />
Setting DPOF for All Still Images<br />
To apply DPOF settings to all your still images, follow the steps<br />
below.<br />
1. Press the 6 (Playback) button.<br />
2. Press the M/O button.<br />
The Playback menu appears.<br />
3. Press the " button to select<br />
[DPOF] and press the $ button.<br />
4. Press the !" buttons to select<br />
[ALL FILES].<br />
5. Make sure that [SELECT] is<br />
selected, and then press the<br />
M/O button.<br />
Once the DPOF setting is made, the<br />
DPOF symbol appears in the upper-left<br />
portion of the screen.<br />
Note<br />
• To remove the DPOF setting from all your still images, select [CANCEL] in step 5.<br />
• You can remove all or multiple still image DPOF settings at once.
Setting DPOF for Multiple Still Images<br />
To make the DPOF setting for selected still images all at once, follow<br />
the steps below.<br />
1. Press the 6 (Playback) button.<br />
2. Press the 9 (Thumbnail) button twice.<br />
The screen is partitioned into twelve segments to display the thumbnails<br />
of files.<br />
3. Press the !"#$ buttons to select the first still image for<br />
which you wish to make the DPOF setting.<br />
4. Press the M/O button.<br />
The Playback menu appears.<br />
5. Press the " button to select<br />
[DPOF] and press the $ button.<br />
6. Press the !" buttons to set the number of copies to print.<br />
Press the ! button to increase the number, or the " button to decrease<br />
it.<br />
7. Press the #$ buttons to select the next still image for<br />
which you wish to make the DPOF setting.<br />
8. Press the !" buttons to set the number of copies to print.<br />
Press the ! button to increase the number, or the " button to decrease<br />
it.<br />
9. Repeat Steps 7 and 8 to select all the still images for which<br />
you wish to make the DPOF setting.<br />
10.Press the M/O button.<br />
The display indicates that the selected images are being processed; once<br />
finished, the display returns to the Thumbnail Display screen.<br />
2<br />
117<br />
A Variety of Shooting Techniques/Playback
118<br />
Changing the Image Size (RESIZE)<br />
You can reduce the image size of a shot still image to additionally<br />
create a file of a different image size.<br />
Caution<br />
• Still images with voice memos, movies, and images shot in the RAW mode (RAW3264/<br />
RAW3:2) cannot be resized.<br />
• The ratio of width to height of the F3:2 image is 3:2. When this image is resized, it is<br />
reduced to the ratio of 4:3, with black borders added at the top and bottom of the image.<br />
Note<br />
The following types of resizing are possible:<br />
Original Resized<br />
F3264/F3:2/N3264/N2592/N2048 N1280 N640<br />
N1280 N640<br />
To change the image size, follow the steps below.<br />
1. Press the 6 (Playback) button.<br />
2. Press the M/O button.<br />
The Playback Setting menu appears.<br />
3. Press the " button to select<br />
[RESIZE] and press the $ button.<br />
4. Press the !" buttons to select<br />
[1280] or [640].<br />
5. Press the M/O button.<br />
The image size is changed and the resized<br />
still image is displayed.<br />
Reference<br />
For how to change the image size at shooting, see P.69.
Copying the Contents of Internal Memory to<br />
a Memory Card (COPY TO CARD)<br />
You can copy all movies, still images, and sound data stored in<br />
internal memory onto an SD Memory Card at once.<br />
1. Turn the <strong>Camera</strong> Off.<br />
2. Insert an SD Memory Card.<br />
3. Turn the camera on.<br />
4. Press the 6 (Playback) button.<br />
5. Press the M/O button.<br />
The Playback Setting menu appears.<br />
6. Press the " button to select<br />
[COPY TO CARD] and press the $<br />
button.<br />
The display indicates copying is in<br />
progress; once finished, the display<br />
returns to the playback screen.<br />
Note<br />
• If the capacity of the SD Memory Card you are copying to is insufficient, a message will be<br />
displayed indicating there is not enough capacity. To copy only the number of shots that<br />
will fit into the available capacity, select [YES] and then press the M/O button. To<br />
cancel copying, select [NO] and then press the M/O button.<br />
• It is not possible to copy from SD Memory Card to internal memory.<br />
2<br />
119<br />
A Variety of Shooting Techniques/Playback
120
Chapter 3<br />
Changing <strong>Camera</strong><br />
Settings<br />
Changing <strong>Camera</strong> Settings........................... 122
122<br />
Changing <strong>Camera</strong> Settings<br />
SETUP Menu<br />
You can change camera settings by<br />
displaying the SETUP menu from the<br />
Shooting Setting menu (see P.67) or<br />
Playback Setting menu (see P.110).<br />
The SETUP menu enables you to set the<br />
items listed in the table below.<br />
*Among the choices listed in the table below, default values<br />
at purchase are enclosed in [ ].<br />
Setting Option Refer to<br />
FORMAT [CARD] P.124<br />
FORMAT [INT. MEM.] P.125<br />
LCD BRIGHTNESS P.126<br />
ADJ. BTN. SET. 1 [OFF], ISO, QUALITY, FOCUS, IMG SET, METERING,<br />
P.127<br />
ADJ. BTN. SET. 2 CONT MDE, AUTO BKT, WITH SND<br />
AUTO POWER OFF OFF, [1], 5, 30 Minutes P.128<br />
BEEP SOUND [ALL], SHUTTER P.129<br />
OPE. ALERT VOL. OFFSmall<br />
MediumLarge<br />
P.130<br />
LCD CONFIRM. OFF, 0.5, [1], 2, 3 Seconds P.131<br />
SEQUENTIAL NO. [ON], OFF P.132<br />
DATE SETTINGS P.134<br />
LANGUAGE [ENGLISH]DEUTSCHFRANÇAIS<br />
ITALIANOESPAÑOL <br />
P.135<br />
VIDEO OUT MODE [NTSC], PAL P.136<br />
SHTG STGS WARNG. [ON], OFF P.137<br />
USB CONNECTION MASS STR, [ORIGINAL] P.138<br />
ENLGE PHOTO ICON [OFF], ON P.142<br />
COLOR SPACE SET [sRGB], Adobe RGB P.143<br />
AF AUX. LIGHT [ON], OFF P.145<br />
<strong>DIGITAL</strong> ZOOM ON, [OFF] P.146<br />
ZOOM BTN. SET. OFF, [EXPO. CMP], WHT. BAL. P.147<br />
REG. MY SETTINGS SETTING1, SETTING2 P.148<br />
START SETTINGS [OFF], SETTING1, SETTING2 P.149
Using the SETUP Menu<br />
To display and use the Setup menu, follow the steps below.<br />
Note<br />
For some functions, the choice selection method may not be as explained here. For detailed<br />
operation, see the explanation of each function.<br />
1. Press the M/O button.<br />
The Shooting Setting menu (or the Playback menu) appears.<br />
2. Press the $ button.<br />
The setup menu appears.<br />
3. Press the !" buttons to select the desired setting.<br />
The setting items are provided on 5 screens.<br />
When the " button is pressed at the<br />
bottom item, the next screen<br />
appears.<br />
To select a screen by screen number:<br />
1. Press the # button to select a screen number on<br />
the left of the screen.<br />
2. With the screen number selectable, press the !"<br />
buttons to switch between screens.<br />
3. After selecting the screen, press the $ button to<br />
return to the setting item selection step.<br />
4. After selecting a setting item, press the $ button.<br />
Choices for the setting item are displayed.<br />
5. Press the !" buttons to select a choice.<br />
6. Press the M/O or # button.<br />
7. If you pressed the # button in step 6, press also the M/<br />
O button.<br />
The menu disappears and the camera becomes ready for shooting and<br />
playing back.<br />
3<br />
123<br />
Changing <strong>Camera</strong> Settings
124<br />
Formatting the SD Memory Card<br />
(FORMAT [CARD])<br />
If the error message "This card cannot be used" is displayed, or if you have<br />
formatted a card with a computer or some other device, it will be necessary to<br />
format the SD Memory Card prior to use. Formatting is the process of<br />
preparing a card so image data can be written on it.<br />
Caution<br />
If you format a card that still has images stored on it, the images will be lost.<br />
Reference<br />
For how to format internal memory, see P.125.<br />
To format a card, follow the steps below.<br />
1. Display the setup menu.<br />
For detailed operation, see P.123.<br />
2. Press the " button to select<br />
[FORMAT [CARD]] and press the $<br />
button.<br />
A screen appears to confirm formatting.<br />
3. Press the #$ button to select<br />
[YES] and then press the M/<br />
O button.<br />
Formatting starts. When it is done, the display returns to the SETUP<br />
menu.<br />
If no SD Memory Card is inserted, a message will be displayed.<br />
After turning the power off, load an SD Memory Card and repeat the<br />
formatting process again.<br />
Note<br />
Protecting your images from being deleted<br />
If you move the card's write-protection switch to LOCK, your still images cannot be<br />
accidentally erased and the card cannot be formatted.<br />
If you release the protection (by returning the switch to its original position), it is once again<br />
possible to erase images and format the card.
Formatting Internal Memory<br />
(FORMAT [INT. MEM.])<br />
If an error message "Format the internal memory" is displayed, it will<br />
be necessary to format the internal memory prior to use.<br />
Caution<br />
Formatting the internal memory erases all of the images recorded in the memory. If you have<br />
images that you do not want to erase stored on the internal memory, please contact the Ricoh<br />
Service offices prior to formatting it.<br />
To format internal memory, follow the steps below.<br />
1. Display the setup menu.<br />
For detailed operation, see P.123.<br />
2. Press the " button to select<br />
[FORMAT [INT. MEM.]] and press<br />
the $ button.<br />
A screen appears to confirm formatting.<br />
3. Press the #$ buttons to select<br />
[YES] and then press the M/<br />
O button.<br />
Formatting starts. When it is done, the<br />
display returns to the SETUP menu.<br />
3<br />
125<br />
Changing <strong>Camera</strong> Settings
126<br />
Adjusting the Brightness of the LCD Monitor<br />
(LCD BRIGHTNESS)<br />
To adjust the brightness of the LCD Monitor, follow the steps below.<br />
1. Display the setup menu.<br />
For detailed operation, see P.123.<br />
2. Press the " button to select [LCD<br />
BRIGHTNESS] and press the $<br />
button.<br />
The LCD Brightness Adjustment bar<br />
appears.<br />
3. Press the !" buttons to adjust<br />
the brightness.<br />
Moving it to the side makes it darker.<br />
Moving it to the side makes it brighter.<br />
The brightness of the screen behind the<br />
bar changes as you alter the setting.<br />
4. When you attain the desired brightness, press the M/<br />
O button.<br />
The display returns to the SETUP screen.<br />
This setting will be used until you change it.<br />
Note<br />
When shooting, keep pressing the DISP. button maximizes the LCD brightness.<br />
When the brightness is at the maximum, keep pressing the DISP. button restores the<br />
brightness set using the [LCD BRIGHTNESS] option.
Setting a Function to the ADJ. dial<br />
(ADJ BTN.SET. 1/2)<br />
The ADJ. dial allows you to display the exposure correction screen and whitebalance<br />
setting screen with fewer button operations.<br />
Functions that can be displayed by pressing the ADJ. dial can be assigned to<br />
[ADJ. BTN. SET. 1] and [ADJ. BTN. SET. 2].<br />
Possible Settings (Refer to)<br />
OFF *Setting 2 upon purchase -<br />
ISO *Setting 1 upon purchase P.91<br />
QUALITY (PIC/QUALITY) P.69<br />
FOCUS P.74<br />
IMG SET P.78<br />
METERING P.77<br />
AUTO BKT P.80<br />
CONT MDE P.101<br />
WITH SND P.85<br />
To assign a function to either [ADJ. BTN. SET. 1] or [ADJ. BTN. SET. 2], follow<br />
the steps below.<br />
1. Display the setup menu.<br />
For detailed operation, see P.123.<br />
2. Press the " button to select [ADJ.<br />
BTN. SET. 1] or [ADJ. BTN. SET. 2],<br />
and press the $ button then.<br />
3. Press the !" buttons to select<br />
the desired setting.<br />
4. Press the M/O or # button.<br />
5. If you pressed the # button in step<br />
4, press also the M/O button.<br />
This setting will be used until you change it.<br />
Reference<br />
For how to use the ADJ. dial, see P.65.<br />
3<br />
127<br />
Changing <strong>Camera</strong> Settings
128<br />
Changing Auto Power-Off Settings<br />
(AUTO POWER OFF)<br />
If you do not operate the camera for the set period of time, it will shut<br />
off automatically (Auto Power-off) to conserve battery power.<br />
At the time of purchase, Auto Power-Off is set to one minute, but you<br />
can change this setting.<br />
Possible Settings<br />
OFF (The Auto Power-Off function does not work)<br />
1 Minute *Setting upon purchase<br />
5 Minutes<br />
30 Minutes<br />
To change the Auto Power-Off setting, follow the steps below.<br />
1. Display the setup menu.<br />
For detailed operation, see P.123.<br />
2. Press the " button to select<br />
[AUTO POWER OFF] and press the<br />
$ button.<br />
3. Press the !" buttons to select<br />
the desired setting.<br />
4. Press the M/O or # button.<br />
5. If you pressed the # button in step<br />
4, press the M/O button.<br />
This setting will be used until you change it.<br />
Note<br />
• To continue on using the camera after auto power-off, press the Power button to turn the<br />
camera on again. Keep pressing the Playback button for more than one second also turns<br />
on the camera, allowing you to use the camera in Playback Mode.<br />
• The Auto Power-off function does not work when the camera is connected to a computer.<br />
• When shooting with Interval Shooting, settings made here are not valid and Auto Power-Off<br />
does not work.
Changing the Beep Sound Setting<br />
(BEEP SOUND)<br />
During operation, the camera generates four types of sounds: start<br />
sound, shutter release sound, focus sound, and beep sound.<br />
Start sound : Sound when the camera power is turned on.<br />
Shutter release sound : Sound when the shutter button is pressed.<br />
Focus sound : When the focus is set, the camera generates the focus sound.<br />
Beep Sound : If an impossible operation is attempted, the camera generates the beep sound.<br />
Possible Settings<br />
SHUTTER (Shutter release sound, Beep Sound)<br />
ALL (all sounds on) *Setting upon purchase<br />
To change the beep sound settings, follow the steps below:<br />
1. Display the setup menu.<br />
For detailed operation, see P.123.<br />
2. Press the " button to select<br />
[BEEP SOUND] and press the $<br />
button.<br />
3. Press the !" buttons to select<br />
the desired setting.<br />
4. Press the M/O or # button.<br />
5. If you pressed the # button in step<br />
4, press also the M/O button.<br />
This setting will be used until you change it.<br />
Reference<br />
For how to adjust volume, see P.130.<br />
3<br />
129<br />
Changing <strong>Camera</strong> Settings
130<br />
Changing the Beep Sound Volume<br />
(VOL. SETTINGS)<br />
The beep sound volume can be changed.<br />
Possible Settings<br />
(Mute)<br />
(Small)<br />
(Medium) *Setting upon purchase<br />
(Large)<br />
To change the beep sound volume, follow the steps below:<br />
1. Display the setup menu.<br />
For detailed operation, see P.123.<br />
2. Press the " button to select [VOL.<br />
SETTINGS] and press the $<br />
button.<br />
3. Press the !" buttons to select<br />
the desired setting.<br />
4. Press the M/O or # button.<br />
5. If you pressed the # button in step<br />
4, press also the M/O button.<br />
This setting will be used until you change it.
Changing Image Confirmation Time<br />
(LCD CONFIRM.)<br />
Immediately after pressing the shutter button, the still image taken is<br />
displayed for a moment so you can check it.<br />
At purchase, Confirmation Time is set to one second, but this can be<br />
changed.<br />
Possible Settings<br />
OFF (Photo not displayed for confirmation)<br />
0.5 Second<br />
1 Second *Setting upon purchase<br />
2 Seconds<br />
3 Seconds<br />
To change Confirmation Time, follow the steps below.<br />
1. Display the setup menu.<br />
For detailed operation, see P.123.<br />
2. Press the " button to select [LCD<br />
CONFIRM.] and press the $<br />
button.<br />
3. Press the !" buttons to select<br />
the desired setting.<br />
4. Press the M/O or # button.<br />
5. If you pressed the # button in step<br />
4, press also the M/O button.<br />
This setting will be used until you change it.<br />
3<br />
131<br />
Changing <strong>Camera</strong> Settings
132<br />
Changing File Name Settings<br />
(SEQUENTIAL NO.)<br />
When you shoot a still image, it is stored on an SD Memory Card or<br />
in internal memory, with a consecutively numbered file name<br />
automatically assigned.<br />
When you are switching SD Memory Cards, you can set your<br />
camera to continue consecutive numbering from the previously<br />
loaded SD Memory Card.<br />
Possible Settings<br />
ON (Continue numbering)<br />
*Setting upon purchase<br />
OFF (Do not continue<br />
numbering)<br />
To make changes to file numbering, follow the steps below.<br />
1. Display the setup menu.<br />
File names will be automatically assigned to still images you take, in the format of<br />
"R" followed by 7 digits, from R0010001.jpg to R9999999.jpg.<br />
With this setting, even when one SD Memory Card is switched with another,<br />
consecutive file numbering from the previous card is continued.<br />
Every time a new card is loaded, file numbering is assigned, from RIMG0001.jpg<br />
to RIMG9999.jpg.<br />
If numbering exceeds RIMG9999, further recording is not possible<br />
For detailed operation, see P.123.<br />
2. Press the " button to select<br />
[SEQUENTIAL NO.] and press the<br />
$ button.<br />
3. Press the !" buttons to select<br />
the desired setting.<br />
4. Press the M/O or # button.<br />
5. If you pressed the # button in step<br />
4, press also the M/O button.<br />
This setting will be used until you change it.
Note<br />
• When you are recording to internal memory, file names are assigned just as when<br />
[SEQUENTIAL NO.] is set to [OFF].<br />
• When transferring images to a computer using RICOH Gate La (P.161), designating a file<br />
name same as the one that already exists in the destination folder, the file is renamed<br />
before saving to avoid overwrite problems.<br />
• When an image has been transferred to a computer using a mass storage (P.164), it is<br />
saved as a file named "RIMG****.jpg" (**** indicates the number of the image) even if<br />
[SEQUENTIAL NO] is set to ON.<br />
• When RIMG9999 is reached, no more files can be saved. In this case, move image data<br />
from the SD memory card to the built-in memory of the computer or a storage medium, and<br />
then format the SD memory card.<br />
• The name of the file to be recorded varies with the setting of [COLOR SPACE SETTING] in<br />
the SETUP menu.<br />
Consecutive numbering<br />
Value of COLOR SPACE setting<br />
sRGB AdobeRGB<br />
ON (Continue numbering) R0010001.jpg _0010001.jpg<br />
OFF (Do not continue numbering) RIMG0001.jpg _RIM0001.jpg<br />
3<br />
133<br />
Changing <strong>Camera</strong> Settings
134<br />
Setting the Date and Time<br />
(DATE SETTINGS)<br />
You can take still images with the time or date stamped onto the<br />
picture.<br />
The date/time setting on the SETUP menu is explained here.<br />
1. Display the setup menu.<br />
For detailed operation, see P.123.<br />
2. Press the " button to select<br />
[DATE SETTINGS] and press the $<br />
button.<br />
3. Press !"#$ to set the year,<br />
month, date and time.<br />
If you hold down the ! or " button, you<br />
can increase/decrease the value quickly.<br />
4. In [FORMAT], choose the date and<br />
time format.<br />
5. Check the display on the bottom of<br />
the screen and then press the<br />
M/O button.<br />
Once you have set the date and time,<br />
the display returns to the Setup menu.<br />
Note<br />
• If the batteries are removed for more than one week, the date and time settings will be lost.<br />
These settings must be made again.<br />
• To retain the date and time settings, load a fully charged battery in the camera for more<br />
than two hours.
Changing the Display Language<br />
(LANGUAGE/ )<br />
You can change the language displayed on the LCD Monitor.<br />
Possible Settings<br />
<br />
ENGLISH *Setting upon purchase<br />
DEUTSCH<br />
FRANÇAIS<br />
ITALIANO<br />
ESPAÑOL <br />
<br />
<br />
<br />
To change the display language, follow the steps below.<br />
1. Display the setup menu.<br />
For detailed operation, see P.123.<br />
2. Press the " button to select<br />
[LANGUAGE/] and press the $<br />
button.<br />
The language selection screen appears.<br />
3. Press the !"#$ buttons to select<br />
the desired setting.<br />
4. Press the M/O button.<br />
This setting will be used until you<br />
change it.<br />
3<br />
135<br />
Changing <strong>Camera</strong> Settings
136<br />
Changing the Playback Method for Viewing<br />
on TV (VIDEO OUT MODE)<br />
You can view your still images and movies on a television screen by<br />
connecting your camera to a television with the AV cable that came<br />
with your camera.<br />
Your camera is set to NTSC video format (used in Japan and other<br />
countries) for use with television equipment, etc. If the equipment<br />
you want to connect to uses PAL format (used in Europe and<br />
elsewhere), then switch your camera to PAL format before<br />
connecting.<br />
Possible Settings<br />
NTSC *Setting upon purchase<br />
PAL<br />
To change the playback format, follow the steps below.<br />
1. Display the setup menu.<br />
For detailed operation, see P.123.<br />
2. Press the " button to select<br />
[VIDEO OUT MODE] and press the<br />
$ button.<br />
3. Press the !" buttons to select<br />
the desired setting.<br />
4. Press the M/O or # button.<br />
5. If you pressed the # button in step<br />
4, press also the M/O button.<br />
This setting will be used until you change it.<br />
Note<br />
Connecting the AV cable to the camera turns off the LCD monitor display.<br />
Reference<br />
For how to view still images on your television screen, see P.54.
Displaying a Setting Change Warning<br />
(SHTG STGS WARNG.)<br />
You can set the icon of a changed function to blink or a warning<br />
message indicating a change will be displayed at power-on for about<br />
5 seconds if the initial settings are changed for the following<br />
functions.<br />
• White Balance<br />
• Focus<br />
• ISO Setting<br />
• Exposure Comp.<br />
If you operate a camera button while an icon is blinking, the icon<br />
stops blinking and lights steadily.<br />
If you operate a camera button during a warning message display,<br />
the message disappears.<br />
Possible Settings<br />
OFF<br />
ON *Setting upon purchase<br />
To set whether to enable (ON) or disable (OFF) the shooting setting<br />
alert, follow the steps below.<br />
1. Display the setup menu.<br />
For detailed operation, see P.123.<br />
2. Press the " button to select<br />
[SHTG STGS WARNG.] and press<br />
the $ button.<br />
3. Press the !" buttons to select<br />
the desired setting.<br />
4. Press the M/O or # button.<br />
5. If you pressed the # button in step<br />
4, press also the M/O button.<br />
This setting will be used until you change it.<br />
3<br />
137<br />
Changing <strong>Camera</strong> Settings
138<br />
Changing the USB Communication System<br />
(USB Connection)<br />
If the USB communication system is changed (by selecting [MASS<br />
STR] at [USB CONNECTION] on the Setup menu), files in the<br />
camera can be browsed and transferred from the camera to your<br />
computer through the USB cable without installing the accessory<br />
application or USB driver.<br />
Usually, select [ORIGINAL]. When [ORIGINAL] is set, you can transfer<br />
images to your computer using the supplied RICOH Gate La.<br />
Mode Mass Storage Original<br />
Download Method The SD memory card or built-in<br />
memory of the camera can be<br />
operated directly as an external drive<br />
for file processing.<br />
Installation from Caplio CD-<br />
ROM<br />
Supported OS<br />
Caution<br />
Unnecessary Necessary<br />
RICOH Gate La allows automatic<br />
transfer to your computer.<br />
The mounter allows transfer to your<br />
computer. (Mac OS)<br />
Windows 98/98 SE X O<br />
Windows 2000 Professional O O<br />
Windows Me O O<br />
Windows XP Home Edition O O<br />
Windows XP Professional O O<br />
Mac OS 8.6 X O<br />
Mac OS 9.0 to 9.2.2 O O<br />
Mac OS X 10.1.2 to 10.4 O O<br />
For those: Familiar with OS file operations Willing to automate downloading to a<br />
Not willing to install a USB driver or computer<br />
other<br />
Using Windows 98/98 Second Edition<br />
Using Mac OS 8.6<br />
• At [MASS STR], RICOH Gate La cannot be used for image transfer.<br />
• At [MASS STR], files can only be read from the camera and cannot be written into or<br />
deleted from the camera.<br />
• For direct printing on a printer supporting both Direct Print and PictBridge, select<br />
[ORIGINAL] at [USB CONNECTION].
To change the USB communication system, follow the steps below:<br />
1. Display the setup menu.<br />
For the operating procedure, see P.123.<br />
2. Press the " button to select [USB<br />
CONNECTION] and press the $<br />
button.<br />
3. Press the !" button to select a<br />
value.<br />
4. Press the M/O or # button.<br />
5. If the # button was pressed in<br />
Step 4, press the M/O button.<br />
These settings are used until they are changed the next time.<br />
Reference<br />
For how to transfer images using RICOH Gate La, see P.161.<br />
3<br />
139<br />
Changing <strong>Camera</strong> Settings
140<br />
To transfer images in Mass Storage Mode, follow the<br />
steps below:<br />
1. Change [USB CONNECTION] to [MASS STR] on the Setup<br />
menu.<br />
2. Make sure that the camera power is off.<br />
3. Connect the accessory USB cable to a USB port of your<br />
computer.<br />
4. Connect the USB cable to the USB<br />
terminal of the camera.<br />
The camera power becomes on.<br />
Your computer automatically reads a file<br />
necessary for recognizing the camera as a<br />
drive.<br />
After this preparation, the camera is<br />
displayed as a drive at My Computer<br />
(Windows) or Desktop (Macintosh).<br />
5. From the displayed drive,<br />
copy a file to the desired<br />
location.<br />
The figure at right shows the folder<br />
configuration in a drive.<br />
When the contents of the built-in<br />
memory are displayed, the drive<br />
name is RICOHDCI.<br />
Caution<br />
• During transfer, do not disconnect the USB cable.<br />
• If a file with the same name already exists at the destination, it is overwritten. If you do not<br />
want the file to be overwritten, rename the file or transfer images to another folder.<br />
Note<br />
Example of the Windows<br />
XP screen<br />
When a SD memory card is inserted, its files are displayed. Otherwise, files in the built-in<br />
memory are displayed.
Disconnecting the <strong>Camera</strong> from Your Computer<br />
(Windows)<br />
This display is an example for Windows XP. The terms are different<br />
for other OS but the operations are the same.<br />
1. Click the Remove Hardware Safely<br />
icon at the right end of the task bar.<br />
2. Select [USB Large-capacity Storage<br />
Device] and click [Stop].<br />
3. Check that [USB Large-capacity Storage Device] is selected<br />
and click [OK].<br />
4. Click [OK].<br />
5. Unplug the USB cable.<br />
Disconnect the <strong>Camera</strong> from Your Computer<br />
(Macintosh)<br />
1. Put the displayed drive in the Recycle Bin.<br />
2. Unplug the USB cable.<br />
3<br />
141<br />
Changing <strong>Camera</strong> Settings
142<br />
Enlarging Icon Display (ENLGE PHOTO ICON)<br />
Icons on the shooting screen are enlarged.<br />
Under this setting, the following icons are enlarged:<br />
•Flash<br />
• Macro Shooting<br />
•Self Timer<br />
• White Balance<br />
•Focus<br />
• Exposure Compensation<br />
• ISO Sensitivity<br />
If icons are enlarged, the following items are not displayed:<br />
• Zoom Bar/Focus Bar<br />
• Date/Time<br />
• Image Settings<br />
To enlarge icons on the shooting screen, follow the steps below:<br />
1. Display the setup menu.<br />
For the operating procedure, see P.123.<br />
2. Press the " button to select [ENLGE PHOTO ICON] and<br />
press the $ button.<br />
3. Press the !" buttons to select<br />
[ON].<br />
4. Press the M/O or # button.<br />
5. If the # button was pressed in<br />
Step 4, press the M/O<br />
button.<br />
Now you have finished the shooting icon<br />
enlargement setting.<br />
These settings are used until they are changed the next time.
Setting the Color Space<br />
(COLOR SPACE SET)<br />
You can select a color space between sRGB (a standard color space<br />
used in the digital world) and Adobe RGB (a color space wider than<br />
sRGB).<br />
Adobe RGB supported by this camera is compatible with the color<br />
space that Adobe Systems Inc. uses for image editing applications<br />
such as Photoshop by default.<br />
1. Display the SETUP menu.<br />
For the operating procedure, see P.123.<br />
2. Press the " button to select<br />
[COLOR SPACE SETTING], and<br />
then press the $ button.<br />
When selecting [sRGB]<br />
3. Press !" buttons to select [sRGB].<br />
4. Press the M/O or # button.<br />
5. If you pressed the # button in step 4, press the M/O<br />
button.<br />
3<br />
143<br />
Changing <strong>Camera</strong> Settings
144<br />
When selecting [AdobeRGB]<br />
3. Press the !" buttons to select [AdobeRGB].<br />
4. Press the M/O or # button.<br />
A confirmation message appears to ask whether you are certain to select<br />
Abobe RGB.<br />
5. If you pressed the # button in step 4, press the M/O<br />
button.<br />
6. Press the #$ buttons to select [YES], and then press the<br />
M/O button.<br />
Now you have completed color space setting.<br />
This setting will be used until you change it.<br />
Caution<br />
• Adobe RGB is intended for commercial printing, so it is not suitable for common print<br />
services and home printers. Adobe RGB covers a color space wider than that of sRGB. In<br />
an environment not complying with Abobe RGB, however, images are displayed/printed in<br />
faint colors.<br />
• Without the application software that can reproduce the Adobe RGB color space correctly,<br />
correct color reproduction will fail.
Setting the AF Auxiliary Light<br />
(AF AUX. LIGHT)<br />
You can set whether to set off the AF auxiliary lamp when shooting<br />
in the Auto Focus mode.<br />
When ON is selected, the AF auxiliary lamp goes on to measure the<br />
focal distance before shooting as required.<br />
1. Display the setup menu.<br />
For the operating procedure, see P.123.<br />
2. Press the " button to select [AF<br />
AUX. LIGHT] and press the $<br />
button.<br />
3. Press the !" buttons to select<br />
[ON] or [OFF].<br />
4. Press the M/O or # button.<br />
5. If the # button was pressed in<br />
Step 4, press the M/O button.<br />
Now you have completed AF auxiliary light setting.<br />
These settings are used until they are changed the next time.<br />
Note<br />
The AF auxiliary lamp goes on when Auto-Focus does not function because of the dark<br />
surrounding area.<br />
When you fully press the shutter button, the AF auxiliary lamp may not go on even if the<br />
surrounding area is dark.<br />
3<br />
145<br />
Changing <strong>Camera</strong> Settings
146<br />
Setting Whether to Use Digital Zooming<br />
(<strong>DIGITAL</strong> ZOOM)<br />
You can set whether to use digital zooming or not.<br />
When ON (use of digital zooming) is selected, the 8/9 button works<br />
as a digital zoom button.<br />
If this is set to OFF (not use), the exposure compensation or the<br />
white balance function can be assigned to the 8/9 button.<br />
1. Display the setup menu.<br />
For the operating procedure, see P.123.<br />
2. Press the " button to select<br />
[<strong>DIGITAL</strong> ZOOM] and press the $<br />
button.<br />
3. Press the !" buttons to select<br />
[ON] or [OFF].<br />
4. Press the M/O or # button.<br />
5. If the # button was pressed in<br />
Step 4, press the M/O button.<br />
Now you have completed setting of digital zooming use or non-use.<br />
These settings are used until they are changed the next time.<br />
Reference<br />
For details about using the Digital Zoom, see P.42.
Changing the Zoom Button Setting<br />
(ZOOM BTN. SET.)<br />
When you do not use digital zooming, you can assign the exposure<br />
compensation or white balancing function to the zoom button (8/9<br />
button).<br />
To change the zoom button setting, follow the steps below.<br />
1. Display the setup menu.<br />
For the operating procedure, see P.123.<br />
2. Press the " button to select<br />
[ZOOM BTN. SET.] and press the $<br />
button.<br />
3. Press the !" buttons to select<br />
[EXPO. CMP.] or [WHT. BAL.].<br />
If you do not assign any function, select<br />
OFF.<br />
4. Press the M/O or # button.<br />
5. If the # button was pressed in Step 4, press the M/O<br />
button.<br />
Now you have completed zoom button setting.<br />
These settings are used until they are changed the next time.<br />
3<br />
147<br />
Changing <strong>Camera</strong> Settings
148<br />
Registering the Power-on Settings<br />
(REG. MY SETTINGS)<br />
The My Setting function allows you to make your desired settings to<br />
be used at power-on. For example, when a digital camera is used in<br />
common by multiple persons, each person can use the camera<br />
without regard to the settings made by the person who used the<br />
camera previously because the camera settings are restored to the<br />
administrator settings each time the camera is turned on.<br />
Two types of my settings can be registered.<br />
Registering My Settings<br />
To register the current camera settings as my settings, follow the<br />
steps below.<br />
1. Change the camera settings to the settings to be registered<br />
as my settings.<br />
2. Display the SETUP menu.<br />
For the operating procedure, see P.123.<br />
3. Press the " button to select [REG.<br />
MY SETTINGS] and press the $<br />
button.<br />
A confirmation message appears.<br />
4. Select [SETTING 1] or [SETTING 2]<br />
and press the M/O button.<br />
The current camera settings will be<br />
registered.<br />
If you do not want to register them, press<br />
the DISP. button.<br />
5. Press the M/O button.
Changing the Startup Settings<br />
(START SETTING)<br />
To change the power-on setting using one of the current my settings,<br />
follow the steps below.<br />
1. Display the setup menu.<br />
For the operating procedure, see P.123.<br />
2. Press the " button to select [START SETTING] and press<br />
the $ button.<br />
3. Select [SETTING 1] or [SETTING 2]<br />
and press the M/O or #<br />
button.<br />
If you do not use the My Setting function,<br />
select OFF in step 3.<br />
4. If the # button was pressed in<br />
Step 3, press the M/O<br />
button.<br />
5. Turn your camera off.<br />
The settings to be used at the next power-on will be changed.<br />
Note<br />
• When [START SETTING] is set to OFF, settings are retained as usual. (P.190)<br />
• When [START SETTING] is set to [SETTING 1] or [SETTING 2], the camera settings made<br />
with the My Setting function are used at power-on even if [RESTORE DEFAULTS] is<br />
selected.<br />
Settings Retained by My Setting Function<br />
PIC QUALITY EXPOSURE COMP.<br />
FOCUS WHITE BALANCE<br />
Focal distance used in Manual Focus mode ISO SETTING<br />
PHOTOMETRY FLASH<br />
CONT. MODE Scene Mode<br />
IMG SET Macro<br />
IMAGE WITH SOUND DENSITY<br />
DATE IMPRINT DISP. Mode<br />
3<br />
149<br />
Changing <strong>Camera</strong> Settings
150
Chapter 4<br />
Installing Software<br />
Installing the Provided Software (For Windows)..152<br />
Installing the Provided Software (For<br />
Macintosh)...................................................... 171<br />
Note<br />
The Caplio Software contained on the supplied CD-ROM is<br />
used for Ricoh digital camera series, <strong>GR</strong> <strong>DIGITAL</strong> and<br />
Caplio, in common.
152<br />
Installing the Provided Software (For Windows)<br />
You need to install software for transferring images to your computer<br />
before you can download images from the camera.<br />
Note<br />
• If a file with the same name already exists at the destination, it is overwritten. If you do not<br />
want the file to be overwritten, rename the file or transfer images to another folder.<br />
• When downloading images from the camera to your computer without necessary software<br />
installation, change [USB CONNECTION] to [MASS STR] on the camera (P.138).<br />
Reference<br />
For how to download images from the camera into your computer, see the Software <strong>User</strong><br />
<strong>Guide</strong> available from the Caplio Software CD-ROM. For how to display the Software <strong>User</strong><br />
<strong>Guide</strong>, see P.155.<br />
Caution<br />
• Be sure to install the software before you connect the<br />
camera to your computer. (P.157)<br />
• When [MASS STR] is selected on the Setup menu of<br />
the camera, you can view the files in the camera<br />
without installing the supplied application or USB<br />
driver. At the time of purchase, [ORIGINAL] is<br />
selected.
Software that can be installed from the Caplio Software<br />
CD-ROM<br />
Once you insert the Caplio Software CD-<br />
ROM in the CD-ROM drive, the following<br />
screen appears automatically:<br />
Item Name Description Refer to<br />
Installing the Software Use this button to install software required for handling the P.157<br />
Installing DeskTopBinder Lite<br />
camera and images.<br />
P.159<br />
Browse <strong>User</strong>’s Manual<br />
(Software Version)<br />
Use this button to display the Software <strong>User</strong> <strong>Guide</strong> (PDF). P.155<br />
Browse CD-ROM Content Use this button to display the list of files contained on the CD-<br />
ROM.<br />
P.155<br />
Go to Adobe Digital Imaging Displays the home page of Adobe Systems Inc. (if connectable -<br />
web site<br />
to Internet).<br />
When [Install the Software] is clicked: (P.157)<br />
The following software will be installed:<br />
Software Windows Description<br />
XP 98<br />
RICOH Gate La O O Downloads images.<br />
ImageMixer O O Shot images can be displayed or edited and video CDs can be created.<br />
DirectX (see P.168) is necessary for handling movies.<br />
USB Driver O O Used to connect the camera to the computer. This driver is<br />
programmed for this camera. (It is also compatible with the existing<br />
models.)<br />
WIA Driver O - Used to capture images and connect the camera to the computer. This<br />
driver is programmed for this camera. (It is also compatible with the<br />
existing models.)<br />
XP:Windows XP 98:Windows 98/98SE/Me/2000<br />
4<br />
153<br />
Installing Software
154<br />
Reference<br />
The camera is provided with software ImageMixer that allows you to display and edit images<br />
from your computer. For how to use ImageMixer, click the [?] button on the ImageMixer<br />
window and see the displayed manual.<br />
For more information on the ImageMixer, contact the Customer Support Center below.<br />
For the latest information about the ImageMixer, access the Web page of Pixela Co., Ltd.<br />
(http://www.imagemixer.com).<br />
Note<br />
The WinASPI installer starts during installation of ImgeMixer.<br />
WinASPI is required when creating a Video CD using ImageMixer.<br />
When [Installing DeskTopBinder Lite] is clicked: (P.159)<br />
The following software will be installed:<br />
Software Windows Description<br />
XP 98<br />
DeskTopBinder Lite O O Software used to manage business documents.<br />
Images in the camera can be downloaded to Ridoc using the Auto<br />
Document link that monitors document updating.<br />
USB Driver O O Used to connect the camera to the computer. This driver is<br />
programmed for this camera. (It is also compatible with the existing<br />
models.)<br />
WIA Driver O - Used to capture images and connect the camera to the computer. This<br />
driver is programmed for this camera. (It is also compatible with the<br />
existing models.)<br />
XP:Windows XP 98:Windows 98/98SE/Me/2000<br />
Caution<br />
The DeskTopBinder Lite is not in compliance with Windows 98 but with Windows 98 SE.<br />
Reference<br />
• For details about the DeskTopBinder Lite, refer to the Read This First (PDF file), Setup<br />
<strong>Guide</strong> (PDF file), Ridoc Auto Document Link <strong>Guide</strong> (PDF file), and Help supplied with the<br />
DeskTopBinder Lite.<br />
• For details about the Auto Document link, refer to the Ridoc Auto Document Link <strong>Guide</strong><br />
(PDF file).
When [Browse <strong>User</strong>’s Manual (Software Version)] is clicked:<br />
The Software <strong>User</strong> <strong>Guide</strong> (PDF file) on the Caplio Software CD-ROM can be<br />
displayed on your computer screen. If you are a Windows user and have<br />
Acrobat Reader installed on your computer, simply double-click [View<br />
Software <strong>User</strong> <strong>Guide</strong>].<br />
If not installed, Acrobat Reader should be installed (see P.167).<br />
When [Browse CD-ROM] is clicked:<br />
You can check folders and files on the CD-ROM.<br />
The CD-ROM contains not only the Caplio software but also the following<br />
software. These software products run on Windows.<br />
For the installation of each software product, see the Reference page in the<br />
table below.<br />
Software Description Refer to<br />
Acrobat Reader Required for viewing the Software <strong>User</strong> <strong>Guide</strong>. P.167<br />
DirectX Necessary for playing movies by the ImageMixer. P.168<br />
Reference<br />
• For details about the Acrobat Reader, see Help for the Acrobat Reader.<br />
• To install ImageMixer alone, double-click Setup.exe in the ImageMixer folder.<br />
4<br />
155<br />
Installing Software
156<br />
System Requirements for Using the<br />
Provided Software<br />
The following environments are necessary for using the provided software.<br />
Please check your computer, or the computer's user manual.<br />
Operating Systems Supported Windows 98/98 Second Edition<br />
Windows 2000 Professional<br />
Windows Me<br />
Windows XP Home Edition/Professional<br />
CPU Pentium ® : 500MHz or more<br />
Memory Windows 98/98SE: 128MB or more<br />
Windows 2000: 128MB or more<br />
Windows Me: 128MB or more<br />
Windows XP: 256MB or more<br />
Hard drive space required for Windows 98/98SE: 500MB or more<br />
installation<br />
Windows 2000: 500MB or more<br />
Windows Me: 500MB or more<br />
Windows XP: 500MB or more<br />
Display resolution 800 x 600 pixels or greater<br />
Display colors 65000 colors or greater<br />
CD-ROM drive A CD-ROM drive compatible with the above-mentioned computer body<br />
USB port A USB port compatible with the above-mentioned computer body<br />
Caution<br />
• If your computer has an upgraded OS, the USB function may not work normally, so it<br />
cannot be supported.<br />
• Problems may arise due to changes made to the OS, such as through patches or a service<br />
package release.<br />
• The camera does not support connection to a USB port added by using an extension<br />
function (PCI bus or other).<br />
• If used in conjunction with a hub or other USB devices, the software may not work properly.<br />
• When dealing with movies and other large files, a larger memory environment is<br />
recommended.<br />
Reference<br />
For how to download images to your computer using an SD Memory Card, see the Software<br />
<strong>User</strong> <strong>Guide</strong>.
Installing the Software on Your Computer<br />
Caution<br />
• Do not connect your camera to the computer until indicated. If you happened to connect<br />
your camera to the computer (resulting in the [Add New Hardware Wizard] screen<br />
appearing), simply click [Cancel], and after disconnecting your camera, install the software<br />
on your computer.<br />
• If a message is displayed during installation to uninstall the old Caplio software before<br />
installing the new one, uninstall the old Caplio software once and install the new one again<br />
by following the message instructions. Even with the new Caplio software, however, the<br />
image downloading and other functions of the old model can still be used as before. (For<br />
how to uninstall the software, see P.169.)<br />
• For Windows XP or Windows 2000, Administrator privileges are required to install the<br />
software.<br />
Note<br />
Here is an example of the Windows XP screen.<br />
1. Start your computer and insert the<br />
Caplio CD-ROM in the CD-ROM<br />
drive.<br />
The screen shown on the right appears<br />
automatically.<br />
2. Click [Installing the Software].<br />
After a while, the [Select Setting<br />
Language] screen appears.<br />
3. Confirm the language, and then click [OK].<br />
After a few moments, the [Welcome to InstallShield Wizard] screen<br />
appears.<br />
4. Click [Next].<br />
After a few moments, the [Select<br />
Installation Destination] screen appears.<br />
4<br />
157<br />
Installing Software
158<br />
5. Confirm where you want to install<br />
and then click [Next].<br />
The [Select Program Folder] screen<br />
appears.<br />
6. Confirm where you want to install and then click [Next].<br />
The ImageMixer installer starts.<br />
Install ImageMixer following the messages<br />
displayed on the screen.<br />
When installation of ImageMixer is<br />
completed, a dialog appears to indicate<br />
that all software applications have been<br />
installed.<br />
7. Click [Finish].<br />
8. Restart your computer.<br />
Reference<br />
For how to remove (uninstall) the software, see P.169.
Installing the DeskTopBinder Lite<br />
Reference<br />
For how to use DeskTopBinder Lite, refer to the Beginner's <strong>Guide</strong>, the Setup <strong>Guide</strong>, and the<br />
DeskTopBinder Lite - Auto Document Link <strong>Guide</strong> (all PDF files) that are installed with<br />
DeskTopBinder Lite.<br />
Caution<br />
• Do not connect your camera to the computer until indicated. If you happened to connect<br />
your camera to the computer (resulting in the [Add New Hardware Wizard] screen<br />
appearing), simply click [Cancel], and after disconnecting your camera, install the software<br />
on your computer.<br />
• For Windows XP or Windows 2000, Administrator privileges are required to install the<br />
software.<br />
Note<br />
Here is an example of the Windows XP screen.<br />
1. Start your computer and insert the<br />
Caplio CD-ROM in the CD-ROM<br />
drive.<br />
The screen shown on the right appears<br />
automatically.<br />
2. Click [Installing DeskTopBinder<br />
Lite].<br />
After a few moments, the [Welcome to InstallShield Wizard] screen<br />
appears.<br />
3. Click [Next].<br />
After a few moments, the [Select Installation Destination] screen appears.<br />
4. Confirm where you want to install<br />
and then click [Next].<br />
The [Select Program Folder] screen<br />
appears.<br />
4<br />
159<br />
Installing Software
160<br />
5. Confirm where you want to install and then click [Next].<br />
6. Click [OK].<br />
7. Click [DeskTopBinder Lite].<br />
The DeskTopBinder Lite installer starts.<br />
Install DeskTopBinder Lite following the messages displayed on the<br />
screen.<br />
When the screen where you verify digital ID is displayed, click OK.<br />
Caution<br />
• When capturing images from the camera using the Auto Document link of the<br />
DeskTopBinder Lite, deselect the [Automatically save on connection] check box in the<br />
[Optional Settings] dialog box displayed by selecting [Optional Settings] on the [RICOH<br />
Gate La Settings] menu. (Refer to the Software <strong>User</strong> <strong>Guide</strong>.) Before capturing images from<br />
the camera, set the date and time using the DATE SETTINGS option of the camera.<br />
(P.134)<br />
• If you turned off and on the camera connected to the computer with the DeskTopBinder Lite<br />
in open state, reboot the computer with the camera connected.
Connecting the <strong>Camera</strong> to Your Computer<br />
Downloading Images Using RICOH Gate La<br />
After installing the software on your computer, connect your camera<br />
to the computer.<br />
The following explanation is provided assuming that [ORIGINAL]<br />
(default) is selected at [USB CONNECTION] of the camera's Setup<br />
menu (P.138). If [MASS STR] is selected, change it to [ORIGINAL].<br />
1. Make sure the camera power is off.<br />
2. Connect the USB cable to the<br />
USB port of your computer.<br />
3. Connect the USB cable to the<br />
USB terminal of your camera.<br />
Your camera turns on.<br />
4<br />
161<br />
Installing Software
162<br />
For Windows XP<br />
The first time you connect your camera to the computer using a USB<br />
cable, the [Found New Hardware Wizard] screen will appear.<br />
1. Select [Install the software<br />
automatically (Recommended)].<br />
2. Insert the Caplio Software CD-ROM into the CD-ROM drive<br />
on your computer.<br />
Installation of the WIA Driver automatically starts. If the CD-ROM is<br />
already on your computer when the [Found New Hardware Wizard]<br />
window is displayed, simply click [Next] to start installation.<br />
Reference<br />
For how to turn the camera on/off, see P.29.<br />
Note<br />
By default, the WIA driver is installed in the following location: (Specify the folder if the CD-<br />
ROM is not available.)<br />
My Computer<br />
Local Disk<br />
Program Files<br />
Caplio Software<br />
WIA Driver
3. Select [RICOH Gate La], check<br />
[Always use this program for this<br />
action] check box, and then click<br />
[OK].<br />
To load images from the camera with assistance from the Windows XP<br />
Scanner and <strong>Camera</strong> Wizard, select [Scanner and <strong>Camera</strong> Wizard].<br />
Leaving the [Always use this program for this action] check box<br />
unchecked will cause the [<strong>GR</strong> <strong>DIGITAL</strong>] screen to be displayed each time<br />
you transfer images from the camera, thereby allowing you to choose<br />
whether to use RICOH Gate La or the Scanner and <strong>Camera</strong> Wizard for<br />
image transfers.<br />
If your PC is installed with Windows XP Service Pack2 and a warning<br />
message is displayed, see P.185.<br />
Disconnecting the <strong>Camera</strong> from Your Computer:<br />
1. Turn your camera off by pressing the power button.<br />
2. Unplug the USB cable.<br />
Note<br />
• If the computer does not recognize the camera, uninstall the software (P.169) and install it<br />
again.<br />
• When downloading images from the camera, use of the AC adapter (sold separately) is<br />
recommended.<br />
Reference<br />
• For how to turn the camera on/off, see P.29.<br />
• For details about [USB CONNECTION](MASS STR/Original), see P.138.<br />
4<br />
163<br />
Installing Software
164<br />
Transferring Images in Mass Storage Mode<br />
Caution<br />
Windows 98/98 SE and Mac OS 8.6 are not compatible with Mass Storage Mode.<br />
1. Change [USB CONNECTION] to [MASS STR] on the Setup<br />
menu.<br />
For more details, see P.138. At the time of purchase, [Original] is<br />
selected.<br />
2. Make sure that the camera power is off.<br />
3. Connect the accessory USB cable to a USB port of your<br />
computer.<br />
4. Connect the USB cable to the USB<br />
terminal of your camera.<br />
Your camera turns on.<br />
Your computer automatically reads a file Example of the Windows XP<br />
necessary for recognizing the camera as a<br />
drive.<br />
After this preparation, the camera is displayed as a drive at My Computer<br />
(Windows) or Desktop (Macintosh).<br />
5. From the displayed drive,<br />
copy a file to the desired<br />
location.<br />
The figure at right shows the folder<br />
configuration in the drive.<br />
When the contents of the built-in<br />
memory are displayed, the drive<br />
name is RICOHDCI.<br />
Caution<br />
During transfer, do not disconnect the USB cable.<br />
Note<br />
When an SD memory card is inserted, its files are displayed. Otherwise, files in the built-in<br />
memory are displayed.
Disconnecting the <strong>Camera</strong> from Your Computer<br />
(Windows)<br />
The display is an example of Windows XP. The terms are different<br />
for other operating systems but the operations are the same.<br />
1. Click the Remove Hardware Safely icon at the right end of<br />
the task bar.<br />
2. Select [USB Large-capacity Storage Device] and click<br />
[Stop].<br />
3. Check that [USB Large-capacity Storage Device] is selected<br />
and click [OK].<br />
4. Click [OK].<br />
Disconnecting the <strong>Camera</strong> from Your Computer<br />
(Macintosh)<br />
1. Put the displayed drive in the Recycle Bin.<br />
4<br />
165<br />
Installing Software
166<br />
Downloading Images from an SD Memory<br />
Card<br />
It is possible to download images from an SD memory card to the<br />
computer via a PC card slot or card reader.<br />
To load an SD memory Card into a PC card slot or card reader, use<br />
the PC card adapter.<br />
Images in an SD Memory Card<br />
Images are stored in an SD Memory Card in a hierarchy shown<br />
below.<br />
Note<br />
If the card reader is SD memory card compatible (directly loadable), no PC card adapter is<br />
required.<br />
Term<br />
Image files<br />
Card Reader<br />
This is a device connected to a computer to read the contents of cards. In addition to the PC<br />
card type, there are card readers compatible with various types of cards, into which you can<br />
directly load a memory card.
Installing Acrobat Reader<br />
Acrobat Reader is required to display the operation manual (PDF<br />
file).<br />
If the computer is running under Windows, Acrobat Reader can be<br />
installed.<br />
Acrobat Reader need not be installed if already installed on your<br />
computer.<br />
Caution<br />
• Do not install the software when the camera is connected to your computer with a USB<br />
cable.<br />
• For Windows XP or Windows 2000, Administrator privileges are required to install the<br />
software.<br />
1. Start your computer, and insert the<br />
included Caplio Software CD-ROM<br />
into the CD-ROM drive.<br />
The following screen appears<br />
automatically.<br />
2. Click [Browse CD-ROM].<br />
The files on the CD-ROM are listed.<br />
3. Double-click the [Acrobat] folder.<br />
4. Double-click the [English] folder.<br />
5. Double-click [ar500enu] (ar500enu.exe).<br />
6. Install Acrobat Reader by following the messages<br />
displayed.<br />
4<br />
167<br />
Installing Software
168<br />
Installing DirectX<br />
DirectX is a program to play a movie file by the ImageMixer.<br />
This camera requires DirectX 8.1 or later to play movie files in<br />
Windows. If you have an earlier version installed, please install the<br />
updated version available on the accompanying CD-ROM.<br />
For Windows XP, installation of DirectX is not needed because the<br />
updated version is already installed.<br />
Caution<br />
• Do not install the software when the camera is connected to your computer with a USB<br />
cable.<br />
• For Windows XP or Windows 2000, Administrator privileges are required to install the<br />
software.<br />
1. Start your computer, and insert the included Caplio<br />
Software CD-ROM into the CD-ROM drive.<br />
2. Click [Browse CD-ROM].<br />
3. Double-click the [DirectX] folder.<br />
4. Double-click the [English] folder.<br />
5. Double-click the following file:<br />
Windows98/98SE/Me [DX81xxx.exe] in the [Win98Me] folder<br />
Windows2000 [DX81NTxxx.exe] in the [Win2000] folder
Uninstalling the Software<br />
Caution<br />
• For Windows 2000/XP, Administrator privileges are required to uninstall the software.<br />
• If any other program is active or unsaved data remains, save the data and terminate the<br />
program before uninstalling.<br />
• If you install both the ImageMixer and the DeskTopBinder Lite and then uninstall either one,<br />
camera connection to the computer may fail. In this case, uninstall both [Caplio Software]<br />
and [Caplio Software S] and then install only the required one.<br />
1. Click [Start] on the Windows task bar.<br />
2. Select [Settings]-[Control Panel] ([Control Panel] for XP]).<br />
3. Double-click the [Add/Remove Programs] icon (or the [Add<br />
Or Remove Programs] icon in Windows XP).<br />
4. Select [Caplio Software] (select [Caplio Software S] if you<br />
have installed the DeskTopBinder Lite), and then click the<br />
[Add/Remove] button.<br />
5. Confirm file deletion and click [OK].<br />
The [Shared File Detected] dialog box appears.<br />
6. Select the [Don't display this message again.] check box,<br />
and then click [OK].<br />
The uninstallation process begins. When it is finished, close the displayed<br />
window.<br />
4<br />
169<br />
Installing Software
170<br />
Uninstalling the ImageMixer<br />
Caution<br />
• For Windows 2000/XP, Administrator privileges are required to uninstall the software.<br />
• If any other program is active or unsaved data remains, save the data and terminate the<br />
program before uninstalling.<br />
1. Click [Start] on the Windows task bar.<br />
2. Select [Settings]-[Control Panel] ([Control Panel] for XP]).<br />
3. Double-click the [Add/Remove Programs] icon (or the [Add<br />
Or Remove Programs] icon in Windows XP).<br />
4. Select [ImageMixer] and then click [Change/Remove].<br />
5. Confirm file deletion and click [OK].<br />
6. Select the [Don't display this message again.] check box,<br />
and then click [OK].
Installing the Provided Software (For Macintosh)<br />
You need to install software for transferring images to your computer<br />
before you can download images from the camera.<br />
Reference<br />
For how to download images from the camera into your computer, see the Software <strong>User</strong><br />
<strong>Guide</strong> available from the Caplio Software CD-ROM. For how to display the Software <strong>User</strong><br />
<strong>Guide</strong>, see P.172.<br />
Caution<br />
Be sure to install the software before you connect the<br />
camera to your computer with the cable.<br />
Software that can be installed from the Caplio Software<br />
CD-ROM<br />
Software Mac Description<br />
9 X<br />
RICOH Gate La O - Downloads images.<br />
USB Driver O O Connects the camera to your computer.<br />
Mounter O O Connects the camera to your computer.<br />
9:Mac OS 8.6 to Mac OS 9.2.2 X: Mac OS X 10.1.2 to 10.4<br />
4<br />
171<br />
Installing Software
172<br />
For Mac OS 8.6 to 9.2.2, double-clicking<br />
the [Caplio Installer] icon displays the<br />
screen on the right.<br />
Item Name Description<br />
Installing the Software Use this button to install software required for handling the camera and<br />
images.<br />
Browse <strong>User</strong>’s Manual Use this button to display the Software <strong>User</strong> <strong>Guide</strong> (PDF).<br />
(Software Version)<br />
When [Install the Software] is clicked:<br />
The following software will be installed.<br />
When [Browse <strong>User</strong>’s Manual (Software Version)] is clicked:<br />
The Software <strong>User</strong> <strong>Guide</strong> (PDF file) on the Caplio Software CD-<br />
ROM can be displayed on your computer screen.<br />
If not installed, Acrobat Reader should be installed.
System Requirements for Using the<br />
Provided Software<br />
The following environments are necessary for using the provided<br />
software.<br />
Please check your computer, or the computer's user manual.<br />
Operating System Mac OS 8.6 to 9.2.2 / Mac OS X 10.1.2 to 10.4<br />
Macintosh A USB port standard-equipped Apple Macintosh Series<br />
Internal Memory Mac OS 8.6 to 9.2.2 96 MB or more (128 MB or more<br />
recommended)<br />
Mac OS X 10.1.2 to 10.4 128 MB or more (256 MB or more<br />
recommended)<br />
Application Allocated Without using the compression utility, 16MB or more (24 MB or more is<br />
Memory (For Mac OS 8.6 to<br />
9.2.2)<br />
recommended) as Application Memory<br />
Hard Disc Drive Capacity Mac OS 8.6 to 9.2.2 10 MB or more (at installation)<br />
Mac OS X 10.1.2 to 10.4<br />
100 MB or more (at operation)<br />
100 MB or more (at installation)<br />
Display resolution 640 x 480 pixels or greater (800 x 600 or greater recommended)<br />
Display colors 256 colors or greater (32000 or greater recommended)<br />
CD-ROM drive A CD-ROM drive compatible with the above-mentioned Macintosh machine<br />
USB port A USB port compatible with the above-mentioned computer body<br />
Caution<br />
• Problems may arise due to changes made to the OS environment setting.<br />
• Connection to a USB port retrofitted using an extended function (PCI bus, etc.) cannot be supported.<br />
• If used in conjunction with a hub or other USB devices, the software may not work properly.<br />
Note<br />
• When dealing with movies and other large files, a larger memory environment is<br />
recommended.<br />
• For Mac OS 8.6 to 9.2.2, use a larger memory environment, as well as allocating extra<br />
application memory.<br />
• While the software can be operated at 256 colors or more for the Display Color, it is<br />
strongly recommended that 32,000 or more be used.<br />
Reference<br />
For how to download images to your computer using an SD Memory Card, see the Software<br />
<strong>User</strong> <strong>Guide</strong>.<br />
4<br />
173<br />
Installing Software
174<br />
Installing the Software on Your Computer<br />
(Mac OS 8.6 to 9.2.2)<br />
1. Turn on your Macintosh and insert the Caplio Software CD-<br />
ROM in the CD-ROM drive.<br />
2. Select the OS 9 folder.<br />
The [Installer] icon appears.<br />
3. Double-click [Installer].<br />
The "Installer" window opens.<br />
4. Click [Install the Software].<br />
5. Click [OK].<br />
6. Click [Install].<br />
When installation finishes, a message<br />
appears to inform you that it is<br />
necessary to restart your Macintosh.<br />
7. Click [Continue].<br />
The software is installed and after a while the Installation Complete<br />
message appears.<br />
8. Click [Restart].<br />
Your Macintosh restarts.<br />
Note<br />
To remove (uninstall) the software:<br />
To remove (uninstall) the software from your Macintosh, drag and drop the installed file into the Trash.<br />
File Name Folder Name<br />
RICOH Gate La System Folder: Control Panels<br />
RICOH Gate La Prefs System Folder: Preferences<br />
Caplio Mounter System Folder: Extensions<br />
Caplio Mounter Prefs System Folder: Preferences<br />
Caplio USB Driver System Folder: Extensions<br />
Caplio Lib System Folder: Extensions
Installing the Software on Your Computer<br />
(Mac OS X 10.1.2 to 10.4)<br />
1. Turn on your Macintosh and insert the Caplio CD-ROM in<br />
the CD-ROM drive.<br />
2. Open the Mac OS X folder.<br />
The [Caplio Mounter.pkg] icon appears.<br />
3. Double-click [Caplio Mounter.pkg].<br />
The Installer starts. A screen appears<br />
prompting you to enter the<br />
administrator's password.<br />
4. Click the key icon.<br />
An authentication window appears.<br />
5. Enter the administrator's name<br />
and password, and then click [OK].<br />
6. Click [Continue].<br />
The [Select a Destination] screen<br />
appears.<br />
4<br />
175<br />
Installing Software
176<br />
7. Click the destination volume you<br />
want, and then click [Continue].<br />
8. Click [Install].<br />
When installation finishes, a message<br />
appears to inform you that it is<br />
necessary to restart your Macintosh.<br />
9. Click [Continue Installation].<br />
The software is installed, and after a<br />
while an Installation Complete message<br />
appears.<br />
10.Click [Restart].<br />
Your Macintosh restarts.<br />
Note<br />
To remove (uninstall) the software:<br />
1. Start [Caplio Mounter] in [Applications] folder.<br />
2. Select [Uninstall] in [File] menu.<br />
The uninstallation process begins.
Installing Adobe ® Photoshop ® Elements<br />
(Trial Version)<br />
The supplied Adobe ® Photoshop ® Elements (Trial Version) is digital<br />
image editing software. With this software, you can read and<br />
process the files shot in the RAW mode (P.69).<br />
To install Adobe ® Photoshop ® Elements (Trial Version), follow the<br />
steps below.<br />
Operating system supported Windows 2000 Professional, Service Pack 4 and later<br />
Windows XP Home Edition/Professional, Service Pack 1 and later<br />
Mac OS X 10.2.8<br />
Mac OS X 10.3<br />
For Windows<br />
1. Turn on the computer and insert the supplied Adobe ®<br />
Photoshop ® Elements (Trial Version) CD-ROM into the CD-<br />
ROM driver.<br />
2. Open [My Computer] and double-click the CD-ROM drive<br />
icon.<br />
3. Double-click "Setup.exe".<br />
4. Install Adobe ® Photoshop ® Elements (Trial Version)<br />
following the messages displayed on the LCD monitor.<br />
4<br />
177<br />
Installing Software
178<br />
For Macintosh<br />
1. Turn on the computer and insert the supplied Adobe ®<br />
Photoshop ® Elements (Trial Version) CD-ROM into the CD-<br />
ROM driver.<br />
2. Double-click the CD-ROM drive icon.<br />
3. Double-click "pse3_mac_ue.dmg".<br />
An Adobe ® Photoshop ® Elements (Trial Version) volume is created.<br />
4. Double-click "Adobe Photoshop Elements.pkg".<br />
5. Install Adobe ® Photoshop ® Elements (Trial Version)<br />
following the messages displayed on the LCD monitor.<br />
Reference<br />
• For how to use Adobe ® Photoshop ® Elements, see the online help for Adobe ®<br />
Photoshop ® Elements.<br />
• For detailed information about Adobe ® Photoshop ® and DNG format, access the home<br />
page (http://www.adobe.com/digitalimag/main.html) of Adobe Systems Inc.<br />
• The trial version is offered only for your evaluation. You can use all functions free of charge<br />
for 30 days starting from the date of first activation.<br />
• Note that no support is provided for the trial version user.
Chapter 5<br />
Troubleshooting<br />
Troubleshooting ............................................ 180<br />
Appendices .................................................... 187<br />
Caution<br />
Never use any battery other than the specified one.<br />
Reference<br />
For the applicable battery, see P.19.
180<br />
Troubleshooting<br />
Troubleshooting the <strong>Camera</strong><br />
Power Supply<br />
Symptom Cause Remedy<br />
The power does not come<br />
on.<br />
The power cuts out during<br />
use.<br />
The power does not go<br />
off.<br />
The low-battery mark is<br />
displayed although the<br />
batteries are new.<br />
The lens is retracted when<br />
the shutter button is<br />
pressed.<br />
The camera is turned off<br />
although the batteries are<br />
new.<br />
Batteries are not loaded. Or they are<br />
exhausted.<br />
Load the rechargeable battery correctly.<br />
Recharge the battery as required. Use<br />
the AC adapter as required.<br />
Refer<br />
to<br />
P.25<br />
P.26<br />
The battery is unacceptable. Replace the batteries with acceptable<br />
ones.<br />
P.19<br />
The AC Adapter is not connected<br />
correctly.<br />
Reconnect it properly. P.26<br />
The camera is automatically turned<br />
off by Auto Power-off.<br />
Turn on the camera again. P.29<br />
The battery is loaded in wrong<br />
orientation.<br />
Load the battery in correct orientation. P.28<br />
The camera was left unattended and<br />
unused, so Auto Power-Off shut it off.<br />
Turn on the camera again. P.29<br />
Batteries are running low. When alkaline batteries are in use, P.25<br />
replace them with new ones. When a P.26<br />
rechargeable battery is used, recharge it<br />
or use an AC adapter.<br />
P.28<br />
An unacceptable battery (manganese<br />
dry cell or other) is used.<br />
Replace the battery with an acceptable<br />
one.<br />
<strong>Camera</strong> malfunction. Remove batteries once and load them<br />
again. Reconnect the AC adapter cable<br />
properly, if using.<br />
The batteries are unacceptable. Replace the batteries with acceptable<br />
ones.<br />
Cannot recharge the<br />
batteries.<br />
Battery life. Replace the batteries with a new set. P.28<br />
Batteries run out quickly. They are being used in extreme high<br />
or low temperatures.<br />
- -<br />
Many shots are being taken in dark<br />
places inside, requiring flash.<br />
- -<br />
P.19<br />
P.26<br />
P.28<br />
P.20
Shooting<br />
Symptom Cause Remedy<br />
The camera does not<br />
shoot even if you press<br />
the shutter release button.<br />
Failed to confirm the shot<br />
image.<br />
Images do not appear on<br />
the LCD Monitor.<br />
Although it is set to Auto<br />
Focus, it does not focus.<br />
Batteries are not loaded. Or they are<br />
exhausted.<br />
The power is not turned on or the<br />
camera is not in the shooting mode.<br />
The shutter button is not pressed all<br />
the way.<br />
If using alkaline batteries, replace the<br />
batteries with a new set. If using<br />
rechargeable batteries, recharge or use<br />
the AC Adapter.<br />
Turn on the camera and turn the Mode<br />
Dial to the shooting mode.<br />
Refer<br />
to<br />
P.25<br />
P.26<br />
P.28<br />
P.29<br />
Press the shutter button all the way. P.36<br />
P.37<br />
The Memory Card is not formatted. Format the card. P.124<br />
The Memory Card does not have any<br />
free space.<br />
Load a new card, or delete unwanted<br />
files.<br />
P.25<br />
P.56<br />
End of Memory Card life. Load a new memory card. P.25<br />
The flash is recharging. Wait until the flash lamp stops blinking. P.44<br />
The SD Memory Card is "locked". Release the "Lock (write-protection)". P.22<br />
The SD Memory Card's contact<br />
surfaces are dirty.<br />
Wipe off with a soft, dry cloth. -<br />
The image confirmation time is too<br />
short.<br />
The power is not on. Or the LCD<br />
Monitor is dark.<br />
Lengthen the image confirmation time. P.131<br />
Turn the power on. Or adjust the<br />
brightness of the LCD Monitor.<br />
P.29<br />
P.126<br />
The VIDEO/AV cable is connected. Diconnect the VIDEO/AV cable. P.54<br />
The screen display status is in<br />
[SYNCHRO-MONITOR MODE].<br />
Press the DISP. button and switch<br />
display.<br />
The lens or AF Window is dirty. Wipe clean with a soft, dry cloth. P.14<br />
The subject is not in the center of the<br />
shooting range.<br />
Shoot with Focus Lock. P.40<br />
It is a hard-to-focus subject. Shoot with Focus Lock or Manual Focus. P.40<br />
P.74<br />
A picture is blurred. You moved the camera when<br />
pressing the shutter release button.<br />
When shooting in a dark place (ex.<br />
indoor), the shutter speed slows down<br />
and pictures become easily blurred.<br />
Hold the camera with your elbows tight<br />
on your body. Or use a tripod.<br />
Use the flash. Or, raise the ISO<br />
sensitivity.<br />
P.32<br />
P.34<br />
P.44<br />
P.91<br />
5<br />
181<br />
Troubleshooting
182<br />
Symptom Cause Remedy<br />
The flash does not fire. Or<br />
the flash cannot recharge.<br />
Even though the flash<br />
fired, the picture is dark.<br />
Flashing is prohibited in the following<br />
statuses:<br />
- White Balance Bracket enabled<br />
- Continuous Shooting Mode<br />
- Movie Mode<br />
For shooting with the flash, change the<br />
settings or mode.<br />
The flash is set to Flash Off. Deselect the Flash Off with the F<br />
button.<br />
Batteries are running low. If using alkaline batteries, replace the<br />
batteries with a new set. If using<br />
rechargeable batteries, recharge or use<br />
the AC Adapter.<br />
Your hand is on the popup or strobe<br />
section of the flash.<br />
The popup section of the flash is not<br />
completely open.<br />
P.81<br />
P.101<br />
P.105<br />
P.44<br />
P.19<br />
Keep your hand away. P.14<br />
Take corrective measures against the<br />
popup failure (such as adjusting the<br />
external flash).<br />
The distance to the subject is greater<br />
than 2.9 meters.<br />
Get closer to your subject and shoot. P.44<br />
The subject is dark. Correct exposure. (Exposure correction<br />
also changes the light quantity of the<br />
flash.)<br />
P.87<br />
The image is too bright. The light quantity of the flash is not<br />
appropriate.<br />
Move a little away from the subject or<br />
light up the subject for shooting without<br />
flashing.<br />
It is over-exposed. Use exposure compensation. Cancel<br />
Time Exposure.<br />
The brightness of the LCD monitor is<br />
not appropriate.<br />
The image is too dark. The shot was taken in a dark place<br />
while set to (Flash Off).<br />
The image lacks natural<br />
color.<br />
The date, or recording<br />
information does not<br />
appear.<br />
The brightness of the LCD<br />
Monitor changes during<br />
AF.<br />
There is a vertical smear<br />
on the image.<br />
Adjust the brightness of the LCD<br />
Monitor.<br />
P.45<br />
P.44<br />
P.87<br />
P.126<br />
Deselect the Flash Off with the F button. P.44<br />
It is under-exposed. Use exposure compensation. Set to<br />
Time Exposure.<br />
The brightness of the LCD monitor is<br />
not appropriate.<br />
The picture was shot in conditions<br />
that are hard for Auto White Balance<br />
to adjust to.<br />
The screen display function is set to<br />
No Display.<br />
You are using it in a dark place or<br />
when Auto Focus range and<br />
surrounding brightness are different.<br />
This is a phenomenon that occurs<br />
when a bright subject is shot. It is<br />
called the smear phenomenon.<br />
Adjust the brightness of the LCD<br />
Monitor.<br />
Add a white object to the composition.<br />
Or use a White Balance setting other<br />
than Auto.<br />
Press the DISP. button and switch<br />
display.<br />
This is normal. -<br />
This is normal. -<br />
Refer<br />
to<br />
P.87<br />
P.126<br />
P.88<br />
P.32
Playback/Deleting<br />
Symptom Cause Remedy<br />
About the Software<br />
For details about the software, refer to the Software <strong>User</strong> <strong>Guide</strong><br />
(PDF file).<br />
Refer<br />
to<br />
Cannot Playback. Or the The camera is not in Playback Mode. Press the 6 (Playback) button. P.48<br />
Playback screen does not<br />
come out.<br />
The VIDEO/AV cable is not<br />
connected properly.<br />
Reconnect it properly. P.54<br />
The video format is set wrong. Set to correct format. P.136<br />
The contents of SD No memory card is loaded. Or a Load a card with stored images. P.25<br />
Memory Card cannot be Memory Card with no stored images<br />
replayed. Or the Playback is loaded.<br />
screen does not come out.<br />
You played back a Memory Card that Load a card that was formatted and P.25<br />
was not formatted by this device. stored on by this device.<br />
P.124<br />
You played back a Memory Card that<br />
was not recorded normally.<br />
The SD Memory Card's contact<br />
surfaces are dirty.<br />
There is something wrong with the<br />
Memory Card.<br />
Load a normally recorded card. -<br />
Wipe off with a soft, dry cloth. -<br />
Play another card and if there is nothing<br />
wrong with it, the camera is OK. There<br />
may be something wrong with the card,<br />
so do not use it.<br />
An image disappeared. Batteries are running low. If using alkaline batteries, replace the<br />
batteries with a new set. If using<br />
rechargeable batteries, recharge or use<br />
the AC Adapter.<br />
The camera was left unattended and<br />
unused, so Auto Power-Off shut it off.<br />
Turn the power back on. P.29<br />
Files cannot be deleted. The file has been set to protect. Release the protection. P.112<br />
The SD Memory Card is "locked". Release the "Lock (write-protection)". P.22<br />
Cannot format a Memory<br />
Card.<br />
The SD Memory Card is "locked". Release the "Lock (write-protection)". P.22<br />
-<br />
P.19<br />
5<br />
183<br />
Troubleshooting
184<br />
Other Problems<br />
Symptom Cause Remedy<br />
Cannot load the Memory<br />
Card.<br />
Even when the camera's<br />
buttons are pressed, it<br />
does not operate.<br />
Refer<br />
to<br />
The card is facing the wrong way. Load correctly. P.25<br />
Batteries are running low. If using alkaline batteries, replace the<br />
batteries with a new set. If using<br />
rechargeable batteries, recharge or use<br />
the AC Adapter.<br />
<strong>Camera</strong> malfunction. Press the Power button to turn the power<br />
off, and then press the Power button to<br />
turn the power on again.<br />
Remove batteries once and load them<br />
again. Reconnect the AC adapter cable<br />
properly, if using.<br />
The date is wrong. The correct date/time are not set. Set the correct date/time. P.134<br />
The date set has<br />
disappeared.<br />
The batteries were removed. If the batteries are removed for about<br />
one week, the date setting will be lost.<br />
Make the settings again.<br />
Auto Power-Off does not<br />
work.<br />
Auto Power-Off is set to OFF. Set the time for Auto Power-Off. P.128<br />
The beep does not sound. The camera is set to silent. Mute is set at [Volume Setting]. P.130<br />
Images do not appear on The video format is set wrong. Set to correct format. P.136<br />
the TV.<br />
The cable is not connected. Reconnect the cable properly. P.54<br />
The TV in/out switch is incorrectly set. Check that the TV in/out switch is set<br />
correctly.<br />
P.19<br />
P.25<br />
P.26<br />
P.29<br />
P.19<br />
P.25<br />
P.26<br />
P.134<br />
-
Warning Messages Under Windows XP<br />
Service Pack 2<br />
When software for Ricoh's digital camera is used on a PC with<br />
Windows XP Service Pack 2 installed, the following warning<br />
message may appear at software activation or USB connection.<br />
With this in mind, refer to the following:<br />
1. Check the information<br />
provided on the message<br />
screen to make sure that it<br />
comes from a reputable<br />
source, and then click the<br />
[Unblock] button.<br />
Caution<br />
If you do not recognize the program, you should block it because it may be a virus. Click the<br />
[Keep Blocking] button to prevent the program from connecting to the Internet.<br />
5<br />
185<br />
Troubleshooting
186<br />
If you clicked the [Keep Blocking] button:<br />
Follow the steps below to check to see the Windows Firewall<br />
settings.<br />
1. Click [Start] and then [Control Panel].<br />
2. Double-click [Windows<br />
Firewall].<br />
If [Windows Firewall] is not displayed,<br />
click [Switch to Classic Display] at the<br />
upper left of the window.<br />
3. Click the [Exceptions] tab.<br />
4. Check that the software is in<br />
[Programs and Services].<br />
5. Click the [Add Program] button<br />
to add software that uses the<br />
network.<br />
If you clicked the [Ask Me Later] button:<br />
Each time the program is activated, the [Critical Warning about<br />
Windows Security] window appears. Then you can select [Unblock].
Appendices<br />
A. Specifications<br />
General<br />
Video Signal Format NTSC, PAL<br />
Power Source Voltage AAA Dry Alkaline Batteries (1.5 V) X 2<br />
Rechargeable Battery (3.7 V) X 1<br />
External Part (AC Adapter); 3.8 V<br />
External Dimensions 107.0 mm (W) x 58.0 mm (H) x25.0 mm (D) (excluding projecting parts)<br />
Weight <strong>Camera</strong>: Approximately 170 g (Excluding the battery, SD memory card, and strap)<br />
Tripod hole shape 1/4-20UNC<br />
Operating Temperature Range 0 °C to 40 °C<br />
Operating Humidity Range 85% or less<br />
Storage Temperature Range -20 °C to 60 °C<br />
<strong>Camera</strong> Parts<br />
Image Pickup Used Total 8.30 million pixels (effective pixels 8.13 million) 1/1.8" primary color CCD<br />
Lens<br />
• Lens F2.4<br />
• Focal Length F: 5.9 mm (35 mm equivalent, 28 mm)<br />
• Shooting distance Approximately 0.3 m to from the front of the lens<br />
• Macro shooting distance Approximately 0.015 m to from the front of the lens<br />
• Digital Zoom<br />
Monitor Display Parts<br />
4.0 times<br />
• Screen Size 2.5"<br />
• Type Cold polysilicone TFT LCD<br />
• Pixel Count Approx. 210,000<br />
• White Balance<br />
Exposure Adjustment<br />
AUTO/Fixed (Daylight, Overcast, Tungsten light, Fluorescent light, Manual<br />
Setting, Detail)<br />
• Light Metering Sensitivity Multi Light Metering (256 segments), Center-weighted Light Metering,<br />
Distribution<br />
Spot Metering<br />
• Exposure Compensation Exposure Compensation +/-2.0EV (1/3EV Steps)<br />
• Metering Method TTL-CCD Metering Method<br />
• Flash AE Yes (In Daylight Synchro: On)<br />
• Shutter Still image: 180, 120, 60, 30, 15, 8, 4, 2, 1 to 1/2000 seconds<br />
Movie: 1/30 to 1/2000 seconds<br />
187
188<br />
• ISO Sensitivity AUTO, ISO64, ISO100, ISO200, ISO400, ISO800, ISO1600<br />
• Aperture F-value 5: F2.4, F3.5, F7.1, F10, F11 (F7.1 to F11 with ND filter)<br />
P, A, M : F2.4, F2.8, F3.2, F3.5, F4.0, F4.5, F5.0, F5.6, F6.3, F7.1, F8.0, F9.0<br />
Distance Control<br />
• AF Method Normal Shooting: External Passive / CCD method; Macro: CCD method<br />
• AF Measurement Range<br />
Internal Flash<br />
Normal: approx. 0.3 m - infinity. Macro: approx. 0.015 m - infinity<br />
•Method Flashmatic<br />
• Shooting Distance Approx. 0.2 to 3.0 m (ISO:AUTO)<br />
• Operating Modes Flash Off/Forced flash/Auto/Slow synchro/Red-eye reduction<br />
• Date Maintain Time Approx. 1 week<br />
Image Data Record/Replay Part<br />
Pixels<br />
• Still Images 3264 X 2448, 3264 X 2176, 2592 X 1944, 2048 X 1536, 1280 X 960, 640 X 480<br />
• Text 3264 X 2448, 2048 X 1536<br />
• Movies<br />
File Formats<br />
320 X 240, 160 X 120<br />
• Still Images JPEG (Exif Ver.2.21), RAW (DNG)<br />
• Text TIFF (MMR Method ITU-T.6)<br />
• Movies AVI (Open DML Motion JPEG Format Compliant)<br />
• Sounds WAV (Exif Ver.2.21 µ law)<br />
<strong>Camera</strong> File System Standard DCF (DCF is an abbreviation for "Design rule for <strong>Camera</strong> File system", a JEITA standard)<br />
Compression Format<br />
Image Size<br />
JPEG Baseline Format Compliant (Still, Movie)<br />
• 3264 X 2448 N; approx. 1665 KB/Screen, F; approx. 2894 KB/ Screen, RAW; approx. 11.52 MB/ Screen<br />
• 3264 X 2176 F; approx. 2576 KB/Screen, RAW; approx. 10.25 MB/ Screen<br />
• 2592 X 1944 N; approx. 1063 KB/Screen<br />
• 2048 X 1536 N; approx. 672 KB/Screen<br />
• 1280 X 960 N; approx. 356KB/Screen<br />
• 640 X 480 N; approx. 83KB/ Screen<br />
I/O Terminals<br />
DC In 3.8 V (AC Adapter)<br />
Video Out 1.0 Vp-p (75Ω)<br />
Memory Cards that can Record, Playback<br />
Memory Type SD Memory Card, Multi-Media Card
B. Recommended Parts<br />
Recommended external flashes are as follows:<br />
Distributor Product name Model name<br />
Sigma EF-500 DG SUPER SA-STTL<br />
Sigma EF-500 DG ST SA-STTL<br />
When using a recommended flash, follow the steps below.<br />
1. Select FLASH OFF as the flash mode of the built-in flash.<br />
(P.44)<br />
2. Turn off the camera and flash.<br />
3. Attach the external flash to the hot shoe on the camera.<br />
4. Turn on the external flash.<br />
5. Turn on the camera.<br />
6. Make sure that the external flash<br />
icon is displayed on the LCD<br />
monitor.<br />
Caution<br />
If the internal flash is set to other than [Flash Off], the internal flash cover may be lifted even<br />
when an external flash is attached.<br />
Note<br />
• When the external flash icon is displayed on the LCD monitor, the built-in flash does not go<br />
on.<br />
• If the camera does not recognize the external flash, turn off the external flash and camera,<br />
detach the external flash, and attach it again.<br />
189
190<br />
C. Menu Items By Mode<br />
*Among the choices listed in the table below, default values at purchase are enclosed in [ ].<br />
Shooting Menu (Movie Mode)<br />
Setting Option Refer to<br />
MOVIE SIZE [320], 160 P.69<br />
FOCUS [MULTI AF], SPOT AF, MF, SNAP, ∞ P.74<br />
WHITE BALANCE [AUTO], (Daylight), (Overcast), (Tungsten light), P.88<br />
(Fluorescent light), (Manual Setting), (Detail)<br />
Shooting Menu (Text Mode)<br />
Setting Option Refer to<br />
DENSITY DEEP, [NORMAL], LIGHT P.93<br />
SIZE 3264, [2048] P.69<br />
IMAGE WITH SOUND ON, [OFF] P.85<br />
DATE IMPRINT [OFF], DATE, TIME P.86<br />
D. Functions Whose Defaults will be<br />
Restored upon Power-off<br />
Power-off may reset some function settings to their defaults. The table below<br />
indicates whether or not the function will be reset to its defaults upon power-off.<br />
Mode Function The current setting is kept:O, Restored:X<br />
Setup LCD BRIGHTNESS O<br />
ADJ. BTN. SET. 1<br />
ADJ. BTN. SET. 2<br />
O<br />
AUTO POWER OFF O<br />
BEEP SOUND O<br />
VOL. SETTINGS O<br />
LCD CONFIRM. O<br />
SEQUENTIAL NO. O<br />
DATE SETTING O<br />
LANGUAGE O<br />
VIDEO OUT MODE O<br />
SHTG STGS WARNG. O
Mode Function The current setting is kept:O, Restored:X<br />
USB CONNECTION O<br />
ENLGE PHOTO ICON O<br />
COLOR SPACE SET O<br />
<strong>DIGITAL</strong> ZOOM O<br />
AF AUX. LIGHT O<br />
Shooting PIC QUALITY/SIZE O<br />
MOVIE SIZE (Movie Mode) O<br />
SIZE (Text Mode) O<br />
DENSITY (Text Mode) O<br />
FOCUS O<br />
PHOTOMETRY O<br />
CONT. MODE X<br />
IMG SET O<br />
AUTO BRACKET X<br />
INTERVAL X<br />
IMAGE WITH SOUND X<br />
DATE IMPRINT O<br />
EXPOSURE COMP. O<br />
WHITE BALANCE O<br />
ISO SETTING O<br />
SELF-TIMER X<br />
FLASH O<br />
MACRO SHOOTING X<br />
LCD DISPLAY O<br />
SCENE MODE O<br />
ADJ. MODE O<br />
Playback LCD DISPLAY O<br />
VOLUME O<br />
191
192<br />
E. Number of Images That Can be Stored in<br />
Internal Memory/SD Memory Card<br />
The following table shows the approximate number of images that can be<br />
recorded onto an SD memory card at various image size and picture quality<br />
settings.<br />
Mode<br />
Picture<br />
Quality<br />
Note<br />
Image Size IN 32MB 64MB 128MB 256MB 512MB 1GB<br />
Still RAW 3264 X 2448 1 2 4 8 16 33 64<br />
Image<br />
RAW 3264 X 2176 1 2 4 9 18 37 72<br />
F 3264 X 2448 8 9 19 39 78 158 305<br />
F 3264 X 2176 9 10 21 44 88 177 341<br />
N 3264 X 2448 14 16 33 68 136 275 530<br />
N 2592 X 1944 22 25 53 107 213 430 828<br />
N 2048 X 1536 36 41 84 170 339 683 1314<br />
N 1280 X 960 63 72 148 301 600 1209 2324<br />
N 640 X 480 277 315 645 1304 2599 5237 10072<br />
TEXT 3264 X 2448 67 75 154 313 624 1257 2417<br />
MODE<br />
2048 X 1536 88 99 203 412 821 1654 3181<br />
Movie 320 X 240 39 s 44 s 1 min 3 min 6 min 12 min 23 min<br />
31 s 4 s 7 s 19 s 42 s<br />
160 X 120 2 min 2 min 5 min 11 min 22 min 46 min 88 min<br />
26 s 46 s 40 s 27 s 50 s 1 s 431 s<br />
Sound<br />
56 min 64 min 132 min 267 min 532 min 1073 min 2063 min<br />
(Voice<br />
Memo)<br />
45 s 36 s 11 s 15 s 36 s 00 s 25 s<br />
• The number of remaining shots displayed on the LCD monitor may differ from the actual<br />
number of shots, depending on the subject.<br />
• The maximum number of pictures and other numeric values may be different even for cards<br />
of the same capacity if the manufacturer, type, or shooting conditions are different.<br />
• The continuous shooting (recording) time depends on the card type, capacity, and<br />
performance.
F. Operations that can be Performed with<br />
the Up-down Dial and ADJ. Dial<br />
Tuning the up-down dial and ADJ. dial<br />
and pressing the ADJ. dial just like a<br />
pushbutton allows you to perform<br />
various camera operations.<br />
Operations that can be performed with<br />
the up-down dial and ADJ. dial are listed<br />
below.<br />
Mode/Screen Refer to Function<br />
Playback mode<br />
(Normal playback screen)<br />
Playback mode<br />
(Enlarged playback screen)<br />
Playback mode<br />
(three-frame view screen)<br />
Playback mode<br />
(thumbnail view screen)<br />
SCENE mode<br />
(SCENE selection screen)<br />
Shooting/Playback/<br />
Setup menu<br />
Up-down dial ADJ. dial<br />
P.49 Same as #$ buttons. Same as #$ buttons.<br />
P.53 Change the magnification of<br />
enlarged display screen.<br />
Switched to the previous/next<br />
image.<br />
* When the image is switched to<br />
the previous/next image on the<br />
enlarged playback screen, the<br />
previous/next image is<br />
displayed at the normal<br />
enlargement ratio (100%).<br />
P.50 Same as #$ buttons. Same as #$ buttons.<br />
P.52 Same as !" buttons. Same as #$ buttons.<br />
P.47 Same as !" buttons. -<br />
P.67<br />
P.110<br />
P.122<br />
Same as !" buttons. Same as #$ buttons.<br />
Transition to ADJ. mode P.65 - When pressed: Transits to the<br />
ADJ. mode.<br />
ADJ. mode P.65 Same as !" buttons Same as #$ buttons<br />
Aperture Priority mode P.96 Changes the aperture (F-value). -<br />
Manual exposure mode P.97 Changes the aperture (F-value). Changes the shutter speed.<br />
Program Shift mode P.99 Changes the combination of<br />
aperture (F-value) and shutter<br />
speed.<br />
-<br />
193
194<br />
G. Using Your <strong>Camera</strong> Abroad<br />
AC Adapter (Model AC-4c)<br />
Can be used in regions with a current of 120V, 50Hz/60Hz.<br />
If you are going to travel to a country that uses a different shaped wall outlet/plug, please consult your travel<br />
agent on a plug adapter suitable for wall outlets in your country of destination.<br />
Warranty<br />
This product is for domestic use. The warranty is only valid domestically.<br />
Should the product fail or malfunction while you are abroad, the manufacturer assumes no responsibility for<br />
servicing the product locally or bearing the expenditure incurred therefore.<br />
Using Playback on Television in other Regions<br />
Playback is possible on televisions (or monitors) equipped with a video input terminal. Please use the video<br />
cable provided.<br />
This camera is compatible with both NTSC and PAL television formats. Switch the video format on the camera<br />
to match the television environment in the region.<br />
When you go overseas, set your camera to the local video format.
H. Cautions on Use<br />
• This product is for domestic use. The warranty is only valid domestically.<br />
• Should the product fail or malfunction while you are abroad, the<br />
manufacturer assumes no responsibility for servicing the product locally or<br />
bearing the expenditure incurred therefore.<br />
• Be sure not to drop or apply any sudden force to the camera.<br />
• Firing the flash consecutively may heat the firing unit. Do not fire it<br />
consecutively more than necessary.<br />
• Do not fire the flash near eyes. It could cause visual impairment (particularly<br />
for infants).<br />
• Do not fire the flash near the driver of a vehicle to avoid causing accidents.<br />
• The batteries may become hot after extended use. Touching the batteries<br />
immediately after use could result in burns to your fingers.<br />
• If the LCD monitor or panel is exposed to sunlight, they may become<br />
washed out and images may become hard to view.<br />
• The LCD monitor and panel may contain some pixels that do not remain lit<br />
up continually in part or at all. Also, the brightness may become uneven<br />
because of the characteristics of LCDs. These are not failures.<br />
• While you are carrying the camera, be careful not to hit it against other<br />
objects.<br />
• In an environment where the temperature changes suddenly, condensation<br />
may occur in the camera, resulting in troubles such as fogging of the glass<br />
surface or malfunctions of the camera. If this occurs, place the camera in a<br />
bag to slow the temperature change as much as possible. Take it out of the<br />
bag after the temperature difference from the atmosphere has decreased to<br />
a fairly small amount.<br />
• To avoid damaging the connectors, do not put any objects into the camera's<br />
microphone or speaker holes.<br />
Note<br />
Conditions in which condensation may easily occur:<br />
• When the camera is moved to an environment where the temperature differs greatly.<br />
• In humid places<br />
• In a room immediately after being heated, or when the camera is exposed directly to cooled<br />
air from an air-conditioner or another similar appliance<br />
195
196<br />
I. Care and Storage<br />
Care<br />
• Please note that if fingerprints, dirt, etc. get onto the lens, picture quality will<br />
suffer.<br />
• When dust or dirt does get on the lens, do not touch it directly with your<br />
fingers, and either use a blower (available in stores) to blow it off, or a soft<br />
cloth to gently dust it off.<br />
• After use at the beach or around chemicals, wipe it off particularly carefully.<br />
• In the unlikely event that your camera fails to work properly, please consult<br />
your Ricoh Repair Center.<br />
• There are high voltage circuits in this camera. As this is dangerous, do not<br />
dismantle this camera under any circumstances.<br />
• Do not get volatile substances, such as thinner, benzene, or pesticides on<br />
your camera. This may cause a change in quality, paint to peel, etc.<br />
• As the surface of the LCD Monitor is easily scratched, do not rub hard<br />
objects against it.<br />
• Please clean the surface of the LCD Monitor with solvents available on the<br />
market specially for cleaning LCD display surfaces. Gently wipe with a soft<br />
cloth dampened with a little cleaner.<br />
Storage<br />
• Please avoid storing your camera in the following kinds of places, as<br />
breakdown may result.<br />
In high heat and humidity, or where there is severe change in temperature<br />
or humidity.<br />
Places with a lot of dust, dirt or sand.<br />
Places with severe vibration.<br />
In places of direct contact with vinyl products, rubber or chemicals, such<br />
as insect repellent, etc.<br />
Places with strong magnetic fields (monitors, next to strong magnets,<br />
etc.).<br />
• If you are using a battery or batteries, remove them if you are not going to<br />
use the camera for a long period of time.<br />
Precautions regarding care of your camera<br />
1. Be sure to turn the power off.<br />
2. Remove the batteries or AC Adapter before caring for your camera.
J. Error Messages<br />
If an error message is displayed on the LCD Monitor, take the<br />
corresponding action.<br />
Error Message Cause and Action Page<br />
INSERT CARD No card is loaded. Insert a card. P.25<br />
SET THE DATE ON THE SETUP<br />
MENU<br />
The date is not set. Set the date. P.134<br />
FILE NUMBER OVER The file number limit has been exceeded. Please use<br />
another card, or delete unwanted files.<br />
P.132<br />
UNMATCHED FILE The camera cannot display this file. Check the file contents<br />
on your computer, and then delete the file.<br />
-<br />
INSUFFICIENT MEMORY.<br />
CONTINUE?<br />
Because there is not sufficient capacity on the card, all the<br />
files cannot be copied. Use another card.<br />
PROTECTED You are trying to delete a protected file. P.112<br />
THE CARD IS WRITE-<br />
PROTECTED.<br />
The card is "Locked (write-protection)". Unlock the card. P.22<br />
PRINT SETTINGS CANNOT BE<br />
SET FOR THIS FILE<br />
This file (movies and other) cannot be selected for printing. -<br />
INSUFFICIENT MEMORY Files cannot be stored. Make sure there is enough free<br />
space, or delete files.<br />
P.22<br />
P.56,<br />
P.124,<br />
P.125<br />
The image print number limit has been exceeded. Select an<br />
image and set the number to 0.<br />
-<br />
FORMAT INTERNAL MEMORY It is necessary to format internal memory. P.125<br />
FORMAT CARD The card is not formatted.Format the card. P.124<br />
CARD ERROR Please reformat. If, after doing so, the error message still<br />
appears, the card may be faulty. Do not use the card.<br />
P.124<br />
WRITE TO CARD Writing file to memory. Wait until writing finishes. -<br />
NO FILE There are no files that can be played back. -<br />
CANNOT RECORD The Number of remaining shots is 0. Switch to another card<br />
or internal memory.<br />
-<br />
197
198<br />
K. Warranty and Servicing<br />
1. This product is backed by a limited warranty. During the warranty period mentioned in the Warranty<br />
supplied with your camera, any defective parts will be repaired free of charge. In the event of a camera<br />
malfunction, contact the dealer from which you purchased the camera or your nearest Ricoh service<br />
office. Please note that you will be not be reimbursed for the cost of bringing the camera to the Ricoh<br />
service office.<br />
2. This warranty does not cover any damage resulting from:<br />
1)failure to follow the instructions in the instruction manual;<br />
2)repair, modification or overhaul not conducted by an authorized service center listed in the instruction<br />
manual;<br />
3)fire or natural disaster;<br />
4)Improper storage, such as exposing the camera to high temperatures, humidity, or moth-balls; storing it<br />
with a leaking battery; storing the camera in a dirty condition so that it becomes moldy; or otherwise<br />
insufficiently caring for the camera;<br />
5)Submergence; exposure to floods or spilled alcohol or other beverages; allowing sand or mud to enter<br />
the camera; exposure to physical shocks; or dropping the camera.<br />
3. After the warranty period has passed, you will be liable for all repair fees, including those incurred at an<br />
authorized service center.<br />
4. You will be liable for all repair fees, even within the warranty period, if the warranty card is not attached or<br />
if the distributor's name or the purchase date have been changed or are not indicated on the card.<br />
5. Expenses for overhaul and thorough inspection by special request of the customer will be charged to the<br />
customer, whether or not they are incurred during the warranty period.<br />
6. This warranty only applies to the camera and not to the accessories, such as the case and strap, nor does<br />
it apply to the battery and other consumables provided.<br />
7. Any consequential damages arising from failure of the camera, such as expenses incurred in taking<br />
pictures or loss of expected profit, will not be reimbursed whether they occur during the warranty period or<br />
not.<br />
8. The warranty is only valid domestically.<br />
*The above provisions refer to repairs offered free of charge, and do not limit your legal rights.<br />
*The intention of the above provisions is also described in the warranty card provided with this camera.<br />
9. Parts essential to the servicing of the camera (that is, components required to maintain the functions and<br />
quality of the camera) will be available for a period of five years after the camera is discontinued.<br />
10. Please note that if the camera is seriously damaged by flooding, submergence, infiltration of sand or mud,<br />
violent shocks or dropping, it may not be repairable, and restoration to its original condition may be<br />
impossible.<br />
Note<br />
• Before sending the camera in for repair, check the battery and read the instruction manual again to ensure proper<br />
operation.<br />
• Some repairs require a significant amount of time to be completed.<br />
• When sending the camera to a service center, please include a note which describes the defective part and the<br />
problem as precisely as possible.<br />
• Remove all accessories not related to the problem before sending the camera to the service center.<br />
• Before taking any important pictures (such as at weddings, on trips abroad, etc.), test the camera to check operation<br />
and ensure proper functioning. We recommend that you keep this manual and spare battery on hand.<br />
• This warranty does not apply to data stored on an SD Memory Card or in internal memory.
INFORMATION TO THE USER<br />
USA FCC Part15 Class B<br />
The equipment has been tested and found to comply with the limits for a Class B digital<br />
device, pursuant to part 15 of the FCC Rules. These limits are designed to provide<br />
reasonable protection against harmful interference in a residential installation. This<br />
equipment generates, uses, and can radiate radio frequency energy and if not installed and<br />
used in accordance with the instructions, may cause harmful interference to radio<br />
communications. However, there is no guarantee that interference will not occur in a<br />
particular installation. If this equipment does cause harmful interference to radio or<br />
television reception, which can be determined by turning the equipment off and on, then<br />
user is encouraged to try to correct the interference by one or more of the following<br />
measures:<br />
• Reorient or relocate the receiving antenna.<br />
• Increase the separation between the equipment and receiver.<br />
• Connect the equipment to an outlet on a circuit different from that to which the receiver is<br />
connected.<br />
• Consult the dealer or an experienced radio/TV technician for help. (FCC 15.105B)<br />
Changes or modifications not expressly approved by the party responsible for compliance<br />
could void the user's authority to operate the equipment. (FCC 15.21)<br />
Properly shielded and grounded cables and connectors must be used for connection to a<br />
host computer in order to comply with FCC emission limits. (FCC 15.27)<br />
An AC adapter with a ferrite core must be used for RF interference suppression.<br />
COMPLIANCE INFORMATION STATEMENT<br />
Product Name: <strong>DIGITAL</strong> CAMERA<br />
Model Number: <strong>GR</strong> <strong>DIGITAL</strong><br />
This device complies with Part 15 of the FCC Rules.<br />
Operation is subject to the following two conditions:<br />
(1) This device may cause harmful interference, and<br />
(2) This device must accept any interference received, including interference that may<br />
cause undesired operation.<br />
RICOH CORPORATION<br />
5 Dedrick Place, West Caldwell NJ, 07006 Tel.: 1-800-225-1899<br />
Note to <strong>User</strong>s in Canada<br />
Note: This Class B digital apparatus complies with Canadian ICES-003<br />
Remarque Concernant les Utilisateurs au Canada<br />
Avertissement: Cet appareil numerique de la classe Best conforme a la norme NMB-003 du<br />
Canada<br />
IMPORTANT SAFETY INSTRUCTIONS-SAVE THESE INSTRUCTIONS<br />
DANGER-TO REDUCE THE RISK OF FIRE OR ELECTRIC SHOCK, CAREFULLY<br />
FOLLOW THESE INSTRUCTIONS.<br />
Declaration of Conformity<br />
"The Product complies with the requirements of the EMC Directive<br />
89/336/EEC."<br />
199
200<br />
Index<br />
A<br />
Acrobat Reader ......................................... 155<br />
ADJ BTN.SET. 1/2 .................................... 127<br />
ADJ. Button ................................................. 65<br />
Auto Bracket ............................................... 80<br />
AUTO POWER OFF ................................. 128<br />
Auto Power Off ............................................ 29<br />
AV Cable ............................................... 10, 54<br />
B<br />
BEEP SOUND .......................................... 129<br />
Browse CD-ROM ...................................... 155<br />
C<br />
Caplio Software CD-ROM ........... 11, 153, 171<br />
COLOR SPACE SET ................................ 143<br />
CONT (Multi-Shot) .................................... 101<br />
COPY TO CARD ....................................... 119<br />
D<br />
DATE IMPRINT ........................................... 86<br />
DENSITY .................................................... 93<br />
Direct Print .................................................. 60<br />
DirectX ...................................................... 155<br />
DPOF ........................................................ 115<br />
E<br />
Erasing ........................................................ 56<br />
Error Message .......................................... 197<br />
EXPOSURE COMP. ................................... 87<br />
F<br />
Flash ........................................................... 44<br />
FOCUS ....................................................... 74<br />
Focus-lock ................................................... 40<br />
FORMAT - CARD ..................................... 124<br />
FORMAT - INT. MEM. .............................. 125<br />
Full-press .................................................... 36<br />
G<br />
Grid <strong>Guide</strong> ................................................... 32<br />
H<br />
Half-press .................................................... 37<br />
Handstrap ................................................... 10<br />
How to Hold the <strong>Camera</strong> ............................. 34<br />
I<br />
Image Size .................................................. 69<br />
IMAGE WITH SOUND ................................ 85<br />
IMG SET ..................................................... 78<br />
INTERVAL .................................................. 83<br />
ISO SETTING ............................................. 91<br />
L<br />
LCD BRIGHTNESS .................................. 126<br />
LCD CONFIRM. ........................................ 131<br />
M<br />
Macro-Mode ................................................ 43<br />
Magnifying Images ...................................... 53<br />
MANUAL FOCUS (MF) ............................... 72<br />
Mounter ..................................................... 171<br />
M (Memory-reversal) Multi-Shot ................101<br />
N<br />
Number of Images That Can be Stored in<br />
Internal Memory/SD Memory Card ............192<br />
P<br />
Packing List .................................................10<br />
PHOTOMETRY ...........................................77<br />
PIC QUALITY/SIZE .....................................69<br />
PictBridge ....................................................60<br />
Picture Quality Mode ...................................69<br />
PROTECT .................................................112<br />
R<br />
Rechargeable Battery ..................................10<br />
REG. MY SETTING ...................................148<br />
RESIZE .....................................................118<br />
RESTORE DEFAULTS ...............................92<br />
RICOH Gate La .................................153, 171<br />
S<br />
Scene ..........................................................47<br />
SD Memory Card .........................................22<br />
Self-timer .....................................................95<br />
SEQUENTIAL NO. ....................................132<br />
Shooting Menu (Movie Mode) ...................190<br />
SLIDE SHOW ............................................111<br />
Specifications ............................................187<br />
START SETTING ......................................149<br />
Synchro-Monitor Mode ................................32<br />
S (Stream) Multi-Shot ................................101<br />
T<br />
Thumbnail Display .......................................52<br />
Trouble ......................................................180<br />
Troubleshooting .........................................180<br />
U<br />
Uninstalling ................................................169<br />
USB Cable ...................................................10<br />
USB Driver ................................153, 154, 171<br />
W<br />
Warranty and Servicing .............................198<br />
WAV file .....................................................108<br />
White Balance .............................................88<br />
White Balance Bracket ................................81<br />
WIA Driver .........................................153, 154<br />
Z<br />
Zoom ...........................................................42<br />
ZOOM BTN. SET. .....................................147
Telephone Support Numbers in Europe<br />
UK (from within the UK) 02073 656 580<br />
(from outside of the UK) +44 2073 656 580<br />
Deutschland (innerhalb Deutschlands) 06331 268 438<br />
(außerhalb Deutschlands) +49 6331 268 438<br />
France (à partir de la France) 0800 91 4897<br />
(en dehors de la France) +33 6331 268 409<br />
Italia (dall’Italia) 02 696 33 451<br />
(dall’estero) +39 02 696 33 451<br />
España (desde España) 91 406 9148<br />
(desde fuera de España) +34 91 406 9148<br />
Nederland (binnen Nederland) 0800 022 9494<br />
(vanuit het buitenland) +49 6331 268 443<br />
http://www.service.ricohpmmc.com/
From environmental friendliness to environmental<br />
conservation and to environmental management<br />
Ricoh is agressively promoting environmentfriendly<br />
activities and also environment<br />
conservation activities to solve the great subject<br />
of management as one of the citizens on our<br />
precious earth.<br />
To reduce the environmental loads of digital<br />
cameras, Ricoh is also trying to solve the great subjects of "Saving energy by reducing power<br />
consumption" and "Reducing environment-effecting chemical substances contained in products".<br />
If a problem arises<br />
First of all, see "Troubleshooting" in this manual. If the issues still persist, please contact a Ricoh office.<br />
Ricoh Offices<br />
Ricoh Company, Ltd. 3-2-3, Shin-Yokohama Kohoku-ku, Yokohama-shi 222-8530, Japan<br />
http://www.ricoh.co.jp/r_dc<br />
Ricoh Corporation 5 Dedrick Place West Caldwell, NJ 07006, USA<br />
1-800-22RICOH<br />
http://www.ricoh-usa.com<br />
RICOH EUROPE B.V. (EPMMC) Oberrather Straße 6, D-40472, Düsseldolf, Germany<br />
http://www.ricohpmmc.com<br />
RICOH UK LTD. (PMMC UK) Ricoh House, 1 Plane Tree Crescent, Feltham, Middlesex, TW13 7HG, England<br />
RICOH FRANCE S.A. (PMMC FRANCE) 383, Avenue du Général de Gaulle – BP 307-931-13 Clamart Cédex, France<br />
RICOH ESPANA, S.A. (PMMC SPAIN) Av. Litoral Mar, 12-14, 08005 Barcelona, Spain<br />
RICOH EUROPE B.V. (PMMC BENELUX) Koolhovenlaan 35, 1119 NB Schiphol-Rijk, The Netherlands<br />
Ricoh Italia S.p.A. (PMMC ITALY) via Ponchielli,3 20063 Cernusco S/N Milano Italy<br />
RICOH HONG KONG LIMITED<br />
Personal Multimedia Products Center<br />
21/F., Tai Yau Building, 181 Johnston Road, Wan Chai, Hong Kong<br />
Ricoh Australia Pty. Ltd. 8 Rodborough Road Frenchs Forrest, N.S.W.2086 Australia<br />
http://www.ricoh.com.au<br />
About ImageMixer<br />
Ricoh Company, Ltd.<br />
Minato-ku, Tokyo 107-8544, Japan<br />
2005 September<br />
EN USA GB GB AE AE<br />
Printed in China<br />
North America (Los Angeles): TEL: +1-213-341-0163<br />
Europe (U.K.): TEL: +44-1489-564-764<br />
Asia (Philippines): TEL: +63-2-438-0090<br />
China: TEL: +86-21-5450-0391<br />
Registration time: 9:00 - 17:00<br />
*L726 2971*