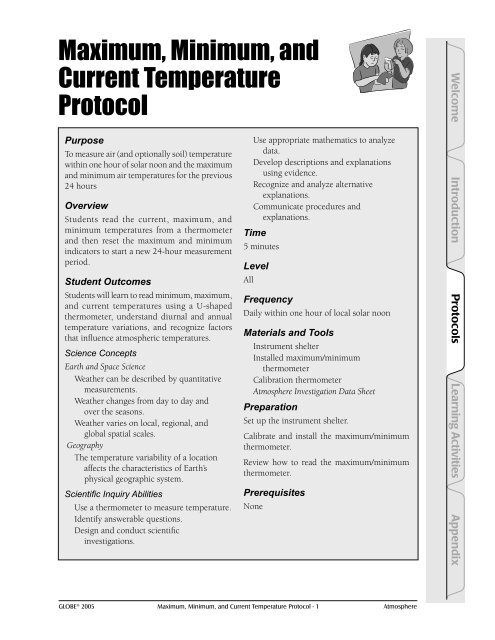
Maximum, Minimum, and Current Temperature Protocol - GLOBE
Maximum, Minimum, and Current Temperature Protocol - GLOBE
Maximum, Minimum, and Current Temperature Protocol - GLOBE

Create successful ePaper yourself
Turn your PDF publications into a flip-book with our unique Google optimized e-Paper software.
<strong>Maximum</strong>, <strong>Minimum</strong>, <strong>and</strong><br />
<strong>Current</strong> <strong>Temperature</strong><br />
<strong>Protocol</strong><br />
Purpose<br />
To measure air (<strong>and</strong> optionally soil) temperature<br />
within one hour of solar noon <strong>and</strong> the maximum<br />
<strong>and</strong> minimum air temperatures for the previous<br />
24 hours<br />
Overview<br />
Students read the current, maximum, <strong>and</strong><br />
minimum temperatures from a thermometer<br />
<strong>and</strong> then reset the maximum <strong>and</strong> minimum<br />
indicators to start a new 24-hour measurement<br />
period.<br />
Student Outcomes<br />
Students will learn to read minimum, maximum,<br />
<strong>and</strong> current temperatures using a U-shaped<br />
thermometer, underst<strong>and</strong> diurnal <strong>and</strong> annual<br />
temperature variations, <strong>and</strong> recognize factors<br />
that influence atmospheric temperatures.<br />
Science Concepts<br />
Earth <strong>and</strong> Space Science<br />
Weather can be described by quantitative<br />
measurements.<br />
Weather changes from day to day <strong>and</strong><br />
over the seasons.<br />
Weather varies on local, regional, <strong>and</strong><br />
global spatial scales.<br />
Geography<br />
The temperature variability of a location<br />
affects the characteristics of Earth’s<br />
physical geographic system.<br />
Scientific Inquiry Abilities<br />
Use a thermometer to measure temperature.<br />
Identify answerable questions.<br />
Design <strong>and</strong> conduct scientific<br />
investigations.<br />
Use appropriate mathematics to analyze<br />
data.<br />
Develop descriptions <strong>and</strong> explanations<br />
using evidence.<br />
Recognize <strong>and</strong> analyze alternative<br />
explanations.<br />
Communicate procedures <strong>and</strong><br />
explanations.<br />
Time<br />
5 minutes<br />
Level<br />
<strong>GLOBE</strong> ® 2005 <strong>Maximum</strong>, <strong>Minimum</strong>, <strong>and</strong> <strong>Current</strong> <strong>Temperature</strong> <strong>Protocol</strong> - 1 Atmosphere<br />
All<br />
Frequency<br />
Daily within one hour of local solar noon<br />
Materials <strong>and</strong> Tools<br />
Instrument shelter<br />
Installed maximum/minimum<br />
thermometer<br />
Calibration thermometer<br />
Atmosphere Investigation Data Sheet<br />
Preparation<br />
Set up the instrument shelter.<br />
Calibrate <strong>and</strong> install the maximum/minimum<br />
thermometer.<br />
Review how to read the maximum/minimum<br />
thermometer.<br />
Prerequisites<br />
None<br />
Welcome Introduction <strong>Protocol</strong>s<br />
Learning Activities Appendix
<strong>Maximum</strong>, <strong>Minimum</strong>,<br />
<strong>and</strong> <strong>Current</strong> <strong>Temperature</strong><br />
<strong>Protocol</strong> – Introduction<br />
<strong>Temperature</strong> <strong>and</strong> Weather<br />
Have you noticed that the daily weather forecasts<br />
are not always correct? This is partly because<br />
scientists are still trying to learn more about how<br />
our atmosphere works. Measurements of air<br />
temperature, <strong>and</strong> particularly how air temperature<br />
changes as storms pass by, are important to help<br />
scientists better underst<strong>and</strong> our atmosphere<br />
from day to day. This underst<strong>and</strong>ing will enable<br />
meteorologists to accurately predict the weather<br />
for the next day, or even for the next week.<br />
Measurements of air temperature are also<br />
important in underst<strong>and</strong>ing precipitation.<br />
Whether precipitation falls as rain, sleet, snow, or<br />
freezing rain depends on the air temperature. Air<br />
temperature also affects the amount of moisture<br />
that will evaporate <strong>and</strong> the relative humidity of<br />
the atmosphere. Moisture evaporated from l<strong>and</strong><br />
<strong>and</strong> water bodies into the atmosphere helps to<br />
fuel storms <strong>and</strong> greatly affects our weather.<br />
<strong>Temperature</strong> <strong>and</strong> Climate<br />
Is this an unusually warm year? Is Earth getting<br />
warmer as some scientists have predicted? Is the<br />
average temperature at your school changing<br />
because of local changes in l<strong>and</strong> cover? To answer<br />
these <strong>and</strong> other questions about Earth’s climate<br />
measurements are needed of daily maximum <strong>and</strong><br />
minimum air <strong>and</strong> soil temperatures, month by<br />
month, year after year.<br />
Generally, cities are warmer than the l<strong>and</strong> areas<br />
surrounding them. As cities grow, temperatures<br />
may get warmer due to the expansion of paved<br />
areas <strong>and</strong> concrete buildings. An underst<strong>and</strong>ing<br />
of local variations in warming <strong>and</strong> cooling helps<br />
scientists to determine if there is a global change<br />
in average surface air temperature. Data from<br />
observations in many different environments,<br />
from the country to the inner city, are needed to<br />
study these changes in Earth’s climate.<br />
Scientists studying Earth’s climate are looking<br />
for patterns of temperature change at different<br />
latitudes <strong>and</strong> longitudes. That is, are all places on<br />
Earth getting warmer or colder at the same rate?<br />
Computer models predict that if Earth’s climate<br />
is changing due to the effect of greenhouse<br />
gases on air temperature, more warming will<br />
take place in the polar regions than in the<br />
tropics (although the polar regions will remain<br />
colder than the tropics). Models also predict that<br />
average nighttime temperatures will increase<br />
more than average daytime temperature <strong>and</strong><br />
that an increase in temperatures will be more<br />
apparent in the winter than in the summer.<br />
Evaluating model predictions of Earth’s changing<br />
climate requires an enormous amount of data<br />
taken in many places on Earth over long periods<br />
of time. Measurements of daily atmosphere<br />
maximum <strong>and</strong> minimum temperature by <strong>GLOBE</strong><br />
schools all over the world can help all of us<br />
improve our underst<strong>and</strong>ing of climate.<br />
<strong>Temperature</strong> <strong>and</strong> Atmospheric<br />
Composition<br />
Many of the chemical reactions that take place<br />
between trace gases in the atmosphere are affected<br />
by temperature. In some cases such as several of<br />
the reactions involved in the formation of ozone,<br />
the rate of the reaction depends on temperature.<br />
The presence of water vapor, water droplets, <strong>and</strong><br />
ice crystals also plays a role in the chemistry of<br />
the atmosphere.<br />
To underst<strong>and</strong> weather, climate, <strong>and</strong> atmospheric<br />
composition, measurements of surface <strong>and</strong> air<br />
temperature are required. <strong>GLOBE</strong> measurements<br />
of air temperature near the ground are<br />
particularly useful because these data are hard<br />
to obtain except by reading carefully placed<br />
thermometers.<br />
<strong>GLOBE</strong> ® 2005 <strong>Maximum</strong>, <strong>Minimum</strong>, <strong>and</strong> <strong>Current</strong> <strong>Temperature</strong> <strong>Protocol</strong> - 2 Atmosphere
Teacher Support<br />
<strong>Maximum</strong>/<strong>Minimum</strong> Thermometer<br />
There are two instruments available to take<br />
daily measurements of maximum <strong>and</strong> minimum<br />
temperature. One is a liquid-filled thermometer<br />
<strong>and</strong> the second is a digital thermometer. The<br />
digital thermometer is also available with a soil<br />
probe that can be buried in the ground so that<br />
soil temperatures can also be measured. The<br />
use of these instruments is described in this<br />
protocol. There is also another type of max/min<br />
thermometer, called a digital multi-day max/min<br />
thermometer, which logs temperatures for six days,<br />
<strong>and</strong> is described in the Digital Multi-Day Max/Min/<br />
<strong>Current</strong> Air <strong>and</strong> Soil <strong>Temperature</strong>s <strong>Protocol</strong>.<br />
The liquid-filled maximum/minimum thermometer<br />
is a horseshoe-shaped tube with two indicators that<br />
show the maximum <strong>and</strong> minimum temperatures<br />
that have occurred since they were reset. See Figure<br />
AT-MM-1. On the maximum side, the temperature<br />
scale is such that temperature increases as you go<br />
from bottom to top (as with typical household<br />
thermometers). On the minimum side, however,<br />
the scale shows temperature decreasing as you go<br />
from bottom to top.<br />
Figure AT-MM-1: <strong>Maximum</strong>/<strong>Minimum</strong> Thermometer<br />
-40<br />
-30<br />
-20<br />
-10<br />
0<br />
<strong>Maximum</strong> 37˚ C<br />
<strong>Minimum</strong> 6˚ C <strong>Current</strong> 28˚ C<br />
+10<br />
+20<br />
+30<br />
+40<br />
C<br />
+50<br />
Min<br />
+50<br />
Max<br />
+40<br />
+30<br />
C<br />
+20<br />
+10<br />
0<br />
-10<br />
-20<br />
-30<br />
-40<br />
Most of the liquid in the thermometer is in the<br />
bulb which is at the top of the minimum side. As<br />
the temperature increases, the expansion of the<br />
liquid in the bulb pushes the mercury down on<br />
the minimum side <strong>and</strong> up on the maximum side.<br />
The indicator at the top of the mercury column on<br />
the maximum side of the thermometer is pushed<br />
upward. When the temperature drops, the column<br />
of mercury moves in the opposite direction, but<br />
the indicator on the maximum side remains in<br />
place indicating the highest temperature reached.<br />
As the temperature decreases, the mercury column<br />
rises on the minimum side of the thermometer<br />
until it reaches the indicator pin on the minimum<br />
side. Then, if the temperature continues to<br />
decrease, it pushes this indicator upward. When<br />
the temperature again increases, the indicator on<br />
the minimum side remains in place to indicate the<br />
lowest temperature reached.<br />
The liquid-filled maximum/minimum<br />
thermometer is different from the type of<br />
thermometer familiar to most students. Thus,<br />
most students will benefit from practice in<br />
reading this type of thermometer prior to<br />
taking data in the field. This practice can be<br />
accomplished in several ways. You can hang<br />
the maximum/minimum thermometer in<br />
the classroom for a period of time <strong>and</strong> ask<br />
students to read it each day as they come in.<br />
Alternatively, you can copy the drawing of the<br />
maximum/minimum thermometer given in the<br />
Appendix, draw in a mercury column <strong>and</strong> the two<br />
indicators (which should be of a length equal to<br />
about 8˚ C) <strong>and</strong> ask the students to read the<br />
current, maximum, <strong>and</strong> minimum temperatures<br />
indicated on each drawing. Along these same<br />
lines, you could ask the students to make their<br />
own drawings showing specified current,<br />
maximum, <strong>and</strong> minimum temperatures.<br />
The digital thermometer records <strong>and</strong> displays<br />
temperatures in 0.1˚ C increments. The sensor<br />
for reading air temperature is located inside the<br />
housing of the instrument. The thermometer is<br />
also available with an optional second sensor<br />
attached to a three meter long cord. This<br />
second sensor can be buried in the ground to<br />
measure soil temperature. If you are going to<br />
be taking both air <strong>and</strong> soil measurements it is<br />
<strong>GLOBE</strong> ® 2005 <strong>Maximum</strong>, <strong>Minimum</strong>, <strong>and</strong> <strong>Current</strong> <strong>Temperature</strong> <strong>Protocol</strong> - 3 Atmosphere<br />
Welcome Introduction <strong>Protocol</strong>s<br />
Learning Activities Appendix
important that you correctly label the sections<br />
of the display screen that apply to each sensor.<br />
This can be done by sticking two pieces of tape,<br />
labeled ‘AIR’ <strong>and</strong> SOIL’, on the plastic casing of<br />
the thermometer to the right side of the display<br />
screen.<br />
Instrument Maintenance<br />
The instrument shelter should be kept clean both<br />
inside <strong>and</strong> outside. Dust, debris, <strong>and</strong> spider webs<br />
should be removed from the inside of the shelter<br />
with a clean, dry cloth. The outside of the shelter<br />
may be lightly washed with water to remove debris,<br />
but try to avoid getting too much water inside the<br />
shelter. If the outside of the shelter becomes very<br />
dirty, it should be repainted white.<br />
Thermometer Calibration<br />
If you are using the liquid-filled maximum/<br />
minimum thermometer, then approximately every<br />
three months you should check the calibration of<br />
your maximum/minimum thermometer against<br />
your calibration thermometer. If they disagree,<br />
recalibrate the thermometer. Roughly once a<br />
week, check that both sides of the maximum/<br />
minimum thermometer read the same. If they<br />
don’t, recalibrate the thermometer.<br />
If you are using a digital thermometer it is<br />
important that you calibrate it using a calibration<br />
thermometer. This calibration is done by<br />
comparing readings from the two thermometers<br />
<strong>and</strong> calculating the offsets that account for the<br />
difference between the digital thermometer<br />
readings <strong>and</strong> the true temperature. When the<br />
instrument is first set up both the air <strong>and</strong> soil<br />
sensors are calibrated following the Digital Single-<br />
Day Max/Min Thermometer Sensor Calibration Field<br />
Guide. Then every six months a check is made to<br />
see if the soil sensor is operating acceptably by<br />
comparing the temperatures that it is reporting<br />
to temperatures measured with a soil probe<br />
thermometer following the Digital Single-Day<br />
Max/Min Thermometer Soil Sensor Error Check Field<br />
Guide. If the difference between the digital soil<br />
sensor readings <strong>and</strong> the soil probe thermometer<br />
readings is greater than 2˚ C in magnitude than<br />
the digital soil sensor is dug out <strong>and</strong> both the air<br />
<strong>and</strong> soil sensors are recalibrated. If the difference<br />
is 2˚ C or more, the soil probe can be left buried<br />
<strong>and</strong> just the air sensor recalibrated.<br />
Helpful Hints<br />
Remind students that the mercury pushes the<br />
bottom of the indicators until the maximum or<br />
minimum temperatures are reached. Therefore,<br />
students should remember to read the maximum<br />
<strong>and</strong> minimum temperatures from the bottom<br />
(the end closest to the mercury column) of the<br />
indicators. To help students remember to read the<br />
bottom of the indicators, remind them that they<br />
are reading the highest point the mercury reached<br />
since the pins were reset.<br />
If your thermometer has a Fahrenheit scale,<br />
paint over it so that students will not read it<br />
by mistake. One of the most common errors in<br />
the temperature data in the <strong>GLOBE</strong> data base is<br />
the reporting of temperature read in degrees<br />
Fahrenheit as if it were a reading in degrees<br />
Celsius. Before using the maximum/minimum<br />
thermometer, make sure that the column of<br />
mercury is continuous. Jarring during shipping<br />
can sometimes cause the mercury to separate<br />
into segments. If there are gaps in the mercury<br />
column, follow the instructions given in the<br />
Frequently Asked Questions section.<br />
Questions for Further Investigation<br />
When does temperature change the most from<br />
day to day?<br />
What are the latitudes <strong>and</strong> elevations of other<br />
<strong>GLOBE</strong> schools with atmosphere temperature<br />
data similar to yours?<br />
How does vegetation in your area respond to<br />
changing temperature?<br />
Is your local environment affected more by average<br />
temperature or temperature extremes?<br />
<strong>GLOBE</strong> ® 2005 <strong>Maximum</strong>, <strong>Minimum</strong>, <strong>and</strong> <strong>Current</strong> <strong>Temperature</strong> <strong>Protocol</strong> - 4 Atmosphere
Thermometer Calibration<br />
Lab Guide<br />
Task<br />
Check the calibration of the calibration thermometer.<br />
What You Need<br />
❑ Calibration thermometer ❑ Crushed ice<br />
❑ Clean container at least 250 mL in size ❑ Water (distilled is ideal, but the key is that the<br />
water is not salty)<br />
In the Lab<br />
1. Prepare a mixture of fresh water <strong>and</strong> crushed ice with more ice than water in your container.<br />
2. Put the calibration thermometer into the ice-water bath. The bulb of the thermometer must<br />
be in the water.<br />
3. Allow the ice-water bath <strong>and</strong> thermometer to sit for 10 to 15 minutes.<br />
4. Gently move the thermometer around in the ice-water bath so that it will be thoroughly<br />
cooled.<br />
5. Read the thermometer. If it reads between -0.5˚ C <strong>and</strong> +0.5˚ C, the thermometer is fine.<br />
6. If the thermometer reads greater than +0.5˚ C, check to make sure that there is more ice than<br />
water in your ice-water bath.<br />
7. If the thermometer reads less than -0.5˚ C, check to make sure that there is no salt in<br />
your ice-water bath.<br />
8. If the thermometer still does not read between -0.5˚ C <strong>and</strong> +0.5˚ C,<br />
replace the thermometer. If you have used this thermometer for<br />
measurements report this to <strong>GLOBE</strong>.<br />
Ice Cubes<br />
<strong>GLOBE</strong> ® 2005 <strong>Maximum</strong>, <strong>Minimum</strong>, <strong>and</strong> <strong>Current</strong> <strong>Temperature</strong> <strong>Protocol</strong> - 5 Atmosphere<br />
0˚ + – 0.5
<strong>Maximum</strong>/<strong>Minimum</strong><br />
Thermometer Calibration<br />
Field Guide<br />
Task<br />
Check the calibration of the maximum/minimum thermometer.<br />
Adjust the maximum/minimum thermometer if necessary.<br />
What You Need<br />
❑ Calibration thermometer that has ❑ Atmosphere Investigation Data Sheet<br />
been checked following the instructions in<br />
the Thermometer Calibration Lab Guide<br />
In the Field<br />
Day 1<br />
Hang the calibration thermometer in the instrument shelter so that the bulb of the thermometer is not<br />
touching any surface.<br />
Day 2<br />
1. After reading the current, maximum, <strong>and</strong> minimum temperatures on the maximum/minimum<br />
thermometer, read the temperature on the calibration thermometer to the nearest 0.5˚ C.<br />
2. Compare this reading with the current temperature from both the maximum <strong>and</strong> the<br />
minimum sides of the maximum/minimum thermometer.<br />
3. If these readings are within +/- 0.5˚ C of the reading on the calibration thermometer, note<br />
in your metadata that the calibration of the maximum/minimum thermometer is good <strong>and</strong><br />
complete the <strong>Maximum</strong>, <strong>Minimum</strong>, <strong>and</strong> <strong>Current</strong> <strong>Temperature</strong> <strong>Protocol</strong>.<br />
4. If the current temperature reading from either side of the maximum/minimum<br />
thermometer is not within +/- 0.5˚ C of the reading on the calibration thermometer,<br />
proceed with the following steps:<br />
5. Record the current temperatures from both the maximum <strong>and</strong> minimum sides of the<br />
maximum/minimum thermometer <strong>and</strong> the temperature reading of the calibration<br />
thermometer as comments for today on the Atmosphere Investigation Data Sheet.<br />
(Report all three temperatures.)<br />
6. Leave the calibration thermometer hanging in the instrument shelter.<br />
7. Remove the maximum/minimum thermometer from the instrument shelter. Do not touch<br />
the bulb of this thermometer. Keep the thermometer out of direct sunlight.<br />
8. Loosen the screw so that the scales on the thermometer can move.<br />
9. Slide the scales so that the current temperature reading agrees with the calibration<br />
thermometer reading.<br />
10. Tighten the screw so that the scales are locked in place once more.<br />
11. Remount the maximum/minimum thermometer in the instrument shelter <strong>and</strong> reset the<br />
indicators to the top of the mercury on both sides.<br />
12. Record <strong>and</strong> report only the current temperature for today using the value from the<br />
calibration thermometer.<br />
13. Record in your metadata for today that the thermometer required recalibration.<br />
<strong>GLOBE</strong> ® 2005 <strong>Maximum</strong>, <strong>Minimum</strong>, <strong>and</strong> <strong>Current</strong> <strong>Temperature</strong> <strong>Protocol</strong> - 6 Atmosphere
<strong>Maximum</strong>, <strong>Minimum</strong>, <strong>and</strong><br />
<strong>Current</strong> <strong>Temperature</strong> <strong>Protocol</strong><br />
Field Guide<br />
Task<br />
Measure the current, maximum, <strong>and</strong> minimum air temperatures.<br />
Reset the maximum <strong>and</strong> minimum indicators to start the next 24-hour measurement.<br />
What You Need<br />
❑ A properly sited instrument shelter ❑ Atmosphere Investigation Data Sheet<br />
❑ A properly calibrated <strong>and</strong> installed ❑ Pen or pencil<br />
maximum/minimum thermometer<br />
In the Field<br />
1. Record the time <strong>and</strong> date on the Atmosphere Investigation Data Sheet.<br />
2. Open the instrument shelter being careful not to touch or breathe on the thermometer.<br />
3. Position yourself so that your eye is level with the mercury in the thermometer.<br />
4. Read the level of the mercury on the maximum side of the thermometer to the nearest 0.5˚<br />
C.<br />
5. Record this reading as the current temperature.<br />
6. Read the bottom of the indicator on the maximum side of the thermometer to the nearest<br />
0.5˚ C.<br />
7. Record this reading as the maximum temperature.<br />
8. Read the bottom of the indicator on the minimum side of the thermometer to the nearest<br />
0.5˚ C. Remember that the temperature scale is upside down.<br />
9. Record this reading as the minimum temperature.<br />
10. Use the magnet to gently move the maximum <strong>and</strong> minimum indicators down until they just<br />
touch the mercury.<br />
11. Close the instrument shelter.<br />
<strong>GLOBE</strong> ® 2005 <strong>Maximum</strong>, <strong>Minimum</strong>, <strong>and</strong> <strong>Current</strong> <strong>Temperature</strong> <strong>Protocol</strong> - 7 Atmosphere
Digital Single-Day Max/Min<br />
Thermometer Sensor Calibration<br />
Field Guide<br />
Task<br />
Calculate the air <strong>and</strong> soils sensor correction offset used to adjust for instrument accuracy errors.<br />
What You Need<br />
❑ Calibration thermometer that has been ❑ Digital Max/Min Thermometer<br />
checked following the instructions in the Calibration Data Sheet<br />
Thermometer Calibration Lab Guide<br />
Note: If you plan on performing only air temperature measurements, or are only recalibrating the<br />
air sensor, skip the portions of this field guide that pertain to the soil sensor.<br />
In the Field<br />
1. Open the door to the instrument shelter <strong>and</strong> hang the calibration thermometer, the digital<br />
thermometer, <strong>and</strong> the soil sensor in the instrument shelter so that they have air flow all around<br />
them <strong>and</strong> do not contact the sides of the shelter.<br />
2. Close the door to the instrument shelter.<br />
3. Wait at least an hour <strong>and</strong> then open the door to the instrument shelter. Make sure that<br />
your digital thermometer is displaying the current temperature(s) (Neither ‘MAX’ or ‘MIN’<br />
symbols should be displayed on the screen. If they are, press the MAX/MIN button until they<br />
disappear).<br />
4. Read the temperatures reported by the air sensor <strong>and</strong> the soil sensor of the digital<br />
thermometer <strong>and</strong> record them on your Digital Max/Min Thermometer Calibration <strong>and</strong> Reset<br />
Data Sheet.<br />
5. Close the door of the instrument shelter.<br />
6. Repeat steps 2 to 5 four more times, waiting at least one hour between each set of readings.<br />
Try to space out the five sets of readings over as much of a day as possible.<br />
7. Report your calibration data to the <strong>GLOBE</strong> Web site.<br />
<strong>GLOBE</strong> ® 2005 <strong>Maximum</strong>, <strong>Minimum</strong>, <strong>and</strong> <strong>Current</strong> <strong>Temperature</strong> <strong>Protocol</strong> - 8 Atmosphere
Digital Max/Min Thermometer<br />
Installation<br />
Field Guide<br />
Task<br />
Install the digital thermometer at your Atmosphere Study Site.<br />
What You Need<br />
❑ <strong>GLOBE</strong> instrument shelter<br />
(specifications are given in the <strong>GLOBE</strong><br />
Instrument List in the Toolkit section)<br />
❑ Drill with 12 mm spade bit (if doing soil measurements)<br />
❑ String or wire ties<br />
❑ 120 cm X 2.5 cm PVC pipe (optional)<br />
❑ Digging tools (if doing soil measurements)<br />
In the Field<br />
1. Mount the digital thermometer housing to the rear wall of your instrument shelter. The<br />
housing should be placed so that the digital display may be easily read.<br />
2. If you are not going to be taking soil temperature measurements, store the soil sensor (if<br />
your thermometer has one) <strong>and</strong> it’s cable neatly in a corner of the shelter where it will be<br />
out of the way <strong>and</strong> skip the following steps. Otherwise, proceed to step 3.<br />
3. If necessary, drill a 12 mm hole, using a drill with a spade bit, in the bottom of the instrument<br />
shelter, near the back. Feed the soil sensor probe through the hole, leaving as much cable<br />
as possible inside the shelter. You may wish to feed the sensor <strong>and</strong> wire through a thin PVC<br />
pipe that will serve to protect the wire.<br />
4. Choose a site to place the soil temperature probe nearby on the equatorward side (sunnyside)<br />
of the mounting post for the instrument shelter. Data collected from soil in unshaded<br />
locations are preferred. Comments in your site definition should include the amount of<br />
shade that the soil surface above the probe will experience during a year.<br />
5. Dig a hole to a depth of a little over 10 cm in depth at the chosen location.<br />
6. Push the probe horizontally into the side of the hole at a depth of 10 cm. Use a nail or steel<br />
pin, with a slightly smaller diameter than the probe, to pilot an opening for the probe if<br />
needed.<br />
7. Refill the hole with the soil that you removed.<br />
PVC<br />
Tube<br />
Soil Probe<br />
(optional)<br />
Digital<br />
Max/Min<br />
Thermometer<br />
10 cm<br />
8. Neatly secure all extra cable for the soil sensor using string or wire ties. Keep as much of the<br />
excess cable as possible within the shelter.<br />
<strong>GLOBE</strong> ® 2005 <strong>Maximum</strong>, <strong>Minimum</strong>, <strong>and</strong> <strong>Current</strong> <strong>Temperature</strong> <strong>Protocol</strong> - 9 Atmosphere
Digital Single-Day <strong>Maximum</strong> <strong>and</strong><br />
<strong>Minimum</strong> <strong>Temperature</strong> <strong>Protocol</strong><br />
Field Guide<br />
Task<br />
Measure the current, maximum, <strong>and</strong> minimum air temperatures from the digital single-day<br />
thermometer.<br />
Measure the current, maximum, <strong>and</strong> minimum soil temperatures from the digital single-day<br />
thermometer (optional).<br />
Reset the digital thermometer to start the next 24-hour measurement.<br />
What You Need<br />
❑ A properly sited instrument shelter ❑ An appropriate Data Sheet<br />
❑ A properly calibrated <strong>and</strong> installed ❑ Pen or pencil<br />
digital single-day max/min thermometer<br />
❑ An accurate watch or other<br />
device that tells time<br />
Note: Make sure that the digital thermometer is reading in Celsius units. If it is not, press the ˚C/˚F<br />
button to switch to Celsius units.<br />
In the Field<br />
1. Within an hour of local solar noon, open the instrument shelter being careful not to breathe on<br />
the thermometer.<br />
2. Record the time <strong>and</strong> date on your Data Sheet in both local <strong>and</strong> UT time. Note: <strong>GLOBE</strong> Web<br />
site entry should be UT time.<br />
3. Make sure that your thermometer is displaying the current temperature(s) (Neither ‘MAX’<br />
or ‘MIN’ symbols should be displayed on the screen. If they are, press the MAX/MIN button<br />
until they disappear).<br />
4. Record the current air temperature on your Data Sheet. If you are taking soil readings, also<br />
record the soil temperature.<br />
5. Press the MAX/MIN button once.<br />
6. <strong>Maximum</strong> temperature reading(s) will now be displayed along with the ‘MAX’ symbol on the<br />
display screen.<br />
7. Record the maximum air temperature on your Data Sheet. If you are taking soil readings,<br />
also record the maximum soil temperature.<br />
8. Press the MAX/MIN button a second time.<br />
9. <strong>Minimum</strong> temperature reading(s) will now be displayed along with the ‘MIN’ symbol on the<br />
display screen.<br />
10. Record the minimum air temperature on your data sheet. If you are taking soil readings, also<br />
record the minimum soil temperature.<br />
11. Press <strong>and</strong> hold the MAX/MIN button for one second. This will reset your thermometer.<br />
12. Close the instrument shelter.<br />
<strong>GLOBE</strong> ® 2005 <strong>Maximum</strong>, <strong>Minimum</strong>, <strong>and</strong> <strong>Current</strong> <strong>Temperature</strong> <strong>Protocol</strong> - 10 Atmosphere
Digital Single-Day Max/Min<br />
Thermometer Soil Sensor Error<br />
Check<br />
Field Guide<br />
Task<br />
Check the accuracy of the soil sensor to see whether or not it needs to be dug out <strong>and</strong> recalibrated.<br />
What You Need<br />
❑ Soil probe thermometer from ❑ Digital Max/Min Thermometer<br />
Soil <strong>Temperature</strong> <strong>Protocol</strong>. Calibration Data Sheet<br />
In the Field<br />
1. Calibrate a soil probe thermometer following the Calibrating the Soil Thermometer Lab Guide of<br />
the Soil <strong>Temperature</strong> <strong>Protocol</strong>.<br />
2. Open the door to the instrument shelter.<br />
3. Select a place about 15 cm from the location of the soil temperature probe.<br />
4. Measure the soil temperature at a depth of 10 cm at this spot following the Soil <strong>Temperature</strong><br />
<strong>Protocol</strong>.<br />
5. Record this temperature in the ‘Soil Sensor Error Check’ section of your Digital Max/Min<br />
Thermometer Calibration <strong>and</strong> Reset Data Sheet.<br />
6. Make sure that your digital thermometer is displaying the current temperature(s) (Neither<br />
‘MAX’ or ‘MIN’ symbols should be displayed on the screen. If they are, press the MAX/MIN<br />
button until they disappear).<br />
7. Read the temperature reported by the soil sensor of the digital thermometer <strong>and</strong> record it<br />
on your Data Sheet.<br />
8. Close the door of the instrument shelter.<br />
9. Repeat steps 2 to 8 four more times, waiting one hour between measurements.<br />
10. Calculate the average of the soil thermometer readings.<br />
11. Calculate the average of the digital soil sensor readings.<br />
12. Calculate the soil sensor error by subtracting the average of the five digital soil sensor<br />
readings (from step 10) from the average of the five soil sensor readings (from step 11)<br />
13. If the absolute value of the soil sensor error is greater than or equal to two 2˚ C, then dig-out<br />
this sensor <strong>and</strong> recalibrate both the air <strong>and</strong> soil sensors following the Digital Single-Day Max/<br />
Min Thermometer Sensor Calibration. Otherwise leave the digital soil sensor in the ground <strong>and</strong><br />
recalibrate only the air sensor.<br />
<strong>GLOBE</strong> ® 2005 <strong>Maximum</strong>, <strong>Minimum</strong>, <strong>and</strong> <strong>Current</strong> <strong>Temperature</strong> <strong>Protocol</strong> - 11 Atmosphere
Frequently Asked Questions<br />
1. If we missed reading the maximum/<br />
minimum thermometer for a day or more<br />
(over the weekend, holiday, vacation, etc.),<br />
can we still report the temperature for today?<br />
You can <strong>and</strong> should report the current<br />
temperature. You may not report the maximum<br />
<strong>and</strong> minimum temperatures as they are the<br />
maximum <strong>and</strong> minimum temperatures for more<br />
than one day. Reset the indicators <strong>and</strong> tomorrow<br />
you can report the maximum, minimum, <strong>and</strong><br />
current temperatures.<br />
2. What should we do if our maximum/<br />
minimum thermometer does not agree with<br />
the calibration thermometer <strong>and</strong> we can not<br />
adjust the scales so that they agree?<br />
This is rare, but there are some maximum/<br />
minimum thermometers that cannot be<br />
calibrated successfully. In this case, contact<br />
the supplier or manufacturer, explain that the<br />
calibration of the thermometer is off, <strong>and</strong> request<br />
a new thermometer.<br />
3. What do we do if there are air bubbles in our<br />
thermometer?<br />
For your thermometer to function properly,<br />
there must be no air bubble in the column of<br />
liquid in the thermometer <strong>and</strong> in the maximum/<br />
minimum thermometer there should be no<br />
gaps in the column of mercury. There are many<br />
techniques for reconnecting the columns of<br />
liquid in thermometers. One technique is to<br />
tap the upright thermometer casing against<br />
your h<strong>and</strong>. Do not press against the stem of<br />
the thermometer as this could cause breakage.<br />
Gently shaking or tapping the thermometer<br />
casing is much more effective in removing the<br />
gaps in the mercury than trying to heat or cool<br />
the thermometer.<br />
Another technique is to attach a string securely<br />
to the top of the thermometer. St<strong>and</strong> in a clear,<br />
open space, <strong>and</strong> swing the thermometer in a<br />
circle so that the centrifugal force pushes the<br />
liquid together. In the case of the maximum/<br />
minimum thermometer which has mercury in<br />
it, this procedure should be done by the teacher<br />
<strong>and</strong> not the students.<br />
If repeated tries do not succeed in<br />
reconnecting the column of liquid,<br />
obtain a replacement thermometer from the<br />
manufacturer or supplier.<br />
4. Can we take maximum <strong>and</strong> minimum<br />
temperature readings without using a<br />
thermometer containing mercury?<br />
The way the horseshoe-shaped maximum/<br />
minimum thermometer works is only possible<br />
using two different liquids, one of which must<br />
be mercury. To take these data without using<br />
a thermometer with mercury you must use an<br />
electronic temperature sensor that remembers<br />
the maximum <strong>and</strong> minimum temperatures<br />
or that stores its readings using a data logger.<br />
See the Optional <strong>Protocol</strong>s given in the on-line<br />
version of this Teacher’s Guide.<br />
5. The maximum temperature reading on our<br />
thermometer today is less than the current<br />
temperature reading yesterday. Is this wrong?<br />
Yes, this is a problem if the difference is more<br />
than 0.5˚ C. Sometimes the maximum indicator<br />
slips. Report your readings anyway so that<br />
<strong>GLOBE</strong> can track these errors. If this problem<br />
occurs often (more than one day in 20 or 5%<br />
of the time), check to see that your instrument<br />
shelter is mounted firmly <strong>and</strong> securely <strong>and</strong> that<br />
there are no routine sources of vibration shaking<br />
the shelter. If your shelter is securely mounted<br />
<strong>and</strong> there are no sources of vibration, contact the<br />
supplier <strong>and</strong> replace your maximum/minimum<br />
thermometer <strong>and</strong> also inform <strong>GLOBE</strong> of your<br />
problem.<br />
If the difference is just 0.5˚ C, this is not a<br />
problem, but be sure that you are always reading<br />
the thermometer with your eyes level with the<br />
mercury. Differences between two observers of<br />
0.5˚ C are acceptable.<br />
6. The minimum temperature reading on our<br />
thermometer today is greater than the current<br />
temperature reading yesterday. Is this wrong?<br />
See the answer to question 5.<br />
<strong>GLOBE</strong> ® 2005 <strong>Maximum</strong>, <strong>Minimum</strong>, <strong>and</strong> <strong>Current</strong> <strong>Temperature</strong> <strong>Protocol</strong> - 12 Atmosphere
<strong>Maximum</strong>, <strong>Minimum</strong>, <strong>and</strong><br />
<strong>Current</strong> Air <strong>Temperature</strong> –<br />
Looking At the Data<br />
Are the data reasonable?<br />
Air temperature varies throughout a 24-hour period.<br />
In some places there may be large daily changes in<br />
temperature, while in others this variation may<br />
be quite small. Figure AT-MM-2 shows a graph<br />
of air temperature over the course of a day with<br />
measurements taken every 15 minutes. You can<br />
see on this graph the current(Tcurrent) , maximum<br />
(Tmax), <strong>and</strong> minimum (Tmin) temperatures for<br />
this day. You will use your horse-shoe-shaped<br />
Figure AT-MM-2: <strong>Temperature</strong> Variation Over a 24-hour Period<br />
T (degrees C)<br />
25<br />
22.5<br />
20<br />
17.5<br />
15<br />
12.5<br />
10<br />
Tcurrent<br />
Tmax<br />
Tmin<br />
Noon1 2 3 4 5 6 7 8 9 101112 1 2 3 4<br />
am<br />
thermometer to record the maximum <strong>and</strong><br />
minimum temperatures so that you only need<br />
to read the thermometer once each day, within<br />
one hour of local solar noon.<br />
By definition T max must be the highest<br />
temperature for this time period <strong>and</strong> T min<br />
must be the lowest.<br />
Therefore,<br />
Local Time<br />
T max > T current <strong>and</strong> T min < T current<br />
for T current at both the beginning <strong>and</strong> the end<br />
of the 24-hour period. If these inequalities are<br />
not true, then something is wrong with the<br />
T max or the T min for this day.<br />
5 6 7 8 9 1011Noon<br />
Tcurrent<br />
<strong>GLOBE</strong> ® 2005 <strong>Maximum</strong>, <strong>Minimum</strong>, <strong>and</strong> <strong>Current</strong> <strong>Temperature</strong> <strong>Protocol</strong> - 13 Atmosphere<br />
Welcome Introduction <strong>Protocol</strong>s<br />
Learning Activities Appendix
Looking at a graph of these data, such as Figure<br />
AT-MM-3, makes it easy to check them visually.<br />
Another check on the reasonableness of data<br />
from a single day is to compare them with data<br />
from near-by <strong>GLOBE</strong> schools or other sources of<br />
temperature data. Figure AT-MM-4 shows the<br />
data from a single day for 12 schools that are<br />
reasonably close to one another. Table AT-MM-<br />
1 gives the air temperature data for the schools<br />
shown in this figure. All the schools shown are<br />
in reasonable agreement.<br />
What do people look for in these<br />
data?<br />
In climate studies, scientists are interested in the<br />
average temperature over various time periods<br />
<strong>and</strong> in the extreme values. On most days, air<br />
temperature varies with the diurnal (daily) cycle<br />
of sunlight, <strong>and</strong> this variation is often larger than<br />
the change from day to day.<br />
In many places, air temperature varies significantly<br />
as weather systems move across the region in a<br />
succession of cold fronts <strong>and</strong> warm fronts. The<br />
exact timing of these weather systems varies<br />
from year to year so comparing temperatures<br />
from the same day in different years is not a good<br />
indication of climate variation. To really be able to<br />
compare year-to-year changes, you must average<br />
over multiple weather systems. A month is long<br />
enough to average out the effects of individual<br />
storms, but not so long that seasonal variations<br />
are averaged out.<br />
The average temperature for a day can be<br />
estimated by averaging the maximum <strong>and</strong><br />
minimum temperatures for that day. Research<br />
has shown that this estimate is generally within<br />
0.1˚ C of the actual average value. For the school<br />
we are considering on April 15, 1998:<br />
T max = 10.0˚ C<br />
T min = 2.0˚ C<br />
Table AT-MM-1: Data for the Schools Shown in Figure AT-MM-4 for April 15, 1998<br />
Tmax + Tmin Taverage = =<br />
10.0˚ C + 2.0˚ C<br />
= 6.0˚ C<br />
2<br />
2<br />
MxTmp MnTmp CrTmp Hour Lat Lon Elev Location of School<br />
14.0 0.0 12.0 11 50.0477 14.4393 272 Praha 4, CZ<br />
13.0 -1.0 12.0 12 49.7667 16.9167 273 Mohelnice, CZ<br />
12.0 -1.0 8.0 10 50.1328 14.4035 322 Praha 8, CZ<br />
12.0 3.0 12.0 11 50.0630 14.4340 272 Praha 4, CZ<br />
11.2 0.9 11.0 9 50.4387 15.3523 868 Jicin,CZ<br />
11.0 -4.0 10.0 11 48.9737 14.5027 395 Ceske Budejovice, CZ<br />
11.0 2.0 9.0 10 49.9078 16.4218 460 Ceska Trebova, CZ<br />
10.5 -1.2 10.2 11 49.9042 16.4432 350 Ceska Trebova, CZ<br />
10.0 2.0 9.0 11 49.5420 15.3537 518 Humpolec, CZ<br />
10.0 5.0 8.0 12 49.2080 16.6833 265 BRNO, CZ<br />
10.0 0.0 8.0 11 49.5190 16.2600 570 Bystrice Nad Perstejnem, CZ<br />
9.0 -2.0 9.0 11 49.3167 16.3417 485 Deblin, CZ<br />
<strong>GLOBE</strong> ® 2005 <strong>Maximum</strong>, <strong>Minimum</strong>, <strong>and</strong> <strong>Current</strong> <strong>Temperature</strong> <strong>Protocol</strong> - 14 Atmosphere
Figure AT-MM-3: Air <strong>Temperature</strong> Data for One Month from a <strong>GLOBE</strong> School<br />
Figure AT-MM-4: <strong>GLOBE</strong> School Data for <strong>Maximum</strong> <strong>Temperature</strong> for a Single Day<br />
<strong>GLOBE</strong> ® 2005 <strong>Maximum</strong>, <strong>Minimum</strong>, <strong>and</strong> <strong>Current</strong> <strong>Temperature</strong> <strong>Protocol</strong> - 15 Atmosphere
The monthly average temperature can also<br />
be calculated by averaging the maximum <strong>and</strong><br />
minimum temperatures for every day in the<br />
month. From the values in Table AT-MM-2, for<br />
Gymnazium Dr. A. Hrdlicky the monthly average<br />
air temperature for April 1998 is:<br />
T average (April 1998) = 10.4˚ C.<br />
Most living things are sensitive to the extremes<br />
in temperature. This is particularly true when<br />
temperatures go below the freezing point<br />
of water (0.0˚ C). Looking at the minimum<br />
temperature curve in Figure AT-MM-3, it is<br />
easy to see that the temperature for this whole<br />
month never dipped below freezing. The lowest<br />
temperature measured was 1˚ C. The maximum<br />
temperature for the month was 21˚ C.<br />
As student researchers, you should consider<br />
comparing temperatures, average temperatures,<br />
<strong>and</strong> temperature extremes between different<br />
schools or locations. You can compare monthly<br />
average temperatures from one year to another<br />
<strong>and</strong> look at the pattern of monthly average<br />
temperatures over the year. It is also interesting<br />
to look for the first <strong>and</strong> last days of the cold<br />
season when the minimum temperature is<br />
below freezing. A number of other sections in<br />
this Guide describe useful correlations of air<br />
temperature with other phenomena.<br />
In comparing schools, remember that the<br />
atmosphere gets colder as elevation increases.<br />
Also, most large cities are warmer than the<br />
surrounding country side. This is called the urban<br />
heat isl<strong>and</strong> effect. Praha (Prague) is a large city.<br />
From the data in Table AT-MM-1 it is clear that<br />
the schools in Praha are at lower elevations as<br />
well as being in a city, <strong>and</strong> on this day they have<br />
the warmest maximum temperatures.<br />
An Example of a Student Research<br />
Investigation<br />
Forming a Hypothesis<br />
A student at a school in Humpolec, CZ looks at<br />
the visualizations of maximum temperature for<br />
several days in April 1998. She notices that the<br />
values for the schools in Praha are warmer than<br />
those for her school for a number of days. She<br />
asks if this could be true on average. As a simple<br />
Table AT-MM-2: <strong>Temperature</strong> Data for April 1998<br />
Date <strong>Temperature</strong>s<br />
(yyyymmdd) <strong>Current</strong> <strong>Maximum</strong> <strong>Minimum</strong><br />
19980430 15.0 18.0 11.0<br />
19980429 18.0 18.0 13.0<br />
19980428 17.0 20.0 12.0<br />
19980427 20.0 21.0 14.0<br />
19980426 19.0 20.0 10.0<br />
19980425 18.0 20.0 8.0<br />
19980424 18.0 18.0 6.0<br />
19980423 17.0 17.0 6.0<br />
19980422 15.0 15.0 6.0<br />
19980421 14.0 14.0 3.0<br />
19980420 10.0 10.0 4.0<br />
19980419 7.0 11.0 2.0<br />
19980418 10.0 10.0 3.0<br />
19980417 9.0 10.0 4.0<br />
19980416 8.0 9.0 6.0<br />
19980415 9.0 10.0 2.0<br />
19980414 8.0 10.0 1.0<br />
19980413 10.0 11.0 5.0<br />
19980412 11.0 13.0 5.0<br />
19980411 12.0 12.0 6.0<br />
19980410 11.0 13.0 5.0<br />
19980409 13.0 13.0 3.0<br />
19980408 10.0 13.0 6.0<br />
19980407 13.0 13.0 2.0<br />
19980406 11.0 16.0 6.0<br />
19980405 16.0 18.0 6.0<br />
19980404 17.0 17.0 5.0<br />
19980403 14.0 15.0 6.0<br />
19980402 13.0 20.0 10.0<br />
19980401 18.0 18.0 6.0<br />
Total 443.0 182.0<br />
From Gymnasium Dr. A. Hrdlicky<br />
starting point for her research she hypothesizes<br />
that: Monthly average temperatures in Praha are<br />
warmer than in Humpolec.<br />
Collecting Data<br />
Data have been collected by <strong>GLOBE</strong> schools in<br />
Praha for April 1998, so she decides to test her<br />
hypothesis using this month as her sample. She<br />
starts by identifying the <strong>GLOBE</strong> schools in Praha<br />
which have reported data for this time period. She<br />
finds five schools. Then she graphs the maximum,<br />
minimum, <strong>and</strong> current temperatures from each<br />
school <strong>and</strong> looks at the graphs to be sure that the<br />
data are of good quality. She decides that they<br />
<strong>GLOBE</strong> ® 2005 <strong>Maximum</strong>, <strong>Minimum</strong>, <strong>and</strong> <strong>Current</strong> <strong>Temperature</strong> <strong>Protocol</strong> - 16 Atmosphere
are good enough for her project as she will be<br />
combining the data from all five schools.<br />
Analyzing Data<br />
As a first step in getting the data from these<br />
schools, she generates a plot of the maximum<br />
temperature data for April 1998 from her school<br />
<strong>and</strong> the schools in Praha. She then creates a data<br />
table with all the values for this graph. She saves<br />
this information either by printing the table from<br />
the computer, cutting <strong>and</strong> pasting the table into<br />
a spreadsheet, or copying down the values by<br />
h<strong>and</strong>. She does the same thing for the minimum<br />
temperatures. Now she calculates the average of<br />
all the maximum <strong>and</strong> minimum temperatures<br />
reported by the schools in Praha for this month.<br />
She gets a value of 12.6˚ C. Since this is greater<br />
than the value for her school of 10.4˚ C, her<br />
hypothesis is supported.<br />
She wonders if averaging all the temperatures is<br />
correct, since on some days all five Praha schools<br />
provided data but on other days only one school<br />
reported. She decides to calculate the monthly<br />
average for each individual school <strong>and</strong> then<br />
average these five values. Her results for the five<br />
schools are 11.6˚ C, 12.1˚ C, 12.5˚ C, 13.0˚ C, <strong>and</strong><br />
14.4˚ C <strong>and</strong> the average of these values is 12.7˚<br />
C which is in good agreement with the original<br />
average she calculated for Praha of 12.6˚ C.<br />
She then proceeds to write-up her hypothesis,<br />
her procedure, <strong>and</strong> her conclusions <strong>and</strong> includes<br />
calculations she has done <strong>and</strong> graphs she has<br />
used or made. As a final note, she discusses<br />
additional tests of her hypothesis that she<br />
would like to investigate in the future including<br />
doing the comparison for April of another year<br />
or even doing the comparison for all months of<br />
the year 1998.<br />
Further Data Analysis<br />
If the student doing this project has been taught<br />
about square roots <strong>and</strong> some elementary statistics,<br />
she could go a bit further <strong>and</strong> examine the<br />
statistical errors in her calculations of monthly<br />
average temperatures. All of the schools involved<br />
in this example reported temperature to the<br />
nearest degree Celsius instead of to the nearest<br />
0.5˚ C. How can she tell? Well she notices that<br />
all of the values reported have 0 in the tenths<br />
place. If readings were taken to the nearest half<br />
degree, there should be some values with 5 in the<br />
tenths place. So, given the accuracy of <strong>GLOBE</strong><br />
instruments <strong>and</strong> the readings by the students, the<br />
error in the individual measurements is ± 1.0˚ C.<br />
The error in the average depends on the number of<br />
independent measurements included, so for each<br />
school the statistical error in the average is:<br />
if N = number of measurements<br />
Error = + 1˚ C * N N<br />
Error = + 1˚ C * 1<br />
N<br />
For the schools with data for 22 or fewer days (<strong>and</strong><br />
therefore 2 x 22 = 44 or fewer measurements),<br />
the error is approximately ± 0.2˚ C while for<br />
schools with more measurements the error is<br />
about ± 0.1˚ C. Given these statistical errors, the<br />
student concludes that the differences among<br />
the schools’ monthly averages are larger than<br />
the errors <strong>and</strong> therefore statistically significant.<br />
This is true even among the schools in Praha. This<br />
strengthens her confidence that the hypothesis<br />
has been supported by the data because the<br />
monthly average temperature in Humpolec in<br />
April 1998 is lower than for any of the schools in<br />
Praha as well as being lower than the average of<br />
all data from Praha.<br />
Advanced Data Analysis<br />
A more advanced student would not calculate<br />
the statistical error using all the measurements<br />
from the five schools taken together because these<br />
data are not independent of one another. On a<br />
given day in Praha, the data from the five schools<br />
should be correlated because they are experiencing<br />
approximately the same weather. Realizing this,<br />
an advanced student decides to make two more<br />
checks on her conclusion.<br />
First, she decides to calculate the average<br />
temperature for each day of April in Praha. For<br />
each day she sums the maximum <strong>and</strong> minimum<br />
temperatures from all schools which have data<br />
for that day <strong>and</strong> divides by the number of<br />
measurements reported. The results of this are<br />
given in the right-h<strong>and</strong> column of Table AT-MM-<br />
3. This process gives her average temperatures<br />
for 28 days in April <strong>and</strong> she averages these to get<br />
<strong>GLOBE</strong> ® 2005 <strong>Maximum</strong>, <strong>Minimum</strong>, <strong>and</strong> <strong>Current</strong> <strong>Temperature</strong> <strong>Protocol</strong> - 17 Atmosphere<br />
Welcome Introduction <strong>Protocol</strong>s<br />
Learning Activities Appendix
Table AT-MM-3: <strong>Maximum</strong> <strong>and</strong> <strong>Minimum</strong> <strong>Temperature</strong> Data for Five Schools in Praha for April 1998<br />
School: Zakladni Skola, Masarykova stredni Zakladni Skola Zakladni Skola Gymnazium Daily<br />
Date<br />
n.Inter. skola chemicka Horackova<br />
o T<br />
max<br />
C T o<br />
min<br />
C T o<br />
max<br />
C T o<br />
min<br />
C T o<br />
max<br />
C T o<br />
min<br />
C T o<br />
max<br />
C T o<br />
min<br />
C T o<br />
max<br />
C T o<br />
min<br />
C T o<br />
avg<br />
C<br />
4/1/1998 21 5 22 8 20 12 — — — — 14.7<br />
4/2/1998 17 12 20 11 19 9 — — — — 14.7<br />
4/3/1998 17 9 20 10 18 9 — — — — 13.8<br />
4/4/1998 19 11 — — 18 7 — — — — 13.8<br />
4/5/1998 14 5 — — 15 8 — — — — 10.5<br />
4/6/1998 14 4 — — 18 8 — — — — 11.0<br />
4/7/1998 15 3 18 8 19 8 — — 26 5 12.8<br />
4/8/1998 14 4 — — 17 9 — — — — 11.0<br />
4/9/1998 16 -1 — — 16 8 — — — — 9.8<br />
4/10/1998 14 2 — — 10 8 — — — — 8.5<br />
4/11/1998 14 2 — — 14 7 — — — — 9.3<br />
4/12/1998 14 2 — — 15 1 — — — — 8.0<br />
4/13/1998 — — — — 15 4 — — — — 9.5<br />
4/14/1998 — — — — 15 -8 — — — — 3.5<br />
4/15/1998 — — — — 12 -1 14 0 12 3 6.7<br />
4/16/1998 — — 15 4 13 5 14 3 14 5 9.1<br />
4/17/1998 — — 15 5 17 7 13 1 14 2 9.3<br />
4/18/1998 — — — — — — 15 4 — — 9.5<br />
4/19/1998 — — — — — — — — — —<br />
4/20/1998 — — — — — — — — — —<br />
4/21/1998 17 8 21 5 — — 16 4 16 2 11.1<br />
4/22/1998 16 4 16 6 — — 16 5 17 3 10.4<br />
4/23/1998 17 4 21 9 — — 20 5 21 3 12.5<br />
4/24/1998 18 8 23 9 — — — — 25 4 14.5<br />
4/25/1998 20 7 — — 19 8 — — — — 13.5<br />
4/26/1998 24 10 — — 24 11 — — — — 17.3<br />
4/27/1998 24 10 — — 25 12 — — 26 10 17.8<br />
4/28/1998 24 10 24 12 25 13 23 12 25 13 18.1<br />
4/29/1998 25 9 22 15 20 13 22 12 21 12 17.1<br />
4/30/1998 22 8 22 13 23 10 20 12 23 9 16.2<br />
Total 396 136 259 115 407 168 173 58 240 71 333.7<br />
Number<br />
of days<br />
Average<br />
Max or Min<br />
Monthly<br />
o Tavg C<br />
Statistical<br />
error ( o C)<br />
22 22 13 13 23 23 10 10 12 12 28<br />
18.0 6.2 19.9 8.8 17.7 7.3 17.3 5.8 20.0 5.9<br />
12.1 14.4 12.5 11.6 13.0 11.9<br />
0.2 0.3 0.2 0.3 0.3 0.2<br />
<strong>GLOBE</strong> ® 2005 <strong>Maximum</strong>, <strong>Minimum</strong>, <strong>and</strong> <strong>Current</strong> <strong>Temperature</strong> <strong>Protocol</strong> - 18 Atmosphere
the monthly average temperature for Praha. The<br />
result is 11.9˚ C with a statistical error of ± 0.1˚<br />
C, <strong>and</strong> this value is significantly lower than the<br />
other results. However, this monthly average is<br />
still significantly higher than that for Humpolec<br />
<strong>and</strong> the hypothesis is still confirmed.<br />
Second, she notices that for two days, April 19<br />
<strong>and</strong> 20, there is no data from any of the Praha<br />
schools. Were these abnormally cold or warm<br />
days which might bias the monthly average?<br />
Generally, Humpolec is close enough to Praha<br />
so that they experience similar periods of cold<br />
or warm weather as weather systems move<br />
through the Czech Republic. The student looks<br />
at the data from her school for these two days<br />
to get an indication of whether these were<br />
unusual days relative to the monthly average<br />
for April. The average temperatures for these<br />
two days were 7.0˚ C <strong>and</strong> 6.5˚ C, respectively.<br />
Both were significantly colder than the monthly<br />
average. Missing data for these two days could<br />
bias the monthly average for Praha, but by how<br />
much? To estimate this, the student decides to<br />
calculate the monthly average for Humpolec<br />
omitting these two days. The monthly average<br />
which one would obtain if data were missing for<br />
these two days is 10.7˚ C, 0.3˚ C higher than the<br />
actual average calculated. This is a significant<br />
effect, but it is not large enough to change the<br />
conclusion that average monthly temperature in<br />
Praha is higher than in Humpolec for the month<br />
of April 1998.<br />
Explaining <strong>and</strong> Communicating Results<br />
Knowing that average temperatures in Praha are<br />
higher than in Humpolec does not explain why<br />
this is the case. Pursuing this question is more<br />
challenging, but should be more rewarding. Two<br />
common effects could explain the systematic<br />
temperature differences observed – urban heat<br />
isl<strong>and</strong> effects <strong>and</strong> differences in elevation. A<br />
student might hypothesize that the warmer<br />
conditions in Praha compared to Humpolec are<br />
due to the difference in elevation. To test this<br />
hypothesis, the student would need to assemble<br />
data from schools in the Czech Republic at<br />
different elevations. For instance, Mohelnice<br />
<strong>and</strong> Jicin are both relatively small towns with<br />
Mohelnice at about the same elevation as Praha<br />
<strong>and</strong> Jicin at an elevation 350 meters higher<br />
than Humpolec. See Table AT-MM-2. If average<br />
temperatures in Mohelnice are about the same<br />
as those in Praha while the variation in average<br />
temperatures between Mohelnice, Humpolec, <strong>and</strong><br />
Jincin are proportional to altitude, the hypothesis<br />
would be supported. Differences in latitude also<br />
affect average temperature. With an increase of<br />
2˚ to 2.5˚ of latitude roughly equivalent to a 150<br />
meter increase in elevation, the latitude effects<br />
should be significantly smaller than the elevation<br />
effects for these cities. Addressing questions such<br />
as this one is easier where there are many <strong>GLOBE</strong><br />
schools consistently reporting data.<br />
<strong>GLOBE</strong> ® 2005 <strong>Maximum</strong>, <strong>Minimum</strong>, <strong>and</strong> <strong>Current</strong> <strong>Temperature</strong> <strong>Protocol</strong> - 19 Atmosphere<br />
.<br />
Welcome Introduction <strong>Protocol</strong>s<br />
Learning Activities Appendix
<strong>Current</strong> <strong>Temperature</strong><br />
Purpose<br />
To measure the current air temperature when<br />
an instrument shelter is not available<br />
Overview<br />
<strong>Current</strong> air temperature is measured using a<br />
thermometer held in the open air but in the<br />
shade for at least 3 minutes.<br />
Student Outcomes<br />
Science Concepts<br />
Atmospheric Science<br />
Weather can be described by quantitative<br />
measurements.<br />
Weather changes over different time <strong>and</strong><br />
spatial scales.<br />
Weather changes over seasons.<br />
Physical Science<br />
Properties can be measured by tools.<br />
Geography<br />
<strong>Temperature</strong> variations affect the<br />
characteristics of Earth’s physical<br />
geographic system.<br />
Scientific Inquiry Abilities<br />
Use a thermometer to measure temperature.<br />
Teacher Support<br />
This method should be used only when an<br />
instrument shelter is not available <strong>and</strong> a current<br />
temperature measurement is required in support<br />
of another <strong>GLOBE</strong> measurement. Remember to<br />
define the appropriate site for your measurements<br />
(i.e., if other atmosphere measurements are taken<br />
this is would be an Atmosphere Study Site, if soil<br />
temperature measurements are taken, this is a Soil<br />
<strong>Temperature</strong> Study Site, etc.).<br />
Calibration <strong>and</strong> Quality Control<br />
This measurement takes only a few minutes to<br />
complete. The main concern is to allow sufficient<br />
time for the thermometer to equilibrate to the<br />
temperature of the air, perhaps three to five<br />
Time<br />
5 minutes<br />
Level<br />
<strong>GLOBE</strong> ® 2005 <strong>Maximum</strong>, <strong>Minimum</strong>, <strong>and</strong> <strong>Current</strong> <strong>Temperature</strong> <strong>Protocol</strong> - 20 Atmosphere<br />
All<br />
Frequency<br />
As needed in support of other <strong>GLOBE</strong><br />
measurements<br />
Calibration every three months<br />
Materials <strong>and</strong> Tools<br />
Alcohol-filled thermometer (calibration<br />
thermometer or sling psychrometer)<br />
A clock or watch<br />
Rubber b<strong>and</strong> <strong>and</strong> a piece of string (if<br />
calibration thermometer is used)<br />
Data sheets<br />
Preparation<br />
Find a shady spot for your air temperature<br />
measurement.<br />
Prerequisites<br />
None<br />
minutes. In addition, the shady spot you use<br />
should not be adjacent to a building or other large<br />
structure, such as a tree. Try to maintain a distance<br />
at least 4 meters away from any such object, <strong>and</strong><br />
take the measurement over a natural surface,<br />
such as vegetation, rather than concrete or paved<br />
walkways.<br />
Your organic liquid-filled thermometer should<br />
be calibrated at least every three months as well<br />
as before its first use. Calibrate it following the<br />
instructions in the <strong>Maximum</strong>, <strong>Minimum</strong>, <strong>and</strong><br />
<strong>Current</strong> <strong>Temperature</strong>s <strong>Protocol</strong>. The thermometers<br />
on your sling psychrometer should also be<br />
calibrated at least once every three months <strong>and</strong><br />
before first use following the instructions in the<br />
Relative Humidity <strong>Protocol</strong>.
<strong>Current</strong> Air <strong>Temperature</strong> <strong>Protocol</strong><br />
Field Guide<br />
Task<br />
To measure current air temperature in support of other <strong>GLOBE</strong> measurements<br />
What You Need<br />
❑ String <strong>and</strong> rubber b<strong>and</strong> <strong>and</strong> ❑ Clock or watch<br />
calibration thermometer OR<br />
Sling psychrometer ❑ Pen or pencil<br />
❑ Data Sheet<br />
In the Field<br />
1. Tie one end of a piece of string securely to the end of the calibration thermometer <strong>and</strong> the<br />
other end to a rubber b<strong>and</strong>.<br />
2. Slip the rubber b<strong>and</strong> around the wrist so that the thermometer is not broken if it is<br />
accidentally dropped on the ground.<br />
OR<br />
Use the dry bulb thermometer on your sling psychrometer.<br />
3. Hold the thermometer at chest height, in the shade, <strong>and</strong> away from your body for three<br />
minutes.<br />
4. At the end of three minutes, record the temperature reading in your science log<br />
5. Hold the thermometer the same way for another minute.<br />
6. At the end of the minute, record the temperature once again. If the temperature is within<br />
0.5˚ C of the previous reading, record the reading on your Data Sheet.<br />
7. If the two temperature readings differ by more than 0.5˚ C, repeat steps 5 <strong>and</strong> 6 again.<br />
8. If two consecutive temperature readings are not within 0.5˚ C of one another after 7<br />
minutes, record the last measurement on the Data Sheet <strong>and</strong> report your other four<br />
measurements in the comments section along with a note that your reading wasn’t stable<br />
after 7 minutes.<br />
<strong>GLOBE</strong> ® 2005 <strong>Maximum</strong>, <strong>Minimum</strong>, <strong>and</strong> <strong>Current</strong> <strong>Temperature</strong> <strong>Protocol</strong> - 21 Atmosphere