Scratchbuild a 1:20.3 scale 29'-6” Flatcar - myLargescale.com
Scratchbuild a 1:20.3 scale 29'-6” Flatcar - myLargescale.com
Scratchbuild a 1:20.3 scale 29'-6” Flatcar - myLargescale.com

You also want an ePaper? Increase the reach of your titles
YUMPU automatically turns print PDFs into web optimized ePapers that Google loves.
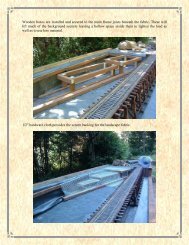
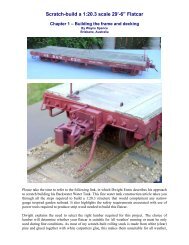
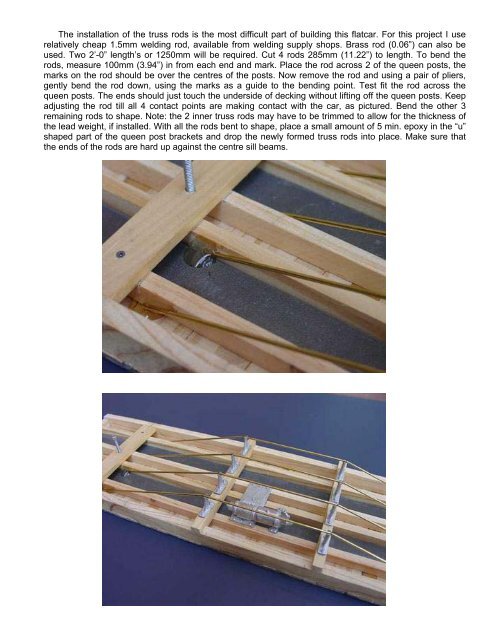
The installation of the truss rods is the most difficult part of building this flatcar. For this project I use<br />
relatively cheap 1.5mm welding rod, available from welding supply shops. Brass rod (0.0<strong>6”</strong>) can also be<br />
used. Two 2’-0” length’s or 1250mm will be required. Cut 4 rods 285mm (11.22”) to length. To bend the<br />
rods, measure 100mm (3.94”) in from each end and mark. Place the rod across 2 of the queen posts, the<br />
marks on the rod should be over the centres of the posts. Now remove the rod and using a pair of pliers,<br />
gently bend the rod down, using the marks as a guide to the bending point. Test fit the rod across the<br />
queen posts. The ends should just touch the underside of decking without lifting off the queen posts. Keep<br />
adjusting the rod till all 4 contact points are making contact with the car, as pictured. Bend the other 3<br />
remaining rods to shape. Note: the 2 inner truss rods may have to be trimmed to allow for the thickness of<br />
the lead weight, if installed. With all the rods bent to shape, place a small amount of 5 min. epoxy in the “u”<br />
shaped part of the queen post brackets and drop the newly formed truss rods into place. Make sure that<br />
the ends of the rods are hard up against the centre sill beams.