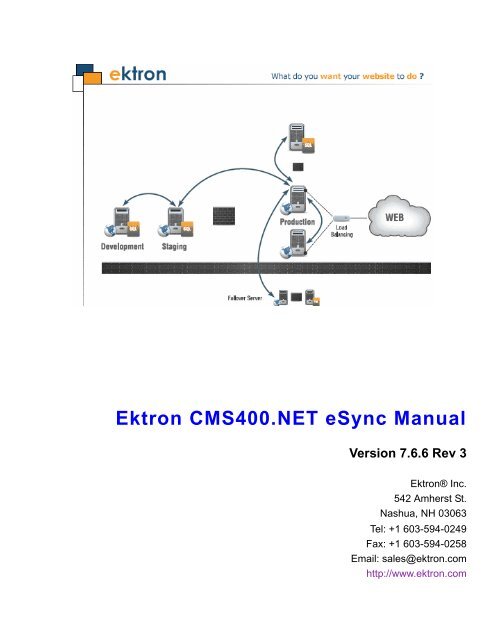
Ektron CMS400.NET eSync Manual
Ektron CMS400.NET eSync Manual
Ektron CMS400.NET eSync Manual

You also want an ePaper? Increase the reach of your titles
YUMPU automatically turns print PDFs into web optimized ePapers that Google loves.
<strong>Ektron</strong> <strong>CMS400.NET</strong> <strong>eSync</strong> <strong>Manual</strong><br />
Version 7.6.6 Rev 3<br />
<strong>Ektron</strong>® Inc.<br />
542 Amherst St.<br />
Nashua, NH 03063<br />
Tel: +1 603-594-0249<br />
Fax: +1 603-594-0258<br />
Email: sales@ektron.com<br />
http://www.ektron.com
Copyright July 2009 <strong>Ektron</strong>®, Inc. All rights reserved.<br />
EKTRON is a registered trademark of <strong>Ektron</strong>, Inc.<br />
Version 7.6.6 Rev 3, July 2009<br />
For updated versions of this manual, please visit:<br />
http://www.ektron.com/documentation
EKTRON, INC. SOFTWARE LICENSE AGREEMENT<br />
** READ THIS BEFORE LOADING SOFTWARE**<br />
YOUR RIGHT TO USE THE PRODUCT DELIVERED IS SUBJECT TO THE TERMS AND CONDITIONS SET OUT IN THIS<br />
LICENSE AGREEMENT. USING THIS PRODUCT SIGNIFIES YOUR AGREEMENT TO THESE TERMS. IF YOU DO NOT<br />
AGREE TO THIS SOFTWARE LICENSE AGREEMENT, DO NOT DOWNLOAD.<br />
CUSTOMER should carefully read the following terms and conditions before using the software program(s) contained herein<br />
(the “Software”). Downloading and/or using the Software or copying the Software onto CUSTOMER’S computer hard drive<br />
indicates CUSTOMER’S acceptance of these terms and conditions. If CUSTOMER does not agree with the terms of this<br />
agreement, CUSTOMER should not download.<br />
<strong>Ektron</strong>, Inc. (“<strong>Ektron</strong>”) grants, and the CUSTOMER accepts, a nontransferable and nonexclusive License to use the Software on<br />
the following terms and conditions:<br />
1. Right to use: The Software is licensed for use only in delivered code form. Each copy of the Software is licensed for use only<br />
on a single URL. Each license is valid for the number of seats listed below (the “Basic Package”). Any use of the Software<br />
beyond the number of authorized seats contained in the Basic Package without paying additional license fees as provided<br />
herein shall cause this license to terminate. Should CUSTOMER wish to add seats beyond the seats licensed in the Basic<br />
Package, the CUSTOMER may add seats on a block basis at the then current price for additional seats (see product pages for<br />
current price). The Basic Packages are as follows:<br />
<strong>Ektron</strong> <strong>CMS400.NET</strong> — Licensed for ten seats (10 named users) per URL.<br />
<strong>Ektron</strong> eWebEditPro — Licensed for ten seats (10 named users) per URL.<br />
<strong>Ektron</strong> eWebEditPro+XML — Licensed for ten seats (10 named users) per URL.<br />
For purposes of this section, the term “seat” shall mean an individual user provided access to the capabilities of the Software.<br />
The CUSTOMER may not modify, alter, reverse engineer, disassemble, or decompile the Software. This software product is<br />
licensed, not sold.<br />
2. Duration: This License shall continue so long as CUSTOMER uses the Software in compliance with this License. Should<br />
CUSTOMER breach any of its obligations hereunder, CUSTOMER agrees to return all copies of the Software and this License<br />
upon notification and demand by <strong>Ektron</strong>.<br />
3. Copyright: The Software (including any images, “applets,” photographs, animations, video, audio, music and text incorporated<br />
into the Software) as well as any accompanying written materials (the “Documentation”) is owned by <strong>Ektron</strong> or its suppliers, is<br />
protected by United States copyright laws and international treaties, and contains confidential information and trade secrets.<br />
CUSTOMER agrees to protect the confidentiality of the Software and Documentation. CUSTOMER agrees that it will not provide<br />
a copy of this Software or Documentation nor divulge any proprietary information of <strong>Ektron</strong> to any person, other than its<br />
employees, without the prior consent of <strong>Ektron</strong>; CUSTOMER shall use its best efforts to see that any user of the Software<br />
licensed hereunder complies with this license.<br />
4. Limited Warranty: <strong>Ektron</strong> warrants solely that the medium upon which the Software is delivered will be free from defects in<br />
material and workmanship under normal, proper and intended usage for a period of three (3) months from the date of receipt.<br />
<strong>Ektron</strong> does not warrant the use of the Software will be uninterrupted or error free, nor that program errors will be corrected. This<br />
limited warranty shall not apply to any error or failure resulting from (i) machine error, (ii) Customer's failure to follow operating<br />
instructions, (iii) negligence or accident, or (iv) modifications to the Software by any person or entity other than Company. In the<br />
event of a breach of warranty, Customer’s sole and exclusive remedy, is repair of all or any portion of the Software. If such<br />
remedy fails of its essential purpose, Customer’s sole remedy and <strong>Ektron</strong>’s maximum liability shall be a refund of the paid<br />
purchase price for the defective Products only. This limited warranty is only valid if <strong>Ektron</strong> receives written notice of breach of<br />
warranty within thirty days after the warranty period expires.
5. Limitation of Warranties and Liability: THE SOFTWARE AND DOCUMENTATION ARE SOLD “AS IS” AND WITHOUT ANY<br />
WARRANTIES AS TO THE PERFORMANCE, MERCHANTIBILITY, DESIGN, OR OPERATION OF THE SOFTWARE. NO<br />
WARRANTY OF FITNESS FOR A PARTICULAR PURPOSE IS OFFERED. EXCEPT AS DESCRIBED IN SECTION 4, ALL<br />
WARRANTIES EXPRESS AND IMPLIED ARE HEREBY DISCLAIMED.<br />
NEITHER COMPANY NOR ITS SUPPLIERS SHALL BE LIABLE FOR ANY LOSS OF PROFITS, LOSS OF BUSINESS OR<br />
GOODWILL, LOSS OF DATA OR USE OF DATA, INTERRUPTION OF BUSINESS NOR FOR ANY OTHER INDIRECT,<br />
SPECIAL, INCIDENTAL, OR CONSEQUENTIAL DAMAGES OF ANY KIND UNDER OR ARISING OUT OF, OR IN ANY<br />
RELATED TO THIS AGREEMENT, HOWEVER, CAUSED, WHETHER FOR BREACH OF WARRANTY, BREACH OR<br />
REPUDIATION OF CONTRACT, TORT, NEGLIGENCE, OR OTHERWISE, EVEN IF COMPANY OR ITS REPRESENTATIVES<br />
HAVE BEEN ADVISED OF THE POSSIBILITY OF SUCH LOSS.<br />
6. Additional Terms and Conditions apply<br />
When using the CMS400 map control, Subject to the terms and conditions of the Map provider (Microsoft Virtual Earth or<br />
Google maps)<br />
Microsoft Virtual Earth - http://www.microsoft.com/virtualearth/product/terms.html<br />
If you have any questions would like to find out more about a MWS/VE Agreement, please contact maplic@microsoft.com for<br />
information.<br />
Google Maps - http://code.google.com/apis/maps/terms.html<br />
7. Miscellaneous: This License Agreement, the License granted hereunder, and the Software may not be assigned or in any way<br />
transferred without the prior written consent of <strong>Ektron</strong>. This Agreement and its performance and all claims arising from the<br />
relationship between the parties contemplated herein shall be governed by, construed and enforced in accordance with the laws<br />
of the State of New Hampshire without regard to conflict of laws principles thereof. The parties agree that any action brought in<br />
connection with this Agreement shall be maintained only in a court of competent subject matter jurisdiction located in the State<br />
of New Hampshire or in any court to which appeal therefrom may be taken. The parties hereby consent to the exclusive<br />
personal jurisdiction of such courts in the State of New Hampshire for all such purposes. The United Nations Convention on<br />
Contracts for the International Sale of Goods is specifically excluded from governing this License. If any provision of this License<br />
is to be held unenforceable, such holding will not affect the validity of the other provisions hereof. Failure of a party to enforce<br />
any provision of this Agreement shall not constitute or be construed as a waiver of such provision or of the right to enforce such<br />
provision. If you fail to comply with any term of this License, YOUR LICENSE IS AUTOMATICALLY TERMINATED. This License<br />
represents the entire understanding between the parties with respect to its subject matter.<br />
YOU ACKNOWLEDGE THAT YOU HAVE READ THIS AGREEMENT, THAT YOU UNDERSTAND THIS AGREEMENT, AND<br />
UNDERSTAND THAT BY CONTINUING THE INSTALLATION OF THE SOFTWARE, BY LOADING OR RUNNING THE<br />
SOFTWARE, OR BY PLACING OR COPYING THE SOFTWARE ONTO YOUR COMPUTER HARD DRIVE, YOU AGREE TO<br />
BE BOUND BY THIS AGREEMENT’S TERMS AND CONDITIONS. YOU FURTHER AGREE THAT, EXCEPT FOR WRITTEN<br />
SEPARATE AGREEMENTS BETWEEN EKTRON AND YOU, THIS AGREEMENT IS A COMPLETE AND EXCLUSIVE<br />
STATEMENT OF THE RIGHTS AND LIABILITIES OF THE PARTIES.<br />
Copyright 1999 - 2008 <strong>Ektron</strong>, Inc. All rights reserved.<br />
LA10031, Revision 2.0
Table of Contents<br />
Introduction to <strong>eSync</strong> .........................................................1<br />
Setting Up <strong>eSync</strong>...................................................................... 4<br />
Scenario 1: Synching Two Sites on the Same Server ..............4<br />
Scenario 2: Synching an <strong>Ektron</strong> <strong>CMS400.NET</strong> Server with Another<br />
Server..................................................................................5<br />
Part One: Set up a Min Site on the Remote Server .................... 6<br />
Part Two: Generate and Copy Security Certificates.................... 6<br />
Part Three: Connect the Local and Remote Servers ................ 10<br />
Part Four: Upload the Local Server’s Database to the Remote<br />
Server ....................................................................................... 13<br />
Part Five: Upload the Local Server’s Templates to Remote...... 15<br />
Scenario 3: Setting up a Development > Staging > Production<br />
Environment...............................................................................17<br />
Part One: Set up a Min Site on the Staging and Development<br />
Servers...................................................................................... 19<br />
Part Two: Generate and Copy Security Certificates.................. 19<br />
Part Three: Connect Staging and Production Servers .............. 29<br />
Part Four: Download the Production Server’s Database to the<br />
Staging Server........................................................................... 31<br />
Part Five: Download the Production Server’s Templates to<br />
Staging ...................................................................................... 34<br />
Part Six: Connect the Development and Staging Servers......... 36<br />
Part Seven: Download the Staging Server’s Database to the<br />
Development Server ................................................................. 39<br />
Part Eight: Download the Staging Server’s Templates to<br />
Development............................................................................. 41<br />
Using <strong>eSync</strong>............................................................................ 44<br />
<strong>eSync</strong> Requirements .................................................................44<br />
<strong>Ektron</strong> Software and Files ...............................................................44<br />
Microsoft Software ..........................................................................45<br />
User Permissions ............................................................................45<br />
Server ..............................................................................................45<br />
Characteristics of <strong>eSync</strong>...........................................................45<br />
Easy and Flexible Setup and Usage ............................................... 46<br />
Sync Configurations ........................................................................ 47<br />
Configuration 1: One Staging Server, One Production Server .. 47<br />
Configuration 2: One Development Server, One Staging Server,<br />
One Production Server.............................................................. 48<br />
Configuration 2a: Multi-site Staging Server, Multi-site Production<br />
Server ....................................................................................... 48<br />
Configuration 3: Several Development Servers, One Staging<br />
Server, One Production Server ................................................. 49<br />
<strong>Ektron</strong> <strong>CMS400.NET</strong> <strong>eSync</strong> <strong>Manual</strong>, Version 7.6.6 Rev 3 i
Configuration 4: One Development Server, One Staging Server,<br />
One Production Site Server, One Production Database Server 49<br />
Configuration 5: Configuration 4 Plus Pre-Production Server... 50<br />
Configuration 6: Multi-site Configurations, Each Site and<br />
Database on its own Production Server.................................... 50<br />
The Server Number................................................................... 51<br />
Unique ID Numbering ...................................................................... 52<br />
<strong>eSync</strong> Moves Changes Only ........................................................... 53<br />
Managing <strong>eSync</strong> Security Certificates.....................................54<br />
The Client and Server Certificates................................................... 54<br />
Installing Security Certificates ......................................................... 56<br />
Step 1: Create Security Certificates on Your Local Server........ 56<br />
Step 2: Create Security Certificates on the Remote Server ...... 58<br />
Step 3: Copy Local Client Certificate to Remote Server ........... 59<br />
Step 4: Copy Remote Client Certificate to Local Server ........... 61<br />
Step 5: Test the Security Certificates ........................................ 62<br />
Regenerating Security Certificates .................................................. 62<br />
Troubleshooting Security Certificates.............................................. 63<br />
Could Not Connect Error........................................................... 63<br />
No Endpoint Error ..................................................................... 65<br />
Using <strong>eSync</strong> to Initialize a New Site.........................................65<br />
Setting up <strong>eSync</strong> Profiles .........................................................66<br />
Global File Type Exceptions...................................................... 69<br />
Setting up a Profile to Sync a Database and Assets ....................... 70<br />
Setting up a Profile to Sync Workarea Files .................................... 72<br />
Setting up a Profile to Sync Template and Bin Files........................ 74<br />
Bidirectional Sync ............................................................................ 77<br />
Conflict Resolution Policy ................................................................ 77<br />
Synchronizing Windows Files.......................................................... 78<br />
Optional Steps before Running a Sync ...................................80<br />
Previewing a Sync .....................................................................80<br />
Running a Sync..........................................................................81<br />
Force Initial Sync ............................................................................. 83<br />
Force Initial Sync Prerequisites................................................. 83<br />
Backing up the Destination Server During an <strong>eSync</strong> .............85<br />
Setting up the Destination Database Backup ..................................85<br />
Sync Logs........................................................................................ 86<br />
Viewing a Log of a Profile’s Most Recent Sync......................... 87<br />
Viewing a Log of a Sync Server Relationship’s Most Recent Sync<br />
88<br />
Viewing a Log of all Syncs for a Sync Server Relationship....... 89<br />
Reviewing Resolved Collisions................................................90<br />
The Review Resolved Collisions Button ................................... 91<br />
The Review Synchronization Collisions Screen........................ 92<br />
Synching Custom Database Tables .........................................93<br />
Content and Folder Sync Options............................................94<br />
Prerequisites for Content/Folder Sync............................................. 95<br />
<strong>Ektron</strong> <strong>CMS400.NET</strong> <strong>eSync</strong> <strong>Manual</strong>, Version 7.6.6 Rev 3 ii
Enabling the Content and Folder Level Sync .................................. 96<br />
Using Content and Folder Level Sync ............................................. 97<br />
Synching a Content Item........................................................... 97<br />
Synching a Folder ..................................................................... 99<br />
<strong>eSync</strong> in a Load Balanced Environment................................ 100<br />
Install a Min Site on Every Server in the Cluster ........................... 102<br />
Update the Assetmanagement.config File ....................................102<br />
Update the <strong>Ektron</strong> Windows Service Config File ..........................102<br />
Create <strong>eSync</strong> Security Certificates for a Load Balanced Cluster ..104<br />
Generate Security Certificates on mach1 ............................... 104<br />
Apply Security Certificates to mach2 and mach3.................... 106<br />
Setting Up and Running <strong>eSync</strong>............................................... 108<br />
Using <strong>eSync</strong> in a Multi-site Environment .............................. 109<br />
Limitations on using <strong>eSync</strong> in a Multi-site Environment ................ 109<br />
Setting up <strong>eSync</strong> in a Multi-Site Environment ................................110<br />
Setting up Staging Multi-sites .........................................................113<br />
Using <strong>eSync</strong> with Web Alerts ................................................. 114<br />
<strong>eSync</strong> and Integrated Search Folders.................................... 114<br />
Using <strong>eSync</strong> with eCommerce ............................................... 115<br />
<strong>eSync</strong> Troubleshooting ........................................................... 116<br />
What’s New in this Release ............................................117<br />
<strong>Ektron</strong> <strong>CMS400.NET</strong> <strong>eSync</strong> <strong>Manual</strong>, Version 7.6.6 Rev 3 iii
<strong>Ektron</strong> <strong>CMS400.NET</strong> <strong>eSync</strong> <strong>Manual</strong>, Version 7.6.6 Rev 3 iv
Introduction to<br />
<strong>eSync</strong><br />
<strong>Ektron</strong>’s <strong>eSync</strong> revolutionizes the way that Web sites are built,<br />
deployed and maintained and is the only synchronization solution<br />
that can keep Web sites up-to-date efficiently, giving you a level of<br />
control over your site that was impossible before. From single<br />
sites, to global multi-sites, to server farms, <strong>eSync</strong> gives you<br />
scalable, geo-synchronization capabilities that allow you to easily<br />
update exactly what you want, when you want to.<br />
The following videos introduce <strong>eSync</strong>.<br />
• http://media.ektron.com/flash/esync/800x600/esync.html<br />
• http://media.ektron.com/webinars/esync/esyncwebinar.html<br />
<strong>Ektron</strong> <strong>CMS400.NET</strong> <strong>eSync</strong> <strong>Manual</strong>, Version 7.6.6 Rev 3 1
<strong>eSync</strong> moves only the changes you want to move, from single<br />
pieces of content to entire sites, making updates efficient and<br />
eliminating site downtime. With its intelligent synchronization<br />
technology, <strong>eSync</strong> is able to securely move selected content<br />
bidirectionally: Web 2.0 sites have a wealth of user-generated<br />
content and membership information. That data can now be<br />
synchronized back to the development side of the firewall.<br />
By employing certificate-based authentication to secure your Web<br />
site, <strong>Ektron</strong>’s <strong>eSync</strong> lets CMS users update content anywhere<br />
safely, whether it is on a production server or within the<br />
development environment. Alternatively, all of your updates can<br />
take place on the safe side of your firewall before they are moved<br />
to the live site.<br />
If conflicting versions of content exist, <strong>eSync</strong>’s configurable conflict<br />
resolution engine ensures that you won’t lose your most up-to-date<br />
content. The version that isn’t posted is saved in a history, along<br />
with other previous versions, enabling you to track changes or<br />
restore content if the need arises.<br />
Within complex IT infrastructures, <strong>eSync</strong> can synchronize content,<br />
assets, HTML pages and other components of your Web site,<br />
whether it is managed by <strong>CMS400.NET</strong> or not.<br />
<strong>Ektron</strong> <strong>CMS400.NET</strong> <strong>eSync</strong> <strong>Manual</strong>, Version 7.6.6 Rev 3 2
Synchronization can be scheduled to take place at strategic times<br />
that assure optimal performance while facilitating site updates.<br />
Global multi-site setups can take advantage of this to coordinate<br />
synchronizations with servers around the world, taking advantage<br />
of low traffic periods. Or, use <strong>eSync</strong>’s scheduling feature to set up<br />
time-sensitive events. Synchronization can take place with single<br />
or multiple servers, whatever your needs are.<br />
<strong>eSync</strong>’s ability to move and copy data is unparalleled, and it offers<br />
a host of options for managing multiple servers. If there is a need<br />
for multiple development servers, <strong>eSync</strong> can create another copy<br />
of the live site for you to work with. As your developers build out<br />
changes to the site, their updates can by synchronized to the<br />
staging and production servers. <strong>eSync</strong> can also support advanced<br />
infrastructures, including load balancing and failover server<br />
configurations.<br />
<strong>Ektron</strong>’s <strong>eSync</strong> is the only solution in the marketplace today that<br />
gives you the level of control you need to keep your Web sites<br />
completely up-to-date. Whatever your Web site structure is,<br />
<strong>Ektron</strong>’s synchronization technology lets updates happen<br />
efficiently and quickly, and provides the tools to deal with today and<br />
tomorrow’s information-hungry world.<br />
<strong>eSync</strong> is more fully explained through these topics.<br />
• ”Setting Up <strong>eSync</strong>” on page 4<br />
• ”<strong>eSync</strong> Requirements” on page 44<br />
• ”Characteristics of <strong>eSync</strong>” on page 45<br />
• ”Managing <strong>eSync</strong> Security Certificates” on page 54<br />
• ”Using <strong>eSync</strong> to Initialize a New Site” on page 65<br />
• ”Running a Sync” on page 81<br />
• ”Content and Folder Sync Options” on page 94<br />
• ”<strong>eSync</strong> in a Load Balanced Environment” on page 100<br />
• ”Using <strong>eSync</strong> in a Multi-site Environment” on page 109<br />
• ”Using <strong>eSync</strong> with eCommerce” on page 115<br />
• ”<strong>eSync</strong> Troubleshooting” on page 116<br />
<strong>Ektron</strong> <strong>CMS400.NET</strong> <strong>eSync</strong> <strong>Manual</strong>, Version 7.6.6 Rev 3 3
Setting Up <strong>eSync</strong><br />
This chapter helps you install and start using <strong>Ektron</strong> <strong>CMS400.NET</strong>’s<br />
<strong>eSync</strong>. For full details about the feature, see ”Using <strong>eSync</strong>” on<br />
page 44.<br />
For this configuration See this section<br />
Two sites on same server ”Scenario 1: Synching Two Sites on the Same Server”<br />
on page 4<br />
One Local to one Remote<br />
server<br />
Development to Staging to<br />
Production servers<br />
”Scenario 2: Synching an <strong>Ektron</strong> <strong>CMS400.NET</strong> Server<br />
with Another Server” on page 5<br />
”Scenario 3: Setting up a Development > Staging ><br />
Production Environment” on page 17<br />
Scenario 1: Synching Two Sites on the Same<br />
Server<br />
Although it is unlikely that you will use this configuration in “reallife”<br />
situations, it the simplest way to begin testing and learning<br />
how <strong>eSync</strong> works.<br />
1. Install the first site.<br />
See Also: <strong>Ektron</strong> <strong>CMS400.NET</strong> Setup <strong>Manual</strong> sections<br />
“Installing <strong>Ektron</strong> <strong>CMS400.NET</strong>” and “Installing the Minimum<br />
and Starter Sites.”<br />
2. Near the end of the installation, the following dialog appears.<br />
<strong>Ektron</strong> <strong>CMS400.NET</strong> <strong>eSync</strong> <strong>Manual</strong>, Version 7.6.6 Rev 3 4
3. Click Yes.<br />
4. Install a second site on the same server.<br />
5. Near the end of the installation, the same dialog appears.<br />
6. Click Yes.<br />
7. Both sites’ security certificates have been set up and<br />
configured. Continue from ”Part Three: Connect the Local and<br />
Remote Servers” on page 10.<br />
Scenario 2: Synching an <strong>Ektron</strong> <strong>CMS400.NET</strong><br />
Server with Another Server<br />
This scenario assumes you have <strong>Ektron</strong> <strong>CMS400.NET</strong> on one<br />
server (call it local), and want to sync it with another (call it<br />
remote). To accomplish this, you install a minimal <strong>Ektron</strong><br />
<strong>CMS400.NET</strong> site to the new, remote server. Next, use <strong>eSync</strong> to<br />
upload your <strong>Ektron</strong> <strong>CMS400.NET</strong> site from the local to the remote<br />
server.<br />
After the you complete the initial and template syncs explained in<br />
this chapter, the two sites are a mirror image of each other.<br />
Follow these steps to configure two servers to sync with each<br />
other.<br />
<strong>Ektron</strong> <strong>CMS400.NET</strong> <strong>eSync</strong> <strong>Manual</strong>, Version 7.6.6 Rev 3 5
Prerequisites - See ”<strong>eSync</strong> Requirements” on page 44<br />
• ”Part One: Set up a Min Site on the Remote Server” on page 6<br />
• ”Part Two: Generate and Copy Security Certificates” on page 6<br />
• ”Part Three: Connect the Local and Remote Servers” on<br />
page 10<br />
• ”Part Four: Upload the Local Server’s Database to the Remote<br />
Server” on page 13<br />
• ”Part Five: Upload the Local Server’s Templates to Remote” on<br />
page 15<br />
Part One: Set up a Min Site on the Remote Server<br />
1. Upgrade the local server to the latest version of <strong>Ektron</strong><br />
<strong>CMS400.NET</strong> if necessary.<br />
2. On the remote server, install a minimum site whose <strong>Ektron</strong><br />
<strong>CMS400.NET</strong> version matches the version on the local server.<br />
To do this, run the <strong>Ektron</strong> <strong>CMS400.NET</strong> base installation file<br />
(CMS400Base7x.exe). For more information, see the <strong>Ektron</strong><br />
<strong>CMS400.NET</strong> Setup manual.<br />
3. If the current site with which you will sync is precompiled, you<br />
must also precompile the min site.<br />
Part Two: Generate and Copy Security Certificates<br />
Security certificates authorize the synchronization of files between<br />
servers. In this part, you generate security certificates on the local<br />
server, then copy them to the remote.<br />
Follow these steps to complete this procedure.<br />
<strong>Ektron</strong> <strong>CMS400.NET</strong> <strong>eSync</strong> <strong>Manual</strong>, Version 7.6.6 Rev 3 6
WARNING!<br />
1. Sign on to the local server.<br />
2. Click the Windows Start Button> All programs > <strong>Ektron</strong> ><br />
CMS400 v7x > Utilities > Security Configurator.<br />
3. The following screen appears.<br />
4. At the Web Site Description field, select the Web site on the<br />
local server.<br />
5. Press Generate.<br />
6. The certificates are created on the local server.<br />
7. Close the Security Configurator dialog.<br />
8. Open two Windows Explorer windows side-by-side: one<br />
showing the local server’s file system, and the other showing<br />
the remote server’s file system.<br />
9. In the remote server window, create a folder underneath the<br />
root folder. Name the folder local security certificates.<br />
Do not create the new folder under the web root, C:\inetpub\wwwroot.<br />
<strong>Ektron</strong> <strong>CMS400.NET</strong> <strong>eSync</strong> <strong>Manual</strong>, Version 7.6.6 Rev 3 7
NOTE<br />
10. In the local server window, open the following folder:<br />
C:\ProgramFiles\<strong>Ektron</strong>\CMS400V7x\Utilities\Software\SecurityCon<br />
figurator.<br />
11. From that folder, copy these files.<br />
•servername_SyncClient.pfx<br />
•servername_SyncClient.pvk<br />
•servername_SyncClient.cer<br />
•servername_SyncServer.pfx<br />
•servername_SyncServer.pvk<br />
•servername_SyncServer.cer<br />
12. Paste the files into the folder you created in Step 9. Make sure<br />
there are no other security files in the folder.<br />
13. Close both windows you opened in Step 8.<br />
After copying security certificates to the remote folder, you need to register and<br />
move them to the correct folders. The Security Configurator screen does this.<br />
14. Sign on to the remote server.<br />
15. Open the security configurator screen using this path:<br />
Windows Start Button > All programs > <strong>Ektron</strong> > CMS400<br />
v7x > Utilities > Security Configurator.<br />
16. The security configurator screen appears.<br />
<strong>Ektron</strong> <strong>CMS400.NET</strong> <strong>eSync</strong> <strong>Manual</strong>, Version 7.6.6 Rev 3 8
17. Click the Apply Remote Server Certificates button (circled<br />
above).<br />
18. Click the Browse button next to that field.<br />
19. Browse to the folder to which you pasted the security<br />
certificates in Step 12.<br />
20. Click the Apply button.<br />
21. The security configurator copies the certificates you pasted in<br />
Step 12 to the correct folder, and configures them for the<br />
remote server.<br />
Next, you need to generate security certificates on the remote<br />
server, then copy them to the local.<br />
<strong>Ektron</strong> <strong>CMS400.NET</strong> <strong>eSync</strong> <strong>Manual</strong>, Version 7.6.6 Rev 3 9
To accomplish this, follow all steps in ”Part Two: Generate and<br />
Copy Security Certificates” on page 6, but this time, consider the<br />
remote server to be the local server and vice versa.<br />
Now that you have generated and copied security certificates<br />
between servers, you can set up <strong>eSync</strong>.<br />
Part Three: Connect the Local and Remote Servers<br />
WARNING!<br />
Back up your database before beginning this procedure!<br />
1. On the local server, sign on to <strong>Ektron</strong> <strong>CMS400.NET</strong>.<br />
2. In the <strong>Ektron</strong> <strong>CMS400.NET</strong> Workarea, go to Settings ><br />
Configuration > Synchronization.<br />
3. The View All Synchronization Configurations screen appears.<br />
<strong>Ektron</strong> <strong>CMS400.NET</strong> <strong>eSync</strong> <strong>Manual</strong>, Version 7.6.6 Rev 3 10
4. Click the Add button ( ).<br />
5. The Create Synchronization Server Relationship screen<br />
appears.<br />
6. At the Remote Server field, enter the name of the remote<br />
server.<br />
7. At the Choose Certificate field, the name of the remote server<br />
appears.<br />
8. Click the Connect button. This action connects the local with<br />
the remote server.<br />
9. After you connect to the remote server, a new screen appears<br />
showing its database.<br />
<strong>Ektron</strong> <strong>CMS400.NET</strong> <strong>eSync</strong> <strong>Manual</strong>, Version 7.6.6 Rev 3 11
10. Click Next.<br />
11. A new screen appears, showing both servers.<br />
12. Click the Switch Synchronization Direction button.<br />
13. Now the screen indicates that the database will be uploaded<br />
from your local server (which contains the CMS400 Developer<br />
site) to the new, remote server. See below.<br />
<strong>Ektron</strong> <strong>CMS400.NET</strong> <strong>eSync</strong> <strong>Manual</strong>, Version 7.6.6 Rev 3 12
14. Click Create. This action connects the local and remote<br />
servers.<br />
Part Four: Upload the Local Server’s Database to the Remote Server<br />
1. From the View All Synchronization Configurations screen, click<br />
the Start Initial Sync button.<br />
<strong>Ektron</strong> <strong>CMS400.NET</strong> <strong>eSync</strong> <strong>Manual</strong>, Version 7.6.6 Rev 3 13
2. The initial sync uploads the local server’s database to the<br />
remote server.<br />
3. A screen tracks the progress.<br />
4. When the sync is finished, Synchronization is Complete<br />
appears.<br />
The initial sync also creates a default database profile. The profile<br />
remembers information about the sync, such as source and<br />
destination databases, sync direction, and the fact that it syncs the<br />
database and resource files (see example below). You can reuse<br />
this profile to sync your database/resource files any time in the<br />
future.<br />
<strong>Ektron</strong> <strong>CMS400.NET</strong> <strong>eSync</strong> <strong>Manual</strong>, Version 7.6.6 Rev 3 14
Part Five: Upload the Local Server’s Templates to Remote<br />
1. From the View All Synchronization Configurations screen, click<br />
the Add Sync Profile button.<br />
2. The Add Synchronization Profile screen appears.<br />
<strong>Ektron</strong> <strong>CMS400.NET</strong> <strong>eSync</strong> <strong>Manual</strong>, Version 7.6.6 Rev 3 15
3. At the Synchronization name field, give this profile a name,<br />
such as Local - Remote Template Sync.<br />
4. At the Items to Synchronize field, select Templates.<br />
5. For Direction, choose Upload.<br />
6. For Schedule, choose None. (See example below.)<br />
7. Save the profile.<br />
8. Click the Run button to the right of the template sync (circled<br />
below).<br />
<strong>Ektron</strong> <strong>CMS400.NET</strong> <strong>eSync</strong> <strong>Manual</strong>, Version 7.6.6 Rev 3 16
9. A screen tracks the sync’s progress.<br />
10. When the sync is complete, Synchronization is Complete<br />
appears.<br />
You can reuse the template sync profile to sync templates any time<br />
in the future.<br />
Scenario 3: Setting up a Development > Staging ><br />
Production Environment<br />
Before<br />
<strong>Ektron</strong> <strong>CMS400.NET</strong> <strong>eSync</strong> <strong>Manual</strong>, Version 7.6.6 Rev 3 17
After<br />
In this scenario, a version of <strong>Ektron</strong> <strong>CMS400.NET</strong> resides on one<br />
server. You will consider that your production server and use it to<br />
initialize the staging and development servers.<br />
Here’s a preview of the steps you will follow.<br />
• ”Part One: Set up a Min Site on the Staging and Development<br />
Servers” on page 19<br />
• ”Part Two: Generate and Copy Security Certificates” on<br />
page 19<br />
• ”Part Three: Connect Staging and Production Servers” on<br />
page 29<br />
• ”Part Four: Download the Production Server’s Database to the<br />
Staging Server” on page 31<br />
• ”Part Five: Download the Production Server’s Templates to<br />
Staging” on page 34<br />
• ”Part Six: Connect the Development and Staging Servers” on<br />
page 36<br />
• ”Part Seven: Download the Staging Server’s Database to the<br />
Development Server” on page 39<br />
• ”Part Eight: Download the Staging Server’s Templates to<br />
Development” on page 41<br />
Prerequisites - See ”<strong>eSync</strong> Requirements” on page 44<br />
<strong>Ektron</strong> <strong>CMS400.NET</strong> <strong>eSync</strong> <strong>Manual</strong>, Version 7.6.6 Rev 3 18
Part One: Set up a Min Site on the Staging and Development Servers<br />
1. Upgrade your existing server to the current version of <strong>Ektron</strong><br />
<strong>CMS400.NET</strong> if necessary.<br />
2. Install a minimum site on the staging and development servers.<br />
To do this, run the <strong>Ektron</strong> <strong>CMS400.NET</strong> base installation file<br />
(CMS400Base7x.exe) version 7.6 or higher. (For more<br />
information, see the <strong>Ektron</strong> <strong>CMS400.NET</strong> Setup manual.)<br />
Part Two: Generate and Copy Security Certificates<br />
Security certificates authorize synchronization between servers. In<br />
an <strong>eSync</strong> configuration, every server needs a security certificate<br />
from every other server, as shown below.<br />
To generate and copy these certificates, follow these steps.<br />
• ”A. Generate Security Certificates on Production and Copy<br />
Them to Staging and Development” on page 20<br />
• ”B. Generate Security Certificates on Staging and Copy Them<br />
to Development and Production” on page 23<br />
<strong>Ektron</strong> <strong>CMS400.NET</strong> <strong>eSync</strong> <strong>Manual</strong>, Version 7.6.6 Rev 3 19
• ”C. Generate Security Certificates on Development and Copy<br />
them to Staging and Production” on page 26<br />
A. Generate Security Certificates on Production and Copy Them to Staging and<br />
Development<br />
Follow these steps to complete this procedure.<br />
1. Sign on to the production server.<br />
2. Click the Windows Start Button> All programs > <strong>Ektron</strong> ><br />
CMS400 v7x > Utilities > Security Configurator.<br />
3. The following screen appears.<br />
<strong>Ektron</strong> <strong>CMS400.NET</strong> <strong>eSync</strong> <strong>Manual</strong>, Version 7.6.6 Rev 3 20
WARNING!<br />
4. At the Web Site Description field, select the Web site on the<br />
production server.<br />
5. Press Generate.<br />
6. The certificates are created on the production server.<br />
7. Open two Windows Explorer windows: one showing the<br />
production server’s file system, and the other showing the<br />
staging server’s file system.<br />
8. In the staging server window, create a folder underneath the<br />
root folder. Name the folder Prod security certificates.<br />
Do not create the new folder under the web root, C:\inetpub\wwwroot.<br />
9. In the production server window, open the following folder:<br />
C:\ProgramFiles\<strong>Ektron</strong>\CMS400V7x\Utilities\Software\SecurityCon<br />
figurator.<br />
10. From that folder, copy these files.<br />
•servername_SyncClient.pfx<br />
•servername_SyncClient.pvk<br />
<strong>Ektron</strong> <strong>CMS400.NET</strong> <strong>eSync</strong> <strong>Manual</strong>, Version 7.6.6 Rev 3 21
•servername_SyncClient.cer<br />
•servername_SyncServer.pfx<br />
•servername_SyncServer.pvk<br />
•servername_SyncServer.cer<br />
11. Paste the files into the folder you created in Step 9. Make sure<br />
there are no other security files in the folder.<br />
12. Close both windows you opened in Step 8.<br />
After copying the security certificate files to the staging folder,<br />
you need to register and move them to the correct folders. The<br />
Security Configurator screen does this.<br />
13. Sign on to the staging server.<br />
14. Open the security configurator screen using this path:<br />
Windows Start Button > All programs > <strong>Ektron</strong> > CMS400<br />
v7x > Utilities > Security Configurator.<br />
15. The security configurator screen appears.<br />
<strong>Ektron</strong> <strong>CMS400.NET</strong> <strong>eSync</strong> <strong>Manual</strong>, Version 7.6.6 Rev 3 22
16. Click the Apply Remote Server Certificates button (circled<br />
above).<br />
17. Click the browse button next to that field.<br />
18. Browse to the folder to which you pasted the security<br />
certificates in Step 12.<br />
19. Click the Apply button.<br />
20. The security configurator copies the certificates you pasted in<br />
Step 12 to the correct folder, and configures them for the<br />
staging server.<br />
21. Follow the same procedure to move production certificates to<br />
the development server. To do this, begin at Step 8 and follow<br />
all steps. Wherever the instructions mention a staging server,<br />
substitute the development server.<br />
B. Generate Security Certificates on Staging and Copy Them to Development and<br />
Production<br />
Follow these steps to complete this procedure.<br />
1. Sign on to the staging server.<br />
2. Click the Windows Start Button> All programs > <strong>Ektron</strong> ><br />
CMS400 v7x > Utilities > Security Configurator.<br />
3. The following screen appears.<br />
<strong>Ektron</strong> <strong>CMS400.NET</strong> <strong>eSync</strong> <strong>Manual</strong>, Version 7.6.6 Rev 3 23
WARNING!<br />
4. At the Web Site Description field, select the Web site on the<br />
staging server.<br />
5. Press Generate.<br />
6. The certificates are created on the staging server.<br />
7. Open two Windows Explorer windows: one showing the<br />
staging server’s file system, and the other showing the<br />
production server’s file system.<br />
8. In the production server window, create a folder underneath the<br />
root folder. Name the folder staging security certificates.<br />
Do not create the new folder under the web root, C:\inetpub\wwwroot.<br />
9. In the staging server window, open the following folder:<br />
C:\ProgramFiles\<strong>Ektron</strong>\CMS400V7x\Utilities\Software\SecurityCon<br />
figurator.<br />
10. From that folder, copy these files.<br />
•servername_SyncClient.pfx<br />
•servername_SyncClient.pvk<br />
<strong>Ektron</strong> <strong>CMS400.NET</strong> <strong>eSync</strong> <strong>Manual</strong>, Version 7.6.6 Rev 3 24
•servername_SyncClient.cer<br />
•servername_SyncServer.pfx<br />
•servername_SyncServer.pvk<br />
•servername_SyncServer.cer<br />
11. Paste the files into the folder you created in Step 9. Make sure<br />
there are no other security files in the folder.<br />
12. Close both windows you opened in Step 8.<br />
After copying the security certificate files to the production<br />
folder, you need to register and move them to the correct<br />
folders. The Security Configurator screen does this.<br />
13. Sign on to the production server.<br />
14. Open the security configurator screen using this path:<br />
Windows Start Button > All programs > <strong>Ektron</strong> > CMS400<br />
v7x > Utilities > Security Configurator.<br />
15. The security configurator screen appears.<br />
<strong>Ektron</strong> <strong>CMS400.NET</strong> <strong>eSync</strong> <strong>Manual</strong>, Version 7.6.6 Rev 3 25
16. Click the Apply Remote Server Certificates button (circled<br />
above).<br />
17. Click the browse button next to that field.<br />
18. Browse to the folder to which you pasted the security<br />
certificates in Step 12.<br />
19. Click the Apply button.<br />
20. The security configurator copies the certificates you pasted in<br />
Step 12 to the correct folder, and configures them for the<br />
production server.<br />
21. Follow the same procedure to move staging certificates to the<br />
development server. To do this, begin at Step 8 and follow all<br />
steps. Wherever the instructions mention a production server,<br />
substitute the development server.<br />
C. Generate Security Certificates on Development and Copy them to Staging and<br />
Production<br />
1. Sign on to the development server.<br />
2. Click the Windows Start Button> All programs > <strong>Ektron</strong> ><br />
CMS400 v7x > Utilities > Security Configurator.<br />
3. The following screen appears.<br />
<strong>Ektron</strong> <strong>CMS400.NET</strong> <strong>eSync</strong> <strong>Manual</strong>, Version 7.6.6 Rev 3 26
WARNING!<br />
4. At the Web Site Description field, select the Web site on the<br />
development server.<br />
5. Press Generate.<br />
6. The certificates are created on the development server.<br />
7. Open two Windows Explorer windows: one showing the<br />
development server’s file system, and the other showing the<br />
staging server’s file system.<br />
8. In the staging server window, create a folder underneath the<br />
root folder. Name the folder Dev security certificates.<br />
Do not create the new folder under the web root, C:\inetpub\wwwroot.<br />
9. In the development server window, open the following folder:<br />
C:\ProgramFiles\<strong>Ektron</strong>\CMS400V7x\Utilities\Software\SecurityCon<br />
figurator.<br />
10. From that folder, copy these files.<br />
•servername_SyncClient.pfx<br />
•servername_SyncClient.pvk<br />
•servername_SyncClient.cer<br />
<strong>Ektron</strong> <strong>CMS400.NET</strong> <strong>eSync</strong> <strong>Manual</strong>, Version 7.6.6 Rev 3 27
•servername_SyncServer.pfx<br />
•servername_SyncServer.pvk<br />
•servername_SyncServer.cer<br />
11. Paste the files into the staging server folder you created in Step<br />
9. Make sure there are no other security files in the folder.<br />
12. Close both windows you opened in Step 8.<br />
After copying the security certificate files to the staging folder,<br />
you need to register and move them to the correct folders. The<br />
Security Configurator screen does this.<br />
13. Sign on to the staging server.<br />
14. Open the security configurator screen using this path:<br />
Windows Start Button > All programs > <strong>Ektron</strong> > CMS400<br />
v7x > Utilities > Security Configurator.<br />
15. The security configurator screen appears.<br />
16. Click the Apply Remote Server Certificates button (circled<br />
above).<br />
<strong>Ektron</strong> <strong>CMS400.NET</strong> <strong>eSync</strong> <strong>Manual</strong>, Version 7.6.6 Rev 3 28
17. Click the browse button next to that field.<br />
18. Browse to the folder you created in Step 9.<br />
19. Click the Apply button.<br />
20. The security configurator copies the certificates you pasted in<br />
Step 12 to the correct folder, and configures them for the<br />
staging server.<br />
21. Follow the same procedure to move development certificates<br />
to the production server. To do this, begin at Step 8 and follow<br />
all steps. Wherever the instructions mention a staging server,<br />
substitute the production server.<br />
Part Three: Connect Staging and Production Servers<br />
WARNING!<br />
Back up your database before beginning this procedure!<br />
1. On the staging server, sign on to <strong>Ektron</strong> <strong>CMS400.NET</strong>.<br />
2. In the <strong>Ektron</strong> <strong>CMS400.NET</strong> Workarea, go to Settings ><br />
Configuration > Synchronization.<br />
3. The View All Synchronization Configurations screen appears.<br />
4. Click the Add button ( ).<br />
<strong>Ektron</strong> <strong>CMS400.NET</strong> <strong>eSync</strong> <strong>Manual</strong>, Version 7.6.6 Rev 3 29
5. The Create Synchronization Server Relationship screen<br />
appears.<br />
6. At the Remote Server field, enter the name of the production<br />
server.<br />
7. At the Choose Certificate field, the name of the production<br />
server appears.<br />
8. Click the Connect button. This action connects the staging with<br />
the production server.<br />
9. After you connect to the production server, a new screen<br />
appears showing its database.<br />
10. Click Next.<br />
<strong>Ektron</strong> <strong>CMS400.NET</strong> <strong>eSync</strong> <strong>Manual</strong>, Version 7.6.6 Rev 3 30
11. A new screen appears, showing both servers.<br />
12. Click Create. This action connects the staging and production<br />
servers.<br />
Part Four: Download the Production Server’s Database to the Staging<br />
Server<br />
1. From the View All Synchronization Configurations screen, click<br />
the Start Initial Sync button.<br />
<strong>Ektron</strong> <strong>CMS400.NET</strong> <strong>eSync</strong> <strong>Manual</strong>, Version 7.6.6 Rev 3 31
2. The initial sync downloads the production server’s database to<br />
the staging server.<br />
3. A screen tracks the sync’s progress.<br />
4. When the sync is complete, Synchronization is Complete<br />
appears.<br />
The initial sync also creates a default database profile. The profile<br />
remembers information about the sync, such as the source and<br />
destination databases, sync direction, and the fact that it syncs the<br />
<strong>Ektron</strong> <strong>CMS400.NET</strong> <strong>eSync</strong> <strong>Manual</strong>, Version 7.6.6 Rev 3 32
database and resource files (see example below). You can reuse<br />
this profile to run database/resource syncs any time in the future.<br />
<strong>Ektron</strong> <strong>CMS400.NET</strong> <strong>eSync</strong> <strong>Manual</strong>, Version 7.6.6 Rev 3 33
Part Five: Download the Production Server’s Templates to Staging<br />
1. From the View All Synchronization Configurations screen, click<br />
the Add Sync Profile button.<br />
2. The Add Synchronization Profile screen appears.<br />
3. At the Synchronization name field, give this profile a name,<br />
such as Prod - Staging Template Sync.<br />
4. At the Items to Synchronize field, select Templates.<br />
5. For Direction, choose Download.<br />
6. For Schedule, choose None. (See example below.)<br />
<strong>Ektron</strong> <strong>CMS400.NET</strong> <strong>eSync</strong> <strong>Manual</strong>, Version 7.6.6 Rev 3 34
7. Save the profile.<br />
8. Click the Run button to the right of the template sync (circled<br />
below).<br />
<strong>Ektron</strong> <strong>CMS400.NET</strong> <strong>eSync</strong> <strong>Manual</strong>, Version 7.6.6 Rev 3 35
9. A screen tracks the sync’s progress.<br />
10. When the sync is complete, Synchronization is Complete<br />
appears.<br />
You can reuse the template sync profile to sync templates any time<br />
in the future.<br />
Part Six: Connect the Development and Staging Servers<br />
1. Sign on to <strong>Ektron</strong> <strong>CMS400.NET</strong> development server.<br />
2. In the <strong>Ektron</strong> <strong>CMS400.NET</strong> Workarea, go to Settings ><br />
Configuration > Synchronization.<br />
3. The View All Synchronization Configurations screen appears.<br />
<strong>Ektron</strong> <strong>CMS400.NET</strong> <strong>eSync</strong> <strong>Manual</strong>, Version 7.6.6 Rev 3 36
4. Click the Add button ( ).<br />
5. The Create Synchronization Server Relationship screen<br />
appears.<br />
6. At the Remote Server field, enter the name of the staging<br />
server.<br />
7. At the Choose Certificate field, the name of the staging server<br />
appears.<br />
8. Click the Connect button. This action connects the<br />
development with the staging server.<br />
9. After you connect to the staging server, a new screen appears<br />
showing its database.<br />
<strong>Ektron</strong> <strong>CMS400.NET</strong> <strong>eSync</strong> <strong>Manual</strong>, Version 7.6.6 Rev 3 37
10. Click Next.<br />
11. A new screen appears, showing both servers.<br />
<strong>Ektron</strong> <strong>CMS400.NET</strong> <strong>eSync</strong> <strong>Manual</strong>, Version 7.6.6 Rev 3 38
12. Click Create. This action connects the development and<br />
staging servers.<br />
Part Seven: Download the Staging Server’s Database to the<br />
Development Server<br />
1. From the View All Synchronization Configurations screen, click<br />
the Start Initial Sync button.<br />
2. The initial sync downloads the staging server’s database to the<br />
development server.<br />
3. A screen tracks the sync’s progress.<br />
<strong>Ektron</strong> <strong>CMS400.NET</strong> <strong>eSync</strong> <strong>Manual</strong>, Version 7.6.6 Rev 3 39
4. When the sync is complete, Synchronization is Complete<br />
appears.<br />
The initial sync also creates a default database profile. The profile<br />
remembers information about the sync, such as the source and<br />
destination databases, sync direction, and the fact that it syncs the<br />
database and resource files (see example below). You can reuse<br />
this profile to sync the database/resources between these two<br />
servers at any time in the future.<br />
<strong>Ektron</strong> <strong>CMS400.NET</strong> <strong>eSync</strong> <strong>Manual</strong>, Version 7.6.6 Rev 3 40
Part Eight: Download the Staging Server’s Templates to Development<br />
<strong>Ektron</strong> <strong>CMS400.NET</strong> <strong>eSync</strong> <strong>Manual</strong>, Version 7.6.6 Rev 3 41
1. From the View All Synchronization Configurations screen, click<br />
the Add Sync Profile button.<br />
2. The Add Synchronization Profile screen appears.<br />
3. At the Synchronization name field, give this profile a name,<br />
such as Staging-Dev Template Sync.<br />
4. At the Items to Synchronize field, select Templates.<br />
5. For Direction, choose Download.<br />
6. For Schedule, choose None. (See example below.)<br />
7. Save the screen.<br />
8. Click the Run button to the right of the template sync (circled<br />
below).<br />
<strong>Ektron</strong> <strong>CMS400.NET</strong> <strong>eSync</strong> <strong>Manual</strong>, Version 7.6.6 Rev 3 42
9. A screen tracks the sync’s progress.<br />
10. When the sync is complete, Synchronization is Complete<br />
appears.<br />
You can reuse the template sync profile to sync templates any time<br />
in the future.<br />
<strong>Ektron</strong> <strong>CMS400.NET</strong> <strong>eSync</strong> <strong>Manual</strong>, Version 7.6.6 Rev 3 43
Using <strong>eSync</strong><br />
<strong>eSync</strong> Requirements<br />
<strong>Ektron</strong> Software and Files<br />
This section explains the following <strong>eSync</strong> topics.<br />
• ”<strong>eSync</strong> Requirements” on page 44<br />
• ”Characteristics of <strong>eSync</strong>” on page 45<br />
• ”Managing <strong>eSync</strong> Security Certificates” on page 54<br />
• ”Using <strong>eSync</strong> to Initialize a New Site” on page 65<br />
• ”Setting up <strong>eSync</strong> Profiles” on page 66<br />
• ”Optional Steps before Running a Sync” on page 80<br />
• ”Previewing a Sync” on page 80<br />
• ”Running a Sync” on page 81<br />
• ”Backing up the Destination Server During an <strong>eSync</strong>” on<br />
page 85<br />
• ”Synching Custom Database Tables” on page 93<br />
• ”Reviewing Resolved Collisions” on page 90<br />
• ”Content and Folder Sync Options” on page 94<br />
• ”<strong>eSync</strong> in a Load Balanced Environment” on page 100<br />
• ”Using <strong>eSync</strong> in a Multi-site Environment” on page 109<br />
• ”Using <strong>eSync</strong> with Web Alerts” on page 114<br />
• ”<strong>eSync</strong> and Integrated Search Folders” on page 114<br />
• ”Using <strong>eSync</strong> with eCommerce” on page 115<br />
• ”<strong>eSync</strong> Troubleshooting” on page 116<br />
• <strong>Ektron</strong> <strong>CMS400.NET</strong> version 7.6 or higher<br />
<strong>Ektron</strong> <strong>CMS400.NET</strong> <strong>eSync</strong> <strong>Manual</strong>, Version 7.6.6 Rev 3 44
WARNING! The version of <strong>Ektron</strong> <strong>CMS400.NET</strong> on every server in the sync configuration<br />
must match. You cannot upgrade nor downgrade <strong>Ektron</strong> <strong>CMS400.NET</strong> using<br />
<strong>eSync</strong>.<br />
Microsoft Software<br />
NOTE<br />
User Permissions<br />
Server<br />
Characteristics of <strong>eSync</strong><br />
• An <strong>Ektron</strong> <strong>CMS400.NET</strong> base installation file (for example,<br />
cms400Base7x.exe). Use this file to install a second site with<br />
which you will sync your current site.<br />
• <strong>Ektron</strong> <strong>CMS400.NET</strong> licenses that support Enterprise or<br />
Professional with <strong>eSync</strong> on every server being synched.<br />
• Matching security certificates on every server being synched.<br />
See Also: ”Managing <strong>eSync</strong> Security Certificates” on page 54<br />
• Windows Server 2003 or higher; Vista Ultimate or Business<br />
• Microsoft .NET Framework 3.5<br />
<strong>Ektron</strong> <strong>CMS400.NET</strong>’s installation checks for this version of the<br />
framework during installation/upgrade. If it’s not on your server,<br />
you are asked for permission to install it.<br />
It is not a problem if your templates were created using the 2.0 Framework.<br />
• Microsoft SQL 2005 SP2 or higher<br />
• You are a member of the Administrators group or assigned the<br />
Synchronization Admin role. See Also: ”Defining Roles” on<br />
page 795<br />
• The user performing the sync has either a db_ddladmin or<br />
dbowner role for the SQL database<br />
The GMT time on each server’s clock must be within 5 minutes of<br />
each other.<br />
• ”Easy and Flexible Setup and Usage” on page 46<br />
• ”Sync Configurations” on page 47<br />
<strong>Ektron</strong> <strong>CMS400.NET</strong> <strong>eSync</strong> <strong>Manual</strong>, Version 7.6.6 Rev 3 45
• ”Unique ID Numbering” on page 52<br />
• ”<strong>eSync</strong> Moves Changes Only” on page 53<br />
Easy and Flexible Setup and Usage<br />
You administer <strong>eSync</strong> through <strong>Ektron</strong> <strong>CMS400.NET</strong>’s Workarea ><br />
Settings > Configuration > Synchronization screens. The<br />
screens let you establish a sync configuration between two<br />
databases, then specify any number of sync profiles for each<br />
configuration.<br />
Each profile lets you specify data to sync, a direction, and a<br />
schedule. You can always sync immediately by clicking the sync<br />
( ) button.<br />
You create profiles to sync these kinds of data.<br />
• all content, assets, and library assets<br />
• all Workarea folder files<br />
• the remaining site files (with a few exceptions)<br />
• a selection of Windows files in your site root folder and its<br />
subfolders<br />
See Also: ”Setting up <strong>eSync</strong> Profiles” on page 66<br />
<strong>Ektron</strong> <strong>CMS400.NET</strong> <strong>eSync</strong> <strong>Manual</strong>, Version 7.6.6 Rev 3 46
Sync Configurations<br />
IMPORTANT!<br />
Individual file types can be included or excluded from the sync. In<br />
addition, you can sync <strong>Ektron</strong> <strong>CMS400.NET</strong> content or folders. See<br />
Also: ”Content and Folder Sync Options” on page 94<br />
Several <strong>eSync</strong> configurations are shown below. You can<br />
synchronize any server to or from any other server with one<br />
important exception: you cannot initiate a sync from a server<br />
outside the firewall. You can only initiate a sync from a server<br />
inside the firewall and copy to a server outside the firewall. This is<br />
because the outside server does not know the address of servers<br />
inside the firewall. However, you can use a staging server to push<br />
and pull updated information to and from a production server.<br />
All <strong>eSync</strong> transmissions use port 8732. This is not configurable.<br />
Configuration 1: One Staging Server, One Production Server<br />
This is the most basic <strong>eSync</strong> configuration, showing one staging<br />
and one production server. Each server has a database and one<br />
site.<br />
The <strong>eSync</strong> feature can automatically create a production server<br />
from your staging server. See Also: ”Using <strong>eSync</strong> to Initialize a<br />
New Site” on page 65<br />
For installation instructions for this configuration, see ”Scenario 2:<br />
Synching an <strong>Ektron</strong> <strong>CMS400.NET</strong> Server with Another Server” on<br />
page 5.<br />
<strong>Ektron</strong> <strong>CMS400.NET</strong> <strong>eSync</strong> <strong>Manual</strong>, Version 7.6.6 Rev 3 47
Configuration 2: One Development Server, One Staging Server, One<br />
Production Server<br />
This configuration includes a development server. Developers can<br />
use it to create new features and modify existing ones. When they<br />
are done, they can sync the changes to the staging server, where<br />
the changes can be verified before being moved to production.<br />
For installation instructions for this configuration, see ”Scenario 3:<br />
Setting up a Development > Staging > Production Environment” on<br />
page 17.<br />
Configuration 2a: Multi-site Staging Server, Multi-site Production Server<br />
The following configuration illustrates synching several sites on a<br />
staging server with those sites on production.<br />
<strong>Ektron</strong> <strong>CMS400.NET</strong> <strong>eSync</strong> <strong>Manual</strong>, Version 7.6.6 Rev 3 48
Configuration 3: Several Development Servers, One Staging Server, One<br />
Production Server<br />
As shown in the illustration, any number of development servers<br />
can sync to each other and to your staging servers.<br />
Configuration 4: One Development Server, One Staging Server, One<br />
Production Site Server, One Production Database Server<br />
In this configuration supported by <strong>eSync</strong>, the production site has<br />
two servers: one for site files, and another for the database.<br />
<strong>Ektron</strong> <strong>CMS400.NET</strong> <strong>eSync</strong> <strong>Manual</strong>, Version 7.6.6 Rev 3 49
NOTE<br />
To synchronize these servers, set up several <strong>eSync</strong> profiles. One<br />
syncs the database, assets, and templates to the production<br />
database server. Use additional profiles to sync the staging<br />
server’s workarea files with the production site server.<br />
When using separate site and database servers, assets are stored on the site<br />
server.<br />
Configuration 5: Configuration 4 Plus Pre-Production Server<br />
This <strong>eSync</strong> configuration adds an extra server between staging<br />
and production. The preproduction server can be used for review<br />
and testing of changes before they are moved to production.<br />
Configuration 6: Multi-site Configurations, Each Site and Database on its<br />
own Production Server<br />
In this configuration, each production server has its own database<br />
plus the site files. As an alternative, you could have a separate<br />
<strong>Ektron</strong> <strong>CMS400.NET</strong> <strong>eSync</strong> <strong>Manual</strong>, Version 7.6.6 Rev 3 50
NOTE<br />
The Server Number<br />
server for each production database, with all sites on one<br />
production server.<br />
The above configuration also supports separate site and database servers.<br />
To synchronize this type of configuration, set up several <strong>eSync</strong><br />
profiles, one for each site.<br />
• Three database and template profiles<br />
• Three Workarea profiles<br />
Every server in a sync configuration is assigned a unique number.<br />
The originating server is numbered 1, the first server with which it<br />
establishes a relationship is numbered 2, etc.<br />
<strong>Ektron</strong> <strong>CMS400.NET</strong> <strong>eSync</strong> <strong>Manual</strong>, Version 7.6.6 Rev 3 51
The server number is in the serverinfo.xml file, located in the<br />
c:\sync\inetpub\wwwroot\siteroot folder, as shown below.<br />
<br />
<br />
b0cccb5a-1d45-4262-8857-79f1333696dc<br />
http://localhost:8732/<strong>Ektron</strong>.Sync.Communication/<br />
SyncCommunicationScheduleService.svc<br />
server=WS10080\SQLExpress;database=CMS400Developer;Integrated<br />
Security=TRUE;user=;pwd=;<br />
<br />
<br />
Unique ID Numbering<br />
All <strong>Ektron</strong> <strong>CMS400.NET</strong> data is assigned a unique ID number to<br />
distinguish it from similar objects. Examples are content (see<br />
illustration below), folders, menus, users, etc.<br />
When you create a sync relationship, <strong>Ektron</strong> <strong>CMS400.NET</strong> applies<br />
to each server a new ID numbering range to ensure that, from then<br />
on, objects created on either server have a unique ID. This<br />
prevents collisions when synching between servers. For example,<br />
since membership users created on a production server have a<br />
different ID number range from those created on the staging<br />
server, <strong>eSync</strong> does not overwrite them.<br />
To view a server’s ID number range, open its serverinfo.xml file,<br />
located in the c:\sync\inetpub\wwwroot\siteroot folder, and check<br />
the MaxId value (highlighted in red below).<br />
<br />
<br />
b0cccb5a-1d45-4262-8857-79f1333696dc<br />
<strong>Ektron</strong> <strong>CMS400.NET</strong> <strong>eSync</strong> <strong>Manual</strong>, Version 7.6.6 Rev 3 52
http://localhost:8732/<strong>Ektron</strong>.Sync.Communication/<br />
SyncCommunicationScheduleService.svc<br />
server=WS10080\SQLExpress;database=CMS400Developer;Integrated<br />
Security=TRUE;user=;pwd=;<br />
<br />
<br />
Multiply that number by 1 trillion to get the largest ID number which<br />
that server can assign. So for example, if MaxId = 3, possible ID<br />
numbers range from 2,000,000,000,001 to 3,000,000,000,000.<br />
<strong>eSync</strong> Moves Changes Only<br />
<strong>eSync</strong> only copies data that changed since the last sync. So, for<br />
example, if your site has 100 menus but only 3 changed since the<br />
last sync, it only copies three. As a result, <strong>eSync</strong> is very quick.<br />
To track changes to <strong>Ektron</strong> <strong>CMS400.NET</strong> data between syncs,<br />
<strong>eSync</strong> sets up a c:\sync folder structure that mirrors your site’s<br />
Windows folder structure. This structure is created on each server<br />
when sync relationships are first established.<br />
<strong>Ektron</strong> <strong>CMS400.NET</strong> <strong>eSync</strong> <strong>Manual</strong>, Version 7.6.6 Rev 3 53
No <strong>Ektron</strong> <strong>CMS400.NET</strong> files reside in the \sync folders. Instead,<br />
each folder has four .sync files that monitor changes to the <strong>Ektron</strong><br />
<strong>CMS400.NET</strong> files in the corresponding folder.<br />
Managing <strong>eSync</strong> Security Certificates<br />
NOTE<br />
<strong>Ektron</strong> <strong>CMS400.NET</strong>’s <strong>eSync</strong> feature uses security certificates to<br />
ensure secure communication between servers. That is, all servers<br />
in an <strong>eSync</strong> configuration must have matching, encrypted security<br />
certificates in order to establish an <strong>eSync</strong> relationship.<br />
If your configuration features separate database servers, you do not need to<br />
install security certificates on them. You only need to install certificates on servers<br />
that host <strong>Ektron</strong> CMS400.Net.<br />
This section explains how to create and replace security<br />
certificates on a server through the following topics.<br />
• ”The Client and Server Certificates” on page 54<br />
• ”Installing Security Certificates” on page 56<br />
• ”Regenerating Security Certificates” on page 62<br />
• ”Troubleshooting Security Certificates” on page 63<br />
See Also: ”Create <strong>eSync</strong> Security Certificates for a Load Balanced<br />
Cluster” on page 104<br />
The Client and Server Certificates<br />
Before you can establish an <strong>eSync</strong> relationship between servers,<br />
each server must have its own (local) security certificate and one<br />
from every other server in the configuration, as shown below.<br />
<strong>Ektron</strong> <strong>CMS400.NET</strong> <strong>eSync</strong> <strong>Manual</strong>, Version 7.6.6 Rev 3 54
As another example, if an <strong>eSync</strong> configuration consists of five<br />
servers, each server would require five security certificates: one<br />
local and four remote certificates.<br />
Each server creates two sets of certificates: a server and a client<br />
set. Then, you copy the certificates to the other server. The local<br />
machine’s server certificate must match a client certificate on the<br />
remote server, and vice versa.<br />
Certificates are typically copied only when you first establish an<br />
<strong>eSync</strong> relationship between servers. After that, any <strong>eSync</strong> activity<br />
triggers a background check, and the user can proceed only if the<br />
certificates match.<br />
Each certificate consists of the following files.<br />
• Server certificate<br />
- servername_SyncServer.pfx<br />
- servername_SyncServer.pvk<br />
<strong>Ektron</strong> <strong>CMS400.NET</strong> <strong>eSync</strong> <strong>Manual</strong>, Version 7.6.6 Rev 3 55
- servername_SyncServer.cer<br />
• Client certificate<br />
- servername_SyncClient.pfx<br />
- servername_SyncClient.pvk<br />
- servername_SyncClient.cer<br />
The security certificates can apply to one site or all sites on a<br />
server. You determine this when installing them.<br />
See Also: ”Installing Security Certificates” on page 56<br />
Installing Security Certificates<br />
Prerequisite: Permission to copy and paste files between local<br />
and remote servers<br />
To create and place <strong>eSync</strong> security certificates in the correct<br />
locations, follow these steps.<br />
• ”Step 1: Create Security Certificates on Your Local Server” on<br />
page 56<br />
• ”Step 2: Create Security Certificates on the Remote Server” on<br />
page 58<br />
• ”Step 3: Copy Local Client Certificate to Remote Server” on<br />
page 59<br />
• ”Step 4: Copy Remote Client Certificate to Local Server” on<br />
page 61<br />
• ”Step 5: Test the Security Certificates” on page 62<br />
Step 1: Create Security Certificates on Your Local Server<br />
NOTE<br />
1. At the end of the <strong>Ektron</strong> <strong>CMS400.NET</strong> installation, you are<br />
asked if you want to install <strong>eSync</strong> security certificates. If you<br />
agree, the following screen prompts you to enter information<br />
needed to create the certificates.<br />
You can access this screen at any time screen by opening Windows Start<br />
Button> All programs > <strong>Ektron</strong> > CMS400 v7x > Utilities > Security<br />
Configurator.<br />
<strong>Ektron</strong> <strong>CMS400.NET</strong> <strong>eSync</strong> <strong>Manual</strong>, Version 7.6.6 Rev 3 56
Field Description<br />
Use the following table to complete this screen.<br />
Generate Certificates - Use this screen area to create security certificates that must be copied to a<br />
remote server with which you want to sync.<br />
Web Site Description If more than one site is set up on this server, use the pull-down list to<br />
select the Web site for which you are installing security certificates. Or,<br />
click All to apply the certificates to all sites on this server.<br />
Apply Remote Server Certificates - Use this screen area to apply <strong>eSync</strong> security certificates that<br />
were copied from a remote server to your local server. See Also: ”Step 3: Copy Local Client<br />
Certificate to Remote Server” on page 59<br />
2. Click Generate.<br />
3. Local security certificates are created and configured<br />
(illustrated below).<br />
<strong>Ektron</strong> <strong>CMS400.NET</strong> <strong>eSync</strong> <strong>Manual</strong>, Version 7.6.6 Rev 3 57
NOTE<br />
See Illustration<br />
Only click OK once. The status field at the bottom of the screen updates the<br />
status as it progresses. If you click OK more than once, you delay the certificates’<br />
creation.<br />
Step 2: Create Security Certificates on the Remote Server<br />
1. Sign on to remote server.<br />
2. Generate security certificates for the remote server, following<br />
instructions in ”Step 1: Create Security Certificates on Your<br />
Local Server” on page 56.<br />
3. When you complete this procedure, remote client and server<br />
security certificates are created and configured (illustrated<br />
below).<br />
See Illustration<br />
<strong>Ektron</strong> <strong>CMS400.NET</strong> <strong>eSync</strong> <strong>Manual</strong>, Version 7.6.6 Rev 3 58
Step 3: Copy Local Client Certificate to Remote Server<br />
WARNING!<br />
1. On the local server, open two Windows Explorer windows: one<br />
showing the local server’s file system, and the other showing<br />
the remote server’s file system.<br />
2. In the remote server window, create a folder underneath the<br />
root folder. The folder name is not important.<br />
Do not place it under the web root folder, C:\inetpub\wwwroot.<br />
3. In the local server window, open the following folder:<br />
C:\ProgramFiles\<strong>Ektron</strong>\CMS400V7x\Utilities\Software\SecurityCon<br />
figurator.<br />
4. Copy the following files.<br />
•servername_SyncClient.pfx<br />
•servername_SyncClient.pvk<br />
<strong>Ektron</strong> <strong>CMS400.NET</strong> <strong>eSync</strong> <strong>Manual</strong>, Version 7.6.6 Rev 3 59
NOTE<br />
•servername_SyncClient.cer<br />
•servername_SyncServer.pfx<br />
•servername_SyncServer.pvk<br />
•servername_SyncServer.cer<br />
These files were created when you completed the <strong>eSync</strong> Security Configurator<br />
Screen in Step 1.<br />
5. Paste the files into the remote server folder that you created in<br />
Step 2. Make sure there are no other security files in the folder.<br />
After the local server’s security certificates are copied to the<br />
remote server, you need to register and move them to the correct<br />
folders. The Security Configurator screen does this.<br />
6. On the remote server, open the security configurator screen<br />
using this path: Windows Start Button > All programs ><br />
<strong>Ektron</strong> > CMS400 v7x > Utilities > Security Configurator.<br />
7. The security configurator screen appears.<br />
<strong>Ektron</strong> <strong>CMS400.NET</strong> <strong>eSync</strong> <strong>Manual</strong>, Version 7.6.6 Rev 3 60
8. Click the Apply Remote Server Certificates button (circled<br />
above).<br />
9. Click the browse button next to that field.<br />
10. Browse to the folder to which you pasted the security<br />
certificates in Step 5.<br />
11. Click the Apply button.<br />
12. The utility copies the security certificates you pasted in Step 5<br />
to the correct folder, and configures them for the remote server.<br />
Step 4: Copy Remote Client Certificate to Local Server<br />
1. Sign on to the remote server.<br />
2. Follow the steps described in ”Step 3: Copy Local Client<br />
Certificate to Remote Server” on page 59, except substitute<br />
remote for local.<br />
<strong>Ektron</strong> <strong>CMS400.NET</strong> <strong>eSync</strong> <strong>Manual</strong>, Version 7.6.6 Rev 3 61
Step 5: Test the Security Certificates<br />
1. From the local server, sign on to <strong>Ektron</strong> <strong>CMS400.NET</strong>.<br />
2. In the Workarea, go to Settings > Configuration ><br />
Synchronization.<br />
3. Click the plus sign ( ).<br />
4. Insert the name of the Remote Server.<br />
5. Select the security certificate you are testing.<br />
6. Click Connect.<br />
7. If the next screen appears, the security certificates are working<br />
properly.<br />
Regenerating Security Certificates<br />
Follow these steps to regenerate security certificates. You may<br />
need to do this if they stop working, or you are concerned about a<br />
security breach.<br />
1. Access the <strong>eSync</strong> Security Configurator screen via Windows<br />
Start Button > All programs > <strong>Ektron</strong> > CMS400 v7x ><br />
Utilities > Security Configurator.<br />
2. Use the Web Site pulldown field to select a site on your server,<br />
or choose All sites.<br />
3. Click the Discard Existing Keys checkbox (circled below).<br />
4. Click Generate.<br />
<strong>Ektron</strong> <strong>CMS400.NET</strong> <strong>eSync</strong> <strong>Manual</strong>, Version 7.6.6 Rev 3 62
5. The existing security certificates are removed from your local<br />
server.<br />
6. Reopen the Security Configurator screen.<br />
7. Choose the correct Web Site, verify the other settings, and<br />
click Generate. See Also: ”Step 1: Create Security Certificates<br />
on Your Local Server” on page 56<br />
8. This action generates new security certificates on your server.<br />
9. Copy the new certificates to all other servers in the <strong>eSync</strong><br />
configuration. This is explained in ”Step 3: Copy Local Client<br />
Certificate to Remote Server” on page 59.<br />
Troubleshooting Security Certificates<br />
Could Not Connect Error<br />
• ”Could Not Connect Error” on page 63<br />
• ”No Endpoint Error” on page 65<br />
When trying to connect to a remote server, after selecting a<br />
security certificate, you may see the following message.<br />
<strong>Ektron</strong> <strong>CMS400.NET</strong> <strong>eSync</strong> <strong>Manual</strong>, Version 7.6.6 Rev 3 63
Here are some steps to resolve the problem.<br />
• Check the Windows Event Viewer > <strong>Ektron</strong>L2 log for the error.<br />
If the service is hosted but already exists, stop then start the<br />
service (do not restart).<br />
• The certificates may be corrupted. To resolve this, see<br />
”Regenerating Security Certificates” on page 62.<br />
<strong>Ektron</strong> <strong>CMS400.NET</strong> <strong>eSync</strong> <strong>Manual</strong>, Version 7.6.6 Rev 3 64
No Endpoint Error<br />
The above error indicates that<br />
• the remote site may not be on the same <strong>Ektron</strong> <strong>CMS400.NET</strong><br />
version as the local site, or<br />
• the <strong>Ektron</strong> Windows Service is not started<br />
Using <strong>eSync</strong> to Initialize a New Site<br />
IMPORTANT!<br />
Typically, before you begin using <strong>eSync</strong>, one server hosts an<br />
<strong>Ektron</strong> <strong>CMS400.NET</strong> Web site, and you want to bring other servers<br />
into the configuration. After the servers are synchronized, one will<br />
be the staging server (the one on which content is created or<br />
updated, then approved). Another server, production, hosts your<br />
live Web site.<br />
The names of the site and all folders must match on both servers. This is because<br />
paths to images, xslt files, etc. refer to a site and its folders. If the servers’ site and<br />
folder names do not match, the links break.<br />
First, use <strong>eSync</strong> to initialize the new servers from the existing one.<br />
This process is described in ”Setting Up <strong>eSync</strong>” on page 4.<br />
Afterwards, use <strong>eSync</strong> to periodically sync updated content,<br />
folders, users, menus, etc.<br />
<strong>Ektron</strong> <strong>CMS400.NET</strong> <strong>eSync</strong> <strong>Manual</strong>, Version 7.6.6 Rev 3 65
Setting up <strong>eSync</strong> Profiles<br />
To minimize data entry, <strong>eSync</strong> saves your specifications about an<br />
individual <strong>eSync</strong> job in a sync profile. So, after you enter<br />
specifications the first time, just select the profile every subsequent<br />
time you want to sync. A profile contains information about the<br />
• source and destination databases<br />
• type of data being synched<br />
• files to include/exclude<br />
• direction<br />
• schedule<br />
Use the Add Synchronization Profile screen to create and update<br />
<strong>eSync</strong> profiles.<br />
<strong>Ektron</strong> <strong>CMS400.NET</strong> <strong>eSync</strong> <strong>Manual</strong>, Version 7.6.6 Rev 3 66
While following the steps in ”Setting Up <strong>eSync</strong>” on page 4, you<br />
created a default database and a template profile. This section<br />
explains how to modify those profiles and create new ones.<br />
To <strong>eSync</strong> an entire Web site, you need a minimum of two profiles:<br />
one for your web site root/Workarea folder, and another for all other<br />
site files.<br />
To create a profile for<br />
• your Workarea folder, click Workarea Files under Items to<br />
Synchronize.<br />
• all other site files, click Database/Resources, Templates and<br />
Bin under Items to Synchronize.<br />
<strong>Ektron</strong> <strong>CMS400.NET</strong> <strong>eSync</strong> <strong>Manual</strong>, Version 7.6.6 Rev 3 67
Items to<br />
Synchronize<br />
Database/<br />
Resources<br />
The following table explains the kinds of files synched by each<br />
category.<br />
Type of data synched Exceptions For setup<br />
instructions,<br />
see<br />
The database plus the<br />
following site root folders<br />
• assets<br />
• Privateassets<br />
• uploadedimages<br />
• uploadedfiles<br />
Workarea Files All files in the site’s<br />
Workarea folder other than<br />
the exceptions<br />
See ”Global File Type Exceptions”<br />
on page 69<br />
Files in these folders:<br />
• ewebeditpro<br />
• help<br />
• explorer<br />
• ewebdiff<br />
• documents<br />
• foundation<br />
• resources<br />
• sync<br />
See Also: ”Global File Type<br />
Exceptions” on page 69<br />
”Setting up a<br />
Profile to Sync a<br />
Database and<br />
Assets” on<br />
page 70<br />
”Setting up a<br />
Profile to Sync<br />
Workarea Files”<br />
on page 72<br />
<strong>Ektron</strong> <strong>CMS400.NET</strong> <strong>eSync</strong> <strong>Manual</strong>, Version 7.6.6 Rev 3 68
Items to<br />
Synchronize<br />
Templates All files in your site root<br />
folder other than the<br />
exceptions<br />
Note: If you perform an<br />
initial sync of a recentlyinstalled<br />
min site with your<br />
staging site, the min site’s<br />
templates could overwrite<br />
templates on your staging<br />
site. This is because,<br />
when two templates have<br />
the same name, the most<br />
recently modified one<br />
overwrites the other.<br />
To avoid this, rename the<br />
only template installed<br />
with the min site<br />
(login.aspx) before<br />
performing the initial<br />
template sync. You should<br />
also rename login.aspx’s<br />
supporting files, such as<br />
login.aspx.vb.<br />
Note: If you create a new<br />
Windows folder within the<br />
site root folder, sync it,<br />
then later delete the new<br />
folder and sync again, the<br />
new folder will not be<br />
deleted from the<br />
destination server.<br />
Bin The bin folder<br />
Type of data synched Exceptions For setup<br />
instructions,<br />
see<br />
Global File Type Exceptions<br />
You can also set up a profile that syncs Windows folders. See Also:<br />
”Synchronizing Windows Files” on page 78<br />
The following file types are not synched by default.<br />
• .config files<br />
Files in these folders:<br />
• workarea (covered by Workarea<br />
Files sync)<br />
• assets, privateassets, uploadedfiles,<br />
uploadedimages (covered<br />
by Database/Resources<br />
sync)<br />
• bin (covered by Bin checkbox,<br />
below)<br />
• app_webreferences<br />
• latestchanges<br />
• app_globalresources<br />
These files:<br />
• assetManagement.config<br />
• web.config<br />
See Also: ”Global File Type<br />
Exceptions” on page 69<br />
Note: If you create a folder within<br />
your site root and name any folders<br />
under that folder assets,<br />
privateassets, uploadedfiles, or<br />
uploadedimages, those folders are<br />
not synched.<br />
”Setting up a<br />
Profile to Sync<br />
Template and Bin<br />
Files” on page 74<br />
<strong>Ektron</strong> <strong>CMS400.NET</strong> <strong>eSync</strong> <strong>Manual</strong>, Version 7.6.6 Rev 3 69
• .txt files<br />
• .sln files<br />
NOTE <strong>Ektron</strong> <strong>CMS400.NET</strong> creates a large number of .txt files to support the search<br />
functionality.<br />
However, you can add these file types to a sync profile via the<br />
Include/Exclude Files field. See Also: ”At the Include/Exclude<br />
files field, include files not normally synched, or exclude files that<br />
are synched by default.” on page 72<br />
Setting up a Profile to Sync a Database and Assets<br />
To set up a profile to sync an <strong>Ektron</strong> <strong>CMS400.NET</strong> database and its<br />
assets, follow these steps.<br />
Prerequisite<br />
• You created a Sync configuration and ran an initial sync. See<br />
Also: ”Setting Up <strong>eSync</strong>” on page 4<br />
1. Go to the Settings > Configuration > Synchronization<br />
screen.<br />
If you are eligible to add a profile to a configuration, the Add<br />
Sync Profile button appears, circled below.<br />
2. Click the Add Sync Profile button. The Add Synchronization<br />
Profile screen appears.<br />
3. At the Synchronization name field, enter a name for this<br />
profile.<br />
4. At the Items to Synchronize field, select database and<br />
assets.<br />
5. At the Synchronization Direction field, select the direction of<br />
the data copy that will occur. Your choices are:<br />
<strong>Ektron</strong> <strong>CMS400.NET</strong> <strong>eSync</strong> <strong>Manual</strong>, Version 7.6.6 Rev 3 70
NOTE<br />
IMPORTANT!<br />
• Bidirectional (that is, both directions). Changed data on either<br />
server is updated on the other. If the same data (for example, a<br />
membership user profile) is updated on both servers, the<br />
conflict resolution policy determines the outcome. See Also:<br />
”Bidirectional Sync” on page 77; ”Conflict Resolution Policy” on<br />
page 77<br />
If you are using bidirectional sync and only one version was updated since the last<br />
sync, the updated version overwrites the unchanged version.<br />
• Upload - the database and assets are copied from the local<br />
server (the one to which you signed on) to the remote server<br />
(specified at the Remote Site field above). Items on the remote<br />
server are overwritten.<br />
• Download - the database and assets are copied from the<br />
remote server to the local server. Items on the local server are<br />
overwritten.<br />
6. At the Conflict Resolution Policy field, decide what to do if<br />
Synchronization Direction is Bidirectional, and the data has<br />
changed on both servers since the last sync. Your choices are.<br />
•Version on Remote Site Wins - the remote version<br />
overwrites the local version<br />
•Version on Local Site Wins - the local version overwrites the<br />
remote version<br />
7. If desired, select a schedule for when the sync will run<br />
automatically. The choices are<br />
•None - Don’t set up a schedule. Run this sync profile as<br />
needed via the Sync Profile screen‘s Start Now button.<br />
•One Time - you specify a start time and date<br />
•Hourly - you specify a start date and time. <strong>eSync</strong> begins on<br />
the start date and time, then runs every hour at that time.<br />
•Daily - you specify a start time and date; this sync profile will<br />
run every day at this time<br />
•Weekly - you specify a start time, date, and day. After the start<br />
date, this sync profile will run this day every week at this time.<br />
•Monthly - you specify a start time and date (numbers 1<br />
through 31). After the start date, this sync profile will run this<br />
day every month at this time.<br />
You cannot schedule more than one sync to begin at the same time.<br />
<strong>Ektron</strong> <strong>CMS400.NET</strong> <strong>eSync</strong> <strong>Manual</strong>, Version 7.6.6 Rev 3 71
NOTE<br />
NOTE<br />
While the following options let you schedule a sync profile, you can sync at any<br />
time by accessing the Sync Profile and clicking the Sync button ( ). See Also:<br />
”Running a Sync” on page 81<br />
If you enter a date greater than 28, the sync will not run in a month that does not<br />
include that date. For example, if you enter 31, the sync will not run in February,<br />
April, June, September, and November.<br />
Setting up a Profile to Sync Workarea Files<br />
Prerequisite<br />
• You created a Sync configuration and ran an initial sync. See<br />
Also: ”Setting Up <strong>eSync</strong>” on page 4<br />
1. Go to the Settings > Configuration > Synchronization<br />
screen.<br />
2. If you are eligible to add a profile to a configuration, the Add<br />
Sync Profile button appears on the right side, as circled below.<br />
3. Click the Add Sync Profile button. The Add Synchronization<br />
Profile screen appears.<br />
4. At the Synchronization name field, enter a name for this profile.<br />
5. At the Items to Synchronize field, select Workarea files.<br />
6. At the Include/Exclude files field, include files not normally<br />
synched, or exclude files that are synched by default.<br />
For example, .txt files are not normally included in a sync, but<br />
you want to copy several on your staging server to the<br />
production server. In this case, check Include and enter *.txt<br />
into the adjacent field (illustrated below). If you do, only files<br />
with that extension are synched.<br />
<strong>Ektron</strong> <strong>CMS400.NET</strong> <strong>eSync</strong> <strong>Manual</strong>, Version 7.6.6 Rev 3 72
NOTE<br />
NOTE<br />
As an example of the Exclude option, assume you do not want<br />
to sync Flash (.swf) files. If you check the Exclude button, and<br />
enter .swf into the text field, <strong>eSync</strong> ignores them.<br />
By default, <strong>eSync</strong> ignores .config and .txt files.<br />
7. At the Synchronization Direction field, select the direction of<br />
the data copy that will occur. Your choices are:<br />
• Bidirectional (that is, both directions). Changed data on either<br />
server is updated on the other. If the same data (for example, a<br />
membership user profile) is updated on both servers, the<br />
conflict resolution policy determines the outcome. See Also:<br />
”Bidirectional Sync” on page 77; ”Conflict Resolution Policy” on<br />
page 77<br />
If you are using bidirectional sync and only one version was updated since the last<br />
sync, the updated version overwrites the unchanged version.<br />
• Upload - if the file on the local server was modified more<br />
recently than the one on the remote server, the local file<br />
replaces the remote. Otherwise, nothing happens.<br />
• Download - if the file on the remote server was modified more<br />
recently than the one on the local server, the remote file<br />
replaces the local. Otherwise, nothing happens.<br />
8. At the Conflict Resolution Policy field, decide what to do if<br />
Synchronization Direction is Bidirectional, and the data has<br />
changed on both servers since the last sync. Your choices are.<br />
•Version on Remote Site Wins - the remote version<br />
overwrites the local version<br />
•Version on Local Site Wins - the local version overwrites the<br />
remote version<br />
<strong>Ektron</strong> <strong>CMS400.NET</strong> <strong>eSync</strong> <strong>Manual</strong>, Version 7.6.6 Rev 3 73
IMPORTANT!<br />
NOTE<br />
NOTE<br />
9. If desired, select a schedule for when the sync will run<br />
automatically. The choices are<br />
•None - Don’t set up a schedule. Run this sync profile as<br />
needed via the Sync Profile screen‘s Start Now button.<br />
•One Time - you specify a start time and date<br />
•Hourly - you specify a start date and time. <strong>eSync</strong> begins on<br />
the start date and time, then runs every hour at that time.<br />
•Daily - you specify a start time and date; this sync profile will<br />
run every day at this time<br />
•Weekly - you specify a start time, date, and day. After the start<br />
date, this sync profile will run this day every week at this time.<br />
•Monthly - you specify a start time and date (numbers 1<br />
through 31). After the start date, this sync profile will run this<br />
day every month at this time.<br />
You cannot schedule more than one sync to begin at the same time.<br />
While the following options let you schedule a sync profile, you can sync at any<br />
time by accessing the Sync Profile and clicking the Sync button ( ). See Also:<br />
”Running a Sync” on page 81<br />
If you enter a date greater than 28, the sync will not run in a month that does not<br />
include that date. For example, if you enter 31, the sync will not run in February,<br />
April, June, September, and November.<br />
Setting up a Profile to Sync Template and Bin Files<br />
Prerequisite<br />
• You created an <strong>eSync</strong> configuration and ran an initial sync. See<br />
Also: ”Setting Up <strong>eSync</strong>” on page 4<br />
1. Go to the Settings > Configuration > Synchronization<br />
screen.<br />
2. If you are eligible to add a profile to a configuration, the Add<br />
Sync Profile button appears, as shown below.<br />
<strong>Ektron</strong> <strong>CMS400.NET</strong> <strong>eSync</strong> <strong>Manual</strong>, Version 7.6.6 Rev 3 74
NOTE<br />
3. Click the Add Sync Profile button. The Add Synchronization<br />
Profile screen appears.<br />
4. At the Synchronization name field, enter a name for this<br />
profile.<br />
5. At the Items to Synchronize field, select Templates and Bin.<br />
6. At the Include/Exclude Files field, include files not normally<br />
synched, or exclude files that are synched by default. For<br />
example, .txt files are not normally included in a sync, but you<br />
want to copy several on your staging server to the production<br />
server. In this case, check Include and enter *.txt into the<br />
adjacent field (illustrated below). If you do, only files with that<br />
extension are synched.<br />
As an example of the Exclude option, assume you do not want<br />
to sync Flash (.swf) files. If you check the Exclude button, and<br />
enter .swf into the text field, <strong>eSync</strong> ignores them.<br />
By default, <strong>eSync</strong> ignores .config and .txt files.<br />
7. At the Synchronization Direction field, select the direction of<br />
the data copy that will occur. Your choices are:<br />
<strong>Ektron</strong> <strong>CMS400.NET</strong> <strong>eSync</strong> <strong>Manual</strong>, Version 7.6.6 Rev 3 75
NOTE<br />
IMPORTANT!<br />
•Bidirectional (that is, both directions). Changed data on<br />
either server is updated on the other. If the same data (for<br />
example, a membership user profile) is updated on both<br />
servers, the conflict resolution policy determines the outcome.<br />
See Also: ”Bidirectional Sync” on page 77; ”Conflict Resolution<br />
Policy” on page 77<br />
If you are using bidirectional sync and only one version was updated since the last<br />
sync, the updated version overwrites the unchanged version.<br />
•Upload - if the file on the local server was modified more<br />
recently than the one on the remote server, the local file<br />
replaces the remote. Otherwise, nothing happens.<br />
•Download - if the file on the remote server was modified more<br />
recently than the one on the local server, the remote file<br />
replaces the local. Otherwise, nothing happens.<br />
8. At the Conflict Resolution Policy field, decide what to do if<br />
Synchronization Direction is Bidirectional, and the data has<br />
changed on both servers since the last sync. Your choices are.<br />
•Version on Remote Site Wins - the remote version<br />
overwrites the local version<br />
•Version on Local Site Wins - the local version overwrites the<br />
remote version<br />
9. If desired, select a schedule for when the sync will run<br />
automatically. The choices are<br />
•None - Don’t set up a schedule. Run this sync profile as<br />
needed via the Sync Profile screen‘s Start Now button.<br />
•One Time - you specify a start time and date<br />
•Hourly - you specify a start date and time. <strong>eSync</strong> begins on<br />
the start date and time, then runs every hour at that time.<br />
•Daily - you specify a start time and date; this sync profile will<br />
run every day at this time<br />
•Weekly - you specify a start time, date, and day. After the start<br />
date, this sync profile will run this day every week at this time.<br />
•Monthly - you specify a start time and date (numbers 1<br />
through 31). After the start date, this sync profile will run this<br />
day every month at this time.<br />
You cannot schedule more than one sync to begin at the same time.<br />
<strong>Ektron</strong> <strong>CMS400.NET</strong> <strong>eSync</strong> <strong>Manual</strong>, Version 7.6.6 Rev 3 76
NOTE<br />
NOTE<br />
Bidirectional Sync<br />
NOTE<br />
While the following options let you schedule a sync profile, you can sync at any<br />
time by accessing the Sync Profile and clicking the Sync button ( ). See Also:<br />
”Running a Sync” on page 81<br />
If you enter a date greater than 28, the sync will not run in a month that does not<br />
include that date. For example, if you enter 31, the sync will not run in February,<br />
April, June, September, and November.<br />
Although most CMS data is created and updated on the staging<br />
server, certain types of data are collected on the production server.<br />
This information can be viewed and edited on the staging server.<br />
Here are some examples:<br />
• membership users<br />
• content ratings data<br />
• forum and blog posts<br />
• community folders<br />
Conflict Resolution Policy<br />
When you set up a sync profile to copy this kind of data<br />
(maintained in the database), you typically would choose<br />
Bidirectional as the direction. In this case, if a membership user<br />
creates or updates his profile on the production server, those<br />
changes are transmitted to staging. On the other hand, if your<br />
administrator needs to change that membership user’s<br />
information, the next <strong>eSync</strong> transfers that from staging to<br />
production.<br />
If changes are made to the same file on both servers since the last<br />
sync, your conflict resolution policy determines which data is<br />
saved. See Also: ”Conflict Resolution Policy” on page 77<br />
The first time you run a sync for templates or Workarea files, the sync is<br />
bidirectional, regardless of the direction you specify on the Synchronization<br />
Direction screen.<br />
If you are using bidirectional synchronization (See Also:<br />
”Bidirectional Sync” on page 77), and the same item changed on<br />
both servers since the last sync, <strong>eSync</strong> must decide which version<br />
should be kept, and which version overwritten.<br />
<strong>Ektron</strong> <strong>CMS400.NET</strong> <strong>eSync</strong> <strong>Manual</strong>, Version 7.6.6 Rev 3 77
NOTE<br />
If you are using bidirectional sync and only one version was updated since the last<br />
sync, the updated version overwrites the unchanged version.<br />
Use the Conflict Resolution Policy field to determine which<br />
version ends up on both servers after synchronization. The<br />
following choices are available.<br />
• Version on Remote Site Wins - the remote version overwrites<br />
the local version<br />
• Version on Local Site Wins - the local version overwrites the<br />
remote version<br />
Synchronizing Windows Files<br />
NOTE<br />
As an alternative to selecting a type of data to sync (using the File<br />
types radio button), you can sync individual Windows files. For<br />
example, you updated a few template files and their related .css<br />
files on the staging server, and now want to update the production<br />
server without moving everything else.<br />
If you create new HTML content and insert a Library image into it, then sync just<br />
that content, the image is not inserted into the destination library nor is it<br />
searchable from the destination site. To remedy this problem, perform a database/<br />
resources sync.<br />
Unlike the full sync, you cannot schedule a Windows file sync.<br />
Instead, you select files then sync immediately.<br />
Like the profile sync, the local file replaces the corresponding<br />
remote one only if the local file was modified more recently than<br />
the one on the remote server. Otherwise, nothing happens.<br />
To synchronize Windows files, follow these steps.<br />
1. Create a sync configuration between the two servers whose<br />
files you want to sync. See ”Setting Up <strong>eSync</strong>” on page 4.<br />
2. From the View All Synchronization Configurations screen, click<br />
the Add Sync Profile button (circled below).<br />
<strong>Ektron</strong> <strong>CMS400.NET</strong> <strong>eSync</strong> <strong>Manual</strong>, Version 7.6.6 Rev 3 78
NOTE<br />
3. Complete the fields on the screen except for Schedule, which<br />
the file sync ignores. See ”Setting up a Profile to Sync<br />
Workarea Files” on page 72.<br />
4. Save the profile.<br />
5. From the View All Synchronization Configurations screen, click<br />
the profile then the Synchronize files button ( ).<br />
6. All folders in your <strong>Ektron</strong> <strong>CMS400.NET</strong> site root folder appear.<br />
Open folders as needed, and check all files to be synched.<br />
If you create a new folder within the site root folder, sync it, then later delete the<br />
new folder and sync again, the new folder will not be deleted from the destination<br />
server.<br />
7. Click the Sync now button ( ).<br />
8. A dialog tracks the sync’s progress, and notifies you when it is<br />
completed.<br />
<strong>Ektron</strong> <strong>CMS400.NET</strong> <strong>eSync</strong> <strong>Manual</strong>, Version 7.6.6 Rev 3 79
Optional Steps before Running a Sync<br />
Previewing a Sync<br />
You may want to adjust the web.config and db.config settings<br />
before running a Sync. The following topics explain <strong>eSync</strong> features<br />
that you control via the .config files.<br />
• ”Content and Folder Sync Options” on page 94<br />
• ”Using <strong>eSync</strong> with Web Alerts” on page 114<br />
• ”Using <strong>eSync</strong> with eCommerce” on page 115<br />
• ”Force Initial Sync” on page 83<br />
• ”Backing up the Destination Server During an <strong>eSync</strong>” on<br />
page 85<br />
• ”Previewing a Sync” on page 80<br />
After creating a profile based on a database sync (as explained in<br />
”Setting up <strong>eSync</strong> Profiles” on page 66), you can preview the<br />
content that the sync will copy before launching it. Use this list to<br />
verify that the sync’s results will match your expectations before<br />
beginning to sync.<br />
To preview a sync profile, go to the View All Synchronization<br />
Configurations screen, find the profile, and click the preview button<br />
( ) (circled below).<br />
<strong>Ektron</strong> <strong>CMS400.NET</strong> <strong>eSync</strong> <strong>Manual</strong>, Version 7.6.6 Rev 3 80
Running a Sync<br />
IMPORTANT!<br />
WARNING!<br />
The preview screen lists information about local (upload) and<br />
remote (download) changes that will occur the next time you sync<br />
that profile.<br />
The names of the site and all folders must match on both servers. This is because<br />
paths to images, xslt files, etc. refer to a site and its folders. If the servers’ site and<br />
folder names do not match, the links break.<br />
You cannot run two <strong>eSync</strong>s simultaneously.<br />
Prerequisites<br />
• ”<strong>eSync</strong> Requirements” on page 44<br />
• You created an <strong>eSync</strong> configuration and profile. See ”Setting<br />
Up <strong>eSync</strong>” on page 4.<br />
• You are not signed on to a production server that is outside the<br />
firewall. This is because you cannot sync from a production<br />
server outside the firewall to other servers - you can only sync<br />
to this production server.<br />
As mentioned in ”Setting up <strong>eSync</strong> Profiles” on page 66, you can<br />
set up <strong>eSync</strong> to run on a schedule. However, you can also sync at<br />
any time. Follow these steps to sync a profile immediately.<br />
1. Go to the Settings > Configuration > Synchronization<br />
screen.<br />
<strong>Ektron</strong> <strong>CMS400.NET</strong> <strong>eSync</strong> <strong>Manual</strong>, Version 7.6.6 Rev 3 81
NOTE<br />
NOTE<br />
WARNING!<br />
2. If a profile is ready for you to sync, a sync button appears in the<br />
right column, as circled below.<br />
3. Click the sync button ( ).<br />
If another sync is running, you are notified. You cannot begin a new sync until the<br />
current one finishes.<br />
4. A screen monitors the sync’s progress.<br />
5. The screen indicates when the sync is complete.<br />
You can close the window and reopen it at any time by clicking the sync button<br />
( ). If you do, the sync’s current status appears.<br />
If you performed a database sync and the site being synched uses URL aliasing,<br />
you must go to its URL Aliasing Configuration screen and click the Refresh button<br />
( ) to update its aliasing information.<br />
<strong>Ektron</strong> <strong>CMS400.NET</strong> <strong>eSync</strong> <strong>Manual</strong>, Version 7.6.6 Rev 3 82
Force Initial Sync<br />
TECHNICAL NOTE<br />
Use the Force Initial Sync button (circled in red below) to<br />
reinitialize a server that was previously initialized.<br />
Here’s a scenario in which you would want to use Force Initial<br />
Sync.<br />
1. You initialized a test server from your current <strong>Ektron</strong><br />
<strong>CMS400.NET</strong> server.<br />
2. You experimented on the test server by adding new content,<br />
deleting content, etc.<br />
3. You no longer want the test server’s database. Instead, you<br />
want to reinitialize the test server from the <strong>Ektron</strong> <strong>CMS400.NET</strong><br />
server.<br />
To accomplish step 3, use the Force Initial Sync button. The button<br />
only appears when all prerequisites are present. See Also: ”Force<br />
Initial Sync Prerequisites” on page 83<br />
The Force Initial Sync procedure ignores the following checks that are normally<br />
made prior to synching:<br />
* the destination database is smaller than the source database<br />
* the site has not been previously staged<br />
Force Initial Sync Prerequisites<br />
In order to use the Force Initial Sync feature, these conditions must<br />
exist.<br />
• The server’s web.config file’s ek_ForceReInit property is set to<br />
true.<br />
<strong>Ektron</strong> <strong>CMS400.NET</strong> <strong>eSync</strong> <strong>Manual</strong>, Version 7.6.6 Rev 3 83
NOTE<br />
If the ForceReInit property is set to false, and you click the Force Initial Sync<br />
button, you are informed that you need to change the property to true if you want<br />
to force an initial sync.<br />
• The site to which you are signed on is not part of a multi-site<br />
configuration.<br />
• The server has only one sync server relationship.<br />
• The server is the destination in the sync server relationship. In<br />
other words, the server is on the download side of the<br />
relationship.<br />
The following image illustrates the last two conditions.<br />
<strong>Ektron</strong> <strong>CMS400.NET</strong> <strong>eSync</strong> <strong>Manual</strong>, Version 7.6.6 Rev 3 84
Backing up the Destination Server During an <strong>eSync</strong><br />
NOTE<br />
You can create a backup of the destination server’s database. If<br />
you do and problems occur during the sync, the database is<br />
automatically restored to its state prior to beginning the backup.<br />
You can specify the backup to occur on the initial sync only, or<br />
every time you sync.<br />
No backup is made when you sync a folder or content. See Also: ”Content and<br />
Folder Sync Options” on page 94<br />
Setting up the Destination Database Backup<br />
To set up the database backup, follow these steps.<br />
1. Open<br />
C:\Program Files\<strong>Ektron</strong>\<strong>Ektron</strong>WindowsServcie30\dbsync.config.<br />
2. Find the following line (near the top).<br />
<br />
3. Add the following properties to that tag<br />
• device - Following device, enter the path to the backup file.<br />
<strong>Ektron</strong> recommends using C:\Program Files\Microsoft SQL<br />
Server\MSSQL.1\MSSQL\Backup\.<br />
• backupOption - possible values<br />
- 1 - backup on initial sync only<br />
- 2 - backup every time you run a sync<br />
4. The line should now look something like this:<br />
<br />
5. Save the file.<br />
6. Restart the <strong>Ektron</strong> Windows Service.<br />
<strong>Ektron</strong> <strong>CMS400.NET</strong> <strong>eSync</strong> <strong>Manual</strong>, Version 7.6.6 Rev 3 85
Sync Logs<br />
Once this is set up, a backup file is created either after the initial<br />
sync (if backupOption="1") or after every sync (if backupOption="2").<br />
Here is the file’s format:<br />
[dbname][yyyy][mm][dd][hh][mm][ss][mmm].[product].bak<br />
For example: cms400min20090216075946765.esync.bak.<br />
- See logs of previous sync activity See Also: ”Sync Logs” on<br />
page 86<br />
<strong>eSync</strong> provides the following logs of previous sync activity.<br />
• the most recent sync for any profile - see ”Viewing a Log of a<br />
Profile’s Most Recent Sync” on page 87<br />
• the most recent sync for any sync server relationship - see<br />
”Viewing a Log of a Sync Server Relationship’s Most Recent<br />
Sync” on page 88<br />
<strong>Ektron</strong> <strong>CMS400.NET</strong> <strong>eSync</strong> <strong>Manual</strong>, Version 7.6.6 Rev 3 86
• all syncs for a sync server relationship - see ”Viewing a Log of<br />
all Syncs for a Sync Server Relationship” on page 89<br />
Viewing a Log of a Profile’s Most Recent Sync<br />
You can view a log of any profile’s most recent sync by clicking the<br />
log icon ( ) next to that profile (circled below).<br />
The Last Sync Status icon appears only for profiles that have been<br />
previously synched.<br />
The sync log (shown below) has the same appearance as the log<br />
that appears upon completion of a sync.<br />
<strong>Ektron</strong> <strong>CMS400.NET</strong> <strong>eSync</strong> <strong>Manual</strong>, Version 7.6.6 Rev 3 87
Viewing a Log of a Sync Server Relationship’s Most Recent Sync<br />
You can view a log of a Sync Server Relationship’s most recent<br />
sync by clicking the log icon ( ) (circled below) in the header<br />
section of the screen.<br />
The sync log (shown above) has the same appearance as the log<br />
that appears upon completion of a sync.<br />
<strong>Ektron</strong> <strong>CMS400.NET</strong> <strong>eSync</strong> <strong>Manual</strong>, Version 7.6.6 Rev 3 88
Viewing a Log of all Syncs for a Sync Server Relationship<br />
The View All Synchronization Configurations screen provides a<br />
toolbar button ( ) (circled below) that displays a chronological log<br />
of all syncs on your server, with the most recent one at the top.<br />
You can click the icon in the Status column to view details about<br />
the sync.<br />
If the column contains a green check mark, the sync was<br />
successful.<br />
If the column contains a warning ( ), the sync failed for some<br />
items. If you click the icon, a new screen appears listing causes for<br />
<strong>Ektron</strong> <strong>CMS400.NET</strong> <strong>eSync</strong> <strong>Manual</strong>, Version 7.6.6 Rev 3 89
the failure, as shown below. <strong>Ektron</strong> support staff can use this log to<br />
troubleshoot the problem.<br />
Reviewing Resolved Collisions<br />
To verify the accuracy of the data being synchronized, <strong>eSync</strong><br />
checks for and resolves the following matching items<br />
• user names<br />
<strong>Ektron</strong> <strong>CMS400.NET</strong> <strong>eSync</strong> <strong>Manual</strong>, Version 7.6.6 Rev 3 90
.<br />
NOTES<br />
• folder names<br />
• metadata definitions<br />
• messages<br />
For example, on the staging server, a user creates a folder directly<br />
under the root folder called Marketing, and a user on the production<br />
server does the same.<br />
* In order for folders to match, they must have the same name and folder path.<br />
* Both CMS and membership users are included.<br />
This problem only occurs if the matching items were both entered<br />
since the last synchronization.<br />
Although matching items have different ID numbers, users cannot<br />
tell them apart. So, <strong>eSync</strong> appends the ID number to the more<br />
recently-created one to distinguish it from the other. For example,<br />
Marketing becomes Marketing11329.<br />
The Review Resolved Collisions Button<br />
To help track these changes, the View All Synchronization<br />
Configurations screen has a button ( ) that appears only after<br />
such a collision is resolved.<br />
<strong>Ektron</strong> <strong>CMS400.NET</strong> <strong>eSync</strong> <strong>Manual</strong>, Version 7.6.6 Rev 3 91
The server on which the button appears is explained below.<br />
<strong>eSync</strong> Direction Collision Resolution Information<br />
Appears on this Server<br />
download local<br />
upload remote<br />
When you click this button, the Review Synchronization Collisions<br />
screen appears, showing the original and changed items.<br />
The Review Synchronization Collisions Screen<br />
This screen shows how collisions between matching items were<br />
resolved. See Also: ”Reviewing Resolved Collisions” on page 90<br />
Each type of resolved collision appears on its own tab.<br />
After noting these changes, you can click the box to the left of each<br />
change, then click the Mark Reviewed button to remove it from the<br />
screen. Alternatively, you can click the box in the header row to<br />
select all.<br />
<strong>Ektron</strong> <strong>CMS400.NET</strong> <strong>eSync</strong> <strong>Manual</strong>, Version 7.6.6 Rev 3 92
NOTE<br />
The Users tab has an additional button, Mark Reviewed and<br />
Email. Use it to remove the user from the screen and send an<br />
email to him/her (using the address from the Add/Edit User<br />
screen’s E-Mail Address field). The email text is below.<br />
lbl sync collision email subject = Your username has been changed<br />
lbl sync collision email body = For security purposes, your username<br />
has been changed. Your new username is {0}. You will need to use<br />
this new username the next time you login. Thank you.<br />
You can change the text in the resource file. To learn about editing it, see<br />
”Procedure for Translating Workarea Strings” on page 929.<br />
Synching Custom Database Tables<br />
You can use <strong>eSync</strong> to synchronize a custom SQL database table.<br />
To do so, follow these steps.<br />
1. Add a new, empty table to the target SQL database.<br />
The table must have a primary key and cannot use identity<br />
columns.<br />
Here is an example of a valid table.<br />
Create table foo3(Id int not null primary key clustered, Id2 int not null, company nvarchar(50)<br />
null)<br />
Here are two examples of invalid tables. The identity columns are<br />
highlighted in red.<br />
create table foo1(Id int not null identity(1,1) primary key clustered,company nvarchar(50)<br />
null)<br />
create table foo2(Id int not null primary key clustered,Id2 bigint not null identity(1,1)<br />
,comapny nvarchar(50) null<br />
2. On the server that hosts the source database, navigate to<br />
C:\Program Files\<strong>Ektron</strong>\<strong>Ektron</strong>WindowsService30.<br />
3. Open the DbSync.config file.<br />
4. Find the section that begins
NOTE<br />
See Also:<br />
• ”Prerequisites for Content/Folder Sync” on page 95<br />
• ”Enabling the Content and Folder Level Sync” on page 96<br />
• ”Using Content and Folder Level Sync” on page 97<br />
• ”Synching a Content Item” on page 97<br />
• ”Synching a Folder” on page 99<br />
Prerequisites for Content/Folder Sync<br />
See Also: ”<strong>eSync</strong> Requirements” on page 44<br />
• You are a member of the Administrators group or assigned to<br />
the Synchronization Admin role<br />
• Content/folder sync is enabled in web.config. See ”Enabling<br />
the Content and Folder Level Sync” on page 96.<br />
• The server has a sync configuration whose initial sync has<br />
been run<br />
• Existing folders: folder information has not been updated since<br />
the last database sync using the selected profile.<br />
If any folder property is changed (for example, a new metadata<br />
value is assigned), a database sync must be run before you<br />
can synchronize content in that folder and the folder itself.<br />
Furthermore, any child folder (and its content) that inherits that<br />
property from the parent folder can only be synchronized after<br />
the next database sync.<br />
• New folders: a database sync must be run before you can<br />
synchronize content in the new folder and the folder itself<br />
• Content: No new tags or taxonomy categories have been<br />
added since the last time the selected profile was synched. If<br />
either event has occurred, a database sync must be run before<br />
you can synchronize that content. You must also run a<br />
database sync for all other profiles that use those tags or<br />
taxonomy.<br />
The following graphic illustrates adding new tags and a taxonomy<br />
category to content.<br />
<strong>Ektron</strong> <strong>CMS400.NET</strong> <strong>eSync</strong> <strong>Manual</strong>, Version 7.6.6 Rev 3 95
• For a folder sync, the content is not a blog or forum post. For a<br />
content sync, the content is not a forum post.<br />
Enabling the Content and Folder Level Sync<br />
To set up the content and folder Synchronize options, follow these<br />
steps.<br />
1. Log on to the server on which content editors will sync content<br />
and folders.<br />
2. Open Windows Explorer > your site root folder > the web.config<br />
file.<br />
3. Go to the following area.<br />
<br />
<br />
<br />
<br />
4. Set the value of <strong>eSync</strong>Enabled to true.<br />
5. Save web.config.<br />
<strong>Ektron</strong> <strong>CMS400.NET</strong> <strong>eSync</strong> <strong>Manual</strong>, Version 7.6.6 Rev 3 96
Using Content and Folder Level Sync<br />
Synching a Content Item<br />
You would typically use <strong>eSync</strong> in the following manner.<br />
1. Create, update, and get content approved on a staging server.<br />
2. Synchronize content blocks or an <strong>Ektron</strong> <strong>CMS400.NET</strong> folder<br />
with the production server.<br />
The <strong>eSync</strong> feature is available if you see Synchronize menu<br />
options (shown below) on Approved content or a folder.<br />
Content sync copies a selected content item to another computer.<br />
The sync also copies library resources within that content, such as<br />
images and quicklinks.<br />
Only Approved content can be synchronized. See Also:<br />
”Prerequisites for Content/Folder Sync” on page 95<br />
To sync a content item, follow these steps.<br />
<strong>Ektron</strong> <strong>CMS400.NET</strong> <strong>eSync</strong> <strong>Manual</strong>, Version 7.6.6 Rev 3 97
1. Navigate to the content. You can<br />
•go to the Web page that displays it<br />
•sign into the <strong>Ektron</strong> <strong>CMS400.NET</strong> Workarea and<br />
- navigate to its folder, or<br />
- use the Search to find it (see below)<br />
2. Click the arrow to the right of the content to see its dropdown<br />
menu.<br />
<strong>Ektron</strong> <strong>CMS400.NET</strong> <strong>eSync</strong> <strong>Manual</strong>, Version 7.6.6 Rev 3 98
NOTE<br />
Synching a Folder<br />
A Synchronize button (shown below) is also available from the View Content<br />
screen.<br />
3. Click Synchronize.<br />
4. All relationships with at least one Database profile whose<br />
direction is Upload or Bidirectional appear. Select the<br />
appropriate one. See Also: ”Setting up <strong>eSync</strong> Profiles” on<br />
page 66<br />
5. Click Sync Now.<br />
6. The content is synchronized with the selected database.<br />
The folder sync updates all content in a folder with another<br />
computer. It does not affect content in folders underneath the<br />
selected folder. See Also: ”Prerequisites for Content/Folder Sync”<br />
on page 95<br />
To sync a folder, follow these steps.<br />
<strong>Ektron</strong> <strong>CMS400.NET</strong> <strong>eSync</strong> <strong>Manual</strong>, Version 7.6.6 Rev 3 99
1. Navigate to the folder.<br />
2. Click Action > Synchronize Folder.<br />
3. A screen asks you to select a sync relationship.<br />
4. Click the Start Sync button.<br />
5. All content in the folder is synched with the selected database.<br />
<strong>eSync</strong> in a Load Balanced Environment<br />
<strong>Ektron</strong> <strong>CMS400.NET</strong> supports a load-balanced environment, in<br />
which several servers share your Web site’s processing load. This<br />
feature is explained in ”Load Balancing Support” on page 1068.<br />
If your site uses load balancing, you can set up <strong>eSync</strong> such that,<br />
after one server in a load balance cluster is synchronized, the other<br />
servers will be automatically synchronized. Note that if a separate<br />
database server is outside the load balance cluster (as shown<br />
below), <strong>eSync</strong> only synchronizes documents and files used by the<br />
<strong>Ektron</strong> <strong>CMS400.NET</strong> <strong>eSync</strong> <strong>Manual</strong>, Version 7.6.6 Rev 3 100
WARNING!<br />
WARNING!<br />
search among the clustered servers. It does not touch the<br />
database.<br />
A typical load balanced cluster is below.<br />
<strong>Ektron</strong>’s <strong>eSync</strong> feature does not synchronize all databases in a SQL database<br />
cluster. If you have such a configuration, it is your responsibility to ensure that<br />
<strong>eSync</strong> updates all the databases.<br />
In a load balanced environment, only update templates on the staging server. Do<br />
not update them on the production server and assume they will be synchronized<br />
with the staging server.<br />
Prerequisites<br />
• The connection string on all servers in the cluster match<br />
• You must initiate <strong>eSync</strong> relationships, and the actual<br />
synchronization, from a staging server<br />
• If your staging servers are clustered, you must remove one<br />
from the cluster before you can sync<br />
Follow these steps to set up this capability.<br />
• ”Install a Min Site on Every Server in the Cluster” on page 102<br />
<strong>Ektron</strong> <strong>CMS400.NET</strong> <strong>eSync</strong> <strong>Manual</strong>, Version 7.6.6 Rev 3 101
• ”Update the Assetmanagement.config File” on page 102<br />
• ”Update the <strong>Ektron</strong> Windows Service Config File” on page 102<br />
• ”Create <strong>eSync</strong> Security Certificates for a Load Balanced<br />
Cluster” on page 104<br />
Install a Min Site on Every Server in the Cluster<br />
1. Upgrade each server to the same 7.6 version of <strong>Ektron</strong><br />
<strong>CMS400.NET</strong>. If <strong>Ektron</strong> <strong>CMS400.NET</strong> is already installed to one<br />
server, you can install a minimum site on the other servers.<br />
To do this, run the <strong>Ektron</strong> <strong>CMS400.NET</strong> base installation file<br />
(CMS400Base7x.exe). For more information, see the <strong>Ektron</strong><br />
<strong>CMS400.NET</strong> Setup manual.<br />
2. If the current site with which you will sync is precompiled, you<br />
must also precompile all min sites.<br />
Update the Assetmanagement.config File<br />
1. Sign on to the first server in your load balanced cluster.<br />
2. In the site root folder, open site root\assetmanagement.config.<br />
3. Change the value of LoadBalanced to 1 and save.<br />
4. Do this on every server in the cluster.<br />
Update the <strong>Ektron</strong> Windows Service Config File<br />
1. Sign on to the first server in your load balanced cluster.<br />
2. Open<br />
C:\ProgramFiles\<strong>Ektron</strong>\<strong>Ektron</strong>WindowsService30\<strong>Ektron</strong>.ASM.<strong>Ektron</strong><br />
Services30.exe.Config.<br />
3. Change the value of LoadBalanced to 1 and save.<br />
4. Do this on every server in the cluster.<br />
<strong>Ektron</strong> <strong>CMS400.NET</strong> <strong>eSync</strong> <strong>Manual</strong>, Version 7.6.6 Rev 3 102
5. Stop and then Start the <strong>Ektron</strong> Windows Service on every<br />
server in the cluster.<br />
<strong>Ektron</strong> <strong>CMS400.NET</strong> <strong>eSync</strong> <strong>Manual</strong>, Version 7.6.6 Rev 3 103
Create <strong>eSync</strong> Security Certificates for a Load Balanced<br />
Cluster<br />
You should be familiar with <strong>eSync</strong> security certificates before<br />
beginning this procedure. If you are not, read the following section:<br />
”Managing <strong>eSync</strong> Security Certificates” on page 54.<br />
Assume the load balance cluster has three servers: mach1, mach2,<br />
and mach3.<br />
This procedure has two major parts.<br />
• Generating Security Certificates on mach1.<br />
• Applying Security Certificates to mach2 and mach3<br />
Generate Security Certificates on mach1<br />
In the first nine steps, you copy mach1’s security certificate files,<br />
then paste them into the same folder, and rename them beginning<br />
with mach2 and mach3.<br />
<strong>Ektron</strong> <strong>CMS400.NET</strong> <strong>eSync</strong> <strong>Manual</strong>, Version 7.6.6 Rev 3 104
1. Sign on to mach1 and generate security certificates. To do this,<br />
click the Windows Start Button> All programs > <strong>Ektron</strong> ><br />
CMS400 v7x > Utilities > Security Configurator.<br />
2. The security configurator screen appears.<br />
3. See ”Use the following table to complete this screen.” on<br />
page 57.<br />
4. Click Generate Certificates then click OK. This action creates<br />
security certificates on mach1.<br />
5. On mach1, open the following folder:<br />
C:\ProgramFiles\<strong>Ektron</strong>\CMS400V7x\Utilities\Software\SecurityCon<br />
figurator.<br />
6. Copy the following files.<br />
•mach1_SyncClient.pfx<br />
•mach1_SyncClient.pvk<br />
•mach1_SyncClient.cer<br />
•mach1_SyncServer.pfx<br />
•mach1_SyncServer.pvk<br />
•mach1_SyncServer.cer<br />
7. Paste them into the same folder.<br />
8. Rename each file according to the following pattern: mach2_file<br />
name. (This assumes the second server in your load balance<br />
cluster is mach2.)<br />
9. Repeat steps 7 and 8 for every server in your load balance<br />
cluster. So the number of certificate files in the folder is 6 x the<br />
number of servers.<br />
10. Copy all security certificate files to the following mach1 folder:<br />
C:\Program Files\<strong>Ektron</strong>\<strong>Ektron</strong>WindowsService30.<br />
11. Stop and start the <strong>Ektron</strong> Windows Service.<br />
In the second part of this procedure, you<br />
• open the <strong>Ektron</strong>.ASM.<strong>Ektron</strong>Services30.exe.config file<br />
• copy mach1’s certificate’s key value<br />
• create new keys, and apply mach1’s encoded value to them<br />
So, when you finish, the affected part of the file looks like this:<br />
<strong>Ektron</strong> <strong>CMS400.NET</strong> <strong>eSync</strong> <strong>Manual</strong>, Version 7.6.6 Rev 3 105
NOTE<br />
WARNING!<br />
WARNING!<br />
4. In the mach2 window, open the following folder: C:\Program<br />
Files\<strong>Ektron</strong>\<strong>Ektron</strong>WindowsService30.<br />
5. Paste all security certificate files you copied in Step 3 to that<br />
folder.<br />
6. Stop and start the <strong>Ektron</strong> Windows Service.<br />
7. In the mach2 window, create a folder underneath the root folder.<br />
Name it <strong>Ektron</strong> Security Certificates.<br />
Do not place it under the web root folder, C:\inetpub\wwwroot.<br />
8. Return to the mach1 window, which is still open to the following<br />
folder: C:\Program Files\<strong>Ektron</strong>\<strong>Ektron</strong>WindowsService30.<br />
9. Copy the following files.<br />
Copy - do not move - the files from the mach1 folder.<br />
•mach2_SyncClient.pfx<br />
•mach2_SyncClient.pvk<br />
•mach2_SyncClient.cer<br />
•mach2_SyncServer.pfx<br />
•mach2_SyncServer.pvk<br />
•mach2_SyncServer.cer<br />
10. Paste the files into the mach2 folder you created in Step 6. Make<br />
sure there are no other security files in the folder.<br />
Next, you need to register and move the files to the correct folders.<br />
The Security Configurator screen does this.<br />
11. On mach2, open the security configurator screen using this path:<br />
Windows Start Button > All programs > <strong>Ektron</strong> > CMS400<br />
v7x > Utilities > Security Configurator.<br />
12. The security configurator screen appears.<br />
<strong>Ektron</strong> <strong>CMS400.NET</strong> <strong>eSync</strong> <strong>Manual</strong>, Version 7.6.6 Rev 3 107
Setting Up and Running <strong>eSync</strong><br />
13. Click the Apply Remote Server Certificates button (circled<br />
above).<br />
14. Click the browse button next to that field.<br />
15. Browse to the folder to which you pasted the security<br />
certificates in Step 9.<br />
16. Click the OK button.<br />
17. The utility copies the security certificates you pasted in Step 9<br />
to the correct folder, and configures them for the remote server.<br />
18. Repeat the above steps for every server in the load balance<br />
cluster. Note that the files to be copied will start with the server<br />
name you’re currently setting up.<br />
You set up and run <strong>eSync</strong> in a load balanced environment the<br />
same way you run it normally. See these sections for details.<br />
<strong>Ektron</strong> <strong>CMS400.NET</strong> <strong>eSync</strong> <strong>Manual</strong>, Version 7.6.6 Rev 3 108
NOTE<br />
• ”Using <strong>eSync</strong> to Initialize a New Site” on page 65<br />
• ”Setting up <strong>eSync</strong> Profiles” on page 66<br />
• ”Optional Steps before Running a Sync” on page 80<br />
• ”Running a Sync” on page 81<br />
If your first load balanced sync fails, you must run the Search Config Utility on the<br />
load balanced server in order for search to work. See Also: ”Automatically<br />
Recreating a Catalog” on page 396<br />
Using <strong>eSync</strong> in a Multi-site Environment<br />
If you want to use <strong>eSync</strong> in a multi-site environment, you must do<br />
so before the initial synchronization of a configuration. That is, you<br />
cannot set up a <strong>eSync</strong> configuration in a single-site environment<br />
and then later change to multi-site. You can set up a new<br />
configuration at any time.<br />
See Also:<br />
• ”Limitations on using <strong>eSync</strong> in a Multi-site Environment” on<br />
page 109<br />
• ”Setting up <strong>eSync</strong> in a Multi-Site Environment” on page 110<br />
Limitations on using <strong>eSync</strong> in a Multi-site Environment<br />
• In a multi-site environment, you cannot create a staging site<br />
from a production site (as described in ”Using <strong>eSync</strong> to<br />
Initialize a New Site” on page 65). You must first create all sites<br />
on the staging server, then set up production sites with which<br />
they will sync.<br />
• If you want to sync templates between sites in a multi-site<br />
configuration, you must sign on to the site that has the<br />
templates that need to be synched. For example, your<br />
configuration consists of a main site and two multi-sites (A & B)<br />
on staging and production. If you want to sync site A’s<br />
templates, you must sign on to site A on the staging server,<br />
then use its Workarea screens to sync its templates to site A on<br />
the production server.<br />
• When using <strong>eSync</strong>, each site in a multi-site configuration must<br />
be created separately in IIS. In other words, you cannot set up<br />
several sites under one IIS site and successfully use <strong>eSync</strong>.<br />
<strong>Ektron</strong> <strong>CMS400.NET</strong> <strong>eSync</strong> <strong>Manual</strong>, Version 7.6.6 Rev 3 109
Setting up <strong>eSync</strong> in a Multi-Site Environment<br />
WARNING!<br />
NOTE<br />
To set up <strong>eSync</strong> in a multi-site environment, follow these steps.<br />
Back up your database before beginning this procedure!<br />
1. Set up all sites on the staging server, following the instructions<br />
in the <strong>Ektron</strong> <strong>CMS400.NET</strong> Administrator <strong>Manual</strong> section “Multi-<br />
Site Support”.<br />
2. Install an <strong>Ektron</strong> <strong>CMS400.NET</strong> min site on each production<br />
server that will host a site. To do this, run the <strong>Ektron</strong><br />
<strong>CMS400.NET</strong> base installation file, version 7.6 or higher. (For<br />
more information, see the <strong>Ektron</strong> <strong>CMS400.NET</strong> Setup manual.)<br />
3. Install security certificates between the staging server and all<br />
production servers. This procedure is described in ”Managing<br />
<strong>eSync</strong> Security Certificates” on page 54.<br />
4. Sign on to the staging server.<br />
5. In the <strong>Ektron</strong> <strong>CMS400.NET</strong> Workarea, go to Settings ><br />
Configuration > Synchronization.<br />
6. The View All Synchronization Configurations screen appears.<br />
7. Click the Add button ( ).<br />
8. The Create Synchronization Server Relationship screen<br />
appears.<br />
If you see the following error, The system cannot find the file specified, you<br />
must set up security certificates. See Also: ”Managing <strong>eSync</strong> Security<br />
Certificates” on page 54<br />
Because the staging server is multi-site, the screen’s staging<br />
server area has a Site pulldown field (circled below), which lets<br />
you select a site.<br />
<strong>Ektron</strong> <strong>CMS400.NET</strong> <strong>eSync</strong> <strong>Manual</strong>, Version 7.6.6 Rev 3 110
9. Use the following table to complete the screen.<br />
WARNING! The first time you sync an <strong>Ektron</strong> <strong>CMS400.NET</strong> Web site, all of its data is<br />
overwritten. Make sure that no important information resides on the production<br />
server before beginning the first sync.<br />
Field Description<br />
Remote Server Select a production server by choosing the path to the site’s physical<br />
location on the remote server.<br />
<strong>Ektron</strong> <strong>CMS400.NET</strong> <strong>eSync</strong> <strong>Manual</strong>, Version 7.6.6 Rev 3 111
Field Description<br />
Port Number Use this field to indicate to the local service the port on which the<br />
remote service runs. By default, port 8732 appears.<br />
If you want to change the service port, you must<br />
• change it in this field<br />
• open the C:\Program<br />
Files\<strong>Ektron</strong>\<strong>Ektron</strong>WindowsService30\<strong>Ektron</strong>.ASM.Ektro<br />
nServices30.exe.config file, and replace every occurrence of<br />
localhost:8732 with localhost: followed by the new port<br />
number.<br />
Choose Certificate If you selected a single server above, its name appears here.<br />
Proceed to the next step.<br />
If you selected a domain or IP address above, click the dropdown<br />
arrow to view all servers whose client security certificates reside on<br />
this server. Then, select the server with which you want to set up an<br />
<strong>eSync</strong> relationship.<br />
10. Click the Connect button.<br />
After you connect to the production server, all eligible<br />
databases on it appear. The top one has a green check mark,<br />
indicating it is selected by default.<br />
11. Click the database with which you want to sync. When you do,<br />
a green check mark appears on it, and its background color<br />
changes.<br />
12. Click Next.<br />
13. A new screen appears, showing both servers and allowing you<br />
to change the direction of the initial database copy. Make sure<br />
you are copying from staging to production.<br />
14. When you are satisfied, click Create. This sets up the server<br />
configuration but does not launch the initial sync.<br />
15. The View All Synchronization Configurations screen appears<br />
with the new configuration.<br />
If you are ready to overwrite the production database with the<br />
staging one, click Start Initial Sync.<br />
16. A confirmation screen appears.<br />
17. A screen monitors the sync’s progress.<br />
18. The initial sync creates a default profile, which appears on the<br />
View All Synchronization Configurations screen.<br />
<strong>Ektron</strong> <strong>CMS400.NET</strong> <strong>eSync</strong> <strong>Manual</strong>, Version 7.6.6 Rev 3 112
19. Set up and launch sync profiles to sync workarea files and<br />
templates on the staging server with those on the production<br />
server. (This is described in ”Setting up <strong>eSync</strong> Profiles” on<br />
page 66 and ”Running a Sync” on page 81.) For<br />
synchronization direction, choose Upload.<br />
Setting up Staging Multi-sites<br />
NOTE<br />
By default, if you sign on to a staging server then insert library<br />
items (images, quicklinks, etc.) into content, the path to those<br />
items includes the production server.<br />
For example, your server setup includes two multi-sites:<br />
sales.ektron.com and support.ektron.com.<br />
The multi-site names are defined in the site’s folder properties screen’s<br />
Production Domain field, as described in ”Step 3: Assign Multi-Site Capabilities<br />
in <strong>Ektron</strong> <strong>CMS400.NET</strong>” on page 1018.<br />
So, any library links in the sales.ektron.com site’s content look like<br />
this: http://sales.ektron.com/template?id=id number.<br />
However, you may wish to change library links so they refer to the<br />
staging server. This would help you verify that the linked items<br />
exist on the staging server.<br />
To change library links so they refer to your staging server, follow<br />
these steps.<br />
1. In the <strong>Ektron</strong> <strong>CMS400.NET</strong> Workarea, go to Settings ><br />
Configuration > Setup.<br />
2. Click the Edit button ( ).<br />
3. Check the This is a Staging Server check box.<br />
4. Save the screen.<br />
5. Go to Content > the staging site folder.<br />
6. Click View > Folder Properties.<br />
7. Click the Edit button ( ).<br />
8. Scroll down to the section labeled Multi-Site Domain<br />
Configuration:.<br />
9. In the Staging Domain field, enter the URL of your staging<br />
server.<br />
<strong>Ektron</strong> <strong>CMS400.NET</strong> <strong>eSync</strong> <strong>Manual</strong>, Version 7.6.6 Rev 3 113
10. Save the screen.<br />
From now on, when a user signs on to the staging server and<br />
works with library links, the links include the staging server instead<br />
of the production server.<br />
Using <strong>eSync</strong> with Web Alerts<br />
The Web Alert feature enables <strong>Ektron</strong> <strong>CMS400.NET</strong> to generate<br />
email for a list of registered users whenever new content appears<br />
on your site, or existing content is updated. For more information,<br />
see ”Web Alert Feature” on page 1021.<br />
In an <strong>eSync</strong> environment, you need to determine which servers<br />
send Web Alerts. For example, Web Alerts should probably not be<br />
generated when content is published on a staging server, but you<br />
would want them when content is published on a production<br />
server.<br />
To determine if a server generates Web alerts, use the following<br />
property of each Web site’s web.config file.<br />
<br />
Set the property’s value to true to suppress Web Alerts on a<br />
server.<br />
Set the property’s value to false to generate Web Alerts to on a<br />
server.<br />
Also, the server clock on the download side of the <strong>eSync</strong><br />
relationship must be exactly the same time as or slightly ahead of<br />
the clock on the sending server.<br />
<strong>eSync</strong> and Integrated Search Folders<br />
In a multi-site environment, Integrated Search folders on the<br />
source server are not synched with the destination server. See<br />
Also: ”Using the Integrated Search” on page 434; ”Setting Up<br />
<strong>eSync</strong>” on page 4<br />
<strong>Ektron</strong> <strong>CMS400.NET</strong> <strong>eSync</strong> <strong>Manual</strong>, Version 7.6.6 Rev 3 114
Using <strong>eSync</strong> with eCommerce<br />
When using <strong>eSync</strong> with an eCommerce site, you will want to<br />
prevent orders from being processed on your staging server. This<br />
is to prevent orders from being processed twice.<br />
For example, a customer on your production site purchases a<br />
product. If the staging server and production server are synced<br />
before the credit card is processed, the potential exists for the<br />
customer’s credit card to be charged twice; once from the<br />
production server and again from the staging server.<br />
To prevent orders from being processed on your staging server,<br />
edit your staging site’s web.config file. Next, set the following<br />
property to true.<br />
<br />
Once the property is set to true, you cannot process or edit orders<br />
from the Workarea’s View Order screen on the staging server.<br />
Also, if you try to create an order from the staging server’s Web<br />
site, you receive the following message.<br />
“We're sorry, an error occurred while processing your<br />
request. Please try again later...”<br />
It is important to note that all other <strong>eSync</strong> functions still work<br />
properly. For example, when you create catalog entries on a<br />
staging server and perform a sync, the entries will be moved to the<br />
production server. This key only affects the processing of orders.<br />
<strong>Ektron</strong> <strong>CMS400.NET</strong> <strong>eSync</strong> <strong>Manual</strong>, Version 7.6.6 Rev 3 115
<strong>eSync</strong> Troubleshooting<br />
Symptom Cause Possible Solutions<br />
Synchronization has failed<br />
There was no endpoint listening at<br />
http://alphatest:8732/<br />
<strong>Ektron</strong>.Sync.Communication/<br />
SyncCommunicationScheduleServic<br />
e.svc that could accept the<br />
message.<br />
This is often caused by an incorrect<br />
address or SOAP action. See<br />
InnerException, if present, for more<br />
details.<br />
The identity check failed for the<br />
outgoing message. The expected<br />
identity is xxx for the xxx target<br />
endpoint.<br />
No viable CMS sites were found on<br />
the remote server specified. Please<br />
check the remote server and try<br />
again.<br />
One server in the configuration<br />
cannot resolve the address of<br />
the other server. This may be<br />
due to security restrictions or<br />
because the <strong>Ektron</strong> Windows<br />
service is off.<br />
Local site can't communicate<br />
with service<br />
No <strong>Ektron</strong> <strong>CMS400.NET</strong> site<br />
exists on the remote server.<br />
• Modify the hostname of the<br />
other server so that it can<br />
be found.<br />
• Restart the Windows service<br />
• Reconfigure security<br />
1. Load the security configuration<br />
utility: C:\Program<br />
Files\<strong>Ektron</strong>\CMS400V7x<br />
\utilities\software\se<br />
curityconfigurator\sec<br />
urityconfigurator.exe.<br />
2. Select the web site that is<br />
failing.<br />
3. Click OK.<br />
This recopies client certificates<br />
to the site and updates<br />
web.config to use them.<br />
Install an <strong>Ektron</strong> <strong>CMS400.NET</strong><br />
min site on the remote server.<br />
<strong>Ektron</strong> <strong>CMS400.NET</strong> <strong>eSync</strong> <strong>Manual</strong>, Version 7.6.6 Rev 3 116
What’s New in this Release<br />
What’s New in this Release<br />
The following new features are documented in this manual.<br />
• ”Using <strong>eSync</strong> with eCommerce” on page 115<br />
• ”Backing up the Destination Server During an <strong>eSync</strong>” on<br />
page 85<br />
• ”Force Initial Sync” on page 83<br />
• Sync profiles can now include all site files other than the<br />
Workarea folder. A new check box lets you include the bin<br />
folder. See ”Setting up <strong>eSync</strong> Profiles” on page 66.<br />
• The Setting up <strong>eSync</strong> chapter has a new section. See<br />
”Scenario 1: Synching Two Sites on the Same Server” on<br />
page 4.<br />
• Logs have been added to <strong>eSync</strong> to provide a record of all<br />
syncs. For each sync, you can view the user ID, and the<br />
number of applied, skipped, and total changes. See ”Sync<br />
Logs” on page 86.<br />
• 7.6.6 SP1 - You can change library links so they refer to the<br />
staging server, as opposed to the production server. This would<br />
help you verify that the linked items exist on the staging server.<br />
See ”Setting up Staging Multi-sites” on page 113.<br />
• 7.6.6 SP1 - You can preview a database sync prior to launching<br />
it. See ”Previewing a Sync” on page 80.<br />
• 7.6.6 SP1 - New icons on the View All Synchronization<br />
Configurations screen display information about the last sync<br />
for the configuration, or a specific profile. See ”Sync Logs” on<br />
page 86.<br />
• 7.6.6 SP1 - If a sync did not complete successfully, you can<br />
now click on that sync on the Sync Log to get a detailed report<br />
of the errors. See ”Viewing a Log of all Syncs for a Sync Server<br />
Relationship” on page 89.<br />
<strong>Ektron</strong> <strong>CMS400.NET</strong> <strong>eSync</strong> <strong>Manual</strong>, Version 7.6.6 Rev 3 117