GreenStar Lightbar - StellarSupport - John Deere
GreenStar Lightbar - StellarSupport - John Deere
GreenStar Lightbar - StellarSupport - John Deere

You also want an ePaper? Increase the reach of your titles
YUMPU automatically turns print PDFs into web optimized ePapers that Google loves.
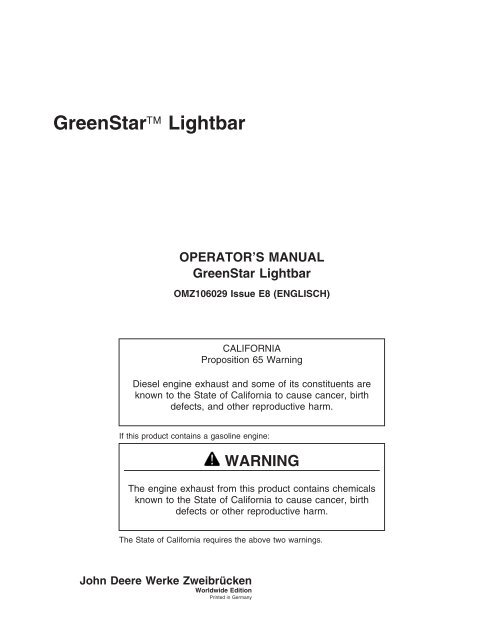
GreenStar <strong>Lightbar</strong><br />
OPERATOR’S MANUAL<br />
GreenStar <strong>Lightbar</strong><br />
OMZ106029 Issue E8 (ENGLISCH)<br />
CALIFORNIA<br />
Proposition 65 Warning<br />
Diesel engine exhaust and some of its constituents are<br />
known to the State of California to cause cancer, birth<br />
defects, and other reproductive harm.<br />
If this product contains a gasoline engine:<br />
WARNING<br />
The engine exhaust from this product contains chemicals<br />
known to the State of California to cause cancer, birth<br />
defects or other reproductive harm.<br />
The State of California requires the above two warnings.<br />
<strong>John</strong> <strong>Deere</strong> Werke Zweibrücken<br />
Worldwide Edition<br />
Printed in Germany
Foreword<br />
WELCOME TO GREENSTAR PRECISION FARMING<br />
SYSTEMS offered by <strong>John</strong> <strong>Deere</strong>. The GreenStar<br />
<strong>Lightbar</strong> is an easy-to-use guidance system.<br />
READ THIS MANUAL carefully to learn how to operate<br />
and service your GreenStar <strong>Lightbar</strong> system<br />
correctly. Failure to do so could result in personal<br />
injury or equipment damage.<br />
THIS MANUAL SHOULD BE CONSIDERED a<br />
permanent part of your <strong>John</strong> <strong>Deere</strong> GreenStar<br />
<strong>Lightbar</strong> system and should remain with the system<br />
when you sell it.<br />
RIGHT-HAND AND LEFT-HAND sides are determined<br />
by facing in the direction the machine will travel when<br />
going forward.<br />
WRITE PRODUCT IDENTIFICATION NUMBERS<br />
(P.I.N.) in the Identification Numbers section.<br />
Accurately record all the numbers to help in tracing the<br />
machine should it be stolen. Your dealer also needs<br />
these numbers when you order parts. File the<br />
identification numbers in a secure place off the<br />
machine.<br />
GreenStar is a trademark of <strong>Deere</strong> & Company<br />
Introduction<br />
WARRANTY is provided as part of <strong>John</strong> <strong>Deere</strong>’s<br />
support program for customers who operate and<br />
maintain their equipment as described in this manual.<br />
The GreenStar <strong>Lightbar</strong> hardware warranty is<br />
explained on the warranty certificate which you should<br />
have received from your dealer.<br />
This warranty provides you the assurance that <strong>John</strong><br />
<strong>Deere</strong> will back its products where defects appear<br />
within the warranty period. In some circumstances,<br />
<strong>John</strong> <strong>Deere</strong> also provides field improvements, often<br />
without charge to the customer, even if the product is<br />
out of warranty. Should the GreenStar <strong>Lightbar</strong><br />
system be abused, or modified to change its<br />
performance beyond the original factory specifications,<br />
the warranty will become void and field improvements<br />
may be denied.<br />
IMPORTANT: This manual provides necessary<br />
information for appropriate operation<br />
of the GreenStar <strong>Lightbar</strong> system.<br />
ENJOY your new GreenStar <strong>Lightbar</strong> system from<br />
<strong>John</strong> <strong>Deere</strong>.<br />
OUCC002,0002982 –19–18JUN08–1/1<br />
071808<br />
PN=2
Contents<br />
Page<br />
Safety ................................05-1<br />
Operating <strong>Lightbar</strong><br />
<strong>Lightbar</strong> Guidance System .................10-1<br />
General Installation Instructions .............10-2<br />
Operating <strong>Lightbar</strong> Console Suction Cup ......10-3<br />
<strong>Lightbar</strong> System—Standalone Configuration. ...10-4<br />
<strong>Lightbar</strong> System—Display Configuration. ......10-5<br />
<strong>Lightbar</strong> System Description ................10-7<br />
Operating <strong>Lightbar</strong> System .................10-9<br />
<strong>Lightbar</strong> System Fuse Protection ...........10-13<br />
<strong>Lightbar</strong> Specifications<br />
Safety Note Regarding the Subsequent<br />
Installation of Electrical and Electronic<br />
Appliances and/or Components ...........15-1<br />
Declaration of Conformity ..................15-1<br />
Serial Numbers<br />
Identification Label .......................20-1<br />
<strong>Lightbar</strong> Console ........................20-1<br />
All information, illustrations and specifications in this manual are based on<br />
the latest information available at the time of publication. The right is<br />
reserved to make changes at any time without notice.<br />
COPYRIGHT © 2008<br />
DEERE & COMPANY<br />
Moline, Illinois<br />
All rights reserved<br />
A <strong>John</strong> <strong>Deere</strong> ILLUSTRUCTION ® Manual<br />
i 071808<br />
PN=1
Contents<br />
ii 071808<br />
PN=2
Recognize Safety Information<br />
This is a safety-alert symbol. When you see this symbol<br />
on your machine or in this manual, be alert to the<br />
potential for personal injury.<br />
Follow recommended precautions and safe operating<br />
practices.<br />
Understand Signal Words<br />
A signal word—DANGER, WARNING, or CAUTION—is<br />
used with the safety-alert symbol. DANGER identifies the<br />
most serious hazards.<br />
DANGER or WARNING safety signs are located near<br />
specific hazards. General precautions are listed on<br />
CAUTION safety signs. CAUTION also calls attention to<br />
safety messages in this manual.<br />
Follow Safety Instructions<br />
Safety<br />
Carefully read all safety messages in this manual and on<br />
your machine safety signs. Keep safety signs in good<br />
condition. Replace missing or damaged safety signs. Be<br />
sure new equipment components and repair parts include<br />
the current safety signs. Replacement safety signs are<br />
available from your <strong>John</strong> <strong>Deere</strong> dealer.<br />
Learn how to operate the machine and how to use<br />
controls properly. Do not let anyone operate without<br />
instruction.<br />
Keep your machine in proper working condition.<br />
Unauthorized modifications to the machine may impair the<br />
function and/or safety and affect machine life.<br />
If you do not understand any part of this manual and need<br />
assistance, contact your <strong>John</strong> <strong>Deere</strong> dealer.<br />
T81389 –UN–07DEC88<br />
DX,ALERT –19–29SEP98–1/1<br />
TS187 –19–30SEP88<br />
DX,SIGNAL –19–03MAR93–1/1<br />
TS201 –UN–23AUG88<br />
DX,READ –19–03MAR93–1/1<br />
05-1 071808<br />
PN=5
Safety<br />
CAUTION: Avoid possible injury or death from<br />
machinery runaway.<br />
Do not connect auxiliary equipment to starter<br />
terminals. If normal circuitry is bypassed by<br />
shorting across starter terminals, tractor will<br />
start in gear and move.<br />
Stop tractor engine and remove key.<br />
• Do NOT mount <strong>Lightbar</strong> so that it obstructs operator’s<br />
field of view.<br />
• Use tie straps and proper routing of harness to avoid<br />
trip hazard.<br />
• Do NOT cover warning labels or indicators.<br />
• Install within reach of operator.<br />
Operate Guidance Systems Safely<br />
The GreenStar <strong>Lightbar</strong> system is intended to aid the<br />
operator in performing field operations more efficiently.<br />
The operator is always responsible for machine path. To<br />
prevent injury to operator and bystanders:<br />
• Remain alert and pay attention to surrounding<br />
environment.<br />
• Turn off or remove the GreenStar <strong>Lightbar</strong> system<br />
during road transport. Do not attempt to operate this<br />
system on roadways.<br />
• Steer vehicle as necessary to avoid field hazards,<br />
bystanders, equipment, or other obstacles.<br />
• Stop operation if poor visibility conditions impair your<br />
ability to operate the machine or identify obstacles or<br />
bystanders in machine path.<br />
Safety<br />
TS177 –UN–11JAN89<br />
OUCC002,00029A9 –19–18JUN08–1/1<br />
OUCC002,00029AC –19–07JUL08–1/1<br />
05-2 071808<br />
PN=6
Handle Global Positioning Receivers and<br />
Brackets Safely<br />
Falling while installing or removing a global positioning<br />
receiver can cause serious injury. Use a ladder or<br />
platform to easily reach a mounting location.<br />
Use sturdy and secure footholds and handholds. Do not<br />
install or remove the receiver in wet or icy conditions.<br />
The receiver mast used on implements is heavy and can<br />
be awkward to handle. Two people are required when<br />
mounting locations are not accessible from the ground or<br />
from a service platform. Use proper lifting techniques and<br />
wear proper protective equipment.<br />
Safety<br />
TS249 –UN–23AUG88<br />
DX,WW,RECEIVER –19–08JAN08–1/1<br />
05-3 071808<br />
PN=7
<strong>Lightbar</strong> Guidance System<br />
GreenStar <strong>Lightbar</strong> system shows your position in<br />
field relative to track that you determine with your first<br />
pass through field. Using LEDs on your <strong>Lightbar</strong><br />
display, you know which way to steer in order to keep<br />
your path parallel with your last.<br />
The <strong>Lightbar</strong> system can be used in a standalone<br />
configuration with just a StarFire receiver or can be<br />
Operating <strong>Lightbar</strong><br />
used with a GreenStar display in conjunction with the<br />
GPS receiver (see ”<strong>Lightbar</strong> System—Standalone<br />
Configuration” or ”<strong>Lightbar</strong> System—Display<br />
Configuration” in this Section).<br />
OUCC002,0002984 –19–18JUN08–1/1<br />
10-1 071808<br />
PN=8<br />
ZX1041603 –UN–07JUL08
General Installation Instructions<br />
Follow these guidelines to correctly install and maintain<br />
the GreenStar Lighbar system:<br />
Operating <strong>Lightbar</strong><br />
• Install within reach of the operator.<br />
• Do not cover up decals or indicators.<br />
• Do not obstruct operator’s view.<br />
• Do not store in direct sunlight.<br />
• Do not pressure wash lightbar.<br />
• Do not use harsh chemicals (such as solvents or<br />
gasoline) or unauthorized rubber cleaners and<br />
conditioners to clean the cup. Contact your <strong>John</strong> <strong>Deere</strong><br />
Dealer.<br />
The GreenStar <strong>Lightbar</strong> suction cup is intended to be<br />
attached on the front windshield of tractor cab.<br />
IMPORTANT: Mistreatment or misuse may damage a<br />
suction cup or otherwise create<br />
conditions which could cause the<br />
suction cup to fail, resulting in an<br />
unexpected release.<br />
• Do not allow anything to interfere with free movement of<br />
the plunger while the cup is attached. This could<br />
prevent the red line from alerting the user of vacuum<br />
loss.<br />
• Remove <strong>Lightbar</strong> and suction cup from windshield when<br />
not in use.<br />
• Keep suction cup clean.<br />
• Re-attach suction cup after 24 hours latest.<br />
NOTE: Read also instructions and cautions contained in<br />
the suction cup instruction manual.<br />
OUCC002,00029AD –19–07JUL08–1/1<br />
10-2 071808<br />
PN=9
Operating <strong>Lightbar</strong> Console Suction Cup<br />
Operating <strong>Lightbar</strong><br />
IMPORTANT: Use the cup at temperatures from -18 to<br />
49°C (0to120°F). Moisture or<br />
contaminants can reduce the slip<br />
resistance of the cup. The red line<br />
indicator (A) may not perform reliably at<br />
elevations above 1500 m (5000 ft.).<br />
Read also instructions and cautions<br />
contained in the suction cup instruction<br />
manual.<br />
The manual pump removes air from between the rubber<br />
pad and the windshield contact surface. A red line (A) on<br />
the pump plunger (B) serves as a vacuum indicator.<br />
The two release pads (C) allow the cup to disengage<br />
completely.<br />
NOTE: A check valve allows the operator to re-pump the<br />
cup without removing it from the contact surface.<br />
1. To Attach:<br />
Clean the windshield contact surface and, if necessary,<br />
the inner face of the suction cup.<br />
2. Position the cup so the red line (A) is visible in case it<br />
should appear (loss of vacuum) while the cup is<br />
attached.<br />
3. Pump the plunger (B) until the cup attaches<br />
completely. Stop pumping as soon as the red line (A)<br />
is hidden.<br />
4. Check the plunger (B) frequently to make sure the cup<br />
remains securely attached. If the red line (A) appears,<br />
pump the plunger (B) until the red line (A) is hidden<br />
again.<br />
NOTE: Re-attach suction cup after 24 hours latest.<br />
1. To Release:<br />
Hold the <strong>Lightbar</strong> console with one hand.<br />
A—Red line<br />
B—Pump plunger<br />
C—Release pad<br />
Continued on next page<br />
ZX1042241 –UN–18JUN08<br />
OUCC002,00029AF –19–07JUL08–1/2<br />
10-3 071808<br />
PN=10
2. Pull one of the release tabs (C) until the cup<br />
disengages completely.<br />
<strong>Lightbar</strong> System—Standalone Configuration<br />
ZX1041619<br />
H<br />
D<br />
E<br />
F<br />
Operating <strong>Lightbar</strong><br />
I<br />
G<br />
Standalone Harness Routing<br />
C<br />
A<br />
E<br />
OUCC002,00029AF –19–07JUL08–2/2<br />
A—<strong>Lightbar</strong> E—CAN Bus active G—StarFire receiver I—SERVICE ADVISOR<br />
B—Suction cup terminators H—Suppression diode diagnostic<br />
C—Power supply harness F—Fuse—10A adapter/connector<br />
D—Power adapter harness (if<br />
required)<br />
NOTE: Connect power adapter harness (D) to<br />
convenience outlet power connector.<br />
Use tie straps to fix the harness (C) routing.<br />
B<br />
OUCC002,00029AE –19–08JUL08–1/1<br />
10-4 071808<br />
PN=11<br />
ZX1041619 –UN–07JUL08
<strong>Lightbar</strong> System—Display Configuration<br />
ZX1041620<br />
E<br />
D<br />
Operating <strong>Lightbar</strong><br />
C<br />
F<br />
A B<br />
Display Configuration—Without Power Adapter Harness<br />
G<br />
F<br />
A B<br />
A—<strong>Lightbar</strong> D—R.h console harness F—StarFire receiver G—Original GreenStar<br />
B—Suction cup E—GreenStar Ready Harness display<br />
C—GS2 1800 Display 2- and 4- pin connectors<br />
Continued on next page<br />
OUCC002,0002996 –19–08JUL08–1/2<br />
10-5 071808<br />
PN=12<br />
ZX1041620 –UN–24JUN08
H<br />
ZX1042242<br />
E<br />
D<br />
Operating <strong>Lightbar</strong><br />
C<br />
F<br />
A B<br />
Display Configuration—With Power Adapter Harness<br />
G<br />
F<br />
A B<br />
A—<strong>Lightbar</strong> D—R.h console harness F—StarFire receiver H—Power adapter harness<br />
B—Suction cup E—GreenStar Ready Harness G—Original GreenStar<br />
C—GS2 1800 Display 2- and 4- pin connectors display<br />
NOTE: GS2 1800 (C) and Original GreenStar (G)<br />
displays are optional. With the R.h. console<br />
harness (D) the <strong>Lightbar</strong> system can be used<br />
in standalone or companion mode.<br />
OUCC002,0002996 –19–08JUL08–2/2<br />
10-6 071808<br />
PN=13<br />
ZX1042242 –UN–07JUL08
<strong>Lightbar</strong> System Description<br />
ZX1041592<br />
A<br />
Operating <strong>Lightbar</strong><br />
B C D<br />
A B C<br />
E<br />
G H<br />
I<br />
A—Set point A/Decrease LED D—Mode Button G—L.h. Offset I—R.h.Offset Tracking/Increase<br />
Brightness/Decrease E—Operator Input Indicator Tracking/Decrease Tracking Indicator LEDs<br />
Spacing Button LED Tracking Indicator LEDs (Red)<br />
B—Set point B/Center Track F—GPS Signal Quality (Red)<br />
Button Indicator LED H—Center Tracking Indicator<br />
C—Set point C/Increase LED LEDs (Green)<br />
Brightness/Increase<br />
Spacing Button<br />
NOTE: The <strong>Lightbar</strong> performs a 5 seconds LED test<br />
with all LEDs illuminated upon power up.<br />
The <strong>Lightbar</strong> system is designed to be connected to<br />
the vehicle CAN Bus or to be operated as a<br />
standalone system and can be used with or without a<br />
GreenStar display in conjunction with the StarFire<br />
GPS receiver (see ”<strong>Lightbar</strong> System—Standalone<br />
Configuration” or ”<strong>Lightbar</strong> System—Display<br />
Configuration” in this Section).<br />
F<br />
NOTE: Whenever a display is detected on the CAN<br />
bus, the <strong>Lightbar</strong> system will be placed into<br />
companion mode. In this mode, the <strong>Lightbar</strong><br />
buttons are disabled and all guidance setup is<br />
performed in the GreenStar display. Refer to<br />
relevant Display Operator’s Manual.<br />
The <strong>Lightbar</strong> system turns on with the vehicle key<br />
switch.<br />
Continued on next page<br />
OUCC002,00029B0 –19–07JUL08–1/2<br />
10-7 071808<br />
PN=14<br />
ZX1041592 –UN–16APR08
CAUTION: The <strong>Lightbar</strong> system MUST be<br />
turned OFF during road transport. Press and<br />
hold Mode Button (D) for 2 seconds to turn<br />
off the <strong>Lightbar</strong>.<br />
As a standalone system, the <strong>Lightbar</strong> can be operated<br />
in three different modes by pressing Mode button (D).<br />
Depending on the mode selected, the buttons (A), (B)<br />
and (C) will have different functionality (see ”Operating<br />
<strong>Lightbar</strong> System” in this Section):<br />
1. Run Mode: Allows the operator to adjust LED<br />
brightness by using buttons (A) or (C) or do a<br />
center track by using button (B).<br />
2. Setup Mode: Allows the operator to setup tracking<br />
by using buttons (A), (B) and (C).<br />
3. Adjust Mode: Allows the operator to adjust track<br />
spacing by using buttons (A) or (C).<br />
IMPORTANT: The <strong>Lightbar</strong> system checks the GPS<br />
signal quality. Either WAAS, EGNOS,<br />
SF1, or SF2 is required for <strong>Lightbar</strong><br />
system to function. Without the<br />
required differential quality, no<br />
navigation LEDs will be displayed on<br />
the lightbar.<br />
A Starfire Configurator Software is<br />
available from Stellar Support<br />
Operating <strong>Lightbar</strong><br />
(http://stellarsupport.deere.com) for<br />
activating and setting up SF1 and<br />
SF2 signals from a laptop. An<br />
additional harness is required—<br />
Contact your <strong>John</strong> <strong>Deere</strong> dealer.<br />
The LED (F) beneath the mode button (D) indicates<br />
the GPS signal quality in the following manner:<br />
Green = Good quality.<br />
Amber = Signal available but not sufficient to drive<br />
parallel tracking.<br />
Red = no GPS signal available.<br />
Red flashing = no GPS receiver detected.<br />
IMPORTANT: The tracking LED navigation is<br />
possible when steering in forward<br />
direction to the desired path only.<br />
The <strong>Lightbar</strong> system does not<br />
support the vehicle reverse<br />
operation.<br />
At first time boot-up, the factory settings are:<br />
• Track Spacing =5m(16ft4.8in.)<br />
OUCC002,00029B0 –19–07JUL08–2/2<br />
10-8 071808<br />
PN=15
Operating <strong>Lightbar</strong> System<br />
The <strong>Lightbar</strong> system can be operated under three<br />
operating modes.<br />
The Run Mode (I) is automatically activated (normal<br />
operation) if a valid setup has been performed (Refer to<br />
”Operating <strong>Lightbar</strong> Under Run Mode”).<br />
NOTE: If a valid setup has not been performed the<br />
<strong>Lightbar</strong> automatically starts under Setup mode.<br />
Operating <strong>Lightbar</strong><br />
Press the button (D) to select the Setup Mode (II)—The<br />
LED beneath the A button is activated to confirm selection<br />
of Setup Mode (Refer to ”Operating <strong>Lightbar</strong> Under Setup<br />
Mode”).<br />
Press the button (D) to select the Adjust Mode (III)—The<br />
LEDs beneath the A and C buttons are activated to<br />
confirm selection of Adjust Mode (Refer to ”Operating<br />
<strong>Lightbar</strong> Under Adjust Mode”).<br />
I—Run Operating Mode<br />
II—Setup Operating Mode<br />
III—Adjust Operating Mode<br />
D—Operating Mode Selection Button<br />
I<br />
ZX1041593<br />
II<br />
ZX1041601<br />
III<br />
ZX1041602<br />
Continued on next page<br />
A B C<br />
Run Operating Mode<br />
A B C<br />
Setup Operating Mode<br />
A B C<br />
Adjust Operating Mode<br />
D<br />
D<br />
D<br />
ZX1041593 –UN–16APR08<br />
ZX1041601 –UN–16APR08<br />
ZX1041602 –UN–16APR08<br />
OUCC002,00029B1 –19–07JUL08–1/5<br />
10-9 071808<br />
PN=16
Operating <strong>Lightbar</strong> Under Run Mode<br />
Operating <strong>Lightbar</strong><br />
The Run Mode is automatically activated under normal<br />
operation if a valid setup has been performed. To be sure<br />
that run mode is activated check that no LEDs beneath<br />
the A, B or C buttons are activated. If necessary, press<br />
button (D) until LEDs beneath buttons A, B or C are all off<br />
to access the run mode. Select this operating mode to:<br />
• Increase/decrease the LED brightness by pressing the<br />
button (A) or (C).<br />
• Do a center track by pressing the button (B).<br />
– The system activates the center tracking indicator<br />
LEDs (F). When driving on track only these LEDs are<br />
activated.<br />
– If a track offset to the right-hand side is detected the<br />
system activates the L.h.offset tracking indicator<br />
LEDs (E) proportionally to the offset detected (about<br />
10 cm (3.93 in.) per LED (E) activated). This LED<br />
activation informs the operator that he must steer to<br />
the left-hand side until all L.h.offset tracking indicator<br />
LEDs (E) are off.<br />
– If a track offset to the left-hand side is detected the<br />
system activates the R.h.offset tracking indicator<br />
LEDs (G) proportionally to the offset detected (about<br />
10 cm (3.93 in.) per LED (G) activated). This LED<br />
activation informs the operator that he must steer to<br />
the right-hand side until all R.h.offset tracking<br />
indicator LEDs (G) are off.<br />
Track Finder Functionality:<br />
To help the operator in finding the track spacing while<br />
turning in headland, the system changes to flashing LEDs<br />
(E) or (G) everytime the gauge limit of the lightbar is<br />
reached. The flashing frequency indicates the distance<br />
from the track:<br />
• A higher frequency means closer to the track.<br />
• A lower frequency means further away from track.<br />
NOTE: Flashing of LEDs starts at a distance from track of<br />
1,3 m (4 ft 3.12 in.) at 10 Hz and changes to 1 Hz<br />
at track spacing/2.<br />
ZX1041594<br />
A<br />
B<br />
A B C<br />
A B C<br />
A B C<br />
A B C<br />
C<br />
E F G<br />
Operating <strong>Lightbar</strong>—Run Mode<br />
A—Decrease LED Brightness Button<br />
B—Center Track Button<br />
C—Increase LED Brightness Button<br />
D—Operating Mode Selection Button<br />
E—L.h. Offset Tracking Indicator LEDs (Red)<br />
F—Center Tracking Indicator LEDs (Green)<br />
G—R.h.Offset Tracking Indicator LEDs (Red)<br />
Continued on next page<br />
D<br />
ZX1041594 –UN–16APR08<br />
OUCC002,00029B1 –19–07JUL08–2/5<br />
10-10 071808<br />
PN=17
ZX1041595<br />
A B C<br />
Operating <strong>Lightbar</strong><br />
B C<br />
D D<br />
A<br />
D<br />
A B C<br />
B<br />
A<br />
X<br />
C<br />
Operating <strong>Lightbar</strong>—Setup Mode<br />
A B C<br />
A—Set point A Button C—Set point C Button E—Operating Mode Selection X—Track Spacing<br />
B—Set point B Button D—Operator Input Indicator Button<br />
LED<br />
Operating <strong>Lightbar</strong> Under Setup Mode<br />
After power up, press button (E) to access setup<br />
mode. The LED beneath the A button is activated to<br />
confirm selection of the Setup Mode. Select this<br />
operating mode to:<br />
• Set a track as initial setup. The operator needs to<br />
define points A, B and C (see illustration). Points A<br />
and B are used to calculate the heading and point C<br />
is used to calculate the track spacing, which is the<br />
distance (X) between the parallel tracks. Setup initial<br />
track as follows:<br />
a. The system turns on the operator input indicator<br />
LED beneath the button (A) and waits for the<br />
operator input to set A point. Press button (A) to<br />
start heading calculation.<br />
NOTE: Current position of point A is stored.<br />
b. The system turns on the operator input indicator<br />
LED (flashing) beneath the button (B). The<br />
system checks that the operator has driven at<br />
least 3m(9ft10in.) then operator input LED<br />
becomes solid. The system waits for the operator<br />
input to set B point. Press button (B) when point<br />
B is reached.<br />
NOTE: New A-B line is calculated and stored.<br />
c. The system turns on the operator input indicator<br />
LED (flashing) beneath the button (C). The<br />
system checks that the vehicle heading is greater<br />
than 90 degrees from A-B line then operator input<br />
LED becomes solid. The system waits for the<br />
operator input to set C point. Press button (C) for<br />
less than 2 seconds when point C is reached.<br />
Continued on next page<br />
E<br />
OUCC002,00029B1 –19–07JUL08–3/5<br />
10-11 071808<br />
PN=18<br />
ZX1041595 –UN–16APR08
NOTE: Vehicle position C and track spacing (X) are<br />
calculated and stored. System switches to Run<br />
Mode.<br />
NOTE: Pressing button (C) longer than 2 seconds will<br />
recall the latest stored track spacing (X).<br />
System switches to Run Mode.<br />
• Recall a track spacing previously set.<br />
Whenever the operator needs to keep his track<br />
spacing a new A-B line can be setup and current<br />
Operating <strong>Lightbar</strong> Under Adjust Mode<br />
After power up, press button (B) twice to access adjust<br />
mode. The LEDs beneath the A and C buttons are<br />
activated to confirm selection of adjust mode. Select this<br />
operating mode to fine tune the track spacing:<br />
• The system turns on the operator input indicator LED<br />
beneath the buttons (A) and (C) as shown opposite.<br />
• Press button (A) to decrease track spacing. Each<br />
tracking indicator LED (D) activation represents 10 cm<br />
(3.93 in.) of track spacing decrement.<br />
• Press button (C) to increase track spacing. Each<br />
tracking indicator LED (E) activation represents 10 cm<br />
(3.93 in.) of track spacing increment.<br />
A—Decrease Spacing Button<br />
B—Operating Mode Selection Button<br />
C—Increase Spacing Button<br />
D—Decrease Tracking Indicator LEDs (Red)<br />
E—Increase Tracking Indicator LEDs (Red)<br />
Operating <strong>Lightbar</strong><br />
track spacing (X) recalled by pressing button (C)<br />
longer than 2 seconds (see explanation above for<br />
initial track setup).<br />
NOTE: During initial track setup procedure, all tracking<br />
indicator LEDs are off.<br />
Once the track spacing (X) has been setup: Press<br />
button (E) twice to select adjust mode and fine tune<br />
track spacing (X), if necessary. See ”Operating<br />
<strong>Lightbar</strong> Under Adjust Mode”.<br />
ZX1041596<br />
A<br />
D<br />
A B C<br />
A B C<br />
A B C<br />
OUCC002,00029B1 –19–07JUL08–4/5<br />
C<br />
E<br />
Operating <strong>Lightbar</strong>—Adjust Mode<br />
B<br />
ZX1041596 –UN–05MAY08<br />
OUCC002,00029B1 –19–07JUL08–5/5<br />
10-12 071808<br />
PN=19
<strong>Lightbar</strong> System Fuse Protection<br />
• Standalone Configuration: A 10A fuse (A) located on<br />
power supply harness protects the <strong>Lightbar</strong> system.<br />
• Display Configuration: The tractor electrical system<br />
protects the <strong>Lightbar</strong> system. To identify which fuse<br />
protects the <strong>Lightbar</strong> system, refer to the tractor<br />
Operator’s Manual.<br />
A—Fuse-10 A<br />
Operating <strong>Lightbar</strong><br />
ZX1042239 –UN–18JUN08<br />
OUCC002,00029A8 –19–24JUN08–1/1<br />
10-13 071808<br />
PN=20
<strong>Lightbar</strong> Specifications<br />
Safety Note Regarding the Subsequent Installation of Electrical and Electronic<br />
Appliances and/or Components<br />
The machine is equipped with electronic components<br />
whose function may be influenced by electromagnetic<br />
radiation from other appliances. Such influences may<br />
be hazardous, so take the following safety instructions<br />
into account:<br />
If electrical and electronic appliances are subsequently<br />
installed on the machine and connected to the onboard<br />
system, the user must verify whether the installation<br />
affects the electronics or other components. This<br />
applies particularly to:<br />
Declaration of Conformity<br />
<strong>John</strong> <strong>Deere</strong> Werke Zweibrücken<br />
Homburger Straße 117<br />
D-66482 Zweibrücken<br />
The following GREENSTAR System Component complies<br />
with the EU electromagnetic compatibility provisions in<br />
directive 2004/108/EC. This component was assessed<br />
using the acceptance criteria defined in the harmonized<br />
standard ISO 14982:1998.<br />
• <strong>Lightbar</strong> System<br />
Zweibrücken 01 May 2008<br />
• Personal Computer<br />
• GPS (Global Positioning System) receiver<br />
In particular, subsequently installed electrical/electronic<br />
components must comply with the relevant edition of<br />
EMC Directive 89/336/EEC, and be CE marked.<br />
Wiring, installation and maximum permissible current<br />
supply must be as stated in the installation instructions<br />
of the machine manufacturer.<br />
Engineering Manager AMS<br />
ZX,OMSPFH,EMV –19–02DEC96–1/1<br />
ZX1041618 –UN–05MAY08<br />
OUCC002,000298C –19–04JUN08–1/1<br />
15-1 071808<br />
PN=21
Identification Label<br />
Serial Numbers<br />
The letters and numbers on the label identify a component<br />
or assembly. All of these characters are needed when<br />
ordering parts or identifying the system or component for<br />
any <strong>John</strong> <strong>Deere</strong> product support program. Also, they are<br />
needed for law enforcement to trace your <strong>Lightbar</strong> system<br />
if it is ever stolen.<br />
For these reaseons, accurately record these characters.<br />
<strong>Lightbar</strong> Console<br />
Label is located underneath console.<br />
OUCC002,00029A6 –19–18JUN08–1/1<br />
ZX1042240 –UN–15JUL08<br />
OUCC002,00029A7 –19–18JUN08–1/1<br />
20-1 071808<br />
PN=22
F<br />
Index<br />
Page<br />
Fuse protection. ........................10-13<br />
G<br />
Guidance system<br />
<strong>Lightbar</strong>. .............................10-1<br />
I<br />
Identification label. .......................20-1<br />
L<br />
LEDs Description ........................10-7<br />
O<br />
Operating <strong>Lightbar</strong><br />
Adjust mode ..........................10-9<br />
Adjust track spacing ....................10-9<br />
Display configuration. ...................10-5<br />
Fuse protection .......................10-13<br />
Recall a track spacing. ..................10-9<br />
Run mode ............................10-9<br />
Set a track ...........................10-9<br />
Setup mode ..........................10-9<br />
Standalone configuration. ................10-4<br />
Suction cup. ..........................10-3<br />
S<br />
Serial numbers<br />
Console .............................20-1<br />
Identification label ......................20-1<br />
System Description. ......................10-7<br />
Index-1 071808<br />
PN=1
Index<br />
Index-2 071808<br />
PN=2
<strong>John</strong> <strong>Deere</strong> Service Keeps You On The Job<br />
<strong>John</strong> <strong>Deere</strong> Parts<br />
We help minimize downtime by putting genuine <strong>John</strong><br />
<strong>Deere</strong> parts in your hands in a hurry.<br />
That’s why we maintain a large and varied inventory—to<br />
stay a jump ahead of your needs.<br />
The Right Tools<br />
Precision tools and testing equipment enable our Service<br />
Department to locate and correct troubles quickly ...to<br />
save you time and money.<br />
Well-Trained Technicians<br />
School is never out for <strong>John</strong> <strong>Deere</strong> service technicians.<br />
Training schools are held regularly to be sure our<br />
personnel know your equipment and how to maintain it.<br />
Result?<br />
Experience you can count on!<br />
Prompt Service<br />
Our goal is to provide prompt, efficient care when you<br />
want it and where you want it.<br />
We can make repairs at your place or at ours, depending<br />
on the circumstances: see us, depend on us.<br />
JOHN DEERE SERVICE SUPERIORITY: We’ll be around<br />
when you need us.<br />
TS100 –UN–23AUG88<br />
DX,IBC,A –19–04JUN90–1/1<br />
TS101 –UN–23AUG88<br />
DX,IBC,B –19–04JUN90–1/1<br />
TS102 –UN–23AUG88<br />
DX,IBC,C –19–04JUN90–1/1<br />
TS103 –UN–23AUG88<br />
DX,IBC,D –19–04JUN90–1/1<br />
1 071808<br />
PN=25
<strong>John</strong> <strong>Deere</strong> Service Keeps You On The Job<br />
2 071808<br />
PN=26