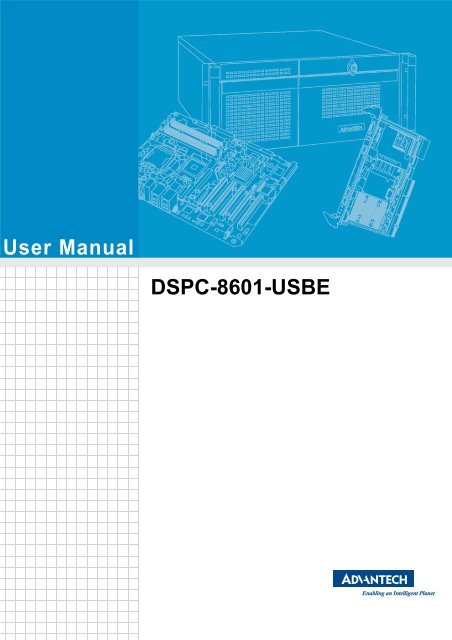
User Manual DSPC-8601-USBE
User Manual DSPC-8601-USBE
User Manual DSPC-8601-USBE

You also want an ePaper? Increase the reach of your titles
YUMPU automatically turns print PDFs into web optimized ePapers that Google loves.
<strong>User</strong> <strong>Manual</strong><br />
<strong>DSPC</strong>-<strong>8601</strong>-<strong>USBE</strong>
Copyright<br />
The documentation and the software included with this product are copyrighted 2012<br />
by Advantech Co., Ltd. All rights are reserved. Advantech Co., Ltd. reserves the right<br />
to make improvements in the products described in this manual at any time without<br />
notice. No part of this manual may be reproduced, copied, translated or transmitted<br />
in any form or by any means without the prior written permission of Advantech Co.,<br />
Ltd. Information provided in this manual is intended to be accurate and reliable. However,<br />
Advantech Co., Ltd. assumes no responsibility for its use, nor for any infringements<br />
of the rights of third parties, which may result from its use.<br />
Acknowledgements<br />
Intel and Pentium are trademarks of Intel Corporation.<br />
Microsoft Windows and MS-DOS are registered trademarks of Microsoft Corp.<br />
All other product names or trademarks are properties of their respective owners.<br />
<strong>DSPC</strong>-<strong>8601</strong> <strong>User</strong> <strong>Manual</strong> ii<br />
Part No. 2002<strong>8601</strong>00 Edition 1<br />
Printed in Taiwan April 2012
Contents<br />
Chapter 1 Overview...............................................1<br />
1.1 Introduction ............................................................................................... 2<br />
1.2 Features .................................................................................................... 2<br />
1.3 Specifications ............................................................................................ 2<br />
1.4 Block Diagram........................................................................................... 3<br />
1.5 Typical Application .................................................................................... 3<br />
1.6 HW Introduction ........................................................................................ 4<br />
1.6.1 Dimension ..................................................................................... 4<br />
Figure 1.1 Top View of <strong>DSPC</strong>-<strong>8601</strong>-<strong>USBE</strong> ................................. 4<br />
Figure 1.2 Side View of <strong>DSPC</strong>-<strong>8601</strong>-<strong>USBE</strong> ................................ 4<br />
Figure 1.3 Bottom View of <strong>DSPC</strong>-<strong>8601</strong>-<strong>USBE</strong> ............................ 4<br />
1.6.2 Connectors.................................................................................... 5<br />
Figure 1.4 Connector of <strong>DSPC</strong>-<strong>8601</strong>-<strong>USBE</strong>................................ 5<br />
Chapter 2 Installation............................................7<br />
2.1 Min. System Requirements ....................................................................... 8<br />
2.2 Hardware Installation ................................................................................ 8<br />
2.2.1 System Setup................................................................................ 8<br />
Figure 2.1 All connectors of <strong>DSPC</strong>-<strong>8601</strong>-<strong>USBE</strong>.......................... 8<br />
Chapter 3 Software Installation ...........................9<br />
3.1 SDK and Driver Installation ..................................................................... 10<br />
3.2 Driver Installation <strong>Manual</strong>ly ..................................................................... 15<br />
3.3 Application Installation ............................................................................ 21<br />
Chapter 4 Startup ................................................23<br />
4.1 Main Application...................................................................................... 24<br />
4.2 Firmware Upgrade Utility......................................................................... 25<br />
Chapter 5 Configuration .....................................27<br />
5.1 Configuration........................................................................................... 28<br />
Chapter 6 Software Development Kit ................29<br />
6.1 Introduction ............................................................................................. 30<br />
6.2 Object Mode............................................................................................ 30<br />
6.3 API Mode ................................................................................................ 31<br />
6.4 APIs and Interface................................................................................... 32<br />
iii <strong>DSPC</strong>-<strong>8601</strong> <strong>User</strong> <strong>Manual</strong>
<strong>DSPC</strong>-<strong>8601</strong> <strong>User</strong> <strong>Manual</strong> iv
Chapter 1<br />
1Overview
1.1 Introduction<br />
<strong>DSPC</strong>-<strong>8601</strong>-<strong>USBE</strong> is an USB 2.0 high-speed video capture module with 1 analog<br />
video input and 1 stereo audio input. <strong>DSPC</strong>-<strong>8601</strong>-<strong>USBE</strong> supports H.264 compression<br />
formats up to full D1 resolution at real-time frame rate (30/25fps). With an easyto-use<br />
software development kit (SDK), <strong>DSPC</strong>-<strong>8601</strong>-<strong>USBE</strong> is an ideal solution for<br />
system integrators to implement versatile video capturing and encoding applications.<br />
1.2 Features<br />
Supports on-board hardware-based H.264 compression<br />
Supports on-board PCM / G.711 hardware-based audio compression<br />
30/25 fps (NTSC/PAL) at up to full D1 (720 x576) recording<br />
USB bus power<br />
Supports up to 8 devices with one PC (by setting device ID)<br />
SDK with VC++ sample codes<br />
1.3 Specifications<br />
Video Input<br />
Channels 1<br />
Video inputs Composite for NTSC/PAL<br />
Compression H.264 / RAW<br />
Dual Streams Yes<br />
Frame Rate Up to 30 fps @NTSC / 25 fps @ PAL (adjustable)<br />
Bit Rate Control Supports constant bit rate (CBR) & variable bit rate (VBR)<br />
OSD Text OSD<br />
Connector<br />
Audio Input<br />
BNC, male / 1.0 Vp-p, 75 ohms<br />
Channels 1 x stereo line-in<br />
Sampling Rates Up to 16 bit, 48 KHz, stereo<br />
Compression PCM / G.711<br />
Connector Phone jack, female<br />
Physical Characteristics<br />
Host Interface USB 2.0 High Speed<br />
Power input USB bus power<br />
Operating Temperature<br />
0 ~ 70° C (32 ~ 158° F)<br />
(needs air flow when operating temperature over 60° C/140° F)<br />
Board Dimensions 70 x 38 mm (2.75” x 1.49”)<br />
Safety<br />
Software Development Kit<br />
CE / FCC<br />
Operating System Supported Windows XP / XPe / Vista / 7<br />
Direct X Required Version 9 or above<br />
<strong>DSPC</strong>-<strong>8601</strong> <strong>User</strong> <strong>Manual</strong> 2
1.4 Block Diagram<br />
1.5 Typical Application<br />
3 <strong>DSPC</strong>-<strong>8601</strong> <strong>User</strong> <strong>Manual</strong><br />
Chapter 1 Overview
1.6 HW Introduction<br />
1.6.1 Dimension<br />
Below is the HW dimension.<br />
Unit: mm.<br />
<strong>DSPC</strong>-<strong>8601</strong> <strong>User</strong> <strong>Manual</strong> 4<br />
Figure 1.1 Top View of <strong>DSPC</strong>-<strong>8601</strong>-<strong>USBE</strong><br />
Figure 1.2 Side View of <strong>DSPC</strong>-<strong>8601</strong>-<strong>USBE</strong><br />
Figure 1.3 Bottom View of <strong>DSPC</strong>-<strong>8601</strong>-<strong>USBE</strong>
1.6.2 Connectors<br />
Loop header<br />
Pin Signal<br />
USB header<br />
Figure 1.4 Connector of <strong>DSPC</strong>-<strong>8601</strong>-<strong>USBE</strong><br />
1 CVBS<br />
2 AUDIO_L<br />
3 AUDIO_R<br />
4 GND<br />
5 <strong>DSPC</strong>-<strong>8601</strong> <strong>User</strong> <strong>Manual</strong><br />
Chapter 1 Overview
Pin Signal<br />
1 USB0_VBUS_CONN<br />
2 USB0_DN<br />
3 USB0_DP<br />
4 GND<br />
Switch setting<br />
SW1 TARGET<br />
Default OFF (1) ON (0)<br />
DEVICE ID<br />
8-1 7-2 6-3<br />
<strong>DSPC</strong>-<strong>8601</strong> <strong>User</strong> <strong>Manual</strong> 6<br />
000 011 110<br />
001 100 111<br />
010 101<br />
USB ID 5-4 Device Mode Host Mode
Chapter 2<br />
2Installation
2.1 Min. System Requirements<br />
One X86 personal computer with:<br />
Intel Pentium 4 CPU<br />
512 MB RAM<br />
500MB HDD<br />
One USB 2.0 port.<br />
Operating Systems - Windows XP or above<br />
2.2 Hardware Installation<br />
2.2.1 System Setup<br />
<strong>User</strong>s can set up one video capturing system by connecting <strong>DSPC</strong>-<strong>8601</strong>-<strong>USBE</strong> with<br />
video source devices and a PC according to the connector function definitions as<br />
below.<br />
<strong>DSPC</strong>-<strong>8601</strong> <strong>User</strong> <strong>Manual</strong> 8<br />
Figure 2.1 All connectors of <strong>DSPC</strong>-<strong>8601</strong>-<strong>USBE</strong><br />
Connection with audio inputs<br />
Connect the audio device with phone jack connector to the Audio Line-In port.<br />
Connection with video inputs<br />
Connect the video source (NTSC or PAL) with BNC male connector to the Video<br />
Input port.<br />
Connection with USB port<br />
Connect the USB cable to the USB Header.<br />
Connection with Loop Header<br />
Connect the video and audio output device to the Loop Header (one special-made<br />
cable is needed).
Chapter 3<br />
3Software Installation
3.1 SDK and Driver Installation<br />
<strong>DSPC</strong>-<strong>8601</strong>-<strong>USBE</strong> provides a Software Development Kit (SDK) for application development.<br />
Only a DLL version is provided in this SDK currently.<br />
When this device is used under Microsoft Windows XP OS, the device driver needs<br />
to be upgraded. Otherwise, some functions will not work correctly. If this device is<br />
used under later versions like Windows Vista, Windows 7, then there is no need to<br />
install the device driver.<br />
To install the he SDK and driver correctly, please connect the <strong>DSPC</strong>-<strong>8601</strong>-<strong>USBE</strong><br />
device to PC first. Then execute the file “Advantech_<strong>DSPC</strong><strong>8601</strong>_Install.exe” to run<br />
the setup program. Follow the instructions below to install the SDK step-by-step.<br />
1. Click the Next button to continue the setup program.<br />
<strong>DSPC</strong>-<strong>8601</strong> <strong>User</strong> <strong>Manual</strong> 10
2. Accept the license agreement.<br />
3. The default install path is the folder “C:\Program Files\Advantech\Capture<br />
Card\<strong>DSPC</strong>-<strong>8601</strong>”. Click Next.<br />
11 <strong>DSPC</strong>-<strong>8601</strong> <strong>User</strong> <strong>Manual</strong><br />
Chapter 3 Software Installation
4. Select the setup type Complete.<br />
5. Click the Install button to start to install SDK.<br />
<strong>DSPC</strong>-<strong>8601</strong> <strong>User</strong> <strong>Manual</strong> 12
6. After the SDK has installed, the driver install will continue. Just ignore the Windows<br />
warnings and click the button Continue Anyway to continue to install the<br />
device driver.<br />
7. Click the Finish button to finish the SDK and driver installation.<br />
13 <strong>DSPC</strong>-<strong>8601</strong> <strong>User</strong> <strong>Manual</strong><br />
Chapter 3 Software Installation
8. Under Device Manager, “USB Video Device” will be shown if the driver has<br />
installed correctly.<br />
9. After the SDK has installed successfully, shortcuts will be shown in Programs.<br />
The SDK includes the DLL files, device driver, demo application, firmware file, and<br />
the SDK user manual. The folders listed below are provided by SDK.<br />
<strong>DSPC</strong>-<strong>8601</strong> <strong>User</strong> <strong>Manual</strong> 14
Bin - Include the execution file of the demo application, SDK DLL files, and the<br />
firmware update utility<br />
Driver - the device driver<br />
<strong>DSPC</strong><strong>8601</strong>Demo - the sample code of the demo application developed by<br />
Microsoft Visual C++ 2008. The user can refer to the code for developing the<br />
application<br />
Firmware - the firmware file, the user can use the program<br />
“<strong>DSPC</strong><strong>8601</strong>FWUpdate.exe” to update the firmware<br />
Include - the header files of the SDK<br />
Lib - the lib files of the SDK<br />
<strong>Manual</strong> - SDK user manual<br />
Relnotes.txt - show the modification for each version of SDK<br />
3.2 Driver Installation <strong>Manual</strong>ly<br />
The setup program “Advantech_<strong>DSPC</strong><strong>8601</strong>_Install.exe” will install the device driver<br />
automatically. The user can also install the device driver manually. This section will<br />
describe how to install the device driver manually.<br />
When the device is used under Microsoft Windows XP, the device driver must be<br />
upgraded. Otherwise, some functions will not work correctly. The user can follow the<br />
steps below to upgrade the device driver manually.<br />
1. Right click the My Computer icon, then choose the Manage command.<br />
15 <strong>DSPC</strong>-<strong>8601</strong> <strong>User</strong> <strong>Manual</strong><br />
Chapter 3 Software Installation
2. Choose Device Manager. Right-click USB Video Device, and choose Update<br />
Driver.<br />
3. Select the No, not this time, and click the Next button.<br />
<strong>DSPC</strong>-<strong>8601</strong> <strong>User</strong> <strong>Manual</strong> 16
4. Select Install from a list or specific location (Advanced), and click the Next<br />
button.<br />
5. Select the Don’t search. I will choose the driver to install, and click the Next<br />
button.<br />
17 <strong>DSPC</strong>-<strong>8601</strong> <strong>User</strong> <strong>Manual</strong><br />
Chapter 3 Software Installation
6. Click the Have Disk... button.<br />
7. Click the Browse... button.<br />
<strong>DSPC</strong>-<strong>8601</strong> <strong>User</strong> <strong>Manual</strong> 18
8. Choose the file “usbvideo.inf” in the “Driver” folder of the SDK, and then click the<br />
Open button.<br />
9. Click the OK button.<br />
19 <strong>DSPC</strong>-<strong>8601</strong> <strong>User</strong> <strong>Manual</strong><br />
Chapter 3 Software Installation
10. Click the Next button.<br />
11. Click the Continue Anyway button.<br />
<strong>DSPC</strong>-<strong>8601</strong> <strong>User</strong> <strong>Manual</strong> 20
12. Click the Finish button.<br />
13. The driver has been upgraded successfully.<br />
3.3 Application Installation<br />
The execution file of the demo application is located in the folder “Bin” of the SDK.<br />
Run the file “<strong>DSPC</strong><strong>8601</strong>Demo.exe” to execute the application.<br />
21 <strong>DSPC</strong>-<strong>8601</strong> <strong>User</strong> <strong>Manual</strong><br />
Chapter 3 Software Installation
<strong>DSPC</strong>-<strong>8601</strong> <strong>User</strong> <strong>Manual</strong> 22
Chapter 4<br />
4Startup
4.1 Main Application<br />
A maximum of 8 <strong>DSPC</strong>-<strong>8601</strong>-<strong>USBE</strong> devices can be supported to connect to one system<br />
(with different device ID settings via the Switcher connector. Please refer to Section<br />
1.6.2). Connect <strong>DSPC</strong>-<strong>8601</strong>-<strong>USBE</strong> devices to the system, and wait for around<br />
one minute (waiting for the hand-shake between the PC and the USB device) then<br />
run the SDK sample program. The application will be shown as follows.<br />
Select the board you want to control from the board option, then click the Start button.<br />
The video will be shown and recorded into the file “capture.mov”.<br />
<strong>DSPC</strong>-<strong>8601</strong> <strong>User</strong> <strong>Manual</strong> 24
4.2 Firmware Upgrade Utility<br />
The program “<strong>DSPC</strong><strong>8601</strong>FWUpdate” is an utility to upgrade the firmware into <strong>DSPC</strong>-<br />
<strong>8601</strong>-<strong>USBE</strong>. This program is located in the folder “Bin” of the SDK. Please run the<br />
“<strong>DSPC</strong><strong>8601</strong>FWUpdate.exe” to execute the program.<br />
1. Select the board number you want to upgrade.<br />
2. Click Browse button to select the firmware file.<br />
3. Click Update button to start upgrade. A progress bar will show the progress of<br />
firmware data transmission.<br />
4. After data transmission, don’t unplug the device. Wait until the firmware upgrade<br />
has fully finished.<br />
5. Once the system shows the message Firmware update done! the firmware<br />
upgrade is completed. Now reboot the device.<br />
25 <strong>DSPC</strong>-<strong>8601</strong> <strong>User</strong> <strong>Manual</strong><br />
Chapter 4 Startup
<strong>DSPC</strong>-<strong>8601</strong> <strong>User</strong> <strong>Manual</strong> 26
Chapter 5<br />
5Configuration
5.1 Configuration<br />
The demo application provides the options to configure different settings for <strong>DSPC</strong>-<br />
<strong>8601</strong>-<strong>USBE</strong>.<br />
1. Shows the current firmware version.<br />
2. Select the board you want to control, and set video standard, video resolution,<br />
video bit rate and video frame rate.<br />
3. Shows the file path of the recorded files for each board.<br />
4. Video color setting. The sliders are used to adjust the value of video brightness,<br />
contract, saturation and hue.<br />
5. Enable/disable the video preview and record.<br />
6. Set OSD text and clear OSD.<br />
7. Start/stop the capture for the selected board.<br />
8. Start/stop the capture for all boards.<br />
9. Exit the program.<br />
<strong>DSPC</strong>-<strong>8601</strong> <strong>User</strong> <strong>Manual</strong> 28
Chapter 6<br />
6Software Development<br />
Kit
6.1 Introduction<br />
The SDK supports two modes, Object mode and API mode, and users can choose<br />
either one for the SDK. Both modes are described below. For detailed information for<br />
the SDK, please refer to the manual installed with the SDK.<br />
6.2 Object Mode<br />
Call the API “<strong>DSPC</strong><strong>8601</strong>_CreateInstance” to create the I<strong>DSPC</strong><strong>8601</strong>SDK instance for<br />
the specified board first. Then users can use the methods for interface<br />
I<strong>DSPC</strong><strong>8601</strong>SDK directly. Call method “Release” of I<strong>DSPC</strong><strong>8601</strong>SDK to release all<br />
resources when the instance will never be used. A sample code is shown below.<br />
int nBoardID = 0;<br />
I<strong>DSPC</strong><strong>8601</strong>SDK * p<strong>DSPC</strong><strong>8601</strong> = NULL;<br />
if<br />
SPC<strong>8601</strong>_CreateInstance ( nBoardID, ( void ** )&p<strong>DSPC</strong><strong>8601</strong> ) )<br />
{<br />
p<strong>DSPC</strong><strong>8601</strong>->Open();<br />
p<strong>DSPC</strong><strong>8601</strong>->Start(<br />
TRUE,<br />
FALSE,<br />
FALSE,<br />
GetDlgItem( IDC_PREVIEW_DLG )-> GetSafeHwnd(),<br />
FALSE );<br />
......<br />
p<strong>DSPC</strong><strong>8601</strong>->Stop();<br />
p<strong>DSPC</strong><strong>8601</strong>->Close();<br />
p<strong>DSPC</strong><strong>8601</strong>->Release();// Release instance<br />
p<strong>DSPC</strong><strong>8601</strong> = NULL;<br />
}<br />
<strong>DSPC</strong>-<strong>8601</strong> <strong>User</strong> <strong>Manual</strong> 30
6.3 API Mode<br />
Call the API “<strong>DSPC</strong><strong>8601</strong>_Open” to initialize the SDK resources and create the SDK<br />
handle. Then call the other APIs by sending the handle to perform the operation.<br />
Finally, call API “<strong>DSPC</strong><strong>8601</strong>_Release” to release the resources of the SDK. A sample<br />
code is shown below.<br />
int nBoardID = 0;<br />
HANDLE h<strong>DSPC</strong><strong>8601</strong> = <strong>DSPC</strong><strong>8601</strong>_Open( nBoardID );<br />
if ( h<strong>DSPC</strong><strong>8601</strong> )<br />
{<br />
<strong>DSPC</strong><strong>8601</strong>_Start(<br />
h<strong>DSPC</strong><strong>8601</strong>,<br />
TRUE,<br />
FALSE,<br />
FALSE,<br />
GetDlgItem( IDC_PREVIEW_DLG )-> GetSafeHwnd(),<br />
FALSE );<br />
......<br />
<strong>DSPC</strong><strong>8601</strong>_Stop( h<strong>DSPC</strong><strong>8601</strong> );<br />
<strong>DSPC</strong><strong>8601</strong>_Release( h<strong>DSPC</strong><strong>8601</strong> );// Release instance<br />
h<strong>DSPC</strong><strong>8601</strong> = NULL;<br />
}<br />
31 <strong>DSPC</strong>-<strong>8601</strong> <strong>User</strong> <strong>Manual</strong><br />
Chapter 6 Software Development Kit
6.4 APIs and Interface<br />
The APIs and interface of the SDK are listed below. For details of the APIs and Interface,<br />
please refer the SDK user manual.<br />
1. APIs<br />
- <strong>DSPC</strong><strong>8601</strong>_GetSDKVersion<br />
- <strong>DSPC</strong><strong>8601</strong>_GetNoOfDevices<br />
- <strong>DSPC</strong><strong>8601</strong>_CreateInstance<br />
- <strong>DSPC</strong><strong>8601</strong>_GetLastError<br />
- <strong>DSPC</strong><strong>8601</strong>_SetLogFile<br />
2. Interface<br />
I<strong>DSPC</strong><strong>8601</strong>SDK<br />
- Release<br />
- Open<br />
- Close<br />
- GetFWVersion<br />
- Start<br />
- Stop<br />
- SetPreview<br />
- StopPreview<br />
- SetRawVideoPreview<br />
- StopRawVideoPreview<br />
- SetRecord<br />
- StopRecord<br />
- IsVideoPresent<br />
- GetCapState<br />
- GetVideoStandard<br />
- SetVideoStandard<br />
- GetVideoResolution<br />
- SetVideoResolution<br />
- GetVideoFrameRate<br />
- SetVideoFrameRate<br />
- GetVideoBitRate<br />
- SetVideoBitRate<br />
- GetBrightness<br />
- SetBrightness<br />
- GetContrast<br />
- SetContrast<br />
- GetSaturation<br />
- SetSaturation<br />
- GetHue<br />
- SetHue<br />
- GetDeInterlaceMode<br />
- SetDeInterlaceMode<br />
- GetNoiseReduction<br />
- SetNoiseReduction<br />
<strong>DSPC</strong>-<strong>8601</strong> <strong>User</strong> <strong>Manual</strong> 32
- GetAudioFormat<br />
- SetAudioFormat<br />
- GetAudioChannel<br />
- SetAudioChannel<br />
- GetAudioSamplingRate<br />
- SetAudioSamplingRate<br />
- SetOSD<br />
- ClearOSD<br />
- StartMotionDetection<br />
- StopMotionDetection<br />
- GetStatistics<br />
- SetNewFrameCallback<br />
- SetRawVideoFrameCallback<br />
- SetFrameDecodedCallback<br />
- SetMotionDetectionCallback<br />
33 <strong>DSPC</strong>-<strong>8601</strong> <strong>User</strong> <strong>Manual</strong><br />
Chapter 6 Software Development Kit
www.advantech.com<br />
Please verify specifications before quoting. This guide is intended for reference<br />
purposes only.<br />
All product specifications are subject to change without notice.<br />
No part of this publication may be reproduced in any form or by any means,<br />
electronic, photocopying, recording or otherwise, without prior written permission<br />
of the publisher.<br />
All brand and product names are trademarks or registered trademarks of their<br />
respective companies.<br />
© Advantech Co., Ltd. 2012