Intellitan Remote Timer - ETS Tan Tanning Bed Parts
Intellitan Remote Timer - ETS Tan Tanning Bed Parts
Intellitan Remote Timer - ETS Tan Tanning Bed Parts

Create successful ePaper yourself
Turn your PDF publications into a flip-book with our unique Google optimized e-Paper software.
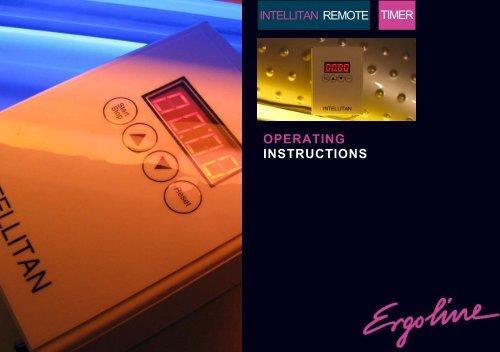
INTELLITAN REMOTE<br />
OPERATING<br />
INSTRUCTIONS<br />
TIMER
<strong>Intellitan</strong> <strong>Remote</strong> <strong>Timer</strong><br />
801129 / Rev. -B<br />
Operating Instructions<br />
3
4<br />
Table of Contents<br />
Table of Contents<br />
Overview . . . . . . . . . . . . . . . . . . . . . . . . . . . . 6<br />
Installation . . . . . . . . . . . . . . . . . . . . . . . . . . . 8<br />
Settings<br />
Setting Parameters . . . . . . . . . . . . . 9<br />
Parameter List . . . . . . . . . . . . . . . . 11<br />
Station Address . . . . . . . . . . . . . . . 12<br />
Session Delay . . . . . . . . . . . . . . . . 13<br />
Clean Room Feature . . . . . . . . . . . 14<br />
Operation<br />
Starting a Session . . . . . . . . . . . . . 15<br />
Pausing Stopping a Session . . . . . 15<br />
Interfacing with a Digital Controller<br />
<strong>Intellitan</strong> . . . . . . . . . . . . . . . . . . . .<br />
T-Max ® 16<br />
. . . . . . . . . . . . . . . . . . . . . 17<br />
Wireless Network . . . . . . . . . . . . . 18<br />
Third Party Interface . . . . . . . . . . . 19 .
6<br />
Overview<br />
Dear Customer,<br />
Your <strong>Tan</strong>ning Device is equipped with an <strong>Intellitan</strong><br />
<strong>Remote</strong> <strong>Timer</strong>. This device is used to regulate the<br />
operation and maximum tanning time of your tanning<br />
device and is required for it to function.<br />
Additionally, it will allow for your tanning device to be<br />
operated by a controller on a digital network. This<br />
includes controllers that communicate using either<br />
<strong>Intellitan</strong> or T-Max ® communications protocol. If you so<br />
choose, you may also connect this device via a wireless<br />
network. In such an application, the use of a retail<br />
wireless module (JK part number 003621215) will be<br />
required.<br />
For your safety, and to ensure proper operation of your<br />
equipment, please read and observe all instructions<br />
contained in this and other manuals for your tanning<br />
equipment.<br />
Observe any legal regulations and requirements<br />
pertaining to the operation of this device, including<br />
environmental considerations.<br />
NOTE:<br />
We reserve the right to make technical changes<br />
to the illustrations and specifications in this<br />
instruction manual. Reprinting, reproduction, or<br />
modification of this document, in whole or in<br />
part, is only permitted with prior written approval<br />
and citation of the source.
Four-Digit LED Display<br />
User Control: Reset Button<br />
User Control: Down Button<br />
User Control: Up Button<br />
User Control: Start/Stop Button<br />
Power Connection<br />
RJ-22 Network Connection<br />
RJ-22 Network Connection<br />
Overview<br />
7
8<br />
Installation<br />
Extreme Danger – High Voltage!<br />
Risk of severe injury or death!<br />
Maintenance on high voltage components<br />
of any tanning system should only be<br />
performed by trained, experienced persons.<br />
No maintenance should ever be performed<br />
without first powering off and securing<br />
power to the tanning system.<br />
The following is a list of the connections to the <strong>Intellitan</strong><br />
<strong>Remote</strong> <strong>Timer</strong> and their functions:<br />
1. <strong>Timer</strong><br />
2. Cable with 7-Pin Plug<br />
3. Adaptor 61644<br />
4. Terminal Strip (In <strong>Tan</strong>ning System)<br />
5. Bridge
Your <strong>Intellitan</strong> <strong>Remote</strong> <strong>Timer</strong> retains information<br />
regarding the operation of your tanning system in its<br />
parameters. These parameters can be accessed via<br />
entering a special mode that allows for viewing and/ or<br />
editing these values.<br />
IMPORTANT:<br />
Parameters can only be accessed in ascending<br />
order. If you inadvertently pass the parameter<br />
you wish to view/edit. You must exit and reenter<br />
parameter mode to return to the<br />
parameter.<br />
To Set/Change Parameters<br />
Settings: Setting Parameters<br />
Disconnect the network cables from the timer, if<br />
applicable<br />
Press the and controls at the same time<br />
until 0000 is displayed.<br />
Press RESET. The 0000’s will begin to flash.<br />
Press until the display reads 0102<br />
Press RESET. The display will read 0002.<br />
9
10<br />
Settings: Setting Parameters<br />
Press START/STOP.<br />
Continue to press START/STOP until the desired<br />
parameter is reached.<br />
To Edit the Value of a Parameter<br />
Once at the parameter you wish to edit, press<br />
RESET. The current value will begin to flash.<br />
Press the or control to change the value.<br />
Press RESET.<br />
Continue to press START/STOP to reach the next<br />
parameter you wish to edit. If there are no other<br />
parameters, press and at the same time to<br />
return to stand-by mode (00:00).
Please refer to the parameter chart below for the description and possible values of each parameter:<br />
Settings: Parameter Chart<br />
11
12<br />
Settings: Station Address<br />
Setting Station Address<br />
Follow the instructions on page 9 to enter parameter<br />
mode.<br />
Continue to press START/STOP until parameter<br />
P005 is reached.<br />
Press RESET. The current value will begin to flash.<br />
Press the or control until the desired value is<br />
reached.<br />
Press RESET.<br />
Continue to press START/STOP to reach the next<br />
parameter you wish to edit. If there are no other<br />
parameters, press and at the same time to<br />
return to stand-by mode (00:00).
Setting Session Delay<br />
Follow the instructions on page 9 to enter parameter<br />
mode.<br />
Continue to press START/STOP until parameter<br />
P004 is reached.<br />
Press RESET. The current value will begin to flash.<br />
Press the or control until the desired value is<br />
reached.<br />
Press RESET.<br />
Settings: Session Delay<br />
Continue to press START to reach the next<br />
parameter you wish to edit. If there are no other<br />
parameters, press and at the same time to<br />
return to stand-by mode (00:00).<br />
13
14<br />
Settings: Clean Room Feature<br />
Enabling Clean Room Feature<br />
Follow the instructions on page 9 to enter parameter<br />
mode.<br />
Continue to press START/STOP until parameter<br />
P015 is reached.<br />
Press RESET. The current value will begin to flash.<br />
Press the or control until a value of 0001 is<br />
reached.<br />
Press RESET.<br />
Continue to press START to reach the next<br />
parameter you wish to edit. If there are no other<br />
parameters, press and at the same time to<br />
return to stand-by mode (00:00).<br />
Acknowledging the Clean Room Feature<br />
After a tanning session, your timer’s display will<br />
indicate a ‘dirty’ status by displaying - -: - -<br />
To Acknowledge:<br />
Press the RESET control on the timer.<br />
or<br />
Press the START/STOP control on the tanning unit<br />
(see the owner’s manual for your tanning unit).<br />
or<br />
Via the software installed on the computer<br />
connected to your network controller (see the<br />
owner’s manual for your software).
Controlling a Session<br />
If you tanning system is not connected to a network<br />
controller, the <strong>Intellitan</strong> <strong>Remote</strong> <strong>Timer</strong> may be used<br />
for direct control and operation of the tanning<br />
system.<br />
To Start a session:<br />
Press the or control until the desired tanning<br />
time is reached.<br />
NOTE:<br />
Time is set in one minute increments and<br />
cannot exceed the maximum exposure time<br />
allowed by the timer.<br />
Press START/STOP. If no session delay has been<br />
set, the unit will begin the tanning session<br />
immediately, otherwise the specified delay will<br />
begin.<br />
If a session delay has been set, the session may be<br />
started any time during the delay period by pressing<br />
the START/STOP control on the timer or the tanning<br />
unit.<br />
To Pause a session:<br />
Operation: Controlling a Session<br />
At any point during the tanning session time may be<br />
paused by pressing the START/STOP control on the<br />
timer or the tanning unit (see the owner’s manual of<br />
your tanning unit for more information).<br />
To Stop a session:<br />
Press the START/STOP control on your tanning<br />
system to Pause the session (if not already paused).<br />
Press the RESET control to clear the remaining<br />
time.<br />
15
16<br />
Interfacing with an <strong>Intellitan</strong> Controller<br />
To Interface with an <strong>Intellitan</strong> Controller<br />
Follow the instructions on page 9 to enter parameter<br />
mode.<br />
Press the START/STOP until parameter P005 is<br />
reached.<br />
Press RESET.<br />
Press the or controls to change the station<br />
address to match the room number you wish the unit<br />
to appear as on the network.<br />
Press RESET.<br />
Your timer is capable of being connected to a digital network controller that is <strong>Intellitan</strong> or T-Max © based<br />
once the parameters have been set.<br />
Press START/STOP until Parameter P027 is<br />
reached.<br />
Press RESET.<br />
Press the or controls to change the <strong>Timer</strong><br />
Protocol to 0000.<br />
Press RESET.<br />
Press and at the same time to return to<br />
stand-by mode (00:00 is displayed).<br />
Connect your network cable to either of the RJ-22<br />
ports on the timer.
To Interface with a T-Max © Controller<br />
Follow the instructions beginning on page 9 to enter<br />
parameter mode.<br />
Press the START/STOP until parameter P005 is<br />
reached.<br />
Press RESET.<br />
Press the or controls to change the station<br />
address to match the room number you wish the unit<br />
to appear as on the network.<br />
Press RESET.<br />
Press START/STOP until Parameter P027 is<br />
reached.<br />
Press RESET.<br />
Interfacing with an T-Max © Controller<br />
Press the or controls to change the <strong>Timer</strong><br />
Protocol to 0001.<br />
Press RESET.<br />
Press and at the same time to return to<br />
stand-by mode (00:00 is displayed).<br />
Connect your network cable to either of the RJ-22<br />
ports on the timer.<br />
17
18<br />
Interfacing with an Wireless T-Max © Controller<br />
To Interface with a Wireless Network<br />
Controller<br />
Follow the instructions beginning on page 9 to enter<br />
parameter mode.<br />
Press the START/STOP until parameter P005 is<br />
reached.<br />
Press RESET.<br />
Press the or controls to change the station<br />
address to match the room number you wish the unit<br />
to appear as on the network.<br />
Press RESET.<br />
Press START/STOP until Parameter P027 is<br />
reached.<br />
Press RESET.<br />
Press the or controls to change the <strong>Timer</strong><br />
Protocol to 0001.<br />
Press RESET.<br />
Press and at the same time to return to<br />
stand-by mode (00:00 is displayed).<br />
Connect the cable from your wireless antenna (JK<br />
part number 003621215) to either of the RJ-22 ports<br />
on the timer.
To Interface Other Network Controllers<br />
Your <strong>Intellitan</strong> <strong>Remote</strong> <strong>Timer</strong> may also be interfaced<br />
with other network controllers via an external TPI<br />
(Third Party Interface) module (JK part number<br />
0440041202).<br />
Follow the instructions beginning on page 9 to enter<br />
parameter mode.<br />
Press the START/STOP until parameter P005 is<br />
reached.<br />
Press RESET.<br />
Press the or controls to change the station<br />
address to 0001.<br />
Press RESET.<br />
Press START/STOP until Parameter P027 is<br />
reached.<br />
Press RESET.<br />
Interfacing using TPI<br />
Press the or controls to change the <strong>Timer</strong><br />
Protocol to 0000.<br />
Press RESET.<br />
Press and at the same time to return to<br />
stand-by mode (00:00 is displayed).<br />
Connect the cable from your TPI to either of the RJ-<br />
22 ports on the timer.<br />
19
20<br />
JK | Global Service<br />
1 Walter Kratz Drive ● Jonesboro, AR 72401<br />
800.445.0624 ● http://support.jkamerica.com ● support@jkamerica.com<br />
801129<br />
Rev. -B