GM GMT Instruction Manual.pdf - White's Metal Detectors
GM GMT Instruction Manual.pdf - White's Metal Detectors
GM GMT Instruction Manual.pdf - White's Metal Detectors

You also want an ePaper? Increase the reach of your titles
YUMPU automatically turns print PDFs into web optimized ePapers that Google loves.
Batteries<br />
4<br />
Chapter 2 <strong>GM</strong>T Batteries<br />
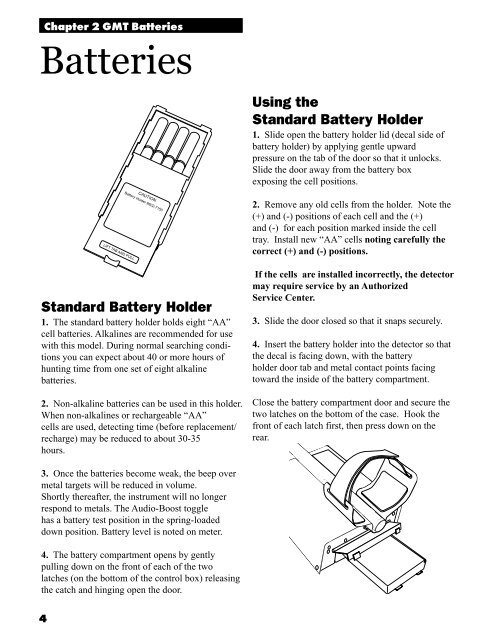
LIFT TAB AND PULL<br />
CAUTION<br />
Battery Holder #802-7150<br />
Standard Battery Holder<br />
1. The standard battery holder holds eight “AA”<br />
cell batteries. Alkalines are recommended for use<br />
with this model. During normal searching conditions<br />
you can expect about 40 or more hours of<br />
hunting time from one set of eight alkaline<br />
batteries.<br />
2. Non-alkaline batteries can be used in this holder.<br />
When non-alkalines or rechargeable “AA”<br />
cells are used, detecting time (before replacement/<br />
recharge) may be reduced to about 30-35<br />
hours.<br />
3. Once the batteries become weak, the beep over<br />
metal targets will be reduced in volume.<br />
Shortly thereafter, the instrument will no longer<br />
respond to metals. The Audio-Boost toggle<br />
has a battery test position in the spring-loaded<br />
down position. Battery level is noted on meter.<br />
4. The battery compartment opens by gently<br />
pulling down on the front of each of the two<br />
latches (on the bottom of the control box) releasing<br />
the catch and hinging open the door.<br />
Using the<br />
Standard Battery Holder<br />
1. Slide open the battery holder lid (decal side of<br />
battery holder) by applying gentle upward<br />
pressure on the tab of the door so that it unlocks.<br />
Slide the door away from the battery box<br />
exposing the cell positions.<br />
2. Remove any old cells from the holder. Note the<br />
(+) and (-) positions of each cell and the (+)<br />
and (-) for each position marked inside the cell<br />
tray. Install new “AA” cells noting carefully the<br />
correct (+) and (-) positions.<br />
If the cells are installed incorrectly, the detector<br />
may require service by an Authorized<br />
Service Center.<br />
3. Slide the door closed so that it snaps securely.<br />
4. Insert the battery holder into the detector so that<br />
the decal is facing down, with the battery<br />
holder door tab and metal contact points facing<br />
toward the inside of the battery compartment.<br />
Close the battery compartment door and secure the<br />
two latches on the bottom of the case. Hook the<br />
front of each latch first, then press down on the<br />
rear.