Create successful ePaper yourself
Turn your PDF publications into a flip-book with our unique Google optimized e-Paper software.
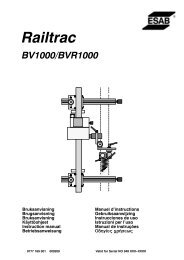
<strong>LPH</strong> <strong>35</strong><br />
Bruksanvisning<br />
Brugsanvisning<br />
Bruksanvisning<br />
Käyttöohjeet<br />
Instruction Manual<br />
Betriebsanweisung<br />
Manuel d’instructions<br />
Gebruiksaanwijzing<br />
Instrucciones de uso<br />
Instruzioni per l’uso<br />
Manual de instruções<br />
Οδηγίες χρήσεως<br />
Instrukcja obsługi<br />
0349 301 026 000831 Valid for serial no. 0<strong>35</strong>-xxx-xxxx
1. DIRECTIVE .............................................................................................................................................. 44<br />
2. SAFETY ................................................................................................................................................... 44<br />
3. INTRODUCTION...................................................................................................................................... 46<br />
3.1 GENERAL .............................................................................................................................................. 46<br />
3.2 SCOPE OF MANUAL............................................................................................................................. 46<br />
3.3 TECHNICAL DATA ................................................................................................................................ 46<br />
3.4 <strong>LPH</strong> <strong>35</strong> CUTTING SET PACKAGE........................................................................................................ 46<br />
4. INSTALLATION ....................................................................................................................................... 47<br />
4.1 GENERAL .............................................................................................................................................. 47<br />
4.2 EQUIPMENT REQUIRED...................................................................................................................... 47<br />
4.3 LOCATION............................................................................................................................................. 47<br />
4.4 INSPECTION ......................................................................................................................................... 47<br />
4.5 AIR LINES CONNECTIOINS ................................................................................................................. 47<br />
4.6 PRIMARY ELECTRICAL CONNECTIONS............................................................................................ 47<br />
4.7 SECONDARY CONNECTIONS............................................................................................................. 48<br />
5. OPERATION ............................................................................................................................................ 50<br />
5.1 <strong>LPH</strong> <strong>35</strong> CONTROLS .............................................................................................................................. 50<br />
6. MAINTENANCE ....................................................................................................................................... 51<br />
6.1 CLEANING............................................................................................................................................. 51<br />
7. CUTTING WITH PT30KK TORCH........................................................................................................... 51<br />
7.1 PIERCING TECHNIQUE........................................................................................................................ 52<br />
8. FAULT TRACING .................................................................................................................................... 52<br />
8.1 COMMON CUTTING PROBLEMS ........................................................................................................ 52<br />
9. SPARE PARTS ...................................................................................................................................... 133<br />
10. ORDERING OF SPARE / WEAR PARTS ............................................................................................. 1<strong>35</strong><br />
11. SCHEMATIC DIAGRAM ........................................................................................................................ 136<br />
43
1. DIRECTIVE<br />
DECLARATION OF CONFORMITY<br />
Esab Welding Equipment AB, S-695 81 Laxå, Sweden, gives its unreserved guarantee that<br />
Plasma Arc Cutting Set <strong>LPH</strong> <strong>35</strong> from serial number 910 complies with standard EN 60974-1, in<br />
accordance with the requirements of directive (73/23/EEC) and addendum (93/68/EEC) and with<br />
standard EN 50192, EN 50199, in accordance with the requirements of directive (89/336/EEC) and<br />
addendum (93/68/EEC).<br />
-----------------------------------------------------------------------------------------------------------------------------------<br />
Göteborg 99-08-30<br />
Bo Sjöberg<br />
Managing Director<br />
<strong>ESAB</strong> AB<br />
Box 8004<br />
402 77 Göteborg<br />
Sweden Tel: +4631 50 90 00 Fax: +4631 50 92 61<br />
2. SAFETY<br />
Full responsibility for safety of personnel working on or near system rests on user of <strong>ESAB</strong> Welding<br />
Equipment.<br />
Wrong operation can lead to abnormal situation, injure operator and damage equipment.<br />
ALL PERSONNEL WORKING WITH WELDING EQUIPMENT MUST BE FULLY FAMILIAR WITH<br />
- handling of equipment<br />
- location of emergency stops<br />
- functions of equipment<br />
- applicable safety regulations<br />
- welding<br />
Operator must make sure<br />
- no one stays inside work area while machine starts<br />
- no one is unprotected while arc is being struck<br />
Work area must be<br />
- suitable for welding<br />
- free of machine parts, tools and other objects that can obstruct operator moving within area<br />
- so arranged, that emergency stop buttons are easily accessible<br />
- free from draughts<br />
Personal safety equipment<br />
- always use proper safety equipment such as goggles, non flammable clothing, protective gloves<br />
- never wear loose clothing, belts, bracelets, rings etc., which may catch on equipment or cause burns<br />
Miscellaneous<br />
- only authorised personnel may operate electrical equipment<br />
- check whether return cables are properly fitted and earthen<br />
- requisite fire fighting equipment should be easily available in specially and clearly marked areas<br />
- lubrication and maintenance of welding equipment must not be proceeded during operation.<br />
44
! WARNING !<br />
ARC WELDING AND CUTTING CAN BE INJURIOUS TO YOURSELF AND OTHERS. TAKE<br />
PRECAUTIONS WHEN WELDING. ASK YOUR EMPLOYER FOR SAFETY PRACTICES THAT SHOULD<br />
BE BASED ON MANUFACTURER’S HAZARD DATA.<br />
ELECTRIC SHOCK - Can kill<br />
- Install and earth welding equipment in accordance with obligatory standards.<br />
- Do not touch live electrical parts or electrodes with bare skin, wet gloves or wet clothes.<br />
- Insulate yourself from earth and workpiece.<br />
- Ensure your work position is safe.<br />
FUMES AND GASES - Can be dangerous to your health<br />
- Keep your head away from fumes.<br />
- Use ventilation and/or extraction to keep fumes and gases away from your breathing zone<br />
and surroundings.<br />
ARC RAYS - Can injure eyes and burn skin<br />
- Protect your eyes and skin. Use correct welding screens, filter lens and wear protective clothes.<br />
- Protect bystanders with suitable screens or curtains.<br />
FIRE HAZARD<br />
- Sparks (spatter) can cause fire. Make therefore sure there are no inflammable materials nearby.<br />
NOISE - Excessive noise can damage your hearing.<br />
- Protect your ears. Use ear defenders or other hearing protection.<br />
- Warn bystanders of the risk.<br />
MALFUNCTION - Call expert assistance in event of malfunction.<br />
READ AND UNDERSTAND THE INSTRUCTION MANUAL BEFORE INSTALLING OR OPERATING UNIT<br />
PROTECT YOURSELF AND OTHERS!<br />
45
3. INTRODUCTION<br />
! CAUTION!<br />
All warranty undertakings of supplier cease to apply if customer attempts to rectify<br />
any faults on machine during warranty period.<br />
NOTE. Supplier reserves right to make changes within the unit without further notice.<br />
3.1 GENERAL<br />
Purpose of this manual is to provide the operator all information necessary to install and operate <strong>LPH</strong> <strong>35</strong> set.<br />
Technical reference materials are enclosed, to help with possible troubleshooting.<br />
<strong>LPH</strong> <strong>35</strong> is compact, self-contained plasma cutting system. As shipped, it’s fully assembled and ready to<br />
operate after being installed. The set consists of <strong>LPH</strong> <strong>35</strong> power source and heavy duty PT30KK torch, and is<br />
capable of severing materials up to 12 mm thick.<br />
! WARNING !<br />
Use only PT30KK torches that are appropriated for use with this power source. Use of other type of<br />
torch may cause ELECTRIC SHOCK HAZARD. Do not use any other torch not designed for use with<br />
<strong>LPH</strong> <strong>35</strong> power unit !<br />
3.2 SCOPE OF MANUAL<br />
Purpose of this manual is to provide the operator all information necessary to install and operate <strong>LPH</strong> <strong>35</strong> set.<br />
Technical reference materials are enclosed, to help with possible troubleshooting.<br />
3.3 TECHNICAL DATA<br />
Rated <strong>35</strong>% Duty Cycle * <strong>35</strong>A @ 94V <strong>35</strong>A @ 94V<br />
Output 100% Duty Cycle * 20A @ 88V 20A @ 88V<br />
Output Current Range 20÷<strong>35</strong>A 20÷<strong>35</strong>A<br />
Open Circuit Voltage 295V DC 295V DC<br />
Rated primary input (@ 11kVA, <strong>35</strong>A@ 94V DC) 3x400-415V<br />
3x230V<br />
3~ 50/60Hz, 16A/phase 3~ 50/60Hz, 28A/phase<br />
Air Requirements PT 30KK 130 l/min @ 3,5÷4,5 bar 130 l/min @ 3,5÷4,5 bar<br />
Max. Cutting thickness 12 mm 12 mm<br />
Dimensions Length<br />
610 mm<br />
610 mm<br />
Height<br />
515 mm<br />
515 mm<br />
Width<br />
255 mm<br />
255 mm<br />
Weight of <strong>LPH</strong> <strong>35</strong> set 52kg 53kg<br />
(*) Duty cycle is based on a 10-minute period; therefore, a <strong>35</strong> % duty cycle means that the power source<br />
may operate for 3,5 minutes with a cool down period of 6,5 minutes.<br />
100 % duty cycle means continuous operation of the power source.<br />
3.4 <strong>LPH</strong> <strong>35</strong> CUTTING SET PACKAGE<br />
Pos.<br />
Qty<br />
Part No Description<br />
3x400V, 50Hz 3x230V, 50Hz<br />
1 1 - 0457 288 880 Plasma arc source <strong>LPH</strong> <strong>35</strong> (with torch assembled, see pos. 6)<br />
2 - 1 0457 288 881 Plasma arc source <strong>LPH</strong> <strong>35</strong> (with torch assembled, see pos. 6)<br />
3 1 1 0457 290 048 Fuse element 1,6A<br />
4 1 1 0457 290 071 Quick detachable coupling<br />
5 1 1 0457 290 072 Hose clip<br />
6 1 1 0457 288 001 PT30KK torch<br />
7 1 1 0349 301 026 Instruction manual <strong>LPH</strong> <strong>35</strong><br />
8 1 1 0349 301 007 Instruction manual PT30KK<br />
46
4. INSTALLATION<br />
4.1 GENERAL<br />
Correct installation is very important for trouble-free and satisfactory operation of <strong>LPH</strong> <strong>35</strong>. It is suggested that<br />
each step of this section is carefully studied and followed.<br />
4.2 EQUIPMENT REQUIRED<br />
Source of clean and dry compressed air capable of forcing air flow rate of 150l/min @ 3,5 – 4,5 bar.<br />
Maximum air pressure at unit input should not exceed 7 bars.<br />
4.3 LOCATION<br />
Adequate ventilation is necessary to provide proper cooling of power source. Amount of dirt, dust and<br />
excessive heat, that unit is exposed to, should be minimised. Between <strong>LPH</strong> <strong>35</strong> and wall (or any obstruction)<br />
should remain distance of at least 300 mm, to secure proper air movement through it.<br />
CAUTION<br />
Installation of any kind of filtering device will reduce volume of through-flowing air, subjecting<br />
therefore interior of machine to overheating. Warranty is void if any type of filter device is employed.<br />
4.4 INSPECTION<br />
A. Remove shipping container and all packing stuff and inspect unit for any sign of damage.<br />
Notify transporters of any defects or damages at once.<br />
B. Check container for any loose parts before disposal.<br />
C. Check air louvers and any other openings to make sure any obstruction is removed.<br />
4.5 AIR LINES CONNECTIOINS<br />
To assembly air lines put on it hose clip and press in quick detachable coupling, that are delivered in<br />
container, and tighten clip next to hose end.<br />
4.6 PRIMARY ELECTRICAL CONNECTIONS<br />
! WARNING !<br />
ELECTRIC SHOCK CAN KILL! Precautionary measurements should be made to provide maximum<br />
protection against electric shock. Disconnect power cable from mains socket before any<br />
connections are made inside power source.<br />
! WARNING !<br />
Operator must make sure, if unit is properly configured for mains voltage. Unit configured for 3x400V<br />
MUST NOT be fed from 440V mains; it may get damaged.<br />
<strong>LPH</strong> <strong>35</strong> machines are equipped with 3m, 4-strands power cables for 3-phase mains connection. Switch<br />
board that unit is to be fed from must be equipped with proper line fuses or circuit breakers (see TECHNICAL<br />
DATA). Power cable may be connected directly to wall disconnect switch or be equipped with suitable plug.<br />
! WARNING !<br />
Chassis must be properly connected to ground. Otherwise it may result in electric shock, burns or<br />
death.<br />
47
4.7 SECONDARY CONNECTIONS<br />
! WARNING !<br />
Before making any connections make sure unit is disconnected from mains.<br />
1. Connect air supply line to inlet of regulator.<br />
2. Clamp work cable to workpiece. Make sure the workpiece is connected to ground with properly sized<br />
cable.<br />
Fig. 4-1. <strong>LPH</strong> <strong>35</strong> connection diagram.<br />
48
Fig. 4-2. Ground and current cable connections.<br />
49
5. OPERATION<br />
! WARNING !<br />
ELECTRIC SHOCK CAN KILL!<br />
- Do not operate unit with cover removed.<br />
- Do not feed unit while it’s being held or carried.<br />
- Do not touch any part of torch head (nozzle, heat shield, electrode) when unit is turned on.<br />
! WARNING !<br />
ARC RAYS CAN BURN EYES OR SKIN!<br />
NOISE CAN DAMAGE HEARING!<br />
- Wear helmet with No. 6 or 7 lens.<br />
- Wear eye, ear and body protection.<br />
CAUTION<br />
Position machine at least 3 m from cutting zone. Sparks and hot slag can damage it.<br />
5.1 <strong>LPH</strong> <strong>35</strong> CONTROLS<br />
A. Power switch / Output current setting - turns the unit on when selected 20A or <strong>35</strong>A position, ‘Power’<br />
indicator lights green, cooling fan starts running.<br />
B. Air pressure regulator – adjust air pressure within 3,5 – 4,5 bar.<br />
C. Fault light -will glow yellow under following conditions (operation will be stopped):<br />
- FLOW FAULT (continuous light) - indicates too low air flow rate.<br />
- OVER TEMPERATURE (continuous light) indicates that the maximum allowable temperature of the<br />
power unit (the transformer) has been exceeded.<br />
Allow unit to cool down before returning to operate.<br />
When fault clears, all signals will automatically reset.<br />
D. ARC-ON LIGHT. When lit red indicates that main contactor is closed, which means torch is<br />
energised and source is ready to cut. In case of no indication while torch switch is depressed<br />
immediately turn the machine off and call service.<br />
NOTE: ARC ON light may turn off if within 2 sec since torch switch is depressed cutting process will not be<br />
proceed. It is automatic feature that guarantees safe operation of machine (obligatory for units with S<br />
symbol).<br />
Fig. 5-1. <strong>LPH</strong> <strong>35</strong> Controls<br />
50<br />
Table for Fig. 5-1<br />
Pos. Description<br />
1 Power switch knob<br />
2 LED – “Power on”<br />
3 LED – (Arc on )<br />
4 LED – “FAULT”<br />
5 Pressure gauge<br />
6 Air pressure regulator knob<br />
7 Torch PT 30KK-connection<br />
8 Work cable-connection
6. MAINTENANCE<br />
NOTE: All warranty undertakings given by supplier cease to apply if customer attempts to rectify any<br />
faults on machine during warranty period.<br />
6.1 CLEANING<br />
A. Power source should be regularly blown with dry compressed air at reduced pressure, more frequently in<br />
dirty environment.<br />
7. CUTTING WITH PT30KK TORCH<br />
Use the following procedures to cut with the PT30KK torch.<br />
A. Hold the torch nozzle approximately 3 to 5 mm above the work and tilted at about 15-30º.<br />
This reduces the chance of spatter entering the nozzle.<br />
If the standoff tool is being used, set the standoff between 5 and 6 mm.<br />
B. Depress the torch switch. Air should flow from the torch nozzle.<br />
C. After ca 0,1sec - the pilot arc should start and the main arc should immediately follow - allowing the cut to<br />
begin.<br />
D. After starting the cut, the torch should be maintained at a 5-15º forward angle. This angle is especially<br />
useful in helping to create a “drop” cut. When not using the standoff guide, the nozzle should be held<br />
approximately 6 mm from the work.<br />
E. For rapid re-start, such as grate or heavy mesh cutting, do not release the torch switch.<br />
NOTE: When replacing the nozzle, always inspect the electrode for wear. If the depth of the crater<br />
is 1,5÷2,0mm (see Fig.7-1 ) - replace the electrode. If the electrode is used beyond this<br />
recommended wear limit, damage to the torch and power source may occur. Nozzle life is also<br />
greatly reduced when using the electrode beyond the recommended limit.<br />
Fig. 7-1. Electrode Wear Limit Fig. 7-2. Effect of cutting speed<br />
51
7.1 PIERCING TECHNIQUE<br />
8. FAULT TRACING<br />
Fig.7-3. Piercing technique using PT30KK torch.<br />
8.1 COMMON CUTTING PROBLEMS<br />
Below are listed common cutting problems, followed by possible cause of each. If it’s still impossible<br />
to correct the problem, contact your <strong>ESAB</strong> distributor.<br />
A. Insufficient penetration.<br />
1. Too low current.<br />
2. Cutting speed too fast.<br />
3. Damaged cutting nozzle.<br />
4. Improper air pressure.<br />
5. Low air flow rate.<br />
B. Main arc extinguishes.<br />
1. Cutting speed too slow.<br />
2. Worn electrode<br />
C. Dross formation.<br />
(For some material thickness it may be impossible to<br />
get dross free cuts.)<br />
1. Current too low.<br />
2. Cutting speed too fast or too slow.<br />
3. Improper air pressure.<br />
4. Defective nozzle or electrode.<br />
5. Low air flow rate.<br />
D. Double arcing.<br />
1. Low air pressure.<br />
2. Damaged cutting nozzle.<br />
3. Loose cutting nozzle.<br />
4. Heavy spatter accumulation on nozzle.<br />
52<br />
E. Uneven arc.<br />
1. Damaged nozzle or worn electrode.<br />
F. Unstable cutting conditions.<br />
1. Incorrect cutting speed.<br />
2. Lose cable or hose connections.<br />
3. Electrode and/or nozzle in poor condition.<br />
G. Main arc does not transfer.<br />
1. Worn electrode.<br />
2. Loose connections.<br />
3. Worn cable.<br />
H. Short consumables life.<br />
1. Improper gas pressure.<br />
2. Loose connections.<br />
3. Low air flow rate.