Mechanized Conversion Kit Installation Instructions for PC-900 - ESAB
Mechanized Conversion Kit Installation Instructions for PC-900 - ESAB
Mechanized Conversion Kit Installation Instructions for PC-900 - ESAB

You also want an ePaper? Increase the reach of your titles
YUMPU automatically turns print PDFs into web optimized ePapers that Google loves.
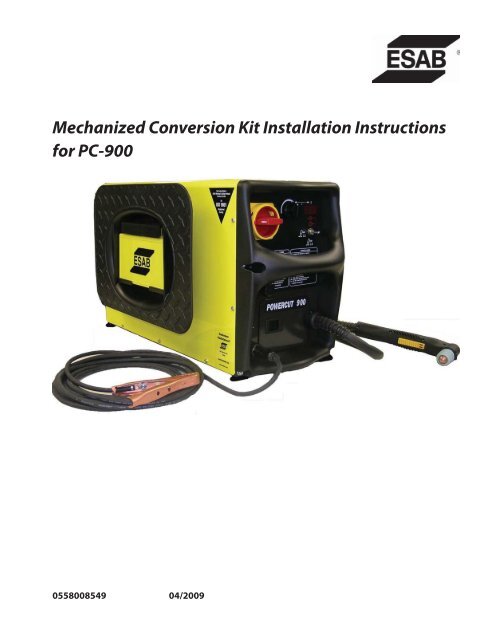
<strong>Mechanized</strong> <strong>Conversion</strong> <strong>Kit</strong> <strong>Installation</strong> <strong>Instructions</strong><br />
<strong>for</strong> <strong>PC</strong>-<strong>900</strong><br />
0558008549 04/2009
BE SURE THIS INFORMATION REACHES THE OPERATOR.<br />
YOU CAN GET EXTRA COPIES THROUGH YOUR SUPPLIER.<br />
CAUTION<br />
These INSTRUCTIONS are <strong>for</strong> experienced operators. If you are not fully familiar with the<br />
principles of operation and safe practices <strong>for</strong> arc welding and cutting equipment, we urge<br />
you to read our booklet, “Precautions and Safe Practices <strong>for</strong> Arc Welding, Cutting, and<br />
Gouging,” Form 52-529. Do NOT permit untrained persons to install, operate, or maintain<br />
this equipment. Do NOT attempt to install or operate this equipment until you have read<br />
and fully understand these instructions. If you do not fully understand these instructions,<br />
contact your supplier <strong>for</strong> further in<strong>for</strong>mation. Be sure to read the Safety Precautions be<strong>for</strong>e<br />
installing or operating this equipment.<br />
USER RESPONSIBILITY<br />
This equipment will per<strong>for</strong>m in con<strong>for</strong>mity with the description thereof contained in this manual and accompanying<br />
labels and/or inserts when installed, operated, maintained and repaired in accordance with the instructions<br />
provided. This equipment must be checked periodically. Malfunctioning or poorly maintained equipment<br />
should not be used. Parts that are broken, missing, worn, distorted or contaminated should be replaced immediately.<br />
Should such repair or replacement become necessary, the manufacturer recommends that a telephone<br />
or written request <strong>for</strong> service advice be made to the Authorized Distributor from whom it was purchased.<br />
This equipment or any of its parts should not be altered without the prior written approval of the manufacturer.<br />
The user of this equipment shall have the sole responsibility <strong>for</strong> any malfunction which results from improper<br />
use, faulty maintenance, damage, improper repair or alteration by anyone other than the manufacturer or a service<br />
facility designated by the manufacturer.<br />
READ AND UNDERSTAND THE INSTRUCTION MANUAL BEFORE INSTALLING OR OPERATING.<br />
PROTECT YOURSELF AND OTHERS!<br />
2
Users of <strong>ESAB</strong> welding and plasma cutting equipment have the ultimate responsibility <strong>for</strong> ensuring that<br />
anyone who works on or near the equipment observes all the relevant safety precautions. Safety precautions<br />
must meet the requirements that apply to this type of welding or plasma cutting equipment. The following<br />
recommendations should be observed in addition to the standard regulations that apply to the workplace.<br />
All work must be carried out by trained personnel well acquainted with the operation of the welding or plasma<br />
cutting equipment. Incorrect operation of the equipment may lead to hazardous situations which can result in<br />
injury to the operator and damage to the equipment.<br />
1. Anyone who uses welding or plasma cutting equipment must be familiar with:<br />
- its operation<br />
- location of emergency stops<br />
- its function<br />
- relevant safety precautions<br />
- welding and / or plasma cutting<br />
2. The operator must ensure that:<br />
- no unauthorized person stationed within the working area of the equipment when it is started up.<br />
- no one is unprotected when the arc is struck.<br />
3. The workplace must:<br />
- be suitable <strong>for</strong> the purpose<br />
- be free from drafts<br />
SAFETY PRECAUTIONS<br />
4. Personal safety equipment:<br />
- Always wear recommended personal safety equipment, such as safety glasses, flame proof<br />
clothing, safety gloves.<br />
- Do not wear loose fitting items, such as scarves, bracelets, rings, etc., which could become<br />
trapped or cause burns.<br />
5. General precautions:<br />
- Make sure the return cable is connected securely.<br />
- Work on high voltage equipment may only be carried out by a qualified electrician.<br />
- Appropriate fire extinquishing equipment must be clearly marked and close at hand.<br />
- Lubrication and maintenance must not be carried out on the equipment during operation.<br />
3
WARNING<br />
SAFETY PRECAUTIONS<br />
WELDING AND PLASMA CUTTING CAN BE INJURIOUS TO YOURSELF AND<br />
OTHERS. TAKE PRECAUTIONS WHEN WELDING OR CUTTING. ASK FOR<br />
YOUR EMPLOYER’S SAFETY PRACTICES WHICH SHOULD BE BASED ON<br />
MANUFACTURERS’ HAZARD DATA.<br />
ELECTRIC SHOCK - Can kill.<br />
- Install and earth (ground) the welding or plasma cutting unit in accordance with applicable standards.<br />
- Do not touch live electrical parts or electrodes with bare skin, wet gloves or wet clothing.<br />
- Insulate yourself from earth and the workpiece.<br />
- Ensure your working stance is safe.<br />
FUMES AND GASES - Can be dangerous to health.<br />
- Keep your head out of the fumes.<br />
- Use ventilation, extraction at the arc, or both, to take fumes and gases away from your breathing zone<br />
and the general area.<br />
ARC RAYS - Can injure eyes and burn skin.<br />
- Protect your eyes and body. Use the correct welding / plasma cutting screen and filter lens and wear<br />
protective clothing.<br />
- Protect bystanders with suitable screens or curtains.<br />
FIRE HAZARD<br />
- Sparks (spatter) can cause fire. Make sure there<strong>for</strong>e that there are no inflammable materials nearby.<br />
NOISE - Excessive noise can damage hearing.<br />
- Protect your ears. Use earmuffs or other hearing protection.<br />
- Warn bystanders of the risk.<br />
MALFUNCTION - Call <strong>for</strong> expert assistance in the event of malfunction.<br />
READ AND UNDERSTAND THE INSTRUCTION MANUAL BEFORE INSTALLING OR OPERATING.<br />
PROTECT YOURSELF AND OTHERS!<br />
4
MECHANIZED CONVERSION KIT INSTALLATION INSTRUCTIONS<br />
4<br />
5<br />
2<br />
10<br />
11<br />
12<br />
Powercut-<strong>900</strong><br />
<strong>Mechanized</strong> <strong>Conversion</strong> <strong>Kit</strong> contents<br />
p/n 0558008284<br />
Item No. Part No. Qty Description<br />
1 0558038337 1 <strong>PC</strong> BOARD - REMOTE<br />
2 0558008457 1 RECEPTACLE / CABLE ASSY 14 PIN<br />
3 952002 1 TOROIDAL CORE<br />
4 951016 1 CONNECTOR COMBICON 10 PIN<br />
5 951005 1 CONNECTOR COMBICON 3 PIN<br />
6 526652 1 STRAIN RELIEF SEALED 1/2" ZINC<br />
7 2062151 1 LOCKNUT CONDUIT 1/2"<br />
8 * 0.75" HEATSHRINK 1" BLACK<br />
9 * 1 CLAMP CABLE STEEL .375 DIA<br />
10 * 2 SCREW HEX WSH TAP #8 x .438 RIBBED<br />
11 * 5 TYWRAP SM 4"<br />
12 0558008111 1 KIT JUMPER - MECHANIZED LOGIC<br />
5<br />
1<br />
3<br />
8<br />
6, 7<br />
9<br />
2<br />
2 wire connector cable
MECHANIZED CONVERSION KIT INSTALLATION INSTRUCTIONS<br />
1. Access the inside of the <strong>PC</strong>-<strong>900</strong> by unscrewing the<br />
screws and removing the cover.<br />
2. Assemble the strain relief onto the 14 pin cable as shown and partially tighten.<br />
3. Remove the hole plug on the top right side of the back of the unit.<br />
6
MECHANIZED CONVERSION KIT INSTALLATION INSTRUCTIONS<br />
4. Cut the tie wrap, unplug control trans<strong>for</strong>mer<br />
wires to allow <strong>for</strong> easier cable routing.<br />
5. Thread the cable through the hole as shown<br />
and allow cable to hang loose. Add locknut<br />
and partially tighten. Add heatshrink to cable<br />
and leave loose, be<strong>for</strong>e applying clamp.<br />
6. Assemble the cable clamp onto the exposed shield area and attach to the frame with the screw provided.<br />
Orient clamp downward as shown.<br />
Cable clamp<br />
Heatshrink (leave loose)<br />
7<br />
Cut the tie wrap here<br />
Cable clamp in postion
MECHANIZED CONVERSION KIT INSTALLATION INSTRUCTIONS<br />
7. Tighten the strain relief nut from the inside<br />
first and then tighten the outside strain relief<br />
nut. Position heatshrink over threads to<br />
prevent power leads from contacting sharp<br />
edges. Electrical or other suitable tape may be<br />
used if heatshrink gun is not available.<br />
Heatshrink or suitable tape<br />
8. Add toroidal core to cable and leave loose, be<strong>for</strong>e<br />
installing connector. Align the 10-pin connector<br />
with the pc board header to identify which<br />
end of the connector is pin 1 and there<strong>for</strong>e ensure<br />
proper connections of the 10 cables wires.<br />
9. Install each wire and tighten. Cable wires are numbered 1 through 10 and must be connected in numerical<br />
sequence starting with number 1. The pc board has been stamped with numbers 1 and 10 to<br />
show the direction of sequence <strong>for</strong> the wires.<br />
8<br />
each wire is numbered<br />
9<br />
10<br />
8<br />
6<br />
7<br />
5<br />
3<br />
4<br />
2<br />
1
MECHANIZED CONVERSION KIT INSTALLATION INSTRUCTIONS<br />
10. Connect the pc board to the main power control board as shown below. Connect the ring terminal<br />
from the 14 pin cable and secure the pc board to the frame with the screw provided.<br />
11. Connect the fast-on connectors of the<br />
"2-wire cable" to the 14 pin cable. Position<br />
and tie wrap toroidal core.<br />
12. Route the "2-wire cable" under the pc<br />
board and tie wrap to the frame using<br />
the provided holes in the areas shown.<br />
13. Re-install the plug and tie wrap on the<br />
previously unplugged wire.<br />
9<br />
Toroidal Core<br />
Install tie wrap as shown by arrow<br />
Fast-on connectors<br />
Tie wrap<br />
Tie wrap
MECHANIZED CONVERSION KIT INSTALLATION INSTRUCTIONS<br />
14. Route the "2-wire cable" downward behind the shelf brace.<br />
15. Locate the 3-pin connector on the existing main power control board.<br />
16. Align the 3-pin connector with the pc board header to identify which end of the connector aligns with<br />
the "+" and "-" on the pc board. On the connector, insert the red wire to the "+" and black wire to the "-"<br />
from the "2-wire cable" as shown and tighten.<br />
red wire "+"<br />
black wire "-"<br />
10<br />
3-pin connector<br />
17. Plug in the 3-pin connector on the pc board.
MECHANIZED CONVERSION KIT INSTALLATION INSTRUCTIONS<br />
18. Secure the cable with a tie wrap as shown<br />
by arrow.<br />
19. Plug 5-pin jumper into J13 header. Installing<br />
this plug will change the Trigger Lock<br />
switch on the front panel <strong>for</strong> mechanized<br />
logic. Refer to the mechanized section of<br />
the machine instruction manual.<br />
5-pin jumper<br />
11<br />
5-pin jumper<br />
J13 header<br />
J13 header
MECHANIZED CONVERSION KIT INSTALLATION INSTRUCTIONS<br />
20. Voltage Divider Adjustment: The Voltage Divider or VDR can be adjusted to provide optimum cut<br />
capability. More precise cuts can be tuned in by adjusting the potentiometer and making test cuts to<br />
gauge accuracy.<br />
• Place ohm meter leads between P25-1 & P25-3. Set R81 to 750 ohms. (This nominal setting usually<br />
per<strong>for</strong>med at pc board calibration).<br />
• Additional minor adjustments of the potentiometer may be per<strong>for</strong>med to achieve desired cut<br />
quality.<br />
21. Trim all tie wraps and replace the unit's<br />
cover.<br />
12<br />
Potentiometer
MECHANIZED CONVERSION KIT INSTALLATION INSTRUCTIONS<br />
<strong>Mechanized</strong> <strong>Conversion</strong> <strong>Kit</strong> Schematic<br />
<strong>PC</strong>-<strong>900</strong><br />
13
NOTES<br />
14
REVISION HISTORY<br />
15
A. CUSTOMER SERVICE QUESTIONS:<br />
Telephone: (800)362-7080 / Fax: (800) 634-7548 Hours: 8:00 AM to 7:00 PM EST<br />
Order Entry Product Availability Pricing Order In<strong>for</strong>mation Returns<br />
B. ENGINEERING SERVICE:<br />
Telephone: (843) 664-4416 / Fax : (800) 446-5693 Hours: 7:30 AM to 5:00 PM EST<br />
Warranty Returns Authorized Repair Stations Welding Equipment Troubleshooting<br />
C. TECHNICAL SERVICE:<br />
Telephone: (800) <strong>ESAB</strong>-123/ Fax: (843) 664-4452 Hours: 8:00 AM to 5:00 PM EST<br />
Part Numbers Technical Applications Specifications Equipment Recommendations<br />
D. LITERATURE REQUESTS:<br />
Telephone: (843) 664-5562 / Fax: (843) 664-5548 Hours: 7:30 AM to 4:00 PM EST<br />
E. WELDING EQUIPMENT REPAIRS:<br />
Telephone: (843) 664-4487 / Fax: (843) 664-5557 Hours: 7:30 AM to 3:30 PM EST<br />
Repair Estimates Repair Status<br />
F. WELDING EQUIPMENT TRAINING<br />
Telephone: (843)664-4428 / Fax: (843) 679-5864 Hours: 7:30 AM to 4:00 PM EST<br />
Training School In<strong>for</strong>mation and Registrations<br />
G. WELDING PROCESS ASSISTANCE:<br />
Telephone: (800) <strong>ESAB</strong>-123 Hours: 7:30 AM to 4:00 PM EST<br />
H. TECHNICAL ASST. CONSUMABLES:<br />
Telephone : (800) 933-7070 Hours: 7:30 AM to 5:00 PM EST<br />
0558008549 04/2009<br />
<strong>ESAB</strong> Welding & Cutting Products, Florence, SC Welding Equipment<br />
COMMUNICATION GUIDE - CUSTOMER SERVICES<br />
IF YOU DO NOT KNOW WHOM TO CALL<br />
Telephone: (800) <strong>ESAB</strong>-123<br />
Fax: (843) 664-4462<br />
Hours: 7:30 AM to 5:00 PM EST<br />
or<br />
visit us on the web at http://www.esabna.com<br />
The <strong>ESAB</strong> web site offers<br />
Comprehensive Product In<strong>for</strong>mation<br />
Material Safety Data Sheets<br />
Warranty Registration<br />
Instruction Literature Download Library<br />
Distributor Locator<br />
Global Company In<strong>for</strong>mation<br />
Press Releases<br />
Customer Feedback & Support