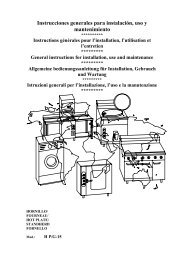
General instructions for installation, use and maintenance - fagor
General instructions for installation, use and maintenance - fagor
General instructions for installation, use and maintenance - fagor

You also want an ePaper? Increase the reach of your titles
YUMPU automatically turns print PDFs into web optimized ePapers that Google loves.
2.- USE<br />
FI - 60<br />
− When the main switch is activated (1), Fig. 8, it lights up. The rinse water <strong>and</strong> then the wash water<br />
begin to fill <strong>and</strong> heat up.<br />
− The cycle can be adjusted to last up to a maximum of 4 minutes. Set the control (4) to the time<br />
required, the pilot light will come on (3).<br />
− When the pilot light (2) comes on, the machine is ready.<br />
FI - 64; FI - 64B; FI – 64D<br />
− Set the switch (1) (Fig. 9 <strong>and</strong> 10) to the 90” or 180” programme. The pilot light will come on (2),<br />
the rinse <strong>and</strong> wash water will start to fill <strong>and</strong> heat up. When the pilot light comes on (3) the machine<br />
is ready.<br />
− The cycle is started by pressing (4).<br />
− The FI-64B drains automatically in each cycle. To completely empty the tub, remove the antioverflow<br />
device (A) (fig. 15), set the switch (1) to the setting <strong>and</strong> press the button (4)<br />
(Fig.10).<br />
− At the end of the day set the switch (1) to the 0 setting.<br />
FI – 72; FI – 64B-BT; FI – 64 CLINIC<br />
− The machine is started in the same way as <strong>for</strong> the FI - 64. The thermometer (3) indicates the rinse<br />
temperature <strong>and</strong> the (4) wash temperature. The machine is ready when the thermometer (3)<br />
indicates 85 - 90ºC <strong>and</strong> the thermometer (4) 55 - 60ºC (except from the FI - 64 CLINIC : > 71ºC).<br />
The cycle is started by pressing (5).<br />
− The FI-64B-BT <strong>and</strong> FI-64 CLINIC drains automatically in each cycle. To completely empty the<br />
tub, remove the anti-overflow device (A) (fig. 15), set the switch (1) to the setting <strong>and</strong> press<br />
the button (5) (Fig. 13).<br />
− At the end of the day set the switch (1) to the 0 setting.<br />
2.1.- Advice on how to wash correctly<br />
− Put the amount of detergent indicated by the manufacturer into the tub (Fig. 16).<br />
− Control <strong>and</strong> maintain the rinse aid level in the <strong>and</strong> the pipe with its filter submerged.<br />
Preparing the crockery<br />
− Remove the biggest bits of food from the crockery be<strong>for</strong>e putting it into the baskets.<br />
− Wash glassware first.<br />
− Put the plates in the racks, but not on top of each other.(Fig. 14).<br />
− Put cups <strong>and</strong> glasses in upside down.<br />
− Put the cutlery in the cutlery baskets with the h<strong>and</strong>le at the bottom. Mix spoons with knives <strong>and</strong><br />
<strong>for</strong>ks.<br />
− Put the special cutlery holders in the base baskets or in the baskets with 16 spaces.<br />
2.2.- Regeneration of the water softener<br />
Model FI-64D, have a water softener which should be regenerated at the end of the day. To do this,<br />
carry out the following operations:<br />
− Set the switch (1) (Fig. 11) to<br />
− Remove the anti-overflow device (A) (Fig. 15).<br />
− Press the switch (5) (Fig. 11) <strong>for</strong> a few seconds until the pilot light comes on (4).<br />
− After about 20 minutes the pilot light go off (4) (Fig. 11) indicating that the regeneration cycle is<br />
complete.<br />
− Fill the tank each week with common salt, hermetically closing the lid (T) (Fig. 15).<br />
6