Philips Soundbar HTS8100 DVD Home Theater System - Radio Shack
Philips Soundbar HTS8100 DVD Home Theater System - Radio Shack
Philips Soundbar HTS8100 DVD Home Theater System - Radio Shack

You also want an ePaper? Increase the reach of your titles
YUMPU automatically turns print PDFs into web optimized ePapers that Google loves.
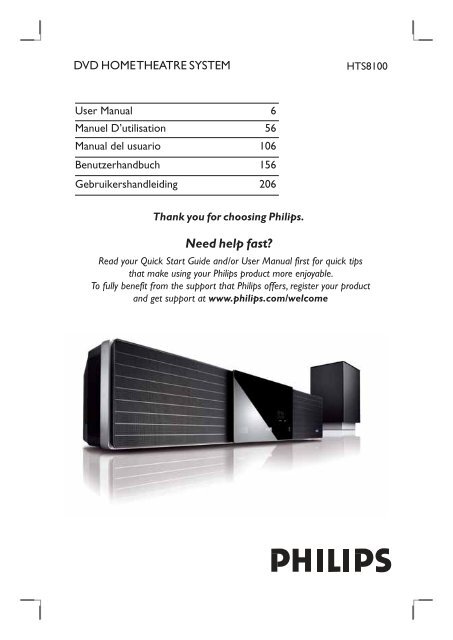
<strong>DVD</strong> HOME THEATRE SYSTEM <strong>HTS8100</strong><br />
User Manual 6<br />
Manuel D’utilisation 56<br />
Manual del usuario 106<br />
Benutzerhandbuch 156<br />
Gebruikershandleiding 206<br />
Read your Quick Start Guide and/or User Manual first for quick tips<br />
that make using your <strong>Philips</strong> product more enjoyable.<br />
To fully benefit from the support that <strong>Philips</strong> offers, register your product<br />
and get support at www.philips.com/welcome<br />
English
2<br />
Important notes for users in the<br />
U.K.<br />
Mains plug<br />
This apparatus is fi tted with an approved 13<br />
Amp plug. To change a fuse in this type of<br />
plug proceed as follows:<br />
1 Remove fuse cover and fuse.<br />
2 Fix new fuse which should be a BS1362<br />
5 Amp, A.S.T.A. or BSI approved type.<br />
3 Refi t the fuse cover.<br />
If the fi tted plug is not suitable for your socket<br />
outlets, it should be cut off and an appropriate<br />
plug fi tted in its place.<br />
If the mains plug contains a fuse, this should<br />
have a value of 5 Amp. If a plug without a fuse<br />
is used, the fuse at the distribution board<br />
should not be greater than 5 Amp.<br />
Note: The severed plug must be disposed of to<br />
avoid a possible shock hazard should it be<br />
inserted into a 13 Amp socket elsewhere.<br />
How to connect a plug<br />
The wires in the mains lead are coloured with<br />
the following code: blue = neutral (N),<br />
brown = live (L).<br />
As these colours may not correspond with the<br />
colour markings identifying the terminals in<br />
your plug, proceed as follows:<br />
– Connect the blue wire to the terminal<br />
marked N or coloured black.<br />
– Connect the brown wire to the terminal<br />
marked L or coloured red.<br />
– Do not connect either wire to the earth<br />
terminal in the plug, marked E (or e) or<br />
coloured green (or green and yellow).<br />
Before replacing the plug cover, make certain<br />
that the cord grip is clamped over the sheath<br />
of the lead - not simply over the two wires.<br />
Copyright in the U.K.<br />
Recording and playback of material may<br />
require consent. See Copyright Act 1956 and<br />
The Performer’s Protection Acts 1958 to<br />
1972.<br />
Italia<br />
DICHIARAZIONE DI CONFORMITA’<br />
Si dichiara che l’apparecchio <strong>HTS8100</strong>, <strong>Philips</strong><br />
risponde alle prescrizioni dell’art. 2 comma 1<br />
del D.M. 28 Agosto 1995 n. 548.<br />
Fatto a Eindhoven<br />
Norge<br />
Typeskilt fi nnes på apparatens underside.<br />
Observer: Nettbryteren er<br />
sekundert innkoplet. Den innebygde<br />
netdelen er derfor ikke frakoplet<br />
nettet så lenge apparatet er<br />
tilsluttet nettkontakten.<br />
For å redusere faren for brann eller elektrisk<br />
støt, skal apparatet ikke utsettes for regn eller<br />
fuktighet.<br />
ATTENTION!<br />
For Customer Use:<br />
<strong>Philips</strong> Consumer Electronics<br />
<strong>Philips</strong>, Glaslaan 2<br />
5616 JB Eindhoven, The Netherlands<br />
Read carefully the information located at the<br />
bottom or rear of your <strong>DVD</strong> <strong>Home</strong> Theatre<br />
<strong>System</strong> and enter below the Serial No. Retain<br />
this information for future reference.<br />
Model No. <strong>HTS8100</strong><br />
Serial No. _______________
DK<br />
Advarsel: Usynlig laserstråling ved<br />
åbning når sikkerhedsafbrydere er ude<br />
af funktion. Undgå utsættelse for<br />
stråling.<br />
Bemærk: Netafbryderen er sekundært<br />
indkoblet og ofbryder ikke strømmen<br />
fra nettet. Den indbyggede netdel er<br />
derfor tilsluttet til lysnettet så længe<br />
netstikket sidder i stikkontakten.<br />
S<br />
Klass 1 laseraparat<br />
Varning! Om apparaten används på<br />
annat sätt än i denna bruksanvisning<br />
specifi cerats, kan användaren utsättas<br />
för osynlig laserstrålning, som<br />
överskrider gränsen för laserklass 1.<br />
Observera! Stömbrytaren är sekundärt<br />
kopplad och bryter inte strömmen från<br />
nätet. Den inbyggda nätdelen är därför<br />
ansluten till elnätet så länge<br />
stickproppen sitter i vägguttaget.<br />
SF<br />
Luokan 1 laserlaite<br />
Varoitus! Laitteen käyttäminen muulla<br />
kuin tässä käyttöohjeessa mainitulla<br />
tavalla saattaa altistaa käyttäjän<br />
turvallisuusluokan 1 ylittävälle<br />
näkymättömälle lasersäteilylle.<br />
Oikeus muutoksiin varataan. Laite ei<br />
saa olla alttiina tippu-ja roiskevedelle.<br />
Huom. Toiminnanvalitsin on kytketty<br />
toisiopuolelle, eikä se kytke laitetta irti<br />
sähköverkosta. Sisäänrakennettu<br />
verkko-osa on kytkettynä<br />
sähköverkkoon aina silloin, kun pistoke<br />
on pistorasiassa.<br />
LASER<br />
Type Semiconductor laser<br />
GaAIAs<br />
Wave length 650 - 660 nm (<strong>DVD</strong>)<br />
784 - 796 nm (CD)<br />
Output Power 7 mW (<strong>DVD</strong>)<br />
10 mW (VCD/CD)<br />
Beam divergence 60 degrees<br />
CAUTION<br />
VISIBLE AND INVISIBLE LASER RADIATION<br />
WHEN OPEN. AVOID EXPOSURE TO BEAM<br />
ADVARSEL<br />
SYNLIG OG USYNLIG LASERSTRÅLING VED<br />
ÅBNING UNDGÅ UDSÆTTELSE FOR<br />
STRÅLING<br />
VARNING<br />
SYNLIG OCH OSYNLIG LASERSTRÅLNING<br />
NÄR DENNA DEL ÄR ÖPPNAD BETRAKTA<br />
EJ STRÅLEN<br />
VARO!<br />
AVATTAESSA OLET ALTTIINA NÄKYVÄLLE<br />
JA NÄKYMÄTTÖMÄLLE LASER SÄTEILYLLE.<br />
ÄLÄ KATSO SÄTEESEEN<br />
VORSICHT<br />
SICHTBARE UND UNSICHTBARE<br />
LASERSTRAHLUNG WENN ABDECKUNG<br />
GEÖFFNET NICHT DEM STRAHL<br />
AUSSETZEN<br />
ATTENTION<br />
RAYONNEMENT LASER VISIBLE ET<br />
INVISIBLE EN CAS D’OUVERTURE<br />
EXPOSITION DANGEREUSE AU FAISCEAU<br />
This product complies with the radio<br />
interference requirements of the<br />
European Community.<br />
This product complies with<br />
the requirements of the<br />
following directives and<br />
guidelines: 73/23/EEC +<br />
89/336/EEC + 93/68/EEC<br />
3<br />
English
Disposal of your old product<br />
Your product is designed and manufactured with high quality materials<br />
and components, which can be recycled and reused.<br />
When this crossed-out wheeled bin symbol is attached to a product it<br />
means the product is covered by the European Directive 2002/96/EC.<br />
Please inform yourself about the local separate collection system for<br />
electrical and electronic products.<br />
Please act according to your local rules and do not dispose of your old products with<br />
your normal household waste. The correct disposal of your old product will help<br />
prevent potential negative consequences for the environment and human health.<br />
4<br />
Se débarrasser de votre produit usagé (Français)<br />
Votre produit est conçu et fabriqué avec des matériaux et des<br />
composants de haute qualité, qui peuvent être recyclés et utilisés de<br />
nouveau.<br />
Lorsque ce symbole d'une poubelle à roue barrée est attaché à un<br />
produit, cela signifie que le produit est couvert par la Directive<br />
Européenne 2002/96/EC.<br />
Veuillez vous informer du système local de séparation des déchets<br />
électriques et électroniques.<br />
Veuillez agir selon les règles locales et ne pas jeter vos produits usagés avec les déchets<br />
domestiques usuels. Jeter correctement votre produit usagé aidera à prévenir les<br />
conséquences négatives potentielles contre l'environnement et la santé humaine.<br />
Cómo deshacerse del producto usado (Español)<br />
Su producto ha sido diseñado y fabricado con materiales y componentes de<br />
alta calidad, que pueden ser reciclados y reutilizados.<br />
Cuando vea este símbolo de una papelera con ruedas tachada junto a un<br />
producto, esto significa que el producto está bajo la Directiva Europea<br />
2002/96/EC<br />
Deberá informarse sobre el sistema de reciclaje local separado para<br />
productos eléctricos y electrónicos.<br />
Siga las normas locales y no se deshaga de los productos usados tirándolos en la basura<br />
normal de su hogar. El reciclaje correcto de su producto usado ayudará a evitar<br />
consecuencias negativas para el medio ambiente y la saludde las persona.<br />
Entsorgung Ihres Altgerätes (Deutsch)<br />
Ihr Produkt ist aus hochqualitativen Materialien und Bestandteilen hergestellt,<br />
die dem Recycling zugeführt und wiederverwertet werden können.<br />
Falls dieses Symbol eines durchgestrichenen Müllcontainers auf Rollen auf<br />
diesem Produkt angebracht ist, bedeutet dies, dass es von der Europäischen<br />
Richtlinie 2002/96/EG erfasst wird.<br />
Bitte informieren Sie sich über die örtlichen Sammelstellen für Elektroprodukte<br />
und elektronische Geräte.<br />
Bitte beachten Sie die lokalen Vorschriften und entsorgen Sie Ihre Altgeräte nicht mit dem<br />
normalen Haushaltsmüll. Die korrekte Entsorgung Ihres Altgerätes ist ein Beitrag zur<br />
Vermeidung möglicher negativer Folgen für die Umwelt und die menschliche Gesundhei.<br />
Wegwerpen van uw afgedankt apparaat (Nederlands)<br />
Uw apparaat werd ontworpen met en vervaardigd uit onderdelen en<br />
materialen van superieure kwaliteit, die gerecycleerd en opnieuw gebruikt<br />
kunnen worden.<br />
Wanneer het symbool van een doorstreepte vuilnisemmer op wielen op<br />
een product is bevestigd, betekent dit dat het product conform is de<br />
Europese Richtlijn 2002/96/EC<br />
Gelieve u te informeren in verband met het plaatselijke inzamelingsysteem<br />
voor elektrische en elektronische apparaten.<br />
Gelieve u te houden aan de plaatselijke reglementering en apparaten niet met het gewone<br />
huisvuil mee te geven. Door afgedankte apparaten op een correcte manier weg te werpen<br />
helpt u mogelijke negatieve gevolgen voor het milieu en de gezondheid te voorkomen.<br />
‘CONSUMERS SHOULD NOTE THAT NOT ALL HIGH<br />
DEFINITION TELEVISION SETS ARE FULLY<br />
COMPATIBLE WITH THIS PRODUCT AND MAY CAUSE<br />
ARTIFACTS TO BE DISPLAYED IN THE PICTURE. IN<br />
CASE OF 525 OR 625 PROGRESSIVE SCAN PICTURE<br />
PROBLEMS, IT IS RECOMMENDED THAT THE USER<br />
SWITCH THE CONNECTION TO THE ‘STANDARD<br />
DEFINITION’ OUTPUT. IF THERE ARE QUESTIONS<br />
REGARDING OUR TV SET COMPATIBILITY WITH THIS<br />
MODEL 525p AND 625p <strong>DVD</strong> PLAYER, PLEASE<br />
CONTACT OUR CUSTOMER SERVICE CENTER.’<br />
This product incorporates copyright protection<br />
technology that is protected by method claims of<br />
certain U.S. patents and other intellectual property<br />
rights owned by Macrovision Corporation and<br />
other rights owners. Use of this copyright<br />
protection technology must be authorized by<br />
Macrovision Corporation, and is intended for<br />
home and other limited viewing uses only unless<br />
otherwise authorized by Macrovision Corporation.<br />
Reserve engineering or disassembly is prohibited.
Manufactured under license from Dolby<br />
Laboratories, Dolby, Pro Logic and the<br />
double-D symbol are trademarks of Dolby<br />
Laboratories.<br />
Manufactured under license from one or more of<br />
the following DTS, Inc. U.S. Pat. No’s: 5,451,942;<br />
5,956,674; 5,974,380; 5,978,762; 6,226,616;<br />
6,487,535 and other U.S. and world-wide patents<br />
issued and pending. ”DTS” and “DTS Digital<br />
Surround” are registered trademarks of DTS, Inc.<br />
Copyright 1996, 2002-2006, DTS, Inc. All Rights<br />
Reserved.<br />
DivX Ultra Certifi ed products: DivX, DivX<br />
Ultra Certifi ed, and associated logos are<br />
trademarks of DivX, Inc. and are used under<br />
license.<br />
Windows Media and the Windows logo are<br />
trademarks, or registered trademarks of<br />
Microsoft Corporation in the United States<br />
and/or other countries.<br />
HDMI, and HDMI logo and High-Defi nition<br />
Multimedia Interface are trademarks or<br />
registered trademarks of HDMI licensing<br />
LLC.<br />
Index<br />
English ------------------------------------ 6<br />
Français ----------------------------------56<br />
Español -------------------------------- 106<br />
Deutsch -------------------------------- 156<br />
Nederlands ---------------------------- 206<br />
iPod is a trademark of Apple Computer, Inc.,<br />
registered in the U.S. and other countries.<br />
‘DCDi’ is a trademark of Faroudja, a division<br />
of Genesis Microchip, Inc.<br />
5<br />
English<br />
Français<br />
Español<br />
Deutsch<br />
Nederlands
English<br />
Table of contents<br />
General<br />
General Information ........................................................................................................ 8<br />
Setup precautions .................................................................................................................................................8<br />
Accessories supplied ...........................................................................................................................................8<br />
Optional GoGear/iPod docking station ........................................................................................................8<br />
About recycling .....................................................................................................................................................8<br />
Product Overview<br />
Main Unit ........................................................................................................................... 9<br />
Remote Control .........................................................................................................10-12<br />
Using the remote control ................................................................................................................................12<br />
Connections<br />
Basic Connections .....................................................................................................13-17<br />
Step 1 : Placement ..............................................................................................................................................13<br />
Step 2 : Connecting to TV ...............................................................................................................................14<br />
Option 1: Using the Scart socket ..........................................................................................................14<br />
Option 2: Connecting to a HDMI-compatible TV ............................................................................14<br />
Option 3: Connecting to a Progressive Scan TV or component video input ............................15<br />
Step 3 : Connecting the FM and AM/MW antennas .................................................................................16<br />
Step 4 : Connecting the subwoofer to the main unit ...............................................................................16<br />
Step 5 : Connecting the power cord ............................................................................................................17<br />
Optional Connections ...............................................................................................18-19<br />
Connecting to cable box/satellite receiver and recorder/VCR ...........................................................18<br />
Mounting the main unit ...................................................................................................................................19<br />
Basic Setup<br />
Getting Started ........................................................................................................ 20-25<br />
Finding the correct viewing channel ............................................................................................................ 20<br />
Setting the speakers ................................................................................................................................. 20~21<br />
Setting language preferences .......................................................................................................................... 22<br />
On-screen display (OSD) language ....................................................................................................... 22<br />
Audio, Subtitle and Menu language for <strong>DVD</strong> playback .............................................................. 22-23<br />
Setting the TV Display ......................................................................................................................................23<br />
Setting up Progressive Scan feature ..............................................................................................................24<br />
Switching to different play source ................................................................................................................ 25<br />
Turning off to low power standby mode ............................................................................................. 25<br />
Disc Playback<br />
Disc Operations ........................................................................................................ 26-33<br />
Playable discs .......................................................................................................................................................26<br />
Playing a disc ........................................................................................................................................................26<br />
Basic playback controls .....................................................................................................................................27<br />
Selecting various repeat/shuffl e functions ...................................................................................................27<br />
Programming disc tracks ................................................................................................................................. 28<br />
Other playback features for video discs (<strong>DVD</strong>/VCD/SVCD) .......................................................28~30<br />
Using the Disc Menu ................................................................................................................................. 28<br />
Viewing playback information ..................................................................................................................29<br />
Zooming in/out ............................................................................................................................................29<br />
Changing subtitle language ......................................................................................................................29<br />
Switching camera angles ............................................................................................................................29<br />
Changing sound track language .............................................................................................................. 30<br />
Setting the delay times for audio playback .......................................................................................... 30<br />
Playback Control (VCD only) ................................................................................................................. 30<br />
6
Playing a MP3/WMA disc ................................................................................................................................31<br />
Playing a JPEG image fi le (slide show) ..........................................................................................................32<br />
Preview function ..........................................................................................................................................32<br />
Zoom picture ..............................................................................................................................................32<br />
Rotating/fl ipping the picture ....................................................................................................................32<br />
Playing MP3/WMA music and JPEG pictures simultaneously ................................................................33<br />
Playing a DivX disc .............................................................................................................................................33<br />
Playback other supported devices<br />
Playback - GoGear/iPod .................................................................................................34<br />
Playing music from compatible GoGear/iPod devices ................................................................... 34<br />
Playback - USB device ....................................................................................................35<br />
Playing from USB fl ash drive or USB memory card reader....................................................................35<br />
Playback - Other Audio Player .....................................................................................36<br />
Playing from other portable audio player ....................................................................................................36<br />
Setup Options<br />
Table of contents<br />
Setup Menu Options................................................................................................ 37-44<br />
Accessing the setup menu ................................................................................................................................37<br />
General Setup Page ........................................................................................................................................... 38<br />
Audio Setup Page ................................................................................................................................................39<br />
Video Setup Page .........................................................................................................................................40-42<br />
Preference Setup Page ...............................................................................................................................43-44<br />
<strong>Radio</strong> Tuning<br />
<strong>Radio</strong> Operations ...................................................................................................... 45-46<br />
Tuning to radio stations ................................................................................................................................... 45<br />
Presetting radio stations ................................................................................................................................. 45<br />
Using auto install ..................................................................................................................................45-46<br />
Using automatic preset ............................................................................................................................. 46<br />
Using manual preset .................................................................................................................................. 46<br />
Selecting a preset radio station ..................................................................................................................... 46<br />
Deleting a preset radio station ...................................................................................................................... 46<br />
Others<br />
Sound and Volume Controls .........................................................................................47<br />
Volume control ...................................................................................................................................................47<br />
Adjusting the Bass/ Treble level .....................................................................................................................47<br />
Selecting surround sound .................................................................................................................................47<br />
Selecting digital sound effects .........................................................................................................................47<br />
Other Features................................................................................................................48<br />
Software upgrades ............................................................................................................................................ 48<br />
Troubleshooting .........................................................................................................49-51<br />
Frequently Asked Questions (USB) ............................................................................. 52<br />
Specifi cations ..................................................................................................................53<br />
Glossary...................................................................................................................... 54-55<br />
Language Code ..............................................................................................................257<br />
7<br />
English
English<br />
General Information<br />
8<br />
WARNING!<br />
This unit does not contain any userserviceable<br />
parts. Please leave all<br />
maintenance work to qualifi ed<br />
personnel.<br />
Setup precautions<br />
Finding a suitable location<br />
– Place this unit on a fl at, hard and<br />
stable surface. Never place the unit on a<br />
carpet.<br />
– Never place this unit on top of other<br />
equipment that might heat it up (e.g.,<br />
receiver or amplifi er).<br />
– Never put anything under this unit<br />
(e.g., CDs, magazines).<br />
– Install this unit near the AC outlet<br />
where the AC power plug can be easily<br />
reached.<br />
Space for ventilation<br />
– Place this unit in a location with<br />
adequate ventilation to prevent internal<br />
heat build up. Allow at least 10 cm (4”)<br />
clearance from the rear and the top of<br />
this unit and 5cm (2”) from the left and<br />
right to prevent overheating.<br />
Avoid high temperature, moisture,<br />
water and dust<br />
– This unit must not be exposed to<br />
dripping or splashing.<br />
– Never place any object or items that<br />
can damage this unit (e.g., liquid fi lled<br />
objects, lighted candles).<br />
Accessories supplied<br />
– 1 subwoofer<br />
– 1 wall mounting bracket and 2 wall<br />
mounting knobs<br />
– 1 remote control with batteries<br />
– 1 scart cable<br />
– 1 audio cable (3.5mm to RCA)<br />
– 1 FM wire antenna<br />
– 1 AM/MW loop antenna<br />
– 1 MP3 LINE-IN cable (for connecting<br />
portable audio player)<br />
– 1 micro fi bre cleaning cloth<br />
– 1 power cable<br />
– Quick Start Guide<br />
Optional GoGear/iPod<br />
docking station<br />
This is an optional feature. The docking<br />
station available only in selected<br />
countries.<br />
About recycling<br />
These operating instructions have been<br />
printed on non-polluting paper. The<br />
electronic equipment contains a large<br />
number of materials that can be recycled.<br />
If you are disposing of an old machine,<br />
please take it to a recycling centre.<br />
Please observe the local regulations<br />
regarding disposal of packaging materials,<br />
exhausted batteries and old equipment.
11 10 9<br />
8<br />
Left side view<br />
a STANDBY ON 2<br />
– Turns on this unit or turns off to normal<br />
standby mode.<br />
– Press and hold to turn off to low power<br />
standby mode.<br />
b SOURCE<br />
– Selects the relevant active source mode:<br />
DISC, USB, DOCK, MP3 LINE-IN,<br />
RADIO FM, RADIO AM/MW, TV1, TV2,<br />
AUX1, AUX2 or DIGITAL IN.<br />
c VOLUME +-<br />
– Adjusts the volume level.<br />
d PLAY PAUSE u<br />
– DISC: starts/pauses playback.<br />
– RADIO: starts auto radio installation for<br />
fi rst time setup.<br />
STOP Ç<br />
– Exits an operation.<br />
– DISC: stops playback.<br />
– RADIO: press and hold this button to<br />
erase the current preset radio station.<br />
e OPEN/CLOSE ç<br />
– Opens/closes the disc compartment.<br />
f Display panel<br />
7<br />
Top view<br />
7<br />
Front view<br />
6<br />
Main Unit<br />
g iR sensor<br />
– Point the remote control towards this<br />
sensor.<br />
h Disc compartment<br />
5<br />
i USB socket<br />
– Input for USB fl ash drive or USB memory<br />
card reader.<br />
j MP3 LINE-IN socket<br />
– Phono input for connecting to the<br />
headphone out socket on your portable<br />
audio player.<br />
k DOCK socket<br />
– Input for GoGear/iPod docking station<br />
(optional feature - available in selected<br />
countries).<br />
4<br />
3<br />
2<br />
1<br />
9<br />
English
English<br />
Remote Control<br />
10<br />
AMBISOUND<br />
a 2<br />
– Turns off to normal standby mode.<br />
– Press and hold to turn off to low power<br />
standby mode.<br />
b OPEN/CLOSE ç<br />
– Opens/closes the disc compartment.<br />
c Source buttons<br />
– DISC: switches to DISC mode.<br />
DOCK: switches to the GoGear/iPod<br />
that is connected to the docking station<br />
(optional feature).<br />
USB: switches to USB mode.<br />
RADIO: toggles between FM and<br />
AM/MW band.<br />
AUX: toggles between AUX1 and AUX2<br />
external source mode.<br />
1<br />
2<br />
3<br />
4<br />
5<br />
6<br />
7<br />
8<br />
9<br />
10<br />
11<br />
12<br />
13<br />
DIGITAL IN: switches to the audio<br />
device that is connected to the DIGITAL<br />
IN socket.<br />
TV: switches to TV1 or TV2 mode. The<br />
sound from the TV will output through<br />
this unit’s speaker system.<br />
MP3 LINE-IN: switches to the audio<br />
device that is connected to the MP3<br />
LINE-IN socket.<br />
d SETUP<br />
– Enters or exits the system setup menu.<br />
e DISPLAY<br />
– Displays the current status or disc<br />
information.<br />
f PLAY/PAUSE u<br />
– DISC: starts/pauses playback.<br />
– RADIO: starts auto radio installation for<br />
fi rst time setup.<br />
g STOP Ç<br />
– Exits an operation.<br />
– DISC: stops playback.<br />
– RADIO: press and hold this button to<br />
erase the current preset radio station.<br />
h TV VOL +-<br />
– Adjusts the volume of the TV (for <strong>Philips</strong><br />
TVs or compatible brands only).<br />
i Numeric keypad 0-9<br />
– Enters a track/title number of the disc.<br />
– Enters a number of a preset radio station.<br />
j REPEAT/SHUFFLE<br />
– Selects various repeat or shuffl e modes;<br />
turns off repeat or shuffl e mode.<br />
k SOUND<br />
– Selects a predefi ned sound effect.<br />
l AUDIO<br />
– DISC: selects an audio language/channel.<br />
– RADIO: toggles between FM stereo and<br />
mono mode.<br />
m ZOOM<br />
– Zoom in or out the picture on the TV.
n DISC MENU<br />
– For <strong>DVD</strong>, enters or exits disc contents<br />
menu.<br />
– For VCD/SVCD, enters digest menu<br />
while in stop mode; turns on/off PBC<br />
mode during playback.<br />
o OK<br />
– Confi rms an entry or selection.<br />
p Cursor keys<br />
– DISC: selects movement direction in the<br />
menu.<br />
– RADIO: press up or down to tune the<br />
radio frequency.<br />
– RADIO: press left or right to start auto<br />
search.<br />
q TITLE <br />
– For <strong>DVD</strong>, go back to the previous menu.<br />
– For VCD version 2.0 only;<br />
During playback, display the disc title<br />
menu or return to the main menu.<br />
r PREV / REW ., NEXT / FFW ><br />
– DISC: skips to the previous or next title/<br />
chapter/track.<br />
– DISC: press and hold this button for fast<br />
forward and backward search.<br />
– RADIO: selects a preset radio station.<br />
s MUTE<br />
– Mutes or restores the volume.<br />
t VOL +-<br />
– Adjusts the volume level.<br />
u AMBISOUND<br />
– Switches the surround sound mode<br />
between Auto, Multi-Channel and Stereo<br />
mode.<br />
v SELECT/PROGRAM<br />
– DISC: starts programming.<br />
– RADIO: press and hold this button to<br />
start automatic/ manual preset<br />
programming.<br />
– Make multiple selection in the menu.<br />
Remote Control (continued)<br />
14<br />
15<br />
16<br />
17<br />
18<br />
19<br />
20<br />
21<br />
22<br />
23<br />
24<br />
25<br />
26<br />
AMBISOUND<br />
w TREBLE / BASS<br />
– Toggles between Treble and Bass mode.<br />
Immediately after toggling, adjust the<br />
volume control to change the level<br />
settings<br />
x AUDIO SYNC<br />
– Sets the audio output delay times if the<br />
video playback is slower than the audio<br />
output.<br />
y SUBTITLE<br />
– Selects a <strong>DVD</strong> subtitle language.<br />
z ANGLE<br />
– Selects a different viewing angle of a <strong>DVD</strong><br />
movie (if available).<br />
11<br />
English
English<br />
Remote Control (continued)<br />
12<br />
Using the remote control<br />
A Open the battery compartment.<br />
B Insert two batteries type R06 or AA,<br />
following the indications (+-) inside<br />
the compartment.<br />
C Close the cover.<br />
D Point the remote control directly at the<br />
remote sensor (iR) on the front panel.<br />
E Select the source you wish to control by<br />
pressing the DISC, DOCK, USB, RADIO,<br />
AUX, DIGITAL IN, TV or MP3 LINE-IN<br />
button on the remote control.<br />
F Then select the desired function (for<br />
example ., >).<br />
CAUTION!<br />
– Remove batteries if they are<br />
exhausted or if the remote control<br />
is not to be used for a long time.<br />
– Never mix batteries (old and new<br />
or carbon and alkaline, etc.).<br />
– Batteries contain chemical<br />
substances, they should be disposed<br />
of properly.
Step 1: Placement<br />
Note:<br />
Never place the main unit in an enclosed<br />
cabinet.<br />
A Place the main unit at a height that is<br />
closest to the listening ear-level.<br />
B Position the main unit so that it is directly<br />
parallel to the listening area.<br />
C Place the subwoofer at the corner of the<br />
room or at least one metre away from<br />
the TV.<br />
Basic Connections<br />
Helpful Hints:<br />
– For optimum performance, place the main<br />
unit on top of a table or mount it on the<br />
wall.<br />
– For Sound Bar speaker setting, see<br />
‘Getting Started - Setting the speakers’.<br />
13<br />
English
English<br />
Basic Connections (continued)<br />
14<br />
SCART IN<br />
SCART OUT<br />
(TV 1)<br />
Step 2: Connecting to TV<br />
Option 1<br />
This connection enables you to view the<br />
video playback from this unit. You only<br />
need to choose one of the options<br />
below to make the video connection.<br />
– For a standard TV, follow option 1.<br />
– For a HDMI TV, follow option 2.<br />
– For a progressive scan TV, follow<br />
option 3.<br />
Before you start ...<br />
Push up the catches to lift up the rear<br />
cover.<br />
Helpful Hint:<br />
– It is important to connect this unit directly<br />
to the TV in order to enjoy optimum video<br />
quality.<br />
HDMI IN<br />
HDMI OUT<br />
Option 2<br />
Option 1: Using the Scart socket<br />
Use the scart cable to connect the<br />
SCART OUT (TV1) socket on the<br />
main unit to the corresponding SCART<br />
input socket on the TV.<br />
<br />
Helpful Hint:<br />
– To hear the TV programmes through this<br />
<strong>Home</strong> Theatre <strong>System</strong>, press TV button on<br />
the remote control to select ‘TV1’.<br />
Option 2: Connecting to a HDMIcompatible<br />
TV<br />
HDMI (High Defi nition Multimedia<br />
Interface) is a digital interface that allows<br />
pure digital video transmission without<br />
the loss of image quality.<br />
A Use a HDMI cable (not supplied) to<br />
connect the HDMI OUT on the main<br />
unit to the HDMI IN on a HDMIcompatible<br />
device (e.g., HDMI TV, HDCP<br />
compliant DVI TV).<br />
B When you have completed the necessary<br />
connections, installation and set-up, see<br />
‘Audio Setup Page and Video Setup Page’<br />
for optimum HDMI audio and video<br />
settings.
TV AUDIO IN<br />
(TV 2)<br />
TO SUBWOOFER<br />
COMPONENT<br />
INTERFACE TO<br />
SUBWOOFER<br />
Option 3: Connecting to a<br />
Progressive Scan TV or component<br />
video input<br />
The progressive scan video quality is only<br />
available when using Y Pb Pr connection<br />
and a progressive scan TV is required. It<br />
provides superior picture quality when<br />
watching <strong>DVD</strong> movies.<br />
A Use the component video cables (red/<br />
blue/green - not supplied) to connect the<br />
COMPONENT VIDEO OUT<br />
(Y Pb Pr) sockets on the main unit to<br />
the corresponding component video<br />
input sockets (or labelled as Y Pb/Cb<br />
Pr/Cr or YUV) on the TV.<br />
B If your TV accepts progressive signals,<br />
proceed to chapter ‘Getting Started -<br />
Setting up Progressive Scan feature’ for<br />
detailed progressive feature setup.<br />
C To hear the TV channels through this<br />
unit, use the supplied audio cable to<br />
connect the TV AUDIO IN (TV2) to<br />
the AUDIO OUT sockets on the TV.<br />
Basic Connections (continued)<br />
Option 3<br />
Helpful Hints:<br />
– Audio connection is not required if the<br />
main unit is connected to your TV using the<br />
SCART connector.<br />
– To hear the TV programmes through this<br />
<strong>Home</strong> Theatre <strong>System</strong>, press TV button on<br />
the remote control to select ‘TV2’ as the<br />
sound source you want to listen to.<br />
15<br />
English
English<br />
Basic Connections (continued)<br />
16<br />
SPEAKERS<br />
RIGHT LEFT<br />
TO MAIN UNIT<br />
COAXIAL<br />
AUX 1 AUX 2<br />
DIGITAL IN<br />
MAINS<br />
fi x the claw<br />
into the slot<br />
L<br />
R<br />
FM/AM/MW ANTENNA<br />
AM/MW FM 75<br />
AM/MW antenna<br />
Step 3: Connecting the<br />
FM and AM/MW<br />
antennas<br />
FM antenna<br />
FM antenna<br />
A Connect the FM antenna (supplied) to<br />
the FM 75 Ω socket.<br />
B Attach the other end of the FM antenna<br />
to a wall.<br />
AM/MW loop antenna<br />
A Stand the AM/MW loop antenna upright<br />
to fi x its claw into the slot.<br />
B Connect the AM/MW loop antenna to<br />
the AM/MW socket.<br />
C Place the AM/MW loop antenna on a<br />
shelf, or attach it to a stand or wall.<br />
Helpful Hints:<br />
– Adjust the position of the antennas for<br />
optimal reception.<br />
– To avoid interference, position the antenna<br />
away from the electronic equipment.<br />
– For better FM stereo reception, connect an<br />
external FM antenna (not supplied).<br />
Ñ LOUDSPEAKERS<br />
FM/MW ANTENNA<br />
MW FM 75<br />
L<br />
R<br />
AUX 1 AUX 2<br />
COAXIAL<br />
DIGITAL IN<br />
TO MAIN UNIT<br />
Step 4: Connecting the<br />
subwoofer to the<br />
main unit<br />
A Unwind the subwoofer’s TO MAIN<br />
UNIT interconnect cable.<br />
MAINS<br />
TO SUBWOOFER<br />
TO SUBWOOFER<br />
B Connect the white end of the<br />
interconnect cable to the<br />
LOUDSPEAKERS socket on the main<br />
unit.<br />
C Connect the black end of the<br />
interconnect cable to the TO<br />
SUBWOOFER socket on the main<br />
unit.
Step 5: Connecting the<br />
power cord<br />
Note:<br />
For power supply rating, refer to the rear<br />
or bottom of the main unit.<br />
A When all the connections are complete,<br />
direct all the cables to the CABLE OUT<br />
point.<br />
B Close the rear cover.<br />
Note:<br />
All the cables must be placed properly<br />
inside the rear panel in order for the rear<br />
cover to close.<br />
C Connect the AC power cord from the<br />
subwoofer to the power outlet.<br />
The standby LED on the main unit<br />
lights up.<br />
Helpful Hint:<br />
– Before making or changing any<br />
connections, make sure that all the devices<br />
are disconnected from the power outlet.<br />
Basic Connections (continued)<br />
C<br />
SPEAKERS<br />
RIGHT LEFT<br />
L<br />
R<br />
COAXIAL<br />
AUX 1 AUX 2<br />
DIGITAL IN<br />
TO MAIN UNIT<br />
MAINS<br />
FM/AM/MW ANTENNA<br />
AM/MW FM 75<br />
17<br />
English
English<br />
Optional Connections<br />
18<br />
TV-OUT ANTENNA-IN<br />
A<br />
IN<br />
EXT2<br />
EXT 2<br />
<strong>DVD</strong> Recorder/VCR<br />
Cable/Satellite Box<br />
AUX - I/O<br />
EXT1<br />
EXT 1<br />
TO TV - I/O<br />
OUT<br />
RF<br />
VIDEO AUDIO<br />
R L S-VIDEO<br />
Connecting to cable box/<br />
satellite receiver and<br />
recorder/VCR<br />
TO TV<br />
This unit provides analogue and digital<br />
audio connection. You can connect the<br />
audio output from an audio/video device<br />
(e.g. <strong>DVD</strong> recorder, VCR, Cable/Satellite<br />
Box) to this <strong>Home</strong> Theatre <strong>System</strong> in<br />
order to enjoy the multi-channel<br />
surround sound capabilities.<br />
Note:<br />
The above illustration is only an example<br />
of the possible connections. It may be<br />
varied depending on the connected<br />
devices.<br />
A Keep the existing connections between<br />
your TV and other devices.<br />
INTERFACE TO<br />
SUBWOOFER<br />
SCART OUT<br />
(TV 1)<br />
B<br />
C<br />
COAXIAL<br />
DIGITAL IN<br />
L<br />
R<br />
~MAINS<br />
AUX 1 AUX 2<br />
<strong>HTS8100</strong><br />
SPEAKERS<br />
RIGHT LEFT<br />
TO MAIN UNIT<br />
COAXIAL<br />
AUX 1 AUX 2<br />
DIGITAL IN<br />
MAINS<br />
L<br />
R<br />
FM/AM/MW ANTENNA<br />
AM/MW FM 75<br />
B Use the scart cable to connect this unit<br />
to your TV.<br />
If your TV does not have double-scart<br />
connectors, see ‘Step 2: Connecting to<br />
TV’ for other video connection options.<br />
C Use an audio cable (red/white - not<br />
supplied) to connect the AUDIO IN-<br />
AUX1 or AUX2 sockets on the<br />
subwoofer to the AUDIO OUT sockets<br />
on the Cable/Satellite Box and recorder/<br />
VCR.<br />
Alternatively, you can use a coaxial cable<br />
(not supplied) to connect the<br />
COAXIAL DIGITAL IN socket on the<br />
subwoofer to the COAXIAL output<br />
socket of the connected device. It<br />
provides better audio transmission.<br />
Helpful Hint:<br />
– Refer to the connected devices’ user<br />
manual for other possible connections.
E<br />
F<br />
A<br />
G<br />
Mounting the main unit<br />
CAUTION!<br />
Risk of personal injury and damage<br />
to the unit. Allow only qualifi ed<br />
persons to mount the unit.<br />
Before you start ...<br />
Make sure that all cables have been<br />
connected to the main unit.<br />
A Attach the supplied knobs to the rear of<br />
the main unit.<br />
B Turn the main unit over so that the<br />
bottom of the main unit faces up.<br />
C While you hold the main unit fi rmly with<br />
one hand, grasp one of the rubber<br />
speaker feet and push it towards the back<br />
of the main unit.<br />
Optional Connections (continued)<br />
B<br />
H<br />
C<br />
I<br />
D Repeat step three to remove the other<br />
speaker foot.<br />
E Position and mark the supplied bracket<br />
where you intend to mount the main<br />
unit.<br />
F Drill the screw holes.<br />
D<br />
G Insert the rubber wall plugs (not<br />
supplied) into the holes.<br />
H Secure the bracket onto the wall with the<br />
screws (not supplied).<br />
I Hook the main unit fi rmly onto the<br />
mounted bracket. Slide the knobs<br />
through the bracket’s key holes and lock<br />
into position.<br />
Helpful Hint:<br />
– To mount the main unit below your TV,<br />
leave at least 10cm (4 inches) of space<br />
between the TV and the bracket.<br />
19<br />
English
English<br />
Getting Started<br />
20<br />
Finding the correct viewing<br />
channel<br />
Before you start ...<br />
Remove the door stop tag on top of the<br />
disc compartment door.<br />
A Press SOURCE button on the main unit<br />
until ‘DISC SOURCE’ appears on the<br />
display panel (or DISC on the remote<br />
control).<br />
B Turn on the TV and switch it to the<br />
correct video-in channel.<br />
You may go to the lowest channel on<br />
your TV, then press the Channel Down<br />
button on your TVs remote control until<br />
you see the Video In channel.<br />
You may press ° button repeatedly<br />
on your TVs remote control.<br />
Usually this channel is between the<br />
lowest and highest channels and may be<br />
called FRONT, A/V IN, VIDEO, etc..<br />
Refer to your TVs user manual on<br />
how to select the correct input on your<br />
TV.<br />
The fi rst screen appears on TV<br />
When you complete the connections and<br />
turn on this unit to the ‘DISC SOURCE’<br />
mode for the fi rst time, you see the<br />
welcome message on the TV.<br />
Welcome<br />
The next few steps will help you set up your<br />
Ambisound home theater system to match your<br />
listening environment.<br />
Stop: Exit Continue<br />
It is advisable that you make several basic<br />
settings to optimise the performance of<br />
this unit. See the following pages for<br />
more information.<br />
Setting the speakers<br />
There are four parameters to adjust the<br />
speakers: room acoustics, placement,<br />
height and distance. Change the speaker<br />
settings according to your room<br />
environment and setup.<br />
A Upon seeing the welcome message in<br />
‘DISC SOURCE’ mode, press cursor right<br />
key on the remote control to access the<br />
speaker setup screen.<br />
A message on the unit positioning<br />
appears.<br />
Ensure that the SoundBar system is always<br />
directly facing you in your listening area.<br />
ds<br />
Orientation<br />
Continue<br />
B Press cursor right key to continue.<br />
{ Room Acoustics } menu appears.<br />
Please select the type of walls that surround<br />
your room:<br />
ds<br />
Room Acoustics<br />
Hard (Concrete, wood)<br />
Soft (Curtains, open space)<br />
Back Change<br />
Select<br />
C Select the condition of the room and<br />
press cursor right key to confi rm.<br />
{ Hard } for concrete or wood<br />
surroundings.<br />
{ Soft } for curtains or an open space<br />
surroundings.
Select the Sound Bar system placement position<br />
in your room:<br />
ds<br />
Room Placement<br />
Middle of the room<br />
Corner of room<br />
Wall on the right<br />
Wall on the left<br />
Back Change<br />
Select<br />
D Select Sound Bar system placement<br />
position in the room and press cursor<br />
right key to confi rm.<br />
Height<br />
Select the height at which your SoundBar system<br />
is placed:<br />
High (> 1.2m / 3.9 ft)<br />
Default (0.8-1.2m / 2.6-3.9 ft)<br />
Low (< 0.8m / 2.6 ft )<br />
ds<br />
Back Change<br />
<strong>HTS8100</strong><br />
Select<br />
E Select the height of which the Sound Bar<br />
system is placed and press cursor right<br />
key to confi rm.<br />
{ High } for height of less than<br />
1.2 metre.<br />
{ Default } for height between<br />
0.8 to 1.2 metres.<br />
{ Low } for height of more than<br />
0.8 metres.<br />
Getting Started (continued)<br />
Distance<br />
Select the distance between your listening position<br />
and the SoundBar system:<br />
Near (> 2m / 6.5 ft )<br />
Default (2-3m / 6.5-9.8 ft)<br />
Far (< 3m / 9.8 ft)<br />
Back Change<br />
<strong>HTS8100</strong><br />
Select<br />
F Select the distance between the listening<br />
position and the speakers, press cursor<br />
right key to confi rm.<br />
{ Near } for distance of less than<br />
2.0 metres.<br />
{ Default } for distance between<br />
2.0 to 3.0 metres.<br />
{ Far } for distance of more than 3.0<br />
metres.<br />
G The speaker settings are now completed,<br />
press cursor right key to exit.<br />
21<br />
English
English<br />
22<br />
Setting language preferences<br />
The language options are different<br />
depending on your country or region. It<br />
may not correspond to the illustrations<br />
shown in the user manual.<br />
On-screen display (OSD) language<br />
The OSD (On-Screen Display) language<br />
for this unit remains as you have set it,<br />
regardless of the changes made to the<br />
<strong>DVD</strong> disc language.<br />
A In disc mode, press SETUP on the<br />
remote control.<br />
{ General Setup Page } appears.<br />
B Select { OSD Language } in the menu<br />
and press cursor right key.<br />
General Setup Page<br />
Ambisound Setup<br />
Disc Lock<br />
Display Dim<br />
OSD Language<br />
Screen Saver<br />
Sleep<br />
DivX(R) VOD Code<br />
English<br />
Dansk<br />
Deutsch<br />
Espanõl<br />
Français<br />
Nederlands<br />
Norsk<br />
C Select a language and press OK to<br />
confi rm.<br />
Audio, Subtitle and Menu language<br />
for <strong>DVD</strong> playback<br />
You can select your preferred language<br />
settings for <strong>DVD</strong> playback. If the<br />
selected language is recorded on the<br />
<strong>DVD</strong> disc, this unit automatically plays<br />
the disc in that language. Otherwise, the<br />
disc’s default language will be used<br />
instead.<br />
A Press Ç twice to stop playback (if any),<br />
then press SETUP.<br />
B Press cursor right key repeatedly to<br />
select { Preference Page }.<br />
C Select one of the options below and<br />
press cursor right key.<br />
Preference Page<br />
Audio<br />
Subtitle<br />
Disc Menu<br />
Parental<br />
PBC<br />
MP3/JPEG Nav<br />
Password<br />
DivX Subtitle<br />
Default<br />
English<br />
French<br />
Spanish<br />
Portuguese<br />
Polish<br />
Italian<br />
Turkish<br />
Greek<br />
{ Audio }<br />
Select the preferred audio language for<br />
<strong>DVD</strong> playback.<br />
{ Subtitle }<br />
Select the preferred subtitle language for<br />
<strong>DVD</strong> playback.<br />
{ Disc Menu }<br />
Select the preferred disc menu language<br />
for <strong>DVD</strong> playback.<br />
D Select a language and press OK to<br />
confi rm.
If the language you want is not<br />
available in the list, select { Others }.<br />
Use the numeric keypad 0-9 on the<br />
remote control to enter the 4-digit<br />
language code ‘XXXX’ (see last page) and<br />
press OK to confi rm.<br />
E Repeat steps C ~ D for other settings.<br />
Helpful Hints:<br />
– During <strong>DVD</strong> playback, you can switch the<br />
audio and subtitle languages by pressing the<br />
AUDIO and SUBTITLE buttons on the<br />
remote control. However, this does not<br />
change the default settings you have made<br />
here.<br />
– For some <strong>DVD</strong>s, the subtitle/audio/menu<br />
language can only be changed via the <strong>DVD</strong><br />
disc menu.<br />
Getting Started (continued)<br />
Setting the TV Display<br />
Set the aspect ratio of this unit according<br />
to the TV type you have connected. The<br />
format you select must be available on<br />
the disc. If it is not, the setting for TV<br />
display will not affect the picture during<br />
playback.<br />
A In disc mode, press SETUP on the<br />
remote control.<br />
B Press cursor right key repeatedly to<br />
select { Video Setup Page }.<br />
C Select { TV Display } in the menu and<br />
press cursor right key.<br />
Video Setup Page<br />
TV Type<br />
TV Display<br />
Picture Setting<br />
Component<br />
Progressive<br />
Adv Picture<br />
4:3 Pan Scan<br />
4:3 Letter Box<br />
16:9 Wide Screen<br />
{ 4:3 Pan Scan }<br />
Select this if you have a<br />
conventional TV and<br />
want both sides of the<br />
picture to be trimmed or formatted<br />
to fi t your TV.<br />
{ 4:3 Letter Box }<br />
Select this if you have a<br />
conventional TV. In this<br />
case, a wide picture with<br />
black bands on the upper and lower<br />
portions of the TV will be displayed.<br />
{ 16:9 Wide Screen }<br />
Select this if you have a<br />
wide-screen TV.<br />
D Select one of the options and press OK<br />
to confi rm.<br />
23<br />
English
English<br />
Getting Started (continued)<br />
24<br />
Setting up Progressive Scan<br />
feature<br />
(for Progressive Scan TV only)<br />
The progressive scan displays twice the<br />
number of frames per second than<br />
interlaced scanning (ordinary normal TV<br />
system). With nearly double the number<br />
of lines, progressive scan offers higher<br />
picture resolution and quality.<br />
Before you start...<br />
Ensure that you have connected this unit<br />
to a progressive scan TV using the Y Pb<br />
Pr connection (see ‘Option 3: Connecting<br />
to a Progressive Scan TV or component<br />
video input’).<br />
A Turn on the TV to the correct viewing<br />
channel for this unit.<br />
Make sure that the TVs progressive<br />
scan mode is turned off (or set to<br />
interlaced mode). Refer to your TVs user<br />
manual.<br />
B Turn on this unit and press DISC on the<br />
remote control.<br />
C Press SETUP on the remote control.<br />
D Press cursor right key repeatedly to<br />
select { Video Setup Page }.<br />
Video Setup Page<br />
TV Type<br />
TV Display<br />
Picture Setting<br />
Component<br />
Progressive<br />
Adv Picture<br />
YUV<br />
RGB<br />
E Move to { Component } > { YUV } in<br />
the menu and press OK to confi rm.<br />
F Move to { Progressive } > { On } in the<br />
menu and press OK to confi rm.<br />
Video Setup Page<br />
TV Type<br />
TV Display<br />
Picture Setting<br />
Component<br />
Progressive<br />
Adv Picture<br />
On<br />
Off<br />
G Read the notifi cation message on the TV<br />
and confi rm your action by selecting the<br />
in the menu and press OK.<br />
There will be no picture on your TV<br />
at this state until you have turned<br />
on the progressive scan mode on<br />
your TV.<br />
H Turn on your TV progressive scan mode,<br />
refer to your TVs user manual.<br />
A message appears on the TV.<br />
I Confi rm your action by selecting the<br />
in the menu and press OK.<br />
The setup is now completed and you<br />
can start to enjoy the high quality picture.<br />
If no picture is displayed:<br />
A Press OPEN/CLOSE ç.<br />
B Press cursor left key on the remote<br />
control.<br />
C Press AUDIO on the remote control.<br />
Helpful Hints:<br />
– If a blank/distorted screen appears, wait<br />
for 15 seconds for the auto recovery.<br />
– There are some progressive scan TVs that<br />
are not fully compatible with this unit,<br />
resulting in an unnatural picture when<br />
playing back a <strong>DVD</strong> VIDEO disc in the<br />
progressive scan mode. In such a case, turn<br />
off the progressive scan feature on this unit<br />
and your TV.
Switching to different play<br />
source<br />
Press the SOURCE button on the main<br />
unit repeatedly to select:<br />
DISC SOURCE USB DOCK<br />
MP3 LINE-IN RADIO FM<br />
RADIO AM/MW TV1 TV2<br />
AUX1 AUX2 DIGITAL IN<br />
DISC SOURCE ....<br />
Or<br />
Press DISC, DOCK, USB, RADIO,<br />
AUX, DIGITAL IN, TV, MP3 LINE-<br />
IN on the remote control.<br />
Press DISC for switching to disc<br />
mode.<br />
Press DOCK for switching to the<br />
GoGear/iPod player that is attached to<br />
the docking station (optional feature).<br />
Press USB for switching to USB<br />
device that is connected to this unit.<br />
Press RADIO to toggle between FM<br />
and AM/MW band.<br />
Press AUX for switching to the<br />
additional audio device that is connected<br />
to the AUDIO AUX1 or AUX2 socket<br />
on the subwoofer.<br />
Press DIGITAL IN for switching to<br />
the additional audio device that is<br />
connected to the DIGITAL IN socket on<br />
the subwoofer.<br />
Press TV for switching to the TVs<br />
sound output that is connected through<br />
SCART (TV1) or TV AUDIO IN (TV2).<br />
Press MP3 LINE-IN for switching to<br />
the portable audio player that is<br />
connected to this unit.<br />
Getting Started (continued)<br />
Turning off to low power standby<br />
mode<br />
Press and hold 2.<br />
The LEDs on the main unit turns red.<br />
25<br />
English
English<br />
Disc Operations<br />
26<br />
Playable discs<br />
Your <strong>DVD</strong> home theatre system<br />
plays:<br />
– Digital Versatile Discs (<strong>DVD</strong>s)<br />
– Video CDs (VCDs)<br />
– Super Video CDs (SVCDs)<br />
– Finalised <strong>DVD</strong> Recordable (<strong>DVD</strong>±R),<br />
<strong>DVD</strong> Rewritable (<strong>DVD</strong>±RW)<br />
– Audio Compact Discs (CDs)<br />
– MP3/ Windows Media Audio discs,<br />
picture (Kodak, JPEG) fi les on<br />
CD-R(W)<br />
– ISO 9660<br />
– JPEG resolution support up to<br />
3072 x 2048<br />
– Supported sampling frequencies :<br />
32 kHz, 44.1 kHz, 48 kHz<br />
– Supported Bit-rates : 32~256 (kbps),<br />
variable bit rates (average 128 kbps)<br />
– DivX fi les on CD-R(W)/<strong>DVD</strong>+R(W):<br />
– DivX 3/4/5/6, DivX Ultra<br />
Region Codes for <strong>DVD</strong> discs<br />
<strong>DVD</strong> discs and players are designed with<br />
regional restrictions. Before playing a disc,<br />
make sure the disc is for the same region<br />
as your player. The regional code for this<br />
unit is indicated at the rear or bottom<br />
panel.<br />
Note:<br />
– If the inhibit icon (ø or X) appears<br />
on the TV when a button is pressed,<br />
it means the function is not<br />
available on the current disc or at<br />
the current time.<br />
– Never put any objects other than<br />
discs on the disc tray. Doing so may<br />
cause the disc player to malfunction.<br />
Playing a disc<br />
A Press SOURCE repeatedly until ‘DISC<br />
SOURCE’ appears on the display panel<br />
(or press DISC on the remote control).<br />
B Turn on the TV to the correct viewing<br />
channel for this unit.<br />
The blue <strong>DVD</strong> background screen<br />
appears on the TV.<br />
C Press OPEN/CLOSE ç to open the<br />
disc compartment.<br />
D Insert a disc into the disc compartment<br />
and press OPEN/CLOSE ç.<br />
Make sure the disc label is facing<br />
towards you. For double-sided discs, load<br />
the side which you want to play facing up.<br />
E Playback starts automatically.<br />
See the following pages for more<br />
playback options and features.<br />
Helpful Hints:<br />
– If you are having trouble playing a certain<br />
disc, remove the disc and try a different one.<br />
Improperly formatted discs cannot be played<br />
on this unit.<br />
– Some discs cannot be played on this player<br />
due to the confi guration and characteristics<br />
of the disc, or due to the condition of<br />
recording and authoring software that was<br />
used.
Basic playback controls<br />
Pausing playback<br />
During playback, press u.<br />
While in pause mode, you can press<br />
cursor left/right keys repeatedly to view<br />
the previous or next still picture (for<br />
video playback only).<br />
To resume playback, press u again.<br />
Selecting another track/chapter<br />
Press ./ > or use the numeric<br />
keypad 0-9 to key in a track/chapter<br />
number.<br />
If the repeat track mode is active, press<br />
. again to replay the same track/<br />
chapter.<br />
Searching backward/forward<br />
Press and hold ./ >.<br />
While searching, press ./ ><br />
repeatedly to decrease/increase the<br />
search speed.<br />
To resume normal playback, press<br />
u.<br />
Stopping playback<br />
Press x.<br />
Helpful Hints:<br />
– If the message ‘To playback from the<br />
beginning, press PREV key’ appears on the<br />
TV while you load in a disc, you can press<br />
. to playback from the beginning.<br />
– This is a power-saving feature, this unit<br />
automatically switches to low power standby<br />
mode if you do not press any buttons within<br />
30 minutes after a disc has stopped playing.<br />
Disc Operations (continued)<br />
Selecting various repeat/<br />
shuffl e functions<br />
The available of the repeat play options<br />
and shuffl e play mode are vary depending<br />
on the disc type.<br />
While playing a disc, press<br />
REPEAT/SHUFFLE on the remote<br />
control repeatedly to choose a repeat/<br />
shuffl e play mode.<br />
<strong>DVD</strong><br />
REPEAT CHAPTER<br />
REPEAT TITLE<br />
REPEAT DISC<br />
SHUFFLE<br />
SHUFFLE REPEAT<br />
REPEAT OFF (exit repeat mode)<br />
VCD/SVCD/CD<br />
REPEAT TRACK<br />
REPEAT DISC<br />
SHUFFLE<br />
SHUFFLE REPEAT<br />
REPEAT OFF (exit repeat mode)<br />
MP3/DivX/Windows Media Audio<br />
REPEAT TRACK<br />
REPEAT ALL / FOLDER<br />
SHUFFLE<br />
REPEAT OFF (exit repeat mode)<br />
Helpful Hint:<br />
– Repeat playback is not possible on VCDs<br />
when the PBC mode is turned on.<br />
27<br />
English
English<br />
Disc Operations (continued)<br />
28<br />
Programming disc tracks<br />
(not for Picture CD/MP3)<br />
You can play the contents of the disc in<br />
the order you want by programming the<br />
playing order of the tracks.<br />
A Press SELECT/PROGRAM on the<br />
remote control.<br />
The programming menu appears.<br />
2<br />
6<br />
7<br />
8<br />
9<br />
10<br />
Exit Start Next<br />
B Use the numeric keypad 0-9 to enter a<br />
valid track/chapter number.<br />
C Use the cursor keys to move the cursor<br />
to the next position.<br />
If there are more than ten total<br />
programme tracks, select { Next } on<br />
the screen and press OK (or press ><br />
on the remote control) to access the<br />
next programming page.<br />
To remove the track/chapter from the<br />
programming menu, select the track/<br />
chapter and press OK.<br />
D Once complete, select { Start } on the<br />
screen and press OK to start playback.<br />
Playback starts from the selected track<br />
under the programmed sequence.<br />
E To exit the programme menu, select<br />
{ Exit } in the menu and press OK.<br />
Other playback features<br />
for video discs (<strong>DVD</strong>/VCD/<br />
SVCD)<br />
DISC MENU<br />
TITLE<br />
AUDIO SYNC<br />
SUBTITLE<br />
ANGLE<br />
AMBISOUND<br />
DISPLAY<br />
AUDIO<br />
ZOOM<br />
Note:<br />
The operating features described here<br />
might not be possible for certain discs.<br />
Always refer to the instructions supplied<br />
with the discs.<br />
Using the Disc Menu<br />
Depending on the disc format, a menu<br />
may appear on the TV screen once you<br />
load the disc.<br />
To select a playback feature or item<br />
Use the cursor keys or numeric<br />
keypad 0-9 on the remote control, then<br />
press OK to start playback.<br />
To access or remove the menu<br />
Press DISC MENU on the remote<br />
control.
Viewing playback information<br />
This unit can display the disc playback<br />
information (for example, title or chapter<br />
number, elapsed playing time, audio/<br />
subtitle language) and a number of<br />
operations can be done without<br />
interrupting disc playback.<br />
A During playback, press DISPLAY.<br />
A list of available disc information<br />
appears on the TV.<br />
Menu<br />
Track<br />
Disc Time<br />
Track Time<br />
Repeat<br />
Time Disp.<br />
<strong>DVD</strong><br />
VCD/SVCD<br />
01/12<br />
0:49:17<br />
0:04:32<br />
Off<br />
Total Elapsed<br />
Bitrate 8 Total Elapsed<br />
B Use cursor up/down keys to view the<br />
information and press OK to access.<br />
C Use the numeric keypad 0-9 to input<br />
the number/time or use cursor up/down<br />
keys to make the selection.<br />
D Press OK to confi rm.<br />
Playback changes according to the<br />
chosen time or to the selected title/<br />
chapter/track.<br />
Disc Operations (continued)<br />
Zooming in/out<br />
This option allows you to zoom in or out<br />
the picture on the TV and to pan through<br />
the picture.<br />
A During playback, press ZOOM<br />
repeatedly to select a different zoom<br />
factor.<br />
Playback continues.<br />
B Use the cursor keys to pan through the<br />
zoomed image.<br />
C Press ZOOM repeatedly to return to<br />
the original size.<br />
Changing subtitle language<br />
This operation works only on <strong>DVD</strong>s with<br />
multiple subtitle languages. You can<br />
change the language you want while<br />
playing a <strong>DVD</strong>.<br />
Press SUBTITLE repeatedly to select<br />
different subtitle languages.<br />
Switching camera angles<br />
This option is only available on <strong>DVD</strong>s<br />
that contain sequences recorded from<br />
different camera angles. This allows you<br />
to view the picture from different angles.<br />
If the camera icon appears on the TV,<br />
press ANGLE repeatedly to select the<br />
available camera angles.<br />
29<br />
English
English<br />
Disc Operations (continued)<br />
30<br />
Changing sound track language<br />
This operation works only on <strong>DVD</strong>s with<br />
multiple sound track languages, or VCDs<br />
with multiple audio channels.<br />
Press AUDIO repeatedly to select the<br />
available audio languages.<br />
For VCD – changing the audio<br />
channel<br />
Press AUDIO repeatedly to select the<br />
available audio channels provided by the<br />
disc (STEREO, MONO LEFT, MONO<br />
RIGHT or MIX MONO).<br />
Setting the delay times for audio<br />
playback<br />
This feature allows you to adjust the<br />
audio delay times if the video playback is<br />
slower than the audio output streams,<br />
which is called ‘Lip-sync’. The only way to<br />
correct ‘Lip-sync’ error caused by<br />
delayed video is to delay audio by an<br />
equal amount.<br />
A Press AUDIO SYNC.<br />
B Within fi ve seconds, use the VOL +-<br />
to set the audio output delay times (0 ~<br />
150 ms).<br />
If the volume control is not used<br />
within fi ve seconds, it resumes normal<br />
volume control function.<br />
Playback Control (VCD only)<br />
Playback Control (PBC) playback allows<br />
you to play Video CDs interactively,<br />
following the menu on the display. This<br />
function can also be accessed via the<br />
‘Preference Page’ menu.<br />
For VCDs with Playback Control<br />
(PBC) feature (version 2.0 only)<br />
During playback, press TITLE to<br />
return to the disc title menu or main<br />
menu.<br />
During playback, press DISC MENU to<br />
turn on or off the PBC mode.
Playing a MP3/ WMA disc<br />
This unit can playback most of the MP3<br />
and Windows Media Audio fi les<br />
recorded on a recordable disc or<br />
commercial CD.<br />
Before you start ...<br />
Turn on your TV to the correct Video In<br />
channel. See ‘Finding the correct viewing<br />
channel’ for details.<br />
A Insert a MP3/WMA disc.<br />
The disc reading time may exceed 30<br />
seconds due to the complexity of the<br />
directory/fi le confi guration.<br />
The disc menu appears on the TV.<br />
00:19 04:39 001/003<br />
\MP3_files_128kbs<br />
Previous<br />
Picture 1<br />
Picture 2<br />
MP3 Music 1<br />
MP3 Music 2<br />
050 003 000 USB<br />
B If the disc main menu contains various<br />
folders, use cursor up/down keys to<br />
select a desired folder and press OK to<br />
open the folder.<br />
C Use cursor up/down keys to select a<br />
track/fi le and press OK to start playback.<br />
Playback starts from the selected fi le<br />
and continues through to the end of the<br />
folder.<br />
Disc Operations (continued)<br />
During playback;<br />
Press ./ > to playback another<br />
track/fi le in the current folder.<br />
Press and hold ./ > to fast<br />
reverse/forward search for a music track.<br />
To select another folder from the<br />
current disc, press cursor up key to<br />
return to the root menu.<br />
Press REPEAT/SHUFFLE repeatedly<br />
to access various play modes.<br />
D To stop playback, press x.<br />
Helpful Hints:<br />
– To skip the folders menu when you load a<br />
MP3/JPEG disc, set the MP3/JPEG NAV<br />
setting in the Preference Setup Page to<br />
{ Without Menu }.<br />
– Only the fi rst session of a multi-session CD<br />
will be played back.<br />
– It is normal to experience an occasional<br />
‘skip’ while listening to your MP3/WMA disc<br />
due to poor clarity of digital contents during<br />
internet downloading.<br />
– If any special characters are present in the<br />
MP3 track name (ID3) or album name, it<br />
might not be displayed correctly on the<br />
screen because this unit does not support the<br />
characters.<br />
31<br />
English
English<br />
Disc Operations (continued)<br />
32<br />
Playing a JPEG image fi le<br />
(slide show)<br />
Before you start ...<br />
Turn on your TV to the correct Video In<br />
channel. See ‘Finding the correct viewing<br />
channel’ for details.<br />
Insert a JPEG photo CD (Kodak Picture<br />
CD, JPEG).<br />
For a Kodak disc, the slide show<br />
begins automatically.<br />
For a JPEG disc, the picture menu<br />
appears on the TV. Press u to start the<br />
slide-show playback.<br />
Helpful Hint:<br />
– It may require longer time for this unit to<br />
display the disc content on the TV due to the<br />
large number of songs/pictures compiled into<br />
one disc.<br />
Supported fi le format:<br />
– The fi le extension has to be ‘*.JPG’<br />
and not ‘*.JPEG’.<br />
– This unit can only display digital camera<br />
pictures according to the JPEG-EXIF<br />
format, typically used by almost all digital<br />
cameras. It cannot display Motion JPEG,<br />
progressive JPEG and other JPEG<br />
formats, or pictures in formats other<br />
than JPEG, or sound clips associated with<br />
pictures.<br />
Preview function<br />
A During playback, press x.<br />
12 thumbnail pictures will be displayed<br />
on the TV.<br />
B Press ./ > to display the other<br />
pictures on the previous/next page.<br />
C Use the cursor keys to select one of the<br />
pictures and press OK to start playback.<br />
D Press DISC MENU to return to Picture<br />
CD menu.<br />
Zoom picture<br />
A During playback, press ZOOM<br />
repeatedly to select a different zoom<br />
factor.<br />
B Use the cursor keys to pan through the<br />
zoomed image.<br />
Rotating/fl ipping the picture<br />
During playback, use the cursor keys to<br />
rotate/fl ip the picture on the TV.<br />
– cursor up: fl ip the picture vertically.<br />
– cursor down: fl ip the picture<br />
horizontally.<br />
– cursor left: rotate the picture counterclockwise.<br />
– cursor right: rotate the picture<br />
clockwise.
Playing MP3/WMA music and<br />
JPEG pictures simultaneously<br />
You can create a musical slide show if the<br />
disc contains both the MP3/WMA music<br />
and JPEG picture fi les.<br />
A Insert a MP3/WMA that contains music<br />
and picture folders.<br />
B Select a track in the menu and press u<br />
to start playback.<br />
C During music playback, use the cursor<br />
keys to select a picture folder from the<br />
disc menu and press u.<br />
The picture fi les will be played back<br />
through to the end of the folder.<br />
The music keeps playing back and will<br />
be repeated if reaches the end of the<br />
selected album, playlist or track.<br />
D To stop simultaneous playback, press<br />
DISC MENU followed by x.<br />
Disc Operations (continued)<br />
Playing a DivX disc<br />
This unit supports the playback of DivX<br />
movies which you can copy from your<br />
computer onto a recordable disc. See<br />
‘Setup Menu Options - { General Setup<br />
Page - DivX(R) VOD code }’ for details.<br />
A Insert a DivX disc.<br />
B Use the cursor keys to navigate to the<br />
title you want to play.<br />
C Press u to start playback.<br />
During playback;<br />
If the DivX disc has multilingual subtitles,<br />
you can press SUBTITLE on the<br />
remote control to change the subtitle<br />
language.<br />
If the DivX title has different audio<br />
tracks, you can press AUDIO on the<br />
remote control to change the audio<br />
stream.<br />
Use the cursor left/right keys on the<br />
remote control to perform fast reverse/<br />
forward search.<br />
For DivX Ultra disc only, press<br />
DISPLAY to view the video<br />
information.<br />
Helpful Hints:<br />
– Subtitle fi les with the following fi le name<br />
extensions (.srt, .smi, .sub, .ssa, .ass) are<br />
supported but do not appear on the fi le<br />
navigation menu.<br />
– The subtitle fi le name has to be the same<br />
as the fi le name of the movie.<br />
– The subtitle can only be displayed up to an<br />
average of 45 characters.<br />
33<br />
English
English<br />
Playback - GoGear/iPod<br />
34<br />
Playing music from<br />
compatible GoGear/iPod<br />
devices<br />
(Optional feature - not available in Europe)<br />
Music on your <strong>Philips</strong> GoGear/Apple iPod<br />
can be played on this unit with the<br />
support of <strong>Philips</strong> HTD7001 docking<br />
station (optional feature - available in<br />
selected countries). It enables you to<br />
enjoy superior sound output from the<br />
speaker system.<br />
<strong>Philips</strong> HTD7001 docking station<br />
supports the following GoGear/iPod<br />
range:<br />
GoGear iPod<br />
HDD1420, 1430<br />
HDD1620, 1630, 1635<br />
HDD1820, 1830, 1835<br />
HDD1840, 1850<br />
HDD6320, 6330<br />
60/80GB (video)<br />
40/60GB (color display)<br />
30GB (video)<br />
20/30GB (color display)<br />
Nano<br />
40GB<br />
20GB<br />
MINI 4GB<br />
Before you start ...<br />
Prepare the <strong>Philips</strong> HTD7001 docking<br />
station by attaching the matching dock<br />
adaptor to the correct docking cradle.<br />
Refer to the Docking Station’s user<br />
manual for more information.<br />
<strong>HTS8100</strong><br />
HTD7001<br />
<br />
A Connect the docking station to the<br />
DOCK socket on this unit (as shown in<br />
the above illustration).<br />
B Turn on your GoGear or iPod before<br />
dock it into the correct cradle.<br />
C Press DOCK on the remote control to<br />
switch this unit to DOCK mode.<br />
The display panel shows ‘GOGEAR<br />
DOCKED’ or ‘IPOD DOCKED’ if the<br />
device is detected and supported.<br />
D Start playback on your GoGear/iPod.<br />
Controlling of playback is on the<br />
GoGear/iPod device by default, it is called<br />
‘Simple Control mode’. However, you<br />
can use the remote control of this unit to<br />
control simple playback functions such as<br />
PLAY, PAUSE, OK, STOP, NEXT/FFW<br />
and PREV/REW.<br />
For iPod music playback only, press<br />
DISPLAY on the remote control to<br />
toggle between ‘Simple Control mode’<br />
and ‘Extended Control mode’.<br />
‘Extended Control Mode’<br />
available for iPod music playback only<br />
While in this mode, the control keys on<br />
the iPod have no function. You can view<br />
the music contents on the TV and use<br />
the remote control of this unit to control<br />
and navigate the music playlists/content.<br />
Helpful Hints:<br />
– The <strong>Philips</strong> HTD7001 docking station is<br />
specially designed for use with this unit.<br />
Never try it on other device.<br />
– Photo and video playback from iPod<br />
compatible device is possible if you connect<br />
the video output from the docking station to<br />
your TV. Controlling of playback is only<br />
possible on the iPod.<br />
– Whenever this unit is powered up and the<br />
docking station is connected to it, the battery<br />
of the docked GoGear or iPod will be<br />
charged automatically.
Playing from USB fl ash drive<br />
or USB memory card reader<br />
You can play or view the data fi les (JPEG,<br />
MP3, Windows Media Audio or DivX)<br />
in the USB fl ash drive or USB memory<br />
card reader. However, editing or copying<br />
the data fi le is not possible.<br />
A Connect the USB fl ash drive / USB<br />
memory card reader directly to the USB<br />
socket on this unit.<br />
B A message appears on the TV for 5 (fi ve)<br />
seconds when the device is detected.<br />
Press USB to select device<br />
C Press USB on the remote control to<br />
access the data in the drive.<br />
When using multiple drives on a single<br />
card reader, only one of the connected<br />
cards can be accessed.<br />
The device numbers may vary from<br />
different card readers.<br />
Playback - USB Device<br />
D Select the fi le to play and press u.<br />
For more playback information, see<br />
‘Playing a MP3/WMA disc’, ‘Playing a JPEG<br />
image fi le (slideshow)’ or ‘Playing a DivX<br />
disc’ for details.<br />
E Before removing the USB device, press x<br />
to stop playback or press DISC to<br />
switch to disc mode.<br />
Helpful Hints:<br />
– The USB socket does not support the<br />
connection of other USB devices except to a<br />
USB fl ash drive / USB memory card reader.<br />
– When the USB device does not fi t into the<br />
USB socket, a USB extension cable is<br />
required.<br />
– You can only read and playback the<br />
content from the USB device.<br />
– Copy-protected contents are not playable.<br />
35<br />
English
English<br />
Playback - Other Audio Player<br />
36<br />
Playing from other portable<br />
audio player<br />
When you connect your portable audio<br />
player to this unit to get the best<br />
immersion sound experience through the<br />
speaker system. However, controlling of<br />
playback is only possible on the portable<br />
audio player.<br />
MP3<br />
LINE-IN<br />
A Use the supplied MP3 LINE-IN cable to<br />
connect between the ‘headphone’ output<br />
socket on your portable audio player and<br />
the MP3 LINE-IN socket on this unit.<br />
B Press MP3 LINE-IN on the remote<br />
control.<br />
C Start playback on your portable audio<br />
player.<br />
The music will be heard through the<br />
speakers.<br />
D To stop playback, press the STOP button<br />
on the portable audio player.<br />
Helpful Hint:<br />
– If you change the input source by pressing<br />
any of the source buttons (e.g. DISC, USB,<br />
RADIO), press the STOP button on the<br />
portable audio player to stop its playback.
Accessing the setup menu<br />
This system setup is carried out via the<br />
TV, enabling you to customise this unit to<br />
suit your particular requirements.<br />
SETUP<br />
A In disc mode, press SETUP on the<br />
remote control.<br />
The setup menu appears.<br />
B Use cursor left/right keys to select one of<br />
the setup menu options and press OK.<br />
If you are not able to access the<br />
{ Preference Page }, press SETUP to<br />
exit the menu. Then, press x twice<br />
before you press the SETUP again.<br />
C Use cursor up/down keys to select a<br />
setup option and press cursor right key<br />
to access.<br />
D Select the setting you wish to change and<br />
press OK to confi rm and go back to the<br />
previously selected item.<br />
Instructions and explanations of the<br />
options are provided in the following<br />
pages.<br />
If the option in the menu is greyed<br />
out, that means the setting is not<br />
available or cannot be changed in the<br />
current state.<br />
E To exit, press SETUP.<br />
General Setup Page<br />
Ambisound Setup<br />
Disc Lock<br />
Display Dim<br />
OSD Language<br />
Screen Saver<br />
Sleep<br />
DivX(R) VOD Code<br />
Audio Setup Page<br />
HDMI Audio<br />
Setup Menu Options<br />
Video Setup Page<br />
TV Type<br />
TV Display<br />
Picture Setting<br />
Component<br />
Progressive<br />
Adv Picture<br />
Preference Page<br />
Audio<br />
Subtitle<br />
Disc Menu<br />
Parental<br />
PBC<br />
MP3/JPEG Nav<br />
Password<br />
DivX Subtitle<br />
Default<br />
see page 38<br />
see page 39<br />
see pages<br />
40~42<br />
see pages<br />
43~44<br />
37<br />
English
English<br />
Setup Menu Options (continued)<br />
38<br />
General Setup Page (underlined options are the factory default settings)<br />
Ambisound Setup Access the speaker setup options.<br />
{ Room Acoustics } – Select the type of walls that surround<br />
your room.<br />
{ Room Placement } – Select the placement position.<br />
{ Height } – Select the height where it is placed.<br />
{ Distance } – Select the distance from the listening position.<br />
Disc Lock Not all discs are rated or coded by the disc maker. You can<br />
prevent play of specifi c discs with the disc lock function. Up to 40<br />
discs can be locked.<br />
{ Lock } – To block the playback of the current disc.<br />
Subsequent access to a locked disc requires a<br />
four-digit password. The default password is<br />
‘0000’ (see { Preference Setup Page -<br />
Password }).<br />
{ Unlock } – All discs can be played.<br />
Display Dim Select the brightness of this unit’s display panel.<br />
{ 100% } – Full brightness.<br />
{ 70% } – Medium brightness.<br />
{ 40% } – Dimmest display. This switches off all LEDs and<br />
icons on the front display panel of this unit.<br />
OSD Language Select the menu language for this unit’s on-screen display.<br />
Screen Saver The screen saver prevents damage to the TV screen by avoiding<br />
exposure to a static image for too long.<br />
{ On } – Switch to TV screen saver mode when<br />
playback has been stopped or paused for<br />
more than 15 minutes.<br />
{ Off } – Turn off the screen saver function.<br />
Sleep The sleep timer enables the unit to switch to standby mode<br />
automatically after the selected preset time.<br />
{ 15/30/45/60 mins } – Select the preset minutes for switching<br />
the unit to standby mode automatically.<br />
{ Off } – Turn off the sleep mode function.<br />
DivX(R) VOD Code <strong>Philips</strong> provides you with the DivX® VOD (Video On Demand)<br />
registration code that allows you to rent or purchase videos from<br />
DivX® VOD service at www.divx.com/vod. All the downloaded<br />
videos from DivX® VOD can only be played back on this unit.<br />
Press cursor right key to see the registration code and press OK<br />
to exit.
Audio Setup Page (underlined options are the factory default settings)<br />
HDMI Audio This setting is only required if you are using the HDMI OUT<br />
socket to connect your TV or other display device (see<br />
‘Option 2: Connecting to a HDMI-compatible TV’).<br />
{ Digital Audio }<br />
Setup Menu Options (continued)<br />
{ Off }<br />
Turn off the HDMI audio output. You can still<br />
enjoy sound output via the speaker system.<br />
{ All }<br />
The HDMI audio output will be same as the audio<br />
stream being played back. In the case when the<br />
playback audio format is not supported, the audio<br />
output will be changed to PCM automatically.<br />
{ PCM only }<br />
Downmix the audio signals to linear-PCM (2channel).<br />
Notes:<br />
– It may take a while for this unit and the input device to communicate<br />
and initialise.<br />
– It is not possible to listen to SACDs or copy-controlled <strong>DVD</strong>-Audio<br />
CPPM (Content Protection for Playable Media) sources using the HDMI<br />
connection.<br />
39<br />
English
English<br />
Setup Menu Options (continued)<br />
40<br />
Video Setup Page (underlined options are the factory default settings)<br />
TV Type Select the colour system that matches the connected TV. It<br />
enables playback of a different type of disc (PAL or NTSC disc)<br />
on this unit.<br />
{ PAL } – For PAL-system TV.<br />
{ NTSC } – For NTSC-system TV.<br />
{ Multi } – For TV that is compatible with both PAL and<br />
NTSC.<br />
TV Display The picture shape can be adjusted to fi t your TV.<br />
{ 4:3 Pan Scan } – For a full-height picture with<br />
the sides trimmed.<br />
{ 4:3 Letter Box } – For a ‘wide-screen’ display<br />
with black bars on the top and<br />
bottom.<br />
{ 16:9 Wide Screen } – For wide-screen TV<br />
(frame ratio 16:9).<br />
Picture Setting This unit provides three predefi ned sets of picture colour settings<br />
and one personal setting which you can defi ne yourself.<br />
{ Standard } – Original colour setting.<br />
{ Bright } – Vibrant colour setting.<br />
{ Soft } – Warm colour setting.<br />
{ Personal } – Select this to personalise the picture colour<br />
setting. Use the cursor left/right keys to<br />
adjust to the setting that best suits your<br />
personal preference and press OK to<br />
confi rm. For an average setting, select { 0 }.<br />
Personal Picture Setup<br />
Brightness<br />
Contrast<br />
Tint<br />
Color
Setup Menu Options (continued)<br />
Video Setup Page (underlined options are the factory default settings)<br />
Component Select the type of video output that matches the video<br />
connection between this unit and your TV.<br />
{ YUV } – For component video (Y Pb Pr) connection.<br />
{ RGB } – For SCART connection.<br />
Progressive Before enabling the progressive scan feature, you must ensure that<br />
your TV can accept progressive signals (a progressive scan TV is<br />
required) and that you have connected this unit to your TV using<br />
the Y Pb Pr. See ‘Getting Started - Setting up the progressive scan<br />
feature’ for details.<br />
{ On } – Turn on progressive scan mode.<br />
Read the instructions on the TV and confi rm<br />
your action by pressing OK on the remote<br />
control.<br />
{ Off } – Turn off the progressive scan mode.<br />
Adv Picture It provides the picture settings to enhance the appearance and<br />
picture quality for disc playback.<br />
Note: { DCDi }, {True Life } and { P-Scan Format } settings are only<br />
applicable for Progressive Scan output.<br />
{ DCDi } – Directional Correlation Deinterlacing. It is<br />
known by its smooth video content as it fi lls<br />
the missing lines.<br />
{ On }<br />
Optimise the picture quality signifi cantly, especially<br />
during the slow motion play.<br />
{ Off }<br />
Turn off the DCDi function.<br />
{ Gamma } – Adjust the intensity of the picture nonlinearly<br />
(-7 to +7). A positive value enables<br />
you to bring out low level detail in dark<br />
scenes, while a negative value emphasises<br />
contrast.<br />
{ Chroma Delay } – Adjust the advance delay of chroma signal<br />
to produce a perfect clear picture (-3 to +3).<br />
{ True Life } – Increase the contrast and colour intensity to<br />
produce a more dynamic picture (00 to 05).<br />
41<br />
English
English<br />
Setup Menu Options (continued)<br />
42<br />
Video Setup Page (underlined options are the factory default settings)<br />
Adv Picture continued ...<br />
{ HDMI Video }– Select a suitable video resolution depending<br />
on the capability of the connected TV/device<br />
to further enhance the HDMI video output.<br />
{ 480p }<br />
Progressive output in 480 lines for NTSC TV.<br />
{ 576p }<br />
Progressive output in 576 lines for PAL TV.<br />
{ 720p } - (if a HDMI TV is connected)<br />
Progressive output upscale to 720 lines.<br />
{ 1080i } - (if a HDMI TV is connected)<br />
Interlaced output upscale to 1080 lines.<br />
{ 1080p } - (if a HDMI TV is connected)<br />
Progressive output upscale to 1080 lines.<br />
{ Auto }<br />
The video output automatically follows the<br />
display’s supported resolution.<br />
Note: If no display appears on the TV due to<br />
unsupported resolution, use the Scart cable to<br />
connect this unit and your TV. Turn on your TV<br />
to the correct video input channel and adjust the<br />
resolution setting to 480p/576p.<br />
{ P-Scan Format } – Select a suitable TV screen display format.<br />
Note: This feature is only available if you have selected the { 16:9<br />
Wide Screen } in { TV Display } setup option.<br />
{ Superwide }<br />
Display the 4:3 picture disc on the wide-screen TV<br />
with non-linear stretching (centre position of the<br />
screen is stretched less than the side).<br />
{ 4:3 Pillar Box }<br />
Display the 4:3 picture disc on the wide-screen TV<br />
without stretching. Black bars will be shown on<br />
the both sides of the TV screen.<br />
{ Off }<br />
No aspect ratio adjustment is made when this<br />
option is selected.<br />
Note: The { Superwide } is only applicable for<br />
resolution: 720p, 1080i or 1080p.
Setup Menu Options (continued)<br />
Preference Setup Page (underlined options are the factory default settings)<br />
Audio Select the preferred audio language for <strong>DVD</strong>s with multiple<br />
sound tracks or VCDs with multiple audio channels.<br />
Subtitle Select the preferred subtitle language for <strong>DVD</strong> playback.<br />
Disc Menu Select the preferred disc menu language for <strong>DVD</strong> playback.<br />
Note: If the selected audio/subtitle/disc menu language is not available on<br />
the <strong>DVD</strong>, the disc’s default language will be used instead.<br />
Parental This is to prohibit viewing of discs that had exceeded the limits<br />
you set. It works only on the <strong>DVD</strong>s with parental level assigned<br />
to the complete disc or to certain scenes on the disc.<br />
1) Use cursor up/down keys to select a rating level from 1 to 8 and<br />
press OK.<br />
2) Use the numeric keypad 0-9 on the remote control to enter your<br />
four-digit password.<br />
Notes:<br />
– The ratings are country-dependent (‘1’ is considered material that is<br />
least offensive and ‘8’ is most offensive). To disable parental controls and<br />
allow all discs to play, select ‘8’.<br />
– Some <strong>DVD</strong>s are not encoded with a rating though the movie rating<br />
may be printed on the disc cover. The rating level feature does not<br />
prohibit playback of such discs. VCD, SVCD and CD have no level<br />
indication, so parental control has no effect on these type of discs.<br />
– <strong>DVD</strong>s that are rated higher than the level you selected will not be<br />
played unless you enter the same four-digit password.<br />
PBC Play Back Control feature is applicable for VCD/SVCD only. It<br />
allows you to play Video CDs (2.0) interactively, following the<br />
menu on the display.<br />
{ On } – The index menu (if available) appears on the<br />
TV when you load a VCD/SVCD.<br />
{ Off } – The VCD/SVCD skips the index menu and<br />
playback directly from the beginning.<br />
MP3/JPEG Nav MP3/JPEG Navigator can only be set if the disc is recorded with a<br />
menu. It allows you to select different display menus for easy<br />
navigation.<br />
{ Without Menu } – Display all the fi les contained in the MP3/<br />
Picture disc.<br />
{ With Menu } – Display the folder menu of the MP3/Picture<br />
disc.<br />
Note: This unit can only display 650 fi les/folder in the directory.<br />
43<br />
English
English<br />
Setup Menu Options (continued)<br />
44<br />
Preference Setup Page (underlined options are the factory default settings)<br />
Password The password is used for the Disc Lock and Parental. The default<br />
password is ‘0000’. To change the password:<br />
1) Press OK to access the change password menu.<br />
Change Password<br />
Old Password<br />
New Password<br />
Confirm PWD<br />
2) Use the numeric keypad 0-9 on the remote control to<br />
enter your existing four-digit password at { Old Password }.<br />
Note: When doing this for the fi rst time or if you forget your existing<br />
password, key in ‘0000’.<br />
3) Enter the new four-digit password at { New Password }.<br />
4) Enter the new four-digit password again at { Confi rm PWD }.<br />
5) Press OK to confi rm and exit the menu.<br />
DivX Subtitle Select the font type that supports the recorded DivX subtitle.<br />
{ Standard } – Display a standard list of Roman subtitle fonts<br />
provided by this unit.<br />
{ Central Europe } – Display Central Europe fonts.<br />
{ Cyrillic } – Display Cyrillic fonts.<br />
Default This feature enables you to reset all the setup menu options and<br />
your personal settings to the factory defaults, except your<br />
password for the Disc Lock and Parental.<br />
Press OK to confi rm the default reset.<br />
OK
Before you start ...<br />
Make sure the FM and AM/MW antennas<br />
are connected.<br />
Tuning to radio stations<br />
A Press SOURCE repeatedly until ‘RADIO<br />
FM’ appears on the display panel (or<br />
press RADIO on the remote control).<br />
B Press cursor left/right keys briefl y on the<br />
remote control to start tuning.<br />
‘SEARCH > or
English<br />
<strong>Radio</strong> Operations (continued)<br />
B Press u.<br />
This unit starts searching from the FM<br />
band followed by the AM band.<br />
All the available radio stations with<br />
strong signal will be stored automatically.<br />
Once complete, the fi rst tuned radio<br />
station will be played back.<br />
46<br />
Using automatic preset<br />
Use automatic presetting to store or<br />
reinstall all the preset radio stations.<br />
AMBISOUND<br />
RADIO<br />
SELECT/<br />
PROGRAM<br />
A Press RADIO to select ‘FM’ or ‘AM’<br />
band.<br />
B Press and hold SELECT/PROGRAM<br />
until ‘INSTALLN IN PROG’ appears on<br />
the display panel.<br />
All previously stored radio stations<br />
will be replaced.<br />
Using manual preset<br />
Use manual presetting to store your<br />
favourite radio stations.<br />
A Tune to your desired radio station (see<br />
‘Tuning to radio stations’).<br />
B Press SELECT/PROGRAM.<br />
C Use ./ > keys to select a preset<br />
number that you want to store the<br />
current radio station.<br />
D Press SELECT/PROGRAM to store.<br />
Selecting a preset radio<br />
station<br />
A Press RADIO to select ‘FM’ or ‘AM’<br />
band.<br />
B Use ./ > keys to select a preset<br />
number (or use the numeric keypad on<br />
the remote control).<br />
The waveband, preset number<br />
followed by the radio frequency appear<br />
on the display panel.<br />
Deleting a preset radio<br />
station<br />
A In radio mode, use ./ > keys to<br />
select a preset radio station.<br />
B Press and hold x until ‘FM/AM X<br />
DELETED’ appears.<br />
‘X’ is the preset number.<br />
The radio station continues to play<br />
but has been deleted from the preset list.<br />
The rest of the preset radio stations<br />
remain unchanged.
Volume control<br />
Press VOL +/- to increase or<br />
decrease the volume level.<br />
‘VOLUME MIN’ is the minimum<br />
volume level and ‘VOLUME MAX’ is the<br />
maximum volume level.<br />
To turn off the volume temporarily<br />
Press MUTE.<br />
Playback continues without sound and<br />
‘VOLUME MUTED’ appears.<br />
To restore the volume, press MUTE<br />
again, or increase the volume level.<br />
Adjusting the Bass/ Treble level<br />
The BASS (low tone) and TREBLE (high<br />
tone) features enable you to defi ne the<br />
sound processor settings.<br />
A Press TREBLE/BASS to toggle between<br />
Treble and Bass mode.<br />
B Within fi ve seconds, use the VOL +-<br />
to adjust the Treble or Bass level.<br />
If the volume control is not used<br />
within fi ve seconds, it resume normal<br />
volume control function.<br />
Selecting surround sound<br />
Press AMBISOUND to select between<br />
Auto, Multi-channel or Stereo sound.<br />
‘Auto’ is the default surround setting<br />
(recommended). Multi-channel or Stereo<br />
will be selected based on the audio<br />
stream of the played content.<br />
The available output modes for Multichannel<br />
include: Dolby Digital, DTS<br />
(Digital <strong>Theater</strong> <strong>System</strong>s) Surround and<br />
Dolby Pro Logic II.<br />
Sound and Volume Controls<br />
Selecting digital sound effects<br />
Select a preset digital sound effect that<br />
matches your disc’s content or that<br />
optimizes the sound of the musical style<br />
you are playing.<br />
Press SOUND to select the available<br />
sound effect.<br />
Movies Music Description<br />
ACTION ROCK Enhanced low and high range<br />
for great sounding movie<br />
effects and atmosphere.<br />
Great for action movies and<br />
rock/pop music.<br />
DRAMA JAZZ Clear mid and high range.<br />
Recreates the atmosphere of<br />
a live club with the artist just<br />
in front of you. Good for Jazz<br />
music and watching dramas.<br />
GAMING PARTY Slightly enhanced low range<br />
and strong mid range ideal for<br />
party music and video gaming.<br />
CONCERT CLASSIC Flat and pure sound mode.<br />
Ideal for listening to classical<br />
music and watching live<br />
concert <strong>DVD</strong>s.<br />
MTV RnB Enhanced low and mid range<br />
for groovy and punchy<br />
sounds. Suitable for R&B, Hip<br />
Hop and MTV videos.<br />
CARTOONS LOUNGE Moderate sound mode<br />
suitable for lounge music and<br />
watching cartoons.<br />
SPORTS SPORTS Moderate mid range and<br />
surround effects for clear<br />
vocals and the atmosphere of<br />
a live sports venue.<br />
NEWS NEWS Enhanced mid range for clear<br />
vocals/speech.<br />
47<br />
English
English<br />
Other Features<br />
48<br />
Installing the latest software<br />
Periodically <strong>Philips</strong> will issue software<br />
upgrades to enhance the user experience.<br />
A Get the software version of this unit by<br />
pressing OPEN/CLOSE ç to open the<br />
disc compartment<br />
B Press DISPLAY on the remote control.<br />
Write down the information for your<br />
current software version.<br />
C Visit the <strong>Philips</strong> website ‘www.philips.<br />
com/support’ to check the availability of<br />
the latest software upgrade and download<br />
the software to a CD-R.<br />
D Insert the CD-R to the disc tray.<br />
The software starts to install on this<br />
unit automatically.<br />
Note:<br />
Never unplug or turn off this unit<br />
during the upgrade.<br />
E When the disc compartment opens,<br />
remove the CD-R.<br />
The software upgrading is in process.<br />
Leave the disc compartment open.<br />
F Wait until the disc compartment closes<br />
automatically, you can now power off and<br />
on the unit.
Troubleshooting<br />
WARNING<br />
Under no circumstances should you try to repair this unit yourself, as this will<br />
invalidate the warranty. Do not open this unit as there is a risk of electric shock.<br />
If a fault occurs, fi rst check the points listed below before taking this unit for repair. If<br />
you are unable to solve a problem by following these instructions, consult your dealer or<br />
<strong>Philips</strong> for help.<br />
Problem (General) Solution<br />
No power.<br />
– Press STANDBY-ON on the unit to turn on the<br />
power.<br />
– Ensure that the interconnect cable between the<br />
subwoofer and main unit are connected.<br />
No picture.<br />
Completely distorted picture<br />
or black/white picture.<br />
No sound or distorted sound.<br />
No surround sound effect<br />
from the speakers.<br />
The remote control does not<br />
function properly.<br />
– Refer to your TVs manual for correct Video In<br />
channel selection. Change the TV channel until you<br />
see the blue <strong>DVD</strong> screen.<br />
– Press DISC to select disc mode.<br />
– If this happens when you turn on the progressive scan<br />
feature or change the HDMI video setting, wait for 15<br />
seconds for the auto recovery or switch back to the<br />
default mode as below:<br />
1) Press OPEN/CLOSE to open the disc compartment.<br />
2) Press cursor left key on the remote control.<br />
3) Press AUDIO on the remote control.<br />
– Check the video connection.<br />
– Sometimes a small amount of picture distortion may<br />
appear. This is not a malfunction.<br />
– The disc is dirty. Clean the disc.<br />
– Adjust the volume.<br />
– Check the speaker connections and settings.<br />
– Make sure that the audio cables are connected and<br />
press SOURCE to select the correct input source (for<br />
example, TV or AUX) to choose the device that you<br />
want to hear through this unit.<br />
– Press AMBISOUND to select a correct surround<br />
sound setting.<br />
– Make sure that the source you are playing is recorded<br />
or broadcast in surround sound (DTS, Dolby Digital,<br />
etc.).<br />
– Select the source you want to play (for example,<br />
DISC or RADIO) before pressing the function button<br />
(, ./ >).<br />
– Reduce the distance between the remote control and<br />
this unit.<br />
– Batteries are weak, replace the batteries.<br />
49<br />
English
English<br />
Troubleshooting (continued)<br />
Problem (Playback) Solution<br />
This unit does not start<br />
playback.<br />
The aspect ratio of the screen<br />
cannot be changed even though<br />
you have set the TV display.<br />
Cannot activate some features<br />
such as Angles, Subtitles, or<br />
multi-language Audio.<br />
Not able to select some items<br />
in the setup/system menu.<br />
Unable to play DivX movies.<br />
<strong>Radio</strong> reception is poor.<br />
This unit does not work.<br />
50<br />
– Insert a readable disc with the playback side facing<br />
inwards. The <strong>DVD</strong>+R/CD-R must be fi nalised.<br />
– Make sure the disc is not scratched or warped.<br />
– Press SETUP to turn off the system setup menu<br />
screen.<br />
– You may need to enter the password in order to<br />
unlock the disc for playback.<br />
– Moisture may have condensed inside this unit.<br />
Remove the disc and leave this unit turned on for<br />
about an hour.<br />
– The aspect ratio is fi xed on the <strong>DVD</strong> disc.<br />
– Depending on the TV, it may not be possible to<br />
change the aspect ratio.<br />
– The features may not be available on the <strong>DVD</strong>.<br />
– Changing the language for the sound or subtitle is<br />
prohibited on this <strong>DVD</strong>.<br />
– Press STOP button twice before selecting the system<br />
setup menu.<br />
– Depending on the disc availability, some menu items<br />
cannot be selected.<br />
– Ensure that the DivX fi le is encoded according to the<br />
‘<strong>Home</strong> Theatre Profi le’ with the DivX encoder.<br />
– Check that the DivX movie downloaded is a complete<br />
fi le.<br />
– If the signal is too weak, adjust the antenna or<br />
connect an external antenna for better reception.<br />
– Increase the distance between this unit and your TV<br />
or VCR.<br />
– Tune in to the correct frequency.<br />
– Place the antenna further away from any equipment<br />
that may be causing the interference.<br />
– Disconnect the power cord from the power outlet<br />
for a few minutes. Reconnect the power cord and try<br />
to operate again as usual.<br />
– Ensure that the interconnect cable between the<br />
subwoofer and main unit are connected.
Problem (USB/HDMI/Dock Station) Solution<br />
The contents of the USB fl ash<br />
drive cannot be read.<br />
Slow operation of the USB<br />
fl ash drive.<br />
No audio output from HDMI<br />
connection.<br />
No video output from HDMI<br />
connection.<br />
No picture after changing the<br />
HDMI video resolution.<br />
No video from iPod playback.<br />
‘NONE DOCKED’ appears on<br />
the display panel.<br />
Troubleshooting (continued)<br />
– The USB fl ash drive format is not compatible with this<br />
unit.<br />
– Drive is formatted with a different fi le system which is<br />
not supported by this unit (e.g. NTFS).<br />
– Large fi le size or high memory USB fl ash drive takes<br />
longer time to read and display on the TV.<br />
– You will not hear any sound from the HDMI output if<br />
the source device is only DVI/HDCP (High-bandwidth<br />
Digital Content Protection)-compatible.<br />
– It is not possible to output SACD or copy-controlled<br />
<strong>DVD</strong>-Audio sources from the HDMI connection.<br />
– Make sure that the audio output setting is not turned<br />
off. See ‘Setup Menu Options - { Audio Setup Page -<br />
HDMI Audio }’ for details.<br />
– HDMI connection can only be made to HDMIequipped<br />
devices with HDCP (High Bandwidth Digital<br />
Content Protection). If you wish to connect to a DVI<br />
connector (equipped with HDCP), you will need a<br />
separate adaptor (DVI to HDMI).<br />
– Make sure the resolution of this unit matches the<br />
device you have connected using the HDMI. See<br />
‘Setup Menu Options - { Video Setup Page - HDMI<br />
Setup - HDMI Video }’ for details.<br />
– Your TV cannot support the current HDMI video<br />
resolution. Switch the HDMI video resolution to the<br />
next setting by holding down the SELECT/PROGRAM<br />
on the remote control for more than 3 seconds<br />
repeatedly until the picture appears on the TV again.<br />
– Make sure you have connected the 3.5mm video cable<br />
from the docking station to your TV. Turn on your<br />
TV to the correct video input channel.<br />
– Turn on the ‘TV ON’ setting of the iPod.<br />
– Remove the GoGear/iPod from the docking cradle<br />
and reinsert again.<br />
– If the battery level of your GoGear/iPod is totally<br />
drained, you have to charge it again before use.<br />
51<br />
English
English<br />
Frequently Asked Questions (USB)<br />
Why does it take so long to display the<br />
contents on my USB device?<br />
– This could be due to the large numbers<br />
of fi les (>500 fi les/folders) or size of the<br />
fi les (>1MB).<br />
– There could be other non-supported fi les<br />
in the device that this unit is trying to<br />
read/display.<br />
What if unsupported devices (e.g. USB<br />
mouse, keyboards) are plugged into<br />
the unit?<br />
The device may cause this unit to be<br />
unstable. Remove the unsupported device<br />
and unplug the mains cord. Wait for a few<br />
minutes before reconnecting the mains cord<br />
and power on this unit again.<br />
What happens when I plug in a USB<br />
HDD?<br />
HDD is not supported as the large storage<br />
capacity makes navigation very diffi cult.<br />
Transfer the music fi les (mp3) and photos<br />
(jpg) into a fl ash drive.<br />
Why does this unit fail to detect my<br />
USB portable music player?<br />
The portable music player may require<br />
propriety software that is bundled with our<br />
system in order to access the contents (eg.<br />
playlist. MTP class not supported, only can<br />
support mass storage class devices.<br />
What types of fi le does this unit<br />
support?<br />
We support only FAT16 and FAT32, not<br />
NTFS.<br />
52<br />
Why does the fi le name appear to be<br />
different from what was displayed on my<br />
computer (e.g. from “Good Bye. jpg” to<br />
“Good_B~1.jpg”)?<br />
– The length of the fi le name is restricted<br />
by the fi le system of the device (FAT16),<br />
which only supports eight (8) characters.<br />
– The computer may be able to display the<br />
full fi le name as the operating system can<br />
convert the fi le system.<br />
Is simultaneous USB and Disc playback<br />
possible?<br />
This is not possible due to memory<br />
limitation. In addition, a different user<br />
interface will be needed in order to function<br />
and in order to be simple enough to use.<br />
Why can’t I rotate the pictures in my<br />
device?<br />
In order to rotate the pictures in the USB<br />
device, the picture must contain EXIF<br />
information, stored by most digital cameras.<br />
This EXIF information may have been<br />
removed when you edit or copy the picture<br />
from other devices using editing<br />
programmes.<br />
Why can’t this unit play some of my<br />
music fi les, photos or movies?<br />
The music fi les may not be playable because<br />
of different formats and encoding bit-rates.<br />
Similarly, the photos may be of low<br />
resolution or too high resolution for this unit<br />
to support.
AMPLIFIER<br />
Frequency Response: 20 Hz – 20 kHz / –3 dB<br />
Signal-to-Noise Ratio: > 65 dB (CCIR)<br />
Input Sensitivity<br />
- AUX 1&2 In: 1000 mV<br />
- TV 1&2 In: 500 mV<br />
- Digital In: 500 mV<br />
- MP3 Line In: 250 mV<br />
* (1% THD 1kHz)<br />
RADIO<br />
Tuning Range: FM 87.5–108 MHz (50 kHz)<br />
MW 531–1602 kHz (9 kHz)<br />
26 dB Quieting<br />
Sensitivity: FM 20 dBf, MW 4μV/m<br />
Image Rejection <strong>Radio</strong>:FM 25 dB, MW 28 dB<br />
IF Rejection Ratio: FM 60 dB, MW 45 dB<br />
Signal-to-Noise Ratio: FM 60 dB, MW 40 dB<br />
MW Suppression Ratio: FM 30 dB<br />
Harmonic Distortion: FM Mono 3%<br />
FM Stereo 3%<br />
MW 5%<br />
Frequency Response FM 180 Hz–10 kHz / ±6 dB<br />
Stereo Separation FM 26 dB (1 kHz)<br />
Stereo Threshold FM 23.5 dB<br />
DISC<br />
Laser Type Semiconductor<br />
Disc Diametre 12cm / 8cm<br />
Video Decoding MPEG-1 / MPEG-2 /<br />
/ DivX 3/4/5/6, Ultra<br />
Video DAC 12 Bits<br />
Signal <strong>System</strong> PAL / NTSC<br />
Video Format 4:3 / 16:9<br />
Video S/N 56 dB (minimum)<br />
Component Video Output<br />
(Y)1.0 Vp-p, 75Ω<br />
(Pb) 0.7 Vp-p, 75Ω<br />
(Pr) 0.7 Vp-p, 75Ω<br />
Audio DAC 24 Bits / 192 kHz<br />
Frequency Response 4 Hz–20 kHz (44.1 kHz)<br />
4 Hz–22 kHz (48 kHz)<br />
4 Hz–44 kHz (96 kHz)<br />
PCM IEC 60958<br />
Dolby Digital IEC 60958, IEC 61937<br />
DTS IEC 60958, IEC 61937<br />
Specifi cations<br />
MAIN UNIT<br />
Dimensions: 935 x 146 x 136 (mm)<br />
(w x h x d)<br />
Weight: 7.2 kg<br />
Speaker system<br />
Centre Speaker<br />
Closed-box system<br />
Speaker Impedance: 4ohm<br />
Speaker drivers: 2 x 2.5” woofer + 2 x 25mm<br />
soft dome tweeter<br />
Frequency response: 200 Hz - 20 kHz<br />
Left/Right Surround Speakers<br />
Speaker Impedance: 6ohm<br />
Speaker drivers: 2 x 2.5” full-range speaker<br />
Frequency response: 200 Hz - 20 kHz<br />
SUBWOOFER<br />
Power Supply Rating: 220–240 V; 50-60 Hz<br />
Power Consumption: 120 W<br />
Low Standby power: < 0.6 W<br />
<strong>System</strong>: Bass Refl ex <strong>System</strong><br />
Impedance: 4 Ω<br />
Speaker drivers: 165 mm (6 ½”) woofer<br />
Frequency response: 35 Hz – 200 Hz<br />
Dimensions: 295 x 470 x 295 (mm)<br />
(w x h x d)<br />
Weight: 11.2 kg<br />
Specifi cations subject to change without prior<br />
notice.<br />
53<br />
English
English<br />
Glossary<br />
Analogue audio: Sound that has not been<br />
turned into numbers. Analogue sound is<br />
available with you use the AUDIO LEFT/<br />
RIGHT. These red and white sockets send<br />
audio through two channels, the left and<br />
right.<br />
Aspect ratio: Aspect ratio refers to the<br />
length to height ratio of TV screens. The<br />
ratio of a standard TV is 4:3, while the ratio<br />
of a high-defi nition or wide TV is 16:9. The<br />
letter box allows you to enjoy a picture with<br />
a wider perspective on a standard 4:3 screen.<br />
AUDIO OUT sockets: Red and white<br />
sockets on the back of the unit that send<br />
audio to another system (TV, Stereo, etc.).<br />
Bit Rate: The amount of data used to hold<br />
a given length of music; measured in kilobits<br />
per second, or kbps. Or, the speed at which<br />
you record. Generally, the higher the bit<br />
rate, or the higher the recording speed, the<br />
better the sound quality. However, higher bit<br />
rates use more space on a disc.<br />
Chapter: Sections of a picture or a music<br />
piece on a <strong>DVD</strong> that are smaller than titles.<br />
A title is composed of several chapters. Each<br />
chapter is assigned a chapter number<br />
enabling you to locate the chapter you want.<br />
Disc menu: A screen display prepared for<br />
allowing a selection of images, sounds,<br />
subtitles, multi-angles, etc., recorded on a<br />
<strong>DVD</strong>.<br />
DivX: The DivX code is a patent-pending,<br />
MPEG-4 based video compression<br />
technology, developed by DivX Networks,<br />
Inc., that can shrink digital video to sizes<br />
small enough to be transported over the<br />
internet, while maintaining high visual quality.<br />
54<br />
Dolby Digital: A surround sound system<br />
developed by Dolby Laboratories containing<br />
up to six channels of digital audio (front left<br />
and right, surround left and right, centre and<br />
subwoofer).<br />
Dolby Surround Pro Logic II: It is an<br />
improved matrix decoding technology that<br />
provides better spatiality and directionality<br />
on Dolby Surround programme material,<br />
provides a convincing three dimensional<br />
sound fi eld on conventional stereo music<br />
recordings and is ideally suited to bring the<br />
surround experience to automotive sound.<br />
While conventional surround programming<br />
is fully compatible with Dolby Surround Pro<br />
Logic II decoders, soundtracks will be able to<br />
be encoded specifi cally to take full advantage<br />
of Pro Logic II playback, including separate<br />
left and right surround channels. (Such<br />
material is also compatible with conventional<br />
Pro Logic decoders).<br />
DTS: Digital Theatre <strong>System</strong>s. This is a<br />
surround sound system, but it is different<br />
from the Dolby Digital. The formats were<br />
developed by different companies.<br />
HDMI: High-Defi nition Multimedia<br />
Interface (HDMI) is a high-speed digital<br />
interface that can transmit uncompressed<br />
high defi nition video and digital multichannel<br />
audio. It delivers perfect picture and sound<br />
quality, completely free from noise. HDMI is<br />
fully backward-compatible with DVI.<br />
As required by the HDMI standard,<br />
connecting to HDMI or DVI products<br />
without HDCP (High-bandwidth Digital<br />
Content Protection) will result in no Video<br />
or Audio output.<br />
HDCP (High-bandwidth Digital Content<br />
Protection) is a specifi cation that provides a<br />
secure transmission of digital contents<br />
between different devices (to prevent<br />
unauthorised copyright).
JPEG: A very common digital still picture<br />
format. A still-picture data compression<br />
system proposed by the Joint Photographic<br />
Expert Group, which features small decrease<br />
in image quality in spite of its high<br />
compression ratio. Files are recognised by<br />
their fi le extension ‘JPG or JPEG’.<br />
MP3: A fi le format with a sound data<br />
compression system. ‘MP3’ is the<br />
abbreviation of Motion Picture Experts<br />
Group 1 (or MPEG-1) Audio Layer3. By<br />
using the MP3 format, one CD-R or CD-RW<br />
can contain about 10 times more data than a<br />
regular CD.<br />
MPEG: Motion Picture Experts Group. A<br />
collection of compression systems for digital<br />
audio and video.<br />
Multi-channel: <strong>DVD</strong>s are formatted to<br />
have each sound track constitute one sound<br />
fi eld. Multi-channel refers to a structure of<br />
sound tracks having three or more channels.<br />
PBC: Playback Control. A system of<br />
navigating a Video CD/Super VCD through<br />
on-screen menus recorded onto the disc.<br />
You can enjoy interactive playback and<br />
searching.<br />
Progressive Scan: The progressive scan<br />
displays twice the number of frames per<br />
second than in an ordinary TV system. It<br />
offers higher picture resolution and quality.<br />
Region code: A system allowing discs to be<br />
played only in the region designated. This<br />
unit will only play discs that have compatible<br />
region codes. You can fi nd the region code<br />
of your unit by looking at the product label.<br />
Some discs are compatible with more than<br />
one region (or ALL regions).<br />
Glossary (continued)<br />
Surround: A system for creating realistic<br />
three dimensional sound fi elds full of realism<br />
by arranging multiple speakers around the<br />
listener.<br />
Title: The longest section of a movie or<br />
music feature on <strong>DVD</strong>. Each title is assigned<br />
a title number, enabling you to locate the<br />
title you want.<br />
WMA: Windows Media Audio. Refers to<br />
an audio compression technology developed<br />
by Microsoft Corporation. WMA data can be<br />
encoded by using Windows Media Player<br />
version 9 or Windows Media Player for<br />
Windows XP. Files are recognised by their<br />
fi le extension ‘WMA’.<br />
55<br />
English