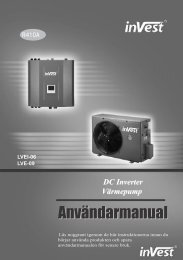
BRUKSANVISNING VÄRMEPUMP MSR3-12 - Byggmax
BRUKSANVISNING VÄRMEPUMP MSR3-12 - Byggmax
BRUKSANVISNING VÄRMEPUMP MSR3-12 - Byggmax
Create successful ePaper yourself
Turn your PDF publications into a flip-book with our unique Google optimized e-Paper software.
Selecting installation place<br />
Read completely, then follow step by step.<br />
Indoor unit<br />
Do not expose the indoor unit to heat or steam.<br />
Select a place where there are no obstacles<br />
in front or around the unit.<br />
Make sure that condensation drainage can<br />
be conveniently routed away.<br />
Do not install near a doorway.<br />
Ensure that the space on the left and right<br />
Fig.1<br />
of the unit is more than <strong>12</strong>cm.<br />
Use a stud finder to locate studs to prevent unnecessary damage to the wall.<br />
The indoor unit should be installed on the wall at a height of 2.3 metres or more from the floor.<br />
The indoor unit should be installed allowing a minimum clearance of 15cm from the ceiling.<br />
Any variations in pipe length will/may require adjustment to refrigerant charge.<br />
There should not be any direct sunlight. Otherwise, the sun will fade the plastic cabinet<br />
and affect its appearance. If unavoidable, sunlight prevention should be taken into<br />
consideration.<br />
Outdoor unit<br />
If an awning is built over the outdoor unit to<br />
prevent direct sunlight or rain exposure,<br />
make sure that heat radiation from the<br />
condenser is not restricted.<br />
Ensure that the clearance around the back<br />
of the unit is more than 30cm and left side is<br />
more than 30cm . The front of the unit should<br />
have more than 200cm of clearance and the<br />
connection side (right side) should have more<br />
than 60cm of clearance.<br />
Fig.2<br />
Do not place animals and plants in the path of the air inlet or outlet.<br />
Take the air conditioner weight into account and select a place where noise and vibration<br />
will not be an issue.<br />
Select a place so that the warm air and noise from the air conditioner do not disturb neighbors.<br />
Rooftop installation:<br />
If the outdoor unit is installed on a roof structure, be sure to level the unit.<br />
Ensure the roof structure and anchoring method are adequate for the unit location.<br />
Consult local codes regarding rooftop mounting.<br />
If the outdoor unit is installed on roof structures or external walls, this may result in excessive<br />
noise and vibration, and may also be classed as a non serviceable installation.<br />
Tools needed for installation:<br />
Level gauge<br />
Screwdriver<br />
Electric drill,Hole core drill ( ¦ 65mm)<br />
Flaring tool set<br />
Specified torque wrenches: 1.8kgf.m,<br />
4.2kgf.m, 5.5kgf.m, 6.6kgf.m<br />
(different depending on model No.)<br />
Spanner (half union)<br />
3<br />
INSTALLATION INSTRUCTIONS<br />
More than <strong>12</strong>cm<br />
More than30cm<br />
More than 200cm<br />
More than 15cm<br />
More than 2.3m<br />
Hexagonal wrench (4mm)<br />
Gas-leak detector<br />
Vacuum pump<br />
Gauge manifold<br />
Users manual<br />
Thermometer<br />
Multimeter<br />
Pipe cutter<br />
Measuring tape<br />
More than <strong>12</strong>cm<br />
More than30cm<br />
More than 60cm


