CONTEGA EXO application guide (PDF) - Four Seven Five, High ...
CONTEGA EXO application guide (PDF) - Four Seven Five, High ...
CONTEGA EXO application guide (PDF) - Four Seven Five, High ...

Create successful ePaper yourself
Turn your PDF publications into a flip-book with our unique Google optimized e-Paper software.
WHAT HAT FOR?<br />
For exterior windproof sealing of thermally insulated joints when<br />
installing windows and doors. In combination with <strong>CONTEGA</strong> FC<br />
or <strong>CONTEGA</strong> SL also suitable for sealing joints in masonry and<br />
timber construction in accordance with the high quality standard<br />
of the Germany RAL recommendations.<br />
If the window is already in place, <strong>EXO</strong> is applied on the<br />
cladding frame.<br />
Sticking to the reveal<br />
4<br />
Remove the second strip of release fi lm on the smooth<br />
side of the membrane and stick the tape all the way<br />
around the reveal.<br />
<strong>EXO</strong> has already been stuck to the sides of the cladding<br />
frame, e.g. by the window manufacturer.<br />
WHAT ON<br />
A permanent bond is achieved on all pro clima roof lining and<br />
wall lining membranes, planed and painted wood, high density<br />
plastic, metal or hardboard (chipboard, OSB and veneer plywood<br />
and MDF board).<br />
Application Guide<br />
pro clima exterior connection tape<br />
Removing the inner layer of release fi lm<br />
Pull off one strip of release fi lm on the membrane side<br />
(smooth side).<br />
Pressing fi rmly to secure the tape<br />
Press fi rmly to secure the tape to the reveal and the<br />
window frame, for example using a pro clima PRESSFIX<br />
to do the job effectively and to protect your hands.<br />
Folding the corner<br />
Fold the tape in the corners then remove the release<br />
fi lm in the corners and tape one side of the tape to the<br />
other, making sure that there are no folds or creases<br />
to ensure a wind-tight bond around the entire window<br />
frame.<br />
<strong>CONTEGA</strong> <strong>EXO</strong><br />
Sticking to the cladding frame<br />
Position the full width of the tape on the cladding<br />
frame and stick down the fi rst side of the jamb.<br />
Sticking the ends<br />
Partially remove the outermost strip of release fi lm<br />
on the membrane side. <strong>CONTEGA</strong> HF does not stick<br />
to the release fi lm! Apply a bead of <strong>CONTEGA</strong> HF<br />
joint adhesive approx. 3/16”/5 mm thick between the<br />
overlapping ends of the tape.<br />
Sticking to the reveal<br />
Remove the release fi lm on the smooth side of the<br />
membrane and stick the tape all the way around the<br />
reveal so that it forms a rainproof and wind-tight bond.<br />
Press fi rmly to secure the tape.<br />
Suitable for universal use in<br />
masonry and timber construction<br />
ADVANTAGES<br />
Vapour permeable sealing of outdoor window and door joints<br />
Monolithic TEEE functional membrane - active moisture<br />
transport<br />
RAL-compliant in combination with <strong>CONTEGA</strong> FC/SL indoors<br />
Can be plastered over on the fl eece side<br />
With three adhesive tapes it is very versatile in timber and<br />
masonry construction<br />
SEE OVER FOR FURTHER DETAILS >><br />
Situation A Timber construction, window is already in place, <strong>EXO</strong> is being added subsequently<br />
Situation B<br />
1<br />
5<br />
Folding the corner<br />
Fold the tape in the corners, making sure that there are<br />
no folds or creases to ensure a wind-tight bond around<br />
the entire window frame, then continue sticking it to<br />
the straight section of the cladding frame. At the end,<br />
cut the tape o leaving an overlap of approx. 2”/5 cm.<br />
Sticking the ends<br />
Press the joint fi rmly together for a wind tight seal.<br />
Timber construction, <strong>EXO</strong> is adhered to the sides of the frame before win. installation<br />
1<br />
2<br />
6<br />
2<br />
3<br />
7<br />
Sticking the ends<br />
3<br />
Apply a bead of <strong>CONTEGA</strong> HF joint adhesive approx.<br />
3/16”/ 5 mm thick between the overlapping ends of<br />
the tape. Press the tape into the adhesive.
… Continued: Application Guide for<br />
If the window is already in place, <strong>EXO</strong> is applied on the<br />
cladding frame.<br />
Applying adhesive to the entire surface<br />
4<br />
Apply a bead of <strong>CONTEGA</strong> HF joint adhesive to the<br />
window jamb in a zig-zag pattern.<br />
<strong>EXO</strong> has already been stuck to the sides of the window<br />
frame, e.g. by the window manufacturer.<br />
Laying the tape into the adhesive<br />
4<br />
Lay the tape into the adhesive.<br />
Situation C<br />
Situation D<br />
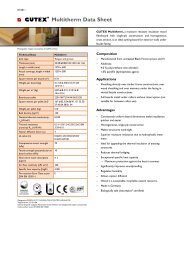
COMPOSITION<br />
<strong>CONTEGA</strong> <strong>EXO</strong> consists of a double-layer specialist<br />
membrane made from PP fl eece and TEEE functional fi lm.<br />
The integrated adhesive tape is made from pure acrylate<br />
that is waterproof non-ageing and free of solvents or<br />
Sticking to the window frame<br />
1<br />
www.proclima.com<br />
…optimize your insulation<br />
Pull off one strip of release fi lm on the membrane side<br />
(smooth side). Position the full width of the tape on the<br />
window frame and and bond the tape to the fi rst side<br />
of the window reveal.<br />
Laying the tape into the adhesive<br />
5<br />
Remove the inner strips of release fi lm all the way<br />
round. <strong>CONTEGA</strong> HF does not stick to the fi lm!<br />
Lay the tape into the adhesive.<br />
Removing the inner layer of release fi lm<br />
1<br />
To prepare for sticking the tape to the window jamb<br />
using <strong>CONTEGA</strong> HF joint adhesive, remove the<br />
release fi lm on the blank side of the membrane.<br />
<strong>CONTEGA</strong> HF does not stick to the release fi lm!<br />
Sticking the ends<br />
5<br />
Apply a bead of <strong>CONTEGA</strong> HF joint adhesive approx.<br />
3/16”/5 mm thick between the overlapping ends of<br />
the tape. Press the tape into the adhesive.<br />
pro clima <strong>CONTEGA</strong> <strong>EXO</strong> exterior connection tape<br />
Masonry construction, window is already in place, <strong>EXO</strong> is being added subsequently<br />
Removing the inner layer of release fi lm<br />
2<br />
Remove the inner strips of release fi lm on the fi rst side<br />
of the reveal until your reach the fi rst corner.<br />
Sticking the ends<br />
6<br />
Apply a bead of <strong>CONTEGA</strong> HF joint adhesive approx.<br />
2”/5 mm thick between the overlapping ends of the<br />
tape. Lay the tape into the adhesive.<br />
Masonry construction, <strong>EXO</strong> is already stuck to the sides of the window<br />
CONDITIONS<br />
The bonds should not be subjected to tensile strain. Press<br />
fi rmly to secure the tape, ensuring there is suffi cient backpressure.<br />
Rainproof and wind- or airtight seals can only be<br />
achieved if this connection tape is laid without folds or cre-<br />
softeners. This, combined with high temperature resistance, ases and are uninterrupted. Ventilate regularly to prevent<br />
ensures a strong, durable bond. The high fi nal strength of build-up of excessive humidity and use a dryer if necessary.<br />
the bond is reached within 24 hours.<br />
The information provided here is based on practical ex-<br />
SUBSTRATES<br />
perience and the current state of knowledge. We reserve<br />
To ensure a durable, windtight bond with connection tape the right to make changes to the recommendations given<br />
the substrates onto which the tape is applied should be or to make alterations due to technical developments and<br />
load bearing and stable, dry, smooth and free from dust, si- associated improvements in the quality of our products.<br />
licon and grease. Bonding to frozen surfaces is not possible. We would be happy to inform you of the current technical<br />
The applicator is responsible for checking the suitability of state of the art at the time you use our products.<br />
the substrate. Adhesion tests are recommended.<br />
MOLL bauökologische Produkte GmbH · Rheintalstraße 35 - 43 · D-68723 Schwetzingen · Germany<br />
Applying adhesipve to the entire surface<br />
2<br />
Apply a bead of <strong>CONTEGA</strong> HF joint adhesive to the<br />
window jamb in a zig-zag pattern.<br />
Sticking the corners<br />
6<br />
Stick the folded and overlapping corners together with<br />
<strong>CONTEGA</strong> HF to make it easier to plaster over the tape<br />
later.<br />
If you have any questions, please call the pro<br />
clima technical hotline IUSA/<strong>Four</strong> <strong>Seven</strong> <strong>Five</strong>:<br />
Phone: 718 622 1600<br />
www.foursevenve.com<br />
info@foursevenvecom<br />
Further information about <strong>application</strong> and<br />
construction is given in the pro clima planning<br />
documentation.<br />
(Please also take note of the recommendations<br />
contained in the current pro clima <strong>application</strong> matrix.)<br />
Forming the corner<br />
3<br />
Fold the tape in the corners, making sure that there are<br />
no folds or creases to ensure a wind-tight bond around<br />
the entire window frame, then continue sticking it to<br />
the straight section of the window frame. At the end,<br />
cut the tape off leaving an overlap of approx. 5 cm.<br />
Removing the outermost strip of release fi lm<br />
7<br />
Remove the outer strips of release fi lm (on the fl eece<br />
side) all the way round. Plaster does not stick to the<br />
release fi lm! You can now plaster over the <strong>EXO</strong>.<br />
Forming the corner<br />
3<br />
Fold the tape in the corners then remove the release<br />
fi lm in the corners and tape one side of the tape to the<br />
other, making sure that there are no folds or creases<br />
to ensure a wind-tight bond around the entire window<br />
frame.<br />
Finished!<br />
7<br />
Now the joint is fi nished, diffusion-permeable, rainproof<br />
and wind-tight. You can now plaster over the<br />
tape.<br />
Characteristic Value<br />
Backing Double-layer specialist membrane<br />
made of PP fl eece and TEEE<br />
functional fi lm<br />
Perm rating 66 (Sd value 0.05m)<br />
Water column >8’4”, > 2.500 mm<br />
Temperature resistance Long term –40°F to 194°F<br />
–40°C to 90°C<br />
Application temperature > 14°F, > –10°C<br />
Colour Dark grey<br />
UV stability / outdoor exposure 3 months<br />
Storage<br />
Cool and dry<br />
Ecological Building Systems ltd.<br />
Main St, Athboy<br />
Co Meath<br />
Phone +353 469432104<br />
Fax +353 469432435<br />
info@ecologicalbuildingsystems.com<br />
www.ecologicalbuildingsystems.com<br />
ID 12576 - Last updated: 04/2010