OLED Display Driver for the HCS08 Family: OLED Driver ... - Freescale
OLED Display Driver for the HCS08 Family: OLED Driver ... - Freescale
OLED Display Driver for the HCS08 Family: OLED Driver ... - Freescale

Create successful ePaper yourself
Turn your PDF publications into a flip-book with our unique Google optimized e-Paper software.
<strong>Freescale</strong> Semiconductor<br />
Application Note<br />
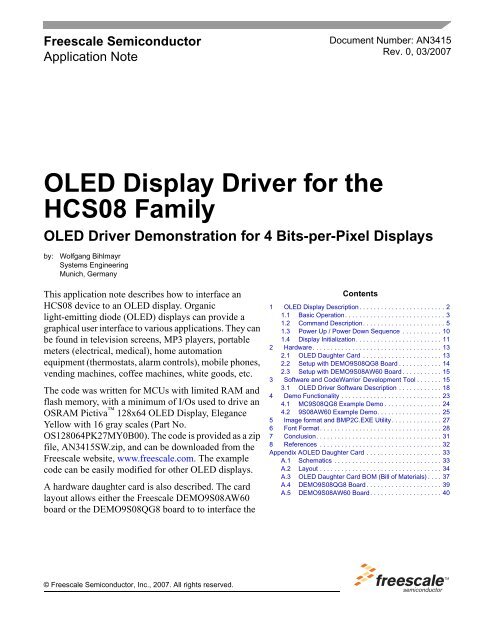
<strong>OLED</strong> <strong>Display</strong> <strong>Driver</strong> <strong>for</strong> <strong>the</strong><br />
<strong>HCS08</strong> <strong>Family</strong><br />
This application note describes how to interface an<br />
<strong>HCS08</strong> device to an <strong>OLED</strong> display. Organic<br />
light-emitting diode (<strong>OLED</strong>) displays can provide a<br />
graphical user interface to various applications. They can<br />
be found in television screens, MP3 players, portable<br />
meters (electrical, medical), home automation<br />
equipment (<strong>the</strong>rmostats, alarm controls), mobile phones,<br />
vending machines, coffee machines, white goods, etc.<br />
The code was written <strong>for</strong> MCUs with limited RAM and<br />
flash memory, with a minimum of I/Os used to drive an<br />
OSRAM Pictiva 128x64 <strong>OLED</strong> <strong>Display</strong>, Elegance<br />
Yellow with 16 gray scales (Part No.<br />
OS128064PK27MY0B00). The code is provided as a zip<br />
file, AN3415SW.zip, and can be downloaded from <strong>the</strong><br />
<strong>Freescale</strong> website, www.freescale.com. The example<br />
code can be easily modified <strong>for</strong> o<strong>the</strong>r <strong>OLED</strong> displays.<br />
A hardware daughter card is also described. The card<br />
layout allows ei<strong>the</strong>r <strong>the</strong> <strong>Freescale</strong> DEMO9S08AW60<br />
board or <strong>the</strong> DEMO9S08QG8 board to to interface <strong>the</strong><br />
© <strong>Freescale</strong> Semiconductor, Inc., 2007. All rights reserved.<br />
Document Number: AN3415<br />
Rev. 0, 03/2007<br />
<strong>OLED</strong> <strong>Driver</strong> Demonstration <strong>for</strong> 4 Bits-per-Pixel <strong>Display</strong>s<br />
by: Wolfgang Bihlmayr<br />
Systems Engineering<br />
Munich, Germany<br />
Contents<br />
1 <strong>OLED</strong> <strong>Display</strong> Description . . . . . . . . . . . . . . . . . . . . . . . . 2<br />
1.1 Basic Operation. . . . . . . . . . . . . . . . . . . . . . . . . . . . 3<br />
1.2 Command Description. . . . . . . . . . . . . . . . . . . . . . . 5<br />
1.3 Power Up / Power Down Sequence . . . . . . . . . . . 10<br />
1.4 <strong>Display</strong> Initialization. . . . . . . . . . . . . . . . . . . . . . . . 11<br />
2 Hardware . . . . . . . . . . . . . . . . . . . . . . . . . . . . . . . . . . . . 13<br />
2.1 <strong>OLED</strong> Daughter Card . . . . . . . . . . . . . . . . . . . . . . 13<br />
2.2 Setup with DEMO9S08QG8 Board . . . . . . . . . . . . 14<br />
2.3 Setup with DEMO9S08AW60 Board . . . . . . . . . . . 15<br />
3 Software and CodeWarrior ‘ Development Tool . . . . . . . 15<br />
3.1 <strong>OLED</strong> <strong>Driver</strong> Software Description . . . . . . . . . . . . 18<br />
4 Demo Functionality . . . . . . . . . . . . . . . . . . . . . . . . . . . . 23<br />
4.1 MC9S08QG8 Example Demo . . . . . . . . . . . . . . . . 24<br />
4.2 9S08AW60 Example Demo. . . . . . . . . . . . . . . . . . 25<br />
5 Image <strong>for</strong>mat and BMP2C.EXE Utility . . . . . . . . . . . . . . 27<br />
6 Font Format . . . . . . . . . . . . . . . . . . . . . . . . . . . . . . . . . . 28<br />
7 Conclusion. . . . . . . . . . . . . . . . . . . . . . . . . . . . . . . . . . . 31<br />
8 References . . . . . . . . . . . . . . . . . . . . . . . . . . . . . . . . . . 32<br />
Appendix A<strong>OLED</strong> Daughter Card . . . . . . . . . . . . . . . . . . . . . 33<br />
A.1 Schematics . . . . . . . . . . . . . . . . . . . . . . . . . . . . . . 33<br />
A.2 Layout . . . . . . . . . . . . . . . . . . . . . . . . . . . . . . . . . . 34<br />
A.3 <strong>OLED</strong> Daughter Card BOM (Bill of Materials) . . . . 37<br />
A.4 DEMO9S08QG8 Board . . . . . . . . . . . . . . . . . . . . . 39<br />
A.5 DEMO9S08AW60 Board. . . . . . . . . . . . . . . . . . . . 40
<strong>OLED</strong> <strong>Display</strong> Description<br />
<strong>OLED</strong>. The <strong>OLED</strong> daughter card contains <strong>the</strong> interface, a DC/DC converter to provide <strong>the</strong> <strong>OLED</strong> voltage<br />
(12 V), and <strong>the</strong> actual <strong>OLED</strong> display itself.<br />
The <strong>OLED</strong> displays are a self-emissive technology that typically require less power than LCDs with<br />
backlights. Only an “on” pixel consumes power. This feature makes <strong>OLED</strong> displays suitable <strong>for</strong><br />
battery-powered devices.<br />
Advantages of <strong>OLED</strong> displays:<br />
• Less power than LCDs — Better <strong>for</strong> portable/handheld applications<br />
• Self-emissive technology<br />
• Vivid color — High brightness and contrast<br />
• Video capability<br />
• Wide viewing angle<br />
• Thin <strong>for</strong>m factor — No backlight required<br />
• Long-lasting lifetime — Up to 55,000 hours<br />
• Monochrome (yellow, orange, green, white, blue) with one- or four-bit gray-scale capability<br />
• Full color capability<br />
1 <strong>OLED</strong> <strong>Display</strong> Description<br />
The <strong>OLED</strong> display used in this application note offers a parallel- or serial-interface-connection option. The<br />
BS1 and BS2 pins are used to select <strong>the</strong> interface to be used. In this example only <strong>the</strong> serial interface is<br />
used (Figure 1).<br />
2<br />
15<br />
17<br />
11<br />
12<br />
16<br />
D/C<br />
CS<br />
SDIN<br />
SCLK<br />
RST<br />
<strong>OLED</strong> Module<br />
BS1 BS2<br />
20 21<br />
Figure 1. <strong>OLED</strong> Module Interface (Serial Mode)<br />
The main advantage of using <strong>the</strong> serial interface ra<strong>the</strong>r than <strong>the</strong> parallel interface is <strong>the</strong> number of I/Os<br />
required to drive <strong>the</strong> display. For <strong>the</strong> serial interface, only 5 I/Os (D/C, CS, SDIN, SCLK, RST) are<br />
required, compared with 13 I/Os (D/C, CS, R/W, E/RD, D0:D7, RST) <strong>for</strong> <strong>the</strong> parallel interface.<br />
Table 1 briefly describes <strong>the</strong> <strong>OLED</strong> pin functions <strong>for</strong> <strong>the</strong> serial interface.<br />
VCC<br />
VDD<br />
VSS<br />
COMH<br />
IREFH<br />
VSL<br />
<strong>OLED</strong> <strong>Display</strong> <strong>Driver</strong> <strong>for</strong> <strong>the</strong> <strong>HCS08</strong> <strong>Family</strong>, Rev. 0<br />
2<br />
21<br />
29<br />
3<br />
4<br />
30<br />
<strong>Freescale</strong> Semiconductor
1.1 Basic Operation<br />
Table 1. <strong>OLED</strong> Pin Description<br />
Pin Pin Name Description<br />
15 D/C Data/Command<br />
17 CS Chip-select control<br />
11 SDIN Serial-data input<br />
12 SCLK Serial-clock input<br />
16 RST Reset<br />
20, 21 BS1, BS2 Interface selection<br />
BS1 = 0; BS2 = 0 <strong>for</strong> serial<br />
2 V CC <strong>OLED</strong> power-supply voltage (12 V)<br />
21 V DD Logic-supply voltage (3.3 V)<br />
29 V SS Ground<br />
<strong>OLED</strong> <strong>Display</strong> <strong>Driver</strong> <strong>for</strong> <strong>the</strong> <strong>HCS08</strong> <strong>Family</strong>, Rev. 0<br />
<strong>OLED</strong> <strong>Display</strong> Description<br />
3 COMH Common (row) high voltage — A capacitor should be connected between this pin<br />
and V SS.<br />
4 IREFH Segment (column) current reference — A resistor should be connected between<br />
this pin and V SS .<br />
30 VSL Voltage segment low — A capacitor should be connected between this pin and<br />
V SS.<br />
The <strong>OLED</strong> display contains a chip-on-glass (COG) controller (SSD0323 128 x 80, 16 Gray Scale Dot<br />
Matrix <strong>OLED</strong>/PLED Segment/Common <strong>Driver</strong> with Controller from Solomon Systech) with display<br />
RAM (graphic display data RAM — GDDRAM) that holds <strong>the</strong> data <strong>for</strong> <strong>the</strong> pattern/images to be displayed.<br />
Four bits of data are required <strong>for</strong> each pixel (4 bpp = bits per pixel) allowing 16 possible gray values. One<br />
byte is used to store <strong>the</strong> in<strong>for</strong>mation <strong>for</strong> two pixels. In total, 4 Kbytes (4096 bytes) are required to hold <strong>the</strong><br />
complete display content <strong>for</strong> <strong>the</strong> 128_x_64 pixels. The MCU needs to transfer data only if <strong>the</strong> display<br />
content needs updated. Cyclic refresh of <strong>the</strong> display is not necessary .<br />
The data transfer is done byte-wise, first sending <strong>the</strong> most significant bit (MSB) (Figure 2). The data is<br />
applied with <strong>the</strong> rising edge of <strong>the</strong> SCLK signal and is sampled at <strong>the</strong> falling edge of <strong>the</strong> SCLK signal. The<br />
data/command signal D/C is used to distinguish between graphic display data access and control<br />
commands sent to <strong>the</strong> display. Table 3 outlines <strong>the</strong> available display-control commands.<br />
<strong>Freescale</strong> Semiconductor 3
<strong>OLED</strong> <strong>Display</strong> Description<br />
4<br />
D/C<br />
CS<br />
SCLK<br />
SDIN<br />
B7 B6 B5 B4 B3 B2 B1 B0<br />
Figure 2. Serial Data Transfer (Command)<br />
The display data is sent byte-by-byte. Each byte automatically increments <strong>the</strong> address pointer to <strong>the</strong> next<br />
position. The display supports different GDDRAM to pixel mappings <strong>for</strong> mounting flexibility (regarding<br />
display orientation). You can rotate <strong>the</strong> display output by 180 degrees. Figure 3 and Table 2 show <strong>the</strong><br />
default pixel mapping <strong>the</strong> software uses.<br />
(0,0)<br />
Figure 3. Pixel Mapping<br />
(127,63)<br />
<strong>OLED</strong> <strong>Display</strong> <strong>Driver</strong> <strong>for</strong> <strong>the</strong> <strong>HCS08</strong> <strong>Family</strong>, Rev. 0<br />
<strong>Freescale</strong> Semiconductor
Row<br />
Table 2. GDDRAM Address Mapping (Data-Byte Sequence D0, D1, ..., D5119)<br />
<strong>OLED</strong> <strong>Display</strong> <strong>Driver</strong> <strong>for</strong> <strong>the</strong> <strong>HCS08</strong> <strong>Family</strong>, Rev. 0<br />
<strong>OLED</strong> <strong>Display</strong> Description<br />
To update a portion of <strong>the</strong> display partially, you can use <strong>the</strong> set-column-address and set-row-address<br />
commands. They allow defining a portion (canvas) of <strong>the</strong> display to be updated without updating <strong>the</strong> whole<br />
128 x 64 pixels. Also, each transferred data byte increases <strong>the</strong> address pointer to <strong>the</strong> next (two) pixel within<br />
<strong>the</strong> defined area. Basically, this mechanism allows you to individually update any (two) pixel (respectively,<br />
any byte in <strong>the</strong> GDDRAM).<br />
One constraint of using <strong>the</strong> serial interface is that it supports only unidirectional data transfer (write-only).<br />
Basically, in <strong>the</strong> serial mode you cannot read back <strong>the</strong> GDDRAM content; you cannot update only a single<br />
pixel of two pixel in a byte by using a read-modify-write one byte method.<br />
1.2 Command Description<br />
Column<br />
0 1 ... 63 Address<br />
0 1 2 3 ... 126 127 Pixel<br />
0 D0[7:4] D0[3:0] D1[7:4] D1[3:0] ... D63[7:4] D63[3:0]<br />
1 D64[7:4] D64[3:0] D65[7:4] D65[3:0] .... D127[7:4] D127[3:0]<br />
.<br />
.<br />
.<br />
.<br />
.<br />
.<br />
.<br />
.<br />
.<br />
.<br />
.<br />
.<br />
Table 3 briefly explains <strong>the</strong> available commands (<strong>for</strong> <strong>the</strong> serial interface) and <strong>the</strong>ir corresponding<br />
parameters. For a more detailed description, consult <strong>the</strong> OSRAM Pictiva or SSD0323 documentation<br />
(Section 8, “References,” on page 32). Most commands are used to parametrize <strong>the</strong> COG <strong>for</strong> a specific<br />
display under specific ambient conditions. Recommendations <strong>for</strong> setup <strong>for</strong> various displays are provided<br />
by <strong>the</strong> display manufacturers (<strong>for</strong> OSRAM <strong>OLED</strong> see Table 4).<br />
<strong>Freescale</strong> Semiconductor 5<br />
.<br />
.<br />
.<br />
... .<br />
.<br />
.<br />
63 D5056[7:4] D5056[3:0] D5057[7:4] D5057[3:0] ... D5119[7:4] D5119[3:0]<br />
Address<br />
.<br />
.<br />
.
<strong>OLED</strong> <strong>Display</strong> Description<br />
6<br />
Table 3. Command Table (Sheet 1 of 5)<br />
D/C Hex Command Length Description 1<br />
0<br />
0<br />
0<br />
0<br />
0<br />
0<br />
0<br />
0<br />
0x15<br />
A[5:0]<br />
B[5:0]<br />
0x75<br />
A[5:0]<br />
B[5:0]<br />
0x81<br />
A[6:0]<br />
Set Column Address 3 bytes This command specifies column start address and end address of<br />
<strong>the</strong> display data RAM. It also sets <strong>the</strong> column address pointer to<br />
column start address.<br />
Second byte A[5:0] sets <strong>the</strong> column start address from 0–63. POR<br />
= 0.<br />
Third byte B[5:0] sets <strong>the</strong> column end address from 0–63,<br />
POR = 63<br />
Set Row Address 3 bytes This command specifies row start address and end address of <strong>the</strong><br />
display data RAM. It also sets <strong>the</strong> row address pointer to row start<br />
address.<br />
Second byte A[5:0] sets <strong>the</strong> row start address from 0–79, POR= 0.<br />
Third byte B[5:0] sets <strong>the</strong> row end address from 0–79, POR = 79<br />
Set Contrast Control Register 2 bytes This command is to set contrast setting of <strong>the</strong> display. The COG<br />
chip has 128 contrast steps from 0x00 to 0x7F. The segment<br />
output current increases linearly with <strong>the</strong> increase of contrast step.<br />
Second byte A[6:0] sets <strong>the</strong> contrast in 128 steps. Contrast<br />
increases as level increases. POR = 0x40.<br />
0 0x84–0x86 Set Current Range 1 byte This command is used to select quarter range or half range or full<br />
range current mode. With <strong>the</strong> same contrast level, quarter range<br />
mode gives a quarter of <strong>the</strong> current output of <strong>the</strong> full range mode.<br />
Similar to half-range current mode, it gives a half of <strong>the</strong> current<br />
output of <strong>the</strong> full-range mode.<br />
0x84 = Quarter-current range (POR)<br />
0x85 = Half-current range<br />
0x86 = Full-current range<br />
<strong>OLED</strong> <strong>Display</strong> <strong>Driver</strong> <strong>for</strong> <strong>the</strong> <strong>HCS08</strong> <strong>Family</strong>, Rev. 0<br />
<strong>Freescale</strong> Semiconductor
0<br />
0<br />
0<br />
0<br />
0xA0<br />
A[6:0]<br />
0xA1<br />
A[6:0]<br />
Table 3. Command Table (Sheet 2 of 5)<br />
D/C Hex Command Length Description 1<br />
<strong>OLED</strong> <strong>Display</strong> <strong>Driver</strong> <strong>for</strong> <strong>the</strong> <strong>HCS08</strong> <strong>Family</strong>, Rev. 0<br />
<strong>OLED</strong> <strong>Display</strong> Description<br />
Set Re-map 2 bytes This command changes <strong>the</strong> mapping between <strong>the</strong> display data<br />
column address and segment driver, row address and common<br />
driver. It allows flexibility in layout during <strong>OLED</strong> module assembly.<br />
Column Address Re-map<br />
If column address re-map is set, columns 0–63 map to<br />
SEG127–0, regardless of star-column and end-column<br />
commands.<br />
Nibble Re-map<br />
If nibble re-map is set, <strong>the</strong> two nibbles of <strong>the</strong> data bus <strong>for</strong> RAM<br />
access are re-mapped, such that B7, B6, B5, B4, B3, B2, B1, B0<br />
acts like B3, B2, B1, B0, B7, B6, B5, B4.<br />
This feature working with column address re-map produces an<br />
effect of flipping outputs SEG0–127 to SEG127–SEG0.<br />
Address Increment Mode<br />
If horizontal increment mode is set, <strong>the</strong> column address pointer<br />
advances after each RAM access. If vertical increment mode is<br />
set, <strong>the</strong> row-address pointer advances after each RAM access.<br />
COM Re-map<br />
If COM re-map is set, ROW 0–79 maps to COM79–0, regardless<br />
of start and end row commands.<br />
A[0]=0, Disable Column Address Re-map (POR)<br />
A[0]=1, Enable Column Address Re-map<br />
A[1]=0, Disable Nibble Re-map (POR)<br />
A[1]=1, Enable Nibble Re-map<br />
A[2]=0, Horizontal Address Increment (POR)<br />
A[2]=1, Vertical Address Increment<br />
A[4]=0, Disable COM Re-map disable (POR)<br />
A[4]=1, Enable COM Re-map<br />
A[5]=0, Reserved (POR)<br />
A[5]=1, Reserved<br />
A[6]=0, Disable COM Split Odd Even (POR)<br />
A[6]=1, Enable COM Split Odd Even<br />
Set <strong>Display</strong> Start Line 2 bytes This command sets <strong>the</strong> display-start-line register, determining <strong>the</strong><br />
display RAM address that can be shown by selecting a value from<br />
0 to 79.<br />
Second byte A[6:0] sets <strong>the</strong> display RAM start-line register from 0<br />
to 79. POR = 0.<br />
<strong>Freescale</strong> Semiconductor 7
<strong>OLED</strong> <strong>Display</strong> Description<br />
0<br />
0<br />
8<br />
0xA2<br />
A[6:0]<br />
Set <strong>Display</strong> Offset 2 bytes This command is to set <strong>the</strong> display-offset register to determine <strong>the</strong><br />
mapping of <strong>the</strong> display start line to one of COM0–79. (It is<br />
assumed that COM0 is <strong>the</strong> display start line, display start line<br />
register equals 0.)<br />
For example, to move <strong>the</strong> COMX toward <strong>the</strong> COM0 direction <strong>for</strong> L<br />
lines, <strong>the</strong> 7-bit data in <strong>the</strong> second command should be given by L.<br />
In o<strong>the</strong>r words, to move <strong>the</strong> COMX towards <strong>the</strong> COM79 direction<br />
<strong>for</strong> L lines, <strong>the</strong> 7-bit data in <strong>the</strong> second command should be given<br />
by 80–L.<br />
Second byte A[6:0] sets <strong>the</strong> vertical scroll by COM from 0–79.<br />
POR = 0.<br />
0 0xA4–0xA7 Set <strong>Display</strong> Mode 1 byte This command is used to set normal display, entire display on,<br />
entire display off, and inverse display.<br />
0<br />
0<br />
0<br />
0<br />
0xA8<br />
A[6:0]<br />
0xAD<br />
A[1:0]<br />
<strong>OLED</strong> <strong>Display</strong> <strong>Driver</strong> <strong>for</strong> <strong>the</strong> <strong>HCS08</strong> <strong>Family</strong>, Rev. 0<br />
Normal <strong>Display</strong> turns <strong>the</strong> data to ON at <strong>the</strong> corresponding gray<br />
levels GS0–GS15 (see Set Gray Scale Table).<br />
Entire <strong>Display</strong> On <strong>for</strong>ces <strong>the</strong> entire display to be at gray level<br />
GS15, regardless of <strong>the</strong> contents of <strong>the</strong> display data RAM.<br />
Entire <strong>Display</strong> Off <strong>for</strong>ces <strong>the</strong> entire display to be at gray level GS0<br />
regardless of <strong>the</strong> contents of <strong>the</strong> display data RAM.<br />
Inverse <strong>Display</strong> uses <strong>the</strong> gray scale table in reverse order gray<br />
level 0–15 uses GS15–GS0, and so on.<br />
0xA4 = Normal <strong>Display</strong> (POR)<br />
0xA5 = Entire <strong>Display</strong> On (GS15)<br />
0xA6 = Entire <strong>Display</strong> Off (GS0)<br />
0xA7 = Inverse <strong>Display</strong><br />
Set Multiplex Ratio 2 bytes This command sets multiplex ratio N from 16 to 80.<br />
Second byte A[6:0] determines multiplex ration N. POR = 0x4F<br />
(80).<br />
Set Master Configuration 2 bytes This command is used to enable or disable <strong>the</strong> internal DC–DC<br />
voltage converter. This command is executed when display is on.<br />
A[0] = 0, Disable DC–DC converter<br />
A[0] = 1, Enable DC–DC converter (POR)<br />
A[1] = 0, Disable internal VCOMH<br />
A[1] = 1, Enable internal VCOMH (POR)<br />
0 0xAE–0xAF Set <strong>Display</strong> On/Off 1 byte This command turns <strong>the</strong> display on or off. When <strong>the</strong> display is off,<br />
<strong>the</strong> segment and common output are in high impedance state.<br />
0xAE = display off (sleep mode) (POR)<br />
0xAF = display on<br />
0<br />
0<br />
0<br />
0<br />
0xB0<br />
A[5:0]<br />
0xB4<br />
A[2:0]<br />
Set Pre-charge<br />
Compensation Enable<br />
Set Pre-charge<br />
Compensation Level<br />
Table 3. Command Table (Sheet 3 of 5)<br />
D/C Hex Command Length Description 1<br />
2 bytes This command enables <strong>the</strong> pre-charge voltage.<br />
A[5:0] = 0x08 (POR)<br />
A[5:0] = 0x28, enable pre-charge compensation<br />
2 bytes This command sets <strong>the</strong> pre-charge voltage level.<br />
A[2:0] = 0 (POR)<br />
A[2:0] = 3, recommended level<br />
<strong>Freescale</strong> Semiconductor
0<br />
0<br />
0<br />
0<br />
0<br />
0<br />
0<br />
0<br />
0<br />
0<br />
0xBF<br />
A[3:0]<br />
0xBE<br />
A[5:0]<br />
0xBC<br />
A[7:0]<br />
0xB1<br />
A[7:0]<br />
0xB2<br />
A[7:0]<br />
Set Segment Low<br />
Voltage (VSL)<br />
Table 3. Command Table (Sheet 4 of 5)<br />
D/C Hex Command Length Description 1<br />
<strong>OLED</strong> <strong>Display</strong> <strong>Driver</strong> <strong>for</strong> <strong>the</strong> <strong>HCS08</strong> <strong>Family</strong>, Rev. 0<br />
<strong>OLED</strong> <strong>Display</strong> Description<br />
2 bytes This command is used to set segment low voltage (VSL). The<br />
value of VSL is <strong>the</strong> same <strong>for</strong> display all on, display all off pattern<br />
with internal or external DC–DC voltage converter.<br />
The second byte A[3:0] sets <strong>the</strong> VSL voltage as follow: 1000–1110<br />
A[3:0] = 0010 connects to V SS<br />
A[3:0] = 1110 (POR)<br />
(When V DD > 2.5 V)<br />
Set VCOMH Voltage 2 bytes This command is used to set VCOMH voltage level.<br />
The second byte A[5:0] specifies <strong>the</strong> VCOMH voltage level<br />
000000–011111<br />
A[5:0] = 1xxxxx = 1.0*VREF<br />
A[5:0] = 010001(POR)<br />
Set Pre-charge Voltage 2 bytes This command is used to set <strong>the</strong> pre-charge voltage level.<br />
The second byte A[7:0] sets <strong>the</strong> pre-charge voltage level<br />
00000000–00011111<br />
A[7:0] = 1xxxxxxx connects to VCOMH<br />
A[7:0] = 001xxxxx equals 1.0*VREF<br />
A[7:0] = 00011000(POR)<br />
Set Phase Length 2 bytes This command sets <strong>the</strong> phase length. The lower nibble of <strong>the</strong><br />
second byte selects phase 1 period (no pre-charge and current<br />
drive) from 1 to 16 DCLKs. The higher nibble of <strong>the</strong> second byte<br />
is used to select phase 2 period (pre-charge) from 1 to 16 DCLKs.<br />
A[3:0] = P1, phase 1 period of 1–15 DCLK clocks, POR = 3DCLKS<br />
= 3<br />
A[7:4] = P2, phase 2 period of 1–15 DCLK clocks, POR = 5DCLKS<br />
= 5<br />
Set Row Period 2 bytes This command is used to set <strong>the</strong> row period. It is defined by<br />
multiplying <strong>the</strong> internal display clock period by <strong>the</strong> number of<br />
DCLKSs per row (value from 2–158).<br />
The larger <strong>the</strong> value, <strong>the</strong> more precise tuning of each gray scale<br />
level. See set gray scale table command <strong>for</strong> details.<br />
Also, it is used to define <strong>the</strong> frame frequency with <strong>the</strong> display clock<br />
divide ratio command.<br />
Row period equal to <strong>the</strong> sum of phase 1, 2 periods and <strong>the</strong> pulse<br />
width of GS15.<br />
Second byte sets <strong>the</strong> number of DCLKs, K, per row between<br />
2–158DCLKS, POR = 37DCLKS = 0x25<br />
The K value should be set as K = P1+P2+GS15 pulse width (POR:<br />
3+5+29DCLKS)<br />
<strong>Freescale</strong> Semiconductor 9
<strong>OLED</strong> <strong>Display</strong> Description<br />
0<br />
0<br />
0<br />
0<br />
0<br />
0<br />
0<br />
0<br />
0<br />
0<br />
0<br />
0<br />
0<br />
1.3 Power Up / Power Down Sequence<br />
To protect <strong>the</strong> <strong>OLED</strong> display and to extend <strong>the</strong> display life time <strong>the</strong> power up/down sequence should be<br />
controlled, specifically, <strong>the</strong> display voltage V CC (typ. 12–15 V).<br />
1.3.1 Power-Up Sequence<br />
To power-up <strong>the</strong> <strong>OLED</strong> display follow <strong>the</strong> steps below:<br />
1. Power-up VDD (3.3 V) and wait until stable<br />
2. <strong>OLED</strong> display hardware reset<br />
3. Send display-off command<br />
10<br />
0xB3<br />
A[7:0]<br />
B8<br />
A[2:0]<br />
B[6:4][2:0]<br />
C[6:4][2:0]<br />
D[6:4][2:0]<br />
E[6:4][2:0]<br />
F[6:4][2:0]<br />
G[6:4][2:0]<br />
H[6:4][2:0]<br />
0xCF<br />
A[7:4]<br />
Set <strong>Display</strong> Clock Divide<br />
Ratio/Oscillator<br />
Frequency<br />
2 bytes This command is used to set <strong>the</strong> frequency of <strong>the</strong> internal display<br />
clocks, DCLKs. It is defined by dividing <strong>the</strong> oscillator frequency by<br />
<strong>the</strong> divide ratio (Value from 1 to 16). Frame frequency is<br />
determined by divide ratio, number of display clocks per row, MUX<br />
ratio and oscillator frequency.<br />
The lower nibble of <strong>the</strong> second byte is used to select <strong>the</strong> oscillator<br />
frequency.<br />
The lower nibble of <strong>the</strong> next byte sets <strong>the</strong> divide ratio of <strong>the</strong> display<br />
clocks: Divide ratio = 1–16, POR = 2<br />
The higher nibble of <strong>the</strong> next byte sets <strong>the</strong> Oscillator Frequency.<br />
Oscillator Frequency increases with <strong>the</strong> value of A[7:4] and vice<br />
versa. POR=0<br />
Set Gray Scale Table 9 bytes This command is used to set <strong>the</strong> gray scale table <strong>for</strong> <strong>the</strong> display.<br />
The next 8 bytes set <strong>the</strong> gray scale level of GS1–15 as below:<br />
A[2:0] = L1, POR=1<br />
B[2:0] = L2, POR=1<br />
B[6:4] = L3, POR=1<br />
C[2:0] = L4 POR=1<br />
C[6:4] = L5, POR=1<br />
D[2:0] = L6, POR=1<br />
D[6:4] = L7, POR=1<br />
E[2:0] = L8, POR=1<br />
E[6:4] = L9, POR=1<br />
F[2:0] = L10, POR=1<br />
F[6:4] = L11, POR=1<br />
G[2:0] = L12, POR=1<br />
G[6:4] = L13, POR=1<br />
H[2:0] = L14, POR=1<br />
H[6:4] = L15, POR=1<br />
Set Biasing Current <strong>for</strong><br />
DC–DC converter<br />
1 byte F0H = High (POR)<br />
70H = Low<br />
0 0xE3 NOP 1 byte Command <strong>for</strong> no operation<br />
1 POR indicates <strong>the</strong> default value after power on reset<br />
Table 3. Command Table (Sheet 5 of 5)<br />
D/C Hex Command Length Description 1<br />
<strong>OLED</strong> <strong>Display</strong> <strong>Driver</strong> <strong>for</strong> <strong>the</strong> <strong>HCS08</strong> <strong>Family</strong>, Rev. 0<br />
<strong>Freescale</strong> Semiconductor
4. Power-up V CC (12 V) and wait until stable<br />
5. Delay 100 ms<br />
6. Send display-on command<br />
1.3.2 Power-Down Sequence<br />
To power-down <strong>the</strong> <strong>OLED</strong> display follow <strong>the</strong> steps below:<br />
1. Send display-off command<br />
2. Power down VCC (12 V)<br />
3. Delay 100 ms (when VCC has reached 0 V and panel is completely discharged)<br />
4. Power down VDD (3.3 V)<br />
1.4 <strong>Display</strong> Initialization<br />
<strong>OLED</strong> <strong>Display</strong> <strong>Driver</strong> <strong>for</strong> <strong>the</strong> <strong>HCS08</strong> <strong>Family</strong>, Rev. 0<br />
<strong>OLED</strong> <strong>Display</strong> Description<br />
Table 4 shows <strong>the</strong> manufacturers (OSRAM) recommended initialization sequence after power-up <strong>for</strong> <strong>the</strong><br />
Pictiva 2.7-inch 128x64 <strong>OLED</strong> <strong>Display</strong>, Elegance Yellow with <strong>the</strong> following parameters:<br />
• VDD = 3.3 V<br />
• VCC = 12 V<br />
• Frame frequency = 100 Hz<br />
CAUTION<br />
Consult <strong>the</strong> manufacturer documentation <strong>for</strong> <strong>the</strong> latest in<strong>for</strong>mation and <strong>for</strong><br />
different displays (<strong>for</strong> example, spring green instead of elegance yellow)<br />
and/or parameters (<strong>for</strong> example, different V CC voltages).<br />
Table 4. Initialization Sequence After Power-Up<br />
Command Code POR Default Value<br />
Set column address 0x15 0x00<br />
0x3F<br />
Set row address 0x75 0x00<br />
0x4F<br />
Initialization<br />
(Dual Voltage Supply)<br />
<strong>Freescale</strong> Semiconductor 11<br />
0x00<br />
0x3F<br />
0x00<br />
0x3F<br />
Set contrast control 0x81 0x40 0x66 1<br />
Set current range 0x84–0x86 quarter (0x84) full (0x86)<br />
Set re-map 0xA0 0x00 0x41<br />
Set display start line 0xA1 00 default<br />
Set display offset 0xA2 0x00 0x44<br />
Set multiplexer ratio 0xA8 0x4F 0x3F<br />
Set display ON/OFF 0xAE (OFF) 0xAF (ON)<br />
Set display mode 0xA4 default
<strong>OLED</strong> <strong>Display</strong> Description<br />
12<br />
Table 4. Initialization Sequence After Power-Up (continued)<br />
Command Code POR Default Value<br />
Set DC-DC converter 0xAD 0x02 0x02 (disabled)<br />
Set DC-DC bias current 0xCF 0xF0 default<br />
Set row period 0xB2 0x25 0x46<br />
Set pre-charge<br />
compensation enable<br />
Set pre-charge<br />
compensation level<br />
0xB0 0x08 0x28<br />
0xB4 0x00 0x07<br />
Set clock divide 0xB3 0x02 0xF1<br />
Set phase length 0xB1 P1=3, P2=5 0x22 (P1=2, P2=2)<br />
Set VSL 0xBF 0x0E 0x0D<br />
Set VCOMH 0xBE 0x11 0x021 Set Vprecharge 0xBC 0x18 0x04<br />
Set gray scale table 0xB8 all 1 see Table 5<br />
1 This setting represents maximum luminance <strong>for</strong> proper operation of <strong>the</strong> display. A lower<br />
setting can be used <strong>for</strong> dimming. A higher setting adversely affects <strong>the</strong> operating lifetime, as<br />
defined in this specification.<br />
Table 5 shows <strong>the</strong> corresponding recommended gray-scale settings.<br />
Table 5. Gray-Scale Settings<br />
GS Level Phase 1 Phase 2 S/W Set GS Pulse Total DCLK<br />
L0 2 2 0 0 4<br />
L1 2 2 1 1 5<br />
L2 2 2 1 3 7<br />
L3 2 2 1 5 9<br />
L4 2 2 2 8 12<br />
L5 2 2 2 11 15<br />
L6 2 2 2 14 18<br />
L7 2 2 3 18 22<br />
L8 2 2 3 22 26<br />
L9 2 2 4 27 31<br />
L10 2 2 4 32 36<br />
L11 2 2 5 38 42<br />
L12 2 2 5 44 48<br />
L13 2 2 6 51 55<br />
L14 2 2 6 58 62<br />
L15 2 2 7 66 70<br />
<strong>OLED</strong> <strong>Display</strong> <strong>Driver</strong> <strong>for</strong> <strong>the</strong> <strong>HCS08</strong> <strong>Family</strong>, Rev. 0<br />
Initialization<br />
(Dual Voltage Supply)<br />
<strong>Freescale</strong> Semiconductor
2 Hardware<br />
<strong>OLED</strong> <strong>Display</strong> <strong>Driver</strong> <strong>for</strong> <strong>the</strong> <strong>HCS08</strong> <strong>Family</strong>, Rev. 0<br />
Hardware<br />
The system is set up using <strong>the</strong> standard DEMO9S08AW60 and DEMO9S08QG8 boards with a second pcb<br />
board called an <strong>OLED</strong> daughter card (Figure 4).<br />
Power Supply<br />
2 Switches<br />
Potentiometer<br />
Light Sensor<br />
QG8DEMO Board<br />
2.1 <strong>OLED</strong> Daughter Card<br />
3.3 V Logic Supply<br />
GND<br />
12 V Enable<br />
RESET<br />
Data/Command<br />
MOSI<br />
SPCLK<br />
SS<br />
DC/DC<br />
3.3 V<br />
to<br />
12 V<br />
Figure 4. System Setup Example<br />
<strong>OLED</strong> <strong>Display</strong><br />
128x64pixel<br />
(Yellow 4bit)<br />
<strong>OLED</strong> Daughter Card<br />
The <strong>OLED</strong> daughter card allows <strong>the</strong> <strong>OLED</strong> display to connect to <strong>the</strong> DEMO9S08QG8 or<br />
DEMO9S08AW60 demo boards. The <strong>OLED</strong> daughter card contains <strong>the</strong> socket <strong>for</strong> <strong>the</strong> flat flex cable (FFC)<br />
of <strong>the</strong> <strong>OLED</strong> display, a DC/DC converter (12 V, 120 mA boost converter) to supply <strong>the</strong> <strong>OLED</strong> display with<br />
<strong>the</strong> necessary 12 V derived from <strong>the</strong> 3.3 V supply of <strong>the</strong> DEMO9S08AW60 and DEMO9S08QG8 boards.<br />
It has two separate 0.1-inch pinheader connectors, J1 and J2, that can be directly connected to <strong>the</strong><br />
DEMO9S08AW60 and DEMO9S08QG8 boards, respectively.<br />
Fur<strong>the</strong>r details of <strong>the</strong> <strong>OLED</strong> Daughter Card, like schematics, layout and bill of materials (BOM), can be<br />
found in Section Appendix A, “<strong>OLED</strong> Daughter Card.”<br />
2.1.1 Interface<br />
• <strong>OLED</strong> daughter-card interface — Requires six signals and two power-supply connections (Table 6,<br />
Table 7).<br />
• MCU serial peripheral interface — Used to transfer data and commands to <strong>the</strong> <strong>OLED</strong> display.<br />
Three SPI pins—slave select (SS), serial clock (SPSCK), and master-out slave-in (MOSI)—are<br />
used <strong>for</strong> <strong>the</strong> unidirectional data flow from <strong>the</strong> MCU to <strong>the</strong> <strong>OLED</strong> display. The master-in slave-out<br />
(MISO) pin is available <strong>for</strong> o<strong>the</strong>r use.<br />
• 12VEN signal — Controls DC/DC converter output voltage. Allows a controlled power up/down<br />
of <strong>the</strong> <strong>OLED</strong> power voltage V CC .<br />
<strong>Freescale</strong> Semiconductor 13
Hardware<br />
14<br />
• RST signal — Connected to an MCU general-purpose input output (GPIO) pin to control <strong>the</strong><br />
<strong>OLED</strong> display hardware reset by software.<br />
2.2 Setup with DEMO9S08QG8 Board<br />
Figure 4 indicates <strong>the</strong> <strong>OLED</strong> driver setup using <strong>the</strong> DEMO9S08QG8 board.<br />
To protect <strong>the</strong> system and <strong>for</strong> proper operation, set up <strong>the</strong> DEMO9S08QG8 board be<strong>for</strong>e <strong>the</strong> system<br />
powers up.<br />
Use <strong>the</strong> documentation provided with <strong>the</strong> board <strong>for</strong> more details about <strong>the</strong> DEM09S08QG8 board.<br />
2.2.1 Jumpers<br />
Table 6. <strong>OLED</strong> Daughter-Card Connector J1 (DEMO9S08QG8)<br />
Pin Signal Description<br />
1 3.3 V 3.3 V power supply input<br />
3 GND Ground<br />
17 SDIN Serial data input<br />
19 12VEN 12 V enable control input<br />
21 SCLK Serial clock input<br />
23 CS Chip Select input<br />
27 D/C Data/command input<br />
29 RST Reset input<br />
all o<strong>the</strong>r pins Unused — not connected<br />
Table 7. <strong>OLED</strong> Daughter-Card Connector J2 (DEMO9S08AW60)<br />
Pin Signal Description<br />
1 3.3 V 3.3 V power supply input<br />
3 GND Ground<br />
13 D/C Data/command input<br />
15 RST Reset input<br />
17 SDIN Serial data input<br />
19 12VEN 12 V enable control input<br />
21 SCLK Serial clock input<br />
23 CS Chip Select input<br />
All o<strong>the</strong>r pins Unused — not connected<br />
Jumper VX_EN must be closed to provide <strong>the</strong> <strong>OLED</strong> daughter card with power (3.3 V).<br />
<strong>OLED</strong> <strong>Display</strong> <strong>Driver</strong> <strong>for</strong> <strong>the</strong> <strong>HCS08</strong> <strong>Family</strong>, Rev. 0<br />
<strong>Freescale</strong> Semiconductor
<strong>OLED</strong> <strong>Display</strong> <strong>Driver</strong> <strong>for</strong> <strong>the</strong> <strong>HCS08</strong> <strong>Family</strong>, Rev. 0<br />
Software and CodeWarrior ‘ Development Tool<br />
The Jumper PWR_SEL must be in position V DD . This selects <strong>the</strong> external power supply as <strong>the</strong> power<br />
source.<br />
The Jumper USER_EN should be closed <strong>for</strong> full demo functionality.<br />
Figure 5 summarizes <strong>the</strong> jumper settings.<br />
Figure 5. DEMO9S08QG8 Jumper Settings<br />
2.3 Setup with DEMO9S08AW60 Board<br />
Figure 13 indicates <strong>the</strong> <strong>OLED</strong> <strong>Driver</strong> setup using <strong>the</strong> DEMO9S08AW60 board.<br />
To protect <strong>the</strong> system and <strong>for</strong> proper operation, set up <strong>the</strong> DEMO9S08AW60 board be<strong>for</strong>e <strong>the</strong> system<br />
powers up.<br />
WARNING<br />
Set up <strong>the</strong> DEMO9S08AW60 board correctly to avoid system damage or<br />
malfunction! The board must be configured <strong>for</strong> 3 V (see Section 2.3.1,<br />
“Jumpers”).<br />
Use <strong>the</strong> documentation provided with <strong>the</strong> board <strong>for</strong> more details about <strong>the</strong> DEM09S08AW60 board.<br />
2.3.1 Jumpers<br />
• Jumper W1 — V DD _SEL must be in position 3 V. This selects <strong>the</strong> 3 V operation.<br />
• Jumper W2 — 5V_SEL must be in position EXT. This selects <strong>the</strong> external power supply as <strong>the</strong><br />
power source.<br />
• Jumper W3 — P_IO_5V must be closed to provide <strong>the</strong> <strong>OLED</strong> daughter card with power (3.3 V).<br />
• Jumpers from J3 to J31 — Should be closed <strong>for</strong> full demo functionality.<br />
Figure 6 summarizes jumper settings.<br />
W3 P_IO_5V<br />
VX_EN PWR_SEL<br />
USB EXT<br />
5V_SEL<br />
W2<br />
VB VDD<br />
5V 3V<br />
VDD_SEL<br />
Figure 6. DEMO9S08AW60 Jumper Settings<br />
USER_EN<br />
3 Software and CodeWarrior Development Tool<br />
The application software was developed <strong>for</strong> <strong>the</strong> DEMO9S08QG8 and <strong>the</strong> DEMO9S08AW60 boards<br />
driving an OSRAM Pictiva OSRAM Pictiva 2.7-inch 128x64 <strong>OLED</strong> <strong>Display</strong>, Elegance Yellow with 16 gray<br />
<strong>Freescale</strong> Semiconductor 15<br />
W1<br />
SW1<br />
SW2<br />
LED1<br />
LED2<br />
RV1<br />
RZ1<br />
J31<br />
J3
Software and CodeWarrior ‘ Development Tool<br />
scales (Part.No. OS128064PK27MY0B00). It is written in a way which should make it easy to adopt <strong>for</strong><br />
different MCUs or different <strong>OLED</strong> displays.<br />
The software is also tested to be used with <strong>the</strong> OSRAM Pictiva 1.6-inch 128x64 <strong>OLED</strong> display, elegance<br />
yellow with 16 gray scales (Part.No. OS128064PK16MY0A01).<br />
The driver project was developed with <strong>the</strong> CodeWarrior <strong>for</strong> HC08 V5.1 — Special Edition development<br />
tool.<br />
Application features:<br />
• Serial interface to <strong>OLED</strong> display using SPI module (low number of I/Os used)<br />
• Low-level routines:<br />
— Send data byte<br />
— Send command byte<br />
— <strong>OLED</strong> power voltage ON/OFF<br />
— <strong>OLED</strong> hardware reset<br />
• High-level routines:<br />
— <strong>Display</strong> initialization<br />
— Set drawing area<br />
— Fill drawing area<br />
— Draw text using bitmap font<br />
— Draw bitmap graphic<br />
• Two bitmap type fonts 5x7 and 8x15 pixel size are included<br />
• Adaptable <strong>for</strong> o<strong>the</strong>r <strong>OLED</strong> displays or MCUs<br />
To open <strong>the</strong> <strong>OLED</strong> driver demo project, open file <strong>OLED</strong>Demo.mcp in <strong>the</strong> CodeWarrior integrated<br />
development environment (IDE). Figure 7 shows <strong>the</strong> project view.<br />
16<br />
<strong>OLED</strong> <strong>Display</strong> <strong>Driver</strong> <strong>for</strong> <strong>the</strong> <strong>HCS08</strong> <strong>Family</strong>, Rev. 0<br />
<strong>Freescale</strong> Semiconductor
Figure 7. <strong>OLED</strong> <strong>Driver</strong> Demo Project Tree<br />
<strong>OLED</strong> <strong>Display</strong> <strong>Driver</strong> <strong>for</strong> <strong>the</strong> <strong>HCS08</strong> <strong>Family</strong>, Rev. 0<br />
Software and CodeWarrior ‘ Development Tool<br />
<strong>Freescale</strong> Semiconductor 17
Software and CodeWarrior ‘ Development Tool<br />
3.1 <strong>OLED</strong> <strong>Driver</strong> Software Description<br />
The <strong>OLED</strong> driver project contains <strong>the</strong> following files:<br />
3.1.1 <strong>Driver</strong> Configuration<br />
18<br />
Table 8. <strong>OLED</strong> <strong>Driver</strong> Files<br />
Files Description<br />
<strong>OLED</strong>.H <strong>OLED</strong> driver header file<br />
— Constants (defines) <strong>for</strong> <strong>OLED</strong> commands<br />
— Preparation <strong>for</strong> different <strong>OLED</strong> displays<br />
— Definition of MCU hardware interface<br />
<strong>OLED</strong>.C <strong>OLED</strong> driver c file<br />
— <strong>OLED</strong> initialization sequence (array)<br />
— <strong>OLED</strong> functions (Table 9)<br />
FONT.H Font include file<br />
FONT.C Font c file<br />
— Definition of two fonts 5x7pixel and 8x16pixel<br />
IMAGES.H Image include file<br />
IMAGES.C Image c file<br />
— Example images<br />
DERIVATIVE.H Header file to include <strong>the</strong> derivative specific header file<br />
— This and <strong>the</strong> MCU derivative-specific files (<strong>for</strong> example,<br />
MC9S08QG8.H and MC9S08QG8.C) are controlled by <strong>the</strong><br />
CodeWarrior IDE (Section 3.1.1, “<strong>Driver</strong> Configuration”).<br />
MYTYPES.H Type definitions<br />
MAIN.C Shows an example implementation of <strong>the</strong> <strong>OLED</strong> driver<br />
The <strong>OLED</strong>.H header file can adapt <strong>the</strong> driver <strong>for</strong> different microcontrollers. Currently, it supports <strong>the</strong><br />
MC9S08QG8 and <strong>the</strong> MC9S08AW60 MCUs.<br />
To change <strong>the</strong> microcontroller, click on <strong>the</strong> “Change MCU/Connection ...” button and select <strong>the</strong> MCU<br />
derivative and <strong>the</strong> debugger connection you want to use (Figure 8 and Figure 9).<br />
NOTE<br />
You must select <strong>the</strong> correct MCU derivative and debugger interface to<br />
download <strong>the</strong> software into <strong>the</strong> microcontroller flash memory.<br />
Figure 8. Change MCU<br />
<strong>OLED</strong> <strong>Display</strong> <strong>Driver</strong> <strong>for</strong> <strong>the</strong> <strong>HCS08</strong> <strong>Family</strong>, Rev. 0<br />
<strong>Freescale</strong> Semiconductor
Figure 9. Select MCU Derivative and Debugger Connection<br />
<strong>OLED</strong> <strong>Display</strong> <strong>Driver</strong> <strong>for</strong> <strong>the</strong> <strong>HCS08</strong> <strong>Family</strong>, Rev. 0<br />
Software and CodeWarrior ‘ Development Tool<br />
The CodeWarrior IDE automatically modifies <strong>the</strong> DERIVATIVE.H file and inclues <strong>the</strong> right MCU<br />
derivative files.<br />
For example, after changing to <strong>the</strong> MC9S08QG8 MCU <strong>the</strong> DERIVATIVE.H file looks like this:<br />
/*<br />
* Note: This file is recreated by <strong>the</strong> project wizard whenever <strong>the</strong> MCU is<br />
* changed and should not be edited by hand<br />
*/<br />
/* Include <strong>the</strong> derivative-specific header file */<br />
#include <br />
<strong>Freescale</strong> Semiconductor 19
Software and CodeWarrior ‘ Development Tool<br />
And now, <strong>the</strong> project contains <strong>the</strong> MC9S08QG.C and MC9S08QG8.H files:<br />
20<br />
Figure 10. IDE Updates MCU Derivative Files<br />
The MC9S08QG8.H file defines a macro with <strong>the</strong> derivative name, <strong>for</strong> example, _MC9S08QG8_H, which<br />
is used to implement <strong>the</strong> hardware interface-specific code.<br />
<strong>OLED</strong> <strong>Display</strong> <strong>Driver</strong> <strong>for</strong> <strong>the</strong> <strong>HCS08</strong> <strong>Family</strong>, Rev. 0<br />
<strong>Freescale</strong> Semiconductor
<strong>OLED</strong> <strong>Display</strong> <strong>Driver</strong> <strong>for</strong> <strong>the</strong> <strong>HCS08</strong> <strong>Family</strong>, Rev. 0<br />
Software and CodeWarrior ‘ Development Tool<br />
// ----------------------------------------------------------------------------<br />
// macros <strong>for</strong> hardware interface<br />
// ----------------------------------------------------------------------------<br />
// ------------------------------<br />
// pinout <strong>for</strong> DEMO9S08QG8 board:<br />
#ifdef _MC9S08QG8_H<br />
// use PTB4/MISO pin to enable 12V <strong>for</strong> <strong>OLED</strong> display<br />
#define _12V_Init() PTBD_PTBD4 = 0; PTBDD_PTBDD4 = 1<br />
#define _12V_Enable() (PTBD_PTBD4 = 1)<br />
#define _12V_Disable() (PTBD_PTBD4 = 0)<br />
// use PTB7 pin to drive reset signal <strong>OLED</strong> display<br />
#define _RST_Init() PTBD_PTBD7 = 1; PTBDD_PTBDD7 = 1<br />
#define _RST_Assert() (PTBD_PTBD3 = 0)<br />
#define _RST_Release() (PTBD_PTBD3 = 1)<br />
// use PTB6 pin to drive D/#C (Data/Command) signal to <strong>OLED</strong> display<br />
#define _DC_Init() {PTBD_PTBD6 = 1; PTBDD_PTBDD6 = 1;}<br />
#define _DC_Set() (PTBD_PTBD6 = 1)<br />
#define _DC_Clr() (PTBD_PTBD6 = 0)<br />
// SPI init<br />
#define _SPI_Init() { \<br />
SPIC1 = SPIC1_SPE_MASK|SPIC1_MSTR_MASK|SPIC1_SSOE_MASK; \<br />
SPIC2 = SPIC2_MODFEN_MASK|SPIC2_BIDIROE_MASK|SPIC2_SPC0_MASK; \<br />
SPIBR = 0; \<br />
}<br />
#define _SPI_Send(v) {while(!SPIS_SPTEF) {;} SPID = (v);}<br />
#endif<br />
To adapt <strong>the</strong> driver software <strong>for</strong> a different <strong>OLED</strong> display, modify <strong>the</strong> initialization routine. This is<br />
currently limited to only 4 bpp displays. Different color resolutions require fur<strong>the</strong>r adaptations.<br />
In <strong>the</strong> <strong>OLED</strong>.H file, a define, based on <strong>the</strong> manufacturer part number (<strong>for</strong> example,<br />
OS128064PK27MY0B00), is used to select which display is connected. A second definition<br />
_UP_SIDE_DOWN allows to select <strong>the</strong> display orientation.<br />
// ----------------------------------------------------------------------------<br />
// macros <strong>for</strong> display selection and orientation<br />
// ----------------------------------------------------------------------------<br />
// select which display to use, if necessary add new display and init sequence<br />
//#define OS128064PK27MY0B00<br />
#define OS128064PK16MY0A01<br />
// select if display is mounted up side down<br />
//#define _UP_SIDE_DOWN // define to rotate output 180 degrees<br />
<strong>Freescale</strong> Semiconductor 21
Software and CodeWarrior ‘ Development Tool<br />
In <strong>the</strong> <strong>OLED</strong>.C file, modify <strong>the</strong> actual initialization sequence.<br />
22<br />
//-----------------------------------------------------------------------------<br />
// <strong>OLED</strong> Init Sequence <strong>for</strong> Pictiva 128x64 2.7" Yellow OS128064PK27MY0B00<br />
// is used by <strong>OLED</strong>_<strong>Display</strong>_Init()<br />
//-----------------------------------------------------------------------------<br />
#if defined(OS128064PK27MY0B00)<br />
const UINT8 _<strong>Display</strong>_Init_Seq[] = {<br />
<strong>OLED</strong>_SETCONTRAST,0x5D, // <strong>for</strong> yellow<br />
<strong>OLED</strong>_SETCURRENTRANGE_100,<br />
#if defined (_UP_SIDE_DOWN)<br />
<strong>OLED</strong>_SETREMAP,0x52,<br />
<strong>OLED</strong>_SETDISPLAYOFFSET,0x4C, // mapping of RAM to display<br />
#else<br />
<strong>OLED</strong>_SETREMAP,0x41,<br />
<strong>OLED</strong>_SETDISPLAYOFFSET,0x44, // mapping of RAM to display<br />
#endif<br />
<strong>OLED</strong>_SETDISPLAYSTARTLINE,0, // TOP<br />
<strong>OLED</strong>_SETMULTIPLEXRATIO,63, // 64 MUX<br />
<strong>OLED</strong>_SETDISPLAYMODE_NORM,<br />
<strong>OLED</strong>_SETPHASELENGTH,0x22,<br />
<strong>OLED</strong>_SETROWPERIOD,0x46,<br />
<strong>OLED</strong>_SETDISPLAYCLOCKDIVIDE,0x41,<br />
<strong>OLED</strong>_SETSEGMENTLOWVOLT,0x0D,<br />
<strong>OLED</strong>_SETVCOMH,0x00,<br />
<strong>OLED</strong>_SETPRECHAGEVOLT,0x10,<br />
<strong>OLED</strong>_SETGREYSCALETABLE,0x01,0x11,0x22,0x32,0x43,0x54,0x65,0x76,<br />
<strong>OLED</strong>_SETMASTERCONFIG,0x02, // DC-DC 0x02 disabled, 0x03 enabled<br />
};<br />
#endif<br />
3.1.2 <strong>OLED</strong> <strong>Driver</strong> API<br />
Table 9 summarizes <strong>the</strong> services provides by <strong>the</strong> <strong>OLED</strong> driver:<br />
Table 9. <strong>OLED</strong> <strong>Driver</strong> Services<br />
Function Name Type Parameters Description<br />
<strong>OLED</strong>_Interface_Init void void Initialization of MCU <strong>OLED</strong> hardware-interface (I/O ports, SPI)<br />
<strong>OLED</strong>_VCC_On void void Turn ON V CC <strong>OLED</strong> power voltage (12 V)<br />
<strong>OLED</strong>_VCC_Off void void Turn OFF V CC <strong>OLED</strong> power voltage (12 V)<br />
<strong>OLED</strong>_Reset void void Applies hardware reset (RST) to <strong>OLED</strong> display<br />
<strong>OLED</strong>_WriteCmd void UINT8 cmd Transfers one byte of command data (D/C = 0)<br />
<strong>OLED</strong>_WriteData void UINT8 data Transfers one byte of display data (D/C = 1)<br />
<strong>OLED</strong>_<strong>Display</strong>_Init void void Initialization sequence <strong>for</strong> <strong>OLED</strong> display.<br />
The actual command sequence is specified as a const array <strong>for</strong> easy<br />
adaptation, <strong>for</strong> example, <strong>for</strong> a different display type.<br />
<strong>OLED</strong> <strong>Display</strong> <strong>Driver</strong> <strong>for</strong> <strong>the</strong> <strong>HCS08</strong> <strong>Family</strong>, Rev. 0<br />
<strong>Freescale</strong> Semiconductor
<strong>OLED</strong>_Fill void UINT8 left<br />
UINT8 top<br />
UINT8 width<br />
UINT8 height<br />
UINT8 fill<br />
<strong>OLED</strong>_SetCanvas void UINT8 left<br />
UINT8 top<br />
UINT8 width<br />
UINT8 height<br />
<strong>OLED</strong>_DrawImage void UINT8 left<br />
UINT8 top<br />
UINT8 mask<br />
UINT8* image<br />
<strong>OLED</strong>_WriteString5x7 void UINT8 left<br />
UINT8 top<br />
UINT8 cc<br />
char* text<br />
<strong>OLED</strong>_WriteString8x15 void UINT8 left<br />
UINT8 top<br />
UINT8 cc<br />
char* text<br />
4 Demo Functionality<br />
Table 9. <strong>OLED</strong> <strong>Driver</strong> Services (continued)<br />
Function Name Type Parameters Description<br />
<strong>OLED</strong> <strong>Display</strong> <strong>Driver</strong> <strong>for</strong> <strong>the</strong> <strong>HCS08</strong> <strong>Family</strong>, Rev. 0<br />
Demo Functionality<br />
Fills a specified area with a color:<br />
— Left/top are <strong>the</strong> x/y coordinates of <strong>the</strong> top/left corner of <strong>the</strong> area<br />
— Width/height of <strong>the</strong> area<br />
— Fill is <strong>the</strong> pattern=color to fill <strong>the</strong> area (high/low nibble specifying<br />
<strong>the</strong> color) (4bpp)<br />
Attention: 4bpp is <strong>the</strong> supported color depth. An even number must<br />
be set <strong>for</strong> left and width.<br />
Sets a canvas (an sub-set of <strong>the</strong> display area) to be active<br />
— Left/top are <strong>the</strong> x/y coordinates of <strong>the</strong> top/left corner<br />
— Width/height of <strong>the</strong> area<br />
Attention: 4bpp is <strong>the</strong> supported color depth. An even number must<br />
be set <strong>for</strong> left and width.<br />
draws a image (bitmap) to <strong>the</strong> specified position<br />
— Left/top are <strong>the</strong> x/y coordinates of <strong>the</strong> top/left corner<br />
— Mask allows to modify <strong>the</strong> color of <strong>the</strong> image to be modified.<br />
Darkens an onscreen button to indicate it has been pressed (see<br />
demo).<br />
— *Image is a pointer to <strong>the</strong> image data<br />
Attention: <strong>for</strong> 4bpp left and <strong>the</strong> width of <strong>the</strong> image must be an even<br />
number.<br />
Writes <strong>the</strong> text with <strong>the</strong> Font 5x7 to <strong>the</strong> specified position<br />
— Left/top are <strong>the</strong> x/y coordinates of <strong>the</strong> top/left corner<br />
— cc is <strong>the</strong> color of <strong>the</strong> font (high/low nibble specifying <strong>the</strong> color)<br />
(4bpp)<br />
Attention: <strong>for</strong> 4bpp left must be an even number.<br />
Writes <strong>the</strong> text with <strong>the</strong> Font 8x15 to <strong>the</strong> specified position<br />
— Left/top are <strong>the</strong> x/y coordinates of <strong>the</strong> top/left corner<br />
— cc is <strong>the</strong> color of <strong>the</strong> font (high/low nibble specifying <strong>the</strong> color)<br />
(4bpp)<br />
Attention: On <strong>the</strong> left side <strong>for</strong> 4bpp, set an even number.<br />
The demo functionality varies slightly between <strong>the</strong> DEMO9S08QG8 and <strong>the</strong> DEMO9S08AW60 setups.<br />
Figure 11 depicts <strong>the</strong> basic program flow and <strong>the</strong> <strong>OLED</strong> display outputs <strong>for</strong> DEMO9S08QG8 example.<br />
<strong>Freescale</strong> Semiconductor 23
Demo Functionality<br />
24<br />
Power On<br />
(Reset)<br />
MCU initialization<br />
(Real Time Interrupt modules<br />
RTI used <strong>for</strong> timing)<br />
<strong>OLED</strong>_Interface_Init()<br />
<strong>OLED</strong> Power Up Sequence<br />
<strong>Display</strong> Welcome Message<br />
(<strong>for</strong> about 1 second)<br />
<strong>Display</strong> example GUI<br />
with real time data<br />
(about 10 second)<br />
<strong>Display</strong> <strong>Freescale</strong> Logo<br />
(scrolls in)<br />
<strong>Display</strong> Memory In<strong>for</strong>mation<br />
Message<br />
(<strong>for</strong> about 3 seconds)<br />
4.1 MC9S08QG8 Example Demo<br />
Figure 11. Basic Program Flow<br />
The demo software demonstrates <strong>the</strong> <strong>OLED</strong> display drive and displays some real-time data (see Figure 4):<br />
• Status of two switches<br />
• Analog-voltage reading set by potentiometer<br />
• Analog-voltage reading of ambient-light sensor<br />
<strong>OLED</strong> <strong>Display</strong> <strong>Driver</strong> <strong>for</strong> <strong>the</strong> <strong>HCS08</strong> <strong>Family</strong>, Rev. 0<br />
<strong>Freescale</strong> Semiconductor
Potentiometer Light Sensor<br />
4.2 9S08AW60 Example Demo<br />
Figure 12. Demo Setup with DEMO9S08QG8 (Photo)<br />
<strong>OLED</strong> <strong>Display</strong> <strong>Driver</strong> <strong>for</strong> <strong>the</strong> <strong>HCS08</strong> <strong>Family</strong>, Rev. 0<br />
<strong>OLED</strong> Daughter Card<br />
9S08QG8<br />
BDM Interface<br />
Switches SW1,SW2<br />
Demo Functionality<br />
The demo software demonstrates <strong>the</strong> drive of <strong>the</strong> <strong>OLED</strong> display and displays some real-time data:<br />
• Status of four switches<br />
• Analog-voltage reading set by potentiometer<br />
• Analog-voltage reading of ambient light sensor<br />
• Two analog-voltage readings of a X/Y accelerometer<br />
<strong>Freescale</strong> Semiconductor 25
Demo Functionality<br />
26<br />
Power Supply<br />
4 Switches<br />
Potentiometer<br />
Light Sensor<br />
X/Y Accelerometer<br />
AW60DEMO Board<br />
3.3 V Logic Supply<br />
GND<br />
12 V Enable<br />
RESET<br />
Data/Command<br />
MOSI<br />
SPCLK<br />
SS<br />
DC/DC<br />
3.3 V<br />
to<br />
12 V<br />
<strong>OLED</strong> Daughter Card<br />
Figure 13. Demo Setup with DEMO9S08AW60 Board<br />
<strong>OLED</strong> <strong>Display</strong> <strong>Driver</strong> <strong>for</strong> <strong>the</strong> <strong>HCS08</strong> <strong>Family</strong>, Rev. 0<br />
<strong>OLED</strong> <strong>Display</strong><br />
128x64pixel<br />
(Yellow 4bit)<br />
<strong>Freescale</strong> Semiconductor
Switches SW1-SW4<br />
Figure 14. Demo Setup with DEMO9S08AW60 (Photo)<br />
5 Image <strong>for</strong>mat and BMP2C.EXE Utility<br />
<strong>OLED</strong> <strong>Display</strong> <strong>Driver</strong> <strong>for</strong> <strong>the</strong> <strong>HCS08</strong> <strong>Family</strong>, Rev. 0<br />
Image <strong>for</strong>mat and BMP2C.EXE Utility<br />
The BMP2C.EXE utility (freeware from <strong>Freescale</strong>) is a command-line tool to convert a Windows bitmap<br />
file (*.bmp) to a C-language structure used with <strong>the</strong> <strong>OLED</strong> driver software. To convert a bitmap file, open<br />
a command window and run <strong>the</strong> BMP2C.EXE, as described below:<br />
Usage:<br />
BMP2C.exe bmpfile outfile<br />
bmpfile bitmap file to be converted<br />
outfile output "C" file created<br />
Light Sensor<br />
<strong>OLED</strong> Daughter Card<br />
9S08AW60<br />
Accelerometer<br />
Potentiometer<br />
BDM Interface<br />
(bottom side)<br />
<strong>Freescale</strong> Semiconductor 27
Font Format<br />
The tool converts bitmap pixel from <strong>the</strong> RGB <strong>for</strong>mat to <strong>the</strong> 4 bpp <strong>for</strong>mat using <strong>the</strong> following equation:<br />
R, G, B are <strong>the</strong> 8bit values representing <strong>the</strong> red, green, and blue portion of <strong>the</strong> pixel.<br />
All converted pixel are packed into a C-language structure (byte array).<br />
Each byte contains <strong>the</strong> in<strong>for</strong>mation <strong>for</strong> two pixels.<br />
28<br />
const char Image[] = {<br />
128,40, // first two byte are size in pixel (x * y)<br />
0x00, 0x00, .........}; // pixel data<br />
NOTE<br />
The software and <strong>the</strong> BMP2C.EXE requires that <strong>the</strong> source bitmap file<br />
horizontal resolution is an even number.<br />
This structure can be included into <strong>the</strong> IMAGE.C source file (<strong>for</strong> example, in <strong>the</strong> CodeWarrior IDE).<br />
6 Font Format<br />
Pixel<br />
Bitmap type fonts are stored in a <strong>for</strong>mat where one bit represents one pixel of in<strong>for</strong>mation — monochrome<br />
font. Each letter can <strong>the</strong>n be displayed in one of 16 gray levels.<br />
To explain how <strong>the</strong> font data is represented, <strong>the</strong> character 1 is used as an example.<br />
For <strong>the</strong> 5x7 font, five bytes are used to store each character:<br />
const char FONT5X7 [][5] = {<br />
....................<br />
{ 0x00, 0x42, 0x7F, 0x40, 0x00 }, // 1<br />
....................<br />
}<br />
R + G + B<br />
=<br />
-----------------------<br />
3 ⋅ 16<br />
<strong>OLED</strong> <strong>Display</strong> <strong>Driver</strong> <strong>for</strong> <strong>the</strong> <strong>HCS08</strong> <strong>Family</strong>, Rev. 0<br />
<strong>Freescale</strong> Semiconductor
Byte<br />
0 1 2 3 4<br />
0x00 0x42 0x7F 0x40 0x00<br />
For <strong>the</strong> 8x15 font, 8 times 2 = 16 bytes are used to store each character:<br />
<strong>OLED</strong> <strong>Display</strong> <strong>Driver</strong> <strong>for</strong> <strong>the</strong> <strong>HCS08</strong> <strong>Family</strong>, Rev. 0<br />
Font Format<br />
<strong>Freescale</strong> Semiconductor 29<br />
0<br />
1<br />
2<br />
3<br />
4<br />
5<br />
6<br />
7<br />
Bit<br />
Figure 15. Number “1” in FONT 5x7 Format<br />
const char FONT8X15 [][8][2] = {<br />
.....................<br />
{ {0x00, 0x00}, {0x04, 0x08}, {0x06, 0x08}, {0xFF, 0x0F}, {0xFF, 0x0F}, {0x00, 0x08},<br />
{0x00, 0x08}, {0x00, 0x00} } , // 1<br />
.....................<br />
}
Font Format<br />
30<br />
Byte<br />
0 2 4 6 8 10 12 14<br />
0x00 0x04 0x06 0xFF 0xFF 0x00 0x00 0x00<br />
Byte<br />
1 3 5 7 9 11 13 15<br />
0x00 0x08 0x08 0x0F 0x0F 0x08 0x08 0x00<br />
Figure 16. Number “1” in FONT8x15 Format<br />
<strong>OLED</strong> <strong>Display</strong> <strong>Driver</strong> <strong>for</strong> <strong>the</strong> <strong>HCS08</strong> <strong>Family</strong>, Rev. 0<br />
0<br />
1<br />
2<br />
3<br />
4<br />
5<br />
6<br />
7<br />
0<br />
1<br />
2<br />
3<br />
4<br />
5<br />
6<br />
7<br />
Bit<br />
Bit<br />
<strong>Freescale</strong> Semiconductor
7 Conclusion<br />
<strong>OLED</strong> <strong>Display</strong> <strong>Driver</strong> <strong>for</strong> <strong>the</strong> <strong>HCS08</strong> <strong>Family</strong>, Rev. 0<br />
Conclusion<br />
The provided documentation and software show how to control an <strong>OLED</strong> display with an <strong>HCS08</strong><br />
microcontroller, even with a limited amount of memory or GPIOs. The software can be used as <strong>the</strong> basis<br />
<strong>for</strong> o<strong>the</strong>r projects and fur<strong>the</strong>r enhancements, such as:<br />
• Support <strong>for</strong> monochrome (1bpp) <strong>OLED</strong> displays<br />
• Support <strong>for</strong> full-color <strong>OLED</strong> displays<br />
• Support <strong>for</strong> software SPI or parallel interface<br />
• Scalable fonts<br />
• Use of power-down sequence (controlled shut down)<br />
• Implementation of a screen saver<br />
• Power-consumption optimization<br />
• Implementation of drawing functions, <strong>for</strong> example, lines, rectangulars, etc.(requires sufficient<br />
amount of RAM memory)<br />
• Use of compressed storage of data to enhance memory efficiency<br />
• Utility to generate fonts<br />
More in<strong>for</strong>mation on how to use an <strong>OLED</strong> in a real-world application can be found on <strong>the</strong> OSRAM Pictiva<br />
website (see Section 8, “References”).<br />
For more in<strong>for</strong>mation on CodeWarrior tools, see Section 8, “References”.<br />
To get to a small memory footprint, some specific actions were incorporated (<strong>the</strong> storage of <strong>the</strong> <strong>Freescale</strong><br />
Logo image). Only <strong>the</strong> logo itself was stored and not <strong>the</strong> surrounding background. Like this <strong>the</strong> size of <strong>the</strong><br />
bitmap could be reduced by 37.5% from 4096 bytes (128 x 64 x 4 Bit) to 2560 bytes (128 x 40 x 4 Bit).<br />
A second method used <strong>for</strong> <strong>the</strong> push buttons (Figure 11) is <strong>the</strong> ability to “darken” a bitmap during runtime<br />
when it is drawn (<strong>OLED</strong>_DrawImage function — see Table 9). Like this, <strong>the</strong> storage of two<br />
images—button released and button pressed—can be reduced to only one image. This saves 258 bytes<br />
(50% reduction).<br />
Table 10 summarizes <strong>the</strong> memory consumption <strong>for</strong> <strong>the</strong> example applications. This differences are mainly<br />
caused by demonstration functionalities.<br />
Table 10. Memory Consumption Overview<br />
MC9S08QG8 MC9S08AW60<br />
Images 3912 bytes 5260 bytes<br />
Fonts 1995 bytes 1995 bytes<br />
Text 187 bytes 134 bytes<br />
Program 1951 bytes 1987 bytes<br />
Flash total 8045 bytes 9376 bytes<br />
RAM
References<br />
8 References<br />
Fur<strong>the</strong>r details can be found in <strong>the</strong> following documentation<br />
• MC9S08QG8 Data Sheet<br />
• MC9S08AW60 Advanced In<strong>for</strong>mation Data Sheet<br />
• SSD0323 Data sheet (128x80, 16 gray scale dot matrix controller)<br />
Useful web sites:<br />
• <strong>Freescale</strong> website http://www.freescale.com<br />
• OSRAM Pictiva website http://www.pictiva.com<br />
• Wikipedia website http://en.wikipedia.org/wiki/Oled<br />
• <strong>OLED</strong> In<strong>for</strong>mation website http://www.oled-info.com<br />
32<br />
<strong>OLED</strong> <strong>Display</strong> <strong>Driver</strong> <strong>for</strong> <strong>the</strong> <strong>HCS08</strong> <strong>Family</strong>, Rev. 0<br />
<strong>Freescale</strong> Semiconductor
Appendix A <strong>OLED</strong> Daughter Card<br />
A.1 Schematics<br />
<strong>OLED</strong> <strong>Display</strong> <strong>Driver</strong> <strong>for</strong> <strong>the</strong> <strong>HCS08</strong> <strong>Family</strong>, Rev. 0<br />
References<br />
<strong>Freescale</strong> Semiconductor 33
References<br />
A.2 Layout<br />
34<br />
Figure 17. Placement<br />
Figure 18. Solderstop Mask (Top)<br />
<strong>OLED</strong> <strong>Display</strong> <strong>Driver</strong> <strong>for</strong> <strong>the</strong> <strong>HCS08</strong> <strong>Family</strong>, Rev. 0<br />
<strong>Freescale</strong> Semiconductor
Figure 19. Copper (Top)<br />
Figure 20. Copper (Bottom)<br />
<strong>OLED</strong> <strong>Display</strong> <strong>Driver</strong> <strong>for</strong> <strong>the</strong> <strong>HCS08</strong> <strong>Family</strong>, Rev. 0<br />
References<br />
<strong>Freescale</strong> Semiconductor 35
References<br />
36<br />
Figure 21. Solderstop Mask (Bottom)<br />
<strong>OLED</strong> <strong>Display</strong> <strong>Driver</strong> <strong>for</strong> <strong>the</strong> <strong>HCS08</strong> <strong>Family</strong>, Rev. 0<br />
<strong>Freescale</strong> Semiconductor
A.3 <strong>OLED</strong> Daughter Card BOM (Bill of Materials)<br />
Table 11. <strong>OLED</strong> Daughter Card Bill of Materials<br />
Quantity Reference Description Supplier PartNo. Supplier<br />
1 U1 TPS7634ID (Texas Instruments)<br />
IC, DC/DC 120 mA, 12 V<br />
SMD-SOIC8<br />
2 C1, C2 Ceramic Capacitor<br />
4.7 μF 6.3 V 20%<br />
SMD–0805<br />
1 C3 Tantal Capacitor<br />
4.7 μF 16 V 20%<br />
SMC–A<br />
1 C4 Tantal Capacitor<br />
10 μF 16 V 20%<br />
SMC–B<br />
2 C5, C6 Tantal Capacitor<br />
33 μF 16 V 10%<br />
SMC–D<br />
1 C7 Ceramic Capacitor<br />
47pF 50 V 10%<br />
SMD–0603<br />
1 C8 Ceramic Capacitor<br />
1 pF 50 V 10%<br />
SMD–0603<br />
1 D1 Schottky Diode<br />
MBRA130LT3 ONSEMI<br />
SMD–SMA (DO–214AC)<br />
1 J1 PinHeader 2x16<br />
0.1 inch pitch<br />
1 J2 PinHeader 2x20<br />
0.1 inch pitch<br />
1 J3 FCB Flex 30 pin socket<br />
0.5 mm pitch<br />
1 L1 Inductor 15 μH, max. 850 mA, 0.15 Ω<br />
Panasonic ELL6RH150M<br />
<strong>OLED</strong> <strong>Display</strong> <strong>Driver</strong> <strong>for</strong> <strong>the</strong> <strong>HCS08</strong> <strong>Family</strong>, Rev. 0<br />
8458111 Farnell<br />
9227857 Farnell<br />
197269 Farnell<br />
498737 Farnell<br />
757858 Farnell<br />
722042 Farnell<br />
721840 Farnell<br />
3004120 Farnell<br />
9729070 Farnell<br />
9729070 Farnell<br />
SFV30R1–ST FCI<br />
3837403 Farnell<br />
References<br />
<strong>Freescale</strong> Semiconductor 37
References<br />
38<br />
1 LED1, LED2 LED green<br />
low power<br />
SMD–ChipLED 0603<br />
1 R1 Resistor<br />
820 kΩ, 5%, 0.1 W<br />
SMD–0805<br />
1 R2 Resistor<br />
3 kΩ, 5%, 0.1 W<br />
SMD–0805<br />
1 R3 Resistor<br />
330 Ω, 5%, 0.1 W<br />
SMD–0805<br />
Table 11. <strong>OLED</strong> Daughter Card Bill of Materials (continued)<br />
Quantity Reference Description Supplier PartNo. Supplier<br />
<strong>OLED</strong> <strong>Display</strong> <strong>Driver</strong> <strong>for</strong> <strong>the</strong> <strong>HCS08</strong> <strong>Family</strong>, Rev. 0<br />
8554609 Farnell<br />
9334920 Farnell<br />
9334319 Farnell<br />
9334351 Farnell<br />
<strong>Freescale</strong> Semiconductor
A.4 DEMO9S08QG8 Board<br />
<strong>OLED</strong> <strong>Display</strong> <strong>Driver</strong> <strong>for</strong> <strong>the</strong> <strong>HCS08</strong> <strong>Family</strong>, Rev. 0<br />
References<br />
<strong>Freescale</strong> Semiconductor 39
References<br />
A.5 DEMO9S08AW60 Board<br />
40<br />
1<br />
2<br />
3<br />
4<br />
5<br />
P_EXT_5V<br />
P3_3V<br />
U1<br />
VDD_5V<br />
U2<br />
F50<br />
1 2<br />
VIN_F<br />
3<br />
1<br />
VIN<br />
ADJ<br />
0.75A<br />
2<br />
2<br />
0.6<br />
VOUT VOUT<br />
4<br />
VOUT VOUT<br />
4<br />
+ C54 10uF<br />
1<br />
3<br />
100uf C55<br />
ADJ<br />
LT1086<br />
VIN<br />
LT1086<br />
D50<br />
0.1<br />
MBRS130L<br />
R1<br />
R3<br />
1 2<br />
1 2<br />
+ + C50 C50<br />
0.6<br />
C51<br />
100uf<br />
+ C57 10uF<br />
+ C58<br />
R2<br />
510 OHM<br />
10uF<br />
0.1<br />
100uf C59<br />
R53<br />
510 OHM<br />
C56<br />
100uf<br />
D J1<br />
+/-5%<br />
D<br />
1.5K<br />
0.6<br />
0.1<br />
820 +/-5%<br />
10uF<br />
0.1<br />
1<br />
+/-5%<br />
+/-5%<br />
0.6<br />
3<br />
2<br />
1<br />
1 2<br />
2<br />
1<br />
1<br />
1<br />
1<br />
1<br />
1<br />
2<br />
2<br />
2<br />
1 2<br />
2<br />
2<br />
JP4<br />
1<br />
PJ-002A-SMT<br />
PJ-002A-SMT<br />
7V to 12V CENTER POSITIVE<br />
HDR_1X1<br />
NO _POP<br />
RESET_B<br />
BKGD<br />
VDD<br />
VDD<br />
R70<br />
R7<br />
10.0K<br />
C 10.0K<br />
C<br />
+/-1%<br />
+/-1%<br />
VDD<br />
BKGD<br />
RESET_B<br />
VDD_5V<br />
Q51<br />
VDD<br />
VDD<br />
VCC IRLML6402TRPBF VCC_3V<br />
U3A<br />
1 OF 2<br />
3 2<br />
56<br />
P_EXT_5V VCC_TGT_5V<br />
BKGD/MS<br />
VDD<br />
SW3<br />
RESET_B<br />
C53<br />
+ C52<br />
JP1<br />
1 3<br />
3<br />
RESET<br />
0.1uF<br />
100uf<br />
1<br />
R4<br />
2<br />
4<br />
XTAL 57<br />
0.1<br />
0.1<br />
P_IO_5V<br />
10K<br />
PTG5/XTAL<br />
SPST PB NO<br />
W3<br />
HDR_1X1<br />
+/-5%<br />
58<br />
PTG6/EXTAL<br />
2<br />
NO _POP<br />
1<br />
69190-603<br />
R61<br />
W2<br />
W1<br />
XTAL_R<br />
HDR_2X1<br />
1 2<br />
U50<br />
3<br />
ZR431<br />
0ohm<br />
2<br />
2 1<br />
1<br />
5%<br />
Q50<br />
R56<br />
R57<br />
1<br />
MGSF1N02LT1G<br />
1 2 EXTAL_R 1 2 EXTAL<br />
69190-603<br />
P3_3V<br />
R50<br />
10M +/-5%<br />
10K<br />
0ohm<br />
D7<br />
Y1<br />
+/-5%<br />
5%<br />
MC9S08AW60<br />
SML-LXL1206GC<br />
1 2<br />
4MHz<br />
B B<br />
C60<br />
C61<br />
R54<br />
22pF<br />
22pF<br />
510ohm<br />
0.2<br />
0.2<br />
C65 C63 C62<br />
5%<br />
0.1uF 0.1uF 0.1uF<br />
0.1 0.1<br />
0.1<br />
22<br />
VSS<br />
21<br />
VSS<br />
59<br />
VREFH 54<br />
VDDAD<br />
VREFL<br />
55<br />
44<br />
VSSAD 45<br />
J18<br />
1 2<br />
3 4<br />
5<br />
6<br />
TSW-103-07-S-D<br />
NO_POP<br />
1<br />
1<br />
2<br />
<strong>OLED</strong> <strong>Display</strong> <strong>Driver</strong> <strong>for</strong> <strong>the</strong> <strong>HCS08</strong> <strong>Family</strong>, Rev. 0<br />
1<br />
3<br />
2<br />
2<br />
1<br />
1 2<br />
R1<br />
2 1<br />
1<br />
2 1<br />
2<br />
2<br />
1 2<br />
1 2<br />
1<br />
1<br />
2<br />
1<br />
2<br />
3<br />
2<br />
2 3<br />
1<br />
1<br />
1<br />
1<br />
2<br />
2<br />
2<br />
2<br />
VDD<br />
14<br />
13<br />
12<br />
11<br />
10<br />
9<br />
8<br />
IO14<br />
IO13<br />
IO12<br />
IO11<br />
IO10<br />
IO9<br />
IO8<br />
R60<br />
10.0K<br />
+/-1%<br />
J6<br />
1<br />
IO1<br />
2<br />
IO2<br />
3<br />
IO3<br />
4<br />
IO4<br />
5<br />
IO5<br />
6<br />
IO6<br />
7<br />
IO7<br />
DIP14<br />
1 2<br />
NO_POP<br />
R59<br />
10.0K<br />
+/-1%<br />
1 2<br />
A A<br />
Drawing Title:<br />
DEMO9S08AW60<br />
Page Title:<br />
POWER, CLOCK, AND RESET<br />
Size Document Number Rev<br />
C PDF: SPF-20805 SOURCE: SCH-20805 B<br />
Date: Date: Thursday, September 22, 2005 Sheet Sheet 3 of 5<br />
1<br />
<strong>Freescale</strong> Semiconductor<br />
2<br />
3<br />
4<br />
5
5<br />
1<br />
2<br />
3<br />
4<br />
PTA[0:7]<br />
PTB[0:7]<br />
PTC[0:6]<br />
RESET_B<br />
BKGD<br />
VDD<br />
PTE[0:7]<br />
P3_3V<br />
PTF[0:7]<br />
VDD<br />
U3B<br />
D D<br />
2 OF 2<br />
PTG[0:4]<br />
IRQ<br />
PTC4_SW<br />
PTA7<br />
PTA6<br />
P_IO_5V<br />
VDD<br />
PTA5<br />
PTA4<br />
IRQ<br />
PTA3<br />
PTC4<br />
RESET_B<br />
PTA2<br />
PTE0<br />
BKGD<br />
PTA1<br />
PTE1<br />
PTG4<br />
PTA0<br />
PTG0<br />
PTB0<br />
PTG1<br />
PTB1<br />
PTD0 PTD0_SW<br />
PTE2<br />
PTB2<br />
PTB7<br />
PTE3<br />
PTB3<br />
PTB6<br />
PTE6<br />
PTB4<br />
PTB5<br />
PTE5<br />
PTB5<br />
PTB4<br />
VDD<br />
PTE7<br />
PTB6<br />
PTB3<br />
PTD1<br />
PTE4<br />
PTB7<br />
PTB2<br />
PTA0<br />
PTC1<br />
PTD5_SW<br />
PTB1<br />
PTA1<br />
PTC0<br />
PTB0<br />
PTA2<br />
PTG2<br />
PTA3<br />
PTG3<br />
PTD2<br />
PTA4<br />
PTF4<br />
PTC6<br />
PTA5<br />
PTF5<br />
PTC5<br />
PTA6<br />
PTC5<br />
PTC4<br />
PTA7<br />
PTC3<br />
PTC3<br />
PTC2<br />
PTD3<br />
PTC1<br />
PTC0<br />
VDD<br />
PTD7<br />
PTD4<br />
PTD4_SW<br />
PTD6<br />
PTD5<br />
HDR_2X1<br />
C PTD4<br />
VDD<br />
C<br />
PTD3<br />
J9<br />
PTD2<br />
PTD5<br />
PTD1<br />
PTD0<br />
PTD1_SW<br />
PTE7<br />
PTD6<br />
PTE6<br />
U51<br />
PTE5<br />
V+<br />
PTE4<br />
SW8<br />
- 3<br />
PTE3<br />
PTC2_SW 1 3<br />
4<br />
PTE2<br />
PTD7<br />
+ 1<br />
PTE1<br />
2<br />
4<br />
PTE0<br />
SPST PB NO<br />
V-<br />
LMV321DBV<br />
PTC2<br />
SW7<br />
PTF7<br />
PTC6<br />
PTC6_SW 1 3<br />
PTF6<br />
PTF5<br />
2<br />
4<br />
PTF4<br />
PTE0<br />
SPST PB NO<br />
PTF3<br />
PTF2<br />
PTD7_SW<br />
PTF1<br />
PTD2_SW<br />
PTF0<br />
PTD6_SW<br />
PTE1<br />
C7<br />
0.1uF<br />
VDD<br />
P3_3V<br />
HDR_2X1<br />
0.1<br />
PTG4<br />
J17<br />
PTD3_SW<br />
VDD<br />
PTG3<br />
PTF0<br />
VDD<br />
PTG2<br />
PTG1<br />
LT_PTC4_SW<br />
PTG0<br />
R89<br />
1 2<br />
MC9S08AW60<br />
PTF1<br />
0ohm 5%<br />
PTE0_SW<br />
PTE0<br />
B B<br />
PTF0_SW<br />
PTF1_SW<br />
PTF2<br />
PTF2_SW<br />
PTE0_TXD<br />
PTE1_SW<br />
PTE1<br />
HDR_2X1<br />
J12<br />
PTE1_RXD<br />
PTF3<br />
PTF3_SW<br />
PTE2_SW<br />
PTE2<br />
NO_POP<br />
R81<br />
0 ZERO OHM<br />
+/-5%<br />
PTF4 PTF4_SW<br />
PTE3_SW<br />
PTE3<br />
R97 510ohm 1 2 5%<br />
PTF5 PTF5_SW<br />
PTE4_SW<br />
PTE4<br />
PTF6 PTF6_SW<br />
PTE5_SW<br />
PTE5<br />
2<br />
R83<br />
10.0K<br />
+/-1%<br />
PTA7<br />
33<br />
PTA6<br />
32<br />
PTA5<br />
31<br />
PTA4<br />
30<br />
PTA3<br />
29<br />
R82<br />
PTA2<br />
28<br />
1 2<br />
PTA1<br />
27<br />
PTA0<br />
26<br />
47K +/-5%<br />
PTB7/AD1P7<br />
41<br />
PTB6/AD1P6<br />
40<br />
PTB5/AD1P5<br />
39<br />
C74<br />
U57<br />
PTB4/AD1P4<br />
38<br />
0.1uF<br />
V+<br />
PTB3/AD1P3<br />
37<br />
0.1<br />
VR1<br />
- 3<br />
PTB2/AD1P2<br />
36<br />
1 3<br />
4<br />
PTB1/AD1P1<br />
35<br />
+ 1<br />
PTB0/AD1P0<br />
34<br />
10K<br />
+/-10%<br />
V-<br />
LMV321DBV R79<br />
PTC6<br />
9<br />
10.0K C75<br />
PTC5/RXD2<br />
64<br />
HDR_2X1<br />
+/-1% 0.1uF<br />
PTC4<br />
1<br />
0.1<br />
PTC3/TXD2<br />
63<br />
J3<br />
PTC2/MCLK<br />
62<br />
PTC1/SDA1<br />
61<br />
PTC0/SCL1<br />
60<br />
PTD7/AD1P15/KBI1P7<br />
53<br />
PTD6/AD1P14/TPM1CLK<br />
52<br />
PTD5/AD1P13<br />
51<br />
PTD4/AD1P12/TPM2CLK<br />
50<br />
PTD3/AD1P11/KBI1P6<br />
47<br />
PTD2/AD1P10/KBI1P5<br />
46<br />
PTD1/AD1P9<br />
43<br />
PTD0/AD1P8<br />
42<br />
HDR_2X1<br />
J5<br />
C68<br />
PTE7/SPSCK1<br />
20<br />
0.1uF<br />
PTE6/MOSI1<br />
19<br />
0.1<br />
PTE5/MISO1<br />
18<br />
PTE4/SS1<br />
17<br />
PTE3/TPM1CH1<br />
16<br />
PTE2/TPM1CH0<br />
15<br />
PTE1/RXD1<br />
14<br />
PTE0/TXD1<br />
13<br />
PTF7<br />
10<br />
PTF6<br />
12<br />
PTF5/TPM2CH1<br />
11<br />
PTF4/TPM2CH0<br />
8<br />
PTF3/TPM1CH5<br />
7<br />
PTF2/TPM1CH4<br />
6<br />
PTF1/TPM1CH3<br />
5<br />
PTF0/TPM1CH2<br />
4<br />
C69<br />
0.1uF<br />
U4<br />
PTG4/KBI1P4<br />
49<br />
0.1<br />
PTG3/KBI1P3<br />
48<br />
VDD<br />
PTG2/KBI1P2<br />
25<br />
PTG1/KBI1P1<br />
24<br />
PTG0/KBI1P0<br />
23<br />
R80<br />
ST<br />
12<br />
10.0K<br />
XOUT<br />
15<br />
+/-1%<br />
YOUT<br />
14<br />
SW6<br />
1<br />
20<br />
2<br />
19<br />
3<br />
18<br />
HDR_2X1<br />
4<br />
17<br />
J24<br />
5<br />
16<br />
6<br />
15<br />
7<br />
14<br />
8<br />
13<br />
9<br />
12<br />
10<br />
11<br />
76SB10ST<br />
MMA6260Q_QFN16<br />
HDR_2X1<br />
J13<br />
R16<br />
10.0K<br />
+/-1%<br />
HDR_2X1<br />
J23<br />
1 2<br />
3<br />
U59<br />
VCC<br />
EL7900ILCZ<br />
NC1<br />
1<br />
NC2<br />
2<br />
NC3<br />
5<br />
NC4<br />
6<br />
NC5<br />
7<br />
NC6<br />
8<br />
NC7<br />
9<br />
NC8<br />
10<br />
17<br />
VSS NC9<br />
11<br />
NC10<br />
13<br />
4<br />
VSS NC11<br />
16<br />
1<br />
U54<br />
5<br />
DIR VCCA<br />
1<br />
VCCB<br />
6<br />
3<br />
A<br />
B<br />
4<br />
2<br />
GND<br />
SN74LVC1T45<br />
HDR_2X1<br />
J20<br />
HDR_2X1<br />
J8<br />
HDR_2X1<br />
J4<br />
R65<br />
1 2<br />
R63<br />
47K +/-5%<br />
1 2<br />
5<br />
20K +/-5%<br />
C66<br />
OUT<br />
0.1uF<br />
4<br />
NC<br />
0.1<br />
HDR_2X1<br />
2<br />
GND1EN_B<br />
3<br />
J2<br />
6<br />
GND2<br />
R91<br />
1.0K<br />
+/-5%<br />
C67<br />
0.1uF<br />
0.1<br />
U58<br />
C77<br />
SW4<br />
1 3<br />
1 2<br />
2<br />
4<br />
0.1uF<br />
SPST PB NO<br />
0.1<br />
HDR_2X1<br />
J11<br />
C8<br />
J22<br />
1 2<br />
M1<br />
HDR_2X1<br />
1<br />
J10<br />
0.1uF<br />
6<br />
0.1<br />
2<br />
7<br />
3<br />
8<br />
4<br />
9<br />
5<br />
R71 510ohm 1 2 5%<br />
M2<br />
R73 510ohm<br />
R5IN<br />
1 2 5%<br />
788750-1<br />
R74 510ohm 1 2 5%<br />
MAX3243<br />
R94 510ohm 1 2 5%<br />
HDR_2X1<br />
J34<br />
8<br />
R1IN 4<br />
R2IN 5<br />
R3IN 6<br />
R4IN 7<br />
15<br />
R5OUT<br />
R4OUT<br />
16 R3OUT<br />
17 R2OUT<br />
18 R1OUT<br />
19 R2OUTB<br />
27<br />
V+<br />
VCC<br />
28<br />
C1+<br />
24<br />
C1-<br />
V-<br />
3<br />
C2+<br />
1<br />
21<br />
INVALID<br />
22<br />
FORCEOFF<br />
23<br />
FORCEON<br />
C2-<br />
2<br />
14<br />
T1IN T1OUT<br />
9<br />
13<br />
T2IN T2OUT<br />
10<br />
12<br />
T3IN T3OUT<br />
11<br />
20<br />
26<br />
GND 25<br />
J50<br />
1 2<br />
3 4<br />
5 6<br />
7 8<br />
R78<br />
9 10<br />
11 12<br />
1 2<br />
C76<br />
13 14<br />
0.1uF<br />
15 16<br />
20K +/-5%<br />
0.1<br />
17 18<br />
19 20<br />
21 22<br />
23 24<br />
25 26<br />
HDR_2X1<br />
27 28<br />
29 30<br />
J7<br />
31 32<br />
33 34<br />
35 36<br />
37 38<br />
39 40<br />
CONN_SKT_20X2<br />
R75<br />
10.0K<br />
+/-1%<br />
HDR_2X1<br />
HDR_2X1<br />
R64<br />
J19<br />
J32<br />
10.0K<br />
+/-1%<br />
HDR_2X1<br />
HDR_2X1<br />
J33<br />
SW5<br />
1 3<br />
J16<br />
2<br />
4<br />
SPST PB NO<br />
C5<br />
R77<br />
R8<br />
0.1uF<br />
2 1<br />
10.0K<br />
0.1<br />
+/-1%<br />
1K +/-5%<br />
R90<br />
R69<br />
C9<br />
1 2<br />
2 1<br />
0.1uF<br />
0.1<br />
0ohm 5%<br />
1K +/-5%<br />
HDR_2X1<br />
J25<br />
LED1<br />
1 20<br />
2 19 R72 510ohm 1 2 5%<br />
3 18<br />
HDR_2X1<br />
4 17<br />
J26<br />
5 16<br />
6 15 R96 510ohm 1 2 5%<br />
7 14<br />
8 13 R95 510ohm 1 2 5%<br />
9 12<br />
HDR_2X1<br />
10 11<br />
J27<br />
R15<br />
LED_BAR_10<br />
10.0K<br />
+/-1%<br />
HDR_2X1<br />
J28<br />
1 2<br />
1 2<br />
1<br />
2<br />
1<br />
2<br />
5<br />
2<br />
1 2<br />
1<br />
2<br />
1 2<br />
1 2<br />
2<br />
1<br />
2<br />
1<br />
2<br />
1<br />
2<br />
1<br />
2<br />
1 2<br />
5<br />
1 2<br />
1<br />
2<br />
1<br />
1 2<br />
1<br />
2<br />
1<br />
2<br />
1 2<br />
1 2<br />
2<br />
2<br />
1<br />
2<br />
1<br />
2<br />
1 2<br />
1<br />
2<br />
1<br />
2<br />
1 2<br />
1 2<br />
1 2<br />
1<br />
2<br />
1<br />
2<br />
1<br />
2<br />
1<br />
2<br />
2<br />
1<br />
1<br />
1<br />
2<br />
2<br />
1<br />
2<br />
1<br />
2<br />
2<br />
1<br />
1 2<br />
1 2<br />
1<br />
2<br />
2<br />
1<br />
1<br />
2<br />
2<br />
1<br />
HDR_2X1<br />
HDR_2X1<br />
J14<br />
J29<br />
PTF7 PTF7_SW<br />
PTE6_SW<br />
PTE6<br />
A A<br />
HDR_2X1<br />
HDR_2X1<br />
J15<br />
J30<br />
PTE7_SW<br />
PTE7<br />
1<br />
2<br />
2<br />
1<br />
2<br />
1<br />
Drawing Title:<br />
HDR_2X1<br />
J31<br />
DEMO9S08AW60<br />
Page Title:<br />
USER FUNCTIONS<br />
Size Document Number Rev<br />
C PDF: SPF-20805 SOURCE: SCH-20805 B<br />
Date: Monday, September 26, 2005 Sheet 4 of 5<br />
1<br />
2<br />
3<br />
4<br />
5
How to Reach Us:<br />
Home Page:<br />
www.freescale.com<br />
E-mail:<br />
support@freescale.com<br />
USA/Europe or Locations Not Listed:<br />
<strong>Freescale</strong> Semiconductor<br />
Technical In<strong>for</strong>mation Center, CH370<br />
1300 N. Alma School Road<br />
Chandler, Arizona 85224<br />
+1-800-521-6274 or +1-480-768-2130<br />
support@freescale.com<br />
Europe, Middle East, and Africa:<br />
<strong>Freescale</strong> Halbleiter Deutschland GmbH<br />
Technical In<strong>for</strong>mation Center<br />
Schatzbogen 7<br />
81829 Muenchen, Germany<br />
+44 1296 380 456 (English)<br />
+46 8 52200080 (English)<br />
+49 89 92103 559 (German)<br />
+33 1 69 35 48 48 (French)<br />
support@freescale.com<br />
Japan:<br />
<strong>Freescale</strong> Semiconductor Japan Ltd.<br />
Headquarters<br />
ARCO Tower 15F<br />
1-8-1, Shimo-Meguro, Meguro-ku,<br />
Tokyo 153-0064<br />
Japan<br />
0120 191014 or +81 3 5437 9125<br />
support.japan@freescale.com<br />
Asia/Pacific:<br />
<strong>Freescale</strong> Semiconductor Hong Kong Ltd.<br />
Technical In<strong>for</strong>mation Center<br />
2 Dai King Street<br />
Tai Po Industrial Estate<br />
Tai Po, N.T., Hong Kong<br />
+800 2666 8080<br />
support.asia@freescale.com<br />
For Literature Requests Only:<br />
<strong>Freescale</strong> Semiconductor Literature Distribution Center<br />
P.O. Box 5405<br />
Denver, Colorado 80217<br />
1-800-441-2447 or 303-675-2140<br />
Fax: 303-675-2150<br />
LDCFor<strong>Freescale</strong>Semiconductor@hibbertgroup.com<br />
Document Number: AN3415<br />
Rev. 0<br />
03/2007<br />
In<strong>for</strong>mation in this document is provided solely to enable system and software<br />
implementers to use <strong>Freescale</strong> Semiconductor products. There are no express or<br />
implied copyright licenses granted hereunder to design or fabricate any integrated<br />
circuits or integrated circuits based on <strong>the</strong> in<strong>for</strong>mation in this document.<br />
<strong>Freescale</strong> Semiconductor reserves <strong>the</strong> right to make changes without fur<strong>the</strong>r notice to<br />
any products herein. <strong>Freescale</strong> Semiconductor makes no warranty, representation or<br />
guarantee regarding <strong>the</strong> suitability of its products <strong>for</strong> any particular purpose, nor does<br />
<strong>Freescale</strong> Semiconductor assume any liability arising out of <strong>the</strong> application or use of any<br />
product or circuit, and specifically disclaims any and all liability, including without<br />
limitation consequential or incidental damages. “Typical” parameters that may be<br />
provided in <strong>Freescale</strong> Semiconductor data sheets and/or specifications can and do vary<br />
in different applications and actual per<strong>for</strong>mance may vary over time. All operating<br />
parameters, including “Typicals”, must be validated <strong>for</strong> each customer application by<br />
customer’s technical experts. <strong>Freescale</strong> Semiconductor does not convey any license<br />
under its patent rights nor <strong>the</strong> rights of o<strong>the</strong>rs. <strong>Freescale</strong> Semiconductor products are<br />
not designed, intended, or authorized <strong>for</strong> use as components in systems intended <strong>for</strong><br />
surgical implant into <strong>the</strong> body, or o<strong>the</strong>r applications intended to support or sustain life,<br />
or <strong>for</strong> any o<strong>the</strong>r application in which <strong>the</strong> failure of <strong>the</strong> <strong>Freescale</strong> Semiconductor product<br />
could create a situation where personal injury or death may occur. Should Buyer<br />
purchase or use <strong>Freescale</strong> Semiconductor products <strong>for</strong> any such unintended or<br />
unauthorized application, Buyer shall indemnify and hold <strong>Freescale</strong> Semiconductor and<br />
its officers, employees, subsidiaries, affiliates, and distributors harmless against all<br />
claims, costs, damages, and expenses, and reasonable attorney fees arising out of,<br />
directly or indirectly, any claim of personal injury or death associated with such<br />
unintended or unauthorized use, even if such claim alleges that <strong>Freescale</strong><br />
Semiconductor was negligent regarding <strong>the</strong> design or manufacture of <strong>the</strong> part.<br />
<strong>Freescale</strong> and <strong>the</strong> <strong>Freescale</strong> logo are trademarks of <strong>Freescale</strong> Semiconductor, Inc.<br />
All o<strong>the</strong>r product or service names are <strong>the</strong> property of <strong>the</strong>ir respective owners.<br />
© <strong>Freescale</strong> Semiconductor, Inc. 2007. All rights reserved.<br />
RoHS-compliant and/or Pb-free versions of <strong>Freescale</strong> products have <strong>the</strong> functionality<br />
and electrical characteristics as <strong>the</strong>ir non-RoHS-compliant and/or non-Pb-free<br />
counterparts. For fur<strong>the</strong>r in<strong>for</strong>mation, see http://www.freescale.com or contact your<br />
<strong>Freescale</strong> sales representative.<br />
For in<strong>for</strong>mation on <strong>Freescale</strong>’s Environmental Products program, go to<br />
http://www.freescale.com/epp.