Scenario Info - GMT Games
Scenario Info - GMT Games
Scenario Info - GMT Games

Create successful ePaper yourself
Turn your PDF publications into a flip-book with our unique Google optimized e-Paper software.
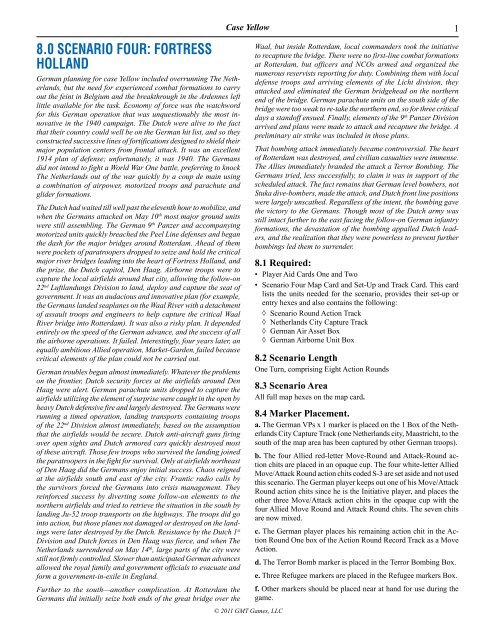
8.0 SCENARIO FOUR: FORTRESS<br />
HOLLAND<br />
German planning for case Yellow included overrunning The Netherlands,<br />
but the need for experienced combat formations to carry<br />
out the feint in Belgium and the breakthrough in the Ardennes left<br />
little available for the task. Economy of force was the watchword<br />
for this German operation that was unquestionably the most innovative<br />
in the 1940 campaign. The Dutch were alive to the fact<br />
that their country could well be on the German hit list, and so they<br />
constructed successive lines of fortifications designed to shield their<br />
major population centers from frontal attack. It was an excellent<br />
1914 plan of defense; unfortunately, it was 1940. The Germans<br />
did not intend to fight a World War One battle, preferring to knock<br />
The Netherlands out of the war quickly by a coup de main using<br />
a combination of airpower, motorized troops and parachute and<br />
glider formations.<br />
The Dutch had waited till well past the eleventh hour to mobilize, and<br />
when the Germans attacked on May 10 th most major ground units<br />
were still assembling. The German 9 th Panzer and accompanying<br />
motorized units quickly breached the Peel Line defenses and began<br />
the dash for the major bridges around Rotterdam. Ahead of them<br />
were pockets of paratroopers dropped to seize and hold the critical<br />
major river bridges leading into the heart of Fortress Holland, and<br />
the prize, the Dutch capitol, Den Haag. Airborne troops were to<br />
capture the local airfields around that city, allowing the follow-on<br />
22 nd Luftlandungs Division to land, deploy and capture the seat of<br />
government. It was an audacious and innovative plan (for example,<br />
the Germans landed seaplanes on the Waal River with a detachment<br />
of assault troops and engineers to help capture the critical Waal<br />
River bridge into Rotterdam). It was also a risky plan. It depended<br />
entirely on the speed of the German advance, and the success of all<br />
the airborne operations. It failed. Interestingly, four years later, an<br />
equally ambitious Allied operation, Market-Garden, failed because<br />
critical elements of the plan could not be carried out.<br />
German troubles began almost immediately. Whatever the problems<br />
on the frontier, Dutch security forces at the airfields around Den<br />
Haag were alert. German parachute units dropped to capture the<br />
airfields utilizing the element of surprise were caught in the open by<br />
heavy Dutch defensive fire and largely destroyed. The Germans were<br />
running a timed operation, landing transports containing troops<br />
of the 22 nd Division almost immediately, based on the assumption<br />
that the airfields would be secure. Dutch anti-aircraft guns firing<br />
over open sights and Dutch armored cars quickly destroyed most<br />
of these aircraft. Those few troops who survived the landing joined<br />
the paratroopers in the fight for survival. Only at airfields northeast<br />
of Den Haag did the Germans enjoy initial success. Chaos reigned<br />
at the airfields south and east of the city. Frantic radio calls by<br />
the survivors forced the Germans into crisis management. They<br />
reinforced success by diverting some follow-on elements to the<br />
northern airfields and tried to retrieve the situation in the south by<br />
landing Ju-52 troop transports on the highways. The troops did go<br />
into action, but those planes not damaged or destroyed on the landings<br />
were later destroyed by the Dutch. Resistance by the Dutch 1 st<br />
Division and Dutch forces in Den Haag was fierce, and when The<br />
Netherlands surrendered on May 14 th , large parts of the city were<br />
still not firmly controlled. Slower than anticipated German advances<br />
allowed the royal family and government officials to evacuate and<br />
form a government-in-exile in England.<br />
Further to the south—another complication. At Rotterdam the<br />
Germans did initially seize both ends of the great bridge over the<br />
Case Yellow<br />
© 2011 <strong>GMT</strong> <strong>Games</strong>, LLC<br />
Waal, but inside Rotterdam, local commanders took the initiative<br />
to recapture the bridge. There were no first-line combat formations<br />
at Rotterdam, but officers and NCOs armed and organized the<br />
numerous reservists reporting for duty. Combining them with local<br />
defense troops and arriving elements of the Licht division, they<br />
attacked and eliminated the German bridgehead on the northern<br />
end of the bridge. German parachute units on the south side of the<br />
bridge were too weak to re-take the northern end, so for three critical<br />
days a standoff ensued. Finally, elements of the 9 th Panzer Division<br />
arrived and plans were made to attack and recapture the bridge. A<br />
preliminary air strike was included in those plans.<br />
That bombing attack immediately became controversial. The heart<br />
of Rotterdam was destroyed, and civilian casualties were immense.<br />
The Allies immediately branded the attack a Terror Bombing. The<br />
Germans tried, less successfully, to claim it was in support of the<br />
scheduled attack. The fact remains that German level bombers, not<br />
Stuka dive-bombers, made the attack, and Dutch front line positions<br />
were largely unscathed. Regardless of the intent, the bombing gave<br />
the victory to the Germans. Though most of the Dutch army was<br />
still intact further to the east facing the follow-on German infantry<br />
formations, the devastation of the bombing appalled Dutch leaders,<br />
and the realization that they were powerless to prevent further<br />
bombings led them to surrender.<br />
8.1 Required:<br />
• Player Aid Cards One and Two<br />
• <strong>Scenario</strong> Four Map Card and Set-Up and Track Card. This card<br />
lists the units needed for the scenario, provides their set-up or<br />
entry hexes and also contains the following:<br />
◊ <strong>Scenario</strong> Round Action Track<br />
◊ Netherlands City Capture Track<br />
◊ German Air Asset Box<br />
◊ German Airborne Unit Box<br />
8.2 <strong>Scenario</strong> Length<br />
One Turn, comprising Eight Action Rounds<br />
8.3 <strong>Scenario</strong> Area<br />
All full map hexes on the map card.<br />
8.4 Marker Placement.<br />
a. The German VPs x 1 marker is placed on the 1 Box of the Netherlands<br />
City Capture Track (one Netherlands city, Maastricht, to the<br />
south of the map area has been captured by other German troops).<br />
b. The four Allied red-letter Move-Round and Attack-Round action<br />
chits are placed in an opaque cup. The four white-letter Allied<br />
Move/Attack Round action chits coded S-3 are set aside and not used<br />
this scenario. The German player keeps out one of his Move/Attack<br />
Round action chits since he is the Initiative player, and places the<br />
other three Move/Attack action chits in the opaque cup with the<br />
four Allied Move Round and Attack Round chits. The seven chits<br />
are now mixed.<br />
c. The German player places his remaining action chit in the Action<br />
Round One box of the Action Round Record Track as a Move<br />
Action.<br />
d. The Terror Bomb marker is placed in the Terror Bombing Box.<br />
e. Three Refugee markers are placed in the Refugee markers Box.<br />
f. Other markers should be placed near at hand for use during the<br />
game.
Case Yellow<br />
8.5 Unit Placement<br />
Refer to the <strong>Scenario</strong> Four Set Up and Track Card. Allied player<br />
sets up first.<br />
8.6 Supply<br />
All units are considered to be in supply for the entire scenario.<br />
8.7 <strong>Scenario</strong> Special Rules<br />
a. Refugees. Normally the German player places Refugee markers<br />
in the End Phase, however the refugee problems for the Allies<br />
began as soon as the German attack commenced. Prior to German<br />
movement in the first German Move Action Round, the German<br />
player will place the three available Refugee markers. All three are<br />
to be placed according to refugee placement rules in Netherlands<br />
controlled towns and cities.<br />
b. German Airborne Operations<br />
1) The German player must use the four parachute units of the 1/7FJ<br />
and 2/7FJ during the German Paradrop Segment of the Air Phase of<br />
the scenario game turn.<br />
Reminder: Parachute units must always be dropped into hexes no<br />
more than ten hexes distant (nine hexes intervening) from a supplied<br />
German ground unit, and only one parachute unit may be dropped<br />
into a hex. Parachute units may be dropped into clear hexes only.<br />
Clear hexes may contain Defensive Works, Towns or Cities.<br />
2) Remove the four regimental units from the German Airborne Units<br />
Box, place one unit on each of four allowed target hexes within The<br />
Netherlands.<br />
3) The 22nd Division is removed from the German Airborne Units<br />
Box and placed on map immediately after the parachute units are<br />
placed.<br />
4) The 22nd Division is placed on one of the parachute units before<br />
the German Airborne Landing Table die roll for the parachute regiment<br />
is made.<br />
5) Roll for parachute unit step loss on the German Airborne Landing<br />
Table. Apply any losses.<br />
6) After making the German Airborne Landing Table die roll for the<br />
parachute unit in the hex, make a German Airborne Landing Table<br />
die roll for the 22nd Division. Apply any losses.<br />
7) The 22nd Division and the parachute regiments cannot move<br />
during the first German Move Action Round following the air landing.<br />
c. Allied Movement Restrictions. All Netherlands units with a<br />
black star on their counters are prohibited from moving during the<br />
first Allied Move Action Round.<br />
DESIGN NOTE: A very late Netherlands mobilization meant that<br />
large numbers of Dutch reservists were still in transit to their units<br />
even after the fighting had begun. Most Netherlands units must<br />
wait until the second Allied Move Action Round to move to simulate<br />
incomplete mobilization early in the fighting.<br />
d. Modified End Phase. The only three required sections of the<br />
End Phase for this scenario are:<br />
1) Terror Bombing Segment. The German player has the option to<br />
place the Terror Bomb marker on map on a Netherlands controlled<br />
city hex. After placement, mover the marker in the Netherlands City<br />
Capture Track one box to the right.<br />
© 2011 <strong>GMT</strong> <strong>Games</strong>, LLC<br />
2) Netherlands Surrender Segment. Determine if The Netherlands<br />
surrenders [see 6.7 for surrender criteria].<br />
3) Victory Determination Segment. Determine the level of victory<br />
[see 6.7]<br />
8.8 Victory Conditions<br />
The German player must force The Netherlands into an early surrender,<br />
and surrender requirements are identical to all other scenarios—six<br />
Netherlands cities, or their equivalents, must be German<br />
controlled by the end of the scenario turn. The German player tracks<br />
German controlled cities on the Netherlands City Capture Track. At<br />
the end of the scenario turn, if:<br />
• the German marker is in the 6 Box on the track—German<br />
Operational Victory.<br />
• the German marker is in the 6 Box on the track, but the Terror<br />
Bomb marker has been placed on map – German Marginal<br />
Victory.<br />
• the German marker is in the 5 Box, or lower, on the track—Allied<br />
Victory.<br />
CITY – Each city hex captured moves the marker one box to the<br />
right. On map available cities:<br />
• Den Haag (hex 4224)<br />
• Eindhoven (hex 3528)<br />
• Nijmegen (hex 3830)<br />
• Rotterdam (hex 4024)<br />
• Utrecht (hex 4127)<br />
TOWN – Three captured town hexes = one city hex. For each<br />
three cities captured, move the marker one box to the right. On map<br />
available towns:<br />
• Apeldoorn (hex 4131)<br />
• Arnhem (hex 4031)<br />
• Breda ((hex 3725)<br />
• Delft (hex 4123)<br />
• Enschede (hex 4135)<br />
• Gouda (hex 4125)<br />
TERROR BOMBING – If the Terror Bombing Marker is placed<br />
on a city hex under Netherlands control, move the marker one box<br />
to the right.<br />
8.9 Play Notes<br />
Allied Player. As you have probably picked up from the narrative,<br />
The Netherlands had no real chance of surviving the German onslaught.<br />
Your task as the Allied player is to survive to fight a second<br />
turn, or failing that, to force the German player to become the villain<br />
in the court of world opinion by resorting to terror bombing to bring<br />
about Netherlands surrender. It’s all about tying up German forces<br />
that are needed elsewhere. Your units are not strong, and most are<br />
immobile during the first Allied Move Action Round, so you do<br />
not have a great deal of operational flexibility. If you have the opportunity,<br />
do not hesitate to move the Licht Division and any other<br />
available Dutch units to block the approaches to both Rotterdam and<br />
Utrecht. Those units will likely be lost, but the German player will<br />
need to take one of the two without terror bombing in order to win<br />
big. If the German is careless, take any opportunity to re-capture<br />
German occupied town and city hexes.<br />
German Player. This is not a situation where it pays to be cautious.<br />
Copying the historical strategy, Den Haag can be captured<br />
during the Paradrop segment, barring bad die rolls. Nijmegen and<br />
Eindhoven should fall to the German player during the course of
Case Yellow<br />
<br />
the turn. However, it is much more difficult to capture either of the<br />
two remaining cities – Rotterdam or Utrecht. Your 9th Panzer and<br />
LAH units will need to operate far ahead of your infantry to have<br />
a chance of capturing either. Remember that you win by capturing<br />
city and town hexes, and not destroying the bulk of the Netherlands<br />
army, except when necessary to open avenues for further advance.<br />
Landing the 22nd LL at Den Haag is not the only option, though it’s<br />
very tough for the Allied player to force it out if it survives. Landing<br />
the 22nd LL at Gouda allows the German player the opportunity to<br />
move and attack either Rotterdam or Utrecht. The downside to this<br />
option is that if the Action Chits fall wrong, the Allied player will<br />
move units to block the division, leaving you without Den Haag,<br />
Rotterdam or Utrecht. Again, depending on how the Action Chits<br />
are drawn, the German player can swing the 9th Panzer and LAH<br />
north to mount a powerful attack on Utrecht, possibly in conjunction<br />
with the 22nd LL. This will make capturing Eindhoven more<br />
problematic with infantry alone. A reminder: ZOCs do not extend<br />
across major river hexsides. The Allied player can move laterally<br />
with impunity and cross such hexsides to occupy hexes that will<br />
stop or delay your forward progress, or to recapture cities or towns<br />
left unoccupied.<br />
9.0 Fortress Holland Introductory<br />
Tutorial<br />
Air Phase<br />
Air Asset Availability: Per set up sheet, the German player has three<br />
Stuka Air Assets available for use in the German Air Assets Box.<br />
Paradrop Segment: The German player decides to place his four<br />
parachute regiments in the following in-range hexes: 4224, 4125,<br />
4027 and 3924.<br />
Note: hex 4224 (Den Haag) is barely within range, being ten hexes<br />
from the German XXVI Corps.<br />
The German player elects to commit the 22nd LL Division to hex<br />
4224 and places it on top of the parachute regiment in that hex.<br />
Now the fun begins! Time to see which airborne units survive. The<br />
German player refers to the German Airborne Landing Table and<br />
rolls for each unit.<br />
Hex 4224 (Den Haag). First roll is for the parachute regiment. The<br />
hex is clear but contains a city, so a +3 DRM is added to the die roll<br />
of 4, making the modified die roll 7. Elimination! The parachute<br />
regiment is removed, having suffered the result it suffered historically.<br />
Next the German player must roll for the 22nd LL, and since<br />
the parachute unit received an E result, it too gets a +3 DRM. The<br />
die roll is 5, so the final die roll is 8. The elimination result reduces<br />
the 22nd LL by one step and it is turned to its reduced side. Since<br />
the final result was 8, the survival of the division is in doubt and a<br />
die roll with no DRMs is made. A die roll of 6 would eliminate the<br />
surviving step, but a 3 is rolled. The battered 22nd LL hangs on to<br />
the Den Haag hex.<br />
The Netherlands City Capture Track marker is moved to the 2 Box.<br />
Hex 4125 (Gouda). The presence of a town in the clear hex adds a<br />
+1 DRM to the die roll of 2, making the final result 3. The regiment<br />
survives. For the moment, the Germans control one town and have<br />
a Bridgehead over the major river crossing hexside.<br />
Hex 4027. This hex contains Defensive Works, so a +1 DRM is<br />
added to the die roll of 4. The final result of 5 allows the parachute<br />
regiment to survive by the narrowest of margins. Now that the<br />
regiment occupies the hex, the Defensive Works are eliminated<br />
and a Defensive Works (DW) Destroyed marker is placed under<br />
the regiment. This regiment also projects bridgeheads into both<br />
Utrecht and hex 3926.<br />
Hex 3924. This hex also contains Defensive Works, so a +1 DRM<br />
is added to the die roll of 1. The final result of 2 allows the parachute<br />
regiment to survive. Now that the regiment occupies the hex,<br />
the Defensive Works are eliminated and a Defensive Works (DW)<br />
Destroyed marker is placed under the regiment. This regiment also<br />
projects bridgeheads into both Rotterdam and hex 3825.<br />
The German player declines to use any of his Stuka Air Assets in the<br />
Stuka Dive Bombing segment, preferring to save them for column<br />
shifts in combats during the Action Phase.<br />
Supply Phase<br />
All units are in supply for the turn of this scenario.<br />
Action Phase<br />
The Action Chit in box 1 of the Action Round Record track is a<br />
German Move Action chit. The three surviving Parachute Regiments<br />
and the 22nd LL Division cannot move since this is the first<br />
German Move Round. All other on-map and reinforcement German<br />
units will move.<br />
Prior to movement, the German player places his three Refugee<br />
markers. The Rotterdam and Utrecht city hexes receive Refugee<br />
markers on their city side. The Breda town hex receives a Refugee<br />
marker on its town side.<br />
German Movement<br />
XI Corps enters hex 3330 at a cost of 3 MPs (1 for clear terrain,<br />
+1 MP for crossing a major river hexside and +1 for entering a hex<br />
with Defensive Works). A DW Destroyed marker is placed in the<br />
hex (the +1 MP movement penalty no longer applies). The XI Corps<br />
spends its last MP to enter clear hex 3329.<br />
The IX Corps repeats the same movement pattern as the XI Corps<br />
to move through hex 3531 and end movement in hex 3530.<br />
The XXVI Corps spends 2 MPs to enter hex 3831 (1 MP for hill terrain<br />
and +1 MP for the Defensive Works). A DW Destroyed marker is<br />
placed in the hex and the XXVI Corps spends one more MP to enter<br />
Nijmegen. Since Nijmegen is now German controlled, the marker in<br />
the Netherlands City Capture Track moves to the 3 box. The XXVI<br />
Corps cannot advance further because all hex and hexside terrain<br />
costs more to enter or cross than the 1 MP remaining.<br />
X Corps spends 1 MP to enter clear hex 3933 and 2 MPs to enter<br />
forest hex 3932. Its one remaining MP remains unspent because<br />
advancing across the Ijssel into a Defensive Works hex will cost 3<br />
MPs. The 208th Division spends all four of its MPs to join X Corps<br />
in hex 3932.<br />
The SS V Motorized Division spends 2 MPs to enter map hex 3935,<br />
2 more MPs to enter clear hex 3834, and its last 2 MPs to cross the<br />
Rhein River hexside into hex 3833.<br />
The 225th Division spends 1 MP to enter the map at hex 3535, 1MP<br />
to enter city hex 3534, and its last 2 MPs to cross the Rhein and end<br />
movement in city hex 3533.<br />
The 9th Panzer and LAH Motorized both move together, expending<br />
1 MP to enter clear hex 3731, 3 MPs to enter hex 3730 (a DW<br />
Destroyed marker also gets placed in this hex), 1 MP to enter clear<br />
© 2011 <strong>GMT</strong> <strong>Games</strong>, LLC
Case Yellow<br />
Graphic 8.1: End of first Action Round, prior to Motorized Movement.<br />
hex 3729, and the final MP of the 9th Panzer is spent on a Bridgehead<br />
attempt. The die roll on the Bridgehead Creation Table is favorable,<br />
and a bridgehead marker is placed in hex 3629. A Bridgehead marker<br />
negates the column shift on the Combat Results Table and allows<br />
the attacker to gain more favorable odds.<br />
German movement is complete [refer to graphic 8.1]<br />
Combat After Movement.<br />
Most German motorized units (those with a red box around their<br />
MA) can attack after movement in a Move Action Round ends.<br />
Combat is identical to combat in a Combat Action Round except<br />
that motorized units can only advance one hex if victorious instead<br />
of two hexes.<br />
The 9th Panzer and LAH Motorized attack the Dutch Peel(a) unit.<br />
The German units have 4 combat factors and the Peel(a) has 1. The<br />
initial odds are 4 to 1. Defender terrain can provide column shifts<br />
to lower the odds, and if more than one type of terrain is present,<br />
the shifts are cumulative. The attack comes through a river hexside,<br />
but since the Germans have a bridgehead, this shift is negated. The<br />
Defensive Works in the defender hex provide a one column shift<br />
to the left and reduce the odds to 3 to 1. Each attacking Panzer<br />
division (up to three) provides a one column shift to the right,<br />
bringing the odds back up to 4 to 1. There is only one chance in six<br />
(an Engaged result) to prevent the Germans from advancing into<br />
the hex, but advancing is critical to overall German success. The<br />
German player removes one Stuka Air Asset from the Air Assets<br />
Available Box and commits it to shift the odds one column right<br />
to 5 to 1 where an advance is guaranteed. The die roll eliminates<br />
the Peel(a) unit. The 9th Panzer and LAH advance into the vacated<br />
defender hex. The Bridgehead marker is removed. A DW Destroyed<br />
marker is placed in the hex refer to graphic 8.2]. The Stuka asset<br />
is placed in the Air Assets Used Box. The German Move Action<br />
Round is complete.<br />
Graphic 8.2<br />
© 2011 <strong>GMT</strong> <strong>Games</strong>, LLC
Case Yellow<br />
<br />
The German player draws the next Action chit from the cup and it<br />
is an Allied Combat Action chit that is placed in box 2 of the Action<br />
Round Record Track.<br />
The Allied player sees only three realistic opportunities to attack,<br />
and two of them are quite unfavorable.<br />
1) 1st Dutch Division could attack the 22nd LL in Den Haag, but<br />
the initial odds would be 1 to 2, and even the most favorable result<br />
where both sides lose one step (both units are one step units), the hex<br />
would still remain German controlled because it was last occupied<br />
by the Germans.<br />
2) The Rotterdam division could attack the adjacent parachute regiment<br />
in hex 3924 at initial odds of 2 to 1. The major river hexside<br />
reduces those odds to 1 to 1. At 1 to 1 odds there is one chance in six<br />
that the defender will retreat. Another one chance in six that if both<br />
units lose one step the city will remain under Netherlands control.<br />
However, there are two unused Stuka Air Assets, and if they are both<br />
committed, the odds drop to 1 to 3 where there are four chances out<br />
of six that the Rotterdam division would be eliminated, allowing the<br />
parachute regiment to walk into Rotterdam unopposed.<br />
The Allied player knows that there are still two Allied Move Action<br />
chits in the cup. The first could bring the Licht Division to make a<br />
far more effective attack. The second could bring the neighboring<br />
1st Division, also with the same result. The prudent course of action<br />
is to wait and not attack.<br />
3) The third attack is much more promising. The Dutch 7th Division<br />
in Utrecht and the G Brigade in hex 3927 are both adjacent to the<br />
parachute regiment in hex 4027. Initial odds are 4 to 1, shifted left<br />
one column to 3 to 1 by the river hexsides. The German player will<br />
surely be hesitant about committing the valuable Stuka Air Assets<br />
to this attack. The attack is declared. No Stukas are committed. The<br />
odds remain 3 to 1, the die roll indicates Defender Retreat, and the<br />
parachute regiment must retreat two hexes. It cannot retreat into<br />
any of the hexes specified by the German Retreat Compass, but can<br />
retreat into other hexes if necessary. The German player chooses<br />
to retreat this unit to join the parachute regiment already in Gouda.<br />
Both Dutch units advance into hex 4027 [refer to graphic 8.3]. Any<br />
German advance from the south will now have to fight through one<br />
more hex. Both units are now close enough to reach Rotterdam on<br />
the Second Allied Move Action Round if needed. The Allied Combat<br />
Action Round is complete. The Allied player really wants the next<br />
chit drawn to be an Allie Move Action.<br />
Graphic 8.3<br />
Disappointment! The next chit drawn is German, and the German<br />
player chooses to make this a Combat Action Round. The chit is<br />
placed on its Combat side in box 3 of the Record track. The German<br />
player makes only one attack. Since motorized and non-motorized<br />
units can both attack in a Combat Round, he declares an attack by<br />
the IX Corps, 9th Panzer and LAH against the Peel(b) unit in hex<br />
3529. The initial odds are 9 to 1. Terrain shifts for river hexsides,<br />
© 2011 <strong>GMT</strong> <strong>Games</strong>, LLC<br />
defensive works and woods bring the odds back to 6 to 1. Since<br />
maximum odds are 6 to 1, the German player dispenses with making<br />
a Bridgehead attempt. Even if successful, the odds would still be<br />
reduced back to 6 to 1. The Die roll eliminates the Peel(b) unit and<br />
the German units may advance. The 9th Panzer and LAH are both<br />
motorized and allowed to advance two hexes in a Combat Round.<br />
They must first advance into defender hex 3529, placing a DW Destroyed<br />
in the hex, and then advance a second hex into Eindhoven,<br />
hex 3528. The marker is moved to the 4 box of the captured Cities<br />
Track. The IX Corps advances into the vacated defender hex 3529<br />
[refer to graphic 8.4]. The German Combat Round is over.<br />
Graphic 8.4: German First Combat Action Round completed.<br />
The Allied player is worried. The 9th Panzer and LAH are now<br />
adjacent to one of his key units, the Licht Division. He needs to<br />
move it away.<br />
More disappointment! The next chit drawn is the second Allied<br />
Combat chit. It is placed in box 4 of the Record Track. The Allied<br />
player is still willing to bet on the next chit being an Allied Move<br />
Action, so he still does not attack. He declares the Allied Combat<br />
Round to be over. There is no more chance for the Allied player to<br />
attack this turn. He is now limited to moving units only in order to<br />
block German advances toward either Rotterdam or Utrecht. He<br />
still feels that barring incredible luck, attacking would have only<br />
made his position worse. When forced to use the Allied Move only<br />
or Combat only action chits, the Allied player has far less flexibility<br />
than his German opponent who can decide whether a chit is best<br />
used as a Move Action or a Combat Action.<br />
Getting worse. The next chit is German. The German player has to<br />
choose how best to use it. If used as a Move action, he can secure<br />
Arnhem and Apeldoorn, making three towns German controlled<br />
and moving the marker one box. Delaying the advance may allow<br />
the Allied player the chance to advance and occupy them. The 9th<br />
Panzer and LAH will not be able to reach hex 3924, and if they<br />
cannot reach that hex, they cannot make an attack on Rotterdam. If,<br />
however, a Combat Round is chosen, a successful two hex advance<br />
after combat against the Licht Division would allow these units<br />
to reach hex 3924 on the next Move Round. Easy decision. The<br />
German player declares his second Combat Action Round and the<br />
chit is placed as a Combat Action in box 5 of the Record track. His<br />
final chit will have to be used as a Move Action because no side<br />
can conduct more than two Move and Two Combat Action Rounds<br />
in an Action Phase.<br />
The initial odds are 4 to 1 and there are no terrain shifts. The Ger-
Case Yellow<br />
man receives one shift for his 9th Panzer, making final odds 5 to 1<br />
since no Stukas are being committed. The Licht Division has one<br />
chance in six of retreating to safety, but alas, the die roll calls for<br />
the defender to lose one step. Being a one step unit, the Licht Division<br />
is eliminated. Both the 9th Panzer and LAH advance through<br />
defender hex 3527 and stop in hex 3627 to complete their two<br />
hex advance [refer to graphic 8.5]. Thus ends the second German<br />
Combat Round.<br />
Graphic 8.5<br />
Regret. Finally an Allied Move Action chit is drawn and placed in<br />
box 6 on the Record Track, but there are no Dutch units that can<br />
move! All surviving units have a black star by their set-up hexes.<br />
They cannot move during the first Allied Move Action Round (they<br />
are still mobilizing). The only hope now is the second Allied Move<br />
Action chit, and it has to be drawn now.<br />
Final Disappointment. The seventh chit drawn is German. The<br />
dreaded second Move Action Round. The chit is placed as a Move<br />
Action in box 7 of the record Track.<br />
The X Corps and 208 Division both enter hex 4032 at a cost of 3<br />
MPs. A DW Destroyed marker is placed in the hex. The X Corps<br />
moves into hex 4031 (Arnhem) with its last MP. Two Netherlands<br />
towns now under German control. The 208 Division expends its last<br />
MP to enter hex 4131 (Apledoorn). Three town hexes now German<br />
controlled. Three towns equal one city. The marker is moved to the<br />
5 box on the City Capture Track.<br />
The 9th Panzer and LAH expend 2 MPs to enter the Breda town hex<br />
(having a fourth German controlled town hex will probably not matter,<br />
but a German control marker is placed in the hex as the German<br />
units move onward). The Refugee marker is also removed. Refugees<br />
have no effect on German units. Refugee markers are simply removed<br />
when a German unit enters a hex containing one. Both units<br />
expend 2 MPs to cross the Wilhelmina Kanaal hexside because the<br />
far hex is still Allied controlled, and their final 2 MPs are expended<br />
to cross the Maas major river hexside. They both end movement in<br />
hex 3924 stacked with the parachute regiment located there.<br />
The remaining German units move, but their movement is anticlimactic<br />
to the Movement Round Combat about to take place. For<br />
final movement positions for these units refer to graphic 8.6. After<br />
movement ends, the German player declares one combat involving<br />
the 9th Panzer and LAH against the Rotterdam Division in hex 4024<br />
(Rotterdam). Initial odds are 4 to 1. Terrain shift is one column left<br />
for city. The parachute unit bridgehead negates the river hexside<br />
shift. There is no panzer shift attacking into city hexes, so adjusted<br />
odds are now 3 to 1. But wait, there are two unused Stuka Air Assets,<br />
and both are committed to this attack, raising the final odds to<br />
5 to 1. The valiant Rotterdam Division is eliminated, the 9th Panzer<br />
and LAH advance into the Rotterdam hex. The Refugee marker is<br />
removed. Since Rotterdam is now German controlled, the marker<br />
on the captured city track is moved to the 6 box. The German player<br />
has his Operational Victory assured.<br />
© 2011 <strong>GMT</strong> <strong>Games</strong>, LLC<br />
Graphic 8.6: End of German second Move Action Round. 7 of 8<br />
Rounds completed.<br />
The second Allied Move Round is perfunctory. Breda is retaken,<br />
but the Germans still have their six hexes.<br />
Game Turn End Phase.<br />
1) Terror Bombing Segment. The German has all six hexes, so placing<br />
the Terror Bomb marker is unnecessary. It remains off map.<br />
2) Netherlands Surrender. With six cities (or their equivalent)<br />
under German control, the handwriting is on the wall. According<br />
to scenario victory conditions, The Netherlands surrenders.<br />
3) Victory Determination. Since the marker is in the 6 box of the<br />
City Capture table and the Terror Bomb marker is not on map, the<br />
German player earns an Operational Victory. He has done better<br />
(perhaps been luckier) than his historical predecessors.<br />
COMMENTS: This scenario could not have turned out better for<br />
the German player, and it could have turned out much worse. In<br />
fact, it almost always will turn out worse. Allied chit pulls were<br />
terrible. In many cases the Licht Division will be able to move to<br />
hex 3825, and from that hex prevent the 9th Panzer and LAH from<br />
reaching hex 3924.<br />
For example, the sequence: GE Move—AL Move—AL Combat<br />
would allow the attack and elimination of the German parachute<br />
regiment, and its Bridgeheads in hex 3924.<br />
So would GE Move—GE Combat—AL Move—AL Combat<br />
The possibilities for Allied success are numerous. They just did<br />
not occur in this scenario. If this scenario modeled the historical<br />
campaign, the 9th Panzer would end in hex 3825 or 3924 awaiting<br />
either the Terror Bomb marker to be placed or the first Action Round<br />
of Turn 2 to attack.<br />
There are other paths to victory, or defeat, for the Germans. Perhaps<br />
the push on Utrecht will succeed. Perhaps landing the 22nd LL<br />
Division somewhere besides Den Haag will work better. Try the<br />
scenario again and find out!