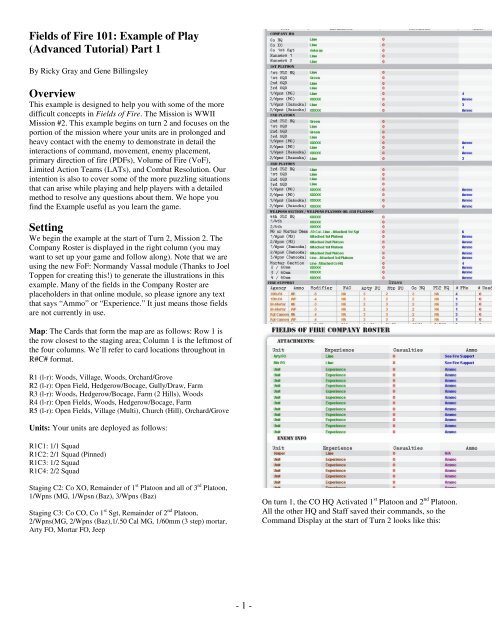
Fields of Fire 101: Example of Play (Advanced ... - GMT Games
Fields of Fire 101: Example of Play (Advanced ... - GMT Games
Fields of Fire 101: Example of Play (Advanced ... - GMT Games

Create successful ePaper yourself
Turn your PDF publications into a flip-book with our unique Google optimized e-Paper software.
<strong>Fields</strong> <strong>of</strong> <strong>Fire</strong> <strong>101</strong>: <strong>Example</strong> <strong>of</strong> <strong>Play</strong><br />
(<strong>Advanced</strong> Tutorial) Part 1<br />
By Ricky Gray and Gene Billingsley<br />
Overview<br />
This example is designed to help you with some <strong>of</strong> the more<br />
difficult concepts in <strong>Fields</strong> <strong>of</strong> <strong>Fire</strong>. The Mission is WWII<br />
Mission #2. This example begins on turn 2 and focuses on the<br />
portion <strong>of</strong> the mission where your units are in prolonged and<br />
heavy contact with the enemy to demonstrate in detail the<br />
interactions <strong>of</strong> command, movement, enemy placement,<br />
primary direction <strong>of</strong> fire (PDFs), Volume <strong>of</strong> <strong>Fire</strong> (VoF),<br />
Limited Action Teams (LATs), and Combat Resolution. Our<br />
intention is also to cover some <strong>of</strong> the more puzzling situations<br />
that can arise while playing and help players with a detailed<br />
method to resolve any questions about them. We hope you<br />
find the <strong>Example</strong> useful as you learn the game.<br />
Setting<br />
We begin the example at the start <strong>of</strong> Turn 2, Mission 2. The<br />
Company Roster is displayed in the right column (you may<br />
want to set up your game and follow along). Note that we are<br />
using the new FoF: Normandy Vassal module (Thanks to Joel<br />
Toppen for creating this!) to generate the illustrations in this<br />
example. Many <strong>of</strong> the fields in the Company Roster are<br />
placeholders in that online module, so please ignore any text<br />
that says “Ammo” or “Experience.” It just means those fields<br />
are not currently in use.<br />
Map: The Cards that form the map are as follows: Row 1 is<br />
the row closest to the staging area; Column 1 is the leftmost <strong>of</strong><br />
the four columns. We’ll refer to card locations throughout in<br />
R#C# format.<br />
R1 (l-r): Woods, Village, Woods, Orchard/Grove<br />
R2 (l-r): Open Field, Hedgerow/Bocage, Gully/Draw, Farm<br />
R3 (l-r): Woods, Hedgerow/Bocage, Farm (2 Hills), Woods<br />
R4 (l-r): Open <strong>Fields</strong>, Woods, Hedgerow/Bocage, Farm<br />
R5 (l-r): Open <strong>Fields</strong>, Village (Multi), Church (Hill), Orchard/Grove<br />
Units: Your units are deployed as follows:<br />
R1C1: 1/1 Squad<br />
R1C2: 2/1 Squad (Pinned)<br />
R1C3: 1/2 Squad<br />
R1C4: 2/2 Squad<br />
Staging C2: Co XO, Remainder <strong>of</strong> 1 st Platoon and all <strong>of</strong> 3 rd Platoon,<br />
1/Wpns (MG, 1/Wpsn (Baz), 3/Wpns (Baz)<br />
Staging C3: Co CO, Co 1 st Sgt, Remainder <strong>of</strong> 2 nd Platoon,<br />
2/Wpns(MG, 2/Wpns (Baz),1/.50 Cal MG, 1/60mm (3 step) mortar,<br />
Arty FO, Mortar FO, Jeep<br />
On turn 1, the CO HQ Activated 1 st Platoon and 2 nd Platoon.<br />
All the other HQ and Staff saved their commands, so the<br />
Command Display at the start <strong>of</strong> Turn 2 looks like this:<br />
- 1 -
Activation Level is CONTACT as we begin Turn 2.<br />
Turn 2<br />
3.1 Friendly Higher HQ Event<br />
We draw one card. No HQ symbol is present, so no higher HQ<br />
event this turn.<br />
3.2 Defensive Missions: Enemy Activity Phase<br />
Does not take place in this mission as Mission 2 is an<br />
Offensive mission<br />
3.3 Friendly Command Phase<br />
3.3.1 Activation Segment<br />
A. BN HQ Impulse<br />
The BN HQ is not on the map, so the CO HQ is automatically<br />
activated.<br />
B. CO HQ Impulse<br />
Draw an Action Card.<br />
Pyrotechnics are linked to the following commands:<br />
• Red Cluster, Parachute, or Smoke: CEASE FIRE<br />
• Green Cluster, Parachute, or Smoke: ADVANCE<br />
(INFILTRATE IF POSSIBLE) TOWARD<br />
PRIMARY OBJECTIVE<br />
• Yellow or Purple Smoke: SHIFT FIRE<br />
On turn 1, 1 st and 2 nd platoon each advanced two units (l-to-r<br />
1/1, 2/1, 1/2, 2/2) forward to “scout” all <strong>of</strong> the cards in row 1.<br />
None are under cover (General Initiative commands were used<br />
to try to find cover on turn 1, but all the Seek Cover attempts<br />
failed). Surprisingly, only one contact was generated by the<br />
four units advancing, a Sniper in Foxholes (not spotted) in the<br />
Hedgerow/Bocage in Row 2, Column 2 that achieved a PIN<br />
result on 2/1 squad in Row 1, Column 2. Below is an<br />
illustration <strong>of</strong> the local map situation at the start <strong>of</strong> Turn 2.<br />
The card drawn lists 3/2 for commands, so the CO HQ<br />
receives 3 commands because it is activated (it uses the<br />
leftmost number – inside the helmet illustration). Note that if<br />
the HQ had an experience level <strong>of</strong> “Green”, that “3” would be<br />
modified by -1, for a result <strong>of</strong> “2.” But the first thing we did<br />
with the Experience points from Mission #1 was to upgrade<br />
the HQs from Green to Line (except for 2 nd Platoon HQ,<br />
which was a casualty in Mission 1. See Company Roster,<br />
above, for all the troops’ experience levels), so we get a final<br />
result <strong>of</strong> “3.” The CO HQ uses two <strong>of</strong> these commands to<br />
activate the 1 st PLT and 2nd PLT HQs and decides to save one<br />
command for a later turn. We update the Command Display<br />
by moving the CO HQ Saved Commands Marker to the “1”<br />
space.<br />
- 2 -<br />
C. PLT HQ/CO Staff Impulse<br />
1. The 1 st PLT HQ has been activated so it draws an Action<br />
Card which lists 4/3 for commands. The 1 st Platoon HQ’s<br />
experience level is Line so the number <strong>of</strong> commands received<br />
is not modified. Thus, it receives 4 commands. It uses those<br />
commands as follows:<br />
• Use two commands for a platoon move to move<br />
the HQ and all the rest <strong>of</strong> the 1 st Platoon (the 3/1
squad and the attached weapons teams) into the<br />
Woods in Row 1 Column 1. Mark all the moving<br />
units with Exposed markers. Note that because<br />
the Platoon HQ is not on the same card as the<br />
pinned 2/1 squad in the Village, it cannot give<br />
orders to that unit.<br />
Remove the “?” marker from the German sniper. He<br />
is now spotted.<br />
US units on all three cards that can see the German sniper now<br />
open fire. Place PDFs from each card directed toward the<br />
Sniper’s card. Place an “A” VOF on the Sniper’s card (as the<br />
MG weapons team in the Woods in Column 1 has the best<br />
VOF. It is not a tripod mounted MG, so it can fire while<br />
Exposed). Also, place a “Crossfire -1” marker on the sniper’s<br />
card.<br />
• Use 1 command to order 3/1 to attempt to spot<br />
the German sniper in the Hedgerow/Bocage.<br />
Refer to the Spotting Attempt Modifiers Table.<br />
Draw 1 Card (Base draw is 2 cards. Mods are -1<br />
for target <strong>of</strong> attempt being a Sniper and -1 for<br />
target being under cover, but the minimum is<br />
always 1 card.) Card drawn has no “crosshairs”<br />
icon, so the spotting attempt fails.<br />
1 st Platoon HQ has now used all his commands.<br />
2. The 2 nd Platoon now draws a card to determine his<br />
commands. The card shows “3/2”. Because 2 nd Platoon HQ is<br />
Green (-1 to commands), it receives 2 commands instead <strong>of</strong><br />
the “3” shown on the card. As you’ll note from the Command<br />
Display, it also has two Saved commands that it will use this<br />
turn. The commands are spent as follows:<br />
• Use 1 command to EXHORT 3/1 and add one<br />
card to previous attempt. This time the card<br />
includes a “crosshairs” icon, so the attempt is<br />
successful.<br />
• Use two commands for a platoon move to move<br />
the HQ and all the rest <strong>of</strong> the 2nd Platoon into<br />
the Woods in Row 1 Column 3. Mark all the<br />
moving units with Exposed markers.<br />
• Use 1 command to order 1/2 to move forward<br />
into the Gully in Row 2, Column 3. Place an<br />
Exposed marker on 1/2 as it moves. Leave the<br />
PDF on the card 1/2 is leaving (units remaining<br />
there will continue firing). Place a PDF from the<br />
Gully toward the Sniper as 1/2 will immediately<br />
open fire on the sniper from his new position.<br />
- 3 -
The 1 st and 2 nd PLT HQs were activated so they are<br />
skipped.<br />
The 3rd PLT HQ draws an Action Card that lists<br />
“4/3” for commands, so it receives 3 commands,<br />
which it decides to save. Move its Saved Commands<br />
marker from the “3” box to the “6” box on the<br />
Command Display.<br />
C. CO Staff Impulse<br />
Neither the CO XO nor CO 1 st Sgt were<br />
activated so they both receive 1 command and<br />
choose to not do anything this turn so save their<br />
1 command.<br />
• Use 1 command to order the machinegun<br />
weapons team to find cover. Draw 4 cards. One<br />
has the word “Cover” at the top, so place the<br />
weapons team under a “+1 Cover” marker.<br />
2nd Platoon HQ has now used all his commands. Remove his<br />
Saved Commands marker from the numbered track on the<br />
Command Display.<br />
D. General Initiative Impulse<br />
We draw an Action Card (#38) which lists<br />
commands as 4/2. General Initiative command<br />
draws are not modified in any way, so we have 2<br />
commands to expend on any unit(s) in play.<br />
• We use the first command on 1/2 in the<br />
Gully: Attempt to Seek Cover. We draw 3<br />
cards and do get one that says “Cover”, so<br />
we place the 1/2 squad under a “+1 Cover”<br />
marker in the Gully. (Note that this is the<br />
only cover marker that will be allowed on<br />
that card, as the “Max Cover” number at<br />
the bottom left <strong>of</strong> the Gully card is “1.”)<br />
• We use the second command on the 2/1 unit<br />
in the village to attempt to Rally: Remove<br />
Pin Marker. We draw two cards, but neither<br />
has “Rally” at the top. So the Rally attempt<br />
fails and the unit remains Pinned.<br />
So here is our map situation at the end <strong>of</strong> the Friendly<br />
Command Phase:<br />
3.3.2 Initiative Segment<br />
A. CO HQ Impulse<br />
The CO HQ was activated so this is skipped.<br />
B. PLT HQ Impulse<br />
- 4 -
VoF into the card the sniper vacated are NOT removed. They<br />
remain until the US units either move or get a cease fire or<br />
shift fire order. Note also that the PINNED marker on the US<br />
2/1 squad remains. It will be removed at the end <strong>of</strong> the VOF<br />
Segment [See 3.7.1 errata] as long as there is no enemy VOF<br />
on the Village card at that time.<br />
Because the sniper has moved to a new card and currently has<br />
no PDF/VoF, we must now immediately check to see if there<br />
are any units in his LOS and range upon which he can open<br />
fire. In this case, there is only one such unit – the 1/2 squad in<br />
the Gully. So we place the sniper’s PDF facing toward the<br />
gully, and sniper VoF on the 1/2 unit, and a Small Arms VoF<br />
on the gully card.<br />
3.4 Offensive Missions/Combat Patrols: Enemy Activity<br />
Phase<br />
3.4.1 Enemy Higher HQ Event Segment<br />
We draw one card, but get no HQ symbol, so no event.<br />
3.4.2 Enemy Activity Check Segment<br />
There is only one active enemy to check – the sniper in the<br />
Hedgerow/Bocage. Remember that Snipers use the special<br />
rules in 9.6, not the normal Enemy Activity Check<br />
Hierarchies. In this instance, because the sniper is spotted, he<br />
must move one card away from the US units. So he moves to<br />
the village in Row 3, leaving his Foxholes marker in the<br />
Hedgerow/Bocage and receiving an Exposed marker as he<br />
moves.<br />
IMPORTANT: the 1/2 in the Gully will continue to fire along<br />
his PDF into the Hedgerow/Bocage until he is given a Shift<br />
<strong>Fire</strong> order. He will not automatically ‘track’ the Sniper as it<br />
moves into the Village. As you see, in <strong>Fields</strong> <strong>of</strong> <strong>Fire</strong> as on the<br />
real battlefield, Snipers are EXTREMELY difficult to find,<br />
fix, and kill.<br />
3.5 Mutual Capture & Retreat Phase<br />
There are no paralyzed or litter teams on the map, so this<br />
phase is skipped.<br />
3.6 Mutual Vehicle-Aircraft Phase<br />
The Jeep was not activated so this phase is skipped.<br />
3.7 Mutual Combat Phase<br />
3.7.1 VoF Segment<br />
A. Update <strong>Fire</strong> Missions<br />
There are no fire missions so this step is skipped.<br />
B. Evaluate Potential Contact Markers<br />
a. We have only one unit on a card with Potential<br />
Contact markers: 1/2 squad in the Gully. The Marker<br />
is a “C” contact. Checking the Potential Combat<br />
Draw Chart shows that we do not have to draw when<br />
the Current Activity Level is “Contact.” A new<br />
contact is automatic.<br />
The Sniper’s PDF and VOFs are immediately removed from<br />
the US-occupied Village card. Note that the US PDFs and<br />
- 5 -
So we remove the Potential Contact C marker from<br />
the Terrain card, then generate an enemy contact.<br />
b. To determine what unit we have contacted, draw<br />
an Action Card and consult the random number<br />
section.<br />
Details”), so we also place a ‘Foxholes’ counter on<br />
the Mortar Spotter.<br />
f. Note that the Mortar spotter does not exert a<br />
normal PDF or VoF, only the Incoming VoF marker.<br />
Because the Spotter is currently Unspotted, no US<br />
PDF or VoF markers are placed.<br />
The number under the “10” is “2.” Checking the<br />
“2/10” row on the Potential Contact C chart for this<br />
mission in the Mission Briefing Book (page 7) gives<br />
a result <strong>of</strong> “Incoming Mortars.” Now we check the<br />
German Force Package on page 3 <strong>of</strong> the Briefing<br />
Booklet to get the details on exactly what to place.<br />
c. On the “Incoming Mortars’ line <strong>of</strong> the German<br />
Force Package, we see that we put an Incoming<br />
Marker on the Gully Card (the Incoming marker<br />
always goes on the card that generated the contact.)<br />
This Incoming marker will have a -3 NCM, which is<br />
noted on the Mortar Spotter.<br />
g. I note the Mortar Spotter contact on the back side<br />
<strong>of</strong> my Mission Log, indicating that he gets a -3 NCM,<br />
4 Draws per Call for <strong>Fire</strong>, and a total <strong>of</strong> 3 <strong>Fire</strong><br />
Missions (this turn’s Incoming <strong>Fire</strong> will count as one<br />
<strong>of</strong> the three). All <strong>of</strong> this information comes from the<br />
Spotter Information section <strong>of</strong> the Enemy<br />
Information section in the Briefing Booklet (page 7).<br />
d. We now flip the next Action Card to determine<br />
placement <strong>of</strong> the 81 mm Mortar Spotter.<br />
3.7.2 Combat Effects Segment<br />
The random number (under the “10”) on the card is<br />
“3”. We check the Unit Placement Table (page 5 <strong>of</strong><br />
Briefing Booklet). The “3/10” result is “Front at max<br />
LOS”. So we place the Spotter on the Farm in the<br />
hills on Row 3, directly in front <strong>of</strong> the Gully.<br />
e. We place one <strong>of</strong> the “?” Contact markers on the<br />
Mortar Spotter to denote that he is Unspotted (per the<br />
German Force Package table). The default cover for<br />
the mission is Foxholes (see Mission Briefing<br />
Booklet, page 7 – “Enemy Information: Mission<br />
The first thing we do in this segment is remove the<br />
Pinned marker from the 2/1 squad in the Village, as<br />
there is now no VoF marker on his card.<br />
Because there is only one unit on a card with a VoF<br />
marker, we only have one combat effect to resolve –<br />
the incoming artillery fire on the 2/1 squad in the<br />
Gully. They are under fire from both a sniper and<br />
enemy mortars, so this could be ugly.<br />
We have multiple VoFs on the target card, so we<br />
consult the Infantry Combat Modifiers table on the<br />
<strong>Play</strong>er Aid Card to help us sort this out.<br />
- 6 -
There we see that the lowest applicable modifier for this fire is<br />
the -3 NCM, generated by either the Incoming mortar fire or<br />
the sniper. It doesn’t matter which we use; the base combat<br />
NCM is still -3. This is modified as follows:<br />
• +1 Terrain Modifier <strong>of</strong> card [Note that you use<br />
the smaller number to the right for Incoming <strong>Fire</strong><br />
on cards that have split Intrinsic Defense Terrain<br />
Values.]<br />
• +1 Squad is under a cover marker<br />
• -2 Squad has an exposed marker<br />
So the final NCM is “-3.”<br />
We draw an Action Card and -3 is a HIT.<br />
We place a PINNED marker on the squad then draw<br />
another Action Card to see the hit effects.<br />
The result (under Line, as that is the 2/1 squad’s<br />
experience level – see Mission Log) is “P”, so one<br />
step <strong>of</strong> the 3-step squad is Paralyzed by the incoming<br />
fire. We flip the 3-step unit over to its 2-step side and<br />
add a Paralyzed LAT to the card. Both the squad and<br />
the Paralyzed LAT are Pinned and under the Cover<br />
marker.<br />
As the final actions in this segment, we expend<br />
ammunition for the two MG weapons teams that are<br />
firing into the (now empty) Hedgerow/Bocage card in<br />
Row 2 Column 2. Cross <strong>of</strong>f one available MG ammo<br />
for each <strong>of</strong> them on the Mission Log (leaving each<br />
with 3 remaining Ammo). We also cross <strong>of</strong>f one <strong>of</strong><br />
the three fire missions for the enemy mortar spotter<br />
on the Mission Log.<br />
3.8 Clean Up Phase<br />
We remove all exposed markers. Turn 2 is now complete.<br />
End-<strong>of</strong>-Turn Thoughts: The good news is that casualties<br />
thus far are very light. The bad news is that we’re moving<br />
forward at a snail’s pace and the enemy has the high ground<br />
and mortars.<br />
The only unit under fire at this point is 1/2. We’d like to help<br />
those paralyzed soldiers in the gully, but with an undetected<br />
enemy spotter dropping mortar fire into that area and the<br />
sniper firing at anything that moves in that gully, it’s just too<br />
risky to send leaders or additional troops in there right now.<br />
So 1/2 squad is on its own for the moment.<br />
Instead <strong>of</strong> reinforcing 1/2, we intend to probe forward on their<br />
right flank with 2/2 while attempting to find that spotter and<br />
direct fire onto him. We’ll put pressure on the sniper by<br />
closing with our 1 st platoon troops over on our left flank.<br />
So on the left half <strong>of</strong> the battlefield we’ll slowly probe forward<br />
with the two point squads <strong>of</strong> 1 st Platoon in hopes <strong>of</strong> clearing<br />
those areas so we can bring the heavier weapons and<br />
artillery/mortar spotters forward shortly. We imagine that the<br />
men <strong>of</strong> 1/1 must be shaking their heads and cursing the<br />
stupidity <strong>of</strong> their commander as they contemplate moving<br />
across that open field towards the far woods line. We know<br />
things could get ugly there, but someone has to clear that<br />
area. We’ll take a bit <strong>of</strong> a risk and try to get a machinegun<br />
forward to their right - into the hedgerows from which we just<br />
flushed the sniper - to provide covering fire from the flank<br />
should 1/1 get bushwhacked.<br />
As we probe forward with two point platoons, we want to<br />
begin to bring up spotters, reserves, and Company staff so that<br />
we can quickly respond to and exploit opportunities as they<br />
arise.<br />
- 7 -
Turn 3<br />
3.1 Friendly Higher HQ Event<br />
We draw one card.<br />
There is an HQ symbol on the card, so we do have a Friendly<br />
HQ Event. We draw another card and check the random<br />
number under “10.” The result is a ‘6.” Checking the Friendly<br />
HQ Events Table (page 6 <strong>of</strong> Mission Briefing Book), we find<br />
the #6 event for this mission is: “Company on the flank is<br />
ahead. You must move forward to close the gap.” That’s a<br />
good event for us, as we’d planned to advance anyway, and<br />
now will get a bit <strong>of</strong> free Experience as we do.<br />
3.2 Defensive Missions: Enemy Activity Phase<br />
Does not take place in this mission as Mission 2 is an<br />
Offensive mission<br />
• 2 nd Platoon HQ expends one command to Deploy<br />
a Pyrotechnic, firing the Red Star Cluster. This<br />
orders every unit on the map to Cease <strong>Fire</strong>. So<br />
we remove all US PDF and VoF markers, then<br />
check to see if anyone still has a spotted enemy<br />
in their LOS to re-open fire. In this case, the 1/2<br />
unit in the gully still has the Sniper in its LOS, so<br />
the we place a PDF from the gully card facing<br />
the Sniper’s card, and place a Small Arms VoF<br />
on the Hedgerow/Bocage card occupied by the<br />
Sniper. 2 nd Plat HQ has 2 commands remaining.<br />
3.3 Friendly Command Phase<br />
3.3.1 Activation Segment<br />
A. BN HQ Impulse<br />
The BN HQ is not on the map, so the CO HQ is automatically<br />
activated.<br />
B. CO HQ Impulse<br />
We draw an Action Card to determine the number <strong>of</strong><br />
commands our CO HQ gets this turn. It is a 3/2 card, so the<br />
CO HQ gets 3 commands. He spends them to activate the 1 st<br />
and 2 nd platoon HQs and the 1 st Sgt. He has one saved<br />
command that he could use as well, but chooses not to, saving<br />
it for a future turn.<br />
C. PLT HQ/CO Staff Impulse<br />
Because you do not have to expend all <strong>of</strong> one HQ’s commands<br />
before using commands from another HQ, we will draw for<br />
each <strong>of</strong> the three activated leaders’ commands before we<br />
spend any.<br />
1. The 1 st PLT HQ draws an Action Card which lists 3/2 for<br />
commands. There are no modifiers (it is not Green, not<br />
under fire, and the Activity Level is not No Contact) so it<br />
gets 3 commands.<br />
2. The 2 nd PLT HQ draws an Action Card which lists 4/2 for<br />
commands. The “4” is modified to a “3” because 2 nd HQ<br />
is Green, so it gets 3 commands.<br />
3. The 1 st Sgt draws an Action Card which lists 5/4 for<br />
commands. Because the 1 st Sgt’s Experience Level is<br />
“Veteran,” he receives one additional command, for a<br />
total <strong>of</strong> 6.<br />
• 1st Platoon HQ expends one command to order<br />
1/1 to move forward from the woods into the<br />
Open <strong>Fields</strong> to its front. We mark 1/1 with an<br />
Exposed marker.<br />
• 1 st Platoon HQ spends its remaining 2 commands<br />
on a Platoon Move. We move all remaining 1 st<br />
Platoon units (and attachments) from the Woods<br />
card they occupy into the Hedgerow/Bocage card<br />
in Row 2, Column 2. Because there is already a<br />
Foxholes cover on the card, we choose to place<br />
all <strong>of</strong> the moving units in the Foxholes. We mark<br />
all the units that moved with an Exposed marker.<br />
1 st Platoon HQ has now spent all its commands.<br />
We leave one <strong>of</strong> 1 st Platoon HQs phone lines<br />
behind on the Woods card as they move.<br />
We’ll expend those commands as follows:<br />
- 8 -
• Because all the moved 1 st Platoon units have the<br />
spotted German Sniper in their range and LOS,<br />
they immediately open fire on the Sniper’s card.<br />
We place PDFs from both cards, as well as an<br />
Automatic VoF on the Sniper’s card (it’s the best<br />
VoF <strong>of</strong> all the firing units), and a Crossfire<br />
marker on the sniper’s card as it now is the target<br />
<strong>of</strong> PDFs coming from different angles.<br />
• We decide to save the 1 st Sgt’s 6 th command, so<br />
move his Saved Commands marker from the “2”<br />
to the “3” box on the Command Display.<br />
• Given that the 1 st Sgt managed to get 2/2 moving<br />
forward and that the card directly forward <strong>of</strong> the<br />
2 nd Platoon HQ is under heavy mortar and sniper<br />
fire, we decide to have the rest <strong>of</strong> 2 nd platoon<br />
stay put for now, and save 2 nd Platoon HQ’s<br />
remaining 2 commands.<br />
Because we now have VOF markers on two or<br />
more occupied cards, we increase the Activity<br />
Level to ENGAGED.<br />
• Now we turn to the 1 st Sgt (we’ll get back to 2 nd<br />
Platoon HQ’s last 2 commands once we see what<br />
our 1 st Sgt can accomplish). We spend the first<br />
two <strong>of</strong> his 6 commands to order the Artillery FO<br />
and the Mortar FO (with their Radios) to move<br />
forward. The Arty FO moves diagonally into the<br />
Village at his left front. The Mortar FO moves<br />
directly ahead into the Woods. We mark both<br />
units with an Exposed marker. We spend his<br />
third command to order the .50 Cal MG to move<br />
forward into the Woods (it too gets an Exposed<br />
marker). We’ll use the 4 th command to move the<br />
1 st Sgt into the Orchard/Grove card to his right<br />
front, and the 5 th command to order the 2/2 squad<br />
there to move forward into the Farm to its front.<br />
2/2 is not currently firing, so we check to see if<br />
there are any targets in his range and LOS after<br />
he moves. The only possible target in his LOS is<br />
the enemy mortar spotter, and it is still<br />
Unspotted, so we place no PDF/VoF for 2/2.<br />
• All <strong>of</strong> our Activated HQs/Staff have now spent<br />
or saved all <strong>of</strong> their commands for this turn.<br />
3.3.2 Initiative Segment<br />
A. CO HQ Impulse<br />
The CO HQ was activated so this is skipped.<br />
B. PLT HQ Impulse<br />
The 1st and 2 nd PLT HQs were activated so they are<br />
skipped. The 3 rd PLT HQ draws an Action Card that<br />
lists “1/0” for commands, so it receives 0 commands.<br />
It does, however, have 6 Saved Commands on the<br />
Command Display. We decide to use two <strong>of</strong> those<br />
saved commands to make a Platoon Move <strong>of</strong> the<br />
entire third platoon forward into the Village to its<br />
front. We move its Saved Commands marker from<br />
the “6” box back to the “4” box on the Command<br />
Display.<br />
- 9 -
• With our second command we want to<br />
attempt to Spot that enemy Mortar spotter.<br />
We decide to use 3/1 squad to make the<br />
attempt (2/2 on the right flank could also<br />
make the attempt, but it is Green and would<br />
only get to draw one card instead <strong>of</strong> the<br />
normal two. 3/1 is Line so will draw two<br />
cards.) We draw two cards, and one <strong>of</strong> them<br />
has the Crosshairs symbol, so we remove the<br />
“?” marker from the enemy Mortar spotter.<br />
He is now spotted.<br />
Because 2/2 is within range and line <strong>of</strong> sight<br />
<strong>of</strong> the newly-spotted Mortar spotter and is<br />
not currently firing, it now opens fire on the<br />
enemy spotter. We place a PDF from 2/2’s<br />
card facing the spotter’s card, and place a<br />
Small Arms VoF on the Hill/Farm card.<br />
C. CO Staff Impulse<br />
The CO 1 st Sgt was activated so he is skipped.<br />
The CO XO receives 1 command. We use it to<br />
move him forward into the Village. Note that<br />
this makes a total <strong>of</strong> 16 steps occupying the<br />
Village card – the maximum allowed. We choose<br />
not to use any <strong>of</strong> the XOs saved commands at<br />
this time.<br />
D. General Initiative Impulse<br />
We draw an Action Card which shows<br />
commands as 5/3.<br />
General Initiative command draws are not<br />
modified in any way, so we have 3 commands to<br />
expend on any unit(s) in play.<br />
• We use the first command on 1/2 in the<br />
Gully: Attempt to Remove a Pinned Marker.<br />
The 1/2 Squad’s Experience is Line, so there<br />
are no modifications to the normal two-card<br />
draw for a Rally Attempt. Unfortunately,<br />
neither drawn card includes the word<br />
“Rally” at the top, so our Rally attempt fails<br />
and one <strong>of</strong> our commands is spent.<br />
- 10 -<br />
• With our final command we attempt to find<br />
cover for the 1/1 squad in the Open <strong>Fields</strong><br />
on our left flank. The card indicates that we<br />
get to draw two cards when attempting to<br />
find cover, but our squad is Green, so that is<br />
reduced to one card. Unfortunately, the card<br />
drawn does not have the word “Cover” at<br />
the top, so our attempt fails. We have now<br />
spent all <strong>of</strong> our commands.
So here is our map situation at the end <strong>of</strong> the Friendly<br />
Command Phase:<br />
2. We extend the VoF <strong>of</strong> the US units in the R2C2<br />
Hedgerow/Bocage into the Sniper’s hex. This is the<br />
only case in which a US unit can “follow” a moving<br />
enemy unit – when the move extends within range<br />
and along the unit’s PDF (See errata 6.4). So we<br />
place an Automatic Weapons VoF on the Sniper’s<br />
new card.<br />
3. We remove the PC marker on the Hedgerow/Bocage<br />
card the Sniper is firing THROUGH (9.2.2 7 th bullet).<br />
3.4 Offensive Missions/Combat Patrols: Enemy Activity<br />
Phase<br />
3.4.1 Enemy Higher HQ Event Segment<br />
We draw one card, but get no HQ symbol, so no event.<br />
3.4.2 Enemy Activity Check Segment<br />
There are two active enemy units to check. Both the sniper<br />
and the mortar spotter use special rules (9.6 and 9.8) instead <strong>of</strong><br />
the normal Enemy Activity Check Hierarchies. We determine<br />
the order <strong>of</strong> enemy activity randomly, so we designate the<br />
sniper as #1 and the spotter as #2, then draw an Action Card.<br />
The random number on the card under “2” is a “1”, so we will<br />
check the sniper first.<br />
Just like last turn, because the sniper is spotted, he must move<br />
one card away from the US units. So he retreats to the<br />
Hedgerow/Bocage in Row 4, Column 2. We place an Exposed<br />
marker on him on his new card.<br />
The Sniper’s PDF and VOFs are immediately removed from<br />
the US-occupied Gully card. Remember that the US PDFs and<br />
VoF into the card the sniper vacated are NOT removed. But<br />
this situation is different than the one we encountered last turn<br />
when the Sniper retreated because there is still a clear LOS<br />
along the PDF between the sniper and one card that contains<br />
US units. So, three things happen here:<br />
1. We replace the Sniper’s VoF and a Small Arms VoF<br />
on the Hedgerow/Bocage card in Row 2, Column 2.<br />
The Sniper VoF targets the 3/1 squad because it is the<br />
unit with the most steps.<br />
- 11 -<br />
The heavy US crossfire into his previous terrain card has<br />
forced the sniper to relocate to a secondary firing position at<br />
extended range. From there he continues to fire at targets <strong>of</strong><br />
opportunity and generally make the 1 st squad’s lives
miserable. The price the sniper pays is that he was exposed<br />
during the turn, so is more vulnerable to US fire when we<br />
resolve combat later in the turn.<br />
Now we check for the mortar spotter. 9.8 indicates that a good<br />
order spotter will continue to call for fire as long as he has<br />
missions. This spotter has two missions remaining, so he will<br />
attempt to Call for <strong>Fire</strong>. We draw four cards (see spotter info<br />
on mission log) and two <strong>of</strong> them have the “Burst” icon that<br />
indicates a successful Call for <strong>Fire</strong>. The spotter’s first target<br />
priority is “Units in the same card as the VoF marker” and,<br />
unfortunately for us, the 1/2 squad and the paralyzed LAT in<br />
the gully fit the bill. So we flip the Incoming marker on the<br />
gully card to its Pending <strong>Fire</strong> Mission side.<br />
All enemy activity checks are now complete.<br />
3.5 Mutual Capture & Retreat Phase<br />
There is one paralyzed team on the map, but it is Pinned, so<br />
this phase is skipped.<br />
Now we’ll randomly choose the next PC contact. We<br />
designate 1 for the Open <strong>Fields</strong> and 2 for Hedgerow/Bocage.<br />
We flip an Action card and see “1” under the “2” column. So<br />
we’ll resolve the PC marker in the Open <strong>Fields</strong> next.<br />
Again, we draw two cards, but this time one <strong>of</strong> them includes<br />
the word Contact, so we have made contact. We remove the<br />
PC “C” marker from the Open <strong>Fields</strong>, then flip an Action Card<br />
and refer to the Potential Contact Charts on page 7 <strong>of</strong> the<br />
Briefing Booklet. The random number in the “10” column <strong>of</strong><br />
the card is a “6.” Referencing a “6” result on the “Potential<br />
Contact C” chart, we get an “LMG Nest” (German Force #7).<br />
We check the German Force Package listing on page 3 <strong>of</strong> the<br />
Briefing Booklet and note that we place an LMG team under<br />
Foxholes, UNSPOTTED.<br />
We flip another card to determine where we place the LMG<br />
team, and get a “7” result in the “10” column. The “Unit<br />
Placement” chart on page 5 shows that this is “Front Left at<br />
Max LOS”. There is no Terrain Card to the front left <strong>of</strong> the<br />
Open <strong>Fields</strong> card, so we draw a new one and place it there.<br />
The new Terrain Card is an “Orchard/Grove” card. It has dark<br />
green on it’s corner facing the Open <strong>Fields</strong>, so there is no LOS<br />
through the card (if it had been white on both that side and the<br />
opposite diagonal, we would have drawn another Terrain Card<br />
and placed at top left in order to place the enemy at Max LOS<br />
as directed). We place the enemy LMG team on the<br />
Orchard/Grove card under Foxholes (with a ? atop it to<br />
indicate it is not spotted) and make an entry for it in the<br />
“Enemy Info” section <strong>of</strong> the Mission Log, noting that it has an<br />
ammunition supply <strong>of</strong> “6”.<br />
3.6 Mutual Vehicle-Aircraft Phase<br />
The Jeep was not activated so this phase is skipped.<br />
3.7 Mutual Combat Phase<br />
3.7.1 VoF Segment<br />
A. Update <strong>Fire</strong> Missions<br />
We flip the Pending <strong>Fire</strong> mission in the gully to its Incoming<br />
side.<br />
B. Evaluate Potential Contact Markers<br />
We have three US-occupied cards - all in Row 2 - that contain<br />
enemy PC markers. We will determine the order in which we<br />
check for contact randomly, so we assign the random #s left to<br />
right – 1 for the Open <strong>Fields</strong>, 2 for the Hedgerow/Bocage, 3<br />
for the Farm. We draw and Action Card and check under the<br />
“3.” The result is “3,” so we will check the Farm card first.<br />
The are two US cards within the line <strong>of</strong> sight <strong>of</strong> the enemy<br />
LMG (the Open <strong>Fields</strong> adjacent on the diagonal and the<br />
Village diagonally behind it – due to the open LOS through<br />
the Open <strong>Fields</strong> card), but enemy will engage the unit that<br />
triggered its placement, so we place an enemy PDF facing the<br />
Open <strong>Fields</strong> card and an Automatic Weapons VoF on the<br />
Open <strong>Fields</strong> card. The Exposed 1/1 unit in the open fields is in<br />
big trouble.<br />
Note that if the German contact had been a tripod-mounted<br />
machinegun, we would have placed VoFs on BOTH US cards,<br />
due to grazing fire (6.4.1).<br />
The Enemy PC marker is a “C” and the Current Activity Level<br />
is “Engaged”. Referencing the Potential Contact Draw Chart<br />
on the <strong>Play</strong>er Aid Card, we see that we draw two cards for<br />
contacts under these conditions. So we draw two cards, but<br />
neither has the word “Contact” across the top, so the 2/2 squad<br />
in the Farm did not run into an enemy contact. We remove the<br />
PC marker from that card and discard it.<br />
- 12 -
Now we resolve the final PC marker, on the units in the R2C2<br />
Hedgerow/Bocage. Again, we draw two cards, as the Activity<br />
Level is still “Engaged” and this is another “C” PC marker.<br />
One <strong>of</strong> the cards contains the word “Contact” at the top, so we<br />
have made yet another enemy contact. We flip an Action Card<br />
and the result under the “10” column is “1.” Checking the<br />
Potential Contact C table on page 5 <strong>of</strong> the Briefing Booklet<br />
indicates that this contact is “Mines!” Ouch!<br />
Mine contacts are covered in 9.5. There it tells us that when<br />
we contact mines, we must IMMEDIATELY make a mine<br />
check for each unit on the card. So we draw three Action<br />
Cards for each unit. If we get any “Burst” icons for a unit, then<br />
we place a Mine VoF (only one, you can’t have more than one<br />
mine VoF on a unit) on the unit that has been hit.<br />
We were pretty lucky to only have one unit get hit by the<br />
mines, but with the card already under sniper fire, combat<br />
resolution for this portion <strong>of</strong> 1 st Platoon could be very ugly.<br />
And those mines now sit astride one <strong>of</strong> our avenues <strong>of</strong><br />
advance, attacking anyone who moves into or within that card,<br />
making our maneuver and flank support – even attempts to<br />
seek cover – more difficult and dangerous.<br />
3.7.2 Combat Effects Segment<br />
The first thing we do in this segment is to check to<br />
see if any friendly pinned units have no enemy VoFs<br />
on their card and remove the Pinned markers. In this<br />
case there are no such units, as the Pinned units in the<br />
gully still have an Incoming VoF on their card.<br />
Now we resolve all combat effects, in any order. To<br />
make things easier we’re going to resolve all the<br />
combats left to right. So we start with the US unit in<br />
the Open <strong>Fields</strong> on R2C1.<br />
Our Mine Check results are as follows:<br />
The base NCM for this combat is -1 for the<br />
Automatic VoF. The only modification is -2 because<br />
the unit is Exposed, for a net -3 NCM.<br />
We draw an Action Card.<br />
1 st Plat HQ: No Effect<br />
3/1 Squad: No Effect<br />
1/Wpns: Hit – Place Mine VoF<br />
3/Wpns: No Effect<br />
- 13 -
The next combat resolution is for the US units in the<br />
Hedgerow/Bocage in R2C2. There’s a lot going on in<br />
this card, so this resolution could get a little messy.<br />
As you see, -3 is a Hit. We place a Pinned marker on<br />
the US unit and draw another Action Card to<br />
determine the result <strong>of</strong> the Hit.<br />
In this case, since the results all happen to be the<br />
same, the Experience level <strong>of</strong> the targeted troops<br />
doesn’t matter (although most <strong>of</strong>ten it does); the<br />
result is a “C”. One step <strong>of</strong> the 1/1 squad has become<br />
a casualty (killed or seriously wounded and<br />
immobilized). We place a Casualty marker on the<br />
card and flip the squad to its 2-step side.<br />
Moving left-to-right, we’ll now resolve the US <strong>Fire</strong><br />
against the Sniper in R4C2. The base NCM for this<br />
combat is -1 for the Automatic VoF. This is modified<br />
by -2 because the unit is Exposed and +2 for the<br />
Terrain Defense <strong>of</strong> the Woods card, for a net -1<br />
NCM. The Action Card we draw indicates that -1 is a<br />
PIN. We place a Pinned marker on the Sniper and<br />
this resolution is complete.<br />
We’ll resolve fire against each <strong>of</strong> the four US units,<br />
and draw an Action Card for each, with results as<br />
follows:<br />
1 st Platoon HQ: Small Arms VoF +0, Exposed -2,<br />
Terrain <strong>of</strong> Card +2, Foxholes +1. Net +1. Result =<br />
MISS.<br />
3/1 Squad: Sniper VoF -3, Exposed -2, Terrain <strong>of</strong><br />
Card +2, Foxholes +1. Net -2. Result = HIT. Hit<br />
Result (Line) = PP<br />
1/Wpns Team: Mine VoF -4, Exposed -2, Terrain<br />
+2, Foxholes +1. Net -3. Result = HIT. Hit Result<br />
(Line) = L<br />
3/Wpns Team: Small Arms VoF +0, Exposed -2,<br />
Terrain +2, Foxholes +1. Net +1. Result = PIN<br />
To implement the Combat Effects, we remove the 3/1<br />
Squad marker and replace it with two Paralyzed steps<br />
(for the PP result) and one <strong>Fire</strong> Team step. We<br />
replace the 1/Weapons with a Litter Team. We then<br />
place Pinned markers on all but the HQ unit.<br />
- 14 -<br />
Next we’ll Resolve Combat Effects against the<br />
German Mortar Spotter in the Farm in the Hills on<br />
R3C3. The Small Arms NCM is 0. Modifiers are +1
for Foxholes and +2 for the Farm’s terrain for a net <strong>of</strong><br />
+3. We draw an Action Card and the result is PIN.<br />
We place a Pinned marker on the Spotter.<br />
Our final Combat Effects resolution will be for the<br />
US units in the Gully in R2C3.<br />
1/2 Squad: -3 Incoming VoF, +1 Cover, +1 Pinned,<br />
+1 Card Terrain (we use the smaller number to the<br />
right against Artillery/Mortars). Net 0. Result = MISS<br />
Paralyzed LAT: (Same NCM and mods as 1/2<br />
Squad). Result = C<br />
So we replace the Paralyzed LAT with a Casualty<br />
marker (they’re adding up!).<br />
Because <strong>of</strong> the MISS result, we remove the PIN<br />
marker from the 1/2 squad.<br />
• We have two changes to make to the VoF <strong>of</strong><br />
the units in the (above) R2C2 card. Their<br />
previous PDF was pointing directly toward<br />
R3C2, but their VoF was extended into the<br />
Sniper’s card ( because the sniper in R4C2<br />
was within both their range and LOS). Now,<br />
because the machinegun team was reduced<br />
to a LAT and the 3/1 squad has broken<br />
down into all LATs and everyone on the<br />
card except the HQ is Pinned, no unit in the<br />
hex has the Range (all are C range) to reach<br />
the Sniper’s card. The units in this hex,<br />
although they are seriously damaged and<br />
pinned, ARE still firing, so we leave their<br />
PDF in place.<br />
Normally we would then replace the A VoF<br />
marker (on the sniper card) with an All<br />
Pinned VoF and move that VoF back into<br />
the Hedgerow/Bocage in R3C2 (which is the<br />
extent <strong>of</strong> the units’ range). But in this case<br />
R3C2 already contains a Small Arms VoF<br />
(which is better than the All Pinned VoF we<br />
would place) so we just remove the A VoF<br />
altogether and leave R3C2 as is.<br />
All <strong>of</strong> the other VoFs and PDFs on the map remain.<br />
That completes all the combat resolution. Now we<br />
will adjust PDF/VoF markers that need to change as a<br />
result <strong>of</strong> our combat results.<br />
We now expend ammunition for all the weapons and<br />
mortars that fired this turn (the German LMG and<br />
Mortar and our 1/Wpns, although he is a Litter team<br />
now, so we’re through tracking ammo for the MG for<br />
this mission).<br />
• The German sniper in R4C2 is Pinned, so he<br />
loses his Sniper VoF and will get an ALL<br />
PINNED VoF. So we remove the Sniper<br />
VoF from the Hedgerow/Bocage card in<br />
R2C2 and replace the Small Arms VoF with<br />
an ALL PINNED VoF. We also remove the<br />
Mines -4 VoF from the card, but retain the<br />
MINE Draw 3 marker as a reminder that any<br />
unit that moves into or within this card is<br />
subject to mine attack.<br />
- 15 -
3.8 Clean Up Phase<br />
We remove all exposed markers. Turn 3 is now complete.<br />
Here’s how the battlefield looks at this point.<br />
the enemy and occupy our objectives. That will take longer,<br />
and with so much terrain to clear and occupy, time is clearly<br />
our enemy in this scenario.<br />
So what do we do now? Well, here are a few thoughts as we<br />
prepare to give orders to the troops on turn 4.<br />
The clear line <strong>of</strong> sight from the Village in R1C2 to the enemy<br />
LMG in the Orchard gives us an opportunity to utilize the<br />
Artillery FO that we advanced last turn. So we’ll try to use<br />
him to call in <strong>Fire</strong> on the LMG team while hoping those troops<br />
in the Open <strong>Fields</strong> can keep their heads down long enough to<br />
survive while we let the artillery do its work. If we can’t get<br />
artillery help, we’ll move the company mortars up to fire<br />
direct lay on the LMG – anything to get them hugging the<br />
earth and not chewing up 1/1 in the field. If we can neutralize<br />
the LMG, then we will have reopened a path along the<br />
battlefield’s left flank and given ourselves some flexibility to<br />
maneuver.<br />
Because the enemy sniper who was targeting the units in the<br />
Minefield is Pinned, we have bought some time to try and rally<br />
those LATs and the Bazooka team in the minefield and get<br />
them moving forward again. So the plan there for this turn is<br />
to get the Pins removed and get some units forward if possible<br />
to scout the terrain to 1 st platoon’s front, with an eye toward<br />
getting everyone out <strong>of</strong> that minefield by turn 5. So essentially<br />
1 st Platoon is in Rally mode this turn.<br />
On the right, we have opportunity. The enemy spotter is<br />
pinned, so we should be spared the rain <strong>of</strong> artillery fire for<br />
this turn. To take advantage <strong>of</strong> this, we’ll try to infiltrate the<br />
understrength 1/2 onto the spotter’s card and engage him at<br />
close range. On the far right, we’ll continue moving 2/2<br />
forward to scout out the woods on the right flank.<br />
End-<strong>of</strong>-Turn Thoughts: Wow! Our left flank is a mess! We<br />
thought R2C2 was a pretty “safe” area to direct troops into<br />
(or we would have only sent a scout). Those mines really hurt,<br />
not only wreaking havoc on the 1 st platoon but also clogging<br />
up one <strong>of</strong> our avenues <strong>of</strong> advance. 1 st Platoon has taken a lot<br />
<strong>of</strong> combat damage for this early in the advance and may not<br />
have the punch we need to clear their sector <strong>of</strong> enemy troops.<br />
It’s clear that the left is going to pose a big challenge for us.<br />
On the right, though, we’re in pretty good shape. We located<br />
and pinned the enemy mortar spotter this turn and advanced<br />
on the right flank to find no opposition.<br />
We did manage to get our reserve platoon moving forward,<br />
along with an assortment <strong>of</strong> FOs and heavy weapons, so we’re<br />
in decent shape in regards to support. But because <strong>of</strong> the<br />
flanking MG fire into the Open <strong>Fields</strong> on the left, and that<br />
minefield, it looks like we’re going to have to maneuver<br />
around to the right and then swing back left in order to flank<br />
- 16 -<br />
We need to get the rest <strong>of</strong> 2 nd platoon forward. Our dilemma is<br />
whether to send them to the far right – to the Farm where 2/2<br />
is now – thus leaving room for 3 rd Platoon to advance now<br />
into the Gully in R2C3, or to send them into the Gully now and<br />
keep 3 rd platoon in reserve where it is in case we can get the<br />
left flank opened up and can then send them that way. The<br />
gully is the quicker route, but if 2 nd platoon gets bogged down<br />
in the Gully, then 3 rd platoon has nowhere to go. Decisions,<br />
decisions! That’s what makes this game so much fun!<br />
This concludes Part 1 <strong>of</strong> our <strong>Example</strong>. We hope you are<br />
finding it useful and enjoyable to this point. Stay tuned for<br />
Part 2, covering Turns 4 and 5, to see if we can get<br />
ourselves out <strong>of</strong> this mess and get our advance back on<br />
track.<br />
Gene & Ricky<br />
__________________________________________________
- 17 -