
You also want an ePaper? Increase the reach of your titles
YUMPU automatically turns print PDFs into web optimized ePapers that Google loves.
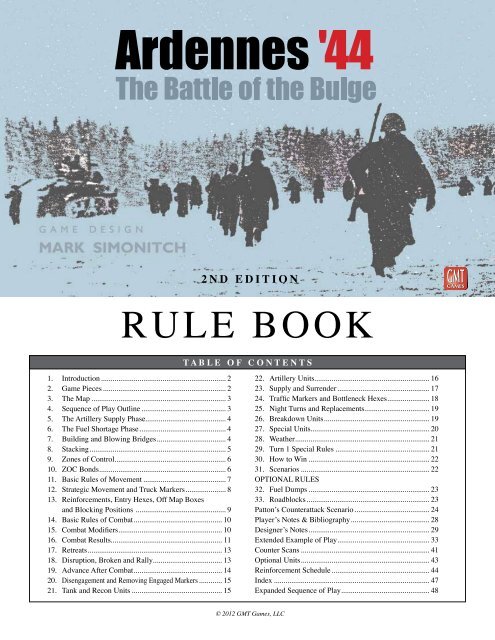
Ardennes ‘44 : The Battle of the Bulge — SECOND EDITION<br />
<br />
2 N D E D I T I O N<br />
RULE BOOK<br />
T A B L E O F C O N T E N T S<br />
1. Introduction.................................................................. 2<br />
2. Game Pieces................................................................. 2<br />
3. The Map....................................................................... 3<br />
4. Sequence of Play Outline............................................. 3<br />
5. The Artillery Supply Phase.......................................... 4<br />
6. The Fuel Shortage Phase.............................................. 4<br />
7. Building and Blowing Bridges..................................... 4<br />
8. Stacking........................................................................ 5<br />
9. Zones of Control.......................................................... 6<br />
10. ZOC Bonds.................................................................. 6<br />
11. Basic <strong>Rules</strong> of Movement............................................ 7<br />
12. Strategic Movement and Truck Markers...................... 8<br />
13. Reinforcements, Entry Hexes, Off Map Boxes<br />
and Blocking Positions ............................................... 9<br />
14. Basic <strong>Rules</strong> of Combat............................................... 10<br />
15. Combat Modifiers...................................................... 10<br />
16. Combat Results.......................................................... 11<br />
17. Retreats...................................................................... 13<br />
18. Disruption, Broken and Rally.................................... 13<br />
19. Advance After Combat.............................................. 14<br />
20. Disengagement and Removing Engaged Markers............. 15<br />
21. Tank and Recon Units................................................ 15<br />
22. Artillery Units............................................................ 16<br />
23. Supply and Surrender................................................. 17<br />
24. Traffic Markers and Bottleneck Hexes...................... 18<br />
25. Night Turns and Replacements.................................. 19<br />
26. Breakdown Units....................................................... 19<br />
27. Special Units.............................................................. 20<br />
28. Weather...................................................................... 21<br />
29. Turn 1 Special <strong>Rules</strong>.................................................. 21<br />
30. How to Win................................................................ 22<br />
31. Scenarios.................................................................... 22<br />
OPTIONAL RULES<br />
32. Fuel Dumps................................................................ 23<br />
33. Roadblocks................................................................. 23<br />
Patton’s Counterattack Scenario........................................ 24<br />
Player’s Notes & Bibliography.......................................... 28<br />
Designer’s Notes................................................................ 29<br />
Extended Example of Play................................................ 33<br />
Counter Scans.................................................................... 41<br />
Optional Units................................................................... 43<br />
Reinforcement Schedule.................................................... 44<br />
Index.................................................................................. 47<br />
Expanded Sequence of Play.............................................. 48<br />
© 2012 <strong>GMT</strong> <strong>Games</strong>, LLC
Ardennes ‘44 : The Battle of the Bulge — SECOND EDITION<br />
1. INTRODUCTION<br />
“All Hitler wants me to do is to cross a river, capture Brussels, and<br />
then go on and take Antwerp! And all this in the worst time of the<br />
year through the Ardennes, where the snow is waist deep and there<br />
isn’t room to deploy four tanks abreast, let alone armored divisions!<br />
Where it doesn’t get light until eight and it’s dark again at four and<br />
with reformed divisions made up chiefly of kids and sick old men—and<br />
at Christmas!”<br />
—Sepp Dietrich<br />
<strong>GMT</strong>’s Ardennes ‘44 is a two-player game depicting Hitler’s surprise<br />
attack in the Ardennes during 1944. The standard game covers the<br />
period from December 16th to the 26th when the German attack still<br />
had a chance to cross the Meuse, but an extended version is provided<br />
that takes the game till December 30th. Three shorter scenarios are<br />
included which cover the initial stages of the German attack and the<br />
attack of the US 3rd Army in its attempt to relieve Bastogne.<br />
> = Indicates a significant change from the 1st Edition<br />
1.1 Game Scale<br />
Each game-turn represents approximately 8 hours of real time. Each<br />
map hex represents about 1.6 miles (2.6 kilometers). Units represent<br />
battalions, regiments and brigades.<br />
1.2 Inventory<br />
A complete game of Ardennes ‘44 includes the following:<br />
2 map sheets (each 22 x 34 inches)<br />
3 sets of counters (570 pieces total)<br />
2 Player Aid Cards<br />
1 <strong>Rules</strong> Booklet<br />
1 die<br />
2. GAME PIECES<br />
2.1 How to Read the Combat Units<br />
Unit Size (2.3)<br />
Unit I.D. (2.5)<br />
4th Div/8th Regt/2nd Bn<br />
Attack<br />
Factor<br />
TQ (Tank Quality) (2.9)<br />
Gray = Tank<br />
Red = Tank Destroyer or Assault<br />
Gun (subtract one from the<br />
TQ rating when attacking)<br />
Range<br />
(22.4)<br />
S = Column<br />
Shift<br />
Attack<br />
Factor<br />
Defense<br />
Factor*<br />
Infantry Unit<br />
Defense<br />
Factor<br />
Tank Unit<br />
Defense<br />
Factor<br />
Artillery Unit<br />
Front<br />
Movement<br />
Allowance<br />
*Defense Factors in<br />
parenthesis indicates<br />
unit may not receive<br />
DCBs (15.1)<br />
Arrival Info (2.6)<br />
Stacking Value (8.2)<br />
Unit Type (2.4)<br />
Movement<br />
Allowance<br />
Set-up Info (2.7)<br />
Morale Box (2.8)<br />
Movement<br />
Allowance<br />
Back<br />
© 2012 <strong>GMT</strong> <strong>Games</strong>, LLC<br />
2.2 Attack, Defense and Movement Factors<br />
These numbers indicate how well the unit can attack, defend and<br />
move. These factors will be further explained in the appropriate rule<br />
section.<br />
2.3 Unit Sizes<br />
X = Brigade III = Regiment II = Battalion<br />
TF = Task Force Gp = Group XXX = Corps<br />
Sq = Squadron CC = Combat Command I = Company<br />
(–) = less elements (+) = with added elements<br />
2.4 Unit Types<br />
All ground combat units belong to one of two basic categories: mechanized<br />
or non-mechanized (important for movement purposes). The<br />
following is a list of the different unit types:<br />
M4 Sherman<br />
M5 Stuart<br />
M10 TD<br />
M18 TD<br />
M36 TD<br />
Sherman Firefly<br />
Churchill<br />
Pzkw IV<br />
Pzkw V (Panther)<br />
Pzkw VI (Tiger)<br />
Pzkw VI (King Tiger)<br />
StuG III<br />
Hetzer<br />
Jpz IV<br />
Jpz V (Hunting Panther)<br />
Jpz VI (Hunting Tiger)<br />
Sturmtiger<br />
Brummbär<br />
Armor (NATO symbol)<br />
Recon (aka Mechanized Cavalry)<br />
FLAK (Anti-Aircraft)<br />
Artillery<br />
Artillery<br />
Nebelwerfer (Rockets) Units<br />
Mechanized Infantry/Panzergrenadiers (PzG)<br />
Motorized Infantry<br />
Infantry<br />
Parachute Infantry<br />
Glider Infantry<br />
Mountain Infantry<br />
Combat Engineers<br />
Fortress Infantry<br />
Non-<br />
Mechanized<br />
Type<br />
Infantry Type<br />
Units<br />
TANK UNITS: Tank Units come in two types: silhouetted or with a<br />
NATO symbol. The NATO symbol represents a mixed force of tanks<br />
and infantry. A silhouetted Tank Unit represents a battalion of armored<br />
vehicles with little or no infantry support. A summary of silhouetted<br />
Tank Unit properties can be found on the player aid card.<br />
Tank Units<br />
Mechanized Type<br />
These units have their own column on the TEC, may use the<br />
Road Bonus in Advance After Combat and may use Strategic<br />
Movement. They may not use Extended Movement.<br />
Vehicle Type Units<br />
These units may not cross unbridged river hexsides<br />
or enter Forest hexes except along roads
ARTILLERY UNITS: Artillery and Nebelwerfer units are collectively<br />
called Artillery Units.<br />
Ardennes ‘44 : The Battle of the Bulge — SECOND EDITION<br />
2.5 Unit I.D.<br />
The divisional IDs are printed first and in bold for easy recognition— it<br />
is the only ID number that is relevant in game play. The second number<br />
is the regimental number, and the third (if any) is the battalion ID.<br />
2.6 Arrival Information<br />
Indicates the turn the unit arrives and the Entry Hex it arrives at.<br />
2.7 Set Up Information<br />
A white box indicates an at-start unit. A red box indicates an at-start<br />
unit with movement restrictions (see 29.1). Allied units list the hex<br />
the unit starts in, while German units have the Corps they belong to<br />
at the start of the game.<br />
2.8 Morale Box<br />
All units are either Elite, Veteran or Green. A red box around the Defense<br />
Factor (DF) means the unit is Elite, a white box around the DF<br />
means the unit is Green, and no box means Veteran. Morale is used<br />
for Fire Fights (16.2), Determined Defense (16.7), Disengagements<br />
(20.2), and Surrender Checks (23.7).<br />
2.9 TQ (Tank Quality)<br />
A general rating given to Tank Units. The higher the better. Used to<br />
determine Armor Shifts (21.1). TQs in red indicate a Tank Destroyer<br />
or Assault Gun (21.2).<br />
2.10 Color Schemes<br />
The colors used to identify the combat units are:<br />
GREEN: U.S. Army<br />
GRAY:<br />
German Army<br />
DARK GRAY: Waffen SS<br />
TAN:<br />
British Army<br />
BLUE GRAY: Fallschirmjäger<br />
2.11 Army/Corps Identification Colors: Every combat unit is color<br />
coded to the army or corps they originally started the campaign with.<br />
German identification colors are used for Prime Movers (22.3), Army<br />
Boundaries (11.10), and the “West Map” result on the Fuel Shortage<br />
Tables (6.4). Both players use the colors for Artillery Support restrictions<br />
(22.6).<br />
GERMAN:<br />
Red: Dietrich’s 6th Panzer Army<br />
Gray: Manteuffel’s 5th Panzer Army<br />
Blue: Brandenberger’s 7th Army<br />
Green: Operation Nordwind units (Optional)<br />
ALLIED:<br />
Purple:<br />
Burgundy:<br />
Orange:<br />
Beige:<br />
Blue:<br />
Red:<br />
BOTH:<br />
Yellow:<br />
White:<br />
Middleton’s VIII Corps<br />
Gerow’s V Corps<br />
Patton’s 3rd Army (Milikin’s III & Eddy’s XII Corps)<br />
Collin’s VII Corps<br />
Ridgeway’s XVIII Airborne Corps<br />
Horrock’s XXX Corps (British)<br />
Army level troops (US) or Remnants<br />
Breakdown units<br />
2.12 Game Markers<br />
The game also includes a variety of markers that are used to help facilitate<br />
play of the game. Their use is explained through the rules.<br />
3. THE MAP<br />
The map shows the area in the Ardennes and Eifel where the Battle of<br />
the Bulge was fought.<br />
3.1 Setup<br />
Place the maps so the East Map overlays the West Map. Players may<br />
sit on any side they wish. Marker holding boxes are provided along<br />
the edge of the map for players who wish to keep these markers handy<br />
and organized.<br />
3.2 Entry Hexes and Blocking Positions<br />
Entry Hexes are indicated by a star for Allied units or a balkenkreuz<br />
for German units. Connected to each Entry Hex on the East Map is a<br />
Blocking Position box to hold Allied units that are abstractly blocking<br />
German movement down that particular road.<br />
3.3 Rivers That<br />
Flow Through<br />
Hexes<br />
Ignore rivers that flow<br />
through the middle of<br />
a town (such as at Malmédy)<br />
or in the middle<br />
of a Wooded Rough<br />
hex. The importance of the<br />
river as a movement barrier<br />
See this Think this<br />
and defensive terrain has been mitigated by the other terrain.<br />
4. SEQUENCE OF PLAY OUTLINE<br />
Each game-turn consists of a German Player Turn followed by an<br />
Allied Player Turn. The sequence of each game-turn must be strictly<br />
followed.<br />
A. GERMAN PLAYER TURN<br />
1. The Artillery Supply Phase<br />
2. The Fuel Shortage Phase (German Turn only)<br />
3. The Bridge Phase<br />
4. The Movement Phase<br />
5. The Rally Phase<br />
6. The Combat Phase<br />
7. The Traffic Marker Phase<br />
8. The Supply and Surrender Phase<br />
9. The Victory Check Phase (Allied Turn only)<br />
PLAY NOTE: Night Turns follow a different and much shorter sequence<br />
(25.1).<br />
B. ALLIED PLAYER TURN<br />
The Allied Player Turn is identical to the German Player Turn (switching<br />
the term German for Allied), except the Allied player has a Victory<br />
Check Phase and no Fuel Shortage Phase.<br />
C. END TURN<br />
Record the completion of a game-turn by advancing the Game Turn<br />
marker one box.<br />
<br />
© 2012 <strong>GMT</strong> <strong>Games</strong>, LLC
Ardennes ‘44 : The Battle of the Bulge — SECOND EDITION<br />
5. THE ARTILLERY SUPPLY PHASE<br />
5.1 In General<br />
During this phase the phasing player flips over a number of his Artillery<br />
Units from their Fired side to their Ready side. If it is the German Turn,<br />
the German player should remove all his Prime Mover markers from<br />
the map in order to take stock of these important markers and better<br />
view his Artillery Units (see 22.3).<br />
5.2 Artillery Supply Procedure<br />
Artillery supply may not be accumulated—those not used are lost.<br />
The number of Artillery Units each side may flip over each friendly<br />
Artillery Supply Phase is:<br />
GERMAN: 3 per turn. On Turn 2 (only) the German player may flip<br />
over six (5.4).<br />
ALLIED: All units may flip<br />
5.3 Artillery Supply Restrictions<br />
Artillery Units that are Disrupted (18.2), out of supply (23.4), or using<br />
Strategic Movement (Allied only [12.1]), may not be flipped to<br />
their Ready side. Artillery Units in an EZOC or Engaged (16.5) may<br />
be flipped.<br />
5.4 Turn 2 Special Artillery Supply<br />
To reflect the accumulation of supply for the offensive, the German<br />
player may flip six Artillery Units to their Ready side on Turn 2 (16<br />
PM).<br />
6. THE FUEL SHORTAGE PHASE<br />
6.1 Procedure<br />
Only the German player checks for fuel shortage and only on or after<br />
Turn 7 (19 AM). Fuel Shortage is checked using the Fuel Shortage<br />
Tables. Roll once for each table. If the result indicates a division (the<br />
Führer Begleit and the Führer Grenadier brigades are considered<br />
divisions for this rule), then all units in that division are considered<br />
out of supply and suffer all the penalties of that status (see 23.4). The<br />
result often gives a choice of two divisions; the German player may<br />
choose either one.<br />
DESIGN NOTE: Units marked OOS for Fuel Shortage can have the<br />
marker removed in the Supply and Surrender Phase (at the end of the<br />
German player’s turn) if they can trace a Line of Supply.<br />
6.2 Fuel Shortage Die Roll Modifier<br />
Starting on Turn 15 (23 AM) the German player must modify his die<br />
roll by +1 to account for Allied bombing of the rail net west of the<br />
Rhine.<br />
6.3 Fuel Shortage and Reinforcements<br />
If fuel shortage targets a division that is arriving as a reinforcement that<br />
turn, it arrives in an unsupplied state (it may move a maximum of two<br />
hexes). If only one of the formations listed has arrived, the German<br />
player must select the one that is on the map. If neither division has<br />
arrived the result is treated as a “No Fuel Shortage” result.<br />
> 6.4 Any Division Results<br />
If the result says “West Map” the Allied player, instead of the German<br />
player, selects the German division to be subject to fuel shortage. He<br />
must pick a division belonging to the appropriate army (5 PzA or 6<br />
PzA). Only the units of that division that are on the West Map at that<br />
moment are affected. If the result says “Any one Pz Div in 5th PzA”<br />
then the Allied player can pick any one panzer division in the 5th Pz<br />
Army on the East or West Map.<br />
© 2012 <strong>GMT</strong> <strong>Games</strong>, LLC<br />
7. BUILDING AND BLOWING<br />
BRIDGES<br />
7.1 The Bridge Phase<br />
During this phase the phasing player may destroy or rebuild bridges.<br />
7.2 Bridge Demolition in General<br />
Both players may destroy (or the colloquial “blow”)<br />
bridges. Bridge demolition occurs in the friendly Bridge<br />
Phase or during your opponent’s Combat Phase. Only<br />
one attempt on each bridge is allowed per player turn. Supply has no<br />
effect on blowing bridges.<br />
7.3 Bridge Demolition in a Friendly Bridge Phase<br />
You may only attempt to blow a bridge during your turn if an enemy<br />
unit is within one hex of that bridge (please see the example below).<br />
Bridge demolition requires that you have a friendly combat unit within<br />
one hex of the bridge hexside. The one-hex range may be traced through<br />
EZOCs, but not through enemy units or into or across an enemy ZOC<br />
Bond (see example). Roll one die and consult the Bridge Demolition<br />
Table. If the result is “Blown” the bridge is destroyed and a Blown<br />
Bridge marker is placed.<br />
7.4 Bridge Demolition in the Combat Phase<br />
Bridge blowing is allowed during your opponent’s Combat Phase<br />
whenever an enemy unit is about to attack across the bridge hexside.<br />
NOTE: Successful demolition of a bridge during a Combat Phase will:<br />
• Prevent any Tank Unit that is attacking across the bridge from gaining<br />
the Armor Shift (21.3).<br />
• Prevent any Vehicle Type Unit from being used as the Lead Unit in<br />
a Fire Fight (16.2).<br />
• Prevent Vehicle Type Units from Advancing After Combat across<br />
the river hexside (19.2).<br />
• Allow the attacker the opportunity to cancel the attack (14.4).<br />
7.5 Bridge Demolition Modifiers (cumulative)<br />
+1 If the attempt is made during your opponent’s Combat Phase.<br />
+2 If the friendly unit conducting the demolition is either Disrupted<br />
or Engaged.<br />
EXAMPLE: It is the Bridge Phase of the Allied player turn. The<br />
American player selects the unit shown to blow as many bridges<br />
as possible. The bridges marked A may not be blown because they<br />
are not within one hex of an Allied unit. The bridges marked B<br />
may not be blown because the 1-hex range may not enter or cross<br />
an enemy ZOC Bond or a hex containing an enemy unit. All other<br />
bridges may be blown by the Allied unit on a die roll of 1–4.
Ardennes ‘44 : The Battle of the Bulge — SECOND EDITION<br />
<br />
7.6 Effects of Blown Bridges<br />
Players must treat a blown bridge as an unbridged river hexside.<br />
7.7 Demolition Restriction<br />
• FIRST DAY: No bridge blowing is allowed on Turns 1 and 2 (16<br />
AM & PM) (including the first Night Turn) with the exception of<br />
the Ouren bridge (7.8).<br />
• > STRATEGIC MOVEMENT: Units using Strategic Movement,<br />
Trucks or Prime Movers may not blow bridges.<br />
• RIVERS THROUGH TOWNS: When a river flows through the<br />
middle of a town hex (example Clervaux and Houffalize), no demolition<br />
is possible in that hex (see 3.3).<br />
7.8 The Ouren Bridge (E2119)<br />
DESIGN NOTE: The bridge near Ouren actually represents two weak<br />
bridges. These were crucial to the advance of the 116th Panzer Division<br />
which, upon reaching the bridges on the second day of the offensive,<br />
found the bridges inadequate for tanks and heavy equipment. In this<br />
game there is a chance one of the bridges is adequate.<br />
The first time the German player attempts to move, attack or advance<br />
across the Ouren bridge with a combat unit the Allied player rolls a<br />
die. On a die roll of 1-4 the bridge is considered destroyed (and a<br />
Blown Bridge marker is placed). On a die roll of 5 or 6 the bridge is<br />
considered normal and remains intact. This special die roll occurs only<br />
once: if the bridge is blown and later rebuilt it is considered a normal<br />
bridge in all respects; if the bridge remains intact it can be blown like<br />
all other bridges starting on Turn 3 (17 AM).<br />
7.9 Rebuilding Bridges<br />
Bridges may be rebuilt by either player at original bridge<br />
sites. To build a bridge the following two conditions are<br />
necessary:<br />
• Both hexes tangent to the bridge hexside must be clear of enemy<br />
units and either be: a) occupied by friendly units, or b) clear of<br />
enemy Zones of Control (9.1).<br />
• A Supply Path using roads only (23.3) must be possible from at least<br />
one of the hexes tangent to the bridge hexside.<br />
DESIGN NOTE: If there are no enemy units projecting a ZOC on the<br />
construction site, then a friendly unit is not physically needed in the<br />
hex to repair a bridge.<br />
PROCEDURE: Bridge construction is conducted in a two-part process.<br />
In the first friendly Bridge Phase that the two conditions above are<br />
satisfied, the Blown Bridge marker is flipped to it’s Under Construction<br />
side. In the next friendly Bridge Phase, if the two conditions above are<br />
still met, the Blown Bridge marker is removed and the bridge may be<br />
used normally that turn. (If the conditions are not met in the second<br />
Bridge Phase, the Under Construction marker must be flipped back<br />
to its Blown side.)<br />
7.10 The Dasburg (E2115) and Gemünd (E2013) Bridges<br />
The construction of these two bridges was planned weeks before the<br />
offensive and each had an engineer battalion and bridging equipment<br />
committed to its construction, which allowed these two bridges to be<br />
completed quickly (approximately by 4 PM on the 16th). Therefore,<br />
these two bridges are considered completed in the German Bridge<br />
Phase of Turn 2 (16 PM). If either bridge is later blown, then reconstruction<br />
occurs normally.<br />
PLAY NOTE: It may be helpful to flip the Dasburg and Gemünd Blown<br />
Bridge markers to their Under Construction sides on Turn 1, to serve<br />
as a visual reminder that they are removed during the Bridge Phase<br />
on Turn 2.<br />
8. STACKING<br />
8.1 Stacking Limits<br />
Stacking occurs when multiple units are in one hex. The stacking limit<br />
for both sides is 3 Stacking Points. Markers have no Stacking Point<br />
value and may freely stack in a hex without limit.<br />
> 8.2 Stacking Points<br />
Each Stacking Point represents approximately a battalion, so a 3-<br />
battalion regiment would have a Stacking Point value of 3 while a<br />
2-battalion regiment would have a Stacking Point value of 2. Stacking<br />
Points are indicated on all non-Silhouetted Tank Units by the number<br />
in the small black box to the right of the unit-type symbol.<br />
FREE STACKING UNITS: All Silhouetted Tank Units and all Artillery<br />
Units have no Stacking Point value and can stack in a hex for free<br />
under the following conditions:<br />
• No more than one Artillery Unit per hex.<br />
• No more than two Silhouetted Tank steps per hex.<br />
NOTE: For ease of identification, all 2-step Tank Units have a defense<br />
factor of 3 or 4. All 1-step Tank Units have a defense factor of 2 or<br />
1.<br />
8.3 Stacking Restrictions<br />
The stacking limit can never be voluntarily exceeded except during<br />
the course of movement and after a retreat. The stacking limit must<br />
be strictly observed at the completion of movement, Retreat or an<br />
Advance After Combat (19.1). The owning player must correct all<br />
stacking violations at these times by eliminating enough units from<br />
the hex to satisfy the stacking limit.<br />
8.4 Allied Cooperation<br />
British and American units may stack and defend together in the same<br />
hex, but may not participate in the same attack (27.3).<br />
EXAMPLES OF STACKING:<br />
3 Stacking Points of infantry<br />
and the 2-step Silhouetted<br />
Tank Unit stacks for<br />
free (8.2).<br />
0 Stacking Points = The<br />
Silhouetted Tank Unit and<br />
the Artillery Unit have no<br />
stacking value.<br />
3 Stacking Points of mechanized infantry<br />
and the Silhouetted Tank Unit stacks for<br />
free (8.2).<br />
3 Stacking points plus two 1-step Silhouetted<br />
Tank Units.<br />
© 2012 <strong>GMT</strong> <strong>Games</strong>, LLC
Ardennes ‘44 : The Battle of the Bulge — SECOND EDITION<br />
9. ZONES OF CONTROL (ZOC)<br />
9.1 General Rule<br />
The six hexes immediately surrounding a hex occupied by one or more<br />
combat units constitute the Zone of Control (ZOC) of those units. All<br />
combat units exert a ZOC (even Disrupted units [18.3], and Artillery<br />
Units). Multiple Enemy ZOCs give no additional effect. A hex can<br />
have friendly ZOCs and Enemy ZOCs simultaneously.<br />
9.2 ZOCs and Movement<br />
Units must stop upon entering an enemy Zone of Control (EZOC).<br />
Units that start their movement in an EZOC may move away. It costs<br />
all units one additional Movement Point (+1 MP) to exit an EZOC. It<br />
costs no additional movement points to enter an EZOC.<br />
9.3 ZOC to ZOC Movement<br />
A unit that starts its move in an EZOC may move directly into another<br />
EZOC (and stop) of the same or different enemy unit as long as it does<br />
not cross or enter a ZOC Bond (10.2).<br />
9.4 ZOCs and Silhouetted Tank Units<br />
ZOCs from Silhouetted Tank Units do not extend into or out of a<br />
Wooded Rough hex except along a road (any type).<br />
9.5 Other Effects of ZOCs<br />
• EZOCs and Retreats: see 17.1, 17.2<br />
• EZOCs and Advances: see 19.3<br />
• EZOCs and Supply Paths: see 23.3<br />
10.3 ZOC Bonds and Terrain<br />
A ZOC Bond cannot extend ACROSS two river hexsides or two<br />
Wooded Rough hexsides or any combination of those two. A ZOC<br />
Bond can extend along a Wooded Rough hexside as long as that<br />
hexside does not join two Wooded Rough hexes. A ZOC Bond may<br />
extend across a Lake hexside.<br />
EXAMPLES: ZOC Bonds that are not possible are shown with a dashed<br />
line. Legal ZOC Bonds are shown with a solid line.<br />
10. ZOC BONDS<br />
10.1 General Rule<br />
> When two friendly non-Artillery Units are two hexes apart (with<br />
one vacant intervening hex), they create a bond between them that no<br />
enemy unit may enter or cross. (Artillery Units have ZOCs but may<br />
not form ZOC Bonds.) Due to the pattern of a hex grid, there are two<br />
types of ZOC Bonds—Hex Bonds and Hexside Bonds.<br />
10.2 Effects of ZOC Bonds:<br />
• Units may not enter an enemy Hex Bond or cross an enemy Hexside<br />
Bond during the Movement Phase.<br />
• Units forced to Retreat into an enemy Hex Bond or across an enemy<br />
Hexside Bond are eliminated (17.2).<br />
• Supply can never be traced into an enemy Hex Bond or across an<br />
enemy Hexside Bond.<br />
Silhoutted Tank Units in a Wooded Rough hex never form ZOC Bonds;<br />
they may, however, form ZOC Bonds with non-Silhouetted Tank Units<br />
in such hexes. Roads leading in and out of the Wooded Rough hex<br />
have no effect on this restriction.<br />
10.4 Negating ZOC Bonds<br />
A Hexside Bond is negated when enemy units are located on each<br />
side of the intervening hexside (as with units D and E in the diagram<br />
below). A Hex Bond is negated when the intervening hex contains an<br />
enemy unit (as with units E and F in the same diagram).<br />
10.5 Intersecting ZOC Bonds<br />
If both players have intersecting ZOC Bonds, then neither player may<br />
cross the other’s ZOC Bond until it is negated.<br />
10.6 ZOC Bonds With the Map Edge<br />
A unit can form a ZOC Hexside Bond with the map edge, but not a<br />
ZOC Hex Bond.<br />
EXAMPLES OF ZOC BONDS: Black lines indicate friendly ZOC<br />
Bonds, red lines indicate enemy ZOC Bonds. Dashed lines indicate<br />
negated ZOC Bonds (D-E and E-F). Note that Units F and G still have<br />
a ZOC Bond even though it is intersected by the enemy ZOC Bonds.<br />
Also note how Unit H has Hexside Bonds with the map edge.<br />
© 2012 <strong>GMT</strong> <strong>Games</strong>, LLC
Ardennes ‘44 : The Battle of the Bulge — SECOND EDITION<br />
11. BASIC RULES OF MOVEMENT<br />
11.1 The Movement Procedure<br />
During the Movement Phase the phasing player may move all, some,<br />
or none of his combat units. Each unit has a Movement Allowance<br />
(MA) that is the maximum number of Movement Points (MPs) it may<br />
expend for movement during the Movement Phase and still be able to<br />
attack in the Combat Phase. Each hex entered costs a certain number<br />
of MPs to enter as determined on the Terrain Effects Chart (TEC). You<br />
must complete the movement of one unit (or stack) before starting to<br />
move another.<br />
11.2 Extended Movement<br />
Non-Mechanized units may use Extended Movement to increase their<br />
Movement Allowance by 2 MPs. Mechanized Type units may not use<br />
Extended Movement (Mechanized units have Strategic Movement).<br />
Units that use Extended Movement may not end their move adjacent<br />
to an enemy unit (even if the hex is not in an EZOC). However, a unit<br />
may start adjacent to an enemy unit and use Extended Movement.<br />
11.3 Tactical Movement<br />
Any unit with a MA of 2 or more, may ignore all MP cost (for terrain,<br />
EZOCs, etc.) and move up to two hexes, this is called Tactical Movement.<br />
Units that use Tactical Movement may attack normally in the<br />
following Combat Phase. Units that use Tactical Movement must still<br />
stop upon entering an EZOC, may not cross enemy ZOC Bonds and<br />
may not enter or cross prohibited terrain (example: Vehicle Type units<br />
and non-road Forest hexes).<br />
DELAY MARKERS: Traffic markers, Roadblocks (rule 33.0) and<br />
St-Vith Bottleneck hexes (24.7) are ignored when using Tactical<br />
Movement.<br />
11.4 Movement and Rivers<br />
RIVERS: Vehicle Type units (see 2.4) may not cross an unbridged river<br />
hexside—they must use bridges. Infantry Type units may only cross<br />
if they start adjacent to the river hexside and use Tactical Movement<br />
(move a maximum of two hexes). Infantry Type units may not cross<br />
two unbridged river hexsides in the same Movement Phase.<br />
THE MEUSE: Is treated as a regular river for movement and combat<br />
purposes. However, units are eliminated if they Retreat across the<br />
Meuse (17.2).<br />
11.5 West Wall and Forest Hexes<br />
Vehicle Type Units may only enter and exit West Wall and Forest hexes<br />
if following the path of a road.<br />
See this<br />
Think this<br />
<br />
EXAMPLE: The numbers indicate how many MPs each hex costs to<br />
enter (before the Ground Freeze [28.1]). Unit A moves 6 MPs. Unit B<br />
uses Extended Movement to increase its MA to 5 (11.2). Unit C may<br />
not cross the river hexside because it didn’t start adjacent to it (11.4).<br />
Unit D must use Tactical Movement to cross an unbridged river hexside<br />
(11.4). Unit E uses Tactical Movement because it would cost 8 MPs<br />
otherwise (+1 MP to exit an EZOC, 4 MPs for the Forest hex and 3<br />
MPs for the Light Woods). Unit F cannot enter the Wooded Rough hex<br />
© 2012 <strong>GMT</strong> <strong>Games</strong>, LLC<br />
because it did not start adjacent to it (11.6). Unit G has to pay 4 MPs<br />
for the Forest Road with a Traffic marker (24.2). Unit H must stop after<br />
one hex because it enters an EZOC (9.2). Unit I takes advantage of<br />
the Wooded Rough hexes canceling the enemy ZOC Bond (10.3). Note<br />
that Unit I can only enter Forest and Wooded Rough hexes along roads<br />
(11.5). Units J and K must use Tactical Movement to cross a non-road<br />
Wooded Rough hexside (11.6). Unit K may not cross a non-road Wooded<br />
Rough hexsides plus an unbridged river hexside.
Ardennes ‘44 : The Battle of the Bulge — SECOND EDITION<br />
11.6 Wooded Rough (Dark Green) Hexsides<br />
Wooded Rough represents a small wooded valley with a river or stream<br />
running through the middle of the hex.<br />
Crossing a non-road dark green hexside is the same as crossing an<br />
unbridged river hexside. Vehicle Type units may not cross. Infantry<br />
Type units may only cross if they start adjacent to the Wooded Rough<br />
hexside and use Tactical Movement (move a maximum of two hexes).<br />
Infantry Type units may not cross two non-road Wooded Rough hexsides<br />
in the same Movement Phase.<br />
11.7 Road Movement<br />
A unit that follows the path of a road when it moves may use the reduced<br />
rate of the road. The road rate may be used when moving into<br />
or out of an enemy ZOC.<br />
11.8 Forest Roads<br />
Secondary Roads in Forest or Wooded Rough hexes that don’t share<br />
the hex with a Primary Road are called Forest Roads. Forest Roads<br />
are indicated with a dashed line. This type of Secondary road cost 2<br />
MPs for Mechanized units and may not be used for the Road Bonus<br />
in Advance After Combat (19.1).<br />
11.9 Exiting the Map<br />
Allied units may exit the map through the south, west or north map<br />
edge. An Allied unit that exits the map is placed in the Off Map Box<br />
associated with that map edge (southwest, southeast, west, northwest<br />
or northeast). The MP cost to exit the map from a map edge hex is<br />
always 1 MP. German units may never enter Off Map Boxes, and may<br />
only exit the map to fulfill their victory conditions. No unit from either<br />
side may exit the east edge. See 13.1–13.8 for additional details on<br />
Off Map Boxes.<br />
> TO ANTWERP: German units that exit the map through any F<br />
or G Entry Hex to fulfill their victory conditions are placed in the<br />
Antwerp Box. German units must exit via an Entry Hex, they may<br />
not exit between two Entry Hexes. They may not re-enter the map<br />
after exiting. Once a German unit uses an Allied Entry Hex to exit<br />
the map, that particular hex is no longer available as an Entry Hex<br />
for Allied units.<br />
> RETREAT OFF MAP: An Allied unit that retreats off the map is<br />
placed in the appropriate Off Map Box. If the retreat called for the<br />
unit to become Disrupted or Broken, then it must be marked as such.<br />
A Disrupted or Broken unit may not exit an Off Map Box until it<br />
Rallies (18.5).<br />
11.10 Army Boundaries<br />
MOVEMENT RESTRICTION: German units may not cross the Army<br />
Boundary Lines before Turn 5 (18 AM). Army Boundary Line restrictions<br />
are removed at the start of Turn 5. The boundary lines do not<br />
extend beyond the hexes marked on the map—so German units that<br />
move west of the boundary lines may move in any direction.<br />
EFFECTS ON COMBAT: German units may attack across army<br />
boundaries but may not Advance After Combat across them. If a German<br />
unit is forced to retreat across an Army Boundary Line it may not<br />
Rally (18.5) until it has recrossed the boundary line or until Turn 5.<br />
Army Boundaries have no affect on ZOCs or ZOC Bonds.<br />
© 2012 <strong>GMT</strong> <strong>Games</strong>, LLC<br />
12. STRATEGIC MOVEMENT AND<br />
TRUCK MARKERS<br />
12.1 Strategic Movement in General<br />
Mechanized units (including Allied Artillery Units) may<br />
use Strategic Movement to double their MA. Strategic<br />
Movement is not available to German non-Mechanized<br />
units, German Artillery Units (22.3), Disrupted units, or units that are<br />
out of supply. Non-Mechanized Allied units may use Strategic Movement<br />
if they are assigned Trucks (12.6). Units using Strategic Movement<br />
must move entirely along roads (all types). Reinforcements entering the<br />
map may arrive using Strategic Movement.<br />
EXAMPLE: A Cavalry Squadron (MA=7) in Strategic Movement could<br />
move 28 hexes along a primary road.<br />
12.2 Restrictions<br />
Units that use Strategic Movement may start stacked with other units<br />
but are under the following restrictions:<br />
• > May not start their move adjacent to an enemy unit or at any time<br />
move adjacent to an enemy unit.<br />
• May not end their move stacked with any unit.<br />
• > May not blow bridges or build Improved Positions.<br />
• May not end their move adjacent to another unit that bears a Strategic<br />
Movement or Truck marker. If the unit is adjacent but on a different<br />
road, then it is not considered adjacent for this rule.<br />
> 12.3 Strategic Movement and Traffic Markers<br />
Units using Strategic Movement may enter and pass through St-Vith<br />
Bottleneck hexes (24.7), hexes containing a Traffic marker (24.1), or<br />
a Roadblock (33.0) by paying the additional movement cost.<br />
12.4 Strategic Movement (SM) Markers<br />
The number of units that may use Strategic Movement in a single<br />
Movement Phase is strictly limited to the number of SM markers available<br />
to each side (6 for the German player, 10 for the Allied player).<br />
Place a SM marker on every unit (including Reinforcements) that<br />
used Strategic Movement. Units that are part of the same regiment or<br />
brigade may stack together during Strategic Movement and use only<br />
one SM marker. For example, the 106/424(-) and the 106/424/1 would<br />
require only one Truck marker if stacked together.<br />
12.5 Strategic Movement and Combat<br />
Units attacked with an SM marker receive no Defensive Combat<br />
Bonuses (15.1) and provide the attacker with one shift right on the<br />
CRT. TQ ratings and ZOCs are unaffected by SM. If forced to retreat<br />
or become Engaged, the SM marker is removed.<br />
12.6 Truck Markers<br />
(12.61) Allied non-Mechanized units must be assigned<br />
trucks to use Strategic Movement. A non-Mechanized<br />
unit moving in trucks is identical to a Mechanized unit<br />
using Strategic Movement—trucks are SM markers. An<br />
Allied non-Mechanized unit may be assigned trucks if it starts its<br />
Movement Phase on a road (any type) and is not adjacent to an enemy<br />
unit, or it is currently in an Off Map Box. A unit must expend its entire<br />
MA to load up on trucks (i.e., the first turn it may not move).<br />
Exception: Allied non-Mechanized reinforcements may enter the map<br />
in trucks—they do not need to spend their first turn loading.<br />
Truck markers are printed on the back of SM markers. This means that<br />
for every infantry unit trucked, one less Allied Mechanized unit can<br />
use Strategic Movement.
Ardennes ‘44 : The Battle of the Bulge — SECOND EDITION<br />
<br />
12.62 TRUCK PROPERTIES: Allied non-Mechanized units trucked<br />
receive 12 MPs and move at the rate of Mechanized units. Units in<br />
trucks are considered to be using Strategic Movement and must abide<br />
by all the rules of Strategic Movement. However, do not double the<br />
12 MPs, the movement rate has already been adjusted for Strategic<br />
Movement.<br />
EXAMPLE: A non-Mechanized unit being transported in a truck could<br />
move 24 hexes along a primary road.<br />
12.7 Removing SM and Truck Markers<br />
If a unit uses a SM or Truck marker then the marker must remain on<br />
the unit until the next friendly Movement Phase, unless it is removed<br />
in one of the following cases:<br />
• In the next friendly Movement Phase if the unit will not be using<br />
Strategic Movement or the Truck marker that phase. The marker is<br />
immediately available for use with other units.<br />
• The unit suffers an engaged result or is forced to retreat.<br />
13. REINFORCEMENTS, ENTRY<br />
HEXES, OFF MAP BOXES AND<br />
BLOCKING POSITIONS<br />
13.1 Reinforcements<br />
Reinforcements receive their full MA on their turn of entry and enter<br />
play during the Movement Phase by paying the terrain cost (the road<br />
rate) of the first hex entered. Reinforcements must enter through Entry<br />
Hexes, they may not enter through hexes between two Entry Hexes.<br />
Reinforcements may enter the map by moving into an enemy ZOC<br />
but must stop and move no farther. Reinforcements may use Strategic<br />
Movement on the turn of entry. Allied non-Mechanized reinforcements<br />
may enter the map in trucks if Truck markers are available. In lieu of<br />
entering the map, a reinforcement may be placed in the Off Map Box<br />
or a Blocking Position associated with the unit’s Entry Hex.<br />
EXAMPLE: The American 4/8/2 infantry battalion scheduled to arrive<br />
on Turn 3 may either enter the map at Entry Hex A or B, be placed in<br />
the Allied Southeast Off Map Box, or placed in a Blocking Position<br />
for Entry Hexes A or B. (Moving to the Blocking Position only makes<br />
sense if Entry Hex A or B is German occupied [13.4].)<br />
13.2 US Engineer Reinforcements<br />
American Engineer units do not arrive from off map. On their turn of<br />
arrival the Allied player may place them in friendly controlled town<br />
or city hexes (no villages) outside of all EZOCs, with no more than<br />
one in each town/city hex—one may be placed in each of the two Bastogne<br />
hexes for a total of two. They may exceed stacking limits upon<br />
placement. They may not be placed in towns or city hexes containing<br />
enemy Roadblocks (rule 33).<br />
MOVEMENT RESTRICTION: American Engineer units may move<br />
only in Tactical Movement on the turn they arrive.<br />
DESIGN NOTE: During the panic of the first three days the US mobilized<br />
the corps and army engineer battalions in the area to fight as<br />
infantry.<br />
13.3 Artillery Reinforcements<br />
All Artillery Units arrive on their Fired side.<br />
13.4 German Capture of Entry Hexes<br />
If a German unit occupies an Entry Hex then no Allied reinforcement<br />
scheduled to enter through that Entry Hex or any Entry Hex in that<br />
“sector” can enter the map until the German threat is “blocked.” A<br />
Sector is defined as the Off Map Box and all Entry Hexes associated<br />
with that Off Map Box. Furthermore, no unit in that sector may move<br />
to a different Off Map box.<br />
BLOCKING: German units on an Entry hex present a threat to the<br />
Allied player beyond the map. To block this threat, an Allied unit with<br />
a Defense Factor of at least 6 (or two or more units with a combined<br />
Defense Factor of at least 6) must be moved to the Blocking Position<br />
Box associated with that Entry Hex. See 13.1 and 13.5 on how to move<br />
to a Blocking Position.<br />
EXAMPLE: Say the Germans have a unit in Entry Hex A. This means<br />
that no US reinforcements can enter the map through either Entry<br />
Hexes A, B or C until the Allied player places unit(s) with at least<br />
6 Defense Factors in the Blocking Position for Entry Hex A. It also<br />
means units in the Allied Southeast Off Map Box may not move to the<br />
Allied Southwest Box either.<br />
DESIGN NOTE: It is extremely important that the Allied player holds<br />
his flanks. If he cannot do it, he will have his reinforcements pulled<br />
from him to do it.<br />
13.5 Movement from an Off Map Box<br />
Units that start their move in an Off Map Box may:<br />
• Remain in place.<br />
• Move to any Blocking Position associated with that Off Map Box.<br />
• Enter the map through any Entry Hex associated with that Off Map<br />
Box.* The unit may use its full MA (13.1).<br />
• Move to an adjacent Off Map Box.*<br />
13.6 Movement from a Blocking Position<br />
Units that start their move in a Blocking Position may:<br />
• Remain in place or move back to the Off Map Box.<br />
• Enter the map through the Entry Hex connected to that Blocking<br />
Position (if the Entry Hex is free of enemy units).* The unit may<br />
use its full MA (13.1).<br />
*Only allowed if all captured Entry Hexes in that sector are blocked.<br />
13.7 Properties of Entry Boxes and Blocking Positions<br />
• No stacking limits<br />
• German units cannot attack into these boxes.<br />
• ZOCs do not extend into or out of.<br />
13.8 Allied Attacks onto the Map<br />
Allied units in a Blocking Position may attack onto the map during the<br />
Allied Combat Phase. The number of Allied units that may attack an<br />
Entry Hex from a Blocking Position is limited to what the Allied player<br />
could normally stack in two hexes (6 Stacking Points plus 4 steps of<br />
Silhouetted Tank Units). Air Support and Artillery on its Ready side<br />
(22.5) in the Blocking Position or from the sector’s Off Map Box can<br />
be utilized. All rules of combat apply.<br />
RESTRICTION: An attack onto the map is only allowed if all German-occupied<br />
Entry Hexes in that sector are blocked (have at least 6<br />
Allied Defense Factors assigned to them). In other words, you can’t<br />
attack onto the map until your flanks are covered.<br />
FAILED ATTACKS: If the Allied attack onto the map does not succeed<br />
in removing the defender from the hex, the attackers remain in<br />
the Blocking Position.<br />
SUCCESSFUL ATTACKS: If the attack succeeds in removing the<br />
defender from the hex, all participating units may Advance After<br />
Combat—the first hex of the advance must be the Entry Hex. Any<br />
units that do not or could not advance (due to stacking restrictions)<br />
must remain in the Blocking Position.<br />
© 2012 <strong>GMT</strong> <strong>Games</strong>, LLC
10 Ardennes ‘44 : The Battle of the Bulge — SECOND EDITION<br />
14. BASIC RULES OF COMBAT<br />
14.1 General Rule<br />
Phasing units may attack adjacent enemy units in the Combat Phase.<br />
Attacking is voluntary; no unit is forced to attack. No unit may attack<br />
or be attacked more than once per Combat Phase (exception: Breakthrough<br />
Combat [19.4]). All defending units in a hex must be attacked<br />
as one combined defense strength. The attacker may conduct his attacks<br />
in any order and need not predesignate them.<br />
14.2 Multi-Hex Combat<br />
• The attacker may attack only one hex at a time; he may not target<br />
two hexes in a single combat.<br />
• Units in the same hex may attack adjacent defenders in different<br />
hexes as long as each attack is conducted separately.<br />
• No unit may split its attack strength to attack a second hex in a<br />
separate attack.<br />
NOTE: Unlike some other game systems, attacking units are not required<br />
to attack all adjacent defending units.<br />
14.3 Command and Control Restrictions<br />
> (14.31) Two Formation Limit: The attacker may have a maximum of<br />
two different Formations participate in each attack. All units belonging<br />
to the same Division, Brigade, or Cavalry Group count as one Formation.<br />
Each Independent unit (those without an ID in bold) counts as<br />
one Formation unless attached (see below). Artillery is not restricted<br />
by this rule, but is subject to the Army/Corps ID limitations (22.6).<br />
(14.32) Attachments: Each Formation may have one unit (Independent<br />
or from another formation) temporary attached to it by simply<br />
stacking with one of the units of that Formation. When attached they<br />
are considered part of that Formation for rule 14.31.<br />
In this example Lehr’s Panther battalion is attached to the 2nd Panzer<br />
Division, Lehr’s Recon battalion is attached to the 26th VG Division<br />
and the 705th TD is attached to the 101st Division.<br />
14.4 Combat Procedure<br />
Follow these steps for each combat:<br />
STEP 1: The defender may roll for bridge demolition before the attack<br />
takes place (7.4). If the bridge is blown the attacker may cancel<br />
the attack.<br />
STEP 2: Compare the combined attack strength of the participating<br />
attacking units against the total defense strength (plus Defensive Combat<br />
Bonuses [15.1]) of the involved defending units and express the<br />
comparison as a numerical odds ratio (attacker to defender). Round off<br />
this odds ratio downward to conform to one of the odds ratio categories<br />
found on the CRT. Example, a 15 to 4 would be a 3-1.<br />
STEP 3: The attacker, followed by the defender, declares whether he<br />
will use Artillery Support (22.6) and, if so, which Artillery Units are<br />
providing the support. The Allied player (only) also places his Air<br />
Support units (15.6) at this time (on or after Turn 15 [23 AM]).<br />
STEP 4: If this is a German attack during Clear Weather (on or after<br />
23 AM), then the Allied player rolls on the Jabos Table (15.6).<br />
STEP 5: After taking column shifts into account, the die is rolled and<br />
the results are implemented. Players immediately remove any step<br />
losses (16.3), and perform Retreats (17.1), Determined Defense (16.7),<br />
Advance After Combat (19.1), and Breakthrough Combat (19.4).<br />
© 2012 <strong>GMT</strong> <strong>Games</strong>, LLC<br />
14.5 Minimum and Maximum Odds<br />
Combat at odds less than 1-3 is resolved on the 1-3 column. Combat<br />
at odds greater than 7-1 is resolved on the 7-1 column. Attacker and<br />
defender column shifts are applied before the minimum and maximum<br />
restriction. Example, 9-1 odds with one shift left would use the 7-1<br />
column.<br />
15. COMBAT MODIFIERS<br />
15.1 Defensive Combat Bonuses (DCBs)<br />
Instead of column shifts for terrain the defender receives Defensive<br />
Combat Bonuses (DCBs). These are strength point additions to the hex<br />
(not per unit). Refer to the Terrain Effects Chart (TEC) for a complete<br />
list of DCBs. A defender can receive only one DCB—always use the<br />
most favorable to the defender.<br />
EXAMPLE: A 6-6-3 infantry regiment in a town hex (+3) would have<br />
a defense strength of 9.<br />
RESTRICTIONS:<br />
• > The DCB can never exceed the combined defense strength of the<br />
defender’s stack. Example, a 2-2-3 infantry battalion in a city hex<br />
(+4) would receive only 2 DCBs—not 4.<br />
• Due to their lack of infantry support, a stack consisting of only<br />
silhouetted Tank Units is restricted to a maximum DCB of 1.<br />
• Units with a Defense Factor in parenthesis do not receive DCBs.<br />
• Units using Strategic Movement do not receive DCBs (12.5).<br />
15.2 The Halving Rule<br />
When halving, always halve by individual unit—not stack, and round<br />
any fractions up to the next higher whole number.<br />
EXAMPLE: Two units with an attack factor of 5 would have a combined<br />
strength of 6 after halving (3 + 3 = 6).<br />
IMPORTANT: An attacking unit may never have its attack strength<br />
halved more than once for a given attack.<br />
15.3 Rivers<br />
Combat units attacking across a River hexside (including the Meuse),<br />
have their attack factor halved. NOTE: An intact bridge allows a Tank<br />
Unit to gain an Armor Shift (21.3) but does not cancel the halving of<br />
its Attack Factor.<br />
15.4 Vehicle Units and Combat<br />
Vehicle Units have their Attack Factor halved if attacking across a<br />
hexside that they normally could not move across (Wooded Rough<br />
hexsides, West Wall hexsides, unbridged river hexsides, Forest hexsides,<br />
etc.).<br />
15.5 Wooded Rough and Height Advantage<br />
Combat units attacking out of a Wooded Rough hex or from one<br />
Wooded Rough hex to another, have their Attack Factor halved. Units<br />
are not halved attacking into a Wooded Rough hex from a non-Wooded<br />
Rough hex (this is called Height Advantage). A Vehicle Unit must attack<br />
along a road to get Height Advantage (due to 15.4).<br />
DESIGN NOTE: Think of a unit in a Wooded Rough hex as being in<br />
a small valley. If it attacks up and out of the valley it is halved. If it is<br />
attacked from above, the attacker is not halved. A Wooded Rough hex<br />
is not necessarily a good defensive position in this game.<br />
RIVERS & WOODED ROUGH HEXES: Always ignore rivers inside<br />
Wooded Rough hexes—the Wooded Rough hexside benefit takes account<br />
of the river. Exception: Units attacking into a Wooded Rough<br />
hex across a hexside containing a bridge (blown or intact) are always<br />
halved (see 15.3).
Ardennes ‘44 : The Battle of the Bulge — SECOND EDITION<br />
11<br />
See this<br />
A<br />
Down<br />
Think this<br />
EXAMPLE: Unit A would be halved attacking into any of the six<br />
surrounding hexes no matter what type of unit it was. The PzG<br />
regiment is an Infantry Type unit so is not halved attacking into hex<br />
C or D, the tank battalion is a Vehicle Unit so is halved attacking<br />
into hex E because it could not legally enter the hex.<br />
15.6 Allied Air Support<br />
Starting on Turn 15 (23 AM) the Allied player receives Air Support.<br />
OFFENSIVE AIR SUPPORT: During the Allied player turn, the Allied<br />
player uses Ground Support markers to indicate which attacks will<br />
receive air support. The Allied player determines the number of Air<br />
Support markers available that turn by rolling a die (any time during<br />
his Movement Phase) and halving the result (round fractions up). For<br />
example, a die roll of 5 would result in three Air Support markers. Each<br />
marker provides a favorable shift of one column to the right on the CRT.<br />
A maximum of one marker may be used in each combat. Air Support<br />
markers may not be accumulated and any not used are forfeited. The<br />
markers are removed after the combat is resolved.<br />
DEFENSIVE AIR SUPPORT: During the German player turn, Allied<br />
Air Support is random and is determined by a die roll on the Jabos<br />
Table immediately before each attack is conducted (but after artillery<br />
commitment). The result on the Jabos Table indicates column shifts<br />
to the left. Defensive Air Support is applied to all German attacks and<br />
is not tied into the number of Allied Air Support markers.<br />
NIGHT: No Air Support is allowed during a Night Turn.<br />
15.7 West Wall<br />
Only German units may benefit from the +3 DCB for the West Wall<br />
(the movement restrictions of 11.5 apply to both players). Allied Vehicle<br />
Units attacking into a West Wall hex have their Attack Factor<br />
halved.<br />
15.8 Improved Positions<br />
COMBAT EFFECTS: Units defending in a hex with an<br />
Improved Position (IP) receive a DCB of +2 (see below<br />
for exceptions). Units currently using Strategic Movement,<br />
and units with their Defense Factor in parenthesis receive no<br />
benefit from IPs. The restriction of +1 DCB for Silhouetted Tank Units<br />
(15.1) also applies in Improved Positions.<br />
Up<br />
Up<br />
Down<br />
Up<br />
Down<br />
Up<br />
Down<br />
Down<br />
Up<br />
Down<br />
Down<br />
Up<br />
Up<br />
Important: The +2 DCB is used in lieu of the terrain DCB—it is not<br />
cumulative. Building an IP in a Village, Town or City hex has no effect<br />
since those hexes already have a DCB value of 2 or more.<br />
HOW TO BUILD: Both sides may build IPs. IPs may be<br />
built in any hex except those containing a city, town or<br />
village. Any non-Disrupted, non-engaged, Infantry Type<br />
unit that is in supply and not using Strategic Movement<br />
may build an IP. Construction is a two-part process—an eligible unit<br />
that does not move in its Movement Phase may begin to build an IP.<br />
Place an IP Under Construction marker in the hex at that time. It may<br />
not attack in the following Combat Phase. If the unit is still there in<br />
the next friendly Movement Phase and is not Disrupted or Engaged,<br />
it may complete the IP (flip the marker over). The unit may move in<br />
the same Movement Phase that it completes the IP.<br />
DELAYED CONSTRUCTION: An IP construction marker that cannot<br />
be completed (see above) can remain in the hex and be completed in a<br />
later turn (including by a different friendly unit). Once an IP is begun,<br />
the only way to remove it is to dislodge all defenders from the hex.<br />
REMOVING IPs: At the end of each Movement Phase remove any<br />
IPs left vacant. During the Combat Phase remove IPs immediately if<br />
the occupants are eliminated or forced to retreat.<br />
15.9 Miscellaneous Modifiers<br />
• Units attacked while in Strategic Movement give the attacker one<br />
shift right (12.5)<br />
• Tank Units may provide an Armor Shift (21.1)<br />
• Artillery provides shifts on the CRT. Both the attacker and the defender<br />
may use artillery (22.6)<br />
• Out of Supply Shift (23.4)<br />
16. COMBAT RESULTS<br />
16.1 Explanation of Combat Results<br />
The words “attacker” and “defender” refer only to the units participating<br />
in the combat in question—not to the general strategic situation.<br />
D1* = Defender loses 1 step. Surviving defenders must Retreat 4<br />
hexes and become Broken. No Determined Defense is possible (16.7).<br />
The attacker receives the Bonus Advance (19.1) and Breakthrough<br />
Combat (19.4).<br />
> DR4 = The defender must Retreat four hexes and becomes Broken.<br />
No Determined Defense is possible (16.7). The attacker receives the<br />
Bonus Advance (19.1).<br />
DR3 = The defender must Retreat three hexes and becomes Broken.<br />
No Determined Defense is possible (16.7). The attacker receives the<br />
Bonus Advance (19.1).<br />
DR2 = The defender must Retreat two hexes and becomes Disrupted.<br />
The attacker receives a Regular Advance.<br />
FF = FIRE FIGHT: The attacker may either take this as an ENG result,<br />
or immediately roll again on the Fire Fight Table (16.2).<br />
FF (+1) = Same as FF except the attacker must modify his Fire Fight<br />
die roll by +1.<br />
EX = Each side loses 1 step (see 16.3). The surviving defenders are<br />
Engaged. No Retreat or Disruption. If the defender had only 1 step,<br />
then the attacker receives a Limited Advance (19.1).<br />
Eng = No Retreat or Advance. Place an Engaged marker on the defending<br />
stack (16.5).<br />
A1/Eng = Same as Eng except one attacking unit loses one step.<br />
© 2012 <strong>GMT</strong> <strong>Games</strong>, LLC
12 Ardennes ‘44 : The Battle of the Bulge — SECOND EDITION<br />
A1 = One of the attacking units lose one step.<br />
*asterisk = A reminder that the attacker receives Breakthrough Combat<br />
(19.4).<br />
16.2 Fire Fight Table<br />
This table is only used when a Fire Fight result occurs on the CRT and<br />
the attacker wishes to “push forward.” The attacker must first determine<br />
the Lead Unit. If the attacker has only one unit involved, that unit is the<br />
“Lead Unit.” If the attacker has two or more units that participated in<br />
the attack then the attacker picks one unit as his Lead Unit. The Lead<br />
Unit determines any die roll modifiers and will be the unit to suffer a<br />
step loss if one is called for. Only a unit that can legally advance into<br />
the defender’s hex can be designated as a Lead Unit—if the attacker<br />
has no such unit then he may not use the Fire Fight Table.<br />
EXAMPLE: A Tank Unit may not be selected as a Lead Unit when<br />
attacking across an unbridged river hexside.<br />
DIE ROLL MODIFIERS:<br />
+1 Lead Unit is Green.<br />
–1 > Lead Unit is Elite. If the defender has a Tank Unit in the hex,<br />
then the Elite unit selected must be a Tank Unit.<br />
EXAMPLE: The 4th Armored Division is attacking towards Bastogne.<br />
The Allied player rolls a FF result. He selects the CCR of the 4th<br />
Armored (an Elite Tank Unit) as his Lead Unit and declares to the<br />
German player he is pushing forward “with all guns blazing!” His<br />
modifier is –1 (for the Elite status).<br />
RESULTS FOUND ONLY ON THE FIRE FIGHT TABLE:<br />
D1 = The defender loses 1 step and surviving defenders must Retreat<br />
2 hexes and become Disrupted. The attacker receives the Regular<br />
Advance.<br />
A1/D1 = Both sides lose 1 step. The defender must Retreat 2 hexes and<br />
becomes Disrupted. The attacker receives the Regular Advance.<br />
A1/DR2 = The attacker loses 1 step. The defender must Retreat 2 hexes<br />
and becomes Disrupted. The attacker receives the Regular Advance.<br />
Eng+ = Same as Eng except the attacking units receive an Attacker’s<br />
Advantage marker (16.6).<br />
NOTE: If the Fire Fight result allows an Advance After Combat, all<br />
units in the original combat may advance—not just the Lead Unit.<br />
16.3 Selecting Step Losses<br />
The owning player always selects which unit suffers the step loss. On<br />
an EX result, the owning player must select a Tank Unit for the step<br />
loss if he had an Armor Shift in his favor in that combat. The selected<br />
Tank Unit must be one that qualified for the shift.<br />
FIRE FIGHTS: The Lead Unit always takes the step loss if one is<br />
called for on the Fire Fight Table (16.2).<br />
16.4 Indicating Step Losses<br />
Flipping a unit over indicates the unit has suffered a step loss. If it is<br />
a one step unit, or the unit is already flipped, then it is placed in the<br />
Dead Pile.<br />
REMNANTS: Any unit with a Stacking Point value of<br />
2 on its reduced side (also indicated with a thin stripe)<br />
forms a remnant unit when it takes its second step loss.<br />
Remove the unit and replace it with a remnant of the<br />
same type. The remnant must abide by any retreats or disruptions of<br />
the CRT result. All remnants are considered Independent units. If there<br />
is no remnant available when a 3-step unit takes a second step loss,<br />
then none is created (the player forfeits the step).<br />
© 2012 <strong>GMT</strong> <strong>Games</strong>, LLC<br />
16.5 Engaged Markers<br />
Engaged affects the defender only (the attacker does not<br />
have to refight an engaged battle in the next turn). Units<br />
that are engaged suffer the following effects:<br />
• may not move in the following Movement Phase,<br />
• may not begin construction of an Improved Position (15.8)<br />
• suffer a +2 DRM for bridge demolition (7.5).<br />
Those are the only effects of being Engaged. Engaged markers are<br />
removed in the owning player’s Combat Phase (20.5).<br />
16.6 Attacker’s Advantage Markers<br />
This marker is applied in an Eng+ result—place it on one<br />
of the attacking stacks or units pointing to the defender’s<br />
hex. The marker provides a favorable column shift if the<br />
stack/unit attacks the same hex again in the following turn (by itself<br />
or with other units).<br />
REMOVAL: The Attacker’s Advantage marker is removed in the<br />
following cases:<br />
• After resolving the second attack (unless another Eng+ is rolled).<br />
• If the target hex is vacant of enemy units at the start of the owning<br />
player’s Combat Phase.<br />
• If all units originally under the marker exit the hex—it does not<br />
matter if other friendly units take their place. One or more units<br />
can exit the hex as long as at least one of the original attacking<br />
units remain.<br />
• The units in the hex containing the Attacker’s Advantage marker<br />
suffer a Retreat result (even if the Retreat result is cancelled by a<br />
successful Determined Defense [16.7]).<br />
16.7 Determined Defense<br />
A determined defense represents a counterattack or a hold-at-all-cost<br />
order.<br />
(16.71) PROCEDURE: The defender may attempt to cancel a<br />
Regular Advance (from the CRT or the Fire Fight Table) by using the<br />
Determined Defense Table—a Bonus Advance may not be cancelled.<br />
A successful result on this table will allow the unit or stack to ignore<br />
the retreat and the associated Disruption and the attacker’s advance is<br />
cancelled. If there are two or more units in the defending stack, then<br />
the defender picks one non-Disrupted unit as the Lead Unit; this unit<br />
determines any die roll modifiers and will be the unit to suffer the step<br />
loss if one is called for. If all units in the stack are Disrupted, then no<br />
Determined Defense is possible.<br />
NOTE: A successful Determined Defense does not cancel any step losses<br />
suffered—only the Retreat and Disruption portion of the result.<br />
(16.72) EXPLANATION OF RESULTS:<br />
• Yes: The Retreat is cancelled (along with the Disruption and the attacker’s<br />
advance). The defender is marked with an Engaged marker.<br />
• No: The counterattack or hold-at-all-cost order is not carried out<br />
or fails; the retreat result stays in effect.<br />
“Yes” and “No” results may be accompanied by:<br />
• –1 step: The Lead Unit suffers one step loss.<br />
• EX: The defender’s Lead Unit suffers one step loss and any one<br />
participating attacking unit (attacker’s choice) suffers a step loss.<br />
> (16.73) DIE ROLL MODIFIERS:<br />
+1 Lead Unit is Green.<br />
–1 Lead Unit is Elite.<br />
–? The DCB of the defender’s hex. If there are no Infantry-type units<br />
in the hex, a silhouetted Tank Unit is limited to a –1 DRM.
Ardennes ‘44 : The Battle of the Bulge — SECOND EDITION<br />
13<br />
EXAMPLE: The Allied player has an infantry battalion and a tank<br />
battalion in Clervaux and has just suffered a DR2 result. Instead of<br />
retreating he declares he is making a Determined Defense and selects<br />
the tank battalion as his Lead Unit. The Town provides a –3 modifier.<br />
He rolls a 4 which is modified to a 1 which gives a “Yes –1 step” result.<br />
The tank battalion is reduced one step and the retreat and disruption<br />
are cancelled.<br />
(16.74) Single Step Defenders: If the defender had only one step, and<br />
that step was lost in the Determined Defense, then the attacker may<br />
advance into the defender’s vacated hex (only) and stop (a Limited<br />
Advance).<br />
17. RETREATS<br />
17.1 Retreat Procedure<br />
The attacker never retreats, only the defender. When called upon to<br />
retreat by the CRT, defending units must be retreated the full number<br />
of hexes indicated without passing through the same hex twice. A stack<br />
of retreating units may retreat to different hexes. The owning player<br />
may determine the path, but must follow the guidelines below listed<br />
in order of priority:<br />
A. If possible, the retreat must end a number of hexes away from<br />
the battle hex equal to the number of hexes of the retreat result.<br />
B. EZOCs: If possible, avoid entering a vacant hex in an EZOC. If<br />
not possible, the first hex of a retreat may enter a vacant hex in<br />
an EZOC as long as the retreating unit does not cross or enter an<br />
enemy ZOC Bond. After that first hex, all other hexes in a retreat<br />
must be clear of enemy ZOCs! A friendly unit (one that did not<br />
retreat in the current combat) negates an EZOC in the hex it occupies<br />
for this purposes.<br />
C. If possible, a unit must end its retreat in Supply.<br />
D. ROADS: Vehicle Units must use roads as much as possible.<br />
CLARIFICATION: “If possible” means you can ignore it if its not<br />
possible. So retreating the full number of hexes from the battle hex<br />
is more important than avoiding enemy ZOCs in the first hex, and<br />
avoiding enemy ZOCs in the first hex is more important than retreating<br />
towards friendly supply, etc.<br />
17.2 Elimination due to a Retreat<br />
Units are eliminated if they retreat:<br />
• into a hex occupied by an enemy unit,<br />
• across or into an enemy ZOC Bond,<br />
• into a vacant hex in an enemy ZOC other than the first hex of their<br />
retreat, or<br />
• across a non-bridged Meuse River or Lake hexside, or<br />
• are unable to retreat the full number of hexes required.<br />
Additionally, Vehicle Units are eliminated if they retreat:<br />
• into or out of a Forest, West Wall or Wooded Rough hex unless<br />
through a road hexside<br />
• across a non-bridged river hexside.<br />
17.3 Unfulfilled Retreats<br />
If the defender does not retreat because it is eliminated, the attacker<br />
still receives his full Advance opportunity.<br />
> 17.4 Overstacking in a Retreat<br />
Overstacking is not allowed after a retreat. A player may avoid an<br />
overstacked situation by retreating the stack (or the units in excess<br />
of the stacking limit) additional hexes until a hex is reached where<br />
EXAMPLE OF RETREAT PATHS: There are two retreat paths for<br />
the tank unit (A and B). The hexes marked “No” are prohibited<br />
to the tank unit during this retreat. Priority must go to the path<br />
that avoids all EZOCs (Path B).<br />
stacking restrictions are not violated. Units retreated additional hexes<br />
become Broken if not already. If no such hex can be reached, then the<br />
units in excess of the stacking limit are eliminated (owning players<br />
choice but the units must come from those that retreated).<br />
17.5 Combat Against Previously Retreated Units<br />
If a unit or stack is retreated into a friendly occupied hex and that hex<br />
undergoes an attack in the same Combat Phase, the retreated units<br />
do not add their strength to the combat, and if required to retreat<br />
again are eliminated.<br />
17.6 Retreat Off the Map<br />
German units that retreat off any map edge, and Allied Units that retreat<br />
off the East Map edge are eliminated. Allied units that retreat off<br />
the South, West or North Map edge, are placed in the appropriate Off<br />
Map Box. They may reenter the map again after they Rally (18.5).<br />
17.7 Artillery and Retreats<br />
• Artillery Units that retreat must flip to their Fired side.<br />
• German Artillery Units without a Prime Mover marker are eliminated<br />
if forced to retreat.<br />
17.8 Retreating Units Bearing Engaged Markers<br />
Remove the Engaged marker from the retreating units and retreat<br />
normally. Note this can only happen if the unit was engaged in the<br />
Night Turn and attacked in the following AM turn.<br />
18. DISRUPTED, BROKEN AND RALLY<br />
> 18.1 In General<br />
When a good order unit (one that is neither Disrupted or Broken) retreats<br />
2 hexes it becomes Disrupted; when it must retreat 3 or 4 hexes<br />
it “breaks” and is considered Broken. A Broken unit suffers all the<br />
effects of Disruption plus some additional penalties (18.4).<br />
18.2 Effects of Disruption<br />
• May only use Tactical Movement and may not enter an EZOC. If<br />
the unit starts in an EZOC, it must move away if possible.<br />
• > If the defending stack contains one or more Disrupted units the<br />
attacker receives one shift right on the CRT.<br />
• May not attack or (if Artillery) provide support. Nor may they flip<br />
to their Ready side.<br />
• May not use Strategic Movement, Determined Defense, build IPs,<br />
receive Replacements (25.2), or perform Breakdown (26.2).<br />
© 2012 <strong>GMT</strong> <strong>Games</strong>, LLC
14 Ardennes ‘44 : The Battle of the Bulge — SECOND EDITION<br />
• a Disrupted unit that suffers another 2 hex retreat becomes Broken.<br />
A Disrupted unit that Breaks is eliminated.<br />
NOTE: US Truck markers are immediately removed from a unit if<br />
it retreats. A Prime Mover marker remains on a Disrupted German<br />
Artillery Unit to indicate the unit may not fire.<br />
18.3 Abilities of Disrupted Units<br />
Disrupted units retain their ZOC, their full defense strength, their<br />
ability to form ZOC Bonds and can benefit from DCBs.<br />
> 18.4 Effects of Broken<br />
A Broken unit is considered Disrupted and all rules that apply to a<br />
Disrupted unit also applies to a Broken unit with the following two<br />
additional penalties:<br />
• a Broken unit that suffers any type of retreat is eliminated.<br />
• Recovery for a Broken unit is a 2-turn process. If it can recover (see<br />
18.5) its status is improved to Disrupted. Removal of the Disrupted<br />
marker must wait until the following turn per 18.5.<br />
PLAY NOTE: Think of Broken as a Level 2 Disruption.<br />
18.5 Rally Phase<br />
> During the Rally Phase, all friendly Disrupted or Broken units that<br />
are not adjacent to an enemy unit automatically recover one level—Disrupted<br />
units have their Disrupted marker removed and Broken units<br />
become Disrupted. If the Disrupted or Broken unit is adjacent to an<br />
enemy unit (remember, units must move out of an EZOC if possible)<br />
then recovery is determined by a die roll. On a die roll of 1–2 it recovers<br />
one level. On a die roll of 3–6 it does not recover. Modify the die roll<br />
by +1 if the unit is Green, and by –1 if the unit is Elite.<br />
NOTE: A German unit forced to retreat across an Army Boundary Line<br />
may not rally until it recrosses the Boundary Line.<br />
19.3 EZOCs and Advance<br />
ZOC BONDS: May never be entered or crossed during an Advance<br />
After Combat except when entering the defender’s vacated hex.<br />
EZOCs: Generally do not stop advances, but no unit may advance<br />
from one EZOC directly into another EZOC of the same enemy unit,<br />
except when entering the first hex of its advance.<br />
19.4 Breakthrough Combat<br />
If the CRT result is D1*, then the attacking units may attack again<br />
after advancing. This second combat is called Breakthrough Combat.<br />
Only one stack of units in the group may participate in this second<br />
attack, but you are allowed to form the stack (henceforth called the<br />
Breakthrough Group) during the advance. A mechanized Breakthrough<br />
Group may use its full advance and attack again; a non-mechanized<br />
Breakthrough Group, or a mix of both, may advance only one hex<br />
and attack again.<br />
PROCEDURE: The Breakthrough Group may not split up and attack<br />
two or more target hexes. Finish advancing units from the originating<br />
combat before conducting the Breakthrough Combat. The Breakthrough<br />
Combat must be conducted before the attacker conducts the<br />
next regular attack. Breakthrough Combat is resolved in the same manner<br />
as normal combat using all the same rules. Artillery on its Ready<br />
19. ADVANCE AFTER COMBAT<br />
19.1 Advance in General<br />
There are three types of Advances: Limited, Regular and Bonus.<br />
Artillery Units cannot Advance After Combat.<br />
LIMITED ADVANCE: This occurs when the defender is eliminated<br />
but was not required to retreat (in an EX result or a successful Determined<br />
Defense by a 1-step defender)—the attacker may only occupy<br />
the defender’s vacated hex.<br />
REGULAR ADVANCE: The attacker may advance one hex in any<br />
direction.<br />
BONUS ADVANCE: The attacker may advance two hexes in any<br />
direction. This occurs on a DR3, DR4 and a D1* result.<br />
ROAD BONUS: If a Mechanized unit follows the path of a primary<br />
and/or a secondary road throughout its advance, it may increase its<br />
advance rate by one hex. In this way a Mechanized unit could advance<br />
two hexes in a Regular Advance and three hexes in a Bonus Advance.<br />
Forest Roads may not be used in a Road Bonus. Traffic markers (24.2)<br />
and Roadblocks (33.0) have no effect on the Road Bonus.<br />
19.2 Terrain and Advance<br />
• No unit may advance into a hex or across a hexside that is prohibited<br />
to it in normal movement.<br />
• Infantry Type units may only advance into a Forest hex if it’s the first<br />
hex of the advance, or the unit enters the hex via a road. Vehicle Units<br />
may never enter such hexes unless following the path of a road.<br />
• Infantry Type units may only advance across a non-road Wooded<br />
Rough hexside or an unbridged river hexside if it is the first hex of<br />
their advance. Vehicle Units may never cross such hexsides.<br />
© 2012 <strong>GMT</strong> <strong>Games</strong>, LLC<br />
EXAMPLE OF A REGULAR ADVANCE: The defender’s vacated<br />
hex is indicated with dashed lines. The two German units can<br />
advance in any direction. The Mechanized unit may advance two<br />
hexes if it follows the path of the road.<br />
EXAMPLE OF A BONUS ADVANCE: Units may advance two<br />
hexes in any direction. The Mechanized unit may advance three<br />
hexes if following the path of a road. Note that the river may only<br />
be crossed, and the non-road Forest hex may only be entered, in<br />
the first hex of an advance. The 12/77 Gren VG regiment cannot<br />
advance into the hex marked “No” because it may not advance<br />
from one EZOC directly into another EZOC of the same enemy<br />
unit, except in the first hex of an Advance.
Ardennes ‘44 : The Battle of the Bulge — SECOND EDITION<br />
15<br />
side may be used (offensively and defensively). Units conducting<br />
Breakthrough Combat may Advance After Combat again if allowed<br />
by the CRT result.<br />
> MULTIPLE BREAKTHROUGH RESULTS: There is no limit to<br />
the number of times a Breakthrough Group can advance and attack<br />
again as long as each attack achieves a D1* result.<br />
DESIGN NOTE: This is a significant change from the 1st Edition.<br />
19.5 The Breakthrough Group Assisting Other Attacks<br />
If the Breakthrough Group advances adjacent to a defending hex<br />
which is about to be attacked by other friendly units, the Breakthrough<br />
Group may use their Breakthrough Combat option to add their strength<br />
to the combat and take part in that attack (if allowed by Command and<br />
Control [14.3]). If this happens, this attack must be resolved next.<br />
19.6 Supply and Advance<br />
Units currently Out of Supply may advance a maximum of one hex<br />
and may not conduct Breakthrough Combat.<br />
19.7 Friendly Units and Advance<br />
Stacking restrictions must be observed at the end of an Advance.<br />
Units may not end their advance in a hex containing a friendly unit in<br />
Strategic Movement.<br />
20. DISENGAGEMENT AND<br />
REMOVING ENGAGED MARKERS<br />
20.1 In General<br />
Units that are marked with an Engaged marker may not<br />
move in the Movement Phase—but they have a chance<br />
at moving in the Combat Phase using the Disengagement<br />
Table. During the friendly Combat Phase, before any combats<br />
are conducted, the phasing player conducts Disengagements. A unit<br />
may Disengage rather than attack—it may not do both. If successful,<br />
the unit is retreated one or two hexes by the owning player.<br />
Non-Disrupted units adjacent to an enemy unit may also use the<br />
Disengagement Table, not just engaged units (20.4).<br />
CLARIFICATION: Disrupted units that are Engaged must attempt<br />
Disengagement if a retreat path is open.<br />
20.2 Procedure<br />
Disengagement occurs on a unit-by-unit basis. Indicate which unit<br />
EXAMPLE: During the Movement Phase Unit A is moved to hex<br />
C—the unit must stop because it enters an enemy ZOC. Unit B<br />
cannot move in the Movement Phase because it is engaged. During<br />
the Combat Phase both units conduct Disengagement. Unit A is<br />
successful and is retreated one hex (it could have retreated two).<br />
Unit B is also successful and is retreated two hexes (although it<br />
could retreat just one hex).<br />
is attempting to Disengage and roll a die. For a stack of units the<br />
owning player must roll for each unit disengaging (announce before<br />
rolling which units will attempt to Disengage and which, if any, will<br />
remain). Apply any applicable DRMs and then find the result on the<br />
Disengagement Table.<br />
DIE ROLL MODIFIERS (cumulative):<br />
+1 Unit is Green<br />
–1 Unit is Elite<br />
–1 Tank or Recon Unit<br />
20.3 Explanation of Results<br />
No: Disengagement fails, the unit must remain in the hex.<br />
Yes: The unit must retreat one or two hexes abiding by the restrictions<br />
of 17.2 and 17.7. If the unit is not Disrupted it may stop<br />
in the first hex even if it is in an EZOC (however, it may not<br />
cross or enter an enemy ZOC Bond).<br />
D: The unit is Disrupted. If the result is a Yes +D, then the unit<br />
is Disrupted at the end of its retreat and is prohibited from<br />
stopping in the first hex if that hex is in an EZOC.<br />
20.4 Non-Engaged Units Disengaging<br />
Units that were not Engaged and using the Disengagement Table<br />
may not enter an EZOC during their retreat (they were allowed<br />
their ZOC to ZOC movement opportunity during the Movement<br />
Phase). If the unit has no other option but to retreat into an EZOC,<br />
it is eliminated.<br />
NOTE: A unit can move in the Movement Phase and conduct a Disengament<br />
in the Combat Phase.<br />
20.5 Removing Engaged Markers<br />
Remove Engaged markers from your units at the moment you decide<br />
whether the unit will Disengage or not. All Engaged markers come<br />
off the phasing player’s units during the Combat Phase. Engaged units<br />
that did not Disengage may attack in the Combat Phase.<br />
21. TANK AND RECON UNITS<br />
21.1 The Armor Shift<br />
ATTACKER: The attacker gains a column shift to the right on the CRT<br />
in the following two cases:<br />
• He has a Tank Unit participating in the battle and the defender does<br />
not, or<br />
• He has a Tank Unit participating in the battle that has a higher TQ<br />
rating than all the defender’s units.<br />
EXAMPLE: If a Tank Unit with a TQ rating of 4 attacks a Tank Unit<br />
with a TQ rating of 3, the attacker would receive a shift.<br />
DEFENDER: The attacker suffers a column shift left on the CRT if he<br />
does not have a Tank Unit participating in the battle and the defender<br />
has both Infantry Type units and a Tank Unit defending. For this rule,<br />
a US Combat Command, the British Guards Armored Brigades and the<br />
150th Pz Brigade satisfies both the infantry and armor requirement.<br />
EXAMPLE: If the attacker attacked a Combat Command with only<br />
infantry, the attacker would suffer one shift left.<br />
21.2 Red TQ Numbers<br />
> TQ ratings in a red circle must be reduced by one when the unit is<br />
attacking. The TQ rating is not reduced when the unit is defending.<br />
The German FLAK unit is not a Tank Unit and so cannot gain the<br />
Armor Shift—it can only prevent it. Its TQ number is in a red square<br />
as a reminder of this.<br />
© 2012 <strong>GMT</strong> <strong>Games</strong>, LLC
16 Ardennes ‘44 : The Battle of the Bulge — SECOND EDITION<br />
21.3 Terrain Effects on the Armor Shift<br />
The attacker or defender can never earn the Armor Shift if the defender<br />
is in Forest, Wooded Rough, West Wall, or City hex. The attacker may<br />
not gain an Armor Shift from a Tank Unit that cannot legally cross<br />
the hexside into the defender’s hex, whether due to an unbridged<br />
river, or a non-road Forest/Wooded Rough hexside.<br />
NOTE: With the above in mind, its possible to get the Armor Shift attacking<br />
across a river hexside at an intact bridge, or out of a Wooded<br />
Rough hex if the defender is in a hex where the base terrain is Clear<br />
or Light Woods.<br />
21.4 Recon Units Special Ability<br />
> Recon Units defending alone in a hex without an Improved Position<br />
may treat all D1 and D1* results against them as a DR4 result.<br />
NOTE: A Recon Unit that retreats 4 hexes as a result of a D1* result<br />
can be attacked again by the Breakthrough Group.<br />
21.5 Summary of Other Tank and Recon Unit Properties<br />
• Are considered Vehicle Units so may not move, Advance or Retreat<br />
across an unbridged river hexside.<br />
• May not move, Advance or Retreat into or out of a non-road Forest,<br />
West Wall or Wooded Rough hex except along a road.<br />
• Receive a –1 DRM when attempting Disengagement (20.2).<br />
22. ARTILLERY UNITS<br />
22.1 Artillery in General<br />
Artillery and Nebelwerfers are collectively called Artillery<br />
Units. They cannot move and fire in the same turn<br />
unless Shifting Fire Position (22.2). Allied Artillery Units<br />
that move more than one hex (or move to an Off Map Box or Blocking<br />
Position) must flip to their Fired side. German Artillery Units require<br />
a Prime Mover marker to move more than one hex (22.3). Allied Artillery<br />
Units on their Fired sides, and German Prime Movers move at the<br />
mechanized movement rate. Allied Artillery Units may use Strategic<br />
Movement; German Artillery Units may not.<br />
22.2 Shifting Fire Position (1 Hex)<br />
German Nebelwerfer brigades and Allied Artillery Units on their<br />
Ready side have an MA of 1. These units can shift one hex and still<br />
remain on their Ready side. The one hex move may be made into any<br />
hex, regardless of the MP cost, as long as the unit could legally enter<br />
the hex under normal rules of movement. Primary roads may not be<br />
used to move two hexes.<br />
22.3 German Prime Movers<br />
Germany was short of Prime Movers for their corps<br />
level artillery and much of it was left behind after the<br />
initial attack. Therefore German Artillery Units are<br />
nearly immobile. However, up to five Artillery Units per turn may<br />
have their MA increased to 5 if they use a Prime Mover marker<br />
(they may not use Strategic Movement). There are five Prime Mover<br />
markers—two for the 6th Pz Army, two for the 5th Pz Army, and one<br />
for the 7th Army. A Prime Mover marker belonging to one army may<br />
not be used to move an Artillery Unit belonging to a different army. A<br />
Prime Mover may move an Artillery Unit (including Werfer brigades)<br />
on its Fired or Ready side (a German Artillery Unit is not flipped if<br />
it moves). Leave the Prime Mover marker on the Artillery Unit until<br />
the next Artillery Supply Phase to indicate the Artillery Unit cannot<br />
fire until then.<br />
The German player removes all his Prime Mover markers from the<br />
map during the German Artillery Supply Phase (5.1).<br />
© 2012 <strong>GMT</strong> <strong>Games</strong>, LLC<br />
NOTE: Prime Mover markers are printed on the backside of Strategic<br />
Movement markers, so every Artillery Unit moved means one less German<br />
Mechanized unit that may use Strategic Movement. This reflects<br />
limited fuel, trucks diverted for ammo transport, road space and other<br />
logistical factors.<br />
22.4 Range<br />
Each Artillery Unit has a range printed in a small box on the upper<br />
left side of the counter. This is the maximum distance (measured<br />
in hexes) that the Artillery Unit may be from the target hex and<br />
still provide artillery support (22.6). Intervening terrain and combat<br />
units have no effect. Both the attacker and the defender trace range<br />
to the hex under attack. Count the target hex but not the hex of the<br />
Artillery Unit.<br />
22.5 Ready and Fired Sides<br />
All Artillery Units have only one step; the reverse side<br />
is used to indicate the Artillery Unit has fired (and/or<br />
moved in the case of Allied artillery). The front side is<br />
considered the Artillery Unit’s “ready” side. Once an Artillery Unit<br />
fires (or moves more than one hex if it is Allied), it is flipped to its<br />
back side. Artillery Units on their Fired side may flip back to their<br />
Ready side only during the Artillery Supply Phase (5.2).<br />
22.6 Artillery Support in General<br />
Only Artillery Units that are in range, on their Ready side and are not<br />
Engaged or Disrupted may provide artillery support. Each Artillery<br />
Unit may provide support to only one combat, after it is used it is<br />
flipped to its “Fired” side. The attacker must declare his Offensive<br />
Artillery Support before the defender declares his.<br />
> ARMY/CORPS IDENTIFICATION COLORS: An Artillery Unit<br />
may only provide Offensive or Defensive Support to a combat if there<br />
is at least one ground unit participating in the combat that has the same<br />
Identification color (2.11) as the Artillery Unit.<br />
22.7 Offensive Artillery Support<br />
Each Artillery Unit providing Offensive Support gives the attacker a<br />
favorable shift of one column to the right on the CRT. The attacker<br />
may use up to two Artillery Units per combat for a maximum of two<br />
shifts right.<br />
> 22.8 Defensive Artillery Support<br />
The defender may use only one Artillery Unit per combat. The defender<br />
finds the effect of his defensive artillery by rolling one die<br />
and checking the Defensive Artillery Table. The defender’s artillery<br />
is flipped regardless of the result. If the result is a 1 or 2, the attacker<br />
must apply that number of column shifts to the left on the CRT. If the<br />
defender is Allied and a TOT (Time on Target) result is achieved, the<br />
attacker suffers one step loss and the attack is stopped cold (treat as an<br />
A1 result). The attacker chooses the unit to lose the step.<br />
DESIGN NOTE: Time on Target was a practice of coordinating as<br />
many artillery batteries as possible to land their shells at one spot,<br />
all at one time. The coordination necessary to accomplish this made<br />
it infrequent, however, when it did happen it was devastating.<br />
22.9 Artillery in Ground Combat<br />
Artillery Units may not attack by themselves—they may only provide<br />
support. Artillery Units that are attacked use their Defense Factor<br />
without DCBs and may not provide Defensive Artillery Support to<br />
their own hex; however, an Artillery Unit attacked by an enemy unit<br />
may still provide Defensive Artillery Support to a different defending<br />
hex. An Artillery Unit may use its Defense Factor in the same<br />
Combat Phase it provides Defensive Ground Support.<br />
PLAY TIP: It is often best to attack the hex containing the Artillery
Ardennes ‘44 : The Battle of the Bulge — SECOND EDITION<br />
17<br />
Unit first, because an Eng or Disrupted result will prevent the Artillery<br />
Unit from providing defensive support to another hex.<br />
22.10 Summary of Other Characteristics<br />
• Artillery Units have ZOCs but cannot form ZOC Bonds (9.1, 10.1).<br />
• Artillery in Retreats (17.7).<br />
• Artillery Units may not Advance After Combat (19.1).<br />
• OOS Artillery Units cannot flip to their Ready side (23.4).<br />
• Artillery cannot be rebuilt (25.25).<br />
23. SUPPLY AND SURRENDER<br />
23.1 The Supply and Surrender Phase<br />
During the Supply and Surrender Phase the phasing<br />
player checks supply and surrender for all his units.<br />
Players check for supply by tracing a Supply Path from<br />
the unit to a Supply Source. If a Supply Path cannot be traced, the<br />
unit receives an Out of Supply marker. If the unit was already Out<br />
of Supply there is no additional effect. If any unit bearing an Out of<br />
Supply marker from a previous phase can now trace a Supply Path,<br />
the marker is removed.<br />
NOTE: This rule also applies to German units that suffered fuel shortage<br />
at the beginning of the German turn—they are back in supply if<br />
they can trace a Supply Path at this time.<br />
23.2 Supply Sources<br />
Supply is available at certain map edge hexes. German map edge<br />
Supply Sources are indicated with a German balkenkreuz while Allied<br />
ones are indicated with a white star in a green circle (these also<br />
indicate Entry Hexes). To block a Supply Source an enemy unit must<br />
occupy the hex—merely passing through the hex has no effect on a<br />
Supply Source. Allied units in Off Map Boxes are always in Supply.<br />
23.3 Supply Paths<br />
A Supply Path consists of two portions: an overland portion and a<br />
road portion.<br />
OVERLAND PORTION: The overland portion of the Supply Path may<br />
be up to four hexes long. It may traverse all types of terrain (including<br />
across rivers) with the following restrictions:<br />
• It may not enter an enemy-occupied hex or cross or enter an enemy<br />
ZOC Bond.<br />
• It may not enter a vacant hex in an enemy ZOC other than the first<br />
hex of the path. An overland Supply Path may enter that first vacant<br />
hex in an EZOC which is useful for units partially surrounded by<br />
enemy units. The presence of a friendly unit in a hex will negate the<br />
supply blocking effects of EZOCs within that hex.<br />
The example above shows two legal overland Supply Paths for unit A.<br />
Note how the path can cross unbridged river hexsides and how unit B<br />
negates the EZOC in the hex it occupies.<br />
© 2012 <strong>GMT</strong> <strong>Games</strong>, LLC<br />
ROAD PORTION: The road portion of the Supply Path may be of any<br />
length but must follow a path of contiguous road hexes (any type). At<br />
no time may the road portion of the Supply Path:<br />
• Enter an enemy occupied hex.<br />
• Enter an EZOC unless the hex contains a friendly unit.<br />
• Enter a vacant, but enemy controlled Town or City hex (these hexes<br />
are considered garrisoned by non-combat troops).<br />
• Enter a hex containing a Roadblock (33.0).<br />
• Cross a river at a blown bridge hexside.<br />
EXAMPLE: The three hexes marked “No” may not be used in the<br />
road portion of a Supply Path, either because of uncanceled EZOCs<br />
or blown bridges.<br />
23.4 Out of Supply (OOS) Penalties<br />
Any unit bearing an Out of Supply marker suffers the following<br />
penalties:<br />
• > COMBAT: If one or more attacking units are OOS the odds are<br />
shifted one column to the left (1L). OOS defending units are not<br />
effected.<br />
• MOVEMENT: May only use Tactical Movement (2 hexes).<br />
• ARTILLERY: Artillery Units may not flip to their Ready side.<br />
They may still provide artillery support as long as they are on their<br />
Ready side.<br />
• > RETREAT: Are eliminated if forced to retreat 3 or more hexes.<br />
• > ADVANCE: May not use the Road Bonus (19.1).<br />
23.5 Out of Supply Abilities<br />
Units marked OOS retain their ZOC, their ability to form ZOC Bonds,<br />
their full defense strength, and can benefit from DCBs. OOS units can<br />
blow bridges and complete an IP (15.8) once it has been started.<br />
23.6 Isolation and Surrender<br />
After supply is checked, the phasing player then determines<br />
if any of his units bearing an Out of Supply<br />
marker are Isolated (including those units just marked).<br />
Any unit that cannot trace a Line of Communication (LOC) is Isolated.<br />
A LOC is similar to a Supply Path with the exception that the overland<br />
portion may be traced to a friendly unit which in turn can trace four<br />
hexes to another friendly unit, and so on, with eventually one unit in<br />
the chain being able to trace a normal Supply Path. If the unit is not<br />
able to trace a LOC, it is considered Isolated. Each Isolated unit or<br />
group of Isolated units must immediately check for Surrender.<br />
DEFINITION OF AN ISOLATED GROUP: An Isolated Group may<br />
be of any size, but each unit in the group must be able to trace a 4-<br />
hex overland Supply Path to at least one other unit in the Isolated<br />
Group. See example below.<br />
23.7 Surrender Check<br />
If units are part of a group then they will surrender as a group. Roll<br />
one die for each Isolated Group, and consult the Surrender Table.<br />
The result is the number of Surrender Points the Isolated Group accumulates<br />
(or removes in the case of an Air Drop). An Isolated Group
18 Ardennes ‘44 : The Battle of the Bulge — SECOND EDITION<br />
EXAMPLE: Units A and B can trace an overland Supply Path to each<br />
other, they form one group. Units C, D and E can trace a 4 hex overland<br />
Supply Path to at least one other unit in their group, but not to A or<br />
B—they form a second group.<br />
surrenders if its Surrender Threshold is reached. Surrendered units<br />
are immediately removed from play and cannot be replaced.<br />
PLAY NOTE: Since a Surrender Point marker implies the unit is<br />
Out of Supply, the Out of Supply marker is not necessary and may<br />
be removed.<br />
23.8 Surrender Thresholds<br />
Green Threshold: 3 Surrender Points<br />
Normal Threshold: 4 Surrender Points<br />
Elite Threshold: 5 Surrender Points<br />
Use the Elite Threshold if there are one or more Elite units in the<br />
group. Use the Green Threshold if all units in the group are Green.<br />
Use the Normal Threshold for all other groups. Keep track of the<br />
number of Surrender Points of a group with a Surrender marker next<br />
to one of the units in the group.<br />
DESIGN NOTE: Units tended to surrender as a group and good units<br />
would inspire others to hold out.<br />
23.9 Splitting and Combining Isolated Groups<br />
If an Isolated Group splits into separate parts due to friendly or enemy<br />
action then each of the splinter groups becomes a separate group with<br />
its own marker. If two Isolated Groups combine then the combined<br />
group uses only the Surrender Points of the larger group. Larger is<br />
defined as the group with the greater number of attack factors (use<br />
printed values). If the two groups are identical in size, then use the<br />
greater of the Surrender Points.<br />
23.10 Breaking Isolation<br />
The Surrender Points are removed from an Isolated Group if during<br />
the friendly Supply Phase at least one unit in the group can trace<br />
supply.<br />
24. TRAFFIC MARKERS and<br />
BOTTLENECK HEXES<br />
24.1 Traffic Markers In General<br />
Each player may place available Traffic markers<br />
in an attempt to slow the movement of the<br />
opposing player’s units. Besides traffic, these<br />
also represent German commando teams, SNAFUs, psychological<br />
disruption and air interdiction (once the weather clears). The Allied<br />
player has Traffic markers and the German player has Greif markers<br />
(named after Operation Greif). Both markers are identical and are<br />
collectively called Traffic markers.<br />
24.2 Effects of Traffic Markers<br />
Traffic markers increase the entry cost (road and off road) of the<br />
hex by two MPs for all units. Units using Tactical Movement (11.3)<br />
ignore Traffic markers. Traffic markers have no effect on combat,<br />
advance, retreat and Supply Paths. German Traffic markers have no<br />
effect on German units and Allied Traffic markers have no effect on<br />
Allied units.<br />
24.3 The Traffic Marker Phase<br />
During this phase the phasing player may place any of his Traffic<br />
markers that are in his Traffic Marker Holding Box on the map, plus<br />
reposition or place his Roadblocks (33.0).<br />
REMOVAL: After placement he rolls two dice and removes his Traffic<br />
markers with the ID of those die rolls (for example, if a 2 and a<br />
4 were rolled, he would remove his Traffic markers numbered 2 and<br />
4). If doubles are rolled, then only one marker is removed. Place the<br />
removed Traffic marker(s) back in the Traffic Marker Holding Box<br />
for the next turn. Traffic markers are never voluntarily removed once<br />
placed on the map—they are removed only as a result of the removal<br />
dice roll or by a scheduled removal (24.6).<br />
NOTE: Once German Traffic markers begin to be removed by scheduled<br />
removals (24.6) it is possible that the removal dice roll will not<br />
remove any markers.<br />
DESIGN NOTE: Letting the opposing player pick where the traffic<br />
jams occur seems devious yet is sufficiently realistic—your opponent<br />
is apt to place the markers in the road hexes you need to use the most.<br />
Removing one or two with a die roll ensures that you never know<br />
which will be effective.<br />
24.4 Traffic Marker Placement Restrictions<br />
Traffic markers may not be placed:<br />
• on or adjacent to one another (ignore your opponent’s Traffic markers<br />
for this restriction),<br />
• the Allied player may not place them in a St-Vith Bottleneck hex,<br />
although he may place them adjacent to those hexes.<br />
Beyond those exceptions they can be placed in any hex, in or out of<br />
enemy ZOCs, in hexes occupied by enemy units, in German At Start<br />
Divisional Set up Areas, behind or in front of enemy lines. Only Traffic<br />
markers that are in the Traffic Marker Holding Box may be placed;<br />
the ones already on the map may not be repositioned or removed.<br />
24.5 At Start Situation<br />
All markers start in the Traffic Marker Holding Boxes. The Allied<br />
player may place all six during his Traffic Marker Phase of Turn 1 (then<br />
roll to see which are removed). The German player does not receive<br />
his until Turn 3 (17 AM)—during his Traffic Marker Phase.<br />
24.6 Traffic Marker Scheduled Removals<br />
Starting on Turn 8 (19 PM), one German Traffic marker is removed<br />
permanently from play every PM turn. Removal occurs during the<br />
German player’s Traffic Marker Phase. Markers must be removed in<br />
numerical order (i.e., #1 first, #2 second, and so on). Allied Traffic<br />
markers have no scheduled removals (once the clear weather starts<br />
they begin to represent air interdiction).<br />
24.7 St-Vith Bottleneck Hexes<br />
These three hexes are marked on the map in yellow. They have all the<br />
same effects as a Traffic marker (24.2) except units must pay four additional<br />
MPs (+4 MPs) instead of +2. The instant the German player<br />
© 2012 <strong>GMT</strong> <strong>Games</strong>, LLC
Ardennes ‘44 : The Battle of the Bulge — SECOND EDITION<br />
19<br />
gains control of St-Vith the cost of these hexes is reduced to +2 MPs.<br />
If the German player loses control of St-Vith the bottleneck hexes<br />
again cost +4 MPs. St-Vith Bottleneck hexes have no effect on Allied<br />
units or Tactical Movement.<br />
NOTE: Allied Traffic markers may be placed adjacent to St-Vith Bottleneck<br />
hexes to create serious traffic problems for the German player.<br />
When that happens, it is often best for the German player to just use<br />
Tactical Movement to traverse it.<br />
25. NIGHT TURNS AND<br />
REPLACEMENTS<br />
25.1 In General<br />
Between the PM and AM turn is a mini Night Turn. The player sequence<br />
in a Night Turn is flip-flopped (Allied first, followed by German)<br />
so each player will have two turns in a row to create some chaos<br />
for the other player. Night Turns are also when replacements arrive.<br />
The following is the Sequence of Play for each Night Turn:<br />
A. Allied Night Replacement and Movement Phase<br />
B. Allied Night Combat Phase<br />
C. German Night Replacement and Movement Phase<br />
D. German Night Combat Phase<br />
NOTE: There are no other phases to a Night Turn (such as Supply,<br />
Bridges, Rally, Traffic, etc.).<br />
25.2 Replacements<br />
(25.21) IN GENERAL: During each Night Turn both<br />
players receive Replacements. Replacements are used<br />
to restore reduced or eliminated units. The number of<br />
Replacements each player receives is printed on the Turn<br />
Record Track. If a player receives only one replacement, then it may<br />
only be used for an Infantry Type unit (2.4). If a player receives two<br />
replacements, one may be used for an Infantry Type unit and the<br />
other may be used for either a Tank, Recon, or Flak Unit; or used for<br />
another Infantry Type unit. Each Replacement can restore a reduced<br />
unit to its full strength side or bring a unit out of the dead pile on its<br />
reduced side (see 25.23 for 3-step units). Replacements may not be<br />
saved, and those not used are forfeited. Players use their Replacements<br />
during their Night Movement Phase.<br />
> (25.22) PROCEDURE: Only units in the dead pile or on the map in<br />
a supplied, non-Engaged, non-Disrupted state can receive Replacements.<br />
Units adjacent to an enemy unit may receive replacements. If<br />
a player uses a replacement to bring a unit from the dead pile, then the<br />
unit must arrive under the following restrictions:<br />
• must be placed in a friendly controlled city, town or Entry Hex (no<br />
villages) free of enemy Roadblocks which has a road-bound supply<br />
path to a friendly Supply Source.<br />
• may not be placed adjacent to an enemy unit.<br />
• > must be placed within 5 hexes of another unit with the same<br />
Corps/Army Identification color (2.11).<br />
Alternatively, German units may be placed in any Entry Hex labeled<br />
K, L or M that is not in an EZOC.<br />
(25.23) LARGE UNITS: Any unit in the dead pile with a stacking<br />
value of 2 on its reduced side may only be replaced if a supplied, non-<br />
Engaged, good order Remnant unit of the same type is on the map.<br />
Expend the replacement point, remove the Remnant, and place the unit<br />
(on its reduced side) where the Remnant was located.<br />
EXAMPLE: To bring a 6-6-3 US regiment out of the dead pile, the Allied<br />
player must have a 1-2-3 infantry-type Remnant on the map.<br />
> 25.24 REPLACEMENT MARKERS: Indicate each unit that<br />
received a replacement with a Replacement marker. During the<br />
upcoming AM Turn, that unit may move a maximum of one hex<br />
and may not attack. This marker has no effect on the unit’s defense<br />
strength and is removed at the end of the unit’s Combat Phase.<br />
(25.25) RESTRICTIONS: Artillery Units and units that are OOS,<br />
Disrupted, Engaged or marked with a Night marker may not receive<br />
a replacement. The following units may never receive replacements:<br />
German Tank Units with a TQ of 5 or higher, German Tank Units<br />
with Black Box Attack Strengths, von der Heydte, 150th Panzer Bde,<br />
Allied Airborne units, Artillery Units, British units, and any unit that<br />
has Surrendered (23.7).<br />
25.3 Night Movement and Combat<br />
(25.31) MOVEMENT: Movement in the Night Turn is<br />
identical to the normal rules, except each side is limited<br />
to three stacks of units moving. The units moved may<br />
use their full MA. Extended Movement and Tactical<br />
Movement are allowed during a Night Turn. Strategic<br />
Movement is not.<br />
(25.32) COMBAT: Combat in the Night Turn is identical to the normal<br />
rules, except only the units that were marked with Night markers may<br />
attack. Artillery on their Ready side may be used for Offensive and Defensive<br />
Support in a Night Turn without the need for a Night marker.<br />
(25.33) PLACING THE NIGHT TURN MARKERS: Players must<br />
indicate in their PM turn which three stacks will be available for the<br />
upcoming Night Turn. To do this, the phasing player places a Night<br />
marker on each stack in the Movement Phase of his PM turn. If a player<br />
did not indicate any stacks for the Night Turn during his PM turn, then<br />
his Night Turn Movement and Combat Phases are skipped.<br />
(25.34) ELIGIBILITY: Units currently Engaged, Out of Supply (including<br />
from German Fuel Shortage), or Disrupted may not be designated<br />
for the Night Turn.<br />
(25.35) RESTRICTIONS: Units with a Night marker are under the<br />
following restrictions during the PM turn:<br />
• may only use 1 MP (no Tactical Movement), and<br />
• may not attack.<br />
(25.36) BRIDGE BLOWING AT NIGHT: The only bridge blowing<br />
allowed in a Night Turn are those that may occur before combat, as<br />
described in 7.4.<br />
26. BREAKDOWN UNITS<br />
26.1 In General<br />
Both players may create a breakdown unit by reducing a larger unit.<br />
An infantry/mountain regiment creates an infantry battalion, a parachute,<br />
glider or Fallschirmjäger regiment creates a parachute battalion,<br />
a Panzergrenadier regiment creates a Panzergrenadier battalion, and<br />
a Combat Command or US Tank battalion creates a Task Force. The<br />
breakdown unit is placed in the hex with the unit that removed the<br />
step and both units may then move, disengage, or advance normally.<br />
Alternatively, a 3-step unit may break down into two breakdown units<br />
plus the appropriate Remnant unit.<br />
26.2 Breakdown Restrictions<br />
A unit must perform breakdown before it moves, disengages or advances<br />
after combat. Breakdown may only occur during a friendly<br />
© 2012 <strong>GMT</strong> <strong>Games</strong>, LLC
20 Ardennes ‘44 : The Battle of the Bulge — SECOND EDITION<br />
Some examples of creating<br />
breakdown units.<br />
Movement or Combat Phase—never during the enemy player turn.<br />
Disrupted units may not perform breakdown. EZOCs, OOS and Engagement<br />
markers have no effect on the ability of a unit to perform<br />
breakdown. The number of breakdown units that may be created is<br />
strictly limited by the number in the counter mix.<br />
STRATEGY TIP: An Engaged unit may create a breakdown unit and<br />
then the reduced unit could attempt to Disengage while the breakdown<br />
unit holds the line.<br />
26.3 Properties of Breakdown Units<br />
Breakdown units are normal 1-step units in all respects. The morale<br />
ratings of Breakdown units are often lower than the morale rating of<br />
the parent unit to reflect the loss of integrity.<br />
26.4 Rebuilding With Breakdown Units<br />
> Breakdown units may only reattach to the unit that created it.*<br />
The breakdown unit is removed from the map and the parent unit is<br />
increased one step. Rebuilding occurs during the Movement Phase at<br />
the instant the two units have completed their movement.<br />
*This may require some bookkeeping.<br />
27. SPECIAL UNITS<br />
27.1 Allied Engineer Units<br />
> Allied Engineer units are eliminated if forced to retreat<br />
3 or more hexes. Their defense strength has been outlined<br />
to remind players of this rule.<br />
DESIGN NOTE: Allied Engineer units were smaller than a regular<br />
infantry battalion and were not trained for sustained fighting. They<br />
were used as a stop-gap measure to hold bridges and key locations<br />
until larger forces could arrive.<br />
27.2 Von der Heydte (Operation Stösser)<br />
DESIGN NOTE: Operation Stösser was a paratroop<br />
drop into the American rear in the High Fens area.<br />
Their objective was the “Baraque Michel” crossroads.<br />
The parachute drop was a complete failure. Von der Heydte ended up<br />
with a total of around 300 troops. Too small and too weak to counter<br />
the Allies, they abandoned plans to take the crossroads and instead<br />
converted his mission to reconnaissance.<br />
The Von der Heydte unit enters play on Turn 3 (17 AM) via an air drop.<br />
The landing hex may be any clear or Light Woods hex that does not<br />
contain a city, town, village, enemy unit, or EZOC. After placement,<br />
the German player rolls for its survival using the Von der Heydte Table.<br />
The unit may not move on the turn it drops. The unit is considered a<br />
normal unit for all purposes (including supply) once it lands.<br />
27.3 British Units<br />
MOVEMENT RESTRICTION: All British units must<br />
remain on the West Map and west of the Meuse River at<br />
all times. Exception: see 29th Armoured Brigade.<br />
> 29TH ARMOURED BRIGADE: This unit is released from the<br />
British movement restriction rule on Turn 29 (30 AM) or when any<br />
German unit crosses the Meuse River.<br />
ATTACK RESTRICTION: Due to the difficulty encountered in coordinating<br />
inter-Allied operations, British and American units cannot be<br />
involved in the same attack. There is no defensive penalty if British<br />
and American units are stacked together.<br />
> ANTWERP DEFENSE: When German units exit the West Map<br />
through an F or G Entry Hex, the Allied player must respond by moving<br />
British units to the Antwerp Box. The number of British Defense<br />
Factors in the Antwerp Box must always exceed the number of German<br />
Attack Factors by at least six. The Allied player may pick any British<br />
units currently on the map. The units are removed at the end of the<br />
German turn that the situation occurs—simply pick them up and place<br />
them in the Antwerp Box. British factors removed in excess of the<br />
required amount may count towards future German map edge exits. If<br />
there are insufficient British units on the map to satisfy this condition,<br />
then all British reinforcements must be diverted to Antwerp (as they<br />
arrive) until the Allied player again has +6 factors.<br />
27.4 Sturmtigers and Brummbärs<br />
The 1000(+) Sturmtiger and the 217th<br />
Brummbär units have their attack factor<br />
doubled when attacking a Village, Town or<br />
City hex. These units have their Attack Factor enclosed in a black box<br />
to remind players of this special ability.<br />
The Sturmtiger was equipped with a 38cm mortar while the Brummbär<br />
had a 15cm howitzer. Both were ideal for urban fighting.<br />
27.5 Kampfgruppe Peiper<br />
The four units of the 1SS indicated as KG<br />
Peiper may move and fight in the first Night<br />
Turn of the game (even if they moved their<br />
full Movement Allowance and attacked in<br />
the PM turn). In addition, they may use any<br />
German unit they are stacked with at the end<br />
of their Dec. 16th Night Movement Phase to<br />
assist them in that night combat. The commandeered units are activated<br />
for night combat only—not night movement. The commandeered units<br />
may advance after combat if the defender retreats.<br />
DESIGN NOTE: Peiper was a very aggressive commander, and on<br />
the night of the 16th commandeered units of the 3rd Fallschirmjäger<br />
Division to help him in his attack.<br />
NOTE: Potentially, the German player can have the four Kampfgruppe<br />
Peiper units plus the three stacks under the Night markers moving and<br />
fighting on the Dec. 16th Night Turn.<br />
27.6 The US 2nd Division<br />
> The two regiments of the 2nd Division that<br />
start in hexes 1535 and 1636 may not move at<br />
all on Turn 1 (16 AM) and only two hexes on<br />
Turn 2. These units are marked with a red RRD as a reminder.<br />
DESIGN NOTE: These two regiments had just spent the last three days<br />
in a grueling offensive to outflank the Roer River Dams. These units<br />
would not have abandoned their ground lightly. Historically they did<br />
not pull out until early on the 17th.<br />
© 2012 <strong>GMT</strong> <strong>Games</strong>, LLC
Ardennes ‘44 : The Battle of the Bulge — SECOND EDITION<br />
21<br />
27.7 The 653 PzJ (Jpz VI)<br />
The arrival of the 653rd PzJ is not guaranteed. On Turn<br />
4 (17 PM) roll one die—on a die roll of 1 or 2 the unit<br />
arrives that turn. On a die roll of 3 or 4 the unit is delayed<br />
(roll again next turn). On a 5 or 6 the unit does not arrive at all.<br />
CLARIFICATION: It’s possible to keep rolling 3’s and 4’s and the<br />
unit being delayed again and again.<br />
DESIGN NOTE: This unit was intended to fight in the Ardennes, but<br />
it was diverted to the Nordwind Operation.<br />
27.8 Dr Sola and Panzer Brigade 150<br />
DESIGN NOTE: Dr. Sola was the code name for Col. Otto<br />
Skorzeny, who commanded the 150th Panzer Brigade,<br />
a unit that was disguised as an American unit and was<br />
partially equipped with captured American tanks and vehicles. It was<br />
intended to slip through Allied lines during the confusion caused by the<br />
attack of the 6th Panzer Army (Operations Greif and Wãhrung).<br />
(28.11) GENERAL RULE: The German player may use this unit to<br />
infiltrate and/or provide a combat shift. These abilities may be used if<br />
the units is not detected (determined by a die roll). If not detected by<br />
a die roll, the unit is automatically detected at the end of the turn one<br />
or both of its capabilities is used. Once the unit is detected it loses its<br />
special abilities immediately and is treated as a normal unit.<br />
NOTE: The German player does not roll for detection if an Allied unit<br />
moves adjacent to the 150th Pz Brigade.<br />
(28.12) INFILTRATION MOVEMENT: This unit may attempt to<br />
ignore enemy ZOCs. Resolve the attempt by rolling a die the instant<br />
the brigade attempts to ignore an EZOC. On a die roll of 1, 2 or 3<br />
the deception is successful and the Allied ZOC in that hex is ignored<br />
(ZOC Bonds are never ignored). The brigade may continue to move<br />
and attempt to ignore more EZOCs (roll for each attempt). On a 4–6<br />
the unit is recognized as enemy (detected) and the ZOC is treated<br />
normally (no further deception attempts are possible).<br />
(28.13) COMBAT BONUS: This unit may attempt to surprise a defender<br />
and achieve a favorable shift of one column to the right on the<br />
CRT. A surprise attempt is only possible if the brigade has not been<br />
detected yet. Resolve the attempt by rolling a die during the Combat<br />
Phase before the attack is resolved. On a die roll of 1–3 the surprise is<br />
successful. On a 4–6 it is unsuccessful. Whether successful or not, the<br />
brigade is “detected” and becomes a normal unit after that one attack.<br />
EXAMPLE: The Skorzeny unit is currently undetected and moves as<br />
shown in the diagram. In hex A the German player declares he will<br />
attempt to ignore EZOCs and rolls the die. He only rolls once even<br />
though there are two enemy units. The die roll is a 2 which is successful.<br />
In hex B he again rolls successfully (1-3). He then moves Skorzeny<br />
one more hex and attempts a surprise attack on unit C. On a die roll of<br />
1-3 it would be successful and provide a column shift. If not successful<br />
the attack would be resolved normally.<br />
28. WEATHER<br />
28.1 Frozen Ground Conditions<br />
The ground condition from Turn 1–10 (16 AM to 20 PM) is considered<br />
muddy. This is the normal condition for the game. Starting on Turn<br />
11 (21 AM) a cold front moves in making off road movement easier.<br />
Mechanized Units now use the Frozen MP cost on the TEC.<br />
28.2 Clear Weather<br />
The weather from Turns 1–14 and 23-30 is considered overcast and no<br />
special rules apply. Turns 15-22 the weather clears and the following<br />
rules take effect:<br />
• The Allied player receives Air Support (15.6).<br />
• The Allied player modifies all his Surrender die rolls by –2 (air<br />
supply is now possible).<br />
• The German player must modify his Fuel Shortage die rolls by +1<br />
to account for bombing of the rail net west of the Rhine. This modifier<br />
applies for the rest of the game—even after Overcast weather<br />
returns.<br />
29. TURN 1 SPECIAL RULES<br />
29.1 Movement Restrictions<br />
All units with their setup code printed on a red field may not move<br />
or conduct Disengagement (20.1) on Turn 1. If any of these units are<br />
forced to retreat due to combat, they may retreat normally—but they<br />
are not released from their movement restriction. These units may attack<br />
but may not advance. See the Designer Notes for an explanation<br />
of the movement restrictions.<br />
Exception: If the Germans advance adjacent to either the V/187th or<br />
V/406th artillery units, that artillery unit is freed from its movement<br />
restriction and may move its full Movement Allowance.<br />
29.2 The 212 VGD at Echternach<br />
German units crossed the Sauer River below Echternach on the morning<br />
of the 16th. On the first turn only, allow one unit from the 212th<br />
VG to move into hex 1005 (from hex 1006). It must stop and end its<br />
movement in that hex.<br />
29.3 German Divisional Boundaries<br />
No German unit may enter another division’s At Start Area, nor the<br />
Rear Zone (those hexes behind the divisional At Start Areas), on Turn<br />
1. Units may freely move and advance into American territory on the<br />
first turn. Divisional boundaries are ignored after the first turn.<br />
29.4 Strategic Surprise<br />
The offense caught the Americans by surprise; therefore the following<br />
rules apply to Turn 1:<br />
• The only Allied Artillery Units that may use Defensive Artillery<br />
Support on Turn 1 are the V/187 and the V/406 (near Monschau).<br />
• No American units may use Strategic Movement.<br />
NOTE: Extended Movement and Determined Defense is allowed on<br />
turn one for both sides.<br />
29.5 German Corps Artillery<br />
German Artillery Units can only provide Offensive Artillery Support<br />
to an attack involving units with the same corps I.D. as the artillery.<br />
This restriction is lifted after Turn 1.<br />
© 2012 <strong>GMT</strong> <strong>Games</strong>, LLC
22 Ardennes ‘44 : The Battle of the Bulge — SECOND EDITION<br />
30. HOW TO WIN<br />
“Antwerp! If we reach the Meuse, we should go down on our knees<br />
and thank God—let alone trying to reach Antwerp!”<br />
—Field Marshal Gerd von Rundstedt<br />
30.1 The Victory Check Phase<br />
Victory is checked and awarded in the Victory Check Phase which<br />
only occurs in the Allied player turn. The game ends immediately if<br />
the German player achieves a victory.<br />
CONTROL: Control of Victory Hexes is important for determining<br />
victory. A Victory Hex is considered controlled by the German player<br />
if the hex is either occupied by a German unit or a German unit was<br />
the last to pass through the hex. In both cases, the Victory Hex must<br />
have a road-bound Supply Path to a German Supply Source.<br />
> 30.2 German Victory<br />
The German player wins the game if during any Victory Check Phase<br />
if he accomplishes one or more of the following objectives:<br />
• Has exited a number of units whose combined Attack Factors total<br />
at least 24, off the West Map through any F or G Entry Hex. At least<br />
one of the Entry Hexes used must be able to trace a road-bound<br />
Supply Path (during the Victory Check Phase) back to a German<br />
Supply Source.<br />
• Control all 4 Liege hexes.<br />
• Control 4 of the following 6 Victory Hexes on the Meuse river:<br />
Givet, Dinant, Namur, Andenne, Huy and Amay.<br />
• Control 6 Victory Hexes on the West Map.<br />
30.3 Allied Victory<br />
• Prevent the German player from achieving a victory, or<br />
• Occupy three or more German At Start Divisional areas for two<br />
consecutive Victory Check Phases with at least one Allied combat<br />
unit in each Divisional area. The Allied units must be in supply in<br />
each Victory Check Phase. This supersedes any German victory.<br />
31. SCENARIOS<br />
31.1 The Campaign Game<br />
IN GENERAL: This is the standard game that uses both maps and all<br />
the preceding rules. The Allied player controls elements of the U.S.<br />
and British armies. The German player controls all German Army, SS,<br />
and Luftwaffe ground units.<br />
GAME LENGTH: 22 Day Turns—16 AM to 26 PM. The game ends<br />
at the completion of the Allied 26 PM turn.<br />
REINFORCEMENTS: Both players should separate their reinforcements<br />
from their at-start units. At-start units have their set up code highlighted<br />
with a white or red background, all others are reinforcements.<br />
Place these units on their arrival turn on the Turn Record Track.<br />
ALLIED SET UP: The Allied player sets up first. Place your at start<br />
units in the hex specified on the counter. A dot after the hexcode indicates<br />
the unit starts with an Improved Position.<br />
GERMAN SET UP: Place your at-start units anywhere within their divisional<br />
setup area (indicated by the dashed outlines on the map). Your<br />
corps artillery may be placed in any divisional setup area belonging to<br />
that corps. Units may be set up adjacent to enemy units (stacking limits<br />
must be observed). Also observe the following restrictions:<br />
• The 5FJ/11 Stg may not set up in either of the two Wooded Rough<br />
hexes.<br />
• The two units of the 26th VG that are marked with a red setup code,<br />
may not start in any of the three Wooded Rough hexes.<br />
OTHER MARKERS: Place the Turn Record Track marker in the 16<br />
AM Box. Place a Blown Bridge marker on the four bridge sites labeled<br />
1-4 (between Echternach and Vianden), and place bridge Under<br />
Construction markers on bridges #5 and #6 (7.10).<br />
ARTILLERY: All Artillery Units start on their ready sides.<br />
QUICK SET UP: First time players should use the first illustration of<br />
the Extended Example of Play to help them set up the game.<br />
31.2 Six Turn Scenario<br />
GAME LENGTH: 6 Day Turns—16 AM to 18 PM. The game ends at<br />
the completion of the Allied 18 PM turn.<br />
SET UP: Use the set up for the regular game.<br />
SPECIAL RULES: Use only the East Map. The 101st and 82nd Airborne<br />
units arrive on Turn 6 (18 PM) in Strategic Movement having<br />
already expended 4 MPs. They may enter on any west edge road hex.<br />
The Allied player must use eight SM markers during Turn 6 to move<br />
his eight airborne units.<br />
VICTORY CONDITIONS: The German player wins if he has 10 VPs<br />
at the end of the scenario. Award 1 VP for each Victory Hex he controls,<br />
and 1 VP for every 4 Attack Factors he has exited off the west edge<br />
of the (East) Map. If the German player exits units off the west edge<br />
he must be able to trace a road-bound Supply Path back to a German<br />
Supply Source from at least one of the exit hexes, otherwise the VPs<br />
for exiting units do not count.<br />
31.3 Eight Turn Scenario<br />
GAME LENGTH: 8 Turns—16 AM to 19 PM. The game ends at the<br />
completion of the Allied 19 PM turn.<br />
SET UP: Use the set up for the regular game.<br />
SPECIAL RULES: Use only the East Map. The 101st and 82nd Airborne<br />
units arrive on Turn 6 (18 PM) in Strategic Movement having<br />
already expended 4 MPs. They may enter on any west edge road hex.<br />
The Allied player must use eight SM markers during Turn 6 to move<br />
his eight airborne units.<br />
VICTORY CONDITIONS: Same as the Six Turn Scenario except the<br />
German player needs 14 VPs to win.<br />
31.4 Patton’s Counterattack, December 22<br />
GAME LENGTH: 10 Turns—22 AM to 26 PM. The game ends at the<br />
completion of the Allied 26 PM turn.<br />
SET UP: Use the Patton’s Counterattack Scenario setup pages later<br />
in the rules booklet. The German player sets up first, followed by the<br />
Allied player.<br />
FIRST PLAYER: Start with the Artillery Supply Phase of the German<br />
player turn.<br />
SPECIAL RULES:<br />
A. Use both maps.<br />
B. After the Allied player has set up (and before the game starts), he<br />
may place his six Traffic markers anywhere on the map and then rolls<br />
the dice and removes the appropriate markers per the rules.<br />
C. All German Artillery Units start on their Fired side. The German<br />
player starts the game by flipping any three during the German Artillery<br />
Supply Phase.<br />
© 2012 <strong>GMT</strong> <strong>Games</strong>, LLC
Ardennes ‘44 : The Battle of the Bulge — SECOND EDITION<br />
23<br />
D. Fuel Shortage—The German player must roll on both tables on<br />
the first turn.<br />
E. The following bridges are blown: La Roche (E-3920), Ortho (E-<br />
3718), Trois Ponts (3029—both hexsides).<br />
F. ISOLATED GROUPS: The only units OOS are the stack containing<br />
the three Peiper units and all Allied units inside the Bastogne<br />
perimeter. Peiper’s group is at Surrender Level 3 and the Bastogne<br />
group is at Level 1.<br />
VICTORY CONDITIONS: Same as the Campaign Game except<br />
consider the game a draw if the Allied player cannot trace a Line of<br />
Supply to the two Bastogne town hexes.<br />
31.5 The Extended Game<br />
Players wishing to continue the Campaign Game or the Patton’s Counterattack<br />
Scenario until the 30th of December can play this Extended<br />
Game. Follow all the rules for the Campaign Game except the game<br />
ends at the completion of the Allied Player Turn of Turn 30.<br />
SPECIAL RULES: None<br />
VICTORY CONDITIONS: Same as the Campaign Game except the<br />
Germans also win if they satisfy both conditions below at the end of<br />
the game:<br />
• Either controls both Bastogne hexes or prevent the Allied player<br />
from tracing a LOS to a Bastogne town hex, and<br />
• Control 4 Victory Hexes on the West Map.<br />
OPTIONAL RULES<br />
The following rules add a bit of complexity to the game and are not<br />
essential. They may be used if both players agree.<br />
> 32. FUEL DUMPS<br />
32.1 Hidden Fuel Dump<br />
At the start of the game the Allied player randomly places the three<br />
Fuel Dump markers on the map—one in each space marked with a<br />
Fuel Dump symbol. Only one of the markers contains the real fuel<br />
dump—the rest are dummies. The Allied player may examine the<br />
markers after he has placed them, but the markers remain secret to the<br />
German player. The instant the German player moves a unit adjacent to<br />
one of the markers, it is flipped over. If it is a dummy, it is removed.<br />
COMMENTARY: 1st Army had a primary fuel dump located outside<br />
of Francorchamps. If captured, this was enough fuel to alleviate the<br />
German fuel shortages. Kampfgruppe Peiper came within a few miles<br />
of the dump without knowing it.<br />
32.2 Combat and Capture<br />
PROPERTIES: The dump has a Defense Factor of 2 representing<br />
the Belgian battalion assigned to its defense. The dump by itself has<br />
no stacking value, does not receive DCBs nor may it be selected for<br />
Determined Defense. If eliminated, forced to retreat, or suffers a step<br />
loss, the German player is considered to have captured the dump and<br />
may advance into the hex.<br />
If captured, the German player must hold the dump until the fuel can<br />
be removed. The German player can remove the captured dump in his<br />
next German Fuel Shortage Phase if a road-bound Supply Path can be<br />
traced from the dump to the German East map edge.<br />
EFFECTS: If captured and the fuel can be removed, the German player<br />
skips the Fuel Shortage Phases on Turns 7 and 8 (19 AM and PM).<br />
© 2012 <strong>GMT</strong> <strong>Games</strong>, LLC<br />
If the Allied player recaptures the dump before the German player<br />
removes it, then the dump regains its inherent Defense Factor.<br />
32.3 Destruction<br />
The dump may be destroyed in the same manner as Bridge demolition<br />
(1–4 in the Allied Bridge Phase, 1–2 in a German Combat Phase if<br />
the German player attacks the dump hex). Demolition in the Allied<br />
Bridge Phase may only occur if a German unit is adjacent to the hex.<br />
No Allied unit is required for either case. All Fuel Dump markers are<br />
automatically removed at the end of Turn 6 (18 PM).<br />
33. ROADBLOCKS<br />
33.1 General Rule<br />
Roadblocks are markers that can control hexes and slow<br />
enemy movement. They are like Traffic markers, but<br />
are more reliable. Each player has two. They have all<br />
the same effects as a Traffic marker with the following additional<br />
properties:<br />
• May be repositioned each turn and are not removed by a die roll.<br />
• Supply Paths may not be traced through a hex containing an enemy<br />
Roadblock.<br />
• They control the hex they are in (30.1).<br />
• U.S. Engineers (13.2) may not be placed in a town or city hex that<br />
contains an enemy Roadblock.<br />
33.2 Placement<br />
Roadblocks are placed or repositioned in the owning player’s Traffic<br />
Marker Phase before the removal die rolls. The following restrictions<br />
apply to placement:<br />
• Must be placed on a road within 4 contiguous road hexes of a friendly<br />
unit. The placement hex must have a valid road-bound Supply Path<br />
to the friendly unit and to a friendly map-edge Supply Source.<br />
• May not be placed on or adjacent to an enemy unit.<br />
• May not be placed on or adjacent to a friendly Traffic marker or<br />
another Roadblock marker (friendly or enemy).<br />
33.3 Removal<br />
Friendly Roadblocks must be removed at the end of any enemy Movement<br />
Phase or Combat Phase (including Night Turns) in which an<br />
enemy unit either ends in the hex or passes through the hex. They are<br />
also removed during a friendly Traffic Marker Phase if they no longer<br />
have a road-bound Supply Path. You may voluntarily remove or reposition<br />
your Roadblocks every friendly Traffic Marker Phase.<br />
Roadblocks are never eliminated, those that are removed are available<br />
to be placed in the next friendly Traffic Marker Phase.<br />
> 33.4 At Start<br />
The Allied player receives his two Roadblock markers on his first<br />
Traffic Marker Phase. The German player does not receive his until<br />
Turn 3 (17 AM)—during his Traffic Marker Phase.<br />
> 34. 15 FACTOR LIMIT<br />
The attacker may use a maximum of 15 Attack Factors in each attack.<br />
All factors in excess of 15 are ignored.<br />
EXAMPLE: Two stacks of German units totaling 24 factors attack 6<br />
Allied Defense Factors. The odds would be 15 to 6 (2-1).<br />
DESIGN NOTE: This rule reflects the difficulties of massing large<br />
number of troops against a single objective and also prevents excessive<br />
factor counting. It will speed up play.
24 Ardennes ‘44 : The Battle of the Bulge — SECOND EDITION<br />
© 2012 <strong>GMT</strong> <strong>Games</strong>, LLC
Ardennes ‘44 : The Battle of the Bulge — SECOND EDITION<br />
25<br />
Patton’s Counterattack<br />
Scenario<br />
All hexes are on the East Map unless indicated<br />
with a “W” prefix.<br />
GERMAN AT START<br />
Unit Factors TQ Hex<br />
7th Army<br />
212 / 316 (2-3-3) 1105<br />
212 / 320 (2-3-3) 1104<br />
212 / 423 (2-3-3) 1305<br />
212 / Fusilier 2-2-3 Elim<br />
276 / 986 (1-3-3) 1706<br />
276 / 987 (1-3-3) 1606<br />
276 / 988 (2-3-3) 1506<br />
352 / 914 4-5-3 2306<br />
352 / 915 (2-3-3) 2105<br />
352 / 916 (2-3-3) 1906<br />
5 FJ /13 5-6-3 3007<br />
5 FJ /14 5-6-3 3709<br />
5 FJ /15 (3-4-3) 3408<br />
5 FJ /11 Stg 3-2-6 [3] 3408<br />
44 Festung 1-2-2 Elim<br />
Fuh Gr (all 4 units at full strength) 2508*<br />
79 VG (all 3 units at full strength) 1810*<br />
—————————————————————<br />
8 Volkswerfer S-(1)-1 1307<br />
18 Volkswerfer S-(1)-1 1808<br />
406 Volks-Art S-(1)-0 2107<br />
408 Volks-Art S-(1)-0 1007<br />
© 2012 <strong>GMT</strong> <strong>Games</strong>, LLC<br />
5th Panzer Army<br />
2 Pz / 3 Panther (3-2-6) 4 4017*<br />
2 Pz / 3 Mk IV (3-2-6) 3 4017*<br />
2 Pz / 38 PzJ 3-2-6 [3] 4017*<br />
2 Pz / 2 Pzg (3-3-6) 4017*<br />
2 Pz / 304 Pzg 5-5-6 4017*<br />
2 Pz / 2 Recon 3-2-7 4017*<br />
Lehr / 130 Panther 5-4-6 4 W1113*<br />
Lehr / 559 PzJ 3-2-5 [5] Elim<br />
Lehr / 243 Stg 3-2-6 [3] W1113*<br />
Lehr / 902 Pzg 4-5-6 W1113*<br />
Lehr / 130 Recon 4-3-7 W1113*<br />
Lehr / 901 Pzg 4-5-6 3214<br />
Lehr / 130 PzJ 2-2-6 [4] 3611<br />
116 Pz / 16 Panther (3-2-6) 4 3722*<br />
116 Pz / 60 Pzg (3-3-6) 3722*<br />
116 Pz / 16 Mk IV 5-4-6 3 3824*<br />
116 Pz / 156 Pzg 5-5-6 3824*<br />
116 Pz / 116 Recon 3-2-7 3824*<br />
116 Pz / 228 PzJ 2-2-6 [4] 3824*<br />
26 / 39 Fus (3-3-3) 3311<br />
26 / 77 Gren 5-5-3 3615<br />
26 / 78 Gren 5-5-3 3416<br />
26 / KG Kunkel 3-2-7 3712<br />
560 / 1128 4-4-3 3624<br />
560 / 1130 4-4-3 3422<br />
560/1129 4-4-3 2119<br />
18 / 293 (2-3-3) 2025<br />
18 / 294 (2-3-3) 2025<br />
18 / 295 (2-3-3) 2026<br />
18 / 18 FEB 1-2-3 Elim<br />
18 / 244 Stg 3-2-6 [3] Elim
26 Ardennes ‘44 : The Battle of the Bulge — SECOND EDITION<br />
18 / 10 Flak (+) 1-2-5 [4] Elim<br />
62 / 164 (2-3-3) 2221<br />
62 / 183 (2-3-3) 1923<br />
62 / 190 (2-3-3) 1921<br />
Fuh Bglt (all 4 units at full strength) 2028*<br />
—————————————————————<br />
7 Volkswerfer S-(1)-1 3015<br />
15 Volkswerfer S-(1)-1 3217<br />
16 Volkswerfer S-(1)-1 3617<br />
401 Volks-Art S-(1)-0 1823<br />
766 Volks-Art S-(1)-0 1920<br />
6th Panzer Army<br />
1SS / 1 Panther (3-2-7) 4 §3031<br />
1SS / 501 Tiger (4-2-5) 5 §3031<br />
1SS / 1(–) Pzg (3-3-6) §3031<br />
1SS / 1 / 1 Pzg 3-2-7 Elim<br />
1SS / 2(–) Pzg (3-3-6) 2728<br />
1SS / 2 / 1 Pzg 3-2-6 2828<br />
1SS / 1 Recon 3-2-7 Elim<br />
1SS / 1 PzJ 3-2-6 [4] Elim<br />
2SS (Any 3 units) 3018*<br />
2SS (the remaining 3 units) 2618*<br />
9SS (Any 3 units) 1830*<br />
9SS (the remaining 3 units) 2329*<br />
12SS / 12 Panther 7-4-6 4 Elim<br />
12SS / 12 Recon 3-2-7 1731<br />
12SS / 25 Pzg 7-7-6 Elim<br />
12SS / 26 Pzg (4-5-6) 1731<br />
12SS / 12 PzJ 3-2-6 [4] Elim<br />
12SS / 560 PzJ 5-4-5 [5] 1731<br />
Pzg (SS) Remnant 1-3-6 1632<br />
12 / 27 Fus (2-3-3) 1732<br />
12 / 48 (2-3-3) 1732<br />
12 / 89 (2-3-3) 1633<br />
12 / Fus 2-2-3 Elim<br />
277 / 989 (2-3-3) 1734<br />
277 / 990 4-5-3 1734<br />
277 / 991 3-4-3 Elim<br />
3 FJ / 5 5-6-3 2331<br />
3 FJ / 8 4-6-3 1931<br />
3 FJ / 9 4-6-3 2131<br />
326 / 751 (2-3-3) 1737<br />
326 / 752 (2-3-3) 1737<br />
326 / 753 (2-3-3) 1738<br />
3 PG (all 5 units at full strength) 1637*<br />
506 Tiger 8-4-5 5 1430<br />
521 PzJ 3-2-5 [5] 1722<br />
150 Pz Bde 6-5-6 3 2431<br />
von der Heydte 2-2-3 Elim<br />
—————————————————————<br />
4 Volkswerfer S-(1)-1 2130<br />
9 Volkswerfer S-(1)-1 2129<br />
17 Volkswerfer S-(1)-1 1538<br />
388 Volks-Art S-(1)-0 1530<br />
402 Volks-Art S-(1)-0 1531<br />
405 Volks-Art S-(1)-0 1439<br />
—————————————————————<br />
Discretionary Units: The following units must<br />
be stacked with any unit that is in supply and<br />
matching its army color code. No more than<br />
one discretionary unit per hex.<br />
5th Pz Army<br />
902 Stg 3-2-6 [3] **<br />
741 PzJ 2-2-6 [3] **<br />
669 Ost 1-2-3 **<br />
6th Pz Army<br />
519 PzJ 3-2-5 [5] **<br />
653 PzJ 4-2-4 [6] **<br />
394+667 Stg 3-2-6 [3] **<br />
217 StrmPz 2-1-5 **<br />
1000+ StrmPz 3-1-4 **<br />
§ = Surrender Level 3<br />
* = At or within one hex, and no more than<br />
one unit per hex.<br />
** Stacked with any supplied unit in that<br />
army.<br />
( ) = starts at reduced strength<br />
ALLIED AT-START<br />
Unit Factors TQ Hex<br />
VIII Corps<br />
4 / 8 / 2 2-2-3 Elim<br />
4 / 12 / 1 2-2-3 1303<br />
4 / 70 Tnk (–) 3-2-6 3 1303<br />
4 / 12 / 2 2-2-3 Elim<br />
4 / 12 / 3 2-2-3 1504<br />
4 / 22 / 2 2-2-3 1103<br />
4 / 803 TD (–) 2-2-6 [3] 1103<br />
9 Arm / CCA (–) 5-4-6 3 Elim<br />
© 2012 <strong>GMT</strong> <strong>Games</strong>, LLC
Ardennes ‘44 : The Battle of the Bulge — SECOND EDITION<br />
27<br />
9 Arm / CCA / 60 3-2-6 Elim<br />
9 Arm / CCB (6-4-6) 3 •2124<br />
9 Arm / CCR 7-6-6 3 Elim<br />
28 / 109 / 1 2-2-3 W1206<br />
28 / 109 / 2 2-2-3 2503<br />
28 / 109 / 3 2-2-3 Elim<br />
28 / 110 / 1 2-2-3 Elim<br />
28 / 110 / 2 2-2-3 Elim<br />
28 / 110 / 3 2-2-3 Elim<br />
28 / 112 / 1 2-2-3 2522<br />
28 / 112 / 2 2-2-3 •2321<br />
28 / 112 / 3 2-2-3 2321<br />
28 / 707 Tnk 4-3-6 3 Elim<br />
28 / P 1-2-3 Elim<br />
106 / 422 (–) 4-4-3 Elim<br />
106 / 422 / 3 2-2-3 Elim<br />
106 / 423 (–) 3-4-3 Elim<br />
106 / 423 / 2 2-2-3 Elim<br />
106 / 424 (–) 3-4-3 •2122<br />
106 / 424 / 1 2-2-3 Elim<br />
106 / 424 / P 1-2-3 Elim<br />
14 Cav / 18 3-2-7 Elim<br />
14 Cav / 32 3-2-7 Elim<br />
333 FA S-(2)-1 2324<br />
402 FA S-(2)-1 2524<br />
174 FA S-(2)-1 1602<br />
35 Engineer 1-2-3 Elim<br />
44 Engineer 1-2-3 Elim<br />
159 Engineer 1-2-3 Elim<br />
168 Engineer 1-2-3 Elim<br />
V Corps<br />
1 / 26 6-7-3 1832<br />
1 / 18 6-7-3 2233<br />
1 / 16 6-7-3 •2032<br />
1 / 634 TD 3-2-6 [3] 2233<br />
1 / 703 TD 3-2-6 [4] 2032<br />
1 / 745 Tnk (2-1-6) 3 1832<br />
2 / 9 (4-4-3) •1833<br />
2 / 23 6-6-3 Elim<br />
2 / 38 5-6-3 1834<br />
2 / 741 Tnk 4-3-6 3 Elim<br />
2 / 644 TD 3-2-6 [3] Elim<br />
99 / 393 / 1 2-2-3 1835<br />
99 / 393 / 2 2-2-3 Elim<br />
99 / 393 / 3 2-2-3 Elim<br />
99 / 394 / 1 2-2-3 1835<br />
99 / 394 / 2 2-2-3 Elim<br />
99 / 394 / 3 2-2-3 Elim<br />
99 / 395 (–) 4-4-3 Elim<br />
99 / 395 / 3 2-2-3 1835<br />
7 Arm / CCA (6-4-6) 3 •2427<br />
7 Arm / CCB (6-4-6) 3 2125<br />
7 Arm / CCR (5-4-6) 3 •2227<br />
7 Arm / 814 TD 3-2-6 [4] Elim<br />
9 / 47 6-6-3 1837<br />
9 / 39 6-6-3 1836<br />
30 / 117 (4-4-3) 2730<br />
30 / 119 (4-4-3) 3131<br />
30 / 743 Tnk (2-1-6) 3 3131<br />
30 / 120 6-6-3 2432<br />
30 / 526 2-2-6 2531<br />
30 / 99 (Nor.) 2-2-3 2531<br />
102 Cav / 38 (+) 4-3-7 1838<br />
146 Engineer 1-2-3 Elim<br />
190 FA S-(2)-1 2732<br />
187 FA S-(2)-1 2034<br />
406 FA S-(2)-1 2134<br />
XVIII Corps<br />
82 / 504 4-6-3 3030<br />
82 / 505 (3-4-3) 3029<br />
82 / 508 4-6-3 2823<br />
82 / 325G (3-4-3) 3023<br />
101 / 501 4-6-3 •3314§<br />
101 / 502 (3-4-3) •3514§<br />
101 / 506 4-6-3 •3415§<br />
101 / 327G 4-6-3 3312§<br />
3 Arm / CCB (6-4-6) 3 2931<br />
3 Arm / 643 TD 3-2-7 [3] W1025<br />
3 Arm / CCR (6-4-6) 3 3925<br />
3 Arm / TF (2-1-6) 2 3625<br />
517 Airborne 4-6-3 SM-W2932<br />
509 Airborne 2-2-3 3625<br />
551 Airborne 2-2-3 3232<br />
VII Corps<br />
84 / 334 5-6-3 W1323<br />
84 / 335 5-6-3 W1522<br />
84 / 771 Tnk 4-3-6 3 W1522<br />
84 / 333 5-6-3 W1529<br />
84 / 638 TD 3-2-6 [4] W1525<br />
3rd Army<br />
10 Arm / CCA 9-6-6 3 2104<br />
10 Arm / CCB (6-4-6) 3 3414§<br />
© 2012 <strong>GMT</strong> <strong>Games</strong>, LLC<br />
10 Arm / CCR (5-4-6) 3 1805<br />
10 Arm / 609 TD 3-2-7 [3] Elim<br />
4 Arm / CCA 7-4-6 3 3101<br />
4 Arm / CCB 6-4-6 3 3703<br />
4 Arm / CCR 8-6-6 3 3302<br />
4 Arm / 704 TD 3-2-7 [3] 3302<br />
Independent<br />
51 Eng 1-2-3 W1224<br />
158 Eng 1-2-3 Elim<br />
299 Eng 1-2-3 Elim<br />
705 TD 3-2-7 [3] •3512§<br />
740 Tnk 3-2-6 3 Elim<br />
29 Inf Regt 3-4-3 3840<br />
XXX CORPS BRITISH<br />
SAS (–) 1-1-7 W3028<br />
29 Arm / 8 RB 2-2-6 W3026<br />
29 Arm / 2 F&FY 3-2-6 3 W3033<br />
29 Arm / 3 RTR 3-2-6 3 W2924<br />
29 Arm / 23 Hus 3-2-6 3 W3219<br />
Arriving this Turn 13 (22AM)<br />
5 / 10 6-6-3 BC<br />
26 / 101 5-6-3 BC<br />
26 / 104 5-6-3 BC<br />
26 / 328 5-6-3 BC<br />
26 / 735 Tnk 4-3-6 3 BC<br />
26 / 818 TD 3-2-6 [3] BC<br />
80 / 317 6-6-3 BC<br />
80 / 318 6-6-3 BC<br />
80 / 319 6-6-3 BC<br />
80 / 702 Tnk 4-3-6 3 BC<br />
80 / 610 TD 3-2-6 [4] BC<br />
XII / 182 FA S-(2)-1 BC<br />
30 / 823 TD 3-2-6 [3] H<br />
3 Arm / CCA 9-6-6 3 H<br />
Ind Thrasher 1-2-3 F<br />
British Units arriving:<br />
34 Tnk (–) 6-4-6 3 FG<br />
43 / 129 5-7-3 FG<br />
43 / 130 5-7-3 FG<br />
43 / 214 5-7-3 FG<br />
Battalions, TFs and Remnants<br />
Inf Bn 1-2-3 3323<br />
Para Bn 1-2-3 3512§<br />
Para Bn 1-2-3 2826<br />
Para Bn 1-2-3 2927<br />
TF 2-2-6 3 3323<br />
TF 2-2-6 3 3922<br />
TF 2-2-6 3 2627<br />
TF 2-2-6 3 2522<br />
Rem Inf 1-2-3 1833<br />
Rem Armor 2-2-6 2 1805<br />
Rem Armor 2-2-6 2 3514§<br />
( ) = reduced strength<br />
• = Starts with Improved Position<br />
SM= Starts in Strategic Movement<br />
§ = Surrender Level 1
28 Ardennes ‘44 : The Battle of the Bulge — SECOND EDITION<br />
PLAYER’S NOTES:<br />
Here are a few pointers to help first time players:<br />
GERMAN PLAYER:<br />
1. Allow the 12th SS to slide around Elsenborn and head west as<br />
soon as possible—don’t get involved in a costly battle for Elsenborn<br />
or even Bullingen.<br />
2. I’ve found the Monschau attack direction to be a dead end. Don’t<br />
try to push that sector.<br />
3. Houfallize is critically important. Once that town is captured the<br />
whole board seems to open up with possibilities.<br />
4. Stretch the American line until it snaps! Do this by constantly<br />
heading west and bypassing some American units. Keep pushing<br />
down every road forcing the Americans to thin themselves out.<br />
5. It almost seems easier to reach the Meuse if you bottle up the<br />
101st Airborne in Bastogne rather than push it back to the forest<br />
belt between St. Hubert and La Roche.<br />
6. Send the 3rd Panzergrenadier Division and the 2nd SS Panzer<br />
Division west without delay. Those units will be needed badly to<br />
expand any breakout that occurs west of Bastogne.<br />
7. The 116th Panzer Division has the most interesting options. Send<br />
it against St-Vith and that town will crumble quickly, send it to<br />
Houffalize and your breakout will come a day sooner. I tend to favor<br />
the Houfallize option, but both directions have their merits.<br />
8. Be sure to prepare yourself for Patton’s 3rd Army’s arrival from<br />
the south. You will definitely need the Führer Grenadier Brigade<br />
plus a few independent tank units for this.<br />
9. Don’t attack the two regiments of the 106th on the Schnee<br />
Eifel—just isolate them and they will soon surrender.<br />
10. 1-1 and 2-1 attacks can often be successful if you have elite<br />
and or Tank Units involved in the attack.<br />
11. Pin some American units with 2-1 attacks (and hope for an<br />
engaged result) while you hit flanking units with higher odds.<br />
12. Don’t let the Allied player read this list.<br />
ALLIED PLAYER:<br />
1. Read the German list.<br />
2. CCB of the 9th Armored: This is a critical unit. If you send it to<br />
the St-Vith sector, as it was historically, you have a good chance<br />
at holding St-Vith throughout the 17th. If you send it to block the<br />
1st SS, you’ll stimy that divisions breakout but you may lose the<br />
unit. Hard to make a recommendation.<br />
3. Send the two artillery units of 5th Corps to the Elsenborn area<br />
on Turn 2. This is crucial if you want to hold Elsenborn.<br />
4. Hold the south edge—don’t send any units of the 4th Infantry<br />
or the 109th Regiment west. It’s not crucial that you defend the<br />
Redange-Arlon area, because the German player will rarely have<br />
the units to send there. But hold in front of Junglinster.<br />
5. Its not a huge upset if you don’t win the race to Bastogne. Deploy<br />
the airborne units in the forest belt between St. Hubert and<br />
La Roche.<br />
6. Garrison Liege with at least one unit.<br />
7. Use your Roadblocks in the 5th Panzer Army sector to prevent<br />
the Germans from getting to Bastogne too fast.<br />
BIBLIOGRAPHY<br />
Books:<br />
Toland, John, Battle The Story of the Bulge. Excellent reading and a good<br />
place to start to learn about the battle.<br />
Cole, Hugh M. The Ardennes: The Battle of the Bulge. The United States<br />
Army in World War II. The European Theater of Operation.<br />
Dupuy, Trevor N., Hitler’s Last Gamble: The Battle of the Bulge, December<br />
1944–January 1945.<br />
Dupuy, R. Ernest. St. Vith: Lion in the Way. Washington, D.C., 1949<br />
Marshall, S. L. A. Bastogne; The Story of the First Eight Days… This<br />
is excellent reading and highly recommended. You can find it on the<br />
internet.<br />
Eisenhower, John S. D., Bitter Woods, The Battle of the Bulge. New<br />
York, 1969.<br />
Astor, Gerald, A Blood-Dimmed Tide. Interesting for the many personal<br />
accounts of the battle.<br />
Blair, Clay. Ridgway’s Paratroopers: The American Airborne in World<br />
War II.<br />
Johnston, Wesley. The US Army Armor School’s The Defense of St. Vith,<br />
Belgium.<br />
Whiting, Charles, Death of a Division, Stein and Day, 1980.<br />
Evans, Gary F. The 501st Parachute Infantry Regiment at Bastogne,<br />
Belgium.<br />
MacDonald, Charles B. A Time for Trumpets: The Untold Story of the<br />
Battle of the Bulge. New York, 1985.<br />
Patton, George S., War As I knew It. Boston, 1947.<br />
Quarrie, Bruce, The Ardennes Offensive, Vols 4, 5, 8, 12,and 13. Osprey.<br />
Stanton, Shelby L. Order of Battle U.S. Army, World War II. Novato,<br />
CA 1984.<br />
Archives:<br />
Luettwitz, Heinrich von. Commitment of the XLVII Panzer Corps in the<br />
Ardennes 1944-1945. MS # A-939. This is an excellent day-by-day account<br />
of each of the divisions of the corps.<br />
Luettwitz, Heinrich von. XLVII Panzer Corps in the Ardennes Offensive.<br />
MS # A-940. This gives the corps commander’s opinions and answers<br />
questions given to him. Worthwhile.<br />
Kniess, Baptist. LXXXV Corps (1 Dec 44-10 Jan 45). MS # B-030.<br />
Brandenberger, Erich. Seventh Army (16 Dec 1944 - 16 Jan 1945. MS<br />
# A-934<br />
Waldenburg, Siegfried Von. Commitment of the 116th Panzer Division<br />
in the Ardennes 1944/45. MS # A-873.<br />
Kraas, Hugo. 12th SS Panzer Division “Hitler Jugend” in the Ardennes<br />
Offensive. MS # 522.<br />
Panzer Lehr Division Situation Maps: 23 Dec. 1944 - Jan. 45. MS # A-<br />
944. Five decent maps showing the location of this division in the later<br />
part of the offensive.<br />
Diebig, Wilhelm. 277 Volks Grenadier Division (Nov 44 - Jan 45). MS<br />
# B-273.<br />
Priess, H. Commitment of the 1 SS Panzer Corps During the Ardennes<br />
Offensive (16 Dec 1944 - 25 Jan 1945). MS # A-877. A good day-by-day<br />
account of this corps.<br />
Staudinger, Walter. The Artillery Command of the 6 Panzer Army During<br />
the Ardennes Offensive, 1944-1945. MS # B-347. Not as helpful as<br />
it sounds.<br />
Engel, Gerhard. 12th Volks Grenadier Division (3 - 29 Dec 44). MS #<br />
B-733. Very interesting and detailed account of this division.<br />
Krueger, Walter, Offensive in the Ardennes from 16 Dec 44-2 Feb 45.<br />
<strong>Games</strong>:<br />
Parker, Danny. Hitler’s Last Gamble. 3W Publishing.<br />
Sinigaglio, Bruno. The Battle of the Bulge. The Avalon Hill Game<br />
Company.<br />
© 2012 <strong>GMT</strong> <strong>Games</strong>, LLC
1ST EDITION DESIGNER’S NOTES<br />
“Most history is guessing, and the rest is prejudice.”<br />
—Will Durant<br />
Ardennes ‘44 : The Battle of the Bulge — SECOND EDITION<br />
General Design Philosophy: Keep it as simple and as clear as you<br />
possibly can. Every rule has to be worth the trouble of learning it;<br />
every exception to the rule has to be worth the trouble of confusing<br />
the reader. Keep the number of modifiers to a level that can be easily<br />
remembered—three. If I forget to use a rule during playtesting then it<br />
goes to the chopping block. Don’t design a simulation that masquerades<br />
as a game, but rather design a game that can stand among the<br />
simulations.<br />
Why a New Bulge Game: This game started as an invitation from<br />
John Kranz to develop a deluxe game on the subject. I had worked<br />
on many other Bulge games for other designers, so I knew what was<br />
already out there. None of the games had low stacking, which I felt<br />
deserved investigation. I also wanted to show tank types and their effects,<br />
which only Hitler’s Last Gamble had attempted to show before.<br />
But most importantly, I was eager to study the Ardennes terrain and<br />
depict it for a hex game.<br />
Map: I thank Randy Heller who allowed me to use the same map<br />
Danny Parker used for Hitler’s Last Gamble, which he had received<br />
from Hugh Cole (author of the U.S. Army’s The Battle of the Bulge).<br />
The map was scanned and visually enhanced before I drew over it.<br />
This was supplemented by a number of present day 1:100,000 and<br />
1:150,000 maps of the Eifel, Luxembourg and Ardennes to confirm<br />
topography and roads. I also had the US Army GSGS 1:100,000 maps<br />
for the entire area. For rivers, I used a hydro map of the Ardennes from<br />
the Atlas de Belgique.<br />
The Semois: I think the most interesting map discovery was what a<br />
major barrier the Semois River is. I can now understand why Hitler<br />
felt that the 7th Army could handle protecting the entire southern<br />
flank—the Semois will do most of the work.<br />
Fuel Shortage: The Germans encountered serious problems with fuel.<br />
Not only the lack of it, but the difficulty they had in getting it to their<br />
forward units. The two Fuel Shortage tables attempt to show all the<br />
following as effortlessly as possible:<br />
1. That supply became more difficult the farther west the advance got<br />
(“West of the Ourthe River” result).<br />
2. How the supply situation deteriorated after the weather cleared (the<br />
+1 die roll modifier).<br />
3. That a commander of a panzer corps had some flexibility with<br />
fuel—if he saw that he only had enough fuel for one division, he could<br />
decide which of his two panzer divisions to supply (which is why, as<br />
best I could, I paired up the panzer divisions with their corps).<br />
Blowing Bridges: These are pretty standard bridge blowing rules. The<br />
main goal was to prevent the Allied player from blowing bridges far<br />
behind his lines. Bridges were usually blown at the last minute.<br />
Building Bridges: Why aren’t there limits on the number of bridges<br />
the German player is allowed to build? The Germans definitely had<br />
limits on the number of bridges they could build, but to impose those<br />
on a player would lead to some ahistorical situations. For example,<br />
the German 7th Army built four bridges in their sector—one per division;<br />
but most players would only build one or two if they had limits<br />
imposed. And if the German army really needed one more bridge to<br />
make a crucial advance, I’m sure something would be found. But most<br />
of all, I did not care to see the map cluttered up with a score of Blown<br />
Bridge markers. Fix ‘em and be done with it!<br />
© 2012 <strong>GMT</strong> <strong>Games</strong>, LLC<br />
29<br />
Stacking: The major theme of this game is low stacking. Divisions in<br />
this campaign would cover a large front and a single regiment would<br />
often hold up the enemy for a significant amount of time. If the historical<br />
Bastogne perimeter is equated in game terms, it would place<br />
a regiment in every other hex—not three in the town of Bastogne;<br />
which some games show. Just changing this one rule gives this Bulge<br />
game a whole new feel.<br />
ZOC Bonds: This rule allows a salient to form which is not possible<br />
with standard ZOC rules. With ZOC bonds, a unit can be surrounded<br />
on three sides and still have an escape route. This rule also prevents<br />
the gamey tactic of two units surrounding an enemy unit.<br />
Tactical Movement: I needed this rule because MP costs can add up<br />
fast in some odd situations. For example, an infantry unit exiting a<br />
ZOC (+1 MP), and moving two hexes through forest (2 MPs each) is<br />
5 MPs. Since two hexes only equate to 3 miles—something that most<br />
infantrymen could accomplish in 8 hours—I wanted to make that move<br />
possible and the unit still be able to attack. The rule also works well<br />
for motorized units traversing poor roads and Traffic markers—always<br />
allowing them to move at least 2 hexes.<br />
Extended Movement: This allows you to increase your MA by two<br />
MPs if you don’t end in an EZOC. If marching behind the front, an<br />
infantry unit should be able to march 16 miles a day (10 hexes in this<br />
game). So in a half day period an infantry unit can move 3 hexes (3<br />
MPs) if it attacks, and 5 hexes (5 MPs) if it’s on the march.<br />
Truck Markers: What is the logic behind giving up Strategic Movement<br />
markers to motorize infantry? The biggest issue is road space—<br />
you can only have so many units moving through the Ardennes road<br />
net at a time. A panzer or armored division moving along a road takes<br />
up about 60 miles of road space. This equates to four units taking up<br />
about 36 hexes on the map. So, when you are moving 10 units with<br />
Strategic Movement markers, you are actually filling up about 90–100<br />
road hexes at any one time.<br />
Forest Roads (2 MPs): This rule came about as I studied Panzer Lehr’s<br />
historically slow progress through the first two days. Without any<br />
enemy resistance the division took 4 turns to travel 12 to 14 hexes. Its<br />
line of march went through the Luxembourg forest, where serpentine<br />
roads and mud slowed vehicles to the rate of the marching troops.<br />
Defensive Artillery Table: This rule developed as a means to avoid<br />
the defender’s artillery shift invariably cancelling the attacker’s artillery<br />
shift (very boring). The present rule adds variety and also allowed<br />
me to introduce the concept of a Time on Target result, which was<br />
occasionally devastating to the Germans.<br />
Morale: Note that some morale values go up on their reverse side. We<br />
did this to reflect those units that hardened into veteran units during<br />
the campaign.<br />
The CRT: Notice that the attacker will lose more steps than the defender<br />
(on average) in the 2-1 to 4-1 columns. This is intentional—I<br />
wanted the attacker to be eventually worn down if he does nothing<br />
but frontal assaults.<br />
TQ Ratings and the Armor Shift: This idea was inspired from Danny<br />
Parker’s Hitler’s Last Gamble. I liked his idea, but I wanted to make it<br />
more user friendly. I originally gave the defender a shift for having a<br />
superior TQ rating than the attacker but found this to be too much of<br />
a dampener on American attacks. In a way, cancelling the attacker’s<br />
shift is like a shift.<br />
Fire Fight: This came about in the later stages of the design as I attempted<br />
to find an easy way to include the effects of morale in combat<br />
without burdening the players with a morale modifier or a morale
30 Ardennes ‘44 : The Battle of the Bulge — SECOND EDITION<br />
comparison procedure every time they calculated combat odds. In<br />
the present system, players need only check morale for combat when<br />
requested by the CRT. The Fire Fight Table also fits in nicely with two<br />
other design elements: (1) it showed that a player who was willing to<br />
risk higher casualties could achieve faster progress; and (2) it allowed<br />
a D1 result even in the lower odds columns.<br />
Command and Control: This rule kills two birds with one stone—it<br />
keeps players from breaking up their divisions in every direction and<br />
also reflects the reality of command and control. Many other games<br />
give a shift or a die modifier for divisional integrity, but I wanted to<br />
keep shifts and die modifiers to a minimum.<br />
Engaged Results: Some felt that the attacker should be engaged too.<br />
But the attacker has already spent his turn attacking the defender, so<br />
now the defender must spend his turn defending. Remember, an engaged<br />
unit may attack—so the counterattack could end up engaging<br />
the original attacker.<br />
Attacker’s Advantage: I’ve always liked the “Engaged” rules typical<br />
of Bulge games, but being an impatient person I’ve never liked getting<br />
that same result two turns in a row! I added the Attacker’s Advantage<br />
rule just to limit that occurrence from happening too much. The unforeseen<br />
by-product was a nice bit of detail to combat.<br />
Determined Defense: This is an old SPI rule in disguise. In many<br />
of their WWII games you could take an extra step loss to cancel one<br />
hex of a retreat. This rule and table essentially does the same thing<br />
but adds uncertainty to it. Players should always use this rule when<br />
their units are surrounded and have no retreat route, because the EX<br />
result will inflict a step loss on the attacker (reflecting how dangerous<br />
a trapped defender can be).<br />
Advance After Combat: It started as “A Advance 2,” and (of course)<br />
the first hex of the advance had to be into the defender’s vacated<br />
hex. But a problem soon developed with tank units attacking into<br />
hexes they could not enter (see the example below). Just because the<br />
defender has craftily placed his defender on each side of the bridge<br />
hexside shouldn’t prevent the tank unit from attacking the bridge.<br />
I originally felt that to allow units to advance in any direction was<br />
heresy! But I tried it anyway, and it soon became clear that allowing<br />
units to advance in any direction was similar to the way they moved<br />
in an Exploitation Phase—so why not? The more I played with it the<br />
more I liked it. German players will quickly learn that this is a key<br />
tool in their chances to win.<br />
Surrender: This rule is pulled from Campaign to Stalingrad, but<br />
greatly simplified. Units tended to surrender in groups and the greener<br />
they were, the faster the group would surrender. One tough unit could<br />
influence the others into holding out.<br />
Traffic Markers: I wanted to avoid traffic rules that allowed a player<br />
to circumvent the problem by carefully sequencing the movement<br />
of his units—I didn’t want players to become traffic control police.<br />
Besides representing traffic, this rule allows some forest road sections<br />
to be a muddy mess (4 MPs), and it creates some variations in how<br />
fast and how far reinforcements arrive (the 7th Armored and the two<br />
American airborne divisions especially). Their biggest use, however,<br />
is in strangling a narrow advance. For example, let’s say the German<br />
player bypasses Bastogne and darts towards the Meuse along a single<br />
road. The Allied player can place two Traffic markers on the road the<br />
first turn and then maybe two more in the next. The single road is now<br />
a traffic nightmare. The lead German units can keep moving forward<br />
but follow-up units can’t keep up. Reversing direction for the lead<br />
units is now an extremely difficult undertaking (just like it was for<br />
the 116th Panzer Division when it made its fateful turnaround near<br />
Houffalize). Players will notice that the more roads you have open,<br />
the less effective the Traffic markers become—which is the way they<br />
should work.<br />
Roadblocks: As much as I wanted those Traffic markers to represent<br />
all the delay factors, they just weren’t simulating roadblocks very well.<br />
These two markers came late in the design and really helped the Allied<br />
player in slowing down the Panzer Lehr Division’s march through the<br />
Luxembourg forest, and became a welcome tool for both players in<br />
plugging holes. The fact that they could use the same rules as Traffic<br />
markers was a big plus.<br />
St-Vith Bottleneck: Why are the hexes nowhere near St-Vith? Those<br />
three hexes experienced traffic delays throughout the campaign (especially<br />
the bridge at Dasburg). Tying them to St-Vith was somewhat<br />
arbitrary, but I wanted to give the German player some reward for<br />
taking that crucial road junction. Even without the Bottleneck rule,<br />
players playing the German side will notice how dramatically the map<br />
opens up when St-Vith is captured.<br />
Night Turns: This developed from my initial Kampfgruppe Peiper<br />
rule, which allowed those units a night move on the 16th. Not being a<br />
fan of special rules, I wanted to turn it into a general rule. The result<br />
added a wonderful element to the game. Night turns are a very valuable<br />
EXAMPLE: The two Combat Commands attack at half strength<br />
(they cannot enter those hexes). If the attack succeeds they can<br />
advance in any direction—it’s not required to enter the defender’s<br />
vacated hex as in other games.<br />
At Start Movement Restrictions: The following are the reasons<br />
I placed movement restrictions on units on Turn 1.<br />
ALLIED UNITS:<br />
9Arm/CCA was the reserve for V Corps.<br />
9 Arm/CCR was the reserve for VIII Corps.<br />
2 Division was in the middle of an offensive to capture the Roer<br />
River Dams.<br />
28 Division: The provisional battalion that starts in Wiltz represents<br />
the HQ battalion, the divisional marching band and scratch forces<br />
pulled together for the defense of the town.<br />
106 Division: The two regiments of the 106th in the Schnee Eifel<br />
occupied important ground for a later offensive into Germany.<br />
GERMAN UNITS:<br />
The 5FJ/13 Regt. had no boats to cross the Our on the first turn.<br />
The 1SS, 12SS and Pz Lehr were held back for exploitation.<br />
© 2012 <strong>GMT</strong> <strong>Games</strong>, LLC
Ardennes ‘44 : The Battle of the Bulge — SECOND EDITION<br />
31<br />
tool for creating a breakthrough in the mid game if the Americans have<br />
managed to form a solid line. I’ve also used it to capture a Meuse river<br />
bridge (in somewhat a coup de main). With a little planning a player<br />
can put together a powerful double punch with two turns in a row.<br />
Victory Conditions: The German attack in the Ardennes was an all or<br />
nothing affair. I didn’t include a partial German victory for making it<br />
only “so far,” because a player would be tempted to stop, hunker down<br />
and entrench before the Meuse—which would never have happened.<br />
Can the Germans Win? If the German player reaches the Meuse<br />
by the 21st or 22nd of December he has a fair chance at crossing.<br />
The amount of Allied reinforcements arriving around the 22nd and<br />
23rd makes crossing on the 23rd difficult. Allied reinforcements and<br />
Allied air power will make crossing on the 24th and later extremely<br />
difficult (unless the Allied player has lost a lot of units). Most German<br />
players will have either won by the 23rd or will consider throwing in<br />
the towel.<br />
Why No Generals: It is hard to determine the actual impact corps or<br />
divisional generals had on the outcome of the battle. If a division performed<br />
well or poorly, credit or blame often went to the commanding<br />
general, but in actuality the actions of subordinates, soldiers, or pure<br />
“chance” could have been much more decisive. Patton is the only general<br />
I could definitely cite that had an influence on his soldiers—they<br />
seemed to be motivated by simply being told they were part of his<br />
army. However, something like this is best shown by the morale ratings<br />
of his divisions rather than a counter. Finally, the players play<br />
the role of the generals.<br />
Supply: Why at the end of the turn? This gives players one turn to<br />
get back into supply before they run out. If you become surrounded<br />
you still have the fuel in your tanks and the ammunition at hand to<br />
last 12 hours.<br />
Playtesters: My poor playtesters. They put up with so many changes<br />
and adjustments. I was constantly tinkering with the CRT, the strength<br />
of the Engineers, and the maximum DCB limit, etc. All were of great<br />
assistance, but two playtesters stand out: Marty Sample and Lew Ritter.<br />
If you ever see the names of these gentlemen in the credits for a game,<br />
you can rest assured the game has had good care.<br />
Miscellaneous Notes on Units: The two heavy U.S. armored divisions<br />
(2nd and 3rd) had a brigade structure, but evidence shows they operated<br />
as Combat Commands during this battle. Likewise with the two<br />
brigades of the British Guards Armoured Division—one was armored<br />
and the other was motorized infantry, but in reality they operated as<br />
two combined arms groups.<br />
The 4 TQ on the Fuh Bglt/GD/2 unit is not a mistake. This unit contained<br />
about 43 Mk IVs carrying the L70 cannon.<br />
The 560th PzJ Battalion was an army unit attached to the 12th SS.<br />
The real Kampfgruppe Peiper had only one battalion of motorized<br />
infantry. I added the 1SS/1(-) panzergrenadier regiment for play balance<br />
sake.<br />
DESIGNER’S NOTES FOR THE<br />
SECOND EDITION<br />
I’m really grateful for the opportunity to upgrade this game. I’ve had a<br />
lot of positive comments about it since its publication, but there were<br />
a lot of minor blemishes that surfaced over time that began to bother<br />
me. I also received constructive criticism from a number of players<br />
who enjoyed it but saw items that could be improved upon. All the<br />
feedback was helpful. I’ve gone through all the components of the<br />
game and tried to improve them without increasing the cost of the<br />
game. I’ve itemized below the changes in this 2nd Edition.<br />
MAP CHANGES<br />
Since doing the original game map in 2003, I’ve had the opportunity<br />
to travel extensively through the Ardennes. Seeing first-hand some<br />
of the valleys and roads in the area, I noticed some errors and over<br />
simplifications I made in the original. This 2nd edition has allowed<br />
me to fix those and make many other minor alterations. Perhaps the<br />
most extensive changes on the map occur in the Ambleve River valley<br />
around Stoumont and on the Our River near Dasburg.<br />
COUNTER CHANGES<br />
The counters also received many small changes. All the American<br />
divisions with 7 Attack Factors were knocked down to 6—I just didn’t<br />
think they deserved that kind of offensive power. All American CCRs<br />
and Task Forces were reduced by one Attack Factor. The 1st Division’s<br />
defense strength was increased to 7 to help it stand out in the defensive<br />
battles around Elsenborn Ridge. Most of the German Pz IV battalions<br />
are now rated 5-4-6 instead of the 4-4-6. The range on the German<br />
Nebelwerfer brigades were reduced from 3 to 2, but are now allowed<br />
to move one hex on their Fired side.<br />
RULE CHANGES<br />
8.0 Stacking: The stacking rule has been simplified and as it turned<br />
out, the simplification made it a much better rule. Each side may now<br />
stack only two steps of Silhouetted Tank Units in a hex—divisional<br />
identity does not matter. The German player now has full freedom to<br />
add the kind of tank support he wants to a stack, up to the two step<br />
limit. The rule makes these units excellent support units—allowing a<br />
huge increase to the strength of a stack, but prohibiting players from<br />
creating killer stacks of three or more silhouetted tank units.<br />
10.0 ZOC Bonds: Artillery units can no longer form ZOC Bonds.<br />
13.4 Capture of Entry Hexes: A lot of questions in the 1st edition<br />
came in about Off Map Boxes and Blocking so I attempted to clarify<br />
those rules. To that end I’ve added Blocking Position spaces on the map<br />
and explicitly laid out the movement and combat options for each off<br />
map space. Very little in actual rule changes occurred in this section.<br />
The 15 Factor Limit: Wargames shouldn’t be about piling as many<br />
factors into a battle as possible. That is unrealistic and causes a player<br />
to spend more time moving his units—counting and recounting hexes<br />
to see if he can get another couple factors into an attack. The 15 Factor<br />
Limit puts a stop to that. I like knowing that a hex is relatively safe<br />
as long as I get 8 factors in there (counting DCBs). If I really want<br />
to make it safe I’ll put a tank unit in there and have an artillery unit<br />
nearby—but I don’t want to waste time wondering if I should put 1 or<br />
2 more factors in there in case my opponent decides to make a mass<br />
attack. As the attacker, I like knowing that once I’ve moved 15 factors<br />
up against the hex I’ve done all I can and I can move on to other parts<br />
of the battlefield. If I really want that attack to succeed I’ll try to put<br />
in a good tank unit, support it with one or two artillery units and have<br />
more units behind the front line ready to exploit any openings. That<br />
should be enough.<br />
15.1 Defensive Combat Bonuses (DCBs): This rule changed so now<br />
DCBs may not exceed the defender’s combined defense strength. In<br />
the 1st edition there was no limit.<br />
16.2 Fire Fight Table: The TQ and Elite modifiers are no longer cumulative.<br />
The best DRM the attacker can get is now –1. In the original<br />
edition the German player was using his elite Panther tanks to get a<br />
© 2012 <strong>GMT</strong> <strong>Games</strong>, LLC
32 Ardennes ‘44 : The Battle of the Bulge — SECOND EDITION<br />
–2 DRM and getting far too many D1 results.<br />
16.7 Determined Defense: The DCB value of the defender’s hex is<br />
now a DRM to the table. So if you are defending in a city hex (DCB =<br />
4) you modify your Determined Defense die roll by –4. This was done<br />
to highlight the value of towns and cities. Town and City fighting now<br />
becomes a very costly affair and something to be avoided if you need<br />
to keep your loses down. Note that an Elite unit (–1) in a City hex (–4)<br />
has an excellent chance of turning a retreat into an EX result.<br />
18.1 Disruption Effects: Disruption is now a shift instead of a unit<br />
losing an additional step if it retreats again.<br />
18.4 Broken Status: One of the <strong>Living</strong> Rule changes back in 2005<br />
was to add in a Rout result. I’ve incorporated it in the 2nd edition but<br />
refined it and renamed it Broken instead of Rout.<br />
19.4 Breakthrough Combat: There is now no limit to the number of<br />
times a Breakthrough Group can earn the ability to attack again, as<br />
long as they can continue to roll a D1* result. I did this because I don’t<br />
want the defender to ever feel safe by putting weak units in the front<br />
line—there should be a chance they can all be overrun.<br />
21.1 The Armor Shift: The rule is the same except the TQ numbers<br />
were taken off of all recon units. Recon units were for screening—a<br />
defensive action—and to allow them the armor shift was wrong.<br />
21.2 Red TQ Numbers: All turret-less tanks and tank destroyers are<br />
now rated with Red TQ numbers. To compensate for this, red TQ<br />
numbers now qualify for the Armor Shift, but they must reduce their<br />
TQ number by one when attacking.<br />
21.4 Recon Units: The special rule for recon units was changed so<br />
they now treat D1 and D1* results as a DR4 result (the old benefit of<br />
treating Engaged results as DR1 results was of dubious value). With<br />
this protection they are now more useful in screening. Note that they<br />
can still be eliminated in EX and A1/D1 results.<br />
22.6 Artillery Support in General: Artillery units may now only<br />
support units with the same army/corps identification color. This helps<br />
prevent some unrealistic repositioning of corps artillery by cunning<br />
Allied players far from their corps troops.<br />
22.8 Defensive Artillery Support: The defender is now limited to using<br />
only one artillery unit in each battle. In the original game the Allied<br />
player was shutting down far too many German attacks by using two<br />
artillery units and having a 33% chance of the ToT result.<br />
23.4 Out of Supply Effects: The CRT column shift for being OOS now<br />
only applies to the attacker. The defender now defends at full strength<br />
until they surrender. This rule will help the 101st Airborne Division<br />
hold out at Bastogne and Peiper hold out at La Gleize.<br />
Also, OOS units are now eliminated if they retreat 3 or more hexes. This<br />
represents a rout of an already suffering unit. This new rule helps the<br />
Allied player hunt down and eliminate the pesky von der Heydte unit.<br />
Before it took up to three units to effectively deal with that unit.<br />
25.22 Replacements: Units that arrive from the dead pile must now<br />
be placed within 5 hexes of another unit with the same Corps/Army<br />
identification color. This rule was added to make it less likely that Allied<br />
replacements would always pop up right in front of the German<br />
advance on the Meuse.<br />
27.1 Engineer Units: These units are now eliminated if forced to<br />
retreat 3 or more hexes in a single combat. This was done to show<br />
that these units where for emergency purposes only and were not used<br />
for prolonged combat.<br />
27.3 British Units: The 29th Armoured Brigade is now allowed to<br />
cross the Meuse if the German player crosses the Meuse. In addition,<br />
if the German player manages to exit units off the map towards Antwerp,<br />
then the Allied player must withdraw British units to counter<br />
the threat. This will help the German player if he is able to exit units<br />
off the map.<br />
30.0 Victory Conditions: Bouillon and Neufchateau were removed<br />
as VP locations from the West map, as well as four other hexes on<br />
the East Map. The two on the West Map were not in the direction<br />
of Antwerp and the hexes removed on the East Map had no military<br />
value. Capture or isolation of Bastogne has been added to the German<br />
Victory Conditions to provide incentive for the Allied player to hold<br />
and then relieve Bastogne.<br />
33.1 Roadblocks: This rule has been moved to the Optional section<br />
because they are complicated and not essential to the game. Also, with<br />
the addition of the Wooded-Rough hexes to the Our River they were<br />
no longer needed in the initial setup. However, they are fun to use and<br />
recommended for experienced players.<br />
The Patton Counterattack Scenario<br />
I was very surprised to learn how exciting the situation of December<br />
22nd was. Both sides are poised to make strong attacks. The Germans<br />
have three panzer divisions on the west map edge and ready to head<br />
to the Meuse. They also have the 2SS and 9SS ready to punch into the<br />
Allied line, and the Fuhrer’s Begleit Brigade is in position to collapse<br />
the St. Vith Goose Egg. The two Fuel Shortage die rolls on the first<br />
turn make the German initial move different in every game.<br />
On the Allied side they have British divisions arriving to man the Meuse<br />
crossings, three of Patton’s divisions coming in from the south (with<br />
more to follow) and a number of American divisions coming from the<br />
north. A huge influx of strength to attempt to stop the German drive.<br />
On top of that you have the drama of two isolated pockets—Peiper’s<br />
Kampfgruppe and the Bastogne perimeter. Peiper is pretty well sealed<br />
up, but the Allied player should be seriously worried about the 101st.<br />
A couple of bad die rolls and McAuliffe will be considering those<br />
surrender terms.<br />
CHARTS AND TABLES<br />
Surrender Table: A “≤ 0” row was added to the table and the “Air<br />
Drop” result was pushed down to that row. So now the regiments of<br />
the 106th on the Schnee Eifel are less likely to hold out for an excessively<br />
long time.<br />
Determined Defense Table: This table was slightly modified to account<br />
for the new DCB DRM (see 16.7 above).<br />
Fuel Shortage Tables: Minor changes were made to these tables to<br />
better distribute the shortage results.<br />
Disengagement Table: The chances for a successful Disengagement<br />
are a little better. Now it happens on a 1-3 rather than a 1 or 2. This just<br />
felt better. An Elite tank or recon unit can almost always disengage,<br />
while a low moral infantry unit needs to roll a 1 or a 2.<br />
Rally Die Rolls: The chances for a successful Rally when adjacent to<br />
an enemy unit are now slightly more difficult (1 or 2 instead of 1-3).<br />
Thanks for your interest in the game. If you have any questions please<br />
check out the Ardennes ‘44 folder at Consimworld or contact me directly<br />
at Simon7itch@aol.com<br />
—Mark Simonitch<br />
© 2012 <strong>GMT</strong> <strong>Games</strong>, LLC
Ardennes ‘44 : The Battle of the Bulge — SECOND EDITION<br />
33<br />
Extended Example of Play<br />
The purpose of the following example of play is to help players get<br />
started and to clarify many of the rule concepts in the game. The first<br />
illustration can be used by players to help them set up the game. The<br />
strategy shown in this example were often used by the designer during<br />
playtesting, but should not be considered to represent the best possible<br />
moves. The optional 15-Facor Limit is used in the example.<br />
ABBREVIATIONS USED IN THIS EXAMPLE:<br />
arty: Artillery KG: Kampfgruppe<br />
Bn: Battalion Pz: Panzer<br />
Div: Division Rgt: Regiment<br />
FJ: Fallschirmjäger VGD: Volksgrenadier Division<br />
German Turn 1 (16 AM)<br />
Movement Phase<br />
The German Turn 1 illustration shows the game at the end of the German<br />
Movement Phase. A few things to note:<br />
1. The 212/316 Rgt takes advantage of rule 29.2 and crosses the Sauer<br />
below Echternach.<br />
2. The 276/986 Rgt has moved into the Ernz Noire—a wooded rough<br />
hex that prevents a ZOC Bond forming between the two American<br />
units on each side.<br />
3. The FJ regiment and the 26th VG regiment must use Tactical Movement<br />
to exit the non-road Wooded Rough hexes.<br />
4. The Recon unit cannot cross the unbridged river hexside (the bridge<br />
at Gemünd starts blown (but under construction). One regiment of<br />
the 26th VG and all units of Pz Lehr are frozen on Turn 1.<br />
5. The units of the 560 VGD did not move, one of the regiments could<br />
have moved into the Wooded Rough hex to outflank the U.S. battalion,<br />
but this would have reduced the odds for the upcoming battle.<br />
6. Note that the two Silhouetted Tank units of the 116 Pz cannot enter<br />
or exit a West Wall hex unless via a road (11.5) and so are unable<br />
to move adjacent to an American unit. Only one Tank unit of the<br />
116th Pz can take part in combat on the first turn.<br />
7. Note that these units moved one hex from EZOC to EZOC. This is allowed<br />
as long as enemy ZOC Bonds were not entered or crossed.<br />
Rally Phase<br />
There are no disrupted units, so this phase is skipped.<br />
Combat Phase<br />
Determined Defense will only be considered in this example if the<br />
defender has more than one step or is surrounded. German Artillery<br />
units will be flipped as they are used.<br />
A. During the Combat Phase three units of the 212 VGD plus one<br />
artillery unit attack the 4/12/3 Bn in Echternach. The 212 Fusilier Bn<br />
is not used in this attack, but will be used in Attack-B. Defender’s<br />
DCB is +3 but only +2 may be used (15.1). The regiment of the 212th<br />
attacking across the river is halved, the others are full strength. The<br />
odds are 10 to 4 + arty shift = 3-1. A die roll of 3 gives an FF result.<br />
The German player decides to push forward and uses the Fire Fight<br />
Table rather than take an Eng result. A die roll of 5 results in an Eng+.<br />
The defender is engaged and one stack of attackers gain an Attacker’s<br />
Advantage marker. It is placed on the 212/320 Rgt on the German<br />
side of the Saure. Note: you can see many of the combat results and<br />
advances by viewing the Allied Turn 1 illustration.<br />
B. Two regiments of the 276 VGD plus the Fusilier battalion of the 212<br />
VGD, plus one artillery unit attack the 4/12/2 Bn at Berdorf. Note that<br />
the German regiment attacking across the Wooded Rough hexside is<br />
halved. Odds are 8 to 4 + arty = 3-1. The die roll is a 4, giving an EX<br />
result. The American battalion is eliminated and the German player<br />
picks the 276/988 (4-5-3) for the step loss. Since the defender’s hex<br />
is vacated, the German player may occupy the hex (no other advance<br />
is permitted on an EX).<br />
C. Three regiments of the 352 VGD and one artillery unit attack the<br />
28/109/3 Bn at the junction of the Our and Saure Rivers. Two of the<br />
regiments are halved attacking across river hexsides. Odds are 8 to 4 +<br />
arty shift = 3-1. The die roll is a 2, giving a DR2 result. The American<br />
battalion is retreated two hexes and becomes Disrupted. Note that<br />
the first hex of a retreat may enter an EZOC—as long as an enemy<br />
ZOC Bond is not entered or crossed. All three German regiments may<br />
advance one hex in any direction. A crucial advance by the 352/916<br />
completes the encirclement of the American battalion in Fouhren.<br />
D. The three units of the 5 FJ plus an artillery unit attack the American<br />
battalion in Fouhren. The two units attacking across the river are halved.<br />
The odds are 10 to 4 + arty shift = 3-1. A die roll of 6 results in an Eng.<br />
An Engaged marker is placed on the American battalion.<br />
E. Two regiments of the 26 VGD and one artillery unit attack the<br />
28/110/3 Bn at Hosingen. Note that the regiment attacking out of the<br />
Wooded Rough hex is halved. The odds are 8 to 4 + arty shift = 3-1. A<br />
die roll of 5 results in an FF(+1). The German player decides to make<br />
it an Engage result, rather than push the attack—an Engaged marker<br />
is placed on the American battalion.<br />
F. Both panzergrenadier regiments of the 2 Pz attack the 28/110/1 Bn<br />
at Marnach. One artillery unit is in support. Odds are 8 to 4 + arty shift<br />
= 3-1. A die roll of 1 gives a DR3 result. The American battalion is<br />
retreated three hexes and becomes Broken. The two panzergrenadier<br />
regiments get the Bonus Advance (two hexes).<br />
G. The 116Pz/60, two regiments of the 560 VGD, plus one artillery unit<br />
attack the 28/112/3 Bn at Sevenig. Odds are 13 to 4 + arty shift = 4-1.<br />
A die roll of 2, gives a DR3 result. The American battalion is retreated<br />
three hexes and becomes Broken. All three German units receive the<br />
Bonus Advance, but their opportunities are limited to one hex.<br />
H. Three units of the 116Pz plus one artillery unit attack the 28/112/1<br />
Bn at Lützkampen. The odds are 13 to 4 + tank shift + arty shift =<br />
5-1. The die roll is a 5 giving a FF result.The German player decides<br />
to push forward and selects the Elite Panther battalion as his Lead<br />
Unit. The Elite status provides a –1 modifier. The German player<br />
rolls a 2 (modified to 1) on the Fire Fight Table which results in a<br />
D1. The American battalion is eliminated and the three German units<br />
may advance one hex. The Panther battalion and the recon battalion<br />
advance into Lützkampen.<br />
© 2012 <strong>GMT</strong> <strong>Games</strong>, LLC
34 Ardennes ‘44 : The Battle of the Bulge — SECOND EDITION<br />
I. Two regiments of the 62 VGD plus artillery attack the 106/424/1<br />
Bn in front of Winterspelt. Odds are 8 to 4 + arty shift = 3-1. A die roll<br />
of 6 results in an Eng. An Engaged marker is placed on the American<br />
battalion and no advance for the German units.<br />
J. One regiment of the 62 VGD, one regiment of the 18 VGD attack<br />
the 106/424/P Bn at Bleialf. Odds are 8 to 4 = 2-1. A die roll of 3 results<br />
in an EX. The provisional battalion is removed and the German player<br />
removes a step from one of his infantry regiments (his choice since no<br />
Armor Shift was used). Since all defenders were removed, the German<br />
player may occupy the defender’s vacated hex (Limited Advance).<br />
K. One regiment of the 18 VGD, the 244 Stg Brigade, an artillery<br />
unit and two regiments of the 3 FJ attack the 14Cav/18 squadron in<br />
the Losheim Gap. Total German factors = 16, which is reduced to 15<br />
due to the 15 Factor Limit. Odds are 15 to 4 + armor shift + arty shift<br />
= 5-1. A die roll of 1 results in a D1*. Since the cavalry squadron is<br />
in an IP it may not use its special ability and so is eliminated. The<br />
four German units may advance two hexes in any direction. Note that<br />
the German units may not advance across the Army Boundary Line<br />
although two of them attacked across it. Also note, that the 244th Stg<br />
Brigade may advance an additional hex if it follows the path of a road<br />
throughout its advance (Road Bonus). The 244th Stg may also conduct<br />
Breakthrough Combat against the artillery unit (3 factors to 2 with one<br />
shift for Armor) but the German player declines to do so.<br />
L. Two regiments of the 12 VGD with an artillery unit attack the<br />
99/394/1 Bn in hex 1430. Odds are 8 to 4 + arty shift = 3-1. The die<br />
roll is a 6, resulting in an Eng. The American player places an Engaged<br />
marker on the American battalion.<br />
© 2012 <strong>GMT</strong> <strong>Games</strong>, LLC
Ardennes ‘44 : The Battle of the Bulge — SECOND EDITION<br />
35<br />
M. One regiment of the 12 VGD, plus the fusilier battalion, plus an<br />
artillery unit attack 99/393/1 Bn in hex 1432. Odds are 6 to 4 + 1 arty<br />
shifts = 2-1. A die roll of 1 results in a DR2. The American battalion<br />
is retreated two hexes and becomes disrupted. The two German units<br />
may advance one hex in any direction.<br />
N. Two regiments of the 277 VGD attack hex 1433 with one artillery<br />
unit in support. 8 to 4 + arty shift = 3-1. A die roll of 3 results in a<br />
FF. The German player decides to push forward and selects the green<br />
277/990 Rgt and rolls again. The Fire Fight Table die roll is modified<br />
+1 for the green unit. A die roll of 5 is increased to 6 giving an A1/Eng<br />
result. An Engaged marker is placed on the American battalion and a<br />
step is removed from the Lead Unit.<br />
326 VGD: Unless I’m feeling lucky, I don’t attack in this sector. The two<br />
artillery units will stay on their ready side, waiting for an opportune<br />
time or an Allied counterattack.<br />
The final tally of the turn is five American step losses to four German<br />
step losses. The American units, however, are mostly engaged or<br />
disrupted, making movement in their turn difficult.<br />
Traffic Marker Phase<br />
None—the German player does not begin to use his until the 17 A.M.<br />
turn.<br />
Supply and Isolation Phase<br />
All units are in supply.<br />
© 2012 <strong>GMT</strong> <strong>Games</strong>, LLC
36 Ardennes ‘44 : The Battle of the Bulge — SECOND EDITION<br />
Allied Turn 1 (16 AM)<br />
The Allied Turn 1 illustration shows the positions of the Allied units<br />
after the Movement Phase and before the Rally Phase. You may also<br />
see German Turn 1 advances with this illustration.<br />
Artillery Supply Phase<br />
All Allied artillery units are already on their Ready side (none but the<br />
two near Monshau could fire during German Turn 1).<br />
Bridge Phase<br />
No bridge blowing allowed on 16th AM, PM or night.<br />
Movement Phase<br />
The Allied player makes the moves as shown in the illustration. A few<br />
things to notice:<br />
1. The VIII/333 Artillery group skedaddled to St-Vith. Its dotted path<br />
lines are not shown in the illustration to preserve clarity.<br />
2. The 14Cav/32 squadron moved down from Vielsalm to Schönberg.<br />
Its dotted path is also not shown to preserve clarity.<br />
3. The 106/423/2 Bn at Born moved 5 MPs taking advantage of Extended<br />
Movement (it didn’t end in an EZOC).<br />
4. The 9Arm/CCA created a Breakdown Unit (a Task Force).<br />
5. These units may not move on Turn 1.<br />
6. The tank battalion of the 28th Division created a Breakdown unit<br />
and sent it to Weiswampach. The remainder stayed in Clervaux.<br />
7. A regiment of the 106th created an infantry battalion.<br />
Rally Phase<br />
All Disrupted markers will come off the Allied units (none are adjacent<br />
to a German unit). The Broken units will become Disrupted. Allied<br />
units that were Disrupted/Broken were not allowed to reenter an EZOC<br />
and can only use Tactical Movement.<br />
Combat Phase<br />
The Allied player has some tough choices with his Engaged units—if<br />
he doesn’t move them they will be surrounded and destroyed, however,<br />
if he attempts to disengage them they may become Disrupted.<br />
A. The 4/12/3 in Echternach does not attempt to disengage and the<br />
marker is removed.<br />
B. The 28/110/3 in Hosingen attempts to disengage. The die roll is a<br />
1, allowing the battalion to retreat (one or two hexes). Since the unit<br />
is not disrupted in the disengagement attempt, it may stop in hex 2313<br />
or 2314 or continue on to 2414. Those three hexes are the only legal<br />
retreat paths. The Allied player retreats it to 2313.<br />
C. The 106/424/1 outside of Winterspelt is about to be surrounded,<br />
so a disengagement is attempted. The battalion is green so the die roll<br />
must be modified by +1. A die roll of 6 results in a “No + D.” The<br />
battalion is disrupted and the disengagement attempt is unsuccessful—no<br />
retreat is allowed. The Engagement marker is replaced with<br />
a Disruption marker.<br />
D & E. The two engaged battalions of the 99th are fine where they are and<br />
no disengagement is necessary. The Engaged markers are removed.<br />
Traffic Marker Phase<br />
Placement of the Allied Traffic markers on 16 AM is very critical. You<br />
want to slow up Pz Lehr, the 2 Pz and the 1SS. The six markers are<br />
placed in 2113, 1913, 2216, 1527, 1328 and 1129 (those hexes marked<br />
with a “T”). The Allied player then places his two Roadblock markers<br />
in the hexes marked with a “R”. These are legal placement hexes<br />
because they are currently not adjacent to a German unit, within four<br />
contiguous road hexes of an “in supply” Allied unit. Next, the Allied<br />
© 2012 <strong>GMT</strong> <strong>Games</strong>, LLC
Ardennes ‘44 : The Battle of the Bulge — SECOND EDITION<br />
37<br />
player rolls two dice to see which two Traffic markers are removed<br />
(the roadblocks are not removed). He rolls a 2 and a 5—removing the<br />
markers in 2214, 1328. (See the German Turn 2 illustration to view<br />
which four markers remain.)<br />
Supply and Isolation Phase<br />
The rapid advance of the 18 VGD has already surrounded and isolated<br />
the two regiments of the 106 on the Schnee Eifel. All three units are<br />
indicated as Out of Supply and the Allied player must roll one die to<br />
see if any Surrender Points are accumulated (an accumulation of three<br />
points will cause the entire group of three units to surrender). A die<br />
roll of 2 results in no points accumulated.<br />
Victory Check Phase<br />
The German player is far from winning, so this phase is skipped. The<br />
turn is now over.<br />
German Turn 2 (16 PM)<br />
The German Turn 2 illustration shows the positions of the German<br />
units after the Movement Phase. Allied ZOC Bonds near the front line<br />
are shown to help players visualize the rule.<br />
Artillery Supply Phase<br />
On Turn 2 the German player may flip over six artillery units. He flips<br />
over one in the 7th Army, two in the 5th Panzer Army, and the last<br />
three in the 6th Panzer Army.<br />
Fuel Shortage Phase<br />
The German player does not start rolling for Fuel Shortage until the<br />
19 AM turn. This phase is skipped until then.<br />
Bridge Phase<br />
The two bridges at Gemünd and Dasburg are completed. The German<br />
player also begins construction of two bridges in the 7th Army sector.<br />
Movement Phase<br />
Note the following items about the German Movement Phase:<br />
1. There are two Silhouetted Tank Units stacked in hex 1913—this is<br />
legal since both are 1-step Silhouette Tank Units.<br />
2. The Traffic marker in hex 2013 (a forest road) makes the cost of<br />
that hex 4 MPs for Pz Lehr and the KG Kunkel.<br />
3. The placement of a Traffic marker at Marnach (2216) adjacent to a<br />
St-Vith Bottleneck Hex has created a massive traffic jam. The tank<br />
units of the 2 Pz are only able to move two hexes using Tactical<br />
Movement. Apparently the bridge at Dasburg was not completed as<br />
fast as planned or pockets of resistance continue to hold out near<br />
Marnach.<br />
4. Nebelwerfer brigades in this 2nd Edition are allowed to move one<br />
hex even if flipped. If on their ready side this 1-hex movement does<br />
not require them to be flip.<br />
5. The three units of KG Peiper use 7 MPs to move four hexes.<br />
6. A night marker is placed in hex 1134. This stack plus the four units<br />
of KG Peiper will be able to move and fight in the Night Turn.<br />
Combat Phase<br />
Follow the combats with the German Turn 2 illustration and see the<br />
retreats and advances using the Allied Turn 2 illustration.<br />
A. The reduced 276/988, and the 212/423 attack the 2-2-6 Task Force<br />
(with a +1 DCB). The odds are 6 to 3 = 2-1. No Armor Shift is possible<br />
since the defender is in a Forest hex. A die roll of 1 results in a<br />
DR2. The task force is retreated two hexes, becomes Disrupted, and<br />
the attackers receive the Regular Advance (one hex). The advance will<br />
block the retreat path for Attack B.<br />
B. The other three units of the 212 VGD attack the 4/12/2 in Echternach.<br />
The Allied battalion has a +3 DCB (Town) which is reduced to +2<br />
since DCBs cannot exceed the combined defense strength. The odds are<br />
8 to 4 = 2-1. The Attacker’s Advantage marker brings it to a 3-1. The<br />
CRT die roll is a 3 resulting in a FF result. The German player picks<br />
the 212/320 Rgt as his Lead Unit and rolls again. The result is a 4 =<br />
A1/DR2. The German player removes a step from the Lead Unit and<br />
the 4/12/2 must retreat. The American battalion is surrounded and will<br />
be eliminated if it retreats, so the Allied player declares a Determined<br />
Defense hoping to get an EX result or at least slow down the German<br />
advance. The Town provides a –3 DRM to the Determined Defense<br />
Table. A die roll of 4 modifies to 1, which results in a “Yes –1 step”<br />
result. The American battalion is eliminated but slows the advance<br />
down to a Limited Advance.<br />
C. Its a little risky, but the 352/914 attacks the 28/109/3 Bn in hex 1807.<br />
The odds are 4 to 4 (1–1). A die roll of 3 results in a FF(+1) which the<br />
German player accepts as an Eng result. The Allied unit is Engaged.<br />
D. The four German units that surround the 28/109/2 in Fouhren attack<br />
with artillery support. The odds are 15 to 4 + arty shift = 4-1. A die<br />
roll of 3 results in a DR2. The Allied unit has no retreat route so the<br />
Allied player declares a Determined Defense. The Village provides<br />
a –2 DRM. He rolls a 3 which modifies to a 1 = Yes (–1 Step). The<br />
American battalion is eliminated but the Regular Advance is reduced<br />
to a Limited Advance (only into the defender’s vacated hex). Note the<br />
11 Stg Bde may not advance across the unbridged river hexside.<br />
E. Three German units of the 26 VGD attack the 28/110/3 Bn. The<br />
odds are 15 to 3 = 5-1. The die roll is a 5 resulting in a FF. The German<br />
player selects the 26/77 Gren as his Lead Unit and rolls on the Fire<br />
Fight Table. A die roll of 4 results in a A1/DR2. The German Lead Unit<br />
is reduced a step and the American battalion is retreated two hexes<br />
© 2012 <strong>GMT</strong> <strong>Games</strong>, LLC
38 Ardennes ‘44 : The Battle of the Bulge — SECOND EDITION<br />
and becomes Disrupted. Note that it is allowed to retreat through an<br />
EZOC in the first hex of a retreat. All three German units can advance<br />
one hex in any direction.<br />
F. Two panzergrenadier regiments of the 2 Pz plus an artillery unit attack<br />
Clervaux. The defenders get an Armor Shift since the attacker has<br />
no Tank Units involved. The Town provides a +3 DCB. The odds are 10<br />
to 6 = 1-1 (the two shifts cancel each other out). A die roll of 4 results<br />
in an FF(+1). The German player takes an Engaged result instead. No<br />
advance or retreat, an Engaged marker is placed in Clervaux.<br />
G. The five German units attack the American 28/112/2 Bn near<br />
Weiswampach. Since the attack is coming across the bridge hexside<br />
the German player rolls to see the condition of the bridge (rule 7.8), a<br />
die roll of 3 results in the bridge being destroyed. Now for the combat,<br />
the odds are 13 to 3 = 4-1. The Allied player calls in artillery support<br />
and rolls on the Artillery Support Table. A die roll of 2 results in two<br />
shifts left. Final odds are 2-1. The German player rolls a 5 getting an<br />
Eng result. The American battalion holds.<br />
H. Three German units attack the disrupted American battalion near<br />
Winterspelt. The American unit has a +2 DCB for the Improved Position.<br />
The odds are 15 to 4 with two shifts right for Armor and the<br />
Disruption = 5-1. A die roll of 4 results in a DR2. The unit is retreated<br />
two hexes and since it is already Disrupted it now becomes Broken.<br />
The German units may advance one hex in any direction. The Pzkw<br />
IV Tank Unit uses the Road Bonus to advance two hexes.<br />
I. Three units from the 18 VGD and one 3 FJ unit attack the armored<br />
cavalry unit near Schönberg. The American unit has a +1 DCB for the<br />
Forest. Note that the 3 FJ unit is allowed to attack across the army<br />
boundary. The odds are 11 to 3 (3-1). No armor shift since the defender<br />
is in Forest. A die roll of 2 = DR2. The defender is retreated two hexes<br />
and becomes disrupted. All German units may advance one hex in any<br />
direction being careful not to advance across the army boundary. The<br />
244 Stg brigade can use the Road Bonus to advance two hexes.<br />
J. The next attack comes against the flanking battalion of the 99th. One<br />
unit from the 3 FJ and three units from the 1 SS attack the 99/394/3.<br />
© 2012 <strong>GMT</strong> <strong>Games</strong>, LLC
Ardennes ‘44 : The Battle of the Bulge — SECOND EDITION<br />
39<br />
hexes in any direction. Due to the poor secondary roads no units may<br />
use the Road Bonus.<br />
K. Two units from the 12 VGD, two units from the 12SS, plus one<br />
artillery unit attack the 99/394/2 Bn in hex 1431 (+2 DCB for the IP).<br />
The odds are 12 to 4 + arty shift = 4-1. A die roll of 5 gives an EX result.<br />
The German player can take the step loss from any of the involved<br />
units because there was no Armor Shift used in the battle. The German<br />
player removes the 12/Fus Bn and the Allied player removes his unit.<br />
The German player may occupy the vacated hex which cuts off the<br />
retreat route of the next American battalion to be attacked.<br />
L. Two regiments of the 12 VGD plus two units of the 1SS, plus one<br />
artillery unit, attack the 99/394/1 at 15(+) to 4 + arty shift = 4-1. A<br />
die roll of 3 = DR2. The American battalion attempts a Determined<br />
Defense (–2 DRM) but fails. It is eliminated and the German units<br />
may advance one hex in any direction.<br />
M. Two units of the 277 plus one artillery unit attack the 99/393/3 (+2<br />
DCB). The odds are 6 to 4 + arty shift = 2-1. A die roll of 5 = Eng. An<br />
Engage marker is placed on the American battalion.<br />
The 19 German factors are capped at 15, so the odds are 15 to 4 (3-1).<br />
A die roll of 1 results in a DR3. The American battalion must retreat<br />
three hexes and becomes Broken. All German units may advance two<br />
Allied Turn 2 (16 PM)<br />
Artillery Supply Phase<br />
All Allied artillery units are turned face up to their ready sides.<br />
Bridge Phase<br />
No demolition allowed yet.<br />
Movement Phase<br />
The Allied Turn 2 illustration shows the positions of the Allied units<br />
at the end of the Movement Phase (I’ve also added into the illustration<br />
the location of the delay markers which will be placed later). Allied<br />
ZOC Bonds near the front line are shown. Notice that the artillery units<br />
© 2012 <strong>GMT</strong> <strong>Games</strong>, LLC
40 Ardennes ‘44 : The Battle of the Bulge — SECOND EDITION<br />
that moved only one hex are not flipped to their fired side. A few notes<br />
about the American moves:<br />
1: This is a reinforcement entering from the map edge.<br />
2: This Disrupted unit may use only Tactical Movement and must exit<br />
the EZOC it is in.<br />
3: The 9Arm/CCR moves to Weiswampach. It should stay near the<br />
Clearvaux-Bastogne road to slow up the German advance.<br />
4: The 9Arm/CCB is the Allied player’s big reserve unit. Historically<br />
it moved to the St-Vith area and helped stem the tide there. In this<br />
game it does the same to form a strong St-Vith group.<br />
5: The Allied player begins to build a strong position around Büllingen<br />
and Rocherath-Krinkelt.<br />
6. It’s important for the Allied player to get these two artillery units in<br />
position to help defend the Elsenborn area.<br />
Rally Phase<br />
All Disrupted markers are removed from American units that are not<br />
adjacent to a German unit.<br />
Combat Phase<br />
The Allied player has three units that are engaged, but all are fine<br />
where they are (the three Engaged markers are removed). There are<br />
no combats.<br />
Traffic Marker Phase<br />
The Allied player can place Traffic markers #2 and #5 (the two that<br />
were removed last turn). He places one in Hosingen and the other in<br />
front of KG Peiper. He then places his two roadblocks—one on the<br />
road to Wiltz and the other in the way of Peiper. He then rolls the die<br />
two times to see which Traffic markers are removed. He rolls a 4 and<br />
6 and removes those two markers.<br />
Supply and Isolation Phase<br />
All units are in supply except the two regiments of the 106th in the<br />
Schnee Eifel. Those three units are also isolated, so must check for<br />
Surrender Points. A die roll of 3 results in one Surrender Point (two<br />
more and those three units will surrender). Note that one marker is<br />
sufficient for all units in that Isolated Group.<br />
Dec 16th Night Turn<br />
Replacement Phase<br />
Neither player has replacements on the first night turn.<br />
Allied Night Movement Phase<br />
The Allied player has no Night Movement.<br />
German Night Movement Phase<br />
The German player can move all four units of KG Peiper plus the two<br />
units of 12SS that were under the Night marker.<br />
1. The three KG Peiper units that start in this hex move adjacent to the<br />
Allied unit at A. The two panzergrenadier units use Tactical Movement<br />
to move two hexes. The Panther battalion unable to move through<br />
Forest hexes moves forward one hex.<br />
2. The Tiger battalion takes a different route but has to pass through a<br />
Traffic marker. It spends 4 and a half MPs to move three hexes.<br />
3. The two units of the 12SS move to engage at hex B.<br />
German Night Combat Phase<br />
A. The three KG Peiper units attack the 99/394/3 Bn. The odds are 15<br />
to 3 with 1 right shift for Disruption = 6-1. A die roll of 4 results in a<br />
DR3 which will eliminate the battalion (Disrupted units that suffer a<br />
Broken result are eliminated). The three German units may advance two<br />
hexes in any direction. All three can take advantage of the Road Bonus<br />
to move three hexes—advancing as far as the hex marked “Y”.<br />
B. The two units of the 12SS perform a Night attack. Note that the<br />
road into the forest hex allows the Panther battalion to attack at full<br />
strength. The forest terrain prevents any armor shifts. The odds are 14<br />
to 4 = 3-1. A die roll of 3 results in a DR2. The American battalion is<br />
retreated two hexes and becomes disrupted. The two attacking units<br />
may advance one hex in any direction.<br />
Conclusion<br />
The German player is in good shape—the road is wide open for KG<br />
Peiper in the 17 AM turn. The Allied player is also happy with his<br />
situation—the southern front is shaken but not broken, he is still in<br />
possession of Clervaux, and he has a strong group forming around<br />
St-Vith. So what if a few units of KG Peiper break out…<br />
The illustration shows the position of units after the<br />
German player has finished his Night Movement<br />
but before German Night Combat.<br />
© 2012 <strong>GMT</strong> <strong>Games</strong>, LLC
Ardennes ‘44 : The Battle of the Bulge — SECOND EDITION<br />
41<br />
© 2012 <strong>GMT</strong> <strong>Games</strong>, LLC
42 Ardennes ‘44 : The Battle of the Bulge — SECOND EDITION<br />
© 2012 <strong>GMT</strong> <strong>Games</strong>, LLC
Ardennes ‘44 : The Battle of the Bulge — SECOND EDITION<br />
43<br />
OPTIONAL WHAT IF UNITS<br />
Units with a blue background on their Turn of Entry code are optional.<br />
Players may use some or all of the optional units as long as<br />
both players agree.<br />
Allied Units<br />
5th Armored Division: Place it in the Allied Northwest Off Map<br />
Box on Turn 17. Must remain there until a German unit crosses or<br />
moves adjacent to the Meuse.<br />
11th Armored and 17th Airborne Divisions: Are restricted to the<br />
southwest corner of the map (may enter, but not cross, the Semois<br />
River).<br />
90th Division: Only enters the map if one or more German units<br />
cross the Meuse River (but never before Turn 22).<br />
German Units<br />
11th Panzer and 10th SS: Arrives the turn after one or more German<br />
units cross the Meuse River between Givet and Liege (inclusive),<br />
but never before Turn 11.<br />
NORDWIND: The nine units with a green Army I.D. color were<br />
earmarked for Operation Nordwind. This was Himmler’s offensive<br />
against the American 7th Army which ended up achieving very little.<br />
Players wishing to see what would have happened had they been<br />
committed in the Ardennes may use them. They arrive on Turn 21<br />
with no restrictions.<br />
> FUEL TABLE: All Optional German mechanized units suffer Fuel<br />
Shortage if doubles are rolled when using the Fuel Shortage Tables<br />
(i.e., you roll the same die roll for both tables).<br />
© 2012 <strong>GMT</strong> <strong>Games</strong>, LLC
44 Ardennes ‘44 : The Battle of the Bulge — SECOND EDITION<br />
GERMAN REINFORCEMENT<br />
SCHEDULE<br />
Army Unit Factors TQ Entry<br />
Turn 2 (16PM)<br />
6PzA 150 Pz (Skorzeny) 6-5-6 3 K<br />
6PzA 217 StrmPz 2-1-5 K<br />
Turn 3 (17AM)<br />
6PzA 3 FJ / 8 4-6-3 K<br />
6PzA von der Heydte 2-2-3 Airdrop<br />
6PzA 394 + 667 Stg 3-2-6 [3] K<br />
7A 44 Festung 1-2-2 MN<br />
7A 669 Ost 1-2-3 L<br />
Turn 4 (17PM)<br />
6PzA 12SS / 26 7-7-6 K<br />
6PzA 653 PzJ 4-2-4 [6] K (Rule 27.9)<br />
Turn 5 (18AM)<br />
5PzA Fuh Bglt / GD / 2 5-4-6 4 LK<br />
5PzA Fuh Bglt / 200 Stg 3-2-6 [3] LK<br />
5PzA Fuh Bglt / FBB 5-5-6 LK<br />
5PzA Fuh Bglt / 828 (+) 4-4-6 LK<br />
6PzA 12SS/560th PzJ 5-4-5 [5] K<br />
Turn 6 (18PM)<br />
5PzA 902 Stg 3-2-6 [3] L<br />
5PzA 741 PzJ 2-2-6 [3] L<br />
6PzA 1000 (+) StrmPz 3-1-4 K<br />
Turn 7 (19AM)<br />
6PzA 3 PG / 103 5-4-6 [3] L<br />
6PzA 3 PG / 3 PzJ 2-2-6 [4] L<br />
6PzA 3 PG / 8 5-7-6 L<br />
6PzA 3 PG / 29 5-7-6 L<br />
6PzA 3 PG / 103 2-2-7 K<br />
Turn 8 (19PM)<br />
6PzA 2SS / 2 / 1 7-5-6 4 LK<br />
6PzA 2SS / 2 / 2 5-4-6 3 LK<br />
6PzA 2SS / 3 7-7-6 LK<br />
6PzA 2SS / 4 7-7-6 LK<br />
6PzA 2SS / 2 3-2-7 LK<br />
6PzA 2SS / 2 PzJ 3-2-6 [4] LK<br />
6PzA 9SS / 9 / 1 5-4-6 4 LK<br />
6PzA 9SS / 9 / 2 5-4-6 3 LK<br />
6PzA 9SS / 19 7-7-6 LK<br />
6PzA 9SS / 20 7-7-6 LK<br />
6PzA 9SS / 9 3-2-7 LK<br />
6PzA 9SS / 9 PzJ 3-2-6 [4] LK<br />
Turn 9 (20AM)<br />
6PzA 519 PzJ 3-2-5 [5] K<br />
Turn 10 (20PM)<br />
7A Fuh Gr / 101 6-4-6 4 M<br />
7A Fuh Gr / 911 Stg 3-2-6 [3] M<br />
© 2012 <strong>GMT</strong> <strong>Games</strong>, LLC<br />
7A Fuh Gr / 99 (–) 4-5-6 M<br />
7A Fuh Gr / 99 Füs 2-2-6 M<br />
Turn 11 (21AM)<br />
5PzA 560 / 1129 4-4-3 L<br />
6PzA 506 Tiger 8-4-5 5 K<br />
6PzA 521 PzJ 3-2-5 [5] LK<br />
7A 79 / 208 4-5-3 M<br />
7A 79 / 212 4-5-3 M<br />
7A 79 / 226 4-5-3 M<br />
5PzA 11 Pz / 15 / 1 6-4-6 4 LK OPT<br />
5PzA 11 Pz / 15 / 2 5-4-6 3 LK OPT<br />
5PzA 11 Pz / 61 PzJ 2-2-6 [4] LK OPT<br />
5PzA 11 Pz / 110 5-5-6 LK OPT<br />
5PzA 11 Pz / 111 5-5-6 LK OPT<br />
5PzA 11 Pz / 11 3-2-7 LK OPT<br />
6PzA 10SS / 10 / 1 3-2-6 4 LK OPT<br />
6PzA 10SS / 10 / 2 2-2-6 3 LK OPT<br />
6PzA 10SS / 21 5-7-6 LK OPT<br />
6PzA 10SS / 22 5-7-6 LK OPT<br />
6PzA 10SS / 10 2-2-7 LK OPT<br />
6PzA 10SS / 10 PzJ 2-2-6 [4] LK OPT<br />
6PzA 10SS / 655 PzJ 3-2-5 [5] LK OPT<br />
Turn 14 (22PM)<br />
5PzA 9 Pz / 33 / 1 5-4-6 3 L<br />
5PzA 9 Pz / 33 / 2 6-4-6 4 L<br />
5PzA 9 Pz / 50 PzJ 2-2-6 [4] L<br />
5PzA 9 Pz / 10 5-5-6 L<br />
5PzA 9 Pz / 11 5-5-6 L<br />
5PzA 9 Pz / 60 3-2-7 L<br />
Turn 15 (23AM)<br />
5PzA 15 PG / 115 5-4-6 [3] L<br />
5PzA 15 PG / 115 PzJ 2-2-6 [4] L<br />
5PzA 15 PG / 104 5-7-6 L<br />
5PzA 15 PG / 115 5-7-6 L<br />
5PzA 15 PG / 33 2-2-7 L<br />
6PzA 301 Tiger 4-2-5 5 K<br />
Turn 19 (25AM)<br />
5PzA 167 / 331 4-5-3 LM<br />
5PzA 167 / 339 4-5-3 LM<br />
5PzA 167 / 387 4-5-3 LM<br />
5PzA 167 / Fusilier 2-2-3 M<br />
6PzA 246 / 352 3-4-3 K<br />
6PzA 246 / 404 3-4-3 K<br />
6PzA 246 / 689 3-4-3 K<br />
Turn 20 (25PM)<br />
7A 9 / 36 4-5-3 M<br />
7A 9 / 57 4-5-3 M<br />
7A 9 / 116 4-5-3 M<br />
Turn 21 (26AM)<br />
N 6SS / 11 6-7-3 LK OPT<br />
N 6SS / 32 6-7-3 LK OPT
Ardennes ‘44 : The Battle of the Bulge — SECOND EDITION<br />
45<br />
N 6SS / 38 3-2-6 LK OPT<br />
N 17SS / 37 5-7-6 LK OPT<br />
N 17SS / 38 5-7-6 LK OPT<br />
N 17SS / 17 2-2-7 LK OPT<br />
N 17SS / Stg 3-2-6 [3] LK OPT<br />
N 654 PzJ 3-2-5 [5] LK OPT<br />
N 20 Volkswerfer S-(1)-1 LK OPT<br />
Turn 22 (26PM)<br />
7A 89 / 1055 4-5-3 M<br />
7A 89 / 1056 4-5-3 M<br />
Turn 27 (29AM)<br />
6PzA 340 / 694 4-5-3 K<br />
6PzA 340 / 695 4-5-3 K<br />
6PzA 340 / 696 4-5-3 K<br />
= Optional Units<br />
ALLIED REINFORCEMENT<br />
SCHEDULE<br />
ID Unit Factors TQ Entry<br />
Turn 2 (16PM)<br />
VIII 4 / 70 Tnk (–) 3-2-6 3 AB<br />
VIII VIII / 174 FA S-(2)-1 B<br />
Turn 3 (17AM)<br />
V 1 / 26 6-7-3 H<br />
V 7 Arm / CCA 9-6-6 3 H<br />
V 7 Arm / CCB 9-6-6 3 H<br />
V 7 Arm / CCR 7-6-6 3 H<br />
V 7 Arm / 814 TD 3-2-6 [4] H<br />
V 146 Eng 1-2-3 Any town or city hex<br />
VIII 4 / 8 / 2 2-2-3 AB<br />
VIII 4 / 803 TD (–) 2-2-6 [3] AB<br />
VIII 35 Eng 1-2-3 Any town or city hex<br />
VIII 44 Eng 1-2-3 Any town or city hex<br />
VIII 159 Eng 1-2-3 Any town or city hex<br />
VIII 168 Eng 1-2-3 Any town or city hex<br />
Turn 4 (17PM)<br />
3A 10 Arm / CCA 9-6-6 3 BC<br />
3A 10 Arm / 609 TD 3-2-7 [3] BC<br />
V 9 / 47 6-6-3 J<br />
V 30 / 117 6-6-3 H<br />
VIII 4 / 22 / 2 2-2-3 AB<br />
Turn 5 (18AM)<br />
3A 10 Arm / CCB 9-6-6 3 BC<br />
3A 10 Arm / CCR 7-6-6 3 BC<br />
V 1 / 634 TD 3-2-6 [3] H<br />
V 1 / 703 TD 3-2-6 [4] H<br />
V 30 / 119 6-6-3 H<br />
V 30 / 120 6-6-3 H<br />
XVIII 82 / 504 4-6-3 E<br />
XVIII 82 / 505 4-6-3 E<br />
© 2012 <strong>GMT</strong> <strong>Games</strong>, LLC<br />
XVIII 82 / 508 4-6-3 E<br />
XVIII 82 / 325G 4-6-3 E<br />
XVIII 101 / 501 4-6-3 E<br />
XVIII 101 / 502 4-6-3 E<br />
XVIII 101 / 506 4-6-3 E<br />
XVIII 101 / 327G 4-6-3 E<br />
Ind 158 Eng 1-2-3 Any town or city hex<br />
Ind 299 Eng 1-2-3 Any town or city hex<br />
Ind 705 TD 3-2-7 [3] H<br />
Turn 6 (18PM)<br />
V 30 / 99 (Nor.) 2-2-3 H<br />
V 30 / 526 3-2-6 H<br />
V 30 / 743 Tnk 4-3-6 3 H<br />
V V / 190 FA S-(2)-1 H<br />
Turn 7 (19AM)<br />
V 1 / 16 6-7-3 H<br />
V 9 / 39 6-6-3 J<br />
Ind 51 Eng 1-2-3 Any town or city hex<br />
Turn 8 (19PM)<br />
XVIII 3 Arm / CCR 9-6-6 3 H<br />
XVIII 3 Arm TF 4-3-6 2 H<br />
XVIII 509 Para 2-2-3 E<br />
XVIII 551 Para 2-2-3 E<br />
Ind 740 Tnk 3-2-6 3 H<br />
Turn 9, 20AM<br />
XVIII 3 Arm / CCB 9-6-6 3 H<br />
XVIII 3 Arm / 643 TD 3-2-7 [3] H<br />
Turn 10 (20PM)<br />
V 1 / 18 6-7-3 H<br />
VII 84 / 334 5-6-3 G<br />
XXX SAS (–) 1-1-7 FG<br />
Turn 11 (21AM)<br />
V 1 / 745 Tnk 4-3-6 3 H<br />
VII 84 / 335 5-6-3 G<br />
VII 84 / 771 Tnk 4-3-6 3 G<br />
Ind 29 2-4-3 FG<br />
Turn 12 (21PM)<br />
3A 4 Arm / CCA 7-4-6 3 BC<br />
3A 4 Arm / CCB 6-4-6 3 BC<br />
3A 4 Arm / CCR 7-6-6 3 BC<br />
3A 4 Arm / 704 TD 3-2-7 [3] BC<br />
VII 84 / 333 5-6-3 G<br />
VII 84 / 638 TD 3-2-7 [3] G<br />
XVIII 517 Ind 4-6-3 E<br />
XXX 29 Arm / 8 RB 2-2-6 FG<br />
XXX 29 Arm / 2 F&FY 3-2-6 3 FG<br />
XXX 29 Arm / 3 RTR 3-2-6 3 FG<br />
XXX 29 Arm / 23 Hus 3-2-6 3 FG<br />
Turn 13 (22AM)<br />
3A 5 / 10 6-6-3 BC<br />
3A 26 / 101 5-6-3 BC
46 Ardennes ‘44 : The Battle of the Bulge — SECOND EDITION<br />
3A 26 / 104 5-6-3 BC<br />
3A 26 / 328 5-6-3 BC<br />
3A 26 / 735 Tnk 4-3-6 3 BC<br />
3A 26 / 818 TD 3-2-6 [3] BC<br />
3A 80 / 317 6-6-3 BC<br />
3A 80 / 318 6-6-3 BC<br />
3A 80 / 319 6-6-3 BC<br />
3A 80 / 702 Tnk 4-3-6 3 BC<br />
3A 80 / 610 TD 3-2-6 [4] BC<br />
3A XII / 182 FA S-(2)-1 BC<br />
V 30 / 823 TD 3-2-6 [3] H<br />
XVIII 3 Arm / CCA 9-6-6 3 H<br />
Br. 34 Tnk (–) 6-4-6 3 FG<br />
Br. 43 / 129 5-7-3 FG<br />
Br. 43 / 130 5-7-3 FG<br />
Br. 43 / 214 5-7-3 FG<br />
Ind Thrasher 1-2-3 F<br />
Turn 14 (22PM)<br />
VII 75 / 289 5-6-3 G<br />
VII 75 / 290 5-6-3 G<br />
VII 75 / 291 5-6-3 G<br />
VII 75 / 750 Tnk 4-3-6 3 G<br />
VII 75 / 629 TD 3-2-6 [3] G<br />
Br. 53 / 71 5-7-3 FG<br />
Br. 53 / 158 5-7-3 FG<br />
Br. 53 / 160 5-7-3 FG<br />
Turn 15 (23AM)<br />
3A 5 / 737 Tnk 4-3-6 3 BC<br />
3A 6 Cav / 6 3-2-7 BC<br />
3A 6 Cav / 28 3-2-7 BC<br />
3A III / 193 FA S-(2)-1 BC<br />
3A III / 203 FA S-(2)-1 BC<br />
3A XII / 177 FA S-(2)-1 BC<br />
VII 2 Arm / CCA 9-6-6 3 G<br />
VII 2 Arm / CCB 9-6-6 3 G<br />
VII 2 Arm / CCR 9-6-6 3 G<br />
VII 2 Arm / TF 4-3-6 2 G<br />
VII 2 Arm / 702 TD 3-2-6 [4] G<br />
VII 4 Cav / 4 3-2-7 G<br />
VII 4 Cav / 24 3-2-7 G<br />
VII 628 TD 3-2-6 [4] G<br />
Br. Gds / 5 12-9-6 3 FG<br />
Br. Gds / 32 12-9-6 3 FG<br />
Ind 118 2-4-3 FG<br />
Turn 16 (23PM)<br />
3A 654 TD 3-2-6 [3] BC<br />
VII VII / 18 FA S-(2)-1 G<br />
VII VII / 142 FA S-(2)-1 G<br />
VII VII / 188 FA S-(2)-1 G<br />
Br. XXX / 4 AGRA S-(2)-1 FG<br />
Br. XXX / 5 AGRA S-(2)-1 FG<br />
Turn 17 (24AM)<br />
3A 5 / 2 6-6-3 BC<br />
3A 5 / 11 6-6-3 BC<br />
3A 602 TD 3-2-7 [3] CD<br />
Ind 5 Arm / CCA 8-6-6 3 G<br />
Ind 5 Arm / CCB 8-6-6 3 G<br />
Turn 19 (25AM)<br />
XVIII XVIII / 179 FA S-(2)-1 E<br />
Br. 33 Arm (–) 6-4-6 3 FG<br />
Br. 51 / 152 5-7-3 G<br />
Br. 51 / 153 5-7-3 G<br />
Br. 51 / 154 5-7-3 G<br />
Turn 20 (25 PM)<br />
3A 11 Arm / CCA 9-6-6 3 D OPT<br />
Turn 21 (26 AM)<br />
3A 35 / 134 6-6-3 BC<br />
3A 35 / 137 6-6-3 BC<br />
3A 35 / 320 6-6-3 BC<br />
3A 11 Arm / CCB 9-6-6 3 D OPT<br />
Turn 22 (26 PM)<br />
3A 6 Arm / CCA 9-6-6 3 BC<br />
3A 6 Arm / CCB 9-6-6 3 BC<br />
3A 6 Arm / CCR 7-6-6 3 BC<br />
3A 6 Arm / 603 TD 3-2-7 [3] BC<br />
3A 90 / 357 6-6-3 BC OPT<br />
3A 90 / 358 6-6-3 BC OPT<br />
3A 90 / 359 6-6-3 BC OPT<br />
3A 90 / 712 Tnk 4-3-6 3 BC OPT<br />
3A 90 / 773 TD 3-2-7 [3] BC OPT<br />
3A 11 Arm / CCR 7-6-6 3 D OPT<br />
Turn 23 (27 AM)<br />
Br. 6 / 3 4-6-3 FG<br />
Br. 6 / 5 4-6-3 FG<br />
Br. 6 / 6 5-6-3 FG<br />
Br. 6 Gds Arm (–) 6-4-6 3 FG<br />
3A 17 / 507 4-6-3 D OPT<br />
3A 17 / 513 4-6-3 D OPT<br />
3A 17 / 193G 4-6-3 D OPT<br />
3A 17 / 194G 4-6-3 D OPT<br />
© 2012 <strong>GMT</strong> <strong>Games</strong>, LLC
Ardennes ‘44 : The Battle of the Bulge — SECOND EDITION<br />
47<br />
INDEX<br />
150 Panzer Brigade: 27.8<br />
2nd Division (U.S.): 27.6<br />
26th VG Division: 31.1<br />
Advance After Combat: 19.0<br />
Allied Attacks onto the Map: 13.8<br />
Allied Air Support: 15.6<br />
Armor Shift: 21.1<br />
Army Boundaries: 11.10<br />
Artillery<br />
Artillery Supply Phase: 5.0<br />
Movement and Combat: 22.1–22.9<br />
See 22.10 for a summary of other artillery effects.<br />
Attacker’s Advantage Markers: 16.6<br />
Bonus Advance: 19.1<br />
Breakdown Units: 26.0<br />
Breakthrough Combat: 19.4<br />
Bridges: 7.0<br />
British Units: 27.3<br />
Broke/Broken: 18.4<br />
Combat Modifiers: 15.0<br />
Combat Results: 16.0<br />
Command and Control: 14.3<br />
Dasburg Bridge: 7.10<br />
DCBs: 15.1<br />
Determined Defense: 16.7<br />
Disengagement: 20.0<br />
Disruption/Disrupted: 18.2<br />
Echternach: 29.2<br />
Engaged Markers: 16.5<br />
Engineer Reinforcements: 13.2<br />
Engineer Units: 27.1<br />
Entry Hexes: 13.1, 13.4, 13.7<br />
Exiting the Map: 11.9<br />
Extended Movement: 11.2<br />
EZOC:<br />
Effects on Movement: 9.2<br />
Effects on Advance: 19.3<br />
Effects on Retreat: 17.1 & 17.2<br />
Effects on Supply Paths: 23.3<br />
Forest Hexes: 11.5, 15.4, 17.2, 19.2<br />
Forest Roads: 11.8, 19.1<br />
Frozen Ground Conditions: 28.1<br />
Fuel Dumps: 32.0<br />
Fuel Shortage Phase: 6.0<br />
Gemünd Bridge: 7.10<br />
German Divisional Boundaries: 29.3<br />
German Prime Movers: 22.1, 22.3<br />
Ground Freeze: 28.1<br />
Halving Rule: 15.2<br />
Improved Positions: 15.8<br />
Isolation/Isolated: 23.6<br />
Jabos: 15.6<br />
Kampfgruppe Peiper: 27.5<br />
Meuse River: 17.2 (retreats)<br />
Morale<br />
© 2012 <strong>GMT</strong> <strong>Games</strong>, LLC<br />
Morale and Determined Defense: 16.7<br />
Morale and Disengagements: 20.2<br />
Morale and Fire Fights: 16.2<br />
Morale and Surrender: 23.8<br />
Mud: 28.1<br />
Night Turns: 25.1, 25.3<br />
OOS (Out of Supply): 23.4<br />
Ouren Bridge: 7.8<br />
Overcast: 28.2<br />
Poor Secondary Roads: 11.8, 19.1<br />
Rally Phase: 18.5<br />
Range: 22.4<br />
Recon Units: 21.4, 21.5<br />
Rivers:<br />
Advance: 19.2<br />
Combat Across: 15.3<br />
Movement Across: 11.4<br />
Retreat: 17.2<br />
Reinforcements: 13.1<br />
Remnants: 16.4<br />
Retreats: 17.0<br />
Roadblocks: 33.0<br />
Road Movement: 11.7<br />
Roer River Dams: 27.6<br />
Silhouetted Tank Units:<br />
Stacking: 8.3<br />
ZOCs: 9.4<br />
DCBs: 15.1<br />
St-Vith Bottleneck Hexes: 24.7<br />
Stacking: 8.2<br />
Step Losses: 16.3, 16.4<br />
Strategic Movement: 12.0<br />
Strategic Surprise: 29.4<br />
Sturmtigers: 27.4<br />
Supply:<br />
Supply Phase: 23.1<br />
Supply Sources: 23.2<br />
Supply Paths: 23.3<br />
Supply Dumps: 32.0<br />
Surrender Checks: 23.7<br />
Surrender Thresholds: 23.8<br />
T.O.T. (Time on Target): 22.8<br />
TQ Ratings: 21.1-21.2 (Combat), 23.4 (Supply)<br />
Tactical Movement: 11.3<br />
Tank Destroyers: 21.2<br />
Tank Units: 21.0<br />
Traffic Markers: 24.0<br />
Truck Markers: 12.6<br />
Vehicle Units: 11.4-11.5 (Movement), 15.4-15.5 (Combat), 17.1-<br />
17.2 (Retreats), 19.2 (Advance After Combat)<br />
Von der Heydte: 27.2<br />
Weather: 28.0<br />
West Wall: 15.7<br />
Wooded Rough: 10.3 (ZOC Bonds), 11.6 (Movement), 15.5 (Combat),<br />
17.2 (Retreats), 19.2, Advance After Combat
48 Ardennes ‘44 : The Battle of the Bulge — SECOND EDITION<br />
EXPANDED SEQUENCE OF PLAY<br />
A. GERMAN PLAYER TURN<br />
1. The Artillery Supply Phase<br />
Flip over the appropriate number of German Artillery Units to their<br />
Ready side (see 5.3 for restrictions).<br />
2. The Fuel Shortage Phase (German Turn only)<br />
This phase is skipped until Turn 7 (19 AM).<br />
A. The German player rolls one die for Fuel Shortage Table #1 and<br />
one die for Fuel Shortage Table #2 (6.1).<br />
B. The German player places Out of Supply markers on those units<br />
affected by the results.<br />
3. The Bridge Phase<br />
A. The German player may destroy or rebuild bridges (rule 7.0).<br />
NOTE: No bridge blowing on Turns 1 and 2 (16 AM and 16 PM) with<br />
the exception of the Ouren bridge (rule 7.8).<br />
4. The Movement Phase<br />
All non-engaged German units may move.<br />
• Disrupted units may only use Tactical Movement (18.2).<br />
• OOS units may only use Tactical Movement (23.4).<br />
• Units may build Improved Positions at this time (15.8).<br />
• Units may Breakdown at this time (26.1).<br />
• (Allied Turn only) Roll for Offensive Air Support (15.6).<br />
• Units may be marked with a Night Turn marker during a PM turn;<br />
these units are restricted in their movement (25.3).<br />
5. The Rally Phase<br />
All Disrupted or Broken German units that are not adjacent to an<br />
enemy unit recover one level. Roll for those that are adjacent to an<br />
enemy unit (18.5).<br />
6. The Combat Phase<br />
A. Remove all ENG markers (16.5) from German units. As each ENG<br />
marker is removed, decide if that unit (or which units in the stack)<br />
will conduct Disengagement (20.0). Resolve Disengagement at<br />
that time. Unengaged units may also use the Disengagement Table<br />
at this time.<br />
B. Conduct all Combats (14.0). Units may breakdown before advancing<br />
after combat (26.2).<br />
7. The Traffic Marker Phase<br />
A. Place any Traffic markers from the German Traffic Marker Holding<br />
Box onto the map (24.0).<br />
B. (Optional) Place or reposition the two German Roadblock markers<br />
(33.2).<br />
C. Roll two dice and remove the German Traffic (Greif) markers<br />
with those I.D. numbers (24.3).<br />
8. The Supply and Surrender Phase<br />
A. Check Supply for all German units (23.1).<br />
B. Roll for Surrender of all German units that are Isolated (23.7).<br />
9. The Victory Check Phase (Allied Turn only)<br />
Check to see if the German player has won a Victory, if not continue<br />
with another game turn (30.2, 30.3).<br />
B. ALLIED PLAYER TURN<br />
The Allied Player Turn is identical to the German Player Turn (switching<br />
the term German for Allied), except the Allied player has a Victory<br />
Check Phase and no Fuel Shortage Phase.<br />
C. END TURN<br />
Record the completion of a game-turn by advancing the Game Turn<br />
Marker one box.<br />
Night Turn Sequence of Play<br />
A. Allied Night Replacement and Movement Phase: The Allied<br />
player uses his replacements and the 3 Allied stacks marked<br />
with Night markers in the PM turn may move.<br />
B. Allied Night Combat Phase: The 3 Allied stacks marked with<br />
Night markers in the PM turn may attack.*<br />
C. German Night Replacement and Movement Phase: The<br />
German player uses his replacements and the 3 German stacks<br />
marked with Night markers in the PM turn may move.<br />
D. German Night Combat Phase: The 3 German stacks marked<br />
with Night markers in the PM turn may attack.*<br />
* Artillery on their ready side may provide Artillery Support even<br />
if not marked with Night markers.<br />
CREDITS<br />
Game Design: Mark Simonitch<br />
ALPHA Developer: John Kranz<br />
BETA Developer: Tony Curtis<br />
2nd Edition Developer: Ivano Rosa<br />
Research: Mark Simonitch and Tony Curtis<br />
Playtesting: David Aud, Tony Curtis, Skip Franklin, Rick De<br />
Girolami, John Grant, Chris Hancock, Franklin Haskell, Randy<br />
Heller, John Kranz, Rick Kurtz, Lew Ritter, Martin Sample, Dick<br />
Sauer, John Spalding, Phil Wettsch.<br />
Art Director, Cover Art and Package Design:<br />
Rodger B. MacGowan<br />
Layout and Graphics: Mark Simonitch<br />
Proofreaders: Kevin Duke, Vincent Lefavrais, Hans Korting,<br />
Peter Rich and Ivano Rosa.<br />
Production Coordination: Tony Curtis<br />
Producer: Gene Billingsley, Tony Curtis, Andy Lewis and Rodger<br />
MacGowan<br />
Special Thanks: To Tony Curtis, Randy Heller and Joe Youst for<br />
encouragement and suggestions. To Bruno Sinigaglio and Danny<br />
Parker for designing inspirational Battle of the Bulge games.<br />
<strong>GMT</strong> <strong>Games</strong><br />
P.O. Box 1308, Hanford, CA 93232-1308<br />
www.<strong>GMT</strong><strong>Games</strong>.com<br />
© 2012 <strong>GMT</strong> <strong>Games</strong>, LLC