AQ-RT-PRO (Oct 08 & later) - Hayward
AQ-RT-PRO (Oct 08 & later) - Hayward
AQ-RT-PRO (Oct 08 & later) - Hayward

Create successful ePaper yourself
Turn your PDF publications into a flip-book with our unique Google optimized e-Paper software.
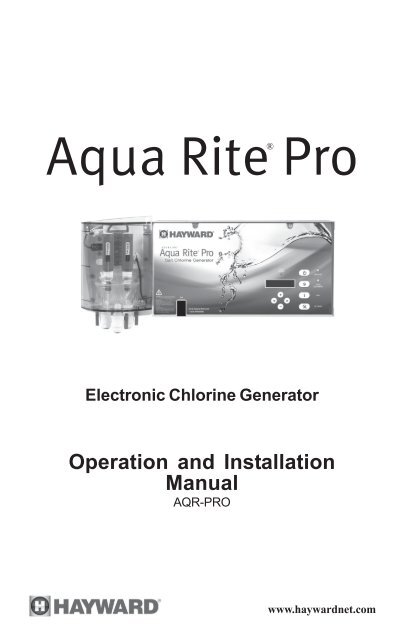
Aqua Rite Pro<br />
®<br />
Electronic Chlorine Generator<br />
Operation and Installation<br />
Manual<br />
<strong>AQ</strong>R-<strong>PRO</strong><br />
www.haywardnet.com
IMPO<strong>RT</strong>ANT SAFETY INSTRUCTIONS<br />
• READ AND FOLLOW ALL INSTRUC-<br />
TIONS<br />
• WARNING – To reduce the risk of injury, do not permit children<br />
to use this product unless they are closely supervised at<br />
all times.<br />
• A wire bonding lug is provided on the lower external surface<br />
(two for Canadian models) of this unit to connect a minimum<br />
8 AWG (8.4 mm 2 ) solid copper conductor between this unit<br />
and any metal equipment, metal enclosures of electrical equipment,<br />
metal water pipe, or conduit within 5 feet (1.5 m) tying<br />
the unit to the local bonding grid.<br />
• Use Copper Conductors Only<br />
• Disconnect all AC power during installation.<br />
• A green colored terminal marked “ Ground” is located inside<br />
the wiring compartment. To reduce the risk of electric shock,<br />
this terminal must be connected to the grounding means provided<br />
in the electric supply service panel with a continuous<br />
copper wire equivalent in size to the circuit conductors supplying<br />
the equipment.<br />
• All field installed metal components such as rails, ladders,<br />
drains, or other similar hardware within 3 meters of the pool,<br />
spa or hot tub shall be bonded to the equipment grounding<br />
bus with copper conductors not smaller than 8 AWG US / 6<br />
AWG Canada.<br />
• NOTICE TO USERS: This control product is to be used only<br />
in accordance with the directions of this label. It is an offense<br />
under the Pest Control Products Act to use a control<br />
product under unsafe conditions.<br />
• SAVE THESE INSTRUCTIONS
Table of Contents<br />
OPERATION<br />
General.........................................................................................1<br />
Water Chemistry........................................................................2<br />
Controls........................................................................................6<br />
Information Menu.......................................................................7<br />
Settings Menu..............................................................................9<br />
Operation...................................................................................11<br />
Maintenance...............................................................................12<br />
INSTALLATION<br />
Mounting.......................................................................................13<br />
Plumbing......................................................................................14<br />
Wiring..........................................................................................15<br />
TROUBLESHOOTING<br />
Troubleshooting.......................................................................18<br />
WARRANTY<br />
Warranty....................................................................................20
OPERATION<br />
The Aqua Rite Pro is an automatic chlorine generation system for pool or spa sanitization.<br />
The operation requires a low concentration of salt (sodium chloride) in the pool<br />
water. These levels are low enough that it normally will not be tasted. The Aqua Rite Pro<br />
automatically sanitizes your pool by converting the salt into free chlorine which kills<br />
bacteria and algae in the pool. Chlorine will revert back to sodium chloride after killing<br />
bacteria. These reactions will continuously recycle virtually eliminating the need to add<br />
sanitizing chemicals to your pool. The only time you may need to add more salt to the<br />
pool is when water is replenished due to backwashing, draining, or splashing (not<br />
evaporation).<br />
The Aqua Rite Pro is designed to handle the purification needs of most residential<br />
swimming pools up to 40,000 gallons (150,000 liters), or the needs of most commercial<br />
pools up to 25,000 gallons (95,000 liters). Check local codes for other restrictions. The<br />
actual amount of chlorination required to properly sanitize a pool varies due to bather<br />
load, rainfall, temperature, and the pool's cleanliness.<br />
Aqua Rite Pro chlorine generators operating with software version 1.10 or <strong>later</strong> are<br />
designed to use one of 3 different chlorinator cells that are available from your authorized<br />
<strong>Hayward</strong>/Goldline dealer. These cells are not included with the Aqua Rite Pro and<br />
must be purchased before installation. Choose the appropriate cell based on the size of<br />
your pool. The models are shown below:<br />
T-CELL-15- for pools up to 40,000 gallons<br />
T-CELL-9 - for pools up to 25,000 gallons<br />
T-CELL-3 - for pools up to 15,000 gallons<br />
Note that the installation and mounting requirements are the same for all models.<br />
The Aqua Rite Pro can be used with the optional <strong>Hayward</strong>/Goldline <strong>AQ</strong>L-CHEM to<br />
provide a fully integrated chemistry solution for your pool. With the <strong>AQ</strong>L-CHEM<br />
installed, the Aqua Rite Pro senses the pool's ORP and pH levels and automatically<br />
generates the correct amount of chlorine to keep your pool properly sanitized. The Aqua<br />
Rite Pro can also control pH by introducing acid or CO 2<br />
into the pool using an <strong>AQ</strong>L-<br />
CHEM2 (120V), <strong>AQ</strong>L-CHEM2-240 (240V) or other dispensing device requiring 120VAC<br />
or 240VAC on/off control. The Aqua Rite Pro and <strong>AQ</strong>L-CHEM products offer the user a<br />
complete automated system controlling both sanitization and pH balance.<br />
NOTE: <strong>Hayward</strong>/Goldline does not recommend using the Aqua Rite Pro to<br />
generate bromine.<br />
NOTE: Before installing this product as part of a saline water purification system in a<br />
pool or spa using natural stone for coping or for immediately adjacent patios/decking, a<br />
qualified stone installation specialist should be consulted regarding the appropriate<br />
type, installation, sealant (if any) and maintenance of stone used around a saline pool<br />
with electronic chlorine generator in your particular location and circumstances.<br />
NOTE: The use of dry acid (sodium bisulfate) to adjust pool pH is discouraged especially<br />
in arid regions where pool water is subject to excessive evaporation and is not<br />
commonly diluted with fresh water. Dry acid can cause a buildup of by-products that<br />
can damage your chlorinator cell.<br />
1
Water Chemistry<br />
The table below summarizes the levels that are recommended by The Association of<br />
Pool and Spa Professionals (APSP). The only special requirements for the Aqua Rite<br />
Pro are the salt level and stabilizer. It is important to maintain these levels in order to<br />
prevent corrosion or scaling and to ensure maximum enjoyment of the pool. Test your<br />
water periodically. Your authorized Aqua Rite Pro dealer or most pool stores can provide<br />
you with the chemicals and procedures to adjust the water chemistry. Be sure to tell the<br />
pool store that you are using an Aqua Rite Pro chlorine generator.<br />
Saturation index<br />
The saturation index (Si) relates to the calcium and alkalinity in the water and is an<br />
indicator of the pool water "balance". Your water is properly balanced if the Si is 0 ±.2.<br />
If the Si is below -0.2, the water is corrosive and plaster pool walls will be dissolved into<br />
the water. If the Si is above +0.2, scaling and staining will occur. Use the chart below to<br />
determine the saturation index.<br />
ºC ºF Ti<br />
12<br />
16<br />
19<br />
24<br />
29<br />
34<br />
39<br />
Si = pH + Ti + Ci + Ai - 12.1<br />
53<br />
60<br />
66<br />
76<br />
84<br />
94<br />
103<br />
.3<br />
.4<br />
.5<br />
.6<br />
.7<br />
.8<br />
.9<br />
Calcuim<br />
Hardness<br />
Ci<br />
Total<br />
Alkalinity Ai<br />
1.5 1.9<br />
1.6 2.0<br />
1.7 2.1<br />
1.8 2.2<br />
1.9 2.3<br />
2.0 2.4<br />
2.1 2.5<br />
2.2 2.6<br />
2.4 2.8<br />
2.5 2.9<br />
75 75<br />
100 100<br />
125 125<br />
150 150<br />
200 200<br />
250 250<br />
300 300<br />
400 400<br />
600 600<br />
800 800<br />
How to use: Measure pool pH, temperature, calcium hardness,<br />
and total alkalinity. Use the chart above to determine Ti, Ci,and<br />
Ai from your measurements. Insert values of pH, Ti, Ci and Ai<br />
into the above equation. If Si equals .2 or more, scaling and<br />
staining may occur. If Si equals -.2 or less corrosion or irritation<br />
may occur.<br />
-.2 0 .2<br />
CORROSIVE<br />
SCALING<br />
2<br />
OK
Salt Level<br />
Use the chart on page 4 to determine how much salt in pounds or (Kgs) need to be added<br />
to reach the recommended levels. Use the equations below (measurements are in feet/<br />
gallons and meters/liters) if pool size is unknown.<br />
Gallons<br />
(pool size in feet)<br />
Rectangular Length x Width x<br />
Average Depth x 7.5<br />
Round<br />
Diameter x Diameter x<br />
Average Depth x 5.9<br />
Liters<br />
(pool size in meters)<br />
Length x Width x<br />
Average Depth x 1000<br />
Diameter x Diameter x<br />
Average Depth x 785<br />
Oval<br />
Length x Width x<br />
Average Depth x 6.7<br />
Length x Width x<br />
Average Depth x 893<br />
The ideal salt level is between 2700-3400 ppm (parts per million) with 3200 ppm being<br />
optimal. If the level is low, determine the number of gallons in the pool and add salt<br />
according to the chart on page 4. A low salt level will reduce the efficiency of the Aqua<br />
Rite Pro and result in low chlorine production. A high salt level can cause the Aqua Rite<br />
Pro to shutdown and may begin to give a salty taste to your pool (generally, the salt will<br />
begin to be tasted at a level of about 3500-4000 ppm). The salt in your pool/spa is<br />
constantly recycled and the loss of salt throughout the swimming season should be<br />
small. This loss is due primarily to the addition of water because of splashing,<br />
backwashing, or draining (because of rain). Salt is not lost due to evaporation.<br />
Type of Salt to Use<br />
It is important to use only sodium chloride (NaCl) salt that is greater than 99% pure. This<br />
is common food quality or water softener salt and is usually available in 40-80 lb. bags<br />
labeled "Coarse Solar Salt". It is also acceptable to use water conditioning salt pellets,<br />
however, it will take longer for them to dissolve. Do not use rock salt, salt with yellow<br />
prussiate of soda, salt with anti-caking additives, or iodized salt.<br />
How to Add or Remove Salt<br />
For new plaster pools, wait 10-14 days before adding salt to allow the plaster to cure.<br />
Turn the circulating pump on and add salt directly into the pool. Brush the salt around<br />
to speed up the dissolving process--do not allow salt to pile up on the bottom of the<br />
pool. Run the filter pump for 24 hours with the suction coming from the main drain (use<br />
pool vac if there is no main drain) to allow the salt to evenly disperse throughout the<br />
pool. The salt display may take 24 hours to respond to the change in salt concentration.<br />
The only way to lower the salt concentration is to partially drain the pool and refill with<br />
fresh water.<br />
Always check stabilizer (cyanuric acid), when checking salt. These levels will most<br />
likely decline together. Use the chart on page 5 to determine how much stabilizer must<br />
be added to raise the level to 80 ppm.<br />
3
Current salt<br />
level<br />
ppm<br />
0<br />
200<br />
400<br />
600<br />
800<br />
1000<br />
1200<br />
1400<br />
1600<br />
1800<br />
2000<br />
2200<br />
2400<br />
2600<br />
2800<br />
3000<br />
8,000<br />
(30,000)<br />
10,000<br />
(37,500)<br />
213 267<br />
(97) (121)<br />
200 250<br />
(91) (114)<br />
187 233<br />
(85) (106)<br />
173 217<br />
(79) (98)<br />
160 200<br />
(73) (91)<br />
147 183<br />
(67) (83)<br />
133 167<br />
(61) (76)<br />
120 150<br />
(55) (68)<br />
107 133<br />
(48) (61)<br />
93 117<br />
(42) (53)<br />
80 100<br />
(36) (45)<br />
67 83<br />
(30) (38)<br />
53 67<br />
(24) (30)<br />
40 50<br />
(18) (23)<br />
27 33<br />
(12) (15)<br />
13 17<br />
(6) (8)<br />
Gallons and (Liters) of Pool/Spa water<br />
12,000 14,000 16,000 18,000 20,000 22,000 24,000 26,000 28,000 30,000 32,000 34,000 36,000 38,000 40,000<br />
(45000) (52,500) (60,000) (67,500) (75,000) (82,500) (90,000) (97,500) (105,000) (112,500) (120,000) (127,500) (135,000) (142,500) (150,000)<br />
320<br />
(145)<br />
300<br />
(136)<br />
280<br />
(127)<br />
260<br />
(118)<br />
240<br />
(109)<br />
220<br />
(100)<br />
200<br />
(91)<br />
180<br />
(82)<br />
160<br />
(73)<br />
140<br />
(64)<br />
120<br />
(55)<br />
100<br />
(45)<br />
80<br />
(36)<br />
60<br />
(27)<br />
40<br />
(18)<br />
20<br />
(9)<br />
373<br />
(170)<br />
350<br />
(159)<br />
327<br />
(148)<br />
303<br />
(138)<br />
280<br />
(127)<br />
257<br />
(117)<br />
233<br />
(106)<br />
210<br />
(95)<br />
187<br />
(85)<br />
163<br />
(74)<br />
140<br />
(64)<br />
117<br />
(53)<br />
93<br />
(42)<br />
(32)<br />
47<br />
(21)<br />
23<br />
(11)<br />
POUNDS and (Kg) OF SALT NEEDED FOR 3200 PPM<br />
427<br />
(194)<br />
400<br />
(182)<br />
373<br />
(170)<br />
347<br />
(158)<br />
320<br />
(145)<br />
293<br />
(133)<br />
267<br />
(121)<br />
240<br />
(109)<br />
213<br />
(97)<br />
187<br />
(85)<br />
160<br />
(73)<br />
133<br />
(61)<br />
107<br />
(48)<br />
80<br />
(36)<br />
53<br />
(24)<br />
27<br />
(12)<br />
480<br />
(218) (242)<br />
450<br />
(205)<br />
420<br />
(191)<br />
390<br />
(177)<br />
360<br />
(164)<br />
330<br />
(150)<br />
300<br />
(136)<br />
270<br />
(123)<br />
240<br />
(109)<br />
210<br />
(95)<br />
180<br />
(82)<br />
150<br />
(68)<br />
120<br />
(55)<br />
90<br />
(41)<br />
60<br />
(27)<br />
30<br />
(14)<br />
500<br />
(227)<br />
467<br />
(212)<br />
433<br />
(197)<br />
400<br />
(182)<br />
367<br />
(167)<br />
333<br />
(152)<br />
300<br />
(136)<br />
267<br />
(121)<br />
233<br />
(106)<br />
200<br />
(91)<br />
167<br />
(76)<br />
133<br />
(61)<br />
100<br />
(45)<br />
67<br />
(30)<br />
33<br />
(15)<br />
587 640 693 747 800 854 907 960<br />
1067<br />
(267) (291) (315) (339) (364) (388) (412) (436) (460) (484)<br />
550 600 650 700 750 800 850 900 950 1000<br />
(250) (273) (295) (318) (341) (363) (385) (4<strong>08</strong>) (430) (453)<br />
513 560 607 653 700 747 793 840 887 933<br />
(233) (255) (276) (297) (318) (339) (360) (382) (403) (424)<br />
477 520 563 607 650 693 737 780 823 867<br />
(217) (236) (256) (276) (297) (317) (337) (358) (378) (398)<br />
440 480 520 560 600 640 680 720 760 800<br />
(200) (218) (236) (255) (273) (291) (310) (328) (346) (364)<br />
403 440 477 513 550 587 623 660 697 733<br />
(183) (200) (217) (233) (250) (267) (283) (300) (317) (333)<br />
367 400 433 467 500 533 567 600 633 667<br />
(167) (182) (197) (212) (227) (243) (258) (274) (289) (304)<br />
330 360 390 420 450 480 510 540 570 600<br />
(150) (164) (177) (191) (205) (218) (232) (246) (259) (263)<br />
293 320 347 373 400 427 453 480 507 533<br />
(133) (145) (158) (170) (182) (195) (207) (219) (231) (243)<br />
257 280 303 327 350 373 397 420 443 467<br />
(117) (127) (138) (148) (159) (169) (180) (190) (201) (211)<br />
220 240 260 280 300 320 340 360 380 400<br />
(100) (109) (118) (127) (136) (145) (154) (163) (172) (181)<br />
183 200 217 233 250 267 283 300 317 333<br />
(83) (91) (98) (106) (114) (121) (129) (137) (144) (152)<br />
147 160 173 187 200 213 227 240 253 267<br />
(67) (73) (79) (85) (91) (98) (104) (110) (117) (123)<br />
110 120 130 140 150 160 170 180 190 200<br />
(50) (55) (59) (64) (68) (73) (77) (81) (86) (90)<br />
73 80 87 93 100 107 113 120 127 133<br />
(33) (36) (39) (42) (45) (48) (51) (54) (57) (60)<br />
37 40 43 47 50 53 57 60 63 67<br />
(17) (18) (20) (21) (23) (24) (26) (27) (29) (30)<br />
3200 Ideal Ideal Ideal Ideal Ideal Ideal Ideal Ideal Ideal Ideal Ideal Ideal Ideal Ideal Ideal Ideal Ideal<br />
3400 OK OK OK OK OK OK OK OK OK OK OK OK OK OK OK OK OK<br />
3600+ Dilute Dilute Dilute Dilute Dilute Dilute Dilute Dilute Dilute Dilute Dilute Dilute Dilute Dilute Dilute Dilute Dilute<br />
4
Current<br />
Stabilizer<br />
Level (ppm)<br />
0 ppm<br />
10 ppm<br />
20 ppm<br />
30 ppm<br />
40 ppm<br />
50 ppm<br />
60 ppm<br />
70 ppm<br />
80 ppm<br />
8,000<br />
(30000)<br />
5.3<br />
(3.6)<br />
4.7<br />
(3.2)<br />
4.0<br />
(2.7)<br />
3.3<br />
(2.3)<br />
2.7<br />
(1.8)<br />
2.0<br />
(1.4)<br />
1.3<br />
(.91)<br />
0.7<br />
(.45)<br />
10,000<br />
(37500)<br />
6.7<br />
(4.3)<br />
5.8<br />
(3.7)<br />
4.2<br />
(2.7)<br />
3.3<br />
(2.1)<br />
2.5<br />
(1.6)<br />
1.7<br />
(1.1)<br />
0.8<br />
(.54)<br />
12,000<br />
(45000)<br />
8.0<br />
(3.6)<br />
7.0<br />
(3.2)<br />
6.0<br />
(2.7)<br />
5.0<br />
(2.3)<br />
4.0<br />
(1.8)<br />
3.0<br />
(1.4)<br />
2.0<br />
(.91)<br />
1.0<br />
(.45)<br />
14,000<br />
(52500)<br />
9.4<br />
(4.3)<br />
8.2<br />
(3.7)<br />
7.0<br />
(3.2)<br />
5.9<br />
(2.7)<br />
4.7<br />
(2.1)<br />
3.5<br />
(1.6)<br />
2.3<br />
(1.1)<br />
1.2<br />
(.54)<br />
POUNDS and (Kg) OF STABILIZER (CYANURIC ACID) NEEDED FOR 80 PPM<br />
Gallons and (Liters) of Pool/Spa water<br />
16,000<br />
(60000)<br />
10.7<br />
(4.9)<br />
9.4<br />
(4.3)<br />
8.0<br />
(3.6)<br />
6.7<br />
(3.0)<br />
5.4<br />
(2.4)<br />
4.0<br />
(1.8)<br />
2.7<br />
(1.2)<br />
1.4<br />
(.64)<br />
18,000<br />
(67500)<br />
12.0<br />
(5.4)<br />
10.5<br />
(4.8)<br />
9.0<br />
(2.2)<br />
7.5<br />
(3.4)<br />
6.0<br />
(2.7)<br />
4.5<br />
(2.0)<br />
3.0<br />
(1.4)<br />
1.5<br />
(.68)<br />
20,000<br />
(75000)<br />
13.4<br />
(6.1)<br />
11.7<br />
(5.3)<br />
10.0<br />
(4.5)<br />
8.4<br />
(3.8)<br />
6.7<br />
(3.0)<br />
5.0<br />
(2.3)<br />
3.3<br />
(1.5)<br />
1.7<br />
(.77)<br />
22,000<br />
(82500)<br />
14.7<br />
(6.7)<br />
12.9<br />
(5.9)<br />
11.0<br />
(5.0)<br />
9.2<br />
(4.2)<br />
7.4<br />
(3.3)<br />
5.5<br />
(2.5)<br />
3.7<br />
(1.7)<br />
1.8<br />
(.82)<br />
24,000<br />
(90000)<br />
16.0<br />
(7.3)<br />
14.0<br />
(6.4)<br />
12.0<br />
(5.4)<br />
10.0<br />
(4.5)<br />
8.0<br />
(3.6)<br />
6.0<br />
(2.7)<br />
4.0<br />
(1.8)<br />
2.0<br />
(.91)<br />
26,000<br />
(97500)<br />
15.2<br />
(6.9)<br />
13.0<br />
(5.9)<br />
10.8<br />
(4.9)<br />
8.7<br />
(3.9)<br />
6.5<br />
(2.9)<br />
4.3<br />
(2.0)<br />
2.2<br />
(1.0)<br />
28,000<br />
(105000)<br />
18.7<br />
(8.5)<br />
16.4<br />
(7.4)<br />
14.0<br />
(6.4)<br />
11.7<br />
(5.2)<br />
9.3<br />
(4.2)<br />
7.0<br />
(3.2)<br />
4.7<br />
(2.1)<br />
2.3<br />
(1.1)<br />
30,000<br />
(112500)<br />
20.0<br />
(9.1)<br />
17.2<br />
(8.0)<br />
15.0<br />
(6.8)<br />
12.5<br />
(5.6)<br />
10.0<br />
(4.5)<br />
7.5<br />
(3.4)<br />
5.0<br />
(2.3)<br />
2.5<br />
(1.2)<br />
32,000<br />
(120000)<br />
21.3<br />
(9.7)<br />
18.7<br />
(8.5)<br />
16.0<br />
(7.2)<br />
13.3<br />
(6.0)<br />
10.7<br />
(4.8)<br />
8.0<br />
(3.6)<br />
5.3<br />
(2.4)<br />
2.7<br />
(1.2)<br />
34,000<br />
(127500)<br />
22.7<br />
(10.3)<br />
19.8<br />
(9.0)<br />
14.2<br />
(6.3)<br />
8.5<br />
(3.9)<br />
5.7<br />
(2.6)<br />
2.8<br />
(1.3)<br />
36,000<br />
(135000)<br />
21.0<br />
(9.5)<br />
18.0<br />
(8.1)<br />
15.0<br />
(6.7)<br />
12.0<br />
(5.4)<br />
9.0<br />
(4.1)<br />
3.0<br />
(1.3)<br />
38,000<br />
(142500)<br />
25.3<br />
(11.5)<br />
22.2<br />
(10.0)<br />
19.0<br />
(8.6)<br />
15.8<br />
(7.1)<br />
12.7<br />
(5.7)<br />
9.5<br />
(4.3)<br />
6.3<br />
(2.8)<br />
3.2<br />
(1.4)<br />
40,000<br />
(150000)<br />
26.7<br />
(12.0)<br />
23.3<br />
(10.5)<br />
20.0<br />
(9.0)<br />
16.7<br />
(7.5)<br />
13.3<br />
(6.0)<br />
10.0<br />
(4.5)<br />
6.7<br />
(3.0)<br />
3.3<br />
(1.5)<br />
0.0 0.0 0.0 0.0 0.0 0.0 0.0 0.0 0.0 0.0 0.0 0.0 0.0 0.0 0.0 0.0 0.0<br />
5
Controls<br />
Keypad Buttons<br />
RUN/STOP: The Aqua Rite Pro will toggle back and forth between RUN and STOP<br />
with each push of the RUN/STOP button.<br />
RUN: When in RUN mode, the Aqua Rite Pro will produce chlorine according to the<br />
desired output % or ORP setting (when <strong>AQ</strong>L-CHEM is used) for the entire filtering/<br />
pumping cycle. The Aqua Rite Pro can only produce chlorine when RUN is selected<br />
and the filter pump is running.<br />
STOP: When in STOP mode, the Aqua Rite Pro is prevented from energizing the<br />
electrolytic cell. In this position there is no chlorine generation. NOTE: To service<br />
any of the pool equipment or the Aqua Rite Pro, the power must be turned off at the<br />
circuit breaker.<br />
SUPER CHLORINATE: (if optional <strong>AQ</strong>L-CHEM sensing is NOT used) When you<br />
have an abnormally high bather load, a large amount of rain, a cloudy water condition,<br />
or any other condition which needs a large amount of purification to be introduced,<br />
SUPER CHLORINATE should be selected. This electronically “super chlorinates”<br />
(shocks) the water for a user selectable period of 1-96 hours (filter pump must<br />
be on during this time) or until the power has been turned off, whichever comes first.<br />
The Aqua Rite Pro will automatically revert back to the previous desired output %<br />
setting at the end of the super chlorinate period.<br />
INFO: Push the INFO button to enter the Information Menu (see Information Menu).<br />
SETTINGS: Push the SETTINGS button to enter the Settings Menu (see Settings<br />
Menu).<br />
CURSORS (+, -, ): Use these buttons to scroll through submenus, make selections<br />
and adjust values.<br />
Indicator LED's<br />
RUN/STOP: When illuminated, the Aqua Rite Pro is in automatic mode and will<br />
produce chlorine based on the desired output % or ORP setting (when <strong>AQ</strong>L-CHEM<br />
is used). When the LED is off, the Aqua Rite Pro has been manually turned off. It will<br />
not produce chlorine until RUN has been selected.<br />
SUPER CHLORINATE: When illuminated, the Super Chlorinate feature is active.<br />
CHECK SYSTEM: When Check System is illuminated, an error has occurred that<br />
requires attention. Refer to the Troubleshooting section of this manual for possible<br />
errors and solutions.<br />
6
Information Menu<br />
The Information Menu displays valuable system and pool information. The Aqua Rite<br />
Pro will default to displaying a portion of the Information Menu when no buttons have<br />
been pushed for 2 minutes. The unit will automatically scroll through several status<br />
displays. To access all of the Information Menu items, push the INFO button on the<br />
front panel. Advance through the various menu items using the "" buttons. A<br />
list of the Information Menu items is shown below.<br />
if ORP Auto Sensing is not used<br />
Chlorinator<br />
50%<br />
Super Chlorinate<br />
22:15 remaining<br />
No function<br />
Move to previous/next menu item<br />
No function<br />
Move to previous/next menu item<br />
The Aqua Rite Pro desired output % is shown here. If Super Chlorinate<br />
is active, the display will show the time remaining until the Aqua Rite<br />
Pro will return to the desired output %. This menu is disabled if an<br />
<strong>AQ</strong>L-CHEM is used and ORP Auto Sensing is enabled (see <strong>AQ</strong>L-<br />
CHEM manual).<br />
if <strong>AQ</strong>L-CHEM is used<br />
pH 7.5 (On)<br />
ORP 700 mV (On)<br />
No function<br />
Move to previous/next menu item<br />
This display will be shown only if chemical sensing is enabled. This<br />
display shows both pH and ORP levels/status when chemistry sensing<br />
is enabled via the Chemistry Configuration Wizard (requires the use<br />
of <strong>AQ</strong>L-CHEM Sensing Kit). The Aqua Rite Pro will refer to these<br />
levels to determine how much chlorine to generate (ORP) and how<br />
much CO 2<br />
or acid to dispense (pH). Refer to the <strong>AQ</strong>L-CHEM manual<br />
for specific information about these levels as well as the recommended<br />
ranges.<br />
+23.45 Set Day and +6.75A Time<br />
Wednesday 84°F 3200PPM 10:37P<br />
Press to switch chlorinator operation to opposite polarity (15 second delay)<br />
Move to previous/next menu item<br />
+/- 23.45V is the voltage applied to the chlorinator cell<br />
+/-6.75A is the current (amps) through the cell<br />
84ºF is the water temperature at the cell<br />
3200PPM is the “instant” salt level at this time<br />
For the chlorinator to be operating, several conditions must exist: the<br />
filter pump must be running, the flow switch must be detecting flow,<br />
the chlorinator setting must be set greater than 0%, the water<br />
temperature at the cell must be between 50ºF and 140ºF, and the salt<br />
level must be within the operating range. If any of these conditions<br />
are not met, the chlorinator diagnostic display will tell you the reason.<br />
It’s possible to have more than one reason, in which case after you<br />
rectify what was displayed the first time, a second display will appear.<br />
If the current (amps) display is 0.00A, then the chlorinator is operating<br />
normally but is in the off part of its normal operating cycle. Simply<br />
press either the “+” or “-“ key to start a new cycle.<br />
7
The Aqua Rite Pro periodically reverses the polarity of the voltage<br />
applied to the cell in order to automatically clean off any calcium<br />
deposits that may have built up on the cell. It is important that you<br />
check the chlorinator operation in both polarities. To do this, press<br />
either the “+” or “-“ buttons and the chlorinator will turn off, wait for<br />
15 seconds and then turn on in the opposite polarity.<br />
Salt Level<br />
3200 PPM<br />
No function<br />
Move to previous/next menu item<br />
This is the average "Salt Level" in the pool. This value is calculated<br />
over time and minimizes the effects of spikes or dips that may naturally<br />
occur.<br />
Instant Salt Press to load the “Instant Salt” into the averaged salt display<br />
3200 PPM (+=save) Move to previous/next menu item<br />
The “Instant Salt” is calculated based on the voltage, current (amps),<br />
and water temperature at the cell at that instant. There are a number of<br />
reasons why instant and average salt readings may differ. Some of<br />
these include salt having just been added to the pool and not yet<br />
thoroughly mixed, calcium buildup on the cell, and cell aging.<br />
Press the "+" button to enter the instant salt value into the average<br />
salt level. The average salt level will use this new value for its<br />
calculations.<br />
Flow Switch<br />
Flow<br />
No function<br />
Move to previous/next menu item<br />
The current status of the flow switch is displayed. There is a short<br />
delay when transitioning from flow to no-flow and a longer delay on<br />
the transition from no-flow to flow. The delay time is displayed.<br />
Main Software<br />
Revision 1.10<br />
Display Software<br />
Revision 0.18<br />
Chemistry Sense<br />
Software r1.28<br />
No function<br />
Move to previous/next menu item<br />
No function<br />
Move to previous/next menu item<br />
No function<br />
Move to previous/next menu item<br />
Available displays depend on configuration. These displays show<br />
the software revisions of various components.<br />
Inspect Cell<br />
hold + to reset<br />
Press to reset<br />
Move to previous/next menu item<br />
For optimum operation, you will need to inspect the Aqua Rite Pro<br />
chlorinator cell approximately every 3 months and clean the cell if<br />
necessary. The Aqua Rite Pro will automatically remind you and display<br />
“Inspect Cell, hold + to reset” as part of the rotating Information<br />
Menu. Clean the cell and then press the “+” button during the “Inspect<br />
Cell” display to reset the timer.<br />
8
Check System<br />
Low Salt<br />
Function depends on displayed menu item<br />
Move to next Check System condition or<br />
previous/next menu item<br />
Refer to the Troubleshooting section for information about error<br />
conditions and possible causes.<br />
Settings Menu<br />
The Settings Menu is used to configure the Aqua Rite Pro and adjust various settings.<br />
Access this menu by pushing the Settings Menu button. Refer to the information below<br />
when setting system operating parameters.<br />
Chlor. Config.<br />
+ to view/change<br />
Body Chlorinator of Water Type<br />
Pools Enabled<br />
Display<br />
Salt<br />
Cell Type<br />
T-CELL-15<br />
Push to access Chlorinator option<br />
Move to previous/next menu item<br />
Toggle between Pool and Spa<br />
Move to next menu item<br />
Toggle between Salt (default) and Minerals<br />
Move to next menu item<br />
Toggle between available cell types<br />
Move to previous/next menu item<br />
Body of Water Type<br />
Select Pool or Spa. "Pool" should be selected for bodies of water<br />
over 1000 gallons. The Aqua Rite Pro will adjust its operation<br />
according to this selection.<br />
Display<br />
Allows for the display of salt (default) or mineral values.<br />
Cell Type Selection<br />
Make the proper selection based on the electrolytic cell that is used in<br />
your system. Refer to the information below. Selections are: T-CELL-<br />
3, T-CELL-5, T-CELL-9 and T-CELL-15 (default). Note that the unit<br />
will not function properly if the wrong cell is selected.<br />
"T-CELL-3" = T-CELL-3, GLX-CELL-3-W<br />
"T-CELL-5" = GLX-CELL-5, GLX-CELL-5-W<br />
"T-CELL-9" = T-CELL-9, GLX-CELL-9-W<br />
"T-CELL-15" = T-CELL-15, GLX-CELL-15-W<br />
if <strong>AQ</strong>L-CHEM is used<br />
Chemistry Config.<br />
Wizard + to enter<br />
Sensing System<br />
Enabled<br />
Push to access Chemistry Config. Wizard<br />
Move to previous/next menu item<br />
Toggle between Enabled and Disabled (default)<br />
Move to next menu item<br />
Requires use of the optional <strong>AQ</strong>L-CHEM Sensing Kit. Following the<br />
steps of the Chemistry Config. Wizard will set up the <strong>AQ</strong>L-CHEM to<br />
sense ORP and pH levels. The Aqua Rite Pro will generate the correct<br />
amount of chlorine to properly sanitize the pool based on the <strong>AQ</strong>L-<br />
CHEM sensing function. Refer to the <strong>AQ</strong>L-CHEM manual for more<br />
detailed information.<br />
9
if ORP Auto Sensing is not used<br />
Chlorinator<br />
50%<br />
Adjust the desired output % for the pool<br />
Move to previous/next menu item<br />
The desired output % is used to control the amount of chlorine the<br />
Aqua Rite Pro generates. Raise this setting to increase chlorine level<br />
and lower it to decrease chlorine level. If an <strong>AQ</strong>L-CHEM is being used<br />
and ORP Auto Sensing is enabled (see <strong>AQ</strong>L-CHEM manual), the Aqua<br />
Rite Pro will override the desired chlorinator output % setting and<br />
generate chlorine based on the pool's ORP level.<br />
if ORP Auto Sensing is not used<br />
Super Chlorinate<br />
22 hours<br />
Adjust Super Chlorinate period (1-96 hours)<br />
Move to previous/next menu item<br />
Use the Super Chlorinate feature when there is an unusually high<br />
bather load, a large amount of rain, a cloudy water condition, or any<br />
other condition that requires a large amount of chlorine to be<br />
introduced to the pool. Note that the filter pump must be running for<br />
the entire time during the Super Chlorinate period. Set the actual time<br />
based on the size of the pool; larger pools require more hours, smaller<br />
pools require less.<br />
if <strong>AQ</strong>L-CHEM is used<br />
pH Calibration<br />
Wizard + to enter<br />
Push to access pH Calibration Wizard<br />
Move to previous/next menu item<br />
Use this Wizard to calibrate the optional <strong>AQ</strong>L-CHEM’s pH probe.<br />
This requires a manual pH test of the pool water using a dependable<br />
red phenol test kit (see <strong>AQ</strong>L-CHEM manual).<br />
if <strong>AQ</strong>L-CHEM is used<br />
Clean Probe Wizard<br />
+ to enter<br />
Push to access Clean Probe Wizard<br />
Move to previous/next menu item<br />
Use this Wizard to clean the optional <strong>AQ</strong>L-CHEM’s ORP and pH<br />
probes. The probes must be clean and free from oil, chemical deposits<br />
and contamination to function properly. Slow response, increased<br />
need to calibrate, and inconsistent readings are indications that the<br />
probes need to be cleaned (see <strong>AQ</strong>L-CHEM manual).<br />
Units<br />
Metric<br />
Toggle between Metric and English<br />
Move to previous/next menu item<br />
The Aqua Rite Pro can display temperature and units in Metric (ºC<br />
and g/L) or English (ºF and PPM). Make the desired selection here.<br />
10
Display Light<br />
On for 60 sec<br />
Toggle between Always On and On for 60 sec.<br />
Move to previous/next menu item<br />
This function controls the backlight on the display. Select<br />
between "Always On" and "On for 60 seconds". If “On for 60<br />
seconds” option is selected, then the backlight will automatically<br />
turn off 60 seconds after the last key is pressed and will stay off<br />
until next time a key is pressed.<br />
Beeper<br />
Enabled<br />
Toggle between Enabled (default) and Disabled Beeper<br />
Move to previous/next menu item<br />
When “Enabled”, the keypad will beep every time a key is pressed.<br />
If this audible indication is not desired, select “Disabled”.<br />
Reset Config. to<br />
Default Press +<br />
Are you sure?<br />
+ to proceed<br />
Initiate reset of all configuration parameters<br />
Move to previous/next menu item (config. not reset)<br />
Reset all configuration parameters<br />
Move to previous/next menu item (config. not reset)<br />
Config. reset<br />
Confirmed<br />
Move to previous/next settings menu item<br />
Use this function to erase all previous system configuration and<br />
reset all configuration parameters back to the factory default<br />
values. This function is NOT reversible--be careful<br />
Operation<br />
Assuming that the water chemical levels are in the recommended range, there are<br />
three factors that you can control which directly contribute to the amount of chlorine<br />
the Aqua Rite Pro will generate:<br />
1. filter run time each day (hours)<br />
2. the desired output % setting or ORP setting (when using <strong>AQ</strong>L-CHEM)<br />
3. the amount of salt in the pool<br />
The filter pump timer should be set so that entire volume of pool water passes<br />
through the filter each day. For pools with high chlorine demand, the timer may<br />
have to be set longer to generate enough chlorine.<br />
If optional <strong>AQ</strong>L-CHEM sensing is NOT used. To find the optimum desired output<br />
% setting, start at approximately 50%. Test the chlorine level every few days and<br />
adjust the setting up or down accordingly. It usually takes 2-3 adjustments to find<br />
the ideal setting for your pool/spa and after that, it should only take minor, infrequent<br />
adjustments. Because the chlorine demand of the pool increases with temperature,<br />
most people find they have to adjust the desired output up at the peak of<br />
the summer and down during the colder periods.<br />
NOTE: After the ideal setting has been found, you may need to raise the setting<br />
when the pool water temperature increases significantly, when there is higher than<br />
normal bather load or when your chlorinator cell ages. You may need to lower the<br />
setting when the pool water temperature decreases significantly or there are long<br />
periods of inactivity.<br />
11
The Aqua Rite Pro automatically stops generating when the pool water temperatures<br />
drops below 50ºF. This is usually not a problem because bacteria and algae stop growing<br />
at this temperature. You can override this low temperature cutoff by using the Super<br />
Chlorinate function for a day.<br />
Prevent overchlorination during cold weather: Check chlorine levels periodically. Most<br />
pools require less chlorine during cold weather and the desired output % setting should<br />
be lowered accordingly.<br />
Maintaining the Aqua Rite Pro System<br />
To maintain maximum performance, it is recommended that you open and visually inspect<br />
the cell every 3 months or after cleaning your filter. The Aqua Rite Pro will remind<br />
you to do this by displaying the message “Inspect/Clean Cell” after approximately 500<br />
hours of operation.<br />
The Aqua Rite Pro electrolytic cell has a self cleaning feature incorporated into the<br />
electronic control’s logic. In most cases this self cleaning action will keep the cell<br />
working at optimum efficiency. In areas where water is hard (high mineral content) and<br />
in pools where the water chemistry has been allowed to get "out of balance", the cell<br />
may require periodic cleaning.<br />
Servicing and Cleaning the Aqua Rite Pro Cell<br />
Turn off power to the Aqua Rite Pro before removing the electrolytic cell. Once removed,<br />
look inside the cell and inspect for scale formation (light colored crusty or flaky<br />
deposits) on the plates and for any debris which has passed through the filter and<br />
caught on the plates. If no deposits are visible, reinstall. If deposits are seen, use a high<br />
pressure garden hose and try to flush the scale off. If this is not successful, use a plastic<br />
or wood tool (do not use metal as this will scratch the coating off the plates) and scrape<br />
deposits off of plates. Note that a buildup on the cell indicates that there is an unusually<br />
high calcium level in the pool (old pool water is usually the cause). If this is not<br />
corrected, you may to have to periodically clean the cell. The simplest way to avoid this<br />
is to bring the pool chemistry to the recommended levels as specified.<br />
Mild Acid Washing: Use only in severe cases where flushing and scraping will not<br />
remove the majority of deposits. To acid wash, turn off power to Aqua Rite Pro. Remove<br />
cell from piping. In a clean plastic container, mix a 4:1 solution of water to muriatic acid<br />
(one gallon of water to one quart of muriatic acid). ALWAYS ADD ACID TO WATER -<br />
NEVER ADD WATER TO ACID. Be sure to wear rubber gloves and appropriate eye<br />
protection. The level of the solution in the container should just reach the top of the cell<br />
so that the wire harness compartment is NOT submerged. It may be helpful to coil the<br />
wiring before immersing the cell. The cell should soak for a few minutes and then rinse<br />
with a high pressure garden hose. If any deposits are still visible, repeat soaking and<br />
rinsing. Replace cell and inspect again periodically.<br />
Winterizing<br />
The Aqua Rite Pro electrolytic cell and flow detection switch will be damaged by freezing<br />
water just as your pool plumbing would. In areas of the country which experience<br />
severe or extended periods of freezing temperatures, be sure to drain all water from the<br />
pump, filter, and supply and return lines before any freezing conditions occur. The<br />
electronic control is capable of withstanding any winter weather and should not be<br />
removed.<br />
Spring Start-up<br />
DO NOT turn the Aqua Rite Pro on, until the pool water chemistry has been brought to<br />
the proper levels. This information can be found on page 2.<br />
12
INSTALLATION<br />
Installation must be performed in accordance with Local and NEC codes.<br />
120/240 VAC<br />
POWER<br />
Aqua Rite Pro<br />
FROM<br />
POOL<br />
FROM<br />
SPA<br />
TO<br />
POOL<br />
TO<br />
SPA<br />
Preparing Pool/Spa Water<br />
Refer to page 2 for recommended chemical levels. The pool's chemistry must be balanced<br />
BEFORE activating the Aqua Rite Pro. NOTE: If the pool does not have new<br />
water, add 1 quart (1 liter) of metal remover and 1 quart (1 liter) of non-copper based<br />
algaecide to the pool, per manufacturer's instructions. This ensures a quick, troublefree<br />
transfer to the Aqua Rite Pro system.<br />
Mounting the Aqua Rite Pro Control<br />
The Aqua Rite Pro is contained in a raintight enclosure that is suitable for outdoor<br />
mounting. The control must be mounted a minimum of 5 ft. (1.5 meters) horizontal<br />
distance (or more, if local codes require) from the pool/spa.<br />
The control is designed to mount horizontally on a flat surface with the knockouts<br />
facing downward. Because the enclosure also acts as a heat sink (disperses heat from<br />
inside the box), it is important not to block the four sides of the control. Do not mount<br />
Aqua Rite Pro inside a panel or tight enclosed area.<br />
13
If an <strong>AQ</strong>L-CHEM kit will be used, take into consideration the space necessary for<br />
mounting the unit as well as running the plumbing lines from the <strong>AQ</strong>L-CHEM's probe<br />
cell to the pool plumbing. Refer to the <strong>AQ</strong>L-CHEM manual for specific mounting instructions.<br />
Plumbing<br />
Ensure that the Aqua Rite Pro installation does not constitute a cross connection with<br />
the local potable water supply. Consult local plumbing codes.<br />
The Aqua Rite Pro is packaged with a flow switch and cell unions. The cell must be<br />
purchased separately. Refer to page 1 for information about available chlorinator cells.<br />
The flow switch and cell should be plumbed in the return line to the pool/spa. The<br />
preferred installation is after (downstream) all the pool equipment (filter, heater, solar,<br />
etc.). The electrolytic cell and flow switch tee fitting are designed to be plumbed into 2"<br />
(51mm) PVC pipe. Adapters (not included) can be used for systems with 1½" (38 mm)<br />
plumbing.<br />
For proper plumbing, refer to the overview diagram on page 13. Alternate configurations<br />
#1 shows the flow switch can also be in front of the cell. Configurations #2 and #3<br />
allow for chlorination of both the pool and spa during spa spillover operation, but<br />
prevent overchlorination of the spa during "spa only" operation. Never use configuration<br />
#4.<br />
1<br />
2<br />
12”<br />
min<br />
12”<br />
min<br />
3 4<br />
Flow Switch:<br />
IMPO<strong>RT</strong>ANT: There must be at least a 12" (25cm) straight pipe run<br />
before (upstream) the flow switch. If the switch is plumbed after the<br />
cell, the cell can by counted as the 12" (25cm) of straight pipe. To<br />
ensure proper operation, verify that the arrow on the flow switch<br />
(located on top of gray hex) points in the direction of water flow.<br />
14
Electrolytic Cell:<br />
Install using the unions provided. Tighten unions BY HAND for a<br />
watertight seal. For pool/spa combination systems with spillover,<br />
use configurations #2 or #3 above to allow chlorination of both the<br />
pool and spa during spillover but preventing overchlorination when<br />
operating the spa only.<br />
Wiring<br />
Power must be shut off at the circuit breaker before performing any wiring. Be sure to<br />
follow Local and NEC electrical codes. To provide safe operation, the Aqua Rite Pro<br />
must be properly grounded and bonded.<br />
Input Power:<br />
Wire the Aqua Rite Pro to the LOAD SIDE of the filter pump timer. It is very important<br />
that the Aqua Rite Pro is powered only when the pump is running. Note that this circuit<br />
must be protected by a Ground Fault Circuit Breaker (GFCB).<br />
Refer to the wiring label on the Aqua Rite Pro as well as the diagram below to determine<br />
correct wiring connections. The Aqua Rite Pro is shipped from the factory with the<br />
configuration jumpers in 240VAC position. If using 120VAC, move the jumpers as<br />
shown below. IMPO<strong>RT</strong>ANT: If a dispensing device will be used (page 17), it must be<br />
powered by the same input voltage as the Aqua Rite Pro.<br />
For Canadian models, the Aqua Rite Pro shall be connected to a circuit protected by a<br />
class A ground fault interrupter. Be sure to connect the ground wire to the green ground<br />
screw terminal located on the bottom of the enclosure.<br />
120 VAC<br />
TYPICAL 240 VAC WIRING<br />
<strong>AQ</strong>UA<br />
RITE Pro<br />
<strong>AQ</strong>UA<br />
RITE Pro<br />
TIMECLOCK<br />
SUBPANEL<br />
LOAD<br />
LINE<br />
PCB<br />
PCB<br />
GND<br />
BONDING<br />
LUG<br />
GROUND<br />
IMPO<strong>RT</strong>ANT:<br />
MOVE JUMPERS<br />
TO POSITIONS SHOWN<br />
BONDING<br />
LOOP<br />
PUMP<br />
Note: Wire the pump directly to the timeclock--do not use the Aqua Rite Pro as a junction box.<br />
Bonding:<br />
A lug used for bonding is attached to the bottom of the Aqua Rite Pro enclosure (two<br />
lugs are provided for Canadian models). The Aqua Rite Pro must be bonded with an 8<br />
AWG copper wire (6 AWG Canada) to the pool bonding system. Refer to the diagram<br />
below.<br />
Cutout for<br />
cell cable<br />
Bottom of<br />
Aqua Rite Pro Enclosure<br />
Second bonding lug for<br />
Canadian models only<br />
15<br />
Bonding lug to pool<br />
bonding system
Electrolytic Cell and Flow Switch:<br />
The electrolytic cell and flow switch cables are terminated with connectors which plug<br />
into the Aqua Rite Pro for easy attachment and removal. The door of the Aqua Rite Pro<br />
must be open and the front panel removed to access the cell cable and flow switch<br />
connectors. Route the flow switch cable through one of the knockouts. A cutout in the<br />
enclosure is provided for the cell cable. The diagram below shows the location of these<br />
connections.<br />
Flow Switch<br />
Connector<br />
Cell Connector<br />
Optional <strong>AQ</strong>L-CHEM Chemistry Kit<br />
Plug the connector from the <strong>AQ</strong>L-CHEM into the designated connector on the Aqua<br />
Rite Pro PCB as shown below. For detailed installation and operation information, refer<br />
to the <strong>AQ</strong>L-CHEM instructions.<br />
Connector for<br />
<strong>AQ</strong>L-CHEM<br />
16
<strong>Hayward</strong>/Goldline Aqua Rite Chlorinator<br />
The Aqua Rite Pro can control one or more <strong>Hayward</strong>/Goldline Aqua Rite chlorinators<br />
when additional sanitizing capacity is required. A 4 wire connection is used to communicate<br />
to the Aqua Rite(s) and can be wired up to 500' apart. Any outdoor rated 4<br />
conductor cable can be used. Refer to the wiring diagram below and on the following<br />
page for proper wiring connection to the Aqua Rite. NOTE: There must be only 1<br />
"primary" unit. All other Aqua Rite units must be configured as "secondary".<br />
The Aqua Rite(s) power input must be wired to the LOAD SIDE of the filter pump timer<br />
(the same as the Aqua Rite Pro).<br />
Jumper Installed<br />
For Primary<br />
(Factory Default)<br />
4 GREEN<br />
3 YELLOW<br />
2 BLACK<br />
1 RED<br />
Jumper Removed<br />
For Secondary(s)<br />
Additional<br />
Aqua Rite(s)<br />
(if required)<br />
Aqua Rite<br />
Pro<br />
Aqua Rite<br />
(Primary)<br />
Aqua Rite<br />
(Secondary)<br />
NOTE: Primary/Secondary jumper is located underneath small circuit board.<br />
Aqua Rite<br />
Pro<br />
RED 1<br />
green<br />
4<br />
BLK 2<br />
yellow<br />
3<br />
YEL 3<br />
black<br />
2<br />
GRN 4<br />
red<br />
1<br />
GRN<br />
YEL<br />
BLK<br />
RED<br />
Aqua Rite<br />
Optional pH Dispense Wiring<br />
Requires the use of a <strong>Hayward</strong>/Goldline <strong>AQ</strong>L-CHEM sensing device and an <strong>AQ</strong>L-<br />
CHEM2, <strong>AQ</strong>L-CHEM2-240 or other pH dispensing device requiring 120VAC or<br />
240VAC on/off control. A screw terminal block located on the enclosure surface below<br />
the transformer is provided for connection to an <strong>AQ</strong>L-CHEM2, <strong>AQ</strong>L-CHEM2-240 or<br />
other pH related dispensing device (peristaltic pumps, solenoid valves, etc.). After<br />
properly installing and configuring the <strong>AQ</strong>L-CHEM and the pH dispensing device, the<br />
Aqua Rite Pro will turn on the dispensing device when pH correction is required.<br />
IMPO<strong>RT</strong>ANT: The dispensing device must be powered by the same voltage used to<br />
power the Aqua Rite Pro. Configure the output voltage to the pH device by moving the<br />
wiring connections on the mainboard as shown on page 18.<br />
Example: If an <strong>AQ</strong>L-CHEM2-240 (240VAC) will be used, the Aqua Rite Pro must be<br />
powered by 240VAC. Connect the 240VAC pigtail supplied with the <strong>AQ</strong>L-CHEM to the<br />
Aqua Rite Pro’s terminal block as shown in the diagram. The <strong>AQ</strong>L-CHEM2-240 will then<br />
plug into the pigtail’s 240VAC receptacle. Refer to the <strong>AQ</strong>L-CHEM manual for more<br />
detailed information.<br />
17
240VAC pH Dispensing Device<br />
(Factory Default)<br />
WHITE<br />
BLACK<br />
EP2<br />
EP1<br />
240 VAC<br />
Ground<br />
L1 L2<br />
to <strong>AQ</strong>L-CHEM2-240 Pigtail or<br />
240VAC pH Dispensing Device<br />
120VAC pH Dispensing Device<br />
For 120VAC operation<br />
position connectors as shown<br />
WHITE<br />
BLACK<br />
EP3<br />
EP1<br />
120 VAC<br />
Ground<br />
L1 N<br />
to <strong>AQ</strong>L-CHEM2 Pigtail or<br />
120VAC pH Dispensing Device<br />
TROUBLESHOOTING<br />
Check System Indicator<br />
The “CHECK SYSTEM” LED will alert you when the Aqua Rite Pro detects any of the<br />
following conditions that are abnormal and require attention for optimal operation of<br />
your pool. Press “” to view all of the existing “Check System” conditions.<br />
• Inspect Cell -- For optimum operation, you will need to inspect the Aqua Rite Pro<br />
chlorinator cell approximately every 3 months and clean the cell if necessary. The<br />
Aqua Rite Pro will automatically remind you when it is time and display “Inspect Cell,<br />
+ to reset” as part of the rotating Default Menu. Clean the cell (see instructions, page<br />
12) and then press the “+” button during the “Inspect Cell” display to reset the timer.<br />
• Low Salt/Minerals or Very Low Salt/Minerals -- When the salt is too low the Aqua<br />
Rite Pro will generate less chlorine and the life of the cell is degraded. Check the cell<br />
and clean if necessary before adding salt.<br />
18
• High Salt/Amps/Minerals -- The Aqua Rite Pro will stop generating chlorine under<br />
certain high salt conditions in order to protect the internal electronics from damage.<br />
The only way to lower the salt level is to partially drain the pool and add fresh water.<br />
• Chlorinator Cell Sensor -- The cell sensor is either an open or short circuit.<br />
• Low Volts -- If the chlorinator cell voltage is too low.<br />
• No Cell Power -- If no chlorinator cell power is detected on the printed circuit board.<br />
• Check Flow Switch -- If the flow switch input is invalid.<br />
• Cell Power Error -- If a chlorinator cell power error is detected on the printed circuit<br />
board.<br />
• Cell Missing -- If the chlorinator is enabled but no cell is detected.<br />
• CSM Comm Error: -- If Chemistry Sensing is enabled and the Chemistry Sense<br />
Module (CSM) is not responding.<br />
• pH Probe Error -- If the CSM indicates that there is a problem with the pH probe.<br />
• pH Low - Check Feeder -- If a pH level of 6.9 or less is detected, check the feeder for<br />
proper operation<br />
• pH High - Check Feeder -- If a pH level of 8.1 or higher is detected, check the<br />
chemical supply and the feeder for proper operation<br />
• pH Timeout - Check Feeder -- If the unit has been dispensing for more than the<br />
selected timeout without reaching the desired level. Check the chemical supply and<br />
the feeder. If both are OK, the timeout may need to be increased. Press the “+”<br />
button to reset the alarm and resume dispensing.<br />
• pH Calibration Error -- When using the pH Calibration Wizard and the entered test<br />
result was different from the measured pH level by ± 1.0 or more. The pH probe may<br />
need to be cleaned or replaced.<br />
• ORP Probe Error -- If the CSM indicates that there is a problem with the ORP probe.<br />
• ORP Low - Check Chlor -- If an ORP level of 350mV or less is detected. Check the<br />
chlorinator for proper operation.<br />
• ORP High - Check Chlor -- If an ORP level of 950mV or higher is detected. Check the<br />
chlorinator for proper operation.<br />
• ORP High - Chlor Off -- If an ORP level of 950mV or higher is detected and the<br />
chlorine feed mode is ORP Auto Sensing, the chlorinator has been turned off. Check<br />
the chlorinator for proper operation.<br />
• ORP Timeout -Chlor Off -- If the unit has been chlorinating for more than the<br />
selected sanitizer timeout without reaching the desired level, the chlorinator has<br />
been turned off. Press the “+” button to reset the alarm and resume chlorination.<br />
• Ambient Sensor -- If the internal (ambient) sensor is either open or short circuit.<br />
19
LIMITED WARRANTY (effective 04/01/09) <strong>Hayward</strong>/Goldline warrants its Pro Logic and<br />
E-Command pool automation products as well as its Aqua Rite, Aqua Rite Pro, Aqua Plus and<br />
SwimPure chlorination products to be free of defects in materials and workmanship, under<br />
normal use and service, for a period of three (3) years. <strong>Hayward</strong>/Goldline also warrants its<br />
Aqua Trol chlorination products to be free of defects in materials and workmanship, under<br />
normal use and service for a period of one (1) year. These warranties are applicable from the<br />
initial date of installation on private residential swimming pools in the US and Canada.<br />
<strong>Hayward</strong>/Goldline warrants all the above-identified pool automation and chlorination products<br />
installed on commercial swimming pools and on swimming pools outside of the US and<br />
Canada for a period of one (1) year. Likewise, <strong>Hayward</strong>/Goldline warrants all accessories<br />
and replacement parts for the above-identified pool automation and chlorination products for<br />
a period of one (1) year. Each of these warranties is not transferable and applies only to the<br />
original owner.<br />
Proof of purchase is required for warranty service. If written proof of purchase is not<br />
provided, the manufacturing date code will be the sole determinant of the date of installation<br />
of the product. To obtain warranty service or repair, please contact the place of purchase or<br />
the nearest <strong>Hayward</strong>/Goldline authorized warranty service center. For more information on<br />
authorized service centers please contact the <strong>Hayward</strong>/Goldline Technical Service Support<br />
Center (61 Whitecap Road, North Kingstown RI, 02852) or visit the Goldline web site at<br />
www.goldlinecontrols.com or the <strong>Hayward</strong> website at www.haywardnet.com.<br />
WARRANTY EXCLUSIONS:<br />
1. Material supplied or workmanship performed by others in process of installation.<br />
2. Damage resulting from improper installation including installation on pools larger than the<br />
product rating.<br />
3. Problems resulting from failure to install, operate or maintain the product(s) in accordance<br />
with the recommendations contained in the owners manual(s).<br />
4. Problems resulting from failure to maintain pool water chemistry in accordance with the<br />
recommendations in the owners manual(s).<br />
5. Problems resulting from tampering, accident, abuse, negligence, unauthorized repairs or<br />
alternations, fire, flood, lightning, freezing, external water, degradation of natural stone used in<br />
or immediately adjacent to a pool or spa, war or acts of God.<br />
DISCLAIMER. THE EXPRESS LIMITED WARRANTIES ABOVE CONSTITUTE THE<br />
ENTIRE WARRANTIES WITH RESPECT TO THE ABOVE-IDENTIFIED HAYWARD/<br />
GOLDLINE POOL AUTOMATION AND CHLORINATION <strong>PRO</strong>DUCTS AND IS IN<br />
LIEU OF ALL OTHER WARRANTIES, EXPRESS OR IMPLIED, INCLUDING WAR-<br />
RANTIES OF MERCHANTABILITY OR FITNESS FOR A PA<strong>RT</strong>ICULAR PURPOSE.<br />
THESE WARRANTIES GIVE YOU SPECIFIC LEGAL RIGHTS, AND YOU MAY ALSO<br />
HAVE OTHER RIGHTS OF EQUIPMENT, LOST <strong>PRO</strong>FITS OR REVENUE, COSTS<br />
OF RENTING REPLACEMENTS, AND OTHER ADDITIONAL EXPENSES, EVEN IF<br />
THE SELLER HAD BEEN ADVISED OF THE POSSIBILITY OF SUCH DAMAGES.<br />
SOME STATES DO NOT ALLOW THE EXCLUSION OF LIMITATION OF INCI-<br />
DENTAL OR CONSEQUENTIAL DAMAGES, SO THE ABOVE LIMITATION OR<br />
EXCLUSION MAY NOT APPLY TO YOU.<br />
NO WHOLESALER, AGENT, DEALER, CONTRACTOR OR OTHER PERSON IS<br />
AUTHORIZED TO <strong>PRO</strong>VIDE, SUPPLEMENT OR MODIFY ANY WARRANTY ON<br />
BEHALF OF HAYWARD/GOLDLINE.<br />
THESE WARRANTIES ARE VOID IF THE <strong>PRO</strong>DUCT HAS BEEN ALTERED IN ANY<br />
WAY AFTER LEAVING THE FACTORY. FOR THE ABOVE-IDENTIFIED CHLORI-<br />
NATION <strong>PRO</strong>DUCTS, THESE WARRANTIES ALSO ARE VOID IF, DURING THE<br />
WARRANTY PERIOD, YOU USE A REPLACEMENT CHLORINATOR CELL OTHER<br />
THAN AN UNMODIFIED, NEW HAYWARD/GOLDLINE CHLORINATOR CELL PUR-<br />
CHASED FROM HAYWARD/GOLDLINE. IF A WARRANTY BECOMES VOID, YOU<br />
STILL MAY PURCHASE SERVICE AND/OR TELEPHONE TECHNICAL SUPPO<strong>RT</strong><br />
AT THE THEN CURRENT TIME AND MATERIAL RATES.<br />
20
ELECTROLYTIC CHLORINE GENERATOR<br />
BASIC POOL MAINTENANCE REQUIREMENTS<br />
TEST IDEAL RANGE ADJUSTMENT REQUIRED<br />
WEEKLY<br />
Free Chlorine<br />
1.0 - 3.0 ppm<br />
pH 7.2 - 7.8<br />
Raise desired output % to<br />
increase, lower desired output %<br />
to decrease -OR- increase or<br />
decrease pump filtration time.<br />
Too high - add muriatic acid<br />
Too low - add soda ash.<br />
MONTHLY<br />
Alkalinity<br />
Salt<br />
80 - 120 ppm Add baking soda to increase.<br />
Add acid as required to decrease.<br />
2700 - 3400 ppm Add salt as required to increase.<br />
QUA<strong>RT</strong>ERLY<br />
Stabilizer 60 - 80 ppm Add cyanuric acid to increase.<br />
Calcium 200 - 400 ppm Add calcium to increase.<br />
Drain and add water to decrease.<br />
Electrolytic Cell inspect & clean Refer to section in manual.<br />
Questions?<br />
Refer to www.goldlinecontrols.com for latest manual<br />
revisions, additional information and helpful service.<br />
620 Division St.<br />
Elizabeth, NJ 07207<br />
092392D<br />
Copyright © 2010 <strong>Hayward</strong> Inc.