Preserving Food with Help From Your Microwave (SP 50-538)
Preserving Food with Help From Your Microwave (SP 50-538)
Preserving Food with Help From Your Microwave (SP 50-538)

Create successful ePaper yourself
Turn your PDF publications into a flip-book with our unique Google optimized e-Paper software.
O R E G O N S T A T E U N I V E R S I T Y E x t e n s i o n S e r v i c e<br />
<strong>SP</strong> <strong>50</strong>-<strong>538</strong> Reprinted March 2013<br />
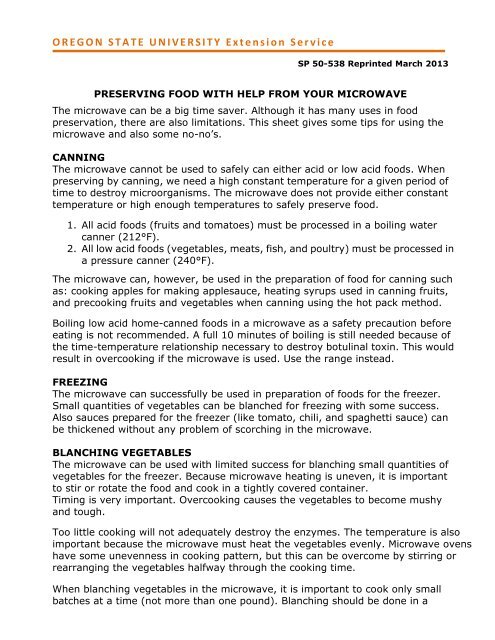
PRESERVING FOOD WITH HELP FROM YOUR MICROWAVE<br />
The microwave can be a big time saver. Although it has many uses in food<br />
preservation, there are also limitations. This sheet gives some tips for using the<br />
microwave and also some no-no’s.<br />
CANNING<br />
The microwave cannot be used to safely can either acid or low acid foods. When<br />
preserving by canning, we need a high constant temperature for a given period of<br />
time to destroy microorganisms. The microwave does not provide either constant<br />
temperature or high enough temperatures to safely preserve food.<br />
1. All acid foods (fruits and tomatoes) must be processed in a boiling water<br />
canner (212°F).<br />
2. All low acid foods (vegetables, meats, fish, and poultry) must be processed in<br />
a pressure canner (240°F).<br />
The microwave can, however, be used in the preparation of food for canning such<br />
as: cooking apples for making applesauce, heating syrups used in canning fruits,<br />
and precooking fruits and vegetables when canning using the hot pack method.<br />
Boiling low acid home-canned foods in a microwave as a safety precaution before<br />
eating is not recommended. A full 10 minutes of boiling is still needed because of<br />
the time-temperature relationship necessary to destroy botulinal toxin. This would<br />
result in overcooking if the microwave is used. Use the range instead.<br />
FREEZING<br />
The microwave can successfully be used in preparation of foods for the freezer.<br />
Small quantities of vegetables can be blanched for freezing <strong>with</strong> some success.<br />
Also sauces prepared for the freezer (like tomato, chili, and spaghetti sauce) can<br />
be thickened <strong>with</strong>out any problem of scorching in the microwave.<br />
BLANCHING VEGETABLES<br />
The microwave can be used <strong>with</strong> limited success for blanching small quantities of<br />
vegetables for the freezer. Because microwave heating is uneven, it is important<br />
to stir or rotate the food and cook in a tightly covered container.<br />
Timing is very important. Overcooking causes the vegetables to become mushy<br />
and tough.<br />
Too little cooking will not adequately destroy the enzymes. The temperature is also<br />
important because the microwave must heat the vegetables evenly. <strong>Microwave</strong> ovens<br />
have some unevenness in cooking pattern, but this can be overcome by stirring or<br />
rearranging the vegetables halfway through the cooking time.<br />
When blanching vegetables in the microwave, it is important to cook only small<br />
batches at a time (not more than one pound). Blanching should be done in a
covered glass casserole or microwave freezer bags.<br />
It is recommended that 1-2 tablespoons water be added to the vegetables before<br />
cooking. <strong>Microwave</strong> (high) 3-4 minutes per pound, stirring halfway through<br />
cooking. Let stand one minute after cooking and then put blanched vegetables<br />
immediately into cold water to cool. Drain and pack in moisture vapor-proof freezer<br />
bags. Freeze immediately.<br />
Note: Cooking times may vary but are usually half the cooking time of the same<br />
fresh vegetable. Blanch vegetables to a temperature of 180°F.<br />
Tips on freezing foods for microwave cooking<br />
Be sure to package your frozen foods so they can be thawed and cooked in the<br />
microwave <strong>with</strong> little or no handling. Package in moisture vapor-resistant,<br />
packaging sturdy enough to <strong>with</strong>stand microwave cooking. Package in flat, thin<br />
packages keeping the thickness 1-2 inches. This type of packaging will allow you<br />
to cook your vegetables in the microwave <strong>with</strong>out thawing first.<br />
Don’t overcook frozen vegetables. Allow 5-10 minutes carry-over time to equalize<br />
the temperature and tenderize the vegetables. Overcooking toughens and dries<br />
out the food. A 10 oz. package of frozen vegetables will be cooked in 7-8 minutes<br />
on high.<br />
Sauces like tomato, spaghetti, salsa and chili are great cooked in the microwave<br />
because there is no worry about scorching. These products are cooked until the<br />
desired thickness is reached.<br />
Cooking tip: Cook sauces in a large tall casserole or 2 quart pitcher. Cover container<br />
and cook on high power until mixture boils and then uncover and reduce power to<br />
medium (<strong>50</strong>%). Continue cooking until sauce reaches desired thickness. If sauce<br />
spatters as it thickens, cover <strong>with</strong> a paper towel. Be sure to cool all sauces thoroughly<br />
before packaging for the freezer.<br />
Freezer Tomato Sauce<br />
8 cups of ripe unpeeled tomatoes (chopped into pieces)<br />
2 Tbsp. sugar<br />
2 Tbsp. chopped fresh parsley<br />
1 bay leaf<br />
1 tsp. dried leaf basil<br />
1 tsp. salt<br />
1 tsp. dried leaf oregano<br />
¼ tsp. pepper<br />
2 stalks celery, chopped<br />
Combine all ingredients into a large casserole dish and microwave high power 25-35<br />
minutes or until all the vegetables are tender. Run the mixture through a food mill or<br />
colander. Return to the microwave and cook until the desired thickness (10-15<br />
minutes). Freeze sauce in 1 cup serving portions.<br />
Note: A 1-cup portion will thaw in 4-5 minutes on high power.
DRYING<br />
Except for herbs and mushrooms, drying foods in the microwave is not<br />
recommended. Other foods contain too much moisture and will cook and become<br />
tough in the long drying process.<br />
The microwave can be used for pretreatment of fruits and vegetables before<br />
drying them in a dehydrator, oven, or the sun.<br />
Tips on drying herbs and mushrooms<br />
Use food-grade microwave paper towels when drying. (The dye used in the<br />
decorator towels and the scraps of metal in recycled towels can cause hot spots<br />
that could catch the towels on fire.) Place paper towel on meat rack to dry herbs.<br />
This way moisture can escape easier.<br />
Dry in small quantities (1-2 cups) at a time. Layer the herbs and mushroom slices in<br />
a single layer. Too large a quantity will cause them to cook and not dry well.<br />
Dry the herbs until they are almost dry and then let them finish drying at room<br />
temperature. Let herbs completely cool before packaging.<br />
Allow 3-6 minutes per cup on high power for 600 watt ovens, 2-4 minutes for 6<strong>50</strong>-700<br />
watt ovens. Stir the herbs every 30 seconds after the first minute until dry.<br />
Herbs commonly dried in the microwave are parsley, celery leaves, thyme and sage.<br />
When drying mushrooms, clean the mushrooms, slice and arrange in a single layer<br />
on paper towel on meat rack. <strong>Microwave</strong> on high 6-10 minutes or until the slices<br />
are semi-leathery. Air dry to cool before storing.<br />
Reconstituting Dried <strong>Food</strong>s<br />
The microwave is great for reconstituting dried fruits and vegetables. Combine 1<br />
cup of fruit or vegetable <strong>with</strong> ½ cup water and microwave covered 2-4 minutes,<br />
stirring once. Let fruit sit a few minutes or until desired plumpness is reached. Let<br />
vegetables sit 30 minutes before cooking or adding to soups and stews.<br />
JAMS AND JELLIES<br />
The microwave can be helpful when making jams and jellies. When making large<br />
quantities, you really don’t save any time. However, the product will not stick so<br />
constant stirring is not necessary and the clean-up is simple.<br />
Tips on Making Jams and Jellies<br />
Pot holders should be used since sugar mixture gets very hot. Cover products<br />
when heating to speed up the cooking and melt the sugar crystals clinging to the<br />
side of the container during the first part of cooking. When removing cover, be<br />
sure to lift the lid away from you so you won’t get burned from the steam.<br />
Use high power when cooking. Pour jellies and jams into hot sterilized jars and<br />
process in a boiling water bath.
Strawberry-Rhubarb Jam (freezer jam)<br />
1½ cups strawberry puree (approx. 1½ pints whole berries)<br />
2 cups sliced fresh rhubarb<br />
½ cup water<br />
1 package powdered fruit pectin (1¾ oz.)<br />
5 cups sugar<br />
Combine rhubarb and water and pectin in a large bowl and mix well.<br />
<strong>Microwave</strong> on high power covered 5-6 minutes or until rhubarb is tender and<br />
pectin is dissolved. Stir once or twice.<br />
Stir in sugar and microwave uncovered 3-4 minutes or until mixture comes to a<br />
boil. Stir once.<br />
When mixture boils, add strawberries and mix well.<br />
Wine Jelly<br />
2½ cups red or rose wine<br />
3¼ cups sugar<br />
1 envelope liquid pectin<br />
Combine wine and sugar in a large bowl and mix well.<br />
<strong>Microwave</strong> mixture uncovered on high power 5-6 minutes or until boiling. Stir once or<br />
twice to equalize temperature.<br />
When hot, pour in liquid pectin and blend well.<br />
<strong>Microwave</strong> 1-2 minutes longer or until mixture returns to boiling.<br />
Pour into sterilized jars, leaving ¼ inch headspace. Adjust lids and process half-pint<br />
jars for 5 minutes in a boiling water bath.<br />
Makes about 5 glasses.<br />
<strong>Microwave</strong> Apple-Butter<br />
8 medium apples, quartered and cored<br />
1 cup apple cider or juice<br />
1 cup sugar<br />
1 tsp. ground cinnamon<br />
¼ tsp. ground cloves<br />
In a 2 quart casserole combine the apples and cider. Cover and microwave 8-12<br />
minutes on high power stirring every 3 minutes until apples are tender. Press the<br />
cooked apples through a food mill or sieve to puree.<br />
Return mixture to casserole dish and add sugar and spices.<br />
<strong>Microwave</strong> uncovered 10-15 minutes on high power. Stir often until the mixture<br />
thickens.<br />
Pour cooked butter into hot sterilized jars, leaving ¼ inch headspace.<br />
Process half-pint jars 5 minutes in a boiling water bath.<br />
PICKLES AND RELISHES<br />
The microwave can be used when making quick pickles and relishes. The time saved<br />
is not great when large quantities are cooked but clean-up is easy because food<br />
doesn’t stick. It is important to stir the pickles and relishes as they cool.<br />
<strong>Microwave</strong>d quick pickles and relishes need to be processed in a boiling water bath<br />
according to processing directions in PNW355 – Pickling Vegetables.
Year Round Fresh Tomato Relish<br />
In 1½ quart casserole, stir together:<br />
1 Tablespoon prepared mustard<br />
1 Tablespoon brown sugar<br />
2 teaspoons vinegar<br />
½ teaspoon seasoned salt.<br />
Place in microwave and cook on high power 1 minute. Add:<br />
2 cups finely chopped tomato<br />
½ cup finely chopped celery<br />
½ cup finely chopped green pepper<br />
¼ cup finely chopped green onion<br />
Return to microwave and cook uncovered 2 minutes.<br />
Stir well and refrigerate at least 1 hour before serving to blend flavors.<br />
Store leftovers in refrigerator. Makes about 3 cups of relish.<br />
Beet Pickles<br />
1 (16 ounce can) sliced beets<br />
¼ cup white vinegar<br />
1 tsp. salt<br />
½ tsp. cinnamon<br />
¼ tsp. allspice<br />
In a 4 cup glass measuring cup, drain off beet juice and add vinegar, salt and<br />
spices.<br />
<strong>Microwave</strong> liquids 3-5 minutes or until the mixture comes to a boil.<br />
Stir once or twice during the cooking.<br />
Add beets to the hot juice mixture. Store in a covered container in the<br />
refrigerator and serve as needed. Serves 4.<br />
Source: OSU Master <strong>Food</strong> Preserver Program<br />
© 2012 Oregon State University. OSU Extension Service cooperating. OSU Extension Service offers educational programs,<br />
activities, and materials <strong>with</strong>out discrimination based on race, color, religion, sex, sexual orientation, national origin, age,<br />
marital status, disability, or disabled veteran or Vietnam-era veteran status. OSU Extension Service is an Equal Opportunity<br />
Employer.