


Create successful ePaper yourself
Turn your PDF publications into a flip-book with our unique Google optimized e-Paper software.
MS 150<br />
Installation<br />
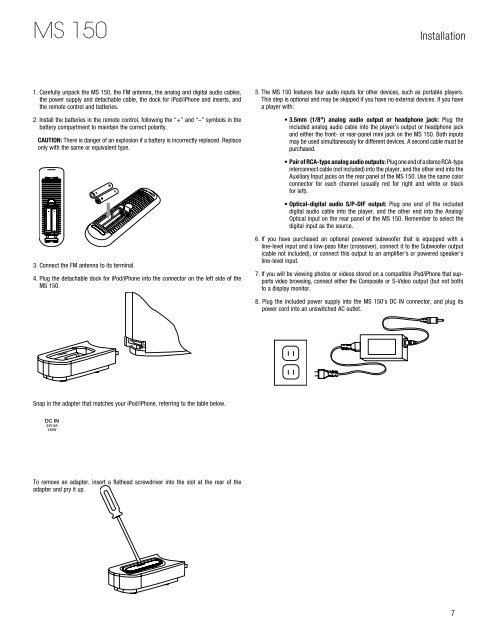
1. Carefully unpack the MS 150, the FM antenna, the analog and digital audio cables,<br />
the power supply and detachable cable, the dock for iPod/iPhone and inserts, and<br />
the remote control and batteries.<br />
2. Install the batteries in the remote control, following the “+” and “–” symbols in the<br />
battery compartment to maintain the correct polarity.<br />
CAUTION: There is danger of an explosion if a battery is incorrectly replaced. Replace<br />
only with the same or equivalent type.<br />
5. The MS 150 features four audio inputs for other devices, such as portable players.<br />
This step is optional and may be skipped if you have no external devices. If you have<br />
a player with:<br />
• 3.5mm (1/8") analog audio output or headphone jack: Plug the<br />
included analog audio cable into the player’s output or headphone jack<br />
and either the front- or rear-panel mini jack on the MS 150. Both inputs<br />
may be used simultaneously for different devices. A second cable must be<br />
purchased.<br />
• Pair of RCA-type analog audio outputs: Plug one end of a stereo RCA-type<br />
interconnect cable (not included) into the player, and the other end into the<br />
Auxiliary Input jacks on the rear panel of the MS 150. Use the same color<br />
connector for each channel (usually red for right and white or black<br />
for left).<br />
• Optical-digital audio S/P-DIF output: Plug one end of the included<br />
digital audio cable into the player, and the other end into the Analog/<br />
Optical input on the rear panel of the MS 150. Remember to select the<br />
digital input as the source.<br />
3. Connect the FM antenna to its terminal.<br />
4. Plug the detachable dock for iPod/iPhone into the connector on the left side of the<br />
MS 150.<br />
6. If you have purchased an optional powered subwoofer that is equipped with a<br />
line-level input and a low-pass filter (crossover), connect it to the Subwoofer output<br />
(cable not included), or connect this output to an amplifier’s or powered speaker’s<br />
line-level input.<br />
7. If you will be viewing photos or videos stored on a compatible iPod/iPhone that supports<br />
video browsing, connect either the Composite or S-Video output (but not both)<br />
to a display monitor.<br />
8. Plug the included power supply into the MS 150’s DC IN connector, and plug its<br />
power cord into an unswitched AC outlet.<br />
Snap in the adapter that matches your iPod/iPhone, referring to the table below.<br />
DC IN<br />
24V 5A<br />
120W<br />
To remove an adapter, insert a flathead screwdriver into the slot at the rear of the<br />
adapter and pry it up.<br />
DC Power Input<br />
Adapter<br />
iPod Model<br />
NANO<br />
iPod nano, 1st and 2nd generation<br />
5G (VIDEO 60GB) iPod, 5th generation (60GB, 80GB) and iPod classic (160GB)<br />
5G (VIDEO 30GB) iPod, 5th generation (30GB) and iPod classic (80GB)<br />
13 iPod nano, 3rd generation<br />
12, 14 iPod touch – install large bumper<br />
7


