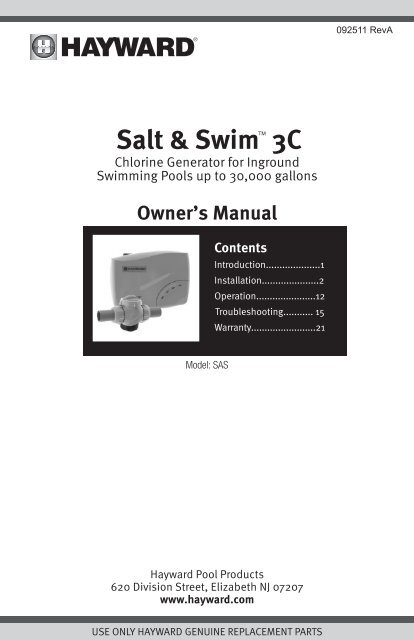
Salt & Swim 3C Owner's Manual (SAS) - Hayward
Salt & Swim 3C Owner's Manual (SAS) - Hayward
Salt & Swim 3C Owner's Manual (SAS) - Hayward

Create successful ePaper yourself
Turn your PDF publications into a flip-book with our unique Google optimized e-Paper software.
092511 RevA<br />
TM<br />
<strong>Salt</strong> & <strong>Swim</strong> <strong>3C</strong><br />
Chlorine Generator for Inground<br />
<strong>Swim</strong>ming Pools up to 30,000 gallons<br />
Owner’s <strong>Manual</strong><br />
Contents<br />
Introduction....................1<br />
Installation.....................2<br />
Operation......................12<br />
Troubleshooting........... 15<br />
Warranty........................21<br />
Model: <strong>SAS</strong><br />
<strong>Hayward</strong> Pool Products<br />
620 Division Street, Elizabeth NJ 07207<br />
www.hayward.com<br />
USE ONLY HAYWARD GENUINE REPLACEMENT PARTS
When installing and using this electrical equipment, basic safety<br />
precautions should always be followed, including the following:<br />
• READ AND FOLLOW ALL INSTRUC-<br />
TIONS<br />
• TO REDUCE THE RISK OF DROWNING FROM HAIR AND<br />
BODY ENTRAPMENT, INSTALL A SUITABLY RATED SUCTION<br />
GUARD TO MATCH THE MAXIMUM FLOW RATE MARKED.<br />
ATTENTION : LES PRISES DASPIRATION DOIVENT ETRE<br />
EQUIPEES DE GRILLES CONVENANT AU DEBIT MAXIMAL<br />
INDIQUE.<br />
• WARNING - To reduce the risk of injury, do not permit children<br />
to use this product unless they are closely supervised at all<br />
times.<br />
• WARNING – Risk of Electric Shock. Connect only to a grounding<br />
type receptacle protected by a ground-fault circuit-interrupter<br />
(GFCI). Contact a qualified electrician if you cannot verify that<br />
the receptacle is protected by a GFCI.<br />
• Do not bury cord. Locate cord to minimize abuse from lawn<br />
mowers, hedge trimmers, and other equipment.<br />
• WARNING – To reduce the risk of electric shock, replace damaged<br />
cord immediately.<br />
• WARNING – To reduce the risk of electric shock, do not use<br />
extension cord to connect unit to electric supply; provide a<br />
properly located outlet.<br />
• “CAUTION: To reduce the risk of electric shock, install at least<br />
10 feet (3 meters) horizontally from the inside walls of a pool<br />
or spa/hot tub. Do not use an extension cord.” ATTENTION :<br />
MAINTENIR UNE DISTANCE MINIMALE D’UN METRE, MESU-<br />
REE DANS UN PLAN HORIZONTAL, ENTRE LE BASSIN ET<br />
LES APPAREILS ET COMMANDES.<br />
• For Canadian Units: At least two lugs marked “BONDING<br />
LUGS” are provided on the external surface or on the inside of<br />
the supply terminal box or compartment. To reduce the risk of<br />
electric shock, connect the local common bonding grid in the<br />
area of the hot tub or spa to these terminals with an insulated<br />
or bare copper conductor not smaller than No. 6 AWG.<br />
• SAVE THESE INSTRUCTIONS<br />
USE ONLY HAYWARD GENUINE REPLACEMENT PARTS
Introduction<br />
<strong>Salt</strong> & <strong>Swim</strong> TM <strong>3C</strong> is an automatic chlorine generation system for pool sanitization. It is designed<br />
for inground swimming pools up to 30,000 gallons only. <strong>Salt</strong> & <strong>Swim</strong> <strong>3C</strong> is NOT to be used<br />
with above ground pools or with inground pools greater than 30,000 gallons.<br />
<strong>Salt</strong> & <strong>Swim</strong> <strong>3C</strong> requires a low concentration of salt (sodium chloride) in the pool water. It automatically<br />
sanitizes your pool by converting the salt into free chlorine which kills bacteria and algae<br />
in the water. Chlorine will revert back to sodium chloride after killing bacteria. These reactions<br />
will continuously recycle virtually eliminating the need to add sanitizing chemicals to your pool.<br />
<strong>Salt</strong> & <strong>Swim</strong> <strong>3C</strong> can handle the purification needs of most residential swimming pools up to 30,000<br />
gallons (114,000 liters). This unique low cost chlorine generator uses a replaceable electrolytic<br />
Cell (<strong>SAS</strong>-CELL) that is designed to produce 200lbs of 100% available chlorine over its lifetime.<br />
Note that the actual amount of chlorination required to properly sanitize a pool varies due to bather<br />
load, rainfall, temperature, and the pool's cleanliness.<br />
NOTE: Before installing this product as part of a saline water purification system in a pool or<br />
spa using natural stone for coping or for immediately adjacent patios/decking, a qualified stone<br />
installation specialist should be consulted regarding the appropriate type, installation, sealant (if<br />
any) and maintenance of stone used around a saline pool with electronic chlorine generator in<br />
your particular location and circumstances.<br />
NOTE: The use of dry acid (sodium bisulfate) to adjust pool pH is discouraged especially in arid<br />
regions where pool water is subject to excessive evaporation and is not commonly diluted with<br />
fresh water. Dry acid can cause a buildup of by-products that can damage your chlorinator Cell.<br />
USE ONLY HAYWARD GENUINE REPLACEMENT PARTS
Installation<br />
Remove power to the pool filter pump before starting this installation. Installation must be performed<br />
in accordance with Local and NEC codes. The Control Box must be mounted a minimum of 10 ft.<br />
horizontal distance (or more, if local codes require) from the pool, within 3ft from a GFCI outlet, and<br />
within 15ft from where the Cell will be installed. Take care to protect the Cell Cap connector pins<br />
while handling the <strong>Salt</strong> & <strong>Swim</strong> <strong>3C</strong> unit during installation. If the supply cord is damaged, it must be<br />
replaced by the manufacturer, its service agent or similarly qualified persons in order to avoid a hazard.<br />
Waterproof<br />
GFCI<br />
Outlet<br />
3 Feet<br />
15 Feet<br />
FILTER<br />
PUMP<br />
Optional<br />
Vertical<br />
Installation<br />
FROM<br />
POOL<br />
TO<br />
POOL<br />
Preparing Pool Water<br />
To prepare the pool water for <strong>Salt</strong> & <strong>Swim</strong> <strong>3C</strong> operation, the pool's chemistry must be balanced and<br />
salt must be added. This must be done BEFORE activating the <strong>Salt</strong> & <strong>Swim</strong> <strong>3C</strong>. Some adjustments<br />
to your pool chemistry may take several hours, so start the procedure well before you intend to operate<br />
the <strong>Salt</strong> and <strong>Swim</strong>.<br />
To prepare your pool water, follow the instructions on the included Pool Chemistry Quick Start Guide<br />
and refer to page 8 of this manual.<br />
Adding <strong>Salt</strong>: Add salt several hours or, if possible, 1 day prior to operating the <strong>Salt</strong> & <strong>Swim</strong> <strong>3C</strong> . Take<br />
care not to exceed the recommended salt level. Measure salt 6-8 hours after adding to the pool.<br />
NOTE: If the pool does not have new water, add 1 quart (1 liter) of metal remover and 1 quart (1 liter)<br />
of non-copper based algaecide to the pool, per manufacturer's instructions. This ensures a quick,<br />
troublefree transfer to the <strong>Salt</strong> & <strong>Swim</strong> <strong>3C</strong> system.<br />
<strong>Salt</strong> & <strong>Swim</strong> <strong>3C</strong> Installation<br />
Follow the step by step instructions located on the Installation Quick Start Guide. Refer to the following<br />
sections for more detailed information.<br />
2<br />
USE ONLY HAYWARD GENUINE REPLACEMENT PARTS
MOUNTING TEMPLATE<br />
Use the included hardware or your own hardware<br />
(suitable for a 20lb load) to mount the Control Box<br />
to a wall or post within 3 feet of a GFCI outlet,<br />
making sure that the cord will reach. Use this<br />
template to locate and drill fastener holes.<br />
After marking the mounting<br />
surface with this template,<br />
screw in top fasteners leaving<br />
1/8” space between<br />
screw head and surface<br />
Use to mount<br />
on flat surface<br />
Use to mount<br />
on post<br />
Hang Control Box<br />
on fasteners<br />
Screw in bottom fasteners securely<br />
Use to mount<br />
on flat surface<br />
Use to mount<br />
on post<br />
092xxx<br />
Mounting the <strong>Salt</strong> & <strong>Swim</strong> <strong>3C</strong> Control Box<br />
The <strong>Salt</strong> & <strong>Swim</strong> <strong>3C</strong> is contained in a raintight enclosure that is suitable for outdoor mounting. The<br />
Control Box must be mounted a minimum of 10 ft. (4 meters) horizontal distance (or more, if local codes<br />
require) from the pool, within 3ft from a GFCI outlet, and within 15ft from where the Cell is installed.<br />
The Control Box is designed to mount vertically on a flat surface with the cables facing downward.<br />
Because the enclosure also acts as a heat sink (disperses heat from inside the box), it is important<br />
not to block the four sides of the Control Box. Do not mount <strong>Salt</strong> & <strong>Swim</strong> <strong>3C</strong> inside a panel or tightly<br />
enclosed area.<br />
Before securing the Control Box to the intended location, make sure that the power cord will reach the<br />
GFCI outlet and that the Cell cable will reach the location where the Cell Vessel will be installed. Use the<br />
included Mounting Template to position the fasteners to the mounting surface. Refer to the diagram below.<br />
Secure Mounting<br />
Template to desired<br />
mounting location and drill<br />
mounting holes.<br />
Screw in top<br />
fasteners leaving<br />
1/8” space between<br />
screw head and surface<br />
1<br />
2<br />
Hang Control Box<br />
on fasteners<br />
Screw in bottom<br />
fasteners securely.<br />
3<br />
Plumbing<br />
The Cell Vessel is designed to install in either 1½" or 2" PVC pool plumbing. For pools using 1½"<br />
polypipe, you must use a <strong>Hayward</strong> DIY-POLYPIPE adapter kit. The Cell Vessel must be installed on a<br />
10" run of straight pipe at the end of the return piping just before the water returns to the pool. All<br />
pool equipment should be upstream from the Cell Vessel. It must be located within 15 feet of where<br />
the Control Box is mounted. Also, there must be enough clearance to insert and remove the Cell from<br />
the Vessel after the Vessel is installed.<br />
USE ONLY HAYWARD GENUINE REPLACEMENT PARTS<br />
4<br />
3
I ndicati ng M arks<br />
C ut P ipe H er e<br />
CUTTING TEMPLATE<br />
1. Secur ely hol d this Cut ting Templ at e to thedesir edpi pe. Theent ire l ength of the Gui de<br />
must fit in t helocat ionwher e the cel vessel wil be instal ed.<br />
2. W ith a waterpr of permanent mar ker, mar kthecut ,compressi on ring, and i ndicator mark cutout<br />
o nt o th ep ip e .<br />
3. RemoveCut ti ng Template and cut pipe at bot hlocat ions.<br />
4. Sli deNut sonto t he pi pe with t hr eads f acing t he cut ends.<br />
5. Sli dethe Compresion Ri ngs over t he mar kings m ade on t he pipe.<br />
6. Sli dethe Spacers between the cut end andthe Compressi on Rings.<br />
7. I nsert the Cel Veselbetween the cutendsand sli dethe Nuts t oengage thethreadson<br />
t he C el lV e s se l.<br />
8. Hand ti ghten and cont inue to ti ght en Nut sanaddit ional 1/4 t ur n wit hthe included St rap Wr ench.<br />
9. The back of the ti ght ened Nuts should be located on t he I ndi cati ngMarks. I fnot, loosen Nuts<br />
and re- positi onthe Cel Vessel .Not e: whenproper ly instal ed, the cutpipes do NOT go ful y<br />
i nt o th eC e l V es s e l.<br />
Cut Pi pe Her e<br />
I ndicati ng Mar ks<br />
With power removed to the pump and water drained from the pool plumbing, secure the Cutting<br />
Template to the location where the Cell Vessel will be installed. Note that the Cutting Template is the<br />
same width as the Cell Vessel. The entire Cutting Template must fit on the pipe otherwise the Cell<br />
Vessel will not fit. With the Cutting Template secure on the pipe, mark all 10 cutouts on to the pipe<br />
using a waterproof permanent marker.<br />
Mark all<br />
10 cutouts<br />
Permanent<br />
Marker<br />
FILTER<br />
PUMP<br />
FROM<br />
POOL<br />
TO<br />
POOL<br />
Remove the Template, cut the pipe and install the Nut Assemblies as shown below. Use the included<br />
2” Nut Assembly for 2” pipe and 1½” Nut Assembly for 1½” pipe. Place Nut Assembly on each side<br />
of the cut pipe (threads face in). Be sure to place the Nut, Compression Ring and Collar on the pipe<br />
as shown in the diagram.<br />
CUTTING TEMPLATE<br />
Indicating Marks<br />
Cut Pipe Here<br />
Securely hold or tape this Cutting Template to the desired<br />
Cell Vessel installation location. Use a waterproof permanent<br />
marker to mark the pipe. When finished, there should be 12 marks<br />
on the pipe. Follow procedures on the Installation Quick Start Guide<br />
to complete Vessel installation.<br />
Cut Pipe Here<br />
Indicating Marks<br />
1<br />
2<br />
3<br />
Mark Pipe<br />
Cut Pipe and<br />
Clean Shavings<br />
Slide Nuts<br />
on Pipe<br />
4<br />
Slide Compression<br />
Rings on pipe<br />
5<br />
Slide Collars<br />
on pipe<br />
4<br />
USE ONLY HAYWARD GENUINE REPLACEMENT PARTS
Position the Vessel in a manner where the Cell can be easily inserted and removed. Secure the<br />
Vessel to the cut pipe by tightening the Nuts as shown below. Handtighten the Nuts to stop, then<br />
continue 1/4 turn more using the included strap wrench. If the Inspection marks can be seen, the<br />
pipe has not been inserted far enough into the Cell Vessel.<br />
Verify that both Cell<br />
Vessel gaskets are in place<br />
6<br />
Insert Cell<br />
Vessel and<br />
hand tighten<br />
Nuts<br />
Use the included strap wrench<br />
to tighten an additional 1/4 turn<br />
7<br />
IMPORTANT:<br />
Inspection<br />
Marks should<br />
not be visible<br />
If so, loosen<br />
Nuts and slide<br />
the pipes further<br />
into the Cell<br />
Vessel and<br />
re-tighten<br />
Remove the foam protector from the <strong>SAS</strong>-CELL. Fully cover Cell pins with supplied grease. Verify<br />
that the O-ring is attached to the Cell before inserting the Cell into the Cell Vessel as shown.<br />
USE ONLY HAYWARD GENUINE REPLACEMENT PARTS<br />
5
Connect and Fasten Cell Cap<br />
Slip the Cell Cap through the Retaining Nut as shown below. Plug the Cell Cap into the Cell and<br />
secure with the Retaining Nut. Run pump for 5 minutes and check for leaks.<br />
Cell Cap<br />
Retaining Nut<br />
Bonding<br />
Pool bonding or "equipotential bonding" ensures that all pool components around the pool are at<br />
the same electrical potential. If bonding is required at your location (see Local and NEC codes), a<br />
bonding lug is provided at the bottom of the <strong>Salt</strong> & <strong>Swim</strong> <strong>3C</strong> enclosure. Run an eight gauge (8 AWG)<br />
solid copper wire from the bonding lug to your pool's existing bonding loop.<br />
6<br />
to Pool Bonding loop<br />
USE ONLY HAYWARD GENUINE REPLACEMENT PARTS
Flow Switch Calibration Procedure<br />
IMPORTANT: Before going any further, the pool water must be balanced and salt must be added to<br />
your pool. If this has not already been done, refer to the included Chemistry Quick Start Guide as well<br />
as the "Water Chemistry" section of this manual for information on how to prepare your pool water for<br />
<strong>Salt</strong> & <strong>Swim</strong> <strong>3C</strong> operation.<br />
At start-up, or when a new Cell is installed, <strong>Salt</strong> & <strong>Swim</strong> <strong>3C</strong> will run a Flow Switch Calibration procedure<br />
to ensure that the Cell's flow switch is properly initialized. This will occur just once when a new Cell is<br />
installed. After the flow switch is initialized, the <strong>Salt</strong> & <strong>Swim</strong> <strong>3C</strong> will not perform this procedure again<br />
until the Cell is replaced. The Flow Switch Calibration procedure will require the user to cycle the<br />
pump on and off. Follow the instructions below:<br />
1. Turn the filter pump OFF.<br />
2. Plug the <strong>Salt</strong> & <strong>Swim</strong> <strong>3C</strong>'s linecord into a ground fault circuit interrupter (GFCI) safety outlet or<br />
an outlet protected by a ground fault circuit breaker (GFCB). Follow Local and National codes.<br />
GFCI<br />
OUTLET<br />
After being powered on for the first time, the <strong>Salt</strong> & <strong>Swim</strong> <strong>3C</strong> will run a diagnostic routine which<br />
can take up to 30 seconds. During this time, various LEDs will turn on and off. When finished,<br />
the <strong>Salt</strong> & <strong>Swim</strong> <strong>3C</strong> will display a blinking INADEQUATE WATER FLOW LED and a solid STANDING<br />
BY LED. Keep the <strong>Salt</strong> & <strong>Swim</strong> <strong>3C</strong> powered for the remainder of this procedure and go to Step<br />
3.<br />
3. Turn the filter pump ON. Make sure that full flow is achieved (no air in the system) and run the<br />
pump for at least 15 seconds.<br />
4. Turn the filter pump OFF.<br />
5. <strong>Salt</strong> & <strong>Swim</strong> <strong>3C</strong> should now display a solid INADEQUATE WATER FLOW and a solid STANDING BY<br />
LED. The Flow Switch Calibration procedure is complete. You can now turn on your filter pump<br />
and begin normal operation.<br />
If the INADEQUATE WATER FLOW LED is still blinking after performing this procedure, refer to the<br />
Troubleshooting section of this manual.<br />
USE ONLY HAYWARD GENUINE REPLACEMENT PARTS<br />
7
Water Chemistry<br />
The table below summarizes the levels that are recommended by The Association of Pool and Spa<br />
Professionals (APSP). It is important to maintain these levels in order to prevent corrosion or scaling<br />
and to ensure maximum performance from your <strong>Salt</strong> & <strong>Swim</strong> <strong>3C</strong> chlorine generator. Have your<br />
water tested or use pool water test strips and refer to the Chemistry Quick Start Guide information<br />
on testing and adjusting your pool's water chemistry. Your Authorized <strong>Salt</strong> & <strong>Swim</strong> <strong>3C</strong> Dealer or most<br />
pool stores can provide you with the chemicals and procedures to adjust the water chemistry as well.<br />
Note that pool water emanating from wells and municipal water supplies, along with the introduction<br />
of environmental contaminants, can contain chemistries that are deleterious to the life expectancy<br />
of the Cell.<br />
Saturation index<br />
The saturation index (Si) relates to the calcium and alkalinity in the water and is an indicator of the<br />
pool water "balance". Your water is properly balanced if the Si is 0 ±.2. If the Si is below -0.2, the<br />
water is corrosive and plaster pool walls will be dissolved into the water. If the Si is above +0.2,<br />
scaling and staining will occur. Use the chart below to determine the saturation index.<br />
Si = pH + Ti + Ci + Ai - 12.1<br />
ºC ºF Ti<br />
12 53 .3<br />
16 60 .4<br />
19 66 .5<br />
24 76 .6<br />
29 84 .7<br />
34 94 .8<br />
39 103 .9<br />
Calcuim<br />
Hardness<br />
Ci<br />
Total<br />
Alkalinity<br />
How to use: Measure pool pH, temperature, calcium hardness,<br />
and total alkalinity. Use the chart above to determine Ti, Ci,and<br />
Ai from your measurements. Insert values of pH, Ti, Ci and Ai<br />
into the above equation. If Si equals .2 or more, scaling and<br />
staining may occur. If Si equals -.2 or less corrosion or irritation<br />
may occur.<br />
-.2 0 .2<br />
CORROSIVE<br />
SCALING<br />
Ai<br />
75 1.5 75 1.9<br />
100 1.6 100 2.0<br />
125 1.7 125 2.1<br />
150 1.8 150 2.2<br />
200 1.9 200 2.3<br />
250 2.0 250 2.4<br />
300 2.1 300 2.5<br />
400 2.2 400 2.6<br />
600 2.4 600 2.8<br />
800 2.5 800 2.9<br />
8<br />
OK<br />
USE ONLY HAYWARD GENUINE REPLACEMENT PARTS
<strong>Salt</strong> Level<br />
Use the chart on page 10 to determine how much salt in pounds or (Kgs) need to be added to reach<br />
the recommended levels. Use the equations below (measurements are in feet/gallons and meters/<br />
liters) if pool size is unknown.<br />
Gallons<br />
(pool size in feet)<br />
Rectangular Length x Width x<br />
Average Depth x 7.5<br />
Round<br />
Diameter x Diameter x<br />
Average Depth x 5.9<br />
Liters<br />
(pool size in meters)<br />
Length x Width x<br />
Average Depth x 1000<br />
Diameter x Diameter x<br />
Average Depth x 785<br />
Oval<br />
Length x Width x<br />
Average Depth x 6.7<br />
Length x Width x<br />
Average Depth x 893<br />
The recommended salt level is between 2700-3400 ppm (parts per million) with 3200 ppm being<br />
ideal. If the level is low, determine the number of gallons in the pool and add salt according to the<br />
chart on page 10. A low salt level will reduce the efficiency of the <strong>Salt</strong> & <strong>Swim</strong> <strong>3C</strong> and result in low<br />
chlorine production. A high salt level can cause the <strong>Salt</strong> & <strong>Swim</strong> <strong>3C</strong> to shutdown and may begin to<br />
give a salty taste to your pool (generally, the salt will begin to be tasted at a level of about 3500-4000<br />
ppm). The salt in your pool is constantly recycled and the loss of salt throughout the swimming season<br />
should be small. This loss is due primarily to the addition of water because of splashing, backwashing,<br />
or draining (because of rain). <strong>Salt</strong> is not lost due to evaporation.<br />
Type of <strong>Salt</strong> to Use<br />
It is important to use only sodium chloride (NaCl) salt that is greater than 99% pure. This is common<br />
food quality or water softener salt and is usually available in 40-80 lb. bags labeled "Coarse Solar<br />
<strong>Salt</strong>" or "Pool <strong>Salt</strong>". It is also acceptable to use water conditioning salt pellets, however, it will take<br />
longer for them to dissolve. Do not use rock salt, salt with yellow prussiate of soda, salt with anticaking<br />
additives, or iodized salt.<br />
How to Add or Remove <strong>Salt</strong><br />
For new plaster pools, wait 10-30 days (check with you local pool professional) before adding salt<br />
to allow the plaster to cure. Turn the circulating pump on and add salt directly into the pool. Brush<br />
the salt around to speed up the dissolving process--do not allow salt to pile up on the bottom of the<br />
pool. Run the filter pump for 24 hours with the suction coming from the main drain (use pool vac if<br />
there is no main drain) to allow the salt to evenly disperse throughout the pool.<br />
The only way to lower the salt concentration is to partially drain the pool and refill with fresh water.<br />
Always check stabilizer (cyanuric acid), when checking salt. These levels will most likely decline<br />
together. Use the chart on page 11 to determine how much stabilizer must be added to raise the<br />
level to 50 ppm.<br />
USE ONLY HAYWARD GENUINE REPLACEMENT PARTS<br />
9
Current salt<br />
level<br />
ppm<br />
0<br />
200<br />
400<br />
600<br />
800<br />
1000<br />
1200<br />
1400<br />
1600<br />
1800<br />
2000<br />
2200<br />
2400<br />
2600<br />
2800<br />
3000<br />
POUNDS and (Kg) of SALT NEEDED FOR 3200PPM<br />
Gallons and (Liters) of Pool Water<br />
8,000 10,000 12,000 14,000 16,000 18,000 20,000 22,000 24,000 25,000<br />
(30,000) (37,500) (45000) (52,500) (60,000) (67,500) (75,000) (82,500) (90,000) (93,500)<br />
213 267 320 373 427 480<br />
587 640 666<br />
(97) (121) (145) (170) (194) (218) (242) (267) (291) (303)<br />
200 250 300 350 400 450 500 550 600 625<br />
(91) (114) (136) (159) (182) (205) (227) (250) (273) (284)<br />
187 233 280 327 373 420 467 513 560 583<br />
(85) (106) (127) (148) (170) (191) (212) (233) (255) (267)<br />
173 217 260 303 347 390 433 477 520 544<br />
(79) (98) (118) (138) (158) (177) (197) (217) (236) (246)<br />
160 200 240 280 320 360 400 440 480 500<br />
(73) (91) (109) (127) (145) (164) (182) (200) (218) (227)<br />
147 183 220 257 293 330 367 403 440 459<br />
(67) (83) (100) (117) (133) (150) (167) (183) (200) (209)<br />
133 167 200 233 267 300 333 367 400 417<br />
(61) (76) (91) (106) (121) (136) (152) (167) (182) (190)<br />
120 150 180 210 240 270 300 330 360 375<br />
(55) (68) (82) (95) (109) (123) (136) (150) (164) (171)<br />
107 133 160 187 213 240 267 293 320 334<br />
(48) (61) (73) (85) (97) (109) (121) (133) (145) (152)<br />
93 117 140 163 187 210 233 257 280 292<br />
(42) (53) (64) (74) (85) (95) (106) (117) (127) (133)<br />
80 100 120 140 160 180 200 220 240<br />
(36) (45) (55) (64) (73) (82) (91) (100) (109) (114)<br />
67 83 100 117 133 150 167 183 200<br />
(30) (38) (45) (53) (61) (68) (76) (83) (91) (95)<br />
53 67 80 93 107 120 133 147 160 166<br />
(24) (30) (36) (42) (48) (55) (61) (67) (73) (76)<br />
40 50 60<br />
80 90 100 110 120 125<br />
(18) (23) (27) (32) (36) (41) (45) (50) (55) (57)<br />
27 33 40 47 53 60 67 73 80 83<br />
(12) (15) (18) (21) (24) (27) (30) (33) (36) (37)<br />
13 17 20 23 27 30 33 37 40<br />
(6) (8) (9) (11) (12) (14) (15) (17) (18) (19)<br />
3200 Ideal Ideal Ideal Ideal Ideal Ideal Ideal Ideal Ideal Ideal<br />
3400 OK OK OK OK OK OK OK OK OK OK<br />
3600+ Dilute Dilute Dilute Dilute Dilute Dilute Dilute Dilute Dilute Dilute<br />
10<br />
USE ONLY HAYWARD GENUINE REPLACEMENT PARTS
USE ONLY HAYWARD GENUINE REPLACEMENT PARTS<br />
11
Operation<br />
Controls<br />
The main controls and indicators are shown below.<br />
Illuminates when Cell has reached the end of its expected life.<br />
When this LED indicator is illuminated, there is a problem with<br />
the unit. Refer to the Troubleshooting section of this manual.<br />
Illuminates when unit is waiting for the filter pump to turn on or<br />
is in-between generating cycles as part of normal operation to<br />
maintain selected DAILY CHLORINE OUTPUT.<br />
Illuminates when unit is actively generating chlorine.<br />
Illuminates when unit is SUPER CHLORINATING.<br />
Illuminates when there is no flow or low flow through the<br />
Cell. The pool filter pump could be in its “off” cycle. If this<br />
is not the case, refer to the Troubleshooting section in<br />
this manual.<br />
Blinks when performing the Flow Switch Calibration<br />
procedure.<br />
Press ( + ) and ( - ) to increase or decrease the chlorine<br />
generation. The DAILY CHLORINE OUTPUT LEDs<br />
above these buttons will indicate the relative amount of<br />
chlorine being generated.<br />
When you have an abnormally high bather load, a large<br />
amount of rain, a cloudy water condition, or any other<br />
condition which requires a large amount of purification to<br />
be introduced, press the SUPER CHLORINATING button.<br />
This electronically “super chlorinates” (boosts chlorine<br />
generation output) the water for 24 hours (filter pump must<br />
be on during this time). To cancel super chlorinating, press<br />
the SUPER CHLORINATING button again.<br />
12<br />
USE ONLY HAYWARD GENUINE REPLACEMENT PARTS
Operation<br />
<strong>Salt</strong> & <strong>Swim</strong> <strong>3C</strong> does not have an ON/OFF switch . The unit is designed to be plugged into a GFCI<br />
rated outlet at all times. There should be no need to remove power from the <strong>Salt</strong> & <strong>Swim</strong> <strong>3C</strong> unless<br />
pool components are being serviced or the pool will be closed.<br />
When power is first applied to the <strong>Salt</strong> & <strong>Swim</strong> <strong>3C</strong>, an initialization routine will run for approximately<br />
30 seconds. During this time, various LEDs will illuminate. This is perfectly normal and does not<br />
require any input from the user. When the routine is finished, the <strong>Salt</strong> and & <strong>Swim</strong> will begin<br />
normal operation.<br />
If the water chemical levels are in the recommended range, there are three factors that you can<br />
control which directly contribute to the amount of chlorine the <strong>Salt</strong> & <strong>Swim</strong> <strong>3C</strong> will generate:<br />
1. filter time each day (hours)<br />
2. the DAILY CHLORINE OUTPUT setting<br />
3. the amount of salt in the pool<br />
The filter pump timer should be set so that all of the water in the pool passes through the filter at<br />
least once each day. For pools with high chlorine demand, the timer may have to be set longer to<br />
generate enough chlorine.<br />
Daily Chlorine Output Setting<br />
You can adjust the amount of chlorine that is generated using the "+" and "-" button on the <strong>Salt</strong><br />
& <strong>Swim</strong> <strong>3C</strong> unit. The DAILY CHLORINE OUTPUT LEDs will display the current setting. Push "+" to<br />
increase and "-" to decrease the current setting. Each DAILY CHLORINE OUTPUT LED represents<br />
6 minutes of chlorine generation out of 1 hour. For example, if 5 LEDs are illuminated, the <strong>Salt</strong> &<br />
<strong>Swim</strong> <strong>3C</strong> unit will generate chlorine for 5 x 6 = 30 minutes out of every hour of operation. During<br />
this time, the GENERATING CHLORINE LED will be lit. The unit will be idle for the remaining 30<br />
minutes at which time the GENERATING CHLORINE LED will turn off and the STANDING BY LED<br />
will illuminate.<br />
To find the optimum setting, start the operation with 5 DAILY CHLORINE OUTPUT LEDs illuminated.<br />
Test the chlorine level every few days and adjust up or down accordingly. It usually takes 2-3<br />
adjustments to find the ideal setting for your pool and after that, it should only take minor, infrequent<br />
adjustments. Because the chlorine demand of the pool increases with temperature, most people<br />
find they have to adjust up at the peak of the summer and down during colder periods. <strong>Salt</strong> & <strong>Swim</strong><br />
<strong>3C</strong> automatically scales back to 12 minutes of output per hour (if set higher than 12 minutes) when<br />
the pool water is 50º - 60ºF. This protects the unit as well as prevents possible over-chlorination.<br />
<strong>Salt</strong> & <strong>Swim</strong> <strong>3C</strong> stops generating when the pool water temperature drops below 50ºF. This is usually<br />
not a problem because bacteria and algae stop growing at this temperature. You can override<br />
these automatic low temperature operations by switching to SUPER CHLORINATE for a day.<br />
NOTE: After the ideal DAILY CHLORINE OUTPUT setting has been found, you may need to raise the<br />
setting when the pool water temperature increases significantly, when there is higher than normal<br />
bather load or when the <strong>Salt</strong> & <strong>Swim</strong> <strong>3C</strong> Cell ages. You may need to lower the setting when the<br />
pool water temperature decreases significantly or there are long periods of inactivity.<br />
USE ONLY HAYWARD GENUINE REPLACEMENT PARTS<br />
13
Prevent over-chlorination during cold weather: Check chlorine levels periodically. Most pools<br />
require less chlorine during cold weather and the DAILY CHLORINE OUTPUT should be lowered<br />
accordingly.<br />
Maintaining the <strong>Salt</strong> & <strong>Swim</strong> <strong>3C</strong> System<br />
The replaceable Cell uses the same electronic self cleaning technology as the popular <strong>Hayward</strong><br />
Turbo Cell. In most cases this self cleaning action will keep the Cell working at optimum<br />
efficiency. In areas where water is hard (high mineral content) and in pools where the water<br />
chemistry has been allowed to get "out of balance," the Cell may require periodic cleaning.<br />
Servicing and Cleaning the <strong>Salt</strong> & <strong>Swim</strong> <strong>3C</strong> Cell<br />
Unplug <strong>Salt</strong> & <strong>Swim</strong> <strong>3C</strong> from the GFCI outlet and remove power from the pump before attempting<br />
to remove the Cell. Unplug the Cell cord from the Cell. Remove the Cell from the Vessel<br />
by unscrewing the Retaining Nut and gently pulling the Cell out of Vessel. Once removed, look<br />
inside the Cell and inspect for scale formation (light colored crusty or flaky deposits) on the<br />
plates and for any debris which has passed through the filter and caught on the plates. If no<br />
deposits are visible, reinstall. If deposits are seen, use a high pressure garden hose and try to<br />
flush the scale off. If this is not successful, use a plastic or wood tool (do not use metal as this<br />
will scratch the coating off the plates) and scrape deposits off of plates. Note that a buildup on<br />
the Cell indicates that there is an unusually high calcium level in the pool (old pool water is usually<br />
the cause). If this is not corrected, you may have to periodically clean the Cell. The simplest<br />
way to avoid this is to bring the pool chemistry to the recommended levels as specified.<br />
Mild Acid Washing: Use only in severe cases where flushing and scraping will not remove the<br />
majority of deposits. To acid wash, mix a 4:1 solution of water to muriatic acid (one gallon of<br />
water to one quart of muriatic acid) in a clean plastic container, . ALWAYS ADD ACID TO WATER<br />
- NEVER ADD WATER TO ACID. Be sure to wear rubber gloves and appropriate eye protection.<br />
Place the Cell in the container. The solution should reach the top of the Cell so that the cylindrical<br />
electronics compartment is not submerged. Soak the Cell for a few minutes and then rinse<br />
with a high pressure garden hose. If any deposits are still visible, repeat soaking and rinsing.<br />
Replace Cell and inspect again periodically.<br />
Winterizing<br />
The <strong>Salt</strong> & <strong>Swim</strong> <strong>3C</strong>'s replaceable Cell will be damaged by freezing water just as your pool<br />
plumbing would. In areas of the country which experience severe or extended periods of freezing<br />
temperatures, be sure to drain all water from the pump, filter, and supply and return lines<br />
before any freezing conditions occur. The Control Box and plumbed in Cell Vessel are capable of<br />
withstanding any winter weather and should not be removed.<br />
Spring Start-up<br />
DO NOT turn <strong>Salt</strong> & <strong>Swim</strong> <strong>3C</strong> on until the pool water chemistry has been brought to the proper<br />
levels. This information can be found on page 8.<br />
14<br />
USE ONLY HAYWARD GENUINE REPLACEMENT PARTS
Troubleshooting<br />
Visit www.hayward.com or call 855-429-9274 for helpful information on operation, maintenance<br />
and troubleshooting your <strong>Salt</strong> & <strong>Swim</strong> <strong>3C</strong> Electronic Chlorine Generator.<br />
Common Problems and Solutions<br />
The <strong>Salt</strong> & <strong>Swim</strong> <strong>3C</strong>'s various LEDs show the operation status as well as alert the user to any<br />
problems that may have occurred. Some indications may require a combination of LEDs to illuminate.<br />
To aid in interpreting these indications, <strong>Hayward</strong> has created an interactive tool located<br />
at www.hayward.com. Use this tool and the information below to identify and correct problems<br />
that may arise.<br />
1. Possible causes of little or no free chlorine residual<br />
- DAILY CHLORINE OUTPUT adjustment setting is too low<br />
- Low stabilizer (Cyanuric Acid)<br />
- Filter pump time too short (8 hours for average size pools, more for large pools)<br />
- <strong>Salt</strong> level too low (below 2400 ppm)<br />
- <strong>Salt</strong> level too high<br />
- Very warm pools increase chlorine demand--increase Output %, or filter run time<br />
- Cold water below 50ºF causes <strong>Salt</strong> & <strong>Swim</strong> <strong>3C</strong> to stop generating<br />
- Cold water between 50ºF - 60ºF causes <strong>Salt</strong> & <strong>Swim</strong> <strong>3C</strong> to reduce output regardless of<br />
DAILY CHLORINE OUTPUT setting<br />
- Excessive scaling on Cell.<br />
- High level of Nitrogen in pool water.<br />
- "Yellow Out" or similar treatment recently used. Some yellow algae treatments will use<br />
chlorine at a very high rate and deplete the residual free chlorine. <strong>Manual</strong>ly shock the pool<br />
if indicated in the directions on the algae treatment. It still may be a matter of days before<br />
the pool returns to "normal" and chlorine tests will show the desired 1-3ppm free chlorine<br />
reading.<br />
2. LEDs not on<br />
Depending on current conditions, there should always be at least one LED illuminated when the<br />
<strong>Salt</strong> & <strong>Swim</strong> <strong>3C</strong> is powered. If no LEDs are on, check to make sure that the linecord is plugged<br />
in and that the GFCI outlet is powered. If no power is detected, the GFCI may have to be reset.<br />
3. STANDING BY LED blinking<br />
The <strong>Salt</strong> & <strong>Swim</strong> <strong>3C</strong> has shut down because the temperature of the pool/spa water is too high<br />
(120ºF) or too low (50ºF). The system will not resume operation until the water temperature<br />
returns to normal. Note: This condition can sometimes happen if the pool/spa temperature is<br />
already high and the heater is running. The temperature coming out of the heater and into the<br />
Cell could possibly be high enough to shut down the <strong>Salt</strong> & <strong>Swim</strong> <strong>3C</strong>.<br />
4. INADEQUATE WATER FLOW LED illuminated<br />
<strong>Salt</strong> & <strong>Swim</strong> <strong>3C</strong> has sensed a low flow or no flow condition and has stopped generating chlorine.<br />
- Verify that the filter pump is running and there are no obstructions or restrictions in the pool<br />
plumbing.<br />
- Backwash the pool filter.<br />
- Increase the speed of your variable speed pump<br />
USE ONLY HAYWARD GENUINE REPLACEMENT PARTS<br />
15
If the condition persists, remove the Cell from the Vessel and check that the flow switch is<br />
free to move in both directions. Refer to the diagram below.<br />
Flow Switch<br />
5. CELL LIFE LOW LED illuminated<br />
The Cell has reached the end of its life. Replace as soon as possible<br />
6. PROBLEM DETECTED LED illuminated AND MAX LED blinking<br />
There is a communication error with the Cell. Check that the Cell cap is properly plugged in<br />
and that the wire to the Control Box is not cut or damaged.<br />
7. PROBLEM DETECTED LED illuminated AND MIN LED blinking<br />
- The salt level may be too low. Adjust salt to recommended levels.<br />
- Remove and inspect the Cell for scale. If the Cell is scaled, follow the directions on<br />
page 14 for Cell cleaning.<br />
8. PROBLEM DETECTED LED illuminated AND a DAILY CHLORINE OUTPUT LED<br />
is blinking<br />
<strong>Salt</strong> & <strong>Swim</strong> <strong>3C</strong> may display an error by illuminating the PROBLEM DETECTED LED and<br />
blinking one of the DAILY CHLORINE OUTPUT LEDs. There are ten DAILY CHLORINE OUT-<br />
PUT LEDs that each indicate a different error. These LEDs are labeled with a number on<br />
the diagram below. Refer to the table for their corresponding errors.<br />
16<br />
USE ONLY HAYWARD GENUINE REPLACEMENT PARTS
LED<br />
BLINKING<br />
MIN LED<br />
or<br />
LED 2<br />
POSSIBLE ACTIONS<br />
1. Recycle power to the <strong>Salt</strong> & <strong>Swim</strong> by unplugging the linecord for two minutes<br />
and then plugging it back in.<br />
2. Inspect the Cell. If dirty, follow the Cell cleaning procedure.<br />
3. Check the salt level in the pool and verify the salt level is greater than<br />
2600ppm but also less than 3400ppm.<br />
4. Inspect the Cell Vessel and verify the Cell plates are fully covered by moving<br />
water.<br />
5. Contact <strong>Hayward</strong> Technical Service.<br />
LED 3<br />
LED 4<br />
LED 5<br />
or<br />
LED 6<br />
LED 7<br />
LED 8<br />
LED 9<br />
MAX LED<br />
1. Recycle power to the <strong>Salt</strong> & <strong>Swim</strong> by unplugging the linecord for two minutes<br />
and then plugging it back in.<br />
2. Verify that the <strong>Salt</strong> & <strong>Swim</strong> is receiving 120VAC input.<br />
3. Contact <strong>Hayward</strong> Technical Service.<br />
1. Recycle power to the <strong>Salt</strong> & <strong>Swim</strong> by unplugging the linecord for two minutes<br />
and then plugging it back in.<br />
2. Contact <strong>Hayward</strong> Technical Service.<br />
1. Recycle power to the <strong>Salt</strong> & <strong>Swim</strong> by unplugging the linecord for two minutes<br />
and then plugging it back in.<br />
2. Check that the salt level in the pool is no greater than 3400ppm and/or the<br />
temperature does not exceed 104F.<br />
3. Inspect the Cell Vessel and verify the cell plates are fully covered by moving<br />
water.<br />
4. Contact <strong>Hayward</strong> Technical Service.<br />
1. Recycle power to the <strong>Salt</strong> & <strong>Swim</strong> by unplugging the linecord for two minutes<br />
and then plugging it back in.<br />
2. Contact <strong>Hayward</strong> Technical Service.<br />
1. Recycle power to the <strong>Salt</strong> & <strong>Swim</strong> by unplugging the linecord for two minutes<br />
and then plugging it back in.<br />
2. Inspect the Cell. If dirty, follow the Cell cleaning procedure.<br />
3. Inspect the Cell Vessel and verify the cell plates are fully covered by moving<br />
water.<br />
4. Inspect the cable that connects the cell to the system. Make sure the cable is<br />
secure and undamaged.<br />
5. Contact <strong>Hayward</strong> Technical Service.<br />
1. Recycle power to the <strong>Salt</strong> & <strong>Swim</strong> by unplugging the linecord for two minutes<br />
and then plugging it back in.<br />
2. Contact <strong>Hayward</strong> Technical Service.<br />
1. Recycle power to the <strong>Salt</strong> & <strong>Swim</strong> by unplugging the linecord for two minutes<br />
and then plugging it back in.<br />
2. Inspect the cable that connects the cell to the system. Make sure the cable is<br />
secure and undamaged.<br />
3. Contact <strong>Hayward</strong> Technical Service.<br />
Inadequate<br />
Water Flow<br />
Standing By<br />
1. Recycle power to the <strong>Salt</strong> & <strong>Swim</strong> by unplugging the linecord for two minutes<br />
and then plugging it back in.<br />
2. Perform “Flow Switch Calibration” procedure.<br />
2. Contact <strong>Hayward</strong> Technical Service.<br />
1. Recycle power to the <strong>Salt</strong> & <strong>Swim</strong> by unplugging the linecord for two minutes<br />
and then plugging it back in.<br />
2. Check that the pool temperature does is more than 50ºF and less than 104ºF.<br />
2. Contact <strong>Hayward</strong> Technical Service.<br />
17<br />
USE ONLY HAYWARD GENUINE REPLACEMENT PARTS
18<br />
USE ONLY HAYWARD GENUINE REPLACEMENT PARTS
USE ONLY HAYWARD GENUINE REPLACEMENT PARTS<br />
19
20<br />
USE ONLY HAYWARD GENUINE REPLACEMENT PARTS
LIMITED WARRANTY (effective 12/01/12) <strong>Hayward</strong> warrants its <strong>Salt</strong> & <strong>Swim</strong> <strong>3C</strong> chlorination products to be<br />
free of defects in materials and workmanship, under normal use and service as follows:<br />
Control Box - 2 year limited warranty, parts only<br />
<strong>SAS</strong>-CELL - 1 year limited warranty<br />
<strong>Hayward</strong> warrants all accessories and other replacement parts for the above-identified chlorination products<br />
for a period of one (1) year.<br />
Each of these warranties is not transferable and applies only to the original owner.<br />
Proof of purchase is required for warranty service. If written proof of purchase is not provided, the manufacturing<br />
date code will be the sole determinant of the date of installation of the product. To obtain warranty service<br />
or repair, please contact the place of purchase or the nearest <strong>Hayward</strong> authorized warranty service center. For<br />
more information on authorized service centers please contact the <strong>Hayward</strong> Technical Service Support Center<br />
(61 Whitecap Road, North Kingstown RI, 02852) or visit the <strong>Hayward</strong> website at www.hayward.com.<br />
WARRANTY EXCLUSIONS:<br />
1. Damage resulting from improper installation including installation on pools larger than the product rating.<br />
2. Problems resulting from failure to install, operate or maintain the product(s) in accordance with the recommendations<br />
contained in the owners manual(s).<br />
3. Problems resulting from failure to maintain pool water chemistry in accordance with the recommendations<br />
in the owners manual(s).<br />
4. Problems resulting from tampering, accident, abuse, negligence, unauthorized repairs or alternations, fire,<br />
flood, lightning, freezing, external water, degradation of natural stone used in or immediately adjacent to a pool<br />
or spa, war or acts of God.<br />
DISCLAIMER. THE EXPRESS LIMITED WARRANTIES ABOVE CONSTITUTE THE ENTIRE WARRANTIES WITH<br />
RESPECT TO THE ABOVE-IDENTIFIED HAYWARD POOL AUTOMATION AND CHLORINATION PRODUCTS AND IS<br />
IN LIEU OF ALL OTHER WARRANTIES, EXPRESS OR IMPLIED, INCLUDING WARRANTIES OF MERCHANTABILITY<br />
OR FITNESS FOR A PARTICULAR PURPOSE. THESE WARRANTIES GIVE YOU SPECIFIC LEGAL RIGHTS, AND YOU<br />
MAY ALSO HAVE OTHER RIGHTS OF EQUIPMENT, LOST PROFITS OR REVENUE, COSTS OF RENTING REPLACE-<br />
MENTS, AND OTHER ADDITIONAL EXPENSES, EVEN IF THE SELLER HAD BEEN ADVISED OF THE POSSIBILITY<br />
OF SUCH DAMAGES. SOME STATES DO NOT ALLOW THE EXCLUSION OF LIMITATION OF INCIDENTAL OR<br />
CONSEQUENTIAL DAMAGES, SO THE ABOVE LIMITATION OR EXCLUSION MAY NOT APPLY TO YOU.<br />
NO WHOLESALER, AGENT, DEALER, CONTRACTOR OR OTHER PERSON IS AUTHORIZED TO PROVIDE, SUPPLE-<br />
MENT OR MODIFY ANY WARRANTY ON BEHALF OF HAYWARD.<br />
THESE WARRANTIES ARE VOID IF THE PRODUCT HAS BEEN ALTERED IN ANY WAY AFTER LEAVING THE FAC-<br />
TORY. FOR THE ABOVE-IDENTIFIED CHLORINATION PRODUCTS, THESE WARRANTIES ALSO ARE VOID IF, DUR-<br />
ING THE WARRANTY PERIOD, YOU USE A REPLACEMENT CHLORINATOR CELL OTHER THAN AN UNMODIFIED,<br />
NEW HAYWARD CHLORINATOR CELL PURCHASED FROM HAYWARD. IF A WARRANTY BECOMES VOID, YOU<br />
STILL MAY PURCHASE SERVICE AND/OR TELEPHONE TECHNICAL SUPPORT AT THE THEN CURRENT TIME AND<br />
MATERIAL RATES.<br />
USE ONLY HAYWARD GENUINE REPLACEMENT PARTS<br />
21
FOR FURTHER INFORMATION OR CONSUMER<br />
TECHNICAL SUPPORT, VISIT OUR WEBSITE AT<br />
www.hayward.com<br />
<strong>Hayward</strong> is a registered trademark and <strong>Salt</strong> & <strong>Swim</strong> is a<br />
trademark of <strong>Hayward</strong> Industries, Inc. © 2012 <strong>Hayward</strong> Industries, Inc.<br />
All other trademarks not owned by <strong>Hayward</strong> are the property of their respective owners.<br />
<strong>Hayward</strong> is not in any way affiliated with or endorsed by those third parties.<br />
USE ONLY HAYWARD GENUINE REPLACEMENT PARTS