HP LaserJet Pro 200 color M251 Series Printer - ENWW
HP LaserJet Pro 200 color M251 Series Printer - ENWW
HP LaserJet Pro 200 color M251 Series Printer - ENWW

Create successful ePaper yourself
Turn your PDF publications into a flip-book with our unique Google optimized e-Paper software.
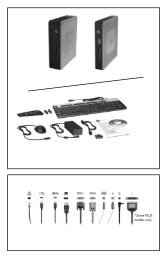
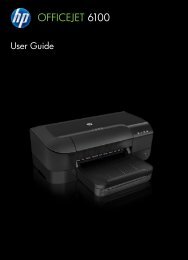
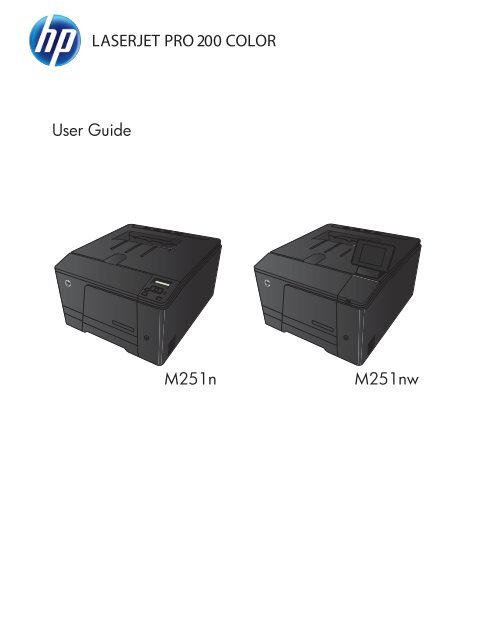
LASERJET PRO <strong>200</strong> COLOR<br />
User Guide<br />
<strong>M251</strong>n<br />
<strong>M251</strong>nw
<strong>HP</strong> <strong>LaserJet</strong> <strong>Pro</strong> <strong>200</strong> <strong>color</strong> <strong>M251</strong> <strong>Series</strong><br />
<strong>Printer</strong><br />
User Guide
Copyright and License<br />
© 2012 Copyright Hewlett-Packard<br />
Development Company, L.P.<br />
Reproduction, adaptation, or translation<br />
without prior written permission is<br />
prohibited, except as allowed under the<br />
copyright laws.<br />
The information contained herein is subject<br />
to change without notice.<br />
The only warranties for <strong>HP</strong> products and<br />
services are set forth in the express warranty<br />
statements accompanying such products and<br />
services. Nothing herein should be<br />
construed as constituting an additional<br />
warranty. <strong>HP</strong> shall not be liable for technical<br />
or editorial errors or omissions contained<br />
herein.<br />
Trademark Credits<br />
Adobe ® , Acrobat ® , and PostScript ® are<br />
trademarks of Adobe Systems Incorporated.<br />
Java is a US trademark of Sun<br />
Microsystems, Inc.<br />
Microsoft®, Windows®, Windows® XP,<br />
and Windows Vista® are U.S. registered<br />
trademarks of Microsoft Corporation.<br />
Apple and the Apple logo are trademarks of<br />
Apple Computer, Inc., registered in the U.S.<br />
and other countries. iPod is a trademark of<br />
Apple Computer, Inc. iPod is for legal or<br />
rightholder-authorized copying only. Don't<br />
steal music.<br />
UNIX ® is a registered trademark of The<br />
Open Group.<br />
Edition 1, 4/2012<br />
Part number: CF146-90901
Table of contents<br />
1 <strong>Pro</strong>duct introduction ......................................................................................................... 1<br />
<strong>Pro</strong>duct views .......................................................................................................................... 2<br />
<strong>Pro</strong>duct front view ..................................................................................................... 2<br />
<strong>Pro</strong>duct back view ..................................................................................................... 3<br />
Serial number and model number location ................................................................... 3<br />
Control panel layout .................................................................................................. 4<br />
LCD control panel ...................................................................................... 4<br />
Touchscreen control panel ........................................................................... 5<br />
Touchscreen Home screen .......................................................................................... 7<br />
Print product reports ................................................................................................................. 8<br />
Print product reports (LCD control panel) ...................................................................... 9<br />
Print product reports (touchscreen control panel) ........................................................... 9<br />
<strong>Printer</strong> sharing disclaimer ........................................................................................................ 10<br />
2 Paper tray ...................................................................................................................... 11<br />
Supported paper sizes ............................................................................................................ 12<br />
Supported paper types ........................................................................................................... 14<br />
Load the paper input tray ........................................................................................................ 15<br />
3 Print ............................................................................................................................... 17<br />
Supported printer drivers (Windows) ........................................................................................ 18<br />
Change print-job settings (Windows) ........................................................................................ 19<br />
Priority for changing print-job settings ........................................................................ 19<br />
Change the settings for all print jobs until the software program is closed ....................... 19<br />
Change the default settings for all print jobs ............................................................... 19<br />
Change the product configuration settings .................................................................. 20<br />
Change print-job settings (Mac OS X) ....................................................................................... 21<br />
Priority for changing print-job settings ........................................................................ 21<br />
Change the settings for all print jobs until the software program is closed ....................... 21<br />
Change the default settings for all print jobs ............................................................... 21<br />
Change the product configuration settings .................................................................. 21<br />
<strong>ENWW</strong><br />
iii
Print tasks for Windows .......................................................................................................... 23<br />
Use a printing shortcut (Windows) ............................................................................. 23<br />
Create a printing shortcut (Windows) ........................................................................ 24<br />
Print on both sides (duplex) with Windows ................................................................. 27<br />
Print multiple pages per sheet with Windows .............................................................. 28<br />
Select the page orientation (Windows) ...................................................................... 30<br />
Select the paper type (Windows) .............................................................................. 32<br />
Print the first or last page on different paper (Windows) ............................................... 33<br />
Scale a document to fit page size (Windows) ............................................................. 35<br />
Create a booklet (Windows) ..................................................................................... 36<br />
Print tasks for Mac OS X ......................................................................................................... 38<br />
Use a printing preset (Mac OS X) .............................................................................. 38<br />
Create a printing preset (Mac OS X) ......................................................................... 38<br />
Print on both sides (Mac OS X) ................................................................................. 38<br />
Print multiple pages on one sheet of paper (Mac OS X) ............................................... 39<br />
Select the page orientation (Mac OS X) ..................................................................... 39<br />
Select the paper type (Mac OS X) ............................................................................. 39<br />
Print a cover page (Mac OS X) ................................................................................. 40<br />
Scale a document to fit page size (Mac OS X) ............................................................ 40<br />
Create a booklet (Mac OS X) ................................................................................... 40<br />
Additional print tasks (Windows) ............................................................................................. 41<br />
Cancel a print job (Windows) ................................................................................... 41<br />
Select the paper size (Windows) ............................................................................... 41<br />
Select a custom paper size (Windows) ...................................................................... 41<br />
Print watermarks (Windows) ..................................................................................... 42<br />
Additional print tasks (Mac OS X) ............................................................................................ 43<br />
Cancel a print job (Mac OS X) ................................................................................. 43<br />
Select the paper size (Mac OS X) .............................................................................. 43<br />
Select a custom paper size (Mac OS X) ..................................................................... 43<br />
Print watermarks (Mac OS X) .................................................................................... 43<br />
Create archival-quality prints ................................................................................................... 45<br />
Create archival-quality prints (LCD control panel) ........................................................ 45<br />
Create archival-quality prints (touchscreen control panel) ............................................. 45<br />
Color printing ........................................................................................................................ 46<br />
Use the <strong>HP</strong> EasyColor option .................................................................................... 46<br />
Change <strong>color</strong> options (Windows) .............................................................................. 47<br />
Change the <strong>color</strong> theme for a print job (Windows) ...................................................... 47<br />
Change the <strong>color</strong> options (Mac OS X) ....................................................................... 48<br />
Manual <strong>color</strong> options ............................................................................................... 49<br />
Match <strong>color</strong>s .......................................................................................................... 49<br />
Print <strong>color</strong>ed text as black (Windows) ........................................................................ 50<br />
iv<br />
<strong>ENWW</strong>
Use <strong>HP</strong> ePrint ......................................................................................................................... 51<br />
Use <strong>HP</strong> ePrint (LCD control panel) .............................................................................. 51<br />
Use <strong>HP</strong> ePrint (touchscreen control panel) ................................................................... 52<br />
Use AirPrint ........................................................................................................................... 53<br />
Walk-up USB printing ............................................................................................................. 54<br />
4 Manage and maintain the product .................................................................................. 55<br />
Use the <strong>HP</strong> Reconfiguration Utility to change the product connection ............................................ 56<br />
Use <strong>HP</strong> Web Services applications ........................................................................................... 57<br />
Use <strong>HP</strong> Web Services applications (LCD control panel) ................................................ 57<br />
Use <strong>HP</strong> Web Services applications (touchscreen control panel) ..................................... 57<br />
Configure IP network settings ................................................................................................... 58<br />
View or change network settings ............................................................................... 58<br />
Manually configure IPv4 TCP/IP parameters from the control panel ............................... 58<br />
Manually configure IPv4 TCP/IP parameters (LCD control panel) .................... 58<br />
Manually configure IPv4 TCP/IP parameters (touchscreen control panel) ......... 58<br />
Rename the product on a network ............................................................................. 59<br />
Link speed and duplex settings .................................................................................. 60<br />
Link speed and duplex settings (LCD control panel) ....................................... 60<br />
Link speed and duplex settings (touchscreen control panel) ............................ 60<br />
<strong>HP</strong> Device Toolbox (Windows) ................................................................................................ 62<br />
<strong>HP</strong> Utility for Mac OS X .......................................................................................................... 64<br />
Open the <strong>HP</strong> Utility ................................................................................................. 64<br />
<strong>HP</strong> Utility features .................................................................................................... 64<br />
<strong>HP</strong> Web Jetadmin .................................................................................................................. 65<br />
<strong>Pro</strong>duct security features .......................................................................................................... 66<br />
Set or change the product password .......................................................................... 66<br />
Economy settings ................................................................................................................... 67<br />
Print with EconoMode .............................................................................................. 67<br />
Set the sleep delay .................................................................................................. 67<br />
Set the sleep delay (LCD control panel) ....................................................... 67<br />
Set the sleep delay (touchscreen control panel) ............................................ 68<br />
Set the Auto Power Down delay ................................................................................ 68<br />
Set the Auto Power Down delay (LCD control panel) ..................................... 68<br />
Set the Auto Power Down delay (touchscreen control panel) .......................... 69<br />
Print when a toner cartridge is at estimated end of life ................................................................ 70<br />
Enable or disable the At Very Low settings (LCD control panel) ..................................... 70<br />
Enable or disable the At Very Low settings (touchscreen control panel) ........................... 71<br />
Store and recycle supplies ....................................................................................................... 72<br />
Recycle supplies ...................................................................................................... 72<br />
Toner cartridge storage ............................................................................................ 72<br />
<strong>ENWW</strong><br />
v
Replacement instructions ......................................................................................................... 73<br />
Replace the toner cartridges ..................................................................................... 73<br />
Update the firmware ............................................................................................................... 77<br />
Manually update the firmware (LCD control panel) ...................................................... 77<br />
Manually update the firmware (touchscreen control panel) ........................................... 77<br />
Set the product to automatically update the firmware (LCD control panel) ....................... 77<br />
Set the product to automatically update the firmware (touchscreen control panel) ............ 78<br />
5 Solve problems ............................................................................................................... 79<br />
Solve problems checklist ......................................................................................................... 80<br />
Step 1: Make sure that the product is set up correctly .................................................. 80<br />
Step 2: Check the cabling or wireless connection ........................................................ 80<br />
Step 3: Check the control panel for error messages ..................................................... 81<br />
Step 4: Check the paper .......................................................................................... 81<br />
Step 5: Check the software ....................................................................................... 81<br />
Step 6: Test print functionality ................................................................................... 81<br />
Step 7: Check the supplies ....................................................................................... 81<br />
Step 8: Try sending a print job from a computer ......................................................... 81<br />
Restore the factory-set defaults ................................................................................................. 82<br />
Restore the factory-set defaults (LCD control panel) ...................................................... 82<br />
Restore the factory-set defaults (touchscreen control panel) ............................................ 82<br />
Control panel help system ....................................................................................................... 83<br />
Interpret control panel messages .............................................................................................. 84<br />
Control panel message types .................................................................................... 84<br />
Control panel messages ........................................................................................... 84<br />
10.X00Y Supply Error .............................................................................. 84<br />
49 Error Turn off then on ........................................................................... 84<br />
50.x Fuser Error Turn off then on ................................................................ 85<br />
51.XX Error Turn off then on ...................................................................... 85<br />
54.XX Error Turn off then on ...................................................................... 85<br />
55.X Error Turn off then on ........................................................................ 86<br />
57 Fan error Turn off then on ..................................................................... 86<br />
59.X Error Turn off then on ........................................................................ 86<br />
79 Error Turn off then on ........................................................................... 86<br />
Black Cartridge Low ................................................................................. 87<br />
Black in wrong position ............................................................................. 87<br />
Black Very Low ........................................................................................ 87<br />
Cleaning ................................................................................................. 88<br />
Cyan Cartridge Low ................................................................................. 88<br />
Cyan in wrong position ............................................................................. 88<br />
Cyan Very Low ........................................................................................ 88<br />
vi<br />
<strong>ENWW</strong>
Device error Press [OK] ............................................................................. 89<br />
Door open ............................................................................................... 89<br />
Genuine <strong>HP</strong> supply installed ...................................................................... 89<br />
Incompatible ................................................................................ 89<br />
Incorrect supplies ..................................................................................... 89<br />
Install cartridge ............................................................................ 90<br />
Invalid driver Press [OK] ........................................................................... 90<br />
Jam in ..................................................................................... 90<br />
Jam in Tray 1 Clear jam and then Press [OK] .............................................. 90<br />
Load tray 1 Press [OK] for available media ................................................. 90<br />
Load tray 1 , ..................................................................... 91<br />
Load tray 1 PLAIN Cleaning Mode .................................................. 91<br />
Magenta Cartridge Low ............................................................................ 91<br />
Magenta in wrong position ....................................................................... 91<br />
Magenta Very Low ................................................................................... 91<br />
Manual duplex Load tray 1 Press [OK] ....................................................... 92<br />
Memory is low Press [OK] ......................................................................... 92<br />
Misprint Press [OK] .................................................................................. 92<br />
Print failure, press OK. If error repeats, turn off then on. ................................ 92<br />
Rear door open ....................................................................................... 93<br />
Remove shipping lock from cartridge .............................................. 93<br />
Remove shipping locks from cartridges ....................................................... 93<br />
Replace ...................................................................................... 93<br />
Supplies low ............................................................................................ 94<br />
Unexpected size in tray 1 Load Press [OK] ....................................... 94<br />
Unsupported Press [OK] to continue ................................................ 94<br />
Used cartridge is installed Press [OK] to continue ............................. 94<br />
Used in use ................................................................................. 94<br />
Used supplies in use ................................................................................. 95<br />
Yellow Cartridge Low ............................................................................... 95<br />
Yellow in wrong position ........................................................................... 95<br />
Yellow Very Low ...................................................................................... 95<br />
Paper feeds incorrectly or becomes jammed .............................................................................. 96<br />
The product does not pick up paper .......................................................................... 96<br />
The product picks up multiple sheets of paper ............................................................. 96<br />
Prevent paper jams .................................................................................................. 96<br />
Clear jams ............................................................................................................................ 97<br />
Jam locations .......................................................................................................... 97<br />
Clear jams in the paper input tray ............................................................................. 97<br />
Clear jams from the output bin .................................................................................. 99<br />
Clear jams from the rear door ................................................................................... 99<br />
<strong>ENWW</strong><br />
vii
Improve print quality ............................................................................................................. 101<br />
Check the paper type setting (Windows) .................................................................. 101<br />
Check the paper type setting (Mac OS X) ................................................................. 101<br />
Check toner cartridge status ................................................................................... 102<br />
Print the supplies status page (LCD control panel) ....................................... 102<br />
Print the supplies status page (touchscreen control panel) ............................ 102<br />
Check the supplies status ......................................................................... 102<br />
Print a cleaning page ............................................................................................ 103<br />
Print a cleaning page (LCD control panel) ................................................. 103<br />
Print a cleaning page (touchscreen control panel) ....................................... 103<br />
Perform additional print quality troubleshooting ........................................................ 104<br />
Print the print quality page (LCD control panel) .......................................... 104<br />
Print the print quality page (touchscreen control panel) ................................ 104<br />
Interpret the print quality page ................................................................. 104<br />
Inspect the toner cartridge for damage .................................................................... 105<br />
Check the paper and printing environment ............................................................... 106<br />
Use paper that meets <strong>HP</strong> specifications ..................................................... 106<br />
Check the product environment ................................................................ 106<br />
Check print job settings .......................................................................................... 106<br />
Check the EconoMode setting .................................................................. 106<br />
Adjust <strong>color</strong> settings in the printer driver .................................................... 107<br />
Change the <strong>color</strong> theme for a print job ...................................... 107<br />
Change the <strong>color</strong> options ......................................................... 107<br />
Use the printer driver that best meets your printing needs ........................................... 108<br />
The product does not print or it prints slowly ............................................................................ 110<br />
The product does not print ...................................................................................... 110<br />
The product prints slowly ........................................................................................ 111<br />
Solve walk-up USB printing problems ...................................................................................... 112<br />
The USB Flash Drive menu does not open when you insert the USB accessory ............... 112<br />
The file does not print from the USB storage accessory ............................................... 112<br />
The file that you want to print is not listed in the USB Flash Drive menu ........................ 113<br />
Solve direct connection problems ........................................................................................... 114<br />
Solve wired network problems ............................................................................................... 115<br />
Poor physical connection ....................................................................................... 115<br />
The computer is using the incorrect IP address for the product ..................................... 115<br />
The computer is unable to communicate with the product ........................................... 116<br />
The product is using incorrect link and duplex settings for the network ......................... 116<br />
New software programs might be causing compatibility problems .............................. 116<br />
The computer or workstation might be set up incorrectly ............................................. 116<br />
The product is disabled, or other network settings are incorrect ................................... 116<br />
Solve wireless network problems ............................................................................................ 117<br />
viii<br />
<strong>ENWW</strong>
Wireless connectivity checklist ................................................................................ 117<br />
The product does not print after the wireless configuration completes ........................... 117<br />
The product does not print, and the computer has a third-party firewall installed ........... 118<br />
The wireless connection does not work after moving the wireless router or product ........ 118<br />
Cannot connect more computers to the wireless product ............................................. 118<br />
The wireless product loses communication when connected to a VPN .......................... 118<br />
The network does not appear in the wireless networks list .......................................... 118<br />
The wireless network is not functioning ..................................................................... 119<br />
Perform a wireless network diagnostic test ................................................................ 119<br />
Reduce interference on a wireless network ............................................................... 120<br />
Solve product software problems with Windows ...................................................................... 121<br />
A printer driver for the product is not visible in the <strong>Printer</strong> folder .................................. 121<br />
An error message was displayed during the software installation ................................ 121<br />
The product is in Ready mode, but nothing prints ...................................................... 121<br />
Solve product software problems with Mac OS X ..................................................................... 123<br />
The printer driver is not listed in the Print & Fax list .................................................... 123<br />
The product name does not appear in the product list in the Print & Fax list .................. 123<br />
The printer driver does not automatically set up the selected product in the Print & Fax<br />
list ....................................................................................................................... 123<br />
A print job was not sent to the product that you wanted ............................................. 124<br />
When connected with a USB cable, the product does not appear in the Print & Fax list<br />
after the driver is selected. ...................................................................................... 124<br />
You are using a generic printer driver when using a USB connection ........................... 124<br />
Remove software (Windows) ................................................................................................. 125<br />
Remove software (Mac OS X) ................................................................................................ 126<br />
6 Supplies and accessories .............................................................................................. 127<br />
Order parts, accessories, and supplies ................................................................................... 128<br />
<strong>HP</strong> policy on non-<strong>HP</strong> supplies ................................................................................................ 128<br />
<strong>HP</strong> anticounterfeit Web site ................................................................................................... 128<br />
Index ............................................................................................................................... 129<br />
<strong>ENWW</strong><br />
ix
x<br />
<strong>ENWW</strong>
1 <strong>Pro</strong>duct introduction<br />
●<br />
●<br />
●<br />
<strong>Pro</strong>duct views<br />
Print product reports<br />
<strong>Printer</strong> sharing disclaimer<br />
<strong>ENWW</strong> 1
<strong>Pro</strong>duct views<br />
<strong>Pro</strong>duct front view<br />
1 Output bin<br />
2 Walk-up USB port (<strong>HP</strong> <strong>LaserJet</strong> <strong>Pro</strong> <strong>200</strong> <strong>color</strong> <strong>M251</strong>nw <strong>Printer</strong> only)<br />
3 Power button<br />
4 Input tray<br />
5 Jam access door<br />
6 LCD control panel (<strong>HP</strong> <strong>LaserJet</strong> <strong>Pro</strong> <strong>200</strong> <strong>color</strong> <strong>M251</strong>n <strong>Printer</strong>) or <strong>color</strong> touchscreen control panel (<strong>HP</strong> <strong>LaserJet</strong> <strong>Pro</strong><br />
<strong>200</strong> <strong>color</strong> <strong>M251</strong>nw <strong>Printer</strong>)<br />
7 Front door latch<br />
2 Chapter 1 <strong>Pro</strong>duct introduction <strong>ENWW</strong>
<strong>Pro</strong>duct back view<br />
1 Rear door<br />
2 Power connection<br />
3 Hi-Speed USB 2.0 port<br />
4 Network port<br />
Serial number and model number location<br />
The serial number and product model number label is on the back of the product.<br />
<strong>ENWW</strong> <strong>Pro</strong>duct views 3
Control panel layout<br />
LCD control panel<br />
NOTE:<br />
This section applies to the <strong>HP</strong> <strong>LaserJet</strong> <strong>Pro</strong> <strong>200</strong> <strong>color</strong> <strong>M251</strong>n <strong>Printer</strong> model only.<br />
1 Control-panel display: The display provides information about the product. Use the menus on the display to establish<br />
product settings.<br />
2 Back arrow button: Use this button for the following actions:<br />
●<br />
●<br />
●<br />
Exit the control-panel menus.<br />
Scroll back to a previous menu in a submenu list.<br />
Scroll back to a previous menu item in a submenu list (without saving changes to the menu item).<br />
3 Cancel button: Press this button to cancel a print job whenever the attention light is blinking or to exit the controlpanel<br />
menus.<br />
4 Left arrow button: Use this button to navigate through the menus or to decrease a value that appears on the display.<br />
5 OK button: Press the OK button for the following actions:<br />
●<br />
●<br />
●<br />
●<br />
●<br />
Open the control-panel menus.<br />
Open a submenu displayed on the control-panel display.<br />
Select a menu item.<br />
Clear some errors.<br />
Begin a print job in response to a control-panel prompt (for example, when the message Press [OK] to continue<br />
appears on the control-panel display).<br />
6 Right arrow button: Use this button to navigate through the menus or to increase a value that appears on the display.<br />
7 Web Services button: This button provides quick access to <strong>HP</strong> Web Services features, including <strong>HP</strong> ePrint.<br />
4 Chapter 1 <strong>Pro</strong>duct introduction <strong>ENWW</strong>
8 Ready light (green): The Ready light is on when the product is ready to print. It blinks when the product is receiving print<br />
data, or when the product is in sleep mode.<br />
9 Attention light (amber): The Attention light blinks when the product requires user attention.<br />
Touchscreen control panel<br />
NOTE:<br />
This section applies to the <strong>HP</strong> <strong>LaserJet</strong> <strong>Pro</strong> <strong>200</strong> <strong>color</strong> <strong>M251</strong>nw <strong>Printer</strong> model only.<br />
1 Wireless light: indicates the wireless network is enabled. The light blinks while the product is establishing a connection to the<br />
wireless network.<br />
2 Touchscreen display<br />
3 Attention light: indicates a problem with the product<br />
4 Ready light: indicates the product is ready<br />
5 Help button and light: provides access to the control panel help system<br />
6 Right arrow button and light: moves the cursor to the right or moves the display image to the next screen<br />
NOTE:<br />
This button illuminates only when the current screen can use this feature.<br />
7 Cancel button and light: clears settings, cancels the current job or exits the current screen<br />
NOTE:<br />
This button illuminates only when the current screen can use this feature.<br />
8 Back button and light: returns to the previous screen<br />
NOTE:<br />
This button illuminates only when the current screen can use this feature.<br />
<strong>ENWW</strong> <strong>Pro</strong>duct views 5
9 Left arrow button and light: moves the cursor to the left<br />
NOTE:<br />
This button illuminates only when the current screen can use this feature.<br />
10 Home button and light: provides access to the Home screen<br />
6 Chapter 1 <strong>Pro</strong>duct introduction <strong>ENWW</strong>
Touchscreen Home screen<br />
NOTE:<br />
This section applies to the <strong>HP</strong> <strong>LaserJet</strong> <strong>Pro</strong> <strong>200</strong> <strong>color</strong> <strong>M251</strong>nw <strong>Printer</strong> model only.<br />
The Home screen provides access to the product features, and it indicates the product status.<br />
NOTE: Depending on the product configuration, the features on the Home screen can vary. The<br />
layout might also be reversed for some languages.<br />
1 Web Services button: provides quick access to <strong>HP</strong> Web Services features, including <strong>HP</strong> ePrint<br />
<strong>HP</strong> ePrint is a tool that prints documents by using any email enabled device to send them to the product’s email<br />
address.<br />
2 Setup button: provides access to the main menus<br />
3 Wireless button: provides access to the Wireless menu and wireless status information<br />
4<br />
NOTE:<br />
Network<br />
When you are connected to a wireless network, this icon changes to a set of signal strength bars.<br />
button: provides access to network settings and information. From the network settings screen, you<br />
can print the Network Summary page.<br />
5 Information button: provides product status information. From the status summary screen, you can print the<br />
Config Report page.<br />
6 Supplies button: provides information about supplies status. From the supplies summary screen, you can print<br />
the Supplies Status page.<br />
7 Apps button: provides access to the Apps menu to print directly from Web applications that you have downloaded<br />
from the <strong>HP</strong> ePrintCenter Web site at www.hpeprintcenter.com<br />
8 <strong>Pro</strong>duct status<br />
9 USB button: provides access to the USB Flash Drive menu<br />
<strong>ENWW</strong> <strong>Pro</strong>duct views 7
Print product reports<br />
<strong>Pro</strong>duct reports reside within the product memory. These pages help diagnose and solve problems with<br />
the product.<br />
NOTE: If the product language was not correctly set during installation, you can set the language<br />
manually so the information pages print in one of the supported languages. Change the language by<br />
using the System Setup menu on the control panel or the embedded Web server.<br />
From the Reports menu, you can print several informative pages about the product.<br />
Menu item<br />
Demo Page<br />
Menu Structure<br />
Config Report<br />
Supplies Status<br />
Description<br />
Prints a page that demonstrates print quality<br />
Prints a map of the control panel-menu layout. The active settings for each menu are<br />
listed.<br />
Prints a list of all the product settings. Includes network information when the<br />
product is connected to a network.<br />
Prints the status for each toner cartridge, including the following information:<br />
●<br />
●<br />
●<br />
●<br />
Estimated percentage of cartridge life remaining<br />
Approximate pages remaining<br />
Part numbers for <strong>HP</strong> toner cartridges<br />
Number of pages printed<br />
Network Summary<br />
Usage Page<br />
PCL Font List<br />
PS Font List<br />
PCL6 Font List<br />
Color Usage Log<br />
Service Page<br />
Diagnostics Page<br />
Print Quality Page<br />
Prints a list of all product network settings<br />
Prints a page that lists PCL pages, PCL 6 pages, PS pages, pages that were jammed<br />
or mispicked in the product, monochrome (black and white) or <strong>color</strong> pages; and<br />
reports the page count<br />
Prints a list of all the PCL fonts that are installed<br />
Prints a list of all the PostScript (PS) fonts that are installed<br />
Prints a list of all the PCL6 fonts that are installed<br />
Prints a report that shows the user name, application name, and <strong>color</strong> usage<br />
information on a job-by-job basis<br />
Prints the service report<br />
Prints the calibration and <strong>color</strong> diagnostics pages<br />
Prints a page that helps solve problems with print quality<br />
8 Chapter 1 <strong>Pro</strong>duct introduction <strong>ENWW</strong>
Print product reports (LCD control panel)<br />
NOTE:<br />
This section applies to the <strong>HP</strong> <strong>LaserJet</strong> <strong>Pro</strong> <strong>200</strong> <strong>color</strong> <strong>M251</strong>n <strong>Printer</strong> model only.<br />
1. At the control panel, press the OK button to open the menus.<br />
2. Open the Reports menu.<br />
3. Select the report you want to print, and then press the OK button to print the report.<br />
Print product reports (touchscreen control panel)<br />
NOTE:<br />
This section applies to the <strong>HP</strong> <strong>LaserJet</strong> <strong>Pro</strong> <strong>200</strong> <strong>color</strong> <strong>M251</strong>nw <strong>Printer</strong> model only.<br />
1. From the Home screen on the product control panel on the product control panel, touch the Setup<br />
button.<br />
2. Touch the Reports button.<br />
3. Touch the name of the report that you want to print.<br />
<strong>ENWW</strong> Print product reports 9
<strong>Printer</strong> sharing disclaimer<br />
<strong>HP</strong> does not support peer-to-peer networking, as the feature is a function of Microsoft operating systems<br />
and not of the <strong>HP</strong> printer drivers. Go to Microsoft at www.microsoft.com.<br />
10 Chapter 1 <strong>Pro</strong>duct introduction <strong>ENWW</strong>
2 Paper tray<br />
●<br />
●<br />
●<br />
Supported paper sizes<br />
Supported paper types<br />
Load the paper input tray<br />
<strong>ENWW</strong> 11
Supported paper sizes<br />
This product supports a number of paper sizes, and it adapts to various paper.<br />
NOTE: To obtain best print results, select the appropriate paper size and type in your print driver<br />
before printing.<br />
Table 2-1 Supported paper and print media sizes<br />
Size<br />
Letter<br />
Legal<br />
Executive<br />
Dimensions<br />
216 x 279 mm (8.5 x 11 in)<br />
216 x 356 mm (8.5 x 14 in)<br />
184 x 267 mm (7.24 x 10.51 in)<br />
8.5 x 13 216 x 330 mm (8.5 x 13 in)<br />
4 x 6 102 x 152 mm (4 x 6 in)<br />
5 x 8 127 x 203 mm (5 x 8 in)<br />
A4<br />
A5<br />
A6<br />
B5 (JIS)<br />
210 x 297 mm (8.27 x 11.69 in)<br />
148 x 210 mm (5.83 x 8.27 in)<br />
105 x 148 mm (4.13 x 5.83 in)<br />
182 x 257 mm (7.17 x 10.12 in)<br />
10 x 15 cm 100 x 150 mm (3.9 x 5.9 in)<br />
16k<br />
184 x 260 mm (7.24 x 10.23 in)<br />
195 x 270 mm (7.68 x 10.62 in)<br />
197 x 273 mm (7.75 x 10.75 in)<br />
Custom<br />
Minimum: 76 x 127 mm (3 x 5 in)<br />
Maximum: 216 x 356 mm (8.5 x 14.0 in)<br />
Table 2-2 Supported envelopes and postcards<br />
Size<br />
Japanese Postcard<br />
Dimensions<br />
100 x 148 mm (3.94 x 5.83 in)<br />
Postcard (JIS)<br />
Double Japan Postcard Rotated<br />
148 x <strong>200</strong> mm (5.82 x 7.87 in)<br />
Double Postcard (JIS)<br />
Envelope #10<br />
Envelope DL<br />
Envelope C5<br />
105 x 241 mm (4.13 x 9.49 in)<br />
110 x 220 mm (4.33 x 8.66 in)<br />
162 x 229 mm (6.93 x 9.84 in)<br />
12 Chapter 2 Paper tray <strong>ENWW</strong>
Table 2-2 Supported envelopes and postcards (continued)<br />
Size<br />
Envelope B5<br />
Envelope Monarch<br />
Dimensions<br />
176 x 250 mm (6.7 x 9.8 in)<br />
98 x 191 mm (3.9 x 7.5 in)<br />
<strong>ENWW</strong> Supported paper sizes 13
Supported paper types<br />
Paper type Dimensions 1 Weight Capacity 2 Paper orientation<br />
Paper, including the<br />
following types:<br />
●<br />
●<br />
Plain<br />
Letterhead<br />
Minimum: 76 x 127 mm<br />
(3 x 5 in)<br />
Maximum:<br />
216 x 356 mm<br />
(8.5 x 14 in)<br />
60 to 90 g/m 2<br />
(16 to 24 lb)<br />
Up to 150 sheets of<br />
75 g/m 2 (20 lb bond)<br />
Side to be printed on<br />
face-up, with the top edge<br />
at the back of the tray<br />
●<br />
●<br />
●<br />
●<br />
Color<br />
Preprinted<br />
Prepunched<br />
Recycled<br />
Thick paper Same as for paper Up to <strong>200</strong> g/m 2 (53 lb) Up to 15 mm (.59 in)<br />
stack height<br />
Cover paper Same as for paper Up to <strong>200</strong> g/m 2 (53 lb) Up to 15 mm (.59 in)<br />
stack height<br />
Side to be printed on<br />
face-up, with the top edge<br />
at the back of the tray<br />
Side to be printed on<br />
face-up, with the top edge<br />
at the back of the tray<br />
Glossy paper<br />
Photo paper<br />
Same as for paper Up to 220 g/m 2 (59 lb) Up to 15 mm (.59 in)<br />
stack height<br />
Side to be printed on<br />
face-up, with the top edge<br />
at the back of the tray<br />
Transparencies A4 or Letter Thickness: 0.12 to<br />
0.13 mm (4.7 to 5.1 mils)<br />
Labels 3 A4 or Letter Thickness: up to 0.23 mm<br />
(9 mils)<br />
Up to 50 sheets<br />
Up to 50 sheets<br />
Side to be printed on<br />
face-up, with the top edge<br />
at the back of the tray<br />
Side to be printed on<br />
face-up, with the top edge<br />
at the back of the tray<br />
Envelopes ● COM 10<br />
● Monarch<br />
● DL<br />
Up to 90 g/m 2 (24 lb) Up to 10 envelopes Side to be printed on<br />
face-up, with the stampend<br />
at the back of the<br />
tray<br />
●<br />
●<br />
C5<br />
B5<br />
Postcards or index cards<br />
100 x 148 mm<br />
(3.9 x 5.8 in)<br />
Up to 50 sheets<br />
Side to be printed on<br />
face-up, with the top edge<br />
at the back of the tray<br />
1<br />
The product supports a wide range of standard and custom sizes of paper. Check the printer driver for supported sizes.<br />
2<br />
Capacity can vary depending on paper weight and thickness, and environmental conditions.<br />
3<br />
Smoothness: 100 to 250 (Sheffield)<br />
14 Chapter 2 Paper tray <strong>ENWW</strong>
Load the paper input tray<br />
1. Pull the tray out of the product.<br />
2. Slide open the paper length and width guides.<br />
3. To load Legal-size paper, extend the tray by<br />
pressing and holding the extension tab while<br />
pulling the front of the tray outward.<br />
NOTE: When loaded with Legal-size paper,<br />
the tray extends from the front of the product<br />
approximately 51 mm (2 inches).<br />
<strong>ENWW</strong> Load the paper input tray 15
4. Place the paper in the tray and make sure that<br />
it is flat at all four corners. Slide the paper<br />
length and width guides so that they are<br />
against the stack of paper.<br />
NOTE:<br />
The tray capacity is 150 sheets.<br />
5. Push down on the paper to make sure that the<br />
paper stack is below the paper limit tabs on<br />
the side of the tray.<br />
6. Slide the tray into the product.<br />
16 Chapter 2 Paper tray <strong>ENWW</strong>
3 Print<br />
●<br />
●<br />
Supported printer drivers (Windows)<br />
Change print-job settings (Windows)<br />
● Change print-job settings (Mac OS X)<br />
●<br />
●<br />
●<br />
Print tasks for Windows<br />
Print tasks for Mac OS X<br />
Additional print tasks (Windows)<br />
● Additional print tasks (Mac OS X)<br />
●<br />
●<br />
●<br />
●<br />
●<br />
Create archival-quality prints<br />
Color printing<br />
Use <strong>HP</strong> ePrint<br />
Use AirPrint<br />
Walk-up USB printing<br />
<strong>ENWW</strong> 17
Supported printer drivers (Windows)<br />
<strong>Printer</strong> drivers provide access to the product features and allow the computer to communicate with the<br />
product (using a printer language). Check the installation notes and readme files on the product CD for<br />
additional software and languages.<br />
<strong>HP</strong> PCL 6 driver description<br />
●<br />
●<br />
●<br />
●<br />
●<br />
●<br />
Installs from the Add <strong>Printer</strong> wizard<br />
<strong>Pro</strong>vided as the default driver<br />
Recommended for printing in all supported Windows environments<br />
<strong>Pro</strong>vides the overall best speed, print quality, and product-feature support for most users<br />
Developed to align with the Windows Graphic Device Interface (GDI) for the best speed in<br />
Windows environments<br />
Might not be fully compatible with third-party and custom software programs that are based on<br />
PCL 5<br />
<strong>HP</strong> UPD PS driver description<br />
●<br />
●<br />
●<br />
Available for download from the Web at www.hp.com/support/lj<strong>color</strong>m251series<br />
Recommended for printing with Adobe ® software programs or with other highly graphics-intensive<br />
software programs<br />
<strong>Pro</strong>vides support for printing from postscript emulation needs, or for postscript flash font support<br />
<strong>HP</strong> UPD PCL 5 driver description<br />
●<br />
●<br />
●<br />
●<br />
●<br />
Available for download from the Web at www.hp.com/support/lj<strong>color</strong>m251series<br />
Compatible with previous PCL versions and older <strong>HP</strong> <strong>LaserJet</strong> products<br />
The best choice for printing from third-party or custom software programs<br />
Designed for use in corporate Windows environments to provide a single driver for use with<br />
multiple printer models<br />
Preferred when printing to multiple printer models from a mobile Windows computer<br />
18 Chapter 3 Print <strong>ENWW</strong>
Change print-job settings (Windows)<br />
Priority for changing print-job settings<br />
Changes to print settings are prioritized depending on where the changes are made:<br />
NOTE:<br />
The names of commands and dialog boxes might vary depending on your software program.<br />
●<br />
●<br />
●<br />
●<br />
●<br />
Page Setup dialog box: Click Page Setup or a similar command on the File menu of the<br />
program you are working in to open this dialog box. Settings changed here override settings<br />
changed anywhere else.<br />
Print dialog box: Click Print, Print Setup, or a similar command on the File menu of the<br />
program you are working in to open this dialog box. Settings changed in the Print dialog box<br />
have a lower priority and usually do not override changes made in the Page Setup dialog box.<br />
<strong>Printer</strong> <strong>Pro</strong>perties dialog box (printer driver): Click <strong>Pro</strong>perties in the Print dialog box<br />
to open the printer driver. Settings changed in the <strong>Printer</strong> <strong>Pro</strong>perties dialog box usually do not<br />
override settings anywhere else in the printing software. You can change most of the print settings<br />
here.<br />
Default printer driver settings: The default printer driver settings determine the settings used<br />
in all print jobs, unless settings are changed in the Page Setup, Print, or <strong>Printer</strong> <strong>Pro</strong>perties<br />
dialog boxes.<br />
<strong>Printer</strong> control panel settings: Settings changed at the printer control panel have a lower<br />
priority than changes made anywhere else.<br />
Change the settings for all print jobs until the software program is<br />
closed<br />
1. From the software program, select the Print option.<br />
2. Select the driver, and then click <strong>Pro</strong>perties or Preferences.<br />
Change the default settings for all print jobs<br />
1. Windows XP, Windows Server <strong>200</strong>3, and Windows Server <strong>200</strong>8 (using the<br />
default Start menu view): Click Start, and then click <strong>Printer</strong>s and Faxes.<br />
Windows XP, Windows Server <strong>200</strong>3, and Windows Server <strong>200</strong>8 (using the<br />
Classic Start menu view): Click Start, click Settings, and then click <strong>Printer</strong>s.<br />
Windows Vista: Click Start, click Control Panel, and then in the category for Hardware<br />
and Sound click <strong>Printer</strong>.<br />
Windows 7: Click Start, and then click Devices and <strong>Printer</strong>s.<br />
2. Right-click the driver icon, and then select Printing Preferences.<br />
<strong>ENWW</strong> Change print-job settings (Windows) 19
Change the product configuration settings<br />
1. Windows XP, Windows Server <strong>200</strong>3, and Windows Server <strong>200</strong>8 (using the<br />
default Start menu view): Click Start, and then click <strong>Printer</strong>s and Faxes.<br />
Windows XP, Windows Server <strong>200</strong>3, and Windows Server <strong>200</strong>8 (using the<br />
Classic Start menu view): Click Start, click Settings, and then click <strong>Printer</strong>s.<br />
Windows Vista: Click Start, click Control Panel, and then in the category for Hardware<br />
and Sound click <strong>Printer</strong>.<br />
Windows 7: Click Start, and then click Devices and <strong>Printer</strong>s.<br />
2. Right-click the driver icon, and then select <strong>Pro</strong>perties or <strong>Printer</strong> properties.<br />
3. Click the Device Settings tab.<br />
20 Chapter 3 Print <strong>ENWW</strong>
Change print-job settings (Mac OS X)<br />
Priority for changing print-job settings<br />
Changes to print settings are prioritized depending on where the changes are made:<br />
NOTE:<br />
The names of commands and dialog boxes might vary depending on your software program.<br />
●<br />
●<br />
●<br />
●<br />
Page Setup dialog box: Click Page Setup or a similar command on the File menu of the<br />
program you are working in to open this dialog box. Settings changed here might override<br />
settings changed anywhere else.<br />
Print dialog box: Click Print, Print Setup, or a similar command on the File menu of the<br />
program you are working in to open this dialog box. Settings changed in the Print dialog box<br />
have a lower priority and do not override changes made in the Page Setup dialog box.<br />
Default printer driver settings: The default printer driver settings determine the settings used<br />
in all print jobs, unless settings are changed in the Page Setup, Print, or <strong>Printer</strong> <strong>Pro</strong>perties<br />
dialog boxes.<br />
<strong>Printer</strong> control panel settings: Settings changed at the printer control panel have a lower<br />
priority than changes made anywhere else.<br />
Change the settings for all print jobs until the software program is<br />
closed<br />
1. On the File menu, click the Print button.<br />
2. Change the settings that you want on the various menus.<br />
Change the default settings for all print jobs<br />
1. On the File menu, click the Print button.<br />
2. Change the settings that you want on the various menus.<br />
3. On the Presets menu, click the Save As... option and type a name for the preset.<br />
These settings are saved in the Presets menu. To use the new settings, you must select the saved preset<br />
option every time you open a program and print.<br />
Change the product configuration settings<br />
1. From the Apple menu , click the System Preferences menu and then click the Print & Fax<br />
icon.<br />
2. Select the product in the left side of the window.<br />
3. Click the Options & Supplies button.<br />
<strong>ENWW</strong> Change print-job settings (Mac OS X) 21
4. Click the Driver tab.<br />
5. Configure the installed options.<br />
22 Chapter 3 Print <strong>ENWW</strong>
Print tasks for Windows<br />
Use a printing shortcut (Windows)<br />
1. From the software program, select the Print<br />
option.<br />
2. Select the product, and then click the<br />
<strong>Pro</strong>perties or Preferences button.<br />
<strong>ENWW</strong> Print tasks for Windows 23
3. Click the Printing Shortcuts tab.<br />
4. Select one of the shortcuts, and then click the<br />
OK button.<br />
NOTE: When you select a shortcut, the<br />
corresponding settings change on the other<br />
tabs in the printer driver.<br />
Create a printing shortcut (Windows)<br />
1. From the software program, select the Print<br />
option.<br />
24 Chapter 3 Print <strong>ENWW</strong>
2. Select the product, and then click the<br />
<strong>Pro</strong>perties or Preferences button.<br />
3. Click the Printing Shortcuts tab.<br />
4. Select an existing shortcut as a base.<br />
NOTE: Always select a shortcut before<br />
adjusting any of the settings on the right side<br />
of the screen. If you adjust the settings and<br />
then select a shortcut, or if you select a<br />
different shortcut, all your adjustments are lost.<br />
<strong>ENWW</strong> Print tasks for Windows 25
5. Select the print options for the new shortcut.<br />
NOTE: You can select the print options on<br />
this tab or on any other tab in the printer<br />
driver. After selecting options on other tabs,<br />
return to the Printing Shortcuts tab before<br />
continuing with the next step.<br />
6. Click the Save As button.<br />
7. Type a name for the shortcut, and click the OK<br />
button.<br />
26 Chapter 3 Print <strong>ENWW</strong>
Print on both sides (duplex) with Windows<br />
1. On the File menu in the software program,<br />
click Print.<br />
2. Select the product, and then click the<br />
<strong>Pro</strong>perties or Preferences button.<br />
3. Click the Finishing tab.<br />
<strong>ENWW</strong> Print tasks for Windows 27
4. Select the Print on both sides (manually)<br />
check box. Click the OK button to print the<br />
first side of the job.<br />
5. Retrieve the printed stack from the output bin,<br />
and maintaining the same orientation, place it<br />
with the printed-side facing down in the input<br />
tray.<br />
6. On the control panel, press the OK button to<br />
print the second side of the job.<br />
Print multiple pages per sheet with Windows<br />
1. On the File menu in the software program,<br />
click Print.<br />
28 Chapter 3 Print <strong>ENWW</strong>
2. Select the product, and then click the<br />
<strong>Pro</strong>perties or Preferences button.<br />
3. Click the Finishing tab.<br />
<strong>ENWW</strong> Print tasks for Windows 29
4. Select the number of pages per sheet from the<br />
Pages per sheet drop-down list.<br />
5. Select the correct Print page borders,<br />
Page order, and Orientation options.<br />
Select the page orientation (Windows)<br />
1. From the software program, select the Print<br />
option.<br />
30 Chapter 3 Print <strong>ENWW</strong>
2. Select the product, and then click the<br />
<strong>Pro</strong>perties or Preferences button.<br />
3. Click the Finishing tab.<br />
4. In the Orientation area, select the Portrait<br />
or Landscape option.<br />
To print the page image upside down, select<br />
the Rotate by 180 degrees option.<br />
<strong>ENWW</strong> Print tasks for Windows 31
Select the paper type (Windows)<br />
1. From the software program, select the Print<br />
option.<br />
2. Select the product, and then click the<br />
<strong>Pro</strong>perties or Preferences button.<br />
3. Click the Paper/Quality tab.<br />
4. From the Paper type drop-down list, click the<br />
More... option.<br />
32 Chapter 3 Print <strong>ENWW</strong>
5. Select the category of paper types that best<br />
describes your paper.<br />
6. Select the option for the type of paper you are<br />
using, and click the OK button.<br />
Print the first or last page on different paper (Windows)<br />
1. From the software program, select the Print<br />
option.<br />
<strong>ENWW</strong> Print tasks for Windows 33
2. Select the product, and then click the<br />
<strong>Pro</strong>perties or Preferences button.<br />
3. Click the Paper/Quality tab.<br />
4. Click the Print pages on different paper<br />
check box, and then select the necessary<br />
settings for the front cover, other pages, and<br />
back cover.<br />
34 Chapter 3 Print <strong>ENWW</strong>
Scale a document to fit page size (Windows)<br />
1. From the software program, select the Print<br />
option.<br />
2. Select the product, and then click the<br />
<strong>Pro</strong>perties or Preferences button.<br />
3. Click the Effects tab.<br />
4. Select the Print document on option, and<br />
then select a size from the drop-down list.<br />
<strong>ENWW</strong> Print tasks for Windows 35
Create a booklet (Windows)<br />
1. From the software program, select the Print<br />
option.<br />
2. Select the product, and then click the<br />
<strong>Pro</strong>perties or Preferences button.<br />
3. Click the Finishing tab.<br />
36 Chapter 3 Print <strong>ENWW</strong>
4. Click the Print on both sides (manually)<br />
check box.<br />
5. In the Booklet layout drop-down list, select<br />
a binding option. The Pages per sheet<br />
option automatically changes to 2 pages per<br />
sheet.<br />
<strong>ENWW</strong> Print tasks for Windows 37
Print tasks for Mac OS X<br />
Use a printing preset (Mac OS X)<br />
1. On the File menu, click the Print option.<br />
2. In the <strong>Printer</strong> menu, select this product.<br />
3. In the Presets menu, select the printing preset.<br />
NOTE:<br />
To use printer-driver default settings, select the standard option.<br />
Create a printing preset (Mac OS X)<br />
Use printing presets to save the current printer driver settings for reuse.<br />
1. On the File menu, click the Print option.<br />
2. In the <strong>Printer</strong> menu, select this product.<br />
3. Select the print settings that you want to save for reuse.<br />
4. In the Presets menu, click the Save As... option, and type a name for the preset.<br />
5. Click the OK button.<br />
Print on both sides (Mac OS X)<br />
1. Insert enough paper into one of the trays to accommodate the print job.<br />
2. On the File menu, click the Print option.<br />
3. Open the Finishing menu, and click the Manual Duplex tab or open the Manual Duplex<br />
menu.<br />
4. Click the Manual Duplex box, and select a binding option.<br />
5. Click the Print button. Follow the instructions in the pop-up window that appears on the computer<br />
screen before replacing the output stack in Tray 1 for printing the second half.<br />
6. Go to the product, and remove any blank paper that is in Tray 1.<br />
7. Insert the printed stack face-up with the bottom edge feeding into the printer first in Tray 1.<br />
8. If prompted, press the appropriate control-panel button to continue.<br />
38 Chapter 3 Print <strong>ENWW</strong>
Print multiple pages on one sheet of paper (Mac OS X)<br />
1. On the File menu, click the Print option.<br />
2. In the <strong>Printer</strong> menu, select this product.<br />
3. Open the Layout menu.<br />
4. From the Pages per Sheet menu, select the number of pages that you want to print on each<br />
sheet (1, 2, 4, 6, 9, or 16).<br />
5. In the Layout Direction area, select the order and placement of the pages on the sheet.<br />
6. From the Borders menu, select the type of border to print around each page on the sheet.<br />
Select the page orientation (Mac OS X)<br />
1. On the File menu, click the Print option.<br />
2. In the <strong>Printer</strong> menu, select this product.<br />
3. In the Copies & Pages menu, click the Page Setup button.<br />
4. Click the icon that represents the page orientation that you want to use, and then click the OK<br />
button.<br />
Select the paper type (Mac OS X)<br />
1. On the File menu, click the Print option.<br />
2. In the <strong>Printer</strong> menu, select this product.<br />
3. Open the Finishing menu.<br />
4. Select a type from the Media-type drop-down list.<br />
5. Click the Print button.<br />
<strong>ENWW</strong> Print tasks for Mac OS X 39
Print a cover page (Mac OS X)<br />
1. On the File menu, click the Print option.<br />
2. In the <strong>Printer</strong> menu, select this product.<br />
3. Open the Cover Page menu, and then select where to print the cover page. Click either the<br />
Before Document button or the After Document button.<br />
4. In the Cover Page Type menu, select the message that you want to print on the cover page.<br />
NOTE:<br />
menu.<br />
To print a blank cover page, select the standard option from the Cover Page Type<br />
Scale a document to fit page size (Mac OS X)<br />
1. On the File menu, click the Print option.<br />
2. In the <strong>Printer</strong> menu, select this product.<br />
3. Open the Paper Handling menu.<br />
4. In the Destination Paper Size area, click the Scale to fit paper size box, and then select<br />
the size from the drop-down list.<br />
Create a booklet (Mac OS X)<br />
1. On the File menu, click the Print option.<br />
2. In the <strong>Printer</strong> menu, select this product.<br />
3. Open the Manual Duplex menu.<br />
4. Click the Manual Duplex box.<br />
5. Open the Booklet Printing menu.<br />
6. Click the Format Output as Booklet box, and select a binding option.<br />
7. Select the paper size.<br />
40 Chapter 3 Print <strong>ENWW</strong>
Additional print tasks (Windows)<br />
Cancel a print job (Windows)<br />
1. If the print job is currently printing, cancel it by pressing the Cancel button on the product<br />
control panel.<br />
NOTE: Pressing the Cancel button clears the job that the product is currently processing. If<br />
more than one process is running, pressing the Cancel button clears the process that currently<br />
appears on the product control panel.<br />
2. You can also cancel a print job from a software program or a print queue.<br />
●<br />
●<br />
Software program: Typically, a dialog box appears briefly on the computer screen,<br />
allowing you to cancel the print job.<br />
Windows print queue: If a print job is waiting in a print queue (computer memory) or<br />
print spooler, delete the job there.<br />
◦ Windows XP, Server <strong>200</strong>3, or Server <strong>200</strong>8: Click Start, click Settings, and<br />
then click <strong>Printer</strong>s and Faxes. Double-click the product icon to open the window,<br />
right-click the print job that you want to cancel, and then click Cancel.<br />
◦ Windows Vista: Click Start, click Control Panel, and then, under Hardware<br />
and Sound, click <strong>Printer</strong>. Double-click the product icon to open the window, rightclick<br />
the print job that you want to cancel, and then click Cancel.<br />
◦ Windows 7: Click Start, and then click Devices and <strong>Printer</strong>s. Double-click the<br />
product icon to open the window, right-click the print job that you want to cancel, and<br />
then click Cancel.<br />
Select the paper size (Windows)<br />
1. From the software program, select the Print option.<br />
2. Select the product, and then click the <strong>Pro</strong>perties or Preferences button.<br />
3. Click the Paper/Quality tab.<br />
4. Select a size from the Paper size drop-down list.<br />
Select a custom paper size (Windows)<br />
1. From the software program, select the Print option.<br />
2. Select the product, and then click the <strong>Pro</strong>perties or Preferences button.<br />
3. Click the Paper/Quality tab.<br />
4. Click the Custom button.<br />
<strong>ENWW</strong> Additional print tasks (Windows) 41
5. Type a name for the custom size and specify the dimensions.<br />
●<br />
●<br />
The width is the short edge of the paper.<br />
The length is the long edge of the paper.<br />
NOTE:<br />
Always load paper into the trays short edge first.<br />
6. Click the Save button, and then click the Close button.<br />
Print watermarks (Windows)<br />
1. From the software program, select the Print option.<br />
2. Select the product, and then click the <strong>Pro</strong>perties or Preferences button.<br />
3. Click the Effects tab.<br />
4. Select a watermark from the Watermarks drop-down list.<br />
Or, to add a new watermark to the list, click the Edit button. Specify the settings for the<br />
watermark, and then click the OK button.<br />
5. To print the watermark on the first page only, select the First page only check box. Otherwise,<br />
the watermark is printed on each page.<br />
42 Chapter 3 Print <strong>ENWW</strong>
Additional print tasks (Mac OS X)<br />
Cancel a print job (Mac OS X)<br />
1. If the print job is currently printing, cancel it by pressing the Cancel button on the product<br />
control panel.<br />
NOTE: Pressing the Cancel button clears the job that the product is currently processing. If<br />
more than one print job is waiting, pressing the Cancel button clears the print job that currently<br />
appears on the product control panel.<br />
2. You can also cancel a print job from a software program or a print queue.<br />
●<br />
●<br />
Software program: Typically, a dialog box appears briefly on the computer screen,<br />
allowing you to cancel the print job.<br />
Mac print queue: Open the print queue by double-clicking the product icon in the dock.<br />
Highlight the print job, and then click Delete.<br />
Select the paper size (Mac OS X)<br />
1. On the File menu, click the Print option.<br />
2. In the <strong>Printer</strong> menu, select this product.<br />
3. In the Copies & Pages menu, click the Page Setup button.<br />
4. Select a size from the Paper Size drop-down list, and then click the OK button.<br />
Select a custom paper size (Mac OS X)<br />
1. On the File menu, click the Print option.<br />
2. In the <strong>Printer</strong> menu, select this product.<br />
3. In the Copies & Pages menu, click the Page Setup button.<br />
4. From the Paper Size drop-down list, select the Manage Custom Sizes option.<br />
5. Specify the dimensions for the page size, and then click the OK button.<br />
Print watermarks (Mac OS X)<br />
1. On the File menu, click the Print option.<br />
2. In the <strong>Printer</strong> menu, select this product.<br />
3. Open the Watermarks menu.<br />
4. From the Mode menu, select the type of watermark to use. Select the Watermark option to print<br />
a semi-transparent message. Select the Overlay option to print a message that is not transparent.<br />
<strong>ENWW</strong> Additional print tasks (Mac OS X) 43
5. From the Pages menu, select whether to print the watermark on all pages or on the first page<br />
only.<br />
6. From the Text menu, select one of the standard messages, or select the Custom option and type<br />
a new message in the box.<br />
7. Select options for the remaining settings.<br />
44 Chapter 3 Print <strong>ENWW</strong>
Create archival-quality prints<br />
NOTE:<br />
Using this feature uses more toner.<br />
Archive print produces output that is less susceptible to toner smearing and dusting. Use archive print to<br />
create documents that you want to preserve or archive.<br />
Create archival-quality prints (LCD control panel)<br />
NOTE:<br />
This section applies to the <strong>HP</strong> <strong>LaserJet</strong> <strong>Pro</strong> <strong>200</strong> <strong>color</strong> <strong>M251</strong>n <strong>Printer</strong> model only.<br />
1. At the control panel, press the OK button to open the menus.<br />
2. Open the following menus:<br />
●<br />
●<br />
Service<br />
Archive Print<br />
3. Select the On or Off option, and then press the OK button.<br />
Create archival-quality prints (touchscreen control panel)<br />
NOTE:<br />
This section applies to the <strong>HP</strong> <strong>LaserJet</strong> <strong>Pro</strong> <strong>200</strong> <strong>color</strong> <strong>M251</strong>nw <strong>Printer</strong> model only.<br />
1. From the Home screen on the product control panel, touch the Setup button.<br />
2. Touch the Service menu.<br />
3. Touch the Archive Print button, and then touch the On button.<br />
<strong>ENWW</strong> Create archival-quality prints 45
Color printing<br />
Use the <strong>HP</strong> EasyColor option<br />
If you are using the <strong>HP</strong> PCL 6 printer driver for Windows, the <strong>HP</strong> EasyColor technology automatically<br />
improves mixed-content documents that are printed from Microsoft Office programs. This technology<br />
scans documents and automatically adjusts photographic images in .JPEG or .PNG format.<br />
<strong>HP</strong> EasyColor technology enhances the entire image at one time, rather than dividing it into several<br />
pieces, which results in improved <strong>color</strong> consistency, sharper details, and faster printing.<br />
If you are using the <strong>HP</strong> Postscript printer driver for Mac, <strong>HP</strong> EasyColor technology scans all<br />
documents and automatically adjusts all photographic images with the same improved photographic<br />
results.<br />
In the following example, the images on the left were created without using the <strong>HP</strong> EasyColor option.<br />
The images on the right show the enhancements that result from using the <strong>HP</strong> EasyColor option.<br />
The <strong>HP</strong> EasyColor option is enabled by default in both the <strong>HP</strong> PCL 6 printer driver and the <strong>HP</strong> Mac<br />
Postscript printer driver, so you do not need to make manual <strong>color</strong> adjustments. To disable the option so<br />
you can manually adjust the <strong>color</strong> settings, open the Color tab in the Windows driver or the Color/<br />
Quality Options tab in the Mac driver, and then click the <strong>HP</strong> EasyColor check box to clear it.<br />
46 Chapter 3 Print <strong>ENWW</strong>
Change <strong>color</strong> options (Windows)<br />
1. From the software program, select the Print<br />
option.<br />
2. Select the product, and then click the<br />
<strong>Pro</strong>perties or Preferences button.<br />
3. Click the Color tab.<br />
4. Click the Automatic or Manual setting.<br />
●<br />
●<br />
Automatic setting: Select this setting for<br />
most <strong>color</strong> print jobs.<br />
Manual setting: Select this setting to<br />
adjust the <strong>color</strong> settings independent from<br />
other settings.<br />
NOTE: Changing <strong>color</strong> settings<br />
manually can impact output. <strong>HP</strong><br />
recommends that only <strong>color</strong> graphics<br />
experts change these settings.<br />
5. Click the Print in Grayscale option to print<br />
a <strong>color</strong> document in black and shades of gray.<br />
Use this option to print <strong>color</strong> documents for<br />
photocopying or faxing. You can also use this<br />
option to print draft copies or to save <strong>color</strong><br />
toner.<br />
6. Click the OK button.<br />
Change the <strong>color</strong> theme for a print job (Windows)<br />
1. From the software program, select the Print<br />
option.<br />
<strong>ENWW</strong> Color printing 47
2. Select the product, and then click the<br />
<strong>Pro</strong>perties or Preferences button.<br />
3. Click the Color tab.<br />
4. Select a <strong>color</strong> theme from the Color Themes<br />
drop-down list.<br />
●<br />
●<br />
●<br />
●<br />
●<br />
Default (sRGB): This theme sets the<br />
product to print RGB data in raw device<br />
mode. When using this theme, manage<br />
<strong>color</strong> in the software program or in the<br />
operating system for correct rendering.<br />
Vivid: The product increases the <strong>color</strong><br />
saturation in the midtones. Use this theme<br />
when printing business graphics.<br />
Photo: The product interprets RGB <strong>color</strong><br />
as if it were printed as a photograph using<br />
a digital mini lab. The product renders<br />
deeper, more saturated <strong>color</strong>s differently<br />
than with the Default (sRBG) theme. Use<br />
this theme when printing photos.<br />
Photo (Adobe RGB 1998): Use this<br />
theme with printing digital photos that use<br />
the AdobeRGB <strong>color</strong> space rather than<br />
sRGB. Turn off <strong>color</strong> management in the<br />
software program when using this theme.<br />
None: No <strong>color</strong> theme is used.<br />
Change the <strong>color</strong> options (Mac OS X)<br />
1. On the File menu, click the Print option.<br />
2. In the <strong>Printer</strong> menu, select this product.<br />
3. Open the Color/Quality Options menu.<br />
4. Open the Advanced menu.<br />
5. Adjust the individual settings for text, graphics, and photographs.<br />
48 Chapter 3 Print <strong>ENWW</strong>
Manual <strong>color</strong> options<br />
Use manual <strong>color</strong> options to adjust the Neutral Grays, Halftone, and Edge Control options for<br />
text, graphics, and photographs.<br />
Table 3-1 Manual <strong>color</strong> options<br />
Setting description<br />
Setting options<br />
Edge Control<br />
The Edge Control setting determines the rendering<br />
of edges. Edge control has two components:<br />
adaptive halftoning and trapping. Adaptive<br />
halftoning increases edge sharpness. Trapping<br />
reduces the effect of <strong>color</strong>-plane misregistration by<br />
overlapping the edges of adjacent objects slightly.<br />
Halftone<br />
Halftone options affect <strong>color</strong> output clarity and<br />
resolution.<br />
Neutral Grays<br />
The Neutral Grays setting determines the method<br />
for creating gray <strong>color</strong>s used in text, graphics, and<br />
photographs.<br />
●<br />
●<br />
●<br />
●<br />
●<br />
●<br />
●<br />
●<br />
Off turns off both trapping and adaptive halftoning.<br />
Light sets trapping at a minimal level. Adaptive halftoning is on.<br />
Normal sets trapping at a medium level. Adaptive halftoning is<br />
on.<br />
Maximum is the most aggressive trapping setting. Adaptive<br />
halftoning is on.<br />
Smooth provides better results for large, solid-filled print areas<br />
and enhances photographs by smoothing <strong>color</strong> gradations. Select<br />
this option when uniform and smooth area fills are important.<br />
Detail is useful for text and graphics that require sharp<br />
distinctions among lines or <strong>color</strong>s, or images that contain a<br />
pattern or a high level of detail. Select this option when sharp<br />
edges and small details are important.<br />
Black Only generates neutral <strong>color</strong>s (grays and black) by using<br />
only black toner. This guarantees neutral <strong>color</strong>s without a <strong>color</strong><br />
cast. This setting is best for documents and grayscale viewgraphs.<br />
4-Color generates neutral <strong>color</strong>s (grays and black) by combining<br />
all four toner <strong>color</strong>s. This method produces smoother gradients<br />
and transitions to other <strong>color</strong>s, and it produces the darkest black.<br />
Match <strong>color</strong>s<br />
For most users, the best method for matching <strong>color</strong>s is to print sRGB <strong>color</strong>s.<br />
The process of matching printer output <strong>color</strong> to your computer screen is complex, because printers and<br />
computer monitors use different methods of producing <strong>color</strong>. Monitors display <strong>color</strong>s by using light<br />
pixels that use an RGB (red, green, blue) <strong>color</strong> process, but printers print <strong>color</strong>s by using a CMYK<br />
(cyan, magenta, yellow, and black) process.<br />
Several factors can influence your ability to match printed <strong>color</strong>s to those on your monitor:<br />
●<br />
●<br />
●<br />
●<br />
●<br />
Print media<br />
<strong>Printer</strong> <strong>color</strong>ants (inks or toners, for example)<br />
Printing process (inkjet, press, or laser technology, for example)<br />
Overhead lighting<br />
Personal differences in perception of <strong>color</strong><br />
<strong>ENWW</strong> Color printing 49
●<br />
●<br />
●<br />
●<br />
●<br />
●<br />
Software programs<br />
<strong>Printer</strong> drivers<br />
Computer operating systems<br />
Monitors<br />
Video cards and drivers<br />
Operating environment (humidity, for example)<br />
Keep these factors in mind when <strong>color</strong>s on your screen do not perfectly match your printed <strong>color</strong>s.<br />
Print <strong>color</strong>ed text as black (Windows)<br />
1. From the software program, select the Print option.<br />
2. Select the product, and then click the <strong>Pro</strong>perties or Preferences button.<br />
3. Click the Paper/Quality tab.<br />
4. Click the Print All Text as Black check box. Click the OK button.<br />
50 Chapter 3 Print <strong>ENWW</strong>
Use <strong>HP</strong> ePrint<br />
Use <strong>HP</strong> ePrint to print documents by sending them as an email attachment to the product's email<br />
address from any email enabled device.<br />
NOTE: The product must be connected to a wired or wireless network and have Internet access to use<br />
<strong>HP</strong> ePrint.<br />
Use <strong>HP</strong> ePrint (LCD control panel)<br />
NOTE:<br />
This section applies to the <strong>HP</strong> <strong>LaserJet</strong> <strong>Pro</strong> <strong>200</strong> <strong>color</strong> <strong>M251</strong>n <strong>Printer</strong> model only.<br />
1. To use <strong>HP</strong> ePrint, you must first enable <strong>HP</strong> Web Services.<br />
a. At the control panel, press the OK button to open the menus.<br />
b. Select the <strong>HP</strong> Web Services menu, and then press the OK button.<br />
c. Select the Enable Web Services option, and then press the OK button.<br />
When the Web Services option is enabled, the product prints an information sheet that<br />
includes the product code and instructions to sign up at www.eprintcenter.com.<br />
2. Once you have registered the product, use the <strong>HP</strong> ePrintCenter Web site to define security settings<br />
and to configure default print settings for all <strong>HP</strong> ePrint jobs sent to this product.<br />
a. Go to www.hpeprintcenter.com.<br />
b. Click Sign In, and enter your <strong>HP</strong> ePrintCenter credentials or sign up for a new account.<br />
c. Select your product from the list, or click + Add printer to add it. To add the product, you<br />
need the printer code, which is the segment of the product email address that is before the @<br />
symbol.<br />
NOTE: This code is valid for only 24 hours from the time you enable <strong>HP</strong> Web Services. If it<br />
expires, follow the instructions to enable <strong>HP</strong> Web Services again, and obtain a new code.<br />
d. To prevent your product from printing unexpected documents, click ePrint Settings, and<br />
then click the Allowed Senders tab. Click Allowed Senders Only, and add the email<br />
addresses from which you want to allow ePrint jobs.<br />
e. To set up default settings for all ePrint jobs sent to this product, click ePrint Settings, click<br />
Print Options, and select the settings that you want to use.<br />
3. To print a document, attach it to an email message sent to the product's email address.<br />
<strong>ENWW</strong> Use <strong>HP</strong> ePrint 51
Use <strong>HP</strong> ePrint (touchscreen control panel)<br />
NOTE:<br />
This section applies to the <strong>HP</strong> <strong>LaserJet</strong> <strong>Pro</strong> <strong>200</strong> <strong>color</strong> <strong>M251</strong>nw <strong>Printer</strong> model only.<br />
1. To use <strong>HP</strong> ePrint, you must first enable <strong>HP</strong> Web Services.<br />
a. From the Home screen on the product control panel, touch the Web Services button.<br />
b. Touch the Enable Web Services button.<br />
When the Web Services option is enabled, the product prints an information sheet that<br />
includes the product code and instructions to sign up at www.eprintcenter.com.<br />
2. Once you have registered the product, use the <strong>HP</strong> ePrintCenter Web site to define security settings<br />
and to configure default print settings for all <strong>HP</strong> ePrint jobs sent to this product.<br />
a. Go to www.hpeprintcenter.com.<br />
b. Click Sign In, and enter your <strong>HP</strong> ePrintCenter credentials or sign up for a new account.<br />
c. Select your product from the list, or click + Add printer to add it. To add the product, you<br />
need the printer code, which is the segment of the product email address that is before the @<br />
symbol.<br />
NOTE: This code is valid for only 24 hours from the time you enable <strong>HP</strong> Web Services. If it<br />
expires, follow the instructions to enable <strong>HP</strong> Web Services again, and obtain a new code.<br />
d. To prevent your product from printing unexpected documents, click ePrint Settings, and<br />
then click the Allowed Senders tab. Click Allowed Senders Only, and add the email<br />
addresses from which you want to allow ePrint jobs.<br />
e. To set up default settings for all ePrint jobs sent to this product, click ePrint Settings, click<br />
Print Options, and select the settings that you want to use.<br />
3. To print a document, attach it to an email message sent to the product's email address.<br />
52 Chapter 3 Print <strong>ENWW</strong>
Use AirPrint<br />
Direct printing using Apple’s AirPrint is supported for iOS 4.2 or later. Use AirPrint to print directly to<br />
the product from an iPad (iOS 4.2), iPhone (3GS or later), or iPod touch (third generation or later) in<br />
the following applications:<br />
●<br />
●<br />
●<br />
●<br />
Mail<br />
Photos<br />
Safari<br />
Select third-party applications<br />
To use AirPrint, the product must be connected to a network. For more information about using AirPrint<br />
and about which <strong>HP</strong> products are compatible with AirPrint, go to www.hp.com/go/airprint.<br />
NOTE: You might need to upgrade the product firmware to use AirPrint. Go to www.hp.com/<br />
support/lj<strong>color</strong>m251series.<br />
<strong>ENWW</strong> Use AirPrint 53
Walk-up USB printing<br />
NOTE:<br />
This section applies to the <strong>HP</strong> <strong>LaserJet</strong> <strong>Pro</strong> <strong>200</strong> <strong>color</strong> <strong>M251</strong>nw <strong>Printer</strong> model only.<br />
This product features printing from a USB flash drive, so you can quickly print files without sending<br />
them from a computer. The product accepts standard USB storage accessories in the USB port on the<br />
front of the product. You can print the following types of files:<br />
●<br />
●<br />
.PDF<br />
.JPEG<br />
1. Insert the USB drive into the USB port on the<br />
front of the product.<br />
2. The USB Flash Drive menu opens. Touch the<br />
arrow buttons to scroll through the options.<br />
●<br />
●<br />
Print Documents<br />
View and Print Photos<br />
●<br />
Scan to USB Drive<br />
3. To print a document, touch the Print<br />
Documents screen, and then touch the name<br />
of the folder on the USB drive where the<br />
document is stored. When the summary screen<br />
opens, you can touch it to adjust the settings.<br />
Touch the Print button to print the document.<br />
4. To print photos, touch the View and Print<br />
Photos screen, and then touch the preview<br />
image for each photo that you want to print.<br />
Touch the Done button. When the summary<br />
screen opens, you can touch it to adjust the<br />
settings. Touch the Print button to print the<br />
photos.<br />
5. Retrieve the printed job from the output bin,<br />
and remove the USB drive.<br />
54 Chapter 3 Print <strong>ENWW</strong>
4 Manage and maintain the product<br />
●<br />
●<br />
●<br />
●<br />
●<br />
●<br />
●<br />
●<br />
●<br />
●<br />
●<br />
●<br />
Use the <strong>HP</strong> Reconfiguration Utility to change the product connection<br />
Use <strong>HP</strong> Web Services applications<br />
Configure IP network settings<br />
<strong>HP</strong> Device Toolbox (Windows)<br />
<strong>HP</strong> Utility for Mac OS X<br />
<strong>HP</strong> Web Jetadmin<br />
<strong>Pro</strong>duct security features<br />
Economy settings<br />
Print when a toner cartridge is at estimated end of life<br />
Store and recycle supplies<br />
Replacement instructions<br />
Update the firmware<br />
<strong>ENWW</strong> 55
Use the <strong>HP</strong> Reconfiguration Utility to change the<br />
product connection<br />
If you are already using the product and you wish to change the way it is connected, use the<br />
<strong>HP</strong> Reconfiguration Utility to set up the connection. For example, you can reconfigure the product to use<br />
a different wireless address, to connect to a wired or wireless network, or change from a network<br />
connection to a USB connection. You can change the configuration without inserting the product CD.<br />
After you select the type of connection you wish to make, the program goes directly to the portion of<br />
the product setup procedure that needs to change.<br />
The <strong>HP</strong> Reconfiguration Utility is located in the <strong>HP</strong> programs group on your computer.<br />
56 Chapter 4 Manage and maintain the product <strong>ENWW</strong>
Use <strong>HP</strong> Web Services applications<br />
Several innovative applications are available for this product that you can download directly from the<br />
Internet. For more information and to download these applications go to the <strong>HP</strong> ePrintCenter Web site<br />
at www.hpeprintcenter.com.<br />
To use this feature, the product must be connected to a computer or network that has an Internet<br />
connection. <strong>HP</strong> Web Services must be enabled on the product. Follow this procedure to enable<br />
<strong>HP</strong> Web Services:<br />
Use <strong>HP</strong> Web Services applications (LCD control panel)<br />
NOTE:<br />
This section applies to the <strong>HP</strong> <strong>LaserJet</strong> <strong>Pro</strong> <strong>200</strong> <strong>color</strong> <strong>M251</strong>n <strong>Printer</strong> model only.<br />
1. On the control panel, press the OK button.<br />
2. Select the <strong>HP</strong> Web Services menu, and then press the OK button.<br />
3. Select the Enable Web Services menu, and then press the OK button.<br />
After you download an application from the <strong>HP</strong> ePrintCenter Web site, it is available in the Apps<br />
menu on the product control panel.<br />
Use <strong>HP</strong> Web Services applications (touchscreen control panel)<br />
NOTE:<br />
This section applies to the <strong>HP</strong> <strong>LaserJet</strong> <strong>Pro</strong> <strong>200</strong> <strong>color</strong> <strong>M251</strong>nw <strong>Printer</strong> model only.<br />
1. From the Home screen on the product control panel, touch the Web Services button.<br />
2. Touch the Enable Web Services button.<br />
After you download an application from the <strong>HP</strong> ePrintCenter Web site, it is available in the Apps<br />
menu on the product control panel.<br />
<strong>ENWW</strong> Use <strong>HP</strong> Web Services applications 57
Configure IP network settings<br />
View or change network settings<br />
Use the <strong>HP</strong> Device Toolbox to view or change IP configuration settings.<br />
1. Print a configuration page, and locate the IP address.<br />
●<br />
If you are using IPv4, the IP address contains only digits. It has this format:<br />
xxx.xxx.xxx.xxx<br />
●<br />
If you are using IPv6, the IP address is a hexadecimal combination of characters and digits. It<br />
has a format similar to this:<br />
xxxx::xxxx:xxxx:xxxx:xxxx<br />
2. Open the <strong>HP</strong> Device Toolbox by clicking the Start button, clicking the <strong>Pro</strong>grams or All<br />
<strong>Pro</strong>grams group, clicking <strong>HP</strong>, clicking the product group, and then clicking <strong>HP</strong> <strong>Pro</strong>duct<br />
Settings.<br />
3. Click the Networking tab to obtain network information. You can change settings as needed.<br />
Manually configure IPv4 TCP/IP parameters from the control panel<br />
Manually configure IPv4 TCP/IP parameters (LCD control panel)<br />
NOTE:<br />
This section applies to the <strong>HP</strong> <strong>LaserJet</strong> <strong>Pro</strong> <strong>200</strong> <strong>color</strong> <strong>M251</strong>n <strong>Printer</strong> model only.<br />
1. On the control panel, press the OK button.<br />
2. Use the arrow buttons to select the Network Setup option, and then press the OK button.<br />
3. Use the arrow buttons to select the TCP/IP configuration option, and then press the OK button.<br />
4. Use the arrow buttons to select the Manual option, and then press the OK button.<br />
5. Use the alphanumeric buttons to type the IP address, and then press the OK button.<br />
6. If the IP address is incorrect, use the arrow buttons to select the No option, and then press the OK<br />
button. Repeat step 5 with the correct IP address, and then repeat step 5 for the subnet mask and<br />
default gateway settings.<br />
Manually configure IPv4 TCP/IP parameters (touchscreen control panel)<br />
NOTE:<br />
This section applies to the <strong>HP</strong> <strong>LaserJet</strong> <strong>Pro</strong> <strong>200</strong> <strong>color</strong> <strong>M251</strong>nw <strong>Printer</strong> model only.<br />
Use the control-panel menus to manually set an IPv4 address, subnet mask, and default gateway.<br />
1. From the Home screen on the product control panel, touch the Setup button.<br />
2. Scroll to and touch the Network Setup menu.<br />
58 Chapter 4 Manage and maintain the product <strong>ENWW</strong>
3. Touch the TCP/IP Config menu, and then touch the Manual button.<br />
4. Use the numeric keypad to enter the IP address, and touch the OK button. Touch the Yes button to<br />
confirm.<br />
5. Use the numeric keypad to enter the subnet mask, and touch the OK button. Touch the Yes button<br />
to confirm.<br />
6. Use the numeric keypad to enter the default gateway, and touch the OK button. Touch the Yes<br />
button to confirm.<br />
Rename the product on a network<br />
If you want to rename the product on a network so that it can be uniquely identified, use the<br />
<strong>HP</strong> Embedded Web Server.<br />
1. To open the <strong>HP</strong> Embedded Web Server, type the product IP address into the address line of a<br />
Web browser.<br />
NOTE: You can also access the <strong>HP</strong> Embedded Web Server from the <strong>HP</strong> Device Toolbox for<br />
Windows or the <strong>HP</strong> Utility for Mac OS X.<br />
2. Open the System tab.<br />
3. On the Device Information page, the default product name is in the Device Status field. You<br />
can change this name to uniquely identify this product.<br />
NOTE:<br />
Completing the other fields on this page is optional.<br />
4. Click the Apply button to save the changes.<br />
<strong>ENWW</strong> Configure IP network settings 59
Link speed and duplex settings<br />
NOTE:<br />
This information applies only to Ethernet networks. It does not apply to wireless networks.<br />
The link speed and communication mode of the print server must match the network hub. For most<br />
situations, leave the product in automatic mode. Incorrect changes to the link speed and duplex settings<br />
might prevent the product from communicating with other network devices. If you need to make<br />
changes, use the product control panel.<br />
NOTE: The setting must match with the network product to which you are connecting (a network hub,<br />
switch, gateway, router, or computer).<br />
NOTE: Making changes to these settings causes the product to turn off and then on. Make changes<br />
only when the product is idle.<br />
Link speed and duplex settings (LCD control panel)<br />
NOTE:<br />
This section applies to the <strong>HP</strong> <strong>LaserJet</strong> <strong>Pro</strong> <strong>200</strong> <strong>color</strong> <strong>M251</strong>n <strong>Printer</strong> model only.<br />
1. On the control panel, press the OK button.<br />
2. Use the arrow buttons to select the Network Setup option, and then press the OK button.<br />
3. Use the arrow buttons to select the Link Speed option, and then press the OK button.<br />
4. Use the arrow buttons to select one of the following settings.<br />
Setting<br />
Automatic<br />
10T Half<br />
10T Full<br />
100TX Half<br />
100TX Full<br />
Description<br />
The print server automatically configures itself for the highest link speed and<br />
communication mode allowed on the network.<br />
10 megabytes per second (Mbps), half-duplex operation<br />
10 Mbps, full-duplex operation<br />
100 Mbps, half-duplex operation<br />
100 Mbps, full-duplex operation<br />
5. Press the OK button. The product turns off and then on.<br />
Link speed and duplex settings (touchscreen control panel)<br />
NOTE:<br />
This section applies to the <strong>HP</strong> <strong>LaserJet</strong> <strong>Pro</strong> <strong>200</strong> <strong>color</strong> <strong>M251</strong>nw <strong>Printer</strong> model only.<br />
1. From the Home screen on the product control panel, touch the Setup button.<br />
2. Scroll to and touch the Network Setup menu.<br />
3. Touch the Link Speed menu.<br />
4. Select one of the following options.<br />
60 Chapter 4 Manage and maintain the product <strong>ENWW</strong>
Setting<br />
Automatic<br />
10T Half<br />
10T Full<br />
100TX Half<br />
100TX Full<br />
Description<br />
The print server automatically configures itself for the highest link speed and<br />
communication mode allowed on the network.<br />
10 megabytes per second (Mbps), half-duplex operation<br />
10 Mbps, full-duplex operation<br />
100 Mbps, half-duplex operation<br />
100 Mbps, full-duplex operation<br />
5. Touch the OK button. The product turns off and then on.<br />
<strong>ENWW</strong> Configure IP network settings 61
<strong>HP</strong> Device Toolbox (Windows)<br />
Use the <strong>HP</strong> Device Toolbox for Windows to view or change product settings from your computer. This<br />
tool opens the <strong>HP</strong> Embedded Web Server for the product.<br />
NOTE:<br />
This tool is available only if you performed a full installation when you installed the product.<br />
1. Click the Start button, and then click the <strong>Pro</strong>grams item.<br />
2. Click your <strong>HP</strong> product group, and then click the <strong>HP</strong> Device Toolbox item.<br />
Tab or section<br />
Description<br />
Status tab<br />
<strong>Pro</strong>vides product, status, and<br />
configuration information.<br />
●<br />
●<br />
●<br />
●<br />
●<br />
●<br />
●<br />
●<br />
●<br />
Device Status: Shows the product status and shows the approximate percent life<br />
remaining of <strong>HP</strong> supplies.<br />
Supplies Status: Shows the approximate percent life remaining of <strong>HP</strong> supplies.<br />
Actual supply life remaining can vary. Consider having a replacement supply<br />
available to install when print quality is no longer acceptable. The supply does not<br />
need to be replaced unless the print quality is no longer acceptable.<br />
Device Configuration: Shows the information found on the product configuration<br />
page.<br />
Network Summary: Shows the information found on the product network<br />
configuration page.<br />
Reports: Allows you to print the configuration and supplies status pages that the<br />
product generates.<br />
Color Usage Log: Shows a log that shows the user name, application name, and<br />
<strong>color</strong> usage information on a job-by-job basis.<br />
Event Log: Shows a list of all product events and errors.<br />
Support button: <strong>Pro</strong>vides a link to the product support page.<br />
Shop for Supplies button: <strong>Pro</strong>vides a link to a page where you can order<br />
supplies for the product.<br />
62 Chapter 4 Manage and maintain the product <strong>ENWW</strong>
Tab or section<br />
Description<br />
System tab<br />
<strong>Pro</strong>vides the ability to configure the<br />
product from your computer.<br />
●<br />
●<br />
●<br />
●<br />
●<br />
●<br />
●<br />
●<br />
●<br />
●<br />
Device Information: <strong>Pro</strong>vides basic product and company information.<br />
Paper Setup: Allows you to change the paper-handling defaults for the product.<br />
Print Quality: Allows you to change the print quality defaults for the product,<br />
including calibration settings.<br />
Print Density: Allows you to change the contrasts, highlights, midtones, and<br />
shadows values for each supply.<br />
Paper Types: Allows you to configure print modes that correspond to the paper<br />
types that the product accepts.<br />
System Setup: Allows you to change the system defaults for the product.<br />
Service: Allows you to start the cleaning procedure on the product.<br />
<strong>Pro</strong>duct Security: Allows you to set or change the product password.<br />
Support button: <strong>Pro</strong>vides a link to the product support page.<br />
Shop for Supplies button: <strong>Pro</strong>vides a link to a page where you can order<br />
supplies for the product.<br />
NOTE: The System tab can be password-protected. If this product is on a network,<br />
always consult with the administrator before changing settings on this tab.<br />
Print tab<br />
<strong>Pro</strong>vides the ability to change<br />
default print settings from your<br />
computer.<br />
●<br />
●<br />
●<br />
Printing: Change the default product print settings, such as number of copies and<br />
paper orientation. These are the same options that are available on the control<br />
panel.<br />
PCL5c: View and change the PCL5c settings.<br />
PostScript: View and change the PS settings.<br />
Networking tab<br />
<strong>Pro</strong>vides the ability to change<br />
network settings from your<br />
computer.<br />
<strong>HP</strong> Web Services tab<br />
Network administrators can use this tab to control network-related settings for the product<br />
when it is connected to an IP-based network. This tab does not appear if the product is<br />
directly connected to a computer.<br />
Use this tab to set up and use various Web tools with the product.<br />
<strong>ENWW</strong> <strong>HP</strong> Device Toolbox (Windows) 63
<strong>HP</strong> Utility for Mac OS X<br />
Use the <strong>HP</strong> Utility for Mac OS X to view or change product settings from your computer. This tool opens<br />
the <strong>HP</strong> Embedded Web Server for the product.<br />
You can use the <strong>HP</strong> Utility when the product is connected with a USB cable or is connected to a TCP/IPbased<br />
network.<br />
Open the <strong>HP</strong> Utility<br />
▲<br />
From the dock, click <strong>HP</strong> Utility.<br />
-or-<br />
From Applications, click Hewlett Packard, and then click <strong>HP</strong> Utility.<br />
<strong>HP</strong> Utility features<br />
Use the <strong>HP</strong> Utility software to perform the following tasks:<br />
●<br />
●<br />
●<br />
●<br />
●<br />
●<br />
●<br />
Obtain information about supplies status.<br />
Obtain information about the product, such as the firmware version and the serial number.<br />
Print a configuration page.<br />
Configure the paper type and size for the tray.<br />
Transfer files and fonts from the computer to the product.<br />
Update the product firmware.<br />
Display the <strong>color</strong> usage page.<br />
64 Chapter 4 Manage and maintain the product <strong>ENWW</strong>
<strong>HP</strong> Web Jetadmin<br />
<strong>HP</strong> Web Jetadmin is an award-winning, industry-leading tool for efficiently managing a wide variety of<br />
networked <strong>HP</strong> devices, including printers, multifunction products, and digital senders. This single<br />
solution allows you to remotely install, monitor, maintain, troubleshoot, and secure your printing and<br />
imaging environment — ultimately increasing business productivity by helping you save time, control<br />
costs, and protect your investment.<br />
<strong>HP</strong> Web Jetadmin updates are periodically made available to provide support for specific product<br />
features. Visit www.hp.com/go/webjetadmin and click the Self Help and Documentation link to<br />
learn more about updates.<br />
NOTE:<br />
features.<br />
Device plug-ins can be installed into <strong>HP</strong> Web Jetadmin to provide support for specific product<br />
NOTE: Browsers must be Java-enabled. Web Jetadmin is not supported for Mac OS X.<br />
<strong>ENWW</strong> <strong>HP</strong> Web Jetadmin 65
<strong>Pro</strong>duct security features<br />
The product supports security standards and recommended protocols that help you keep the product<br />
secure, protect critical information on your network, and simplify the way you monitor and maintain the<br />
product.<br />
For in-depth information about <strong>HP</strong>'s secure imaging and printing solutions, visit www.hp.com/go/<br />
secureprinting. The site provides links to white papers and FAQ documents about security features.<br />
Set or change the product password<br />
Use the <strong>HP</strong> Embedded Web Server to set a password or change an existing password for a product on<br />
a network.<br />
1. To open the <strong>HP</strong> Embedded Web Server, type the product IP address into the address line of a<br />
Web browser.<br />
NOTE: You can also access the <strong>HP</strong> Embedded Web Server from the <strong>HP</strong> Device Toolbox for<br />
Windows or the <strong>HP</strong> Utility for Mac OS X.<br />
2. Click the Settings tab, and click the Security link.<br />
NOTE: If a password has previously been set, you are prompted to type the password. Type the<br />
password, and then click the Apply button.<br />
3. Type the new password in the New Password box and in the Verify password box.<br />
4. At the bottom of the window, click the Apply button to save the password.<br />
66 Chapter 4 Manage and maintain the product <strong>ENWW</strong>
Economy settings<br />
Print with EconoMode<br />
This product has an EconoMode option for printing drafts of documents. Using EconoMode can use less<br />
toner. However, using EconoMode can also reduce print quality.<br />
<strong>HP</strong> does not recommend the full-time use of EconoMode. If EconoMode is used full-time, the toner<br />
supply might outlast the mechanical parts in the toner cartridge. If print quality begins to degrade and<br />
is no longer acceptable, consider replacing the toner cartridge.<br />
NOTE: This feature is available with the PCL 6 printer driver for Windows. If you are not using that<br />
driver, you can enable the feature by using the <strong>HP</strong> Embedded Web Server.<br />
1. From the software program, select the Print option.<br />
2. Select the product, and then click the <strong>Pro</strong>perties or Preferences button.<br />
3. Click the Paper/Quality tab.<br />
4. Click the EconoMode check box.<br />
Set the sleep delay<br />
Set the sleep delay (LCD control panel)<br />
NOTE:<br />
This section applies to the <strong>HP</strong> <strong>LaserJet</strong> <strong>Pro</strong> <strong>200</strong> <strong>color</strong> <strong>M251</strong>n <strong>Printer</strong> model only.<br />
1. At the control panel, press the OK button to open the menus.<br />
2. Open the following menus:<br />
●<br />
●<br />
●<br />
System Setup<br />
Energy Settings<br />
Sleep Delay<br />
3. Select the time for the delay, and then press the OK button.<br />
NOTE:<br />
The default value is 15 minutes.<br />
<strong>ENWW</strong> Economy settings 67
Set the sleep delay (touchscreen control panel)<br />
NOTE:<br />
This section applies to the <strong>HP</strong> <strong>LaserJet</strong> <strong>Pro</strong> <strong>200</strong> <strong>color</strong> <strong>M251</strong>nw <strong>Printer</strong> model only.<br />
1. From the Home screen on the product control panel, touch the Setup button.<br />
2. Open the following menus:<br />
●<br />
●<br />
●<br />
System Setup<br />
Energy Settings<br />
Sleep Delay<br />
3. Select the time for the sleep delay.<br />
NOTE:<br />
The default value is 15 Minutes.<br />
Set the Auto Power Down delay<br />
Set the Auto Power Down delay (LCD control panel)<br />
NOTE:<br />
This section applies to the <strong>HP</strong> <strong>LaserJet</strong> <strong>Pro</strong> <strong>200</strong> <strong>color</strong> <strong>M251</strong>n <strong>Printer</strong> model only.<br />
1. At the control panel, press the OK button to open the menus.<br />
2. Open the following menus:<br />
●<br />
●<br />
●<br />
●<br />
System Setup<br />
Energy Settings<br />
Auto Power Down<br />
Auto-Off Delay<br />
3. Select the time for the power-down delay.<br />
NOTE:<br />
The default value is 30 Minutes.<br />
4. The product automatically wakes from the auto power-down mode when it receives jobs or when<br />
you press a button on the control panel. You can change which events cause the product to wake.<br />
Open the following menus:<br />
●<br />
●<br />
●<br />
●<br />
System Setup<br />
Energy Settings<br />
Auto Power Down<br />
Wake Events<br />
To turn off a wake event, select the event and then select the No option.<br />
68 Chapter 4 Manage and maintain the product <strong>ENWW</strong>
Set the Auto Power Down delay (touchscreen control panel)<br />
NOTE:<br />
This section applies to the <strong>HP</strong> <strong>LaserJet</strong> <strong>Pro</strong> <strong>200</strong> <strong>color</strong> <strong>M251</strong>nw <strong>Printer</strong> model only.<br />
1. From the Home screen on the product control panel, touch the Setup button.<br />
2. Open the following menus:<br />
●<br />
●<br />
●<br />
●<br />
System Setup<br />
Energy Settings<br />
Auto Power Down<br />
Auto-Off Delay<br />
3. Select the time for the power-down delay.<br />
NOTE:<br />
The default value is 30 Minutes.<br />
4. The product automatically wakes from the auto power-down mode when it receives jobs or when<br />
you press a button on the control panel. You can change which events cause the product to wake.<br />
Open the following menus:<br />
●<br />
●<br />
●<br />
●<br />
System Setup<br />
Energy Settings<br />
Auto Power Down<br />
Wake Events<br />
To turn off a wake event, select the event and then select the No option.<br />
<strong>ENWW</strong> Economy settings 69
Print when a toner cartridge is at estimated end of<br />
life<br />
Supply-related notifications are communicated on the product control panel, Desktop Alerts, software<br />
applications, and network alerts.<br />
A Low message—where is the <strong>color</strong> toner cartridge: The product indicates when<br />
a supply level is low. Actual cartridge life remaining may vary. Consider having a replacement<br />
available to install when print quality is no longer acceptable. The supply does not need to be replaced<br />
now.<br />
A Very Low message. The product indicates when a supply level is very low. Actual<br />
cartridge life remaining may vary. Consider having a replacement available to install when print<br />
quality is no longer acceptable. The supply does not need to be replaced now unless the print quality is<br />
no longer acceptable. Once an <strong>HP</strong> supply has reached Very Low, <strong>HP</strong>’s Premium <strong>Pro</strong>tection Warranty<br />
on that supply has ended.<br />
Print-quality problems can occur when using a toner cartridge that is at its estimated end of life. The<br />
supply does not need to be replaced at this point in time unless the print quality is no longer<br />
acceptable.<br />
NOTE: Using the Continue setting allows printing beyond Very Low without customer interaction<br />
and can result in unsatisfactory print quality.<br />
Enable or disable the At Very Low settings (LCD control panel)<br />
NOTE:<br />
This section applies to the <strong>HP</strong> <strong>LaserJet</strong> <strong>Pro</strong> <strong>200</strong> <strong>color</strong> <strong>M251</strong>n <strong>Printer</strong> model only.<br />
You can enable or disable the default setting at any time, and you do not have to re-enable it when you<br />
install a new toner cartridge.<br />
1. At the control panel, press the OK button to open the menus.<br />
2. Open the following menus:<br />
●<br />
●<br />
●<br />
●<br />
System Setup<br />
Supply Settings<br />
Black Cartridge or Color Cartridges<br />
Very Low Setting<br />
3. Select one of the following options.<br />
●<br />
●<br />
●<br />
Select the Continue option to set the product to alert you that the toner cartridge is very low,<br />
but to continue printing.<br />
Select the Stop option to set the product to stop printing until you replace the toner cartridge.<br />
Select the <strong>Pro</strong>mpt option (the default option) to set the product to stop printing and prompt<br />
you to replace the toner cartridge. You can acknowledge the prompt and continue printing.<br />
The customer can choose to be prompted in 100 pages, <strong>200</strong> pages, 300 pages, 400 pages<br />
70 Chapter 4 Manage and maintain the product <strong>ENWW</strong>
or never. The default prompt setting is 100 pages. This option is provided as a customer<br />
convenience and is not an indication these pages will have acceptable print quality.<br />
●<br />
On the Color Cartridges menu only, select Print Black to alert you when the toner<br />
cartridge is very low, but to continue printing in black only.<br />
Once an <strong>HP</strong> supply has reached Very Low, <strong>HP</strong>’s Premium <strong>Pro</strong>tection Warranty on that supply has<br />
ended.<br />
Enable or disable the At Very Low settings (touchscreen control<br />
panel)<br />
NOTE:<br />
This section applies to the <strong>HP</strong> <strong>LaserJet</strong> <strong>Pro</strong> <strong>200</strong> <strong>color</strong> <strong>M251</strong>nw <strong>Printer</strong> model only.<br />
You can enable or disable the default settings at any time, and you do not have to re-enable them<br />
when you install a new toner cartridge.<br />
1. From the Home screen on the control panel, touch the Setup button.<br />
2. Open the following menus:<br />
●<br />
●<br />
●<br />
●<br />
System Setup<br />
Supply Settings<br />
Black Cartridge or Color Cartridges<br />
Very Low Setting<br />
3. Select one of the following options:<br />
●<br />
●<br />
●<br />
●<br />
Select the Continue option to set the product to alert you that the toner cartridge is very low,<br />
but to continue printing.<br />
Select the Stop option to set the product to stop printing until you replace the toner cartridge.<br />
Select the <strong>Pro</strong>mpt option (the default option) to set the product to stop printing and prompt<br />
you to replace the toner cartridge. You can acknowledge the prompt and continue printing.<br />
The customer can choose to be prompted in 100 pages, <strong>200</strong> pages, 300 pages, 400 pages<br />
or never. The default setting is to prompt in 100 pages. This option is provided as a customer<br />
convenience and is not an indication these pages will have acceptable print quality.<br />
On the Color Cartridges menu only, select Print Black to alert you when the toner<br />
cartridge is very low, but to continue printing in black only.<br />
Once an <strong>HP</strong> supply has reached Very Low, <strong>HP</strong>’s Premium <strong>Pro</strong>tection Warranty on that supply has<br />
ended. All print defects or cartridge failures incurred when an <strong>HP</strong> supply is used in Continue at very<br />
low mode will not be considered to be defects in materials or workmanship in the supply under the<br />
<strong>HP</strong> Print Cartridge Warranty Statement.<br />
<strong>ENWW</strong> Print when a toner cartridge is at estimated end of life 71
Store and recycle supplies<br />
Recycle supplies<br />
To recycle a genuine <strong>HP</strong> toner cartridge, place the used cartridge in the box in which the new cartridge<br />
arrived. Use the enclosed return label to send the used supply to <strong>HP</strong> for recycling. For complete<br />
information, see the recycling guide that is included with each new <strong>HP</strong> supply item.<br />
Toner cartridge storage<br />
Do not remove the toner cartridge from its package until you are ready to use it.<br />
CAUTION:<br />
minutes.<br />
To prevent damage to the toner cartridge, do not expose it to light for more than a few<br />
72 Chapter 4 Manage and maintain the product <strong>ENWW</strong>
Replacement instructions<br />
Replace the toner cartridges<br />
1. Open the front door.<br />
2. Pull out the toner cartridge drawer.<br />
<strong>ENWW</strong> Replacement instructions 73
3. Grasp the handle on the toner cartridge, and<br />
then pull the toner cartridge straight up to<br />
remove it.<br />
4. Remove the new toner cartridge from the<br />
packaging.<br />
5. Gently rock the toner cartridge from front to<br />
back to distribute the toner evenly inside the<br />
cartridge.<br />
74 Chapter 4 Manage and maintain the product <strong>ENWW</strong>
6. Remove the plastic shield from the bottom of<br />
the new toner cartridge.<br />
7. Do not touch the imaging drum on the bottom<br />
of the toner cartridge. Fingerprints on the<br />
imaging drum can cause print-quality<br />
problems.<br />
8. Insert the new toner cartridge into the product.<br />
<strong>ENWW</strong> Replacement instructions 75
9. Pull the tab on the left side of the toner<br />
cartridge straight up to completely remove the<br />
sealing tape. Discard the sealing tape.<br />
10. Close the toner cartridge drawer.<br />
11. Close the front door.<br />
12. Place the old toner cartridge and the plastic<br />
shield in the box for the new toner cartridge.<br />
Follow the recycling instructions that are<br />
included in the box.<br />
76 Chapter 4 Manage and maintain the product <strong>ENWW</strong>
Update the firmware<br />
<strong>HP</strong> offers periodic upgrades to the product firmware. You can load the firmware updates manually, or<br />
you can set the product to automatically load firmware updates.<br />
Manually update the firmware (LCD control panel)<br />
NOTE:<br />
This section applies to the <strong>HP</strong> <strong>LaserJet</strong> <strong>Pro</strong> <strong>200</strong> <strong>color</strong> <strong>M251</strong>n <strong>Printer</strong> model only.<br />
1. At the control panel, press the OK button to open the menus.<br />
2. Open the following menus:<br />
●<br />
●<br />
●<br />
Service<br />
<strong>LaserJet</strong> Update<br />
Check For Updates Now<br />
3. Select the Yes option, and then press the OK the button to prompt the product to search for<br />
firmware updates. If the product detects an upgrade, it will begin the update process.<br />
Manually update the firmware (touchscreen control panel)<br />
NOTE:<br />
This section applies to the <strong>HP</strong> <strong>LaserJet</strong> <strong>Pro</strong> <strong>200</strong> <strong>color</strong> <strong>M251</strong>nw <strong>Printer</strong> model only.<br />
1. From the Home screen on the control panel, touch the Setup button.<br />
2. Open the following menus:<br />
●<br />
●<br />
●<br />
Service<br />
<strong>LaserJet</strong> Update<br />
Check For Updates Now<br />
3. Touch the Yes button to prompt the product to search for firmware updates. If the product detects<br />
an upgrade, it will begin the update process.<br />
Set the product to automatically update the firmware (LCD control<br />
panel)<br />
NOTE:<br />
This section applies to the <strong>HP</strong> <strong>LaserJet</strong> <strong>Pro</strong> <strong>200</strong> <strong>color</strong> <strong>M251</strong>n <strong>Printer</strong> model only.<br />
1. At the control panel, press the OK button to open the menus.<br />
2. Open the following menus:<br />
●<br />
●<br />
Service<br />
<strong>LaserJet</strong> Update<br />
<strong>ENWW</strong> Update the firmware 77
●<br />
●<br />
Manage Updates<br />
Check Automatically<br />
3. Select the On option, and then press the OK the button.<br />
Set the product to automatically update the firmware (touchscreen<br />
control panel)<br />
NOTE:<br />
This section applies to the <strong>HP</strong> <strong>LaserJet</strong> <strong>Pro</strong> <strong>200</strong> <strong>color</strong> <strong>M251</strong>nw <strong>Printer</strong> model only.<br />
1. From the Home screen on the control panel, touch the Setup button.<br />
2. Open the following menus:<br />
●<br />
●<br />
●<br />
●<br />
Service<br />
<strong>LaserJet</strong> Update<br />
Manage Updates<br />
Check Automatically<br />
3. Touch the On option.<br />
78 Chapter 4 Manage and maintain the product <strong>ENWW</strong>
5 Solve problems<br />
●<br />
●<br />
●<br />
●<br />
●<br />
●<br />
●<br />
●<br />
●<br />
●<br />
●<br />
●<br />
●<br />
●<br />
●<br />
Solve problems checklist<br />
Restore the factory-set defaults<br />
Control panel help system<br />
Interpret control panel messages<br />
Paper feeds incorrectly or becomes jammed<br />
Clear jams<br />
Improve print quality<br />
The product does not print or it prints slowly<br />
Solve walk-up USB printing problems<br />
Solve direct connection problems<br />
Solve wired network problems<br />
Solve wireless network problems<br />
Solve product software problems with Windows<br />
Solve product software problems with Mac OS X<br />
Remove software (Windows)<br />
● Remove software (Mac OS X)<br />
<strong>ENWW</strong> 79
Solve problems checklist<br />
Follow these steps when trying to solve a problem with the product.<br />
●<br />
●<br />
●<br />
●<br />
●<br />
●<br />
●<br />
●<br />
Step 1: Make sure that the product is set up correctly<br />
Step 2: Check the cabling or wireless connection<br />
Step 3: Check the control panel for error messages<br />
Step 4: Check the paper<br />
Step 5: Check the software<br />
Step 6: Test print functionality<br />
Step 7: Check the supplies<br />
Step 8: Try sending a print job from a computer<br />
Step 1: Make sure that the product is set up correctly<br />
1. Press the power button to turn on the product or to deactivate the Auto-Off mode.<br />
2. Check the power-cable connections.<br />
3. Make sure that the line voltage is correct for the product power configuration. (See the label that is<br />
on the back of the product for voltage requirements.) If you are using a power strip and its voltage<br />
is not within specifications, plug the product directly into the wall. If it is already plugged into the<br />
wall, try a different outlet.<br />
4. If none of these measures restores power, contact <strong>HP</strong> Customer Care.<br />
Step 2: Check the cabling or wireless connection<br />
1. For direct USB connections or wired network connections, check the cable connection between the<br />
product and the computer. Make sure that the connection is secure.<br />
2. Make sure that the cable itself is not faulty by using a different cable, if possible.<br />
3. If the product is connected to a network, check the following items:<br />
●<br />
●<br />
●<br />
●<br />
Check the light next to the network connection on the product. If the network is active, the<br />
light is green.<br />
Make sure that you are using a network cable and not a phone cord to connect to the<br />
network.<br />
Make sure the network router, hub, or switch is turned on and that it is working correctly.<br />
If your computer or the product is connected to a wireless network, low signal quality or<br />
interference might be delaying print jobs.<br />
4. If you are using a personal firewall system on the computer, it might be blocking communication<br />
with the product. Try temporarily disabling the firewall to see if it is the source of the problem.<br />
80 Chapter 5 Solve problems <strong>ENWW</strong>
Step 3: Check the control panel for error messages<br />
The control panel should indicate ready status. If an error message appears, resolve the error.<br />
Step 4: Check the paper<br />
1. Make sure that the paper that you are using meets specifications.<br />
2. Make sure that the paper is loaded correctly in the input tray.<br />
Step 5: Check the software<br />
1. Make sure that the product software is installed correctly.<br />
2. Verify that you have installed the printer driver for this product. Check the program to make sure<br />
that you are using the printer driver for this product.<br />
Step 6: Test print functionality<br />
1. Print a configuration page from the product control panel.<br />
2. If the page does not print, verify that the input tray contains paper.<br />
3. If the page jams in the product, clear the jam.<br />
Step 7: Check the supplies<br />
Print a supplies status page and check remaining life of the toner cartridges.<br />
Step 8: Try sending a print job from a computer<br />
1. Try printing the job from another computer that has the product software installed.<br />
2. Check the USB or network cable connection. Direct the product to the correct port, or reinstall the<br />
software, selecting the connection type that you are using.<br />
3. If the print quality is unacceptable, verify that the print settings are correct for the media that you<br />
are using.<br />
<strong>ENWW</strong> Solve problems checklist 81
Restore the factory-set defaults<br />
Restoring the factory-set defaults returns all of the product and network settings to the factory defaults. It<br />
will not reset the page count, tray size, or language. To restore the product to the factory-default<br />
settings, follow these steps.<br />
CAUTION: Restoring the factory-set defaults returns all of the settings to the factory defaults, and it<br />
also deletes any pages that are stored in the memory. The procedure then automatically restarts the<br />
product.<br />
Restore the factory-set defaults (LCD control panel)<br />
NOTE:<br />
This section applies to the <strong>HP</strong> <strong>LaserJet</strong> <strong>Pro</strong> <strong>200</strong> <strong>color</strong> <strong>M251</strong>n <strong>Printer</strong> model only.<br />
1. At the control panel, press the OK button to open the menus.<br />
2. Open the following menus:<br />
●<br />
●<br />
Service<br />
Restore Defaults<br />
The product automatically restarts.<br />
Restore the factory-set defaults (touchscreen control panel)<br />
NOTE:<br />
This section applies to the <strong>HP</strong> <strong>LaserJet</strong> <strong>Pro</strong> <strong>200</strong> <strong>color</strong> <strong>M251</strong>nw <strong>Printer</strong> model only.<br />
1. From the Home screen on the product control panel, touch the Setup button.<br />
2. Scroll to and touch the Service menu.<br />
3. Scroll to and touch the Restore Defaults button, and then touch the OK button.<br />
The product automatically restarts.<br />
82 Chapter 5 Solve problems <strong>ENWW</strong>
Control panel help system<br />
NOTE:<br />
This section applies to the <strong>HP</strong> <strong>LaserJet</strong> <strong>Pro</strong> <strong>200</strong> <strong>color</strong> <strong>M251</strong>nw <strong>Printer</strong> model only.<br />
The product has a built-in Help system that explains how to use each screen. To open the Help system,<br />
touch the Help button in the upper-right corner of the screen.<br />
For some screens, the Help opens to a global menu where you can search for specific topics. You can<br />
browse through the menu structure by touching the buttons in the menu.<br />
Some Help screens include animations that guide you through procedures, such as clearing jams.<br />
For screens that contain settings for individual jobs, the Help opens to a topic that explains the options<br />
for that screen.<br />
If the product alerts you of an error or warning, touch the Help button to open a message that<br />
describes the problem. The message also contains instructions to help solve the problem.<br />
<strong>ENWW</strong> Control panel help system 83
Interpret control panel messages<br />
Control panel message types<br />
The control panel messages indicate the current product status or situations that might require action.<br />
Alert and warning messages appear temporarily and might require you to acknowledge the message<br />
by pressing the OK button to resume or by pressing the Cancel button to cancel the job. With<br />
certain warnings, the job might not complete or the print quality might be affected. If the alert or<br />
warning message is related to printing and the auto-continue feature is on, the product will attempt to<br />
resume the printing job after the warning has appeared for 10 seconds without acknowledgement.<br />
Critical error messages can indicate some kind of failure. Turning off and then turning on the power<br />
might fix the problem. If a critical error persists, the product might require service.<br />
Control panel messages<br />
10.X00Y Supply Error<br />
Description<br />
The memory chip for one of the toner cartridges cannot be read or is missing.<br />
◦ 10.0000 = black memory chip error<br />
◦ 10.0001 = cyan memory chip error<br />
◦ 10.0002 = magenta memory chip error<br />
◦ 10.0003 = yellow memory chip error<br />
◦ 10.1000 = black memory chip is missing<br />
◦ 10.1001 = cyan memory chip is missing<br />
◦ 10.1002 = magenta memory chip is missing<br />
◦ 10.1003 = yellow memory chip is missing<br />
Recommended action<br />
Reinstall the toner cartridge.<br />
Turn the product off and then on.<br />
If the problem is not solved, replace the toner cartridge.<br />
49 Error Turn off then on<br />
Description<br />
The product experienced an internal error.<br />
84 Chapter 5 Solve problems <strong>ENWW</strong>
Recommended action<br />
Turn the product off, wait at least 30 seconds, and then turn the product on and wait for it to initialize.<br />
If you are using a surge protector, remove it. Plug the product directly into the wall socket. Turn the<br />
product power on.<br />
If the message persists, contact <strong>HP</strong> support.<br />
50.x Fuser Error Turn off then on<br />
Description<br />
The product has experienced an error with the fuser.<br />
Recommended action<br />
Turn the product power off, wait at least 30 seconds, and then turn the product power on and wait for<br />
it to initialize.<br />
Turn off the product, wait at least 25 minutes, and then turn on the product.<br />
If you are using a surge protector, remove it. Plug the product directly into the wall socket. Turn the<br />
product power on.<br />
If the message persists, contact <strong>HP</strong> support.<br />
51.XX Error Turn off then on<br />
Description<br />
The product has experienced an internal hardware error.<br />
Recommended action<br />
Turn the product power off, wait at least 30 seconds, and then turn the product power on and wait for<br />
it to initialize.<br />
If you are using a surge protector, remove it. Plug the product directly into the wall socket. Turn the<br />
product on.<br />
If the message persists, contact <strong>HP</strong> support.<br />
54.XX Error Turn off then on<br />
Description<br />
The product has experienced an error with one of the internal sensors.<br />
Recommended action<br />
Turn the product power off, wait at least 30 seconds, and then turn the product power on and wait for<br />
it to initialize.<br />
If you are using a surge protector, remove it. Plug the product directly into the wall socket. Turn the<br />
product power on.<br />
<strong>ENWW</strong> Interpret control panel messages 85
If the message persists, contact <strong>HP</strong> support.<br />
55.X Error Turn off then on<br />
Description<br />
The product has experienced an internal error.<br />
Recommended action<br />
Turn the product power off, wait at least 30 seconds, and then turn the product power on and wait for<br />
it to initialize.<br />
If you are using a surge protector, remove it. Plug the product directly into the wall socket. Turn the<br />
product power on.<br />
If the message persists, contact <strong>HP</strong> support.<br />
57 Fan error Turn off then on<br />
Description<br />
The product has experienced a problem with its internal fan.<br />
Recommended action<br />
Turn the product power off, wait at least 30 seconds, and then turn the product power on and wait for<br />
it to initialize.<br />
If you are using a surge protector, remove it. Plug the product directly into the wall socket. Turn the<br />
product power on.<br />
If the message persists, contact <strong>HP</strong> support.<br />
59.X Error Turn off then on<br />
Description<br />
The product has experienced a problem with one of the motors.<br />
Recommended action<br />
Turn the product power off, wait at least 30 seconds, and then turn the product power on and wait for<br />
it to initialize.<br />
If you are using a surge protector, remove it. Plug the product directly into the wall socket. Turn the<br />
product power on.<br />
If the message persists, contact <strong>HP</strong> support.<br />
79 Error Turn off then on<br />
Description<br />
The product has experienced an internal firmware error.<br />
86 Chapter 5 Solve problems <strong>ENWW</strong>
Recommended action<br />
Turn the product power off, wait at least 30 seconds, and then turn the product power on and wait for<br />
it to initialize.<br />
If you are using a surge protector, remove it. Plug the product directly into the wall socket. Turn the<br />
product power on.<br />
If the message persists, contact <strong>HP</strong> support.<br />
Black Cartridge Low<br />
Description<br />
The toner cartridge is nearing the end of its useful life.<br />
Recommended action<br />
Printing can continue, but consider having a replacement supply on hand.<br />
Black in wrong position<br />
Description<br />
The toner cartridge is installed in the incorrect slot.<br />
Recommended action<br />
Make sure that each toner cartridge is installed in the correct slot. From front to back, the toner<br />
cartridges are installed in this order: black, cyan, magenta, and yellow.<br />
Black Very Low<br />
Description<br />
The toner cartridge is at the end of its useful life. A customer configurable option on this product is<br />
"<strong>Pro</strong>mpt to Remind Me in 100 pages, <strong>200</strong> pages, 300 pages, 400 pages, or never." This option is<br />
provided as a customer convenience and is not an indication these pages will have acceptable print<br />
quality.<br />
Recommended action<br />
To ensure optimal print quality, <strong>HP</strong> recommends replacing the toner cartridge at this point. You can<br />
continue printing until you notice a decrease in print quality. Actual cartridge life may vary.<br />
Once an <strong>HP</strong> supply has reached very low, <strong>HP</strong>'s Premium <strong>Pro</strong>tection Warranty on that supply has<br />
ended. All print defects or cartridge failures incurred when an <strong>HP</strong> supply is used in continue at very low<br />
mode will not be considered to be defects in materials or workmanship in the supply under the <strong>HP</strong> Print<br />
Cartridge Warranty Statement.<br />
<strong>ENWW</strong> Interpret control panel messages 87
Cleaning<br />
Description<br />
The product periodically performs a cleaning procedure to maintain the best print quality.<br />
Recommended action<br />
Wait for the cleaning process to finish.<br />
Cyan Cartridge Low<br />
Description<br />
The toner cartridge is nearing the end of its useful life.<br />
Recommended action<br />
Printing can continue, but consider having a replacement supply on hand.<br />
Cyan in wrong position<br />
Description<br />
The toner cartridge is installed in the incorrect slot.<br />
Recommended action<br />
Make sure that each toner cartridge is installed in the correct slot. From front to back, the toner<br />
cartridges are installed in this order: black, cyan, magenta, and yellow.<br />
Cyan Very Low<br />
Description<br />
The toner cartridge is at the end of its useful life. A customer configurable option on this product is<br />
"<strong>Pro</strong>mpt to Remind Me in 100 pages, <strong>200</strong> pages, 300 pages, 400 pages, or never." This option is<br />
provided as a customer convenience and is not an indication these pages will have acceptable print<br />
quality.<br />
Recommended action<br />
To ensure optimal print quality, <strong>HP</strong> recommends replacing the toner cartridge at this point. You can<br />
continue printing until you notice a decrease in print quality. Actual cartridge life may vary.<br />
Once an <strong>HP</strong> supply has reached very low, <strong>HP</strong>'s Premium <strong>Pro</strong>tection Warranty on that supply has<br />
ended. All print defects or cartridge failures incurred when an <strong>HP</strong> supply is used in continue at very low<br />
mode will not be considered to be defects in materials or workmanship in the supply under the <strong>HP</strong> Print<br />
Cartridge Warranty Statement.<br />
88 Chapter 5 Solve problems <strong>ENWW</strong>
Device error Press [OK]<br />
Door open<br />
Description<br />
An internal error occurred.<br />
Recommended action<br />
Press the OK button to resume the job.<br />
Description<br />
The product toner cartridge door is open.<br />
Recommended action<br />
Close the door.<br />
Genuine <strong>HP</strong> supply installed<br />
Description<br />
A genuine <strong>HP</strong> supply was installed.<br />
Recommended action<br />
No action necessary.<br />
Incompatible <br />
Description<br />
You have installed a toner cartridge that is intended for use in a different <strong>HP</strong> product model. The<br />
product might not function correctly with this toner cartridge installed.<br />
Recommended action<br />
Install the correct toner cartridge for this product.<br />
Incorrect supplies<br />
Description<br />
More than one toner cartridge is installed in the incorrect slot.<br />
Recommended action<br />
Be sure that each toner cartridge is in the correct slot. From front to back, the toner cartridges are<br />
installed in this order: black, cyan, magenta, yellow.<br />
<strong>ENWW</strong> Interpret control panel messages 89
Install cartridge<br />
Description<br />
The toner cartridge is either not installed or not correctly installed in the product.<br />
Recommended action<br />
Install the toner cartridge.<br />
Invalid driver Press [OK]<br />
Description<br />
You are using an incorrect printer driver.<br />
Recommended action<br />
Select the correct printer driver.<br />
Jam in <br />
Description<br />
The product has detected a jam.<br />
Recommended action<br />
Clear the jam from the location indicated. The job should continue to print. If it does not, try reprinting<br />
the job.<br />
If the message persists, contact <strong>HP</strong> support.<br />
Jam in Tray 1 Clear jam and then Press [OK]<br />
Description<br />
The product has detected a jam.<br />
Recommended action<br />
Clear the jam from the location indicated, and then press the OK button.<br />
If the message persists, contact <strong>HP</strong> support.<br />
Load tray 1 Press [OK] for available media<br />
Description<br />
The tray is empty.<br />
Recommended action<br />
Load paper into the tray to continue printing.<br />
90 Chapter 5 Solve problems <strong>ENWW</strong>
Load tray 1 , <br />
Description<br />
No trays are configured for the paper type and size that the print job is requesting.<br />
Recommended action<br />
Load the correct paper into Tray 1.<br />
Load tray 1 PLAIN Cleaning Mode<br />
Description<br />
The product is ready to process the cleaning operation.<br />
Recommended action<br />
Load Tray 1 with plain paper in the size indicated, and then press the OK button.<br />
Magenta Cartridge Low<br />
Description<br />
The toner cartridge is nearing the end of its useful life.<br />
Recommended action<br />
Printing can continue, but consider having a replacement supply on hand.<br />
Magenta in wrong position<br />
Description<br />
The toner cartridge is installed in the incorrect slot.<br />
Recommended action<br />
Make sure that each toner cartridge is installed in the correct slot. From front to back, the toner<br />
cartridges are installed in this order: black, cyan, magenta, and yellow.<br />
Magenta Very Low<br />
Description<br />
The toner cartridge is at the end of its useful life. A customer configurable option on this product is<br />
"<strong>Pro</strong>mpt to Remind Me in 100 pages, <strong>200</strong> pages, 300 pages, 400 pages, or never." This option is<br />
provided as a customer convenience and is not an indication these pages will have acceptable print<br />
quality.<br />
Recommended action<br />
To ensure optimal print quality, <strong>HP</strong> recommends replacing the toner cartridge at this point. You can<br />
continue printing until you notice a decrease in print quality. Actual cartridge life may vary.<br />
<strong>ENWW</strong> Interpret control panel messages 91
Once an <strong>HP</strong> supply has reached very low, <strong>HP</strong>'s Premium <strong>Pro</strong>tection Warranty on that supply has<br />
ended. All print defects or cartridge failures incurred when an <strong>HP</strong> supply is used in continue at very low<br />
mode will not be considered to be defects in materials or workmanship in the supply under the <strong>HP</strong> Print<br />
Cartridge Warranty Statement.<br />
Manual duplex Load tray 1 Press [OK]<br />
Description<br />
The first side of a manual duplex job has printed, and the page needs to be loaded to process the<br />
second side.<br />
Recommended action<br />
Load the page in the tray with the side to be printed face up, and the top of the page away from you,<br />
and then press the OK button.<br />
Memory is low Press [OK]<br />
Description<br />
The product memory is almost full.<br />
Recommended action<br />
Press the OK button to finish the job, or press the Cancel<br />
button to cancel the job.<br />
Break the job into smaller jobs that contain fewer pages.<br />
Misprint Press [OK]<br />
Description<br />
Paper has been delayed as it moves through the product.<br />
Recommended action<br />
Press the OK button to clear the message.<br />
To avoid this problem, try the following solutions:<br />
1. Adjust the paper guides in the tray. Make sure the front paper guide is pushing the paper against<br />
the back edge of the tray.<br />
2. Use paper that meets <strong>HP</strong> specifications. Store paper unopened in its original packaging.<br />
3. Use the product in an area that meets the environmental specifications for this product.<br />
Print failure, press OK. If error repeats, turn off then on.<br />
Description<br />
The product cannot process the page.<br />
92 Chapter 5 Solve problems <strong>ENWW</strong>
Recommended action<br />
Press the OK button to continue printing the job, but output might be affected.<br />
If the error persists, turn the power off and then on. Resend the print job.<br />
Rear door open<br />
Description<br />
The product rear door is open.<br />
Recommended action<br />
Close the door.<br />
Remove shipping lock from cartridge<br />
Description<br />
A toner cartridge shipping lock is installed.<br />
Recommended action<br />
Pull the orange tab to remove the shipping lock from the cartridge.<br />
Remove shipping locks from cartridges<br />
Description<br />
A toner cartridge shipping lock is installed on one or more toner cartridges.<br />
Recommended action<br />
Pull the orange tab to remove the shipping lock from the cartridge.<br />
Replace <br />
Description<br />
The toner cartridge is at the end of its useful life, and the product is customer-configured to stop printing<br />
when it reaches the very low state.<br />
Recommended action<br />
To ensure optimal print quality, <strong>HP</strong> recommends replacing the toner cartridge at this point. You can<br />
continue printing until you notice a decrease in print quality. Actual cartridge life may vary. Once an<br />
<strong>HP</strong> supply has reached very low, <strong>HP</strong>'s Premium <strong>Pro</strong>tection Warranty on that supply has ended. All print<br />
defects or cartridge failures incurred when an <strong>HP</strong> supply is used in continue at very low mode will not<br />
be considered to be defects in materials or workmanship in the supply under the <strong>HP</strong> Print Cartridge<br />
Warranty Statement.<br />
<strong>ENWW</strong> Interpret control panel messages 93
Supplies low<br />
Description<br />
More than one supply item is low.<br />
Recommended action<br />
Check the supply level gauges on the control panel, or print a supplies status page to determine which<br />
toner cartridges are low.<br />
Printing will continue until a Very Low message displays. Consider having replacement supplies on<br />
hand.<br />
Unexpected size in tray 1 Load Press [OK]<br />
Description<br />
The product has detected paper in the tray that does not match the configuration for the tray.<br />
Recommended action<br />
Load the correct paper into the tray, or configure the tray for the size that you have loaded.<br />
Unsupported Press [OK] to continue<br />
Description<br />
The product has detected a toner cartridge that was not made by <strong>HP</strong>.<br />
Recommended action<br />
Press the OK button to continue printing.<br />
If you believe you purchased an <strong>HP</strong> supply, go to www.hp.com/go/anticounterfeit. Service or repairs<br />
that are required as a result of using unsupported supplies is not covered under <strong>HP</strong> warranty.<br />
Used cartridge is installed Press [OK] to continue<br />
Description<br />
You have installed a toner cartridge that reached the default low threshold while it was installed in<br />
another product.<br />
Recommended action<br />
Press the OK button to continue.<br />
Used in use<br />
Description<br />
You are using a toner cartridge that reached the default low threshold while it was installed in a<br />
product.<br />
94 Chapter 5 Solve problems <strong>ENWW</strong>
Recommended action<br />
Printing can continue, but consider having a replacement supply on hand.<br />
Used supplies in use<br />
Description<br />
You are using more than one toner cartridge that reached the default low threshold while it was<br />
installed in a product.<br />
Recommended action<br />
Printing can continue, but consider having replacement supplies on hand.<br />
Yellow Cartridge Low<br />
Description<br />
The toner cartridge is nearing the end of its useful life.<br />
Recommended action<br />
Printing can continue, but consider having a replacement supply on hand.<br />
Yellow in wrong position<br />
Description<br />
The toner cartridge is installed in the incorrect slot.<br />
Recommended action<br />
Make sure that each toner cartridge is installed in the correct slot. From front to back, the toner<br />
cartridges are installed in this order: black, cyan, magenta, and yellow.<br />
Yellow Very Low<br />
Description<br />
The toner cartridge is at the end of its useful life. A customer configurable option on this product is<br />
"<strong>Pro</strong>mpt to Remind Me in 100 pages, <strong>200</strong> pages, 300 pages, 400 pages, or never." This option is<br />
provided as a customer convenience and is not an indication these pages will have acceptable print<br />
quality.<br />
Recommended action<br />
To ensure optimal print quality, <strong>HP</strong> recommends replacing the toner cartridge at this point. You can<br />
continue printing until you notice a decrease in print quality. Actual cartridge life may vary.<br />
Once an <strong>HP</strong> supply has reached very low, <strong>HP</strong>'s Premium <strong>Pro</strong>tection Warranty on that supply has<br />
ended. All print defects or cartridge failures incurred when an <strong>HP</strong> supply is used in continue at very low<br />
mode will not be considered to be defects in materials or workmanship in the supply under the <strong>HP</strong> Print<br />
Cartridge Warranty Statement.<br />
<strong>ENWW</strong> Interpret control panel messages 95
Paper feeds incorrectly or becomes jammed<br />
The product does not pick up paper<br />
If the product does not pick up paper from the tray, try these solutions.<br />
1. Open the product and remove any jammed sheets of paper.<br />
2. Load the tray with the correct size of paper for your job.<br />
3. Make sure the paper guides in the tray are adjusted correctly for the size of paper. Adjust the<br />
guides so they are touching the paper stack without bending it.<br />
4. Check the product control panel to see if the product is waiting for you to acknowledge a prompt<br />
to feed the paper manually. Load paper, and continue.<br />
The product picks up multiple sheets of paper<br />
If the product picks up multiple sheets of paper from the tray, try these solutions.<br />
1. Remove the stack of paper from the tray and flex it, rotate it 180 degrees, and flip it over. Do not<br />
fan the paper. Return the stack of paper to the tray.<br />
2. Use only paper that meets <strong>HP</strong> specifications for this product.<br />
3. Use paper that is not wrinkled, folded, or damaged. If necessary, use paper from a different<br />
package.<br />
4. Make sure the tray is not overfilled. If it is, remove the entire stack of paper from the tray,<br />
straighten the stack, and then return some of the paper to the tray.<br />
5. Make sure the paper guides in the tray are adjusted correctly for the size of paper. Adjust the<br />
guides so they are touching the paper stack without bending it.<br />
Prevent paper jams<br />
To reduce the number of paper jams, try these solutions.<br />
1. Use only paper that meets <strong>HP</strong> specifications for this product.<br />
2. Use paper that is not wrinkled, folded, or damaged. If necessary, use paper from a different<br />
package.<br />
3. Use paper that has not previously been printed or copied on.<br />
4. Make sure the tray is not overfilled. If it is, remove the entire stack of paper from the tray,<br />
straighten the stack, and then return some of the paper to the tray.<br />
5. Make sure the paper guides in the tray are adjusted correctly for the size of paper. Adjust the<br />
guides so they are touching the paper stack without bending it.<br />
96 Chapter 5 Solve problems <strong>ENWW</strong>
Clear jams<br />
Jam locations<br />
Jams can occur in these locations:<br />
1 Output bin<br />
2 Rear door<br />
3 Input tray<br />
Loose toner might remain in the product after a jam. This problem typically resolves itself after a few<br />
sheets have been printed.<br />
Clear jams in the paper input tray<br />
CAUTION: Do not use sharp objects, such as tweezers or needle-nose pliers, to remove jams.<br />
Damage caused by sharp objects is not covered by the warranty.<br />
When removing jammed paper, pull it straight out from the product. Pulling jammed paper out of the<br />
product at an angle can damage the product.<br />
NOTE:<br />
Depending on where the jam is located, some of the following steps might not be necessary.<br />
<strong>ENWW</strong> Clear jams 97
1. Pull out the tray, and lift the jam access door<br />
above the tray.<br />
2. With both hands, grasp the paper, and<br />
carefully pull it free from the product.<br />
3. Replace the tray.<br />
4. Press the OK button to continue printing.<br />
98 Chapter 5 Solve problems <strong>ENWW</strong>
Clear jams from the output bin<br />
CAUTION: Do not use sharp objects, such as tweezers or needle-nose pliers, to remove jams.<br />
Damage caused by sharp objects will not be covered by the warranty.<br />
1. With both hands, grasp the paper, and<br />
carefully pull it free from the product.<br />
Clear jams from the rear door<br />
1. Open the rear door.<br />
CAUTION: The fuser is located above the<br />
rear door, and it is hot. Do not attempt to<br />
reach into the area above the rear door until<br />
the fuser is cool.<br />
<strong>ENWW</strong> Clear jams 99
2. With both hands, grasp the paper, and<br />
carefully pull it free from the product.<br />
NOTE: If the sheet tears, remove all<br />
fragments before continuing. Do not use sharp<br />
objects to remove fragments.<br />
3. Close the rear door.<br />
100 Chapter 5 Solve problems <strong>ENWW</strong>
Improve print quality<br />
Check the paper type setting (Windows)<br />
Check the paper type setting if you are having any of the following problems:<br />
●<br />
●<br />
●<br />
●<br />
●<br />
Toner is smearing on the printed pages.<br />
Repeated marks occur on the printed pages.<br />
Printed pages are curled.<br />
Toner flakes off the printed pages.<br />
Printed pages have small unprinted areas.<br />
1. From the software program, select the Print option.<br />
2. Select the product, and then click the <strong>Pro</strong>perties or Preferences button.<br />
3. Click the Paper/Quality tab.<br />
4. From the Paper type drop-down list, click the More... option.<br />
5. Expand the list of Type is: options.<br />
6. Expand each category of paper types until you find the paper type that you are using.<br />
7. Select the option for the type of paper you are using, and then click the OK button.<br />
Check the paper type setting (Mac OS X)<br />
Check the paper type setting if you are having any of the following problems:<br />
●<br />
●<br />
●<br />
●<br />
●<br />
Toner is smearing on the printed pages.<br />
Repeated marks occur on the printed pages.<br />
Printed pages are curled.<br />
Toner flakes off the printed pages.<br />
Printed pages have small unprinted areas.<br />
1. On the File menu, click the Print option.<br />
2. In the <strong>Printer</strong> menu, select this product.<br />
3. In the Copies & Pages menu, click the Page Setup button.<br />
4. Select a size from the Paper Size drop-down list, and then click the OK button.<br />
5. Open the Finishing menu.<br />
<strong>ENWW</strong> Improve print quality 101
6. Select a type from the Media-type drop-down list.<br />
7. Click the Print button.<br />
Check toner cartridge status<br />
Print the supplies status page (LCD control panel)<br />
NOTE:<br />
This section applies to the <strong>HP</strong> <strong>LaserJet</strong> <strong>Pro</strong> <strong>200</strong> <strong>color</strong> <strong>M251</strong>n <strong>Printer</strong> model only.<br />
Information pages reside within the product memory. These pages help diagnose and solve problems<br />
with the product.<br />
NOTE: If the product language was not correctly set during installation, you can set the language<br />
manually so the information pages print in one of the supported languages. Change the language by<br />
using the System Setup menu on the control panel or the embedded Web server.<br />
1. At the control panel, press the OK button to open the menus.<br />
2. Open the Reports menu.<br />
3. Select the Supplies Status item, and then press the OK button to print the report.<br />
Print the supplies status page (touchscreen control panel)<br />
NOTE:<br />
This section applies to the <strong>HP</strong> <strong>LaserJet</strong> <strong>Pro</strong> <strong>200</strong> <strong>color</strong> <strong>M251</strong>nw <strong>Printer</strong> model only.<br />
Information pages reside within the product memory. These pages help diagnose and solve problems<br />
with the product.<br />
NOTE: If the product language was not correctly set during installation, you can set the language<br />
manually so the information pages print in one of the supported languages. Change the language by<br />
using the System Setup menu on the control panel or the embedded Web server.<br />
1. From the Home screen on the product control panel, touch the Setup button.<br />
2. Touch the Reports button.<br />
3. Touch the Supplies Status button to print the report.<br />
Check the supplies status<br />
Check the supplies status page for the following information:<br />
●<br />
●<br />
●<br />
●<br />
Estimated percentage of cartridge life remaining<br />
Approximate pages remaining<br />
Part numbers for <strong>HP</strong> toner cartridges<br />
Number of pages printed<br />
102 Chapter 5 Solve problems <strong>ENWW</strong>
Print a cleaning page<br />
Print a cleaning page to remove dust and excess toner from the paper path if you are having any of the<br />
following problems:<br />
●<br />
●<br />
●<br />
Specks of toner are on the printed pages.<br />
Toner is smearing on the printed pages.<br />
Repeated marks occur on the printed pages.<br />
Print a cleaning page (LCD control panel)<br />
NOTE:<br />
This section applies to the <strong>HP</strong> <strong>LaserJet</strong> <strong>Pro</strong> <strong>200</strong> <strong>color</strong> <strong>M251</strong>n <strong>Printer</strong> model only.<br />
1. At the control panel, press the OK button to open the menus.<br />
2. Open the following menus:<br />
●<br />
●<br />
Service<br />
Cleaning Page<br />
3. Load plain paper in Tray 1, and then press the OK button to start the cleaning process.<br />
4. The product prints the first side and then prompts you to remove the page from the output bin and<br />
reload it in Tray 1, keeping the same orientation (the side with the black stripe should be facedown<br />
with the arrow toward the back of the product).<br />
5. Press the OK button to continue the cleaning process. Wait until the process is complete. Discard<br />
the page that prints.<br />
Print a cleaning page (touchscreen control panel)<br />
NOTE:<br />
This section applies to the <strong>HP</strong> <strong>LaserJet</strong> <strong>Pro</strong> <strong>200</strong> <strong>color</strong> <strong>M251</strong>nw <strong>Printer</strong> model only.<br />
1. From the Home screen on the product control panel, touch the Setup button.<br />
2. Touch the Service menu.<br />
3. Touch the Cleaning Page button.<br />
4. Load plain letter or A4 paper when you are prompted.<br />
5. Touch the OK button to begin the cleaning process.<br />
6. The product prints the first side and then prompts you to remove the page from the output bin and<br />
reload it in Tray 1, keeping the same orientation (the side with the black stripe should be facedown<br />
with the arrow toward the back of the product).<br />
7. Press the OK button to continue the cleaning process. Wait until the process is complete. Discard<br />
the page that prints.<br />
<strong>ENWW</strong> Improve print quality 103
Perform additional print quality troubleshooting<br />
Print the print quality page (LCD control panel)<br />
NOTE:<br />
This section applies to the <strong>HP</strong> <strong>LaserJet</strong> <strong>Pro</strong> <strong>200</strong> <strong>color</strong> <strong>M251</strong>n <strong>Printer</strong> model only.<br />
1. From the Home screen on the product control panel, touch the Setup button.<br />
2. Touch the Reports button.<br />
3. Touch the Print Quality Page button.<br />
Print the print quality page (touchscreen control panel)<br />
NOTE:<br />
This section applies to the <strong>HP</strong> <strong>LaserJet</strong> <strong>Pro</strong> <strong>200</strong> <strong>color</strong> <strong>M251</strong>nw <strong>Printer</strong> model only.<br />
1. From the Home screen on the product control panel, touch the Setup button.<br />
2. Touch the Reports button.<br />
3. Touch the Print Quality Page button.<br />
Interpret the print quality page<br />
This page contains five bands of <strong>color</strong>, which are divided into four groups as indicated in the following<br />
illustration. By examining each group, you can isolate the problem to a particular toner cartridge.<br />
Section<br />
Print-cartridge<br />
1 Yellow<br />
2 Cyan<br />
104 Chapter 5 Solve problems <strong>ENWW</strong>
Section<br />
Print-cartridge<br />
3 Black<br />
4 Magenta<br />
●<br />
●<br />
●<br />
If dots or streaks appear in only one of the groups, replace the toner cartridge that correlates with<br />
that group.<br />
If dots appear in more than one group, print a cleaning page. If this does not solve the problem,<br />
determine if the dots are always the same <strong>color</strong>; for example, if magenta dots appear in all five<br />
<strong>color</strong> bands. If the dots are all the same <strong>color</strong>, replace that toner cartridge.<br />
If a streak continues through multiple <strong>color</strong> bands, contact <strong>HP</strong>. A component other than the toner<br />
cartridge is probably causing the problem.<br />
Inspect the toner cartridge for damage<br />
1. Remove the toner cartridge from the product, and verify that the sealing tape has been removed.<br />
2. Check the memory chip for damage.<br />
3. Examine the surface of the imaging drum on the bottom of the toner cartridge.<br />
CAUTION: Do not touch the roller (imaging drum) on the bottom of the cartridge. Fingerprints<br />
on the imaging drum can cause print-quality problems.<br />
4. If you see any scratches, fingerprints, or other damage on the imaging drum, replace the toner<br />
cartridge.<br />
5. If the imaging drum does not appear to be damaged, rock the toner cartridge gently several times<br />
and reinstall it. Print a few pages to see if the problem has resolved.<br />
<strong>ENWW</strong> Improve print quality 105
Check the paper and printing environment<br />
Use paper that meets <strong>HP</strong> specifications<br />
Use different paper if you are having any of the following problems:<br />
●<br />
●<br />
●<br />
●<br />
●<br />
The printing is too light or seems faded in areas.<br />
Specks of toner are on the printed pages.<br />
Toner is smearing on the printed pages.<br />
Printed characters seem misformed.<br />
Printed pages are curled.<br />
Always use a paper type and weight that this product supports. In addition, follow these guidelines<br />
when selecting paper:<br />
●<br />
●<br />
●<br />
●<br />
Use paper that is of good quality and free of cuts, nicks, tears, spots, loose particles, dust,<br />
wrinkles, voids, staples, and curled or bent edges.<br />
Use paper that has not been previously printed on.<br />
Use paper that is designed for use in laser printers. Do not use paper that is designed only for use<br />
in Inkjet printers.<br />
Use paper that is not too rough. Using smoother paper generally results in better print quality.<br />
Check the product environment<br />
Verify that the product is operating within the environmental specifications listed in the product<br />
Warranty and Legal Guide.<br />
Check print job settings<br />
Check the EconoMode setting<br />
This product has an EconoMode option for printing drafts of documents. Using EconoMode can use less<br />
toner. However, using EconoMode can also reduce print quality. To improve print quality, verify that<br />
the EconoMode setting is deactivated.<br />
1. From the software program, select the Print option.<br />
2. Select the product, and then click the <strong>Pro</strong>perties or Preferences button.<br />
3. Click the Paper/Quality tab.<br />
4. Verify that the EconoMode check box is cleared. If there is a checkmark in the check box, click<br />
the check box to clear it.<br />
<strong>HP</strong> does not recommend the full-time use of EconoMode. If EconoMode is used full-time, the toner<br />
supply might outlast the mechanical parts in the toner cartridge. If print quality begins to degrade and<br />
is no longer acceptable, consider replacing the toner cartridge.<br />
106 Chapter 5 Solve problems <strong>ENWW</strong>
Adjust <strong>color</strong> settings in the printer driver<br />
Change the <strong>color</strong> theme for a print job<br />
1. On the File menu in the software program, click Print.<br />
2. Click <strong>Pro</strong>perties or Preferences.<br />
3. Click the Color tab.<br />
4. Select a <strong>color</strong> theme from the Color Themes drop-down list.<br />
●<br />
●<br />
●<br />
●<br />
●<br />
Default (sRGB): This theme sets the product to print RGB data in raw device mode. When<br />
using this theme, manage <strong>color</strong> in the software program or in the operating system for correct<br />
rendering.<br />
Vivid: The product increases the <strong>color</strong> saturation in the midtones. Use this theme when<br />
printing business graphics.<br />
Photo: The product interprets RGB <strong>color</strong> as if it were printed as a photograph using a digital<br />
mini lab. The product renders deeper, more saturated <strong>color</strong>s differently than with the Default<br />
(sRBG) theme. Use this theme when printing photos.<br />
Photo (Adobe RGB 1998): Use this theme with printing digital photos that use the<br />
AdobeRGB <strong>color</strong> space rather than sRGB. Turn off <strong>color</strong> management in the software<br />
program when using this theme.<br />
None<br />
Change the <strong>color</strong> options<br />
Change the <strong>color</strong> options settings for the current print job from the <strong>color</strong> tab of the printer driver.<br />
1. On the File menu in the software program, click Print.<br />
2. Click <strong>Pro</strong>perties or Preferences.<br />
3. Click the Color tab.<br />
<strong>ENWW</strong> Improve print quality 107
4. Click the Automatic or Manual setting.<br />
●<br />
●<br />
Automatic setting: Select this setting for most <strong>color</strong> print jobs<br />
Manual setting: Select this setting to adjust the <strong>color</strong> settings independent from other<br />
settings.<br />
NOTE: Changing <strong>color</strong> settings manually can impact output. <strong>HP</strong> recommends that only<br />
<strong>color</strong> graphics experts change these settings.<br />
5. Click the Print in Grayscale option to print a <strong>color</strong> document in black and white. Use this<br />
option to print <strong>color</strong> documents for photocopying or faxing.<br />
6. Click the OK button.<br />
Use the printer driver that best meets your printing needs<br />
You might need to use a different printer driver if the printed page has unexpected lines in graphics,<br />
missing text, missing graphics, incorrect formatting, or substituted fonts.<br />
<strong>HP</strong> PCL 6 driver ● <strong>Pro</strong>vided as the default driver. This driver is automatically installed unless you<br />
select a different one.<br />
●<br />
●<br />
●<br />
●<br />
Recommended for all Windows environments<br />
<strong>Pro</strong>vides the overall best speed, print quality, and product-feature support for<br />
most users<br />
Developed to align with the Windows Graphic Device Interface (GDI) for the<br />
best speed in Windows environments<br />
Might not be fully compatible with third-party and custom software programs<br />
that are based on PCL 5<br />
<strong>HP</strong> UPD PS driver ● Recommended for printing with Adobe ® software programs or with other<br />
highly graphics-intensive software programs<br />
●<br />
<strong>Pro</strong>vides support for printing from postscript emulation needs, or for postscript<br />
flash font support<br />
108 Chapter 5 Solve problems <strong>ENWW</strong>
<strong>HP</strong> UPD PCL 5 ● Recommended for general office printing in Windows environments<br />
●<br />
●<br />
●<br />
●<br />
●<br />
Compatible with previous PCL versions and older <strong>HP</strong> <strong>LaserJet</strong> products<br />
The best choice for printing from third-party or custom software programs<br />
The best choice when operating with mixed environments, which require the<br />
product to be set to PCL 5 (UNIX, Linux, mainframe)<br />
Designed for use in corporate Windows environments to provide a single<br />
driver for use with multiple printer models<br />
Preferred when printing to multiple printer models from a mobile Windows<br />
computer<br />
<strong>HP</strong> UPD PCL 6 ● Recommended for printing in all Windows environments<br />
●<br />
●<br />
●<br />
<strong>Pro</strong>vides the overall best speed, print quality, and printer feature support for<br />
most users<br />
Developed to align with Windows Graphic Device Interface (GDI) for best<br />
speed in Windows environments<br />
May not be fully compatible with third-party and custom solutions based on<br />
PCL5<br />
Download additional printer drivers from this Web site: www.hp.com/support/lj<strong>color</strong>m251series.<br />
<strong>ENWW</strong> Improve print quality 109
The product does not print or it prints slowly<br />
The product does not print<br />
If the product does not print at all, try the following solutions.<br />
1. Make sure the product is turned on and that the control panel indicates it is ready.<br />
◦ If the control panel does not indicate the product is ready, turn the product off and then on<br />
again.<br />
◦ If the control panel indicates the product is ready, try sending the job again.<br />
2. If the control panel indicates the product has an error, resolve the error and then try sending the<br />
job again.<br />
3. Make sure the cables are all connected correctly. If the product is connected to a network, check<br />
the following items:<br />
◦ Check the light next to the network connection on the product. If the network is active, the<br />
light is green.<br />
◦ Make sure that you are using a network cable and not a phone cord to connect to the<br />
network.<br />
◦ Make sure the network router, hub, or switch is turned on and that it is working correctly.<br />
4. Install the <strong>HP</strong> software from the CD that came with the product. Using generic printer drivers can<br />
cause delays clearing jobs from the print queue.<br />
5. From the list of printers on your computer, right-click the name of this product, click <strong>Pro</strong>perties,<br />
and open the Ports tab.<br />
◦ If you are using a network cable to connect to the network, make sure the printer name listed<br />
on the Ports tab matches the product name on the product configuration page.<br />
◦ If you are using a USB cable and are connecting to a wireless network, make sure the box is<br />
checked next to Virtual printer port for USB.<br />
6. If you are using a personal firewall system on the computer, it might be blocking communication<br />
with the product. Try temporarily disabling the firewall to see if it is the source of the problem.<br />
7. If your computer or the product is connected to a wireless network, low signal quality or<br />
interference might be delaying print jobs.<br />
110 Chapter 5 Solve problems <strong>ENWW</strong>
The product prints slowly<br />
If the product prints, but it seems slow, try the following solutions.<br />
1. Make sure the computer meets the minimum specifications for this product. For a list of<br />
specifications, go to this Web site: www.hp.com/support/lj<strong>color</strong>m251series.<br />
2. When you configure the product to print on some paper types, such as heavy paper, the product<br />
prints more slowly so it can correctly fuse the toner to the paper. If the paper type setting is not<br />
correct for the type of paper you are using, change the setting to the correct paper type.<br />
3. If your computer or the product is connected to a wireless network, low signal quality or<br />
interference might be delaying print jobs.<br />
<strong>ENWW</strong> The product does not print or it prints slowly 111
Solve walk-up USB printing problems<br />
●<br />
●<br />
●<br />
The USB Flash Drive menu does not open when you insert the USB accessory<br />
The file does not print from the USB storage accessory<br />
The file that you want to print is not listed in the USB Flash Drive menu<br />
The USB Flash Drive menu does not open when you insert the USB<br />
accessory<br />
1. You might be using a USB storage accessory or a file system that this product does not support.<br />
Save the files on a standard USB storage accessory that uses File Allocation Table (FAT) file<br />
systems. The product supports FAT12, FAT16, and FAT32 USB storage accessories.<br />
2. If another menu is already open, close that menu and then reinsert the USB storage accessory.<br />
3. The USB storage accessory might have multiple partitions. (Some USB storage accessory<br />
manufacturers install software on the accessory that creates partitions, similar to a CD.) Reformat<br />
the USB storage accessory to remove the partitions, or use a different USB storage accessory.<br />
4. The USB storage accessory might require more power than the product can provide.<br />
a. Remove the USB storage accessory.<br />
b. Turn the product off and then on.<br />
c. Use a USB storage accessory that has its own power supply or that requires less power.<br />
5. The USB storage accessory might not be functioning correctly.<br />
a. Remove the USB storage accessory.<br />
b. Turn the product off and then on.<br />
c. Try printing from another USB storage accessory.<br />
The file does not print from the USB storage accessory<br />
1. Make sure paper is in the tray.<br />
2. Check the control panel for messages. If paper is jammed in the product, clear the jam.<br />
112 Chapter 5 Solve problems <strong>ENWW</strong>
The file that you want to print is not listed in the USB Flash Drive<br />
menu<br />
1. You might be trying to print a file type that the USB printing feature does not support. The product<br />
supports .PDF and .JPEG file types.<br />
2. You might have too many files in a single folder on the USB storage accessory. Reduce the<br />
number of files in the folder by moving them to subfolders.<br />
3. You might be using a character set for the file name that the product does not support. In this case,<br />
the product replaces the file names with characters from a different character set. Rename the files<br />
using ASCII characters.<br />
<strong>ENWW</strong> Solve walk-up USB printing problems 113
Solve direct connection problems<br />
If you have connected the product directly to a computer, check the cable.<br />
●<br />
●<br />
●<br />
Verify that the cable is connected to the computer and to the product.<br />
Verify that the cable is not longer than 5 m (16.4 ft). Try using a shorter cable.<br />
Verify that the cable is working correctly by connecting it to another product. Replace the cable if<br />
necessary.<br />
114 Chapter 5 Solve problems <strong>ENWW</strong>
Solve wired network problems<br />
Check the following items to verify that the product is communicating with the network. Before<br />
beginning, print a configuration page from the product control panel and locate the product IP address<br />
that is listed on this page.<br />
●<br />
●<br />
●<br />
●<br />
●<br />
●<br />
●<br />
Poor physical connection<br />
The computer is using the incorrect IP address for the product<br />
The computer is unable to communicate with the product<br />
The product is using incorrect link and duplex settings for the network<br />
New software programs might be causing compatibility problems<br />
The computer or workstation might be set up incorrectly<br />
The product is disabled, or other network settings are incorrect<br />
NOTE: <strong>HP</strong> does not support peer-to-peer networking, as the feature is a function of Microsoft<br />
operating systems and not of the <strong>HP</strong> printer drivers. Go to Microsoft at www.microsoft.com.<br />
Poor physical connection<br />
1. Verify that the product is attached to the correct network port using a cable of the correct length.<br />
2. Verify that cable connections are secure.<br />
3. Look at the network port connection on the back of the product, and verify that the amber activity<br />
light and the green link-status light are lit.<br />
4. If the problem continues, try a different cable or port on the hub.<br />
The computer is using the incorrect IP address for the product<br />
1. Open the printer properties and click the Ports tab. Verify that the current IP address for the<br />
product is selected. The product IP address is listed on the product configuration page.<br />
2. If you installed the product using the <strong>HP</strong> standard TCP/IP port, select the box labeled Always<br />
print to this printer, even if its IP address changes.<br />
3. If you installed the product using a Microsoft standard TCP/IP port, use the hostname instead of<br />
the IP address.<br />
4. If the IP address is correct, delete the product and then add it again.<br />
<strong>ENWW</strong> Solve wired network problems 115
The computer is unable to communicate with the product<br />
1. Test network communication by pinging the network.<br />
a. Open a command-line prompt on your computer. For Windows, click Start, click Run, and<br />
then type cmd.<br />
b. Type ping followed by the IP address for your product.<br />
For Mac OS X, open the Network Utility, and then supply the IP address in the correct field in<br />
the Ping pane.<br />
c. If the window displays round-trip times, the network is working.<br />
2. If the ping command failed, verify that the network hubs are on, and then verify that the network<br />
settings, the product, and the computer are all configured for the same network.<br />
The product is using incorrect link and duplex settings for the<br />
network<br />
Hewlett-Packard recommends leaving this setting in automatic mode (the default setting). If you change<br />
these settings, you must also change them for your network.<br />
New software programs might be causing compatibility problems<br />
Verify that any new software programs are correctly installed and that they use the correct printer<br />
driver.<br />
The computer or workstation might be set up incorrectly<br />
1. Check the network drivers, printer drivers, and the network redirection.<br />
2. Verify that the operating system is configured correctly.<br />
The product is disabled, or other network settings are incorrect<br />
1. Review the configuration page to check the status of the network protocol. Enable it if necessary.<br />
2. Reconfigure the network settings if necessary.<br />
116 Chapter 5 Solve problems <strong>ENWW</strong>
Solve wireless network problems<br />
NOTE:<br />
This section applies to the <strong>HP</strong> <strong>LaserJet</strong> <strong>Pro</strong> <strong>200</strong> <strong>color</strong> <strong>M251</strong>nw <strong>Printer</strong> model only.<br />
Wireless connectivity checklist<br />
●<br />
●<br />
●<br />
●<br />
●<br />
●<br />
●<br />
●<br />
●<br />
●<br />
●<br />
●<br />
Verify that the network cable is not connected.<br />
Verify that the product and the wireless router are turned on and have power. Also make sure that<br />
the wireless radio in the product is turned on.<br />
Verify that the service set identifier (SSID) is correct. Print a configuration page to determine the<br />
SSID. If you are not sure the SSID is correct, run the wireless setup again.<br />
With secured networks, verify that the security information is correct. If the security information is<br />
incorrect, run the wireless setup again.<br />
If the wireless network is working correctly, try accessing other computers on the wireless network.<br />
If the network has Internet access, try connecting to the Internet over a wireless connection.<br />
Verify that the encryption method (AES or TKIP) is the same for the product as it is for the wireless<br />
access point (on networks using WPA security).<br />
Verify that the product is within the range of the wireless network. For most networks, the product<br />
must be within 30 m (100 ft) of the wireless access point (wireless router).<br />
Verify that obstacles do not block the wireless signal. Remove any large metal objects between the<br />
access point and the product. Make sure poles, walls, or support columns containing metal or<br />
concrete do not separate the product and wireless access point.<br />
Verify that the product is located away from electronic devices that might interfere with the<br />
wireless signal. Many devices can interfere with the wireless signal including motors, cordless<br />
phones, security system cameras, other wireless networks, and some Bluetooth devices.<br />
Verify that the printer driver is installed on the computer.<br />
Verify that you have selected the correct printer port.<br />
Verify that the computer and product connect to the same wireless network.<br />
The product does not print after the wireless configuration<br />
completes<br />
1. Make sure that the product is turned on and in the ready state.<br />
2. Turn off any third-party firewalls on your computer.<br />
3. Make sure that the wireless network is working correctly.<br />
4. Make sure that your computer is working correctly. If necessary, restart the computer.<br />
<strong>ENWW</strong> Solve wireless network problems 117
The product does not print, and the computer has a third-party<br />
firewall installed<br />
1. Update the firewall with the most recent update available from the manufacturer.<br />
2. If programs request firewall access when you install the product or try to print, make sure you<br />
allow the programs to run.<br />
3. Temporarily turn off the firewall, and then install the wireless product on the computer. Enable the<br />
firewall when you have completed the wireless installation.<br />
The wireless connection does not work after moving the wireless<br />
router or product<br />
Make sure that the router or product connects to the same network that your computer connects to.<br />
1. Print a configuration page.<br />
2. Compare the service set identifier (SSID) on the configuration page to the SSID in the printer<br />
configuration for the computer.<br />
3. If the numbers are not the same, the devices are not connecting to the same network. Reconfigure<br />
the wireless setup for the product.<br />
Cannot connect more computers to the wireless product<br />
1. Make sure that the other computers are within the wireless range and that no obstacles block the<br />
signal. For most networks, the wireless range is within 30 m (100 ft) of the wireless access point.<br />
2. Make sure that the product is turned on and in the ready state.<br />
3. Turn off any third-party firewalls on your computer.<br />
4. Make sure that the wireless network is working correctly.<br />
5. Make sure that your computer is working correctly. If necessary, restart the computer.<br />
The wireless product loses communication when connected to a<br />
VPN<br />
●<br />
Typically, you cannot connect to a VPN and other networks at the same time.<br />
The network does not appear in the wireless networks list<br />
●<br />
●<br />
Make sure the wireless router is turned on and has power.<br />
The network might be hidden. However, you can still connect to a hidden network.<br />
118 Chapter 5 Solve problems <strong>ENWW</strong>
The wireless network is not functioning<br />
1. Make sure that the network cable is not connected.<br />
2. To verify if the network has lost communication, try connecting other devices to the network.<br />
3. Test network communication by pinging the network.<br />
a. Open a command-line prompt on your computer. For Windows, click Start, click Run, and<br />
then type cmd.<br />
b. Type ping followed by the router IP address.<br />
For Mac OS X, open the Network Utility, and then supply the IP address in the correct field in<br />
the Ping pane.<br />
c. If the window displays round-trip times, the network is working.<br />
4. Make sure that the router or product connects to the same network that the computer connects to.<br />
a. Print a configuration page.<br />
b. Compare the service set identifier (SSID) on the configuration report to the SSID in the printer<br />
configuration for the computer.<br />
c. If the numbers are not the same, the devices are not connecting to the same network.<br />
Reconfigure the wireless setup for the product.<br />
Perform a wireless network diagnostic test<br />
From the product control panel, you can run a diagnostic test that provides information about the<br />
wireless network settings.<br />
1. From the Home screen, touch the Setup button.<br />
2. Open the following menus<br />
●<br />
●<br />
System Setup<br />
Service<br />
3. Touch the Run Network Test button to start the test. The product prints a test page that shows<br />
test results.<br />
<strong>ENWW</strong> Solve wireless network problems 119
Reduce interference on a wireless network<br />
The following tips can reduce interference in a wireless network:<br />
●<br />
●<br />
●<br />
Keep the wireless devices away from large metal objects, such as filing cabinets, and other<br />
electromagnetic devices, such as microwaves and cordless telephones. These objects can disrupt<br />
radio signals.<br />
Keep the wireless devices away from large masonry structures and other building structures. These<br />
objects can absorb radio waves and lower signal strength.<br />
Position the wireless router in a central location in line of sight with the wireless products on the<br />
network.<br />
120 Chapter 5 Solve problems <strong>ENWW</strong>
Solve product software problems with Windows<br />
A printer driver for the product is not visible in the <strong>Printer</strong> folder<br />
1. Reinstall the product software.<br />
NOTE: Close any applications that are running. To close an application that has an icon in the<br />
system tray, right-click the icon, and select Close or Disable.<br />
2. Try plugging the USB cable into a different USB port on the computer.<br />
An error message was displayed during the software installation<br />
1. Reinstall the product software.<br />
NOTE: Close any applications that are running. To close an application that has an icon in the<br />
system tray, right-click the icon, and select Close or Disable.<br />
2. Check the amount of free space on the drive where you are installing the product software. If<br />
necessary, free up as much space as you can, and reinstall the product software.<br />
3. If necessary, run the Disk Defragmenter, and reinstall the product software.<br />
The product is in Ready mode, but nothing prints<br />
1. Print a configuration page, and verify the product functionality.<br />
2. Verify that all of the cables are correctly seated and within specifications. This includes the USB<br />
and power cables. Try a new cable.<br />
3. Verify the IP address on the configuration page matches the IP address for the software port. Use<br />
one of the following procedures:<br />
Windows XP, Windows Server <strong>200</strong>3, Windows Server <strong>200</strong>8, and Windows Vista<br />
a. Click Start.<br />
b. Click Settings.<br />
c. Click <strong>Printer</strong>s and Faxes (using the default Start menu view) or click <strong>Printer</strong>s (using the<br />
Classic Start menu view).<br />
d. Right-click the product driver icon, and then select <strong>Pro</strong>perties.<br />
e. Click the Ports tab, and then click Configure Port.<br />
f. Verify the IP address, and then click OK or Cancel.<br />
g. If the IP addresses are not the same, delete the driver, and reinstall the driver using the<br />
correct IP address.<br />
<strong>ENWW</strong> Solve product software problems with Windows 121
Windows 7<br />
a. Click Start.<br />
b. Click Devices and <strong>Printer</strong>s.<br />
c. Right-click the product driver icon, and then select <strong>Printer</strong> properties.<br />
d. Click the Ports tab, and then click Configure Port.<br />
e. Verify the IP address, and then click OK or Cancel.<br />
f. If the IP addresses are not the same, delete the driver, and reinstall the driver using the<br />
correct IP address.<br />
122 Chapter 5 Solve problems <strong>ENWW</strong>
Solve product software problems with Mac OS X<br />
●<br />
●<br />
●<br />
●<br />
●<br />
●<br />
The printer driver is not listed in the Print & Fax list<br />
The product name does not appear in the product list in the Print & Fax list<br />
The printer driver does not automatically set up the selected product in the Print & Fax list<br />
A print job was not sent to the product that you wanted<br />
When connected with a USB cable, the product does not appear in the Print & Fax list after the<br />
driver is selected.<br />
You are using a generic printer driver when using a USB connection<br />
The printer driver is not listed in the Print & Fax list<br />
1. Make sure that the product .GZ file is in the following hard-drive folder: Library/<strong>Printer</strong>s/<br />
PPDs/Contents/Resources. If necessary, reinstall the software.<br />
2. If the GZ file is in the folder, the PPD file might be corrupt. Delete the file and then reinstall the<br />
software.<br />
The product name does not appear in the product list in the Print &<br />
Fax list<br />
1. Make sure that the cables are connected correctly and the product is on.<br />
2. Print a configuration page to check the product name. Verify that the name on the configuration<br />
page matches the product name in the Print & Fax list.<br />
3. Replace the USB or network cable with a high-quality cable.<br />
The printer driver does not automatically set up the selected<br />
product in the Print & Fax list<br />
1. Make sure that the cables are connected correctly and the product is on.<br />
2. Make sure that the product .GZ file is in the following hard-drive folder: Library/<strong>Printer</strong>s/<br />
PPDs/Contents/Resources. If necessary, reinstall the software.<br />
3. If the GZ file is in the folder, the PPD file might be corrupt. Delete the file and then reinstall the<br />
software.<br />
4. Replace the USB or network cable with a high-quality cable.<br />
<strong>ENWW</strong> Solve product software problems with Mac OS X 123
A print job was not sent to the product that you wanted<br />
1. Open the print queue and restart the print job.<br />
2. Another product with the same or similar name might have received your print job. Print a<br />
configuration page to check the product name. Verify that the name on the configuration page<br />
matches the product name in the Print & Fax list.<br />
When connected with a USB cable, the product does not appear in<br />
the Print & Fax list after the driver is selected.<br />
Software troubleshooting<br />
▲<br />
Make sure that your Mac operating system is Mac OS X 10.5 or later.<br />
Hardware troubleshooting<br />
1. Make sure that the product is turned on.<br />
2. Make sure that the USB cable is connected correctly.<br />
3. Make sure that you are using the appropriate high-speed USB cable.<br />
4. Make sure that you do not have too many USB devices drawing power from the chain. Disconnect<br />
all of the devices from the chain, and then connect the cable directly to the USB port on the<br />
computer.<br />
5. Check to see if more than two non-powered USB hubs are connected in a row on the chain.<br />
Disconnect all of the devices from the chain, and then connect the cable directly to the USB port<br />
on the computer.<br />
NOTE:<br />
The iMac keyboard is a non-powered USB hub.<br />
You are using a generic printer driver when using a USB<br />
connection<br />
If you connected the USB cable before you installed the software, you might be using a generic printer<br />
driver instead of the driver for this product.<br />
1. Delete the generic printer driver.<br />
2. Reinstall the software from the product CD. Do not connect the USB cable until the software<br />
installation program prompts you.<br />
3. If multiple printers are installed, make sure that you have selected the correct printer in the<br />
Format For drop-down menu in the Print dialog box.<br />
124 Chapter 5 Solve problems <strong>ENWW</strong>
Remove software (Windows)<br />
Windows XP<br />
1. Click Start, and then click <strong>Pro</strong>grams.<br />
2. Click <strong>HP</strong>, and then click the product name.<br />
3. Click Uninstall, and then follow the onscreen instructions to remove the software.<br />
Windows Vista and Windows 7<br />
1. Click Start, and then click All <strong>Pro</strong>grams.<br />
2. Click <strong>HP</strong>, and then click the product name.<br />
3. Click Uninstall, and then follow the onscreen instructions to remove the software.<br />
<strong>ENWW</strong> Remove software (Windows) 125
Remove software (Mac OS X)<br />
You must have administrator rights to remove the software.<br />
1. Disconnect the product from the computer.<br />
2. Open Applications.<br />
3. Select Hewlett Packard.<br />
4. Select <strong>HP</strong> Uninstaller.<br />
5. Select the product from the list of devices, and then click the Uninstall button.<br />
6. After the software is uninstalled, restart the computer and empty the Trash.<br />
126 Chapter 5 Solve problems <strong>ENWW</strong>
6 Supplies and accessories<br />
●<br />
●<br />
●<br />
Order parts, accessories, and supplies<br />
<strong>HP</strong> policy on non-<strong>HP</strong> supplies<br />
<strong>HP</strong> anticounterfeit Web site<br />
<strong>ENWW</strong> 127
Order parts, accessories, and supplies<br />
<strong>HP</strong> original toner cartridge or paper<br />
Order genuine <strong>HP</strong> parts or accessories<br />
Order through service or support providers<br />
www.hp.com/go/suresupply<br />
www.hp.com/buy/parts<br />
Contact an <strong>HP</strong>-authorized service or support provider.<br />
Item Part number Cartridge number Description<br />
<strong>HP</strong> <strong>LaserJet</strong> toner cartridge<br />
CF210A (standard)<br />
CF210X (extended life)<br />
131A<br />
131X<br />
Black toner cartridge with <strong>HP</strong><br />
ColorSphere toner<br />
CF211A 131A Cyan toner cartridge with <strong>HP</strong><br />
ColorSphere toner<br />
CF212A 131A Yellow toner cartridge with <strong>HP</strong><br />
ColorSphere toner<br />
CF213A 131A Magenta toner cartridge with <strong>HP</strong><br />
ColorSphere toner<br />
USB 2.0 printer cable C6518A (2-meter standard) A-to-B cable<br />
<strong>HP</strong> policy on non-<strong>HP</strong> supplies<br />
Hewlett-Packard Company cannot recommend the use of non-<strong>HP</strong> toner cartridges, either new or<br />
remanufactured.<br />
NOTE: For <strong>HP</strong> printer products, the use of a non-<strong>HP</strong> toner cartridge or a refilled toner cartridge does<br />
not affect either the warranty to the customer or any <strong>HP</strong> support contract with the customer. However, if<br />
product failure or damage is attributable to the use of a non-<strong>HP</strong> toner cartridge or refilled toner<br />
cartridge, <strong>HP</strong> will charge its standard time and materials charges to service the product for the<br />
particular failure or damage.<br />
<strong>HP</strong> anticounterfeit Web site<br />
Go to www.hp.com/go/anticounterfeit when you install an <strong>HP</strong> toner cartridge and the control-panel<br />
message says the cartridge is non-<strong>HP</strong>. <strong>HP</strong> will help determine if the cartridge is genuine and take steps<br />
to resolve the problem.<br />
Your toner cartridge might not be a genuine <strong>HP</strong> toner cartridge if you notice the following:<br />
●<br />
●<br />
●<br />
The supplies status page indicates that a non-<strong>HP</strong> supply is installed.<br />
You are experiencing a high number of problems with the toner cartridge.<br />
The cartridge does not look like it usually does (for example, the packaging differs from<br />
<strong>HP</strong> packaging).<br />
128 Chapter 6 Supplies and accessories <strong>ENWW</strong>
Index<br />
A<br />
accessories<br />
ordering 127, 128<br />
AirPrint 53<br />
anticounterfeit supplies 128<br />
applications<br />
downloading 57<br />
Apps menu 57<br />
archival-quality printing 45<br />
B<br />
bin, output<br />
locating 2<br />
bins, output<br />
jams, clearing 99<br />
booklets<br />
printing (Mac) 40<br />
printing (Windows) 36<br />
C<br />
canceling<br />
print job (Mac) 43<br />
print job (Windows) 41<br />
cartridges<br />
non-<strong>HP</strong> 128<br />
part numbers 128<br />
recycling 72<br />
replacing 73<br />
storage 72<br />
supplies status page 8<br />
cleaning<br />
paper path 103<br />
<strong>color</strong><br />
Edge Control 49<br />
halftone options 49<br />
matching 49<br />
Neutral Grays 49<br />
printed vs. monitor 49<br />
<strong>color</strong> options<br />
changing manually 49<br />
<strong>HP</strong> EasyColor 46<br />
setting (Mac) 48<br />
setting (Windows) 47<br />
<strong>color</strong> settings<br />
adjusting 107<br />
<strong>color</strong> theme<br />
changing (Windows) 47<br />
<strong>color</strong> usage log 8<br />
configuration page 8<br />
control panel<br />
buttons and lights 4, 5<br />
help 83<br />
Home screen 7<br />
locating 2<br />
menu map, printing 8<br />
message types 84<br />
messages, troubleshooting 84<br />
Reports menu 8, 9<br />
counterfeit supplies 128<br />
D<br />
default gateway, setting 58<br />
defaults, restoring 82<br />
double-sided printing (duplexing)<br />
Mac 38<br />
drivers<br />
changing settings (Mac) 21<br />
changing settings (Windows)<br />
19<br />
presets (Mac) 38<br />
settings (Mac) 38<br />
usage page 8<br />
duplex printing (double-sided)<br />
settings (Windows) 27<br />
duplex settings, changing 60<br />
E<br />
EconoMode setting 67<br />
economy settings 67<br />
Edge Control 49<br />
Embedded Web Server<br />
changing network settings 58<br />
changing password 66<br />
changing product name 59<br />
opening 58, 59, 66<br />
error messages, control panel 84<br />
errors<br />
software 121<br />
F<br />
factory-set defaults, restoring 82<br />
fonts<br />
lists, printing 8<br />
fraud Web site 128<br />
front door, locating 2<br />
G<br />
gateway, setting default 58<br />
grayscale printing, Windows 50<br />
H<br />
help, control panel 83<br />
Home screen, control panel 7<br />
<strong>HP</strong> Device Toolbox, using 62<br />
<strong>HP</strong> Easy Color<br />
disabling 46<br />
using 46<br />
<strong>HP</strong> Embedded Web Server<br />
changing network settings 58<br />
changing password 66<br />
changing product name 59<br />
opening 58, 59, 66<br />
<strong>HP</strong> ePrint, using 51<br />
<strong>HP</strong> fraud Web site 128<br />
<strong>ENWW</strong> Index 129
<strong>HP</strong> Reconfiguration Utility<br />
network installation 56<br />
<strong>HP</strong> Utility for Mac<br />
features 64<br />
opening 64<br />
<strong>HP</strong> Utility, Mac 64<br />
<strong>HP</strong> Web Jetadmin 65<br />
<strong>HP</strong> Web Services<br />
applications 57<br />
enabling 57<br />
<strong>HP</strong> Web Services, enabling 51<br />
I<br />
input tray<br />
locating 2<br />
interface ports<br />
locating 3<br />
IPv4 address 58<br />
J<br />
jams<br />
locating 97<br />
output bin, clearing 99<br />
preventing 96<br />
rear door, clearing 99<br />
tracking number of 8<br />
Jetadmin, <strong>HP</strong> Web 65<br />
L<br />
landscape orientation<br />
changing (Mac) 39<br />
changing (Windows) 30<br />
link speed settings 60<br />
M<br />
Mac<br />
driver settings 21, 38<br />
<strong>HP</strong> Utility 64<br />
problems, troubleshooting 123<br />
managing network 58<br />
matching <strong>color</strong>s 49<br />
media<br />
pages per sheet 39<br />
menus, control panel<br />
map, printing 8<br />
messages, control panel 84<br />
model number, locating 3<br />
multiple pages per sheet 39<br />
printing (Windows) 28<br />
N<br />
n-up printing 39<br />
selecting (Windows) 28<br />
network<br />
password, changing 66<br />
password, setting 66<br />
product name, changing 59<br />
settings, changing 58<br />
settings, viewing 58<br />
network port<br />
locating 3<br />
networks<br />
configuration page 8<br />
default gateway 58<br />
installing the product 56<br />
IPv4 address 58<br />
settings report 8<br />
subnet mask 58<br />
Neutral Grays 49<br />
non-<strong>HP</strong> supplies 128<br />
O<br />
online help, control panel 83<br />
ordering<br />
supplies and accessories 128<br />
ordering supplies<br />
Web sites 127<br />
orientation<br />
changing (Mac) 39<br />
changing (Windows) 30<br />
output bin<br />
locating 2<br />
P<br />
page count 8<br />
page orientation<br />
changing (Mac) 39<br />
changing (Windows) 30<br />
page sizes<br />
scaling documents to fit (Mac)<br />
40<br />
scaling documents to fit<br />
(Windows) 35<br />
pages per sheet 39<br />
selecting (Windows) 28<br />
paper<br />
jams 96<br />
ordering 128<br />
pages per sheet 39<br />
selecting 106<br />
supported sizes 12<br />
supported types 14<br />
paper jams. See jams<br />
paper pickup problems<br />
solving 96<br />
paper sizes<br />
selecting (Mac) 43<br />
selecting (Windows) 41<br />
selecting custom sizes (Mac)<br />
43<br />
selecting custom sizes<br />
(Windows) 41<br />
paper types<br />
selecting (Mac) 39<br />
selecting (Windows) 32<br />
paper, covers<br />
printing (Mac) 40<br />
printing (Windows) 33<br />
part numbers<br />
toner cartridges 128<br />
PCL font list 8<br />
portrait orientation<br />
changing (Mac) 39<br />
changing (Windows) 30<br />
ports<br />
locating 3<br />
power-down delay<br />
setting 68<br />
presets (Mac) 38<br />
print job<br />
canceling (Mac) 43<br />
canceling (Windows) 41<br />
print media<br />
supported 12<br />
print quality<br />
improving 101<br />
print quality page<br />
interpreting 104<br />
printing 104<br />
printer driver (Windows)<br />
supported 18<br />
printer drivers<br />
choosing 108<br />
printer drivers (Mac)<br />
changing settings 21<br />
settings 38<br />
printer drivers (Windows)<br />
changing settings 19<br />
130 Index <strong>ENWW</strong>
printing<br />
from USB storage accessories<br />
54<br />
product reports 8, 9<br />
settings (Mac) 38<br />
printing on both sides<br />
settings (Windows) 27<br />
problem-solving<br />
no response 110<br />
slow response 111<br />
PS font list 8<br />
R<br />
rear door<br />
jams 99<br />
locating 3<br />
recycling supplies 72<br />
replacing toner cartridges 73<br />
reports<br />
Color Usage Log 8<br />
Config Report 8<br />
Demo Page 8<br />
Diagnostics Page 8<br />
Menu Structure 8<br />
Network Summary 8<br />
PCL Font List 8<br />
PCL6 Font List 8<br />
Print Quality Page 8<br />
PS Font List 8<br />
Service Page 8<br />
Supplies Status 8<br />
Usage Page 8<br />
Reports menu 8, 9<br />
resize documents<br />
Mac 40<br />
Windows 35<br />
restoring factory-set defaults 82<br />
S<br />
scale documents<br />
Mac 40<br />
Windows 35<br />
serial number, locating 3<br />
service page 8<br />
settings<br />
driver presets (Mac) 38<br />
drivers 19<br />
drivers (Mac) 21<br />
factory-set defaults, restoring<br />
82<br />
network report 8<br />
shortcuts (Windows)<br />
creating 24<br />
using 23<br />
sleep delay<br />
disabling 67<br />
enabling 67<br />
software<br />
<strong>HP</strong> Utility for Mac 64<br />
<strong>HP</strong> Web Jetadmin 65<br />
problems 121<br />
uninstalling for Mac 126<br />
uninstalling for Windows 125<br />
solving<br />
walk-up USB printing<br />
problems 112<br />
special paper for covers<br />
printing (Mac) 40<br />
printing (Windows) 33<br />
status<br />
Home screen, control panel 7<br />
<strong>HP</strong> Utility, Mac 64<br />
supplies, printing report 8<br />
storing<br />
toner cartridges 72<br />
subnet mask 58<br />
supplies<br />
counterfeit 128<br />
non-<strong>HP</strong> 128<br />
ordering 127, 128<br />
part numbers 128<br />
recycling 72<br />
status, viewing with <strong>HP</strong> Utility<br />
for Mac 64<br />
supplies status page 8<br />
supported paper 12<br />
T<br />
TCP/IP<br />
manually configuring IPv4<br />
parameters 58<br />
toner cartridges<br />
checking for damage 105<br />
door, locating 2<br />
non-<strong>HP</strong> 128<br />
part numbers 128<br />
recycling 72<br />
replacing 73<br />
storage 72<br />
supplies status page 8<br />
trapping 49<br />
Tray 1<br />
double-sided printing 38<br />
trays<br />
double-sided printing 38<br />
jams, clearing 97<br />
supported paper types 14<br />
troubleshooting<br />
checklist 80<br />
control panel messages 84<br />
jams 96<br />
Mac problems 123<br />
network problems 115<br />
paper feed problems 96<br />
USB connection 114<br />
walk-up USB printing<br />
problems 112<br />
Windows problems 121<br />
wired network 115<br />
wireless network 117<br />
two-sided printing<br />
settings (Windows) 27<br />
U<br />
uninstalling Mac software 126<br />
uninstalling Windows software<br />
125<br />
usage page 8<br />
USB cable, part number 128<br />
USB connection<br />
troubleshooting 114<br />
USB port<br />
locating 3<br />
USB storage accessories<br />
printing from 54<br />
W<br />
walk-up USB printing 54<br />
watermarks<br />
printing (Mac) 43<br />
printing (Windows) 42<br />
Web Services<br />
applications 57<br />
enabling 57<br />
Web sites<br />
fraud reports 128<br />
ordering supplies 127<br />
<strong>ENWW</strong> Index 131
Windows<br />
driver settings 19<br />
wireless network<br />
troubleshooting 117<br />
wireless network interference 120<br />
132 Index <strong>ENWW</strong>
© 2012 Hewlett-Packard Development Company, L.P.<br />
www.hp.com