user's guide alfa 1050 / 1100 alfa 2050 / 2100 - Retrocomputing.net
user's guide alfa 1050 / 1100 alfa 2050 / 2100 - Retrocomputing.net
user's guide alfa 1050 / 1100 alfa 2050 / 2100 - Retrocomputing.net

Create successful ePaper yourself
Turn your PDF publications into a flip-book with our unique Google optimized e-Paper software.
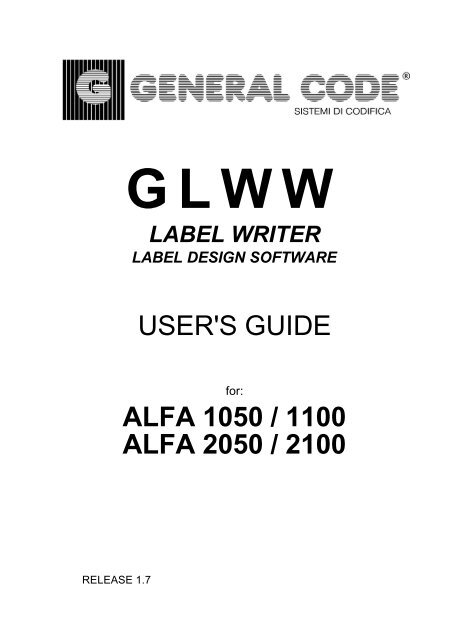
GLWW<br />
LABEL WRITER<br />
LABEL DESIGN SOFTWARE<br />
USER'S GUIDE<br />
for:<br />
ALFA <strong>1050</strong> / <strong>1100</strong><br />
ALFA <strong>2050</strong> / <strong>2100</strong><br />
RELEASE 1.7
Gazelle Label Writer Label Design Software<br />
User's Guide<br />
© 1995 GENERAL CODE - MATRIX All rights reserved.<br />
Release 1.7, revised February 1995<br />
GLWW version 2.50 and above<br />
Trademark Acknowledgements<br />
This application makes use of the Bitstream® 4-in-1 Processor, Version 3.1.<br />
Specifically, it uses Bitstream® Speedo font-scaling technology to print characters<br />
in the typefaces selected. The Bitstream® Swiss 721, Swiss 721 Bold, News<br />
701 and Impress typefaces are included with this application.<br />
Bitstream is a registered trademark and Speedo and Swiss are trademarks of<br />
Bitstream Inc. US. Patent No. 5,099,435.<br />
MS-DOS® is a registered trademark and Windows is a trademark of Microsoft<br />
Corporation.<br />
PC-DOS is a registered trademark of International Business Machines<br />
Corporation and Microsoft Corporation.<br />
dBase, dBase III, dBase III Plus, dBase IV are registered trademarks of Ashton-Tate<br />
Inc.<br />
GLWW software is produced for GENERAL CODE by MATRIX Developments Ltd<br />
GENERAL CODE<br />
Via P.S. Mattarella, 69<br />
30037 GARDIGIANO (VE) - ITALY<br />
Tel: 041-449888 International: +39-41-449888<br />
Fax: 041-449730 International: +39-41-449730<br />
GENERAL CODE products are subject to continuous development and<br />
improvement and consequently may incorporate minor changes from the information<br />
contained in this manual.<br />
GENERAL CODE GLWW Label Design Software - User's Guide Page 1
TABLE OF CONTENTS<br />
1 Getting Started....................................................................................................1<br />
1.1 Introduction...............................................................................................1<br />
1.2 Main Features............................................................................................1<br />
1.3 Package Contents......................................................................................1<br />
1.4 Requirements.............................................................................................2<br />
1.5 Installation..................................................................................................2<br />
1.6 Product Registration...................................................................................3<br />
2 Label Design Overview......................................................................................4<br />
2.1 The Label Screen.......................................................................................4<br />
2.2 Mouse Functions........................................................................................4<br />
2.3 Function Keys............................................................................................4<br />
2.4 Data Entry Conventions..............................................................................5<br />
2.5 Help Messages ..........................................................................................5<br />
3 Running the Software..........................................................................................6<br />
3.1 Running GLWW........................................................................................6<br />
4 Label Editor Menu..............................................................................................7<br />
4.1 File Menu ..................................................................................................7<br />
4.1.1 Create New Label...............................................................................7<br />
4.1.2 Load Label..........................................................................................8<br />
4.1.3 Save Label...........................................................................................8<br />
4.1.4 Save Label As .....................................................................................9<br />
4.1.5 Rename File.........................................................................................9<br />
4.1.6 Delete File ...........................................................................................9<br />
4.1.7 Print Label...........................................................................................9<br />
4.1.8 Shell to DOS .......................................................................................9<br />
4.1.9 Exit......................................................................................................10<br />
4.2 Edit Menu..................................................................................................10<br />
4.2.1 Edit Field .............................................................................................10<br />
4.2.2 Delete Field .........................................................................................11<br />
4.2.3 List Fields............................................................................................11<br />
4.2.4 Edit Label Size.....................................................................................11<br />
4.2.5 Edit Stationery Type.............................................................................11<br />
4.2.6 Change Printer Setup ...........................................................................12<br />
4.3 Options Menu............................................................................................12<br />
4.3.1 Select Grid Size ...................................................................................14<br />
4.3.2 Select Measurement Units....................................................................14<br />
4.3.3 Select Mouse Speed............................................................................14<br />
4.3.4 Directory Sort......................................................................................14<br />
5 Label Editor.........................................................................................................15<br />
5.1 Fixed Text Parameter Screen.....................................................................17<br />
5.2 Variable Text Parameter Entry....................................................................17<br />
5.3 Fixed Barcode Parameter Entry Dialog.......................................................18<br />
5.4 Variable Barcode Parameter Entry Dialog...................................................19<br />
5.4.1 Text Database Field Parameter Entry Dialog.........................................20<br />
5.4.2 dBase Database Field Parameter Entry Dialog......................................21<br />
GENERAL CODE GLWW Label Design Software - User's Guide Page 2
5.4.3 Auto Date/Time Dialog.........................................................................22<br />
5.5 Date Entry Dialog.......................................................................................22<br />
5.6 Time Entry Dialog......................................................................................23<br />
5.7 Box/Line Entry Dialog................................................................................23<br />
5.8 PCX Logo File Entry Dialog.......................................................................23<br />
5.9 Text File Entry Dialog.................................................................................24<br />
5.10 Font Selector..........................................................................................25<br />
6 Configuration Utility............................................................................................27<br />
6.1 Barcode Defaults .......................................................................................27<br />
6.2 Communications Settings............................................................................28<br />
6.3 Printer Selection.........................................................................................28<br />
6.4 Passwords.................................................................................................29<br />
6.5 Paths .........................................................................................................29<br />
6.6 Exit Configuration.......................................................................................29<br />
7 Print Utility ..........................................................................................................30<br />
7.1 Print Queue................................................................................................30<br />
7.2 Label Menu ...............................................................................................31<br />
7.2.1 Add Label Format ...............................................................................31<br />
7.2.2 Remove Label Format..........................................................................31<br />
7.2.3 Copies.................................................................................................31<br />
7.2.4 Shell to DOS .......................................................................................32<br />
7.2.5 Exit......................................................................................................32<br />
7.3 Printer Menu..............................................................................................32<br />
7.3.1 Start/Stop Preparation..........................................................................32<br />
7.3.2 Pause/Restart Output to Printer ............................................................32<br />
7.3.3 Stop Printer .........................................................................................32<br />
7.4 Options Menu............................................................................................33<br />
7.4.1 Pause Between Formats.......................................................................33<br />
7.4.2 Preview Labels ....................................................................................33<br />
7.4.3 Start Printing After Add........................................................................33<br />
7.4.4 Reset Counter......................................................................................33<br />
7.5 Quick Print Mode......................................................................................33<br />
7.6 Printing Trouble Shooting ...........................................................................34<br />
8 Download to DT32 ..............................................................................................35<br />
8.1 Download Format......................................................................................35<br />
8.2 Create New Batch of Formats....................................................................35<br />
8.3 Edit Batch List ...........................................................................................36<br />
8.4 Download Batch of Formats.......................................................................36<br />
8.5 Exit............................................................................................................36<br />
9 Shell to DOS........................................................................................................37<br />
10 Exit.......................................................................................................................37<br />
Appendix A - Supported Character Set.......................................................................38<br />
Appendix B - Codepages and Language Specific Characters.......................................39<br />
Appendix C - GLWW Installation Notes.....................................................................40<br />
GENERAL CODE GLWW Label Design Software - User's Guide Page 3
1 GETTING STARTED<br />
1.1 Introduction<br />
Welcome to Gazelle Label Writer, the latest label design and printing software from GENERAL<br />
CODE, which provides a user-friendly front end to the ALFA <strong>1050</strong>-<strong>2050</strong>-<strong>1100</strong>-<strong>2100</strong> Direct<br />
Thermal/Thermal Transfer printers. The software provides all of the features necessary to design<br />
and print custom label formats quickly and easily in a variety of sizes and styles. It has now been<br />
extensively updated to provide a host of additional features which make it more powerful, but<br />
easier to use.<br />
1.2 Main Features<br />
GLWW is a DOS based programme that enables complex labels to be designed with full What-<br />
You-See-Is-What-You-Get (WYSIWYG) on screen capabilities. The software has features to<br />
enable a variety of text, barcode formats and graphics to be reproduced easily and quickly. It<br />
provides fixed and variable fields for text and barcodes, auto-increment fields, dBase III/IV and<br />
text database access, PCX format images and automatic date and time stamping at print time.<br />
The software uses Bitstream® Speedo fonts matching those contained in ALFA printers for<br />
maximum typographical flexibility. Handling of PCX format images has been improved in<br />
GLWW V2.4 allowing scaling and rotation of black and white and true 256-greyscale images.<br />
Print queuing of multiple printers simultaneously reduces waiting time combined with a flexible<br />
and informative status report.<br />
A demonstration version of the software is available which has all the features of the full package<br />
but with the following restrictions: The software will only enable you to save and print a file called<br />
DEMO.LBL, and when the label is printed an additional line of text "Demonstration Version" is<br />
printed at the top of the label.<br />
1.3 Package Contents<br />
The software is supplied in its own case folder which includes the following items :-<br />
GLWW Diskette<br />
Users Manual<br />
Security Dongle<br />
Registration Card<br />
GENERAL CODE GLWW Label Design Software - User's Guide Page A
1.4 Requirements<br />
In order to run the software you will need a computer which has the following minimum hardware<br />
:-<br />
640K of RAM (Minimum 520K free)<br />
Hard disk (Minimum 1.6 MBytes free)<br />
VGA card and monitor<br />
Microsoft compatible Mouse<br />
A parallel or serial port for the printer<br />
You are strongly recommended to be running DOS 5.0 or later and have 384K of expanded<br />
memory available. Smartdrive or any other disk cache can also increase performance.<br />
GLWW is designed to work with all the latest ALFA printers having firmware revision 1.20 or<br />
later. Many older printers can also be supported or updated. Contact your supplier for further<br />
details.<br />
1.5 Installation<br />
The software is contained on a single diskette which includes installation routines for Windows<br />
and DOS. Use whichever is most convenient to you. If you encounter problems with the<br />
installation, refer to Appendix C for further details.<br />
To perform a Windows Setup:<br />
1. Place the diskette in your floppy disk drive (usually either A: or B:)<br />
2. Start Windows. Select Run from the File menu and enter:<br />
X:\SETUP.EXE<br />
replacing X with the floppy disk drive name.<br />
3. During setup, the GLWW Configuration Utility will be run. Enter the appropriate details<br />
and select Exit from the Configure menu. (For details on using the Configuration Utility,<br />
see Section 6.)<br />
4. To start GLWW, double click on the GLWW icon in the Program Manager.<br />
To perform a DOS Installation:<br />
1. Place the diskette in your floppy disk drive (usually either A: or B:)<br />
GENERAL CODE GLWW Label Design Software - User's Guide Page B
2. Change to the floppy disk chosen (normally type A: or B:) and run Install using the<br />
format:<br />
INSTALL <br />
where - drive: is the drive name where the files<br />
are to be copied to (e.g. C: or D:)<br />
- directory is the name of the directory<br />
into which the files will be copied (This<br />
is often \GLWW)<br />
Example INSTALL C:\GLWW<br />
3. During installation, the GLWW Configuration Utility will be run. Enter the appropriate<br />
details and select Exit from the Configure menu. (For details on using the Configuration<br />
Utility, see Section 6.<br />
4. For optimum performance, GLWW requires 384K of expanded memory. If you do not<br />
already have EMM386 installed, add the following line to your CONFIG.SYS file :-<br />
DEVICE = EMM386.EXE AUTO<br />
Where is the directory containing the EMM386 program.<br />
5. To start GLWW, change to its directory and type GLWW.<br />
1.6 Product Registration<br />
Please complete the registration card enclosed with the software package as soon as you have<br />
completed the installation. Completing the registration card will entitle you to receive Technical<br />
Support, and also to be included on our mailing list, which will ensure that you receive priority<br />
details on any new products and upgrades that are introduced.<br />
Extended Support for the software is available for an annual subscription, which will entitle you to<br />
free product upgrades. For further information on extended support please tick the box on the<br />
registration card.<br />
GENERAL CODE GLWW Label Design Software - User's Guide Page C
2 LABEL DESIGN OVERVIEW<br />
2.1 The Label Screen<br />
The label screen shows a graphical representation of the label on the screen exactly as it will<br />
appear when printed. The various fields in the label format may be re-positioned with the mouse<br />
and the data changed by selecting the field. When placing new fields, the data type is selected by<br />
means of the icons at the bottom of the screen, which represent the various field types.<br />
2.2 Mouse Functions<br />
The following terms are used to describe the actions of the mouse referred to in this manual :-<br />
CLICK ON means to position the cursor over the desired item and to press and release the left<br />
mouse button.<br />
DRAG means to position the cursor over the desired item and depress the mouse button, and<br />
while continuing to hold the button down, move the mouse to reposition the object on the screen.<br />
As you drag, you will see an outline of the item you are re-positioning.<br />
LEFT MOUSE BUTTON is used to select a particular field for editing or re-positioning. Field<br />
icons are also selected using the left button<br />
RIGHT MOUSE BUTTON is used to edit the contents of a particular field. When a field has<br />
been selected, click on the field to bring up the field editor screens.<br />
2.3 Function Keys<br />
The following function key can be used to achieve keyboard shortcuts for some of the functions,<br />
details of the particular function keys available are shown in each menu and at the bottom of the<br />
label editor menu screen :-<br />
FUNCTION KEY<br />
F1<br />
F2<br />
F3<br />
F4<br />
F5<br />
F7<br />
F8<br />
F9<br />
OPERATION<br />
On-Line Help<br />
Create New Label<br />
Load Label<br />
Save Label<br />
Print Label Format<br />
DOS Shell<br />
Edit Label Field<br />
Label Editor Menu/Layout Toggle<br />
GENERAL CODE GLWW Label Design Software - User's Guide Page D
2.4 Data Entry Conventions<br />
To enter data or values into any of the dialog boxes you have to select the individual parameter<br />
box that you wish to enter or edit data using the left mouse button. Information may then be<br />
typed into the box using the keyboard. When all of the information for a particular dialog has<br />
been entered select the appropriate action required by clicking on the box at the bottom of the<br />
dialog. Boxes which can be edited will normally be displayed in reverse text, and boxes which<br />
"open" into another dialog are shown by means of the box details being surrounded by < ><br />
characters.<br />
2.5 Help Messages<br />
Comprehensive context sensitive help is available at all times in the program. The help messages<br />
are displayed by either pressing F1 or by clicking the left mouse button on the help menu or icon.<br />
To move through a topic, use the arrows on the scroll bar or the cursor keys. A master index of<br />
available topics is available from the Help menu in the Label Editor or Print programs.<br />
GENERAL CODE GLWW Label Design Software - User's Guide Page E
3 RUNNING THE SOFTWARE<br />
3.1 Running GLWW<br />
To run GLWW from DOS you must follow the steps below :-<br />
1. Change to the GLWW directory (Type CD\GLWW)<br />
2. Run the main programme (Type GLWW)<br />
To run GLWW from Windows, double click on the GLWW icon in the Program Manager.<br />
The programme will load and take you into the main menu selection screen.<br />
3.2 The Main Menu<br />
The software is based around a main menu which allows access to all of the functions of the<br />
software. Each function is selected by clicking with the mouse pointer. The options that are<br />
available from the main menu are shown in Fig 1 below :-<br />
Fig 1 Gazelle Label Writer Main Menu<br />
The function of each of the menu selections is detailed in the following sections.<br />
GENERAL CODE GLWW Label Design Software - User's Guide Page F
4 LABEL EDITOR MENU<br />
The Label Editor menu is displayed across the top of the screen as a row of pull-down menus.<br />
To select a menu either click on the particular function with the mouse or press the ALT key<br />
followed either by the highlighted letter from the function name, or by using the left/right arrow<br />
keys. To the right of the menu bar, the current units, label format name (an asterisk next to the<br />
name, indicates the file has not been saved) and the size of the current label format are displayed.<br />
4.1 File Menu<br />
The File Menu commands are used to manipulate files with such operations as opening, saving,<br />
renaming and printing files.<br />
Fig 2 File Menu<br />
The menu is selected by clicking on the File button on the menu bar (Alt-F) which then displays<br />
the pull-down menu above. Options may be selected using the mouse, hot key letter or the<br />
cursor navigation buttons.<br />
4.1.1 Create New Label<br />
Click on the file menu heading with the mouse and select the Create New Label function, which<br />
will bring up the Create New Label dialog box. The shortcut key for this command is F2.<br />
Fig 3 Create New Label Dialog<br />
GENERAL CODE GLWW Label Design Software - User's Guide Page G
The dialog box allows you to enter the name for the new label format, which should follow<br />
normal DOS conventions of 8 characters. The label name can contain spaces but it is not<br />
recommended. An LBL extension will automatically be added to the new label filename. The<br />
dimensions of the printed area of the label should be entered and the position of this area within<br />
the physical label should also be specified. The label must be no wider or longer than the<br />
currently configured printer will allow.<br />
Double Image Printing can also be enabled and the offset from one image to the next specified.<br />
Double Image Printing prints the same print area twice on the label, one image above the other,<br />
useful for example if printing box end labels. The offset between the first and second images<br />
should also be specified.<br />
4.1.2 Load Label<br />
This command lets you load an existing label formats. Activating this option brings up the Load<br />
Label dialog box. The shortcut key for this command is F3.<br />
Fig 4 Load Label Dialog<br />
The dialog box for the load label produces a list of all of the label format in the default directory.<br />
The required file can either be selected from the list of files, or by typing the file name into the<br />
Filename box. The current directory can be changed by editing the directory name in the<br />
Directory box. A filter, following the normal DOS conventions, can be typed into the Filename<br />
box to reduce the numbers of files listed. Example "TH*7" would only list labels starting with<br />
"TH" and ending with "7".<br />
4.1.3 Save Label<br />
The Save Label command lets you save to disk the current label format that is being worked on<br />
in the editor. The shortcut key for this command is F4<br />
If passwords are enabled in the Option menu, the Save command will ask you to enter a<br />
password which will be use to protect this particular label format, and can be different to the<br />
passwords defined in the password function in the configuration menu.<br />
The programme will automatically request you to save the current label format prior to exiting the<br />
editor, printing or downloading the label.<br />
GENERAL CODE GLWW Label Design Software - User's Guide Page H
4.1.4 Save Label As<br />
The Save Label As function allows you to save the current label format with a different name,<br />
whilst maintaining the original label format file. This is useful when you wish to create a new label<br />
which is similar to an existing label format.<br />
The Save Label As dialog shows the standard file selector list which allows you to either type the<br />
name of a new label format, or to save the file with an existing filename which would overwrite<br />
any existing data in that file.<br />
The directory, descriptor and files listed may be changed, in the manner described for the Load<br />
Label operation.<br />
4.1.5 Rename File<br />
This function allows you to take any existing label format and to save it with a different filename.<br />
This command will not create another copy of the file, but will changes the filename of the label,<br />
similar to the DOS command "REN".<br />
The Rename dialog lets you select an existing file from the scroll window, or to type the name of<br />
the file into the File Name box. The name of the new file is typed into the Rename To box.<br />
The directory, descriptor and files listed may be changed in the manner described for the Load<br />
Label operation.<br />
4.1.6 Delete File<br />
The Delete file command lets you delete an existing label format file. Care should be taken when<br />
using this function as once a file has been deleted it is not possible to undelete the file.<br />
The Delete dialog shows the standard file selector list which enables you to select an existing file<br />
and delete it by responding OK at the bottom of the dialog.<br />
4.1.7 Print Label<br />
The Print Label command runs the GLWW Print with the current label format as the first label for<br />
printing. The form of GLWW Print is determined by the Quick Print option in the Options Menu.<br />
If you have not saved your current label format before you exit, you will be warned and given a<br />
last opportunity to save it.<br />
For details on using the GLWW Print Utility, see section 7.<br />
4.1.8 Shell to DOS<br />
Shell to DOS is a duplication of the Shell to DOS command on the GLWW Menu. The GLWW<br />
Editor leaves little room for other applications so you may not be able to run many application<br />
from this shell.<br />
GENERAL CODE GLWW Label Design Software - User's Guide Page I
For details on using Shell to DOS, see section 9.0.<br />
4.1.9 Exit<br />
This will exit the editor and will take you back to the GLWW Menu. If you have not saved your<br />
current label format before you exit, you will be warned and given a last opportunity to save it.<br />
4.2 Edit Menu<br />
The Edit menu provides an alternative way of editing the fields in the label format, which is often<br />
useful when you need to edit, list or delete the contents of the fields in the label format, but not to<br />
change the positional information of the fields, which is best done in the WYSIWYG screen. It<br />
also enables you to change the details entered when the label was created and the printer<br />
defaults.<br />
4.2.1 Edit Field<br />
Fig 5 Edit Menu<br />
The Edit Field command allows any of the fields in the current label format to be edited or<br />
viewed in the WYSIWYG screen. The shortcut key for this function is F8.<br />
GENERAL CODE GLWW Label Design Software - User's Guide Page J
The Dialog box for this function shows a list of all of the fields displayed in field number order.<br />
Each field has the type of field shown and the contents of the field. A typical example of the Edit<br />
Field dialog box is shown in Fig 7 below :-<br />
Fig 6 Edit Field Menu<br />
To select a field, highlight it using either the mouse or the cursor keys. Choosing the Edit function<br />
will bring up the standard dialog parameter box for the type of field selected. Any of the<br />
parameters may be changed using this function, and when completed will return you to the Edit<br />
Field screen. To confirm that changes made are correct the View function displays the standard<br />
WYSIWYG screen.<br />
4.2.2 Delete Field<br />
The Delete Fields dialog box is very similar to the Edit fields dialog box. The View and Edit<br />
buttons are replaced by a Delete button. To delete a field, select a field from the list, click on the<br />
delete and wait for the confirmation dialog box. To delete the field, select Delete from this Dialog<br />
box.<br />
It is normally easier to delete a field by clicking on the field with the right button on the layout<br />
screen and selecting the delete button from the dialog box but this process is an alternative<br />
method which avoids need to use the graphics screen.<br />
4.2.3 List Fields<br />
The List Fields dialog box contains a list of the fields in a label format with each fields' type, X<br />
and Y co-ordinates and an abbreviated form of their contents.<br />
4.2.4 Edit Label Size<br />
This function displays the dialog box used for the Create Label function. The label size, stationery<br />
type, X and Y offset, cutter position and double image printing can be changed.<br />
For more details about this dialog box, see Create New Label (section 4.1.1).<br />
4.2.5 Edit Stationery Type<br />
GENERAL CODE GLWW Label Design Software - User's Guide Page K
Click on the Edit menu heading with the mouse and select Edit Stationery Type, which will<br />
display the Stationary Type dialog box.<br />
Fig 7 Stationary Type<br />
The Stationary Type dialog box tells GLWW the type of stationery you intend to use. The<br />
Stationery Type field contains a free-form description of the stationery for reference. If you are<br />
using stationery with multiple labels across the web, click on the Labels Across Web text box<br />
and enter the number. Then click on Horizontal Label Pitch and enter the offset from the start of<br />
one label to the start of the next.<br />
For continuous stationery, you must enter the height of the label to be ejected by the printer. If<br />
the cutter is fitted and the option selected in the Printer dialog box in GLWW Configure, another<br />
section will be displayed where the cutter can be disabled, activated at the end of each label or<br />
the end of each batch of labels by selecting the appropriate option.<br />
For Phoenix Printer/applicators, you also can define whether the label is for a right or left hand<br />
constructed machine. (ALFA Printers are normally left hand.)<br />
4.2.6 Change Printer Setup<br />
This function displays a dialog box which allows the print density, print speed and paper type to<br />
be set independently of the default printer settings. The dialog box is similar to the Printer<br />
Selection dialog box in the Configuration Utility. You can also select the default printer to be used<br />
at print time.<br />
For more details about this dialog box, see Printer Section, 6.6.<br />
4.3 Options Menu<br />
GLWW, and in particular, the GLWW Editor contain a number of aspects that can be<br />
configured to the <strong>user's</strong> taste. The items on the Options Menu do not change the final label format<br />
but make the GLWW environment and the GLWW Editor easier to use.<br />
The Options Menu contains a number of menu items that reverse their meaning when selected.<br />
For example, Hide Logos toggles to Show Logos. The current state is therefore the reverse of<br />
that shown on the menu. Each of the items on the menu gets a fuller explanation below.<br />
GENERAL CODE GLWW Label Design Software - User's Guide Page L
Fig 8 Options Menu<br />
Overwrite/Backup Existing Files - When a label that already exists is saved, the previous copy<br />
would normally be overwritten. If a mistake had been made in<br />
changing the label, the original version would have been lost.<br />
GLWW will either backup the original label (to filename.bak,<br />
where filename is the label format name) or will warn you that<br />
you are going to overwrite the file and ask you to confirm this is<br />
what you want to do.<br />
Request/Do not Request Descriptors - GLWW allows the user to add some freeform<br />
information about a label format or a field on the label. This<br />
information is requested when the label format is created or<br />
edited, if this option is set to request it. Although the information<br />
is often of use, the regular requests slow down the creation<br />
process.<br />
Enable/Disable File Password Requests -GLWW supports file passwords which if set are<br />
requested before a label format is loaded. If this option is set to<br />
Enabled, a dialog password is display every time a label is saved<br />
requesting the password needed for reloading the label.<br />
Enable/Disable Quick Print -<br />
Quick Printing mode is a method of printing a label format<br />
without using print queues. It is only available from GLWW<br />
Editor and is used when this option is set.<br />
Hide/Show Logos as Graphic Images - A label format containing many fields, may display slowly<br />
on older computers, logos taking longer to display than other<br />
fields. They can be replaced by a rectangle with the logo's name<br />
in the centre by selecting this menu item.<br />
Hide/Show Outlines -<br />
When this option is set to Show Outlines, a rectangle surrounds<br />
each fields display in the Label Editor for clarity.<br />
GENERAL CODE GLWW Label Design Software - User's Guide Page M
Show/Hide Grid -<br />
A visible grid can make lining up fields on a label format easier<br />
but a fine grid can take a little time to display on a slow<br />
computer.<br />
Enable/Disable Snap to Grid - When this option is enabled any field that is moved or created on<br />
a label is forced to line up with the grid.<br />
4.3.1 Select Grid Size<br />
A background grid can be selected to aid field positioning. To select the grid spacing required<br />
click on the selection. Time is taken to draw the grid when the display is refreshed so it is<br />
recommended not to use a smaller grid than necessary. Confirm the selection by clicking OK, or<br />
Cancel by clicking on Cancel.<br />
The grid can be visible or hidden by selecting Show Grid or Hide Grid from the Options menu.<br />
4.3.2 Select Measurement Units<br />
The default measurement unit used by the label editor to define the label size can be specified.<br />
The options available for you to chose are Dots, Millimetres or inches. When you have selected<br />
the unit required click on OK to accept the changes or Cancel to exit without saving.<br />
4.3.3 Select Mouse Speed<br />
The mouse speed (amount of cursor movement to mouse movement) can be varied over<br />
approximately a 10:1 range. Not all mice support the double speed option so you may need to<br />
experiment. When you have selected the mouse parameters click on OK to accept the changes<br />
or Cancel to exit without saving.<br />
4.3.4 Directory Sort<br />
You can choose that the directory listing shown when you load, save, rename or delete a file<br />
should be sorted alphabetically (in ascending or descending order) by selecting one of the options<br />
in the directory sort box.<br />
If you have more than 200-300 files in your directories, sorting the files will be quite slow. You<br />
may find it helpful to sort your labels into categories and store each category in a separate<br />
subdirectory.<br />
When you have selected the required sort click on OK to accept the changes or Cancel to exit<br />
without saving.<br />
GENERAL CODE GLWW Label Design Software - User's Guide Page N
5 LABEL EDITOR<br />
The label editor takes you into a screen with a row of pull-down menus across the top to enable<br />
all of the functions to be selected. To design a new label select Create New Label (Alt F C) or<br />
press F2. The label format parameters screen should be completed to define the label size, file<br />
name and paper position. After accepting the parameters you are taken into the layout screen<br />
which allows you to design the label with full WYSIWYG display.<br />
The icons at the bottom of the screen allow you to select the particular design tool required<br />
according to the particular field that you wish to place on the label format. The field function is<br />
selected by clicking on the particular icon with the left mouse button, which causes the icon to be<br />
highlighted. To enter data for a particular field, position the cursor at the top left-hand corner of<br />
field and press the right hand mouse button. The relevant parameter screen appears to enable the<br />
data to be entered. When the parameters have been accepted, by clicking on OK, the field will<br />
be displayed on the layout screen. The field may then be re-positioned by clicking and holding<br />
down the left mouse button and dragging the field to the new position. Having selected a<br />
particular field, pressing the right mouse button will take you back to the field parameters screen.<br />
Boxes, lines and graphics files can be resized by holding down a shift button, clicking on the<br />
image with the left mouse button and dragging the outline to the correct size.<br />
Function<br />
Text - Fixed<br />
Text - Variable<br />
Barcode - Fixed<br />
Barcode - Variable<br />
Date<br />
Time<br />
Line/Box<br />
Picture<br />
Text File<br />
Copy Field<br />
Centre Horizontally<br />
Use<br />
Alphanumeric fixed text field<br />
Alphanumeric text field which<br />
allows variable data entry at print<br />
time<br />
Fixed barcode data field<br />
Barcode field that allows data to<br />
be entered at print time<br />
Date field that picks up current<br />
date at print time<br />
Time field that picks up current<br />
time when label is printed<br />
Create line or box fields<br />
Place PCX format clip art<br />
Place ASCII text file into label<br />
Duplicates the last used field and<br />
displaces the copy down and<br />
right. The last used field is the last<br />
field moved, changed or created<br />
on the graphics screen since the<br />
label format was loaded/created.<br />
Centres the last used field<br />
horizontally on the label<br />
GENERAL CODE GLWW Label Design Software - User's Guide Page O
Centre Vertically<br />
View Window (Larger<br />
labels only)<br />
Menu<br />
Help<br />
Template/Printed<br />
Centres the last used field<br />
vertically on the label<br />
Choose the area of the label to<br />
view on screen by moving mouse<br />
and then click left mouse button.<br />
Go to Label Editor main menu<br />
Select help text<br />
Toggle between printed data and<br />
template fields that enable defined<br />
areas to be "mapped" onto label<br />
format.<br />
On a colour monitor the colour will denote the type of field that has been defined according to the<br />
following table :-<br />
Colour<br />
Black<br />
Green<br />
Red<br />
Field Type<br />
Fixed<br />
Variable<br />
Template<br />
GENERAL CODE GLWW Label Design Software - User's Guide Page P
5.1 Fixed Text Parameter Screen<br />
The fixed text parameter screen is shown in Fig 10 below.<br />
Fig 10 Fixed Text Dialog<br />
To add/change the contents of the text field click on the Field Contents Box and type in the<br />
required data string. The characters are always left justified in the field.<br />
The font size for the text can be changed by clicking on the Change Font box. The current font<br />
size will be shown in the box. If you choose to change the font a dialogue box is displayed which<br />
enables you to change the selected font and character size.<br />
The orientation of the text on the label may be changed by changing the required selection from a<br />
choice of 0°, 90, 180° or 270°. The default orientation is 0°. The X-Y co-ordinates for the field<br />
may be specified by typing the required values into the X or Y ORIGIN boxes.<br />
When all of the parameters have been entered click on OK to create the new field. If you want<br />
to cancel the new field click on Delete.<br />
5.2 Variable Text Parameter Entry<br />
The variable text function allows you to define text fields within the label, and to enter the actual<br />
text at the time of printing, either directly from the PC, or by means of the DT32 Data Terminal.<br />
You can define the variable field text as incrementing, or decrementing with the initial value<br />
entered at print time.<br />
For more details of the various types of variable field text, see section 5.4.<br />
To select the maximum number of user entered characters in the field enter the required value in<br />
the Field Length box.<br />
GENERAL CODE GLWW Label Design Software - User's Guide Page Q
5.3 Fixed Barcode Parameter Entry Dialog<br />
The fixed barcode entry dialog allows you to enter the data for fields that will have a fixed<br />
barcode. The format for the dialog screen is shown below :-<br />
Fig 11 Fixed Barcode Parameter Entry Screen<br />
Select the required barcode symbology from the list on the left hand side of the dialog box.<br />
Some of the symbologies are available with formats that will print both with and without check<br />
digit calculations. The selection of the barcode will determine the default number of characters in<br />
the barcode, which dependent upon the symbology chosen may be changed by entering the<br />
required length in the field length box. A value for the barcode must be entered, or the default<br />
string will be used.<br />
The height of the barcode can be changed by clicking on the height box and entering the required<br />
value. The orientation of the barcode can be specified by clicking on the appropriate button.<br />
Dependent upon the symbology chosen the default barcode parameters (defined in the<br />
Configuration Utility) may be changed within the dialog box. The parameters that may be<br />
changed are the narrow and wide module widths, and the barcode magnification.<br />
Some barcode symbologies only include a restricted range of characters. If an invalid character is<br />
used, an error message will be displayed. EAN-128 allows the FUNC1 character to be included<br />
in the code by pressing Ctrl-F (typing "F" while holding down the Control key). The character is<br />
displayed on the screen as a right pointing arrow ">" (on some computers the character may be a<br />
solid arrow).<br />
When you have entered all of the parameters click on OK to accept the changes or Cancel to<br />
exit without updating the changes or creating the field.<br />
GENERAL CODE GLWW Label Design Software - User's Guide Page R
5.4 Variable Barcode Parameter Entry Dialog<br />
The variable barcode dialog is similar to the fixed barcode dialog, but with the addition of a<br />
number of extra options that allow you to specify the format for the variable data as shown below<br />
:-<br />
Fig 12 Variable Barcode Parameter Entry Dialog<br />
You can now specify the prompt text for the variable entry that will appear either on the PC<br />
screen, or the DT32 data terminal at print time.<br />
The way in which the prompt is handled by the printer is selected by clicking on the Prompt box,<br />
which then displays an option dialog which allows you to choose from the following options :-<br />
Prompt Once -<br />
Prompt Each Label -<br />
Prompt & Increment -<br />
Prompt & Decrement -<br />
Always Increment -<br />
At print time the variable data is requested once only and is then<br />
repeated on each label that is printed as part of that batch. This<br />
is useful for printing batch codes, where 100 labels may be<br />
printed for a batch of goods that will all have the same batch<br />
reference number.<br />
At print time of a batch of labels, GLWW Print will stop<br />
between labels for entry of the variable text required for the next<br />
label. This is useful when each label will have one (or more)<br />
fields that change (e.g. part number, serial number etc.)<br />
At print time, you can enter an initial value for the first label to be<br />
printed. Each subsequent label will have a value that will be<br />
incremented by one from the previous label<br />
This is similar to above, but will decrement by one from the initial<br />
value entered.<br />
At print time the printer will increment this field for each label<br />
printed by one. The initial value is determined by the value<br />
printed on the last label of this type - even after the program is<br />
exited and the computer is switched off. This function is useful<br />
for serial number labelling.<br />
GENERAL CODE GLWW Label Design Software - User's Guide Page S
Always Decrement -<br />
Database Input -<br />
Linked -<br />
Auto Date/Time -<br />
This is similar to above, but will decrement by one from the value<br />
from the last label printed.<br />
This feature allows you to specify a field within a record of a<br />
database that will be used for the contents of the field. GLWW<br />
supports text delimited and dBase format databases. Once you<br />
have chosen which format, another dialog box shown below that<br />
lets you specify the format for the database field. This option is<br />
explained is further detail below.<br />
You can link one variable field to another so that information only<br />
has to be calculated or requested once. When the source field is<br />
deleted, the destination field will also be deleted.<br />
The date/time variable text field allows you to embed a date or<br />
time which will automatically be updated by either the system<br />
clock in the PC, or the real time clock maintained within the<br />
DT32. The field is shown on the screen as the time when the<br />
field was last changed. It is updated at print time and when the<br />
field's details are changed. This option is explained is further<br />
detail below.<br />
5.4.1 Text Database Field Parameter Entry Dialog<br />
Fig 13 Database Field Parameter Entry Dialog<br />
To select a text database or to change to a different one, click on Select Database and choose<br />
the database file from the standard directory listing box.<br />
Database information can be imported provided it is prepared in a correct and consistent format.<br />
The database file must be a character separated ASCII text file and have the suffix .TXT. One of<br />
the records (usually the first) is selected as representative of the maximum field width for the<br />
database. This is used to determine the number of characters to clear in each field of subsequent<br />
labels.<br />
To select the field and pattern record numbers click on the respective text and enter the number<br />
in the text box. The Pattern Record is used to determine the amount of space to leave on the<br />
label for this field. It should represent the largest field that might be encountered. To select the<br />
first field to the printed, click on First Print Record and enter the record number. You will be<br />
GENERAL CODE GLWW Label Design Software - User's Guide Page T
asked to confirm this number when you print the label. This number is increased by one every<br />
time a label is printed.<br />
The field separator can be a Tab character (ASCII 9) or any ASCII character. To change the<br />
field separator, click on Tab or click on the Field Separator box and enter the single separator<br />
character.<br />
The record separator can be a carriage return character (ASCII 13, 10 or both) or any ASCII<br />
character. To change the record separator, click on CR (short for Carriage Return) or click on<br />
the Record Separator box and enter the single separator character.<br />
When you have entered all of the parameters click on OK to accept the changes or Cancel to<br />
exit without updating the changes or creating the field.<br />
5.4.2 dBase Database Field Parameter Entry Dialog<br />
Fig 14 dBase Field Parameter Entry Dialog<br />
To select a dBase database or to change to a different one, click on Select Database and choose<br />
the database file from the standard directory listing box.<br />
GLWW supports both dBase III and dBase IV fields. Only integer decimal and date fields can<br />
be imported into numeric barcodes.<br />
To select a field, either select Database Field No. and enter the field number or click on Select<br />
Field and select the field from the list. The select a pattern record number click on the text box<br />
and enter the number. The Pattern Record is used to determine the amount of space to leave on<br />
the label for this field. It should represent the largest field that might be encountered. You will be<br />
asked to enter the number of the first printed field when you print the label. This number is<br />
increased by one every time a label is printed.<br />
When you have entered all of the parameters click on OK to accept the changes or Cancel to<br />
exit without updating the changes or creating the field.<br />
GENERAL CODE GLWW Label Design Software - User's Guide Page U
5.4.3 Auto Date/Time Dialog<br />
Fig 15 Auto Date/Time Parameter Entry Dialog<br />
You can choose between date and time format and for the date specify UK, European or US<br />
and Japanese format. It is also possible to enter an offset for the date in number of days from the<br />
current date. This can be useful to automatically enter a "Sell by" or "Use by" date.<br />
The barcode must be large enough to contain the numeric representation of the time or date or an<br />
error will be produced.<br />
You can specify whether the date or time printed on the label will be changed from one label to<br />
the next in a batch of labels. By selecting Fixed Date/Time, you can speed up printing by keeping<br />
the date or time constant.<br />
5.5 Date Entry Dialog<br />
The date entry field allows you to print a date which will automatically be updated by the system<br />
clock in the PC. The field is shown on the screen as a series of 0's which represent the particular<br />
format selected. The date entry dialog is shown below :-<br />
Fig 16 Date Entry Dialog<br />
You can specify the format for the date displayed between UK, European, US and Japanese.<br />
Like other text fields you can also specify the font used for the date field and the orientation for<br />
the field. It is also possible to enter an offset for the date in number of days from the current<br />
date. This can be useful to automatically enter a "Sell by" or "Use by" date.<br />
GENERAL CODE GLWW Label Design Software - User's Guide Page V
You can also choose whether the date printed on the label will be changed from one label to the<br />
next in a batch of labels. By selecting Fixed Date, you can speed up printing by keeping the date<br />
or time constant.<br />
5.6 Time Entry Dialog<br />
The time entry dialog lets you specify the format for the time in a similar way to the date. The<br />
dialog let you enter the font to be used as well as the orientation of the text.<br />
Fig 17 Time Entry Dialog<br />
You can specify whether a 12 or 24-hour clock is used and the separator between the three<br />
elements of the time. You can also choose whether the date printed on the label will be changed<br />
from one label to the next in a batch of labels. By selecting Fixed Date, you can speed up printing<br />
by keeping the date or time constant.<br />
5.7 Box/Line Entry Dialog<br />
GLWW can include lines and boxes in label formats. Once they have been added to the label<br />
format, they can be changed by click on the field with the right mouse button. To change the field<br />
from a box to line, selected Vertical Line or Horizontal Line. To change the dimensions, click on<br />
the appropriate text entry box and type in the correct size. Boxes and lines can be black or 25%<br />
grey. To change the colour, click on the appropriate setting.<br />
Once the box or line has been created, its dimension can be changed on the graphics screen by<br />
holding down a shift key, clicking with the left mouse button on the field and dragging it to the<br />
correct size.<br />
5.8 PCX Logo File Entry Dialog<br />
GLWW can import black and white and 256-colour greyscale PCX files directly into a label<br />
layout, and will then convert these automatically to a binary file when they are transferred to the<br />
printer or DT32. Graphics bitmaps can be rotated like any other field and can be scaled either by<br />
entering new sizes into the dialog box or by clicking with the left mouse button on the logo while<br />
holding down the shift key and dragging the box out to a new size.<br />
GLWW will adjust itself to 256-colour greyscale images by dithering the image to black and<br />
white. The dither occurs after the scaling so that the quality of the image is preserved. You can<br />
GENERAL CODE GLWW Label Design Software - User's Guide Page W
choose between three dithers for screen display. Bayer's is much faster than the other two but<br />
displays quickly. Burkes' dithers are slower but of higher quality. The darker Burkes dither<br />
represents the image with the correct proportion of black and white to represent the grey. The<br />
lighter dither is display exactly as it will be printed. The greys in this dither have been transformed<br />
for optimum printing.<br />
The program asks you whether the file image will be taken from an existing logo in memory or<br />
from a disk file. GLWW will automatically store any logos already placed on the current label so<br />
that more than one copy may be used. If you select File the program will display a list of files<br />
having a PCX extension which are in the directory from which the program was run. You can<br />
change the default directory by clicking on the directory box and typing a new directory. You can<br />
reduce the size of the list of logos by typing a filter into Filename box.<br />
Greyscale images reply on the Print Density in the Change Printer Setup dialog box being set<br />
correctly. Paper and ribbons supplied by GENERAL CODE should produce best results with<br />
the print density set at 100% but other papers or ribbons may produce better results with higher<br />
or lower settings. The best way is to experiment. A test image (GREYSCAL.PCX) is supplied<br />
on the distribution disk to help determine the ideal setting.<br />
Once you have selected the file required you can only change the X and Y co-ordinates and size<br />
of the image as shown in the figure below :-<br />
5.9 Text File Entry Dialog<br />
Fig 18 Logo Dialog<br />
The text file field allows you to select an ASCII format file which can be placed onto the label.<br />
This file is then treated as a single field, and can only be re-positioned as a single field.<br />
The initial Text File Dialog lets you select a file from a list in the default directory which has a<br />
.TXT extension. The default directory can be changed by clicking on the directory box and<br />
typing in the new directory name. Once you have selected the required file another dialog box is<br />
displayed which allows you to change the font size and orientation of the text field. The extra line<br />
spacing can be entered as a percentage of the vertical font size.<br />
GENERAL CODE GLWW Label Design Software - User's Guide Page X
5.10 Font Selector<br />
Fixed, Variable and File Text, Time and Date Fields all allow the select the font typeface, size<br />
and effects from the Font Selector. To change the font being used by a field, select Choose Font<br />
from the main dialog box. The font selector is shown in fig 19.<br />
Fig 19 The Font Selector<br />
To choose the typeface, click on its name in the Font section. To change the size, either click on<br />
one of the listed sizes or click on Vert. Size/Hor. Size. To change the font size to one not already<br />
listed, click on Vert. Size/Hor. Size and enter the Vertical and Horizontal point size required into<br />
the black text boxes. The two sizes are set independently and can be between 3 and 999 points<br />
(assuming the label is big enough).<br />
The fonts shown in Fig 20 are included as standard with GLWW and new ALFA printers. The<br />
fonts have been enlarged for this manual. The quality will be higher in normal use.<br />
Fig 20 GLWW Fonts<br />
Kerning is the process of moving characters closer together to improve their appearance. For<br />
example, if the letters "AV" were spaced normally, there would be more white space between<br />
them than the letters "ML". Kerning would move the letters "AV" closer (often allowing the left of<br />
the "V" to start above the right of the "A"). Kerning can bring characters a little closer or much<br />
closer. GLWW represents kerning on a scale on 0 to 3 where 0 is no kerning and 3 is tight<br />
kerning. To change the kerning select one of the numbers 0 to 3.<br />
AV ML AV<br />
Not kerned<br />
Kerned<br />
GENERAL CODE GLWW Label Design Software - User's Guide Page Y
To italicise the font, select Italics or to print White text on a black box, select Inverse. When<br />
characters need to be read quickly or by a machine, extra spacing between each letter can often<br />
improve clarity. Spacing can be increased by multiple of 10% of the horizontal point-size. To<br />
change the spacing, select on the Extra Characters Spacing box and enter a number between 0<br />
and 9 (0 to 90% more space).<br />
GENERAL CODE GLWW Label Design Software - User's Guide Page Z
6 CONFIGURATION UTILITY<br />
The configuration pull-down menu allows you to define barcode formats, output port,<br />
communications protocol, measurement parameters, nationality, printer format, password<br />
protection and paths. The menu is selected by clicking on the Configure button on the menu bar,<br />
or using the hot key (Alt-C).<br />
6.1 Barcode Defaults<br />
Fig 21 Configure Menu<br />
The magnification and module width of the different symbologies are preset, which is determined<br />
by the dot resolution of the printer. The normal default for printers is a magnification factor of 2<br />
which will give a module size of 0.33 mm on 6 dot/mm printers and 0.25 mm on 8 dot/mm<br />
printers.<br />
Fig 22 Barcode Configuration Dialog<br />
The module width for EAN barcodes cannot be changed as these are defined by the symbology.<br />
To change other parameters click on the particular box and enter the new value. When all of the<br />
required changes have been made click on the OK button. If you wish to exit without updating<br />
the values click on the cancel button. The defaults widths are shown in fig 22.<br />
GENERAL CODE GLWW Label Design Software - User's Guide Page AA
6.2 Communications Settings<br />
Changes to the set-up for the communications apply to all of the serial ports available on your<br />
machine. To change the value click on the required option box. When all of the changes are<br />
complete, click on OK to accept the changes or cancel to exit without updating the changes. The<br />
setting must match exactly those in the printer or DT32 terminal.<br />
6.3 Printer Selection<br />
Multiple printers of different models can be used with GLWW simultaneously. Only one printer<br />
can be attributed to each communications port on a computer. To change the printer attached to<br />
a port, click on the line containing the port's name and select the Printer button. The Configure<br />
Printer dialog box will be displayed.<br />
GLWW defines different parameters dependent upon the printer that is selected (resolution, print<br />
width, speed, head temperature), and so you must select the printer that you will be using with<br />
the software.<br />
To select the printer model being used click on the printer model box and press the Enter key. A<br />
list of available printer drivers will pop-up. Please refer to the table below for cross-reference<br />
name of printers:<br />
Commercial name: Factory name: printhead width resolution<br />
ALFA <strong>2050</strong> ALFA <strong>1050</strong> LP568 56 mm 8 dots/mm<br />
ALFA <strong>2100</strong> ALFA <strong>1100</strong> LP1048 104 mm 8 dots/mm<br />
ALFA <strong>2050</strong>/6 ALFA <strong>1050</strong>/6 LP526 52 mm 6 dots/mm<br />
ALFA <strong>2100</strong>/6 ALFA <strong>1100</strong>/6 LP1056 105 mm 6 dots/mm<br />
Fig 23 Printer Configuration Dialog<br />
To select a particular driver click on the printer required and press OK to accept, or Cancel to<br />
exit without saving the changes.<br />
GENERAL CODE GLWW Label Design Software - User's Guide Page BB
The default print speed or print density can be set by clicking on Printer Speed or Printer Density<br />
and entering an appropriate value. The valid speed range is 40-139 mm/s and print density is<br />
50% to 200% of the factory default setting.<br />
To enable the External Rewinder or Label Present Sensor (mounted on the front of the printer<br />
above the label) click on their options. If a cutter is fitted, select Cutter Fitted and a range of<br />
extra options will be displayed in the Stationery Type allowing you to control its use.<br />
Once the changes have been made, select OK to return to the list of printers.<br />
6.4 Passwords<br />
6.5 Paths<br />
You can configure the program to set access to the system which is controlled by Passwords.<br />
To set a Password click on the text entry box for the program and type in the Password<br />
required. When all of the changes are complete click on OK to accept the changes, or Cancel to<br />
exit without updating the changes. If any of the text entry boxes are left blank then no password<br />
will be requested for that program.<br />
The DOS system of paths allows files to be kept in groups. GLWW encourages the use of<br />
directories by allowing different default directories for each file type. The default directories are<br />
those listed when Load Label, Save Label, Select Database, etc. are chosen.<br />
Fig 24 Paths Dialog<br />
To set a Path, click on the text entry box for that type of file and type in the path required. Paths<br />
should be entered in full, including the drive letter.<br />
GLWW keeps a reference including a full path of imported files in every label. so if a file used in<br />
a label is moved, GLWW will not be able to find it when the label format is next used. If you<br />
specify a set of Working Directories, GLWW will look for the file in these directories if it is not<br />
found in its initial path.<br />
6.6 Exit Configuration<br />
To exit the configuration menu and return to the Main Menu select exit.<br />
GENERAL CODE GLWW Label Design Software - User's Guide Page CC
7 PRINT UTILITY<br />
The Print Utility is a sub-program of the GLWW Editor but can also be used as a separate<br />
standalone utility. The Print Utility prints label formats that have already been defined using the<br />
label editor. The number of labels to be printed and any variable information which has been<br />
defined will be entered at this stage.<br />
To print a label format, either select Print from the File Menu of the GLWW Editor or select<br />
Print Utility from the main GLWW Menu. If you select Print from the GLWW Editor with the<br />
Quick Print option enabled, a simplified interface will be used - see section 7.5.<br />
7.1 Print Queue<br />
When the Quick Print option is not being used, GLWW Print uses the print queue. List of<br />
formats can be set up and variable field data entered independent of the printer speed.<br />
Fig 25 Print Queue<br />
Printing takes place in two stages. During the first, known as preparing, variable field data is<br />
collected from the user, or from a database, or by incrementing or decrementing previous data.<br />
This stage is often very quick. If a label contains no prompted or database data, thousands of<br />
labels may be prepared in a second.<br />
Once the preparation process has been started, the second process starts. Known as printing,<br />
this is the stage where the label formats are passed to the printer for printing. This process runs in<br />
the background while GLWW Print is running.<br />
Once preparation of all the formats is complete, more formats can be added and the menus<br />
become operative again. If you leave GLWW Print, printing may pause until you start it again.<br />
Warning: If you switch off the printer before restarting GLWW Print, printing may not restart<br />
properly.<br />
GLWW Print supports up to 5 printers of the same type simultaneously (on ports COM1,<br />
COM2, LPT1, LPT2, LPT3).<br />
GENERAL CODE GLWW Label Design Software - User's Guide Page DD
Once printing has started, it can be suspended by selecting Pause Output to Printer from the<br />
Printer Menu. A few labels may print before the printer buffer is cleared. If a label format does<br />
not contains any prompted or database fields, all the label formats may have already been sent to<br />
the printer. The printer can still be stopped by selecting Stop Printer from the Printer menu. This<br />
command only works with labels with fixed fields.<br />
7.2 Label Menu<br />
7.2.1 Add Label Format<br />
To add a label format to the print queue, select Add Label Format from the Label Menu or press<br />
F2. The normal directory listing box will be displayed. Select the name of the label format and<br />
click on OK. The Add Format dialog box will be displayed.<br />
Fig 26 Add Format<br />
To change the number of copies, click on the No. of Copies text box and enter the number<br />
required. To identity who added a label format to the queue, the user can enter his or her into the<br />
User's Initials text box. The Initials then become the default ones. This information is displayed in<br />
the queue list and in the Print Report File. To change to a printer on a different port select the<br />
name of the port. If File is selected, the filename will be requested when the preparing stage<br />
starts. You can only change to ports that are listed with printers in the Printers section of GLWW<br />
Configure.<br />
To confirm the selection, click on OK. If the Preview Label option has been selected, a preview<br />
of the label will be display. Click on Continue or Cancel to accept or reject this format.<br />
7.2.2 Remove Label Format<br />
If a label format has been added to the queue in error, you can remove it by clicking on the errant<br />
label format in the last and selecting Remove Label Format from the Label menu or pressing F3.<br />
This option can also be used to remove a format during the printing stage if the Output to the<br />
Printer has been paused.<br />
7.2.3 Copies<br />
To change the number of copies needed of a label format already in the print queue but not yet<br />
prepared, select Copies, click on the No. of Copies text box and enter the correct number. This<br />
command can also be used to change the initials or the port to be used for printing.<br />
GENERAL CODE GLWW Label Design Software - User's Guide Page EE
If this command is used after a label format has been printed (when the Status is marked as<br />
Done), it can be used to print more copies of the label format. Enter the number of extras copies<br />
in the text box and select OK. The Status will change from Done to Waiting.<br />
7.2.4 Shell to DOS<br />
7.2.5 Exit<br />
If you have enough memory, you can run a DOS shell to enter DOS commands temporarily<br />
before returning to GLWW. While you are in DOS, no more label formats will be sent to the<br />
printer, but the printers will continue to process any formats they have received.<br />
Leave GLWW Print and returns to the GLWW Editor or the GLWW Menu. If GLWW Print is<br />
still printing, the output to the printer will be suspended. The printing will continue when you<br />
restart GLWW if the printer has not been switched off.<br />
7.3 Printer Menu<br />
7.3.1 Start/Stop Preparation<br />
When you have added at least one label format to the list, selecting Start Preparing/Stop<br />
Preparing from the Printer menu (or press F10) will start the preparation of the listed label<br />
format. Any prompted fields will be requested and any database information will be collected.<br />
Once preparation is completed (normally after just a few seconds), the menus become operative<br />
again.<br />
Stop Preparing can be used to abort the label format preparation but will not stop the output to<br />
the printer of label formats that have already been prepared.<br />
7.3.2 Pause/Restart Output to Printer<br />
Once label formats have been prepared, they are sent, in the background, to the printer. To stop<br />
the flow of information to all the printers, select Pause Output to Printer from the Printer Menu<br />
(or press F9). To restart the flow, select Restart Output to Printer from the Printer Menu (or<br />
press F10 again).<br />
If a label format does not contains prompted or database fields, the label format will only be sent<br />
to the printer once and therefore Pause Output to Printer will have no effect once the information<br />
for the first label has been sent.<br />
7.3.3 Stop Printer<br />
If a label contains only fixed fields, an instruction will be sent to the printer to print the same label<br />
as many times as instructed. To stop the printer, select Stop Printer from the Printer menu, select<br />
the port of the printer to be stopped and click on OK.<br />
GENERAL CODE GLWW Label Design Software - User's Guide Page FF
Fig 27 Stop Printer<br />
The copies counter will not be reduced by the number of labels not printed so its value will<br />
become meaningless.<br />
If more label formats have been sent (or are being sent to the printer), then this command will be<br />
ignored.<br />
7.4 Options Menu<br />
7.4.1 Pause Between Formats<br />
When printing several batches of label formats, it is often useful to pause between batches to<br />
change labels in the printer or to move label from the rewinder. By selecting this option from the<br />
Options menu, GLWW will automatically pause at the end of each batch of labels as if Pause<br />
Output to Printer had been selected from the Printer menu. To restart output, select Reset Output<br />
to Printer from the Printer menu or press F9.<br />
7.4.2 Preview Labels<br />
It is often useful to be able to view a label format in order to verify it before it is added to the<br />
queue. If this option is selected, the label will be displayed on the screen after it has been selected<br />
from the directory listing box. Above the label will be two buttons - Continue and Cancel.<br />
Selecting Continue will add the label format to the list, but selecting Cancel will abandon it.<br />
7.4.3 Start Printing After Add<br />
If you regularly only print one label format at a time, selecting this option can simplify the printing<br />
process. With this option selected, preparation of label formats will start immediately after a label<br />
format has been added to the queue.<br />
7.4.4 Reset Counter<br />
The counter is on the right of the menu bar. When printing is complete, the number of copies sent<br />
to the printer, are added to the counter. It can be used to determine how many labels have been<br />
printed from a reel and used as a <strong>guide</strong> to the number left.<br />
If the Stop Printer command is used, the number of labels stopped is not subtracted so the<br />
counter reading is then no longer valid.<br />
7.5 Quick Print Mode<br />
GENERAL CODE GLWW Label Design Software - User's Guide Page GG
If Quick Print is enabled in the GLWW Editor and Print is selected from the File menu of the<br />
GLWW Editor, GLWW Print uses a quicker non-queuing mode. The same Add Format dialog<br />
box is displayed but the label format details are displayed in a smaller box:<br />
Fig 28 Quick Print Progress Window<br />
When the label format has been printed, GLWW Print returns immediately to the GLWW Editor.<br />
The counter and the report file are both updated although the counter is not displayed.<br />
7.6 Printing Trouble Shooting<br />
Symptom<br />
No labels printed<br />
Poor print quality<br />
Label format on screen does<br />
not match printed label<br />
Time/Date print incorrectly<br />
Some fields don't print<br />
Some country-specific<br />
characters don't print<br />
Database fields print<br />
corrupted or do not print<br />
Check<br />
Printer attached and switched on<br />
Paper (and wax ribbon on thermal printers) present<br />
Cable connected to correct port<br />
Baud rate, parity etc. in GLWW Configuration Utility<br />
match those on the printer DIP switches. NB. GLWW<br />
requires that all printers use the same communication<br />
parameters<br />
Print head is not dirty<br />
Correct heat setting (See section 6.6)<br />
Correct speed setting (See section 6.6)<br />
Paper is good quality and has not been mistreated.<br />
The printer type listed in the Printers section off GLWW<br />
Configure matches the printer in use.<br />
Your PC's clock has right time<br />
Date offset is correct (See section 5.5)<br />
Correct local time/date format chosen<br />
Correct printer driver is being used<br />
All files used when label was created are still present<br />
DOS version 5.0 or later present<br />
Code pages are set up correctly in your<br />
AUTOEXEC.BAT and CONFIG.SYS files<br />
Characters are ALFA Printers' character set. See<br />
appendix A.<br />
Check the pattern record is the largest record<br />
Check database has sufficient records<br />
Database file is still present on disk<br />
GENERAL CODE GLWW Label Design Software - User's Guide Page HH
8 DOWNLOAD TO DT32<br />
This utility is for use in conjunction with the DT32 Control Panel, which allows pre-defined label<br />
formats to be transferred to the DT32 for printing in stand-alone applications.<br />
The Download Utility can download single label formats picked individually, a batch of formats<br />
or a mixture of both. The batch lists can be edited in a DOS text editor or from the Download<br />
Utility's Main Menu:-<br />
Fig 29 GLWW Download Utility Main Menu<br />
Before loading the Download Utility, the DT32 Data Terminal must be active, have a memory<br />
card present and be connected to the PC. The download header is sent before the menu is<br />
displayed so if the menu is not displayed, recheck the DT32 and the connections.<br />
8.1 Download Format<br />
This command lets you download a single label format. Activating this option brings up the Load<br />
Label dialog box.<br />
The required label format can either be selected from the list of files, or by typing the file name<br />
into the Filename box. The current directory can be changed by editing the directory name in the<br />
Directory box. A filter, following the normal DOS conventions, can be typed into the Filename<br />
box to reduce the number of files listed.<br />
When you select Ok, the label format starts downloading. The block number on GLWW should<br />
always match that on the DT32 and indicates the download is progressing successfully. Any<br />
errors are displayed in the Downloading Progress box:-<br />
8.2 Create New Batch of Formats<br />
Fig 30 Download Progress Box<br />
GENERAL CODE GLWW Label Design Software - User's Guide Page II
It is often easier to download a batch of labels onto a memory card than to remember which<br />
formats to use and downloading them individually. GLWW provides an environment where a<br />
batch list can be prepared and altered before being the label formats are downloaded.<br />
To create a new list, select Create New Batch List from the GLWW Download menu and type<br />
in a name for the batch list (the name can be up to 8 characters long). GLWW Download batch<br />
files always have the extension ".DT".<br />
8.3 Edit Batch List<br />
The batch list file contains the full name of all the formats in the order they will be downloaded to<br />
the DT32 Download Terminal.<br />
Fig 31 Batch File Editor<br />
To add another label format, click on Add, select the label format required from the Directory<br />
Listing box and click on Ok. To remove a label format, click on the label format in the batch file<br />
listing box, and then click on Remove.<br />
When the batch file is complete, select Done and the batch file will be saved.<br />
8.4 Download Batch of Formats<br />
8.5 Exit<br />
To download a batch of formats, select Download Batch of Formats from the Download Utility's<br />
main menu and choose the name of the required batch file form the Directory Listing displayed.<br />
Then select Ok. The name of each label format any downloading errors will be displayed in the<br />
Download Progress box during downloading.<br />
To complete the downloading process, select Exit from the Download Utility's menu. Any logos<br />
contained in the label formats downloaded will now be downloaded to the Download Terminal.<br />
If there are many logos, this may be quite slow. At 9600 baud, you must allow at least 1 second<br />
for every 1000 units in the block.<br />
GENERAL CODE GLWW Label Design Software - User's Guide Page JJ
9 SHELL TO DOS<br />
This will temporarily enable the program to be suspended and will allow you to shell out to the<br />
DOS prompt. The program can be restarted by typing Exit at the DOS prompt.<br />
The program is only suspended and is still in memory so the memory available to other programs<br />
is reduced. Some programs may not have enough memory to run.<br />
This command is also available from within the GLWW Editor and the GLWW Configuration<br />
Utility.<br />
10 EXIT<br />
This will exit the program and take you back to the DOS prompt.<br />
GENERAL CODE GLWW Label Design Software - User's Guide Page KK
APPENDIX A - SUPPORTED CHARACTER SET<br />
The GLWW set of programs support the characters shown below. They are mapped from<br />
National character sets onto this set.<br />
GENERAL CODE GLWW Label Design Software - User's Guide Page LL
APPENDIX B - CODEPAGES AND LANGUAGE SPECIFIC CHARACTERS<br />
GLWW is used internationally for label format design and printing. It uses information provided<br />
by DOS to adjust to the keyboard and character code pages used on different computers.<br />
In order for GLWW to work correctly, MS-DOS V3.3 or later is needed and CONFIG.SYS<br />
and AUTOEXEC.BAT must contain the necessary information. On most computers, the DOS<br />
Setup routine adds the appropriate commands. This section may be of interest when foreign<br />
characters (those characters not present in the original ASCII character set, 32-127) fail to print<br />
or the wrong characters are printed.<br />
In the CONFIG.SYS, there should be the line:<br />
COUNTRY = XXX,[YYY],COUNTRY.SYS<br />
where XXX is the country code (this is often, the international dialling code for your country) and<br />
YYY is the default code page for DOS to use.<br />
The value of YYY determines the code page and range of characters available for use on the<br />
WYSIWYG screen. GLWW supports all common character code pages, but for any one<br />
country only two code pages are legal. The table below shows the recommended code page for<br />
many countries.<br />
Country/Language Code page Country/Language Code page<br />
English / US. 437 Sweden 850<br />
Germany 850 Finland 850<br />
French 850 Poland 852<br />
Netherlands 850 Hungary 852<br />
Belgium 850 Portugal 860<br />
Spain 850 Canadian-French 863<br />
Italy 850 Norway 865<br />
Switzerland 850 Denmark 865<br />
Many countries can also use code page 850. GLWW supports all the characters shown in<br />
Appendix A. A few rarely used characters listed in these code pages are not currently available<br />
in GLWW.<br />
If the correct characters are not being displayed on the text screen, try adding the following lines<br />
to the ends of your AUTOEXEC.BAT:<br />
MODE CON CODE PAGE PREPARE = ((YYY) C:\DOS\EGA.CPI)<br />
MODE CON CODE PAGE SELECT = YYY<br />
The first line, loads the correct code page into the screen character buffers while the second,<br />
makes the correct code page the active code page.<br />
DOS allows printers to support Codepages as well as the screen devices. Printers are supported<br />
by adding extra lines to the CONFIG.SYS loading .CPI files or by using the MODE LPT1:<br />
command in the AUTOEXEC.BAT. ALFA Printers do their own code page translation and<br />
having these commands present, may prevent correct printing.<br />
GENERAL CODE GLWW Label Design Software - User's Guide Page MM
APPENDIX C - GLWW INSTALLATION NOTES<br />
System Requirements<br />
• IBM-PC or compatible<br />
• DOS 5.00 or higher<br />
• Hard disk (minimum 2MB free)<br />
• 640K main memory (minimum 520K free)<br />
• 384K Extended or Expanded memory<br />
• Microsoft compatible mouse<br />
• VGA card & monitor<br />
• A free serial or parallel port for the printer<br />
Checking the DOS version<br />
At the C: prompt, type VER ↵<br />
The PC will report the DOS version number, e.g.<br />
MS-DOS Version 6.20<br />
Ensure that the version reported is 5.00 or greater.<br />
Checking hard disk space<br />
At the C: prompt, type DIR ↵<br />
The PC will give a list of files, ending with a report of the amount of free disk space, e.g.<br />
3325952 bytes free<br />
Ensure that the free space is at least 2,000,000 bytes.<br />
Checking free memory<br />
At the C: prompt, type MEM ↵<br />
The PC will report the amount of memory available. The format of the report is different in DOS-5 and<br />
DOS-6. The important features are highlighted in the examples below.<br />
DOS-5 memory report :-<br />
655360 bytes total conventional memory<br />
655360 bytes available to MS-DOS<br />
524384 largest executable program size<br />
655360 bytes total EMS memory<br />
393216 bytes free EMS memory<br />
3145728 bytes total contiguous extended memory<br />
0 bytes available contiguous extended memory<br />
2457600 bytes available XMS memory<br />
MS-DOS resident in High Memory Area<br />
GENERAL CODE GLWW Label Design Software - User's Guide Page NN
DOS-6 memory report :-<br />
Memory Type Total = Used + Free<br />
---------------- ------- ------- -------<br />
Conventional 640K 92K 548K<br />
Upper 123K 123K 0K<br />
Reserved 128K 128K 0K<br />
Extended (XMS) 3,205K 2,181K 1,024K<br />
---------------- ------- ------- -------<br />
Total memory 4,096K 2,524K 1,572K<br />
Total under 1 MB 763K 214K 548K<br />
Total Expanded (EMS)<br />
Free Expanded (EMS)<br />
1,024K (1,048,576 bytes)<br />
1,024K (1,048,576 bytes)<br />
Largest executable program size 548K (561,552 bytes)<br />
Largest free upper memory block 0K (0 bytes)<br />
MS-DOS is resident in the high memory area.<br />
The important values to note are the largest executable program size, which must be 520K or greater,<br />
and the amount of free expanded (EMS) memory, which must be 384K or greater. If there is not enough<br />
memory free, then it may be possible to edit the system configuration files to give access to more<br />
memory. Unfortunately, there is no one solution which can be applied to every computer system, as each<br />
PC will be set up differently. The following <strong>guide</strong>lines are taken from the MS-DOS <strong>user's</strong> <strong>guide</strong>, and<br />
assume some familiarity with the workings of DOS. For further information, consult the manuals supplied<br />
with your PC, and your PC supplier.<br />
If you are running DOS-6, the MemMaker program can be used to optimise your computer's memory<br />
usage. This is probably the simplest approach and avoids having to edit the system files by hand. See the<br />
Microsoft manuals for details.<br />
If your PC has extended memory (referred to as XMS in the MEM command report), ensure that your<br />
CONFIG.SYS file starts with a line similar to the following, ensuring that the correct full pathname is<br />
supplied :-<br />
DEVICE = C:\DOS\HIMEM.SYS<br />
The next line should install the Extended memory manager, EMM386. This will allow programs to use<br />
additional memory, and also allows the XMS memory to be used as EMS memory. In DOS-5, the<br />
CONFIG.SYS file should contain a line similar to the following :-<br />
DEVICE = C:\DOS\EMM386 384 RAM AUTO<br />
In DOS-6 you can omit the number 384 as the whole of extended memory can be used by default.<br />
To free conventional memory, DOS should be loaded in the high memory area, so the CONFIG.SYS<br />
file should contain the line :-<br />
DOS = HIGH,UMB<br />
Any additional device drivers (lines starting with DEVICE = ...) should be loaded into high memory by<br />
substituting DEVICEHIGH = ...<br />
Do not install any device drivers that you do not actually need; they all take up memory.<br />
GENERAL CODE GLWW Label Design Software - User's Guide Page OO
In the AUTOEXEC.BAT file, TSR programs such as DOSKEY, MODE, SMARTDRV, <strong>net</strong>work card<br />
drivers, etc. should be loaded into high memory if possible (or removed if not required), by prefixing the<br />
command with LOADHIGH or LH.<br />
If you have installed a RAM-disk driver (e.g. RAMDRIVE.SYS), you can save memory by reducing its<br />
size or removing it entirely.<br />
If you have installed SmartDrive (Microsoft's disk cache program), you can save memory by reducing<br />
the cache size.<br />
Windows Installation<br />
The Windows installation program requires Windows Version 3.1 or higher in order to run correctly. If<br />
your Windows version is older than this, run the DOS installation instead.<br />
Software Security Device (Dongle)<br />
In order to protect the GLWW package from unauthorised copying and distribution, the software will<br />
only operate on a machine fitted with a dongle. The dongle should be fitted to the PC parallel port<br />
(sometimes labelled Printer or LPT1). Any device already connected to the parallel port should then be<br />
connected to the dongle instead. The dongle does not interfere with the operation of the port in any way.<br />
If the software is run without the dongle, a warning message is displayed prompting you to replace it<br />
immediately. NOTE: in some cases, where a printer is connected to the dongle and the printer is not<br />
switched on, the dongle will not operate. Either disconnect the printer or switch it on.<br />
Printing Problems<br />
If the label editor runs correctly, but the program crashes when a label is printed, the most likely cause is<br />
an interrupt conflict within the PC. This may be caused by an add-on card such as a <strong>net</strong>work interface,<br />
additional I/O card, etc. Either resolve the conflict by changing interrupt numbers (consult your PC or<br />
add-on card supplier), or connect the printer to a different port.<br />
Password Problems<br />
Occasionally, where there have been installation problems as described above, the GLWW configuration<br />
file is not updated properly, and the program prompts for passwords unexpectedly. To generate a new<br />
configuration file, type the following commands :-<br />
CD \GLWW ↵<br />
DEL GLW.CFG ↵<br />
GLWCFG /C ↵<br />
NOTE: If you have installed the software in a directory other than C:\GLWW, substitute the directory<br />
name for GLWW in the first command above.<br />
GENERAL CODE GLWW Label Design Software - User's Guide Page PP