Contents Contents - RELM Wireless
Contents Contents - RELM Wireless
Contents Contents - RELM Wireless

Create successful ePaper yourself
Turn your PDF publications into a flip-book with our unique Google optimized e-Paper software.
<strong>Contents</strong><br />
Introduction.....................................................................................1<br />
FCC Requirements..........................................................................1<br />
Safety Precautions..........................................................................2<br />
Information and Options................................................................5<br />
Battery Installation and Removal..................................................6<br />
Battery Care and Maintenance .....................................................7<br />
Antenna Installation and Removal................................................7<br />
Radio Controls................................................................................8<br />
LCD Display.....................................................................................9<br />
Status Indicators .............................................................................9<br />
Alphanumeric Label Options.........................................................10<br />
Programmable Switch and Button Functions............................11<br />
Options and Labels........................................................................12<br />
Channel/Zone Selection Options................................................13<br />
Channel/Zone Selector Knob........................................................13<br />
Button/Menu Item Selection..........................................................14<br />
Direct Keypad Entry.......................................................................14<br />
Using Knob and Button Operations Together................................14<br />
Basic Radio Operation.................................................................15<br />
Command Zone Operation...........................................................16<br />
Building a Command Zone [CHAN+].............................................16<br />
Editing a Command Zone [CHAN-]...............................................16<br />
Code Guard/NAC Operation........................................................17<br />
Code Guard Receive.....................................................................17<br />
Code Guard Transmit....................................................................17<br />
Analog Squelch Control.................................................................17<br />
APCO Project 25 Digital Squelch Control.....................................17
Mixed Mode Operation.................................................................19<br />
Trunking Channel Basic Operation.............................................20<br />
Scan Options.................................................................................21<br />
Channel Scan [SCAN]...................................................................21<br />
Channel Scan List [SCN+].............................................................22<br />
Talkback Scan...............................................................................22<br />
Vote Scan [Requires Option KZA0581].........................................22<br />
Dual Mode Scan [DSCN]...............................................................23<br />
Priority Scan [PSCN].....................................................................23<br />
Priority Channel Select [PRI].........................................................24<br />
Zone Scan [ZSCN]........................................................................25<br />
Zone Scan List [ZSC+]...................................................................25<br />
Pick List Options...........................................................................26<br />
TX/RX CxCSS Picklist [TXCG] [RXCG]........................................26<br />
TX/RX Network Access Code Picklist [TNAC] [RNAC].................26<br />
Talk Group ID Picklist [TGID].........................................................27<br />
Encryption Key Picklist [KEY]........................................................27<br />
Keyset Picklist [KSET]...................................................................27<br />
Unit-to-Unit Call Options..............................................................28<br />
Emergency Signalling Options....................................................30<br />
Encryption Operation...................................................................31<br />
Required Setup..............................................................................31<br />
Basic Operation.............................................................................31<br />
Transmit Secure [SEC]..................................................................32<br />
Transmit Encryption Key Selection [KEY].....................................32<br />
User Selectable Encryption Keyset [KEYST]................................32<br />
Rekey Request [RKEY].................................................................33<br />
Keyset Viewing and Selecting [KSET]...........................................33<br />
Zeroizing [ZERO]...........................................................................33<br />
Messaging .....................................................................................34<br />
Text Messaging [TXT]...................................................................34<br />
User Status Messaging [STS]........................................................36
Paging and Call Alert ...................................................................38<br />
Conventional Two-Tone/DTMF/MDC1200 Paging [MUTE] ...........38<br />
Call Alert Paging [ALRT] ..............................................................38<br />
Radio Check [RCHK] ....................................................................39<br />
Radio Inhibit/Enable [INH]/[UNINH]............................................40<br />
Other Options and Functions......................................................41<br />
Backlight [LITE]..............................................................................41<br />
Busy Channel Operation................................................................41<br />
Channel Select [CHAN].................................................................42<br />
Cloning...........................................................................................42<br />
Control Lockout [LCK]...................................................................42<br />
Keypad Programming....................................................................43<br />
Monitor [MON]...............................................................................43<br />
Nuisance Channel Delete [DEL]....................................................44<br />
Radio info.......................................................................................44<br />
Repeater Talkaround [T/A].............................................................44<br />
Squelch Adjust [SQL].....................................................................44<br />
Site Display [STDS].......................................................................45<br />
Site Lock [STLK]............................................................................45<br />
Site Search [STSR]........................................................................45<br />
Surveillance Mode [SURV]............................................................45<br />
Transmit Digital [TXAD].................................................................45<br />
Transmit Power [PWR]..................................................................46<br />
Keypad Programming...................................................................47<br />
Keypad Programming Navigation..................................................47<br />
Entering Keypad Programming Mode............................................47<br />
Global, System, Zone and Channel Parameters...........................48<br />
Global Settings.........................................................................48<br />
Displayed Information Lines...................................................48<br />
User Password.......................................................................49<br />
System Settings.....................................................................49<br />
System Priority 1 or 2 Channel..............................................49<br />
Tx on Priority 1 Channel.........................................................50<br />
Zone Settings...........................................................................50<br />
Add Zone................................................................................50<br />
Delete Zone............................................................................50<br />
Edit Zone................................................................................50<br />
Zone Label.........................................................................50<br />
Zone Priority 1 or 2 Channel..............................................50<br />
Zone Tx Priority 1 Channel................................................51
Channel Settings......................................................................51<br />
Add Channel...........................................................................51<br />
Delete Channel.......................................................................51<br />
Edit Channel...........................................................................51<br />
Channel Label ...................................................................51<br />
Rx Frequency ....................................................................52<br />
Rx Mode ............................................................................52<br />
Rx Guard ...........................................................................52<br />
RX NAC .............................................................................52<br />
Squelch Mode ...................................................................52<br />
Bandwidth ..........................................................................52<br />
Tx Power ............................................................................52<br />
Tx Frequency .....................................................................53<br />
Tx Mode .............................................................................53<br />
Tx Guard ............................................................................53<br />
Tx NAC ..............................................................................53<br />
TGID ..................................................................................53<br />
P25 ID Unit Call/Receive List........................................................53<br />
User Selectable Code Guards.......................................................54<br />
User Selectable Network Access Codes.......................................55<br />
User Selectable Talkgroup IDs......................................................55<br />
Warranty.........................................................................................56<br />
My Radio Settings.........................................................................59
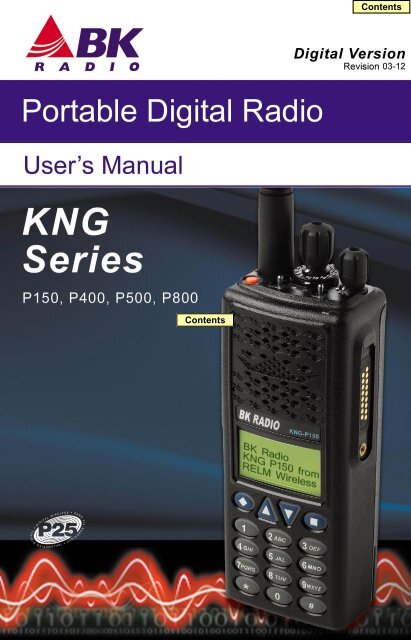
KNG Portable Radio User’s Manual<br />
Introduction<br />
Congratulations on your purchase of the BK Radio KNG Portable radio<br />
from <strong>RELM</strong> <strong>Wireless</strong>.<br />
The KNG APCO Project 25 radio offers an array of programmable<br />
functionality to help radio users get the most out of their portable<br />
communications. Check with your <strong>RELM</strong>/BK Radio dealer or<br />
communications officer for information on the programmed functions of<br />
your radio prior to operation.<br />
This manual contains information concerning the operation procedures<br />
for the BK Radio KNG Portable radio. The KNG has been designed to<br />
meet the tough requirements of today’s communications environment.<br />
Please take a moment to read the information in this manual so you can<br />
get optimum performance from your new radio.<br />
FCC Requirements<br />
Your radio must be properly licensed by the Federal Communications<br />
Commission prior to use. Your BK Radio dealer can assist you in<br />
meeting these requirements. Your dealer will program each radio with<br />
your authorized frequencies, signaling codes, etc., and will be there to<br />
meet your communications needs as your system expands.<br />
The FCC rules require manufacturers to comply with the FCC RF<br />
energy exposure limits for portable 2-way radios before they can be<br />
marketed in the U.S. When 2-way radios are used as a consequence<br />
of employment, the FCC requires users to be fully aware of and able<br />
to control their exposure to meet occupational requirements. Exposure<br />
awareness can be facilitated by the use of a product label directing<br />
users to specific user awareness information. Your BK Radio 2-way<br />
radio has a RF exposure product label. Also, your BK Radio owner’s<br />
and service manuals include information and operating instructions<br />
required to control your RF exposure and to satisfy compliance<br />
requirements.<br />
Compliance with RF Exposure Standards<br />
Your BK Radio 2-way radio is designed and tested to comply with a<br />
number of national and international standards and guidelines (listed<br />
- 1 -
<strong>RELM</strong> <strong>Wireless</strong> Corporation<br />
below) for human exposure to radio frequency electromagnetic energy.<br />
This radio complies with the IEEE and ICNIRP exposure limits for<br />
occupational/controlled RF exposure environment at operating duty<br />
factors of up to 50% transmitting and is authorized by the FCC for<br />
occupational use only. In terms of measuring RF energy for compliance<br />
with the FCC exposure guidelines, your radio radiates measurable<br />
RF energy only while it is transmitting (during talking), not when it is<br />
receiving (listening) or in Standby Mode. Note: The approved batteries<br />
supplied with this radio are rated for a 5-5-90 duty factor (5% talk - 5%<br />
listen - 90% standby), even though this radio complies with the FCC<br />
occupational RF exposure limits and may operate at duty factors of up<br />
to 50% talk.<br />
Your BK Radio 2-way radio complies with the following RF energy<br />
exposure standards and guidelines:<br />
United States Federal Communications Commission, Code of Federal<br />
Regulations; 47 CFR §§ 1.1307, 1.1310, 2.1091 and 2.1093<br />
American National Standards Institute (ANSI) / Institute of Electrical and<br />
Electronic Engineers (IEEE) C95. 1-1992<br />
Institute of Electrical and Electronic Engineers (IEEE) C95.1-1999<br />
Edition<br />
Industry Canada Compliance<br />
This Class B digital apparatus complies with Canadian ICES-003. Cet<br />
appareil numerique de la classe B est conforme à la norme NMB-003<br />
Canada.<br />
Safety Precautions<br />
• Do not operate the transmitter in close<br />
proximity to blasting caps.<br />
• Do not operate the radio in an explosive<br />
atmosphere (petroleum fuels, solvents, dust,<br />
etc.) unless your radio is an intrinsically safe<br />
model designed for such use.<br />
- 2 -
KNG Portable Radio User’s Manual<br />
RF ENERGY EXPOSURE AWARENESS AND CONTROL<br />
INFORMATION, AND OPERATIONAL INSTRUCTIONS FOR<br />
FCC OCCUPATIONAL USE REQUIREMENTS<br />
BEFORE USING YOUR PORTABLE 2-WAY RADIO,<br />
READ THIS IMPORTANT RF ENERGY AWARENESS AND<br />
CONTROL INFORMATION AND OPERATIONAL INSTRUCTIONS<br />
TO ENSURE COMPLIANCE WITH THE FCC’S RF EXPOSURE<br />
GUIDELINES.<br />
NOTICE: This radio is intended for use in occupational/controlled<br />
conditions, where users have full knowledge of their exposure and<br />
can exercise control over their exposure to meet FCC limits. This radio<br />
device is NOT authorized for general population, consumer, or any<br />
other use.<br />
This 2-way radio uses electromagnetic energy in the radio frequency<br />
(RF) spectrum to provide communications between two or more users<br />
over a distance. It uses radio frequency (RF) energy or radio waves<br />
to send and receive calls. RF energy is one form of electromagnetic<br />
energy; other forms include electric power, radar, sunlight and x-rays.<br />
RF energy, however, should not be confused with these other forms<br />
of electromagnetic energy, which when used improperly can cause<br />
biological damage. Very high levels of x-rays, for example, can damage<br />
tissues and genetic material. The energy levels associated with radio<br />
waves from portable 2-way radios, when properly used, are not great<br />
enough to cause biological damage.<br />
Experts in science, engineering, medicine, health and industry work<br />
with organizations to develop standards for exposure to RF energy.<br />
These standards provide recommended levels of RF exposure for both<br />
workers and the general public. These recommended RF exposure<br />
levels include substantial margins of protection. All 2-way radios<br />
marketed in North America are designed, manufactured and tested<br />
to ensure they meet government established RF exposure levels. In<br />
addition, manufacturers also recommend specific operating instructions<br />
to users of 2-way radios.<br />
These instructions are important because they inform users about RF<br />
energy exposure and provide simple procedures on how to control it.<br />
Please refer to the following websites for more information on what<br />
RF energy exposure is and how to control your exposure to assure<br />
compliance with established RF exposure limits.<br />
http://www.fcc.gov/oet/rfsafety/rf-faqs.html<br />
http://www.osha.gov/SLTC/radiofrequencyradiation/index.html<br />
- 3 -
<strong>RELM</strong> <strong>Wireless</strong> Corporation<br />
RF Exposure Compliance and Control Guidelines and Operation<br />
Instructions<br />
To control your exposure and ensure compliance with the occupational/<br />
controlled environment exposure limits always adhere to the following<br />
procedures.<br />
Guidelines:<br />
Do not remove the RF Exposure Label from the device.<br />
User awareness instructions must accompany device when transferred<br />
to other users. Do not use this device if the operational requirements<br />
described herein are not met.<br />
Operating Instructions:<br />
Transmit no more than the rated duty factor of 50% of the time.<br />
To transmit (talk), push the Push-To-Talk (PTT) button. To receive<br />
calls, release the PTT button. Transmitting 50% of the time, or less,<br />
is important because this radio generates measurable RF energy<br />
exposure only when transmitting (in terms of measuring for standards<br />
compliance).<br />
Hold the radio in a vertical position in front of face with the microphone<br />
(and the other parts of the radio, including the antenna) at least one<br />
inch (2.5 cm) away from the nose. Keeping the radio at the proper<br />
distance is important because RF exposures decrease with distance<br />
from the antenna. Antenna should be kept away from eyes.<br />
When worn on the body, always place the radio in a BK Radio approved<br />
clip, holder, holster, case, or body harness for this product. Using<br />
approved body-worn accessories is important because the use of BK<br />
Radio or other manufacturer’s non-approved accessories may result<br />
in exposure levels which exceed the FCC’s occupational/controlled<br />
environment RF exposure limits.<br />
If you are not using a body-worn accessory and are not using the radio<br />
in the intended use position in front of the face, then ensure the antenna<br />
and the radio are kept at least one inch (2.5 cm) from the body when<br />
transmitting. Keeping the radio at the proper distance is important<br />
because RF exposures decrease with increasing distance from the<br />
antenna.<br />
Use only BK Radio approved supplied or replacement antennas,<br />
batteries, and accessories. Use of non-BK Radio approved antennas,<br />
batteries, and accessories may exceed the FCC RF exposure<br />
guidelines.<br />
- 4 -
KNG Portable Radio User’s Manual<br />
For a list of BK Radio approved accessories visit the following website:<br />
http://www.relm.com.<br />
The AMBE® voice compression software included in this product<br />
is protected by intellectual property rights including patent rights,<br />
copyrights and trade secrets of Digital Voice Systems, Inc. The user<br />
of this software is explicitly prohibited from attempting to decompile,<br />
reverse engineer, or disassemble the object code, or in any other way<br />
convert the object code into a human-readable form. This software is<br />
licensed solely for use within this product. US Patent Nos. #6,912,495<br />
B2, #5,870,405, #5,826,222, #5,754,974, #5,715,365, #5,701,390,<br />
#5,649,050, #5,630,011, #5,581,656, #5,517,511, #5,491,772,<br />
#5,247,579, #5,226,084, and #5,195,166.<br />
Contact Information<br />
For additional information on exposure requirements or other<br />
information, visit website http://www.relm.com.<br />
Information and Options<br />
Depending on model type, KNG radios operate in the VHF, UHF or<br />
800MHz frequency band. Up to 2048 channels can be programmed into<br />
the radio. The channels may be divided into operating zones.<br />
Zones can be designated as standard operating zones or command<br />
zones. Command zones are made of up of channels selected from<br />
standard operating zones.<br />
Model<br />
P150<br />
P400<br />
P500<br />
P800<br />
Frequency Range<br />
136 - 174Mhz<br />
380 - 470Mhz<br />
440 - 520HMz<br />
763 - 870Mhz<br />
- 5 -
<strong>RELM</strong> <strong>Wireless</strong> Corporation<br />
Options<br />
Factory installed options are listed on a tag located on the back of your<br />
radio near the top.<br />
KZA0577<br />
KZA0579<br />
Options Tag<br />
Number<br />
KZA0558<br />
KZA0577<br />
KZA0570<br />
KZA0579<br />
KZA0581<br />
KZA0582<br />
Option<br />
Intrinsically Safe Certification<br />
AES/DES Encryption<br />
Over-the-Air Rekeying (OTAR)<br />
P25 Trunking<br />
Vote-Scan<br />
Over-the-Air Programming (OTAP)<br />
Battery Installation and Removal<br />
NOTE: For safety reasons, rechargeable battery packs are shipped<br />
uncharged or only partially charged. Therefore, a rechargeable battery<br />
pack should be properly charged in an approved battery charger before<br />
use.<br />
Only <strong>RELM</strong> <strong>Wireless</strong> approved batteries should be used to insure<br />
proper operation and specifications.<br />
Models with KZA0558, intrinsically safe certification, must use a<br />
KAA0100IS battery to meet certification requirements.<br />
Installing the Battery<br />
1.<br />
2.<br />
3.<br />
Turn the radio off.<br />
Align the tabs on the bottom of the battery<br />
with the slots on the radio.<br />
Push the top of the battery toward the radio<br />
until release tab “clicks” into place.<br />
- 6 -
KNG Portable Radio User’s Manual<br />
Removing the Battery<br />
Release Tab<br />
1.<br />
2.<br />
3.<br />
Slide the release tab toward the<br />
bottom of the radio.<br />
Pull the top of the battery out.<br />
(Approximately 30 o )<br />
Pull up to remove the battery pack.<br />
NOTE: All information programmed into the<br />
radio is maintained even when the battery<br />
pack is removed.<br />
+ TS ON -<br />
Battery Care and Maintenance<br />
BK Radio battery packs are available in a variety of capacities and<br />
types for special applications. Rechargeable battery packs can be<br />
charged separately or while attached to a radio.<br />
Periodically check the contacts on the battery pack for dirt or debris<br />
that could prevent a good electrical contact with the charging base.<br />
WARNING!<br />
Do not drop a battery<br />
pack into fire.<br />
An explosion may occur<br />
Antenna Installation and Removal<br />
NOTE: Transmitting without an antenna could result in damage to<br />
your radio.<br />
Use <strong>RELM</strong>/BK Radio approved antennas only. Use of non-qualified<br />
or mismatched antennas could result in diminished radio operation.<br />
Published radio specifications cannot be guaranteed with non-approved<br />
antennas. Bent, broken or damaged antennas should be replaced.<br />
- 7 -
<strong>RELM</strong> <strong>Wireless</strong> Corporation<br />
Installing the Antenna<br />
Insert the radio’s antenna connector into the<br />
threaded connector of the antenna and turn it<br />
clockwise until it is firmly seated.<br />
Removing the Antenna<br />
Holding the base, turn the antenna<br />
counterclockwise until released.<br />
Radio Controls<br />
Channel/Zone<br />
Select<br />
On/Off<br />
Volume<br />
Programmable<br />
Side Buttons<br />
Speaker<br />
Microphone<br />
Push-to-Talk<br />
BK RADIO<br />
KNG<br />
Accessory<br />
Connector<br />
Alphanumeric<br />
Display<br />
Antenna<br />
Connector<br />
Collar Switch<br />
Programmable<br />
Buttons<br />
Keypad<br />
4<br />
1 2 ABC 3 DEF<br />
5 6<br />
GHI JKL MNO<br />
7 8 9<br />
PQRS TUV WXYZ<br />
#<br />
*<br />
0<br />
Emergency<br />
Button<br />
SCAN<br />
5 6 7 8 9 10<br />
1 1<br />
4<br />
3<br />
2<br />
1<br />
12<br />
13<br />
14<br />
16 15<br />
PRI<br />
VOL<br />
Toggle Switches<br />
LED<br />
- 8 -
KNG Portable Radio User’s Manual<br />
LCD Display<br />
RXD<br />
Ch 1<br />
KNG - P150<br />
171.58500 MHz<br />
CHAN+ TXCG ZONE MENU<br />
C<br />
Status Indicators<br />
Programmable Alphanumeric Labels<br />
Programmed Button Labels<br />
The KNG display can be programmed for a variety of options and<br />
functionality. Check with your <strong>RELM</strong>/BK Radio dealer or communications<br />
officer for information on the programmed functions of your radio.<br />
NOTE: The KNG display can be programmed to display different<br />
information when a trunking or conventional channel is selected.<br />
Status Indicators<br />
Receiver Signal Strength<br />
RXD, RXA<br />
TXD, TXA<br />
Receive Digital, Receive Analog, Hold Time Active<br />
Transmit Digital, Transmit Analog<br />
L, H Low or High transmit power<br />
Selected channel is encrypted.<br />
Flashing when Tx is encrypted or when Rx incoming signal<br />
is encrypted<br />
Battery Level Indicator<br />
P1, P2 Priority 1 Channel, Priority 2 Channel<br />
<br />
C<br />
D<br />
Z<br />
P<br />
C<br />
P<br />
Scanned Channel<br />
Channel Scan On<br />
Dual Mode Scan On<br />
Zone Scan On<br />
Priority Scan On<br />
Repeater Talkaround Enabled<br />
- 9 -<br />
(cont.)
<strong>RELM</strong> <strong>Wireless</strong> Corporation<br />
Status Indicators<br />
Monitor Mode<br />
Flashing indicates Normal Mode in digital operation<br />
Open Audio<br />
Voice Mute Enabled<br />
Alphanumeric Label Options<br />
NOTE: Three channel information lines are programmable with PC Radio Editor.<br />
Channel Number<br />
Channel Label<br />
Channel Number and<br />
Zone Label<br />
Channel Number of Currently Selected Channel or<br />
Active Scanned Channel<br />
Alphanumeric Label of Currently Selected Channel<br />
or Active Scanned Channel<br />
Currently Selected Channel number and Currently<br />
Selected Zone Label<br />
Frequency*<br />
Unit ID<br />
Received Talk Group ID<br />
Pick List Selection*<br />
Zone Label<br />
Zone # and Channel #<br />
Zone Number<br />
RX/TX Key<br />
Subaudible*<br />
DTMF*<br />
MDC*<br />
*Conventional Channels Only<br />
Operating Frequency of Currently Selected Channel<br />
or Active Scanned Channel<br />
Shows your P25 Unit ID<br />
While receiving, the ID of the radio transmitting the<br />
message is displayed<br />
If the received ID is programmed in your radio's Call<br />
List, the corresponding label will be displayed<br />
P25 Talk Group ID of the radio transmitting the<br />
message currently being received<br />
NAC, TGID or Code Guard currently selected from<br />
the programmable Pick Lists<br />
Label of Currently Selected Zone<br />
Currently Selected Zone and Channel Numbers<br />
Currently Selected Zone Number<br />
Currently selected encryption key<br />
Displays CxCSS value of received signal<br />
Displays the numeric DTMF tones of received signal<br />
Displays the numeric MDC ID of received signal<br />
- 10 -
KNG Portable Radio User’s Manual<br />
Programmable Switch and Button Functions<br />
The KNG portable radio is equipped with seven programmable control<br />
buttons and three programmable switches. Switch and button functions<br />
are assigned via PC programming.<br />
NOTE: Switches, buttons and menu items can be programmed for<br />
different functions when a trunking or conventional channel is selected.<br />
Button Options and Labels<br />
The Diamond, Up Arrow, Down Arrow, and Square buttons are<br />
programmable with PC Radio Editor Software. The programmed<br />
functions are activated by pressing the associated button. Active<br />
functions are indicated by a highlighted background.<br />
SCN = Active, SCN = Inactive.<br />
Side Buttons<br />
Collar Switch<br />
Right Toggle<br />
5 6 7 8 9 10<br />
1 1<br />
4<br />
12<br />
3<br />
13<br />
2 14<br />
1 16 15<br />
VOL<br />
On<br />
5 6 7 8 9 10<br />
11<br />
4<br />
3<br />
2<br />
12<br />
13<br />
14<br />
1 16 15<br />
Off<br />
BK RADIO<br />
KNG<br />
SCAN<br />
PRI<br />
SCAN<br />
PRI<br />
Orange Button<br />
Left Toggle<br />
On<br />
Off<br />
Diamond<br />
1 2 ABC 3 DEF<br />
4 5 6<br />
GHI JKL MNO<br />
Square<br />
Up<br />
Down<br />
7PQRS 8 9<br />
TUV WXYZ<br />
#<br />
*<br />
0<br />
Keypad Menu Operation<br />
One button can be programmed as “Menu”. Items shown in the<br />
Options and Labels table can be programmed and arranged via PC<br />
programming. These items can then be accessed with the Menu button.<br />
To select from the menu:<br />
TXD<br />
Channel Scan<br />
1. Press the programmed “Menu” button.<br />
Tx Digital 2. Scroll to the desired menu item with the<br />
PRI Scan<br />
ESC ▲ ▼ ENT up/down buttons .<br />
3. Press the button marked ENT to open<br />
the item.<br />
- 11 -
<strong>RELM</strong> <strong>Wireless</strong> Corporation<br />
Options and Labels<br />
Menu Switch Button Label Trunk Conv.<br />
Backlight x x x LITE x x<br />
Call Alert x x ALRT x x<br />
Channel Add/Delete x CHAN+/- x<br />
Channel Scan x x x SCAN x<br />
Channel Scan List x x SCN+ x<br />
Channel Select x x CHAN x x<br />
Cloning x - x<br />
Contrast x - x x<br />
Control Lock x x x LCK x x<br />
Dual Mode Scan x x x DSCN x x<br />
Emergency 1 x - x x<br />
Inhibit x x INH x<br />
Menu x MENU x x<br />
Monitor x x x MON x<br />
Nuisance Delete x DEL x<br />
Picklist - Rx CxCSS x x RXCG x<br />
Picklist - Rx NAC x x RXNC x<br />
Picklist - Talkgroup ID x x TGID x<br />
Picklist - Tx CxCSS x x TXCG x<br />
Picklist - Tx NAC x x TXNC x<br />
Picklist-KEY* x x KEY x<br />
Picklist-KEYSET* x x KSET x x<br />
Priority Channel x x PRI x<br />
Priority Scan x x x PSCN x x<br />
Radio Check x x x RCHK x<br />
Radio Info x - x x<br />
Rekey Request x x RKEY x x<br />
Repeater Talkaround x x x T/A x<br />
Site Display x x STDS x<br />
Site Lock x x STLK x<br />
Site Search x x STSR x<br />
Squelch Adjust x x SQL x<br />
(cont.)<br />
- 12 -
KNG Portable Radio User’s Manual<br />
Options and Labels (cont.)<br />
Menu Switch Button Label Trunk Conv.<br />
Surveillance Mode x x x SURV x x<br />
System Test x -<br />
Text Message x x TXT x<br />
Tx Digital/Analog x x x TXAD x<br />
Tx Power x x x PWR x x<br />
Tx Secure x x x SEC x x<br />
Unihibit x x UNINH x<br />
Unit Call x x UNIT x x<br />
User Status x x STS x<br />
Version x - x x<br />
Voice Mute x x MUTE x<br />
Zeroize Keys* x x ZERO x x<br />
Zone Scan x x x ZSCN x<br />
Zone Scan List x x ZSC+ x<br />
Zone Select x x ZONE x x<br />
1<br />
Emergency button can only be assigned to the orange button.<br />
* Requires Encryption option.<br />
Channel/Zone Selection Options<br />
The KNG can be programmed with up to 2048 individual channels.<br />
These channels can be divided into zones of one or more channels.<br />
Accessing a channel or zone depends on radio programming.<br />
Channels or zones can be selected using the channel/zone select knob,<br />
by an assigned button or menu item or by direct keypad entry. More<br />
than one selection mode can be programmed.<br />
Channel/Zone Selector Knob<br />
When programmed with the default setting, the channel/zone knob is<br />
used to select a channel (1-16) from the active zone. If programmed to<br />
select zones, zones (1-16) will be selected with the knob.<br />
Channels or zones above sixteen can only be accessed via button,<br />
menu or keypad selection. See below.<br />
- 13 -
<strong>RELM</strong> <strong>Wireless</strong> Corporation<br />
Button/Menu Item Selection<br />
Zone Select<br />
1: Label 1<br />
2: Label 2<br />
3: Label 3<br />
ESC PREV NEXT ENT<br />
Zone Select<br />
118: Label<br />
119: 120 Label<br />
120: Label<br />
ESC PREV NEXT ENT<br />
Zone Select<br />
1: Label 1<br />
2: Label 2<br />
3: Label 3<br />
If programmed to a button, pressing the button<br />
will display the list of available channels or<br />
zones. If programmed as a menu item, the lists<br />
can be displayed by selecting Zone or Channel<br />
select from the menu list. (See “Keypad Menu<br />
Operation”)<br />
Use the Prev/Next buttons to scroll to the<br />
desired selection.<br />
Alternatively, the number keys can be used to<br />
jump directly to the desired channel or zone.<br />
Press the square button marked ENT to go<br />
to the highlighted zone or channel.<br />
ESC PREV NEXT ENT<br />
Direct Keypad Entry<br />
The numeric keypad may also be programmed to directly select channels<br />
or zones. Pressing a number will activate the zone or channel list.<br />
Zone Select<br />
118: Label<br />
119: 120 Label<br />
120: Label<br />
ESC PREV NEXT ENT<br />
Select the desired channel or zone and press<br />
the square button marked ENT to go to the<br />
highlighted location.<br />
Press the diamond button marked ESC to<br />
cancel the selection and return to the currently<br />
operating zone or channel.<br />
Using Knob and Button Operations Together<br />
When selected via the button, menu or keypad method, the entered<br />
channel or zone becomes active regardless of the knob position.<br />
When the knob is turned, the radio leaves the keypad selected channel<br />
and goes to the selection indicated by the knob position.<br />
Example: With the channel select knob on channel 1, selecting channel<br />
12 from the keypad will switch the operating channel to channel 12.<br />
Turning the channel knob to channel 2, switches the operating channel<br />
to channel 2.<br />
- 14 -
KNG Portable Radio User’s Manual<br />
Basic Radio Operation<br />
Turn power on by turning the Volume knob clockwise. A beep sounds,<br />
indicating the radio is operational. The LCD display shows the<br />
programmed display information of the currently selected channel.<br />
Receive<br />
SCAN<br />
5 6 7 8 9 10<br />
1 1<br />
4<br />
12<br />
3<br />
13<br />
2 14<br />
1 16 15<br />
PRI<br />
VOL<br />
RXD<br />
Ch 1<br />
KNG - P25<br />
171.58500 MHz<br />
LITE T/A MENU LCK<br />
Set the volume knob to approximately 50-60%.<br />
When a signal is received, the unprogrammable<br />
top line of the display indicates the signal<br />
strength and operating mode of the incoming<br />
transmission. RXA = analog, RXD = digital.<br />
The check radio volume when no signal is<br />
being received, put the Monitor mode in “Open<br />
Squelch” (see “Monitor”) and adjust the volume<br />
to a comfortable level.<br />
Transmit<br />
Microphone<br />
PTT<br />
BK RADIO<br />
1 2 ABC 3<br />
KNG<br />
TXD<br />
Ch 1<br />
KNG - P25<br />
171.58500 MHz<br />
LITE T/A MENU LCK<br />
DEF<br />
4 5 6<br />
GHI JKL MNO<br />
7PQRS 8 9<br />
TUV WXYZ<br />
#<br />
* 0<br />
1. Press the PTT (Push-To-Talk) switch. When<br />
the radio is transmitting the indicator LED glows<br />
red and TXD or TXA appears in the display.<br />
2. Talk in a normal voice with the microphone<br />
one to two inches from your mouth.<br />
3. Release the PTT switch to stop transmitting.<br />
If the length of your message is nearing the<br />
programmed Time-Out Timer setting, a tone<br />
sounds indicating 5 seconds left to transmit. At<br />
the end of the programmed time, the transmitter<br />
automatically shuts off and an alert tone<br />
sounds. To continue transmission, release the<br />
PTT switch, then press it again and continue<br />
talking.<br />
If the Transmit Indicator does not glow and a tone sounds, you are<br />
on a receive-only channel or the channel is busy (see Busy Channel<br />
Lockout). Select an authorized transmit channel.<br />
NOTE: When using a channel programmed for mixed mode transmit<br />
the signal will be transmitted in the mode selected by the TX Digital<br />
selection. Or if programmed for Mixed Mode Talkback, the radio will<br />
transmit in the mode of the last received channel while the “RX” icon is<br />
displayed. (See Mixed Mode Operation.)<br />
- 15 -
<strong>RELM</strong> <strong>Wireless</strong> Corporation<br />
Command Zone Operation<br />
The KNG portable radio allows construction of Command Zones drawn<br />
from any of the programmed channels in standard operating zones.<br />
Each zone is designated as a Standard Operating Zone or a Command<br />
Zone with the PC radio editor software.<br />
Building a Command Zone [CHAN+]<br />
To build a Command Zone the “Channel Add/Delete” function must be<br />
assigned to a programmable button.<br />
While operating in a standard zone press the “CHAN+” button to add<br />
the currently selected channel to a command zone. The list of available<br />
command zones will be displayed. Use the up/down arrows to select<br />
the zone to add the channel or use the number keys to move directly to<br />
the desired zone.<br />
Pressing the “Enter” button copies the channel information to the first<br />
available channel slot in the selected command zone.<br />
Example: If the command zone has three channels, the newly added<br />
channel will be channel four.<br />
Editing a Command Zone [CHAN-]<br />
When operating in a Command Zone, press the “CHAN-” button to<br />
remove the selected channel from the zone.<br />
When a channel is deleted, the display momentarily shows “Channel<br />
Deleted”, and the following channels move up in the list. For example, if<br />
channel 5 is deleted, channel 6 becomes the new channel 5, channel 7<br />
becomes the new channel 6, etc.<br />
NOTE: Modifications to a command zone channel, such as User<br />
Selected Tones, do not affect the original standard zone channel.<br />
- 16 -
KNG Portable Radio User’s Manual<br />
Code Guard/NAC Operation<br />
Conventional Channels<br />
Code Guard Receive<br />
Analog channels programmed with a receive code guard will be heard<br />
only when the proper carrier frequency and Code Guard value is<br />
received. Analog and mixed mode receive channels will also unmute<br />
when the radio is in monitor mode.<br />
Code Guard Transmit<br />
Whenever transmitting on an analog channel, any programmed subaudible<br />
Code Guard is transmitted. Depending on radio programming,<br />
the Code Guard can be the default tone assigned to the channel or a<br />
tone selected from the Code Guard Picklist (see Pick List Options).<br />
SCAN<br />
5 6 7 8 9 10<br />
1 1<br />
4<br />
12<br />
3<br />
13<br />
2 14<br />
1 16 15<br />
PRI<br />
VOL<br />
Busy Channel/Transmit<br />
Indicator<br />
TXA<br />
Ch 1<br />
KNG - P25<br />
171.58500 MHz<br />
LITE T/A MENU LCK<br />
The frequency must be clear prior to<br />
transmitting on a Code Guarded channel. If the<br />
LED Indicator is yellow do not transmit. Busy<br />
Channel Lockout can be programmed to<br />
disallow transmitting while a channel is busy.<br />
1. Press the PTT switch. When the transmitter<br />
is on, the LED Indicator glows red and TX<br />
appears in the display.<br />
2 Talk in a normal voice with the microphone<br />
one to two inches from your mouth.<br />
3. Release the PTT switch to stop transmitting.<br />
Analog Squelch Control<br />
Sub-audible signaling (CTCSS/CDCSS) is used to allow a group of<br />
radios to be selectively called in an analog system. Programming the<br />
receive code guard equal to zero allows for Carrier Squelch operation,<br />
where the radio will unmute whenever a carrier is detected regardless<br />
of the transmitted Code Guard.<br />
APCO Project 25 Digital Squelch Control<br />
Network Access Codes (NACs) provide the digital equivalent of analog<br />
sub-audible signaling (CTCSS/CDCSS) allowing a group of radios to be<br />
selectively called within a system.<br />
- 17 -
<strong>RELM</strong> <strong>Wireless</strong> Corporation<br />
Users in the same area (using the same NAC) can be further divided<br />
into Talk Groups, with each group having its own Talk Group ID (TGID).<br />
Group Calls are made by designating both the users’ NAC and TGID.<br />
Each radio also has an individual P25 unit ID. A Unit-to-Unit call<br />
contains the addressee’s NAC, and uses the addressee’s P25 unit ID<br />
instead of the TGID.<br />
When operating in Digital Mode, each channel can be programmed to<br />
use either Normal squelch or Selective squelch.<br />
Normal squelch is used to mimic analog operation. Signals are only<br />
qualified with the programmed NAC. TGIDs and P25 Unit IDs are<br />
ignored. Each digital channel is programmed with a receive NAC and a<br />
transmit NAC. When an incoming signal’s NAC matches the channel’s<br />
programmed receive NAC, the radio unmutes. The default NAC is 0659<br />
($293 hex).<br />
The digital equivalent of carrier squelch is achieved by programming<br />
the receive NAC = $F7E (3966 decimal). The radio will unmute when a<br />
digital signal with any NAC is detected. The $F7E (3966 decimal) NAC<br />
is reserved for receivers and is not allowed as a transmit NAC.<br />
Selective squelch is used for processing Group Calls and Unit-to-<br />
Unit Calls. TGIDs are assigned on a per-channel basis. Users can be<br />
separated into Talk Groups with each group having its own TGID. Then,<br />
on channels programmed for Selective squelch, the incoming signal’s<br />
NAC and TGID must match the channels programmed receive NAC<br />
and TGID for the radio to unmute. The default TGID is 1.<br />
The TGID value 65535 ($FFFF hex) is used to effect an “All Call”. If the<br />
radio receives a signal with a matching NAC and the TGID = 65535<br />
($FFFF hex), it will unmute. Also, if the radio’s programmed TGID is<br />
65535 ($FFFF hex), it will open on any signal with a matching NAC,<br />
ignoring the incoming TGID. A TGID = 0 means “no one”. If the radio<br />
is programmed with the TGID = 0, it will accept incoming group calls<br />
containing the “All Call” TGID, and correctly addressed Unit-to-Unit<br />
calls only.<br />
- 18 -
KNG Portable Radio User’s Manual<br />
Mixed Mode Operation<br />
The receiver and transmitter are capable of operating in analog wideband<br />
(25 kHz channel spacing), analog narrow-band (12.5 kHz channel<br />
spacing) and APCO Project 25 Digital Mode.<br />
Each channel’s Receive and Transmit Mode can be set independently<br />
as follows:<br />
Mode RX TX<br />
Analog Receive qualified analog Transmit analog signals only<br />
signals only<br />
Digital<br />
Receive qualified digital<br />
signals only<br />
Transmit digital signals only<br />
Mixed<br />
Automatically receive qualified<br />
analog or digital signals<br />
Transmit analog or digital signal,<br />
depending on the status of “TX<br />
Digital” switch<br />
TXD<br />
Ch 1<br />
KNG - P25<br />
171.58500 MHz<br />
LITE T/A MENU LCK<br />
TXA<br />
Ch 1<br />
KNG - P25<br />
171.58500 MHz<br />
LITE T/A MENU LCK<br />
Digital receptions and transmissions will be<br />
indicated by illuminating the D annunciator in<br />
addition to the RX or TX annunciator.<br />
Analog receptions and transmissions will be<br />
indicated by illuminating the A annunciator in<br />
addition to the RX or TX annunciator.<br />
Mixed Mode Talkback<br />
If Mixed Mode Talkback is enabled, transmissions initiated while<br />
hold time remains will be in the same mode as the received signal,<br />
if the signal was received on the Ready to Transmit (RTX) channel.<br />
Depending on programming, the RTX channel can be the main<br />
channel, a held scan or priority channel if Talkback Scan is enabled, or<br />
the Priority 1 channel if “TX on PR1” is enabled. TX Mode on the RTX<br />
channel must be set to MIXED.<br />
RXD<br />
Ch 1<br />
KNG - P25<br />
171.58500 MHz<br />
LITE T/A MENU LCK<br />
Press the PTT while the<br />
RX indicator is shown<br />
While hold time after a reception remains,<br />
transmissions will be in the same mode as the<br />
received signal, regardless of the status of the<br />
TX Digital switch. As in Talkback Scan, the RTX<br />
channel and receive annunciators will be<br />
displayed for the duration of the timer.<br />
- 19 -
<strong>RELM</strong> <strong>Wireless</strong> Corporation<br />
Trunking Channel Basic Operation<br />
Some KNG radios are equipped with optional P25 Trunking capability.<br />
To determine if your radio is trunking compatible, remove the battery<br />
and check the Options Label near the top of the radio. “KZA0579”<br />
indicates the trunking option is installed.<br />
Trunking parameters and functions can only be programmed by<br />
qualified persons via PC. Contact your system administrator or radio<br />
dealer for information on how your radio is programmed.<br />
System Registration<br />
If the radio is powered on when a trunking channel is selected, the radio<br />
will attempt to register with the selected trunking system.<br />
The LED will flash twice upon successfully registering with the system<br />
and setting talkgroup affiliation.<br />
If the affiliation was unsuccessful the LED will continue to flash.<br />
If the radio is not in range of the system “Out of Range” will be<br />
displayed and an alert tone will sound every ten seconds.<br />
If registration is refused or denied, a denied message and tone will<br />
appear briefly before switching to “Out of Range” mode.<br />
After successful registration the programmed LCD display criteria is<br />
displayed.<br />
Transmitting<br />
When the PTT is pressed, a three beep Talk Permit Tone will be heard<br />
if the channel is available.<br />
If there is no channel available the radio will emit a tone and display<br />
“BUSY”. Release the PTT.<br />
The radio will remain in busy mode until the channel is available.<br />
When the channel becomes available the three beep Talk Permit Tone<br />
will be emitted. Re-press the PTT to continue your call.<br />
If the PTT is not pressed within two seconds of the Talk Permit Tone,<br />
the radio will return to normal standby mode.<br />
- 20 -
KNG Portable Radio User’s Manual<br />
Scan Options<br />
Channel Scan [SCAN]<br />
Conventional Channels<br />
When on, Channel Scan monitors activity on the scan list channels in<br />
the currently operating zone. Scan operates only while the radio is not<br />
transmitting.<br />
Channels designated as scan channels are identified by the symbol<br />
at the top of the LCD display. If allowed, the scan list can be edited by<br />
the radio user. (See Channel Scan List).<br />
When Channel Scan is on, the C symbol will be shown at the top of<br />
the LCD display.<br />
When a signal is detected, scanning stops and the message is<br />
received. The received channel is shown in place of the selected<br />
channel.<br />
Once the signal ends, the radio continues to monitor the channel for the<br />
preset scan delay time before it resumes scanning.<br />
Channel Scan operation can be a switch or as a button or menu list<br />
item.<br />
Channel Scan may be used in conjunction with Priority Scan operation<br />
(see Priority Scan).<br />
Scanning Code Guarded Channels<br />
Conventional Analog Channels<br />
When a signal is detected, scanning stops while the radio checks for<br />
the proper Code Guard value. If the signal contains the proper Code<br />
Guard value, the radio receives the message. Otherwise, the radio<br />
resumes scanning immediately.<br />
Transmitting with Scan On<br />
The radio transmits on the channel selected by the Channel Selector<br />
knob unless Talkback Scan is enabled (see Talkback Scan) or Priority<br />
Scan is on and Transmit on Priority 1 is enabled (see Priority Scan).<br />
- 21 -
<strong>RELM</strong> <strong>Wireless</strong> Corporation<br />
Channel Scan List [SCN+]<br />
Conventional Channels<br />
The Channel Scan List allows the radio user to add or remove channels<br />
from the list of channels to be monitored while channel scanning.<br />
Channels designated as scan channels are identified by the symbol<br />
at the top of the LCD display.<br />
The Scan List operation can be assigned as a button or menu list item.<br />
When Channel Scan List is assigned to a button, press the button to<br />
add or remove the selected channel from the scan list.<br />
When assigned as a menu item, open the menu and select the channel<br />
you wish to add or remove from the scan list. Press “+/-” to add or<br />
remove. Channels in the scan list will be indicated with the symbol.<br />
Talkback Scan<br />
Conventional and Trunking Channels<br />
If your radio is programmed for Talkback Scan, press PTT while<br />
a channel is active or while scan delay time remains, you will be<br />
responding on the transmit frequency of the received channel. The ‘RX’<br />
indicator will be shown in the display while scan delay time remains.<br />
Talkback Scan will not work if Priority Scan is on and your radio is also<br />
programmed to transmit on the Priority 1 channel (see Priority Scan).<br />
Vote Scan [Requires Option KZA0581]<br />
Conventional Channels<br />
Channels in a multicast conventional systems can be added to the scan<br />
list and designated as “voted” channels. When a signal is received on<br />
a voted channel the radio checks all voted channels and selects the<br />
channel with the best signal.<br />
If enabled, vote scanning takes place whenever the channel scan<br />
switch in on.<br />
NOTE: Channel voting occurs only with Channel Scan and is disabled<br />
when Zone Scanning. Channels programmed as Vote channels are<br />
treated as normal scan list channels during Zone Scan operation.<br />
See also Priority Scan and Zone Scan.<br />
- 22 -
KNG Portable Radio User’s Manual<br />
Dual Mode Scan [DSCN]<br />
Conventional and Trunking Channels<br />
Dual Mode scan provides the ability to scan trunking and conventional<br />
channels simultaneously.<br />
NOTE: The Dual Mode Scan list must be setup using the PC radio<br />
editor and cannot be changed by the radio user.<br />
When Dual Mode Scan is turned on the D icon is displayed and the<br />
radio scans all channels in the dual mode scan list.<br />
Dual Mode Scan can be assigned to a switch or as a button or menu list<br />
item. For best operation, Dual Mode Scan should be assigned in both<br />
conventional and trunking global settings with the PC editor.<br />
Priority Scan [PSCN]<br />
Conventional Channels<br />
Two channels can be designated as priority channels. When Priority<br />
Scan is on, these channels are monitored for incoming traffic. When<br />
a qualified signal is detected the speaker is opened to listen to the<br />
message.<br />
If a message is detected on the channel designated as Priority 2, the<br />
radio will continue to monitor Priority 1 channel for activity. If activity is<br />
detected the radio will switch to the Priority 1 channel.<br />
When used in conjunction with Channel Scan, the radio monitors the<br />
Priority channels and will switch from a scanned channel to the Priority<br />
channel if a qualified signal is detected.<br />
Depending on radio setup, priority channels can be tied to the currently<br />
operating zone or can be assigned to a specific channel regardless of<br />
the operating zone.<br />
Channels designated as Priority channels are identified by the P1 or P2<br />
symbol at the top of the LCD display. When Priority Scan is on, the C P<br />
symbol will be shown.<br />
Priority Scan operation can be a switch or as a button or menu list item.<br />
Trunked Channels<br />
When on trunked channels, Priority Scan is used to turn system<br />
scanning on or off.<br />
- 23 -
<strong>RELM</strong> <strong>Wireless</strong> Corporation<br />
Priority Channel Select [PRI]<br />
Conventional Channels<br />
Depending on programming, priority channels can be radio-wide<br />
(System) or zone specific (Zone). Radio-wide priority channels are<br />
monitored regardless of the current operating zone. (See Priority Scan<br />
for more details.)<br />
If enabled the user can use the keypad to change the priority channels.<br />
Priority Channel Select can be assigned to a switch or as a button or<br />
menu list item.<br />
Selecting a System Priority Channel<br />
Open the menu and select the System Priority channel you wish to<br />
change.<br />
Press “ENTER” to open System Priority Channel menu.<br />
Options:<br />
Off - Disables the priority channel.<br />
Use Main - Uses the selected channel as the priority channel.<br />
Select - Assigns a specific channel as the priority channel.<br />
To assign a specific channel as a System Priority Channel, highlight<br />
“Select” and press the “ENTER” button.<br />
The Zone selection menu will be displayed.<br />
Highlight the zone of the desired priority channel and press the<br />
“ENTER” buttons.<br />
The Channel selection menu will then be displayed.<br />
Highlight the desired channel and press the “ENTER” button to set the<br />
priority channel.<br />
The display will return to the main Priority Channel Select menu.<br />
Selecting a Zone Priority Channel<br />
Open the menu and select the Zone Priority channel you wish to<br />
change.<br />
Press “ENTER” to open Priority Channel menu.<br />
Options:<br />
Off - Disables the priority channel.<br />
Use Main - Uses the selected channel as the priority channel.<br />
Select - Assigns a specific channel as the priority channel.<br />
To assign a specific channel as a Zone Priority Channel, highlight<br />
“Select” and press the “ENTER” button.<br />
- 24 -
KNG Portable Radio User’s Manual<br />
The Channel selection menu will be displayed.<br />
Highlight the desired channel and press the “ENTER” button to set the<br />
priority channel.<br />
The display will return to the main Priority Channel Select menu.<br />
Zone Scan [ZSCN]<br />
Conventional Channels<br />
When Zone Scan and Channel Scan are on, the radio scans all<br />
programmed scan channels in zones designated as Zone Scan zones.<br />
If allowed, the scanned zone list can be edited by the radio user. (See<br />
Zone Scan List).<br />
When Zone Scan is on, the Z P symbol will be shown at the top of the<br />
LCD display.<br />
Zone Scan operation can be a switch or as a button or menu list item<br />
and may be used in conjunction with Priority Scan operation.<br />
Zone Scan List [ZSC+]<br />
Conventional Channels<br />
The Zone Scan List allows the radio user to add or remove zones from<br />
the list of zones to be scanned.<br />
The Zone Scan List operation can be assigned as a button or menu list<br />
item.<br />
When Zone Scan List is assigned to a button [ZSC+], press the button<br />
to add or remove the currently operating zone from the scan list.<br />
When assigned as a menu item, open the menu and select the Zone<br />
you wish to add or remove from the scan list. Press “ENTER” to add or<br />
remove. Zones in the scan list will be indicated with the symbol.<br />
- 25 -
<strong>RELM</strong> <strong>Wireless</strong> Corporation<br />
Pick List Options<br />
The KNG provides users the ability to select and assign Pick List<br />
functions to specific channels. Pick List Options can be assigned to a<br />
programmed button or as menu list items.<br />
Available Pick List options include:<br />
Transmit Code Guards<br />
Receive Code Guards<br />
Transmit Network Access Codes<br />
Receive Network Access Codes<br />
Talk Group IDs<br />
Encryption Keys (see Encryption Operation)<br />
Encryption Keysets (see Encryption Operation)<br />
TX/RX CxCSS Picklist [TXCG] [RXCG]<br />
Conventional Analog or Mixed Mode Channels<br />
Selecting a CTCSS/CDCSS Code Guard from the Pick List will assign<br />
the tone to the currently select analog or mixed-mode channel.<br />
User assigned Transmit and Receive Code Guards are selected<br />
independently.<br />
To change a Code Guard, open the RXCG or TXCG menu, select the<br />
desired tone and press “ENTER”.<br />
To return the tone to the pre-programmed value select “Default”.<br />
If allowed, picklist values can be changed through keypad programming.<br />
TX/RX Network Access Code Picklist [TNAC] [RNAC]<br />
Conventional Digital or Mixed Mode Channels<br />
Selecting a Network Access Code (NAC) from the Pick List will assign<br />
the NAC to the currently select digital or mixed-mode channel.<br />
User assigned Transmit and Receive NACs are selected independently.<br />
To change a NAC, open the RXNAC or TXNAC menu, select the<br />
desired NAC and press “ENTER”.<br />
To return the NAC to the pre-programmed value select “Default”.<br />
If allowed, picklist values can be changed through keypad programming.<br />
- 26 -
KNG Portable Radio User’s Manual<br />
Talk Group ID Picklist [TGID]<br />
Conventional Digital Channels<br />
Selecting a Talk Group ID from the Pick List will assign the TGID to the<br />
currently select channel. All other channels are unaffected.<br />
User selectable menu access can be assigned to a button or menu list<br />
item.<br />
Open the menu of available TGIDs.<br />
Select the desired Talk Group ID or, to return the TGID to the preprogrammed<br />
value, select “Default”.<br />
Press “ENTER” to set the selection.<br />
If allowed, picklist values can be changed through keypad<br />
programming.<br />
Encryption Key Picklist [KEY]<br />
Digital or Mixed Mode Channels<br />
Encryption equipped radios only.<br />
Selecting an Encryption Key from the Pick List will assign the key to all<br />
encrypted channels that do not have ‘Key Lock’ programmed. Locked<br />
key channels will continue to use the pre-programmed key.<br />
(See Encryption Operation)<br />
Keyset Picklist [KSET]<br />
Digital or Mixed Mode Channels<br />
OTAR equipped radios only.<br />
Selecting a Keyset from the Pick List will cause the radio to use<br />
encryption keys from the selected Keyset.<br />
(See Encryption Operation)<br />
- 27 -
<strong>RELM</strong> <strong>Wireless</strong> Corporation<br />
Unit-to-Unit Call Options<br />
Individual Unit Call [UNIT]<br />
Conventional Digital and Trunking Channels<br />
P25 Unit IDs allow for Unit-To-Unit calls when the radio is operating in<br />
Digital Mode. The function must be enabled by radio programming to<br />
allow this mode of operation.<br />
Channels programmed for analog only operation will not be able to<br />
transmit or receive Unit-To-Unit calls.<br />
Conventional Channels<br />
Placing an Individual Unit Call<br />
Open the Unit Call menu and select the desired “Unit Call” option.<br />
Last Call = Use the P25 ID of the last Call.<br />
Call List = Use the programmed P25 ID List.<br />
Enter ID = Enter a numeric P25 ID.<br />
Press Enter to enter Unit Call Mode.<br />
The LCD displays the ID number or associate label of the targeted<br />
radio.<br />
Press the PTT button to send the unit-to-unit call.<br />
To exit the Individual Call mode press “Exit”.<br />
If there is no response to the call after 60 seconds, the radio exits the<br />
Unit-to-Unit mode and returns to normal operation.<br />
Receiving an Individual Unit Call<br />
When a properly addressed unit call is received, an alert tone sounds<br />
and the LCD displays the ID number or associate label of the radio<br />
placing the call.<br />
Accept the call<br />
To accept the call and respond in unit-to-unit mode, press “ACPT”<br />
and transmit as normal.<br />
To exit the Individual Call mode, press “Exit”<br />
Ignore the call<br />
To ignore the call and continue operating in normal mode, press “INGR”.<br />
- 28 -
KNG Portable Radio User’s Manual<br />
Unit-to Unit Callback<br />
If enabled, pressing PTT during the hold time results in a Unit-to-Unit<br />
call to the received unit ID.<br />
If there is no response to the call after 60 seconds, the radio returns to<br />
normal operation.<br />
Call List Programming<br />
If enabled with the PC radio editor, the P25 Call List for conventional<br />
channels can edited via the radio’s keypad programming function.<br />
Trunking Channels<br />
Limitations on unit-to-unit calls may programmed in trunking systems.<br />
Options include disallowing unit-to-unit operation, limiting operation<br />
to only the programmed unit call list or ‘response only’ which allows<br />
the user to respond to incoming calls only. Check with your system<br />
administrator for information about your programmed features.<br />
Placing a Call<br />
When placing a unit-to-unit call on a trunking channel, a telephonetype<br />
ring tone will be emitted until the targeted radio acknowledges or<br />
responds to the call.<br />
Receiving an Individual Unit Call<br />
When receiving a unit call, an alert tone will be emitted and the LCD will<br />
display the Unit ID of the radio sending the call.<br />
Press “Accept” to respond to the call or “Ignore” to remain in normal<br />
operation.<br />
- 29 -
<strong>RELM</strong> <strong>Wireless</strong> Corporation<br />
Emergency Signalling Options<br />
Conventional Digital and Trunking Channels<br />
The KNG portable radio supports P25 Emergency Operation. When<br />
Emergency Operation is engaged the radio will transmit the P25 ID<br />
of the radio along with the required P25 Emergency bit. Emergency<br />
operation applies only to channels programmed for Digital or Mixed<br />
Mode transmissions.<br />
On channels programmed for analog transmissions, pressing PTT in<br />
Emergency Mode will result in a normal analog transmission.<br />
On channels programmed for Mixed Mode transmissions, pressing PTT<br />
will result in a digital transmission, regardless of the position of the ‘TX<br />
Digital’ switch.<br />
All scanning and priority functions will be disabled during Emergency<br />
operation.<br />
Depending on the radio’s PC programmable settings, emergency signal<br />
will be sent automatically or with each Push-to-Talk.<br />
Placing an Emergency Call<br />
SCAN<br />
5 6 7 8 9 10<br />
1 1<br />
4<br />
12<br />
3<br />
13<br />
2 14<br />
1 16 15<br />
PRI<br />
VOL<br />
TXD<br />
EM ERG EN CY<br />
KNG - P25<br />
LITE T/A MENU PR1<br />
To place an emergency call, press and hold the<br />
programmed emergency button until the radio<br />
beeps and the display flashes “EMERGENCY”.<br />
Radio automatically sends the emergency<br />
signal on the pre-programmed emergency<br />
channel.<br />
To return to normal operation press and hold<br />
the Emergency button or cycle radio power.<br />
Receiving an Emergency Signal<br />
RXD<br />
EM ERG EN CY<br />
Unit ID 12345<br />
LITE T/A MENU PR1<br />
To receive an emergency call, the radio’s<br />
receive mode must be programmed to Digital or<br />
Mixed.<br />
When receiving a qualified emergency call,<br />
the radio will beep. The the display will flash the word “EMERGENCY”<br />
and the P25 ID of the radio sending the signal for the duration of the<br />
reception, and during any hold time. The RXD icon will also be lit.<br />
- 30 -
KNG Portable Radio User’s Manual<br />
Encryption Operation<br />
Conventional Digital and Trunking Channels<br />
The KNG may optionally be configured for Secure communication<br />
on channels operating in Digital Mode. No encryption is available for<br />
analog channels. To determine if your radio is encryption compatible,<br />
remove the battery and check the Options Label near the top of the<br />
radio. “KZA0577” indicates the encryption option is installed.<br />
Required Setup<br />
Radios that have the DES/AES factory option for encryption must<br />
have encryption keys loaded with an APCO Project 25 compatible<br />
key fill device such as the Motorola KVL 3000 Plus, using a BK Radio<br />
keyloader cable. The radio can hold up to 32 AES and/or DES keys.<br />
After loading keys in the radio, the KNG PC programming software<br />
must be used to configure the radio’s key table and to assign default<br />
transmit keys to each channel.<br />
Radios that have the OTAR factory option support Over-the-Air<br />
Rekeying of encryption keys (OTAR). The KNG PC programming<br />
software must be used to enable OTAR and to mark the channel(s) that<br />
will communicate with the Key Management Facility (KMF). In addition,<br />
the radio must have key encryption keys (used only to encrypt other<br />
keys) loaded with an APCO Project 25 compatible key fill device such<br />
as the Motorola KVL 3000 Plus, using a BK Radio keyloader cable.<br />
Basic Operation<br />
The receiver automatically detects both clear and secure signals.<br />
The transmitter selects clear or secure operation based on each<br />
channel’s programming. Digital channels can be programmed to always<br />
transmit encrypted, always transmit clear, or to select the encryption<br />
mode with the TX Secure switch.<br />
The display indicates Secure Operation as follows:<br />
Ch 1<br />
KNG - P25<br />
171.58500 MHz<br />
LITE T/A MENU LCK<br />
In Standby Mode, if the radio will transmit in<br />
Secure Mode when PTT is pressed, the encrypt<br />
icon is displayed.<br />
When receiving or transmitting an encrypted<br />
signal, the encrypt icon flashes in the display.<br />
- 31 -
<strong>RELM</strong> <strong>Wireless</strong> Corporation<br />
Transmit Secure [SEC]<br />
Channels programmed for selectable encryption can have “Transmit<br />
Secure” programmed as a switch, button or menu item. The default<br />
setting uses the collar switch to select Transmit Secure.<br />
Ø = encrypted, O = clear<br />
When SEC is on, encrypted channels programmed for switchable<br />
encryption will transmit an encrypted signal.<br />
NOTE: The SEC switch has no effect on channels programmed as<br />
Encrypted Only or Clear Only.<br />
Channels in the Ready-to-Transmit Encrypted mode will display the<br />
symbol on the top line of the LCD.<br />
When transmitting or receiving an encrypted signal a flashing symbol<br />
will be displayed.<br />
Transmit Encryption Key Selection [KEY]<br />
The radio can hold up to 32 DES or AES encryption keys. Each channel<br />
is assigned a default key for transmit. The key can be locked to the<br />
channel, or if programming allows, a transmit key other than the default<br />
key can be selected from the radio’s Key Pick List.<br />
To change an encryption key, open the KEY menu. Programmed key<br />
labels will be displayed.<br />
Select the desired key and press “ENTER”.<br />
To return the key to the pre-programmed value select “Default”.<br />
If a key is selected that has not been programmed, the radio will emit a<br />
three beep tone and display “Key Fail” before going to standby mode.<br />
The radio will not transmit but will beep and display “Key Fail” when<br />
PTT is pressed.<br />
User Selectable Encryption Keyset [KEYST]<br />
OTAR equipped radios only.<br />
Selecting a keyset from the Pick List will cause the radio to use<br />
encryption keys from the selected keyset.<br />
User selectable menu access can be assigned to a button or menu list<br />
item.<br />
To change the encryption keyset, open the KEYST menu. Programmed<br />
Keyset labels will be displayed.<br />
Select the desired keyset and press “ENTER”.<br />
- 32 -
KNG Portable Radio User’s Manual<br />
Rekey Request [RKEY]<br />
OTAR equipped radios only.<br />
On radios equipped with over-the-air rekeying (OTAR), a radio user<br />
can manually request an encryption rekey from the Key Management<br />
Facility (KMF).<br />
For a radio to receive encryption keys or keysets over-the-air, the<br />
selected channel must be designated as an OTAR channel via PC<br />
programming. Refer to your PC programming documentation for more<br />
information.<br />
To request a re-key:<br />
Open the Rekey Request menu.<br />
Press the “YES” button to Request Keys, or press “ESC” to cancel the<br />
operation.<br />
If the “YES” button is pressed while on a channel that has not been<br />
marked as an OTAR channel, the radio will boop and “NON-OTAR” will<br />
appear on the display.<br />
If a successful rekey occurs, a tone will sound, and the display will<br />
momentarily show “REKEYED”.<br />
Keyset Viewing and Selecting [KSET]<br />
OTAR equipped radios only.<br />
The radio can hold up to 8 encryption keysets. Only one keyset can be<br />
active at any time. The radio will receive messages encrypted with any<br />
of the keys in any of the keysets, but transmit keys can only be selected<br />
from the active keyset.<br />
To change an encryption keyset, open the KEYST menu. Programmed<br />
keyset labels will be displayed. Select the desired keyset and press<br />
“ENTER”.<br />
Zeroizing [ZERO]<br />
The radio provides a method for the user to “panic-zeroize” all<br />
encryption keys. Zeroizing removes all encryption keys from the radio,<br />
including keys used for OTAR and Tactical OTAR operation.<br />
Zeroize can be assigned as a button or menu list item.<br />
Open the “Zeroize Keys” menu.<br />
Press “YES” to erase all encryption keys or “ESC” to cancel the action.<br />
When successfully removed the “Keys Removed” message will<br />
momentarily be displayed.<br />
- 33 -
<strong>RELM</strong> <strong>Wireless</strong> Corporation<br />
Messaging<br />
Digital Conventional P25 channels can be programmed to send and<br />
receive text messages and radio status messages.<br />
Text messages can be selected from a pre-programmed list or manually<br />
entered using the radio keypad.<br />
Status messages are pre-programmed only.<br />
Text Messaging [TXT]<br />
Conventional Digital Channels<br />
Message types include predefined messages, manually entered<br />
messages or locally stored messages.<br />
Predefined messages - Predefined messages are programmed<br />
into the radio memory using the radio editor software.<br />
Manually Entered Messages - Text messages can be manually<br />
entered via the radio’s keypad.<br />
Locally Stored Messages - Up to five manually entered messages<br />
can be stored in individual radios.<br />
Sending a Message<br />
To initiate a text message press the “TXT” button or select “Text<br />
Message” from the menu.<br />
Select “Send” from the menu and press “Enter”.<br />
Select Message Type<br />
From the “Select Entry Type” menu, choose the type of message to<br />
send and press “Enter”.<br />
Predefined List or Manual Entry List<br />
When “Predefined List” or “Manual Entry List” is selected, a list of<br />
available messages is displayed.<br />
Select the message to be sent and press “Enter”.<br />
NOTE: When sending a predefined message the message ID<br />
is transmitted. The receiving radio will display the message<br />
programmed with the corresponding ID. If the receiving radio has no<br />
programmed message with the transmitted ID, “Text Message X” is<br />
displayed, where “X” is the received ID number.<br />
- 34 -
KNG Portable Radio User’s Manual<br />
Manual Entry<br />
When “Manual Entry” is selected use the keypad to enter the desired<br />
message (see keypad character table). Press “Enter” to select the<br />
target radio.<br />
Select Target Radio<br />
Last Call - Select “Last Call” to send the message to same radio<br />
you last sent a text message.<br />
Press “Send” to send the message.<br />
Call List - Selecting “Call List” opens a list alias’ for the preprogrammed<br />
Unit IDs. Select the desired target radio and press<br />
“Send” to send the message.<br />
Unit ID - Select “Unit ID” to enter the P25 ID of the target radio.<br />
Use the keypad to enter the ID then press “Send” to send the<br />
message<br />
Broadcast - Select “Broadcast” to send the text message to all<br />
text enabled radios regardless of unit ID. Press “Send” to send the<br />
message.<br />
Message Acknowledgement<br />
When the text message has been received by the targeted radio,<br />
an alert tone will sound and the acknowledgment message will be<br />
displayed.<br />
Press “OK” or wait for five seconds to return to normal radio operation.<br />
If the targeted radio is unavailable, an alert tone will sound and the<br />
failed acknowledgement message will be displayed.<br />
Press “RTRY” to resend the message.<br />
Press “OK” or wait for five seconds to return to normal radio operation.<br />
When sending a “Broadcast” message, no “text received” notification<br />
is shown. Only confirmation that the text has been broadcast will be<br />
displayed.<br />
Receiving a Message<br />
When an incoming text message is received an alert tone is sounded<br />
and the Text Message Received message is momentarily displayed.<br />
The top programmed display line will alternate between the programmed<br />
setting and “Text Message” until the message is read.<br />
- 35 -
<strong>RELM</strong> <strong>Wireless</strong> Corporation<br />
Reading the message<br />
To read the message press the “TXT” button or select ‘Text Message”<br />
from the menu.<br />
Select “Read” to view the message<br />
Stored Messages<br />
Up to five messages can be programmed into the “Manual Entry List”<br />
and are accessed from the “Select Entry Type” menu.<br />
To store a manually entered text message press the “TXT” button or<br />
select “Text Message” from the menu.<br />
Select “Store” from the menu an press “Enter”.<br />
Use the keypad to enter the desired message then press “Enter”.<br />
(See keypad character table)<br />
Select the storage slot for the message and press “Enter” to store the<br />
message.<br />
User Status Messaging [STS]<br />
Conventional Digital Channels<br />
Sending a Status Update<br />
NOTE: When sending a message the message ID is transmitted.<br />
The receiving radio will display the message programmed with the<br />
corresponding ID. If the receiving radio has no programmed message<br />
with the transmitted ID “Status: Status X” is displayed, where “X” is the<br />
received ID number.<br />
Select Status Message<br />
Press the “STS” button or select “Status Update” from the menu.<br />
From the “Select Status” menu, select the programmed message to<br />
send and press “Enter”.<br />
Select Message Type<br />
From the “Select Target Type” select the type of message to be sent.<br />
Unit - Send the message to an individual radio ID.<br />
Group - Send message to a group of radios using the Talk Group ID.<br />
Dispatch - Send the message to a dispatch console.<br />
Press “Enter”.<br />
- 36 -
Unit Call<br />
Select Target Radio<br />
KNG Portable Radio User’s Manual<br />
Last Call<br />
Select “Last Call” to send the message to the same radio you last<br />
sent a status message.<br />
Press “Send” to send the message.<br />
Call List<br />
Selecting “Call List” opens a list alias’ for the pre-programmed Unit IDs.<br />
Select the desired target radio and press “Send” to send the message.<br />
Unit ID<br />
Select “Unit ID” to enter the P25 ID of the target radio.<br />
Use the keypad to enter the ID then press “Send”.<br />
Group Call<br />
Select Target Group ID<br />
Selecting “Group” opens the menu to send a status message to a<br />
group of radios with matching talk group ID.<br />
Select “Enter” to manually enter the ID or “Select” to choose and ID<br />
from the pre-programmed talk group pick list.<br />
Dispatch<br />
Select “Dispatch” to send a status message to a dispatch console.<br />
Message Acknowledgement<br />
If the message has been received by the targeted radio, an alert tone<br />
will sound and the acknowledgment message will be displayed.<br />
If the targeted radio is unavailable, an alert tone will sound and the<br />
failed acknowledgement message will be displayed.<br />
Press “OK” or wait for five seconds to return to normal radio operation.<br />
Receiving a Status Update<br />
When an incoming status update is received an alert tone is sounded<br />
and the status message is momentarily displayed before returning to<br />
normal operation.<br />
- 37 -
<strong>RELM</strong> <strong>Wireless</strong> Corporation<br />
Paging and Call Alert<br />
Conventional Two-Tone/DTMF/MDC1200 Paging [MUTE]<br />
Conventional Analog Channels<br />
The KNG can be programmed to receive two-tone, DTMF or MDC1200<br />
pages on conventional analog channels.<br />
Receiving a page<br />
Select an analog or mixed-mode receive channel.<br />
Turn on “Voice Mute” from the programmed button or menu item.<br />
When voice mute is activated the icon is displayed.<br />
The radio ignores all voice traffic until the proper tone sequence is<br />
received.<br />
When a proper signal is received the radio will emit an alert tone and<br />
allow the audio to pass.<br />
If Auto Reset is programmed, the radio will return to the muted standby<br />
mode when the time conditions have been met.<br />
Call Alert Paging [ALRT]<br />
Digital Channels<br />
The KNG can be programmed to send and receive Call Alert messages<br />
on digital channels.<br />
Sending a Call Alert<br />
Press the “ALRT” button or open “Call Alert” from the menu.<br />
Select Target Radio<br />
Last Call<br />
Select “Last Call” to send the message to radio which you last sent<br />
or received a call alert. Press “Enter” to send the message.<br />
Call List<br />
Selecting “Call List” opens a list alias’ for the pre-programmed Unit IDs.<br />
Select the desired target radio and press “Enter” to send the Call Alert.<br />
Unit ID<br />
Select “Unit ID” to enter the ID of the target radio.<br />
Use the keypad to enter the ID then press “Enter” to send the Call.<br />
- 38 -
KNG Portable Radio User’s Manual<br />
Receiving a Call Alert<br />
When a Call Alert is received, an alert tone will sound and the incoming<br />
unit ID or alias is displayed for approximately 5 seconds.<br />
The top display line line will alternated between the programmed<br />
display information and a Call Alert Received message until.<br />
Select “Call Alert” to reset.<br />
Radio Check [RCHK]<br />
Conventional Digital Channels<br />
The KNG can be programmed to check the availability of a KNG radio<br />
with a specific P25 ID.<br />
Requesting a Radio Check<br />
Press the “RCHK” button or open “Radio Check” from the menu.<br />
Select Target Radio<br />
Last Call<br />
Select “Last Call” to send the request to the radio which you last sent<br />
a radio check request. Press “Enter” to send the query.<br />
Call List<br />
Selecting “Call List” opens a list alias’ for the pre-programmed Unit IDs.<br />
Select the desired target ID and press “Enter” to send the query.<br />
Unit ID<br />
Select “Unit ID” to enter the P25 ID of the target radio.<br />
Use the keypad to enter the ID then press “Enter” to send the query.<br />
If a successful handshake is performed, an alert tone will sound and<br />
the "Unit Available" message will be displayed for approximately five<br />
seconds.<br />
If no validation is received from the targeted radio, an alert tone<br />
will sound and the "No Response" message will be displayed for<br />
approximately five seconds.<br />
- 39 -
<strong>RELM</strong> <strong>Wireless</strong> Corporation<br />
Radio Inhibit/Enable [INH]/[UNINH]<br />
Conventional Digital Channels<br />
With “Inhibit” is assigned to a button or menu function, a KNG Radio<br />
can temporarily disable other KNG radios using the targeted radio’s unit<br />
ID number.<br />
The disabled radio can only be re-enabled by sending an “Unhibit”<br />
command.<br />
NOTE: Inhibited radios cannot be read with the Neovision radio editor.<br />
Sending a command<br />
To initiate an inhibit/uninhibit message press the programmed button or<br />
select from the menu.<br />
Use the keypad to enter the User or Administrator password.<br />
Press “ENTER” to open the menu.<br />
Select Target Radio<br />
Last Call<br />
Select “Last Call” to send the message to same radio you last sent an<br />
inhibit or uninhbit message. Press “SEND” to send the message.<br />
Call List<br />
Selecting “Call List” opens a list alias’ for the pre-programmed Unit IDs.<br />
Select the desired target radio and press “SEND” to send the message.<br />
Unit ID<br />
Select “Unit ID” to enter the P25 ID of the target radio.<br />
Use the keypad to enter the ID and press “SEND” to send the message.<br />
Message Acknowledgement<br />
When the message has been received by the targeted radio, an alert<br />
tone will sound and the acknowledgment message will be displayed.<br />
Press “OK” or wait for three seconds to return to normal radio<br />
operation.<br />
If the targeted radio is unavailable, an alert tone will sound and the<br />
failed acknowledgement message will be displayed.<br />
Press “RTRY” to resend the message.<br />
Press “OK” or wait for three seconds to return to normal radio operation.<br />
- 40 -
KNG Portable Radio User’s Manual<br />
Other Options and Functions<br />
Many operational features and functions can be programmed for user<br />
selection and control. Items can be programmed to the radio buttons<br />
or switches. In addition to these quick set buttons, a menu of multiple<br />
functions can be accessed with a “MENU” button.<br />
Backlight [LITE]<br />
Conventional and Trunked Channels<br />
Backlight on/off control can be assigned to a switch, button or as a<br />
menu item. In addition, backlighting may be programmed to illuminate<br />
when any key is pressed.<br />
Busy Channel Operation<br />
Conventional Channels<br />
The radio can be programmed for different behavior when a<br />
conventional channel is busy.<br />
How the radio reacts to a busy channel is programmed with the<br />
following operation options:<br />
Indicate - When a channel is busy the LED will flash green.<br />
Lockout - When a channel is busy the LED flashes and Push-to-talk<br />
will be disabled. When PTT is pressed a Busy message will show in<br />
the display and an alarm will sound.<br />
Override - LED flashes and first PTT displays the Busy message.<br />
Release and press the PTT again to override the lockout and allow<br />
transmitting.<br />
Automatic - When a channel is busy the LED flashes and Push-totalk<br />
will be disabled. When PTT is pressed a Busy message will show<br />
in the display momentarily, then return to standby mode.<br />
Busy Channel Conditions<br />
With the PC radio editor, each channel is programmed for the<br />
conditions under which the channel is considered busy.<br />
Conditions include:<br />
Off - Channel is never declared busy.<br />
- 41 -
<strong>RELM</strong> <strong>Wireless</strong> Corporation<br />
Carrier - A busy condition is declared when carrier is present on the<br />
selected Rx frequency.<br />
Non-Qualified - A busy condition is declared when a non-qualified<br />
signal is present on the Rx frequency. (Non-qualified = Incorrect<br />
CTCSS/CDCSS, talk group or NAC )<br />
Status Symbol - Digital Channels Only. A busy condition is declared<br />
if the P25 busy status symbol is present on the Rx frequency.<br />
Channel Select [CHAN]<br />
Conventional and Trunked Channels<br />
Channel Selection can be assigned to a button or menu item.<br />
(See Channel/Zone Selection Options for details.)<br />
Cloning<br />
Conventional Zones<br />
KNG radios can be set up to send or receive programmed information<br />
from other BK Radio products via a cloning cable available from <strong>RELM</strong><br />
<strong>Wireless</strong>. Refer to the cloning cable manual for cloning information.<br />
Control Lockout [LCK]<br />
Conventional and Trunking Channels<br />
The KNG portable offers a variety of control lock options. Control lock<br />
can be assigned to a toggle switch, collar switch or as a button or menu<br />
item.<br />
Switch Assignment<br />
When assigned to a toggle switch, toggling the switch on locks all<br />
controls except the toggle switches, PTT and volume/off.<br />
When assigned to the collar switch, toggling the switch on locks all<br />
controls except the collar switch, PTT and volume/off.<br />
Button/Menu Assignment<br />
When assigned as a button or menu item, users can select from two<br />
lockout settings, “Lock Keypad Only” and “Lock All Controls”.<br />
“Lock Keypad Only” locks only front panel button operations.<br />
“Lock All Controls” locks all buttons and switches as determined by<br />
radio programming. Any or all of the following function may be locked<br />
- 42 -
KNG Portable Radio User’s Manual<br />
when “Lock All Controls” is selected: Front keypad, side top buttons,<br />
toggle switches, channel knob, collar switch and push-to-talk.<br />
To enable the lock function press the assigned button or open the menu<br />
and select Control Lock from the list.<br />
Select the desired lockout setting and press “ENTER”<br />
To disable Control Lock press the diamond button twice, then the<br />
square button twice.<br />
Keypad Programming<br />
Conventional Systems and Channels<br />
Much of the information stored in the KNG can be edited using the<br />
keypad. Four separate programming functions can be enabled with the<br />
PC Radio Editor software.<br />
Keypad programming selections can only be assigned as a menu item.<br />
Refer to the Keypad Programming section for detailed information on<br />
how to edit programmed radio information.<br />
Monitor [MON]<br />
Conventional Channels<br />
There are four settings available for monitoring traffic on a selected<br />
channel. “Monitor” can be assigned to a button or as a menu item.<br />
Monitor Modes and Indicators<br />
Selective - Digital channels only. Required for Unit-to-Unit calls and<br />
Talkgroup use. (No indicator)<br />
Normal - Requires NAC or Tone. Ignores Talkgroup and Unit-to-<br />
Unit information on digital channels. Flashing on.<br />
Monitor - Monitors activity on selected channel. Steady on.<br />
Open - Open Squelch. Solid on.<br />
Button Operation - Press the button to cycle to the next mode. Press<br />
and hold for Open Squelch. Availability of “Selective” or “Normal” is<br />
determined by each channel’s programmed Squelch Operation setting.<br />
Menu Operation - Open the Monitor menu, select the desired operation<br />
and press “Enter”.<br />
- 43 -
<strong>RELM</strong> <strong>Wireless</strong> Corporation<br />
Nuisance Channel Delete [DEL]<br />
Conventional Channels<br />
If enabled, a nuisance channel can be temporarily removed from the<br />
scan list. Nuisance Channel Delete can only be assigned to a button.<br />
To temporarily remove a channel from the scan list, press the assigned<br />
button while the nuisance channel is being received.<br />
To revert to the programmed scan list, turn off Scan, cycle radio power<br />
or select another zone or channel.<br />
Radio info<br />
Conventional and Trunking Channels<br />
Radio information can be assigned as a menu item.<br />
When selected, the LCD displays programmed radio settings.<br />
Repeater Talkaround [T/A]<br />
Conventional Channels<br />
In Repeater Talkaround mode, the radio will transmit on the programmed<br />
receive frequency of the selected channel. When T/A is enabled the<br />
icon will be displayed on the top line of the LCD.<br />
NOTE: Channels programmed as receive only are not affected by the<br />
Talkaround selection.<br />
Talkaround selection can be assigned to a switch, button or as a menu<br />
list item.<br />
Squelch Adjust [SQL]<br />
Conventional Channels<br />
Squelch Adjust is used to change the signal strength required for the<br />
radio’s speaker to unmute.<br />
Squelch can be assigned as a button or menu list item.<br />
To adjust the squelch setting, open the squelch menu. Select the<br />
desired threshold using the -/+ buttons.<br />
Press “ENTER” to set the level.<br />
- 44 -
KNG Portable Radio User’s Manual<br />
Site Display [STDS]<br />
Trunking Channels<br />
When selected, the Site Display functions shows information for the<br />
currently operating site.<br />
Displayed information includes: Site ID, Site Alias and RSSI.<br />
Site Display can be assigned as a button or menu list item.<br />
Site Lock [STLK]<br />
Trunking Channels<br />
Site lock prevents the radio from searching for other sites by locking it<br />
to the currently selected site.<br />
Site Lock can be assigned as a button or menu list item.<br />
Site Search [STSR]<br />
Trunking Channels<br />
Site Search automatically searches and selects the best available<br />
trunking site.<br />
Site Lock can be assigned as a button or menu list item.<br />
Surveillance Mode [SURV]<br />
Conventional and Trunking Channels<br />
When Surveillance Mode is on, all audible indicators (beeps etc.) and<br />
lighting functions (LEDs and Display) are disabled.<br />
Surveillance Mode can a switch, button or as a menu list item.<br />
Transmit Digital [TXAD]<br />
Conventional Mixed-Mode Transmit Channels<br />
When Transmit Digital is on, channels programmed for mixed-mode<br />
transmit will transmit in digital mode. When off, mixed-mode channels<br />
transmit in analog mode.<br />
When transmitting in digital mode the display shows ‘D’ behind the TX<br />
indicator. In analog transmit, ‘A” will follow the indicator.<br />
- 45 -
<strong>RELM</strong> <strong>Wireless</strong> Corporation<br />
Transmit Digital selection can be assigned as a button, switch or menu<br />
list item.<br />
When assigned as a button function, the “TXAD” button will be<br />
highlighted when in the Transmit Digital mode.<br />
Transmit Power [PWR]<br />
Conventional and Trunking Channels<br />
Transmit Power can be selected between the programmed high and<br />
low settings. The power output of the settings depend on radio options,<br />
model and editor settings.<br />
When operating in the high power mode, “H” will be displayed on the<br />
top line of the LCD. In low power mode, “L” is displayed.<br />
Power selection can be assigned as a button, switch or menu list item.<br />
- 46 -
KNG Portable Radio User’s Manual<br />
Keypad Programming<br />
Radio programming is to be performed only by authorized personnel.<br />
Any or all functions may be password protected to prevent unauthorized<br />
access. Check with your communications officer for information on the<br />
programmed functions of your radio.<br />
NOTE: Trunking channels and systems cannot be programmed via the<br />
radio keypad.<br />
Keypad programmable categories include individual Channel, Zone<br />
and Global radio parameters, individual P25 ID Quick Call/Receive List,<br />
User Tone List, User NAC List and User Talk Group ID List.<br />
Check with your <strong>RELM</strong>/BK Radio dealer or communications officer for<br />
information on the programmed functions of your radio.<br />
Keypad Programming Navigation<br />
While in programming mode the diamond, arrow up, arrow down and<br />
square buttons are used navigate the programming functions. The<br />
following table shows possible button functions:<br />
Keypad Programming Buttons<br />
ENT<br />
ESC<br />
NEXT<br />
PREV<br />
EDIT<br />
BACK<br />
CLR<br />
EDIT<br />
INV<br />
Opens the highlighted function or enters the displayed information<br />
Press once to go back to previous screen or hold to exit<br />
programming mode and return to normal radio operation<br />
Move to the next item in a displayed list or the next character in a<br />
displayed value<br />
Move to the previous item in a displayed list<br />
Used to select and edit individual characters in a displayed value<br />
Move to the previous character in a displayed value<br />
Clears the displayed value<br />
Used to edit individual characters in a displayed value<br />
Inverts a displayed digital tone value (CDCSS)<br />
Entering Keypad Programming Mode<br />
To enter programming mode open the menu list by pressing the<br />
assigned “Menu” button and select “Keypad Prog” from the menu list.<br />
Use the keypad to enter the six-digit user or master password and press<br />
the Enter button.<br />
- 47 -
<strong>RELM</strong> <strong>Wireless</strong> Corporation<br />
Select the item to program and press Enter.<br />
Available programmable functions are:<br />
Keypad - Used to edit individual channel and zone information such<br />
as labels, frequencies, operating modes, etc.<br />
Call List - Used to edit the P25 ID Call List entries.<br />
User Tones - Used to edit the user selectable Code Guard entries.<br />
User NACs - Used to edit user selectable Network Access Codes.<br />
User TGIDs - Used to edit user selectable P25 Talk Groups<br />
NOTE: Depending on PC programming, not all functions may be<br />
accessible for keypad programming.<br />
Global, System, Zone and Channel Parameters<br />
The “Keypad” programming menu consists of four sub-menus for<br />
editing global, system, zone and channel parameters (see table).<br />
Keypad Programming Sub-Menus<br />
Global System Zone Channel<br />
Display Top Sys Pri 1 Add/Delete Add/Delete Rx/Tx NAC<br />
Display Middle Tx on Pri 1 Label Label Sq Mode<br />
Display Bottom Sys Pri 2 Zone Pri 1 Rx/Tx Freq Bandwidth<br />
User Password Tx on Pri 1 Rx/Tx Mode Tx Power<br />
Zone Pri 2 Rx/Tx Guard TGID<br />
Global Settings<br />
To edit the programmable Global settings, select “Keypad” from the<br />
programing menu then select “Global” from the sub-menu.<br />
Select the item you wish to edit from the Global menu.<br />
Displayed Information Lines<br />
The three main display lines can be programmed to display radio<br />
information. Select top, middle or bottom line to change it’s displayed<br />
information. Then select the desired setting from the list (see table).<br />
NOTE: Display changes do not affect the display on trunked channels.<br />
- 48 -
KNG Portable Radio User’s Manual<br />
None<br />
Channel Label<br />
Frequency<br />
Channel Number<br />
Rx’d Unit ID<br />
Rx’d TGID<br />
Rx Picklist Selections<br />
Tx Picklist Selections<br />
Zone Label<br />
Zone and Channel #<br />
Zone Number<br />
Conventional Display Line Options<br />
No information is displayed.<br />
Programmed label of current channel.<br />
Current operating frequency.<br />
Channel number of currently operating channel.<br />
P25 ID of a received digital signal. If the incoming<br />
ID is programmed in your Unit ID Call List list, the<br />
associated label will be displayed. During standby<br />
you radio ID number is displayed.<br />
Talk Group ID of a received digital signal.<br />
Current user selected receiver Code Guard,<br />
Network Access Code and Talkgroup.<br />
Current user selected transmit Code Guard,<br />
Network Access Code and Talkgroup.<br />
Programmed label of current operating zone.<br />
Current operating zone and channel numbers.<br />
Zone number of currently operating zone.<br />
User Password<br />
Select “User Password” from the “Global” menu to edit the keypad<br />
programming password. Enter a six-digit numeric.<br />
NOTE: Changing the user password does not affect the power-up or<br />
administrator password.<br />
System Settings<br />
To edit the programmable System settings, select “Keypad” from the<br />
programing menu then select “System” from the sub-menu.<br />
Select the item you wish to edit from the System menu.<br />
System Priority 1 or 2 Channel<br />
Priority channels can be assigned on a system wide basis. If<br />
assigned, a system priority channel will be monitored during priority<br />
scan regardless of the currently operation zone priority channel.<br />
When set to “Off”, the Priority 1 or Priority 2 Channel is designated by<br />
the selected zone setting.<br />
When set to “Use Main” the channel selected by the channel knob<br />
operates as the priority channel.<br />
- 49 -
<strong>RELM</strong> <strong>Wireless</strong> Corporation<br />
To designate a specific priority channel choose “Select” from the<br />
priority channel menu.<br />
Select the Zone and Channel.<br />
Tx on Priority 1 Channel<br />
If on, the radio will transmit on the System Priority 1 channel<br />
whenever Priority Scan is on.<br />
Zone Settings<br />
To edit the programmable Zone settings, select “Keypad” from the<br />
programing menu then select “Zone” from the sub-menu.<br />
Select Add, Delete or Edit Zone from the Zone menu.<br />
Add Zone<br />
When selected, a new zone is added in the next available slot.<br />
Example: If there are seven zones in the radio, the added zone will be<br />
zone eight.<br />
Delete Zone<br />
When selected the list of available zones is displayed. Choose the<br />
zone you wish to delete.<br />
When a zone is removed all subsequent zones move up one spot.<br />
Example: If there are seven zones in the radio and zone five is<br />
deleted, zone six now becomes zone five and zone seven becomes<br />
zone six.<br />
Edit Zone<br />
Select “Edit Zone” to change the programmable zone information.<br />
Zone Label<br />
Use the keypad to enter a label of up to sixteen characters.<br />
(See keypad character table)<br />
Zone Priority 1 or 2 Channel<br />
NOTE: If system priority channels are programmed, zone priority<br />
settings are ignored.<br />
When set to “Off”, the Priority 1 or Priority 2 Channel is designated<br />
by the selected zone setting.<br />
When set to “Use Main” the channel selected by the channel knob<br />
operates as the priority channel.<br />
- 50 -
KNG Portable Radio User’s Manual<br />
To designate a specific priority channel choose “Select” from the<br />
priority channel menu and choose from the channel list.<br />
Zone Tx Priority 1 Channel<br />
If on, the radio will transmit on the Zone Priority 1 channel<br />
whenever Priority Scan is on and there is no system priority 1<br />
programmed.<br />
Channel Settings<br />
To edit the programmable Channel settings, select “Keypad” from the<br />
programing menu then select “Channel” from the sub-menu.<br />
Select Add, Delete or Edit Channel from the Channel menu.<br />
NOTE: REFER TO THE COMMAND ZONE OPERATIONS SECTION<br />
FOR ADDING OR DELETING COMMAND ZONE CHANNELS.<br />
DO NOT ADD OR DELETE COMMAND ZONE CHANNELS VIA THE<br />
KEYPAD PROGRAMMING METHOD.<br />
Add Channel<br />
Select to add a new channel.<br />
Choose the zone to which the channel is to be added.<br />
Enter a valid channel index number of 1-2048.<br />
NOTE: To access channels about channel sixteen, the radio must be<br />
programmed via PC for keypad channel select or “Channel Select”<br />
must be assigned as a button or menu item.<br />
Delete Channel<br />
When selected the list of programmed zones is displayed. Choose the<br />
zone of the channel you wish to delete.<br />
Select the channel from the list.<br />
Edit Channel<br />
Select “Edit Channel” to change the programmable channel<br />
information.<br />
Select the zone and channel to be edited.<br />
Channel Label<br />
Use the keypad to enter a label of up to sixteen characters.<br />
(See keypad character table)<br />
- 51 -
<strong>RELM</strong> <strong>Wireless</strong> Corporation<br />
Rx Frequency<br />
Enter a valid receive frequency in MHz. Frequencies must be<br />
divisible by 1.25kHz.<br />
Rx Mode<br />
Select Analog, Digital or Mixed Mode.<br />
Rx Guard<br />
Analog or Mixed Mode Receive Channels Only<br />
Select “Off” for analog signals to operate in carrier squelch mode.<br />
Select “Tone” to enter a CTCSS tone,<br />
Select “Digital” to enter a DCS value.<br />
Use “INV” to invert a DCS tone.<br />
RX NAC<br />
Analog or Mixed Mode Receive Channels Only<br />
Select “Enter” to program a receive NAC via the keypad.<br />
Enter the desired value in hexadecimal (000 - FFF).<br />
NOTE: $F7F is an invalid receiver NAC.<br />
Choose “Select” to use a receiver NAC from the programmed pick<br />
list.<br />
Squelch Mode<br />
Digital or Mixed Mode Receive Channels Only<br />
Normal - Requires carrier and NAC only to unmute digital<br />
signals.<br />
Selective - Required for Individual Calls and use of Talkgroup<br />
IDs.<br />
Bandwidth<br />
Analog or Mixed Mode Channels Only<br />
Narrowband - 12.5kHz spacing when operating in analog.<br />
Wideband - 25kHz spacing when operating in analog.<br />
Tx Power<br />
Low Power - Lock channel in low power mode.<br />
High Power - Lock channel in high power mode.<br />
Selectable - Allow high/low transmit power selection form<br />
assigned button, switch or menu item.<br />
- 52 -
KNG Portable Radio User’s Manual<br />
Tx Frequency<br />
Enter a valid receive frequency in MHz. Frequencies must be<br />
divisible by 1.25kHz.<br />
Tx Mode<br />
Select Analog, Digital or Selectable.<br />
Tx Guard<br />
Analog or Mixed Mode Receive Channels Only<br />
Select “Off” for analog signals to operate in carrier squelch mode.<br />
Select “Tone” to enter a CTCSS tone,<br />
Select “Digital” to enter a DCS value.<br />
Use “INV” to invert a DCS tone.<br />
Tx NAC<br />
Analog or Mixed Mode Transmit Channels Only<br />
Select “Enter” to program a transmit NAC via the keypad.<br />
Enter the desired value in hexadecimal (000 - FFF).<br />
NOTE: $F7E and $F7F are invalid transmit NACs.<br />
Choose “Select” to use a transmit NAC from the pick list.<br />
TGID<br />
Analog or Mixed Mode Channels Only<br />
Select “Enter” to program a transmit Talk Group ID via the keypad.<br />
Enter the desired value (1- 65535).<br />
NOTE: 0 is an invalid transmit Talk Group ID.<br />
Choose “Select” to use a TGID from the pick list.<br />
P25 ID Unit Call/Receive List<br />
The KNG can be pre-programmed with up to 100 Project 25 IDs and<br />
labels. If ‘RX’d Unit ID’ is designated as a display line, the P25 ID of<br />
the radio sending the call will be shown when receiving a digital signal.<br />
If the P25 ID of the received call is programmed in the Call List, the<br />
alphanumeric label associated with the ID will be displayed. If the P25 ID<br />
is not in the Call List, the numeric P25 ID will be displayed.<br />
- 53 -
<strong>RELM</strong> <strong>Wireless</strong> Corporation<br />
Select “Call List” from the programing menu.<br />
Select the P25 ID you wish to edit.<br />
The display shows the label and P25 ID of the selected ID.<br />
Select “Label” to edit or add an alphanumeric label<br />
Select “Dest ID” to change the P25 ID<br />
User Selectable Code Guards<br />
The KNG can be pre-programmed with up to 32, user selectable,<br />
CTCSS or CDCSS subaudible tones. Tones are selected via a<br />
programmed button or menu item (see TX/RX CxCSS Picklist). If<br />
enabled, the tones can be programmed via the radio’s keypad<br />
Select “User Tones” from the programing menu.<br />
Select the tone to edit.<br />
To enter a CTCSS tone select “Tone” and enter the desired frequency in<br />
Hertz (67.0 - 254.1 Hz).<br />
To enter a CDCSS (digital) tone select “Digital” then enter the three digit<br />
code. Use the INV button to invert the code.<br />
Valid Code Guard Tone Values<br />
Group A Group B Group C<br />
67.0 (XZ) *151.4 (5Z) 71.9 (XA) 146.2 (4B) 74.4<br />
77.0 (XB) 162.2 (5B) 82.5 (YZ) 156.7 (5A) 79.7<br />
88.5 (YB) 173.8 (6A) 94.8 (ZA) 167.9 (6Z) 85.4 (YA)<br />
*100.0 (1Z) 186.2 (7Z) 103.5 (1A) *179.9 (6B) 91.5 (ZZ)<br />
107.2 (1B) 203.5 (M1) 110.9 (2X) 192.8 (7A)<br />
114.8 (2A) 218.1 (M3) *118.8 (2B) 210.7 (M2)<br />
123.0 (3Z) 233.6 127.3 (3A) 225.7 (M4)<br />
131.8 (3B) 250.3 136.5 (4Z) 241.8<br />
141.3 (4A)<br />
* 50/60 Hz power distribution systems could cause falsing.<br />
The assignments in a given area should be made from within one of the Groups:<br />
A, B, or C.<br />
- 54 -
KNG Portable Radio User’s Manual<br />
Valid Digital Code Guard Values<br />
023 025 026 031 032 043 047 051 054<br />
065 071 072 073 074 114 115 116 125<br />
131 132 134 143 152 155 156 162 165<br />
172 174 205 223 226 243 244 245 251<br />
261 263 265 271 306 311 315 331 343<br />
346 351 364 365 371 411 412 423 431<br />
432 445 464 465 466 503 506 516 532<br />
546 565 606 612 624 627 631 632 654<br />
662 664 703 712 723 731 732 734 743<br />
754<br />
User Selectable Network Access Codes<br />
The KNG can be pre-programmed with up to 32, user selectable<br />
NACs. NACS are selected via a programmed button or menu item (see<br />
TX/RX Network Access Code Picklist). If enabled, the tones can be<br />
programmed via the radio’s keypad.<br />
Select “User NACs” from the programing menu.<br />
Select the NAC to edit.<br />
Enter the desired value in hexadecimal (000 - FFF).<br />
NOTE: $F7E and $F7F are invalid as user selectable NAC values.<br />
User Selectable Talkgroup IDs<br />
The KNG can be pre-programmed with up to 32, user selectable<br />
TGIDs. TDIDs are selected via a programmed button or menu item (see<br />
Talk Group ID Picklist). If enabled, the TGIDs can be programmed via<br />
the radio’s keypad.<br />
Select “User TGIDs” from the programing menu.<br />
Select the Talk Group ID to edit.<br />
Enter the desired value (1 - 65535).<br />
NOTE: A Talk Group ID value of 0 is not allowed.<br />
- 55 -
<strong>RELM</strong> <strong>Wireless</strong> Corporation<br />
Warranty<br />
The KNG portable radio is covered by a two-year warranty. Extended<br />
warranties may be available. For information about your warranty<br />
contact <strong>RELM</strong>/BK Radio at (800) 648-0947. Email; sales@relm.com<br />
If you need service, contact your BK Radio dealer. If you find it<br />
impractical to have service provided by your dealer, contact the <strong>RELM</strong>/<br />
BK Radio Technical Service Department at (800) 422-6281.<br />
Repairs may be sent to the address below.<br />
<strong>RELM</strong> <strong>Wireless</strong> Corporation<br />
Attention: Customer Service<br />
7100 Technology Drive<br />
West Melbourne, FL 32904<br />
Keypad Text/Programming Characters<br />
1 1<br />
2 ABC A, B, C, a, b, c, 2<br />
3 DEF D, E, F, d, e, f, 3<br />
4 GHI G, H, I, g, h, i, 4<br />
5 JKL J, K, L, j, k, l, 5<br />
6 MNO M, N, O, m, n, o, 6<br />
7PQRS<br />
P, Q, R, S, p, q, r, s, 7<br />
8 TUV T, U, V, t, u, v, 8<br />
9WXYZ<br />
W, X, Y, Z, w, x, y, z, 9<br />
0 0, Blank Space<br />
*<br />
*, ., ,, ;, :, ", ', !, ?, %, &, ', ~, @, _<br />
# #, $, +, -, =, ^, /, \, |, , {, }, [, ]<br />
- 56 -
My Radio Settings<br />
Serial #<br />
Collar Switch<br />
Conv.<br />
ID#<br />
Trunked<br />
Left Toggle<br />
Right Toggle<br />
Orange Button<br />
Top Side<br />
Bottom Side<br />
Diamond<br />
Up Arrow<br />
Down Arrow<br />
Square<br />
Menu Settings<br />
Conv.<br />
Trunked