
You also want an ePaper? Increase the reach of your titles
YUMPU automatically turns print PDFs into web optimized ePapers that Google loves.
Main menu Sub menu Function<br />
Management<br />
tools<br />
System<br />
information<br />
Shut down<br />
Hard disk<br />
management<br />
User management<br />
Online user<br />
TV adjust<br />
Automatic maintenance<br />
Restore<br />
Upgrade<br />
Device Info<br />
Hard disk information<br />
Code stream statistics<br />
Log information<br />
Edition information<br />
Set appointed hard disk as read-write disc, read-only disc<br />
or redundant disc, clear data, resume date and so on<br />
Modify user, team or password. Add user or team. Delete<br />
user or team.<br />
Break the connection with the already login user. Lock<br />
the account after break until booting up again.<br />
Adjust TV upside, downside, nearside, starboard distance<br />
Set automatic reboot system and automatic deleting files.<br />
Resume setup state: common setup, code setup, recording<br />
setup, alarm setup, network setup, network service,<br />
preview playback, serial port setup, user management<br />
Upgrade the device by USB port<br />
Show device video,audio and alarm ports<br />
Display hard disk capability and recording time<br />
Display code stream information<br />
Clear all log information according to the log video and time<br />
Display edition information<br />
Logout or reboot<br />
4.2 Record<br />
4.2.1 Record Configuration<br />
To set the recording parameters in the surveillance channel. The system is set<br />
up for 24 hours consecutive recording in the first startup. You can enter [main<br />
menu]> [recording function]> [recording setup] to set.<br />
Note:There must be at least one read-write hard disk.(refer to chapter 4.5.1)<br />
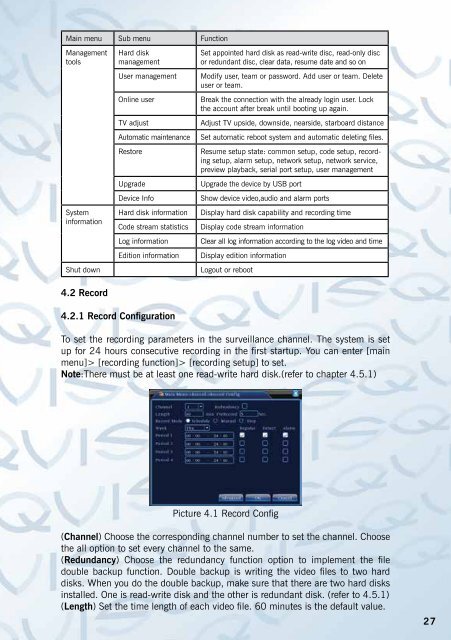
Picture 4.1 Record Config<br />
(Channel) Choose the corresponding channel number to set the channel. Choose<br />
the all option to set every channel to the same.<br />
(Redundancy) Choose the redundancy function option to implement the file<br />
double backup function. Double backup is writing the video files to two hard<br />
disks. When you do the double backup, make sure that there are two hard disks<br />
installed. One is read-write disk and the other is redundant disk. (refer to 4.5.1)<br />
(Length) Set the time length of each video file. 60 minutes is the default value.<br />
27