
Create successful ePaper yourself
Turn your PDF publications into a flip-book with our unique Google optimized e-Paper software.
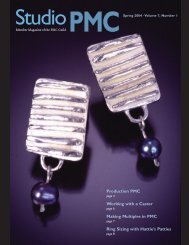
<strong>Studio</strong><br />
Member Magazine of the <strong>PMC</strong> Guild<strong>PMC</strong><br />
Member Magazine of the <strong>PMC</strong> Guild<strong>PMC</strong><br />
Summer 2005 · Volume 8, Number 2
<strong>Studio</strong><br />
Member Magazine of the <strong>PMC</strong> Guild<br />
<strong>PMC</strong><br />
Summer 2005 · Volume 8, Number 2<br />
features<br />
4 Word Art<br />
This beginner's project by Debbie Fehrenbach using rubber stamps is<br />
ideal for teaching the technique.<br />
6 Butterfly Inlay Pendant<br />
Elaine Luther demonstrates the use of some of her favorite tools<br />
in this pendant project.<br />
10 The Tool Trade<br />
For some <strong>PMC</strong> artists, developing and selling tools has become<br />
a welcome addition to their <strong>PMC</strong> careers.<br />
11 Tools, Tools, Tools<br />
<strong>Studio</strong> <strong>PMC</strong>'s First Tool Buyers' Guide! A treasure trove of tools<br />
for use with <strong>PMC</strong>.<br />
departments<br />
3 As I <strong>PMC</strong> It<br />
8 Gallery<br />
18 Happenings<br />
On the Cover: Gang blade from <strong>PMC</strong> Tool and Supply/Darway<br />
Design <strong>Studio</strong>, leaf cutters and rolling tool from Celie Fago, and<br />
tool kit from New Mexico Clay. Background image is Elaine<br />
Luther working on her butterfly pendant... see page 7<br />
<strong>Studio</strong> <strong>PMC</strong><br />
<strong>PMC</strong> Guild<br />
P.O. Box 265, Mansfield, MA 02048<br />
www.<strong>PMC</strong>guild.com<br />
Volume 8, Number 2 • Summer 2005<br />
Editor—Suzanne Wade<br />
Technical Editor—Tim McCreight<br />
Art Director—Jonah Spivak<br />
Advertising Manager—Bill Spilman<br />
<strong>Studio</strong> <strong>PMC</strong> is published by the <strong>PMC</strong> Guild Inc.<br />
• How to SUBMIT WORK to <strong>Studio</strong> <strong>PMC</strong>…<br />
We welcome your <strong>PMC</strong> photos, articles and ideas. You may submit<br />
by mail or electronically. Please include your name, address, e-mail,<br />
phone, plus a full description of your <strong>PMC</strong> piece and a brief bio.<br />
Slides are preferred, but color prints and digital images are OK.<br />
By Mail: Mail articles and photos to: <strong>Studio</strong> <strong>PMC</strong>,<br />
P.O. Box 265, Mansfield, MA 02048.<br />
Electronically: E-mail articles in the body of the e-mail, or as<br />
attachments. E-mail photos as attachments. We require an image<br />
resolution of 300 dpi.<br />
• E-mail files (under 4 MB) to editor@<strong>PMC</strong>guild.com<br />
Deadlines: Nov. 1 for Spring issue; Feb. 1 for Summer issue;<br />
May 1 for Fall issue; Aug. 1 for Winter issue.<br />
• How to Place Advertising in <strong>Studio</strong> <strong>PMC</strong>…<br />
Contact our Advertising Manager, Bill Spilman, for specifications,<br />
deadlines, and prices. Phone Toll-free: 877-878-3260.<br />
E-mail: ads@<strong>PMC</strong>guild.com<br />
• How to get answers to tech questions…<br />
E-mail Tim at: tech@<strong>PMC</strong>guild.com<br />
To join or renew your <strong>PMC</strong> Guild membership, to change your<br />
mailing or e-mail address, or to request back issues or additional<br />
copies of <strong>Studio</strong> <strong>PMC</strong>, visit the <strong>PMC</strong> Guild Web site at<br />
www.<strong>PMC</strong>Guild.com, call toll-free 866-315-6487 or write<br />
P.O. Box 3000, Denville, NJ 07834<br />
<strong>PMC</strong> Guild<br />
Jeanette Landenwitch, Executive Director<br />
2390 Acorn Drive #245<br />
Hebron, KY 41048 USA<br />
Phone: 859-586-0595<br />
Website: www.<strong>PMC</strong>guild.com<br />
E-mail: director@<strong>PMC</strong>guild.com<br />
Copyright ©2005 <strong>PMC</strong> Guild.<br />
Printed four or more times a year. Reprints by permission only.<br />
All rights reserved.<br />
pg. 11<br />
<strong>Studio</strong> <strong>PMC</strong>, its staff and contributors, specifically disclaim any<br />
responsibility or liability for damages or injury as a result of any<br />
construction, design, use, manufacture, or any other activity undertaken<br />
as a result of the use or application of information contained<br />
in any <strong>Studio</strong> <strong>PMC</strong> issue or article.<br />
2 · <strong>Studio</strong> <strong>PMC</strong>
As I <strong>PMC</strong> It: Tools of the Trade<br />
by Suzanne Wade<br />
Who knew there were so many tools<br />
for <strong>PMC</strong>?<br />
When I first proposed this issue, I figured<br />
we'd fill a couple pages with tools. I<br />
knew there was a lot of creativity out there<br />
in the <strong>PMC</strong> world, but how many tools for<br />
<strong>PMC</strong> could there be?<br />
Well, I could have filled an entire year's<br />
worth of <strong>Studio</strong> <strong>PMC</strong>'s with the tools that<br />
were submitted – and still had lots left<br />
over. Wow!<br />
I knew I was in trouble when I got a call<br />
from Speedy Peacock, one of the folks at<br />
<strong>PMC</strong> Supply. "I know you say 'no limit' to<br />
the number of products we can submit," he<br />
told me. "But we have over 4,000 products<br />
related to <strong>PMC</strong>. I figured you didn't want<br />
all of them."<br />
"Oh," I said weakly. "How about sending<br />
me a dozen or so of your favorites?"<br />
And the submissions just kept on coming.<br />
An entire box of description sheets<br />
and slides arrived from Elaine Luther at<br />
Creative Texture Tools. <strong>Rio</strong> <strong>Grande</strong> – who<br />
I know offers dozens of cool <strong>PMC</strong> tools –<br />
showed considerable restraint and sent in<br />
just six of their best and newest offerings.<br />
Santa Fe Jewelers Supply sent a three-page<br />
list – just a list – of their products. Gulp.<br />
Obviously, I wasn't going to fit everything<br />
in the 20 pages of <strong>Studio</strong> <strong>PMC</strong>! Plus I<br />
really wanted to include a couple of howto<br />
projects to give you some ideas for how<br />
to use all these cool tools, and an article<br />
about artists inventing and marketing<br />
their own tools. What's an editor to do?<br />
I turned to Technical Editor Tim<br />
McCreight, Executive Director Jeanette<br />
Landenwitch, and Executive Director<br />
Emeritus CeCe Wire to pick what to print.<br />
As artists themselves, I knew I could count<br />
on them to immediately identify the neatest,<br />
most creative, most wonderful tools –<br />
the ones they'd want for their own studios.<br />
That's what you'll find in these pages:<br />
Tim, Jeanette, and CeCe's picks for great<br />
<strong>PMC</strong> tools. But if that's not enough to satisfy<br />
your thirst, check out the <strong>PMC</strong> Guild<br />
Web site. I couldn't let all those wonderful<br />
tool submissions sit in a folder somewhere,<br />
so we've uploaded an expanded tools section<br />
to the Web site.<br />
And if that's not enough, you can<br />
always click through to the suppliers' Web<br />
sites and check out their on-line catalogs<br />
and specials, or request a print catalog to be<br />
mailed to you for a little light bedtime<br />
drooling, er, reading.<br />
Consider this fair warning: if you continue<br />
past this page, you are in imminent danger of<br />
discovering you cannot live without some<br />
tool that a couple minutes ago you didn't<br />
know existed. You might want to put this<br />
issue away until your company pays out that<br />
bonus, or your birthday nears, or Christmas<br />
rolls around, especially if you're the type who<br />
just can't help reaching for the credit card<br />
when confronted by incredible tools.<br />
The irony of producing a special tools<br />
issue of <strong>Studio</strong> <strong>PMC</strong> isn't lost on me. Many<br />
artists are initially attracted to <strong>PMC</strong><br />
because it doesn't require a large investment<br />
in tools – a torch, a bit of PVC pipe,<br />
some olive oil, and a deck of playing cards<br />
is pretty much all you need to get started.<br />
And here I am, offering hundreds of tools<br />
that you can buy for working with <strong>PMC</strong>.<br />
So much for calling <strong>PMC</strong> a less tool-intensive<br />
material.<br />
But while it's true you don't need a lot of<br />
tools to work with <strong>PMC</strong>, adding a few new<br />
tools to your workbench can expand the<br />
creative possibilities of the material.<br />
Sometimes, a new tool can inspire you to<br />
say, "Hmmm. I wonder if I could use this to<br />
do… that." And before you know it, you've<br />
begun creating more sophisticated and<br />
exciting designs than you'd ever imagined.<br />
So by all means, indulge a little bit after<br />
you finish reading this issue. After your<br />
membership in the <strong>PMC</strong> Guild, tools are<br />
probably the best investment you can<br />
make in your creative endeavors. And if<br />
you do decide to buy a tool you've discovered<br />
in these pages, please be sure to let the<br />
supplier know you saw it in <strong>Studio</strong> <strong>PMC</strong>.<br />
And remember, you've been warned:<br />
There are some mighty cool tools ahead!<br />
—Suzanne<br />
Quick Reference Card<br />
Contacting the <strong>PMC</strong> Guild<br />
To join or renew your membership:<br />
866-315-6487<br />
P.O. Box 3000, Denville, NJ 07834<br />
Guild services:<br />
859-586-0595 • director@<strong>PMC</strong>guild.com<br />
2390 Acorn Drive #245, Hebron, KY 41048<br />
Technical Help:<br />
tech@<strong>PMC</strong>guild.com<br />
Certification Classes<br />
<strong>Rio</strong> Rewards : 866-346-2698<br />
<strong>PMC</strong> Connection: 866-762-2529<br />
<strong>PMC</strong> Guild Web site<br />
www.<strong>PMC</strong>guild.com<br />
Member user name: member (not your name, just this word)<br />
Member password: <strong>PMC</strong>2005 (be sure to use uppercase letters)<br />
Visit the <strong>PMC</strong> Guild Web site to join or renew your membership<br />
in the Guild, find certification classes in your area, view back<br />
issues of <strong>Studio</strong> <strong>PMC</strong>, or participate in online discussion forums.<br />
<strong>Studio</strong> <strong>PMC</strong><br />
Editorial: 508-339-7366 • editor@<strong>PMC</strong>guild.com<br />
P.O. Box 265, Mansfield, MA 02048<br />
Advertising: 877-878-3260 • ads@<strong>PMC</strong>guild.com<br />
Summer 2005 · 3
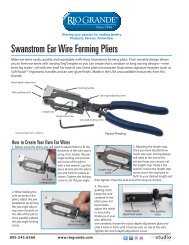
Teaching Project:Word Art<br />
by Debbie Fehrenbach<br />
Tools & Supplies:<br />
<strong>PMC</strong>+ or <strong>PMC</strong>3<br />
<strong>PMC</strong> paste<br />
<strong>PMC</strong>3 Syringe<br />
2 Word stamps<br />
2 Texture stamps<br />
6 Playing cards<br />
Olive oil and brush<br />
Tube roller<br />
Brush for clay<br />
Coffee or soda straw<br />
Tissue blade or X-Acto knife.<br />
Water<br />
400 or 600 grit Sandpaper<br />
Black Max or Liver of Sulfur (0ptional)<br />
Plastic tongues or tweezers<br />
Steel wire brush<br />
Polishing cloth<br />
Burnisher<br />
If you have never used rubber stamps, this<br />
pendant is a great way to start. There is<br />
an infinite variety of textures and realistic<br />
images available in rubber stamps that are<br />
just not available or possible in plastic or<br />
brass. However, not all rubber stamps are<br />
created equal. Two things to keep in mind<br />
when choosing stamps:<br />
• If at all possible, buy unmounted sheets<br />
versus stamps mounted on blocks. The<br />
un-mounted sheets are easier to use and<br />
are one-quarter the price of mounted<br />
stamps. Un-mounted sheets allow you to<br />
place your depth cards on top of the<br />
stamp and roll the clay into it, while<br />
mounted blocks can only be pressed.<br />
• Look over the manufacturer's entire<br />
line. If none of the company's stamps are<br />
etched deeply, the quality of rubber used<br />
may be of an inferior quality. Higher<br />
quality stamps will last longer and give a<br />
sharper image.<br />
The stamps used in this project are from<br />
Red Castle Inc., and are available at<br />
www.redcastle.com.<br />
Step 1. Select two texture stamps with a fairly<br />
flat texture. The word pieces will lay on top of<br />
the texture, and we want them to lay flat.<br />
Select one word from your stamps for the<br />
front and one for the back. Measure the<br />
length of the longest word and add 1 ⁄4 to 3 ⁄8 inch.<br />
Step 2. With a brush designated for olive<br />
oil only, brush a light layer of oil on all of<br />
the stamps to be used. (Figure 1) Rubber<br />
stamps need to be oiled or the <strong>PMC</strong> clay<br />
will stick. If you brush on a heavy layer,<br />
wipe off excess with your brush or finger.<br />
Debbie's finished Word Art pendant.<br />
Step 3. Shape a piece of <strong>PMC</strong> into an oval<br />
ball. Starting with the word stamps, place<br />
the clay in the center of the stamp. Press<br />
slightly to make rolling easier. Place one<br />
card on each side of the word. Press down<br />
with your tube roller in the middle of the<br />
clay. With firm pressure, roll up once and<br />
down once. The less you have to roll, the<br />
sharper the image will be. (Figure 2) Place<br />
rolled clay on cutting mat. Using your tissue<br />
blade, cut off excess on all four sides to<br />
make a rectangle. Cut close to the word,<br />
leaving only a small gap. Repeat for the<br />
other word stamp. Set aside both rectangles<br />
and let dry completely. (Figures 3 & 4).<br />
Figure 1 Figure 2 Figure 3 Figure 4<br />
4 · <strong>Studio</strong> <strong>PMC</strong>
Figure 5 Figure 6 Figure 7<br />
Step 4. Shape another piece of <strong>PMC</strong> into<br />
an oval ball. Place three cards on either<br />
side of the texture stamp. Place the clay on<br />
top of the texture stamp, and with your<br />
tube roller, press down in the middle and<br />
roll as in Step 3. Remove one card from<br />
each side. Place the remaining texture<br />
stamp on top of the rolled clay. Do not<br />
remove the clay from the textured stamp<br />
underneath. Gently roll over the top<br />
stamp. Remove a corner and check that the<br />
desired texture has been achieved. It is better<br />
to roll gently and re-roll than to roll too<br />
hard. Place textured clay on cutting mat.<br />
Cut a rectangle that is 1 ⁄4 to 3 ⁄8 inch longer<br />
and wider than the longest word.<br />
Step 5. Make the bail. You can prepare<br />
the pendant for hanging by drilling a hole<br />
in the top, or by making a rollover bail<br />
(which requires making the rectangle base<br />
approximately 3<br />
⁄4 inch longer than<br />
described here). I chose to make a bail<br />
using syringe <strong>PMC</strong>.<br />
To make a syringe bail, start by holding<br />
a straw in one hand and the syringe in the<br />
other. With even pressure, press out a coil<br />
while gently turning the straw. Keep turning<br />
until you have made two complete<br />
turns. Gently use the work surface or your<br />
finger to flatten the area where the coil<br />
starts and stops.<br />
Hang the straw between two stilts.<br />
(Figure 5) Let the bail dry completely.<br />
Step 6. Now it's time to construct the pendant.<br />
Sand the sides of each component<br />
with 400 or 600 grit sandpaper. The easiest<br />
method is to lay your sandpaper flat on the<br />
table, and holding your piece carefully but<br />
firmly, rub the piece on the sandpaper. Lay<br />
your texture piece on your work surface.<br />
Place a small amount of paste across the<br />
back of the first word. Center and press<br />
your word onto the texture piece. Repeat<br />
for the other side with the second word.<br />
(Figure 6) Remove the bail from the straw.<br />
Place a small amount of paste on the bottom<br />
of the bail and a small amount on top<br />
of the pendant. Press the bail onto pendant<br />
and hold for two or three seconds. Let dry<br />
completely. (Figure 7) Decorate the bail<br />
with <strong>PMC</strong> syringe if desired. Let dry.<br />
Step 7. Fire as directed for the type of <strong>PMC</strong><br />
you are using. Polish as desired. For this<br />
piece, I opted to apply a patina with Black<br />
Max to enhance the texture and readability<br />
of words. Liver of sulfur can also be used<br />
with this method. Apply Black Max solution<br />
with a brush or Q-Tip. This will turn<br />
the entire piece black. Rinse the piece in<br />
running water. Black Max is an acid-based<br />
solution, so it should not come into contact<br />
with your skin. If you do get it on your<br />
skin, flush the area with water.<br />
Once rinsed, rub the piece with steel<br />
wool, Scotch-Brite, baking soda, pumice,<br />
or polishing papers to remove the patina<br />
from the high relief areas of the piece.<br />
Finish by tumbling your piece in a rock<br />
tumbler with mixed steel shot for 30 minutes.<br />
Check your piece. The raised surfaces<br />
will be brightly polished, leaving the<br />
recessed areas black. If the finish is not<br />
bright enough, put the piece back into the<br />
tumbler until desired affect is achieved.<br />
If a tumbler is not available, you can use<br />
a polishing cloth and burnisher. Brush<br />
your piece with a steel brush before dipping<br />
in Black Max. Lay the polishing cloth<br />
on a hard surface, and rub your piece back<br />
and forth vigorously. This will remove the<br />
Black Max patina from the raised areas.<br />
Once you have removed enough black, finish<br />
off by rubbing your burnisher over the<br />
raised area to bring about a bright finish.<br />
The process is the same for the liver of<br />
sulfur. Steel wire brush your piece. If you<br />
love color, try mixing a very weak solution<br />
of liver of sulfur (pea size piece to 1 1 ⁄2 cups<br />
of hot water). Have your jar of water next<br />
to your jar of liver of sulfur. With plastic<br />
tweezers, dip your piece into the solutions<br />
and immediately dunk in the jar of water.<br />
You should get a golden color. Keep dunking<br />
quickly in the solution immediately<br />
followed by a dunk in the water. The water<br />
step is crucial: it stops the coloring process.<br />
You should go from gold, pink, fuchsia,<br />
purple, blue, gray, and finally black. Stop<br />
dipping when you have the color you<br />
desire. Dry your piece with a cloth or<br />
paper towel. Finish with the polishing<br />
cloth and burnisher method as above.<br />
Debbie Fehrenbach has been involved with the<br />
arts since high school, working in pottery, glass,<br />
sewing, and gourd art before discovering <strong>PMC</strong>.<br />
She has recently begun selling her work and is<br />
represented in several galleries near her home<br />
in St. Johns, Michigan. A certified Level II artisan<br />
who has taught several introductory classes<br />
in <strong>PMC</strong>, she is working towards becoming a<br />
Senior Instructor with <strong>PMC</strong> Connection.<br />
When selecting rubber stamps, be<br />
aware of the copyright policy of the<br />
stamp maker. All rubber stamps are<br />
copyrighted, and it is up to the rubber<br />
stamp company to determine what<br />
you can legally do with designs made<br />
from their stamps. Red Castle Inc. is an<br />
"Angel Company" and permits artists<br />
to hand-stamp as many pieces as they<br />
wish and to sell those pieces. Policies<br />
vary, however, so be sure to check with<br />
the maker of your rubber stamps<br />
regarding their copyright policies.<br />
Summer 2005 · 5
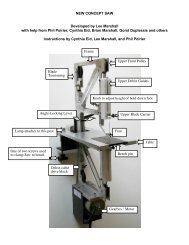
Butterfly Pendant with Resin Inlay<br />
by Elaine D. Luther<br />
Completed pendant with resin inlay.<br />
Editor's Note: This project incorporates a number<br />
of Elaine's favorite tools, many of which she<br />
sells through her tool supply company, Creative<br />
Texture Tools. In most cases, though, Elaine also<br />
suggests alternative tools. Experiment to see<br />
what works best for you!<br />
Tools & Supplies:<br />
<strong>PMC</strong>+<br />
Thick <strong>PMC</strong> slip<br />
Olive oil<br />
Plastic food wrap<br />
Small pieces of Super Parchment<br />
(Teflon paper)<br />
Silicone Texture Plate or other<br />
texture plate such as a design made in polymer clay.<br />
Playing cards<br />
Work surface<br />
Roller<br />
Water<br />
Paintbrush, pointed tip<br />
Paintbrush, square end<br />
Carving tool<br />
Tissue blade<br />
Precision Circle Cutter or small round<br />
cookie cutter or pieces of metal tubing<br />
Pink sanding board for acrylic nails<br />
Butterfly shaped cookie cutter<br />
Small round cookie cutter<br />
(or homemade template)<br />
Two-part five minute epoxy<br />
Scrap of card stock<br />
Toothpicks<br />
Powdered enamel (to mix into the epoxy<br />
as a coloring agent)<br />
Step 1. Place a piece of Super Parchment in<br />
the center of your work surface, and on either<br />
side place two stacked playing cards. Put a<br />
half package of <strong>PMC</strong>+ on the Super<br />
Parchment, cover with plastic wrap, and<br />
using your roller, roll the clay two cards thick.<br />
The bottom will pick up the woven pattern<br />
of the Super Parchment, but you want<br />
the top to be nice and smooth. You may<br />
wish to give it one final roll without the<br />
plastic wrap to get rid of any marks left by<br />
the plastic.<br />
Step 2. To add texture with a Silicone<br />
Texture Plate, rub an oiled hand over the<br />
surface. This is all the oil that is needed.<br />
For other texture plates, add oil or baby<br />
powder. Pick up your rolled out piece of<br />
<strong>PMC</strong> +, place it on top of the texture plate,<br />
and roll over the top of the clay with your<br />
roller. If the texture is particularly deep,<br />
you may find that now your piece of clay is<br />
too thin. If that is the case, you’ll want to<br />
re-roll your clay to three cards thick before<br />
applying the texture.<br />
Step 3. Use a butterfly cookie cutter to cut<br />
out the pendant. Be careful not to press too<br />
hard on the cutter, so you don’t cut the<br />
Super Parchment. To create the openings<br />
where the inlay will go, I use a very small<br />
round cutter, but you could also make your<br />
own plastic or card stock template, or cut<br />
freehand. Cut out round openings on each<br />
wing of the butterfly.<br />
Step 4. Roll out the backing piece for the<br />
butterfly. (While you work on the back, be<br />
sure to cover the butterfly so that it won't<br />
dry out.) Roll as before, on top of Super<br />
Parchment, until the piece is larger than<br />
your butterfly and one card thick.<br />
Paint water on the backing piece, then<br />
gently pick up the butterfly and lay it on<br />
top of the wet sheet.<br />
Step 5. Place the same butterfly cookie cutter<br />
you used earlier exactly over the butterfly.<br />
Cut through the backing piece of clay<br />
and remove the excess. Turn the butterfly<br />
and add water to any seams that need it.<br />
Smooth them out so that they disappear.<br />
Remember to check the seams in the<br />
spaces for the resin inlay, as well.<br />
6 · <strong>Studio</strong> <strong>PMC</strong>
Step 6. Allow the piece to dry to leather<br />
hard. Speed this if you like by placing the<br />
piece in the oven at 325˚F (165˚C) for 10<br />
minutes, placing it in a dehydrator, putting<br />
it on a mug warmer or old fashioned buffet<br />
warming tray, or on top of a hot kiln. In all<br />
these cases, keep the Super Parchment<br />
under the butterfly until it dries.<br />
Step 7. Once the piece is leather hard,<br />
refine the edges using a pink board. These<br />
are for acrylic nails and sold in the health<br />
and beauty section. Some areas may be too<br />
small to get to with the nail board. In those<br />
places, use a blade-shaped carving tool and<br />
gently carve away any excess, holding the<br />
tool and carving the way you might peel an<br />
apple with a paring knife.<br />
then make a center cut with the largest of<br />
the four Precision Circle Cutters. Using a<br />
tissue blade, cut the donut shape in half,<br />
creating two bails. If necessary, apply water<br />
to the cut edges to smooth them. Allow to<br />
dry to leather hard. Sand, if needed, with<br />
the pink nail board.<br />
Step 9. Place the bail in the upper onethird<br />
of the butterfly pendant. Using the<br />
carving tool or a paintbrush, place a generous<br />
dollop of thick slip on each end of the<br />
leather hard bail.<br />
Push the bail onto the back of the butterfly,<br />
gently pressing down. Excess clay<br />
will move to the sides. Remove this with<br />
the dry, square-end brush. Dip your pointed<br />
paintbrush in water and paint water<br />
around the seams to smooth everything<br />
and remove the excess slip. You want this<br />
seam to disappear entirely.<br />
Step 11. For this project, I'm using twopart<br />
five minute epoxy. Devcon is a common<br />
brand, available at hardware stores or<br />
craft stores. Squeeze out equal amounts of<br />
each part of epoxy onto clean card stock.<br />
Use a toothpick to quickly mix the two<br />
together. Throw that toothpick away. Add<br />
your coloring agent; in this project I’m<br />
using powdered glass enamels. Using a<br />
fresh toothpick, mix in the coloring agent.<br />
Throw away that toothpick, too.<br />
Why throw away all those toothpicks?<br />
When mixing epoxy, the first toothpick<br />
you use may have more resin or more<br />
hardener on it. Using that toothpick to<br />
apply the mixed epoxy to your project<br />
could alter the mixture of the epoxy.<br />
Now carefully apply the epoxy to the<br />
butterfly. Removing excess epoxy is messy,<br />
so you want to apply the epoxy as neatly as<br />
possible. Scoop up a bit of epoxy with<br />
another clean toothpick and place it in the<br />
center of one of the circles in the butterfly<br />
wing. Starting from the center, move the<br />
toothpick in a circle, gently spreading out<br />
the epoxy until it reaches the edges. Repeat<br />
on the other side. Work quickly! This<br />
epoxy cures in five minutes. Allow the<br />
epoxy to cure in a clean, dry, dust-free<br />
environment.<br />
Ta da! You’re done. Add a chain and go<br />
out into the world, ready for compliments.<br />
Step 8. Make a bail using whatever technique<br />
you like. I usually use the method<br />
shown by Tim McCreight in his video,<br />
Push Play for <strong>PMC</strong>. He does it with a regular<br />
straw and a beverage stir straw. I love the<br />
technique, but I use metal cutters: a<br />
Precision Circle Cutter for the inner cut<br />
and a small cookie cutter for the outside.<br />
You could also use metal tubing, which<br />
you can find in an assortment bag at the<br />
hardware store.<br />
For this bail, make the outer cut with<br />
the larger tubing or small cookie cutter,<br />
Step 10. Fire the piece face down at 1470°F<br />
(800°c) for 30 minutes. Remove from the<br />
kiln, allow to cool, and tumble with stainless<br />
steel shot for 30 minutes. Remove, dry, and<br />
prepare your work area for the resin inlay.<br />
Summer 2005 · 7
Gallery<br />
To submit your photos to our Gallery send<br />
slides or digital images to:<br />
<strong>Studio</strong> <strong>PMC</strong>, P.O. Box 265,<br />
Mansfield, MA 02048.<br />
E-mail: editor@<strong>PMC</strong>guild.com<br />
Please include your name, address, country,<br />
phone, e-mail address, a brief bio,<br />
photo credit, plus the size and<br />
materials used in your piece.<br />
“Firecracker” by Christine Norton.<br />
<strong>PMC</strong>, seed beads, glass drops, and pearls.<br />
8 · <strong>Studio</strong> <strong>PMC</strong><br />
"In Mercy and Kindness: Anti-War Medal" by Linda Kaye-Moses.<br />
<strong>PMC</strong>, sterling silver, 14k gold, lapis lazuli, moonstone, and vitreous enamel.
"The Goddess Within" by Pat Gullett.<br />
24k gold, <strong>PMC</strong>, and cubic zirconia. Photo by Ralph Gabriner.<br />
Plique a jour cup by Louis Kappel<br />
“Celestial Dreams” by Diana Contine.<br />
<strong>PMC</strong>, sterling silver wire, and gold-filled twisted wire.<br />
Summer 2005 · 9
The Tool Trade<br />
By Suzanne Wade<br />
Where do tools come from?<br />
If you imagine the tools you find in catalogs<br />
are developed by white-coated technicians<br />
in an underground laboratory<br />
somewhere in New Mexico, think again.<br />
Then look around your own studio.<br />
It's a rare <strong>PMC</strong> artist who hasn't shaped<br />
a stray piece of wood, plastic, or metal into<br />
their own unique tool. And occasionally,<br />
those personal solutions to vexing problems<br />
prove to be such a good idea, they<br />
start to take on a life of their own.<br />
For <strong>PMC</strong> artists Hattie Sanderson and<br />
Chris Darway, what began as simple problem-solving<br />
has evolved into serious business.<br />
Thanks to a little serendipity, some<br />
good partnerships, and a creative approach<br />
to tools, both have made tool sales into a<br />
significant aspect of their <strong>PMC</strong> careers.<br />
Chris Darway<br />
Chris Darway began making <strong>PMC</strong> tools<br />
after Tim McCreight approached him in<br />
the early days of the <strong>PMC</strong> certification program<br />
to produce a tool kit for use in classes.<br />
"It sounded like fun," Chris says of the<br />
project that would soon come to dominate<br />
his work life.<br />
Chris developed a cutting tool of high<br />
grade stainless steel to replace the toosharp<br />
tissue blades used by polymer clay<br />
artists, and hired local college students to<br />
sew cloth bags to package the kit. Most of<br />
the initial tool offerings were simple items<br />
<strong>PMC</strong> artists could make for themselves,<br />
but rarely wanted to tackle.<br />
"We turn Home Depot PVC pipe into<br />
rollers," Chris says. "You can go out and do it<br />
yourself, but by the time you buy a 10 foot<br />
piece, get it in the car, get it home, and get<br />
out the hacksaw … Most people choose to<br />
buy one for a buck or a buck and a half."<br />
Gang Blade by Chris Darway.<br />
From being something done as a favor for<br />
a friend, the tool business has evolved into a<br />
full-fledged supply company. "I thought this<br />
was going to be a niche thing, but the<br />
demand quickly outstripped our supply,"<br />
recalls Chris. He found a Philadelphia company<br />
to produce the tool bags in quantity,<br />
and began importing burnishers from India.<br />
With the tool business growing so fast,<br />
Chris has struggled to maintain a balance<br />
between his work and tool production. "I<br />
have had almost no bench time between<br />
workshops, the class I teach at the<br />
University of the Arts, and doing the tools,"<br />
he says. "I also stopped doing the ACC and<br />
Rosen shows – I stopped even applying."<br />
Chris's solution to the burgeoning tool<br />
trade was to invite his sons to join him.<br />
After 25 years running Darway Designs as<br />
a sole proprietorship, Chris has recently<br />
incorporated the business and brought in<br />
his eldest son, a ceramics artist, to manage<br />
the tool business.<br />
The result, hopes Chris, will be a more<br />
efficient, professionally run business that<br />
will give him more time for his own work,<br />
and for developing new tools specifically for<br />
use with <strong>PMC</strong>. "I have some ideas for some<br />
unique tools for <strong>PMC</strong>, and I'd really like to<br />
spend a little more time on that," he says.<br />
Hattie Sanderson<br />
Hattie Sanderson began making HattieS<br />
Patties as a way to fix her own problems in<br />
creating accurately sized rings. "My passion<br />
is to mess around in the studio. I love to<br />
experiment and research and take a problem<br />
HattieS Patties<br />
by Hattie Sanderson.<br />
and figure it out," she says. "Making <strong>PMC</strong><br />
rings was something I loved, and I was really<br />
frustrated with the whole sizing issue, so I<br />
thought, there's got to be a better way."<br />
After plenty of trial and error, Hattie<br />
stumbled upon using casting investment to<br />
create inserts that would keep the rings<br />
from shrinking past the intended size. It<br />
worked so well, she began sharing the<br />
process with her students. When her students<br />
praised the solution, she shared the<br />
idea with other instructors and began selling<br />
the patties. "Pretty soon the word got<br />
out, and the demand began growing really,<br />
really fast," she says.<br />
Hattie had never intended to go into the<br />
tool supply business, and the growing<br />
demand began to be overwhelming. So it<br />
was a happy confluence of events that led<br />
to her first meeting with <strong>PMC</strong> Supply owners<br />
Joe and Speedy Peacock. "I met them at<br />
the <strong>PMC</strong> Conference in Albuquerque last<br />
July after I gave a workshop [on HattieS<br />
Patties], and they just thought it was a great<br />
idea," she says. "We found we share this<br />
innovative spirit, and they're not afraid to<br />
promote new ideas. They can do what it<br />
takes from the marketing and production<br />
end to make things happen."<br />
The result has been an entire line of<br />
products under the "HattieS" brand name,<br />
including a work surface, tool kit, and<br />
<strong>PMC</strong>-ready sterling silver findings. Next up<br />
is a series of DVDs produced in cooperation<br />
with the Peacocks: HattieS Contemporary<br />
Metal Clay 1: Fundamental Tools and<br />
Techniques was released at the end of April,<br />
with the second expected later this spring.<br />
"It is such a blessing and a gift that I have<br />
been given this opportunity," Hattie says.<br />
"As an artist, many times you come up<br />
with a product and all of a sudden you are<br />
doing the shipping and marketing and<br />
order taking. You become a business person,<br />
and you no longer have time to be an<br />
artist. But my relationship with <strong>PMC</strong><br />
Supply allows me to continue to play in<br />
the studio and come up with new products.<br />
I am allowed to do what I love best."<br />
Read more about artists who make and sell tools<br />
at www.<strong>PMC</strong>guild.com.<br />
10 · <strong>Studio</strong> <strong>PMC</strong>
Tools,Tools,Tools<br />
Compiled by Suzanne Wade<br />
Cutting Tools<br />
Flexible Clay Blades, from Santa Fe Jewelers<br />
Supply. These flexible blades come in smooth or<br />
serrated edges, and are used for<br />
making long straight cuts.<br />
Craft Knife Set, from Santa Fe Jewelers Supply.<br />
This versatile set includes a sturdy handle and six<br />
different blades.<br />
Gang Blade, from <strong>PMC</strong> Tool and<br />
Supply/Darway Design <strong>Studio</strong>. This<br />
adjustable gang blade tool is used for<br />
cutting multiple strips of <strong>PMC</strong> sheet at once.<br />
Shaping Tools<br />
Graduated Slat Set, from Pinzart Inc. These<br />
polystyrene slats offer an alternative to playing<br />
cards for rolling metal clay to an even thickness.<br />
Because they are longer and narrower than playing<br />
cards, they are less likely to slip during<br />
rolling, and they are washable, durable, and will not warp or deteriorate<br />
from usage. Although the slats can be stacked, the variety<br />
of thicknesses means stacking is normally not necessary.<br />
The set of six pairs includes thicknesses ranging from 0.25 mm<br />
(one card thick) to 2 mm (8 cards thick), each color-coded to make<br />
it easy to find the pair you're looking for. The slats can also be used<br />
to roll out clay on the edge of the company's rubber texture mats:<br />
one blue and one purple slat stacked next to the mat provide a<br />
level area to work.<br />
Clean up Tool, from Santa Fe<br />
Jewelers Supply. This double-ended<br />
tool is used for smoothing, cutting,<br />
and decorating.<br />
Clay Shapers, from Whole Lotta Whimsy.<br />
Imported from the U.K., these size 0 shapers<br />
feature silicon tips. Shapers are used for sealing<br />
seams in the clay, shaping, modeling, moving<br />
the clay, and making repairs, such as pushing<br />
clay into cracks or mending large areas.<br />
4-in-1 Stylus, from Whole Lotta<br />
Whimsy. This stylus comes with<br />
four removable and adjustable tips<br />
and a soft-touch handle.<br />
Wipe Out Tool, from Bead Bungalow<br />
and Santa Fe Jewelers Supply. This wooden<br />
handle tool has angled rubber tips on both ends, for blending<br />
seams and wiping away fingernail marks and other imperfections<br />
in the wet clay.<br />
Double Ball Stylus, from Santa Fe<br />
Jewelers Supply. This doubleended<br />
tool features different sized<br />
balls for smoothing and rounding out holes.<br />
Carving Tools<br />
Micro Rotary Tool Carving Bits, from<br />
Whole Lotta Whimsy. These carving<br />
bits fit into any rotary tool with a 1 ⁄16"<br />
collet. Select from ball point or doublecut<br />
needle point in sizes ranging from<br />
1.2 to 1.6 mm to carve tiny details into dried cork clay, <strong>PMC</strong>, or<br />
ceramic bisque.<br />
Carving Tool Set, from Whole Lotta<br />
Whimsy. Designed for cutting linoleum<br />
or rubber, this set of German carving<br />
tools includes a beech wood handle and<br />
five cutting nibs, a small V-shape, a small<br />
U-shape, a medium hollow U-shape, a broad hollow U-shape, and<br />
one sharpened blade for edge cutting.<br />
Carving Tools, from Creative Texture<br />
Tools. These stainless steel carving tools<br />
come in several shapes for carving leatherhard<br />
<strong>PMC</strong>, including a narrow-end tool, a<br />
wide-end tool, and a two-ended tool featuring<br />
a long end useful for applying and smoothing slip, and a<br />
small end handy for prying <strong>PMC</strong> out of molds. The octagonal handles<br />
prevent rolling and are grooved for gripping.<br />
Carving Tool Set, from Santa Fe Jewelers Supply. This set of 12<br />
double-ended carving tools are used for detail work before and<br />
after drying <strong>PMC</strong>.<br />
Finishing Tools<br />
Clean Up Sticks, from <strong>PMC</strong> 123. These<br />
1<br />
⁄4" x 6" sanding sticks are two-sided,<br />
with different grits on each side.<br />
Washable and durable, they work well<br />
for shaping and finishing unfired <strong>PMC</strong><br />
pieces. The three-stick set comes with coarse, medium, fine, and<br />
extra fine grits.<br />
Diamond Toothpick Files, from Whole<br />
Lotta Whimsy. At 80 mm long by 1.5 mm<br />
wide, with a 35mm long file section, these<br />
tiny diamond files can fit into places others<br />
can't. The answer for any <strong>PMC</strong> artisan<br />
who has wished for toothpicks with sandpaper<br />
on them.<br />
Continues on next page…<br />
Summer 2005 · 11
Tools,Tools,Tools<br />
Slim Sanders, from Whole Lotta<br />
Whimsy. These flexible sanding sticks<br />
allow you to feel how hard you are pressing,<br />
to help you avoid breakage. Sanders<br />
have different grits on each side.<br />
Rubber Finishing Block, from Santa Fe<br />
Jewelers Supply. This rubber block grips pieces<br />
and holds them firm while you burnish or file.<br />
Brilliant Polishing Cloth, from Creative Texture Tools. This 4" x<br />
6" cloth is embedded with polishing compound. Use on polished<br />
<strong>PMC</strong> to remove the yellowing caused by tarnish.<br />
Lortone Rotary Tumblers, from Santa Fe<br />
Jewelers Supply. This rotary tumbler is available<br />
in several capacities, including a three<br />
pound model, a six-pound model, and a<br />
model with dual three-pound tumbling barrels<br />
to permit tumbling two separate batches at once. Stainless<br />
steel shot and burnishing compound available separately.<br />
Gyroc Model B Vibratory Tumblers,<br />
from Santa Fe Jewelers Supply. This<br />
heavy-duty vibratory tumbler is available<br />
in three capacities: 1.5 pints, 3 quarts, and<br />
6 quarts. Up to three 5" bowls can be<br />
stacked and run simultaneously.<br />
Magnetic Pin Finisher, from Santa Fe Jewelers<br />
Supply. This finisher uses tiny magnetic pins<br />
swirling in a centrifugal pattern to burnish even<br />
intricate filigree work. Features an auto-reverse<br />
feature to cut finish time and variable speed for<br />
delicate items.<br />
Burnishers<br />
Pyrex Burnishers, from Whole Lotta<br />
Whimsy. These double-ended burnishers<br />
heat up more slowly than steel burnishers,<br />
making them a good choice for<br />
Keum-boo, and are less expensive than<br />
agate burnishers. Because these burnishers<br />
are custom-made, artists can request a specific shape for<br />
each of the burnisher's ends at little or no additional charge.<br />
Agate Burnishers, from <strong>PMC</strong> Supply and Allcraft Jewelry Supply<br />
Co. These stone-tipped burnishers are much slower conductors of<br />
heat than traditional metal burnishers, making them excellent<br />
choices for techniques that involve hot metals, such as Keum-boo.<br />
They can also be used to burnish fired <strong>PMC</strong>.<br />
Slim Burnishers, from Creative Texture<br />
Tools. These stainless steel burnishers fit<br />
into tight spaces with their slim silhouette.<br />
The curved burnisher can reach into places<br />
straight burnishers can't.<br />
Straight Burnishers, from Santa Fe Jewelers<br />
Supply. This polished steel straight burnisher is<br />
3.5 mm in diameter.<br />
Ball Burnisher, from <strong>Rio</strong> <strong>Grande</strong>.<br />
This set of three double-ended ball<br />
burnishers are used to burnish away<br />
the white surface left after firing <strong>PMC</strong>. Beveled ends help you get<br />
into deep textures and crevices without harming the surface.<br />
Syringe Tools<br />
Syringe Savers, from <strong>PMC</strong> 123 and Whole Lotta Whimsy. These<br />
clear plastic vials with one-hole covers are used to keep <strong>PMC</strong><br />
syringes from drying out. Fill the vial with water, put on the cap,<br />
and stick the syringe tip into the vial through the hole in the top of<br />
the cap. The container is watertight with the syringe in place, preventing<br />
water spills or dried out syringes.<br />
Syringe Tip Set, from <strong>PMC</strong> 123. This six<br />
piece set includes 24 gauge, 20 gauge, and<br />
18 gauge plastic syringe tips, plus three<br />
stainless steel and three dark green plastic<br />
tips with shaped openings in flat, half-round, and square.<br />
Syringe Tips, from Whole Lotta<br />
Whimsy. Available in various<br />
gauges, these tips can be used to<br />
provide details ranging from delicate<br />
scroll work to structural elements. A significant amount of<br />
hand strength is required to use these tips.<br />
Syringe Design Tip Set, from Santa Fe<br />
Jewelers Supply. This set of six syringe tips<br />
includes three round tips in different sizes,<br />
one half-round tip, one flat tip, and one<br />
square tip.<br />
Kilns and Kiln Accessories<br />
Paragon SC-2 Kiln, from Paragon<br />
Industries, ABR Imagery, and Santa Fe<br />
Jewelers Supply. The heating element in this<br />
<strong>PMC</strong> kiln is embedded in a ceramic fiber firing<br />
chamber, and heats from both top and<br />
bottom. The unit also features a Sentry<br />
Xpress digital controller that lets you control ramp rate, temperature,<br />
and hold time. Options include a high temperature glass<br />
window or bead door. The kiln heats to firing temperature within<br />
minutes and can reach temperatures up to 2000°F.<br />
Evenheat <strong>PMC</strong> Kilns, from <strong>PMC</strong><br />
Connection. Available in four sizes, these<br />
kilns feature energy-saving ceramic fiber<br />
muffles for even heat distribution. A<br />
front door window allows the user to see<br />
into the kiln during firing. The included<br />
12 · <strong>Studio</strong> <strong>PMC</strong>
Tools,Tools,Tools<br />
computer controller comes with five pre-programmed firing<br />
schedules, plus a user-determined eight-segment program. The<br />
kiln can reach temperatures up to 2000°F.<br />
<strong>Rio</strong> <strong>PMC</strong> Kiln, from <strong>Rio</strong> <strong>Grande</strong>. Designed<br />
for firing <strong>PMC</strong> and made exclusively for <strong>Rio</strong><br />
<strong>Grande</strong>, this kiln can be used to fire <strong>PMC</strong> or<br />
enamel, fuse glass, or cure paint on china.<br />
The digital controller features five pre-set<br />
<strong>PMC</strong> Programs, including one to fire <strong>PMC</strong>3<br />
for 30 minutes at 1110°F, and one user-determined<br />
program. The galvanized steel case has an inter-wall layer<br />
of air to keep it cool, and features a ceramic-fiber firing chamber<br />
with embedded heating elements. It includes a fiber shelf with<br />
four ceramic feet, and the newest model features a hinged bead<br />
door built into the front for beading and enamel work.<br />
Bar Stilt Kit, from Whole Lotta Whimsy.<br />
Designed for firing glazed beads in small<br />
<strong>PMC</strong> kilns, with or without silver, the kit<br />
includes two bar stilts and three high-fired<br />
nichrome wire bars in 9 gauge and 11 gauge. Each bead bar holds<br />
two to six beads, for six to 36 beads per stilt.<br />
<strong>Rio</strong> <strong>PMC</strong> Kiln Shelf Kit, from <strong>Rio</strong> <strong>Grande</strong>.<br />
This kit includes two ceramic shelves and<br />
eight shelf feet to increase your kiln's firing<br />
capacity. Stack shelves with feet in between to<br />
create firing layers inside the <strong>Rio</strong> <strong>PMC</strong> Kiln.<br />
Women's Welding Gloves, from Creative Texture Tools. These<br />
leather welding gloves come in women's sizes, smaller than the<br />
men's gloves usually found. Ideal for removing items from the kiln.<br />
Bead Firing Tree, from <strong>PMC</strong> Supply. Designed for firing multiple<br />
<strong>PMC</strong>-enhanced beads in a kiln, this holder is<br />
manufactured from heat-resistant heavy gauge<br />
nichrome wire embedded in ceramic. Each of<br />
the four arms is 1 1 ⁄2" long and strong enough to<br />
hold even heavy beads or pendants for a full<br />
Original <strong>PMC</strong> firing without sagging. The tree reduces the risk of<br />
damage to delicate components by holding beads and pendants so<br />
that the surfaces do not come in contact with anything during firing.<br />
Fiber Shelves, Blankets, and Paper, from Whole Lotta Whimsy.<br />
These ceramic fiber accessories are used to support<br />
your work and protect your kiln. Soft fiber shelf<br />
can be carved for molding glass and lasts for six to<br />
eight firings. Hard fiber shelf is the same material<br />
as soft fiber shelf, with a hardener applied to extend its life to 20 to<br />
30 firings. It can be used for torch firing and soldering, or to<br />
replace the shelf in your kiln. Fiber paper is available in 1 ⁄8" and 1 ⁄16"<br />
thickness and is used for lining the bottom of the kiln during<br />
ceramic firings, or to wrap stones for test firing. Thinfire Paper is<br />
used for glass fusing in place of kiln wash, or to line ceramic ring<br />
mandrels. It can also be used to add a half size to HattieS Patties.<br />
Fiber blanket is made of non-asbestos fine alumina and silica<br />
threads and is used to cushion and support work during firing.<br />
Kaowool Pad, from <strong>PMC</strong> Tool and<br />
Supply/Darway Design <strong>Studio</strong>. This refractory<br />
insulation material is used to support pieces<br />
during firing, without the mess of vermiculite.<br />
Materials<br />
Enameling on Metal Clay Starter Kit, from Pinzart. This kit is<br />
designed to include all the materials you'll need<br />
to begin enameling on metal clay: a 28-page<br />
instruction booklet called Enameling on Metal<br />
Clay by Pam East, 1 ounce Clear for Silver enamel,<br />
12 half-ounce containers of enamel, two<br />
sifters, Klyr-Fire enamel adhesive, a sprayer, two<br />
trivets, a 6" firing rack, a firing fork, inlay tools, a sifting screen, an alundum<br />
stone, a Tri-M-Ite polishing paper sampler, a sanding sponge sampler,<br />
a 3M wet/dry sandpaper sampler, and a Sunshine polishing cloth.<br />
Enamel Kit, from Whole Lotta Whimsy. This starter kit includes<br />
15 half-ounce containers of enamel, a halfounce<br />
Clear for Silver flux, a palette, a detail<br />
size 0 brush, an enamel spoon, packing<br />
palette, and a one-ounce bottle of Klyr-Fire<br />
glue for wet packing. Packed in a zippered,<br />
clear tool bag for easy carrying.<br />
Continues on next page…<br />
Summer 2005 · 13
Tools,Tools,Tools<br />
Enameling Supplies, from Schlaifer's Enameling Supplies. Available<br />
enamels include lead-free Thompson Enamels and Soyer Enamels, an<br />
enamel containing lead. Also offered are a variety of tools for firing<br />
enamels, including trivets, firing racks, and firing forks.<br />
Raku Kit, from <strong>PMC</strong> 123. This kit contains most of the components<br />
needed to create a graduated set of nine raku with <strong>PMC</strong><br />
beads, including nine graduated ceramic beads, two stainless steel<br />
support rods, a steel raku rack, raku glaze, dry <strong>PMC</strong> paste, paintbrush<br />
and directions. All the artist needs to add is a container,<br />
newspaper, and a kiln.<br />
Keum-boo Gold Foil, from Allcraft Jewelry Supply Co. and <strong>Rio</strong><br />
<strong>Grande</strong>. This 24k gold foil is sized specifically for use in Keum-boo.<br />
Texture Tools<br />
Texture Sheets, from Whole Lotta Whimsy.<br />
These plastic sheets can be used to make impressions<br />
on all types of clay, including <strong>PMC</strong>, polymer,<br />
and earthenware. The two-sided sheets are<br />
light-weight and easy to clean.<br />
Texture Roller, from Whole Lotta<br />
Whimsy. Both ends of this texture<br />
roller feature different textures and roll<br />
independently of the handle.<br />
Brass Texture Plates, from <strong>PMC</strong><br />
Supply and Santa Fe Jewelers Supply.<br />
These 2 1 ⁄2" x 4" plates are used to apply<br />
patterns to unfired <strong>PMC</strong>. They are<br />
available in 14 styles.<br />
Silicone Texture Plates, from Creative<br />
Texture Tools. These 1 ⁄4" silicone plates<br />
are non-stick and require little or no oil.<br />
They are flexible, allowing for easy<br />
release from the <strong>PMC</strong>, and unbreakable.<br />
Made by Creative Texture Tools<br />
specifically for use with <strong>PMC</strong>, they are currently available in 14<br />
designs, with additional designs added frequently.<br />
Rubber Pattern Mats, from <strong>PMC</strong> Supply. These<br />
3" x 8" rubber mats contain several different<br />
design areas for applying patterns to unfired<br />
<strong>PMC</strong>. The flexible mats are available in 26 styles.<br />
Punches and Cutters<br />
Kemper Pattern Cutters, from<br />
New Mexico Clay. Designed for<br />
cutting shapes from wet clay,<br />
Kemper Pattern Cutters work<br />
like a cookie cutter, and are<br />
equipped with a spring-return plunger for ejecting clay cut-outs.<br />
The brass cutters are available in a variety of sizes and shapes.<br />
Precision Circle Cutters, from Creative<br />
Texture Tools. These four brass tubes with<br />
sharpened ends are used to cut small holes in<br />
wet <strong>PMC</strong>, such as holes for jump rings or<br />
earring wires.<br />
Mini-Punches, from Whole Lotta Whimsy.<br />
These 7mm to 9 mm punches are great for<br />
punching out accents from <strong>PMC</strong> Paper or<br />
Keum-boo foil.<br />
Nesting Tube Set, from Celie Fago. This<br />
tool is a set of nesting brass tubes used for<br />
cutting concentric circles out of <strong>PMC</strong> and<br />
for making disks and seamless bezels.<br />
The tubes are collected on a hammered<br />
brass pin that serves both as a plunger for<br />
the individual tubes and as a way to keep them together.<br />
Tools for Ring Making<br />
Ring Mandrel Set, from <strong>PMC</strong> Supply. These<br />
non-tapered ring mandrels are for making<br />
rings in sizes 4 to 15. Rings can be created<br />
directly on the round parallel work surface,<br />
and the holding bracket can be turned to<br />
work on the ring horizontally or vertically.<br />
HattieS Patties, from <strong>PMC</strong> Supply.<br />
These ring-sizing inserts are used to<br />
ensure accurate sizes for <strong>PMC</strong>3 rings.<br />
The kit comes with instructions and<br />
three HattieS Ring Forming Strips.<br />
Adjustable Ring Gauge, from Santa Fe Jewelers Supply. This band<br />
allows you to measure your ring shank and then lay it flat for measuring.<br />
Measure two sizes larger to allow for shrinkage with <strong>PMC</strong>+ or<br />
<strong>PMC</strong>3. Economical enough to send to your customers for ring sizing.<br />
Ring Sizing Material, from Creative Texture Tools. This 12" long,<br />
1<br />
⁄2" wide strip of fiber paper is used to wrap around a <strong>Rio</strong> <strong>Grande</strong><br />
ceramic ring form to size a ring up a half size.<br />
14 · <strong>Studio</strong> <strong>PMC</strong>
Tools,Tools,Tools<br />
Mold Compounds<br />
HattieS Brand Mold Compound, from<br />
<strong>PMC</strong> Supply. This two-part mold compound<br />
yields .75 ounces of mold material. Once<br />
blended, the mold compound has a five<br />
minute working time, and sets in 15 minutes. No mold release is<br />
needed when molding <strong>PMC</strong>.<br />
Polyset, from Zero-D Products. This<br />
two-part silicone mold putty offers a<br />
controlled set time of two to 10 minutes.<br />
Available in 8 ounce, 15 ounce, and 3.3<br />
pound kits.<br />
Akron Polyset II, from Zero-D<br />
Products. This new two-part mold compound<br />
offers flexible finished molds<br />
with high tear strength. Both parts are a<br />
soft putty that are easily kneaded together<br />
to the proper texture before applying<br />
to a model or copying a flat design or texture plate. Available in<br />
one pound and four pound kits.<br />
Castaldo Quick Sil, from Creative<br />
Texture Tools and Santa Fe Jewelers<br />
Supply. This two-part, room temperature<br />
vulcanizing silicone mold compound<br />
sets in 15 minutes. It is available<br />
from Santa Fe Jewelers Supply in a two-pound package, or from<br />
Creative Texture Tools in a 3 ounce size geared to artists who want<br />
to experiment with the material. Complete instructions from the<br />
manufacturer included.<br />
<strong>Rio</strong> Cold Mold, from <strong>Rio</strong> <strong>Grande</strong>.<br />
This two-part, no shrink mold compound<br />
does not require release agents<br />
or heat for vulcanizing. It is recommended<br />
for molding delicate originals<br />
or master models.<br />
Mega-Sil Impression Compound,<br />
from Microsonic Inc. This two-part silicone<br />
mold compound sets up in just five<br />
minutes, and easily withstands heat up<br />
to 400°F. Available in yellow, peach, or<br />
blue and in single-use or bulk containers.<br />
Continues on next page…<br />
<br />
<br />
<br />
<br />
<br />
<br />
<br />
<br />
<br />
<br />
<br />
<br />
<br />
<br />
<br />
<br />
<br />
<br />
<br />
<br />
<br />
<br />
Summer 2005 · 15
Tools,Tools,Tools<br />
Other Tools<br />
Coil Cover, from Celie Fago. This<br />
brass cover for hotplate coils for<br />
Keum-boo is a 6" x 6" sheet of 20 gauge<br />
red brass with multiple depressions in<br />
the surface and turned down "feet."<br />
The cover evens out temperature fluctuations<br />
and prevents gold from falling through the heating element.<br />
The depressions allow the artist to easily apply gold to volumetric<br />
pieces such as spheres and cubes.<br />
Wire Rounder Tool, from <strong>PMC</strong>123<br />
and Creative Texture Tools. A stainless<br />
steel cup bur mounted in a wooden<br />
handle, this tool cuts the sharp edges<br />
of wire to produce smooth, round<br />
ends for ear wires.<br />
Gold Brush, from <strong>PMC</strong> 123. This<br />
fine-tipped natural bristle paintbrush<br />
comes with a snap-on cap,<br />
allowing the brush to be carried without risk of damaging the tip<br />
or losing any metal still on the brush. Ideal for use with gold <strong>PMC</strong>.<br />
Two-faced Mallet, from <strong>PMC</strong><br />
123. This 6 1 ⁄2" mallet fits easily into<br />
a tool kit. It features two detachable,<br />
replaceable heads, one chrome over brass, the other nonmarring<br />
nylon.<br />
Bead Rollers, from <strong>PMC</strong> Supply. These four different<br />
rollers permit you to make precisely sized<br />
<strong>PMC</strong> beads quickly. Roll cork in the bead roller,<br />
cover the cork with <strong>PMC</strong>, and fire.<br />
Wizard Pen Plater, from <strong>PMC</strong><br />
Supply. This self-contained pen<br />
plater can be used to add 24k gold<br />
accents to <strong>PMC</strong> pieces, even<br />
around delicate stones and glass.<br />
The self-contained unit is simple to<br />
use: attach the clip to the piece, dip the pen point into 24k gold<br />
pen plating solution (sold separately), and begin plating. No<br />
additional firing required.<br />
<strong>PMC</strong> Humidifier, from Belladonnasilver. This two-inch terracotta<br />
bell features a movable handle and a treated liner that can be<br />
moistened with tap water to keep unused <strong>PMC</strong> moist for hours<br />
while you work. A square piece of clear, flexible plastic film is<br />
included as a base for the bell.<br />
Favorite Tools from our Readers<br />
Iwas just doing some repair work on a<br />
piece that had broken and I realized I<br />
was using one of my favorite tools: a toothpick.<br />
It makes a great medium grit sanding<br />
tool in tight spots like the inside of a bail or<br />
around inside corners where a piece of<br />
sandpaper won't fit and a file is too coarse.<br />
—Lora Hart<br />
After working with Keum-boo and<br />
<strong>PMC</strong> it made sense that the way to<br />
get the Aura 22 to bond better to <strong>PMC</strong> was<br />
to burnish it while it was hot. The only<br />
tool that I could find to burnish into the<br />
textured areas of my piece was the double<br />
ended ball burnisher that <strong>Rio</strong> sells. I torch<br />
fired my piece with two layers of Aura 22.<br />
Immediately after pulling the flame away I<br />
burnished with the ball burnisher. It<br />
worked great!<br />
—Judi Anderson<br />
My favorite tool is the color stick that<br />
comes in Chris Darway's tool kit. I<br />
also buy extras from him. I show my students<br />
how to use it, and tell them that the<br />
tool kit is worth the money just for the<br />
color stick! I also have a chiseled one and<br />
mini color sticks that work great too.<br />
—Linda Matteson<br />
Ilike the plastic needles used for needlepoint.<br />
They are useful for starting holes<br />
and adding a scallop to an edge. I sometimes<br />
use them for stirring slip as well.<br />
They are inexpensive and can be found<br />
find in most craft stores.<br />
—Chris Brooks.<br />
Polymer clay is my thing. I cover the<br />
handles of a lot of my tools with it,<br />
make molds out of elastic Sculpy, create<br />
texture stamps, and create specific tools for<br />
shaping the <strong>PMC</strong>. Once the polymer tools<br />
are baked and buffed, they are a great addition<br />
to my tool jar.<br />
—Lorrene Davis<br />
Iran into a Sally Beauty Supply store a<br />
couple of weeks ago and was blown away<br />
by the variety of nail buffers and sanders<br />
there are. I picked up one of each of the<br />
eight grits. They make greenware sanding<br />
easy. One that I picked up had four grits,<br />
depending on which side and end you<br />
used, all clearly marked in the middle<br />
where it's not going to wear off.<br />
—Judi Weers<br />
To keep your clay moist, get one of<br />
those disposable pudding cup plastic<br />
containers made by Glad. Place it, with lid,<br />
upside down, and put your clay in it. You<br />
can mist water into the cup to help keep<br />
the clay moist. While you are working this<br />
(or any jar/glass) will keep your clay moist.<br />
The nice thing about the lidded container<br />
is that when you are done, just press down<br />
and seal the lid to keep your clay moist<br />
overnight or longer.<br />
—Mary Ellin D'Agostino<br />
16 · <strong>Studio</strong> <strong>PMC</strong>
Directory of Tool Suppliers<br />
ABR Imagery<br />
3417 South Knightbridge Road<br />
Bloomington, IN 47401<br />
phone 812-339-9147 • fax 812-339-8947<br />
rossglass@cs.com • www.abrimagery.com<br />
Allcraft Jewelry Supply<br />
205 West 29th St., Suite 205<br />
New York, NY 10001<br />
phone 800-645-7124 • fax 800-645-7125<br />
www.allcraftonline.com<br />
Bead Bungalow<br />
105-B Annapolis St.<br />
Annapolis, MD 21401<br />
phone 410-268-4774 • fax 410-268-9118<br />
info@beadbungalow.com<br />
www.beadbungalow.com<br />
Belladonnasilver<br />
9699 N. Hayden Road 108-112<br />
Scottsdale, AZ 85258<br />
Phone 480-695-4295<br />
Donna@belladonnasilver.com<br />
www.geocities.com/redbiz50/belladonnasilver.html<br />
Celie Fago<br />
1037 Christian Hill Road<br />
Bethel, VT 05032<br />
phone 802-234-5428<br />
celie@adelphia.net • www.celiefago.com.<br />
CreativeTextureTools.com<br />
P.O. Box 5292<br />
River Forest, IL 60305<br />
phone 708-488-9589 • fax 708-488-9578<br />
eluther@creativetexturetools.com<br />
www.CreativeTextureTools.com<br />
Microsonic, Inc.<br />
1421 Merchant St.<br />
Ambridge, PA 15003<br />
phone 877-376-7139 • fax 717-247-0364<br />
microsonic@earmolds.com<br />
store.earmolds.com.<br />
New Mexico Clay<br />
3300 Girard NE<br />
Albuquerque, NM 87107<br />
phone 800-781-2529 • fax 505-881-2350<br />
www.nmclay.com.<br />
Paragon Industries<br />
2011 South Town East Blvd.<br />
Mesquite, TX 75149<br />
phone 972-288-7557 • fax 972-222-0646<br />
paragonind@att.net<br />
www.paragonweb.com<br />
Pinzart, Inc.<br />
10945 State Bridge Road #401-277<br />
Alpharetta, GA 30022<br />
phone 888-335-9884 • fax 509-352-1009<br />
pam@pinzart.com<br />
www.pinzart.com.<br />
<strong>PMC</strong>123<br />
5822 Oak Run<br />
San Antonio, TX 78247-1326<br />
phone 210-656-8239 • fax 210-656-1419<br />
sherryfotopoulos@hotmail.com<br />
www.pmc123.com.<br />
<strong>PMC</strong> Connection<br />
3718 Cavalier Drive<br />
Garland, TX 75042<br />
phone 866-762-2529 • fax 972-487-2022<br />
info@pmcconnection.com<br />
www.pmcconnection.com.<br />
<strong>PMC</strong> Supply<br />
225 Cash St.<br />
Jacksonville, TX 75766<br />
phone 800-388-2001 • fax 903-586-2534<br />
Joe1@peacocks.com<br />
www.pmcsupply.com.<br />
<strong>PMC</strong> Tool and Supply/Darway Design <strong>Studio</strong><br />
1 Feeder St.<br />
Lambertville, NJ 08530<br />
phone 609-397-9550 • fax 609-397-0702<br />
darwaydesign@earthlink.net<br />
www.pmctoolandsupply.com<br />
<strong>Rio</strong> <strong>Grande</strong><br />
7500 Bluewater NW<br />
Albuquerque, NM 87121<br />
phone 800-545-6566 • fax 800-965-2329<br />
info@riogrande.com<br />
www.riogrande.com.<br />
Santa Fe Jewelers Supply<br />
1513 Fifth St.<br />
Santa Fe, NM 87505<br />
phone 800-659-3835<br />
info@sfjssantafe.com<br />
www.sfjssantafe.com.<br />
Schlaifer's Enameling Supplies<br />
1441 Huntington Dr. #1700<br />
South Pasadena, CA 91030<br />
phone 800-525-5959 • fax 626-441-1127<br />
sales@enameling.com<br />
www.enameling.com.<br />
Silver Sunset Design <strong>Studio</strong><br />
2339 County St. #2940<br />
Blanchard, OK 73010<br />
phone 405-222-0628 • fax 405-793-8523<br />
elisa@silversunsetdesign.com<br />
www.silversunsetdesign.com.<br />
Whole Lotta Whimsy<br />
2911 W. Placita Montessa<br />
Tucson, AZ 85741<br />
phone 520-531-1966 • fax 520-531-1965<br />
tonya@wholelottawhimsy.com<br />
www.wholelottawhimsy.com.<br />
Zero-D Products<br />
38285 North Lane #103<br />
Willoughby, OH 44094<br />
phone 440-942-1150 • fax 440-942-2130<br />
e-mail: jwryrubber@aol.com<br />
Web site: www.zerodproducts.com.<br />
<br />
<br />
<br />
<br />
<br />
<br />
<br />
<br />
<br />
<br />
<br />
<br />
<br />
<br />
<br />
<br />
<br />
<br />
Summer 2005 · 17
Happenings<br />
Call for Entries<br />
<strong>PMC</strong> Guild member Martha Sayers has<br />
been invited to teach a week-long session<br />
on combining kiln-worked glass and metal<br />
clay at the Corning <strong>Studio</strong> in Corning, New<br />
York, in August. To help introduce the students<br />
to the many ways of finishing glass,<br />
Martha is seeking slides of work featuring<br />
innovative ways of embellishing warm- and<br />
hot-glass creations. Among the techniques she<br />
intends to present are stringing, wire work,<br />
traditional metal settings, and metal clay.<br />
Slides that are chosen will be presented<br />
during the week at Corning. The presentation<br />
will be preserved as a CD-ROM catalog<br />
that will be made available to Corning students<br />
and faculty, the Rakow Research<br />
Library at Corning, and distributed internationally.<br />
Artists whose slides are accepted for<br />
the presentation will receive a complimentary<br />
copy. The deadline for entries is June 1.<br />
For more information, e-mail Martha at<br />
mksayers@yahoo.com.<br />
PostPicasso.com, an online international<br />
juried art venue, is currently seeking<br />
entries for "Pocketsize; Our Fascination with<br />
the Miniature," an online exhibit open to all<br />
forms of sculpture, including art jewelry displayed<br />
in a sculptural format. The juror for<br />
the exhibition is Judy Donald, the owner of<br />
OXOXO Gallery in Baltimore, Maryland.<br />
There is a $25 entry fee for artists who are<br />
not members of PostPicasso.com, and the<br />
entry deadline is Aug. 15.<br />
Breaking News<br />
The downside to publishing a quarterly<br />
magazine is that sometimes things happen<br />
faster than we can get to print. That's<br />
especially true for items such as calls for<br />
entries and exhibition opportunities, where<br />
the period for submissions can be less than the<br />
three months between issues of <strong>Studio</strong> <strong>PMC</strong>.<br />
That's why the <strong>PMC</strong> Guild created a special<br />
topic in the discussion forums entitled, appropriately<br />
enough, "Exhibition Opportunities /<br />
Call for Slides." You'll find it under "Outreach<br />
and Education." Members are invited to post<br />
their own calls or pass on information about<br />
exhibitions that welcome metal clay work by<br />
posting it to this forum topic. Stop by the discussion<br />
forums regularly, and you'll never miss<br />
an opportunity to show your work!<br />
And while you're there, check out the<br />
"Buy, Sell, and Swap" thread under<br />
"Miscellaneous." That's the place where used<br />
equipment comes to change owners.<br />
Members are welcome to post their own ads<br />
for equipment they're interested in selling or<br />
swapping. Instructions for posting can be<br />
found by clicking on "Buy, Sell, and Swap" on<br />
the opening page of the discussion forums.<br />
The <strong>PMC</strong> Guild is pleased to announce<br />
that CeCe Wire has accepted the new<br />
position of Local Chapter Liaison for the<br />
guild. CeCe's combination of energy, organizational<br />
skills, and experience make her<br />
uniquely qualified for this role. This parttime<br />
position demonstrates the importance<br />
we place on developing a network of chapters<br />
at the community level.<br />
Starting June 1, CeCe will be our point<br />
person for existing, emerging, and evolving<br />
chapters. Her immediate goal will be to initiate<br />
contact with each chapter once a month.<br />
She will be the primary communication link<br />
between the chapters and the Guild.<br />
In a related effort, the <strong>PMC</strong> Guild will<br />
soon offer each local chapter a page on the<br />
guild's Web site. The guild has designed a<br />
template and is currently working with three<br />
pilot cases, with plans to expand the program<br />
to other chapters in the future.<br />
The <strong>PMC</strong> Connection will sponsor a <strong>PMC</strong><br />
Artist's Retreat Sept. 13-18 at American<br />
Airlines Training & Conference Center at the<br />
Dallas/Fort Worth International Airport in<br />
Fort Worth, Texas. The retreat will offer 29<br />
separate workshops and both Level 1 and<br />
Level 2 <strong>PMC</strong> Connection certification classes,<br />
with participants having the option of<br />
attending anywhere from a single workshop<br />
to five full days of classes. Other activities will<br />
include a golf tournament Friday, a "Texassize<br />
party" on Saturday night, and a Country<br />
Store featuring <strong>PMC</strong> tools. For information,<br />
visit www.<strong>PMC</strong>-Retreat.com or call <strong>PMC</strong><br />
Connection at 866-762-2529.<br />
More than 300 people attended the<br />
opening of Metalmorphosis, an exhibit<br />
organized by <strong>PMC</strong> Guild member Susan<br />
Lewis in Boca Raton, Florida. The exhibit<br />
included 148 pieces of handmade jewelry<br />
and metal object made by 44 artists who have<br />
studied with Susan. The work was selected<br />
from more than 200 entries by Ana Esther<br />
Soued, an instructor at Miami International<br />
University of Art and Design, and awards<br />
were given in five categories. In the metal<br />
clay category, the winners were Laurie<br />
Yoder of Miami, a <strong>PMC</strong> Guild member, Sally<br />
Franke of Coral Springs, Florida, and<br />
Marilyn Weiner of Boca Raton.<br />
<strong>PMC</strong> Guild members continue to appear<br />
in print! Robert Dancik and Sara Jayne<br />
Cole each wrote step-by-step articles for the<br />
March 2005 issue of Lapidary Journal, and<br />
Lorrene J. Davis had a step-by-step article in<br />
the April 2005 issue.<br />
Recent issues of Art Jewelry have also featured<br />
the work of <strong>PMC</strong> Guild members.<br />
Linda Kaye-Moses and Diane Howey had<br />
articles published in the January 2005 issue,<br />
which also featured the work of Celie Fago<br />
and Shahasp Valentine. The March 2005<br />
issue included articles by Hadar Jacobson,<br />
Hattie Sanderson, and Irina Miech and<br />
work by Debbie Fehrenbach, Shahasp<br />
Valentine, Debra Weld, and Linda Kaye-<br />
Moses. And in the May 2005 issue were articles<br />
by Jean Whittington and Carol<br />
Babineau and work by Linda Warner, Pat<br />
Gullett, and Shahasp Valentine.<br />
18 · <strong>Studio</strong> <strong>PMC</strong>
www.CreativeTextureTools.com<br />
Hard-to-find tools for <strong>PMC</strong><br />
Original Silicone<br />
Texture Plates<br />
Won’t<br />
stick to<br />
<strong>PMC</strong>!<br />
Elaine D. Luther<br />
PO Box 5292 • River Forest, IL 60305<br />
(708) 488-9589<br />
<br />
<br />
<br />
<br />
<br />
<br />
<br />
<br />
<br />
<br />
<br />
<br />
<br />
<br />
<br />
<br />
Membership in the <strong>PMC</strong> Guild<br />
Don’t miss a single issue of <strong>Studio</strong> <strong>PMC</strong>!<br />
❑ New Membership<br />
THE DATE on your mailing label<br />
(see back page of <strong>Studio</strong> <strong>PMC</strong>)<br />
is the date your Guild<br />
membership EXPIRES!<br />
Join or renew online at www.<strong>PMC</strong>guild.com.<br />
(You can also change your address.)<br />
• Or call toll-free (866) 315-6487 to join or renew<br />
using your credit card<br />
• Or fill out and mail the attached form to:<br />
<strong>PMC</strong> Guild, P.O. Box 3000, Denville, NJ 07834.<br />
Sign me up for:<br />
06/05<br />
Expiration date<br />
North America:<br />
❑ 1 year $25 ❑ 2 years $45 ❑ 3 years $65<br />
Outside North America:<br />
❑ 1 year $35 ❑ 2 years $55 ❑ 3 years $75<br />
For Advertising information: Call Bill Spilman toll-free at 877-878-3260<br />
❑ Renewal Membership<br />
Member Name: ______________________<br />
Business Name: ______________________<br />
Address: ____________________________<br />
__________________________________<br />
City: ______State: ______ Zip: _________<br />
Phone (day): ________________________<br />
Fax: ______________________________<br />
Phone (eve): ________________________<br />
E-mail: ____________________________<br />
Payment: ❑ Check or Money Order Enclosed<br />
❑ Charge Card - ❑ Visa ❑ Mastercard<br />
{Please note: returned checks are recovered by CrediCheck.<br />
A $20 fee (plus bank charges) will be added to all returned checks.}<br />
Card Number: ________________________<br />
Expiration Date:______<br />
Name on Card________________________<br />
Signature: __________________________<br />
Billing Address on card IF different from above:<br />
__________________________________<br />
__________________________________<br />
“<strong>PMC</strong>:We’re Serious<br />
About This”<br />
CD Now Available!<br />
The Guild is working with Barbara Becker<br />
Simon to make available the presentation of<br />
cutting edge work she presented at two conferences<br />
this year. The CD will include<br />
scores of images of inspirational work along<br />
with the software you'll need to run it. This<br />
will be available as a benefit to members for<br />
only the cost of shipping ($5). "<strong>PMC</strong>: We’re<br />
Serious About This" can be purchased by the<br />
public for $15 plus $5 shipping and handling.<br />
Send check to <strong>PMC</strong> Guild, 2390 Acorn<br />
Drive #245, Hebron, KY 41048<br />
Summer 2005 · 19
GOLD AND SILVER <strong>PMC</strong><br />
Step by step instructions<br />
on Video<br />
By Linda Bernstein<br />
Senior Instructor, <strong>PMC</strong> Connection<br />
“… helpful and informative…”<br />
Art Jewelry Magazine Nov 2004<br />
Only $29.95 + shipping<br />
Order the entire 5 tape set:<br />
Only $129 + shipping<br />
Beginners Workshop: 2<br />
Dimensional Techniques (Silver)<br />
Intermediate Workshop: 3<br />
Dimensional Techniques (Silver)<br />
Advanced Vol 1: Glass Enamel<br />
and Dichroic Glass (Silver)<br />
Advanced Vol 2: Vessels, Raku<br />
and Leaves (Silver)<br />
Advanced Vol 3: <strong>PMC</strong> Gold;<br />
Gold elements and Paste<br />
▼<br />
▼<br />
▼<br />
▼<br />
▼<br />
All tapes approximately 50-60 minutes in length.<br />
Close up shots of specific techniques for working<br />
with <strong>PMC</strong>. Rich variety of original projects with<br />
step by step instructions to help you master <strong>PMC</strong>.<br />
<strong>PMC</strong> Classes, Firing & Videos:<br />
http://www.Artique.org<br />
Call 847-478-0284 or email<br />
LBernstein@Artique.org for more<br />
information and details about Classes<br />
and firing service or to see and buy<br />
her work, products and videos.<br />
TIME TO RENEW your Guild membership? THE DATE on this mailing label is the date<br />
your <strong>PMC</strong> Guild Membership EXPIRES. If your expiration date falls before the next issue<br />
of <strong>Studio</strong> <strong>PMC</strong> (February, May, August, and November issues), you need to renew NOW<br />
to continue your subscription uninterrupted.<br />
P.O. Box 265<br />
Mansfield, MA 02048<br />
www.<strong>PMC</strong>guild.com<br />
Name & Address incorrect? Send corrections to the <strong>PMC</strong> Guild<br />
by mail, fax, or e-mail office@pmcguild.com<br />
PONTIAC, IL<br />
PERMIT No.721<br />
<strong>Studio</strong><br />
Member Magazine of the <strong>PMC</strong> Guild<strong>PMC</strong><br />
U.S. POSTAGE<br />
PAID<br />
PRSRT STD