Studio PMC - Rio Grande
Studio PMC - Rio Grande
Studio PMC - Rio Grande
- No tags were found...

You also want an ePaper? Increase the reach of your titles
YUMPU automatically turns print PDFs into web optimized ePapers that Google loves.
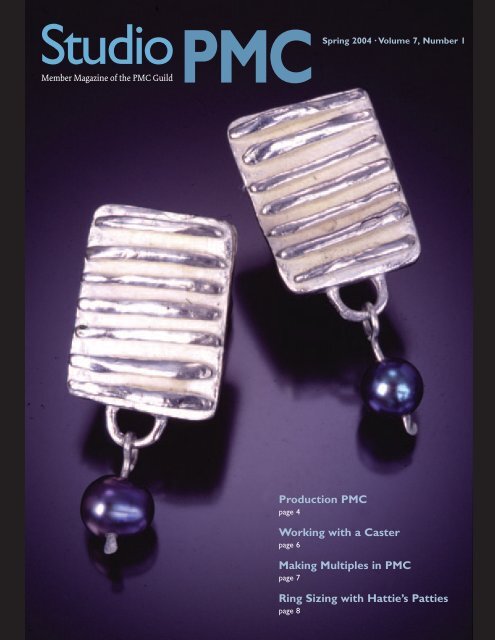
<strong>Studio</strong>Spring 2004 · Volume 7, Number 1Member Magazine of the <strong>PMC</strong> Guild<strong>PMC</strong>Production <strong>PMC</strong>page 4Working with a Casterpage 6Making Multiples in <strong>PMC</strong>page 7Ring Sizing with Hattie’s Pattiespage 8Summer 2003 • 1
<strong>Studio</strong>Member Magazine of the <strong>PMC</strong> Guildfeatures<strong>PMC</strong>Spring 2004 · Volume 7, Number 14 Production <strong>PMC</strong> by Jennifer “Jeff” Bowie<strong>PMC</strong> is ideally suited to making multiples, which allows you toexpand your line and offer lower-priced pieces.6 Working with a Caster By Suzanne WadeHints on developing a good caster-artist relationship.7 Molding Multiples in <strong>PMC</strong> By Suzanne WadeCarl Stanley offers some tips for short-run productionby molding <strong>PMC</strong>.8 Ring Sizing By Hattie SandersonMaking ring sizing patties from casting investment.9 Ring Chart By Ginger SeipleUpdate of popular sizing chart for narrow rings.12 A Budding Artist By Melanie Bentley ShockleyStep-by-step instructions for creating fine silver flowers with <strong>PMC</strong> slip.13 Organic Chemistry By Dianne MahafeeAnother technique for creating silver leaves with <strong>PMC</strong> slip.14 <strong>PMC</strong> Plique-A-Jour Pendant By Louis KappelMaking a pendant using plique-a-jour enameling techniques.departments3 As I <strong>PMC</strong> It9 Readers’ Writes10 Gallery14 Happenings15 Tips & Tricks17 Portfolio18 Questions & Answers19 <strong>PMC</strong> MarketplaceCover: Ridge Earrings by Jeff Bowie. Sterling silver cast from<strong>PMC</strong> original. Photo by Robert Diamante.<strong>Studio</strong> <strong>PMC</strong>Mitsubishi Materials Corp.P.O. Box 265, Mansfield, MA 02048www.<strong>PMC</strong>guild.comVolume 7, Number 1 • Spring 2004Editor—Suzanne WadeTechnical Editor—Tim McCreightArt Director—Jonah SpivakAdvertising Manager—Bill Spilman<strong>Studio</strong> <strong>PMC</strong> is published by the <strong>PMC</strong> Guild Inc.• How to SUBMIT WORK to <strong>Studio</strong> <strong>PMC</strong>…We welcome your <strong>PMC</strong> photos, articles and ideas. You may submitby mail or electronically. Please include your name, address, e-mail,phone, plus a full description of your <strong>PMC</strong> piece and a brief bio.Slides are preferred, but color prints and digital images are OK.By Mail: Mail articles and photos to: <strong>Studio</strong> <strong>PMC</strong>,P.O. Box 265, Mansfield, MA 02048.Electronically: E-mail articles in the body of the e-mail, or asattachments. E-mail photos as attachments. We require an imageresolution of 300 dpi.• E-mail files (under 4 MB) to editor@<strong>PMC</strong>guild.comDeadlines: Nov. 1 for Spring issue; Feb. 1 for Summer issue;May 1 for Fall issue; Aug. 1 for Winter issue.• How to Place Advertising in <strong>Studio</strong> <strong>PMC</strong>…Contact our Advertising Manager, Bill Spilman, for specifications,deadlines, and prices. Phone Toll-free: 877-878-3260.E-mail: ads@<strong>PMC</strong>guild.com• How to get answers to tech questions…E-mail Tim at: tech@<strong>PMC</strong>guild.comContact the <strong>PMC</strong> Guild to…• Join the <strong>PMC</strong> Guild• Get information about <strong>PMC</strong> Certification Classes• Renew your subscription to <strong>Studio</strong> <strong>PMC</strong>• Change your mailing address or e-mail• Request back issues or additional copies<strong>PMC</strong> GuildCeCe Wire, Executive Director417 West Mountain Ave.Fort Collins, CO 80521 USAPhone: 970-419-5503 Fax: 970-419-5504Website: www.<strong>PMC</strong>guild.comE-mail: cece@<strong>PMC</strong>guild.comCopyright ©2004 <strong>PMC</strong> Guild.Printed four or more times a year. Reprints by permission only.All rights reserved.<strong>Studio</strong> <strong>PMC</strong>, its staff and contributors, specifically disclaim anyresponsibility or liability for damages or injury as a result of anyconstruction, design, use, manufacture, or any other activity undertakenas a result of the use or application of information containedin any <strong>Studio</strong> <strong>PMC</strong> issue or article.2 · <strong>Studio</strong> <strong>PMC</strong>
Production <strong>PMC</strong>by Jennifer “Jeff” Bowie"Ridge" earrings with black pearls, cast insterling silver from <strong>PMC</strong> original.Photo by Robert Diamante."Spotted brooches" in fine silver.Largest is 2" x 1.5"Photo by Robert Diamante.By definition, production is the abilityto make many of the same thing orsimilar things with a minimumof time and money. Being able tomake pieces with a minimum oftime and money means you canexpand your offerings to includeentry-level products at inexpensiveprice points.What does that mean? Itmeans that even though thethings you love to make usuallysell for $250, you can have a $20pair of earrings in your line. And that $20pair of earrings can win you a customerwith whom you can develop a relationship,and who will eventually buy your$250 pieces.Artists begin doing production piecesbecause they find a piece that sells reliably,so they make it over and over again. Beforeyou know it, you've started productionwork by default.<strong>PMC</strong> offers a number ofways to incorporate productionpieces into your body ofwork. One way is to make amold of your original with amolding compound such asBelicold or Mega-Sil, andreplicate the piece individuallywith <strong>PMC</strong>.Another option is to use atraditional production method,such as casting. In casting, arubber mold is made from anoriginal model, then the moldis injected with wax. A rubber mold can beused to make hundreds of waxes, which canthen be cast in sterling, gold, brass, orpewter for only a dollar or two a piece,depending on the metal. In addition, manycasters offer finishing services, and willeven attach findings like pin backs and earposts (for a fee, of course).A goodbeginningpoint fordesigninga line ofproductionwork is tochoose adesign theme.I've found <strong>PMC</strong> to be a great mediumfor creating original models that can beused for casting. I can work onan original, work through variationson a design, and if it isn'tturning out right, I roll up the<strong>PMC</strong> and start over. When youfabricate models using traditionalmetalsmithing techniques,you invest a lot of energy andtime into the first originalmodel, so if you don't like it, it'shard to just crumple it up andput it the scrap bin.Because I'm very tactile, I sometimeshave a hard time knowing exactly how adesign will turn out until I actually makeit. Sometimes a design looks great onpaper, but in three dimensions it's kind ofclunky. In <strong>PMC</strong>, you get to that threedimensionalpoint much faster. You canmake a judgement very early on thatsomething isn't quite right, before you'veinvested a lot of time and creative energy.I use my <strong>PMC</strong> models to expand on anidea. When I come up with designs thathang together well for me as a group, I goback to traditional casting methods to keepmy time and costs down. It's an approachthat gives me the instant gratification of<strong>PMC</strong> and the cost effectiveness of productionmethods.Getting StartedA good beginning point for designing a lineof production work is to choose a designtheme. One way I do this is to build little"matrix dies" from sheets of copper that I'vehammered, textured, or drilled holes into.After rolling out the <strong>PMC</strong>, I press themwith the matrix die and cut the pressingsapart into different shapes — round,square, rectangular, oval, triangle, or cutthe pressing in half, or quarter it. Theseshapes are then incorporated into different4 • <strong>Studio</strong> <strong>PMC</strong>
Clockwise from top left; A rubber mold is made from the original<strong>PMC</strong> model… A wax is made from the rubber mold...... And the raw casting (left) is tumbled to finish it.designs to create a series of pieces with thecontinuity of similar design elements.You can use a favorite texture or mold inthe same way. For instance, I have a bookmarkthat someone gave me that I use thisway. The pattern punches available at craftstores with different shapes are anotherexample. However, I like to use coppersheet for my matrix dies because the metaldies hold up well after dozens, even hundreds,of impressions. Less sturdy sourcesof texture, such as playing cards, start tofall apart after 20 or 30 impressions.Be sure to take notes as you are working.If the design is successful, you'll want torepeat the process to make accompanyingpieces. Good notes make it easier to keepyour models consistent. For example, ifyou use playing cards to gauge depth, besure to note the size of the stack. If you usetubing or cookie cutters to cut out shapes,label them and keep track of which oneswere used for which piece.If you are going to include stones, youmay want to choose a stone or two youenjoy working with and that complementsyour design and stick to them. Then youcan order them in quantity so you have aready supply on hand.Once you have made a few models youlike, you can expand on them to create anentire line. What do the earrings look like?The pendant? The brooch? Tie tacks, lapelpins, cufflinks? Can the model you used foran earring be used as a clasp for a chain todraw the pieces together? Matching piecesare a great way to turn a sale for a pendantinto a sale for a pendant, earrings, and pin.Over time, you will find that certaindesigns and styles sell better than others.What do your best sellers have in common?Go back to those themes and startthe process all over again! ❖Jennifer "Jeff" Bowie's first exposure to metalsmithingwas stamping number tags for pieces ofarmor at the Tower of London. Since then, shehas gone on to receive a bachelor's degree in ArtHistory from the University of Rochester and abachelor of fine arts degree in metalsmithingfrom the Massachusetts College of Art. She currentlylives and works in Salem, Massachusetts."Bubble #1" series, cast in sterling silver from <strong>PMC</strong> originals.Photo by Robert Diamante.Go for the Gold!Many <strong>PMC</strong> artists would love to seetheir work produced in gold, but arereluctant to use the relatively pricey 24karat gold <strong>PMC</strong>. Casting offers a perfectsolution to the dilemma, points out<strong>PMC</strong> artist Elaine Luther. You can createyour design in silver <strong>PMC</strong> and haveit cast in whatever alloy you choose.Unlike gold <strong>PMC</strong>, your metaloptions when casting are almost unlimited.Typical casting choices include10k, 14k, 18k, and 22k gold, in green,red, yellow, or white gold. You couldeven have the piece cast in platinum!Spring 2004 · 5
WORKING with a CASTERby Suzanne WadeFinding a good caster is like finding a gooddentist, says <strong>PMC</strong> artist Jennifer "Jeff"Bowie. Recommendations from fellowartists are a good place to begin,but since your needs may be differentfrom your colleagues,unexpected results can sometimesmake the process painful.The best predictor of a successfulcaster-artist relationshipis the quality of communicationbetween them, saysDaniel Grandi of Race CarJewelry in Cranston, Rhode Island, a contractcaster that specializes in workingwith jewelry designers."Lots of my customers have used othercasting companies, and [they'll tell me],'my caster never told me that,'" saysGrandi. "You want to be able to call yourcaster and talk with them."A good caster will be willing and able totell you when design flaws will make amodel difficult or impossible to cast, andsuggest changes to improve your successrate. They may even offer tips for alteringthe design to speed production, or to makesoldering or finishing simpler."If something is not going to cast, we tryand call the customer and tell them whatcan be done to fix the problem," saysGrandi. "Perhaps a piece has an area that'stoo thin, or they've made the piece solightweight it's just not castable."The communication must go bothways, however. When you request a priceestimate, be sure to describe the piece asthoroughly as you can, including anyunusual details that might pose a challengeto the caster. "We've gotten situationswhere the piece is way beyond what'sexpected. [The artist] will tell us it's 2 inchesby 1 inch, and it is — but it hasappendages that are 3 inches long and stickout, and they're very thin [and] aren'tgoing to cast," says Grandi.The bestpredictor ofa successfulcaster-artistrelationship isthe quality ofcommunicationbetween them.When you do settle on a caster, you canimprove your chances of being happy withthe finished castings by sending a finishedsample with your order. A samplepiece shows the caster exactlywhat your expectations are foryour finished castings, making iteasier for him to meet them.It may also reduce argumentsif the castings don't turn outquite as you expected. "If yousent a sample to the [caster] andit's not like the sample, thenthere's a problem," says Grandi. "If it's notlike the sample, then it should be sent back."If you don't have a finished sample, andyou're planning on doing a large numberof castings, you can ask the caster to preparea sample piece for you.You should also put your order in writing.Although telephone conversations aregreat for figuring out what needs to be doneand when, there's no substitute for puttingyour understanding on paper. "If you'replacing an order, you should have a copy soyou can check it when it comes in to see ifit's complete," says Grandi. "The more organizedeveryone is, the easier things will be."Frequently, a caster's services go beyondcasting. Grandi's shop, for example, willmake molds, remove sprues, finish thepiece to a range of polishes, solder jumprings and earring posts, and even do enameling.These added services come withadditional fees, though. To avoid expensivesurprises, you should always specify —in writing — exactly what you want donewith the piece after casting.Remember, though, that doing it yourselfisn't always cheaper in the long run. "Alot of designers work at home, and theydon't have professional polishing equipment,"points out Grandi. "They might tryto hand polish with a Foredom, and they'llsay the casting took 10 minutes to polish.But on a two-horsepower buff, it's a twominutejob."Some other things to consider whendesigning models for casting:Your finished piece will only be as goodas your model. If your model is poorly finished,pocked with pinholes, or sportsragged edges, so will your cast piece. Forbest results, your model should be taken allthe way through final polish before sendingit to your caster. Think of it this way:Would you rather fix the problems on a singlemodel, or on 100 (or 1,000) cast pieces?Remember that casting results inshrinkage, too. You'll need to make yourmaster model 7 to 15 percent larger thanyou want the finished piece.Consistency is key. Working in <strong>PMC</strong>, itoften doesn't matter if your hinges are perfectlysymmetrical, or your tubes uniform.When you cast, however, problems canarise if the caster has to jury-rig wax modelsof your handmade pieces so they holdtogether during casting. For example, saysGrandi, casters use standard-size rodsinside hinges when casting to ensure theyremain hollow. If your hinges are oddlysized or shaped, it will be difficult for thecaster to use his usual methods, increasingthe likelihood of casting failures, additionalcharges, or both.If you're not satisfied with the first castingcompany you contact, or even afteryou've had a few pieces cast, try someonenew. "Keep shopping until you find someoneyou can have a conversation with,"says Grandi. If a casting house doesn't havesomeone willing to walk you through theprocess, move on, he advises. "Many castinghouses aren't designers, and they'renot model makers, so when you tell themyou want to discuss how to make themodel, they don't know what to tell you.You need to find someone who does." ❖For links to resources for finding a caster,visit the <strong>PMC</strong> Guild's Website atwww.pmcguild.com.6 · <strong>Studio</strong> <strong>PMC</strong>
Molding Multiplesby Suzanne WadeMultiplesCarl Stanley produced 50 of these 1 1 ⁄2" x 3 ⁄4" pins from <strong>PMC</strong>as a charitable donation to a local food bank.Casting is one way to move into production,but you can also take yourfirst steps into multiples without masteringthe intricacies of molten metal. <strong>PMC</strong>'smoldable qualities make it well suited forshort-run production.In producing multiples in <strong>PMC</strong>, you'lluse the same techniques used to transfertextures or to produce <strong>PMC</strong> componentsfor one-of-a-kind bracelets. If you can createa single piece by pressing <strong>PMC</strong> into amold, you can do it dozens of times.<strong>Rio</strong> Rewards Senior Instructor CarlStanley recently used this technique toproduce 50 pins for a fundraiser for a localfood bank. "I had the <strong>PMC</strong> on hand, and Iwanted to do something more textural,with a kind of wood block appearance toit," he says, noting he's done pins for thefood bank before, but never in <strong>PMC</strong>.A looming deadline for the project alsopushed him towards using <strong>PMC</strong>. "Onereason to use <strong>PMC</strong> was to just get the productionpieces done," he says. With <strong>PMC</strong>,he could have the pieces done in just a couplesteps: casting, on the other hand,required several more operations.<strong>PMC</strong> molding tends to be most useful forflat pieces, which can be molded quicklyand easily, and is most cost effective whenyou only want a limited number, such as100 or fewer. In this case, Carl designed apin that he could roll directly into a mold,fire, and finish by soldering a tack pin onthe back.Carl began by carving his design into ablock of carving material used for creatingyour own rubber stamps. (Carl usesSpeedy-Stamp pink carving blocks fromSpeedball, but several other brands are alsoavailable, including PZ Cut and NascoSafety Kut. Stamp carvers also sometimesuse erasers for this purpose.)Other types of molds would also haveworked, Carl notes, although care must betaken to choose a mold material sturdyenough to hold up to multiple reproductions.Molding compounds, such asBelicold, Liqui-Cast, and Mega-Sil are frequentlyused for <strong>PMC</strong> molding and shouldbe sturdy enough for short-run production.To ensure that all the pins would all bethe same size, Carl then took a package of<strong>PMC</strong> and divided it into 10 balls, eachweighing 3.7 grams. He sprayed the moldwith jeweler's mold release (available fromjewelry suppliers for preventing injectedwax models from sticking to rubbermolds), and rolled each ball into the mold.He then carefully peeled the <strong>PMC</strong> off themold, and laid it on a piece of tile for dryingand firing.On this particular pin, Carl wanted theedge to be uneven, so he left the edges tothe pattern open. "I wanted them to looklike shards of pottery, with a broken ortorn edge," he explains. For a more regularshape, he would have carved a deep borderaround the pattern. "The border acts as aCarl's mold in Speedy Stamp carving block.Note the design, including the date,is carved in reverse.sort of shear," he explains. "When it hitsthat deeper border, [the <strong>PMC</strong>] cuts at thatsharp edge."Because he had committed to supplying50 pins, Carl opted to mold 55 <strong>PMC</strong> pieces,in case a piece cracked or tore later in theprocess. After firing, he finished the piecesas usual, and soldered on the posts. Thefinal cost was $120 in materials for 50 pins,which Carl donated to the food bank. (Thepins were used to recognize food bank supporters.)Carl notes that this technique can alsobe used to create components for productionpieces that will then be assembledindividually by hand. "I think the bestthing is to start out small and explore [production]for yourself," he says. "Commit tomaking 10 of the same piece, which isn't'tough to do, or making earrings and[molding] the components. See whatworks, and what doesn't." ❖Carl Stanley is a jewelry artist from SantaBarbara, California. He has been workingand experimenting with <strong>PMC</strong> for six years,and is a senior instructor with the <strong>Rio</strong> RewardsCertification Program.Spring 2004 · 7
Ring-Sizing with Hattie's Pattiesby Hattie SandersonIcreate custom <strong>PMC</strong> rings for many of myclients. If the custom ring is too small, Ican stretch the band about half a size witha rawhide mallet on a steel ring mandrel,but if the ring requires more stretchingthan that, or if it's too large, I am stuckwith it. To avoid this problem, I have comeup with a simple, consistent ring sizing system.I call it "Hattie's Patties."Hattie's Patties are easy, inexpensive,and give consistent results. The patties aremade of casting investment, which is normallyused at high temperatures, so it willhold up to the heat of the kiln and will notbreak down at high heat levels like plasterof paris.The pattie is made to the desired size ofthe finished ring. The ring is made largerthan the finished size, and a Hattie's Pattieis placed in the center of the ring before firing.During firing, the ring shrinks to theexact size of the pattie and can shrink nofurther. I have perfect sizing results everytime. Yeah!Here's how to make and use Hattie'sPatties. In this example, I am making a size7 finished ring, but you can make the pattieany size you need.Step 1. To make the pattie molds, wrapthe strip of freezer paper around the size 7on the stepped mandrel, shiny side down.Secure it with a small piece of transparenttape. Remove the paper from the mandreland turn it on its edge. This will be yourpattie mold for the investment. Write thesize on the paper with a marker. Place thepaper mold on a non-stick surface.(Another piece of freezer paper makes agood work surface.) Repeat until you havethree or four pattie molds. (Since each pattieis good for just one use, I make severalat a time.)8 · <strong>Studio</strong> <strong>PMC</strong>Learn more about this techniqueat the <strong>PMC</strong> Conference,where Hattie will be presenting.“Hatties Patties” and <strong>PMC</strong>+ ringStep 2. Mix the investment. Fill a papercup with 2 1 /2 teaspoons of cold water. Stirin 2 tablespoons of investment powder.Work in a well-ventilated area and be carefulnot to inhale the powder. (A dust maskor respirator is also recommended.) Pourthe investment into the pattie molds andlet it set up for about 15 minutes.Step 3. Write the ring size on the investmentwith the marker. The patties willstore indefinitely at room temperatureuntil you are ready to use them.Step 4. Form the <strong>PMC</strong>+ or <strong>PMC</strong>3 ringon the stepped mandrel two sizes largerthan the finished size to allow for shrinkage.I recommend using <strong>PMC</strong>3 forstronger rings.I prefer to create my rings on steppedmandrels because these mandrels give youa 1 inch wide area to create on that is nottapered.Step 5. Place the ring on its side on thekiln shelf. Peel the freezer paper off thepattie and place the pattie in the center ofthe ring. Fire both <strong>PMC</strong>+ and <strong>PMC</strong>3 ringsat 1650°F for two hours for maximumstrength. The ring will shrink tight aroundthe pattie.Step 6. While the ring is still prettywarm, pick it up with tweezers or tongsand quench it in a bucket of water, using aback-and-forth motion. Be sure to usegood ventilation and a respirator, sinceTools & Materials:Casting investment(a white powdery substance availablefrom jewelry suppliers)1/2" x 5" strips of freezer paper(from the grocery store)Transparent tapeMarkerWaterStepped ring mandrel(also available from jewelry suppliers).Respiratorinvestment dust becomes airborne on theresulting steam and can be easily breathed.The investment will fizzle and dissipate inthe water. Clean out any remaining investmentwith an old toothbrush. Voila! Yourring is a perfect size 7!Clean up. Keep a small water bucket forall your investment waste. Do not put itdown the drain! When you accumulateused investment, let the water evaporateuntil the used investment is solid. You caneither discard the used investment orcrumble it up and use it as a firing bed on akiln shelf for firing dimensional work. Besure to follow all safety instructions on theinvestment label!A final tip. To make a cheap holder foryour mandrel so you don't have to hold itwhile creating your rings, use one packageof polymer clay. Split the clay in half androll into two balls. Place the balls on awork surface far enough apart that eachend of the mandrel will rest on one. Holdthe mandrel horizontally, and press itabout halfway down into the balls of clay.Gently remove the mandrel and bake theclay according to the manufacturer'sinstructions. You now have a cradle thatfits the mandrel perfectly. The mandrelalso rotates quite easily while cradled inthe polymer clay. ❖Hattie Sanderson is a <strong>PMC</strong> Connection SeniorInstructor. She also sells pre-made patties inwhole sizes 4 to 15. She may be contacted atHatSan@netzero.net.
Editor's note: This chart is an addendum to onedeveloped by Ginger and published with "22 Rings– Translating <strong>PMC</strong> Ring Sizes for <strong>PMC</strong>+" in theWinter 2002 issue of <strong>Studio</strong> <strong>PMC</strong>. To view the originalchart, please visit the <strong>PMC</strong> Guild Web site atwww.<strong>PMC</strong>guild.com.By Ginger SeipleThe chart is for creating narrow rings of<strong>PMC</strong>+ or <strong>PMC</strong>3, using Original <strong>PMC</strong> ceramicring forms. It has proven quite useful andaccurate in the classes I teach. Unlike the previouschart, which I made for wider rings, thisproject was done using a scientific method,making it more accurate. All rings were made4 mm wide and 4 cards thick, without texture,to eliminate variations in outcome.When making narrow ring shanks, I useeither a 6-card thick piece of <strong>PMC</strong>; or a 4-card thick piece embellished with added<strong>PMC</strong> in a decorative way. I think this thicknessis necessary for increased strength withnarrower shanks.Ginger Seiple is a full-time metalsmith and certified<strong>PMC</strong> artisan. She teaches <strong>PMC</strong> workshops incentral and northern Ohio.<strong>PMC</strong> RingSizing ChartSize of ringform usedSized obtained usingsmall side of formSize obtained usinglarge size of form3 1 44 2 65 2.75 7.256 4 9.257 5 108 6 10.59 6.5 11.510 7 1211 8 12.512 8.5 1313 9 14Readers’ Writes: What form of <strong>PMC</strong> do you use?My favorite <strong>PMC</strong> is <strong>PMC</strong>3. I like thestrength for rings and the ability tofire dichroic glass and genuine stones suchas chrome diopside and tsavorite garnets.— Judi AndersonIalso prefer <strong>PMC</strong>3. I do a lot of work withfused dichroic glass and the <strong>PMC</strong>3 seemsto work best for that due to lower tempsand less shrinkage. I also like the option ofbeing able to fire it at a higher temp formore strength. It's more versatile.— Judi WeersIespecially like the sheet (paper) clay. Ilike it because it does not dry out and thefact that I can use it to decorate otherpieces. I get compliments on my pleatedand folded pieces. It is also an easy startingplace for beginners who are unsure ofthemselves.—Chris BrooksIhave used all forms of <strong>PMC</strong> now and useeach for specific techniques. I have to saythat I still like Original <strong>PMC</strong> for its sheervirtuosity of texture. I have learned toaccount for the shrinkage and do so automaticallynow. The minute details I'm gettingwith Original <strong>PMC</strong> are hard to beat.—Martha SayersIlike all the types and forms of <strong>PMC</strong>.While Original is not my favorite, sometimesthe shrinkage can be just what wasneeded. I still use <strong>PMC</strong>+ for a lot of thingsbecause it is less expensive than <strong>PMC</strong>3, buthave been increasingly drawn to <strong>PMC</strong>3because of the increased strength andquick finishing. Since I teach a lot of shortclasses, being able to have students brushand polish the pieces quickly and with littleeffort is a big plus!—Mary Ellin D'AgostinoAlthough I enjoy using all forms of<strong>PMC</strong>, I especially like the resultachieved when combining Original <strong>PMC</strong>with <strong>PMC</strong>+ paper. I cut the paper in stripswith a craft knife or decorative scissors andweave the strips into a "fabric" or just laythe strips out in a pattern. Then I roll outOriginal <strong>PMC</strong> to a 2 card thickness. I givethe woven paper a light spritz of water androll the Original <strong>PMC</strong> clay over it. I cut outshapes to make pendants, earrings, andcomponents for future projects. Whenfired (two hours at 1650°F), the differentshrinkage rates of the two clays cause theshapes to contour. I learned this techniqueduring the <strong>Rio</strong> Rewards Certification programand have since expanded on it.—Alice Alper-ReinNext Issue’s Question: What’s the most unusual location you’ve fired <strong>PMC</strong> in?Spring 2004 · 9
GalleryTo submit your photos to our Gallery sendslides or prints to:<strong>Studio</strong> <strong>PMC</strong>, P.O. Box 265,Mansfield, MA 02048.Please include your name, address, countryif outside the US, phone, e-mail address, abrief bio, photo credit, plus the size andmaterials used in your piece."She Gathers" pendant by Georgia Ann Waller."Fireworks" by Catherine Davies Paetz.10 • <strong>Studio</strong> <strong>PMC</strong>
Yolanda Cuperus-Nieuwboer"XXX Slide" by Susan Lewis.William Wainwright.Winter Summer 2003 • 11
A Buddingby Melanie Bentley ShockleyI've been an avid runner for the past 24years, and part of what's kept me on theroad all this time is the opportunityrunning affords to spendan hour outside with MotherNature. Little did I expect,however, that Mother Naturewould eventually invite herselfinto my <strong>PMC</strong> jewelry designs!In the last year, I've made aneffort to slow my pace and really takenotice of all that nature is gifting me. Asmy eyes and mind opened to nature's simpleofferings, the pockets of my runningjacket began to bulge with dried pods,flower blossoms, twigs, leaves, and riverpebbles gathered during my morning run.I began searching out wooded trails whereI might discover some little object thatcould be transformed into a unique <strong>PMC</strong>piece. Not only was I getting out of myrunning rut, but I was filling my mindwith thoughts of potential <strong>PMC</strong> projects.Because the objects were beautiful in andof themselves, I decided to try my hand atslip-coating them in order to preserve asmuch of the natural form as possible. As Ibegan experimenting with organic forms Ifound that some forms were more compatiblewith <strong>PMC</strong> slip-coating than others.Coating twigs and leaves generally presentedno problem, but coating blossomsand flower buds with <strong>PMC</strong> slip provedmore of a challenge. Substantial blossomssuch as star magnolias, orchids, tulippoplars, dogwoods, and rose buds withstoodthe weight of <strong>PMC</strong> slip better thanfragile blossoms such as columbine, bleedinghearts, or tulips. Since I didn't knowanyone else who had worked with slipcoatingnatural objects, I had to follow myown learning curve. Through experimentationand refining the process of slip-coatingfound objects, I eventually developedArtistSubstantialblossoms…withstood theweight of <strong>PMC</strong>slip better thanfragile blossomsthe following process for creating <strong>PMC</strong>pieces from blossoms and flower buds.Step 1. Place one packageof <strong>PMC</strong>+ in a film canisterwith an equal amount of waterand place the lid on the canister.Let it set overnight. In themorning the slip is a perfectconsistency, although you maychoose to thin it out a bitdepending on the durability of the blossom.(The thinner the petal, the thinnerthe slip will need to be.) A general rule ofthumb for slip thickness is to achieve a naillacquer consistency.Step 2. Lightly spray the blossom withaerosol hairspray. The hairspray provides atacky coating to the waxy surface of the blossom,making it easier for the slip to adhere.Step 3. Anchor the blossom into positionfor painting with <strong>PMC</strong> slip. (I use a"third hand" for this purpose.) Use a highqualityangled paint brush to delicatelypaint a thin coat of slip on the blossom. IfOrchid by Melanie Bentley Shockley,2" x 2 1 /2"Wisteria pod by Melanie Bentley Shockley,2 1 /2" x 3 1 /2"the blossom appears to be collapsing inupon itself, thin the slip slightly and applythe lightest possible pressure when touchingthe bud — try "floating" the slip on theblossom, as opposed to using brushstrokes. Note that the most important partof this process is patience.Step 4. Once the blossom is painted, Iuse "Good Grip" plastic clips to anchor thebud to a wire rack where it can drip dry. Torecycle any <strong>PMC</strong> slip that drips off of thebud onto the tabletop, I place a small squareof plastic projector paper beneath the rack,which makes for easy clean-up as well.Let the <strong>PMC</strong> slip dry thoroughly beforerepeating the slip-coating process. I usuallyuse eight to 10 coats of slip, depending onhow substantial I want the piece to be afterfiring. Remember to thoroughly drybetween each coat. A hairdryer can be usedon the low setting to facilitate drying, butavoid applying too much air too close tothe blossom. Too strong a breeze may causethe blossoms to fold upon themselves oreach other.Step 5. Because these pieces are so fragilein the dry state, I prefer to fire the <strong>PMC</strong>according to the manufacturer's instructionsprior to adhering the bail. It is mucheasier to handle it once the piece has been12 · <strong>Studio</strong> <strong>PMC</strong>
fired. During firing, be sure to support theblossom with vermiculite or aluminahydrate.Step 6. After the first firing, I attach a<strong>PMC</strong> bail, and re-fire the piece (still supportedby vermiculite or alumina hydrate).Step 7. I finish most of my pieces bytumbling them. If a piece of <strong>PMC</strong> pops offduring tumbling, I simply reattach it using<strong>PMC</strong>+, re-fire (again with support), andthen repeat the tumbling. An alternatechoice for finishing is to burnish it on a flatsurface with a steel brush for a lovely satinfinish.Step 8. For depth, I like to apply a patinaor oxidize the blossoms, then burnish toa soft satin finish using a steel brush anddish detergent.Step 9. I complete my designs withfreshwater pearls, semi-precious stones,and a variety of beads, usually choosinglighter fare that will complement the naturalform and movement of the object,while balancing the weight of the metal.One last tip regarding twigs: twig formsare hollow after firing, and therefore fairlyfragile. As a safeguard against fracturing, Ipurposely break the twig near a joint andinsert a rod of sterling silver into the hollowtube. Then, using a <strong>PMC</strong> syringe, I injectclay into the hollow tube around the wire tofill the cavity. I seal and repair the intendedfracture, re-fire, and finish as describedabove. It's an extra step, but the extra effortis worth it because I never have to worryabout a customer returning the piece.The lesson in my journey has been tofree myself to make connections betweenmy art and my daily existence. Even moreimportantly, I've learned not be afraid ofmaking mistakes along the way, especiallywhen trying new <strong>PMC</strong> techniques. As Dr.Seuss says in, Oh! The Places You'll Go!...Out there things can happenand frequently doto people as brainyand footsy as you.And when things start to happen,don't worry. Don't stew.Just go right along.You'll start happening too! ❖Melanie Bentley Shockley is a <strong>PMC</strong> artist andjewelry designer in Midlothian, Virginia. Shewrites, "I find that making art and living an'authentic life' means that often the boundariesbetween our daily lives and the art we createdissolve. Hence, this article."Organic ChemistryPhoto 1By Dianne MahafeeWhat could be more beautiful than jewelrydesigned by Nature herself? Some of myfavorite pendants have been made bypainting <strong>PMC</strong> slip on the textured side oforganic matter.Leaves are one of my favorite foundations.To create the two pieces picturedhere, I used geranium leaves (Photo 1) andthe leaves and seed pods from a lantanaplant (Photo 2). I painted each leaf withfive layers of slip, letting each layer drybetween coats.I then connected the leaves and seedpods together with slip and <strong>PMC</strong>+, andfired them for 10 minutes at 1650°F. Theleaves burned out completely, leaving onlythe slightest bit of ash behind.After firing, I applied Black Max to themain veins with a tiny watercolor paintbrush. The veins darkened quickly, and theBlack Max flowed from the main veinsinto all the secondary veins as well. The<strong>PMC</strong> leaves were then rinsed in water tostop the Black Max action. A quick brassbrushing completed the piece.Safety Note: Black Max is a more hazardousmaterial than Liver of Sulfur. Usewith good ventilation, and avoid contactwith metal. To avoid contact with the aluminumferrule found on many paintbrushes,consider using a plastic handledflux brush or bamboo brush to apply. ❖Dianne Mahafee is a certified <strong>PMC</strong> instructorand holds a master’s degree in art education.She recently taught an introduction to <strong>PMC</strong> onthe South Carolina Learn TV show she hosts,"Art with Dianne."Diane Mahaffee painted <strong>PMC</strong>+ slip onto plantleaves to create these lifelike designs. (Above)Geranium leaves, 4 inches wide. (Below)Lantana leaves and seed pod, 3 inches wide.Photo 2Winter 2003 · 13
<strong>PMC</strong> Plique-A-Jour PendantBy Louis KappelPlique-a-jour is an enameling techniquein which transparent enamel is fired inbackless cloisons, or cells, so that lightshows through. It produces an effect likeminiature stained glass windows. <strong>PMC</strong> is anideal medium to make the silver frames forplique-a-jour. It is pure silver after firing sotransparent enamels do not discolor as withsterling silver, and <strong>PMC</strong> frames are less timeconsuming to make than sterling frames.The first step in the creation of theorchid pendant shown here was making apaper pattern. My pattern was drawn andcolored on my computer, and printedslightly larger than the final size of thepiece. In designing a pattern, you musttake into account the shrinkage of the<strong>PMC</strong> (in this case <strong>PMC</strong>+), and the fact thatyou must make the cloisons small so theenamel will not melt out during firing.I printed the computer drawing, thencut out the paper pattern with a sharpknife. I rolled the <strong>PMC</strong>+ to about 1 / 16 inchthick on an oiled glass surface, pressed thecut out pattern into the wet <strong>PMC</strong>, andused a needle tool to trace the pattern intothe <strong>PMC</strong>, including all cutouts and edges.I removed the paper pattern and cut outthe openings from the <strong>PMC</strong> sheet with asharp knife. I then sprayed the <strong>PMC</strong>remaining on the glass with a water mist tosmooth it out.The piece was allowed to dry for 24hours and removed from the glass.Remaining defects were cleaned up with aknife and <strong>PMC</strong> slip, and the surfacesmoothed with abrasive paper. Then thependant was fired.After firing, I prefer to tumble polishmy plique-a-jour pieces. The burnishedThe plique-a-jour technique produces aneffect similar to stained glass.The fired <strong>PMC</strong> pattern priorto applying enamel.surface makes it easier to keep the exposedsilver free of enamel and reduces the workof stoning after the enamel has been fired.I use the method of plique-a-jour enamelingtaught by Valeri Timofeev, whichuses no backing during firing. The transparentenamel used is thoroughly washed,and then saturated with a mixture of 20percent Klyrfire (a light organic glue usedin enameling) and 80 percent water.The enamel is applied to the cloisonswith a small stainless steel spatula. Sincethe cloisons are small, the surface tensionof the wet enamel will allow it to hang suspendedin the cell. It is best to apply onlyone color of wet enamel at a time.The enamel must be dry before firing.To dry the enamel, use blotting paper orpaper towel to absorb excess water, andthen place the piece on an enameling triveton the top of the kiln. The Klyrfire willhold the enamel in place when it is dry.To fire the enamel, set kiln temperatureto 1470°F and fire to an orange peel surface.This requires about 60 seconds, butwill vary with the kiln used. Do a test piecein your kiln and be sure to record the time.When a piece has been fired correctly,there will be a spider web of enamel acrossthe cell: there will be holes in the surface,but the enamel will stretch across most ofthe cell. More enamel can be added after thepiece has cooled slightly, but before it coolscompletely, to fill in the gaps. The piece isthen re-fired until the cells are filled. Thepiece shown here required 36 firings beforeall the cells were filled. (Additional colorsmay be added to a filled cell, but only afterthe first surface is mature.)After all cells are filled satisfactorily, anyenamel that fired on the silver surface isremoved using an enameler's techniquecalled "stoning". An enameler's tools typicallyinclude a set of 1 ⁄2 inch square bars ofcarborundum ranging from 200 grit to 800grit or finer, used to smooth and flattenthe surface of the enamel piece after firing.The final bar is used to provide the polishto a cloisonné piece.If you do not have stoning tools, a diamondtool lubricated with water could alsobe used to remove enamel from the surfaceof the silver before the final firing.Finally, the piece is re-fired to fire polishthe enamel in the cells. Firing times areabout 120 seconds at 1470°F for this firing.Again this time may vary for your kiln.To finish the piece I tumble polish withstainless steel shot and burnishing compound.I find that tumble polishing willnot normally damage the enamel surface,but will polish the silver surfaces. ❖Louis Kappel has been a jeweler and lapidaryfor 30 years. He has been working with <strong>PMC</strong>since 1999. He is a member of the <strong>PMC</strong> Guildand a certified <strong>PMC</strong> artist.14 · <strong>Studio</strong> <strong>PMC</strong>
Tips & TricksCompiled by Susanne Wade<strong>PMC</strong> with SoleA tip for an unusual texture comes fromLinda J. Cook, a <strong>PMC</strong> artist in SanFrancisco. She writes, "I have the good fortuneof taking my dog on a daily walk overlookingthe ocean. On these walks, I amconstantly on the lookout for new texturesto use on <strong>PMC</strong>. One particular day, just aftera heavy fog, I lookeddown at the sand,and to my amazement,there werepatterns everywhere,all different, left bypeople's running andwalking shoes."When I gothome I took all ofmy shoes out of thecloset searching thesoles for patterns.Voila! Endless texturingpossibilities.I simply clean themup with an oldtoothbrush, apply alittle spray cookingoil, press them onEarrings by Linda J.Cook using textureswith "sole."rolled out <strong>PMC</strong>, cut the shape, make a hole,dry, and fire. The patterns can be mademore interesting by crossing the pattern.""This can be fun for a class," she concludes."Just tell everyone to bring a bag ofshoes with interesting soles, and have fun!"This is only a test…Ever have a piece of colored glass or a particularshade of enamel change color whenyou fired it set in <strong>PMC</strong>? It may even havesurvived a test firing without effect, only toalter color in your finished piece. Disaster!The source of the problem is a chemicalreaction between the fine silver and the glass.One way to detect the problem before you'veinvested time and creative energy in your finishedpiece is to place the glass on a fine silversheet for your test firing, suggests Dennis R.Zabawa. "If there is no change in the stone atthe point where it rested on the silver surfaceduring the test firing, it should be OK withthe <strong>PMC</strong>," he notes. "This is not foolproof,but it gives you a higher level of confidence."Recycling <strong>PMC</strong><strong>Studio</strong> <strong>PMC</strong> Technical Editor TimMcCreight shares this tip:"In my book Working with Precious MetalClay, I describe a way to recycle dried (butnot fired) <strong>PMC</strong> by dicing it into tiny piecesand adding water. The idea is to expose themaximum surface area so water can morequickly combine with the dried binder.That method works, but lately I’ve beendoing something else."I find it faster to rub a dried lump of<strong>PMC</strong> against coarse sandpaper. I collectthe dust that results, pour it into a smallcontainer, and add water, stirring to testthe consistency. When it feels like yogurt Iknow I’ve added sufficient water. It’s thatsimple. This is not only faster than chopping,but it also makes a <strong>PMC</strong> slip that isready to use almost instantly."The Pioneer Version is to have a pieceof sandpaper on your desk. The CivilizedVersion is to glue the sandpaper onto apiece of plastic or Masonite. This keeps itrigid and handy. Show-offs will drill a holein the corner so the panel can be hung on anearby hook."The Sophisticated Version is to glue thesandpaper into a pie pan. Now what startedas an Idea has become a Tool. Thisdevice keeps the sandpaper from gettinglost on the worktable, holds the paper flat,and collects the dust for easy recycling.”Tumbler TroubleA reader on the <strong>PMC</strong> Guild’s bulletinboard at www.<strong>PMC</strong>guild.com recentlycomplained that pieces coming out ofher tumbler would sometimes lookslightly tarnished. Changing the waterdidn't solve the problem, and she was ata loss to explain the tarnish.An answer was offered by <strong>PMC</strong>Connection Senior Instructor TonyaDavidson. "In a studio I set up inCalifornia, every time [the artist] tumbledthe pieces, they came out patinaed,"she relates. "She cleaned the shot, sheThe Pioneer Version……and the Sophisticated Version of TimMcCreight's slip-making tool.cleaned the barrel, and it continued tohappen. So, by process of elimination,she switched to distilled water and theproblem ceased!"I teach all over the country and havefound that water sources can have a lot todo with the problem that you are having,"Tonya writes. "I assume that [the]local water has traces of sulfur or othercontaminates. I've since started recommendingto my students that they usedistilled water for tumbling with theirburnishing compound, and that hassolved the problem."Winter 2003 · 15
Happenings<strong>PMC</strong> Guild member Sherri Haab ofSpringville, Utah has written a bookabout metal clay entitled The Art of MetalClay. Published by Watson Guptill, thefull-color soft cover book features step-bystepinstructions for a variety of techniquesthat can be used with <strong>PMC</strong>. Thefirst part features basic informationon tools, working with theclay, firing, and finishing, whilepart two offers step-by-step projectsfor texturing, molding,carving, sculpting, and combiningmetal clay with stones, glass,epoxy resins, and polymer clay.Other sections address goldmetal clay and silver paper.A plethora of full-color photos make theinstructions simple to understand, and thephoto galleries in each section offer a greatsource of inspiration for ways to use thetechniques described. The projects rangefrom simple enough for a beginner tomore advanced projects that can be asource of ideas for experienced <strong>PMC</strong>artists. The book is available throughAmazon.com.Sherri is an accomplished writer as wellas a certified <strong>PMC</strong> artisan. The author of aseries of best-selling children's books,including The Incredible Clay Book fromKlutz, Sherri has won awards for herbooks, including Publisher’s Weekly Cuffieaward, Oppenheim’s Toy Portfolio GoldAward, Parent’s Choice, and Family Fun’s ToyAwards. She also teaches craft, jewelry, andmetal clay classes.In December, the Fairchester <strong>PMC</strong> Guild(Ridgefield, Connecticut) celebrated oneyear of meeting with a holiday pot-luckdinner, reports Pam Lacey, one of the localguild's founders. Most meetings haveattracted at least 10 participants, and haveincluded demonstrations and discussionsof a variety of techniques, such as Keum-Boo, hollow boxes, a tear away transfertechnique, and buying quality dichroiccabs. In October, CeCe Wire stopped inafter a certification weekend inBrookfield, Connecticut to say hello andAuthor Sherri Haab.treated the group to a demo onthe water resist technique.(CeCe will share this techniquein the Summer 2004 issue of <strong>Studio</strong> <strong>PMC</strong>.)At the November meeting, guild membersproduced a number of <strong>PMC</strong> works fordonation to the Ridgefield Guild of ArtistsAnnual Holiday Sale, as an expression ofthanks for free use of their studio spaceeach month.Next year promises to be just as interesting,says Pam. Demonstrations scheduledfor the first quarter include cold connectionsand wire work. A resource swap isalso planned. For more informationabout the Fairchester <strong>PMC</strong> Guild andupdates on events, check out the localguild section of the <strong>PMC</strong> bulletin board onthe Guild Web site (www.<strong>PMC</strong>guild.com— click on "Resources" and then "BulletinBoard").Certified <strong>PMC</strong> artisan Marcia Hersonof Bedford, New Hampshire, recentlyreturned from a trip to Turkey, whereshe introduced students at the GlassFurnace, a glass school outside of Istanbul,to the wonders of <strong>PMC</strong>. "From 1967-1970,my family and I lived in Turkey. It has aspecial place in my heart," she writes."Three years ago, I returned to Istanbul forthe first time in 30 years! When I wasthere, I spoke with potters and silversmithsand told them about this amazingnew material, <strong>PMC</strong>."When she returned to Turkey in 2003,she decided to bring a couple of packages of<strong>PMC</strong> along to demonstrate. Her opportunitycame when she visited the Glass Furnace,and discussed <strong>PMC</strong> with a raku teacher andher students. "Because of post 9/11 security,I couldn't bring my usual tools," sheremembers. "I knew getting olive oil wouldbe easy. [The students] got me a knife.Finding texture was no problem. They hada kiln (for fused glass). But what turned outto be the missing step was finding a way todry the clay. So there I was holding my pieceon a trowel over a tea candle!"Unorthodox as it was, Marcia reportsthat the tea-candle drying methodworked, and she was able to fire the piece."But I had to leave after the piece was putinto the 'firin' (oven)," she writes regretfully,although she notes that she's still hopingto be invited back to teach an entireclass in <strong>PMC</strong>.Certified <strong>PMC</strong> artisan Trish Tinsley ofSomerset, Massachusetts, was recentlyfeatured in an article in the Fall RiverHerald News. The article, which appearedon the front page of the paper's Lifestylesection, featured a photo of the artist andseveral pictures of Trish's work. Under theheadline "Silver Wares: Jewelry Artist'sCreations Gaining National Accolades,"Trish talks with Herald News reporter PaulaKerr about how she discovered silver clayand what it feels like to be recognized innational magazines such as Glass Art andJewelry Crafts. To read the Oct. 5, 2003 article,visit the Herald News Web site atwww.hearldnews.com, and search for"Trish Tinsley" under News Search. (Youwill need to go to the Advanced Search andchange the search parameters to articlespublished in the last six months.)The January issue of Lapidary Journalfeatures an article by <strong>Studio</strong> <strong>PMC</strong> editorSuzanne Wade, showcasing the workof seven metal clay artists. Artists featuredin the article include <strong>PMC</strong> Guild DirectorCeCe Wire, Carl Stanley, WendyWallin Malinow, Candice Wakumoto,Shahasp Valentine, Gordon Uyehara,and Kurt Madison.16 · <strong>Studio</strong> <strong>PMC</strong>
Portfolio: Brenda A. Midyette & Susan B. Jepsen"We’ve been robbed — twice! Now what?No jewelry left. OK, let's make jewelry."That's how Brenda A. Midyette and SusanB. Jepsen, both of Santa Fe, New Mexico,describe the start of their jewelry business,BSDesigns, three years ago. With the goalof replacing their lost jewels, the twowomen attended The Bead Expo in SantaFe and took wire work and beading. Theythen traveled to San Diego to learn wirework, followed by the Taos Art Institutefor silversmithing."That proved to be too intense for twoinstant gratification women," writeBrenda and Susan, who soon after discovered<strong>PMC</strong> by taking classes with SusanLewis in Miami. "We were hooked, butsoon learned we needed more silversmithingto maximize our use of <strong>PMC</strong>. Wereally never liked the make-your-own-toolapproach, and wanted more of a fine jewelrylook in our product."After becoming certified <strong>PMC</strong> artisans,they taught for six months and beganexperimenting extensively with <strong>PMC</strong>. "Wewent a little crazy on making pieces just tosee how they would look," Brenda andSusan say. "Finally, our husbands rebelledat the jewelry all over the house and said,'You have to do something with this.'"The pair began doing home trunkshows, and in two months had sold threequartersof their work. An article on thepair in Santa Fean magazine gave the fledgingjewelry business another lift, and mostrecently, Brenda and Susan had 24 piecesexhibited at the Ogden Museum ofSouthern Art in New Orleans."It was an honor we didn’t even understanduntil someone asked, 'Do you knowhow long it takes most artists to get into amuseum?' We didn’t!" say Brenda andSusan. "They chose the <strong>PMC</strong> pieces overothers because 'they could see the artists’hand' — and I bet a few thumbnails too.""We love the organic look and feel of<strong>PMC</strong>, and like all <strong>PMC</strong> addicts we havecoated almost everything in paste," theywrite. "When we got really brave we tookCeCe’s suggestion and had champagnewith the first gold experiments. We justwish the gold didn’t cost as much ascaviar!""We are definitely having fun, and if thefun stops, we stop," Brenda and Susan conclude."No QVC, no employees, just fourhands of two good friends."Winter 2003 · 17
Questions & AnswersQ: I like the strength and quick-firingaspects of <strong>PMC</strong>3, but sometimes it seemsharder to work with — parts don’t join,edges crack, and it feels stiff. What am Idoing wrong?A: You’re probably not doing anythingwrong, but it might help to understandwhy these things are happening. Whenthe Mitsubishi scientists first started workon metal clay, their goal was to create amaterial that handled beautifully. Theycreated original <strong>PMC</strong>, which accomplishedthe goal, along with a shrinkage of28 percent and a two hour firing. Theywere then asked to come up with a metalclay that fires faster and at a lower temperature.Again they achieved these goals, thistime in <strong>PMC</strong>+, a material that traded a littleworkability for these new advantages.The next chapter of the story was to createa material that fired at an even lowertemperature and that could mature soquickly it was practical to fire it with atorch or solid alcohol. This is the materialthat became <strong>PMC</strong>3. The goals wereachieved primarily by using much smallerflakes of silver. This yields a material thatis denser, both as clay and as metal. It isthis density that explains the differences inworkability that you are encountering.Because the material is dense, there isless space between silver particles for water,and it takes longer for moisture to penetrate.This explains why <strong>PMC</strong>3 is stiff andwhy it seems to dry out quickly. You mighthave also noticed that it takes longer torefresh when you add a few drops of water.Each version of <strong>PMC</strong> offers uniqueproperties, both positive and challenging.Your decision about which to use willdepend on your personal working styleand the results you seek.Q: How can I make cutout designs in<strong>PMC</strong>? I’m making <strong>PMC</strong> pendants with acutout design in the backing plate. Thedesign will be seen through transparentstones and I want to avoid any distortionthat may result from shrinkage. Would itbe best to carve out the design before orafter firing?A: In theory, the cutouts will shrink proportionately,so it shouldn’t matterwhether you carve before or after firing.Carving before firing would be easier, butcarving after the <strong>PMC</strong> is sintered intometal would give you a sturdier surface towork on. How to proceed depends on yourskill level. If you’re comfortable using ajewelers saw frame, saw after firing. Ifyou’re not skilled with a saw, it would beeasier to cut the designs out of unfired<strong>PMC</strong>. Rough-cut them in pliable <strong>PMC</strong>,then refine the edges with an X-Acto knifeor file when dry.Membershipin the <strong>PMC</strong> GuildDon’t miss a single issue of <strong>Studio</strong> <strong>PMC</strong>!CeCe Wire6/04147 Hillside DriveColorado Springs, CO 00000Your Membership EXPIRATION DATE!THE DATE on your mailing label (see back page of <strong>Studio</strong><strong>PMC</strong>) is the date your Guild membership EXPIRES!To renew membership to the <strong>PMC</strong> Guild:• MAIL this form and check to <strong>PMC</strong> Guild, 417 West Mountain Ave.,Fort Collins, CO 80521.• PHONE us at 970-419-5503 and charge it.• FAX form to 970-419-5504 and charge it.• DIAL UP our secure server to enroll on the web and charge it byfollowing the links at www.<strong>PMC</strong>guild.com.Sign me up for:❑ 1 year $25 ❑ 2 years $45 ❑ 3 years $65❑ New Membership ❑ Renewal Membership ❑ Gift MembershipMember Name: ______________________________________Business Name: ______________________________________Address: ____________________________________________City: __________State: _____________ Zip: ______________Phone (day): _________________________Fax: ____________Phone (eve): ________________________________________E-mail: ____________________________________________Payment: ❑ Check or Money Order Enclosed❑ Charge Card - ❑ Visa ❑ Mastercard{Please note: returned checks are recovered by CrediCheck. A $20 fee (plus bank charges) will beadded to all returned checks.}Card Number: ______________________________________Expiration Date:______ Name on Card ____________________Signature: __________________________________________Billing Address on card IF different from above: __________________________________________________________________________________________________________________❑ If Gift, please include message: __________________________________________________________________________18 · <strong>Studio</strong> <strong>PMC</strong>
www.CreativeTextureTools.comHard-to-find tools for <strong>PMC</strong>Original SiliconeTexture PlatesWon’tstick to<strong>PMC</strong>!Elaine D. LutherPO Box 5292 • River Forest, IL 60305(708) 488-9589For Advertising information: Call Bill Spilman toll-free at 877-878-3260Winter 2003 · 19
Second biennial International<strong>PMC</strong>ConferenceJuly 23-25, 2004On the campus ofthe University ofNew Mexicoin Albuquerque.MARK THE DATE!www.pmc-conference.comTIME TO RENEW your Guild membership? THE DATE on this mailing label is the dateyour <strong>PMC</strong> Guild Membership EXPIRES. If your expiration date falls before the next issueof <strong>Studio</strong> <strong>PMC</strong> (February, May, August, and November issues), you need to renew NOWto continue your subscription uninterrupted.P.O. Box 265Mansfield, MA 02048www.<strong>PMC</strong>guild.comName & Address incorrect? Send corrections to the <strong>PMC</strong> Guildby mail, fax, or e-mail office@pmcguild.comPONTIAC, ILPERMIT No.721<strong>Studio</strong>Member Magazine of the <strong>PMC</strong> Guild<strong>PMC</strong>U.S. POSTAGEPAIDPRSRT STD