
You also want an ePaper? Increase the reach of your titles
YUMPU automatically turns print PDFs into web optimized ePapers that Google loves.
Soaring<br />
Radi C ntr lled<br />
Digest<br />
<strong>Dec</strong>ember 2010 Vol. 27, No. 12
CONTENTS<br />
<strong>Dec</strong>ember 2010<br />
Vol. 27, No. 12<br />
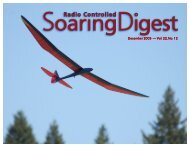
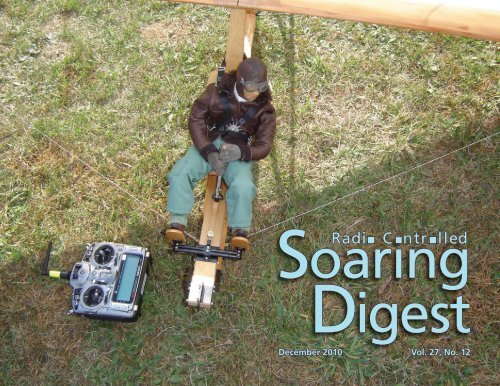
Front cover: Strapped in at the front of a scale primary<br />
glider, this realistic pilot moved along with the stick and rudder<br />
pedals in unison with the control surface servos. Photo taken<br />
at the Cumberland Soar-for-Fun by Pete Carr. See Pete's article<br />
starting on page 18 for coverage of the event and more photos<br />
of this model.<br />
Sony DSC-P73i, ISO 100, 1/125 sec., f/5.6<br />
3 RC Soaring Digest Editorial<br />
4 Moswey II HB-204<br />
The Swiss Moswey II participated in the Rhon World<br />
Competition 1937. Vincenzo Pedrielli relates the story of a<br />
1:3 scale reproduction by Ruedi Straub and Lukas Schaub.<br />
13 Action Composite Photos<br />
A rapid-fire digital camera mounted on a tripod and a<br />
bit of software tinkering leads to some very impressive<br />
photo <strong>com</strong>posites. By Joe Nave<br />
18 Soar-for-Fun<br />
Pete Carr takes to Cumberland Maryland for the 44th<br />
annual event which showcases the aerotowing of some<br />
incredibly beautiful scale sailplanes.<br />
32 Electric Spirit Elite<br />
Leonidas Castello shows how to modify this well<br />
known ARF into a potent electric launch sailplane.<br />
A Swept Wing Saga 38<br />
Drawn by the elegance of the planform and its<br />
unque flying qualities, Paul Westrup relates his<br />
love affair with swept wings and his successful<br />
use of flaps on his 2 meter design.<br />
MiG-7 PSS 47<br />
Derived from the MiG-3, the MiG-7 has a larger<br />
wing and is an ideal candidate for engine<br />
powered <strong>com</strong>bat... and PSS. Dave West's freely<br />
downloadable plans for a corroplast and plywood<br />
model are the basis of Izak Theron's conversion.<br />
Back Cover: Phil Tolfree is a member of the White<br />
Sheet Radio Soaring Club and captured this brooding<br />
image at the club flying site during a January Scale Day<br />
event. Canon EOS 450D, ISO 200, 1/500 sec., f14, 20mm<br />
2 R/C Soaring Digest
R/C Soaring Digest<br />
Managing Editors, Publishers<br />
Contributors<br />
Photographers<br />
Contact<br />
B 2 Kuhlman<br />
Pete Carr<br />
Leonidas Castello<br />
Joe Nave<br />
Vincenzo Pedrielli<br />
Izak Theron<br />
Paul Westrup<br />
Pete Carr<br />
Leonidas Castello<br />
Steve Hunt<br />
Joe Nave<br />
courtesy of Vincenzo Pedrielli<br />
Robert Radford<br />
Izak Theron<br />
courtesy of Verkehrshaus der Schweiz, Luzern<br />
Paul Westrup<br />
rcsdigest@centurytel.net<br />
Web: http://www.rcsoaringdigest.<strong>com</strong><br />
Yahoo! group: RCSoaringDigest<br />
AIM screen name: RCSDigest<br />
Microsoft Messenger: rcsdigest<br />
R/C Soaring Digest (RCSD) is a reader-written monthly publication<br />
for the R/C sailplane enthusiast and has been published since January<br />
1984. It is dedicated to sharing technical and educational information.<br />
All material contributed must be original and not infringe upon the<br />
copyrights of others. It is the policy of RCSD to provide accurate<br />
information. Please let us know of any error that significantly affects<br />
the meaning of a story. Because we encourage new ideas, the content<br />
of each article is the opinion of the author and may not necessarily<br />
reflect those of RCSD. We encourage anyone who wishes to obtain<br />
additional information to contact the author.<br />
———<br />
Copyright © 2010 R/C Soaring Digest<br />
Published by B2Streamlines <br />
P.O. Box 975, Olalla WA 98359<br />
All rights reserved<br />
———<br />
RC Soaring Digest is published using Adobe InDesign CS5<br />
In the Air<br />
There's snow on the ground, the outside temperature as we<br />
write this is under 28°F and falling, high winds last night have<br />
left us with no electricity today, and we're <strong>com</strong>posing this<br />
editorial on our MacBook Pro running off an inverter plugged<br />
into our winch battery. Makes us sormewhat envious of you<br />
folks in the southern hemisphere where the weather is likely<br />
to be more pleasant.<br />
Speaking of the southern hemisphere, Izak Theron, author<br />
of the MiG-7 PSS article, is a member of the Greenfields<br />
Eastern Model Soarers (GEMS) of South Africa.<br />
<br />
GEMS has its origins in the old Eeastern Thermal Busters<br />
(ETB) club and was formed in November 2009. We are<br />
situated about 5km from Bapsfontein on the R25.<br />
25° 59' 44.51" S 28° 21’ 59.89" E<br />
Although our members also dabble in electric models we fly<br />
thermal planes exclusively at this venue. We have a healthy<br />
core of <strong>com</strong>petitive pilots and will be the hosts for the 2012<br />
FAI F3J World Championships.<br />
For details on joining Greenfields Eastern Model Soarers,<br />
contact Paul Carnall at 083 702 7958 or Izak Theron at<br />
082 859 3453.<br />
Those participating in the 2012 F3J World Chamionships,<br />
may want to take a look at the GEMS flying site at<br />
25° 59’ 44.51” S 28° 21’ 59.89” E<br />
Time to build another sailplane!<br />
<strong>Dec</strong>ember 2010 3
1:3 scale<br />
Moswey II HB-204<br />
Vincenzo Pedrielli, vincenzopedrielli@gmail.<strong>com</strong><br />
There are different categories of model<br />
builders. Today some of them should<br />
be named just model flyers. They buy<br />
a ready to fly model and start flying.<br />
Opposite to that there are true model<br />
builders who want to build a scale model<br />
exactly as the original. They start first<br />
with studying the history of the machine<br />
they want to reproduce, chase original<br />
drawings or at least a good three view<br />
drawing. The more photos they can<br />
find the better, to replicate even the<br />
least detail. This type of scale model<br />
builder exists in every part of the world.<br />
I did meet some of them on almost all<br />
continents. The average age of these<br />
fellows is around 50 years.<br />
Recently I received some photographs<br />
of the model of the famous Swiss glider<br />
Moswey II prototype from Lukas Schaub,<br />
a Swiss friend of mine. This model in 1:3<br />
scale has been built by Lukas Schaub<br />
and Ruedi Straub.<br />
4 R/C Soaring Digest
HB-204 at the Rhon World Competition 1937.<br />
<strong>Dec</strong>ember 2010 5
At first glance I did not understand<br />
whether it was a real glider or a model.<br />
Even the pilot inside the cockpit was<br />
looking like an actual man. Skilled model<br />
builders pay great attention to reproduce<br />
any detail. Also from the picture in flight I<br />
could hardly say whether it was a full size<br />
glider or a model.<br />
The reason why these friends selected<br />
the Moswey II prototype was due to the<br />
success this glider obtained participating<br />
with the Swiss pilot Georg Müller in<br />
the International Rhön Competition at<br />
Wasserkuppe in 1937, together with<br />
other famous Swiss gliders such as the<br />
Spalinger S18 Chuka and Spyr III.<br />
The Moswey II, designed by Heinrich<br />
Müller in 1935, was conceived as a<br />
high performance aerobatic sailplane.<br />
The wooden framed cantilever wig was<br />
straight tapered in plan. It had a gull<br />
dihedral and was skinned with plywood<br />
from the leading edge to the main spar,<br />
forming a torsion resistant D-box, while<br />
the rest of the wing was fabric covered.<br />
Spoilers were fitted on the upper surface<br />
of the wing.<br />
The fuselage had a hexagonal cross<br />
section gradually transformed to near<br />
diamond at the tail and was skinned with<br />
plywood. The cockpit was large and<br />
extra room was obtained by opening the<br />
wing roots. The canopy was not moulded<br />
in a single piece, as this technique was<br />
not so popular in those days, but was<br />
built with a few Plexiglas strips. The<br />
The scale reproduction<br />
of vintage gliders is<br />
be<strong>com</strong>ing popular<br />
in many parts of the<br />
world. Sometimes<br />
model builders may<br />
reproduce sailplanes<br />
which today do not exist<br />
any longer, but due<br />
to their great passion<br />
for the vintage gliders<br />
and their history, they<br />
bring these beautiful<br />
machines again to the<br />
air to <strong>com</strong>memorate<br />
their historical designers<br />
and builders.<br />
rudder pedals were adjusted both on the<br />
ground and in flight. The tailplane was<br />
traditional with a fixed fin with hinged<br />
rudder and elevator, both unbalanced. A<br />
wooden skid with rubber shock absorber<br />
was fitted for landing.<br />
The Moswey II prototype registered<br />
HB-204, is still existing in non flyable<br />
conditions, owned by Fritz Zbinden, a<br />
member of the Swiss OSV Club. It is a bit<br />
damaged, but Fritz has a plan to restore<br />
it one day and bring it to the vintage<br />
glider meetings. We are all looking<br />
forward to seeing it, as the Moswey II is a<br />
true rare vintage machine<br />
Now let’s go back to the model of Lukas<br />
Schaub and Ruedi Straub, which was<br />
perfectly built as the original. To scratch<br />
build this model they spent the whole<br />
2009 winter, working about 300 hours in<br />
spare time. The maiden flight took place<br />
last June 2010 in a small field in the Basel<br />
outskirt, aero towed by a model power<br />
aircraft type Sportsman (Fliegerland),<br />
built and piloted by Fredi Gass. It was a<br />
spectacular flight of 20 minutes with a<br />
smooth landing near the feet of Lukas.<br />
The Moswey II in scale 1:3 has a wing<br />
span of 4,6m, length 2m, weight 9,8kg,<br />
wing loading of 72gr/dm 2 , with E209<br />
airfoil at the root, tapering to E205 at<br />
the tips. All details have been respected<br />
including the special canopy and the<br />
instrument board. Great job Lukas and<br />
Ruedi!<br />
6 R/C Soaring Digest
Right: HB-204 at the Rhon World<br />
Competition 1937. Photo courtesy of<br />
Verkehrshaus der Schweiz, Luzern<br />
Below: Georg Müller in the cockpit<br />
of the Moswey II. Photo courtesy of<br />
Verkehrshaus der Schweiz, Luzern<br />
Below right: HB-204 prototype today.<br />
<strong>Dec</strong>ember 2010 7
Lukas Schaub and Ruedi Straub’s 1:3 scale Moswey II under construction.<br />
8 R/C Soaring Digest
Above: The canopy is constructed of clear plastic strips, just as<br />
the original.<br />
Below: A realistic pilot and colorful markings.<br />
Above: Complete and ready to fly!<br />
Below: The pilot’s hand is on the stick and the instrument panel<br />
is well detailed.<br />
<strong>Dec</strong>ember 2010 9
On tow.<br />
10 R/C Soaring Digest
The 1:3 scale Moswey II sits on the<br />
ground, ready to fly.<br />
The builders, (L) Ruedi Straub, (R) Lukas<br />
Schaub, and their creation. At 1:3 scale<br />
this is a large model.<br />
<strong>Dec</strong>ember 2010 11
Spoilers up and <strong>com</strong>ing in. Simply beautiful!<br />
12 R/C Soaring Digest
Action<br />
Photos<br />
Composite<br />
Joe Nave, soaring@rcsoaring.<strong>com</strong><br />
The process of creating these photos is<br />
fairly simple.<br />
First, a set of photos is shot using the<br />
rapid-fire “Sport” mode on a camera<br />
using a tripod. Ensure that the camera<br />
does not move.<br />
Using Photoshop, an initial photo is<br />
chosen as the base photo (or base layer).<br />
Next, another photo is loaded into a<br />
second layer on top of the base layer and<br />
aligned exactly to the first layer.<br />
Then carefully erase around the plane<br />
and everything on the base layer will be<br />
revealed.<br />
Repeat these steps until all photos have<br />
been overlaid.<br />
Once <strong>com</strong>plete, use the “Flatten Layers”<br />
option and save your creation.<br />
Art Chmielewski - Visalia Fall Festival<br />
<strong>Dec</strong>ember 2010 13
Above: Arend Borst - Soaring Masters<br />
Opposite page: (Left) Art Chmielewski - Visalia Fall Festival<br />
(Right) Connor Laurel - Visalia Fall Festival<br />
14 R/C Soaring Digest
<strong>Dec</strong>ember 2010 15
16 R/C Soaring Digest
Above: Joe Wurts - Soaring Masters<br />
Opposite page: (Left) Mass launch - Soaring Masters<br />
(Right) Mike Verzuh - Soaring Masters<br />
<strong>Dec</strong>ember 2010 17
The 44th Annual<br />
Soar-for-Fun<br />
Cumberland, Maryland November 6/7 2010<br />
Pete Carr, wb3bqo@yahoo.<strong>com</strong><br />
18 R/C Soaring Digest
A big Schweizer breaks ground on the tow. Although the grass sloped<br />
slightly there was no problem with keeping the sailplanes tracking behind<br />
the tugs. Normal climb-out was with shallow left turns in a spiral to altitude.<br />
The weather forecast for the site on<br />
Saturday, November 6th was cold,<br />
cloudy and winds from the north across<br />
the slope. I decided to go on Sunday<br />
when the weather was decidedly better.<br />
On arrival I went into the small building<br />
perched at the treeline of the meadow to<br />
sign up and pay the ten dollar “landing<br />
fee”. There were a large number of<br />
sailplanes already flying and I mentioned<br />
that it looked like a good turnout. The<br />
very nice fellow who was handling the<br />
paperwork said, “Oh, if you think this<br />
is good you should have been here<br />
yesterday!” It just showed that glider<br />
people are like fishermen. They can<br />
always stretch the story!<br />
I had a chat with Don Harris. He and<br />
his wife had <strong>com</strong>e from the Columbus<br />
Ohio area. Don is a thermal dude who<br />
has flown many an AMA Nats event over<br />
the years and is a superb pilot. I also<br />
talked to Carl Luft about the possible<br />
scheduling of a Spring 2011 event at<br />
the Cumberland site. The fall event is<br />
run so late in the season that there is<br />
barely 10 hours of daylight available. The<br />
conditions are so good that those pilots<br />
looking for the LSF 8-hour slope task<br />
could make it there if there was more<br />
daylight. The local sailplane club is the<br />
CAMS group and Carl indicated that<br />
information about a Spring event would<br />
be posted there.<br />
The flight line was jammed with<br />
large trailers all packed tight with<br />
<strong>Dec</strong>ember 2010 19
This self-launched sailplane was an excellent performer both on the ground and in the<br />
air. It would climb out at 45 degrees with the electric power system and handled the<br />
lift on the slope in wonderful fashion.<br />
20 R/C Soaring Digest
Above: The window to the rear of the canopy on this Schweizer<br />
2-33 is functional and is used for inspecting the joiner of the<br />
wing panels. The sailplane owner also mentioned that the nose<br />
was totally filled with lead to make the ship balance!<br />
Upper right: The cockpit of the Schweizer 2-33. It looks as if the<br />
pilot figure is giving thanks for another safe landing! The radio<br />
and battery are just visible in front of the canopy brace.<br />
Right: The tail feathers of the Schweizer are controlled by pullpull<br />
cables. The hinge line of the rudder was especially well<br />
done as were the cable exits on the fuselage.<br />
<strong>Dec</strong>ember 2010 21
A Duo Discus<br />
waits for a tow on<br />
the grass. It had<br />
a full cockpit and<br />
pilot figure and a<br />
retract belly wheel.<br />
The distinctive<br />
leading edge<br />
made it stand out<br />
in the crowd in the<br />
lift.<br />
This sailplane was<br />
another smaller<br />
ship that was<br />
towed by the<br />
Hanger 9 Cub<br />
tug. The charging<br />
equipment next to<br />
it was especially<br />
interesting since<br />
it was a <strong>com</strong>plete<br />
system for the onboard<br />
equipment<br />
rather than the<br />
usual rag-tag<br />
collection of<br />
cables and wires.<br />
scale sailplanes. These fell into two<br />
basic categories. There were several<br />
enormous molded modern sailplanes<br />
with amazing performance to match. The<br />
remainder were vintage models of balsa<br />
construction with stunning scale details.<br />
They were all towed to altitude by two<br />
glider tugs that performed flawlessly all<br />
day long. The skills of the tow pilots were<br />
amazing since they would tow a 22 foot<br />
span ship on one flight and then a 100"<br />
span glider on the next. The larger tug<br />
was a <strong>Dec</strong>athalon, <strong>com</strong>plete with wheel<br />
fairings that towed that 22 foot monster<br />
effortlessly. The smaller tug was a<br />
Hanger 9 Piper Cub using electric power.<br />
It flew very nicely and had no trouble<br />
towing the smaller scale sailplanes.<br />
Some of the smaller ships used a variety<br />
of wheeled dolly’s for takeoff and it was<br />
funny to watch them tumble down the<br />
grass after the glider rose free. There<br />
were no incidents of takeoff aborts while<br />
I was there.<br />
Many of the vintage ships were covered<br />
with Solartex fabric. The stuff is<br />
wonderfully translucent and resembles<br />
linen covering. There was a Primary<br />
Trainer that had the wing and tail<br />
covered with it and also a Granau Baby.<br />
I talked to the builder of the Baby about<br />
its covering and he said that it never<br />
developed wrinkles like Monokote. The<br />
material has an adhesive backing and is<br />
applied much like Monocote. There may<br />
be a small weight penalty with the fabric<br />
but these scale ships are more about<br />
22 R/C Soaring Digest
looks and strength than absolute weight<br />
savings. We also discussed the effect<br />
of the fabric weave for turbulating the<br />
airfoil but, again, the interest was in looks<br />
and strength rather than performance.<br />
The view from the ground as these scale<br />
ships climb away behind the tow is quite<br />
striking. The framework showing through<br />
the covering adds to the feeling that you<br />
are watching the real thing.<br />
In contrast to the scale ships were the<br />
electrics and hotliners that screamed<br />
around the sky. It was rather unnerving to<br />
have one of these blindingly fast electric<br />
gliders light off the motor overhead. A<br />
Stratus that I saw was easily capable of<br />
climbing vertically out of sight with an<br />
awesome noise from the front end. While<br />
their performance is amazing it was,<br />
nevertheless, a distraction from the tone<br />
of the day.<br />
Early in the morning several hand<br />
launched glider people showed off their<br />
ships and their style. Back in the days of<br />
6-volt winches many of us would have<br />
been thrilled with launch height that<br />
these guys are getting with their arms!<br />
Once level these DLG ships could range<br />
out over the valley in extremely light air<br />
and still make it home to a hand-catch.<br />
Near the end of the day I talked to Carl<br />
Lorber. Carl is the designer of such<br />
wonderful ships as the Gaggler, Thermal<br />
Queen and the Easterner from the ‘70s.<br />
His transmitter was a Multiplex with<br />
the top of the right stick modified for a<br />
This V-tailed sailplane, a Schleicher Ka 3, had a span of about<br />
120 inches. It was towed very easily by the Hanger 9 Piper Cub<br />
electric tug. It had a fixed belly wheel and made easy takeoffs<br />
from the short grass.<br />
<strong>Dec</strong>ember 2010 23
Carl Lorber, of Gaggler and Thermal<br />
Queen fame, flies an electric sailplane. His<br />
Multiplex transmitter uses a marble on top<br />
of the right stick to ac<strong>com</strong>modate his flying<br />
style. It was a challenge for us “dumbthumb”<br />
pilots!<br />
This Nimbus had a span of 22 feet and<br />
carried a video camera mounted to the<br />
top of the fuselage at the wing trailing<br />
edge.<br />
24 R/C Soaring Digest
In this shot the two pilot figures are very nicely<br />
done. The red knob at the front of the cockpit<br />
is the tow release. Pitot tubes extend from<br />
the top of the nose ahead of the canopy.<br />
The scale Schweizer sailplane awaits a<br />
chance to tow. It was Monokote covered and<br />
very light for its size. The electric Cub had no<br />
trouble getting it to altitude.<br />
<strong>Dec</strong>ember 2010 25
This is the interior of the 22 foot span Nimbus sailplane<br />
that was the largest ship at the event. The cockpit and pilot<br />
figure were especially impressive as was the 2.4 GHz flight<br />
guidance system. Here, the system is tested and adjusted by<br />
an LCD panel that reads out the status of the electronics. The<br />
instrument panel covers everythinbg when the canopy is closed.<br />
The Nimbus 22 foot span sailplane carried a video camera out<br />
over the valley. Let’s hope that the video is posted somewhere<br />
for us to enjoy!<br />
26 R/C Soaring Digest
marble! Carl uses his two fingers rather<br />
than his thumb for steering so found the<br />
marble a <strong>com</strong>fortable fit for his hand.<br />
He’d been up for just over an hour when<br />
I approached him. He handed me the<br />
transmitter for some stick time and my<br />
thumb kept slipping off the marble. After<br />
he took the transmitter back to save the<br />
ship(!) he mentioned that the 144 inch<br />
span Thermal Queen wanted 3 degrees<br />
of wing incidence which was not called<br />
out on the plans. Since I have one of<br />
these beauties on the bench now for a<br />
build, that was good information. The rib<br />
kit came from SkyBench Aerotech (Ray<br />
Hayes) and the parts are a joy to work<br />
with. If I use the Solartex covering the<br />
ship should be impressive.<br />
The radio frequency situation was about<br />
the same as last year. Most all the scale<br />
sailplanes were flown with 2.4 GHz radios<br />
while many of the others used 72 MHz.<br />
It appears that the <strong>com</strong>bination of very<br />
experienced pilots and these modern<br />
radios make for very reliable flying.<br />
Some of the more expensive ships used<br />
redundant equipment, such as receivers<br />
and batteries, but the vast majority were<br />
content with the standard single setups.<br />
In truth, I saw or heard of no crashes<br />
over the day. The only misfortune was<br />
a ship that flew away because the pilot<br />
locked his eye onto the wrong ship and<br />
didn’t discover the error in time. For<br />
those people who are not used to flying<br />
in a group of 20+ sailplanes this can be<br />
an easy mistake.<br />
The fuselage of<br />
the unassembled<br />
Granau Baby.<br />
The very narrow<br />
wing pylon and<br />
massive wing rod<br />
hole are evident.<br />
Wing struts are<br />
functional with this<br />
sailplane!<br />
These are the wing<br />
panels of a Granau<br />
Baby sailplane.<br />
It’s amazing how<br />
thick and under<br />
cambered the<br />
airfoil is. The<br />
covering material<br />
is painted Solartex.<br />
<strong>Dec</strong>ember 2010 27
28 R/C Soaring Digest
This page: The primary Trainer doesn’t have much fuselage<br />
so uses a <strong>com</strong>bination of wires and struts to secure the stab<br />
and vertical fin. It showed no flexing on tow. It had functional<br />
flying wires that took a long time to assemble. The control stick<br />
in the pilots hands would move with the radio. The wings and<br />
tail were covered in Solartex material and gave a very “scale”<br />
appearance in the air. The controls for the elevator and rudder<br />
were by wires as in the full scale ship. The craftsmanship of the<br />
entire sailplane was exceptional.<br />
Opposite page: The red <strong>Dec</strong>athalon taxis back to the start<br />
line after landing. Light winds were mostly from the northwest<br />
during the day so takeoffs were not bothered by crosswinds.<br />
Later in the day the tug lost a wheel pant but continued as if<br />
nothing had happened. The Hanger 9 Cub, in traditional yellow,<br />
used electric power and handled the lighter sailplanes quite<br />
well. The line attachment point is visible just behind the cabin<br />
on top. The scale engine is also a very nice touch.<br />
<strong>Dec</strong>ember 2010 29
This Schweizer 2233 scale sailplane was towed to the launch area with a strap by<br />
its pilot. It was of balsa construction with Monokote covering. Its pilot figure wore a<br />
cowboy hat, which is a nice contrast to the usual white sailor hat.<br />
30 R/C Soaring Digest
The temperature only got to 50 degrees<br />
and started downward soon after lunch.<br />
Many of the scale people packed up<br />
their equipment and headed off the hill.<br />
Some were headed home while other<br />
would be back the next day for more fun.<br />
The Monday forecast was for warmer<br />
conditions but light winds. I’m sure that<br />
the aerotows-to-altitude would make for<br />
very satisfying flights, even without much<br />
slope lift.<br />
Skip Schow of the Washington CASA<br />
Club was not at the hill on Sunday. Skip<br />
has been an organizer of the event for<br />
many years and is the primary reason<br />
for its success. I always look forward<br />
to sharing some conversation with him<br />
each year and the fun of the trip was<br />
diminished by his absence.<br />
Resources:<br />
http://www.solartex.co.uk — Solartex<br />
products, application and trimming.<br />
http://www.skybench.<strong>com</strong> — Ray Hayes’<br />
<strong>com</strong>pany which markets sailplane kits<br />
and parts.<br />
http://www.soarcasa.org — The CASA<br />
soaring group of Washington, DC.<br />
http://www.highpoint-aviation.org — The<br />
CAMS club of Cumberland Maryland.<br />
http://www.hangtimes.<strong>com</strong> — ¼ scale<br />
Schweizer 2-33 scale sailplane with balsa<br />
wing construction, and batteries for RC<br />
applications.<br />
This scale-like ARF Alpina flew several times during the day. It<br />
had pop-up spoilers that were very effective on landing. It also<br />
tracked well on tow.<br />
<strong>Dec</strong>ember 2010 31
Electric<br />
Leonidas Castello Jr, leocastello@uol.<strong>com</strong>.br<br />
I like sailplanes because they post a<br />
challenge in creativity. I have flown them<br />
since 1948 when I built my first free flight<br />
glider from an English kit. I was eight<br />
years old then and the glider name was<br />
FROG. Launching those freeflighters was<br />
simple: all one needed was a line and<br />
good running legs.<br />
When RC came into the scene things<br />
became more sophisticated, so did the<br />
launching methods to reach higher and<br />
faster. Then, recently, the electric motors<br />
appeared. I thought they would simplify<br />
the RC glider launching, but what I saw<br />
in the market were new electric gliders<br />
departing from the thoroughbreds in<br />
concept. I wanted an electrified classic,<br />
a thoroughbred with an electric motor to<br />
do the high start job. So I purchased a<br />
Spirit Elite and started a project to add<br />
an electric motor without modifying the<br />
original glider, except where mandatory.<br />
32 R/C Soaring Digest
RC Soaring Digest had a couple of<br />
articles on the electrification of the Bird<br />
of Time (January 2007 and <strong>Dec</strong>ember<br />
2007 issues). It was a good starting point.<br />
I noticed that the electric equipment<br />
(motor & battery) was somewhat heavy<br />
for what I was looking for. So I did some<br />
MotoCalc <br />
runs and homed in on a Hacker A20–20L<br />
motor running a Graupner CAM 9-5<br />
folder prop and powered by a 2100 mAh<br />
3S LiPo.<br />
The equipment arrangement in the<br />
fuselage had to be modified. Starting<br />
from the nose to the tail, the order is<br />
as follows: 1) motor, 2) battery in the<br />
fuselage body and speed control in the<br />
canopy above the battery, 3) servos, 4)<br />
receiver (Hitec Optima 7). The antenna<br />
runs inside a plastic tube aft of the<br />
receiver on the bottom of the fuse.<br />
Cooling is very important for the motor,<br />
the speed control, the battery and the<br />
2.4 GHz receiver. The Spirit fuselage has<br />
an opening at the aft end that allows air<br />
to flow out. I made a small hole on the<br />
fuselage side by the receiver and I made<br />
perforations through the canopy forward<br />
end to assure enough cooling for the<br />
speed control. I trimmed the top rear end<br />
of the canopy so that there is an opening<br />
between the canopy and the wing to<br />
suck air out in flight.<br />
The concept here was to get the glider<br />
to a 100 - 150m height with a minimum<br />
Cut off the nose. Shaft angle points 7-10<br />
degrees down and 2 degrees right. This<br />
is the only critical operation. Mark the<br />
cut with a thin felt pen. Canopy must be<br />
in place. Use a sharp razor saw to cut<br />
through the fiber.<br />
added equipment weight. The result<br />
was very successful in practice. Up<br />
to now I have logged more than 30<br />
flights with very good duration and in<br />
varied conditions. The Electric Spirit<br />
will negotiate weather from sunny calm<br />
mornings to windy cold fronts with ease.<br />
The penetration ability of this model is<br />
remarkable.<br />
I have just purchased a couple of CAMs<br />
(Competition Altimeter for Models)<br />
from Soaring Circuits . I intend to add a<br />
launching height control similar to that<br />
provided by a capable high start, and I<br />
expect to evaluate the climbing time. At<br />
this point my Spirit Elite Project will be<br />
fully operational.<br />
<strong>Dec</strong>ember 2010 33
Add a horseshoe shaped plywood firewall. Motor mount<br />
externally assembled. Motor aligns with screw holes from inside<br />
the fuselage.<br />
Add the electric motor. The motor wires fill the bottom space in<br />
the horseshoe firewall.<br />
The Hacker A20-20L motor in place. Please note the carbon<br />
fiber reinforcement inside of the wall on the forward end of the<br />
nose. This is to avoid cracks due to hard landings.<br />
34 R/C Soaring Digest
Equipment arrangement: motor, battery<br />
and speed controller, servos, receiver<br />
and antenna. All in sequence from nose<br />
to tail.<br />
The speed controller is mounted in the<br />
canopy with the wiring guided through<br />
the lightening holes. Easily accessible.<br />
<strong>Dec</strong>ember 2010 35
Cooling is important! Motor, speed controller and battery<br />
all need good ventilation. In addition to these air inlets,<br />
there are air outlets. The Spirit fuselage has an opening<br />
at the aft end that allows air to flow out. The top rear<br />
end of the canopy was also trimmed so that there is an<br />
opening between the canopy and the wing to suck air<br />
out in flight.<br />
Below: Skid made of two Japanese bamboo chopsticks<br />
side by side. It prevents nosing in on landing and acts<br />
as a fuselage reinforcement. The smaller third piece was<br />
added after field tests. Skid reinforcement is 123mm<br />
from cut nose.<br />
Below right: Tail skid made of two pieces cut from<br />
chopsticks.<br />
36 R/C Soaring Digest
Electrification <strong>com</strong>plete!<br />
Rudder, elevator, ailerons, flaps, and a<br />
throttled powerplant up front.<br />
On the flying field and ready to get into<br />
the air. Up to now the electrified Spirit<br />
Elite has logged more than 30 flights<br />
with very good duration and in varied<br />
conditions. The penetration ability of this<br />
model is remarkable.<br />
The addition of a launching height control<br />
will make the electrified Spirit Elite<br />
Project fully operational.<br />
<strong>Dec</strong>ember 2010 37
Swept A<br />
Wing<br />
Saga<br />
Paul Westrup, pw@paulwestrup.<strong>com</strong><br />
My 100" wing on a low pass after a dive to film high speed flutter.<br />
It seems for most slope soaring<br />
enthusiasts, the aesthetic qualities of<br />
their models are very important. There<br />
are few designs that polarise the hill-side<br />
<strong>com</strong>munity quite as starkly as the swept<br />
flying wing. They are most definitely a<br />
“Marmite” model; people either love ’em<br />
or hate ’em.<br />
The ubiquitous Zagi and its multitude<br />
of spin offs have exposed many to a<br />
coarser example of the breed, and<br />
these foamies serve their intended<br />
purpose incredibly well. For anything<br />
other than <strong>com</strong>bat though, it seems the<br />
38 R/C Soaring Digest
Launching the 2 meter wing. Photo by Steve Hunt<br />
<strong>Dec</strong>ember 2010 39
’wing remains a rare beast. However, a<br />
well designed swept ’wing will possess<br />
unique qualities. It will circle and<br />
climb effortlessly in thermals at quite<br />
extraordinary angles of bank. It will also<br />
be very stall resistant, and <strong>com</strong>pared<br />
to a similar spanned and loaded plane,<br />
a ’wing will tend to be quicker. Also to<br />
my eye they just look so damn elegant,<br />
which I guess is why I just can’t stop<br />
building them!<br />
A few years back I found myself living<br />
a fair distance from my favourite slope,<br />
but had a playing field nearby that I<br />
could fly from. I decided to build a ‘wing<br />
with an electric motor setup for flat field<br />
thermaling. I selected a thick EH wing<br />
section, the cores came out fine (using<br />
pink foam) so I made an attempt to bag<br />
them using wax paper. Unfortunately<br />
the finish was less than impressive with<br />
numerous air bubbles in the lay-up. I<br />
threw the whole lot in the back of the<br />
garage and left them there to sulk.<br />
A year later I moved house and they<br />
moved with me, but sat in the shed for<br />
another year. Then a few weeks ago I<br />
stumbled across the cores again and<br />
made an impromptu decision to sling<br />
them together as a rough and ready light<br />
The 2 meter wing, flaps deployed <strong>com</strong>ing in.<br />
Photo by Steve Hunt<br />
40 R/C Soaring Digest
The 2 meter wing makes a low pass. Photo by Steve Hunt<br />
<strong>Dec</strong>ember 2010 41
wind slope machine. I fully expected<br />
them to go straight in the bin after the<br />
first flight.<br />
How wrong could I have been! I<br />
maidened the model with “that looks<br />
about right” control throws. From the<br />
outset it instilled confidence, feeling<br />
solid in flight, happily scratching around<br />
in the 4 mph draft. Since the maiden it<br />
has proven to be a versatile machine,<br />
<strong>com</strong>fortably flying in a 20mph breeze.<br />
This success pushed me on. Because of<br />
the rough finish, it seemed logical to use<br />
the model as a test bed so I decided to<br />
try out some flaps. I’d made an attempt<br />
at them on a 100" wing, but lack of<br />
knowledge about sizing and placement<br />
meant when deployed, they gave an<br />
uncontrollable pitch up. The flaps<br />
extended too far inboard, so a downward<br />
deflection (ahead of the pitch axis)<br />
had the effect of up elevator. As down<br />
elevon at the tips produces a nose down<br />
reaction, I concluded that there must be<br />
a flap size where there is no pitch effect<br />
when deployed.<br />
I needed the input of greater minds<br />
than mine to resolve this one, so I<br />
posted on RC Groups with a request<br />
for design help. Norman Masters came<br />
The 100" wing pre-maiden. This wing is very light but suffers<br />
from flutter at speed. This was the model that I built with the<br />
unsuccessful flap placement.<br />
42 R/C Soaring Digest
to my rescue and quickly posted a<br />
dimensioned plan for the flaps. This<br />
saved me from a protracted session<br />
of slope side trial and error, and with a<br />
few hours work I had the flaps ready for<br />
testing.<br />
The next day presented itself with<br />
an ideal wind, so I gave up on home<br />
improvements, and headed out to my<br />
local coastal site. When I arrived the<br />
wind was 10mph straight on the hillperfect!<br />
I launched off and gained a decent<br />
height, pushing out from the hill. I eased<br />
in full flap deflection smoothly and<br />
slowly, the ’wing took on a nose down<br />
attitude as it slowed up. This was easily<br />
<strong>com</strong>pensated for with a little up elevon.<br />
I then flew for another 20 minutes or so<br />
testing the flaps at lower altitudes and<br />
getting used to parking the model in the<br />
air. I finally landed the model without<br />
any issues, the flaps making the whole<br />
process a lot more precise.<br />
The wind then eased off to between 3<br />
and 4 mph so I re-launched and cruised<br />
around firstly with the wing “clean,”<br />
and then with about 5 degrees of flap<br />
deployed. The model climbed to a<br />
higher ceiling with the flaps on, though<br />
I had to dial in some up trim. I then<br />
tried full flaps, but needed to pull in full<br />
up to hold the model stationary. It was<br />
only in this state that I had any marked<br />
reduction in roll authority.<br />
Some of my previous wings, from left to right:<br />
• 38" slope wing with MH45 section. A great little fun flyer.<br />
• 60" two piece slope wing, built for easy transport, again MH45 section.<br />
• 70" heavy weight slope wing, scaled up version of the 38” wing built<br />
with slightly less washout. This made it twitchy to launch and fly.<br />
• 100" thermal slope wing with HS522 section. Lovely flyer in marginal<br />
conditions and in winds up to about 10mph.<br />
• 4m Swift built from Vern Hunt’s plans, based on the rigid wing hang<br />
glider. Simple to build, it thermals well from the slope.<br />
<strong>Dec</strong>ember 2010 43
So the flaps have been a <strong>com</strong>plete<br />
success, they allow me to control the<br />
speed and glide path of the model, and<br />
make hand catches a regular event. All<br />
credit to Norm, without whom I’d have<br />
been chopping away at my trailing edges<br />
for quite some time!<br />
This ’wing is certainly one of the best<br />
I’ve built, it seems that sometimes you<br />
hit an ideal <strong>com</strong>bination of wing section,<br />
washout, weight and sweep and get a<br />
model which fulfils it’s role perfectly.<br />
Now, what to build next……<br />
A Vern Hunt designed<br />
4m Swift. Mine came<br />
out very light at 5.5lbs<br />
(Vern’s original was 8lb).<br />
I think this restricted<br />
the conditions in which<br />
it would fly, the thick<br />
wing section probably<br />
needed the extra weight<br />
of the prototype.<br />
Web links:<br />
Flying the 2m wing before<br />
addition of flaps: http://<br />
www.youtube.<strong>com</strong>/<br />
watch?v=bHnWQ332eVs<br />
Flaps ground test: http://<br />
www.youtube.<strong>com</strong>/<br />
watch?v=zX6jMoSagOQ<br />
2 meter wing in-flight flap<br />
testing: http://www.youtube.<strong>com</strong>/<br />
watch?v=PMhQ8TyYFOM<br />
A selection of my ’wings:<br />
http://www.youtube.<strong>com</strong>/<br />
watch?v=fUzNUR7nVuA<br />
Web site detailing some of my<br />
wings: http://flyingwinggliders.<br />
blogspot.<strong>com</strong>/<br />
44 R/C Soaring Digest
The 2 meter wing overhead. Photo by Steve Hunt<br />
<strong>Dec</strong>ember 2010 45
The 2 metre wing in a low pass against the setting sun. Photo by Robert Radford<br />
46 R/C Soaring Digest
MiG-7 PSS<br />
Izak Theron, izaktheron@absamail.co.za<br />
<strong>Dec</strong>ember 2010 47
This MiG-7 build is based on the<br />
1/12 scale R/C <strong>com</strong>bat design<br />
of Dave West, Winged Shadow<br />
Systems .<br />
Full size plans in tiled PDF and<br />
DXF formats can be downloaded<br />
at no charge from <br />
Corrugated plastic, known by the<br />
trade name Coroplast®, is the<br />
primary construction material.<br />
The plans show installation of a<br />
powerplant (.25 size glow engine)<br />
for flying <strong>com</strong>bat events, so a PSS<br />
version does require modification<br />
to some of the included patterns.<br />
Numerous PSS versions of Dave’s<br />
MiG-7 design, including one with a<br />
span of 3 meters, have been built<br />
by modelers around the world with<br />
great success.<br />
From the GEMS blog<br />
<br />
Part 1, 30 October 2010<br />
With the GEMS 2010 PSS Fest just two<br />
weeks away and really wanting to have<br />
something else to fly apart from the F18,<br />
it does not leave one with enough time to<br />
take on a huge project to <strong>com</strong>plete.<br />
Scratching around on my <strong>com</strong>puter<br />
I came across the plans for a correx<br />
MiG-7 (which you can find here) and<br />
Gert Nieuwoudt has mentioned that he<br />
is taking his along again. According to<br />
him it builds in less than a week, so it<br />
seemed like a do-able project, even with<br />
my slower-than-others building skills. So<br />
Friday I printed out the plans and with<br />
Maizey’s Plastics<br />
in Edenvale<br />
conveniently<br />
close, collected<br />
a sheet each of<br />
2mm and 3mm<br />
white correx. I<br />
really wanted it in<br />
yellow as I had a<br />
yellow and blue<br />
scheme in mind,<br />
but the 2mm they<br />
only do in white.<br />
Quite incidentally,<br />
while speaking<br />
to Emma, the<br />
sales lady<br />
there, I learned that Maizey’s intend to<br />
discontinue the straight fluted correx<br />
in favour of the s-waved version. The<br />
reason being that the latter version is<br />
stronger in both axis which is better for<br />
the bulk of their customers that use it for<br />
advertising boards and the like.<br />
This is a real pity, as it is exactly the<br />
straight fluted version that we need,<br />
especially when utilising the flute as a<br />
hinge line. Apparently the s-wave stuff is<br />
also realy horrible to work with... Emma<br />
couldn’t say how much longer they would<br />
have the straight flute stock around so if<br />
you have any correx projects in mind in<br />
the foreseeable future you had better go<br />
stock up on some correx.<br />
Yesterday I cut and stuck the tiled<br />
templates together and marked it out on<br />
48 R/C Soaring Digest
the corex. Today I got around to cutting<br />
out the various parts and the fruits of my<br />
labour are shown on the opposite page.<br />
Next step is to mark and cut out all the<br />
3mm plywood formers. Time to get<br />
dusty.<br />
Part 2, 02 November 2010<br />
I had forgotten what plywood dust smells<br />
like! The wife wasn’t too happy when I<br />
tackled the making of the formers on the<br />
lounge floor last night while catching up<br />
on some of my favourite “crime soapies”.<br />
She deflated a little this morning after<br />
seeing that I had removed all evidence of<br />
my activities last night.<br />
After first having to scratch around for<br />
the liteply I knew I had but couldn’t find in<br />
the mess I call a workshop, the templates<br />
were marked out on the wood and using<br />
a pin, the position where all the cut-outs<br />
are supposed to go were marked.<br />
I finally figured out how to convince the<br />
wife to start buying me the proper tools I<br />
need... It is bad for your wellbeing using<br />
improper tools! Losing digits to slipping<br />
exacto blades will<br />
seriously shorten<br />
your model<br />
building career...<br />
After much<br />
cussing and<br />
cramping fingers<br />
I called it quits<br />
after getting the<br />
wood cut into<br />
appropriately<br />
sized rectangles<br />
and decided to<br />
quietly slip into<br />
the workshop at<br />
work today to<br />
finish off the final<br />
shaping.<br />
Former F1 calls<br />
for 3/16” (5mm)<br />
ply, I think<br />
primarily to be<br />
able to bolt a<br />
motor/engine to, so I substituted it with<br />
liteply as well as this model is meant for<br />
the slope. Should be OK...I hope….<br />
Only a couple of balsa formers remain to<br />
be cut and tonight I’ll hack out all the cutouts<br />
in the ply formers.<br />
Note to self: Stop by the hardware shop<br />
for some contact adhesive today.<br />
Part 3, 03 November 2010<br />
More dust! After doing some “on the sly”<br />
outline shaping on a bench grinder at<br />
work yesterday (yes, I know it’s not the<br />
right tool for the job…) all that remained<br />
on the formers was to finish the cut-outs.<br />
Drilling big access holes first allowed<br />
the sanding drum on the dremel to make<br />
short work of this task.<br />
Now the dihedral ply braces for the<br />
spars remain to be made. Only thing is,<br />
I couldn’t find any damn plywood stock,<br />
although I’m sure I had some...The liteply<br />
used for the formers won’t be up to the<br />
task. Just the right excuse to visit the<br />
hobby shop today I guess.<br />
The main spar also calls for a 5mm<br />
yardstick to be used, something you<br />
don’t find in hardware shops anymore.<br />
I also don’t look forward to cutting this<br />
from a hard wood so started thinking<br />
about other options. Speaking to Paul<br />
Carnall he suggested making a spruce<br />
capped vertical grained balsa shear web<br />
spar, so the shopping list for the hobby<br />
shop grows.<br />
<strong>Dec</strong>ember 2010 49
The above pic shows the fruit of last<br />
night’s labour and the GWS 2BBMG<br />
metal gear servos I’ll be using on this<br />
project. They’re pretty noisy from what<br />
I recall but their ruggedness makes for<br />
ideal use in a slope soarer bound to have<br />
some rough landings.<br />
Part 4, 05 November 2010<br />
Part four got underway night before<br />
last but about 10 minutes in to my soul<br />
cleansing activities our dear Eskom<br />
decided that it’s bed time for me<br />
F#and$%!!!. Working in the proximity to<br />
sharp tools by candle light didn’t appeal<br />
to me.<br />
I managed to find some 8x3mm spruce<br />
(very scarce to find) and a sheet of 6mm<br />
AAA grade balsa from Airborne Passion<br />
at a princely sum. I must admit that at<br />
least it is very good quality wood, not<br />
the usual crooked and wavy stuff some<br />
hobby shops stock.<br />
The shear webs were made by gluing<br />
35mm strips of cross grain balsa end to<br />
end and then cutting the tapered profiles<br />
from this strip.<br />
The spruce was glued with polyurethane<br />
wood glue and clamped to prevent<br />
distortion. Formers F5A and B were<br />
then glued in position on F5 as per the<br />
instructions.<br />
50 R/C Soaring Digest
Next up will be the making of the dihedral braces and I<br />
should be ready to start assembly then.<br />
I’m starting to think I may have to sacrifice my flying this<br />
weekend just to be sure the project is <strong>com</strong>pleted on<br />
time. Rather safe than sorry.<br />
Part 5, 08 November 2010<br />
Although I didn’t get as far as I had hoped I would over<br />
the weekend, the MiG has progressed quite nicely. I’m<br />
running out of time though as there are still two other<br />
<strong>Dec</strong>ember 2010 51
models that need some reconstructive<br />
surgery before the weekend... And the<br />
trusty old Zagi is still naked after I had<br />
stripped it of its tattered pajamas.<br />
Putting the tailfeathers together is<br />
straight forward and the only deviation<br />
from the plans was to add the balsa<br />
triangle stock to keep everything square<br />
and give the glue more surface area to<br />
take on. See the photo directly below.<br />
The formers have been glued in here and<br />
the fuselage sides pulled in. Masking<br />
tape holds everything in place while the<br />
contact glue takes time to take hold. See<br />
the photo to the right. I still found the<br />
ends of the correx was lifting afterwards<br />
and tacked them in place with cyano.<br />
52 R/C Soaring Digest
The original plans are for a gas model<br />
and had this cut-out up front to allow for<br />
engine installation. I blindly traced and<br />
cut the template and only afterwards<br />
realised that it isn’t required. So I<br />
decided to utilize it as the battery bay<br />
and made a little cover for it. See the<br />
photo at the bottom right of the previous<br />
page. Makes for a convenient location for<br />
lead should I need to add any to adjust<br />
the CG.<br />
In the photo to the right, the spar has<br />
been glued to the bottom of the wing.<br />
The leading edge fold needs to be<br />
creased only (not cut) and when the wife<br />
wasn’t looking I nicked her rotary pizza<br />
cutter for the job... Worked a charm!<br />
And who can resist the mockup when the<br />
parts start taking shape?<br />
<strong>Dec</strong>ember 2010 53
Above, the servos installed and the tray<br />
in position. There is a LOT of space in<br />
this fuselage… Next to go in are the push<br />
rods, switch harness and receiver.<br />
Part 6, 09 November 2010<br />
One would have thought after 15 years<br />
of marriage I would have learned some<br />
skills from my highly organized wife by<br />
now, especially her planning skills! If I did<br />
then I would have had the right parts for<br />
last night’s build, i.e. the correct length<br />
bicycle spokes for the aileron torque<br />
rods.<br />
So the bulk of last night’s available<br />
building time was spent scratching my<br />
head and eventually manufacturing my<br />
own torque rods with some wire, brass<br />
tube and ball links. The only other option<br />
would have been to mount the servos<br />
further outboard with direct push rods<br />
but I don’t like the idea sticking unwanted<br />
bits in the airflow and creating weak<br />
spots in the wings where the cut-outs for<br />
the servos would have been.<br />
For the inboard end of the torque rods I<br />
made use of some ball links lying around<br />
which were soldered to a short section of<br />
brass tube. Photo above right.<br />
The other end was soldered to the<br />
inboard 90° bend of the torque rod.<br />
These will be connected to the servos via<br />
small pushrods.<br />
The hardest and most delicate part of<br />
making the torque rod was putting the<br />
outboard bend in it without ripping the<br />
wing apart. This because it has to be<br />
done with the torque rod already installed<br />
and the wire I had is as hard as hell!!<br />
This bend fits into a second piece of<br />
brass tubing that was inserted into the<br />
flutes of the aileron.<br />
The section of torque rod inside of the<br />
wing is supported on both ends by a<br />
25mm section of plastic tube inserted<br />
into the flute to take up the slop. In the<br />
end I was extremely satisfied as the<br />
whole setup resulted in ZERO slop on the<br />
ailerons.<br />
The two servo slots in the servo tray<br />
and the plan’s lack of indicating the<br />
rudder position had me puzzled once<br />
more. After speaking to my “consulting<br />
engineer” on the project, Gert<br />
54 R/C Soaring Digest
<strong>Dec</strong>ember 2010 55
Nieuwoudt, I decided to not add a rudder on the model as it<br />
would only <strong>com</strong>plicate matters of where to route and exit the<br />
push rod for the rudder, possibly weakening the fin and as Gert<br />
pointed out the model has a very short tail so the rudder would<br />
probably not have been as effective as I would have liked. Only<br />
after our conversation it dawned on me again that as this model<br />
was originally designed as a power <strong>com</strong>bat plane the second<br />
servo position in the tray was for the throttle... DOH!<br />
Part 7, 11 November 2010<br />
Over the past two nights I picked up the pace on the build and<br />
spent less time taking pics throughout the process.<br />
It went something like this: finish torque rods, join wings, work<br />
on Corsair repair while waiting for glue to dry, add hard wood<br />
bearers for servos, make cutouts, install servos, make carbon<br />
push rods, check setup and throws on radio, take picture, go to<br />
sleep and <strong>com</strong>e back next evening to admire handy work. The<br />
end result is very satisfactory.<br />
56 R/C Soaring Digest
As can be seen in the lower photo on the<br />
previous page, if you are used to the tight<br />
spaces typical of F3J/F3B models this<br />
fuselage is simply cavernous, swallowing<br />
up all the necessary bits and pieces<br />
with plenty of room to spare. This model<br />
should be the perfect platform for an<br />
electric power plant….<br />
Hmmm, a Turnigy Park 480 should do<br />
nicely and I see they are only R185.00<br />
from WiFly .<br />
The wing seat on the fuselage and the<br />
wing centre line join also received some<br />
doublers as reinforcement.<br />
Next up on the to-do list was the elevator<br />
push rod. Nothing out of the ordinary<br />
here. Not being a fan of z-bends I opted<br />
for some decent clevises instead. Some<br />
wire and a 6mm dowel <strong>com</strong>pleted the<br />
setup.<br />
Whilst trying to test the elevator I found<br />
the servo was dead….? I could have<br />
sworn I bought all four the GWS 2BBMG<br />
servos together but on closer inspection<br />
this one looked used and felt hot to the<br />
touch after leaving it on for a minute<br />
or so. Ah well, fortunately I won’t be<br />
needing a throttle servo...<br />
All that remains to do now is to close<br />
up the aft fuselage bottom, balance the<br />
model and add a splash of colour. Oh,<br />
and a spinner to round off that square<br />
nose.<br />
The spinner has already been crafted<br />
from some polystyrene. Paul Carnall<br />
suggested I try using a drill as a lathe,<br />
sticking a block of foam on a dowel and<br />
shaping it with some coarse sand paper.<br />
It worked like a charm. The secret is to<br />
use as high a speed as your drill can<br />
deliver and light pressure while sanding.<br />
And if you value the peace at home, DO<br />
IT OUTSIDE!!!<br />
Part 8, 12 November 2010<br />
Yet another photo finish! These last<br />
minute slope projects are turning into<br />
a bad habit. But then I do work better<br />
under pressure...<br />
Last night was occupied with most<br />
the remaining odd tasks to finish up<br />
this model and the repairs to the GWS<br />
Corsair and Blue Angels F18.<br />
I had to finish half a 2 litre Coke in a hurry<br />
to obtain the material for the canopy<br />
but once again I’m chuffed with the end<br />
<strong>Dec</strong>ember 2010 57
Evan Shaw launches Izak’s freshly <strong>com</strong>pleted MiG-7 at the GEMS PSS 2010 event.<br />
58 R/C Soaring Digest
esult. Pity I didn’t have a little bust figure to occupy it.<br />
Initially I had a black and yellow scheme in mind but<br />
previous experience with the black vinyl lifting as soon as it<br />
caught a whiff of sunlight made me settle on my signature<br />
blue and yellow. I’ll add some black trim tape for flair.<br />
Covering the fuselage is as far as I got before I ran out of<br />
time and imagination...Time won’t allow another build update<br />
here before this baby hits the slope but I’ll make sure to take<br />
plenty before and after pics and report back next week.<br />
<strong>Dec</strong>ember 2010 59