Wireshark Exercise 3 Telnet and HTTP (Telnet, TCP, HTTP)
Wireshark Exercise 3 Telnet and HTTP (Telnet, TCP, HTTP)
Wireshark Exercise 3 Telnet and HTTP (Telnet, TCP, HTTP)
Create successful ePaper yourself
Turn your PDF publications into a flip-book with our unique Google optimized e-Paper software.
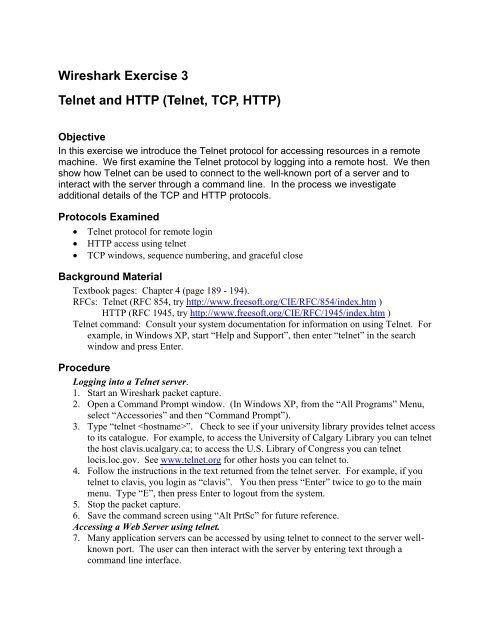
<strong>Wireshark</strong> <strong>Exercise</strong> 3<br />
<strong>Telnet</strong> <strong>and</strong> <strong>HTTP</strong> (<strong>Telnet</strong>, <strong>TCP</strong>, <strong>HTTP</strong>)<br />
Objective<br />
In this exercise we introduce the <strong>Telnet</strong> protocol for accessing resources in a remote<br />
machine. We first examine the <strong>Telnet</strong> protocol by logging into a remote host. We then<br />
show how <strong>Telnet</strong> can be used to connect to the well-known port of a server <strong>and</strong> to<br />
interact with the server through a comm<strong>and</strong> line. In the process we investigate<br />
additional details of the <strong>TCP</strong> <strong>and</strong> <strong>HTTP</strong> protocols.<br />
Protocols Examined<br />
• <strong>Telnet</strong> protocol for remote login<br />
• <strong>HTTP</strong> access using telnet<br />
• <strong>TCP</strong> windows, sequence numbering, <strong>and</strong> graceful close<br />
Background Material<br />
Textbook pages: Chapter 4 (page 189 - 194).<br />
RFCs: <strong>Telnet</strong> (RFC 854, try http://www.freesoft.org/CIE/RFC/854/index.htm )<br />
<strong>HTTP</strong> (RFC 1945, try http://www.freesoft.org/CIE/RFC/1945/index.htm )<br />
<strong>Telnet</strong> comm<strong>and</strong>: Consult your system documentation for information on using <strong>Telnet</strong>. For<br />
example, in Windows XP, start “Help <strong>and</strong> Support”, then enter “telnet” in the search<br />
window <strong>and</strong> press Enter.<br />
Procedure<br />
Logging into a <strong>Telnet</strong> server.<br />
1. Start an <strong>Wireshark</strong> packet capture.<br />
2. Open a Comm<strong>and</strong> Prompt window. (In Windows XP, from the “All Programs” Menu,<br />
select “Accessories” <strong>and</strong> then “Comm<strong>and</strong> Prompt”).<br />
3. Type “telnet ”. Check to see if your university library provides telnet access<br />
to its catalogue. For example, to access the University of Calgary Library you can telnet<br />
the host clavis.ucalgary.ca; to access the U.S. Library of Congress you can telnet<br />
locis.loc.gov. See www.telnet.org for other hosts you can telnet to.<br />
4. Follow the instructions in the text returned from the telnet server. For example, if you<br />
telnet to clavis, you login as “clavis”. You then press “Enter” twice to go to the main<br />
menu. Type “E”, then press Enter to logout from the system.<br />
5. Stop the packet capture.<br />
6. Save the comm<strong>and</strong> screen using “Alt PrtSc” for future reference.<br />
Accessing a Web Server using telnet.<br />
7. Many application servers can be accessed by using telnet to connect to the server wellknown<br />
port. The user can then interact with the server by entering text through a<br />
comm<strong>and</strong> line interface.
8. For example, to log into the yahoo website, type “telnet www.yahoo.com 80” in the<br />
comm<strong>and</strong> interface. You will then obtain a blank screen. Type GET <strong>and</strong> then ENTER.<br />
The server will then send the <strong>HTTP</strong> response.<br />
9. Stop the packet capture.<br />
Protocol Analysis Questions<br />
To answer the following questions, start <strong>Wireshark</strong> <strong>and</strong> open the packet capture file created<br />
above.<br />
Logging into a <strong>Telnet</strong> server<br />
1. Find the IP address of the <strong>Telnet</strong> server you are contacting.<br />
2. Identify the three-way h<strong>and</strong>shake that established the <strong>TCP</strong> connection between the client<br />
<strong>and</strong> server. Note the well-known port number for the server. Note the initial sequence<br />
numbers of the connections in each direction.<br />
3. The <strong>TCP</strong> connection setup is followed by an exchange of packets between the telnet<br />
server <strong>and</strong> client negotiating options. Identify these packets <strong>and</strong> examine the contents of<br />
the telnet messages to see what options where negotiated, e.g. terminal type, terminal<br />
speed, <strong>and</strong> window size.<br />
4. Once the options have been negotiated, the server usually sends a login prompt. Find the<br />
sequence of packets that carry this information from the server.<br />
5. The user then types a user ID <strong>and</strong> sometimes a password. Trace the sequence of packets<br />
that carries the user id. Are the characters in the user ID sent individually or as a group?<br />
Does the client <strong>TCP</strong> set the PUSH flag?<br />
6. If telnet was set up with the echo option, the server will echo each character received<br />
back to the client. Check to see if the characters are being echoed.<br />
7. Use the “Follow <strong>TCP</strong> Stream” option in the <strong>Wireshark</strong> Tools Menu to see the information<br />
that is exchanged between the client <strong>and</strong> server.<br />
8. In the Tools Menu, try the <strong>TCP</strong> Stream Analysis tools provided by <strong>Wireshark</strong>. The timesequence<br />
graph provides a plot of sequence number versus time. The throughput graph<br />
provides an indication of short-term transmission rate versus time. The RTT graph shows<br />
how the round-trip time varies during the course of the session.<br />
9. Finally examine the exchange of segments that execute the <strong>TCP</strong> graceful close for the<br />
connection in each direction. Can you find the FIN segment that is sent by the server to<br />
initiate the closing from its direction? Confirm the setting of the sequence numbers in the<br />
segments as the graceful close proceeds.<br />
Accessing a Web Server using telnet.<br />
1. Examine the DNS packets to identify the IP address of the server that is being contacted.<br />
2. Identify the three-way h<strong>and</strong>shake that sets up the <strong>TCP</strong> connection between the client <strong>and</strong><br />
server. Note the well-known port number for the server. Note the <strong>TCP</strong> initial sequence<br />
numbers <strong>and</strong> the window sizes.<br />
3. Identify the packets that carry the GET comm<strong>and</strong> message from the client. Does <strong>TCP</strong><br />
use the PUSH comm<strong>and</strong>? Note the corresponding ACK segments from the server <strong>and</strong><br />
determine whether the character is being echoed.
4. Next identify the sequence of packets that carry the <strong>HTTP</strong> response from the server.<br />
What is the text carried in the first segment?<br />
5. Do the packets from the server carry maximum size <strong>TCP</strong> segments? Do you see a pattern<br />
as to how frequently the <strong>TCP</strong> client acknowledges segments?<br />
6. Observe the advertised window sizes in the sequence of segments. Do you see any<br />
variation in the window size over time?<br />
7. What is the size of the file transferred from the server to the client? How much time was<br />
required to carry out the transfer? Estimate the average transmission bit rate.<br />
8. In the <strong>Wireshark</strong> Tools Menu, use the <strong>TCP</strong> stream analysis tools to observe the evolution<br />
of sequence number versus time, the throughput versus time, <strong>and</strong> the RTT versus time.<br />
9. In the <strong>Wireshark</strong> Tools Menu, select “Follow <strong>TCP</strong> stream”. The resulting window shows<br />
the client’s “get” <strong>and</strong> the server’s response. Save the window as an HTML file. Open<br />
the HTML file using a web browser to see what would have been displayed in your<br />
browser window.<br />
10. Identify the graceful close that terminates the <strong>TCP</strong> connection.


