
Create successful ePaper yourself
Turn your PDF publications into a flip-book with our unique Google optimized e-Paper software.
<strong>Tooki</strong>-<strong>Maserati</strong> 1-16-2009<br />
Rev 1.0 Mark Ryan<br />
100 NW 11 TH Street, Boca Raton, FL 33432<br />
Tel. 561-955-9770 Fax. 561-955-9760<br />
www.nav-tv.com info@nav-tv.com<br />
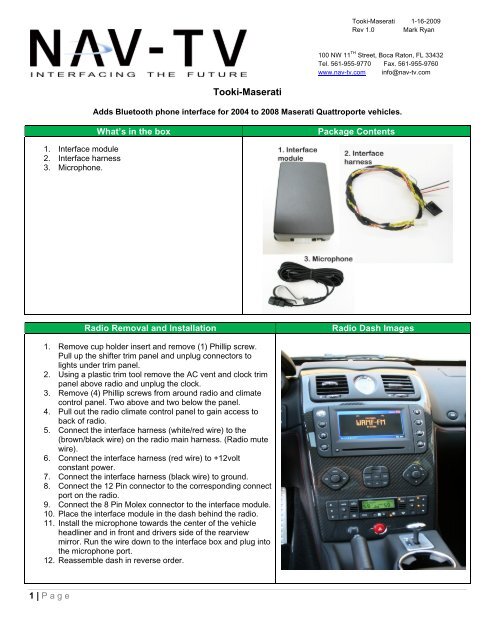
<strong>Tooki</strong>-<strong>Maserati</strong><br />
Adds Bluetooth phone interface for 2004 to 2008 <strong>Maserati</strong> Quattroporte vehicles.<br />
What’s in the box<br />
Package Contents<br />
1. Interface module<br />
2. Interface harness<br />
3. Microphone.<br />
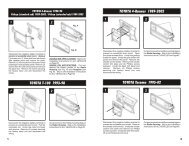
Radio Removal and Installation<br />
Radio Dash Images<br />
1. Remove cup holder insert and remove (1) Phillip screw.<br />
Pull up the shifter trim panel and unplug connectors to<br />
lights under trim panel.<br />
2. Using a plastic trim tool remove the AC vent and clock trim<br />
panel above radio and unplug the clock.<br />
3. Remove (4) Phillip screws from around radio and climate<br />
control panel. Two above and two below the panel.<br />
4. Pull out the radio climate control panel to gain access to<br />
back of radio.<br />
5. Connect the interface harness (white/red wire) to the<br />
(brown/black wire) on the radio main harness. (Radio mute<br />
wire).<br />
6. Connect the interface harness (red wire) to +12volt<br />
constant power.<br />
7. Connect the interface harness (black wire) to ground.<br />
8. Connect the 12 Pin connector to the corresponding connect<br />
port on the radio.<br />
9. Connect the 8 Pin Molex connector to the interface module.<br />
10. Place the interface module in the dash behind the radio.<br />
11. Install the microphone towards the center of the vehicle<br />
headliner and in front and drivers side of the rearview<br />
mirror. Run the wire down to the interface box and plug into<br />
the microphone port.<br />
12. Reassemble dash in reverse order.<br />
1 | P age
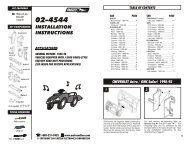
8 Pin Molex wiring guide 8 Pin Molex connector image<br />
1. CAN High to vehicle (Yellow /Black wire)<br />
2. CAN Low to vehicle (Yellow wire)<br />
3. Chassis ground (Black wire)<br />
4. Radio Mute (White/Red wire) – to Brown/Black wire from radio<br />
5. Audio out – Positive ( Yellow/Black wire)<br />
6. Audio out - Negative (Yellow wire)<br />
7. +12V Constant power (Red wire)<br />
8. Not Used (White/Blue)<br />
Note: The CAN wires must be soldered. CAN Bus signal<br />
degradation will cause vehicle system problems if crimp type<br />
connectors are used.<br />
1. To pair your phone to the <strong>Tooki</strong> interface. On your<br />
phone go to your Bluetooth menu and search for<br />
new device. Once found select the <strong>Tooki</strong> and enter<br />
pairing code of 6888, then accept pairing.<br />
2. Press the TEL button on the radio controls to select<br />
the Bluetooth phone menu on the radio.<br />
3. To dial a number use the scroll knob (1) to scroll<br />
through the number pad and press the scroll knob<br />
to select each number. When the complete phone<br />
number is displayed, scroll down to the DIAL tab<br />
and press the scroll knob to dial number. Also once<br />
the phone number has been selected you may use<br />
the down arrow button to go directly to the DIAL<br />
tab.<br />
4. When receiving a call, an incoming call will display<br />
on the radio screen, to answer just press the scroll<br />
knob to accept.<br />
5. To Hang up a call just press the scroll knob (1).<br />
6. To activate Voice dialing, use the voice dialing<br />
button on your phone to activate.<br />
7. To activate Streaming audio (if phone is equipped)<br />
use the mp3 audio playback functions on the phone<br />
to stream audio to vehicle radio.<br />
Note: No Phone Book functions are supported with this<br />
Bluetooth interface.<br />
Operation<br />
Agreement: End user agrees to use this product in compliance with all State and Federal laws. NAV-<strong>TV</strong> Corp. would not be held liable for misuse of its product.<br />
If you do not agree, please discontinue use immediately and return product to place of purchase.<br />
2 | P age