printer-converter-manual - ipcas
printer-converter-manual - ipcas
printer-converter-manual - ipcas

Create successful ePaper yourself
Turn your PDF publications into a flip-book with our unique Google optimized e-Paper software.
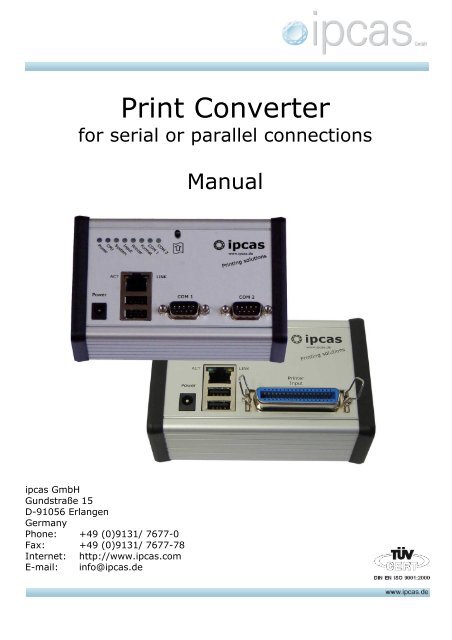
Print Converter<br />
for serial or parallel connections<br />
Manual<br />
<strong>ipcas</strong> GmbH<br />
Gundstraße 15<br />
D-91056 Erlangen<br />
Germany<br />
Phone: +49 (0)9131/ 7677-0<br />
Fax: +49 (0)9131/ 7677-78<br />
Internet: http://www.<strong>ipcas</strong>.com<br />
E-mail: info@<strong>ipcas</strong>.de
Contents<br />
Page<br />
1. Scope of supply................................................................... 3<br />
2. Important note ..................................................................... 3<br />
3. Introducing the device ......................................................... 4<br />
4. Connection and startup ....................................................... 5<br />
5. Configuring the print <strong>converter</strong> ............................................ 6<br />
6. Connecting the hardware .................................................. 14<br />
7. LED behavior during device startup .................................. 16<br />
8. Supported <strong>printer</strong>s............................................................. 17<br />
9. Logging on a USB Stick .................................................... 17<br />
10. Setting the time of the device via network......................... 17<br />
11. Network access ................................................................. 17<br />
12. Compact Flash holder (optionally available) ..................... 18<br />
13. Data exchange from Compact Flash to USB stick ............ 18<br />
14. What if …?......................................................................... 19<br />
15. Interpreting the LEDs ........................................................ 21<br />
16. Specifications .................................................................... 22<br />
Subject to change without prior notice State: Okt 07, 2008<br />
<strong>ipcas</strong> GmbH Print <strong>converter</strong> for serial/parallel connections V 2.4 Page 2 of 23
This <strong>manual</strong> explains how the <strong>printer</strong> <strong>converter</strong> of <strong>ipcas</strong> GmbH is<br />
connected and installed for the basic operation with serial or parallel data<br />
output machines or devices.<br />
A current <strong>manual</strong> is to be found as PDF or ZIP document on our website:<br />
http://www.<strong>ipcas</strong>.de/support/handbuecher.html under<br />
"RS232 to USB Printer Converter" or, respectively, under<br />
"Centronics to USB Printer Converter".<br />
1. Scope of supply<br />
• Printer <strong>converter</strong>, desktop version, with serial or<br />
parallel interface<br />
• Switching power supply<br />
Input voltage: 100 – 240 V AV; EU adapter<br />
Output voltage: 9 V DC; hollow plug 5.5 / 2.1 mm<br />
• USB Stick<br />
Parameterizing software<br />
Manual at hand<br />
• GNU General Public license terms<br />
2. Important note<br />
COPYRIGHT © 2007 <strong>ipcas</strong> GmbH<br />
All rights reserved. No part of this document is allowed to be copied, reproduced,<br />
transcribed or transferred in any other form without the explicit written permission of<br />
<strong>ipcas</strong> GmbH. Subject to printing mistakes, errors, or changes without prior notice.<br />
All brand names or trademarks mentioned in this document serve to identify and may<br />
belong to respective owners and must, therefore, be treated as such.<br />
The warranty claim expires immediately if the product is changed, incorrectly used,<br />
purposely or negligently damaged or impaired by force majeure or operation beyond<br />
the allowed working conditions.<br />
CAUTION:<br />
The warranty claim expires upon removing the serial number. Shipping or<br />
insurance companies cannot be made liable for damage caused by inadequate<br />
packing.<br />
Subject to change without prior notice State: Okt 07, 2008<br />
<strong>ipcas</strong> GmbH Print <strong>converter</strong> for serial/parallel connections V 2.4 Page 3 of 23
3. Introducing the device<br />
With the <strong>printer</strong> <strong>converter</strong> of <strong>ipcas</strong> GmbH you can very easily output your<br />
serial or parallel print data in PCL or ASCII onto a customary<br />
USB/network <strong>printer</strong> or USB Stick. These in turn can be connected to<br />
existing USB or LAN interfaces without effort.<br />
• The <strong>converter</strong> behaves like a normal <strong>printer</strong> and prints the received<br />
data page by page.<br />
• The <strong>converter</strong> is immediately ready to run and prints ASCII logs as<br />
well as graphics with customary (HP-compatible) USB/network<br />
<strong>printer</strong>s in black and white or also in color, provided they are<br />
supported by the connected <strong>printer</strong>.<br />
• The PCL (of the company HP) or ASCII can be processed on the<br />
input side. The data is then collected and output page by page.<br />
• The print data cannot only be logged on a USB/network <strong>printer</strong>, but<br />
also on an off-line USB data carrier or (optionally) on an internal<br />
Compact Flash card.<br />
Subject to change without prior notice State: Okt 07, 2008<br />
<strong>ipcas</strong> GmbH Print <strong>converter</strong> for serial/parallel connections V 2.4 Page 4 of 23
4. Connection and startup<br />
There are some parameters of the print <strong>converter</strong> that have to be set<br />
prior to startup.<br />
These settings have to be performed only once.<br />
The parameterization is imported into the print <strong>converter</strong> through a USB<br />
Stick.<br />
The included configuration program has to be run on a Windows computer<br />
to set these parameters.<br />
1. 2. 3.<br />
Set Store Import<br />
parameters parameters parameters<br />
The following steps are required for this:<br />
1. Insert the USB Stick included in the delivery into a PC (Win2000, XP or<br />
Vista)<br />
2. Start the program directly from the USB Stick (StartHere.exe).<br />
3. Set the parameters and save them.<br />
4. Start up print <strong>converter</strong> (refer to item A, page 12).<br />
5. Insert the USB Stick into the <strong>converter</strong> (refer to item A1, page 12).<br />
6. The <strong>converter</strong> adopts the parameterization automatically and stores it<br />
internally.<br />
7. Done.<br />
The delivery USB Stick must be used only to configure. Please also<br />
make sure that USB Sticks used for logging contain no<br />
configuration software.<br />
Subject to change without prior notice State: Okt 07, 2008<br />
<strong>ipcas</strong> GmbH Print <strong>converter</strong> for serial/parallel connections V 2.4 Page 5 of 23
5. Configuring the print <strong>converter</strong><br />
Please insert the delivery USB Stick into a Windows PC (2000, XP or<br />
Vista).<br />
The window below should appear on display. Click "Open folder".<br />
If the window should not open automatically, please use the Explorer to<br />
navigate to the removable data carrier of the USB Stick.<br />
Subject to change without prior notice State: Okt 07, 2008<br />
<strong>ipcas</strong> GmbH Print <strong>converter</strong> for serial/parallel connections V 2.4 Page 6 of 23
Now click the<br />
icon to start the configuration program.<br />
This starts the program, and a display of the last saved configuration or<br />
the preset default configuration appears.<br />
You can now set the Input parameters of the device in the mask displayed above.<br />
Please note that the program requires Microsoft .Net Framework as of at least<br />
Version 1.1. If the appropriate Framework has not been installed on your<br />
computer, you will find one in the "Support" folder on the USB Stick.<br />
Subject to change without prior notice State: Okt 07, 2008<br />
<strong>ipcas</strong> GmbH Print <strong>converter</strong> for serial/parallel connections V 2.4 Page 7 of 23
Parameter descriptions<br />
Input / Connectivity / RS232 settings<br />
Centronics / Parallel<br />
Selection of Centronics interfaces<br />
Device<br />
Baud rate<br />
Selection of serial interfaces with which the print<br />
<strong>converter</strong> should operate.<br />
/dev/ttyS0……….COM1<br />
/dev/ttyS1……….COM2<br />
Note: The setting of COM Interface 1 is<br />
mandatory for parallel Centronics interfaces.<br />
Transfer rate to be set for the serial interface.<br />
Possible range: 300 to 460,800 bauds<br />
Please note that the counterpart device must operate<br />
with the same parameter values.<br />
Note: The baud rate setting of 115,200 is<br />
mandatory for parallel Centronics interfaces.<br />
Data bits<br />
7 or 8 data bits can be used. Normally, 8 is set.<br />
Parity<br />
Data parity. Range of choice:<br />
None no parity check<br />
Even rounding to even parity<br />
Odd rounding to odd parity<br />
Input/Stop transmitter<br />
…if <strong>printer</strong> is not ready<br />
…if USB Stick is not ready<br />
This setting determines whether the readings from the<br />
serial/parallel interface should be continued when the<br />
USB <strong>printer</strong> is not ready (e.g. in case of no paper).<br />
If this function is switched on, and the <strong>printer</strong><br />
goes offline, the RTS (request to send) of the<br />
serial interface is removed and no longer read.<br />
The control/machine is now no longer permitted to<br />
send data until the <strong>printer</strong> is ready and the RTS is set<br />
back on again.<br />
This setting determines whether the readings from the<br />
serial/parallel interface should be continued when the<br />
USB Stick or, respectively, the USB data carrier is not<br />
ready (e.g. when unavailable or storage is full).<br />
Otherwise the function is analogous to<br />
"…if <strong>printer</strong> is not ready".<br />
Input/Add time to print lines<br />
Printer:<br />
Files:<br />
after<br />
after<br />
The device offers the option to insert the time in front<br />
of every print line. For this the format must be set in<br />
which the line separation should be received. Optional<br />
settings are: Line separation with CR (carriage return)<br />
or CR+LF (carriage return + line feed) or just LF.<br />
If the line separator is received, the time is inserted in<br />
front of each following line.<br />
This function can be imported separately, once for the<br />
file and once for the <strong>printer</strong> output.<br />
Subject to change without prior notice State: Okt 07, 2008<br />
<strong>ipcas</strong> GmbH Print <strong>converter</strong> for serial/parallel connections V 2.4 Page 8 of 23
You can now set the File Output parameters of the device in the mask displayed above.<br />
File output / Output files<br />
Path<br />
Folder name<br />
File name<br />
Append milliseconds<br />
Extension<br />
Setting of storage location of the received data. Optional<br />
storage locations are:<br />
• External USB data carrier<br />
• Internal Compact Flash<br />
Here the format of the directories can be selected.<br />
Possible choices:<br />
Every day a new directory<br />
Every month a new directory<br />
Every year a new directory<br />
Format setting of the file name<br />
Dialog whether the current milliseconds should be<br />
appended to the file name?<br />
Name extension of the files:<br />
Possible settings: "txt" or "dat"<br />
File output / Create new file on<br />
Separator<br />
Definition of string prompting new file creation.<br />
Whenever this string is found in the data flow, a new file<br />
is opened.<br />
All printable characters are permitted including special<br />
characters (e.g. FormFeed). These special characters<br />
have to be inserted using " " .<br />
Timeout<br />
Time value in seconds. Should no characters have been<br />
received for the duration indicated, the current file is<br />
closed, and a new file is started upon receiving the next<br />
character.<br />
Subject to change without prior notice State: Okt 07, 2008<br />
<strong>ipcas</strong> GmbH Print <strong>converter</strong> for serial/parallel connections V 2.4 Page 9 of 23
You can now set the Printer Output parameters of the device in the mask displayed<br />
above.<br />
Printer output<br />
Printer<br />
IP address or name<br />
Queue name<br />
Here the print settings of a local USB <strong>printer</strong> or a<br />
network <strong>printer</strong> can be performed. You may select from<br />
the following three network print protocols: IPP, LPD or<br />
JetDirect.<br />
You will find the network protocol that suits your<br />
network <strong>printer</strong> in the documentation of your network<br />
<strong>printer</strong>.<br />
IP address or name of the network <strong>printer</strong>. This is only<br />
required when a network protocol has been selected<br />
under "Printer".<br />
Queue names have to be added for the network <strong>printer</strong><br />
protocols IPP and LPD. You will find the suitable queue<br />
name in the documentation of your network spooler,<br />
print server or network <strong>printer</strong>.<br />
Subject to change without prior notice State: Okt 07, 2008<br />
<strong>ipcas</strong> GmbH Print <strong>converter</strong> for serial/parallel connections V 2.4 Page 10 of 23
You can now set the Network parameters of the device in the mask displayed above.<br />
Network<br />
Setup LAN interface<br />
DHCP<br />
TCP/IP settings<br />
Setting of LAN interface of the print <strong>converter</strong>.<br />
Note: This is a mandatory setting to be performed<br />
at least once in order to connect the print<br />
<strong>converter</strong> to the network.<br />
Here the IP address and other configuration parameters<br />
can be assigned dynamically. Thus the <strong>manual</strong><br />
assignments of IP address, subnet mask, default<br />
gateway, and DNS are no longer required. The host<br />
name must also be assigned when using DHCP.<br />
TCP/IP settings.<br />
Note: Mandatory when connecting to a network<br />
without DHCP.<br />
Subject to change without prior notice State: Okt 07, 2008<br />
<strong>ipcas</strong> GmbH Print <strong>converter</strong> for serial/parallel connections V 2.4 Page 11 of 23
You can now set the Time sync parameters of the device in the mask displayed above.<br />
Sync Time<br />
Insert Stick at..<br />
The time of the device has to be set <strong>manual</strong>ly in order to<br />
be able to tag log entries with time stamps.<br />
This is done with the function at hand. The time has to<br />
be set to when the Stick should be inserted into the<br />
device. The print <strong>converter</strong> then adopts this time.<br />
The time in the device is measured in UTC<br />
(coordinated world time, similar to GMT).<br />
The annual deviation amounts to approx. 1<br />
minute.<br />
After adapting the settings you save the configuration on the USB Stick<br />
with the "Apply" button.<br />
Subject to change without prior notice State: Okt 07, 2008<br />
<strong>ipcas</strong> GmbH Print <strong>converter</strong> for serial/parallel connections V 2.4 Page 12 of 23
Please do not forget to log out the USB Stick before removing it.<br />
In Windows XP this is performed in the Explorer under "Eject drive":<br />
Or, alternatively, log out via "Safely remove hardware".<br />
Subject to change without prior notice State: Okt 07, 2008<br />
<strong>ipcas</strong> GmbH Print <strong>converter</strong> for serial/parallel connections V 2.4 Page 13 of 23
6. Connecting the hardware<br />
(A) Connect the power supply<br />
included in the delivery<br />
to the print <strong>converter</strong> ("Power").<br />
Then insert the power supply unit<br />
into the socket.<br />
The print <strong>converter</strong> carries out a short eine kurze<br />
diagnosis of itself (for approx. ten<br />
seconds). While this is going on,<br />
various LEDs light up or blink.<br />
After startup the following LEDs<br />
are active:<br />
LED<br />
Power<br />
CPU<br />
System<br />
Description<br />
green (immediately)<br />
blinks green<br />
green or orange<br />
(after approx. 10<br />
seconds)<br />
(1)<br />
(2)<br />
A1. This task is only required<br />
once in order to parameterize the<br />
device. Insert the USB Stick with<br />
the stored parameterization into<br />
one of the two USB sockets. The<br />
device indicates the acceptance of<br />
the parameterization through four<br />
orange-blinking LEDs.<br />
Subsequently, the push-button<br />
has to be pressed once.<br />
The USB Stick can then be<br />
removed. The parameters are now<br />
permanently saved.<br />
Subject to change without prior notice State: Okt 07, 2008<br />
<strong>ipcas</strong> GmbH Print <strong>converter</strong> for serial/parallel connections V 2.4 Page 14 of 23
B. Connect a USB/network<br />
cable to the switched-on<br />
<strong>printer</strong> and print <strong>converter</strong>.<br />
C. Connect the print <strong>converter</strong> and your machine/device with a<br />
Centronics cable (for parallel interfaces) or the usual null-modem cable<br />
(for serial interfaces).<br />
(parallel interface)<br />
(serial interface)<br />
Subject to change without prior notice State: Okt 07, 2008<br />
<strong>ipcas</strong> GmbH Print <strong>converter</strong> for serial/parallel connections V 2.4 Page 15 of 23
7. LED behavior during device startup<br />
The following conditions are indicated by the status LEDs while printing:<br />
(LEDs of serial interface)<br />
(LEDs of parallel interface)<br />
1. Short lighting up of orange LED "COM1" (serial) or, respectively,<br />
"Data Input" (parallel):<br />
• Print data have been received.<br />
2. Input LED blinks green<br />
• Data is available in the device memory. The page to be printed is<br />
not yet complete.<br />
3. Format LED is on (green)<br />
• PCL data for HP-compatible <strong>printer</strong>s was received.<br />
4. Printer LED blinks (green)<br />
• The print data are being transferred to the <strong>printer</strong>.<br />
Please note:<br />
When pages are not completely printed, the remaining data stay in the<br />
print <strong>converter</strong> until a whole page can be printed.<br />
Therefore, in the case of half-printed pages or single screen masks, apply<br />
, the "Print page immendiately" push-button.<br />
Pressing the push-button also has the effect that the USB data<br />
storage activated for logging is checked out by the print<br />
<strong>converter</strong>.<br />
Subject to change without prior notice State: Okt 07, 2008<br />
<strong>ipcas</strong> GmbH Print <strong>converter</strong> for serial/parallel connections V 2.4 Page 16 of 23
8. Supported <strong>printer</strong>s<br />
You will find a list of supported <strong>printer</strong>s at: www.<strong>ipcas</strong>.com/<strong>printer</strong>s<br />
Important criteria for the selection of <strong>printer</strong>s not included in the<br />
supported-by-<strong>ipcas</strong> list: Compatibility with PCL3, PCL4, PCL5 or ASCII.<br />
Host-based <strong>printer</strong>s such as GDI, CAPT and PPA are not supported.<br />
9. Logging on a USB Stick<br />
Usually the logging of print data onto a USB Stick (or any other USB mass<br />
data carrier) is performed to archive textual (ASCII) print data.<br />
In doing so the <strong>converter</strong> creates a directory (with a time stamp) for<br />
every datum on the USB Stick, where the print pages are then stored for<br />
each datum.<br />
The USB Stick can be inserted any time and is then utilized automatically.<br />
This is indicated by the system LED. If it lights up orange, then there is<br />
no USB Stick available. If it lights up green, however, an inserted USB<br />
Stick has been recognized. To remove the USB Stick the push-button<br />
has to be pressed first. The system LED then turns orange, and the USB<br />
Stick can be safely removed.<br />
10. Setting the time of the device via network<br />
The device time must be first set either via network or <strong>manual</strong>ly in order<br />
to be able to tag the log entries with time stamps.<br />
To set the time on the <strong>converter</strong> automatically via network, please install<br />
the configuration program for <strong>ipcas</strong> Ethernet devices. You will find the<br />
program in the "Support" folder on the USB Stick included in the delivery.<br />
Connect the <strong>converter</strong> to your network or connect it to your computer<br />
with a crossover cable.<br />
Start the configuration program. The program now synchronizes all<br />
connected <strong>converter</strong>s in the background.<br />
11. Network access<br />
Via network you have access to stored data on the USB Stick / data<br />
carrier or internal Compact Flash. The standard FTP protocol is used for<br />
this. As to how the network interface is parameterized please read<br />
http://www.<strong>ipcas</strong>.de/lb1<br />
under -> Startup – "FTP access".<br />
The configuration program for setting the IP address is located in the<br />
"Support" folder on the included USB Stick.<br />
Subject to change without prior notice State: Okt 07, 2008<br />
<strong>ipcas</strong> GmbH Print <strong>converter</strong> for serial/parallel connections V 2.4 Page 17 of 23
12. Compact Flash holder (optionally available)<br />
A CF (CompactFlash) card can be<br />
integrated for permanent storage<br />
extension. The optional<br />
CompactFlash holder has to be<br />
ordered from us and installed into<br />
the print <strong>converter</strong>. We use the<br />
Type I Industrial CF card from<br />
Silicon. The industrial CF card<br />
variants offer the advantages of a<br />
longer life span, more balanced<br />
wearout, greater temperature<br />
resistance and shorter access<br />
times. We have included instructions for the additional installation of CF<br />
cards on our website:<br />
http://www.<strong>ipcas</strong>.de/support/developer/lb1-linux-box-embedded-pc/compact-flash-halter.html<br />
13. Data exchange from Compact Flash to USB stick<br />
Attention: This function is available from firmware version 14.12<br />
If you have specified the Compact Flash card as your main storage<br />
medium and want to store the recorded data on a USB stick, please<br />
proceed as follows:<br />
1. First create a cf_data root directory in the USB stick. Then copy the<br />
data from the CF card into this directory. Furthermore, a possibly<br />
available directory called "<strong>ipcas</strong>" has to be renamed. No data is<br />
copied onto the USB stick unless these two requirements are<br />
satisfied.<br />
2. Next, you insert the USB stick into one of the two USB connections.<br />
You may continue to print in the <strong>printer</strong> <strong>converter</strong> while the data is<br />
being transferred.<br />
3. The <strong>printer</strong> <strong>converter</strong> then starts to copy the data onto the USB<br />
stick. During the copying process the four LED's "System", "Input",<br />
"Printer", and "Format" flash orange.<br />
4. Once all data has been transferred to the USB stick successfully, the<br />
respective LED's flash green. The stick may now be removed.<br />
5. Should the LED's flash red, this indicates an error, e.g. the USB<br />
stick is full, or the data could not be written without error. In that<br />
case try it again with another USB stick.<br />
Subject to change without prior notice State: Okt 07, 2008<br />
<strong>ipcas</strong> GmbH Print <strong>converter</strong> for serial/parallel connections V 2.4 Page 18 of 23
Notes on the procedure:<br />
• When you copy to a USB stick, each document is first compared<br />
with the original after the writing. The document on the CF card is<br />
not deleted until this test proves successful. This guarantees high<br />
data security, even when the USB stick is removed by mistake while<br />
copying or when there is not sufficient memory space available for<br />
the data to be stored.<br />
• Since writing on flash media is slow and comparing the copied data<br />
also takes some time, copying on a rather full CF card can be rather<br />
time-consuming. However, as the copying proceeds, additional data<br />
can be printed into the <strong>printer</strong> <strong>converter</strong>.<br />
• To prevent incomplete data from being copied (and subsequently<br />
deleted) during simultaneous printing and copying to the USB stick,<br />
the suffix ".tmp" is added to the name while writing. The suffix is<br />
not removed when renaming until the writing of data has been<br />
thoroughly completed. On the other hand, documents with the<br />
suffix ".tmp" are ignored when copying on a USB stick. On account<br />
of this procedure, the suffix ".tmp" should never be used when<br />
renaming a created document (in /etc/printserv.conf) with variable<br />
extension.<br />
• When the device is taken off the line while data is still being<br />
printed, some temporary documents may be left behind. To prevent<br />
the data from getting lost in such cases, the SF card is searched for<br />
left-behind temporary documents and these are then renamed<br />
when the system reboots.<br />
14. What if …?<br />
Requirements for printing:<br />
The following conditions must be observed to ensure correct data output<br />
on a USB/network <strong>printer</strong>:<br />
• The <strong>printer</strong> interface of the machine must be connected to the print <strong>converter</strong>.<br />
• The appropriate interface cable must be used.<br />
• The appropriate interface with the same transfer rate (baud rate) as in the<br />
machine has to be selected. For parallel interfaces the transfer (baud) rate<br />
setting of 115,200 is mandatory.<br />
• An operable USB/network <strong>printer</strong> (refer to chapter 8) must be connected<br />
correctly, supplied with paper, switched on and ready to print.<br />
Subject to change without prior notice State: Okt 07, 2008<br />
<strong>ipcas</strong> GmbH Print <strong>converter</strong> for serial/parallel connections V 2.4 Page 19 of 23
Whenever you "print" on USB Stick, generate a log file<br />
For quicker and smoother support observe the following instructions:<br />
1. An "<strong>ipcas</strong>" folder should be created on the print USB Stick<br />
In the "<strong>ipcas</strong>" in turn a "support" should be created<br />
2. The <strong>printer</strong> and print USB Stick must be removed from the print <strong>converter</strong><br />
3. "Print" the data in the print <strong>converter</strong><br />
4. Insert print USB Stick into the print <strong>converter</strong> Data is transferred<br />
5. Wait until the print data is written on the print USB Stick (that is when the<br />
COM1 or COM2 LEDs no longer blink)<br />
6. Remove USB Stick (Before you do so, "log out" with push-button)<br />
7. Send the entire "<strong>ipcas</strong>" folder to our support:<br />
mailto:ipether-support@<strong>ipcas</strong>.de<br />
What if ....<br />
.... the red <strong>printer</strong> LED blinks slowly? – The <strong>printer</strong> is switched off /<br />
not connected / defective or was not recognized.<br />
Solution: Unplug the USB / LAN plug from the <strong>printer</strong> and plug it in<br />
again after two seconds.<br />
.... the red format LED blinks fast? – There is print data available to<br />
HP-compatible <strong>printer</strong>s (PCLs), and it was recognized, however, that<br />
no compatible <strong>printer</strong> is connected.<br />
Solution: Please connect an HP-compatible <strong>printer</strong>.<br />
.... the red input LED blinks fast? – A data transer error has occurred.<br />
Solution: The data transfer rate in the machine control has not been<br />
correctly set, or the connection cable is attached to the wrong port<br />
(only with a serial interface).<br />
.... the USB Stick should be removed or exchanged during operation?<br />
Solution: If "Wait for USB-Stick" was configured, and the machine<br />
observes the serial handshaking, you can log out the USB Stick from<br />
the print <strong>converter</strong> by applying the push-button (in parallel data<br />
transfers the handshaking is always observed). The system LED<br />
should light up orange to indicate that there is no data carrier<br />
available. The data flow is interrupted until a new data carrier is<br />
connected via USB.<br />
If the machine does not support the handshaking or if you do not<br />
want to hold up the data flow for too long, you can first connect a<br />
second USB data carrier and then press the push-button shortly<br />
afterwards. The logging is continued on the new USB Stick<br />
immediately after checking out the old one.<br />
Warning: Data losses may occur if the USB Stick is not logged out<br />
properly prior to removal.<br />
Subject to change without prior notice State: Okt 07, 2008<br />
<strong>ipcas</strong> GmbH Print <strong>converter</strong> for serial/parallel connections V 2.4 Page 20 of 23
15. Interpreting the LEDs<br />
LED Color State Description<br />
Power green Lights up Operation voltage is on<br />
CPU green Blinks Firmware is ready to run<br />
System<br />
green<br />
red<br />
(orange)<br />
Lights up<br />
Blinks slowly<br />
Blinks fast<br />
Lights up<br />
Device is ready to operate<br />
Device is not ready<br />
Too many buffered files, or insufficient free<br />
storage space<br />
No USB data carrier connected or<br />
recognized<br />
green Blinks fast Serial/Parallel data is being received<br />
Input Red Blinks slowly<br />
Blinks fast<br />
Serial/Parallel interface cannot be opened.<br />
Data transfer error (usually wrong transfer<br />
rate)<br />
green Blinks fast Data is being sent to the <strong>printer</strong><br />
Printer Red Blinks slowly Printer switched off / not connected /<br />
defective<br />
Blinks schnell Printer has no paper<br />
green Lights up PCL data is being processed<br />
Format Red Blinks fast Printer does not support PCL, but PCL is<br />
required for printing<br />
For two serial interfaces<br />
green Blinks Serial data is being transferred<br />
COM1<br />
orange Blinks Serial data is being received<br />
COM2<br />
Green Blinks Serial data is being transferred<br />
orange Blinks Serial data is being received<br />
For parallel interfaces<br />
Data Green Blinks Parallel data is being transferred<br />
Input orange Blinks Parallel data is being received<br />
Subject to change without prior notice State: Okt 07, 2008<br />
<strong>ipcas</strong> GmbH Print <strong>converter</strong> for serial/parallel connections V 2.4 Page 21 of 23
16. Specifications<br />
RS232 - USB Print<br />
Converter<br />
Interfaces<br />
Real-time clock<br />
Desktop device<br />
2 x RS232 SUB D9, male (<strong>printer</strong> input)<br />
Baud rate: 300 to 115,200 bauds<br />
2 x USB 1.1<br />
(Printer output and storing on USB Stick)<br />
1 x LAN 10/100 BaseT Ethernet, RJ45 female<br />
(Network access to print data)<br />
Battery buffered, TCXO, +-60 sec time freewheeling<br />
/year (at 0° to 40° C) (for time stamps)<br />
Function push-button<br />
1 x page printed from print storage<br />
Power, System, RX, TX,<br />
Diagnostics LEDs<br />
Print data status: Input, Buffer, Print<br />
Ethernet: Activity and link<br />
Voltage supply<br />
+ 9 V DC (+/-10%) 1)<br />
round socket<br />
Power input<br />
9 V DC 160 mA ca. 1.44 W<br />
(typical value when idling) 12 V DC 118 mA ca. 1.41 W<br />
Casing<br />
Measurements<br />
W/H/D<br />
Operation/Storage<br />
temperature<br />
Relative humidity<br />
Protection rating<br />
Standards<br />
Sope of supply<br />
Purchase order<br />
number<br />
Aluminum casing<br />
approx. 126/46/81 mm<br />
5° C to 55° C / -10° C to 70° C<br />
5 % to 90 %, non-condensing<br />
IP40<br />
CE<br />
RS232 - USB Converter, desktop casing<br />
Power pack with round socket<br />
Input: 100 – 240 V AC<br />
Output: + 9 V DC<br />
Configuration software for<br />
Windows (2000, XP, Vista), and<br />
Manual (English on USB Stick)<br />
0202035<br />
Subject to change without prior notice State: Okt 07, 2008<br />
<strong>ipcas</strong> GmbH Print <strong>converter</strong> for serial/parallel connections V 2.4 Page 22 of 23
Centronics - USB Print<br />
Converter<br />
Interfaces<br />
Real-time clock<br />
Desktop device<br />
1x Centronics socket, 36-pin, (<strong>printer</strong> input)<br />
Protocol/Mode: SPP (Standard Parallel Port)<br />
2 x USB 1.1<br />
(Printer output and storing on USB Stick)<br />
1 x LAN 10/100 BaseT Ethernet, RJ45 socket<br />
(Network access to print data)<br />
Battery buffered, TCXO, +-60 sec time freewheeling<br />
/year (at 0° to 40° C) (for time stamps)<br />
Function push-button<br />
1 x page printed from print storage<br />
Power, System, Centronics,<br />
Diagnostics LEDs<br />
Print data status: Input, Buffer, Print<br />
Ethernet: Activity and link<br />
Voltage supply<br />
+ 9 V DC (+/-10%) 1)<br />
Round socket<br />
Power input<br />
9 V DC 181 mA ca. 1.63 W<br />
(typical value when idling) 12 V DC 128 mA ca. 1.54 W<br />
Casing<br />
Measurements<br />
W/H/D<br />
Operation/Storage<br />
temperature<br />
Relative humidity<br />
Protection rating<br />
Standards<br />
Sope of supply<br />
Purchase order<br />
number<br />
Aluminum casing<br />
Approx. 126/46/81 mm<br />
5° C to 55° C / -10° C to 70° C<br />
5 % to 90 %, non-condensing<br />
IP40<br />
CE<br />
Centronics - USB Converter, desktop casing<br />
Power pack with round socket<br />
Input: 100 – 240 V AC<br />
Output: + 9 V DC<br />
Configuration software for<br />
Windows (2000, XP, Vista) and<br />
Manual (English on USB Stick)<br />
0202030<br />
Contact<br />
<strong>ipcas</strong> GmbH Phone: +49 (0)9131/ 7677-0<br />
Gundstraße 15 Fax: +49 (0)9131/ 7677-78<br />
D-91056 Erlangen Internet: http://www.<strong>ipcas</strong>.com<br />
Germany<br />
E-mail: info@<strong>ipcas</strong>.de<br />
Subject to change without prior notice State: Okt 07, 2008<br />
<strong>ipcas</strong> GmbH Print <strong>converter</strong> for serial/parallel connections V 2.4 Page 23 of 23