Universal Remote Instruction Manual - Jasco Products
Universal Remote Instruction Manual - Jasco Products
Universal Remote Instruction Manual - Jasco Products

Create successful ePaper yourself
Turn your PDF publications into a flip-book with our unique Google optimized e-Paper software.
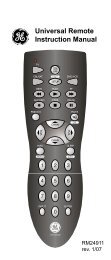
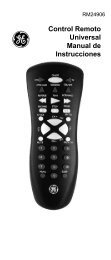
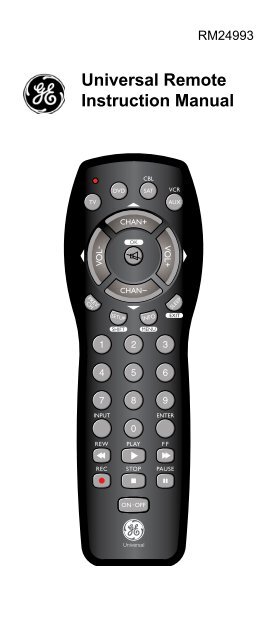
RM24993<br />
<strong>Universal</strong> <strong>Remote</strong><br />
<strong>Instruction</strong> <strong>Manual</strong><br />
TV<br />
DVD<br />
CBL<br />
SAT<br />
VCR<br />
AUX<br />
INPUT<br />
ENTER
Table of Contents<br />
Setup...................................................................... 3<br />
Battery Installation............................................ 3<br />
Battery Saver.................................................... 3<br />
Code Saver....................................................... 3<br />
Code Setup....................................................... 3<br />
Button Functions.................................................... 4<br />
DVD Functions.................................................. 6<br />
SAT Functions................................................... 6<br />
Code Entry............................................................. 7<br />
Direct Code Entry.............................................. 7<br />
Code Search..................................................... 8<br />
Using Your <strong>Remote</strong>................................................ 9<br />
Code Identification............................................ 9<br />
Shifted Functions............................................ 10<br />
Controlling Devices with Power On and Off.... 10<br />
Controlling Combo Devices............................ 10<br />
VCR/DVD/DVR Punch-Through..................... 10<br />
Volume/Mute Control and Punch-Through...... 11<br />
All Volume/Mute Control to any one Mode...... 11<br />
Setting any Mode for its own Volume/Mute..... 12<br />
Sleep............................................................... 13<br />
Troubleshooting................................................... 14<br />
Congratulations on your purchase of the RM24993<br />
<strong>Universal</strong> <strong>Remote</strong> Control. The RM24993 is one<br />
of the most easy to use remote controls available<br />
today. With the RM24993, juggling multiple remote<br />
controls is a thing of the past! Your RM24993<br />
controls up to seven devices, including the most<br />
popular brands of TV, VCR, DVD, SAT, CBL, and<br />
audio equipment.<br />
Note: Some functions from your original remote<br />
may not be controlled by this remote. Use the<br />
original remote, if available, to control such<br />
functions. Sometimes buttons other than described<br />
in these instructions may actually perform the<br />
function. For example, the CHAN and VOL<br />
buttons might be used to navigate through menu<br />
choices. We recommend you experiment with the<br />
remote to identify if such situations pertain to your<br />
equipment.<br />
The RM24993 is easy to use, easy to program,<br />
and it gives you total control—at the touch of your<br />
fingertips!<br />
2
Setup<br />
Battery Installation<br />
1. On the back of the remote, push down on the<br />
tab and lift the cover off.<br />
2. Match the batteries to the + and - marks inside<br />
the battery case, then insert 2 AAA Alkaline<br />
batteries.<br />
3. Press the battery cover back into place.<br />
Battery Saver<br />
Your remote automatically turns off if the buttons<br />
are depressed more than 30 seconds. This will<br />
save your batteries should your remote get stuck in<br />
a place where the buttons remain depressed (e.g.,<br />
between the sofa cushions).<br />
Code Saver<br />
You will have up to 10 minutes to change the<br />
batteries in your remote without losing codes you<br />
have programmed. However, do not press any<br />
buttons until batteries are installed in the remote.<br />
If buttons are pressed without batteries in the<br />
remote, all codes will be lost.<br />
Code Setup<br />
The SETUP button is used to setup the remote.<br />
You can either setup the remote using the code<br />
for your brand of product, from the code tables (on<br />
separate sheet), or you can search through the<br />
library of codes until you find a code that works<br />
for your product. Please refer to “Programming<br />
with Code Search” page 9 for more information<br />
on using the code search feature to learn how<br />
to search through the library of codes for your<br />
products. NOTE: You can store any kind of code<br />
under any mode (except TV). I.E. you can store<br />
a VCR code under the CABLE button, or a DVD<br />
code under the VCR button, etc. However, you can<br />
only store TV codes under the TV button.<br />
3
Button Functions<br />
Some buttons on the remote might have functions that<br />
are referred to by different names on the device you<br />
are controlling. E.G. LAST may be called RECALL,<br />
or ENTER may be called DISPLAY. These differences<br />
depend on the brand and model of your product. Also,<br />
this remote can only operate features that exist on your<br />
product. E.G., your product must have LAST ability for<br />
the LAST button to operate this feature.<br />
VOLUME UP/DOWN<br />
Changes the volume<br />
level of the product,<br />
normally the TV.<br />
TV, DVD, etc. Selects product<br />
to be operated.<br />
MUTE Turns off the<br />
TV sound while the<br />
picture remains.<br />
OK Selects menu<br />
items for the device<br />
you are controlling.<br />
PREV. CH Returns to<br />
the previously selected<br />
channel.<br />
SETUP For setup.<br />
SHIFT Accesses<br />
shifted functions.<br />
INPUT<br />
For some TVs, press<br />
repeatedly to select<br />
from available viewing<br />
sources (antenna, cable<br />
box, VCR, etc.).<br />
RECORD, PLAY, STOP,<br />
REW, FF, PAUSE VCR<br />
control buttons operate your<br />
VCR even when the remote<br />
is set to operate the TV.<br />
Also operates DVD Scan<br />
-/+. Note the VCR keys also<br />
control DVD when in DVD<br />
Mode.<br />
4
Button Functions, cont.<br />
Red Indicator<br />
Lights when any<br />
button is pressed.<br />
CHANNEL Up/Down<br />
Changes the channels.<br />
SLEEP enables<br />
the remote to turn<br />
off your TV after a<br />
period of 1 to 99<br />
minutes.<br />
EXIT Exit On-Screen<br />
Menus and/or Return<br />
to previous On-Screen<br />
selection.<br />
INFO button brings up<br />
DVD Display or Control<br />
Menu for Chapter/Track/<br />
Title number, Time remaining/elapsed<br />
indication,<br />
system information,<br />
etc.<br />
MENU<br />
Selects the on-screen<br />
menu.<br />
NUMBERS<br />
Enter numbers for direct<br />
channel selection. Some<br />
products require ENTER<br />
to be pressed after channel<br />
selection.<br />
ON-OFF Turns<br />
device On or Off.<br />
ENTER<br />
For some TV models,<br />
used after direct channel<br />
number<br />
entry to immediately<br />
change to the<br />
selected channel.<br />
Note: The REC button must be pressed TWICE to record<br />
from your VCR. For some brands of VCRs, you might<br />
need to press the REC button once, then press it again<br />
for three seconds.<br />
5
DVD Functions<br />
This remote controls many DVD functions. The<br />
descriptions may vary from your original remote<br />
descriptions.<br />
REW and FF buttons control the speed of Fast<br />
Forward and Reverse Playback respectively.<br />
CHAN+/CHAN- buttons respectively locate the<br />
succeeding or preceding Chapters or Tracks on a<br />
disc.<br />
INFO button brings up DVD Display or Control<br />
Menu for Chapter/Track/Title number, Time remaining/elapsed<br />
indication, system information, etc.<br />
MENU brings up the DVD disc Menu screen - use<br />
with the UP, DOWN, LEFT & RIGHT navigation<br />
buttons.<br />
OK button is used for on-screen Menu selection.<br />
Note some DVD players require the Play button to<br />
be used.<br />
EXIT Exit On-Screen Menus and/or Return to previous<br />
On-Screen selection.<br />
PLAY button is used to start Disc playback and for<br />
Menu selection on some DVD players.<br />
STOP button stops Disc playback.<br />
PAUSE button pauses Disc playback - press PLAY<br />
to resume.<br />
INPUT brings up the DVD Players Setup Menu.<br />
Note, not all DVD Players support all the functions<br />
described above.<br />
SAT Functions<br />
CHAN+ and CHAN- buttons perform the “Page+”<br />
and “Page-” function for on-screen Guide Menus<br />
used by some Satellite systems.<br />
INFO button brings up Satellite Display screen for<br />
current Channel and system information.<br />
MENU brings up the Satellite Menu screen - use<br />
with the UP, DOWN, LEFT & RIGHT navigation<br />
buttons.<br />
OK button is used for on-screen Menu selection.<br />
EXIT button is used to Exit or Clear on-screen<br />
Menu displays.<br />
INPUT button performs the Satellite TV/SAT<br />
function.<br />
6
Direct Code Entry<br />
1. Press and hold the SETUP button until<br />
the red indicator stays on, then release<br />
the SETUP button.<br />
2. Press and release the desired mode<br />
button (TV, VCR, etc.). The red indicator<br />
blinks, then stays lit.<br />
3. Enter the 4 digit code<br />
from the code tables<br />
(on separate sheet).<br />
Note: after a valid<br />
code entry, the red<br />
indicator turns off. For<br />
an invalid code, the<br />
red indicator flashes.<br />
4. With your device on, press ON/<br />
OFF. If the device turns off, no<br />
further programming is required.<br />
Note: If some buttons do not<br />
operate your equipment, try one of<br />
the other codes for your brand.<br />
Write your codes down here for easy reference<br />
later.<br />
Device<br />
Device stored Code<br />
TV<br />
DVD<br />
CBL/SAT<br />
VCR/AUX<br />
TV<br />
7
Code Search<br />
If your device does not respond after you have<br />
tried all the codes for your brand, or if your brand is<br />
not listed, try searching for your code by following<br />
these steps.<br />
1. <strong>Manual</strong>ly turn on the device (TV, VCR, etc.) to<br />
be controlled.<br />
2. Press and hold the SETUP button until<br />
the red indicator stays on, then release<br />
the SETUP button.<br />
3. Press and quickly release the desired<br />
mode button (TV, VCR, etc.). The red<br />
indicator blinks off once.<br />
4. Press the CHANNEL UP button<br />
repeatedly (up to 300 times)<br />
until the device to be controlled<br />
changes channel. The red<br />
indicator blinks off with each<br />
button press. If you accidentally overshoot the<br />
code required, press the CHANNEL DOWN<br />
button to backtrack through the library until the<br />
device changes channel. Pressing CHANNEL<br />
UP changes direction to forward again.<br />
5. Press and release ENTER to install the<br />
code.<br />
Most users will store VCR codes under the VCR button,<br />
Cable codes under CABLE, etc. If (for example) you<br />
want to store a VCR code under CABLE, first follow<br />
the procedure for Direct Code Entry (page 8) and press<br />
CABLE in step 2 of Direct Code Entry, then enter ANY<br />
VCR code in step 3 of Direct Code Entry. Then follow the<br />
steps above for Code Search.<br />
Note: If the device does not have a CHANNEL UP<br />
button, use PLAY (VCR only) or POWER instead.<br />
Code Search starts from the currently stored three digit<br />
number under that mode. Sometimes the first code<br />
that “works” with your device may only allow limited<br />
functionality (e.g. the MENU button might not work).<br />
There may be a code that performs more functions.<br />
Continue the code search process until the best code is<br />
found.<br />
8
Code Identification<br />
The Code Identification Feature allows you to<br />
identify the 4 digit library code stored under your<br />
device key. For example, if you want to find out<br />
what 4 digit code is stored under your TV device<br />
key, follow the six steps below:<br />
1. Press and hold the SETUP button until<br />
the red indicator stays on. Release the<br />
SETUP button.<br />
2. Press and release the desired mode<br />
button (TV, VCR, etc.). The red<br />
indicator blinks, then stays lit.<br />
3. Press and release the SETUP button.<br />
The red indicator blinks once and<br />
remains lit.<br />
4. To find the first digit for<br />
the code stored under the<br />
mode key pressed in step<br />
2, press each numeric<br />
key from 0-9 in turn. The<br />
number that causes the<br />
indicator light to blink is<br />
the first digit in your code.<br />
5. To find the second digit, repeat step 4.<br />
6. Repeat step 4 again to find the third and fourth<br />
digits. This time the red indicator turns off and<br />
stays off.<br />
9
Using Your <strong>Remote</strong><br />
SHIFT<br />
Press SHIFT (Setup) prior to the shifted key function<br />
e.g., for,<br />
MENU - press and release SHIFT (Setup) then<br />
MENU (Info).<br />
UP - press and release SHIFT then UP (Chan+).<br />
DOWN - press and release SHIFT then DOWN<br />
(Chan-).<br />
LEFT - press and release SHIFT then LEFT (Vol-).<br />
RIGHT - press and release SHIFT then RIGHT<br />
(Vol+).<br />
OK - press and release SHIFT then OK (Mute).<br />
EXIT - press and release SHIFT then EXIT<br />
(Sleep).<br />
The red indicator blinks for each keypress.<br />
Controlling Devices with Separate<br />
Power On and Off Buttons<br />
Some GE, RCA and ProScan models require<br />
you to press the device button for more than one<br />
second to turn the device on and the POWER<br />
button to turn the device off.<br />
Controlling Combo Devices<br />
Some Combo devices (e.g. TV/VCR, TV/DVD,<br />
DVD/VCR, etc.) will require you to set up two<br />
different Mode buttons to control both parts of the<br />
Combo device. For example, if you have a TV/<br />
DVD Combo, you might need to set up one code<br />
under the TV button to control the TV part AND a<br />
separate code (under any other Mode button) to<br />
control the DVD part.<br />
VCR/DVD Punch-Through<br />
This remote allows the 6 VCR transport buttons<br />
(i.e. PLAY, PAUSE, STOP, FF, REWIND, and<br />
REC) to Punch-Through control from any Mode<br />
programmed with TV, SAT or Cable codes to the<br />
last VCR, or DVD programmed Mode you used.<br />
This feature will not operate if the programmed<br />
TV, SAT or Cable code has its own VCR transport<br />
button control e.g. a TV Combo, SAT/PVR, etc.<br />
10
Using Your <strong>Remote</strong>, cont.<br />
Volume/Mute Control and Punch-<br />
Through<br />
This remote lets you select which device Mode<br />
controls your Volume/Mute buttons. The remote is<br />
initially set for all device Modes to use their own<br />
Volume/Mute control if present. If the programmed<br />
code has no Volume/Mute operation of its own<br />
then those buttons will punch-through control to<br />
the TV Mode device without needing to change to<br />
TV Mode.<br />
Setting ALL Volume/Mute Control to<br />
any one Mode<br />
This routine can set all Modes to “punch-through”<br />
to any one chosen Mode for Volume/Mute button<br />
control without the needing to change to that<br />
Mode.<br />
1. Press and hold the SETUP button until<br />
the red indicator turns on, then release<br />
the button.<br />
2. Press and hold the MUTE button until<br />
the red indicator blinks off, then release<br />
the button.<br />
3. Press and release the desired Mode button<br />
(TV, VCR, etc.) for Volume/Mute control,<br />
the red indicator blinks then stays on.<br />
4. Press and release the MUTE button<br />
and the red indicator turns off. The<br />
red indicator will blink rapidly for<br />
three seconds if the Mode you have<br />
selected has no Volume/Mute control.<br />
All other Modes will now punch-through to your<br />
chosen Mode for Volume/Mute control.<br />
11
Using Your <strong>Remote</strong>, cont.<br />
Setting any Mode to use its own<br />
Volume/Mute Control<br />
This routine can set any Mode to use only its own<br />
Volume/Mute control. Note - If your chosen Mode<br />
has no Volume/Mute functions of its own then the<br />
Volume/Mute buttons will do nothing.<br />
1. Press and hold the SETUP button until<br />
the red indicator turns on, then release<br />
the button.<br />
2. Press and hold the MUTE button until<br />
the red indicator blinks off, then release<br />
the button.<br />
3. Press and release the desired Mode<br />
button (TV, VCR, etc.), the red indicator<br />
blinks then stays on.<br />
4. Press and release the VOLUME-<br />
(Down) button, the red indicator blinks<br />
then stays on.<br />
5. Press and release the MUTE button and<br />
the red indicator turns off.<br />
Your chosen Mode will now use its own Volume/<br />
Mute control.<br />
12
Using Your <strong>Remote</strong>, cont.<br />
Sleep Function<br />
The Sleep button enables the remote to turn off<br />
your TV after a period of 1 to 99 minutes as shown<br />
below. The remote must be in TV mode to set a<br />
Sleep Timer. This feature works even if your TV<br />
does not have a sleep feature.<br />
1. Press and release the TV device button.<br />
2. Press and hold the Sleep button until<br />
the LED remains lit (about 2-3 seconds).<br />
3. Release the Sleep button.<br />
4. Press and release the<br />
numeric buttons (01-99)<br />
for the time required.<br />
The LED will blink off to<br />
indicate button press<br />
acceptance.<br />
5. TV Sleep Timer is set.<br />
6. Leave the <strong>Remote</strong> pointing towards the TV<br />
with an unobstructed path.<br />
To cancel the Sleep Timer, press and hold the<br />
Sleep button until the LED blinks, or press and<br />
release the Power button in TV mode.<br />
13
Troubleshooting<br />
<strong>Remote</strong> does not operate your product.<br />
• Press the mode button of the product you want<br />
to control.<br />
• Program the remote with a new code.<br />
• Install new batteries. (You might have to<br />
reprogram your remote after installing new<br />
batteries.)<br />
• <strong>Remote</strong> may not be compatible with your<br />
product.<br />
<strong>Remote</strong> does not operate some<br />
features of your product.<br />
• Sometimes a particular code might operate<br />
some features but not all. Try programing<br />
remote with a new code.<br />
• <strong>Remote</strong> may not be able to operate all features<br />
of your product or button names might be<br />
different than your product.<br />
Red Indicator blinks after you program<br />
a product code.<br />
• <strong>Remote</strong> did not accept the code.<br />
• Try to program the code again or try a different<br />
code.<br />
Lost Your Codes?<br />
Enclosed with this remote is a sticker on which<br />
you should write the codes for each device you<br />
programmed. Apply the sticker to the back of<br />
the remote or somewhere convenient for future<br />
reference.<br />
Also on the sticker is our website address which,<br />
should you lose your codes or programming<br />
instructions, you can find available on our website:<br />
www.jascoproducts.com<br />
14
90 Day Limited Warranty<br />
<strong>Jasco</strong> <strong>Products</strong> Company warrants this product<br />
to be free from manufacturing defects for a period<br />
of ninety days from the original date of consumer<br />
purchase. This warranty is limited to the repair<br />
or replacement of this product only and does not<br />
extend to consequential or incidental damage to<br />
other products that may be used with this unit.<br />
This warranty is in lieu of all other warranties<br />
express or implied. Some states do not allow<br />
limitations on how long an implied warranty lasts<br />
or permit the exclusion or limitation of incidental or<br />
consequential damages, so the above limitations<br />
may not apply to you. This warranty gives you<br />
specific rights, and you may also have other rights<br />
which vary from state to state. If unit should prove<br />
defective within the warranty period, return prepaid<br />
with dated proof of purchase to:<br />
<strong>Jasco</strong> <strong>Products</strong> Company<br />
10 E. Memorial Road<br />
Oklahoma City, OK 73114<br />
15
RM24993<br />
<strong>Universal</strong> <strong>Remote</strong><br />
<strong>Instruction</strong> <strong>Manual</strong><br />
<strong>Jasco</strong> <strong>Products</strong> Company<br />
10 E. Memorial Road<br />
Oklahoma City, OK 73114<br />
Made in China<br />
RM24993-2/07