

Skyjacker F565 Coil Spring Installation Instructions - Jegs
Skyjacker F565 Coil Spring Installation Instructions - Jegs
Skyjacker F565 Coil Spring Installation Instructions - Jegs

Create successful ePaper yourself
Turn your PDF publications into a flip-book with our unique Google optimized e-Paper software.
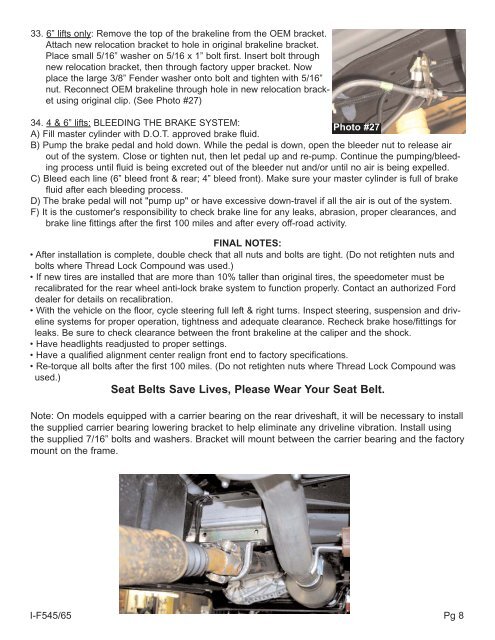
33. 6” lifts only: Remove the top of the brakeline from the OEM bracket.<br />
Attach new relocation bracket to hole in original brakeline bracket.<br />
Place small 5/16” washer on 5/16 x 1” bolt first. Insert bolt through<br />
new relocation bracket, then through factory upper bracket. Now<br />
place the large 3/8” Fender washer onto bolt and tighten with 5/16”<br />
nut. Reconnect OEM brakeline through hole in new relocation bracket<br />
using original clip. (See Photo #27)<br />
34. 4 & 6” lifts: BLEEDING THE BRAKE SYSTEM:<br />
Photo #27<br />
A) Fill master cylinder with D.O.T. approved brake fluid.<br />
B) Pump the brake pedal and hold down. While the pedal is down, open the bleeder nut to release air<br />
out of the system. Close or tighten nut, then let pedal up and re-pump. Continue the pumping/bleeding<br />
process until fluid is being excreted out of the bleeder nut and/or until no air is being expelled.<br />
C) Bleed each line (6” bleed front & rear; 4” bleed front). Make sure your master cylinder is full of brake<br />
fluid after each bleeding process.<br />
D) The brake pedal will not "pump up" or have excessive down-travel if all the air is out of the system.<br />
F) It is the customer's responsibility to check brake line for any leaks, abrasion, proper clearances, and<br />
brake line fittings after the first 100 miles and after every off-road activity.<br />
FINAL NOTES:<br />
• After installation is complete, double check that all nuts and bolts are tight. (Do not retighten nuts and<br />
bolts where Thread Lock Compound was used.)<br />
• If new tires are installed that are more than 10% taller than original tires, the speedometer must be<br />
recalibrated for the rear wheel anti-lock brake system to function properly. Contact an authorized Ford<br />
dealer for details on recalibration.<br />
• With the vehicle on the floor, cycle steering full left & right turns. Inspect steering, suspension and driveline<br />
systems for proper operation, tightness and adequate clearance. Recheck brake hose/fittings for<br />
leaks. Be sure to check clearance between the front brakeline at the caliper and the shock.<br />
• Have headlights readjusted to proper settings.<br />
• Have a qualified alignment center realign front end to factory specifications.<br />
• Re-torque all bolts after the first 100 miles. (Do not retighten nuts where Thread Lock Compound was<br />
used.)<br />
Seat Belts Save Lives, Please Wear Your Seat Belt.<br />
Note: On models equipped with a carrier bearing on the rear driveshaft, it will be necessary to install<br />
the supplied carrier bearing lowering bracket to help eliminate any driveline vibration. Install using<br />
the supplied 7/16” bolts and washers. Bracket will mount between the carrier bearing and the factory<br />
mount on the frame.<br />
I-F545/65<br />
Pg 8


