Ethernet Scale / Printer - Mettler Toledo
Ethernet Scale / Printer - Mettler Toledo
Ethernet Scale / Printer - Mettler Toledo

You also want an ePaper? Increase the reach of your titles
YUMPU automatically turns print PDFs into web optimized ePapers that Google loves.
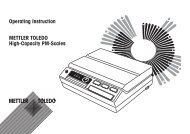
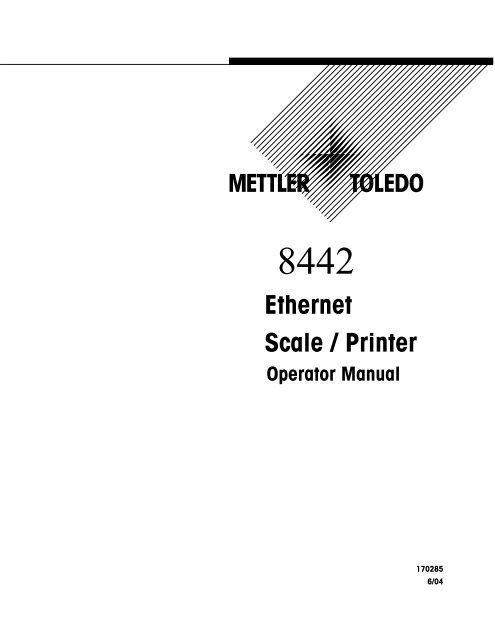
8442<br />
<strong>Ethernet</strong><br />
<strong>Scale</strong> / <strong>Printer</strong><br />
Operator Manual<br />
170285<br />
6/04
©<strong>Mettler</strong>-<strong>Toledo</strong>, Inc. 2004<br />
No part of this manual may be reproduced or transmitted in any form or by any means, electronic or<br />
mechanical, including photocopying and recording, for any purpose without the express written<br />
permission of <strong>Mettler</strong>-<strong>Toledo</strong>, Inc.<br />
U.S. Government Restricted Rights: This documentation is furnished with Restricted Rights.
INTRODUCTION<br />
Your new 8442 unit is among the finest precision digital computing scales available. It is simple to use and requires<br />
minimum maintenance. These scales come from proud tradition that has made METTLER TOLEDO the worldwide symbol of<br />
the highest quality in precision weighing equipment.<br />
Please read these instructions carefully. You will find operating the unit is very simple. In the unlikely event you should<br />
experience difficulties, contact your authorized METTLER TOLEDO SERVICE OFFICE listed in the yellow pages of your<br />
telephone directory.<br />
Properly used and maintained, your new scale will provide years of accurate weighing with will protect your profits and your<br />
customers. Please handle your scale as you would any fine electronic equipment. Information regarding METTLER TOLEDO<br />
Technical Training may be obtained by writing to:<br />
METTLER TOLEDO<br />
1900 Polaris Parkway<br />
Columbus, Ohio 43240<br />
(614) 438-4511<br />
FCC Notice<br />
This device complies with Part 15 of the FCC Rules and the Radio Interference Requirements of the Canadian<br />
Department of Communications. Operation is subject to the following conditions: (1) this device may not cause<br />
harmful interference, and (2) this device must accept any interference received, including interference that<br />
may cause undesired operation.<br />
This equipment has been tested and found to comply with the limits for a Class A digital device, pursuant to<br />
Part 15 of FCC Rules. These limits are designed to provide reasonable protection against harmful interference<br />
when the equipment is operated in a commercial environment. This equipment generates, uses, and can<br />
radiate radio frequency energy and, if not installed and used in accordance with the instruction manual, may<br />
cause harmful interference to radio communications. Operation of this equipment in a residential area is likely<br />
to cause harmful interference in which case the user will be required to correct the interference at his own<br />
expense.<br />
METTLER TOLEDO RESERVES THE RIGHT TO MAKE REFINEMENTS OR<br />
CHANGES WITHOUT NOTICE.
PRECAUTIONS<br />
READ this manual BEFORE<br />
operating or servicing this<br />
equipment.<br />
FOLLOW these instructions<br />
carefully.<br />
SAVE this manual for future<br />
reference.<br />
DO NOT allow untrained<br />
personnel to operate, clean,<br />
inspect, maintain, service, or<br />
tamper with this equipment.<br />
ALWAYS DISCONNECT this<br />
equipment from the power<br />
source before cleaning or<br />
performing maintenance.<br />
CALL METTLER TOLEDO for parts,<br />
information, and service.
Installation<br />
CONTENTS<br />
1 Introduction..................................................................................................1-1<br />
GENERAL DESCRIPTION .......................................................................................................... 1-1<br />
COMPONENT AND CONTROL LOCATIONS ...................................................................................... 1-2<br />
DISPLAY ............................................................................................................................ 1-2<br />
KEYBOARD ......................................................................................................................... 1-3<br />
2 Installation...................................................................................................2-1<br />
LEVELING........................................................................................................................... 2-1<br />
POWER ON......................................................................................................................... 2-1<br />
LABEL INSTALLATION ............................................................................................................. 2-2<br />
3 Unit Setup....................................................................................................3-1<br />
SETUP MODE MENU NAVIGATION.............................................................................................. 3-1<br />
Navigating within the Setup Menu............................................................................................... 3-1<br />
Setup Mode Menu...................................................................................................................... 3-1<br />
SET TIME AND DATE.............................................................................................................. 3-3<br />
PLU PRESET....................................................................................................................... 3-4<br />
Layer 1 and 2 Selection.............................................................................................................. 3-4<br />
Programming Preset Key ............................................................................................................ 3-4<br />
MARQUEE .......................................................................................................................... 3-5<br />
Setting Message ........................................................................................................................ 3-5<br />
LABEL FORMAT .................................................................................................................... 3-6<br />
Default Label Format .................................................................................................................. 3-6<br />
BARCODE........................................................................................................................... 3-7<br />
ENABLE MODIFY FUNCTIONS.................................................................................................... 3-8<br />
VERIFY LABELS .................................................................................................................... 3-9<br />
PROGRAMMING PASSWORDS .................................................................................................. 3-10<br />
4 Operating the <strong>Scale</strong> ......................................................................................4-1<br />
BASIC FUNCTIONS ................................................................................................................ 4-1<br />
Zero <strong>Scale</strong>................................................................................................................................. 4-1<br />
Label Feed................................................................................................................................. 4-1<br />
Calling PLU’s and Printing .......................................................................................................... 4-2<br />
Tare .......................................................................................................................................... 4-4<br />
MANUAL OVERRIDE FUNCTIONS ................................................................................................ 4-5<br />
Tare Override............................................................................................................................. 4-5
Price Override............................................................................................................................ 4-7<br />
Extra Text/Label Number ............................................................................................................ 4-8<br />
Net Weight/Count Override ......................................................................................................... 4-9<br />
Shelf Life/Use By Override ........................................................................................................ 4-10<br />
5 Database Setup............................................................................................5-1<br />
GENERAL DESCRIPTION .......................................................................................................... 5-1<br />
Memory Maximum Capacities .................................................................................................... 5-1<br />
Database Functions .................................................................................................................... 5-1<br />
DATABASE EDIT.................................................................................................................... 5-2<br />
PLU........................................................................................................................................... 5-2<br />
Extra Text.................................................................................................................................. 5-6<br />
Special Message........................................................................................................................ 5-7<br />
PLU QUICK CHANGE............................................................................................................. 5-8<br />
6 Maintenance ................................................................................................6-1<br />
EXTERNAL CLEANING ............................................................................................................. 6-1<br />
CLEANING PRINTHEAD ........................................................................................................... 6-2<br />
7 Label Formats ..............................................................................................7-1<br />
DEFAULT LABEL FORMATS ....................................................................................................... 7-1<br />
8 Error Messages ............................................................................................8-1<br />
WARNING MESSAGE ............................................................................................................. 8-1
Chapter 1: Introduction<br />
1 Introduction<br />
General Description<br />
This manual covers the operating instructions for the model 8442-1611. The<br />
METTLER TOLEDO 8442 is a digital computing scale with an integrated thermal<br />
label printer. The 8442 is an <strong>Ethernet</strong> scale, which has a database containing<br />
PLU’s, Extra Text and etc. A PC program (SPCT) is available to download or upload<br />
the database from the PC. The PLU memory can handle up to 5060 items.<br />
1-1
Chapter 1: Introduction<br />
Component and<br />
Control Locations<br />
Display<br />
Tower<br />
Platter<br />
Preset Keypad<br />
<strong>Printer</strong><br />
Numeric Keypad<br />
Display<br />
The zero cursor indicates that the scale<br />
is within the zero range, either net or<br />
gross zero. If the display does not read<br />
0.00 at ready, press the zero key.<br />
WEIGHT(lb)<br />
Indicates that a tare has been<br />
entered and the weight is NET.<br />
UNIT PRICE($/lb) TOTAL PRICE($)<br />
The top display shows the normal<br />
weight, unit price and total price.<br />
Indicates Prepack mode<br />
has been selected.<br />
TARE(lb)<br />
Capacity:30x0.01 lb<br />
The lower display shows the PLU description,<br />
marquee message and the menu name etc.<br />
Preset layer 1 indicator.<br />
Preset layer 2 indicator.<br />
1-2
Chapter 1: Introduction<br />
Keyboard<br />
The keyboard consists of a membrane switch pad with an overlay that has raised<br />
domes over the switch positions to provide tactile feedback and an audible tone.<br />
The 28 keys on the right keypad are used for entering basic scale functions.<br />
Used to scroll through<br />
possible selections, including<br />
YES/NO selections.<br />
Enters the quantity<br />
of PLU labels to<br />
print in batch mode.<br />
Overrides the<br />
Special Message<br />
of a called PLU.<br />
Retains the PLU in memory<br />
for continued transactions<br />
until CLEAR is pressed.<br />
Accesses Setup Mode<br />
and Database.<br />
Overrides the Sell<br />
By/Use By dates<br />
of the called PLU.<br />
Backs up in<br />
the Menu.<br />
Overrides the Extra Text<br />
number or label format for<br />
the called PLU.<br />
Sets weight<br />
value to zero.<br />
Void key is not<br />
used at this time.<br />
Clears incorrect entries and<br />
messages from display.<br />
Overrides quantity/count of Standard<br />
Pack/By Count PLU’s. Overrides the net<br />
weight field of a Standard Pack PLU.<br />
Manually overrides the<br />
price of the called PLU.<br />
Overrides programmed tare of a<br />
called by-weight PLU. Enter the<br />
tare numerically (keyboard tare)<br />
or place an item on the platter<br />
and press the tare key twice.<br />
Accepts displayed<br />
data or displayed<br />
selection.<br />
Prints a label<br />
and feeds a<br />
blank label.<br />
Mem key is not<br />
used at this time.<br />
1-3
Chapter 1: Introduction<br />
The 77 keys on the left keypad can be programmed as direct access keys (Presets).<br />
There are two levels to the preset keys for a total of 154 PLU Presets. The Preset<br />
keys should be configured first before being used. Please refer to section 3 ‘PLU<br />
Preset’ for programming the Preset keys.<br />
To recall a PLU simply select the proper level and press the desired preset.<br />
The following function keys (located under the Preset insert) can be used as word<br />
processing keys while entering the PLU description, store address, Extra Text and<br />
etc.<br />
Alt key<br />
(not used)<br />
Clears the<br />
whole text.<br />
Backspace deletes<br />
previously typed<br />
characters<br />
Space keys.<br />
Moves cursor to<br />
the beginning of<br />
the line.<br />
Moves cursor to<br />
the end of the line.<br />
Press Shift key once for<br />
momentary shift or press<br />
twice quickly for Shift-lock.<br />
Deletes the<br />
selected character.<br />
Carriage return<br />
during extra text<br />
entry only.<br />
Centers text.<br />
Navigation keys<br />
for text editor.<br />
Switch between insert mode<br />
and overwrite mode.<br />
1-4
Chapter 2: Installation<br />
2 Installation<br />
Leveling<br />
Adjust the four feet until the bubble, located under the scale platter, is in the center of<br />
the bubble level. Then adjust the foot locks until the feet are secure.<br />
Bubble Level<br />
Correct<br />
Incorrect<br />
Power On<br />
Note: If unit has been stored or transported in below freezing temperatures, allow the<br />
unit to warm up to room temperature before turning on AC power.<br />
Remove the power cord from the package box. Install the power cord in the<br />
recepticle on the bottom of the scale. Connect the power cord to AC power. Set the<br />
power switch to the ON position. Allow at least 30 minutes warm-up time before<br />
initial calibration.<br />
2-1
Chapter 2: Installation<br />
Label Installation<br />
Open the plastic door on the right side of the scale.<br />
Slide out the printer.<br />
Press the trigger to open the printer head.<br />
Install the labels according to the instruction legend on the printer frame. Secure the<br />
liner on the take-up spool by spinning the spool clockwise.<br />
2-2
Chapter 2: Installation<br />
Close the printer head gently, until it clicks.<br />
Slide the printer into the scale. Close the plastic door.<br />
Press the PRINT key to bring the label into the start position.<br />
Note: Please refer to section 3 ‘Label Format’ to set the proper label format.<br />
2-3
Chapter 2: Installation<br />
FOR YOUR NOTES<br />
2-4
Chapter 3: Unit Setup<br />
3 Unit Setup<br />
Setup Mode Menu Navigation<br />
Navigating within<br />
the Setup Menu<br />
【ENTER】Selects displayed item and moves to sub menu level, accepts the<br />
variable in the list.<br />
【ESC】 Backs up one menu level and does not accept change.<br />
【↑】 Moves Up to next menu item, will wrap around from the last entry to the first.<br />
【↓】 Moves Down to next menu item, will wrap around to end from the first entry.<br />
Note: The scale is waiting for data input when the display shows a question mark ‘?’<br />
after the menu prompt.<br />
Setup Mode Menu<br />
To enter setup mode, press the SETUP MODE key. Press the ESC key to return to the<br />
first option in the current menu. Press ESC key again to return to the previous menu.<br />
To exit out of SETUP mode, press ESC until the display shows normal weigh state.<br />
SETUP MODE<br />
DATABASE<br />
PRINT REPORTS<br />
UNIT SETUP<br />
SERVICE MODE<br />
PASSWORD SETUP<br />
3-1
Database Print Reports Unit Setup Service Mode Password Setup<br />
Quick PLU Change Verify Labels PLU Presets Initialize Database Change Password: Database<br />
Quick Price Change Assign Presets Calibration Change Password: Unit<br />
Quick Tare Change Delete All Presets Calibrate Change Password: Service<br />
Quick Shelf Life Change Default Label Format View Expanded Weight<br />
Quick Use By Change Service By-Weight Reset RAM<br />
Quick ET Number Service By-Count Label <strong>Printer</strong> Setup<br />
Quick Label Number Service Std Pack Resistance<br />
Quick Message Number Service Gen Merch Print Speed<br />
Database: PLU Prepack By-Weight <strong>Printer</strong> Dot Density<br />
Edit PLU Host Label Delivery<br />
Copy PLU Host Type Label Backup<br />
Database: ET Host Baud Rate Eject Length<br />
Edit Extra Text Host Data Bits Label Takup Sensor<br />
Copy Extra Text Host Parity <strong>Printer</strong> Test<br />
Database: Spec Message Host Stopbits Label Gap Test<br />
Edit Special Message Host Timeout MS Function Tests<br />
Copy Special Message Network Display Test<br />
Database : Delete IP Address <strong>Printer</strong> Test<br />
Delete A PLU Subnet Keyboard Test<br />
Delete A ET Gateway Contrast Adjust<br />
Delete A Special Message MAC Beeper<br />
Delete ALL PLU Idle Time<br />
Delete ALL ET Store Information<br />
Delete ALL Special Message Marquee<br />
Bar Code Settings<br />
Bar Code Number<br />
Bar Type<br />
Define Bar Code Digits<br />
PLU Setting<br />
Default Mode<br />
Print After Motion<br />
Set Time Date<br />
Set Date<br />
Set Time<br />
Year Format<br />
Time Format<br />
Date Separator<br />
Assign Group Name<br />
Enable Function Keys<br />
Enable Prepack Key<br />
Enable Void Key<br />
Enable Price Key<br />
Enable Tare Key<br />
Enable ET Key<br />
Enable CNT/WT Key<br />
Enable Shelf Key<br />
Enable Spec MSG Key<br />
Enable Use By Key<br />
Enable Label Key<br />
3-2
Chapter 3: Unit Setup<br />
Set Time and Date<br />
Press the SETUP MODE key to enter setup mode.Now the display displys<br />
“DATABASE”. Use the UP and DOWN arrow keys to toggle between selections. Press<br />
ENTER to confirm your selections. When finished press the ESC key to exit.<br />
0.00 0.00 0.00<br />
READY 01/17/2004 15:30<br />
【SETUP MODE】<br />
SET TIME: 15:30:25<br />
【ENTER】<br />
DATABASE<br />
HOUR?: 15<br />
【↓】【↓】<br />
Input the correct HOUR, MINUTE, and<br />
SECOND and confirm each with【ENTER】<br />
UNIT SETUP<br />
【ENTER】<br />
PLU PRESETS<br />
【↑】【↑】【↑】<br />
SET TIME DATE<br />
SET TIME: 16:35:25<br />
【↓】<br />
YEAR FORMAT: YYYY<br />
Press【ENTER】and select between<br />
YY or YYYY. Confirm with【ENTER】【↓】<br />
【ENTER】<br />
SET DATE: 01/17/2004<br />
【ENTER】<br />
YEAR?: 4<br />
Input the correct YEAR (last 2 digits),<br />
MONTH, and DAY and confirm each with【ENTER】<br />
SET DATE: 01/18/2004<br />
TIME FORMAT: 12<br />
Press【ENTER】and select between<br />
12 or 24. Confirm with【ENTER】【↓】<br />
DATE SEPARATOR: /<br />
Press【ENTER】and select between<br />
/ or -. Confirm with【ENTER】<br />
Press【ESC】【ESC】【ESC】to exit.<br />
0.00 0.00 0.00<br />
READY 01/18/2004 16:35<br />
【↓】<br />
3-3
Chapter 3: Unit Setup<br />
PLU Preset<br />
Layer 1 and 2 Selection<br />
The 8442 has 2 layers of preset keys doubling the number of available presets.<br />
During normal operation you can switch between Layer 1 and Layer 2 by pressing<br />
the UP【↑】arrow key. The prompt “READY1” during normal operation indicates that<br />
preset layer 1 has been selected. The prompt “READY2” indicates that preset layer 2<br />
has been selected.<br />
Programming Preset Key<br />
Follow the instructions below for programming the preset keys.<br />
0.00 0.00 0.00<br />
READY 01/17/2004 15:30<br />
【SETUP MODE】<br />
DATABASE<br />
【↓】【↓】<br />
UNIT SETUP<br />
【ENTER】<br />
PLU PRESETS<br />
【ENTER】<br />
ASSIGN PRESETS<br />
【ENTER】<br />
L1: PLU-KEY<br />
Press【↑】to select layer.<br />
L2: PLU-KEY<br />
【PRESET KEY】<br />
PLU NUMBER?: 0<br />
Input the PLU number,<br />
then confirm with 【ENTER】<br />
L2: PLU-KEY<br />
【ESC】【ESC】【ESC】【ESC】<br />
0.00 0.00 0.00<br />
READY 01/17/2004 15:30<br />
3-4
Chapter 3: Unit Setup<br />
Marquee<br />
A marquee is a scrolling message that can be displayed on the customer display<br />
after the scale has been idle for 5 seconds.<br />
Setting Message<br />
After toggling to MARQUEE, press the ENTER. Input the marquee and confirm with<br />
ENTER key.<br />
0.00 0.00 0.00<br />
READY 01/17/2004 15:30<br />
【SETUP MODE】<br />
DATABASE<br />
【↓】【↓】<br />
UNIT SETUP<br />
【ENTER】<br />
PLU PRESETS<br />
【↓】【↓】【↓】【↓】【↓】<br />
MARQUEE<br />
【ENTER】<br />
L-001 C-01<br />
Type the desired Marquee,<br />
then confirm with【ENTER】<br />
MARQUEE<br />
【ESC】【ESC】<br />
0.00 0.00 0.00<br />
READY 01/17/2004 15:30<br />
3-5
Chapter 3: Unit Setup<br />
Label Format<br />
Default Label Format<br />
The scale will use one of the default label formats if label format number zero ‘0’ is<br />
selected in the PLU. Custom label formats are 1-20 and standard label formats are<br />
21-49.<br />
0.00 0.00 0.00<br />
READY 01/17/2004 15:30<br />
【SETUP MODE】<br />
LABEL NUMBER: 20<br />
【↓】<br />
DATABASE<br />
PACK DATE:<br />
MM/DD/YYYY<br />
【↓】【↓】<br />
【ENTER】<br />
UNIT SETUP<br />
PACK DATE?:<br />
MM/DD/YYYY<br />
PLU PRESETS<br />
【ENTER】<br />
Press【↓】to select between<br />
MM/DD/YYYY, DD/MM/YYYY, DD/MMM/YYYY<br />
and nopackage. Then confirm with【ENTER】<br />
【↓】<br />
PACK DATE:<br />
MM/DD/YYYY<br />
DEFAULT LABEL FORMAT<br />
【ENTER】<br />
【↓】<br />
Repeat the last 3 steps for Sell-By and Use-By date.<br />
Press【ESC】at any time to save changes.<br />
SERVICE BY-WEIGHT<br />
SAVE CHANGES?<br />
YES<br />
Press【↓】to toggle between<br />
SERVICE BY-WEIGHT, SERVICE BY-COUNT,<br />
SERVICE STD PACK, SERVICE GEN MERCH, and<br />
PREPACK BY-WEIGHT, then confirm with【ENTER】<br />
LABEL NUMBER: 1<br />
【ENTER】<br />
Press【↓】to select between Yes<br />
and No, then confirm with【ENTER】<br />
SERVICE BY-WEIGHT<br />
【ESC】【ESC】【ESC】<br />
0.00 0.00 0.00<br />
READY 01/17/2004 15:30<br />
LABEL NUMBER? 1<br />
Input new label number,<br />
then confirm with【ENTER】<br />
3-6
Chapter 3: Unit Setup<br />
Barcode<br />
There are 8 configurable barcodes available. Number 1 is the barcode used for<br />
default label formats. 2-8 can be used in custom label formats.<br />
0.00 0.00 0.00<br />
READY 01/17/2004 15:30<br />
【SETUP MODE】<br />
BAR TYPE:<br />
【↓】<br />
UPC A<br />
DATABASE<br />
【↓】【↓】<br />
UNIT SETUP<br />
【ENTER】<br />
PLU PRESETS<br />
【↑】【↑】【↑】【↑】【↑】<br />
DEFINE BAR CODE DIGITS<br />
BAR CODE DIGITS<br />
Press【ENTER】, then input the<br />
variables for each digit of the<br />
barcode type using the key below.<br />
Then confirm with【ENTER】.<br />
【ESC】【ESC】【ESC】【ESC】<br />
0.00 0.00 0.00<br />
READY 01/17/2004 15:30<br />
BARCODE SETTINGS<br />
【ENTER】<br />
BARCODE NUMBER: 1<br />
Press【↓】to select barcode<br />
number (1-8) to edit.<br />
BARCODE NUMBER: 5<br />
BAR TYPE:<br />
BAR TYPE?:<br />
【ENTER】<br />
【ENTER】<br />
EAN<br />
EAN<br />
Press【↓】to select barcode<br />
type between EAN and UPC A.<br />
Then confirm with【ENTER】.<br />
Key:<br />
N = Item Number<br />
C = Price Check Digit<br />
$ = Total Price<br />
# = Weight<br />
X = Symbol Check Digit<br />
Examples:<br />
0NNNNNNNNNNX (UPC, Ten digit Item Number)<br />
2NNNNNC$$$$X (UPC, 5-D Item/Price Check Digit/4-D Price)<br />
2NNNNN0$$$$X (UPC, 5-D Item/Zero Fixed/4-D Price)<br />
2NNNNNN$$$$X (UPC, 6-D Item/No Price Check/4-D Price)<br />
2NNNNN$$$$$X (UPC, 5-D Item/No Price Check/5-D Price)<br />
2NNNNNC####X (UPC, 5-D Item/Wgt Check Digit/4-D Wgt)<br />
2NNNNN0####X (UPC, 5-D Item/Zero Fixed/4-D Wgt)<br />
2NNNNNN####X (UPC, 6-D Item/No Price Check/4-D Wgt)<br />
2NNNNN#####X (UPC, 5-D Item/No Price Check/5-D Wgt)<br />
21NNNNNN$$$$X (EAN, 6-D Item/4-D Price)<br />
21NNNNN$$$$$X (EAN, 5-D Item/5-D Price)<br />
21NNNN$$$$$$X (EAN, 4-D Item/6-D Price)<br />
21NNNNNC$$$$X (EAN, 5-D Item/Price Check Digit/4-D Price)<br />
21NNNNC$$$$$X (EAN, 4-D Item/Price Check Digit/5-D Price)<br />
21NNNNN#####X (EAN, 5-D Item/5-D Wgt)<br />
21NNNNC#####X (EAN, 4-D Item/Wgt Check Digit/5-D Wgt)<br />
3-7
Chapter 3: Unit Setup<br />
Enable Modify Functions<br />
Disabling these functions here makes them unavailable during normal operation.<br />
0.00 0.00 0.00<br />
READY 01/17/2004 15:30<br />
【SETUP MODE】<br />
DATABASE<br />
【↓】【↓】<br />
ENABLE FUNCTION KEYS<br />
ENABLE PREPACK KEY<br />
ENABLE VOID KEY<br />
ENABLE PRICE KEY<br />
UNIT SETUP<br />
【ENTER】<br />
PLU PRESETS<br />
Press【↑】<br />
ENABLE FUNCTION KEYS<br />
【ENTER】<br />
ENABLE TARE KEY<br />
ENABLE ET KEY<br />
ENABLE CT/WT KEY<br />
ENABLE SHELF KEY<br />
ENABLE SPEC MSG KEY<br />
ENABLE PREPACK KEY:<br />
【ENTER】<br />
ENABLE PREPACK KEY?<br />
YES<br />
YES<br />
ENABLE USE BY KEY<br />
ENABLE LABEL KEY<br />
Press 【↓】 to select YES or NO,<br />
then confirm with 【ENTER】.<br />
ENABLE PREPACK KEY:<br />
NO<br />
Press 【↓】to select another<br />
function then repeat previous two steps.<br />
When finished press【ESC】【ESC】.<br />
0.00 0.00 0.00<br />
READY 01/17/2004 15:30<br />
3-8
Chapter 3: Unit Setup<br />
Verify Labels<br />
A record of the PLU files can be printed by the scale using this method.<br />
0.00 0.00 0.00<br />
READY 01/17/2004 15:30<br />
DATABASE<br />
【SETUP MODE】<br />
【↓】<br />
PRINT REPORTS<br />
VERIFY LABELS<br />
【ENTER】<br />
【ENTER】<br />
FIRST PLU? 0<br />
Select first PLU to start printing,<br />
then confirm with【ENTER】<br />
LAST PLU? 99<br />
START VERIFY?<br />
take label off<br />
PRINT REPORTS<br />
Select last PLU to print,<br />
then confirm with【ENTER】<br />
YES<br />
Press 【↓】to select YES or NO,<br />
then confirm with 【ENTER】.<br />
Remove labels until printer is<br />
done printing.<br />
【ESC】<br />
0.00 0.00 0.00<br />
READY 01/17/2004 15:30<br />
3-9
Chapter 3: Unit Setup<br />
Programming<br />
Passwords<br />
Use the following procedure to program the DATABASE, UNIT, and SERVICE passwords.<br />
The default for each of these passwords is ZERO (0) for no password enabled.<br />
0.00 0.00 0.00<br />
READY 01/17/2004 15:30<br />
【SETUP MODE】<br />
DATABASE<br />
【↑】<br />
PASSWORD SETUP<br />
【ENTER】<br />
CHANGE PASSWORD: DATABASE<br />
【ENTER】<br />
NEW PASSWORD?<br />
CONFIRM PASSWORD?<br />
Input the password again<br />
and confirm with【ENTER】<br />
CHANGE PASSWORD: DATABASE<br />
Press【↓】to toggle between<br />
DATABASE, UNIT, and SERVICE,<br />
then confirm with【ENTER】<br />
CHANGE PASSWORD: UNIT<br />
Repeat last three steps until<br />
complete. Then press【ESC】<br />
0.00 0.00 0.00<br />
READY 01/17/2004 15:30<br />
Input the numeric password<br />
and confirm with【ENTER】<br />
3-10
Chapter 4: Operating the <strong>Scale</strong><br />
4 Operating the <strong>Scale</strong><br />
Basic Functions<br />
Zero <strong>Scale</strong><br />
This scale is equipped with automatic zeroing software which compensates for small<br />
changes in weight. This software will not activate when a package tare has been<br />
taken. After cleaning the debris from the platter with the scale on, the display can<br />
read :<br />
• a negative value<br />
• "_ _ _ _ _" segments can be lit,<br />
• or the weight display will be blank.<br />
Solution :<br />
Press the ZERO key<br />
If the message appears again or the weight change is too much, turn the scale off<br />
and back on again with the main power switch.<br />
Label Feed<br />
Pressing the PRINT key in READY mode will initiate a label feed. This will help the<br />
scale adjust the label position after new labels have been installed.<br />
4-1
Chapter 4: Operating the <strong>Scale</strong><br />
Calling PLU’s and Printing<br />
Call By Weight PLU’s<br />
in Service Mode<br />
DISPLAY & OPERATON<br />
0.00 0.00 0.00<br />
READY 01/17/2004 15:30<br />
0.87 0.00 0.00<br />
READY 01/17/2004 15:30<br />
1234<br />
0.87 0.00 0.00<br />
PLU? 1234<br />
ENTER<br />
0.87 11.99 10.34<br />
BEEF STEAK 1234<br />
PRINT<br />
DESCRIPTION<br />
Place the item to be weighed on the<br />
platter.<br />
Enter the PLU number on the<br />
keyboard.<br />
Press the ENTER key to retrieve the<br />
PLU record.<br />
Press the PRINT key. By pressing this<br />
key, a label will be printed.<br />
Call a By Weight PLU<br />
in Prepack Mode<br />
DISPLAY & OPERATON<br />
0.00 0.00 0.00<br />
READY 01/17/2004 15:30<br />
PRE-<br />
PACK<br />
0.00 0.00 0.00<br />
READY 01/17/2004 15:30<br />
1234<br />
0.00 0.00 0.00<br />
PLU? 1234<br />
ENTER<br />
0.00 11.99 0.00<br />
BEEF STEAK 1234<br />
0.87 11.99 10.34<br />
BEEF STEAK 1234<br />
DESCRIPTION<br />
Press the PREPACK MODE key. The<br />
prepack indicator will be lit.<br />
Enter the PLU number on the<br />
keyboard.<br />
Press the ENTER key to retrieve the<br />
PLU record.<br />
Place the item to be weighed on the<br />
platter.<br />
A label will be printed automatically<br />
as the weight settles on the platter.<br />
4-2
Call By Count PLU’s<br />
DISPLAY & OPERATON<br />
0.00 0.00 0.00<br />
READY 01/17/2004 15:30<br />
567<br />
0.00 0.00 0.00<br />
PLU? 567<br />
ENTER<br />
5PCS 5.55 5.55<br />
CUCUMBERS 567<br />
CNT/WT<br />
CHANGE<br />
5PCS 5.55 5.55<br />
COUNT NUMBER(PCS)? 5<br />
10 ENTER<br />
10PCS 5.55 11.10<br />
CUCUMBERS 567<br />
PRINT<br />
Chapter 4: Operating the <strong>Scale</strong><br />
DESCRIPTION<br />
Enter the PLU number on the<br />
keyboard.<br />
Press the ENTER key to retrieve the<br />
PLU record.<br />
Press the CNT/WT CHANGE key to<br />
enter a different count.<br />
Enter the quantity and press ENTER.<br />
Press the PRINT key. By pressing<br />
this key, a label will be printed.<br />
Batch Printing<br />
DISPLAY & OPERATON<br />
0.00 0.00 0.00<br />
READY 01/17/2004 15:30<br />
567<br />
0.00 0.00 0.00<br />
PLU? 567<br />
ENTER<br />
5PCS 5.55 5.55<br />
CUCUMBERS 567<br />
CNT/WT<br />
CHANGE<br />
5PCS 5.55 5.55<br />
COUNT NUMBER(PCS)? 5<br />
10<br />
10PCS 5.55 11.10<br />
CUCUMBERS 567<br />
QTY<br />
LABELS<br />
DESCRIPTION<br />
Enter the PLU number on the<br />
keyboard.<br />
Press ENTER key to retrieve the PLU<br />
record.<br />
Press the CNT/WT CHANGE key to<br />
enter a different count.<br />
Enter the quantity and press ENTER.<br />
Press the QTY LABELS key.<br />
QUANTITY OF LABELS 0<br />
5<br />
PRINT<br />
Input the label quantity.<br />
Press PRINT key. By pressing this<br />
key, all the labels will be printed.<br />
4-3
Chapter 4: Operating the <strong>Scale</strong><br />
Call PLU with<br />
a Preset Key<br />
DISPLAY & OPERATON<br />
0.00 0.00 0.00<br />
READY 01/17/2004 15:30<br />
0.87 0.00 0.00<br />
READY 01/17/2004 15:30<br />
【preset key】<br />
0.87 11.99 10.34<br />
BEEF STEAK 1234<br />
PRINT<br />
DESCRIPTION<br />
Place the item to be weighed on the<br />
platter.<br />
Press the desired PLU preset key.<br />
Press the PRINT key. By pressing this<br />
key, a label will be printed.<br />
Tare<br />
Manual Tare (with PLU)<br />
• Select the PLU and press ENTER.<br />
• Place the empty tray on platter.<br />
• Press the TARE key twice.<br />
• Put the item on the tray.<br />
• Press PRINT to register the transaction.<br />
• The tare weight is cleared from the scale when the transaction has printed.<br />
PLU Stored Tare<br />
The weight display will show a negative tare value when a PLU with a stored tare is<br />
called and the platter is empty. Net will also appear on the display.<br />
Manual Clear Tare<br />
Remove the item and the tray from the platter and press TARE twice.<br />
4-4
Chapter 4: Operating the <strong>Scale</strong><br />
Manual Override Functions<br />
Tare Override<br />
Override Tare with<br />
new Tare Number<br />
DISPLAY & OPERATON<br />
0.00 0.00 0.00<br />
READY 01/17/2004 15:30<br />
0.87 0.00 0.00<br />
READY 01/17/2004 15:30<br />
1234<br />
0.87 0.00 0.00<br />
PLU? 1234<br />
ENTER<br />
0.87 11.99 10.34<br />
BEEF STEAK 1234<br />
TARE<br />
DESCRIPTION<br />
Place the item to be weighed on the<br />
platter.<br />
Enter the PLU number on the<br />
keyboard.<br />
Press the ENTER key to retrieve the<br />
PLU record.<br />
Press the TARE key<br />
0.87 0.00 0.00<br />
TARE? 0.05<br />
keyboard and press ENTER.<br />
2 ENTER Enter the new tare value on the<br />
0.90 11.99 10.34<br />
BEEF STEAK 1234<br />
Press PRINT key. By pressing this<br />
PRINT<br />
key, a label will be printed.<br />
4-5
Chapter 4: Operating the <strong>Scale</strong><br />
Platter Tare<br />
DISPLAY & OPERATON<br />
0.00 0.00 0.00<br />
READY 01/17/2004 15:30<br />
DESCRIPTION<br />
Place the item to tare on the platter.<br />
0.97 0.00 0.00<br />
READY 01/17/2004 15:30<br />
1234<br />
0.97 0.00 0.00<br />
PLU? 1234<br />
ENTER<br />
0.97 11.99 11.63<br />
BEEF STEAK 1234<br />
TARE TARE<br />
0.00 11.99 0.00<br />
BEEF STEAK<br />
0.92 11.99 11.03<br />
BEEF STEAK 1234<br />
PRINT<br />
Enter the PLU number on the<br />
keyboard.<br />
Press the ENTER key to retrieve the<br />
PLU record.<br />
Press TARE key twice.<br />
Place the item to be weighed on the<br />
platter.<br />
Press PRINT key to print a label with<br />
platter tare.<br />
4-6
Chapter 4: Operating the <strong>Scale</strong><br />
Price Override<br />
Override the Unit Price<br />
of a Called PLU<br />
DISPLAY & OPERATON<br />
0.00 0.00 0.00<br />
READY 01/17/2004 15:30<br />
0.87 0.00 0.00<br />
READY 01/17/2004 15:30<br />
1234<br />
0.87 0.00 0.00<br />
PLU? 1234<br />
ENTER<br />
0.87 11.99 10.34<br />
BEEF STEAK 1234<br />
PRICE<br />
CHANGE<br />
0.87 11.99 10.34<br />
PRICE? 11.99<br />
1234 ENTER<br />
0.87 11.00 9.57<br />
BEEF STEAK 1234<br />
PRINT<br />
DESCRIPTION<br />
Place the item to be weighed on the<br />
platter.<br />
Enter the PLU number on the<br />
keyboard.<br />
Press the ENTER key to retrieve the PLU<br />
record.<br />
Press PRICE CHANGE key.<br />
Enter the new unit price and press<br />
ENTER.<br />
Press PRINT key to print a label with<br />
new price.<br />
Note: The unit price can be overridden using the PRICE CHANGE key only when the<br />
"OPEN PRICE” option of the called PLU is set to "YES". If it is set to “NO” and<br />
the PRICE CHANGE key is pushed the scale will beep but no price change will<br />
be allowed.<br />
4-7
Chapter 4: Operating the <strong>Scale</strong><br />
Extra Text/Label Number<br />
Override the Extra Text or the<br />
Default Label Format of the<br />
Called PLU<br />
DISPLAY & OPERATON<br />
0.00 0.00 0.00<br />
READY 01/17/2004 15:30<br />
0.87 0.00 0.00<br />
READY 01/17/2004 15:30<br />
1234<br />
0.87 0.00 0.00<br />
PLU? 1234<br />
ENTER<br />
0.87 11.99 10.34<br />
BEEF STEAK 1234<br />
ET<br />
CHANGE<br />
0.87 0.00 0.00<br />
EXT TXT NUMBER 12<br />
34 ENTER<br />
0.87 0.00 0.00<br />
LABEL NUMBER 25<br />
12 ENTER<br />
0.87 11.99 10.34<br />
BEEF STEAK 1234<br />
PRINT<br />
DESCRIPTION<br />
Place the item to be weighed on the<br />
platter.<br />
Enter the PLU number on the<br />
keyboard.<br />
Press the ENTER key to retrieve the<br />
PLU record.<br />
Press the ET CHANGE key.<br />
Enter the new extra text number.<br />
Enter the new label format number.<br />
Press PRINT key to print a label with<br />
new tare and/or new label format.<br />
4-8
Chapter 4: Operating the <strong>Scale</strong><br />
Net Weight/Count Override<br />
Override the Net Weight<br />
of the Called By Count PLU<br />
DISPLAY & OPERATON<br />
0.00 0.00 0.00<br />
READY 01/17/2004 15:30<br />
567<br />
0.00 0.00 0.00<br />
PLU? 567<br />
ENTER<br />
5PCS 5.55 5.55<br />
CUCUMBERS 567<br />
CNT/WT<br />
CHANGE<br />
DESCRIPTION<br />
Enter the PLU number on the<br />
keyboard.<br />
Press the ENTER key to retrieve the PLU<br />
record.<br />
Press the CNT/WT CHANGE key.<br />
5PCS 5.55 5.55<br />
COUNT NUMBER (PCS)? 5<br />
7 ENTER Enter new count and press ENTER.<br />
7PCS 7.77 7.77 If PLU is a Standard Pack PLU, Net<br />
WEIGHT (Lbs)? 0.18 Weight can also be changed.<br />
20 ENTER<br />
Enter the new Net Weight and press<br />
ENTER.<br />
7PCS 7.77 7.77<br />
FIX WEIGHT= 0.20<br />
Press PRINT key to print a label with<br />
PRINT<br />
entered net weight<br />
4-9
Chapter 4: Operating the <strong>Scale</strong><br />
Shelf Life/Use By Override<br />
Override the Sell By Days<br />
of the Called PLU<br />
DISPLAY & OPERATON<br />
0.00 0.00 0.00<br />
READY 01/17/2004 15:30<br />
0.87 0.00 0.00<br />
READY 01/17/2004 15:30<br />
1234<br />
0.87 0.00 0.00<br />
PLU? 1234<br />
ENTER<br />
0.87 11.99 10.34<br />
BEEF STEAK 1234<br />
SHELF<br />
LIFE<br />
CHANGE<br />
0.87 0.00 0.00<br />
SELL BY DAY? 8<br />
5 ENTER<br />
0.87 0.00 0.00<br />
USE BY DAY? 3<br />
1 ENTER<br />
PRINT<br />
DESCRIPTION<br />
Place the item to be weighed on the<br />
platter.<br />
Enter the PLU number on the<br />
keyboard.<br />
Press the ENTER key to retrieve the<br />
PLU record.<br />
Press SHELF LIFE CHANGE key.<br />
Enter the new Sell By Days and press<br />
ENTER.<br />
Enter the new Use By Days and press<br />
ENTER.<br />
Press the PRINT key to print a label<br />
with new Shelf Life and Use By dates.<br />
4-10
Chapter 5: Database Setup<br />
5 Database Setup<br />
General Description<br />
Memory Maximum Capacities<br />
The Product Look Up, PLU, and Extra Text, ET, files can be determined as shown in<br />
the table below during the initialization of the database. This should only be done<br />
at installation as it will erase the database.<br />
Number of PLU’s<br />
ET Memory Available<br />
5060 0K<br />
4200 97K<br />
3790 145K<br />
2510 291K<br />
1880 363K<br />
730 495K<br />
CUSTOM<br />
Based on Number of PLU’s<br />
Database Functions<br />
With this setup menu you can edit the PLU, EXTRA TEXT and SPEC MESSAGE.<br />
DATABASE<br />
QUICK PLU CHANGE<br />
DATABASE: PLU<br />
DATABASE: ET<br />
DATABASE: SPEC MESSAGE<br />
DATABASE: DELETE<br />
5-1
Chapter 5: Database Setup<br />
Database edit<br />
PLU<br />
From the DATABASE: PLU menu press the DOWN or UP keys to change between<br />
EDIT PLU and COPY PLU. Select EDIT PLU, and then ENTER to set.<br />
DISPLAY & OPERATON<br />
0.00 0.00 0.00<br />
READY 01/17/2004 15:30<br />
DESCRIPTION of OPERATION<br />
【SETUP MODE】<br />
DATABASE<br />
【ENTER】<br />
QUICK PLU CHANGE<br />
【↓】<br />
DATABASE:<br />
PLU<br />
【ENTER】<br />
EDIT PLU<br />
【ENTER】<br />
PLU NUMBER? 0<br />
Input desired PLU number, then<br />
confirm with【ENTER】<br />
PLU TYPE:<br />
BY WEIGHT<br />
【ENTER】<br />
PLU TYPE?<br />
BY WEIGHT<br />
Press【↓】to select the PLU type<br />
as BY WEIGHT, BY COUNT, STD PACK or<br />
MERCHANDISE. Then confirm with【ENTER】.<br />
PLU TYPE:<br />
BY WEIGHT<br />
5-2
Chapter 5: Database Setup<br />
【↓】<br />
ITEM NO: 00000000000000<br />
【ENTER】<br />
ITEM NO? 00000000000000<br />
Input the item number. Then<br />
confirm with【ENTER】.<br />
ITEM NO: 00000000000001<br />
DESC1<br />
【↓】<br />
【ENTER】<br />
L-001 C-01 Desc-1<br />
Note: Use QWERTY keypad under preset keypad.<br />
Input first line description. Then<br />
confirm with 【ENTER】.<br />
DESC1<br />
DESC2<br />
【↓】<br />
【ENTER】<br />
L-001 C-01 Desc-2<br />
Input second description. Then<br />
confirm with 【ENTER】.<br />
DESC2<br />
【↓】<br />
GROUP: 0<br />
【ENTER】<br />
GROUP? 0<br />
Input the group number. Then<br />
confirm with 【ENTER】.<br />
GROUP: 1<br />
【↓】<br />
UNIT PRICE: 0.00<br />
【ENTER】<br />
UNIT PRICE? 0.00<br />
Input the unit price. Then confirm<br />
with 【ENTER】.<br />
UNIT PRICE: 1.25<br />
【↓】<br />
5-3
Chapter 5: Database Setup<br />
NETWEIGHT: 0<br />
【ENTER】<br />
Note: If PLU is a By Weight or By Count PLU the ‘NETWEIGHT’<br />
step will be skipped.<br />
NETWEIGHT? 0<br />
Input the Net Weight. Then<br />
confirm with 【ENTER】.<br />
NETWEIGHT: 16<br />
【↓】<br />
TARE: 0.00<br />
【ENTER】<br />
Note: If the PLU is a By Count or Standard Pack PLU the<br />
‘TARE’ step will be skipped.<br />
TARE? 0.00<br />
Input the TARE. Then confirm with<br />
【ENTER】.<br />
TARE: 0.02<br />
【↓】<br />
SHELF LIFE DAYS: 0<br />
【ENTER】<br />
SHELF LIFE DAYS? 0<br />
Input the SHELF LIFE DAYS. Then<br />
confirm with【ENTER】.<br />
SHELF LIFE DAYS: 2<br />
【↓】<br />
USE BY DAYS: 0<br />
【ENTER】<br />
USE BY DAYS? 0<br />
Input the USE BY DAYS. Then<br />
confirm with 【ENTER】.<br />
USE BY DAYS: 3<br />
【↓】<br />
EXTRA TEXT NUNMBER: 0<br />
【ENTER】<br />
EXTRA TEXT NUNMBER? 0<br />
Input the EXTRA TEXT NUMBER.<br />
Then confirm with 【ENTER】.<br />
EXTRA TEXT NUNMBER: 1<br />
【↓】<br />
LABEL FORMAT: 0<br />
【ENTER】<br />
LABEL FORMAT? 0<br />
5-4
Chapter 5: Database Setup<br />
Input the LABEL FORMAT. Then<br />
confirm with 【ENTER】.<br />
LABEL FORMAT: 1<br />
【↓】<br />
ALLOW PRICE CHANGE:<br />
YES<br />
【ENTER】<br />
ALLOW PRICE CHANGE? YES<br />
Press 【↓】to select YES or NO.<br />
Then confirm with 【ENTER】.<br />
ALLOW PRICE CHANGE:<br />
NO<br />
【↓】<br />
COUNT NUMBER: 0<br />
【ENTER】<br />
Note: If the PLU is a By Weight PLU the ‘COUNT’ step will be<br />
skipped.<br />
COUNT NUMBER? 0<br />
Input the COUNT NUMBER if<br />
necessary. Then confirm with【ENTER】.<br />
【↓】<br />
SPEC. MESSAGE: 0<br />
【ENTER】<br />
SPEC. MESSAGE? 0<br />
Input the SPEC MESSAGE<br />
NUMBER. Then confirm with 【ENTER】.<br />
SPEC MESSAGE: 1<br />
【ESC】<br />
SAVE CHANGES?<br />
YES<br />
Press【↓】to toggle<br />
between YES and NO, then confirm<br />
with【ENTER】. Step to the next PLU.<br />
PLU NUMBER?: 0<br />
5-5
Chapter 5: Database Setup<br />
Extra Text<br />
From the DATABASE: ET menu press the DOWN or UP keys to change between EDIT<br />
ET and COPY ET. Select EDIT ET, and then press ENTER to set.<br />
DISPLAY & OPERATON<br />
0.00 0.00 0.00<br />
READY 01/17/2004 15:30<br />
DESCRIPTION of OPERATION<br />
【SETUP】<br />
DATABASE<br />
【ENTER】<br />
QUICK PLU CHANGE<br />
【↓】【↓】<br />
DATABASE:<br />
ET<br />
【ENTER】<br />
EDIT EXTRA TEXT<br />
【ENTER】<br />
EXT TXT NUMBER? 0<br />
Input ET number, then confirm<br />
with【ENTER】.<br />
L-001 C-01<br />
Input ET contents, then confirm<br />
with【ENTER】.<br />
SAVE CHANGES?<br />
YES<br />
Press【↓】to toggle between YES<br />
and NO, then confirm with【ENTER】.<br />
EXT TXT NUMBER? 0<br />
Enter the next ET to be edited or<br />
press【ESC】【ESC】【ESC】【ESC】to exit.<br />
5-6
Chapter 5: Database Setup<br />
Special Message<br />
From the DATABASE: SPEC MESSAGE menu press the DOWN or UP keys to change<br />
between EDIT SPEC MESSAGE and COPY SPEC MESSAGE. Select EDIT SPEC<br />
MESSAGE, and then press ENTER to set.<br />
DISPLAY & OPERATON<br />
0.00 0.00 0.00<br />
READY 01/17/2004 15:30<br />
DESCRIPTION of OPERATION<br />
【SETUP】<br />
DATABASE<br />
【ENTER】<br />
QUICK PLU CHANGE<br />
【↓】【↓】【↓】<br />
DATABASE:<br />
SPEC MESSAGE<br />
【ENTER】<br />
EDIT SPEC MESSAGE<br />
【ENTER】<br />
SPEC MESSAGE NO? 0<br />
Input the Special Message<br />
number (1-99) then confirm with【ENTER】.<br />
L-001 C-01<br />
Input the Special Message<br />
contents, then confirm with【ENTER】.<br />
SAVE CHANGES?<br />
YES<br />
Press【↓】to toggle between YES<br />
and NO, then confirm with【ENTER】.<br />
SPEC MESSAGE NO? 0<br />
Enter the next Special Message<br />
number to be edited or press【ESC】【ESC】<br />
【ESC】【ESC】to exit.<br />
5-7
Chapter 5: Database Setup<br />
PLU Quick Change<br />
QUICK PLU CHANGE<br />
QUICK PRICE CHANGE<br />
QUICK TARE CHANGE<br />
DISPLAY & OPERATON<br />
0.00 0.00 0.00<br />
READY 01/17/2004 15:30<br />
DATABASE<br />
【SETUP】<br />
【ENTER】<br />
QUICK SHELF LIFE CHANGE<br />
QUICK USE BY CHANGE<br />
QUICK ET CHANGE<br />
QUICK LABEL NUMBER<br />
QUICK MESSAGE NUMBER<br />
QUICK PLU CHANGE<br />
【ENTER】<br />
DESCRIPTION of OPERATION<br />
QUICK PRICE CHANGE<br />
【ENTER】<br />
PLU NUMBER?<br />
Input the desired PLU number,<br />
then confirm with【ENTER】.<br />
UNIT PRICE? 1.25<br />
Input the new Unit Price, then<br />
confirm with【ENTER】.<br />
PLU NUMBER?<br />
Enter another PLU number or hit<br />
【ESC】to change another field.<br />
QUICK PRICE CHANGE<br />
【↓】<br />
QUICK TARE CHANGE<br />
5-8
Chapter 6: Maintenance<br />
6 Maintenance<br />
External Cleaning<br />
Turn the scale power off by placing the power switch to the OFF position (Press the<br />
"0" on the power switch).<br />
• Disconnect power<br />
• Use a soft clean cloth dampened with mild detergent and water, or with<br />
mild cleaner to wipe the exterior surfaces.<br />
• Do not spray directly on the unit. A mild spray cleaner can be used by<br />
spraying the cleaning cloth.<br />
• Do not use solvent or commercial cleaners on the unit. They may harm the<br />
surfaces or damage the keyboard.<br />
6-1
Chapter 6: Maintenance<br />
Cleaning Printhead<br />
CLEAN PRINTHEAD USING THE METTLER TOLEDO CLEANING PEN PART<br />
NUMBER 082287020.<br />
DO NOT SCRAPE THE PRINTHEAD WITH ANY OBJECT TO REMOVE GLUE<br />
OR LABEL DEBRIS OR SEVERE DAMAGE MAY RESULT.<br />
• Turn the scale off by placing the power switch to the OFF position. Disconnect<br />
the power cord from the outlet.<br />
• Open the plastic door on the right side of the scale and slide out the printer.<br />
• Press the trigger to open the printhead.<br />
• Clean the printhead with a soft clean cloth soaked in isopropyl alcohol, or the<br />
METTLER TOLEDO Cleaning Pen part number 082287020.<br />
• Push the printhead back until it clicks.<br />
• Slide the printer in and close the plastic door.<br />
6-2
Chapter 7: Label Formats<br />
7 Label Formats<br />
Default Label Formats<br />
Default Label PLU Type Date Bar Extra Pre- Bar VisEdit Standard Library<br />
Label Length<br />
Code Text printed Code<br />
Reference<br />
Number<br />
Position<br />
SHI Number<br />
21 1.9" By-Count Sell By Date BCT 1 19 BC SBD BCT<br />
22 1.9" By-Weight Pack Date BCT 1 19 BW PD BCT<br />
23 1.9" By-Weight Sell By Date BCT 1 19 BW SBD BCT<br />
24 2.1" By-Count Sell By Date BCT 1 21 BC SBD BCT<br />
25 2.1" By-Weight Pack Date BCT 1 21 BW PD BCT<br />
26 2.1" By-Weight Sell By Date BCT 1 21 BW SBD BCT<br />
27 2.4" By-Count Sell By Date BCT Yes 1 24 BC SBD BCT PP SHI<br />
28 2.4" By-Count Sell By Date BCT Yes 1 24 BC SBD ET BCT<br />
29 2.4" By-Weight Pack Date BCT Yes 1 24 BW PD BCT PP SHI<br />
30 2.4" By-Weight Pack Date BCT Yes 1 24 BW PD ET BCT<br />
31 2.4" By-Weight Sell By Date BCT Yes 1 24 BW SBD BCT PP SHI<br />
32 2.4" By-Weight Sell By Date BCT Yes 1 24 BW SBD ET BCT<br />
33 2.4" Std Pack Sell By Date BCT Yes 1 24 STD SBD ET BCT<br />
34 3.3" By-Count Sell By Date BCT Yes Yes 1 33 BC SBD ET BCT PP SHI<br />
35 3.3" By-Count Sell By Date BCT Yes 1 33 BC SBD ET BCT<br />
36 3.3" By-Weight Pack Date BCT Yes Yes 1 33 BW PD ET BCT PP SHI<br />
37 3.3" By-Weight Pack Date BCT Yes 1 33 BW PD ET BCT<br />
38 3.3" By-Weight Sell By Date BCT Yes Yes 1 33 BW SBD ET BCT PP SHI<br />
39 3.3" By-Weight Sell By Date BCT Yes 1 33 BW SBD ET BCT<br />
40 3.3" Std Pack Sell By Date BCT Yes Yes 1 33 STD SBD ET BCT PP SHI<br />
41 3.3" Std Pack Sell By Date BCT Yes 1 33 STD SBD ET BCT<br />
42 3.7" By-Count Sell By Date BCT Yes Yes 1 37 BC SBD ET BCT PP SHI<br />
43 3.7" By-Count Sell By Date BCT Yes 1 37 BC SBD ET BCT<br />
44 3.7" By-Weight Pack Date BCT Yes Yes 1 37 BW PD ET BCT PP SHI<br />
45 3.7" By-Weight Pack Date BCT Yes 1 37 BW PD ET BCT<br />
46 3.7" By-Weight Sell By Date BCT Yes Yes 1 37 BW SBD ET BCT PP SHI<br />
47 3.7" By-Weight Sell By Date BCT Yes 1 37 BW SBD ET BCT<br />
48 3.7" Std Pack Sell By Date BCT Yes Yes 1 37 STD SBD ET BCT PP SHI<br />
49 3.7" Std Pack Sell By Date BCT Yes 1 37 STD SBD ET BCT<br />
7-1
Chapter 8: Error Messages<br />
8 Error Messages<br />
Warning Message<br />
INPUT TOO BIG<br />
Too many characters for field.<br />
INPUT TOO SMALL<br />
The input is too small.<br />
TOO MUCH INPUT<br />
The input is out of limit.<br />
KEY BLOCKED<br />
The key is disabled. Check the KEYBOARD CONFIGURE.<br />
PLU NOT FOUND<br />
The entered PLU number does not exist.<br />
LABEL NOT FOUND<br />
The entered Label Format does not exist.<br />
PLUNR IS OCCUP<br />
You are trying to duplicate a PLU into an existing PLU number.<br />
LABELNR. OCCUP<br />
You are trying to duplicate a label format into an existing label format<br />
number.<br />
MEMORY FULL<br />
Memory is full.<br />
WEIGH AGAIN<br />
You are trying to record one item twice. Remove the item from the<br />
platter and put a new item on the platter.<br />
8-1
Chapter 8: Error Messages<br />
WRONG LABEL<br />
The installed label roll does not match the configured label format.<br />
LABEL MOVED<br />
The stepper motor or the rewind motor is not working properly.<br />
CHANGE PAPERROLL<br />
The label roll is not installed or the label roll is empty.<br />
TAKE LABEL OFF<br />
Take off the current label before printing the next one.<br />
TARE TOO BIG<br />
The entered tare is too big.<br />
PLU TARE ACTIVE<br />
You are forbidden to override the PLU tare.<br />
NO STABLE WEIGHT<br />
The weight is not stable.<br />
PUT PLATTER ON<br />
The weight is too small and out of power up zero range.<br />
ZERO NOT CAPTURE<br />
The weight is too big and out of power up zero range.<br />
WEIGHT TOO SMALL<br />
The weight is too small to be printed.<br />
ERROR TAKE-SENS<br />
The take label sensor is not working properly.<br />
ERROR POS_SENS<br />
The gap sensor is not working properly.<br />
ERROR INTERFACE<br />
The serial port is not working properly.<br />
8-2
METTLER TOLEDO<br />
<strong>Scale</strong>s & Systems<br />
1900 Polaris Parkway<br />
Columbus, Ohio 43240<br />
P/N: 170285<br />
(6/04)<br />
METTLER TOLEDO®<br />
is a registered trademark of <strong>Mettler</strong>-<strong>Toledo</strong>, Inc.<br />
©2004 <strong>Mettler</strong>-<strong>Toledo</strong>, Inc.<br />
Printed in China<br />
170285