

Perfect Performance Products, LLC - Painless Wiring
Perfect Performance Products, LLC - Painless Wiring
Perfect Performance Products, LLC - Painless Wiring

You also want an ePaper? Increase the reach of your titles
YUMPU automatically turns print PDFs into web optimized ePapers that Google loves.
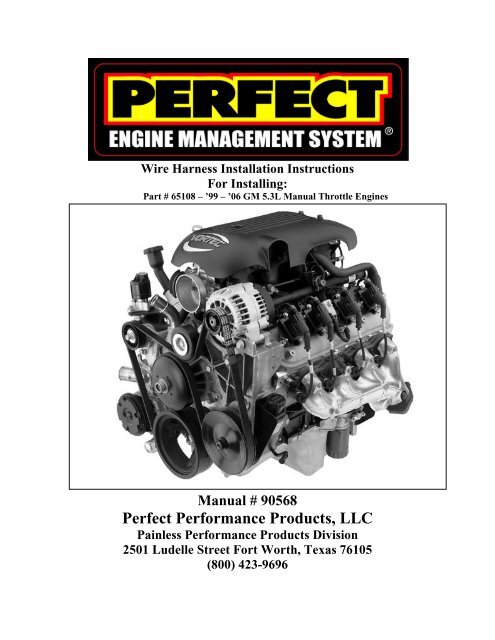
Wire Harness Installation Instructions<br />
For Installing:<br />
Part # 65108 – ’99 – ’06 GM 5.3L Manual Throttle Engines<br />
Manual # 90568<br />
<strong>Perfect</strong> <strong>Performance</strong> <strong>Products</strong>, <strong>LLC</strong><br />
<strong>Painless</strong> <strong>Performance</strong> <strong>Products</strong> Division<br />
2501 Ludelle Street Fort Worth, Texas 76105<br />
(800) 423-9696
We have provided with this kit the most accurate instructions<br />
possible and are always concerned about corrections or<br />
improvements that can be made. If any errors or omissions have<br />
been found please submit them to us via a fax, phone call to our<br />
technical department or an email with a detailed description about<br />
suggestions concerning these instructions. On our website<br />
www.painlessperformance.com the “Contact Us” link can be used<br />
to submit this valuable information as well.<br />
For Technical Questions<br />
E-mail address: tech@painlessperformance.com<br />
Tech Line: (800) 423-9696<br />
Tech Fax: 817-413-0897<br />
<strong>Perfect</strong> <strong>Performance</strong> <strong>Products</strong>, <strong>LLC</strong> shall in no event be<br />
liable in contract or tort (including negligence) for special,<br />
indirect, incidental, or consequential damages, such as but<br />
not limited to loss of property damage, or any other<br />
damages, cost or expenses which might be claimed as the<br />
result of the use or failure of the goods sold hereby, except<br />
only the cost of repair or replacement.<br />
P/N 90568 <strong>Painless</strong> <strong>Performance</strong> <strong>Products</strong> Manual<br />
May 2009 First Edition<br />
Copyright © 2009 by <strong>Perfect</strong> <strong>Performance</strong> <strong>Products</strong>, <strong>LLC</strong><br />
2
TABLE OF CONTENTS<br />
1.0 Introduction……………………………………………………………………….4<br />
2.0 About these Instructions………………………………………………………….5<br />
3.0 Tools Needed……………………………………………………………………..5<br />
4.0 Contents of the 65108 <strong>Perfect</strong> GM 5.3L Kit….…………………....……………...6<br />
5.0 Pre-Installation and Harness Routing Guidelines………………………………...7<br />
5.1 Understanding the engine………………….……………………………..7<br />
6.0 General Installation Instructions………………………………………………….9<br />
6.1 Grounding the vehicle……………………………………………………10<br />
6.2 Rough installation………………………………………………………..10<br />
6.3 Harness attachment………………………………………………………11<br />
6.4 Terminal installation instructions………………………………………..11<br />
7.0 1999-2006 GM 5.3L PERFECT System Wire Harness Installation……..….…...12<br />
7.1 Specific circuit connections……………………………………………...12<br />
7.2 Dash Section installation.………………………………………………...12<br />
7.3 Engine Section installation………………………………………….…...15<br />
7.4 Tail section installation………….……………………………………….24<br />
8.0 Trouble Shooting Instructions…………………………………………………....25<br />
8.1 The “Check Engine” Light……………………………………………….25<br />
8.2 Retrieving trouble codes from the computer…………………………….25<br />
8.3 When to call <strong>Painless</strong> <strong>Performance</strong> Tech line…………………………...27<br />
LIST OF FIGURES<br />
7.1 Engine Control Module (ECM)…………….……...…………………………….12<br />
7.2 Diagnostic Link Connector (DLC).……….……………………………………..13<br />
7.3 Relays and Fuses...……………………………………………………………….15<br />
7.4 Knock Sensor..…………………………………………………………………...18<br />
7.5 Oxygen Sensor…………………..……………………………………………….18<br />
7.6 Injectors 1, 3, 5, 7………………………………………….………..……………19<br />
7.7 Injectors 2, 4, 6, 8……………………………………………….………………..19<br />
7.8 Camshaft Position Sensor (CMP).………………………………...……………..20<br />
7.9 Crankshaft Position Sensor (CKP).……….....…………………………………...20<br />
7.10 Manifold Absolute Pressure Sensor (MAP).………………………...…………..21<br />
7.11 Driver Side Coil Connector..…………………………………………………….21<br />
7.12 Passenger Side Coil Connector...………………………………………………...22<br />
7.13 Throttle Position Sensor (TPS)…………..……………………………………...22<br />
7.14 Idle Air Control Motor (IAC)……………………………………………………23<br />
7.15 Coolant Temperature Sensor (CTS)……………………………………………...23<br />
7.16 Intake Air Temperature Sensor (IAT)……………………………………………24<br />
LIST OF TABLES<br />
Table 4.1<br />
Table 7.1<br />
Table 7.2<br />
Table 7.3<br />
Table 8.1<br />
Sensor Requirements……………………………………………………...8<br />
Dash Section Connections………...……………………………………..14<br />
Engine Section Connections……………………………………………..17<br />
Tail Section Connections………………………………………………...24<br />
Diagnostic Trouble Codes………………………………………………..38<br />
3
1.0 Introduction<br />
Congratulations on purchasing the most up-to-date and easiest-to-install engine<br />
management system on the market. It has been designed for an easy installation; even<br />
with little or no electrical experience.<br />
This kit is a complete fuel injection system for the GM Gen III 5.3L (LM7) engine. This<br />
kit includes all the wiring needed by the MEFI computer to control the fuel injection<br />
system. It is designed to use the parts listed in Table 4.1. Use of any other parts may<br />
cause the system to function improperly.<br />
This system will work on GM 5.3L engines from 1999-2006 with a manual throttle body<br />
and all the appropriate sensors. See Table 4.1 below for throttle body, sensor, coil and<br />
fuel injector requirements.<br />
This system is weatherproof; meaning most of the connectors on this harness are of the<br />
weather pack type of design, thus allowing the ECM and Relay/Fuse Block to be<br />
mounted in the engine compartment without corrosion or moisture control problems. The<br />
computer and dash group can also be easily mounted under the dash for a clean<br />
installation.<br />
Most of the wiring in the harness has been pre-terminated to each proper connector and<br />
all wire has been color-coded. All of the wire used is 600 volt, 275º F, TXL (Trans Cross<br />
Linked) insulation.<br />
This harness has three major groups:<br />
Engine Group<br />
Dash Group<br />
Tail Group<br />
Includes wiring for the fuel injectors, coils, sensors, and the<br />
alternator.<br />
Ignition feed wires, Diagnostic Link<br />
Connector (DLC), check engine light, computer connectors,<br />
tachometer wiring, relays and fuse block.<br />
Includes main power wire for the fuel pump.<br />
4
2.0 About these instructions<br />
These instructions provide the information needed to install the 65108 PERFECT ‘99-<br />
'06 GM 5.3L Engine fuel injection kit. These instructions are divided into eight major<br />
Sections, as follows:<br />
1.0 Introduction<br />
2.0 About These Instructions<br />
3.0 Tools Needed<br />
4.0 Contents of the 65108 <strong>Wiring</strong> Harness Kit<br />
5.0 Pre-Installation and Harness Routing Guidelines<br />
6.0 General Installation Instructions<br />
7.0 Wire Harness Installation<br />
8.0 Trouble Shooting Instructions<br />
Sections are further divided into Paragraphs and Steps. Throughout, the Figure<br />
numbers refer to illustrations and the Table numbers refer to information in table form.<br />
These are located in or near the sections or paragraphs to which they correspond. Please<br />
pay special attention to any Notes or any labels with CAUTION.<br />
3.0 TOOLS NEEDED<br />
In addition to everyday mechanics tools; the following will also be needed:<br />
Crimping Tool - Always use a quality tool, such as a Thomas & Betts to ensure<br />
superior crimps.<br />
Wire Stripper – Be sure to only strip ¼” of the insulation off for all crimps made<br />
during the installation of the harness.<br />
Continuity Tester – ONLY use this device when the battery is disconnected.<br />
CAUTION: Do not use a test light to test the computer or sensor wiring or damage<br />
to the computer may result.<br />
Electric Drill & 1 3/8” Hole Saw – Use this to drill the hole into the firewall for the<br />
main pass through location of the fuel injection harness.<br />
Digital Voltmeter – Use this to verify the battery is fully charged (11.9 – 12.7 volts)<br />
and once the engine is running, the alternator is charging the battery (13 – 14.5<br />
volts).<br />
5
4.0 CONTENTS OF THE 65108 WIRE HARNESS KIT<br />
Take inventory to verify everything that is supposed to be in this kit is there. If anything<br />
is missing go to the dealer where the kit was purchased or contact <strong>Painless</strong> <strong>Performance</strong><br />
at (800) 423-9696.<br />
This kit contains the following items:<br />
• The main wiring harness with required connectors installed.<br />
• PERFECT ECM 65108<br />
• Installation Manual (this booklet)<br />
• One Weatherproof fuse block with four relays and ten fuses<br />
• (1) Bag of 4” Zip Ties<br />
• (20) 7” Zip Ties<br />
• Parts Kit w/Terminals and Fasteners<br />
• Fuse Block Bracket<br />
6
5.0 PRE-INSTALLATION AND HARNESS ROUTING GUIDELINES<br />
The installation of your harness kit will consist of two (2) steps<br />
* The physical routing and securing of the harness, wire groups and<br />
individual wires and connectors.<br />
* Plugging in each preterminated connector into its proper component and to<br />
complete the electrical connection of each individual circuits.<br />
How to route the harness in the vehicle depends a great deal upon the particular<br />
make of vehicle and what extent is desired to secure and conceal the harness. See<br />
Paragraph 5.1.3, for some general routing guidelines. See the general installation<br />
instructions in Section 6.0 and precise instructions concerning the electrical<br />
connections beginning in Section 7.0.<br />
To begin the installation of the wire harness, read the following sections:<br />
5.1 Understanding the GM 5.3L V8 engine<br />
5.1.1 The 1999-2006 GM 5.3L V8 engines came with the same sensor/component<br />
packages until GM started using Electronic Throttle Control in 2003. For the most<br />
part GM built these Gen III engines to the same specifications from 1999-2006<br />
only to add some small revisions but for all practical purposes they stayed the<br />
same. So, through the use of specific components based on what year engine<br />
needs to be controlled, this kit can control the 1999-2006 GM 5.3L engines.<br />
NOTE: This kit can also control both the 4.8L and 6.0L from these years but<br />
will require calibration work to be completed using the 65245 <strong>Perfect</strong>ion<br />
Software.<br />
5.1.2 The PERFECT system for the GM 5.3L engines requires the use of the<br />
following parts in Table 4.1. These parts meet or exceed all requirements of the<br />
PERFECT <strong>Performance</strong> <strong>Products</strong> harness and controller.<br />
7
1999 – 2006 GM 5.3L V8 Sensor Requirements<br />
GM MAP Sensor Delco #16137039<br />
GM Coolant Temp Delco #15326388<br />
GM Intake Air Temp Delco #12160244<br />
GM Oxygen Sensor<br />
Delco #AFS-105<br />
GM Knock Sensor Delco #12589867<br />
GM Cam Position Sensor Delco #12561211<br />
GM Crank Position Sensor Delco #12560228<br />
GM Throttle Position Sensor Delco #17123852<br />
Idle Air Control Motor (IAC) Delco #17113598<br />
Fuel Injectors 1999-2006 GM 5.3L Vin T<br />
Delco #17113698<br />
(Used in all 4.8L and 6.0L from ’01-’06)<br />
*Note: All of the injectors with the “Truck Style” connectors will work with this Fuel<br />
Injection Kit. Be sure to regulate the fuel pressure to 58-60psi with the engine idling<br />
fully warmed up. Any significant change of the fuel pressure will affect the<br />
performance of this system and require recalibration of the fuel tables.<br />
*Note: This system is shipped with a calibration for the GM 5.3L only, however if a<br />
4.8L or 6.0L engine is to be used, then simply purchase the <strong>Perfect</strong> CalTool Software<br />
P/N 65245 and calibrate for the different displacement engine.<br />
Table 4.1 – Sensor Requirements<br />
5.1.3 This harness does not have wiring for emission devices. Most of the GM truck<br />
engines had catalytic convertors for their main emission devices.<br />
5.1.4 Decide on the mounting location for the computer and relays. This PERFECT<br />
Fuel Injection harness kit is designed to mount the computer and relays under the<br />
dash of the vehicle.<br />
5.1.5 A good exercise is to lay out the harness on a workbench beside your vehicle and<br />
study the harness by locating and reading each of the harness labels to gain<br />
understanding on what each connector plugs into on the engine.<br />
5.1.6 When routing the harness, be sure to avoid exhaust manifolds, accessory belts,<br />
hood hinges and any other objects on the engine or under the hood that may<br />
damage the harness. Whenever possible, be sure to use the provided zip ties to<br />
help secure the harness.<br />
8
5.1.7 Plan where harness supports will be located. Many times the OEM harness<br />
supports can be used. The harness brackets located on or near the fuel injector<br />
rail are prime examples of a good harness supports to use.<br />
5.1.8 Allow enough slack in the harness at places where movement could possibly<br />
occur such as engine to body and engine to frame.<br />
6.0 GENERAL INSTALLATION INSTRUCTIONS<br />
CAUTION:<br />
• Separate the two ground wires by connecting them to two different locations.<br />
This will aid in noise suppression throughout the harness and especially on<br />
the clean sensor ground. Again DO NOT SKIP THIS STEP, in this harness<br />
there are (2) two harness grounds. ONE needs to be connected to the rear of<br />
the right cylinder head and ONE needs to be connected to the rear of the left<br />
cylinder head. DO NOT CONNECT BOTH OF THEM TO THE SAME<br />
BOLT.<br />
• Giving or Receiving a “Jump Start” may cause damage to the computer.<br />
• NEVER WELD ON THE VEHICLE WITH THE ECM CONNECTORS<br />
PLUGGED INTO THE ECM. EVER!!! THERE IS AN ALMOST<br />
CERTAINTY OF THE ECM TO FAIL IF THIS OCCURS.<br />
• A test light may be used to check for 12 volts at the coils and the injectors.<br />
Never use it to test a sensor input to the ECM.<br />
• There is normally a small amount of current drain on the battery with this<br />
fuel injection system.<br />
• When connecting the plugs to the computer use extra care to ensure none of<br />
the pins on the computer are bent.<br />
• The fuel pump MUST be rated at a minimum of 60 PSI (lbs. per square<br />
inch). It will be necessary to purchase an external fuel pressure regulator in<br />
most instances. The fuel pressure needed for this system is 58psi. All <strong>Perfect</strong><br />
calibration work was completed with the fuel pressure at 58 psi at the fuel<br />
rail. If this pressure is not correct with this system; the engine will inevitably<br />
not run correctly, may stall and hesitate and could even run lean or rich.<br />
9
6.1 GROUNDING THE VEHICLE AND ENGINE<br />
A correctly wired vehicle will only have problems if the chassis harness components and<br />
the fuel injection systems are not properly grounded. Don’t go to the effort of installing a<br />
quality fuel injection system only to neglect proper grounding.<br />
6.1.1 Connect a ground strap or cable (minimum of a 4 GA. wire) from the negative<br />
battery terminal to the frame. Be sure to clean the place of connection on the<br />
frame with a wire wheel to remove any grease, dirt or paint. For the best<br />
connection, use a star type lock washer to fasten the ground cable to the frame.<br />
6.1.2 Connect a ground strap (minimum of a 4 GA. wire) from the engine to the same<br />
point on the frame in step 6.1.1. This is best accomplished with a braided ground<br />
strap which is available from most auto parts stores. DO NOT RELY ON THE<br />
MOTOR MOUNTS TO MAKE THE CONNECTION FROM THE ENGINE<br />
TO THE FRAME, THEY’RE MADE OF RUBBER AND RUBBER<br />
DOESN’T CONDUCT ELECTRICITY.<br />
6.1.3 Connect a ground strap from the body to the frame. This will ensure your vehicle<br />
has the proper grounds for most all circuits both for the engine and separate from<br />
the engine.<br />
6.2 ROUGH INSTALLATION<br />
CAUTION: DISCONNECT THE POWER FROM YOUR VEHICLE BY<br />
REMOVING THE NEGATIVE BATTERY CABLE FROM THE<br />
BATTERY.<br />
6.2.1 Position the computer, fuse block/relay base assembly in the desired mounting<br />
location. This location should be either under the dash in most applications but<br />
can also be on the firewall in the engine compartment.<br />
6.2.2 If mounting the computer under the dash, drill a 1 3/8” hole in the firewall for the<br />
pass thru grommet.<br />
6.2.3 Route all of the engine section connectors and the gray fuel pump wire though the<br />
hole. Push the grommet (already installed on the harness) into the hole until it is<br />
seated. Be sure the split on the grommet is at the top of the hole in the firewall.<br />
6.2.4 Permanently mount the fuse block/ relay base in the desired mounting location.<br />
6.2.5 Mounting screws for the computer have been included. Be sure not to over tighten<br />
these screws to avoid warping the computer housing. An effort also needs to be<br />
made to mount the computer onto a relatively flat surface. Otherwise, damage can<br />
result to the steel cover on the rear of the computer, which will damage the<br />
internals of the computer.<br />
10
6.3 HARNESS ATTACHMENT<br />
Note: Harness routing doesn’t necessarily need to be a time-consuming task, but<br />
some caution must be taken to ensure isolation of the harness from hot and sharp<br />
parts on the engine. A good way to protect the harness is to use the factory harness<br />
mounting points as often as possible. Most GM Truck Gen III engines have<br />
mounting tabs which can be used to support the trunks of the harnessing.<br />
6.3.1 Attach harness groups to your vehicle with clips or ties starting at the computer<br />
and working outward.<br />
6.3.2 Rubberized clamps from your local auto parts supplier make for a very<br />
professional method of fastening the engine section of the harness onto the<br />
engine.<br />
6.3.3 Call your local <strong>Painless</strong> <strong>Wiring</strong> dealer for a price on the Power Braid Fuel<br />
Injection Kit P/N 70921. This kit comes with all the high performance braid<br />
needed to protect your new harness and makes for a great looking install under the<br />
hood of your vehicle.<br />
6.4 TERMINAL INSTALLATION INSTRUCTIONS<br />
6.4.1 Select the correct terminal for each different gauge of wire. (Red – 22-18ga/ Blue<br />
– 16-14ga/Yellow – 12-10ga)<br />
6.4.2 Determine the correct wire length and cut the wire. Remember to allow enough<br />
slack in the harness and wires at places where movement will occur. Doublecheck<br />
your calculations.<br />
6.4.3 Strip insulation away from the wire. Strip only enough length necessary for the<br />
type of terminal being used. (¼” will be appropriate for most crimp on terminals.)<br />
Note: In the following steps, be sure each terminal is crimped with the proper<br />
die in the crimping tool. An improper crimp will not make good enough of a<br />
connection and be sure not to over crimp and compromise the connection.<br />
6.4.4 Crimp the terminal onto the wire.<br />
6.4.5 Connecting the wires and connectors throughout the harness is a simple process;<br />
just be sure each wire is properly routed and then terminated.<br />
6.4.6 When all the wires are terminated, tighten the mounts and zip ties to secure the<br />
harness permanently.<br />
6.4.7 Attach the connectors to the computer with the battery disconnected. Be careful<br />
not to bend any pins.<br />
6.4.8 Once all the connections have been made throughout the harness, connect the<br />
11
attery to the vehicle with the ignition off or damage to the ECM may occur.<br />
7.0 SYSTEM WIRE HARNESS INSTALLATION<br />
7.1 SPECIFIC CIRCUIT CONNECTION<br />
Note: If you have not already done so, please go back and read sections 5.0 and 6.0<br />
of these instructions and think through the installation of the harness before<br />
securing or cutting any wires.<br />
7.2 DASH SECTION INSTALLATION<br />
The wires in this group consist of the Diagnostic Link Connector (DLC), the check<br />
engine light (pre-mounted into a bracket), the ECM, the Fuse Block and three (3) other<br />
wires.<br />
A. Fuse Block and ECM – mount with the provided fasteners in a secure location<br />
under the dash of the vehicle.<br />
Figure 7.1 Engine Control Module (ECM)<br />
B. DLC - Mount the DLC connector in an easily accessible location on or under the<br />
dash. See Table 7.1.<br />
12
Figure 7.2 Diagnostic Link Connector (DLC)<br />
C. Fuseblock Ignition Wire -Locate the ORANGE ignition hot activation wire,<br />
labeled “FUSEBLOCK IGNITION” and attach it to a swithed 12V power source.<br />
It must have power when the key is in the run and start positions only. This is the<br />
ignition power signal wire for the harness and computer. It allows the computer to<br />
power up and enables the main harness relay to power up the sensors, injectors,<br />
and ignition system. With the orange wire correctly wired, the check engine light<br />
will come on when the ignition switch is in the “ON” position with the engine not<br />
running. See Table 7.1.<br />
D. Tachometer Output – This is the grey signal wire coming from the ECM to be<br />
connected to any aftermarket or some factory tachometers. See Table 7.1.<br />
E. Alternate Fuel Table Wire – this wire is not used in this application. Be sure to<br />
crimp a red 18-22ga butt splice on the end of it to isolate it from ground. See<br />
Table 7.1.<br />
F. Check Engine Light – Mount this light in a location which is visible when driving<br />
the vehicle. It allows for easy troubleshooting if problems occur. See Table 7.1.<br />
13
Label on Harness Connects to: # of Wire Colors<br />
Wires<br />
BLACK J1 Computer J1 Side - -<br />
CLEAR J2 Computer J2 Side (Has - -<br />
the single slotted<br />
mounting tab next to it)<br />
DLC<br />
Diagnostic Link<br />
Connector<br />
4 Blk, Wht/Blk, Pnk,<br />
Tan<br />
CEL Check Engine Light 2 Pnk, Brn/Wht<br />
ALT. FUEL Not Used – Isolate from 1 Tan/Blk<br />
Ground<br />
TACH OUTPUT Tachometer Signal 1 Grey<br />
FUSEBLOCK 12V Igntion/Start Hot 1 Orange<br />
IGNITION<br />
Power Source<br />
Table 7.1 Dash Section Installation Harness Connections<br />
The four relays supplied in the kit:<br />
• Cooling Fan Relay – Supplies 12V power for (1) one standard electric<br />
cooling fan. This will not handle a fan that draws more than 40 amps<br />
continuously.<br />
• Cooling Fan Temperature Settings – On at 200deg F/ Off at 170deg F<br />
• Fuel Pump Relay - Supplies the 12V power to your fuel pump. It will run for<br />
3 seconds after the ignition is turned to the on position to prime the fuel rail to<br />
prepare the engine to start.<br />
• A/C Signal Relay – Supplies the computer a ground signal to slightly increase<br />
engine RPM to compensate for the load on the engine from the A/C<br />
compressor.<br />
• Ignition Relay – Supplies 12V power to the O2 sensor heater, Ignition<br />
System, Check Engine Light and Computer when the key is in the Run or<br />
Start position.<br />
See Figure 7.3 on the next page for Relay Function and Fuse Sizes.<br />
14
FIGURE 7.3 Relays and Fuses<br />
Note: The Cooling fan and Ignition relays are identical sizes and the Fuel Pump and<br />
A/C relays are identical sizes.<br />
7.3 ENGINE SECTION INSTALLATION<br />
The engine group is designed to be separated into left side (driver) and right side<br />
(passenger) sections. Each side is tie-wrapped separately and labeled. The Drivers side of<br />
the harness has connectors for the TPS, IAC, CTS, IAT, Coils and Injectors. The<br />
Passenger side of the harness has connectors for the Knock sensors, Cam sensor, Crank<br />
sensor, idle air control motor, throttle position sensor, injectors, and oxygen sensor.<br />
knock sensor and MAP sensor. To begin routing, separate the engine groups into left and<br />
right sections and place them between the intake manifold and valve covers.<br />
15
7.3.1 Before you connect any wires, separate the fuel pump wire from the engine group<br />
and place it out of the way.<br />
7.3.2 Locate the Ground #1 and Ground #2 breakouts on the harness. Attach each of<br />
them to their own separate bolts. Separating them aids in noise signal cancellation<br />
throughout the harness.<br />
7.3.3 Using Figures 7.4 thru 7.16 and the Table 7.2, plug in each harness connector to<br />
its appropriate sensor or device. They are all labeled accordingly.<br />
7.3.4 The Green wire tagged A/C SIGNAL needs to be connected to the A/C<br />
compressor clutch power wire; if the vehicle is equipped with A/C. This will<br />
enable an increase in the engines RPMs when the A/C is turned on to compensate<br />
for the additional load of the A/C compressor and the additional electrical load on<br />
the alternator.<br />
7.3.5 If running a single electric cooling fan with this kit and want the ECM to control<br />
the on and off temperatures for it; connect the Green wire labeled Cooling Fan to<br />
the positive side of the cooling fan motor. (On most aftermarket puller fans, the<br />
positive wire is the blue wire.)<br />
7.3.6 Locate the green/white wire labeled VSS in this harness. If running a later model<br />
GM automatic or manual transmission which has an analog VSS, this system<br />
requires the use of a signal conditioning device from Dakota Digital P/N SGI-5.<br />
The ECM in this kit is only compatible with a digital signal for the VSS input.<br />
The Dakota Digital piece will allow an analog signal from any GM factory VSS<br />
to be used. Otherwise, if running a speedometer cable, purchase <strong>Painless</strong><br />
<strong>Performance</strong> VSS P/N 60117 and install it according to the instructions included<br />
with it. It connects inline to the existing speedometer cable on most GM<br />
transmissions (7/8” – 18 thread).<br />
7.3.7 Notice the large red 6 gauge wire in the harness near the alternator and the starter.<br />
This wire provides the alternator power down to the starter battery post and then<br />
to the battery. This is the main charging circuit. Two large terminals are provided<br />
to make these connections.<br />
16
Label on Harness Connects to: # of Wires Wire Colors<br />
DRVR.COILS Drivers Side Coils 7 Blk/Wht, Red, Grn,<br />
Blk, LtBlu, Pur, Pnk<br />
PASS. COILS Passenger Side Coils 7 Blk/Wht, Red/Wht,<br />
Grn/Wht, Blk,<br />
Pur/Wht, Pnk<br />
O2 Oxygen Sensor 4 Blk, Pur/Wht, Pnk,<br />
Blk/Wht<br />
INJ #1 – INJ #8 Fuel Injectors (GM Truck<br />
Style Connectors)<br />
2 Blu, Pnk OR Grn,<br />
Pnk<br />
GROUND #1 Passenger Rear Cylinder 1 Black<br />
Head<br />
GROUND #2 Drivers Rear Cylinder Head 1 Blk/Wht<br />
STARTER B+ Large Battery Post on 2 Red<br />
Starter Solenoid<br />
ALT B+ Alternator Output Post 1 Red<br />
ALT REG. Alternator Regulator 2 Brown, Grey<br />
ELECTRIC FUEL Positive Post on Fuel Pump 1 Grey<br />
PUMP<br />
A/C SIGNAL A/C Compressor Clutch B+ 1 Green<br />
MAP MAP Sensor 3 Gry, Lt Grn, Blk<br />
KNOCK Knock Sensor 2 Blue, Lt.Blue<br />
IAT Intake Air Temp Sensor 2 Blk, Tan<br />
IAC Idle Air Control Motor 4 Lt Grn/Blk,<br />
Grn/Blk, Lt Blu/Blk,<br />
Blu/Blk<br />
TPS Throttle Position Sensor 3 Gry, Blu, Blk<br />
CTS Coolant Temp Sensor 2 Ylw, Blk<br />
CMP Cam Position Sensor 3 Brn/Wht, Ylw/Blk,<br />
Red/Blk<br />
CKP Crank Position Sensor 3 Ylw, Ylw/Blk,<br />
Red/Blk<br />
VSS INPUT Vehicle Speed Sensor Input 1 Grn/Wht<br />
to the ECM<br />
ELECTRIC Positive wire on Electric 1 Grn<br />
COOLING FAN Cooling Fan Motor<br />
Table 7.2 Engine Harness Connections<br />
17
Figure 7.4 Knock Sensors (Two below Intake Manifold)<br />
Figure 7.5 Oxygen Sensor<br />
18
Figure 7.6 Injectors 1, 3, 5, 7<br />
Figure 7.7 Injectors 2, 4, 6, 8<br />
19
Figure 7.8 Camshaft Position Sensor (CMP)<br />
Figure 7.9 Crankshaft Position Sensor (CKP)<br />
20
Figure 7.10 Manifold Absolute Pressure Sensor (MAP)<br />
Figure 7.11 Driver Side Coil Connector<br />
21
Figure 7.12 Passenger Side Coil Connector<br />
Figure 7.13 Throttle Position Sensor (TPS)<br />
22
Figure 7.14 Idle Air Control Motor (IAC)<br />
Figure 7.15 Coolant Temperature Sensor (CTS)<br />
23
Figure 7.16 Intake Air Temperature Sensor (IAT)<br />
7.4 TAIL SECTION INSTALLATION<br />
7.4.1 Locate the Gray Fuel Pump wire which was separated earlier from the engine<br />
group. Carefully route it to the high pressure fuel pump. Be sure to avoid all sharp<br />
edges and moving or hot parts that may damage the wire. Connect this wire<br />
directly to the positive terminal on the fuel pump and connect the wire on the<br />
other side of the pump to a good chassis ground. When the key is turned to the on<br />
position the ECM will command the fuel pump to run for 3 seconds and then shut<br />
off until the engine is cranked over or started. See Table 7.3.<br />
Label on Harness Connects to: # of Wires Wire Colors<br />
Electric Fuel Pump Fuel Pump Positive Post 1 Grey<br />
Table 7.3 Tail Section for Fuel Pump<br />
24
8.0 TROUBLE SHOOTING INSTRUCTIONS<br />
If you are having trouble with your engine running badly or not running at all, first<br />
perform basic trouble shooting (checking for faulty connections, spark, fuel pressure,<br />
etc.) then see if the computer has stored any trouble codes in its memory.<br />
8.1 THE CHECK ENGINE LIGHT<br />
Normally, the “check engine” light should come on when ignition is initially turned on,<br />
and then go out few moments after the engine starts running. If the computer has detected<br />
a problem and a fault code has been set the light will come back on.<br />
8.1.1 The computer identifies particular trouble codes by flashing the “check engine”<br />
light in a certain way. The codes are read by counting flashes:<br />
A: The first digit (the “tens” digit) of the code is flashed quickly, followed by<br />
a brief pause, then the second digit (or “ones” digit) is flashed, followed<br />
by a longer pause. For example, three (3) quick flashes followed by a brief<br />
pause followed by two (2) flashes indicate a code 32.<br />
B: The code will repeat itself. The next code, if any, will be<br />
displayed in the same manner.<br />
Note: When you access the codes from the computer a code 12 (one flash followed<br />
by two flashes) will first be displayed. THIS DOES NOT INDICATE A<br />
PROBLEM. Code 12 will be flashed 2 times, followed by the particular<br />
trouble codes, if any. If the computer merely flashes code 12 there are no<br />
trouble codes stored. Code 12 means the engine is not running.<br />
8.2 RETRIEVING TROUBLE CODES FROM THE COMPUTER<br />
8.2.1 In order to retrieve the trouble codes stored in the computer, locate the ALDL<br />
plug installed in Section 7.2. Turn the ignition on, BUT DO NOT START THE<br />
ENGINE. Connect a jumper wire from the ALDL terminal “A” to terminal “B”<br />
see Figure 7.1 and observe the check engine light.<br />
8.2.2 If you have read any codes (remember the normal code 12), write them down for<br />
reference Remove the jumper wire from the ALDL connector.<br />
8.2.3 Take the codes one at a time and match them to the codes in Table 8.1. This will<br />
tell you in which circuit the computer has detected a problem.<br />
Note: A code indicates there is a problem with a specific circuit, NOT<br />
NECESSARILY THAT A PARTICULAR PART IS BAD.<br />
25
8.2.4 Before taking more extensive corrective actions for any trouble codes, make<br />
sure all connections on the indicated circuit, INCLUDING the computer,<br />
are clean and tight. Inspect the wiring in the circuits for any broken, shorted, or<br />
exposed wires. Finally, insure all ground wires are clean and secure.<br />
8.2.5 If you are getting a code from your computer and need to clear the code, other<br />
than 12, after you have replaced a part, readjusted a part, etc. You can do this by<br />
making the following steps.<br />
A: Install a jumper wire from terminal A to terminal B<br />
B. Ignition ON engine OFF<br />
C. Move throttle from 0% (idle) to 100% (WOT) and back to 0%.<br />
D. Remove the jumper wire.<br />
E. Turn ignition OFF for at least 20 seconds.<br />
F. Ignition ON engine OFF<br />
G. Recheck for codes.<br />
.<br />
26
Code #<br />
Circuit affected<br />
13 Oxygen Sensor<br />
14 Coolant Temp. High Voltage (COLD)<br />
15 Coolant Temp. Low Voltage (HOT)<br />
21 Throttle Position Sensor (high voltage)<br />
22 Throttle Position Sensor (low voltage)<br />
23 Intake Air Temp. Low Voltage (HOT)<br />
25 Intake Air Temp. High Voltage (COLD)<br />
33 MAP Sensor Circuit (high voltage)<br />
34 MAP Sensor Circuit (low voltage)<br />
41 Ignition Control Circuit (open IC circuit)<br />
42 Ignition Control Circuit (grounded IC)<br />
44 Knock Sensor Inactive<br />
54 Heated Oxygen Low Voltage (lean)<br />
55 Heated Oxygen High Voltage (rich)<br />
Table 8.1 Diagnostic Trouble Code Chart<br />
8.4 WHEN TO CALL PERFECT PERFORMANCE PRODUCTS TECH LINE<br />
8.4.1 These harness kits have been built with the highest regard to strict quality control<br />
and tested before shipment. Before calling us please double check all connections<br />
and perform basic trouble shooting (fuel pressure, spark, injector pulse, etc.).<br />
8.4.2 If you have any questions concerning the installation of this harness or are having<br />
trouble in general; please call the <strong>Painless</strong> <strong>Performance</strong> tech line at (800) 423-<br />
9696. All calls are answered from 8 AM to 5 PM CST, Monday-Friday, except<br />
holidays. Please leave a message if you are unable to reach us and we will return<br />
your call as soon as possible.<br />
27
Note: HELPFUL INFORMATION ON THE PERFECT ECM CALIBRATIONS.<br />
The PERFECT ECM has been specifically calibrated for your particular engine. If there<br />
are plans to run the 4.8L or 6.0L GM Truck engines with this system, you must purchase<br />
<strong>Perfect</strong> Part Number 65245; the <strong>Perfect</strong> CalTool Software. This computer has been<br />
programmed with a REV. limit set @5,700 RPM. If your computer was to detect an<br />
engine malfunction it will set the “check engine” light and store a code. The computer<br />
will also place itself into a “safe mode” if the engine temperature reaches 250˚. Once the<br />
engine cools down the computer will reset itself out of “safe mode” and return to normal<br />
running operation. Safe mode will still allow you to drive your vehicle, but will not allow<br />
the engine to rev over 1,300 RPM.<br />
E-mail:tech@painlessperformance.com<br />
WEB: www.painlessperformance.com<br />
<strong>Painless</strong> <strong>Performance</strong> Limited Warranty<br />
and Return Policy<br />
Chassis harnesses, fuel injection harnesses, and Striker ColdShot units are covered under<br />
a lifetime warranty.<br />
All other products manufactured and/or sold by <strong>Painless</strong> <strong>Performance</strong> are warranted to<br />
the original purchaser to be free from defects in material and workmanship under normal<br />
use. <strong>Painless</strong> <strong>Performance</strong> will repair or replace defective products without charge during<br />
the first 12 months from the purchase date. No products will be considered for warranty<br />
without a copy of the purchase receipt showing the sellers name, address and date of<br />
purchase. You must return the product to the dealer you purchased it from to initiate<br />
warranty procedures.<br />
28
PERFECTION CalTool<br />
P/N: 65245<br />
Manual #90549<br />
<strong>Perfect</strong> <strong>Performance</strong> <strong>Products</strong>, <strong>LLC</strong><br />
<strong>Painless</strong> <strong>Performance</strong> <strong>Products</strong> Division<br />
2501 Ludelle Street<br />
Fort Worth, TX 76105-1036<br />
800-423-9696 phone – 817-244-4024 fax<br />
Web Site: www.painlessperformance.com<br />
E-Mail: painless@painlessperformance.com
If you have any questions concerning use of this software or<br />
having trouble in general, please feel free to call <strong>Painless</strong><br />
<strong>Performance</strong> <strong>Products</strong>' tech line at 1-800-423-9696. Calls are<br />
answered from 8am to 5pm central time, Monday thru Friday,<br />
except holidays.<br />
We have provided as accurate instructions as possible, and are<br />
always concerned about improvements to be made. Any<br />
comments or suggestions concerning these instructions please<br />
send a fax to (817)244-4024 or e-mail is always welcome at<br />
painless@painlessperformance.com. We appreciate your<br />
business.<br />
<strong>Perfect</strong> <strong>Performance</strong> <strong>Products</strong>, <strong>LLC</strong> shall in no event be liable in contract or<br />
tort (including negligence) for special, indirect, incidental, or consequential<br />
damages, such as but not limited to, loss of property damage, or any other<br />
damages, costs or expenses which might be claimed as the result of the use or<br />
failure of the goods sold hereby, except only the cost of repair or replacement.<br />
P/N 90549<br />
December 06, 2007<br />
Revision #3 07/10<br />
Copyright 2007 by <strong>Perfect</strong> <strong>Performance</strong> <strong>Products</strong>, <strong>LLC</strong><br />
2
Congratulations, on the purchase of the <strong>Perfect</strong> Engine Management fully tunable<br />
fuel-injection system. This booklet is designed as a guide through the tuning process. Tuning<br />
an injection system can be tricky and at times very complex, but with patience and some<br />
general guidelines, a superb running engine can be accomplished.<br />
This kit contains the following parts:<br />
Instruction Manual #90549<br />
USB Key<br />
Software CD w/Case<br />
Gray communication cable<br />
NGK Wide Band Interface Cable<br />
NOTICE: This kit is ONLY compatible with Windows XP. It will not work with<br />
Windows Vista or Windows 7.<br />
This kit does not include a USB to Serial adaptor. Keyspan® company<br />
(www.keyspan.com) makes a very easy to use unit P/N USA-19HS. This is the<br />
ONLY adaptor which is compatible with this kit. This adaptor must be purchased<br />
for this kit and is available from most electronics suppliers.<br />
3
Installing the Software<br />
1. Start by placing the Software CD into the CD/DVD drive on the desired computer and<br />
close the drive door. The software will automatically start an installation wizard and<br />
walk you through the installation process.<br />
2. Follow each step in the wizard and finish the software installation process. At the end<br />
when it asks if you would like to start the software, remove the check from the box<br />
and close the window.<br />
3. Now that the software has been installed onto your computer; there is an icon on<br />
your computer titled, “InGenius <strong>Perfect</strong> v2.2.<br />
4. Now insert your purple USB key into a port on your computer.<br />
5. Double click on the InGenius <strong>Perfect</strong> v2.2 icon on the desktop or go to START>All<br />
Programs><strong>Painless</strong> <strong>Performance</strong>>Ingenius <strong>Perfect</strong> v2.2>Ingenius <strong>Perfect</strong> v2.2.<br />
6. Now you can navigate through the software as explained in these instructions. Please<br />
read about each section and what changes it allows.<br />
7. If you are ready to connect to your car with the <strong>Perfect</strong> System installed (it won’t<br />
work sitting on a workbench disconnected from your engine), place the CD that was<br />
included with your new KeySpan USB to Serial adaptor (P/N USA-19HS) and install the<br />
software as per the KeySpan software wizard.<br />
8. Now connect the USB to Serial adaptor to the computer, connect the gray<br />
communication cable to the USB to Serial adaptor and then, with the ignition OFF<br />
plug the communication cable into the PERFECT engine harness.<br />
9. After the software opens, turn the ignition to the ON position and watch for the red<br />
icon on the lower right hand corner of the screen to turn yellow and then green.<br />
*If the icon did not change colors, the ECM and laptop are not communicating. Click the<br />
Run button on the top of the screen one time, wait three seconds and then click it<br />
again. If the icon on the bottom of the screen still does not change, go to<br />
OPTIONS>Settings>Communication>and pick a different COM port. If it was set to<br />
COM 1 then try COM 3. Try each different Com Port until the icon on the bottom of the<br />
screen turns green. Each time a different Com Port is tried, the RUN button on the top<br />
of the screen will need to be toggled on and then off.<br />
10. IMPORTANT/IMPORTANT/IMPORTANT: ALWAYS CLICK RECEIVE FOR THE<br />
FIRST TIME WHEN THE SOFTWARE CONNECTS TO THE ECM. If you send a<br />
blank calibration to the ECM it will erase the ECM and it will be necessary to<br />
send it back to <strong>Painless</strong> to be recalibrated. THIS IS A VERY IMPORTANT<br />
DETAIL TO NOT MISS.<br />
4
11. On part numbers 65140, 65141, 65252, and 65253 it is necessary to save the<br />
calibration onto your computer once you have received it. These calibrations are not<br />
in the software package where they can be retrieved once they are modified.<br />
12. In order to load a calibration into the ECM, go to Calibration>Open>Calibrations><br />
And then pick the appropriate calibration for your PERFECT SYSTEM. For<br />
example, A GM Tuned-Port Engine uses the L98 calibration.<br />
13. Click on the desired calibration, open it and now click. Do not turn off the<br />
ignition or try to start the vehicle until it’s completed downloading the cal to the ECM.<br />
14. Now cycle the ignition off, wait seven seconds and then turn it to the On position.<br />
15. Providing the engine, fuel system, and wiring installation is complete,<br />
turning the key to the start position should fire up the engine. Be sure to<br />
check the fuel pressure is at the specific pressures for your engine.<br />
5
Section 1: General Tuning Guidelines<br />
The adjustments available in this software have the potential to seriously<br />
damage the engine, if not done in the proper way. If a leaner than required mixture or too<br />
much spark timing is programmed into the engine ECM, detonation leading to a damaged<br />
engine will most likely occur. The calibrations provided for each engine are a good base to<br />
start programming from. Most of the time the spark tables for each engine combo will not<br />
need to be changed from the ones provided. When larger than stock camshafts are installed<br />
into an engine the idle and just off idle spark timing may need to be slightly advanced. The<br />
fuel tables and idle setup are most often in need of tuning. However, if the fuel/air mixture is<br />
too lean engine damage is imminent under sustained heavy loads. A rich condition will usually<br />
just produce clouds of black smoke from the exhaust pipe or even foul spark plugs.<br />
Section 2: Dashboard<br />
This screen serves as a “Scan Tool” for the PERFECT systems. The Dashboard shows<br />
live sensor data, (RPM, TPS, MAP, O2, and ECT), etc, when the engine is running or the key is<br />
in the ON position. This sensor data is used to analyze engine performance, sensor<br />
functionality and monitor critical sequences of events. For example, with the key on engine<br />
off, if the accelerator is not being pressed at all, the TPS gauge should read “0%”. Then with<br />
the accelerator pressed to the floor, the TPS gauge should read “99.6%”. The throttle<br />
adjustment is explained in more detail in Section 3: Idle.<br />
The Dashboard can be customized by adding different gauges with each displaying<br />
different parameters and controlling how each parameter is displayed. Simply right click the<br />
mouse, choose “Design mode”, then right click the mouse again and select “New Gauge”. A<br />
window displaying all of the available features for each gauge will popup. Simply click on each<br />
tab and make decisions based on the appearance and function of the gauge desired. Many of<br />
the most important gauges come preset in this software package and can be modified at<br />
anytime. Once any design changes have been made, simply go to File-Save Workspace and<br />
save any changes that have been made.<br />
Section 3: Fuel<br />
These screens contain the main Base Fuel Table with the fuel injector pulse width<br />
values. The values are in milliseconds of injector firing time or in other words, “How long the<br />
injector is open and allowing fuel to be sprayed into the engine”. Other adjustments in this<br />
section are simply a multiplier being applied to the values in the Base Fuel Table to increase or<br />
decrease the amount of fuel under specific conditions. It is critical the base fuel table values<br />
are as accurate as possible.<br />
See below for a description of how each adjustment is made in the Fuel screen:<br />
6
1. Main – Base Fuel Table<br />
RPM (Revolution per Minute) vs. MAP (Manifold Absolute Pressure) Sensor values in<br />
KPA (Kilopascals) These are the “X” and “Y” coordinates of the table.<br />
How much fuel will the engine efficiently burn at a specific RPM? If the engine was<br />
held at a constant RPM and MAP(Load) listed on the Base Fuel Table, then the<br />
amount of fuel the injector will deliver is directly proportional to how many<br />
milliseconds the injector is command to be open.<br />
It is crucial, when making adjustments to these values; the Coolant and Intake Air<br />
Temperature Compensation multipliers are set to 1.00 and the Transient Fuel<br />
multipliers must be set to 0. Only then will the engine be running solely on off the<br />
Base Fuel Table numbers. The O2 sensor selection in the Setup menu must be set<br />
to either “No Fuel Trim” or when present “Wideband Monitor”. This is to prevent any<br />
Closed Loop O2 fuel trim. This fuel injection system is only compatible with the NGK<br />
AFX wideband system. Call your local <strong>Painless</strong> <strong>Performance</strong> dealer for more details.<br />
<strong>Painless</strong> has provided base calibrations for each engine supported, so be sure and<br />
start with the correct engine base calibration.<br />
2. Compensation – Coolant Temperature and Intake Air Temperature<br />
Coolant Temperature – These values are multiplied to the Base Fuel Table values to<br />
richen the mixture when the engine coolant, hence the engine, is cold. Or another<br />
way of looking at it is, it leans out the mixture as the engine warms up. Generally<br />
speaking, the values warmer than 176deg F should be 1.00. This would mean there<br />
is no enrichment due to the engine not being at running temperature.<br />
Intake Air Temperature – These values are multiplied to the Base Fuel Table values<br />
to richen the mixture when the intake air is cool and to lean out the mixture when<br />
the intake air is hot. It’s best to use the Coolant Temperature to do most of the cold<br />
enrichment when the engine is cold and the Intake Air enrichment to fine tune<br />
fueling via air temperature.<br />
3. Crank Fuel<br />
<br />
Crank Fuel Prime – This is the initial shot of fuel from the injectors, comparable to<br />
throttling a cold carbureted engine before startup. The amount of fuel needed will<br />
vary with each different engine combination. Generally, more fuel is needed for<br />
quicker starts on engines with larger lift and duration camshafts. Watch for an<br />
overly large puff of black smoke out of the tailpipe during startup for an indication if<br />
the values in these fields are too large.<br />
Crank Fuel – This is the amount of fuel sprayed into the engine from 0 rpm to 300<br />
rpm. Colder temperatures require more fuel. Watch for an overly large puff of black<br />
smoke from the tailpipe for an indication of too much fuel during startup.<br />
<br />
Crank to Base Fuel Compensation – These values are multiplied to the Base Fuel<br />
Table values and are used to gradually pull out the overly rich mixture during<br />
cranking. Once the engine speed is greater than 300 rpm, these values will start<br />
tapering off the amount of fuel being injected into the engine. Think of this as the<br />
transition to the Base Fuel Table while the engine is firing up. It’s equivalent to the<br />
choke pull-off on a carburetor.<br />
7
Blend Time – This is the time it takes to transition from Crank Fuel to the Base Fuel<br />
Tables. Larger times here will slow down the transition and keep the fuel mixture<br />
rich longer. Smaller times here will speed up the transition and shorten the amount<br />
of time the mixture is richer. If the engine acts like it’s about to die after it first fires<br />
up, this value may need to be increased dependent upon if the Air/Fuel ratio<br />
measured in the exhaust goes lean and the engine stumbles.<br />
4. Transient Fuel<br />
MAP Acceleration Enrichment - These values are multiplied to the Base Fuel Table<br />
values to richen the mixture when there’s a change in the amount of engine<br />
vacuum. Engine vacuum can be directly translated into the amount of load being<br />
applied to an engine. With increased load, the engine will need more fuel to<br />
continue to do the same amount of work. Only with a change in the engine vacuum<br />
(load) will these fuel multipliers be applied to the mixture.<br />
Fuel Multiplier based on Delta Manifold Pressure (0 to 31.13 msec)<br />
- “Delta” – means “change in”<br />
<br />
TPS Acceleration Enrichment – These values are multiplied to the Base Fuel Table<br />
values to richen the mixture when there’s an increase in the amount of throttle<br />
being applied to the engine. Only on an increase in throttle will this adjustment be<br />
used by the ECM to richen the mixture. In carburetor terms, this adjustment would<br />
be the “accelerator pump”. If under a hard stomp of the throttle the engine<br />
stumbles, slightly increasing these values may help to fix the problem. Watching the<br />
Air/Fuel ratio in the exhaust with a wide band O2 sensor, see if the mixture goes too<br />
lean. Under a hard acceleration, it would be normal to possibly see the AFR goes as<br />
far rich as 10 to 1.<br />
Fuel Multiplier based on Delta Throttle Position (0 to 31.13 msec)<br />
- “Delta” – means “change in”<br />
5. Decel Fuel Cut-off<br />
This enables or disables the fuel to be cut-off during a deceleration. It helps prevent<br />
and control back-firing when decelerating. It also prevents the engine from loading<br />
up with fuel during a high rpm throttle release. In most street applications, it is<br />
recommended to enable this feature for best drivability.<br />
6. Oxygen Sensor<br />
Idle Target A/F Ratio – This is the Air/Fuel Ratio the ECM will trim or add fuel to<br />
when in closed loop and the engine is idling. The ECM only has the authority for<br />
20% more or less fuel. Before any closed loop fuel trim is used the Base Fuel table<br />
must be as accurate as possible.<br />
Target A/F Ratio – This is the Air/Fuel Ratio the ECM will learn to for each engine<br />
load (MAP) and engine rpm. The desired Air/Fuel Ratio entered in each box is where<br />
the fuel trim adjustment in the software will adjust the Air/Fuel Ratio to be. Weather<br />
conditions and Barometric pressure have an effect on how much fuel will need to be<br />
added or subtracted from the base fuel table. Understand these values are a<br />
“Target” for the ECM to reach with Fuel Correction. This is displayed on the Main<br />
8
Dashboard under the O2 Sensor gauges. Fuel Correction is the percentage of fuel<br />
being added or subtracted by the ECM from the Base Fuel Table. The less fuel being<br />
added or subtracted from the Base Fuel Table the closer the values are to being<br />
correct for a given calibration.<br />
<br />
<br />
<br />
<br />
Enable RPM – This is the engine speed in which Closed Loop O2 Fuel control<br />
becomes active. Most stock, smooth idle engine combinations will want to enable<br />
the Closed Loop O2 control at around 600 rpm. Larger profile camshafts may require<br />
the enable rpm to be around 1500-2000 rpm.<br />
Disable RPM – This is the engine speed in which the Closed Loop O2 Fuel control<br />
becomes inactive.<br />
Coolant Temp Enable – This is the coolant temperature the engine must be up to in<br />
order to enter Closed Loop O2 control. It’s best to enter Closed Loop O2 control<br />
after the engine is at operating temperature. Generally about 10-15 degrees before<br />
the thermostat opening temperature will cover most engine combos.<br />
Minimum Run Time – This is the minimum time the engine must be running before<br />
entering Closed Loop O2 control. The main purpose of this is for hot starts were the<br />
engine is still warmed up, but the O2 Sensor is not. If the O2 sensor is not warmed<br />
up it will not function properly and will most likely send the incorrect signal to the<br />
ECM.<br />
Section 4: Spark<br />
The Base Spark Tables are developed in these screens. The sky’s the limit when<br />
configuring a spark table for ignition timing, so great care must be taken when modifying<br />
these tables. If too much spark advance is calibrated into the system, severe detonation will<br />
occur. Detonation will not only hinder engine performance, but can also severely damage the<br />
engine. Engine damage will result from too much spark advance and continual detonation.<br />
The values in these tables are in degrees of spark advance before top dead center. In<br />
other words, “The number of degrees of crankshaft rotation the spark plug fires before each<br />
piston reaches Top Dead Center.” It is critical the Base Spark Table values are as accurate as<br />
possible. If the engine has detonation under a load or hard acceleration, be sure to retard the<br />
spark appropriately. Knock detection can be enabled or disabled in this section. Knock<br />
detection is useful in determining if the Base Spark Table has too much advance calibrated in<br />
it. Spark compensation based on coolant temperature and engine load can be adjusted here as<br />
well.<br />
1. Main – Base Spark Table<br />
RPM (Revolution per Minute) vs. MAP (Manifold Absolute Pressure) Sensor values in<br />
KPA (Kilopascals) These are the “X” and “Y” coordinates of the table.<br />
The MAP values are a direct translation to the amount of engine load. The higher<br />
the MAP value reading indicates a larger engine load.<br />
Base Spark Table values should only be calibrated when the engine is fully warmed<br />
up.<br />
<strong>Painless</strong> has provided base calibrations for each engine platform supported, so be<br />
sure and start with the correct engine base calibration.<br />
9
When the Knock System is enabled, a gauge showing the amount of Knock Retard<br />
on the Mini Dashboard can be used to determine if the Base Spark Table needs to<br />
be calibrated.<br />
Generally speaking, the specific spark table provided for each engine platform<br />
supported will not need to be adjusted. Some examples of when the timing will need<br />
to be advanced more would be when a very large duration/lobe separation camshaft<br />
has been installed. The advance from idle and up to about 1500rpm would be the<br />
area to slightly increase, so a more stable idle speed can be achieved.<br />
2. Compensation – Altitude and Coolant Temp and MAP<br />
Altitude - This is used to add or subtract spark advance based on atmospheric<br />
pressure. The amount of atmospheric pressure is a measurement taken by the ECM<br />
every time the ignition is turned on. This directly relates to the amount of oxygen<br />
available to the engine to support combustion. Higher elevations have less<br />
atmospheric pressure; hence less air will be pushed into the engine with each piston<br />
stroke. SO, to maintain close to the same performance as in lower altitudes;<br />
advancing the timing slightly is one option.<br />
It is always a good idea to monitor the knock system while tuning the spark tables.<br />
If the engine is knocking/has detonation/pinging and more spark timing is added,<br />
severe engine damage will eventually occur.<br />
Coolant Temp and MAP – This table is designed to remove spark when both engine<br />
load and temperature are both at higher levels. As the engine is loaded and the<br />
engine speed decreases knock may occur. This is because the fuel sprayed into the<br />
cylinders is given a longer time to heat up before combustion. The amount of spark<br />
to be removed will depend on the engine combination, efficiency of the cooling<br />
system, and size/weight/gearing of the vehicle it is in. The base calibrations<br />
provided in this software package do not have values in this table.<br />
Knock – All systems supported with this software from <strong>Painless</strong> <strong>Performance</strong> use the<br />
knock system. It is highly recommended to leave the knock system enabled to<br />
prevent severe engine damage. The maximum amount of spark retard the knock<br />
system is allowed to enable is 10 degrees.<br />
Section 5: Idle<br />
1. Idle Speed – Desired Idle Speed and Vehicle Speed Enable<br />
Desired Idle Speed – This is where the idle speed of the engine is set based on<br />
coolant temperature. Higher idle speeds are recommended when the engine is cold<br />
to quicken the amount of time a cold engine takes to reach operating temperature.<br />
On the Dashboard there is an indicator called “Idle in Control of RPM” which tells if<br />
the ECM is in control of the idle speed. The throttle must be fully closed for this to<br />
occur.<br />
Vehicle Speed Enable – Where applicable, this tells the ECM when to go into loop<br />
idle control in relation to MPH. A good place to start is 25mph.<br />
10
2. Throttle Setup – Throttle Zero and Throttle Scaler<br />
Throttle Zero – This is used to synchronize the throttle position sensor signal and<br />
what the ECM considers closed throttle. The calibration procedure for this is outlined<br />
on this screen. If this number is incorrect, Closed Loop Idle Air Control, Idle Spark<br />
Stabilizer and Stall Saver will not work properly.<br />
Throttle Scaler – This multiplier is used to scale up or down the TPS reading to<br />
achieve the correct throttle position percentage at WOT(wide open throttle). With<br />
the throttle fully depressed, adjust this value until the percentage at WOT is 99.6%.<br />
On this system 99.6% is wide open throttle. Always be sure to check the Throttle<br />
Zero value by using the procedure in the software after adjusting the Throttle<br />
Scaler.<br />
3. Advanced Idle Calibrations<br />
Throttle Follower Intro – This value represents the number of steps per percentage<br />
of throttle opening the IAC (Idle Air Control) valve will open as the throttle is<br />
opened. This acts as a buffer when under a quick deceleration to help the transition<br />
from open throttle to closed throttle. Some carbureted applications had a dashpot to<br />
dampen a quick snap of the throttle. This adjustment does the same thing, only with<br />
the IAC. A value of 1 will cause the ECM to open the IAC one count per 1% of<br />
throttle position.<br />
Vehicle Speed Follower Intro – This value represents the number of steps per<br />
vehicle speed (MPH) the IAC valve will open. This is especially useful on a long<br />
deceleration down a hill where the throttle is closed and the engine is still above the<br />
Desired Idle Speed. Without the Vehicle Speed Follower, the ECM will try to bring<br />
the idle down to the set Desired Idle Speed and fully close the IAC. Once the vehicle<br />
came to a stop, the engine speed would droop below the Desired Idle Speed and<br />
almost die because of the time it takes to open the IAC from its fully closed position.<br />
Follower Decay – This is the rate in which the Throttle Follower is decayed out. How<br />
many seconds it takes to bring the IAC back to its Idle Speed Position. If the<br />
engines idle hangs or stays higher than normal, increase this value. If the engine<br />
idle droops and almost dies, decrease this value.<br />
Stall Saver – This is a multiplier used to set a RPM below the Desire Idle Speed in<br />
which the Stall Saver goes into effect. So if the idle speed is 750 rpm and the value<br />
in this field is set at 0.7500, then the Stall Saver will enable at 562 rpm. Stall Saver<br />
adds IAC counts (opens) and advances the ignition timing to keep the engine from<br />
stalling.<br />
Stall Steps – This is the number of IAC steps added by the ECM when in Stall Saver<br />
mode. This number will be added every .125 seconds or 8 times per second. The<br />
more steps added, the more aggressive the ECM will try to recover the engine from<br />
stalling.<br />
Crank IAC Position – This is the IAC cranking position based on coolant temperature.<br />
When the ignition is turned to the on position the ECM will move the IAC to this<br />
position to give the engine the correct amount of air to start. The larger the number<br />
the higher the engine speed will flare when it first fires up. This is why it is not<br />
necessary to hold the throttle open while cranking a fuel injected engine, as it most<br />
likely would be on a carbureted engine.<br />
IAC Max Position – This value is the upper limit for how many counts the IAC can<br />
open to. These values are setup at the factory and the <strong>Perfect</strong> System Calibrations<br />
11
already have them. Under normal circumstances this value will not need to be<br />
changed.<br />
IAC Max Base Position – This is the maximum IAC position without throttle follower,<br />
stall saver or load anticipation added. These values are setup at the factory and the<br />
<strong>Perfect</strong> System Calibrations already have them. Under normal circumstances this<br />
value will not need to be changed.<br />
Section 6: Setup<br />
1. Sensors – IAT Sensor<br />
<br />
IAT Sensor – This is where the Intake Air Temperature Sensor input to the computer<br />
is enabled or disabled. If an IAT Sensor is present, enable this input. Calibration of<br />
the fuel via air temperature must be entered under the Fuel Screen. The IAT sensor<br />
calibration is useful to remove a slight amount of fuel as the air temperature<br />
increases or to add a slight amount of fuel as the air temperature decreases. On a<br />
really cold day, 32deg F and below, this adjustment can be used to enrich the fuel<br />
slightly.<br />
2. Oxygen Sensor – Enable/Disable<br />
● No Fuel Trim - This is exactly what is says, “No Fuel Trim” meaning the engine will<br />
run directly off of the Base Fuel Table values only. This means the O2 system has<br />
been completely disabled. When using an external wide band O2 sensor to monitor<br />
the exhaust air/fuel ratio, this will need to be selected.<br />
<br />
<br />
Stock Closed Loop – This is only used with a stock narrow band O2 sensor. All<br />
PERFECT systems use this type of sensor when no wide band O2 sensor is present.<br />
These next two choices REQUIRE the use of a NGK AFX wide<br />
band Oxygen Sensor Kit P/N 91101.<br />
NOTE: Included in this kit is a wideband interface harness with the purpose<br />
of connecting a NGK Wideband Sensor P/N 91101 into the main engine<br />
harness. Simply match and connect the wires based on their colors and plug<br />
into the O2 connector on the engine harness. Be sure and follow the<br />
instructions on the Wideband display module to do a free-air calibration<br />
before inserting the NGK O2 Sensor into the exhaust pipe.<br />
<br />
<br />
Wideband Monitor – This is only used with the NGK AFX wide band kit. Its purpose<br />
is to accurately measure the oxygen content in the exhaust to indicate if the engine<br />
is receiving too much fuel or not enough fuel. More oxygen is lean and less oxygen<br />
is rich. The gauge on the Dashboard of the software that displays, “O2 Sensor” will<br />
indicate what the air/fuel ratio is in the exhaust. This gauge will not give an<br />
accurate measurement when a narrow band O2 sensor is being used.<br />
Wideband Closed Loop – This is to enable closed loop O2 fuel trim after the base<br />
fuel table has been thoroughly calibrated. The ECM will compare the Air/Fuel ratio<br />
value in the Target Air/Fuel ratio table to the actual value read in the exhaust. The<br />
ECM has the authority to change the amount of fuel plus or minus 20% of the<br />
12
values in the Base Fuel table. This is why it is best to have the Base Fuel Table’s<br />
values within at least 20% of the desired Air/Fuel ratio.<br />
3. Fuel Pump – Prime Time at Keyup<br />
Prime Time at Keyup – This is the amount of time the fuel pump will run when the<br />
ignition switch is initially turned to the on position. Its how the computer primes the<br />
fuel rail with pressurized fuel before the engine is being cranked to lessen the<br />
amount of time for fuel to be delivered and the engine to start. Three seconds is<br />
usually more than enough time to prime the system.<br />
3. Rev Limit<br />
<br />
Engine Speed Limit based on Coolant Temperature – This is the Rev Limiter on the<br />
<strong>Perfect</strong> System. Cold engines and overheating engines need to have a lower rev<br />
limit, than engines at normal operating temperature.<br />
4. Aux Output – NOT SUPPORTED IN PERFECT APPLICATIONS<br />
5. Fan 1 – On Temperature/Off Temperature<br />
On Temperature – On all PERFECT systems this is the temperature in which the ECM<br />
will provide a ground signal to an electric cooling fan relay. Set this temperature at<br />
approximately 20 degrees Fahrenheit lower than the normal engine operating<br />
temperature.<br />
<br />
Off Temperature – On all PERFECT systems this is the temperature in which the<br />
ECM will take away a ground signal to an electric cooling fan relay thus turning the<br />
fan off. Set this temperature at approximately 10 degrees Fahrenheit lower than the<br />
On Temperature set point in order for the fan to run continuously. In most cases,<br />
the electric cooling fan will not need to cycle on and off, but if such operation is<br />
desired the On and Off temperature set points will need to be adjusted.<br />
6. Fan 2 - NOT SUPPORTED IN PERFECT APPLICATIONS<br />
7. Set Timing – Enable/Disable<br />
By enabling the “Set Timing” mode, the ECM will force the spark advance to 10<br />
degrees of base spark timing. At this point, adjust the distributor until the base<br />
timing tab is showing 10 degrees of advance. Lock down the distributor and then<br />
disable the Set Timing function. This function is used to synchronize the distributor<br />
advance to the ECM advance. In other words, the ECM and the Engine’s distributor<br />
are now calibrated to each other. This function is only used on adjustable distributor<br />
ignitions engines.<br />
13
The PERFECTION software has been designed specifically for use with the Delphi<br />
MEFI-4 engine control module supplied by <strong>Painless</strong> in the PERFECT Engine<br />
Management System. This programming software is not compatible with any other<br />
MEFI ECM.<br />
Please note there are early and late versions of the PERFECT ECM. The early version only has the<br />
Delphi serial number on the label located on the back of the ECM. If you have this ECM you will need<br />
to send it in to <strong>Painless</strong> to have the latest base calibration flashed onto the ECM. Please contact <strong>Painless</strong><br />
at 1-800-423-9696 for a return authorization and shipping instructions. There is no charge for this<br />
upgrade. Be sure to send in the purple USB Key Number (as seen below) with your Purple USB<br />
key.<br />
The later version of the PERFECT ECM will have a USB key number in addition to the Delphi serial<br />
number. If you have this version of the ECM the USB dongle included in this software kit must be sent<br />
to <strong>Painless</strong> so it can be matched with the USB key number on the ECM. Again, please contact <strong>Painless</strong><br />
for shipping instructions and make sure you send in the purple USB Key Number (as seen below) with<br />
your Purple USB key.<br />
PERFECT software can only be used with the ECM and dongle for which each USB key number has<br />
been assigned.<br />
<strong>Perfect</strong> <strong>Performance</strong> <strong>Products</strong>, <strong>LLC</strong> shall in no event be liable in contract or tort (including<br />
negligence) for special, indirect, incidental, or consequential damages, such as but not limited to, loss of<br />
property damage, or any other damages, costs or expenses which might be claimed as the result of the<br />
use or failure of the goods sold hereby, except only the cost of repair or replacement.<br />
14


