

View PDF - Painless Wiring
View PDF - Painless Wiring
View PDF - Painless Wiring

Create successful ePaper yourself
Turn your PDF publications into a flip-book with our unique Google optimized e-Paper software.
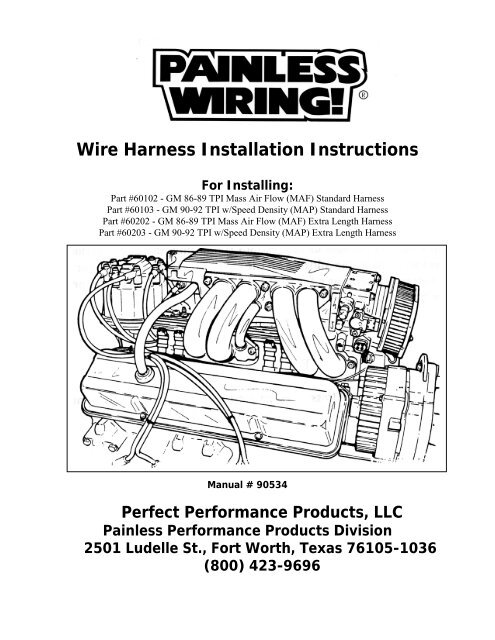
Wire Harness Installation InstructionsFor Installing:Part #60102 - GM 86-89 TPI Mass Air Flow (MAF) Standard HarnessPart #60103 - GM 90-92 TPI w/Speed Density (MAP) Standard HarnessPart #60202 - GM 86-89 TPI Mass Air Flow (MAF) Extra Length HarnessPart #60203 - GM 90-92 TPI w/Speed Density (MAP) Extra Length HarnessManual # 90534Perfect Performance Products, LLC<strong>Painless</strong> Performance Products Division2501 Ludelle St., Fort Worth, Texas 76105-1036(800) 423-9696
We have attempted to provide you with as accurate instructions aspossible, and are always concerned about corrections orimprovements that can be made. If you have found any errors oromissions, or if you simply have comments or suggestionsconcerning these instructions, please write us at the address on thecover, email, or call us, 1-800-423-9696. We sincerely appreciateyour business.For Technical QuestionsE-mail Address:Tech Line:painless@painlessperformance.com817-560-TECHPerfect Performance Products, Inc. shall in no event be liable incontract or tort (including negligence) for special, indirect,incidental or consequential damages, such as, but not limited to, lossof property damage, or any other damages, costs or expenses whichmight be claimed as the result of the use or failure of the goods soldhereby, except only the cost of repair or replacement.P/N 90534 <strong>Painless</strong> <strong>Wiring</strong> ManualRevision #12 MARCH 2011Copyright © 1996 by Perfect Performance Products, Inc.
TABLE OF CONTENTSList of Figures.…………………………………………………………………… iiList of Tables.……………………………………………………………………. iiList of Diagrams………………………………………………………………….. ii1.0 Introduction.............................................................................................................. 12.0 About These Instructions......................................................................................... 13.0 Tools Needed............................................................................................................ 24.0 Pre-Installation and Harness Routing Guidelines.................................................…. 24.1 Transmission Lockup Function.................................................................… 24.2 Understand the Engine that you are using................................................…. 45.0 General Installation Instructions.................................................................................75.1 Grounding The Vehicle................................................................................. ..85.2 Rough Installation......................................................................................... ..95.3 Harness Attachment...................................................................................... ..95.4 Terminal Installation Instructions.........................................................…… ..96.0 Specific Circuit Connections………………………………………………………...106.1. Dash Section Installation……………………………………………………..106.2 Sensor & Relay Installation…………………………………………………..117.0 Early-Version GM Tuned Port System Wire Harness Installation Instructions....... 167.1 Contents of the 60102 Wire Harness Kit...................................................... 167.2 Engine Group Installation............................................................................. 167.3 Dash Section Installation.............................................................................. 167.4 Sensor and Relay Installation........................................................................ 177.5 Tail Section Installation................................................................................ 178.0 Late-Version GM Tuned Port System Wire Harness Installation Instructions........ 218.1 Contents of the 60103 Wire Harness Kit..................................................... 218.2 Engine Group Installation............................................................................ 218.3 Dash Group Installation............................................................................... 218.4 Sensor and Relay Installation....................................................................... 218.5 Tail Section Installation......................................................................………229.0 Pre Adjustments Before Starting Engine…………………....................................... 239.1 Throttle Position Sensor Adjustment………………………………………. 239.2 Base Idle Adjustment……………………………………………………… 2310. Trouble Shooting Instructions………………………………………………………2310.1 The Check Engine Light…………………………………………………….2310.2 Retrieving Trouble Codes From The Computer………………...…………2410.3 When to Call <strong>Painless</strong>…………………………………………....………...26i
11 Add On Early TPI Emissions Kit……………………………………………………2712 Add On Late Emissions………………………………….………………..………...30LIST OF FIGURESFigure 4.1 Fuel Injection Computer................................................................... 4Figure 4.2 External Coil Distributor Hookup.................................................... 6Figure 4.3 Fuel Pump Relay Connector............................................................. 6Figure 6.3 Assembly Line Diagnostic Link (ALDL) Connector...................…. 11Figure 6.4 Brake Switch………………………………………………………...12Figure 6.5 Neutral Safety Switch……………………………………………….13Figure 6.8 Oxygen Sensor.................................................................................. 14Figure 6.9 Knock Sensor.................................................................................... 15Figure 6.10 TCC Solenoid................................................................................... 15Figure 7.1 Tuned Port Injection System, Right Side......................................... 19Figure 7.2 Tuned Port Injection System, Left Side............................................ 19Figure 7.3 Engine Detail, Right Side................................................................. 20Figure 7.4 MAF Sensor..................................................................................... 20Figure 7.5 Engine Compartment Overview....................................................... 21LIST OF TABLESTable 4.1Compatible Parts..................................................................................7Table 6.1 Sensor and Relay Installation........................................................... 14Table 7.1 GM Tuned Port Injection Engine Group Connections.................... 18Table 9.1 Diagnostic Trouble Codes................................................................ 25LIST OF DIAGRAMSDiagram 2Diagram 3Diagram 4Early TPI Emissions……………………………………………….29Late TPI Emissions………………………………………………..32Brake Switch Relay Connection……………………..……………33ii
3.0 TOOLS NEEDEDIn addition to your regular tools, you will need, at least, the following:Crimping Tool Note: Use a quality tool to avoid over-crimping.Wire StripperContinuity TesterCaution: Do not use a test light to test the computer orsensor wiring or you will damage the computer.Electric Drill1-1/4" Hole saw (for the rubber grommet in the firewall)4.0 PRE-INSTALLATION AND HARNESS ROUTING GUIDELINESThe installation of your harness kit consists mainly of two parts:• The physical routing, positioning, and securing of the harness, wire groups, andindividual wires and connectors.• The proper electrical connection of the individual circuits.These two major tasks are not separate steps, but are integrated together. That is, you willroute some wires and make some connections, route some more wires and make somemore connections.We cannot tell you how to physically route the harness in your automobile. That dependsa great deal upon the particular make of automobile and to what extent you want tosecure and conceal the harness. We do offer some general guidelines and routingpractices starting in Paragraph 4.3, GENERAL installation instructions in Section 5.0,and precise instructions concerning the electrical connections you will have to makebeginning in Section 6.0. To help you begin thinking through the installation of yourwire harness, read the following sections:4.1 VEHICLE SPEED SENSOR AND TRANSMISSION LOCKUPFUNCTIONSBefore you install the harness, please decide the following things:a. Are you going to use a 700 R4 Lockup Transmission that you wantthe computer to control the lockup on?b. Does the engine have to be emissions legal; i.e. does the EGRvalve and /or air solenoid, and diverter valve need to be connectedIf you answered yes to either or both of these questions then you must connect thewires labeled VSS to a vehicle speed sensor that will provide a two (2) or four (4)pulse signal to the computer. On the early model tuned port the sensor shouldoutput a square wave and on the late model tuned port engines it should provide asine wave output. <strong>Painless</strong> <strong>Wiring</strong> offers a VSS for either application, that willallow you to use your cable drive speedometer (if applicable)If you answered no to both of these questions then you may choose not to use avehicle speed sensor. Please note, there is the possibility of drivability issues,unless the VSS is installed.2
If you are going to use a vehicle speed sensor, take the orange/black andblack/white wires in the dash section (labeled for the park/neutral indicatorswitch) and connect them to the Park/Neutral Indicator Switch, which is designedto tell the computer the transmission is in park, as instructed in 6.1.4, andFigure 6.5. Do not connect the wires together.Important:The orange/black and black/white wires in the dash section thatare labeled for the park/neutral indicator switch are to beconnected to the park/neutral indicator switch, NOT ANEUTRAL SAFETY SWITCH. Under no circumstances shouldyou connect these wires to a neutral safety switch. (A part/neutralindicator switch is a switch that tells the computer when thevehicle is in park or neutral, but a neutral safety switch is a switchthat keeps the vehicle from starting unless it is in park or neutral.)You should never connect the orange/black and black/white wiresto the vehicle speed sensor wiring.If you are not going to use a vehicle speed sensor then you will take theorange/black and black/white wires in the dash section (labeled for thepark/neutral indicator switch) and connect them together.4.1.1 If you do NOT wish to use the lockup function, tape off and store thesingle purple wire, marked brake switch, in the dash group and the 4-position square connector in the tail section.4.1.2 If you ARE going to use the lockup circuit then you MUST have a vehiclespeed sensor (VSS) and the correct brake switch. These are necessary tomake the lockup function work correctly. The brake switch should beclosed (electrically connected) when the brakes ARE NOT being appliedand open (not electrically connected) when the brakes ARE being applied.This is the opposite of a standard brake light switch. The vehicle speedsensor lets the computer know how fast the wheels are turning.4.1.3 Regardless of whether you use the lockup function, the vehicle speedsensor (VSS) must be used and is needed by the computer so that it cancommand the emissions control devices on the engine. This part isnecessary if you want your vehicle to be street-legal.4.1.4 There are two different VSS harness applications. Early TPI has a singlebrown wire that attaches to one of the two wires coming out of the 60115speed sensor and the other wire is connected to ground. The Late TPI hastwo wires, purple and yellow that goes to and attaches to the 60116 sensorfrom the computer.3
4.2 You should get to know the particular engine that you are using:• EARLY VERSION TUNED PORT INJECTION (TPI) SYSTEM WITHA MASS AIRFLOW (MAF) SENSOR: The 60102 and 60202 harness willsupport the mass airflow (MAF) sensor, the burn off circuit wiring, and theelectronic spark control (ESC) module in addition to the other wiringcommon to the tuned port systems.• LATE VERSION TUNED PORT INJECTION (TPI) SYSTEMWITHOUT A MASS AIRFLOW (MAF) SENSOR, DESIGNED TO USEA MANIFOLD ABSOLUTE PRESSURE (MAP) SENSOR, BUT DOESNOT REQUIRE AN ELECTRONIC SPARK CONTROL (ESC)MODULE: The 60103 and 60203 harnesses are designed for and willsupport this system. This system has three connectors at the computerinstead of the two connectors shown in Figure 4.1.Note: Computer chips, on the later model (late 89 and up) tuned port engines all factorychips have the vehicle anti-theft system (VATS) programmed into them so that theycannot be used unless the factory steering column, compatible with the computer, wasinstalled. For the late model tuned port only you must obtain an aftermarket chip thatdoes not have the VATS programming in it.. For the late model tuned port systems, youwill need to obtain a chip for a 1991 Camaro with the VATS system removed so that itwill be compatible with our harness. Also, GM started using the VATS system in late1989 so if you are using an 1989 chip on an early style tuned port motor then please becareful to use a chip that does not have the VATS programmed into it.Figure 4.1 Fuel Injection Computer4
4.2.1 The <strong>Painless</strong> Harness is designed to be used with specific sensors andrelays. See Table 4.1 on page 7. These will meet all requirements andare compatible with <strong>Painless</strong> Performance harnesses. The followingnumbers given are GM part numbers except for the vehicle speed sensor(VSS) which is a <strong>Painless</strong> Performance number. The main computer partnumbers are REQUIRED for use with our harnesses. Note: Distributor toCoil and the Coil Power/Tach Pigtail are used only if you have a“separate coil” distributor.The computer part numbers shown in the compatible parts list in Table4.1 are required part numbers for that application. The use of any othercomputer may damage the computer, harness or both. Use of the wrongcomputer will almost certainly cause problems. Please double check to besure that you have the correct computer part number (it is shown as aservice number on the computer itself). The rest of the part numbersshown are for your information only.4.2.2 If you are using a separate coil type distributor, then you will use thedistributor adapter included in the kit. You will also need to obtain thedistributor to coil and coil power/tach pigtails either from your localdealer, a wrecking yard or from the original harness. The wiring for theseparate coil system is shown in Figure 4.2.4.3 Familiarize yourself with the harness by locating each of the harness groups andby looking at the connectors on the wire ends.4.4 Decide where and how the computer and sensors will be mounted. <strong>Painless</strong>Performance wire harness kits are designed to mount either under the dash or inthe lower kick panel on the right side. They must be no further apart than thewiring will allow (approx. 10 inches). Part numbers 60202 and 60203 will allowinstallation under the front seat.4.5 A good exercise is to lay out the wire harness on the floor beside your vehicle andidentify all the connectors and wires. The harness must be routed from the insideof the vehicle out to the engine compartment.4.6 You will want to route the harness through and around open areas. Inside edgesprovide extra protection from hazards and also provide places for tie wraps, clipsand other support.4.7 Route the harness away from sharp edges, exhaust pipes, and the hood, trunk, anddoor hinges.4.8 Plan where harness supports will be located. Use a support approximately every 6inches unless the harness routes under the floor carpet.4.9 Allow enough slack in the harness at places where movement could possiblyoccur (body to frame, frame to engine, etc.).4.10 The wires should be bundled into harness groups. Use tape, nylon ties or polysplitloom.5
Figure 4.2 External Coil Distributor Hook-upFigure 4.3 Fuel Pump Relay Connector6
MAF Tuned Port Injection 60102 & 60202 MAP Tuned Port Injection 60103 & 60104Main Computer……………..1227165 or 16198259 Main Computer……..…………1227730 or 16198262Brake Switch………………………………….25524845 Brake Switch…………………………………….25524845Neutral Safety Switch……………………..15705308 Neutral Safety Switch………………………..15705308Electronic Spark Control Module……….16128261 Manifold Absolute Pressure Sensor…..…..16137039Fuel Pump Relay(Style 1)..14078915 or 212-307 Manifold Air Temp……………………………..25036979Fuel Pump Relay(Style 2)…………………14089936 Fuel Pump Relay(Style 1)…..14078915 or 212-307Coolant Temperature Sensor……………25036979 Fuel Pump Relay(Style 2)……………………14089936Knock Sensor………………………………….10456018 Coolant Temperature Sensor………………25036979Oxygen Sensor…………………………………..AFS 21 Knock Sensor……………………………………10456126Mass Airflow Sensor………………………..14094712 Oxygen Sensor………………….………………….AFS 21Mass Airflow Power Relay………………..10067925 Oil Pressure Switch…………..…25036553 or D1818Mass Airflow Burn Off Relay……………..10094701 Vehicle Speed Sensor.……………………….PPP 60116Oil Pressure Switch……………25036553 or D1818 EGR Solenoid…………………1997111 or 214-331 **Vehicle Speed Sensor……………………..PPP 60115 Distributor to Coil <strong>Wiring</strong>.…………………PPP 60124Distributor to Coil <strong>Wiring</strong>……………… PPP 60124 Coil Power/Tach Pigtail….…………………PPP 60125Coil Power/Tach Pigtail…………….......PPP 60125EGR Solenoid………………1997111 or 214-331 **Manifold Air Temp……………………….…25036979Non-Vats Prom (85-88 5.0L engines)…16082183Non-Vats Prom (85-88 5.7L engines)…16068654* Note: This Prom does not control any transmission or torque converter functions.** This part has been discontinued by GM and is for reference only. The new replacement is a 214-339,Available thru your local Delco Distributor. Call <strong>Painless</strong> for the adapter pigtail needed for this unitTable 4.1 Compatible Parts5.0 GENERAL INSTALLATION INSTRUCTIONSCaution:• Do not disconnect the battery or the computer connector(s) while the ignition ison.• Do not short any wire in this harness to ground (with the exception of labeledground wires) or damage to the computer will result.• Giving or receiving a jump-start may damage the computer.• Do not use a test light when testing computer sensors or computer circuits.Damage to the computer will result!When routing the wires for the vehicle speed sensor (if used) make certain that they are atleast 12 inches away from any ignition wiring (spark plug wires, etc.).Notes:• All of the adapters, listed in the manual, are included in the wiring kit. Youshould use or remove them depending on your particular application.• If you are switching a TPI engine from MAF Sensor to MAP Sensor then youmust use the new Knock Sensor in Table 4.1.• An oil pressure SWITCH must be used with this harness. DO NOT BYPASSOIL PRESSURE SWITCH WIRES.• If you are using an oil pressure switch that has two or three small pins surroundedby a plastic collar for an electrical connection, an adapter is in the kit.• There is a normal, small current drain on these fuel injected systems.• Each connector in this harness is different and will not fit in the wrong place.NEVER FORCE ANY CONNECTOR.7
• When connecting the plugs to the computer USE EXTREME CARE to make surenone of the pins in the computer are or have become bent.• IF YOU HAVE A GM SEPARATE COIL IGNITION SYSTEM ON YOURENGINE: use the adapter in the kit.• FOR YOUR DISTRIBUTOR: The power wire used on the previous distributorshould work fine as long as there is no ignition resistor in the circuit. It must be afused power wire (14 ga. minimum) that is HOT (+12V) when the ignition switchis in the START AND RUN positions. Connect it to the terminal on thedistributor cap labeled BAT or to the pink wire on the separate Coil IgnitionSystem. This wire provides power to the ignition coil. YOUR AUTOMOBILEWILL NOT START OR RUN WITHOUT IT.• The connector for ignition timing adjustment is located near the computerconnection. This is a black plastic connector in the tan/black wire• The fuel pump relay connector on the harness requires a style 1. A style 2 relaymay be substituted. See Figure 4.3 for illustration and Table 4.1 for partnumbers.• The fuel pump you are using MUST be rated at a minimum of 45 pounds PSI(per square inch) for tuned port systems.• If you have headers you may have to relocate the knock sensor for properclearance. See Figure 6.9.Note: The oil pressure switch wires are designed to be connected to an oil pressureswitch, not the oil pressure sending unit. An oil pressure sending unit is for a gauge or anindicator light and will only have one terminal on the top. The stock oil pressure switchis cigar shaped and has three terminals. If you wish to use the stock oil pressure switchthen you will use the oil pressure switch adapter included with this kit. On the oilpressure switch adapter there are two wires that match the wire colors coming from ourharness and there is also an extra wire.The extra wire is for the factory oil pressure gauge or indicator light, depending on whatthe switch was originally designed for. You may also obtain a smaller oil pressure switchif you have clearance problems with the original oil pressure switch. This type of switchhas two male connectors that will plug directly into the harness.5.1 GROUNDING THE VEHICLEA perfectly and beautifully wired automobile will nevertheless have problems ifeverything is not properly grounded. Don't go to the effort of installing a qualitywire harness only to neglect proper grounding.5.1.1 Connect a ground strap or cable (minimum of a 2-gauge wire) from thenegative battery terminal to the engine block.5.1.2 Connect a ground strap from the engine to the chassis (frame). DO NOTRELY UPON THE MOTOR MOUNTS TO MAKE THISCONNECTION.5.1.3 Connect a ground strap from the engine to the body.8
5.4.1 Have all needed tools and connectors handy.5.4.2 Select the correct terminal for the wire and application.5.4.3 Determine the correct wire length and cut the wire. Remember to allowenough slack in the harness and wires at places where movement couldpossibly occur. DOUBLE-CHECK YOUR CALCULATIONS.5.4.4 Strip insulation away from wire. Strip only enough length necessary forthe type of terminal you are using.Note: In the following step, make sure that the terminal is crimped with theproper die in the crimping tool. An improper crimp will not make agood connection. DO NOT OVER CRIMP.5.4.5 Crimp the terminal onto the wire.5.4.6 Connecting the wires and connectors throughout the harness is a repeatingprocess. Make sure that each wire is first properly routed and then attach.DO NOT ATTACH THEN ROUTE AFTERWARD.5.4.7 When all wires are attached, tighten the mounts and ties to secure harnesspermanently.5.4.8 Attach the connectors to the computer BEING CAREFUL NOT TOBEND ANY PINS.5.4.9 Only after all connections have been made throughout the harness,connect the battery to the vehicle.Caution:Be sure the ignition is off when you reconnect the battery or youwill damage the computer.6.0 SPECIFIC CIRCUIT CONNECTIONSNote: If you have not already done so, read Sections 4.0 and 5.0 of these instructionsand think through the installation of the harness before securing or cutting anywires.6.1 DASH SECTION INSTALLATIONThe wires in this group consist of the assembly line diagnostic link (ALDL)connector (See Figure 6.3), the check engine light (pre-mounted into a mountingbracket), and four other wires.Note:You may need to connect the check engine light wires to their matesin the wire harness.Caution: Do not make any connections while the computer is plugged into theharness.Note:Wire color (example: Blk/Wht) is one wire with a stripe. The secondcolor (the stripe) may not be bold. Observe all two-color wiresclosely.10
6.1.1 Find a suitable location to mount the ALDL connector (using thebracket that the check engine light is mounted in) that will allowaccess to the front of the connector and still allow you to see thecheck engine light while driving.6.1.2 Mount the ALDL connector.6.1.3. Locate the Pnk/Blk wire and attach it to a 12V fused powersource. POWER IS REQUIRED WHEN THE KEY IS INTHE RUN AND START POSITION. This is the power wirefor the computer.6.1.4 Locate the Orn/Blk and Blk/Wht wires in the dash group. Thesetwo wires are for the Park/Neutral Selector Switch, NOT theNeutral Safety Switch. If you have a GM column then you canuse the combination switch P/N 15679680 and wire it as shownin FIGURE 6.4.Figure 6.3 Assembly Line Diagnostic Link (ALDL) ConnectorCaution:Do not connect these wires using directions from differentinstructions. You may damage the computer.6.1.5 If you are NOT using a Vehicle Speed Sensor (VSS) or aPark/Neutral Indicator Switch then you will connect these twowires together (orn/blk and blk/wht). When this is done, thecomputer will think the vehicle is in park. Engine RPM may belimited by the computer!Note: If you do this, the computer will stop controlling the exhaust gasrecirculation (EGR) solenoid. THIS WILL PREVENT THE SYSTEMFROM BEING STREET LEGAL6.1.6. The recommended switch is a combination reverse light ANDneutral safety switch. You may use it for these purposes AND forthe needed computer signal. If you wire it EXACTLY as shown inFigure 6.4B. You will need to tape off and store the Blk/Wht wirein this case.6.1.7. If you are going to use the recommended switch for the computer'sbenefit ONLY, then you will wire it as shown in Figure 6.4A.11
6.1.8 You may install your own switch. This switch must connect theOrn/Blk wire to ground ONLY when the car is in PARK. You mayor may not want to use the Blk/Wht wire. The other end of theBlk/Wht wire is already connected to ground through the harness.Note: Not attaching the orn/blk wire to anything may turn on the check enginelight6.1.9 The single purple wire is the wire that powers the lockup functionon the transmission. If you ARE NOT using the lockup then youwill tape off and store this wire. If you ARE using thetransmission lockup function then you will have to install a vehiclespeed sensor and a brake switch as described in Paragraph 4.1.2.6.1.10. If you are using the recommended brake switch then you will wireit according to Figure 6.4. The wire jumped to the back of theswitch in the illustration is the wire that has power on it whether ornot the brake is being applied. If you have installed your ownswitch then it must connect the single purple wire to power ONLYwhen the brakes are NOT being applied. If you are using ahydraulic brake switch see page 33 for proper wiring using a relay.Caution:Failure to wire this switch correctly will result in a dangeroussituation on the vehicle.Figure 6.4 Brake switch12
6.2 SENSOR AND RELAY INSTALLATIONA. Take the wiring that was previously routed to the sensors andconnect it according to Table 6.1Figure 6.5 Neutral Safety Switch13
Color # of Positions Labeled Connect to:In ConnectorBlk/Wht(1), Orn, Dk.Grn/Wht, 5 ----- Fuel Pump Relay (Style 1) (This connectorRed, Gry or Tan/Whthas the short red lead on it)Blk/Wht,Orn,Dk.Grn/Wht, 4 ------ Fuel Pump Relay (Style 2)Gry or Tan/WhtLt.Grn, Gry, Pur or Blk 3 MAP 2,3 Manifold Absolute Pressure SensorRed, Dk.Blu, Blk/Wht, 5 MAF (P) 2 Mass Airflow Power RelayOrn, Tan/WhtDk.Blu, Blk, 2x Orn 4 MAF (B) 2 Mass Airflow Burn off RelayBlk, Brn, Pnk/Blk, Blu 5 ESC 2,3 Electronic Spark Control ModuleNotes:1. On striped wires (example: Blk/Wht), the second color (stripe) may not be bold. Observe twocolorwires closely.2. Certain applications only.3. Additional wire length has been added for optional engine compartment mounting.Table 6.1 Sensor and Relay InstallationFigure 6.8 Oxygen Sensor14
Figure 6.9 Knock SensorFigure 6.10 TCC Solenoid15
7.0 EARLY VERSION GM TUNED PORT INJECTION SYSTEM WIRE HARNESSINSTALLATION INSTRUCTIONS7.1 CONTENTS OF THE 60102 AND 60202 WIRE HARNESS KITTake inventory to see that you have everything you are supposed to have in this kit. Ifanything is missing, go to the dealer where you obtained the kit or contact <strong>Painless</strong>Performance at (800) 423-9696. The kit should contain the following items:• Main wire harness• Distributor, Oil Pressure and Fuel pump Adapters.• Fuel injection harness instructions P/N 90503 (this booklet)The following optional parts are not included in the kit but are available from <strong>Painless</strong>Performance.• Emission Control Device Harnesses. (Part #60312 or 60313)7.2 ENGINE GROUP INSTALLATIONThe engine group is designed to be separated into left side (driver) and right side(passenger) sections. Each side is tie wrapped separately, BUT NOT LABELED.The right side of the engine has the connectors for the idle air control, throttleposition sensor, cold start switch, and coolant temp sensor, all of which ARElabeled. When you begin routing, FIRST separate the engine group into left andright sections and place them accordingly.7.2.1 Before you connect any wires, separate the tail section from the enginegroup and place it out of the way.7.2.2 Locate the two Blk/Wht wires in the harness that end in a single, large ringterminal and ground them to the engine.7.2.3 Using Figure 7.5, Table 6.1 and the specific illustrations indicated inTable 6.1, connect the wiring as directed.7.2.4 Green wire tagged A/C POWER attaches to the A/C compressor powerwire at the compressor if the vehicle is so equipped. This will increase theengine idle RPM when the A/C is turned on.7.3 DASH SECTION INSTALLATIONThe dash section installation is addressed in the General InstallationInstructions, section 5.0, Paragraph 6.2.1 and follow the instructions there.16
7.4 SENSOR AND RELAY INSTALLATIONThe following listing is for wires to be cut to length. Connect your wiring accordingly.Route and terminate the following wires in the under dash area;7.4.1 Purple wire tagged VATS attaches to the VATS control module if soequipped.7.4.2 Purple wire tagged BRAKE SWITCH attaches to the brake switch shownin FIGURE 6.47.4.3 Green/White wire tagged FAN RELAY GROUND is the ground for thefan relay if the computer is to be the control for the electric fan.7.4.4 Pink/Black wire attaches to the ignition source described in 6.1.37.4.5 Orange/Black and Black/ White wires attach according to your applicationas discussed in Section 4.1NOTE: Any wire that you are not using should be capped & stowed.7.5 TAIL SECTION INSTALLATIONThe tail section wires are connected as described below.7.5.1 Green – Tan/Blk – Purple wires in the white connector plug into thetransmission, if so equipped.7.5.2 Tan/White wire tagged FUEL PUMP attaches to the fuel pump. This is thepower wire for the pump.7.5.3 Brown wire tagged VEHICLE SPEED SENSOR attaches to the vehiclespeed sensor as described in SECTION 4.1.417
Wire Colors # of Positions Labeled Connect to:In ConnectorTan/Blk,Blk/Red,Wht,Pur/Wht 4 IGN Distributor (Figure 7.1)Pur 1 OXY Oxygen Sensor (Figure 6.8)Blu, Pnk/Blk 4 conn./2 pos.each INJ Drivers Side Fuel Injectors (Figure 7.2) 1Grn, Pnk/Blk 4 conn./2 pos.each INJ Passenger's Side Fuel Injectors (Figure 7.1) 1Orn, Tan ------ OIL Oil Pressure Switch (Figure 7.2)Dk.Blu (late) or Wht (early) 1 KNC Knock Sensor (Figure 6.9) 2Tan, Blk 2 MAT Manifold Air Temp Sensor (Figure 7.1)Blk, Dk.Blu, Gry 3 TPS Throttle Position Sensor (Figure 7.3)Lt.Blu/Wht, Lt.Blu/Blk 4 IAC Idle Air Control Motor (Figure 7.3)Lt.Grn/Wht, Lt.Grn/BlkYlw, Blk 2 CTS Coolant Temp Sensor (Figure 7.3)Pur, Tan (if applicable) 2 CSW Cold Start Switch (Figure 7.3) 1,3Pnk/Blk, Gry 2 EGR Exh.Gas Recirculation Valve Solenoid(Figure 7.1)Gry,Grn,Blk 3 MAP Manifold Absolute Pressure SensorRed ----- ------ Starter Solenoid (Lrg. Term.)Pur ----- ------ Starter Solenoid (Sm.Term.) 3Pur, Tan (If applicable) 2 CIJ Cold Start Injector (Figure 7.2) 1,3,4Dk.Grn, Red, Dk.Blu, 5 MAF Mass Airflow Sensor (Figure 7.4)Blk/Wht, BlkDk.Grn ------ ------- A/C Power (To Compressor) 5Gry ------ VATS To Steering Column VATS Module (late TPI)Pur ------ VATS To Steering Column VATS Module (early TPI)Notes:1. On tuned port injection engines, the injectors, cold start switch, and cold start injector all use a connector that simplypushes on. Do not remove the silver attaching clip or the connector may come loose.2. If you have headers, you may have to relocate the knock sensor for proper clearance.3. These wires are on EARLY version tuned port systems ONLY.4. Do NOT confuse this with the cold start switch.5. The "A/C POWER" wire on both early and late version tuned port systems should be spliced into the A/C compressorpower wire near the compressor. If you do not have A/C then tape and store this wire. This wire senses power to thecompressor and automatically increases the idle speed of the engine when the A/C is turned on.Table 7.1 GM Tuned Port Injection Engine Group Connections18
Figure 7.1 Tuned Port Injection System, Right SideFigure 7.2 Tuned Port Injection System, Left Side19
Figure 7.3 Engine Detail, Right SideFigure 7.4 MAF Sensor20
Figure 7.5 Engine Compartment Overview8.0 LATE VERSION GM TUNED PORT INJECTION SYSTEMSINSTALLATION INSTRUCTIONS8.1 CONTENTS OF THE 60103 AND 60203 WIRE HARNESS KITTake inventory to see that you have everything you are supposed to have in thiskit. If anything is missing; go to the dealer where you obtained the kit or contact<strong>Painless</strong> Performance at (800) 423-9696. The kit should contain the followingitems:• Main wire harness with connectors on the ends of many of the wires.• Distributor, fuel pump relay and Oil Pressure Adapters.• Fuel injection harness instructions P/N 90503 (this booklet).The following optional parts are not included in the kit but are available from<strong>Painless</strong> Performance.• Emission Control Device Harnesses. (Part #60314 and 60315)21
Notes: All factory computer proms (chips), for the late TPI Systems and someearly TPI computers have the vehicle anti-theft system programmed into them.An after-market chip must be used with the VATS removed or the originalsteering column and VATS module must be used or the engine will not start.8.2 ENGINE GROUP INSTALLATIONThe engine group is connected as described in Section 7.2 of these instructionsexcept that the engine will not have a mass airflow (MAF) sensor. This systemutilized a Manifold Absolute Pressure (MAP) sensor. When mounting this sensor,it is important to remember that A) the vacuum port on the sensor must pointstraight down, and B) if not in the stock location, you will have to use factorystyle hard plastic line to make the connection. Do not forget to ground the twoBlk/Wht wires to the engine.8.3 DASH GROUP INSTALLATIONThe dash section is connected as described in Paragraph 6.2.1 of theseinstructions.8.4 SENSOR AND RELAY INSTALLATIONThe sensor and relays are connected according to SECTION 7.4 of theseinstructions, using Table 6.18.5 TAIL SECTION INSTALLATIONThe tail section wires consist of:A. Purple and Yellow wires tagged VEHICLE SPEED SENSOR, after cutting toproper length, attach to the two wires coming out of the Part Number 60116speed sensor. It makes no difference how the wires are attached. Theconnector may have to be cut off the 60116 speed sensor to connect to it.B. Gray wire tagged FUEL PUMP is the power wire for the pump. Route and cutto length.C. Lt.blu, tan/blk and purple wires, in the white connector, plugs into 700R4 if soequipped.22
9.0 PRE-ADJUSTMENTS BEFORE STARTING ENGINE9.1 Throttle Position Sensor AdjustmentA. Turn on ignition but do not start engine.B. Check to insure throttle is not depressedC. At the throttle position sensor, place a digital voltmeter's probes intothe blue and black wires in the back of the sensors connector, whichis plugged into the sensor.D. Loosen the sensor mounting screws and adjust the sensor until themeter reads .5 volts (1/2 of one volt).E. Tighten the mounting screws and recheck the meter reading.F. Some after market chips require a different setting, check theirinstructions carefully9.2 Base Engine Idle AdjustmentA. Turn on ignition but do not start engine.B. Jumper A & B of the ALDL as if you were checking codes.C. Wait 30 seconds and then remove the plug from the IAC motor.D. Remove jumper from ALDL.E. Start engine and adjust idle speed with adjusting screw at throttle lever(there may be a cap covering the adjusting screw that will need to beremoved and discarded).F. Shut off engine and disconnect battery for one minute.G. Plug the IAC connector back in and then reconnect the battery.H. Start engine and check for proper idle speed.10.0 TROUBLE SHOOTING INSTRUCTIONSIf you are having trouble with your engine running badly or not running at all, firstperform basic trouble shooting (checking for faulty connections, spark, timing, fuelpressure, etc.) then see is the computer has stored a trouble code in its memory.10.1 THE "CHECK ENGINE" LIGHTNormally, the "check engine" light should come on when the ignition is initiallyturned on, then go out a few moments after the engine starts running. If itreappears, or stays on while the engine is running, the computer has detected aproblem and a trouble code has been set.23
10.1.1 The computer identifies particular trouble codes by flashing the "checkengine" light in a certain way. The codes are read by counting the flashes:A. The first digit (the "tens" digit) of the code is flashed quickly,followed by a brief pause, then the second digit (or "ones" digit) isflashed, followed by a longer pause. For example, three (3) quickflashes followed by a brief pause followed by two (2) flashesindicates code 32.B. The code will repeat itself three (3) times. The next code, if any,will be displayed in the same manner.Note: When you access the codes from the computer a code 12 (oneflash followed by two flashes) will first be displayed. THISDOES NOT INDICATE A PROBLEM. Code 12 will be flashed3 times, followed by the particular trouble codes, if any. If thecomputer merely flashes code 12 there are no trouble codesstored. Code 12 means the engine is not running.10.2 RETRIEVING TROUBLE CODES FROM THE COMPUTER10.2.1 In order to retrieve the trouble codes stored in the computer, locate theAssembly Line Diagnostic Link (ALDL) connector (installed andconnected in Paragraph 6.1.1). Turn the ignition on, BUT DO NOTSTART THE CAR. Connect a jumper wire from ALDL terminal "A" toterminal "B" (see Figure 6.3) and observe the "check engine" light.10.2.2 After you have read any codes (remember the normal code 12), write themdown for reference. Remove the jumper wire from the ALDL connector.10.2.3 Take the codes one at a time and match them to the codes in Table 9.1.This will tell you in which circuit the computer has detected a problem.Note: A code indicates a problem in a specific circuit, NOT THAT APARTICULAR PART IS BAD.10.2.4 Before taking more extensive corrective actions for any trouble code,make sure that all connections on the indicated circuit, INCLUDING THECOMPUTER, are clean and tight. Inspect the wiring in the circuit for anybroken, shorted, or exposed wires. Finally, insure all ground wires areclean and secure.10.2.5 If you are getting a code from your computer and need to clear the code,other than code 12, after you have replaced a part, readjusted a part, etc.You can do this by making sure the ignition is off and then disconnectingthe negative battery cable for a minimum of two minutes. After the twominutes are up then you simply reconnect the negative battery cable andrecheck the system for codes.24
CODE # CIRCUIT AFFECTED CODE # CIRCUIT AFFECTED13 Oxygen Sensor 36 1 Mass Airflow Burn Off Circuit14 Coolant Temp (high) 41 2 Faulty or Incorrect Mem-Cal Chip15 Coolant Temp (low) 42 2 Electronic Spark Timing Circuit21 Throttle Position Sensor 43 Electronic Spark Control Circuit23 Manifold Air Temp (low) 44 Oxygen Sensor (lean reading) 524 Vehicle Speed Sensor 3 45 Oxygen Sensor (rich reading) 625 Manifold Air Temp (high) 46 2 Vehicle Anti-Theft System32 Exh.Gas Recirculation Valve 51,52,55 2 Faulty Mem-Cal, PROM, or Cal-Pak Chip33 1 Mass Airflow or ManifoldAbsolute Pres. Sensor (high) 53 Charging System over-voltage34 1 Mass Airflow or Manifold 54 Insufficient Fuel Pump Voltage 7Absolute Pres. Sensor (low)35 Idle Air Control CircuitNotes:1. Your engine will use either a mass airflow sensor and burn off circuit OR a manifoldabsolute pressure sensor.2. A PROM, Mem-Cal or Cal-Pak chip that has not been fully seated or that has a bentcontact may cause one or all of these codes to set.3. If the Park/Neutral Indicator switch isn't wired correctly this code can set.4. Early version TPI and TBI systems only.5. Can be caused by a clogged fuel filter or a vacuum leak.6. Can be caused by a clogged air filter.7. Can be caused by a bad fuel pump relay.Table 9.1 Diagnostic Trouble Codes25
10.3 WHEN TO CALL PERFECT PERFORMANCE PRODUCTS' TECH LINE10.3.1 These harness kits have been built with the highest regard to strict qualitycontrol. Before calling us please double-check all connections andperform normal basic trouble shooting (fuel pressure, timing, ignitionsystem, etc.).10.3.2 If you have any questions concerning the installation of this harness or arehaving trouble in general; feel free to call the <strong>Painless</strong> Performance techline at (800) 423-9696. Calls are answered from 8 AM to 5 PM CST,Monday through Friday, except holidays. Please leave a message if youare unable to reach us and we will return your call as soon as possible.E-mail: painless@painlessperformance.comWeb: www.painlessperformance.com11.0 ADD ON EARLY TPI EMISSIONS KIT(For Part #60102 use <strong>Painless</strong> #60312 and for Part #60202 use <strong>Painless</strong> #60313)The emissions wires in this kit include: the wiring for the charcoal canister, the airport solenoid the air pump diverter valve, and the EGR diagnostic temperaturesensor. (See Diagram 2, page 29).STEP 1 - INSTALLATION OF CONNECTORS IN THE ENGINECOMPARTMENTInstall the following connectors into these locations:The red connector with the Dk.Grn/Ylw and Blk/Pnk wires, plugs into thecharcoal canister mounted in the engine compartment.The black connector with the Blk/Red and Blk/Pnk wires, plugs into the air portsolenoid located on the back of the air pump.The gray connector with the Brn and Blk/Pnk wires, plugs into the air pumpdiverter valve located behind the air pump.The black connector with the single Dk.Grn wire plugs into the EGR valvediagnostic temperature connector located under the center of the intake plenum.STEP 2 - ROUTING THE WIRESRoute all of the wires from the front three connectors up to the coolanttemperature sending unit located at the front of the engine next to the thermostathousing. Using tie wraps secure the wiring to the coolant temp sensor (black andyellow) wires all the way back to the computer located inside the vehicle. Be sureto leave enough slack for any possible engine movement.Caution: Be careful routing the wires through the firewall to avoid damagingthe terminals on the ends of the wires.26
STEP 3 - ATTACHING THE B+ POWER WIRESYou will find that the three Blk/Pnk wires, end near the back of the engine block.These wires should be spliced into the Pnk/Blk wire coming from the EGRsolenoid connector. These wires can also be extended and connected to a 12 voltignition only (switched) power source if you wish to do so.STEP 4 - UNPLUGGING THE COMPUTERCaution: Removing the computer connectors from the computer while theignition is on will damage the computer!First making sure that the ignition is off, unplug the two computer connectors bypushing down on the blue retaining tab and then pulling straight out and awayfrom the computer. Be careful not to damage the computer pins! Remove the bluesecondary locks from the black computer connectors by releasing the retainingclips and pulling them out from the back (wire) side of the connectors.STEP 5 - CONNECTING THE CHARCOAL CANISTER WIRE AT THECOMPUTERLocate the 24-pin (the smaller of the two) computer connector. Using theattached wiring diagram for reference, look on the wire side of the connectorhousing for the corner marked "A-1". Once you have located this, count down theopenings on the same side until you reach "A-3". You will insert the terminal onthe Dk.Grn/Ylw wire (charcoal canister) into this opening, pushing in until thelocking tang engages.Note: The terminal will only fit one way into the connector; do not try to forcethe terminal.STEP 6 - CONNECTING THE AIR PORT SOLENOID WIRE AT THECOMPUTEROn the same connector, locate "A-2". This is the opening that you plug theterminal on the Brn wire (port solenoid) into, using the same procedure as in step5.Note: this wire has a second Brn wire spliced into it that should be set asideuntil Step 10.STEP 7 - CONNECTING THE AIR DIVERTER WIRE AT THE COMPUTERLocate the 36-pin (the larger of the two) computer connector. In the same manneras you did in Step 5 and 6, locate the "C-1" side. When you have done this, thencount down the same side one opening to "C-2". This is the opening you willinsert the terminal on the Blk/Red wire into. (air pump diverter valve)STEP 8 - CONNECTING THE EGR TEMPERATURE WIRE AT THECOMPUTEROn the same side of the same connector as you were using in Step 7, find "C-15".This is the opening for the terminal on the Dk.Grn wire (EGR diagnostic temp).27
STEP 9 - REPLACING THE COMPUTER CONNECTORS AT THECOMPUTERReplace the secondary locks on both connectors. Be careful to line up the"fingers" on the locks with the connector openings. Once you have the secondarylocks in place then you can reinstall the computer connectors into the computer.Caution: use care when reinstalling the connectors, to avoid damaging thecomputer pins.STEP 10 - ATTACHING THE AIR PUMP DIAGNOSTIC WIRE AT THEALDLThe brown wire set aside in step 6 goes to the ALDL connector (diagnostic plug).Route this brown wire along the existing ALDL wiring until you come to theconnector itself. The wire is inserted into the opening labeled "C" on theconnector. (See Diagram 2, page 29)Notes: Double check all routing making sure that there is enough slack toallow for any engine or other movement. Reinstall any grommets or other partstaken off.Start and drive the vehicle for at least thirty minutes, then check for any troublecodes stored in the computer.28
Diagram 2 Early TPI Emissions29
12.0 ADD ON LATE TPI EMISSIONS KIT(For Part #60103 use <strong>Painless</strong> #60314 and for Part #60203 use <strong>Painless</strong> #60315)The emissions wires in this kit include: the wiring for the charcoal canister, the airport solenoid and the air pump diverter valve. (See Diagram 3, page 32).STEP 1 - INSTALLATION OF CONNECTORS IN THE ENGINECOMPARTMENTInstall the following connectors into these locations:The red connector with the Dk.Grn/Ylw and Blk/Pnk wires, plugs into the charcoalcanister mounted in the engine compartment.The black connector with the Blk/Red and Blk/Pnk wires, plugs into the air portsolenoid located on the back of the air pump.The gray connector with the Brn and Blk/Pnk wires, plugs into the air pump divertervalve located behind the air pump.STEP 2 - ROUTING THE WIRESRoute all of the wires from the front three connectors up to the coolant temperaturesending unit located at the front of the engine next to the thermostat housing. Usingtie wraps secure the wiring to the coolant temp sensor (black and yellow) wires all theway back to the computer located inside the vehicle. Be sure to leave enough slackfor any possible engine movement.Caution: Be careful routing the wires through the firewall to avoid damaging theterminals on the ends of the wires.STEP 3 - ATTACHING THE B+ POWER WIRESYou will find that the three Blk/Pnk wires, end near the back of the engine block.These wires should be spliced into the Pnk/Blk wire coming from the EGR solenoidconnector. These wires can also be extended and connected to a 12 volt ignition only(switched) power source if you wish to do so.STEP 4 - UNPLUGGING THE COMPUTERCaution: Removing the computer connectors from the computer while the ignitionis on will damage the computer!First making sure that the ignition is off, unplug the three computer connectors bypushing down on the blue retaining tab and then pulling straight out and away fromthe computer. Be careful not to damage the computer pins! Remove the bluesecondary locks from the yellow computer connector by releasing the retaining clipsand pulling them out from the back (wire) side of the connector.30
STEP 5 - CONNECTING THE CHARCOAL CANISTER WIRE AT THECOMPUTERUsing the attached wiring diagram for reference, look on the wire side of theconnector housing for the corner marked "F-1". Once you have located this, countdown the openings on the same side until you reach "F-7". You will insert theterminal on the Dk.Grn/Ylw wire (charcoal canister) into this opening, pushing inuntil the locking tang engages.Note: The terminal will only fit one way into the connector; do not try to force theterminal.STEP 6 - CONNECTING THE AIR DIVERTER WIRE AT THE COMPUTEROn the same connector, in the same manner as you did in Step 5, locate the "F-4" side.This is the opening you will insert the terminal on the Blk/Red wire into. (air pumpdiverter valve)STEP 7 - CONNECTING THE AIR PORT SOLENOID WIRE AT THECOMPUTEROn the same connector, locate "F-2". This is the opening that you plug the terminalon the Brn wire (port solenoid) into, using the same procedure as in step 5 and 6.STEP 8 - REPLACING THE COMPUTER CONNECTORS AT THE COMPUTERReplace the secondary locks on the connector. Be careful to line up the "fingers" onthe locks with the connector openings. Once you have the secondary locks in placethen you can reinstall the computer connectors into the computer.See Drawing at the back of this manual.Caution: use care when reinstalling the connectors, to avoid damaging thecomputer pins.Notes: Double-check all routing making sure that there is enough slack to allowfor any engine or other movement. Reinstall any grommets or other parts takenoff.Start and drive the vehicle for at least thirty minutes, then check for any troublecodes stored in the computer.31
Diagram 3 Late TPI Emissions32
Diagram 4 Brake Switch Relay Connection33
<strong>Painless</strong> Performance Limited Warrantyand Return PolicyChassis harnesses, fuel injection harnesses and Striker ColdShot units covered under a lifetimewarranty.All other products manufactured and/or sold by <strong>Painless</strong> Performance are warranted to the originalpurchaser to be free from defects in material and workmanship under normal use. <strong>Painless</strong>Performance will repair or replace defective products without charge during the first 12 months fromthe purchase date. No products will be considered for warranty without a copy of the purchasereceipt showing the sellers name, address and date of purchase. You must return the product to thedealer you purchased it from to initiate warranty procedures.34


