Trevira CS 100 - NozzFlow - Air Distribution
Trevira CS 100 - NozzFlow - Air Distribution
Trevira CS 100 - NozzFlow - Air Distribution

Create successful ePaper yourself
Turn your PDF publications into a flip-book with our unique Google optimized e-Paper software.
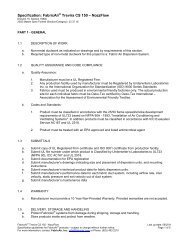
Specification: Fabric<strong>Air</strong> ® <strong>Trevira</strong> <strong>CS</strong> <strong>100</strong> – <strong>NozzFlow</strong><br />
Division 15, Section 15800<br />
2005 Master Spec Format (Section/Category): 23 37 16<br />
Hardware options – (please select one)<br />
a. Aluminum Rails – all other components Stainless Steel<br />
b. Aluminum Rails – all other components Galvanized Steel<br />
11. Type 13: 2x1 (24” – 48”), two rows H-rail/curved rods system located 1.5” above 3 and 9 o’clock<br />
of Fabric<strong>Air</strong> ® system. Hardware to include H-rail joint, end cap H-rail, curved rods, fastener<br />
ceiling/H-rail, tie down strap, cable, cable locks and H-rail as required. Fabric<strong>Air</strong> ® system to be<br />
attached to hardware using two rows of plastic sliders located 3 and 9 o’clock spaced 20 inches.<br />
Hardware options – (please select one)<br />
a. Plastic Coated Stainless Steel Cable – all other components Stainless Steel or Aluminum<br />
b. Stainless Steel Cable – all other components Stainless Steel or Aluminum<br />
c. Plastic Coated Galvanized Cable – all other components Galvanized Steel or Aluminum<br />
2.3 AIR HANDLER REQUIREMENTS<br />
a. Provide adequate pre-filtering prior to the fabric duct system, all according to manufacturers<br />
specifications.<br />
b. Provide fans supplying constant static pressure.<br />
PART 3 - INSTALLATION<br />
3.1 INSTALLATION OF FABRICAIR ® SYSTEM<br />
a. Examine area and conditions under which the Fabric<strong>Air</strong> ® system are to be installed. Do not continue<br />
any installation until unsatisfactory conditions have been corrected.<br />
b. Install chosen suspension system in accordance with the requirements of the manufacturer. Installation<br />
instructions to be provided by the manufacturer with product.<br />
c. Coordinate layout with suspended ceiling, lighting layouts, and similar finished work.<br />
3.2 CLEANING<br />
a. Clean air handling unit and other ductwork prior to the Fabric<strong>Air</strong> ® system as it is installed. Make sure<br />
that all dust from installation are removed from the air handling unit and other ductwork before<br />
connecting the Fabric<strong>Air</strong> ® system.<br />
b. If the Fabric<strong>Air</strong> ® system becomes soiled during the installation, it should be removed and cleaned<br />
following the manufacturers cleaning instructions.<br />
END OF SECTION<br />
Fabric<strong>Air</strong> ® <strong>Trevira</strong> <strong>CS</strong> <strong>100</strong> - <strong>NozzFlow</strong> Last up-date: 06/2011<br />
Specification guidelines for Fabric<strong>Air</strong> ® products – subject to change without further notice. Page 5 of 5<br />
For more information, contact: Fabric<strong>Air</strong>, Inc.: info@fabricair.com or Phone: (502) 493 2210