Smart Shield Product IOM - Evapco
Smart Shield Product IOM - Evapco
Smart Shield Product IOM - Evapco

You also want an ePaper? Increase the reach of your titles
YUMPU automatically turns print PDFs into web optimized ePapers that Google loves.
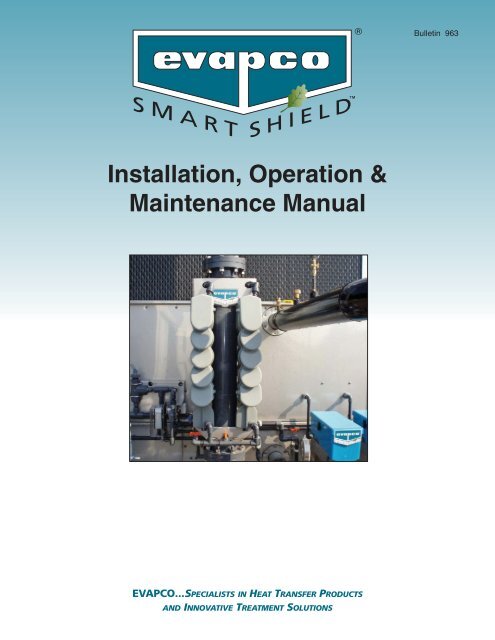
Bulletin 963<br />
SMART<br />
SHIELD<br />
Installation, Operation &<br />
Maintenance Manual<br />
EVAPCO...SPECIALISTS IN HEAT TRANSFER PRODUCTS<br />
AND INNOVATIVE TREATMENT SOLUTIONS
<strong>Smart</strong> <strong>Shield</strong> Installation, Operation & Maintenance Manual<br />
Table of Contents<br />
1.0 Components and Function . . . . . . . . . . . . . . . . . . . . . . . . . . . . . . . . . . . . . . . . . . . . . . . . . . . . . . . . . . . . . . . . . . 1<br />
2.0 Field Connections . . . . . . . . . . . . . . . . . . . . . . . . . . . . . . . . . . . . . . . . . . . . . . . . . . . . . . . . . . . . . . . . . . . . . . . . . 1<br />
3.0 Conductivity Controller . . . . . . . . . . . . . . . . . . . . . . . . . . . . . . . . . . . . . . . . . . . . . . . . . . . . . . . . . . . . . . . . . . . . 2<br />
4.0 Bio-Control Feeder (BCF) . . . . . . . . . . . . . . . . . . . . . . . . . . . . . . . . . . . . . . . . . . . . . . . . . . . . . . . . . . . . . . . . . . . 3<br />
4.1 Biocides . . . . . . . . . . . . . . . . . . . . . . . . . . . . . . . . . . . . . . . . . . . . . . . . . . . . . . . . . . . . . . . . . . . . . . . . . . . 3<br />
4.2 Biocide Storage . . . . . . . . . . . . . . . . . . . . . . . . . . . . . . . . . . . . . . . . . . . . . . . . . . . . . . . . . . . . . . . . . . . . . 3<br />
4.3 BCF Configuration . . . . . . . . . . . . . . . . . . . . . . . . . . . . . . . . . . . . . . . . . . . . . . . . . . . . . . . . . . . . . . . . . . . 3<br />
4.4 Loading the BCF . . . . . . . . . . . . . . . . . . . . . . . . . . . . . . . . . . . . . . . . . . . . . . . . . . . . . . . . . . . . . . . . . . . . 4<br />
4.5 Biocide Feed Calculations . . . . . . . . . . . . . . . . . . . . . . . . . . . . . . . . . . . . . . . . . . . . . . . . . . . . . . . . . . . . . 4<br />
4.6 BCF Piping . . . . . . . . . . . . . . . . . . . . . . . . . . . . . . . . . . . . . . . . . . . . . . . . . . . . . . . . . . . . . . . . . . . . . . . . . 4<br />
4.7 Periodic Testing . . . . . . . . . . . . . . . . . . . . . . . . . . . . . . . . . . . . . . . . . . . . . . . . . . . . . . . . . . . . . . . . . . . . . 5<br />
5.0 Conductivity Probe Manifold/Blowdown Valve/BCF Piping . . . . . . . . . . . . . . . . . . . . . . . . . . . . . . . . . . . . . . . 6<br />
6.0 Factory Mounted Feeder (FMF) . . . . . . . . . . . . . . . . . . . . . . . . . . . . . . . . . . . . . . . . . . . . . . . . . . . . . . . . . . . . . . 7<br />
6.1 FMF Configuration . . . . . . . . . . . . . . . . . . . . . . . . . . . . . . . . . . . . . . . . . . . . . . . . . . . . . . . . . . . . . . . . . . . 7<br />
6.2 Loading the FMF . . . . . . . . . . . . . . . . . . . . . . . . . . . . . . . . . . . . . . . . . . . . . . . . . . . . . . . . . . . . . . . . . . . . 7<br />
6.3 Replenishment Chemistry . . . . . . . . . . . . . . . . . . . . . . . . . . . . . . . . . . . . . . . . . . . . . . . . . . . . . . . . . . . . . 9<br />
6.4 Periodic Testing . . . . . . . . . . . . . . . . . . . . . . . . . . . . . . . . . . . . . . . . . . . . . . . . . . . . . . . . . . . . . . . . . . . . . 9<br />
7.0 Winterization & Shutdown . . . . . . . . . . . . . . . . . . . . . . . . . . . . . . . . . . . . . . . . . . . . . . . . . . . . . . . . . . . . . . . . . . 9<br />
7.1 Winterization . . . . . . . . . . . . . . . . . . . . . . . . . . . . . . . . . . . . . . . . . . . . . . . . . . . . . . . . . . . . . . . . . . . . . . . 9<br />
7.2 Shutdown . . . . . . . . . . . . . . . . . . . . . . . . . . . . . . . . . . . . . . . . . . . . . . . . . . . . . . . . . . . . . . . . . . . . . . . . . . 9<br />
8.0 Passivation . . . . . . . . . . . . . . . . . . . . . . . . . . . . . . . . . . . . . . . . . . . . . . . . . . . . . . . . . . . . . . . . . . . . . . . . . . . . . 10<br />
9.0 Legionella . . . . . . . . . . . . . . . . . . . . . . . . . . . . . . . . . . . . . . . . . . . . . . . . . . . . . . . . . . . . . . . . . . . . . . . . . . . . . . .10<br />
<strong>Evapco</strong> Standard Express Warranty for <strong>Smart</strong> <strong>Shield</strong> . . . . . . . . . . . . . . . . . . . . . . . . . . . . . . . . . . . . . . . . . . . . . . .11
<strong>Smart</strong> <strong>Shield</strong> Installation, Operation & Maintenance Manual<br />
1.0 Components and Function<br />
1.1 The <strong>Evapco</strong> <strong>Smart</strong> <strong>Shield</strong> consists of three separate components that work together to provide convenient and effective<br />
water treatment. These three components are:<br />
1.1.1 An <strong>Evapco</strong> Conductivity Controller with self-draining pre-piped manifold,<br />
1.1.2 A Factory Mounted Feeder (FMF), and<br />
1.1.3 A Biological Control Feeder (BCF) (s).<br />
1.2 The conductivity controller maintains the recirculating waterʼs cycles of concentration by continually measuring the<br />
conductivity of the recirculating water with a toroidal sensor. When the conductivity exceeds the siteʼs programmed set<br />
point, the controller energizes a motorized ball-valve to bleed higher conductivity water from the system. Lower conductivity<br />
make-up water replaces the water bleed-off thereby reducing the conductivity of the recirculating water. When the<br />
conductivity drops below the set point and programmed dead band, the controller de-energizes the motorized ball valve.<br />
This action maintains the conductivity of the spray water within a defined band which helps to maintain water efficiency by<br />
controlling spray water cycles of concentration.<br />
1.3 The FMF is designed to hold and diffuse multiple solid chemistry inhibitor cartridges. These easy and safe cartridges<br />
provide scale and corrosion inhibition via patented controlled release solid chemistry. The corrosion and scale inhibitor<br />
residual in the recirculating water system is easily controlled by the number of 1 kilogram (2.2 pound) cartridges which are<br />
loaded into the FMF. Each cartridge is designed to release chemistry consistently over a 30-day period of operation.<br />
Replacement cartridges are available at https://smartshield.evapco.com<br />
1.4 The BCF is designed to hold and diffuse specific granulated biocides. The BCF contains two baskets with each basket<br />
divided into multiple chambers. The specific biocide designed to be used in your BCF will be noted on the top of these<br />
baskets. Each chamber will release a consistent quantity of biocide over a 28 to 30 day period of wet operation. The<br />
quantity of biocide added to the system is controlled by the number of chambers filled. The specific limitations for dosing<br />
are found on the refill boxʼs label.<br />
1.5 Both the FMF and the BCF are designed for operation with integral-pump closed circuit coolers and condensers. DO NOT<br />
use these <strong>Smart</strong> <strong>Shield</strong> components on any other type of equipment without written authorization from <strong>Evapco</strong>.<br />
1.6 Discharge water (blowdown and overflow) from all chemically-treated cooling systems (including systems using <strong>Evapco</strong><br />
<strong>Smart</strong> <strong>Shield</strong> ) must comply with local discharge regulations. This usually requires that the overflow and discharge from all<br />
treated evaporative systems be piped to the sanitary sewer. Check local sewer and discharge regulations before operating<br />
the cooling system with <strong>Evapco</strong> <strong>Smart</strong> <strong>Shield</strong> .<br />
2.0 Field Connections<br />
<strong>Evapco</strong>ʼs <strong>Smart</strong> <strong>Shield</strong> system is designed to ship factory mounted on a closed circuit cooler or evaporative condenser. A few<br />
field connections, Figure 1, should be verified before commissioning the <strong>Smart</strong> <strong>Shield</strong> system.<br />
2.1 Union Ball Valve<br />
One union ball valve which connects the conductivity probe manifold to the unitʼs riser pipe ships disassembled. The installation of<br />
this union ball valve shall be completed by the contractor prior to equipment commissioning.<br />
2.2 Unions<br />
Each Factory Mounted Feeder (FMF) provided includes two unions which connect the return piping from the FMF to the basin.<br />
These unions ship disassembled and require connection by the contractor prior to equipment commissioning.<br />
2.3 Bulkhead Fittings<br />
Each FMF provided includes two bulkhead fittings located where the return piping penetrates the unitʼs casing. These bulkhead<br />
fittings require hand tightening by the contractor prior to equipment commissioning.<br />
2.4 Factory Prep Units<br />
1
<strong>Smart</strong> <strong>Shield</strong> Installation, Operation & Maintenance Manual<br />
BCF BYPASS<br />
FMF DRAIN<br />
FMF RETURN<br />
TANK FITTING<br />
FMF UNIONS<br />
BCF RETURN<br />
UNION BALL VALVE<br />
Figure 1 – Bulkhead Fittings<br />
Some closed circuit coolers or evaporative condensers require the FMF to be shipped loose and disassembled from the unitʼs<br />
riser piping. In these limited cases, the installing contractor shall mount the FMF on the riser pipe using the provided flanges<br />
and gaskets.<br />
2.4.1 Be sure that the faces of the mating surfaces of the flanges are flush against the gasket.<br />
2.4.2 Use two flat washers with each bolt. Tighten bolts by hand until snug.<br />
2.4.3 Bolts should be tightened in a 180° opposing pattern in 5 ft-lb (7 N-m) increments until the recommended torque<br />
reaches as specified in 2.4.4 and 2.4.5..<br />
2.4.4 Feeders with six tubes (3 and 4 inch riser pipes) utilize 5/8-inch bolts tightened to 25 foot pounds of torque.<br />
2.4.5 Feeders with ten tubes (6 and 8 inch riser pipes) utilize 3/4-inch bolts tightened to 40 foot pounds of torque.<br />
3.0 Conductivity Controller<br />
For details of operation see the Installation, Operation, and Maintenance (<strong>IOM</strong>) Manual associated with the provided<br />
conductivity controller.<br />
All <strong>Evapco</strong> Conductivity Controllers are supplied with a temperature-compensated toroidal conductivity sensor. <strong>Evapco</strong><br />
Conductivity Controllers are microprocessor-driven type with on/off control outputs.<br />
2
<strong>Smart</strong> <strong>Shield</strong> Installation, Operation & Maintenance Manual<br />
4.0 Bio-Control Feeder (BCF)<br />
The BCF is engineered to release a solid biocide into the spray water of a fluid cooler or evaporative condenser. The BCF is<br />
designed to have recirculating water pass through the BCF and back to the basin whenever the spray water pump is in operation<br />
but the system is not blowing down. When the spray pump is de-energized water drains by gravity out of the BCF, and associated<br />
piping, preventing freezing concerns in most locations.<br />
4.1 Biocides<br />
Replenishment biocides for your BCF are supplied in easy-pouring plastic bags. Each bag has a notched spout for easy opening<br />
and no-spill pouring. The BCF is designed to handle only <strong>Evapco</strong> supplied product. Other products may not release properly and<br />
could result in either insufficient biological control or a violation of local pesticide regulations. It is unlawful to use this product other<br />
than as detailed on the label. Review BCF label and biocide Material Safety Data Sheet (MSDS) prior to use.<br />
4.2 Biocide Storage<br />
Replenishment biocide bags should be stored in a cool dry area away from direct sunlight. Biocide packages have a storage life of<br />
12 months from the shipment or 18-months from the date of manufacturing, whichever is less.<br />
4.3 BCF Configuration<br />
The BCF consists of two baskets with each basket containing multiple chambers. Each of the baskets has a cover with integral<br />
pouring spouts. The spouts allow the biocide granules to be added to the chambers with a minimum of spillage or dust generation.<br />
Figure 2 illustrates a BCF with two 3-chambered baskets. The small chambers will release approximately one-pound of biocide<br />
granules per month while the large chambers will release approximately two-pounds per month.<br />
Top View of Baskets in BCF<br />
Side View of Basket Removed from BCF<br />
THREE STORAGE CHAMBERS PER BASKET<br />
SMALL STORAGE CHAMBER<br />
LARGE STORAGE CHAMBERS<br />
MINIMUM<br />
FILL LEVEL.<br />
SMALL STORAGE<br />
CHAMBERS<br />
FOR TRIMMING<br />
BIOCIDE FEED (2)<br />
LARGE STORAGE<br />
CHAMBERS<br />
FOR PRIMARY<br />
BIOCIDE FEED (4)<br />
RELEASE<br />
RATE WILL BE<br />
AFFECTED IF<br />
BIOCIDE IN<br />
CHAMBER<br />
DROPS<br />
BELOW<br />
Figure 2 – BCF with Two Baskets with Each Basket Having Three Separate Chambers<br />
3
<strong>Smart</strong> <strong>Shield</strong> Installation, Operation & Maintenance Manual<br />
4.4 Loading the BCF<br />
The BCF is piped in line after the conductivity controller probe and blowdown valve. Before loading the BCF, close the isolation<br />
valve to this line at the riser. Remove the cover and verify that the water is draining out of the BCF housing. There is a drain<br />
opening in the back of the BCF as shown in Figure 3.<br />
After confirming that the BCF is draining when flow is interrupted, manually adjust the isolation valve at the riser until water flowing<br />
thru the BCF completely covers the weir in the front of the unit from side to side.<br />
Add the biocide granules from the easy-pour bag to the required number of individual chambers in your BCF baskets. Initial<br />
loading of the BCF will require at least two bags per small chamber and three bags per large chamber to ensure that there is a full<br />
bag of Biocide above the mesh area located on the bottom portion of the basket. The biocide stored above the mesh area helps to<br />
ensure consistent release of the biocide over a 30-day period of operation. Replace and fasten the BCF cover. Local regulations<br />
may allow disposal of empty bags without rinsing. Follow all local disposal requirements for the empty bags.<br />
BCF DRAIN OPENING<br />
Figure 3 – BCF Drain Opening Location<br />
NOTE: The BCF drain opening should be inspected monthly and cleaned as required to maintain proper draining of the BCF.<br />
4.5 Biocide Feed Calculations<br />
This product should be used in accordance with control parameters established for your specific application by your <strong>Evapco</strong> water<br />
treatment provider. Your <strong>Evapco</strong>-authorized water treatment service provider will determine the number of individual chambers that<br />
need to be filled in your BCF baskets based on the ambient conditions, load, make-up water quality and other local conditions.<br />
This quantity may vary from month to month.<br />
4.6 BCF Piping<br />
Variable flow rates through the BCF may cause inconsistent release of the biocide granules. The by-pass loop will direct a<br />
consistent flow through the BCF. For some units the by-pass consists of multiple flow restrictors in the inlet piping and a horizontal<br />
by-pass piping back to the basin at a specific height above the feeder. For other designs, the by-pass piping loops down to the<br />
basin. Where the piping loops down, a vent hole is added to the top of the tee as a vacuum break to prevent siphoning. See<br />
Figure 4 for the layout of a horizontal by-pass and Figure 5 for a layout of the looped by-pass.<br />
4
<strong>Smart</strong> <strong>Shield</strong> Installation, Operation & Maintenance Manual<br />
HORIZONTAL BY-PASS FOR<br />
MAINTAINING A CONSTANT<br />
FLOW THROUGH THE BCF<br />
Figure 4 – Horizontal By-Pass on BCF<br />
VENT VACUUM BREAK<br />
TO PREVENT SIPHONING<br />
LOOPED BY-PASS FOR<br />
MAINTAINING A CONSTANT<br />
FLOW THROUGH THE BCF<br />
Figure 5 – Looped By-Pass on BCF<br />
4.7 Periodic Testing<br />
Periodic testing by an <strong>Evapco</strong>-authorized water treatment provider must be performed to verify that the system is performing as<br />
designed and to adjust the quantity of chambers filled based on changes in load, ambient conditions, make-up water quality or<br />
other local conditions.<br />
Individual BCF baskets which contain biocide should be inspected monthly to assure that the product has not bridged at the<br />
waterline.<br />
5
<strong>Smart</strong> <strong>Shield</strong> Installation, Operation & Maintenance Manual<br />
5.0 Conductivity Probe Manifold/Blowdown Valve/BCF Piping<br />
5.1 The conductivity probe, motorized ball-valve and the BCF are all piped together on a single loop off of the spray-pump riser.<br />
The patent-pending piping arrangement allows water to drain back to the basin when the spray water pump is not in<br />
operation thereby minimizing the need for heat trace and insulation.<br />
5.2 When the spray pump is operating, water flows from the riser through an isolation valve and then through the conductivity<br />
probe manifold. Water passes both the toroidal probe and around the by-pass which allows a high flow of water to be used<br />
for blowdown without subjecting the probe to high turbulence.<br />
5.3 During periods of spray pump operation when blowdown is not required, water passes through the BCF and another bypass<br />
loop. This BCF by-pass loop is designed to regulate flow thru the BCF and minimize the potential of the BCF flooding.<br />
Water passes through and around the BCF and then back into the basin. This flow is shown in Figure 6 with blue arrows.<br />
5.4 When the system requires blowdown, the motorized ball-valve is energized and recirculating water goes to drain as shown<br />
by the red arrows in Figure 6.<br />
CONDUCTIVITY PROBE<br />
AND BY-PASS LOOP<br />
3-WAY<br />
MOTORIZED<br />
BALL VALVE<br />
BCF AND<br />
BY-PASS LOOP<br />
ISOLATION VALVE<br />
RETURN<br />
TO BASIN<br />
DRAIN TO<br />
SANITARY<br />
SEWER<br />
Figure 6 – Piping Arrangement for the Conductivity Probe Manifold, Blowdown Valve, and BCF. Water Flow shown in Blue when<br />
system is NOT in Blowdown; Water Flow shown in Red during Blowdown.<br />
6
<strong>Smart</strong> <strong>Shield</strong> Installation, Operation & Maintenance Manual<br />
6.0 Factory Mounted Feeder (FMF)<br />
The FMF is engineered to consistently release corrosion and scale inhibitor into the spray water of a fluid cooler or evaporative<br />
condenser during periods of wet operation. During periods of pump operation, a side-stream flow of spray water passes through<br />
the FMF, comes in contact with the solid inhibitor cartridges and is piped back to the basin. This combination of easy and safe<br />
inhibitor cartridges fed via the FMF is designed to supply consistent corrosion and scale inhibition for the recirculating water of an<br />
evaporative cooling system for a 30-day period of wet operation.<br />
6.1 FMF Configuration<br />
EVAPCOʼs FMF are manufactured with either 6 or 10 individual feed tubes which are each sealed with a cam-actuated plug. Each<br />
tube is designed to hold a single reload cartridge. Loading the FMF consists of filling the appropriate number of tubes with inhibitor<br />
cartridges. Review FMF label and inhibitor cartridge Material Safety Data Sheet (MSDS) prior to use.<br />
6.1.1 When the spray pump is de-energized, water drains by gravity out of the FMF preventing freezing concerns in most<br />
locations. Winterizing or heat trace & insulation may be required in winter weather areas.<br />
6.2 Loading the FMF<br />
6.2.1 To load, the FMF must be isolated from the recirculating water flow and drained. This is accomplished by closing<br />
the Water Feed Valve then opening the Drain Valve as shown in Figures 7 and 8.<br />
6.2.2 Unfasten the door latches and open to reveal individual cam-locks which seal individual tubes on the FMF.<br />
6.2.3 The FMF may take several minutes to drain completely. Please allow a few minutes between opening the drain<br />
valve and moving on to the next step.<br />
6.2.4 Each tube is closed with a cam-lock plug. Remove the top plug first to ensure the FMF has drained. The cam-lock<br />
plugs are opened by 180-degree throw as shown in Figure 7. Plug is removed after cam is moved to the open<br />
position as shown in Figure 8.<br />
FMF WATER FEED<br />
VALVE CLOSED TO DRAIN FEEDER<br />
CAM - OPEN POSITION<br />
TO REMOVE PLUG<br />
FMF DRAIN VALVE<br />
OPENED TO DRAIN FEEDER<br />
CAM - CLOSED POSITION<br />
FOR NORMAL OPERATION<br />
Figure 7 – FMF-6 Cam Lock Positions<br />
7
<strong>Smart</strong> <strong>Shield</strong> Installation, Operation & Maintenance Manual<br />
FMF WATER FEED<br />
VALVE CLOSED TO DRAIN FEEDER<br />
PLUG - REMOVED<br />
TO LOAD INHIBITOR CARTRIDGE<br />
FMF DRAIN VALVE<br />
OPENED FOR DRAIN FEEDER<br />
Figure 8 – Inhibitor Reload Tube<br />
FMF DOOR HINGED SIDE<br />
QUICK THROW CAM<br />
ACTUATED PLUGS<br />
COVER EACH<br />
INDIVIDUAL TUBE<br />
INDIVIDUAL TUBES SHOULD<br />
BE FILLED STARTING WITH<br />
THE SECOND TUBE FROM THE<br />
BOTTOM AND MOVING UP<br />
CAM-LOCK PLUG<br />
SHOWN IN CLOSED<br />
(SEALED) POSITION<br />
FMF DRAIN VALVE<br />
(NORMALLY CLOSED)<br />
WHEN FEEDER IS IN<br />
USE<br />
FMF WATER FEED VALVE<br />
(NORMALLY OPEN) WHEN<br />
FEEDER IS IN USE<br />
Figure 9 – FMF-10<br />
6.2.5 Each individual FMF tube is designed to hold a single reload cartridge as shown in Figure 9. Loading should begin<br />
with the second tube from the bottom position and any additional required cartridges should be balanced between<br />
the left and right hand feeders.<br />
8
<strong>Smart</strong> <strong>Shield</strong> Installation, Operation & Maintenance Manual<br />
6.2.6 Your <strong>Evapco</strong>-authorized water treatment service provider will determine the number of inhibitor cartridges required<br />
based on your systemʼs cycles of concentration, load, make-up water quality and other local conditions. This<br />
quantity may vary from month to month.<br />
6.2.7 These easy and safe cartridges are designed to release inhibitor over 30-days of continuous operation. If space<br />
allows, cartridges may be left in the feeder for up to 60-days of operation.<br />
6.2.8 Remove any consumed cartridges and dispose of appropriately. Local regulations may allow disposal of spent<br />
cartridges as municipal solid waste. Follow all local disposal requirements for the spent cartridges. Replace with<br />
new inhibitor cartridges.<br />
6.2.9 Replace plug, being sure it seats properly, and then fully close the cam. The cams should be aligned at either the<br />
5 oʼclock or 7 oʼclock position such that the cam lever points towards the hinged side of the door in the closed<br />
position. Once closed, the cam should be finger tight.<br />
6.2.10 Verify that the door will fully shut, then close the FMF-Drain Valve and open the FMF-Water-Feed Valve. Verify that<br />
all plugs are water tight then close and latch the door.<br />
6.3 Replenishment Chemistry<br />
The easy and safe cartridges are specifically formulated to provide corrosion and scale protection for closed circuit cooler and<br />
evaporative condenser spray water systems. These solid chemistry products feature a tableted blend of corrosion inhibitors and<br />
polymeric scale inhibitors combined with a patented polymer coating. When used in conjunction with the FMF, the polymer coating<br />
controls the release of the active chemistry over a 30-day period.<br />
6.3.1 Inhibitor cartridges are packaged in 1 kilogram (2.2 pound) cartridges which slide easily into the feeder. Each<br />
cartridge is designed for improved safety and ease of handling with <strong>Evapco</strong>ʼs proprietary ʻbag in bagʼ packaging<br />
which makes treatment contact free to the end-user. The non-hazardous polymer coated tablets are first packaged<br />
in a soluble bag which maintains the cartridgeʼs shape for easy loading. The outer bag allows the tabletʼs residual<br />
polymer coating to be easily removed from the FMF when the inhibitor is consumed.<br />
6.3.2 All replenishment chemistry should be stored in a cool dry area. Inhibitor cartridges have a storage life of 18<br />
months from the shipment or 2-years from the date of manufacturing, whichever is less.<br />
6.3.3 FMF Feed Calculation<br />
6.4 Periodic Testing<br />
This product should be used in accordance with control parameters established for your specific application by your<br />
<strong>Evapco</strong> water treatment provider. Your <strong>Evapco</strong>-authorized water treatment service provider will determine the<br />
number of individual chambers that need to be filled in your FMF based on the ambient conditions, cycles of<br />
concentration, load, make-up water quality and other local conditions. This quantity may vary from month to month.<br />
Periodic testing by an <strong>Evapco</strong>-authorized water treatment provider must be performed to verify that the system is performing as<br />
designed.<br />
7.0 Winterization and Shutdown<br />
Proper winterization and shutdown procedures should be in place and utilized for all evaporative cooling equipment.<br />
7.1 Winterization<br />
The <strong>Evapco</strong> <strong>Smart</strong> <strong>Shield</strong> system is designed to be self-draining during periods when the spray water pump is not in operation.<br />
Care should be exercised, however, in areas prone to freezing conditions as moisture may remain in the feeders and associated<br />
piping during idle periods. Failure to properly heat trace and insulate portions of the evaporative cooling equipment can lead to<br />
damage to feeders, pipes, valves, and other system components.<br />
7.2 Shutdown<br />
Intermittent operation and/or stagnant water can cause operational problems. Circulation of the spray water system several times<br />
per week is recommended for evaporative cooling equipment which is shut-down for short periods of time. If the system is to be<br />
off-line for more than a few weeks, or spray water circulation every three days is not practical, the spray water system should be<br />
drained.<br />
9
<strong>Smart</strong> <strong>Shield</strong> Installation, Operation & Maintenance Manual<br />
8.0 Passivation<br />
All new evaporative cooling equipment which includes any galvanized materials of construction requires initial passivation to<br />
maximize the service life of the equipment. Consult your evaporative cooling equipment's instruction, operation and maintenance<br />
manual for additional information regarding passivation.<br />
A site-specific passivation plan is not included with a <strong>Smart</strong> <strong>Shield</strong> system unless it is specifically called out as a separate line<br />
item. <strong>Evapco</strong> recommends that the siteʼs water treatment vendor should be contacted several weeks prior to adding any water to a<br />
new evaporative cooling system so they can provide a passivation plan along with associated passivation plan costs.<br />
9.0 Legionella<br />
Legionella bacteria are commonly present in natural and municipal water systems. Human exposure, and subsequent infection,<br />
depends on several concurrent factors. Drift that can emit from evaporative cooling equipment may provide a transmission mode<br />
of Legionella bacteria to humans. Human infection, however, is dependent on various factors such as the hostʼs susceptibility, the<br />
level of contamination, and the virulence of the bacteria.<br />
The Biocides used as part of the <strong>Smart</strong> <strong>Shield</strong> system have been shown to be effective against Legionella bacteria in laboratory<br />
testing. Even so, EVAPCO does not claim that using the <strong>Smart</strong> <strong>Shield</strong> system will eliminate the presence of Legionella in water or<br />
control the potential risk factors for human infection.<br />
There are many practices which may be effective in reducing the potential for Legionella infection. For more information, see<br />
ASHRAE Guideline 12-2000, “Minimizing the Risk of Legionellosis Associated with Building Water Systems”.<br />
10
<strong>Smart</strong> <strong>Shield</strong> Installation, Operation & Maintenance Manual<br />
EVAPCO ® STANDARD EXPRESS WARRANTY FOR SMART SHIELD <br />
ONE YEAR TOTAL PRODUCT INCLUDING OPTIONS AND ACCESSORIES<br />
EXPRESS WARRANTY<br />
EVAPCO warrants all components of the <strong>Smart</strong> <strong>Shield</strong> Water Treatment System against failure caused by defects in materials and<br />
workmanship for a period of twelve (12) months from the date installation is completed in accordance with good engineering practices<br />
or eighteen (18) months from the date of shipment, whichever occurs first. Included in this warranty are the Factory Mounted Feeder,<br />
Bio-Control Feeder, Conductivity Controller and Optional equipment, if purchased as part of the <strong>Smart</strong> <strong>Shield</strong> system, including<br />
conductivity probes, and motorized blowdown valves. All defective parts to be repaired or replaced shall be delivered to EVAPCO,<br />
shipping prepaid, with return shipment to the Buyer by EVAPCO to be made F.O.B. the factory, shipping prepaid by the Buyer.<br />
The product warranty is predicated on system operation and maintenance in accordance with EVAPCO’s recommended<br />
operation and maintenance procedures. Failure to follow EVAPCOʼs recommended operation and maintenance procedures will void<br />
these warranties. Labor costs associated with any repair work performed under the terms of the warranties are NOT included<br />
within the warranty.<br />
The Buyer assumes responsibility for compliance with any regulations, codes, standards or ordinances applicable to the installation,<br />
location, operation or maintenance of the products. No person, agent, or dealer is authorized to enlarge upon the warranties set out<br />
herein or the obligations of EVAPCO hereunder.<br />
LIMITATION OF LIABILITY<br />
THE SOLE REMEDY FOR BREACH OF THE EXPRESS WARRANTIES DESCRIBED HEREIN SHALL BE REPAIR OR<br />
REPLACEMENT OF THE EQUIPMENT BY EVAPCO, OR REFUNDING THE PURCHASE PRICE FOR THE SMART SHIELD<br />
WATER TREATMENT SYSTEM SET FORTH ON THE PURCHASE ORDER. IT SHALL BE IN EVAPCO’S SOLE DISCRETION AS<br />
TO WHETHER REPAIR, REPLACEMENT OR REFUND IS THE APPROPRIATE REMEDY. IF EVAPCO DECIDES TO MAKE<br />
REPAIRS, EVAPCO HAS THE OPTION OF COMPLETING ALL NECESSARY REPAIRS ITSELF, OR AUTHORIZING A THIRD<br />
PARTY TO PERFORM SUCH REPAIRS AT EVAPCO’S EXPENSE. EVAPCO IS NOT RESPONSIBLE FOR ANY REPAIR WORK<br />
PERFORMED BY A THIRD PARTY THAT EVAPCO DID NOT APPROVE IN WRITING PRIOR TO THE COMMENCEMENT OF<br />
SUCH REPAIRS<br />
NOTWITHSTANDING ANYTHING ELSE IN THIS DOCUMENT, EVAPCO’S LIABILITY OF ANY KIND WHATSOEVER SHALL NOT<br />
EXCEED THE PURCHASE PRICE SET FORTH ON THE PURCHASE ORDER. UNDER NO CIRCUMSTANCES SHALL EVAPCO<br />
BE LIABLE FOR LOST PROFITS, LOST SAVINGS, PERSONAL INJURIES, INCIDENTAL DAMAGES, ECONOMIC LOSS,<br />
PROPERTY DAMAGE, OR ANY OTHER CONSEQUENTIAL, INDIRECT, INCIDENTAL, OR PUNITIVE DAMAGES, EVEN IF<br />
EVAPCO HAS BEEN ADVISED OF THE POSSIBILITY OF SUCH DAMAGES. In addition, <strong>Evapco</strong> shall not be responsible for any<br />
injuries or damages of any kind whatsoever under any theory of tort to the extent the injuries or damage are caused by misuse of the<br />
product by buyer or any third party.<br />
DISCLAIMER OF IMPLIED WARRANTIES<br />
OTHER THAN THE EXPRESS MANUFACTURER’S WARRANTY DESCRIBED HEREIN, THE UNIT IS SOLD “AS IS” AND THERE<br />
ARE NO OTHER WARRANTIES. EVAPCO HEREBY DISCLAIMS AND EXCLUDES ALL IMPLIED WARRANTIES OF ANY KIND<br />
WHATSOEVER, INCLUDING WITHOUT LIMITATION WARRANTIES OF MERCHANTABILITY, THAT THE UNIT IS FIT FOR A<br />
PARTICULAR USE OR PURPOSE, THAT THE UNIT IS FIT FOR A PARTICULAR APPLICATION OR ENVIRONMENT, AND ANY<br />
WARRANTIES THAT MIGHT OTHERWISE ARISE OUT OF A COURSE OF DEALING BETWEEN THE PARTIES OR USAGE OF<br />
TRADE.<br />
11
Contact your local EVAPCO Sales Representative or EVAPCO Headquarters for more information.<br />
EVAPCO,Inc.<br />
World Headquarters<br />
5151 Allendale Lane<br />
Taneytown, MD 21787 USA<br />
Phone: 410-756-2600<br />
Fax: 410-756-6450<br />
e-mail: marketing@evapco.com<br />
EVAPCO Europe, N.V.<br />
European Headquarters<br />
Industrieterrein Oost 4010<br />
3700 Tongeren, Belgium<br />
Phone: (32) 12-395029<br />
Fax: (32) 12-238527<br />
e-mail: evapco.europe@evapco.be<br />
EVAPCO Asia/Pacific<br />
Headquarters<br />
1159 Luoning Rd. Baoshan Industrial Zone<br />
Shanghai, P.R. China, Postal Code: 200949<br />
Phone: (86) 21-6687-7786<br />
Fax: (86) 21-6687-7008<br />
e-mail: marketing@evapcochina.com<br />
Visit EVAPCO’s website:www.evapco.com<br />
© EVAPCO, INC., 2011 All Rights Reserved<br />
Printed on recycled paper<br />
using soy-based ink