OWNER'S MANUAL CT024N â 8â DRILL PRESS - Busy Bee Tools
OWNER'S MANUAL CT024N â 8â DRILL PRESS - Busy Bee Tools
OWNER'S MANUAL CT024N â 8â DRILL PRESS - Busy Bee Tools

You also want an ePaper? Increase the reach of your titles
YUMPU automatically turns print PDFs into web optimized ePapers that Google loves.
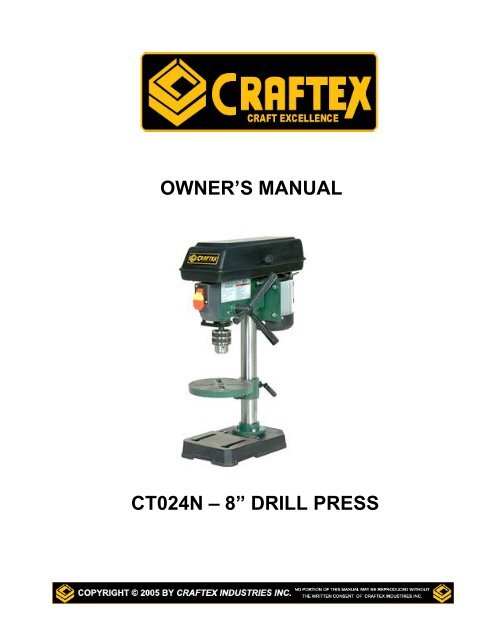
OWNER’S <strong>MANUAL</strong><br />
<strong>CT024N</strong> – 8” <strong>DRILL</strong> <strong>PRESS</strong>
INDEX<br />
GENERAL SAFETY INSTRUCTIONS PAGE 3<br />
SPECIFIC SAFETY INSTRUCTIONS PAGE 4<br />
Features PAGE 5<br />
Electrical Information PAGE 6<br />
Unpacking & Cleaning PAGE 7<br />
Assembly<br />
Base to Column PAGE 8<br />
Drill Press Head to Column PAGE 9<br />
Feed Handle PAGE 9<br />
Pulley Cover PAGE 10<br />
Mounting the Drill Press PAGE 10<br />
Adjustments<br />
Changing Spindle Speeds PAGE 11<br />
Table Adjustments PAGE 11<br />
Drilling Depth PAGE 12<br />
Spindle Return Spring PAGE 12<br />
Operation<br />
Drilling Speeds PAGE 13<br />
Metalworking PAGE 13<br />
Woodworking PAGE 13<br />
Feeding PAGE 13<br />
Maintenance PAGE 14<br />
Schematic Diagram PAGE 15<br />
Parts List PAGE 16<br />
Warranty PAGE 17<br />
2
GENERAL SAFETY INSTRUCTIONS<br />
EXTREME CAUTION SHOULD BE USED IN OPERATING ALL POWER TOOLS. KNOW<br />
YOUR POWER TOOL, BE FAMILIAR WITH ITS OPERATION. READ THE OWNER’S<br />
<strong>MANUAL</strong> AND PRACTICE SAFE USAGE PROCEDURES AT ALL TIMES.<br />
<br />
<br />
<br />
<br />
<br />
<br />
<br />
<br />
<br />
<br />
<br />
<br />
<br />
<br />
CONNECT your machine ONLY to the matched and specified power source.<br />
WEAR SAFETY GLASSES, HEARING PROTECTION and SAFETY<br />
SHOES when operating heavy machinery. Always wear safety glasses.<br />
DO NOT wear loose clothing or jewellery when operating machinery.<br />
A Safe Environment is important. Keep the area free of dust, dirt and other<br />
debris in the immediate vicinity of the machine.<br />
BE ALERT! Do Not Use prescription or other drugs that may affect your ability<br />
or judgement to safely use this machine.<br />
DISCONNECT the power source when making other adjustments or repairs.<br />
NEVER leave an operating tool unattended.<br />
NEVER reach over the table when the tool is in operation.<br />
ALWAYS keep blades, knives or bits sharp and properly aligned.<br />
ALWAYS keep all safety guards in place and ensure their proper function.<br />
ALWAYS make sure that any tools used for adjustments are removed before<br />
operating the machine.<br />
ALWAYS secure your work with the appropriate clamps or vises.<br />
ALWAYS keep bystanders safely away while operating machinery.<br />
THINK SAFETY. WORK SAFELY. Never attempt a procedure if it does not<br />
feel safe or comfortable.<br />
3
SPECIFIC SAFETY INSTRUCTIONS<br />
<br />
<br />
Always make certain that you clamp down any object that you are drilling into.<br />
When drilling, make sure that you are using the correct speed for the material<br />
being drilled.<br />
<br />
<br />
<br />
<br />
<br />
<br />
<br />
Clear the drill press table of all objects before turning the tool on.<br />
Keep hands and fingers safely away from the spinning drill bits.<br />
NEVER start the drill press with the drill bit in contact with the work piece.<br />
Make certain that the drill bit is securely tightened into the drill chuck.<br />
NEVER wear gloves while operating a drill press.<br />
Make certain that the table lock is securely tightened before using the drill press.<br />
Never attempt to drill any material that is not flat without using a secure jig for<br />
that specific work piece.<br />
<br />
Always remove the drill bit before leaving the machine.<br />
4
<strong>DRILL</strong> <strong>PRESS</strong> FEATURES<br />
As part of the growing line of Craftex woodworking equipment, we are proud to<br />
offer the <strong>CT024N</strong> Drill Press. The Craftex name guarantees Craft Excellence. By<br />
following the instructions and procedures laid out in this owner’s manual, you will<br />
receive years of excellent service and satisfaction. The <strong>CT024N</strong> is a professional<br />
tool and like all power tools, proper care and safety procedures should be<br />
adhered to.<br />
This little drill press features solid cast iron construction, depth stop adjustment<br />
and lockable switches. Comes complete with pulleys, belts, arbor, drill chuck and<br />
motor.<br />
Specifications<br />
Size: 8"<br />
Motor: 1/3 HP<br />
Chuck: 1/2"<br />
Spindle: JT33<br />
Table: 7" Round<br />
Speeds: 5<br />
Height: 23"<br />
Weight: 20 kg.<br />
Carton size: 14" x 8 1/2" x 17 1/2"<br />
GROUNDING INSTRUCTIONS<br />
5
In the event of a malfunction or breakdown, grounding provides the path of least<br />
resistance for electrical current and reduces the risk of electrical shock. This tool<br />
is equipped with an electrical cord that has an equipment grounding conductor<br />
and a grounding plug. The plug MUST be plugged into a matching outlet that has<br />
been properly installed and grounded in accordance with ALL local codes and<br />
ordinances.<br />
DO NOT MODIFY THE PLUG PROVIDED. If the provided plug will<br />
not fit the electrical outlet, have the proper outlet installed by a<br />
qualified licensed electrician.<br />
IMPROPER CONNECTION of the equipment grounding conductor can result in<br />
risk of electrical shock. The conductor wire with the green insulation (with or<br />
without yellow stripes) is the equipment-grounding conductor. If repair or<br />
replacement of the electrical cord or plug is required, DO NOT connect the<br />
equipment grounding conductor to a live terminal.<br />
If in doubt about these instructions consult a qualified,<br />
licensed electrician.<br />
USE ONLY A THREE-WIRE EXTENSION CORD with<br />
a 3-prong grounding plug and three-hole receptacles<br />
that accept the tool’s plugs as shown.<br />
It is recommended that stationary tools be assigned to a dedicated 15 amp circuit<br />
using #12 wire.<br />
UNPACKING AND CLEANING<br />
6
Carefully unpack your drill press and all of its parts. Compare the carton contents<br />
with the illustration below. Do not discard any packing material until the drill press<br />
is completely assembled and operating properly.<br />
Your drill press and some of its parts have been coated with a protective<br />
lubricant that should be removed before the machine is assembled. This can be<br />
done with a soft cloth moistened with non-corrosive kerosene or mineral spirits.<br />
7
ASSEMBLY<br />
BASE TO COLUMN<br />
Select the base and the drill press column from the loose parts. Select the four<br />
bolts from the parts bag. Align the holes of the post flange to the threaded holes<br />
in the base. Insert the bolts and tighten securely.<br />
.<br />
8
ASSEMBLY<br />
<strong>DRILL</strong> <strong>PRESS</strong> HEAD TO COLUMN.<br />
Lift the drill press head carefully and position it over the column.<br />
The column fits into the drill press mounting hole. Make certain the mounting hole<br />
is properly seated on the column. Line the drill press head up with the table and<br />
base and then tighten the two set-screws using the supplied hex wrench.<br />
FEED HANDLE.<br />
Fit the feed handle onto the shaft.<br />
9
ASSEMBLY<br />
PULLEY COVER<br />
Insert washer and screw through the hole in the pulley cover, thread the knob<br />
onto the screw and then tighten.<br />
MOUNTING THE <strong>DRILL</strong> <strong>PRESS</strong><br />
Your drill press must be securely fastened to prevent the machine from tipping,<br />
sliding or walking during operation. There are two base holes provided for this.<br />
10
Adjustments<br />
CHANGING SPINDLE SPEEDS<br />
Disconnect the drill press from its power source.<br />
Open the pulley cover.<br />
Loosen the slide bar knob<br />
Move the motor to the front to loosen the tension on both belts.<br />
Relocate the belts to the pulley steps appropriate to the required spindle speed<br />
To tighten the belt tension, move the motor toward the rear of the drill press.<br />
Tighten the slide bar knob<br />
Close the pulley cover.<br />
Test run the drill press to check the belts for proper tension.<br />
TABLE ADJUSTMENTS<br />
To tilt the table from 0 degrees to 45 degrees left or right, loosen the table locking<br />
bolt, tilt the table to the desired angle and tighten the bolt.<br />
When returning the table to 0 degrees tighten the bolts.<br />
11
ADJUSTMENTS<br />
<strong>DRILL</strong>ING DEPTH<br />
Your drill press has been equipped with a new type depth adjustment. To set the<br />
depth stop, loosen the depth locking nuts and rotate them to the desired depth as<br />
indicated on the scale.<br />
SPINDLE RETURN SPRING<br />
The spindle is equipped with an auto-return mechanism. The main components<br />
of which are a spring and a notched chrome housing. The spring was properly<br />
adjusted at the factory and should not be readjusted unless absolutely<br />
necessary. If required, proceed as follows:<br />
- Unplug the drill press.<br />
- Loosen the two housing nuts (1) approximately 1/4".<br />
- Firmly hold the spring housing (2) and pull it out so it clears the raised notch<br />
(3).<br />
- Turn it until the next notch is engaged with the boss. To increase<br />
the tension, turn it clockwise and counter-clockwise to decrease<br />
the tension.<br />
- Tighten the two nuts.<br />
- Do not over-tighten the nuts, as it will make the spindle handle sluggish.<br />
12
OPERATION<br />
Note: As with any new piece of equipment, the owner/operator should use scrap<br />
material in order to become accustomed to it.<br />
<strong>DRILL</strong>ING SPEEDS<br />
The following is intended to be a general rule-of-thumb, not specific information.<br />
Important drilling speed factors are the type of material, hole size, the type of drill<br />
bit/cutter and the desired cut quality. The smaller the drill bit, the higher the<br />
speed required and soft materials generally require a higher speed while hard<br />
materials a slower speed.<br />
METAL WORKING<br />
A metal workpiece (like all work) should be firmly clamped to the drill press table<br />
and the table securely locked. NEVER hold the workpiece with your bare hands.<br />
The drill bit may grab and cause serious personal injury.<br />
Flat metal pieces should be backed with scrap wood and clamped.<br />
Irregular-shaped pieces should be blocked and clamped.<br />
WOODWORKING<br />
Metal-piercing twist drills may be used on wood but the preferred choice is bradpoint<br />
bits or Forstner-type bits.<br />
Do not use auger bits, as they will tend to lift off the table.<br />
To prevent tear-out when drilling through a workpiece, back it with a piece of<br />
scrap wood.<br />
FEEDING<br />
Be aware of the sound of the drill press motor when drilling.<br />
Do not rotate the feed handles too quickly as the belts may slip or the motor may<br />
stall.<br />
Feeding too slowly may cause the drill bit to heat up and possibly burn the<br />
workpiece.<br />
13
MAINTENANCE<br />
Disconnect the Power Cord before Working on the Machine<br />
Although machines such as this drill press are designed to work in wood shops<br />
and metal shops, sawdust and metal shavings are not friendly to electrical<br />
motors.<br />
The owner should routinely (once a month) blow out or vacuum metal shavings<br />
and sawdust from around the motor cover, the pulley housing, the drill press<br />
table and other surfaces.<br />
The drill press table should be cleaned after each use.<br />
The application of a light coat of paste wax on drill press column and the table<br />
will help keep these surfaces clean and rust-free.<br />
The bearings in the quill and V-belt assembly are permanently greased and<br />
sealed.<br />
A light application of oil to the quill every three months is recommended.<br />
Lubricate other moving parts as well to keep the drill press well maintained.<br />
14
<strong>CT024N</strong> – 8” Drill Press<br />
SCHEMATIC DIAGRAM<br />
15
<strong>CT024N</strong> – 8” Drill Press<br />
16
CRAFTEX 2 YEAR LIMITED WARRANTY<br />
Craftex warrants every product to be free from defects in materials and agrees to correct such defects where applicable.<br />
This warranty covers two years for parts and 90 days for labour (unless specified otherwise), to the original purchaser<br />
from the date of purchase but does not apply to malfunctions arising directly or indirectly from misuse, abuse, improper<br />
installation or assembly, negligence, accidents, repairs or alterations or lack of maintenance.<br />
Proof of purchase is necessary.<br />
All warranty claims are subject to inspection of such products or part thereof and Craftex reserves the right<br />
to inspect any returned item before a refund or replacement may be issued.<br />
This warranty shall not apply to consumable products such as blades, bits, belts, cutters, chisels, punches etceteras.<br />
Craftex shall in no event be liable for injuries, accidental or otherwise, death to persons or damage to<br />
property or for incidental contingent, special or consequential damages arising from the use of our<br />
products.<br />
RETURNS, REPAIRS AND REPLACEMENTS<br />
To return, repair, or replace a Craftex product, you must visit the appropriate <strong>Busy</strong> <strong>Bee</strong> <strong>Tools</strong><br />
showroom or call 1-800-461-BUSY. Craftex is a brand of equipment that is exclusive to <strong>Busy</strong> <strong>Bee</strong><br />
<strong>Tools</strong>.<br />
For replacement parts directly from <strong>Busy</strong> <strong>Bee</strong> <strong>Tools</strong>, for this machine, please call 1-800-461-<br />
BUSY (2879), and have your credit card and part number handy.<br />
• All returned merchandise will be subject to a minimum charge of 15% for re-stocking and<br />
handling with the following qualifications.<br />
• Returns must be pre-authorized by us in writing.<br />
• We do not accept collect shipments.<br />
• Items returned for warranty purposes must be insured and shipped pre-paid to the nearest<br />
warehouse (see locations on inside back cover of this manual).<br />
• Returns must be accompanied with a copy of your original invoice as proof of purchase.<br />
Returns must be in an un-used condition and shipped in their original packaging a letter<br />
explaining your reason for the return. Incurred shipping and handling charges are not<br />
refundable.<br />
• <strong>Busy</strong> <strong>Bee</strong> will repair or replace the item at our discretion and subject to our inspection.<br />
• Repaired or replaced items will be returned to you pre-paid by our choice of carriers.<br />
• <strong>Busy</strong> <strong>Bee</strong> reserves the right to refuse reimbursement or repairs or replacement if a third party<br />
without our prior authorization has carried out repairs to the item.<br />
• Repairs made by <strong>Busy</strong> <strong>Bee</strong> are warranted for 30 days on parts and labour.<br />
• Any unforeseen repair charges will be reported to you for acceptance prior to making the<br />
repairs.<br />
• The <strong>Busy</strong> <strong>Bee</strong> Parts & Service Departments are fully equipped to do repairs on all products<br />
purchased from us with the exception of some products that require the return to their<br />
authorized repair depots. A <strong>Busy</strong> <strong>Bee</strong> representative will provide you with the necessary<br />
information to have this done.<br />
• For faster service it is advisable to contact the nearest <strong>Busy</strong> <strong>Bee</strong> location for parts availability<br />
prior to bringing your product in for repairs.<br />
17