Performance Cylinder Head Kit (60T) - RIVA Racing
Performance Cylinder Head Kit (60T) - RIVA Racing
Performance Cylinder Head Kit (60T) - RIVA Racing

Create successful ePaper yourself
Turn your PDF publications into a flip-book with our unique Google optimized e-Paper software.
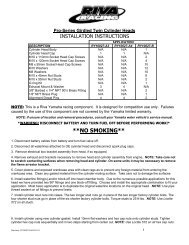
PARTS LIST<br />
<strong>Performance</strong> <strong>Cylinder</strong> <strong>Head</strong> <strong>Kit</strong> (<strong>60T</strong>)<br />
PART# - RY 100313<br />
INSTALLATION INSTRUCTIONS<br />
18 8 x 55mm SS Socket <strong>Head</strong> Bolts<br />
18 8mm SS Washers<br />
1 5 1/4"L X 1/2" I.D. Waterline<br />
2 1/2" BARBED X 1/4" NPT 90* BRASS FITTINGS<br />
3 1/2" BARBED X 1/4" NPT 45 Degree BRASS FITTING<br />
1 1/2" BARBED 'T' FITTING<br />
2 ALUMINUM SPACERS<br />
5 HOSE CLAMPS<br />
4' 1/2" Waterline<br />
1 1/2" 45 degree water bypass<br />
NOTE: This is a Riva <strong>Racing</strong> component. It is designed for competition use only. Failures caused<br />
by the use of this component are not covered by the Yamaha limited warranty.<br />
*WARNING! DISCONNECT BATTERY BEFORE PERFORMING WORK! *<br />
**NO SMOKING**<br />
Gasoline and gasoline fumes are highly flammable and explosive. Handle with care!<br />
1. Disconnect battery cables from battery.<br />
2. Disconnect waterlines attached to cylinder head and remove spark plug caps. NOTE: Set aside hose clamps. These<br />
will be used later.<br />
3. Remove hardware holding OE exhaust brackets in place and carefully remove OE cylinder head. NOTE: Set aside the<br />
two OE cylinder head bolts holding the front exhaust head pipe bracket to OE cylinder head. These will be used<br />
later. Cover pistons with clean rags to prevent any foreign objects from entering motor. Carefully clean gasket surface<br />
on cylinders and OE head gasket (avoid using carburetor cleaner or gasket removing chemicals on head gasket). .<br />
NOTE: Take care not to scratch cylinder-cylinder head mating surface when removing cylinder head and<br />
cleaning.<br />
Proceed to step 5 if <strong>Performance</strong> <strong>Cylinder</strong> <strong>Head</strong> Girdle Hardware <strong>Kit</strong> (part# RY100389-H) is not utilized.<br />
4. Remove one of the twelve OE cylinder bolts holding cylinder to upper crankcase and replace with one of the twelve<br />
supplied 10mm X 70 MM stud nut bolts. Torque stud nut bolts to 40 Nm (4.0m/kg • 28ft/lbs). Repeat for remaining 11 OE<br />
cylinder bolts.<br />
INSTALLING CYLINDER HEADS:<br />
5. With gasket clean, spray gasket with sealant. (We recommend using Permatex® Copper SPRAY-A-GASKET® Hi-Temp<br />
Adhesive Sealant. This is available through Riva Motorsports parts department or most automotive stores. Please follow<br />
manufacturer’s instructions when using sealant.) NOTE: If OEM head gasket requires replacing use Yamaha<br />
Genuine Part <strong>60T</strong>-11181-00-00 only.<br />
Word doc. RY100313 © BK 1/29/2004 1
<strong>Performance</strong> <strong>Cylinder</strong> <strong>Head</strong> <strong>Kit</strong> (<strong>60T</strong>)<br />
PART# - RY 100313<br />
INSTALLATION INSTRUCTIONS (CONT.)<br />
6. Remove rags from the cylinders. Install OE head gasket into position on cylinders making sure gasket follows shape of<br />
cylinders.<br />
7. Install cylinder head bodies taking care not to move OE cylinder head gasket. The proper position is indicated when 1/4”<br />
cooling outlet on top of cylinder head body is on exhaust manifold side of motor. You will need to make a small<br />
modification to the OEM head gasket to make room for the girdled hardware. You can use a rat-tail file to make the cuts in<br />
the gasket. (Refer to illustration #1).<br />
8. Loosely install twelve of the supplied 8mm X 55mm bolts with washers into locations 1-6 of center and rear cylinder head<br />
bodies (Refer to illustration #3). Tighten and torque bolts in two-step order sequence as shown in illustration # 3.<br />
NOTE: Use Loctite 572 on all bolts.<br />
9a. OE EXHAUST HEAD PIPE APPLICATIONS: Loosely install four of the remaining supplied 8mm X 55mm bolts into<br />
holes 1,3,4 & 6 of front cylinder head body (Refer to illustration #3). Next, install the front OE exhaust bracket using the<br />
two OE exhaust bracket/cylinder head bolts and the two supplied aluminum barrel spacers (install barrel spacers under<br />
exhaust bracket on cylinder head cover) in locations 2 & 5. Tighten and torque all bolts in two-step order sequence as<br />
shown in illustration # 3. NOTE: Use Loctite 572 on all bolts.<br />
9b. TRIPLE PIPE EXHAUST APPLICATIONS: Loosely install the remaining six supplied 8mm X 55mm bolts with washers<br />
into locations 1-6 of front cylinder head body (Refer to illustration #3). Tighten and torque bolts in two-step order<br />
sequence as shown in illustration # 3. NOTE: Use Loctite 572 on all bolts.<br />
Proceed to step 11 if <strong>Performance</strong> <strong>Cylinder</strong> <strong>Head</strong> Girdle Hardware <strong>Kit</strong> (part# RY100389-H) is<br />
not utilized.<br />
10. Loosely install four of the supplied 8mm X 75mm bolts with washers into locations 7-10 of cylinder head bodies (Refer to<br />
illustration #2). Tighten and torque bolts in two-step order sequence as shown in illustration # 2. NOTE: Use Loctite<br />
572 on all bolts.<br />
INSTALLING WATER FITTINGS:<br />
11a. OE EXHAUST HEAD PIPE APPLICATIONS: Install Two supplied 1/2” barbed X 1/4” npt 45*brass fitting into front and<br />
center cylinder head Next, install one supplied 1/2” barbed X 1/4” npt 45* brass fittings into rear cylinder head body<br />
NOTE: Use Threebond 1211 on the threads to prevent leaking. Do not over tighten!<br />
11b. TRIPLE PIPE EXHAUST APPLICATIONS: Install one supplied 3/8” barbed X 1/4” npt 90* brass fitting into each cylinder<br />
head body. NOTE: We recommend installing three individual water by-passes towards front of craft when using<br />
triple exhaust pipes. This will require extra 3/8” waterline. These are available at Riva Yamaha or your local<br />
watercraft dealer.<br />
INSTALLING COOLING LINES<br />
12a. OE EXHAUST HEAD PIPE APPLICATIONS: Next, attach curved 1/2” OE waterline on the intake side of the OE exhaust<br />
head pipe to the 1/2" barbed fitting using the OE hose clamp. Then, attach the 1/2” OE waterline on exhaust manifold<br />
side of OE exhaust head pipe to the 1/2" barbed 45* brass fitting in rear cylinder head body using OE hose clamp.<br />
NOTE: Do not over tighten hose clamps!<br />
Word doc. RY100313 © BK 1/29/2004 2
<strong>Performance</strong> <strong>Cylinder</strong> <strong>Head</strong> <strong>Kit</strong> (<strong>60T</strong>)<br />
PART# - RY 100313<br />
INSTALLATION INSTRUCTIONS (CONT.)<br />
INSTALLING COOLING LINES (cont.)<br />
12b. TRIPLE PIPE EXHAUST APPLICATIONS: Attach and secure your 3/8” waterline to each 3/8” barbed X 1/4” npt 90*<br />
brass fitting using enclosed hose clamps. NOTE: Do not over tighten hose clamps!<br />
INSTALLING EXHAUST BRACKETS<br />
13a. OE EXHAUST HEAD PIPE APPLICATIONS: Install two remaining factory exhaust brackets and secure using original<br />
factory hardware. Torque to 40Nm (4.0m/kgf • 29ft/lbs).<br />
13b. TRIPLE PIPE EXHAUST APPLICATIONS: Install applicable brackets and hardware for your set-up and torque to<br />
manufacturer’s specs.<br />
14. Check bilge area for tools, loose lines and/or fittings. Reattach battery cables and turn fuel cock valve to on position.<br />
15. Upon completing installation, run engine on flush kit and check for leaks.<br />
NOTE: Be sure to use 14mm X 1.25mm 3/4 ” reach spark plugs. (e.g. BR8ES)<br />
IMPORTANT: Technical Support<br />
For answers to questions regarding installation or trouble shooting <strong>RIVA</strong> <strong>Racing</strong> <strong>Cylinder</strong> <strong>Head</strong> <strong>Kit</strong> contact:<br />
<strong>RIVA</strong> Tech Line at (954) 247-0705, online at mailto:tech_support@motorsports.com or you’re local <strong>RIVA</strong> Dealer.<br />
<strong>RIVA</strong> <strong>Racing</strong> Limited 1-Year Warranty<br />
<strong>RIVA</strong> <strong>Racing</strong> <strong>Performance</strong> <strong>Cylinder</strong> <strong>Head</strong>s carry a one-year limited warranty to the original purchaser. They are warranted to be free of<br />
defects in materials and workmanship under normal use and service. Customer modified components will be void of warranty. This<br />
warranty is limited to defects in the primary aluminum components only. Anodized finish, wear marks in or on head body, head cover,<br />
and hardware are not covered under this warranty.<br />
<strong>RIVA</strong> <strong>Racing</strong>’s liability is expressly limited to the repair or replacement of the aluminum components contained within or associated with<br />
this head system. Riva agrees to repair or at <strong>RIVA</strong> <strong>Racing</strong>’s option, replace any defective unit without charge, if product is returned to<br />
Riva <strong>Racing</strong> freight prepaid within the warranty period. Any equipment returned which, in <strong>RIVA</strong> <strong>Racing</strong>’s opinion, has been subjected to<br />
misuse; abuse, overheating or accident shall not be covered by this warranty.<br />
<strong>RIVA</strong> <strong>Racing</strong> shall have no liability for special, incidental or consequential damages or injury to persons or property from any cause<br />
arising from the sale, installation or use of this product.<br />
No other warranty, express or implied, including, but not limited to the implied warranties of merchantability and fitness for a particular<br />
purpose, applies. Various states do not allow for the limitation of incidental or consequential damages and therefore the above<br />
exclusion or limitation may not apply to you.<br />
Warranty does not include the expenses related to freight or transportation of parts or compensation for any inconvenience or loss of<br />
use while being repaired. A copy of the original invoice must accompany all warranty claims.<br />
Warranted replacement parts will be returned freight collect.<br />
Remember the water belongs to everyone! Please ride responsibly!<br />
Word doc. RY100313 © BK 1/29/2004 3
<strong>Performance</strong> <strong>Cylinder</strong> <strong>Head</strong> <strong>Kit</strong> (<strong>60T</strong>)<br />
PART# - RY 100313<br />
INSTALLATION IMAGES<br />
ILLUSTRATION #1<br />
4 1<br />
3<br />
1<br />
5<br />
6<br />
2<br />
2<br />
3<br />
4<br />
ILLUSTRATION #2<br />
ILLUSTRATION #3<br />
TORQUE PROCEDURES<br />
GIRDLED HARDWARE<br />
Two step procedure<br />
CYLINDER HARDWARE<br />
Nm m/kg ft/lb Nm m/kg ft/lb<br />
1st 15 1.5 11 1st 23 2.3 17<br />
2nd 25 2.5 18 2nd 31 3.1 22<br />
Word doc. RY100313 © BK 1/29/2004 4