Orvar Supreme Eng-02 - Uddeholm
Orvar Supreme Eng-02 - Uddeholm
Orvar Supreme Eng-02 - Uddeholm
Create successful ePaper yourself
Turn your PDF publications into a flip-book with our unique Google optimized e-Paper software.
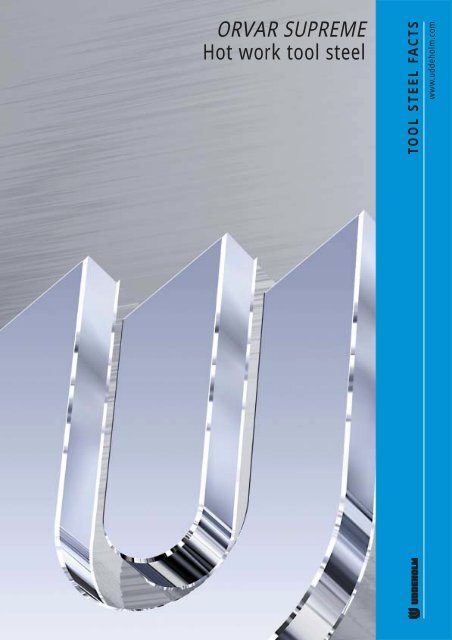
ORVAR SUPREME<br />
Hot work tool steel<br />
TOOL STEEL FACTS<br />
www.uddeholm.com
ORVAR SUPREME<br />
This information is based on our present state of knowledge and is<br />
intended to provide general notes on our products and their uses. It should<br />
not therefore be construed as a warranty of specific properties of the<br />
products described or a warranty for fitness for a particular purpose.<br />
2
ORVAR SUPREME<br />
General<br />
ORVAR SUPREME is a chromium-molybdenumvanadium-alloyed<br />
steel which is characterized by:<br />
• High level of resistance to thermal shock and<br />
thermal fatigue<br />
• Good high-temperature strength<br />
• Excellent toughness and ductility in all<br />
directions<br />
• Good machinability and polishability<br />
• Excellent through-hardening properties<br />
• Good dimensional stability during hardening.<br />
Typical C Si Mn Cr Mo V<br />
analysis % 0,39 1,0 0,4 5,2 1,4 0,9<br />
Standard<br />
specification Premium AISI H13, W.-Nr. 1.2344<br />
Delivery<br />
condition Soft annealed to approx. 180 HB<br />
Colour code Orange<br />
IMPROVED TOOLING PERFORMANCE<br />
The name “SUPREME” implies that by special<br />
processing techniques and close control, the steel<br />
attains high purity and a very fine structure. Further,<br />
ORVAR SUPREME shows significant improvements<br />
in isotropic properties compared to conventionally<br />
produced AISI H 13 grades.<br />
These improved isotropic properties are particularly<br />
valuable for tooling subjected to high mechanical<br />
and thermal fatigue stresses, e.g. die casting dies,<br />
forging tools and extrusion tooling. In practical<br />
terms, tools may be used at somewhat higher<br />
working hardnesses (+1 to 2 HRC) without loss of<br />
toughness. Since increased hardness slows down<br />
the formation of heatchecking cracks, improved tool<br />
performance can be expected.<br />
ORVAR SUPREME meets the North American Die<br />
Casting Association (NADCA) #207-97 for premium<br />
high quality H-13 die steel.<br />
Applications<br />
TOOLS FOR DIE CASTING<br />
Tin, lead Aluminium, Copper<br />
zinc alloys magnesium alloys<br />
Part HRC alloys, HRC HRC<br />
Dies 46–50 42–48 (QRO 90 S)<br />
Fixed inserts<br />
cores 46–52 44–48 (QRO 90 S)<br />
Sprue parts 48–52 46–48 (QRO 90 S)<br />
Nozzles 35–42 42–48 (QRO 90 S)<br />
Ejector pins<br />
(nitrided) 46–50 46–50 46–50<br />
Plunger,<br />
shot-sleeve<br />
(normally<br />
nitrided) 42–46 42–48 (QRO 90 S)<br />
Austenitizing 1<strong>02</strong>0–1030°C 1040–1050°C<br />
temperature (1870–1885°F) (1900–1920°F)<br />
TOOLS FOR EXTRUSION<br />
Aluminium, Copper Stainless<br />
magnesium alloys steel<br />
Part alloys, HRC HRC HRC<br />
Dies 44–50 43–47 45–50<br />
Backers, dieholders,<br />
liners,<br />
dummy blocks,<br />
stems 41–50 40–48 40–48<br />
Austenitizing<br />
temperature 1<strong>02</strong>0–1030°C 1040–1050°C<br />
(approx.) (1870–1885°F) (1900–1920°F)<br />
TOOLS FOR HOT PRESSING<br />
Material Aust. temp. (approx.) HRC<br />
Aluminium,<br />
magnesium 1<strong>02</strong>0–1030°C (1870–1885°F) 44–52<br />
Copper alloys 1040–1050°C (1900–1920°F) 44–52<br />
Steel 1040–1050°C (1900–1920°F) 40–50<br />
3
ORVAR SUPREME<br />
MOULDS FOR PLASTICS<br />
Part Austenitizing temp. HRC<br />
Injection moulds 1<strong>02</strong>0–1030°C (1870–1885°F)<br />
Compression/<br />
transfer moulds Tempering 250°C (480°F) 50–52<br />
OTHER APPLICATIONS<br />
Application Austenitizing temp. HRC<br />
Severe cold<br />
punching, 1<strong>02</strong>0–1030°C (1870–1885°F)<br />
scrap shears Tempering 250°C (480°F) 50–52<br />
Hot shearing 1<strong>02</strong>0–1030°C (1870–1885°F)<br />
Tempering<br />
1. 250°C (480°F) or 50–52<br />
2. 575–600°C 45–50<br />
(1070–1110°F)<br />
Shrink rings<br />
(e.g. for 1<strong>02</strong>0–1030°C (1870–1885°F)<br />
cemented Tempering 575–600°C 45–50<br />
carbide dies)<br />
(1070–1110°F)<br />
Wear- 1<strong>02</strong>0–1030°C (1870–1885°F) Core<br />
resisting parts Tempering 575°C (1070°F) 50–52<br />
Nitriding<br />
Surface<br />
~1000HV 1<br />
Properties<br />
All specimens are taken from the centre of a<br />
407 x 127 mm (16" x 5") bar. Unless otherwise is<br />
indicated all specimens were hardened 30 minutes<br />
at 1<strong>02</strong>5°C (1875°F), quenched in air and tempered<br />
2 + 2 h at 610°C (1130°F). The hardness were<br />
45 ± 1 HRC.<br />
PHYSICAL DATA<br />
Data at room and elevated temperatures.<br />
Temperature 20°C 400°C 600°C<br />
(68°F) (750°F) (1110°F)<br />
Density<br />
kg/m 3 7800 7700 7600<br />
lbs/in 3 0,281 0,277 0,274<br />
Modulus of<br />
elasticity<br />
MPa 210 000 180 000 140 000<br />
psi 30,5 x 10 6 26,1 x 10 6 20,3 x 10 6<br />
Coefficient of<br />
thermal expansion<br />
per<br />
°C from 20°C – 12,6 x 10 -6 13,2 x 10 -6<br />
°F from 68°F – 7,0 x 10 -6 7,3 x 10 -6<br />
Thermal<br />
conductivity<br />
W/m °C 25 29 30<br />
Btu in/(ft 2 h°F) 176 204 211<br />
MECHANICAL PROPERTIES<br />
Approximate tensile strength at room temperature.<br />
Hardness 52 HRC 45 HRC<br />
Tensile strength 1820 MPa 1420 MPa<br />
Rm 185 kp/mm 2 145 kp/mm 2<br />
117 tsi 92 tsi<br />
263 000 psi 206 000 psi<br />
Yield strength 1520 MPa 1280 MPa<br />
Rp0,2 155 kp/mm 2 130 kp/mm 2<br />
98 tsi 83 tsi<br />
220 000 psi 185 000 psi<br />
Approximate strength at elevated temperatures<br />
Longitudinal direction.<br />
psi Rm, Rp0.2<br />
1000x MPa<br />
290 2000<br />
261 1800<br />
232 1600<br />
203 1400<br />
174 1200<br />
145 1000<br />
116 800<br />
87 600<br />
58 400<br />
29 200<br />
0<br />
Hardness, HRC<br />
50<br />
45<br />
40<br />
35<br />
30<br />
25<br />
100 200 300 400 500 600 700 °C<br />
210 390 570 750 930 1110 1290 °F<br />
Testing temperature<br />
Effect of time at high temperatures on hardness<br />
600°C<br />
(1110°F)<br />
650°C (1200°F)<br />
Rp0,2<br />
A5,<br />
Z %<br />
100<br />
90<br />
80<br />
70<br />
60<br />
50<br />
40<br />
30<br />
20<br />
10<br />
20<br />
1 10 100 1000<br />
Time, h<br />
Z<br />
Rm<br />
A5<br />
500°C (930°F)<br />
550°C<br />
(1<strong>02</strong>0°F)<br />
4
ORVAR SUPREME<br />
Effect of testing temperature on impact energy<br />
Charpy V specimens, short transverse direction.<br />
ft lbs Impact energy, J<br />
74 100<br />
STRESS RELIEVING<br />
After rough machining the tool should be heated<br />
through to 650°C (1200°F), holding time 2 hours.<br />
Cool slowly to 500°C (930°F), then freely in air.<br />
59<br />
44<br />
30<br />
15<br />
80<br />
60<br />
40<br />
20<br />
0<br />
45 HRC<br />
100 200 300 400 500 °C<br />
210 390 570 750 930 °F<br />
Testing temperature<br />
HARDENING<br />
Pre-heating temperature: 600–850°C (1110–<br />
1560°F), normally in two pre-heating steps.<br />
Austenitizing temperature: 1<strong>02</strong>0–1050°C (1870–<br />
1920°F), normally 1<strong>02</strong>0–1030°C (1870–1885°F).<br />
Temperature Soaking* time Hardness before<br />
°C °F minutes tempering<br />
1<strong>02</strong>5 1875 30 53±2 HRC<br />
1050 1920 15 54±2 HRC<br />
* Soaking time = time at hardening temperature after the<br />
tool is fully heated through.<br />
Heat treatment–<br />
general recommendations<br />
SOFT ANNEALING<br />
Protect the steel and heat through to 850°C<br />
(1560°F). Then cool in the furnace at 10°C (20°F)<br />
per hour to 650°C (1200°F), then freely in air.<br />
Protect the part against decarburization and<br />
oxidation during hardening.<br />
CCT graph<br />
Austenitizing temperature 1<strong>02</strong>0°C (1870°F). Holding time 30 minutes.<br />
°F °C<br />
2000 1100<br />
1800<br />
1600<br />
1400<br />
1200<br />
1000<br />
800<br />
600<br />
400<br />
200<br />
1000<br />
900<br />
800<br />
700<br />
600<br />
500<br />
400<br />
300<br />
200<br />
100<br />
Carbides<br />
Pearlite<br />
A C3<br />
940°C (1725°F)<br />
A C1<br />
840°C (1545°F)<br />
1 10 100 1000 10 000 100 000 Seconds<br />
Cooling Hard-<br />
Bainite<br />
M S<br />
Martensite<br />
M f 1 2 3 4 5 6 7 8 9 10<br />
curve ness T 800–500<br />
No. HV 10 (sec)<br />
1 707 1<br />
2 673 6<br />
3 613 105<br />
4 613 316<br />
5 599 527<br />
6 592 1054<br />
7 560 2772<br />
8 519 5271<br />
9 483 7944<br />
10 222 20768<br />
1 10 100 1000 Minutes<br />
1 10 100 Hours<br />
Air cooling of bars<br />
0,2 1,5 10 90 600 Ø mm<br />
0,0079 0,059 0,394 3,54 23,6 Ø inch<br />
5
ORVAR SUPREME<br />
QUENCHING MEDIA<br />
• High speed gas/circulating atmosphere<br />
•Vacuum (high speed gas with sufficient positive<br />
pressure). An interrupted quench is recommended<br />
where distortion control and quench cracking are<br />
a concern<br />
• Martempering bath or fluidized bed at 450–<br />
550°C (840–1<strong>02</strong>0°F), then cool in air<br />
• Martempering bath or fluidized bed at approx.<br />
180–220°C (360–430°F) then cool in air<br />
•Warm oil.<br />
Note 1: Temper the tool as soon as its temperature<br />
reaches 50–70°C (120–160°F).<br />
Note 2: In order to obtain the optimum properties<br />
for the tool, the cooling rate should be fast, but not<br />
at a level that gives excessive distortion or cracks.<br />
TEMPERING<br />
Choose the tempering temperature according to the<br />
hardness required by reference to the tempering<br />
graph. Temper minimum twice with intermediate<br />
cooling to room temperature. Lowest tempering<br />
temperature 250°C (480°F). Holding time at<br />
temperature minimum 2 hours. To avoid “temper<br />
brittleness”, do not temper in the range 425–550°C<br />
(800–1<strong>02</strong>0°F), see graph.<br />
Tempering graph<br />
Hardness, HRC<br />
60<br />
55<br />
Austenitizing temp.<br />
1050°C (1920°F)<br />
Retained austenite %<br />
Hardness, grain size and retained austenite as<br />
functions of austenitizing temperature<br />
50<br />
45<br />
1<strong>02</strong>0°C<br />
(1870°F)<br />
1<strong>02</strong>5°C<br />
(1875°F)<br />
Grain<br />
size Hardness<br />
ASTM HRC<br />
60<br />
10<br />
58<br />
Grain size<br />
Retained austenite %<br />
40<br />
35<br />
Retained austenite<br />
6<br />
4<br />
8<br />
56<br />
54<br />
Hardness<br />
30<br />
2<br />
6<br />
4<br />
52<br />
50<br />
25<br />
100 200 300 400 500 600 700°C<br />
210 390 570 750 930 1110 1290°F<br />
48<br />
Tempering temperature (2h + 2h)<br />
46<br />
44<br />
42<br />
Retained austenite<br />
6<br />
4<br />
2<br />
40<br />
1000 1<strong>02</strong>0 1040 1060°C<br />
1830 1870 1905 1940°F<br />
Austenitizing temperature<br />
6
ORVAR SUPREME<br />
Approximate impact strength at different tempering<br />
temperatures.<br />
Charpy V specimens, short transverse direction.<br />
ft.lb.<br />
Impact strength<br />
KV Joule<br />
74 100<br />
59<br />
44<br />
30<br />
15<br />
80<br />
60<br />
40<br />
20<br />
100 200 300 400 500 600 °C<br />
200 400 600 800 1000 1200 °F<br />
Tempering temperature (2h + 2h)<br />
Tempering within the range 425–550°C (800–<br />
1<strong>02</strong>0°F) is normally not recommended due to the<br />
reduction in toughness properties.<br />
DIMENSIONAL CHANGES DURING HARDENING<br />
Sample plate, 100 x 100 x 25 mm, 4” x 4” x 1”.<br />
Width Length Thickness<br />
% % %<br />
Oil hardened from<br />
Min. –0,08 –0,06 ±0<br />
1<strong>02</strong>0°C (1870°F) Max. –0,15 –0,16 +0,30<br />
Air hardened from<br />
Min. –0,<strong>02</strong> –0,05 ±0<br />
1<strong>02</strong>0°C (1870°F) Max. +0,03 +0,<strong>02</strong> +0,05<br />
Vac hardened from<br />
Min. +0,01 –0,<strong>02</strong> +0,08<br />
1<strong>02</strong>0°C (1870°F) Max. +0,<strong>02</strong> –0,04 +0,12<br />
NITRIDING AND NITROCARBURIZING<br />
Nitriding and nitrocarburizing result in a hard<br />
surface layer which is very resistant to wear and<br />
erosion. The nitrided layer is, however, brittle and<br />
may crack or spall when exposed to mechanical or<br />
thermal shock, the risk increasing with layer thickness.<br />
Before nitriding, the tool should be hardened<br />
and tempered at a temperature at least 50°C (90°F)<br />
above the nitriding temperature.<br />
Nitriding in ammonia gas at 510°C (950°F) or<br />
plasma nitriding in a 75% hydrogen/25% nitrogen<br />
mixture at 480°C (895°F) both result in a surface<br />
hardness of about 1100 HV 0,2 . In general, plasma<br />
nitriding is the preferred method because of better<br />
control over nitrogen potential; in particular, formation<br />
of the so-called white layer, which is not<br />
recommended for hot-work service, can readily be<br />
avoided. However, careful gas nitriding can give<br />
perfectly acceptable results.<br />
ORVAR SUPREME can also be nitrocarburized in<br />
either gas or salt bath. The surface hardness after<br />
nitrocarburizing is 900–1000 HV 0,2 .<br />
DEPTH OF NITRIDING<br />
Depth<br />
Process Time mm inch<br />
Gas nitriding 10 h 0,12 0,0047<br />
at 510°C (950°F) 30 h 0,20 0,0079<br />
Plasma nitriding 10 h 0,12 0,0047<br />
at 480°C (895°F) 30 h 0,18 0,0071<br />
Nitrocarburizing<br />
– in gas at<br />
580°C (1075°F) 2,5 h 0,11 0,0043<br />
– in salt bath at<br />
580°C (1075°F) 1 h 0,06 0,0<strong>02</strong>4<br />
DIMENSIONAL CHANGES DURING TEMPERING<br />
Dimensional change %<br />
+0,12<br />
+0,08<br />
+0,04<br />
0<br />
–0,04<br />
–0,08<br />
–0,12<br />
100 200 300 400 500 600 700°C<br />
200 400 600 800 1000 1200°F<br />
Tempering temperature (1h + 1h)<br />
Nitriding to case depths >0,3 mm (>0,012 inch) is<br />
not recommended for hot-work applications.<br />
ORVAR SUPREME can be nitrided in the softannealed<br />
condition. The hardness and depth of case<br />
will, however, be reduced somewhat in this case.<br />
Note: The dimensional changes in hardening and<br />
tempering should be added.<br />
7
ORVAR SUPREME<br />
Machining<br />
recommendations<br />
The cutting data below are to be considered as<br />
guiding values, which must be adapted to existing<br />
local conditions.<br />
TURNING<br />
Turning with Turning<br />
carbide<br />
with high<br />
speed steel<br />
Cutting data Rough Fine Fine<br />
parameters turning turning turning<br />
Cutting speed (v c<br />
)<br />
m/min 200–250 250–300 25–30<br />
f.p.m. 660–820 820–985 82–100<br />
Feed (f)<br />
mm/r 0,2–0,4 0,05–0,2 0,05–0,3<br />
i.p.r. 0,008–0,016 0,0<strong>02</strong>–0,008 0,0<strong>02</strong>–0,012<br />
Depth of cut (a p<br />
)<br />
mm 2–4 0,5–2 0,5–2<br />
inch 0,08–0,16 0,<strong>02</strong>–0,08 0,<strong>02</strong>–0,08<br />
Carbide<br />
designation ISO P20–P30 P10 –<br />
DRILLING<br />
Coated<br />
carbide<br />
High speed steel twist drill<br />
Coated<br />
carbide<br />
or cermet<br />
Drill diameter Cutting speed, v c Feed, f<br />
mm inch m/min f.p.m. mm/r i.p.r.<br />
– 5 –3/16 16–18* 52–59* 0,05–0,15 0,0<strong>02</strong>–0,006<br />
5–10 3/16–3/8 16–18* 52–59* 0,15–0,20 0,006–0,008<br />
10–15 3/8–5/8 16–18* 52–59* 0,20–0,25 0,008–0,010<br />
15–20 5/8–3/4 16–18* 52–59* 0,25–0,35 0,010–0,014<br />
* For coated HSS drill v c 28–30 m/min. (92–98 f.p.m.).<br />
MILLING<br />
Face milling and square shoulder face milling<br />
Milling with carbide<br />
Cutting data<br />
parameters Rough milling Fine milling<br />
Cutting speed (v c )<br />
m/min 180–260 260–300<br />
f.p.m. 590–850 850–985<br />
Feed (f z )<br />
mm/tooth 0,2–0,4 0,1–0,2<br />
inch/tooth 0,008–0,016 0,004–0,008<br />
Depth of cut (a p<br />
)<br />
mm 2–5 –2<br />
inch 0,08–0,20 –0,08<br />
Carbide designation<br />
ISO P20–P40 P10–P20<br />
End milling<br />
Coated<br />
carbide<br />
Coated<br />
carbide or<br />
cermet<br />
Type of end mill<br />
Carbide<br />
Cutting data Solid indexable High<br />
parameters carbide insert speed steel<br />
Cutting<br />
speed (v c )<br />
m/min 160–200 170–230 35–40 1)<br />
f.p.m. 525–660 560–755 115–130 1)<br />
Feed (f z )<br />
mm/tooth 0,03–0,20 2) 0,08–0,20 2) 0,05–0,35 2)<br />
inch/tooth 0,001–0,008 2) 0,003–0,008 2) 0,0<strong>02</strong>–0,014 2)<br />
Carbide<br />
designation<br />
ISO – P20, P30 –<br />
1)<br />
For coated HSS end mill v c 55–60 m/min. (180–195 f.p.m.).<br />
2)<br />
Depending on radial depth of cut and cutter diameter.<br />
Carbide drill<br />
Type of drill<br />
Cutting data Indexable Solid Brazed<br />
parameters insert carbide carbide 1)<br />
Cutting<br />
speed (v c )<br />
m/min 220–240 130–160 80–110<br />
f.p.m. 720–785 425–525 260–360<br />
Feed (f)<br />
mm/r 0,03–0,10 2) 0,10–0,25 2) 0,15–0,25 2)<br />
i.p.r. 0,001–0,004 2) 0,004–0,010 2) 0,006–0,010 2)<br />
1)<br />
Drill with internal cooling channels and brazed carbide tip.<br />
2)<br />
Depending on drill diameter.<br />
GRINDING<br />
A general grinding wheel recommendation is given<br />
below. More information can be found in the<br />
<strong>Uddeholm</strong> brochure “Grinding of Tool Steel” and<br />
can also be obtained from the grinding wheel<br />
manufacturer.<br />
Wheel recommendation<br />
Soft annealed Hardened<br />
Type of grinding condition condition<br />
Face grinding<br />
straight wheel A 46 HV A 46 HV<br />
Face grinding<br />
segments A 24 GV A 36 GV<br />
Cylindrical grinding A 46 LV A 60 KV<br />
Internal grinding A 46 JV A 60 IV<br />
Profile grinding A 100 LV A 120 KV<br />
8
ORVAR SUPREME<br />
Welding<br />
Welding of tool steel can be performed with good<br />
results if proper precautions are taken regarding<br />
elevated temperature, joint preparation, choice of<br />
consumables and welding procedure.<br />
Welding method TIG MMA<br />
Working 325–375°C 325–375°C<br />
temperature 620–710°F 620–710°F<br />
Filler metal QRO 90 TIG-WELD QRO 90 WELD<br />
Hardness<br />
after welding 50–55 HRC 50–55 HRC<br />
Heat treatment after welding<br />
Hardened Temper at 20°C (40°F) below the<br />
condition<br />
original tempering temperature.<br />
Soft annealed Soft-anneal the material at 850°C<br />
condition<br />
(1560°F) in protected atmosphere.<br />
Then cool in the furnace at 10°C (20°F)<br />
per hour to 650°C (1200°F) then freely<br />
in air.<br />
More detailed information can be found in the<br />
<strong>Uddeholm</strong> brochure “Welding of Tool Steel”.<br />
Electrical-discharge<br />
machining<br />
If spark-erosion is performed in the hardened and<br />
tempered condition, the white re-cast layer should<br />
be removed mechanically e.g. by grinding or<br />
stoning. The tool should then be given an additional<br />
temper at approx. 25°C (50°F) below the previous<br />
tempering temperature.<br />
Hard-chromium plating<br />
After plating, parts should be tempered at 180°C<br />
(360°F) for 4 hours within 4 hours of plating to<br />
avoid the risk of hydrogen embrittlement.<br />
Photo-etching<br />
ORVAR SUPREME is particularly suitable for texturing<br />
by the photo-etching method. Its high level of<br />
homogeneity and low sulphur content ensures<br />
accurate and consistent pattern reproduction.<br />
Polishing<br />
ORVAR SUPREME exhibits good polishability in the<br />
hardened and tempered condition. Polishing after<br />
grinding can be effected using aluminium oxide or<br />
diamond paste.<br />
Typical procedure:<br />
1. Rough grinding to 180–320 grain size using a<br />
wheel or stone.<br />
2. Fine grinding with abrasive paper or powder<br />
down to 400–800 grain size.<br />
3. Polish with diamond paste grade 15 (15µm grain<br />
size) using a polishing tool of soft wood or fibre.<br />
4. Polish with diamond paste 3 (3µm grain size)<br />
using a polishing tool of soft wood or fibre.<br />
5. When demands on surface finish are high,<br />
grade 1 (1µm grain size) diamond paste can be<br />
used for final polishing with a fibre polishing<br />
pad.<br />
Further information<br />
Please contact your local <strong>Uddeholm</strong> office for<br />
further information on the selection, heat treatment,<br />
application and availability of <strong>Uddeholm</strong> tool steels.<br />
9


